Sleek side ponytails are the quiet powerhouse of polished hairstyling — they manage to look effortlessly put-together while requiring serious technique to nail properly. There’s something inherently sophisticated about a well-executed side pony that a center part can’t quite match. Whether you’re prepping for a job interview, a date night, or just want to feel more intentional about your appearance, a side ponytail instantly elevates your whole look.
The magic of side ponytails is that they work across nearly every hair texture, length, and face shape when you understand the specific variations. A high side pony reads completely different than a low one. Sleek versions demand precision, while textured alternatives give you more room to play. The real skill isn’t just pulling your hair to one side — it’s understanding which specific style suits your face, your hair type, and what kind of polished aesthetic you’re actually after.
This isn’t a listicle of generic suggestions. Each of these 12 styles comes with the actual techniques that make them work, the common mistakes that wreck them, and exactly how to customize each one for your hair. You’ll know not just what a style looks like, but how to create it, who it flatters most, and when to wear it.
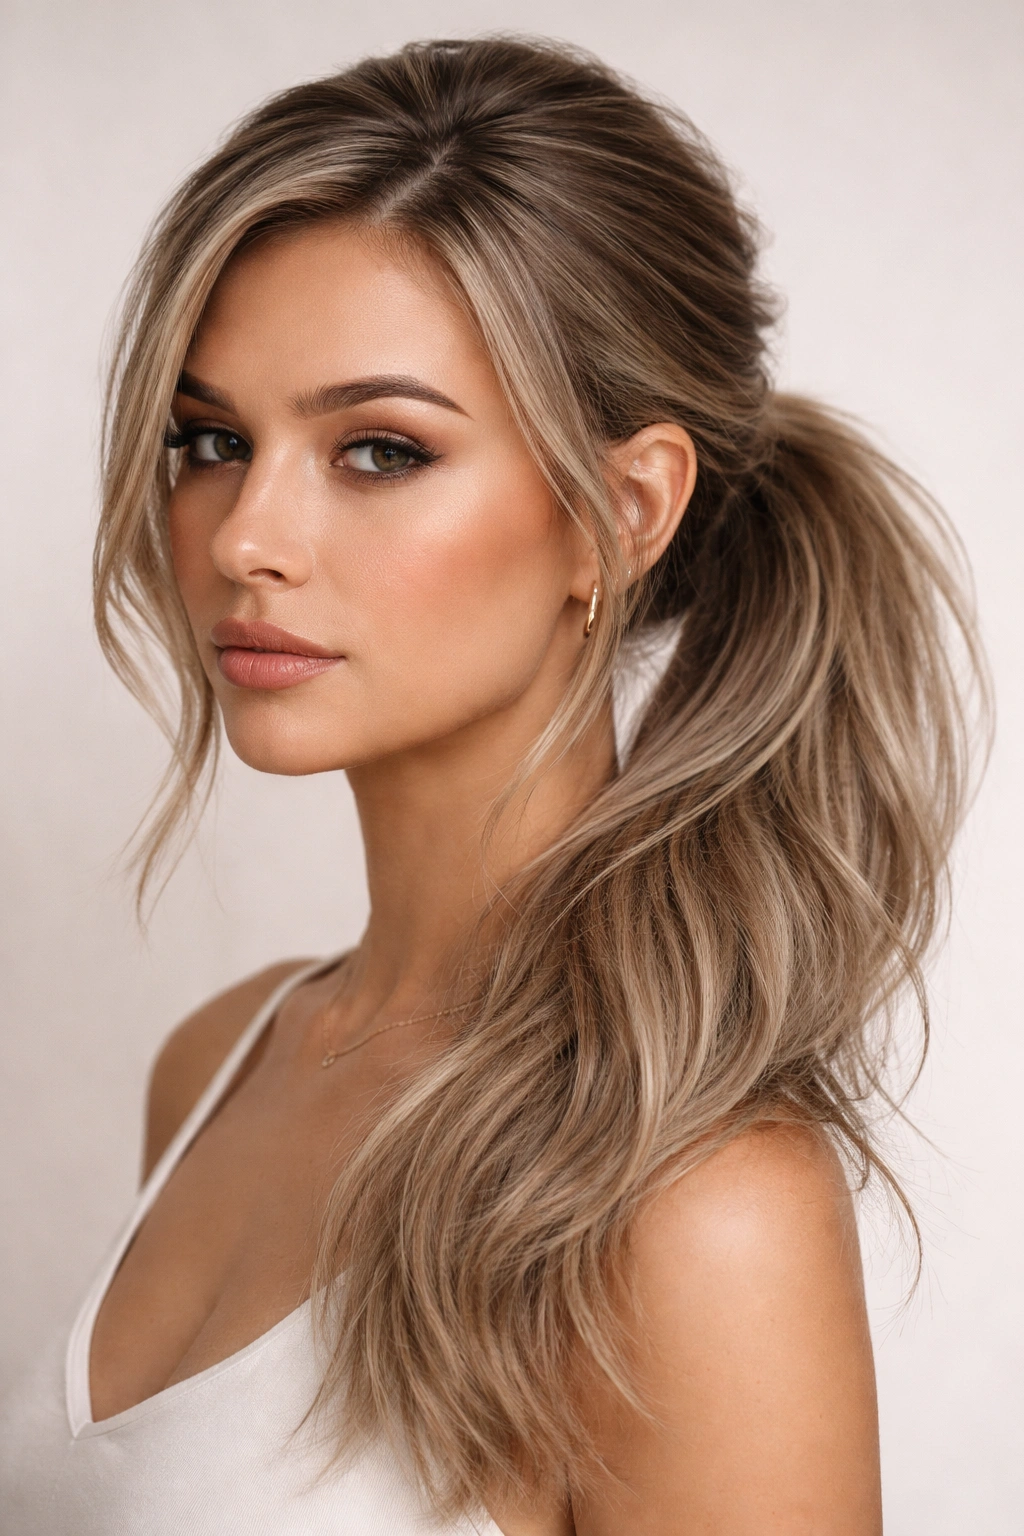
1. The Classic High Side Ponytail
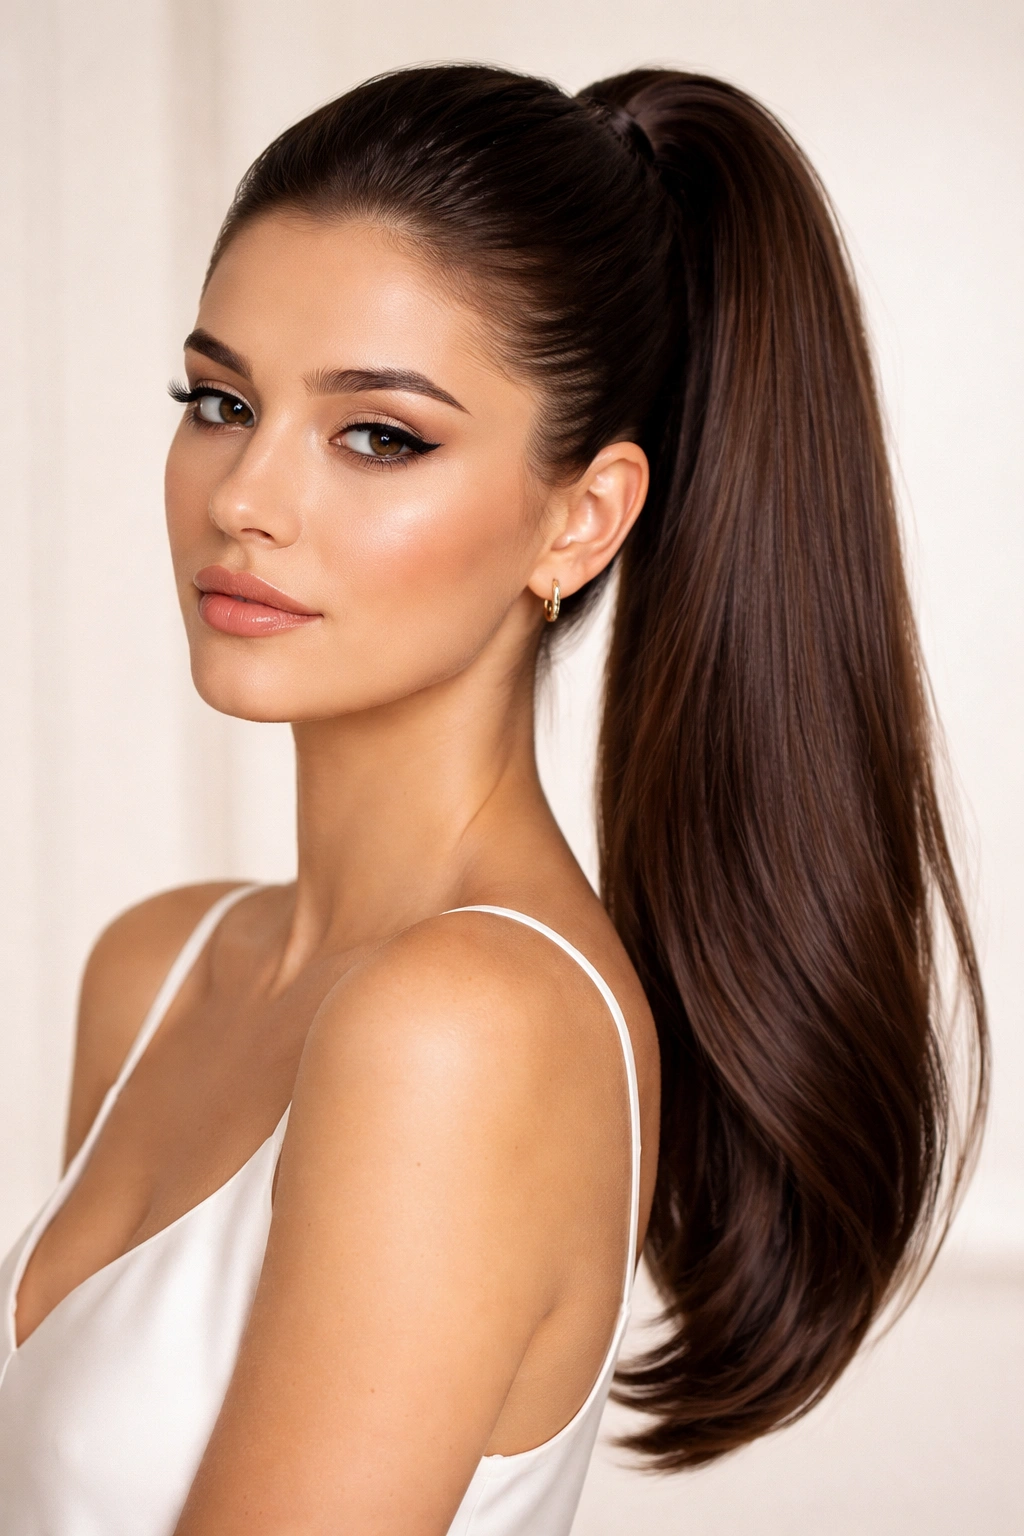
The classic high side ponytail is the foundational style that launched a thousand variations. It sits higher than a traditional center ponytail but still pulls to one side, creating an asymmetrical silhouette that’s inherently more interesting than a centered look. This version reads polished without feeling formal, making it genuinely versatile across different settings and dress codes.
Why This Style Works for Nearly Everyone
High side ponytails sit at the exact spot where they catch the light and frame your face dynamically. The height creates the illusion of a longer neck and lifts your features upward — which is why this style flatters almost every face shape, including rounder faces and wider jawlines. Because the placement is to the side rather than centered, it adds visual interest without requiring any complex techniques, which means you can nail this on a mediocre hair day and still look intentional.
How to Build a Flawless High Side Ponytail
- Start with slightly damp hair to give yourself grip without the slickness of freshly washed strands. If your hair is freshly shampooed, use a texturizing spray or dry shampoo 20 minutes before styling.
- Brush your hair smooth in the direction of your eventual ponytail — this prevents flyaways that break the sleek aesthetic. A boar bristle brush works better than synthetic for this because it distributes your hair’s natural oils as you brush.
- Gather hair at the crown with one hand, angling slightly toward whichever side feels natural for you. Use your other hand to position a clear elastic, starting at the back and moving forward to catch all the hair.
- Secure with two passes of the elastic — the first pass gathers everything loosely, the second pass tightens the base. This prevents the elastic from slipping throughout the day.
- Use a teasing brush or fine-tooth comb to smooth any layers that didn’t catch in the elastic. A thin layer of edge control around the hairline adds polish without looking wet or greasy.
Pro tip: If your ponytail feels loose after 20 minutes, don’t retie it — instead, gently pull the elastic down slightly and work it back up with a slight twist. This re-secures the grip without leaving a second crease in your hair.
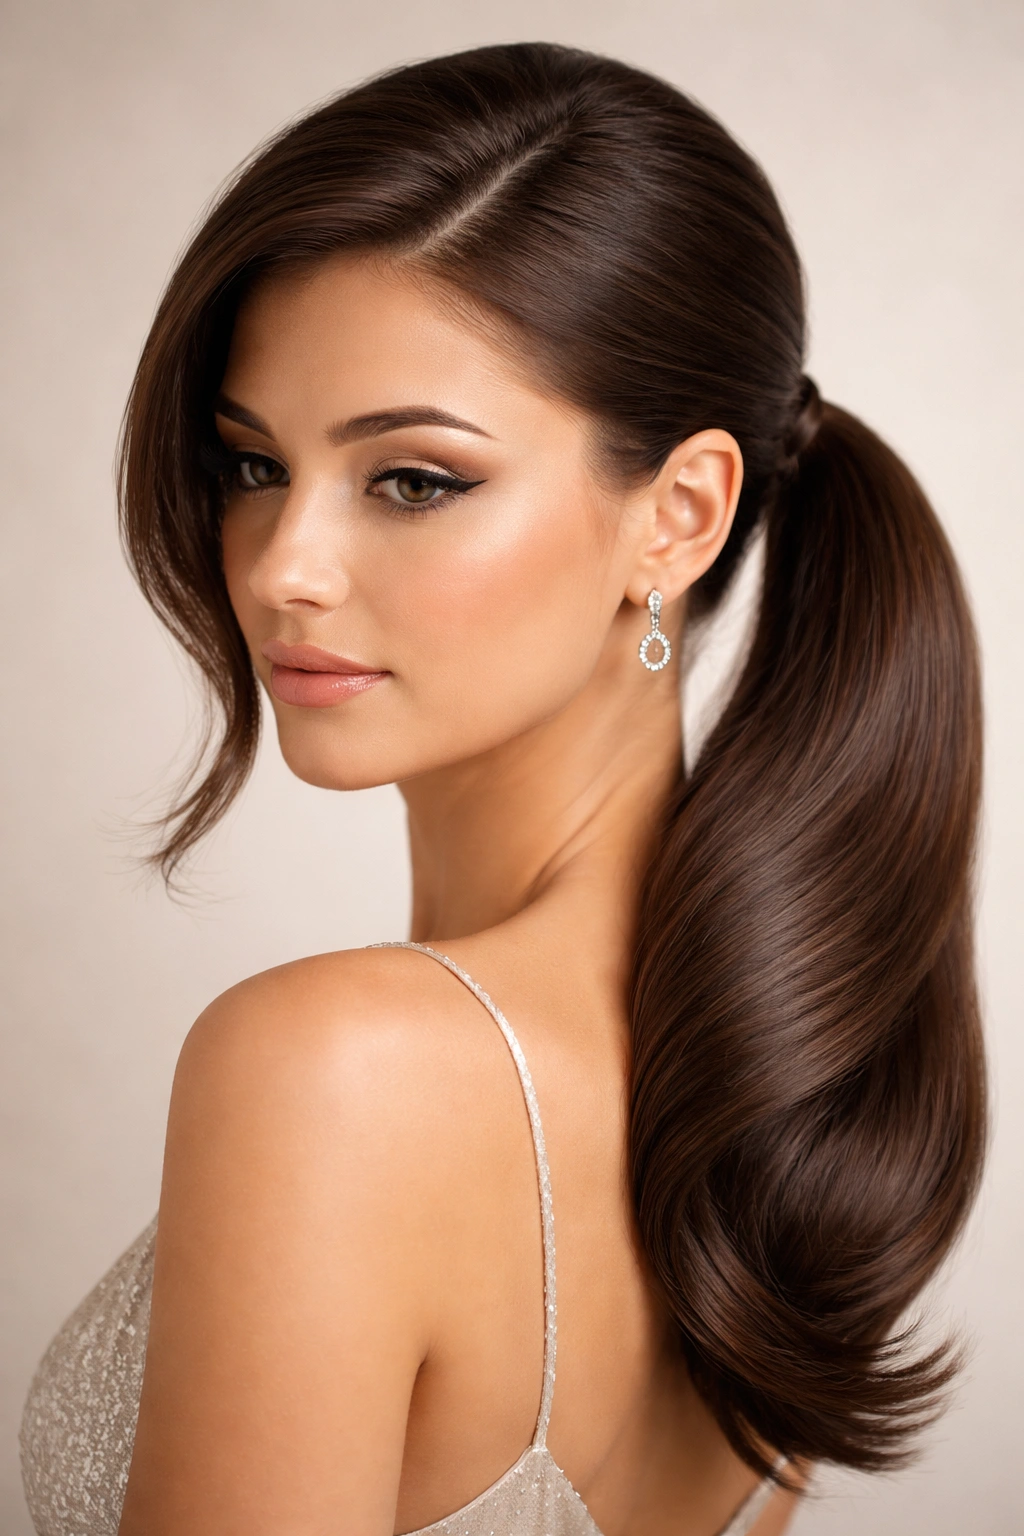
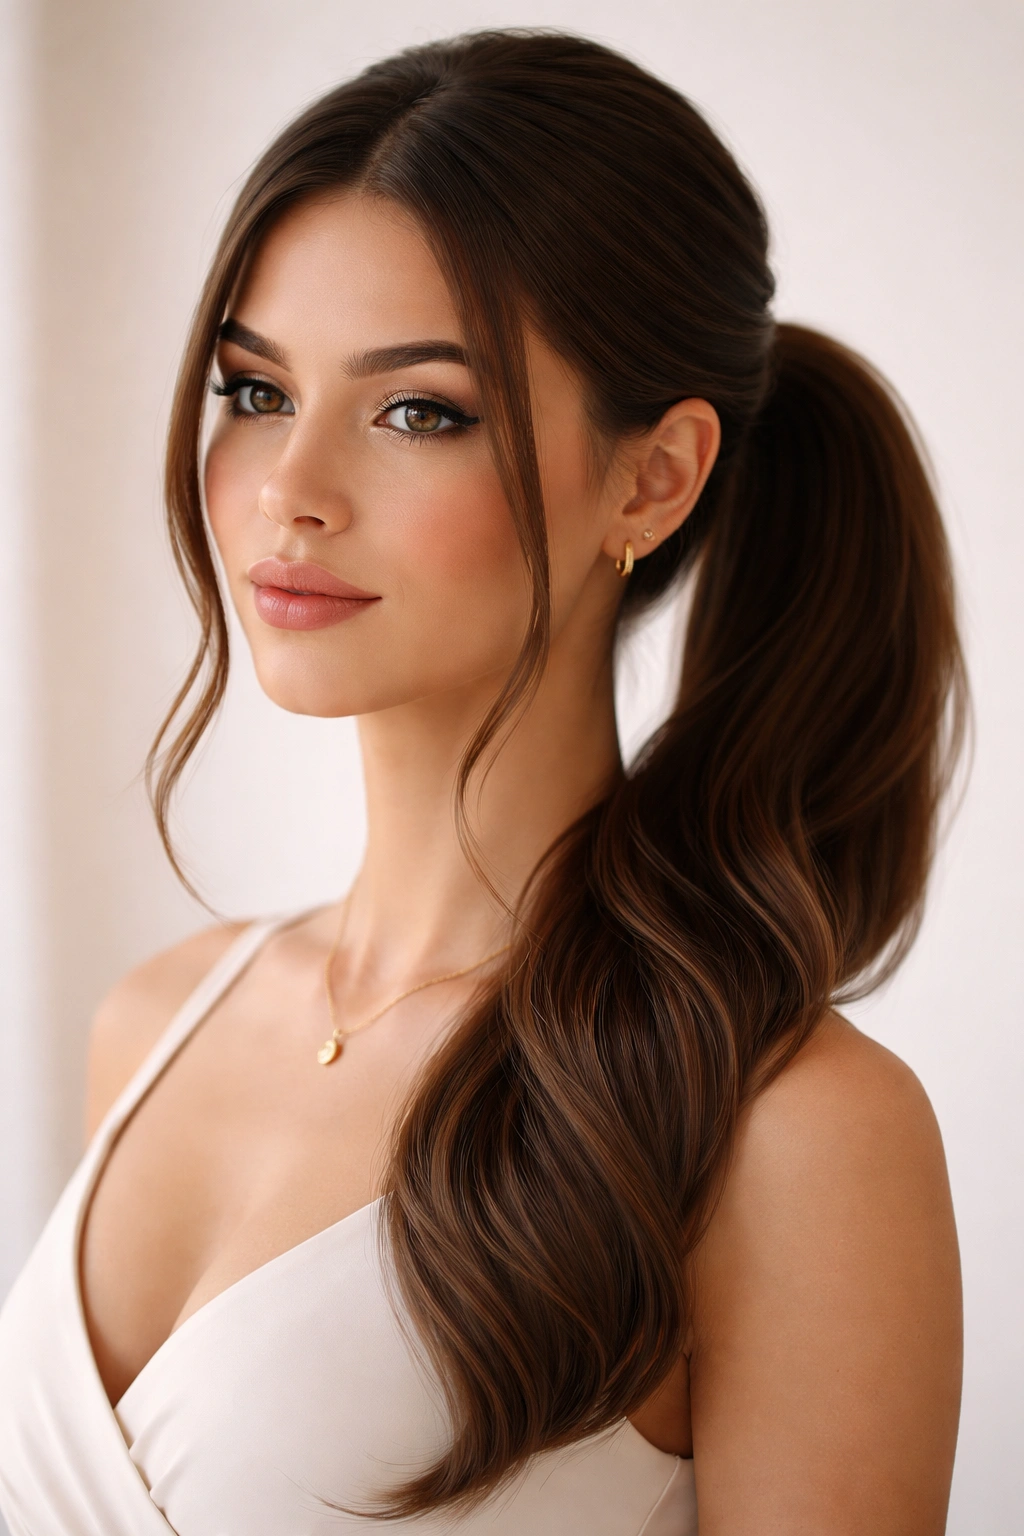
2. The Sleek Low Side Ponytail
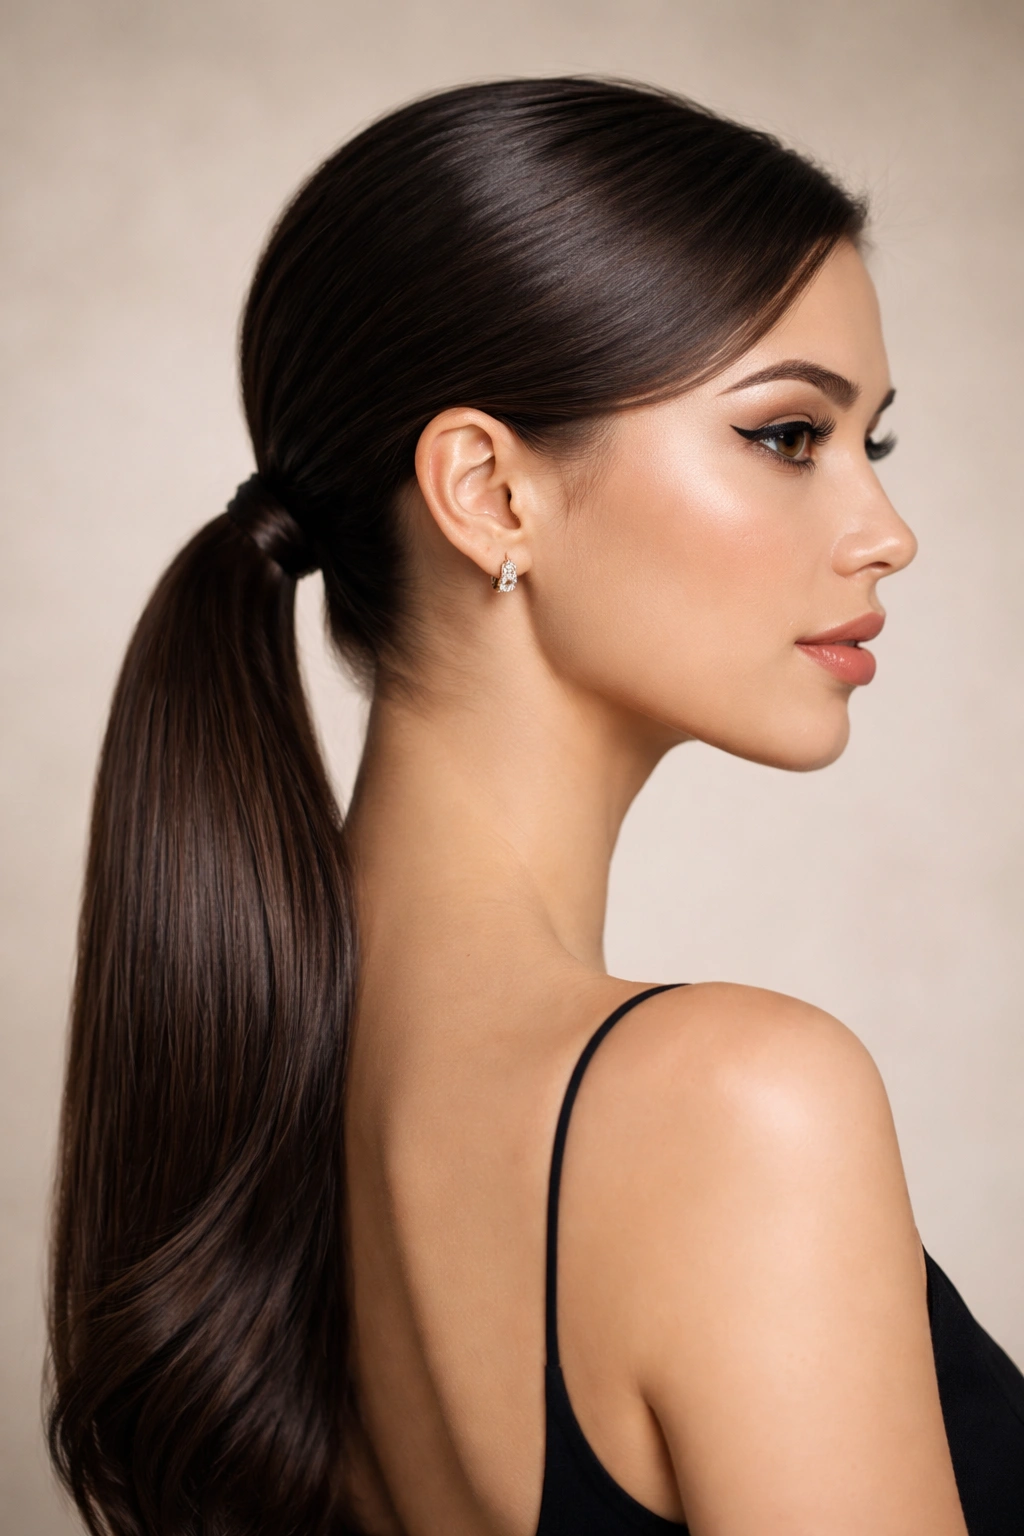
The low side ponytail is the dressier cousin of the high version, sitting closer to your neck with a longer, more elegant proportion. This placement feels naturally more formal and sophisticated, which is why you see it everywhere at events, professional settings, and red carpets. The key difference isn’t just height — it’s the precision required to make it look intentional rather than sloppy.
What Makes Low Side Ponytails Photograph Better Than High Ones
Lower placement creates better camera angles because the ponytail doesn’t disappear behind your shoulders. The elongated line from shoulder to ponytail makes your silhouette look leaner and more refined — which is one reason stylists prefer this version for events and professional environments. The asymmetry is subtle here, which reads as intentionality rather than convenience, which matters when you’re trying to look deliberately polished.
Creating a Low Side Ponytail That Actually Stays Secure
- Brush your hair smooth with a fine-tooth comb, paying special attention to the nape area where strands tend to frizz and escape.
- Locate your positioning point about 2 inches below where your ear connects to your skull. This is the sweet spot for a low side pony that doesn’t look accidental.
- Gather hair at that point, making sure you’ve captured all the shorter layers around your face and neck. A common mistake is leaving hair out — you want everything secured into one clean line.
- Use a small elastic rather than a chunky hair tie. A thin elastic creates a cleaner line and is less likely to slip than a loose, oversized band.
- Smooth the outside layer with edge control or a tiny dab of pomade on your fingers. This eliminates the flyaways that make low ponytails look undone rather than intentional.
Worth knowing: Low side ponytails are significantly more secure when you backcomb the base gently before securing the elastic. This creates grip that a smooth base can’t provide, especially with finer hair types.
3. The Twisted Wrap Side Ponytail
The twisted wrap side ponytail is a single-step complexity upgrade that transforms a basic side pony into something that looks genuinely designed. Instead of leaving the elastic visible, you wrap a thin section of hair around the base, which completely changes the perceived polish level. This is the version that makes people ask what product you’re using, because it looks more intentional than it actually is to create.
The Technique That Makes Wrapped Ponytails Look Salon-Quality
After you’ve secured your basic side ponytail high or low, you’re going to take a thin section of hair from the underside of the ponytail — roughly the thickness of a pencil. Twist this section tightly as you wrap it around the base of the elastic, then secure the end with a bobby pin that matches your hair color. The wrapped section should completely conceal the elastic, creating an unbroken line from your gathered hair down through the wrapped base. This single step makes a basic ponytail look crafted rather than rushed.
Common Wrapping Mistakes and How to Avoid Them
- Using too thick a section is the most common error. The wrapped piece should be thin enough that it conceals the elastic in a single wrap without bunching or creating visible layers. Test your section thickness before wrapping — it should be about the width of a pencil or fine marker.
- Not twisting tightly enough means your wrap unravels by noon. The tighter you twist, the longer it holds. A loose, lazy twist will loosen within hours, so commit to real tension as you wrap.
- Securing the wrap with a visible pin defeats the whole purpose. Use a bobby pin that matches your hair color, not a metallic one. Hide the pin underneath the wrap so it’s completely invisible to anyone looking at you from the front or side.
- Wrapping in the wrong direction can create a visible seam. Wrap in the same direction you twisted — this creates a clean spiral rather than a lumpy loop.
4. The Braided Side Ponytail
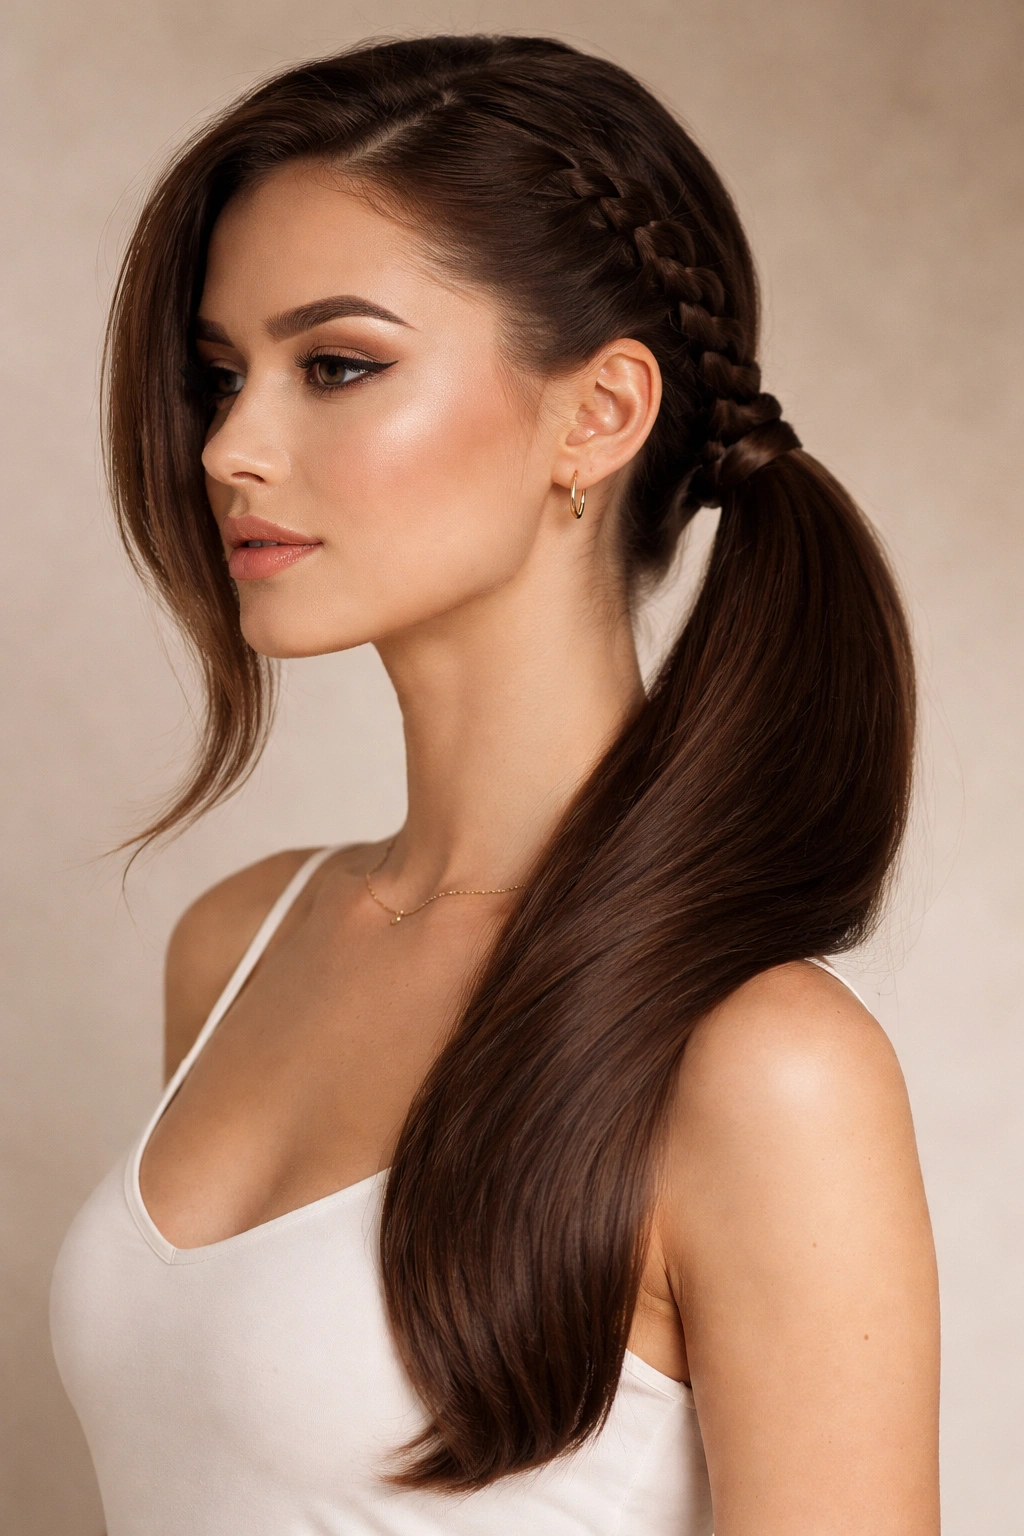
The braided side ponytail combines a braid element with a gathered ponytail, creating texture and visual interest that reads as more elaborate than the actual technique requires. This works as a middle ground between sleek and textured — it’s polished enough for professional settings but has enough dimension that it doesn’t feel harsh on your face. The braid can start at your crown or begin lower, depending on how much detail you want.
Why Braids Add Visual Depth Without Adding Actual Complexity
A three-strand braid running down one side of your head before gathering into a ponytail creates the illusion of more intricate styling than you’ve actually done. Your brain reads braids as “effort,” so even a simple, loose braid makes the entire look feel intentional and crafted. The braid also helps corral any flyaways, which means this version stays polished throughout the day even if you’re not touching it up constantly.
The Step-by-Step Braided Side Pony Build
- Start with textured hair — a light texture spray or a day-old wave makes braiding significantly easier than working with slippery, freshly washed strands. Smooth hair slides apart; textured hair holds.
- Create a side part on whichever side feels natural, then begin a loose three-strand braid at your crown on the fuller side of your part.
- Braid down to about ear level, loosening the braid as you go. A tight braid can look too severe and formal; a loose, slightly undone braid reads as intentional texture.
- Gather the braided section along with all your remaining hair into a side ponytail at your chosen height. The braid becomes the focal point at the top while your gathered hair forms the ponytail body.
- Secure with an elastic, then use a fine-tooth comb to gently pull sections of the braid slightly wider. This creates the “lived-in” texture that separates intentional braiding from accidental sloppiness.
Pro tip: If your braid feels too tight and severe, spritz it lightly with texture spray while you pull the sections wider. The spray gives you grip so the braid holds your adjustments.
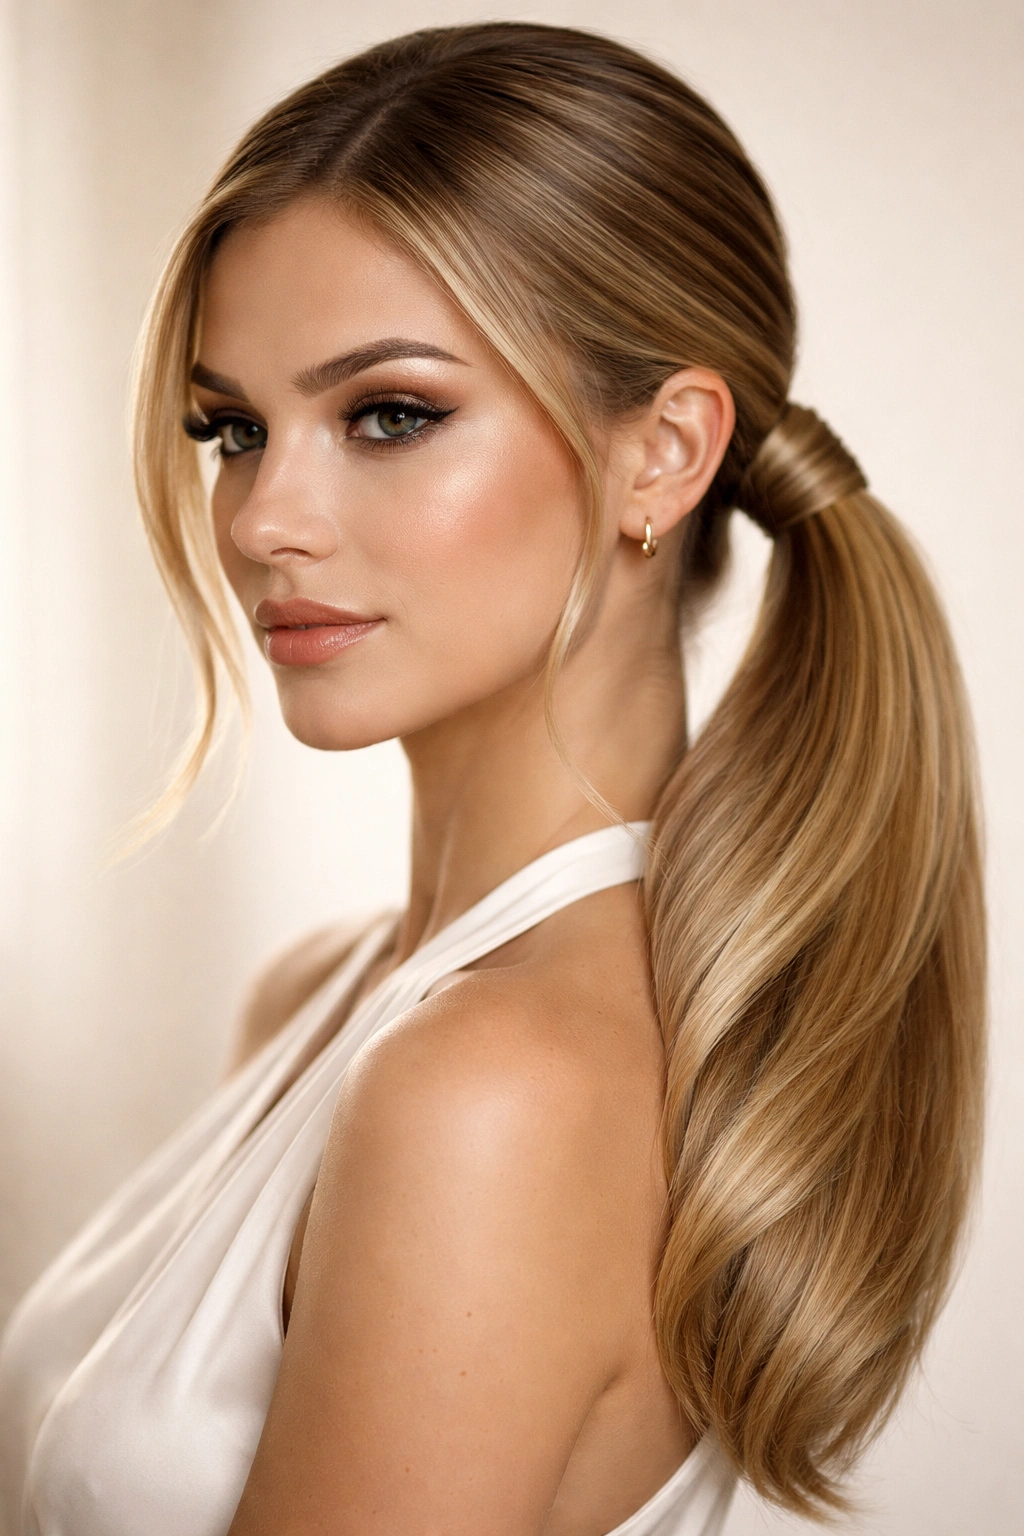
5. The Sleek Side Bun
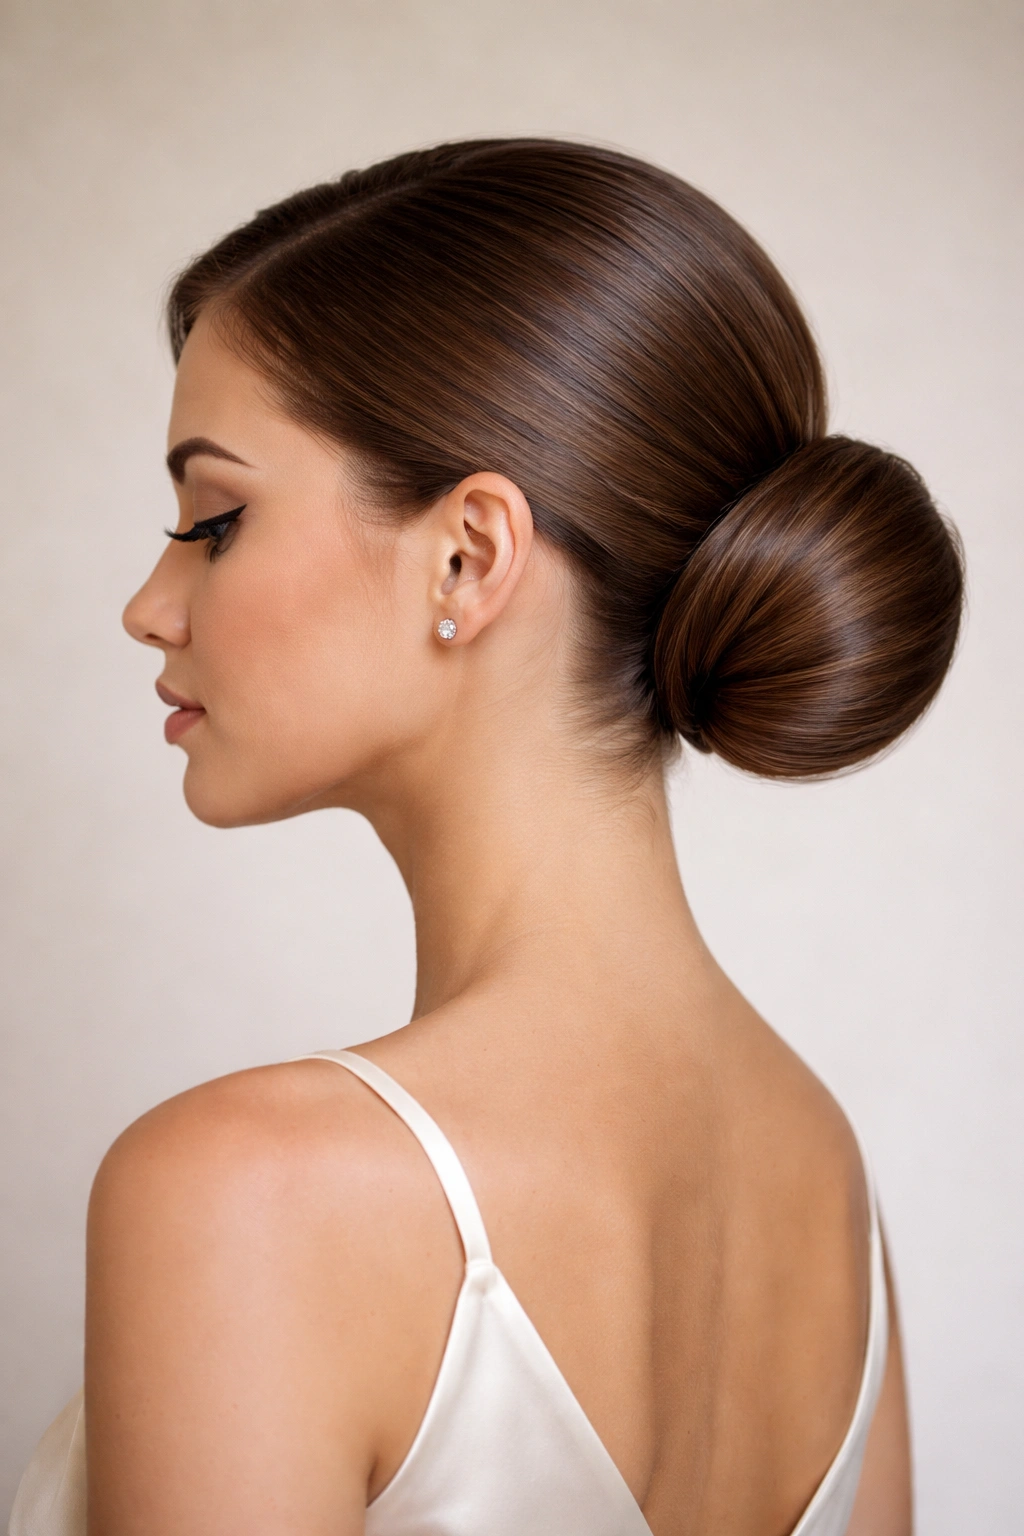
The side bun is the sophisticated upgrade from a side ponytail, taking the same asymmetrical placement and turning it into a wrapped knot at the base of where a ponytail would be. This style reads significantly more formal than a ponytail while requiring almost identical technique. The difference is a single wrapping step that transforms your gathered hair into a compact knot rather than a hanging tail.
When Side Buns Read Polished vs. Sloppy
A side bun’s success entirely depends on how tightly and neatly you wrap it. A loose, undone side bun reads as casual; a tight, precise side bun reads as intentionally elegant. The visual difference is massive, which is why technique matters more here than in almost any other hairstyle. A professional-quality side bun requires your gathered ponytail to be tight enough that it doesn’t feel wispy when you’re wrapping it, which means securing and tightening your base before you ever start wrapping.
Creating a Secure Side Bun That Lasts All Day
- Gather your side ponytail as you would for a low side pony version, making sure everything is smoothly pulled and the base is tight against your head.
- Twist the entire ponytail tightly from the base down to the ends. The tighter you twist, the easier it is to wrap neatly and the longer it holds. A loose twist becomes a loose bun by mid-afternoon.
- Wrap the twisted ponytail around the base of your gathered hair, creating a spiral knot. Tuck the ends underneath as you wrap so they’re completely hidden.
- Secure with bobby pins placed through the bun into your scalp, not just through the hair. You need multiple pins placed at different angles to hold the weight of all your hair.
- Smooth the outside with edge control and a fine-tooth comb. Any visible flyaways break the polished aesthetic that side buns demand.
Worth knowing: A side bun created from twisted hair holds better than one created from braided hair, because the twist is more compact and doesn’t unravel as easily when you’re securing pins.
6. The Half-Up Half-Down Side Pony
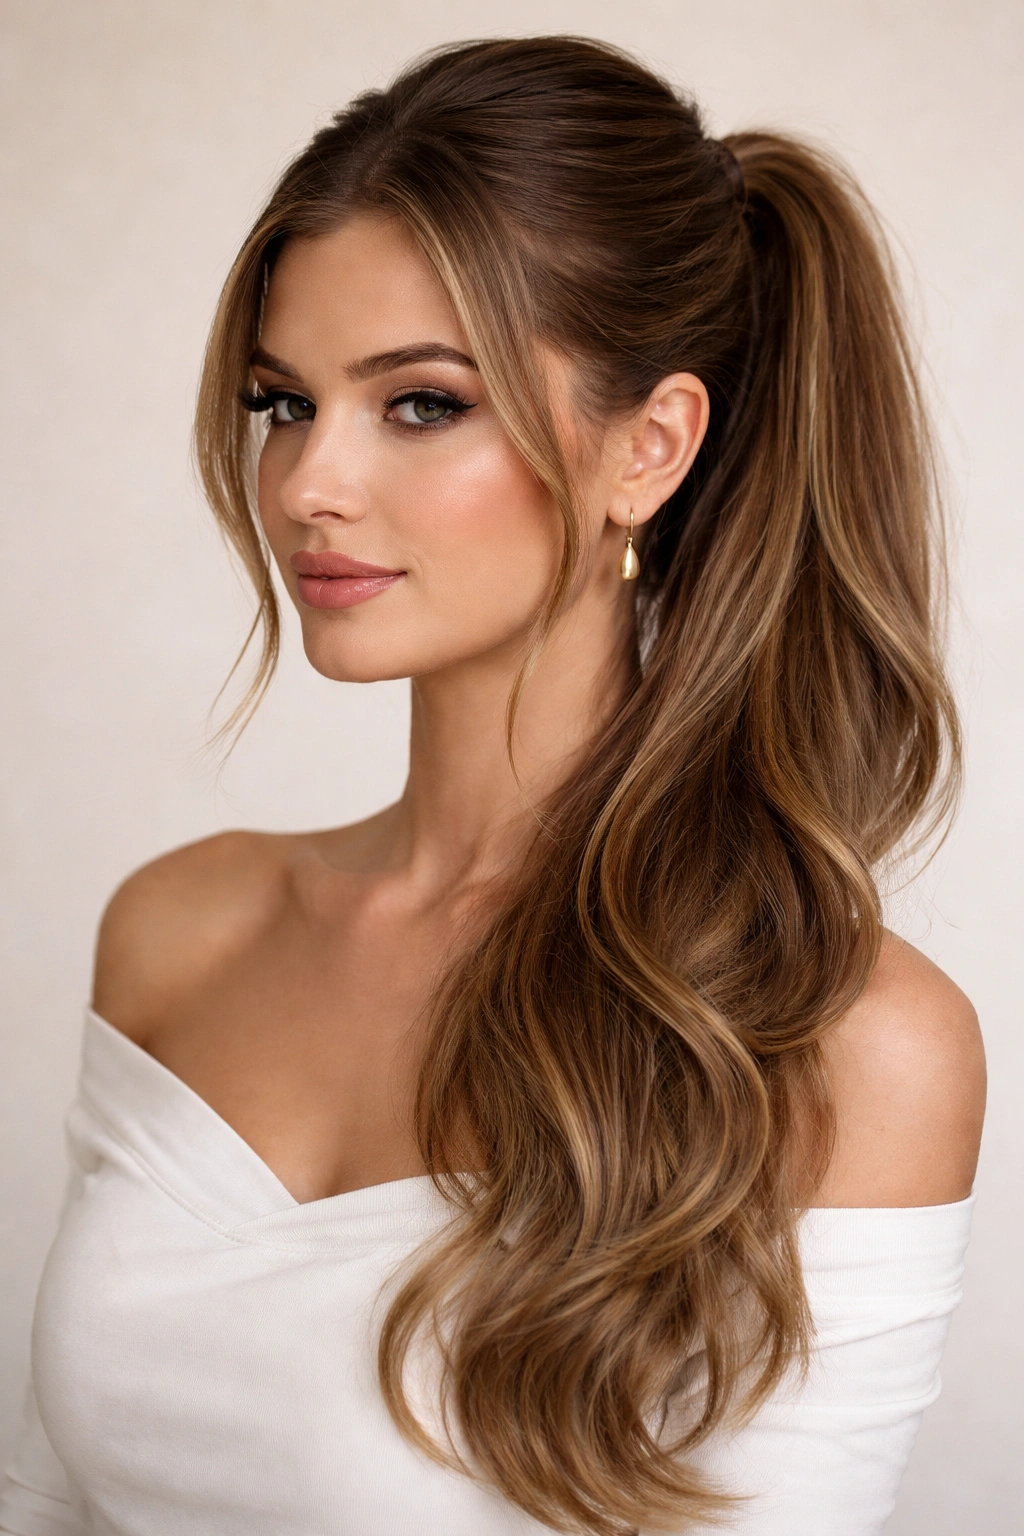
The half-up half-down side ponytail is the romantic middle ground between fully pulled back and completely down. This version gathers the top and back portion of your hair into a side ponytail while leaving the bottom half loose and flowing. It reads elegant rather than corporate, making it perfect for events, dates, or days when you want polish without severity.
Why Half-Up Styles Flatter More Face Shapes Than Full Ponytails
Half-up ponytails show off your hair length while still framing your face with pulled-back volume. This works beautifully for people with longer faces (the fullness balances length), rounder faces (the raised crown lengthens), or anyone who feels that a full ponytail can look too severe. The partially loose hair also gives you flexibility — you can wave the bottom section for softness or keep it straight for a more modern aesthetic.
Building a Half-Up Half-Down Ponytail That Reads Intentional
- Section your hair horizontally from temple to temple across the crown, separating the top half from the bottom half. This line should sit roughly at the point where your ears connect to your head.
- Gather only the top section into a side ponytail, positioning it slightly to one side of center. The placement is more subtle here than in a full ponytail because you’ve got less hair density to work with.
- Secure tightly, because this section is supporting less hair and is therefore more likely to loosen as you move throughout the day.
- Leave the bottom half completely loose, or curl it lightly for dimension. The contrast between the polished gathered section and the flowing lower section is what makes this style work.
- Wrap the base with a thin section of hair from the gathered portion, just like you would for any side ponytail. This detail elevates a half-up style from “half-done” to “intentional.”
Pro tip: If your bottom hair section feels too thin or wimpy, lightly tease the roots of your lower hair before pulling back the top section. This adds volume to the loose portion and creates better visual balance with the gathered part.
7. The Slicked-Back Gel Side Ponytail
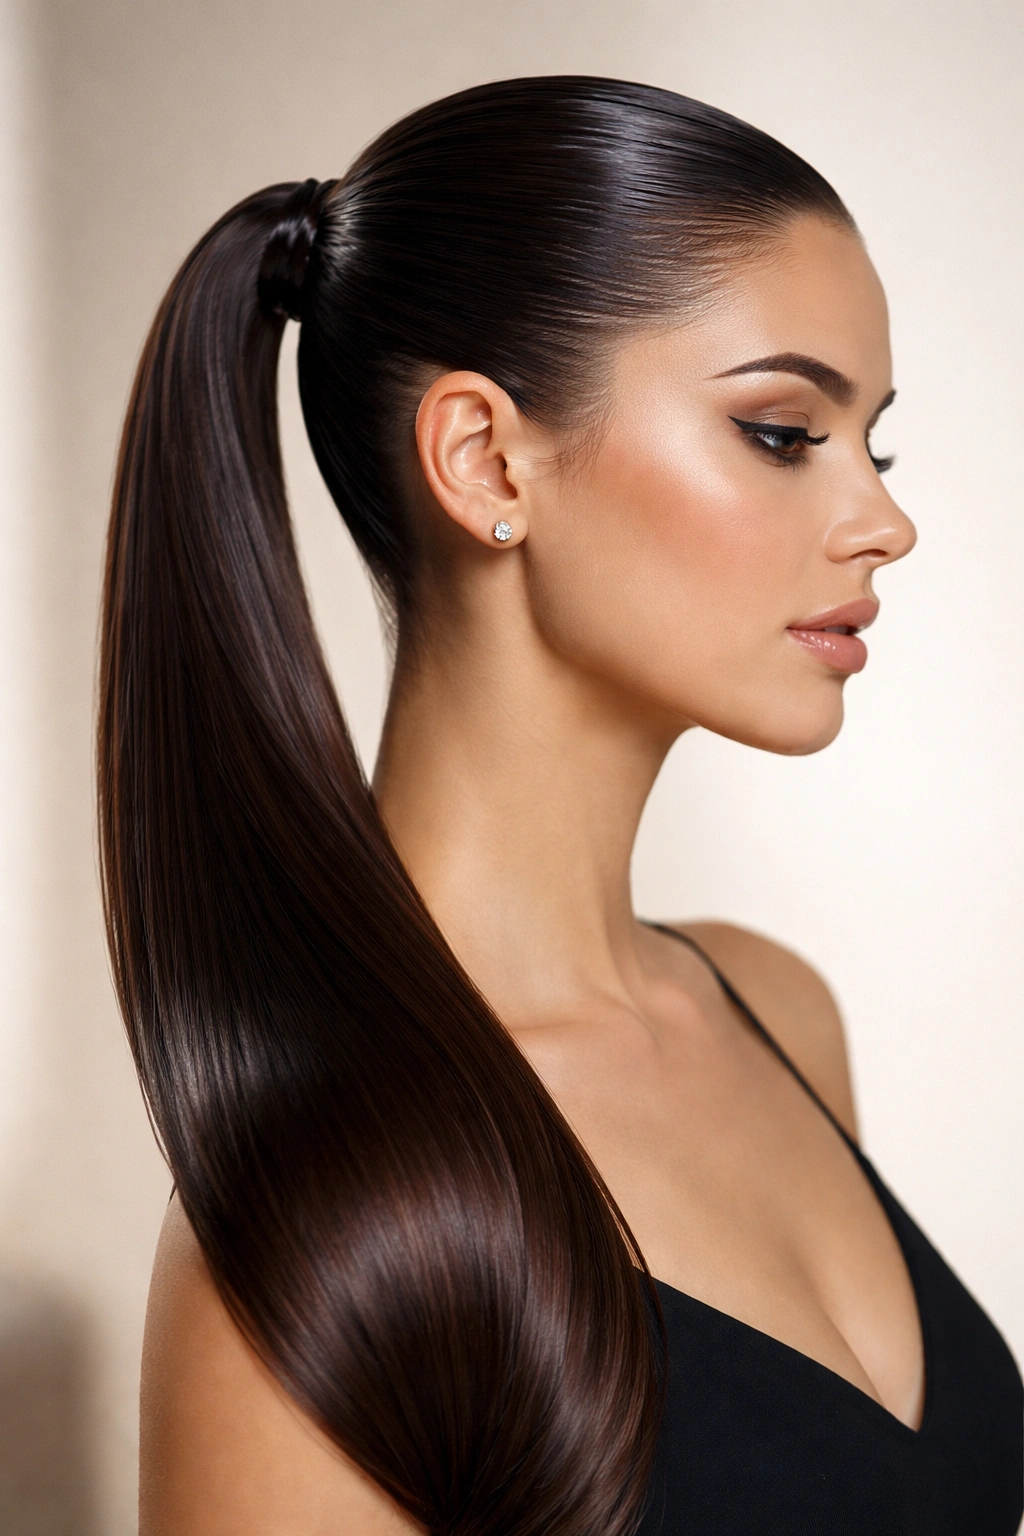
The slicked-back gel side ponytail is the high-impact version that reads modern, edgy, and completely polished. This style pulls every single hair away from your face without a trace of texture, securing it to one side with intentional smoothness. It requires specific products and technique to nail, but when it’s done right, it reads as genuinely striking.
Why Gel-Based Slicking Creates a Different Look Than Traditional Elastics
A gel-slicked ponytail looks fundamentally different from a smoothly brushed one because the product creates a wet appearance that reads intentional and intentionally modern. Gel also holds hair in place far better than elastics alone, which means this version stays positioned exactly as you’ve placed it. The sleekness is more aggressive than traditional side ponytails, which is why this style suits people who want to make a statement rather than blend in.
The Technique for a Slicked-Back Pony That Doesn’t Look Greasy
- Use a gel product formulated for edges or slicking, not a general styling gel. Edge control products are designed specifically for smoothing and securing hair against your scalp without leaving a heavy, wet appearance.
- Apply gel to a fine-tooth comb, then brush from your hairline back toward your gathering point. This distributes product evenly without clumping or creating greasy sections.
- Work methodically from one side of your face, over your crown, and down the other side. The goal is every single hair smoothed back and covered with a thin layer of product.
- Gather your hair into a tight, high side ponytail at the point where all your hair meets. The tightness is crucial here — loose doesn’t work with the intentional sleekness of gel.
- Let the product set for a few minutes before touching it. Gel hardens slightly as it dries, which creates better hold and a cleaner appearance.
Worth knowing: If you’re concerned about a slicked-back look feeling too harsh on your face, position your ponytail slightly lower (at ear level rather than crown height) and leave a few soft face-framing pieces. This softens the look while keeping the intentional sleekness of the style.
8. The Curved Side Ponytail
The curved side ponytail is a subtle technique adjustment that transforms how a standard side pony sits on your head. Instead of a straight vertical line from your gathering point to your ponytail base, you position your ponytail on a diagonal curve that follows the natural line of your head and neck. This positioning reads more sophisticated than a straight ponytail, and it’s especially flattering if you have a longer face or want to soften angular features.
How Positioning Changes the Entire Aesthetic of a Side Pony
When you place a ponytail in a straight line from scalp to ponytail base, it can read geometric and a bit harsh. A curved line — where your ponytail angles slightly down and forward from your gathering point — creates a more organic, face-flattering shape. The curve follows the natural contours of your head and creates a line that your eye finds more visually interesting than a straight alternative.
Creating the Curve That Elevates Your Side Pony
- Brush your hair to one side in the direction of your eventual curve, rather than brushing everything straight back. This pre-positions your hair in the curved direction before you even gather it.
- Gather your hair following the curve of your head rather than pulling everything in a straight line. Your hands should move from one point to another point that’s slightly forward and lower than a straight vertical path would be.
- Position your elastic where your curve ends naturally. This might be at ear level, or it might be at the base of your skull behind your ear — wherever the curve of your head takes you.
- Check the line in the mirror from multiple angles. A good curved ponytail looks intentional and organic from the side, not like you’ve placed it wrong.
9. The Textured Matte Side Ponytail
The textured matte side ponytail is for people who want polish without the sleekness factor. Instead of smoothing every hair flat, you create intentional texture and dimension before gathering into a side ponytail. This reads sophisticatedly casual — polished enough for professional settings but relaxed enough that it doesn’t feel rigid or formal.
Why Texture Adds Interest Without Sacrificing Sophistication
Completely sleek ponytails can sometimes read severe or too formal for everyday wear. A textured alternative keeps polish while adding dimension and movement. The texture also means you have more forgiveness for imperfect technique — slight flyaways actually enhance the intentional texture rather than breaking the look like they would in a slicked version.
Building Texture Before You Gather Your Side Pony
- Use a texturizing spray or dry shampoo liberally throughout your hair, focusing on the crown and the section you’ll be gathering. This creates grip and dimension that smooth hair can’t provide.
- Tease the crown section lightly with a fine-tooth brush, creating subtle volume without a matted appearance. You’re looking for texture, not a giant teased section — build gradually and check in the mirror frequently.
- Gently smooth the teased section with your fingers or a comb, breaking apart the teasing into softer texture rather than leaving it as one solid pouf.
- Create a center part and tease along the part line slightly. This adds dimension along the hairline in a way that’s visible but subtle.
- Gather your textured hair into a side ponytail, leaving the texture relatively undisturbed. A few loose pieces around your face enhance the textured aesthetic.
- Wrap the base with a thin twisted section, and smooth this wrapping section with edge control. The wrapped section should be sleek while the ponytail itself maintains its matte, textured appearance.
Pro tip: Textured matte side ponytails photograph significantly better under natural light than under fluorescent lighting, where they can sometimes look less defined. If you’re wearing this style to an event with harsh indoor lighting, slightly tighten your texture work so it reads clearly even in challenging conditions.
10. The Side Ponytail with Face-Framing Strands
The side ponytail with intentional face-framing pieces is a styling technique that adds softness and dimension while keeping the polished gathered look. Instead of pulling every single hair back into your side pony, you release two thin pieces from near your face to frame your cheekbones and jawline. This works beautifully for people who find completely pulled-back styles too harsh, or anyone wanting to soften angular features.
Why Face-Framing Pieces Change How a Whole Style Reads
A side ponytail with face-framing pieces reads intentional and styled rather than simply convenient. The framing pieces draw attention to your face and cheekbones, and they soften the overall aesthetic without compromising the polished gathered look. This is a technique that professional stylists use constantly because it works across nearly every face shape and hair type.
How to Release and Position Perfect Face-Framing Pieces
- Gather your side ponytail as you normally would, pulling it tightly at your chosen height and securing with an elastic.
- Identify your release points — you want one piece on each side of your face, roughly from temple to cheekbone length. The pieces should frame your face without covering your eyes or obscuring your jawline.
- Use your comb to gently separate a thin section of hair at each release point. These sections should be thin enough that they release cleanly without affecting the rest of your gather.
- Pull the released pieces slightly forward and position them to frame your face naturally. They should fall along your cheekbones, not in front of your eyes.
- Lightly curl or wave the released pieces for softness and movement, or keep them straight for a more modern aesthetic. Curled pieces read softer; straight pieces read more contemporary.
- Secure the released pieces with a light touch of edge control or texture spray. You want them to stay positioned without looking wet or stiff.
Worth knowing: If your face-framing pieces fall out by afternoon, you can secure them temporarily with a small, clear bobby pin tucked behind your ear. This holds them in place without being visible, and you can remove it whenever you want to change the frame.
11. The Fishtail Braided Side Ponytail
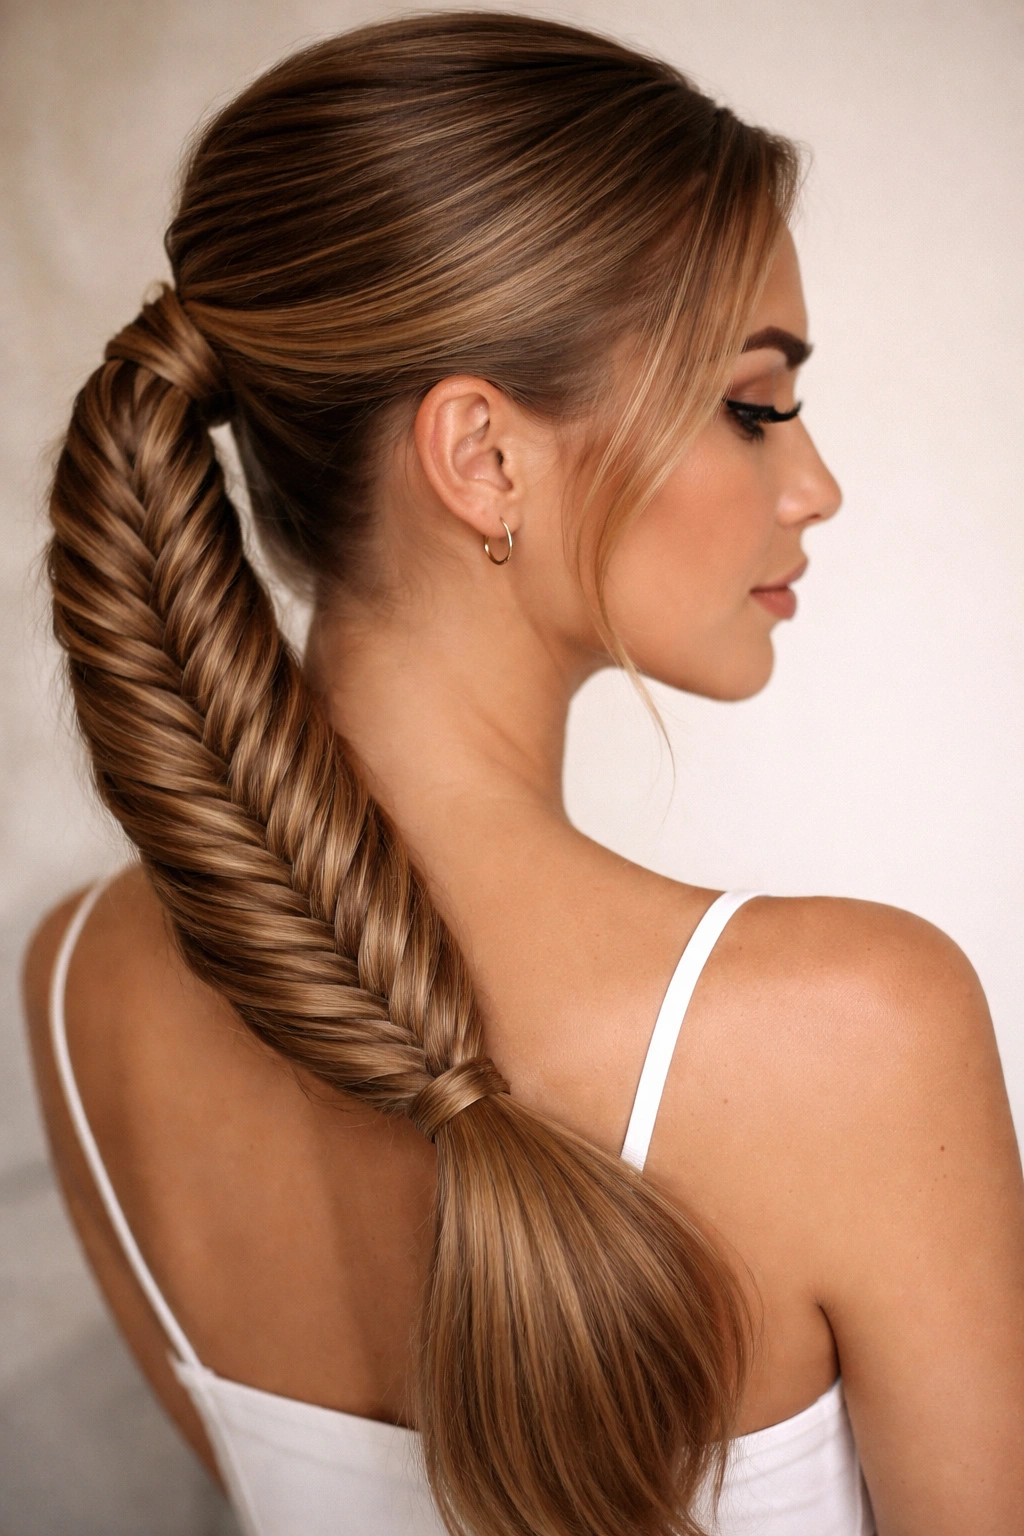
The fishtail braided side ponytail elevates the braided version from earlier by using a more complex braid style that reads even more intricate than a simple three-strand. A fishtail braid creates a delicate, interlocking pattern that looks genuinely impressive, even though the technique is surprisingly learnable. This version reads like you’ve spent serious time on your hair, which makes it perfect for occasions when you want to look genuinely put-together.
Why Fishtail Braids Look More Complex Than They Actually Are
Fishtail braids create a mesmerizing pattern of interlocking strands that photographs beautifully and reads as seriously skilled styling. The reality is that fishtails are simpler than three-strand braids once you understand the alternating pattern. The visual impact is exponentially higher than the actual difficulty level, which makes this technique worth learning.
Creating a Fishtail Braid That Leads Into Your Side Ponytail
- Start with textured hair — a fishtail is infinitely easier to create and hold on day-two hair than on freshly washed strands. If you’re working with fresh hair, use texture spray first.
- Divide your hair into two thick sections rather than three. You’re going to take thin pieces alternately from the outer edge of each section and cross them over to the opposite section, creating the fishtail pattern.
- Take a thin piece from the outer edge of your right section and cross it to the inner edge of your left section. Repeat on the opposite side — taking a thin piece from the outer edge of your left section and crossing it to the inner edge of your right section.
- Continue this alternating pattern down the side of your head from crown to ear level. The thinner the pieces you take, the more delicate and intricate your fishtail appears.
- Loosen the fishtail slightly as you work, pulling the side strands gently wider. A tight fishtail can look harsh; a slightly loosened version reads as intentionally textured and romantic.
- Gather all your hair, including the braided section, into a side ponytail at your chosen height and secure with an elastic. The fishtail becomes the dimensional detail at the top of your ponytail body.
Pro tip: Fishtail braids show up best with volume underneath them. If your hair is fine or thin, tease gently along your part line before starting your braid. This lifts the braid off your scalp so it’s more visible and more visually striking.
12. The Sleek Side Pony with Accessories
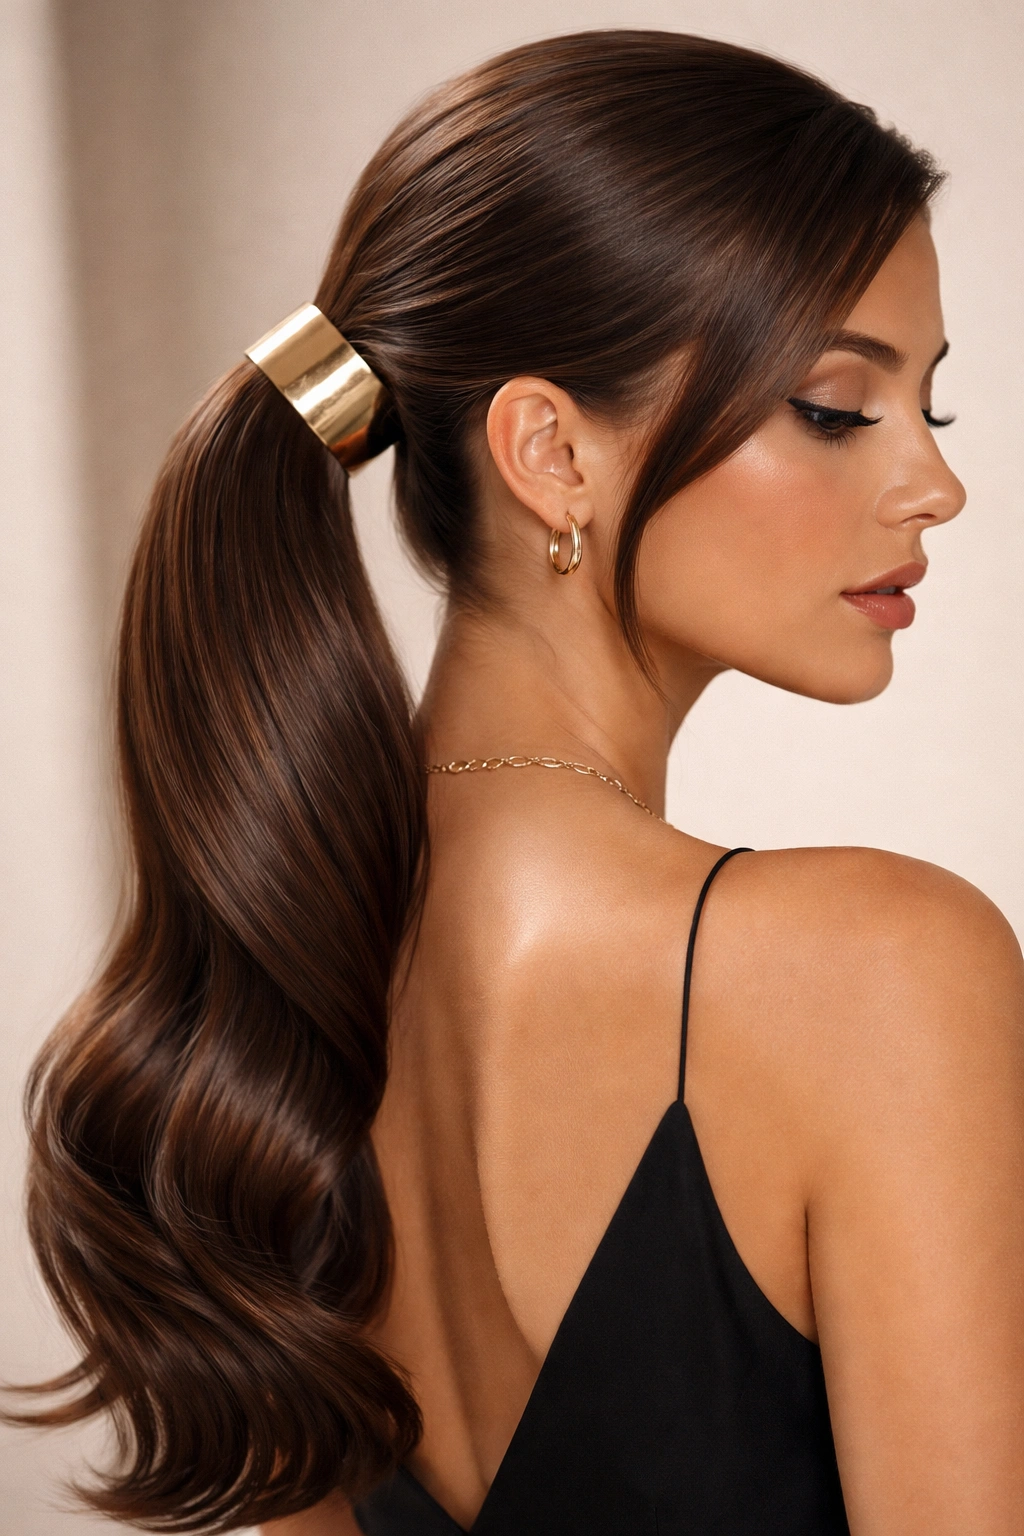
The sleek side ponytail with accessories is the final, most customizable version where your chosen adornment becomes part of the style’s identity. This could be a decorative clip, a metallic cuff, a silk scrunchie, a pearl hair tie, or a ribbon woven through your ponytail — the accessory transforms a basic side pony into something personalized and intentional. Accessories are where you can inject personality into an otherwise uniform style.
How Accessories Change the Formality and Impact of a Side Pony
The right accessory can elevate a casual side pony into event-ready styling, or transform a formal slicked-back look into something playful and contemporary. Accessories are also your opportunity to tie your side pony into your overall look — coordinating your hair accessory with your jewelry, your outfit, or your color palette creates cohesion that makes you look intentionally styled rather than randomly put-together.
Positioning and Securing Accessories for Maximum Impact
- Choose your accessory based on where you’re wearing your side pony. A clip works best on a low pony because it’s visible; a cuff works well on a high pony where it sits against your scalp. A ribbon or scarf can be woven through your ponytail at any height.
- Secure clips through your elastic and into the base of your ponytail, not just sitting on top of your elastic. This keeps it in place throughout the day rather than slipping or rotating.
- For metallic or decorative cuffs, slide them over your ponytail after it’s gathered, positioning them about 1 to 2 inches below your elastic. This creates a clean double-band effect that reads intentional.
- For ribbons or scarves, wrap them around your ponytail base before securing with an elastic, or weave them through the ponytail body itself. The wrapping should be tight enough that it doesn’t slip, but loose enough that it doesn’t create tension on your scalp.
- Ensure your accessory complements your hair color — a rose gold clip on blonde hair reads different than on dark hair. Choose metallics and colors that work with your natural coloring.
Worth knowing: Accessorized side ponytails photograph beautifully, especially when your accessory catches light or contrasts with your hair color. If you’re wearing a side pony to an event where photos are likely, choose an accessory that you love — it will be visible in most angles and will become part of your signature look in those photos.
Key Takeaways
The 12 styles covered here represent the full spectrum of side ponytail possibilities — from the foundational classic high and low versions through textured and braided variations, up to formally accessorized options that read intentionally styled. The common thread across all of them is that a sleek side ponytail works because it’s an asymmetrical style that adds visual interest to your face while keeping your hair intentionally gathered and polished.
The technique matters more than the concept with side ponytails. The difference between a side pony that reads polished and one that reads sloppy comes down to tightness, smoothness, and the specific positioning you choose. A loose pony becomes loose quickly; a tight pony holds all day. An elastic that’s visible reads unfinished; a wrapped base reads intentional.
You don’t need every single style in your regular rotation. Pick the two or three that feel most natural to your hair type and face shape — the classic high version, the braided option, and maybe the textured matte version if you prefer less severity. Master those, and you’ll have a genuinely polished styling option ready whenever you need to look more intentional than your usual styling allows.