Straight hair is the perfect canvas for sleek ponytails—the kind of style that looks intentional, polished, and effortlessly elegant. There’s something deeply satisfying about the clean lines and sharp definition a sleek ponytail creates, especially when your hair texture cooperates naturally. If you’ve got straight locks, you already have the foundation for dozens of sophisticated looks that range from minimalist and modern to romantic and refined.
The beauty of sleek ponytails on straight hair is that they don’t require constant fussing or complicated styling tricks. Your hair’s natural texture does half the work for you. What matters most is the technique you use to smooth everything back, the placement of the ponytail, and the small details—like whether you add a wrap, volume at the crown, or face-framing pieces—that transform a basic style into something memorable.
Whether you’re getting ready for a formal event, a polished workday, or simply want to feel put-together while running errands, sleek ponytail variations give you incredible flexibility. The styles in this guide range from ultra-minimalist to more intricate, so you’ll find options for every occasion, every mood, and every level of styling effort you’re willing to invest. Let’s explore twelve of the most flattering and wearable sleek ponytail styles that make straight hair look absolutely stunning.
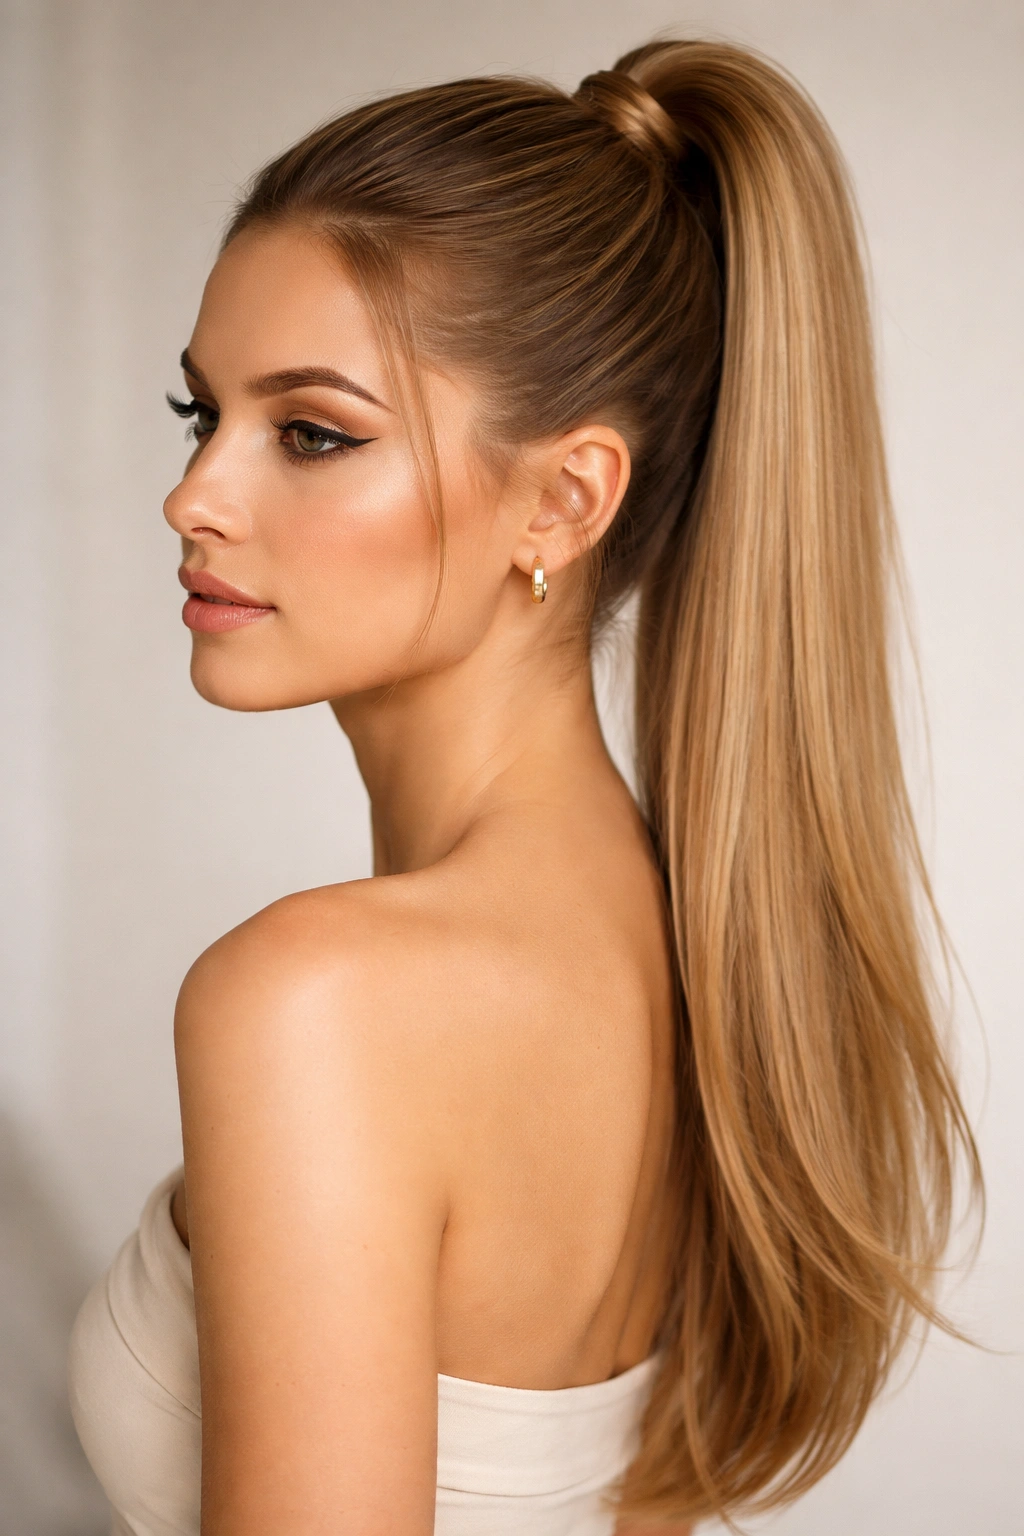
1. The Ultra-High Tight Sleek Ponytail
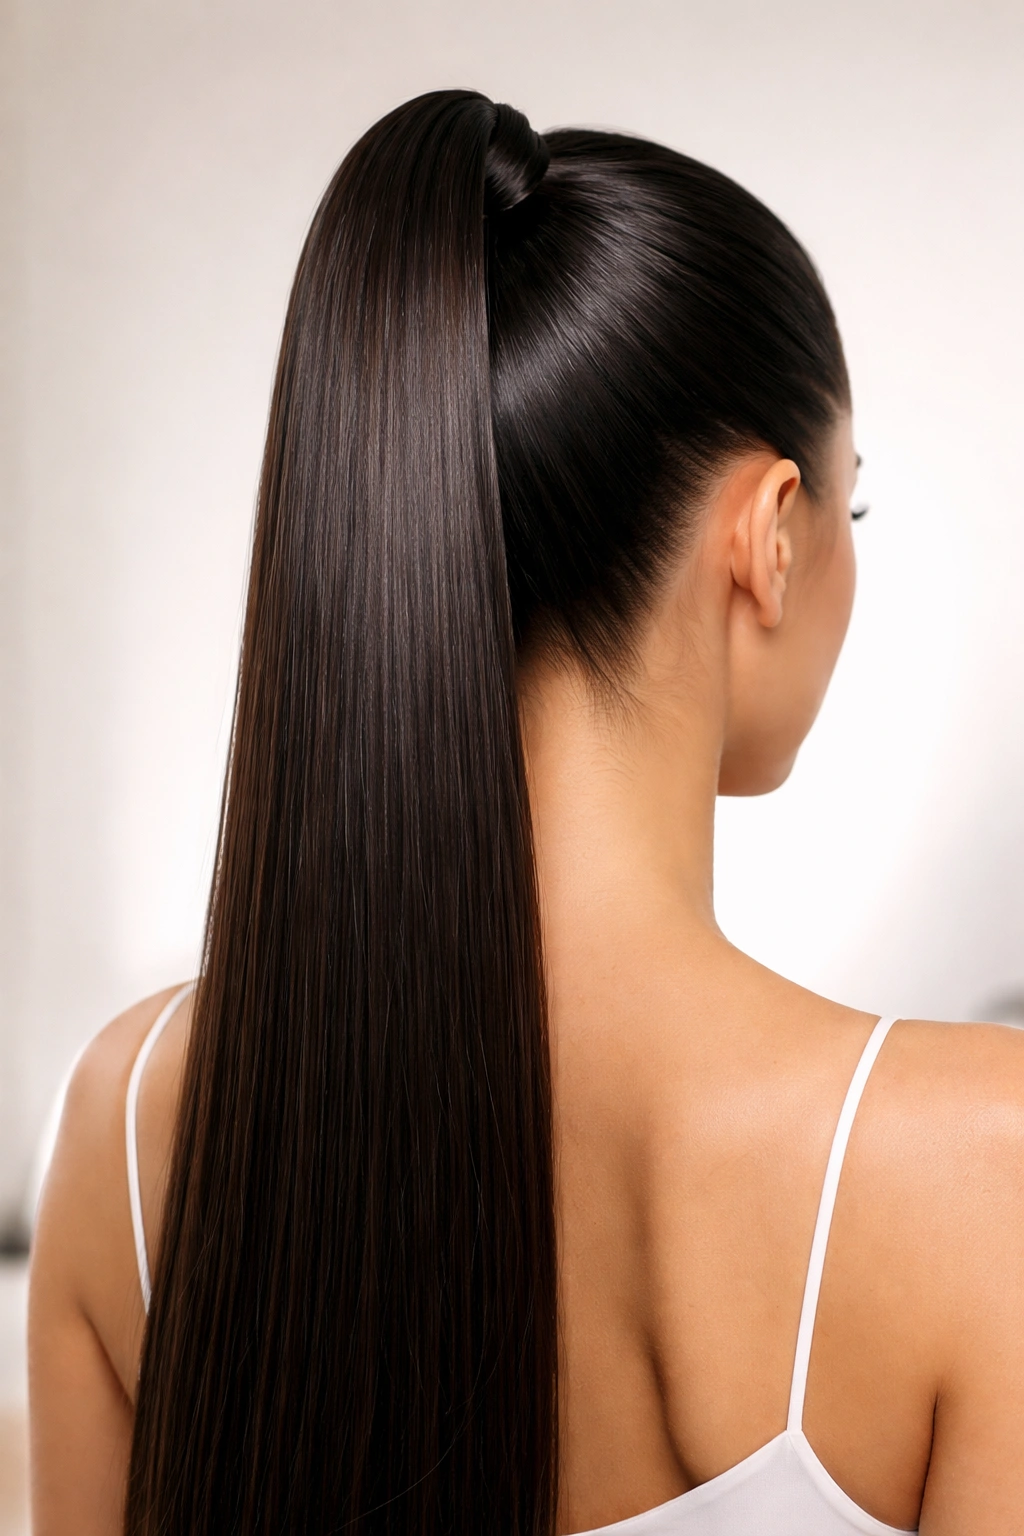
This is the quintessential sleek ponytail—hair pulled sharply back and secured at the very crown of your head. The effect is sleek, modern, and instantly polishing, making it the go-to style for anyone wanting to look put-together in minutes. The high placement creates an elongating effect on the face and draws attention upward, which is why it’s so flattering and widely worn by celebrities and style influencers.
Why This Style Works So Well
The ultra-high placement creates maximum definition and showcases the clean lines that straight hair does beautifully. By pulling hair directly back from the face with no softness or wisps, you create a graphic, intentional look that feels contemporary and professional. This placement also makes your features feel more open and lifted, which is why it’s particularly flattering on most face shapes. The tightness at the roots creates a smooth foundation that emphasizes polish and control.
Key Styling Steps
- Use a fine-tooth comb and smoothing serum to brush hair straight back from your hairline toward the crown with zero flyaways or frizz
- Gather hair at the highest point of your head—the crown—and secure tightly with a clear elastic or a thin hair tie that matches your shade
- For extra sleekness, smooth down any baby hairs with a small amount of edge control or gel around your hairline and temples
- Run your fingers or the comb along the ponytail base to smooth any bumps before securing it fully
Pro tip: The secret to an ultra-sleek base is using a lightweight smoothing serum or dry oil on damp hair before you even blow dry. This creates a silky foundation that takes the friction out of brushing and keeps flyaways at bay all day.
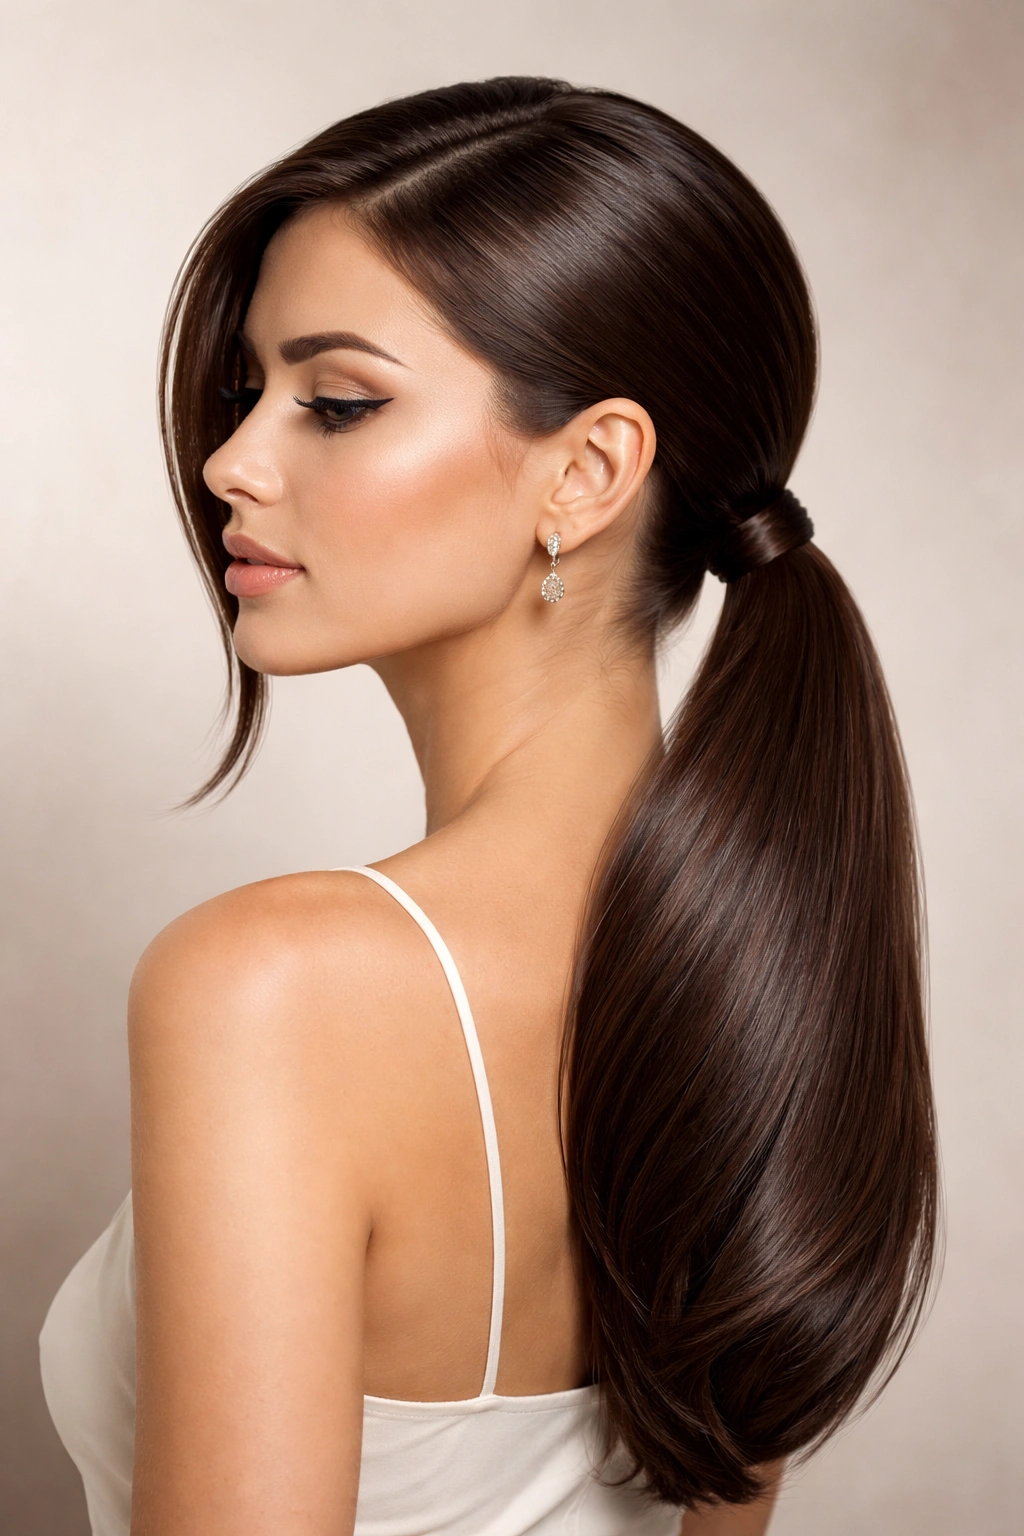
2. The Classic Low Sleek Ponytail
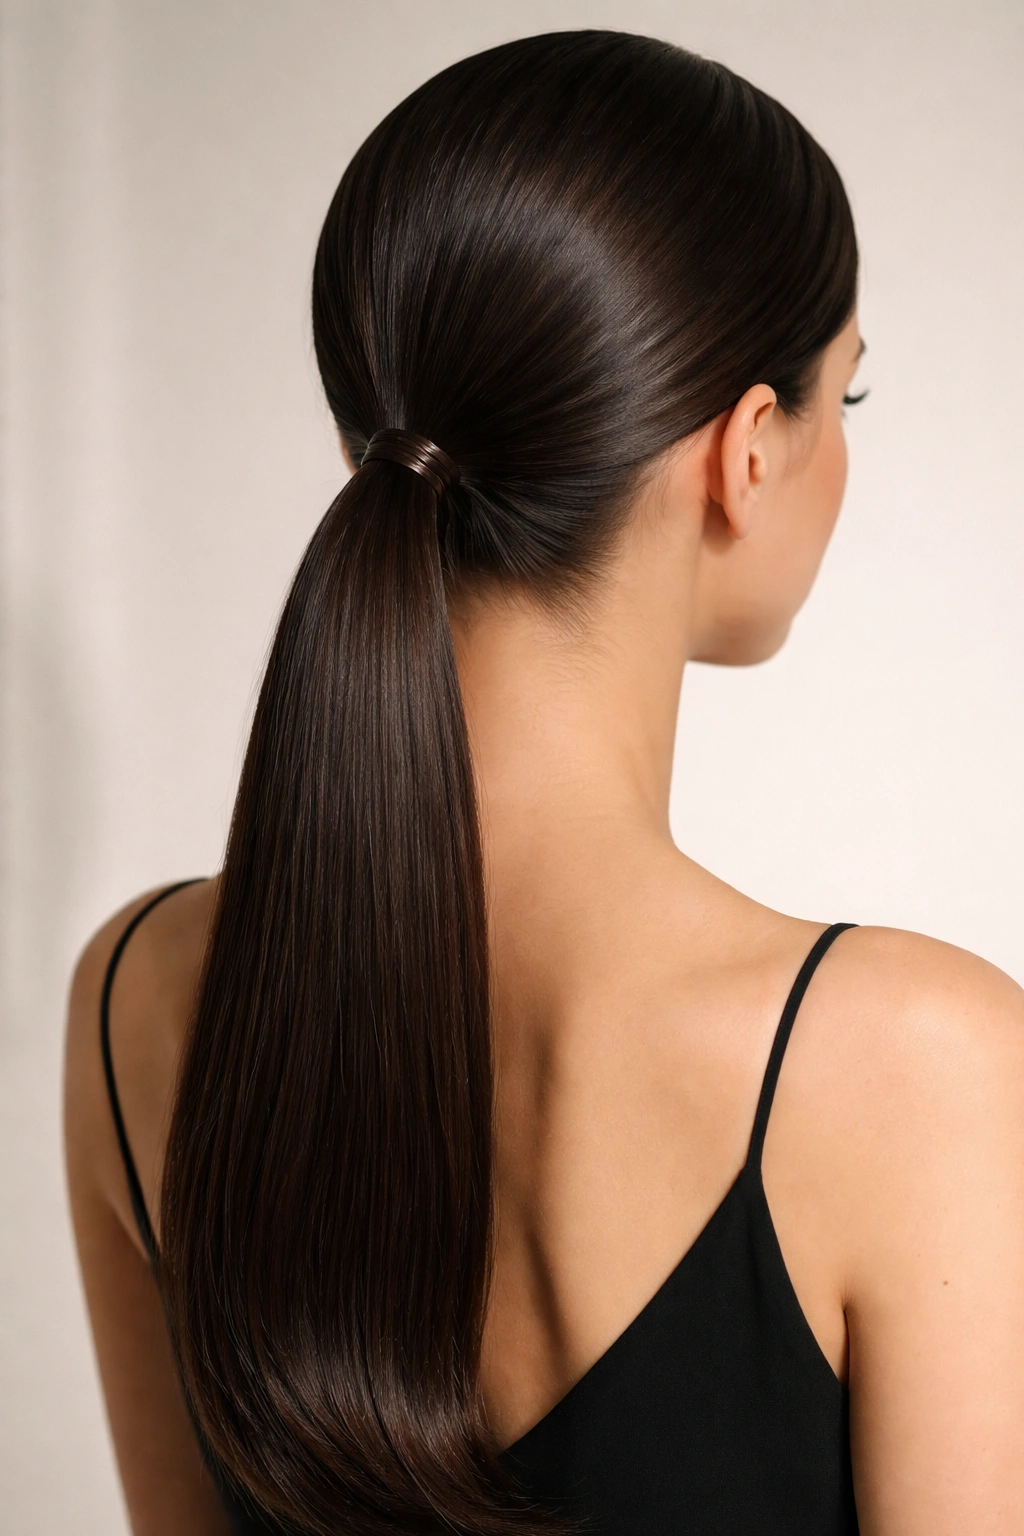
The low sleek ponytail is sophistication in its purest form. Positioned at the nape of your neck, this style is effortlessly elegant and works equally well for formal events, professional settings, or casual-chic days. It’s the ponytail that says you’ve got your life together—polished without looking like you tried too hard.
Why Low Placement Changes Everything
A low ponytail shifts the visual emphasis away from the crown and toward your neck and shoulders, creating an elongated, graceful silhouette. This placement feels inherently more relaxed than a high ponytail, yet equally put-together when done sleekly. The lower gathering point also feels more balanced on certain face shapes and ages, and it’s particularly flattering if you prefer not to emphasize the crown or want a more understated vibe.
How to Achieve the Perfect Low Sleek Base
- Start with straight, smooth hair—blow dry with a flat paddle brush if needed to eliminate any texture or wave
- Use a fine-tooth comb and a smoothing cream to comb hair straight back and slightly downward toward the nape
- Position your gathering point low, about two to three inches above where your neck begins at the very bottom of your head
- Secure tightly with an elastic that matches your hair color—the tightness is what creates the polished effect
- Smooth any flyaways with a light hand of pomade or edge control, focusing on the hairline and the base of the ponytail
Worth knowing: A low sleek ponytail looks expensive and intentional when the hair in the ponytail itself is silky-smooth and has a slight shine. Using a lightweight hair oil or smoothing serum on the secured ponytail gives it an enviable sheen without making it look greasy.
3. The Center-Part High Sleek Ponytail
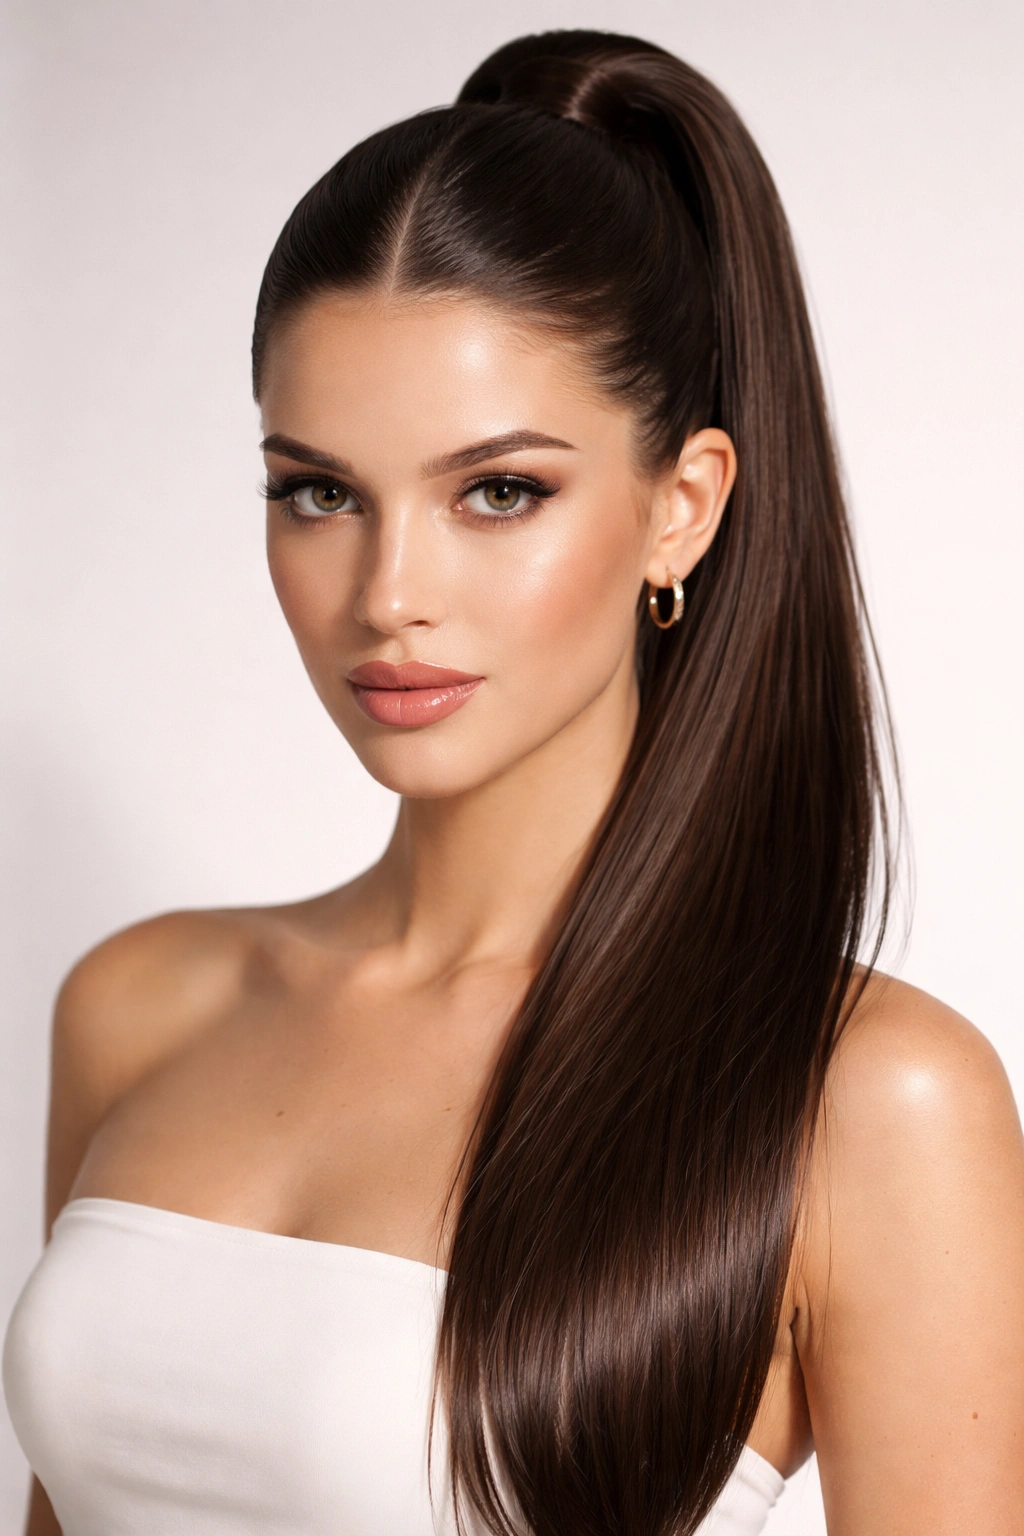
Adding a sharp center part to a high sleek ponytail creates architectural precision that’s instantly flattering and unexpectedly modern. The center part divides the face symmetrically and, when combined with a sleek high ponytail, creates a clean, graphic look that photographs beautifully and feels intentionally styled.
The Visual Impact of a Center Part
A center part naturally draws a vertical line down the middle of the face, which can elongate features and create balance. When paired with a high sleek ponytail, the effect is mathematical precision combined with pulled-back polish—you get a look that feels editorial and fashion-forward. This style works particularly well if you have a balanced or heart-shaped face, as the center part avoids emphasizing width at the cheekbones or forehead.
Steps for Creating This Look
- Begin with a wet or slightly damp head of straight hair
- Using a fine-tooth comb, create a precise center part from your hairline all the way back to the crown, dividing your hair into two equal sections
- Blow dry your hair so the part sets in place and the hair lies flat in two panels on either side of your head
- Gather both sections smoothly back toward the high crown point using a comb and smoothing cream
- Secure very tightly with an elastic, ensuring both sides are pulled equally so the symmetry remains intact
- Smooth the hairline and temples with a tiny amount of gel for a glass-smooth finish
4. The Side-Swept Sleek Ponytail
The side-swept sleek ponytail introduces asymmetry and romance while maintaining that coveted sleek aesthetic. Hair is pulled back and to one side, creating a curved silhouette that’s both elegant and slightly softer than a perfectly centered ponytail. This style is masterful for softening angular features or creating visual interest on days when you want polish with a hint of personality.
Why Side-Swept Is Endlessly Flattering
A side-swept direction creates movement and draws the eye diagonally across the face, which can balance proportions beautifully. The asymmetry feels less severe than a centered look, making it ideal if you want polish without feeling austere. This style also works well if you have a side part naturally, or if you want to incorporate some face-framing without compromising the sleek aesthetic.
How to Perfect the Side Sweep
- Start with smooth, straight hair and use a comb to brush everything back and slightly to one side (typically the side opposite your natural part)
- Smooth hair toward a gathering point that’s positioned slightly off-center—typically about one to two inches to the side of where a centered ponytail would be
- You can keep this point high (creating a high side-swept look) or lower (for a low side-swept effect)
- Secure with a tight elastic that matches your hair color
- Gently adjust the ponytail position until it feels balanced when you look straight ahead in the mirror
- Use edge control around your hairline to smooth any flyaways and emphasize the deliberate side direction
Insider note: The key to making a side-swept ponytail feel intentional rather than accidental is keeping the sweep smooth and the positioning consistent. If your ponytail drifts or falls back to center throughout the day, the whole effect falls apart. Use a strong-hold elastic and consider a small bobby pin hidden beneath the elastic for extra security.
5. The Sleek Ponytail with a Satin or Silk Wrap
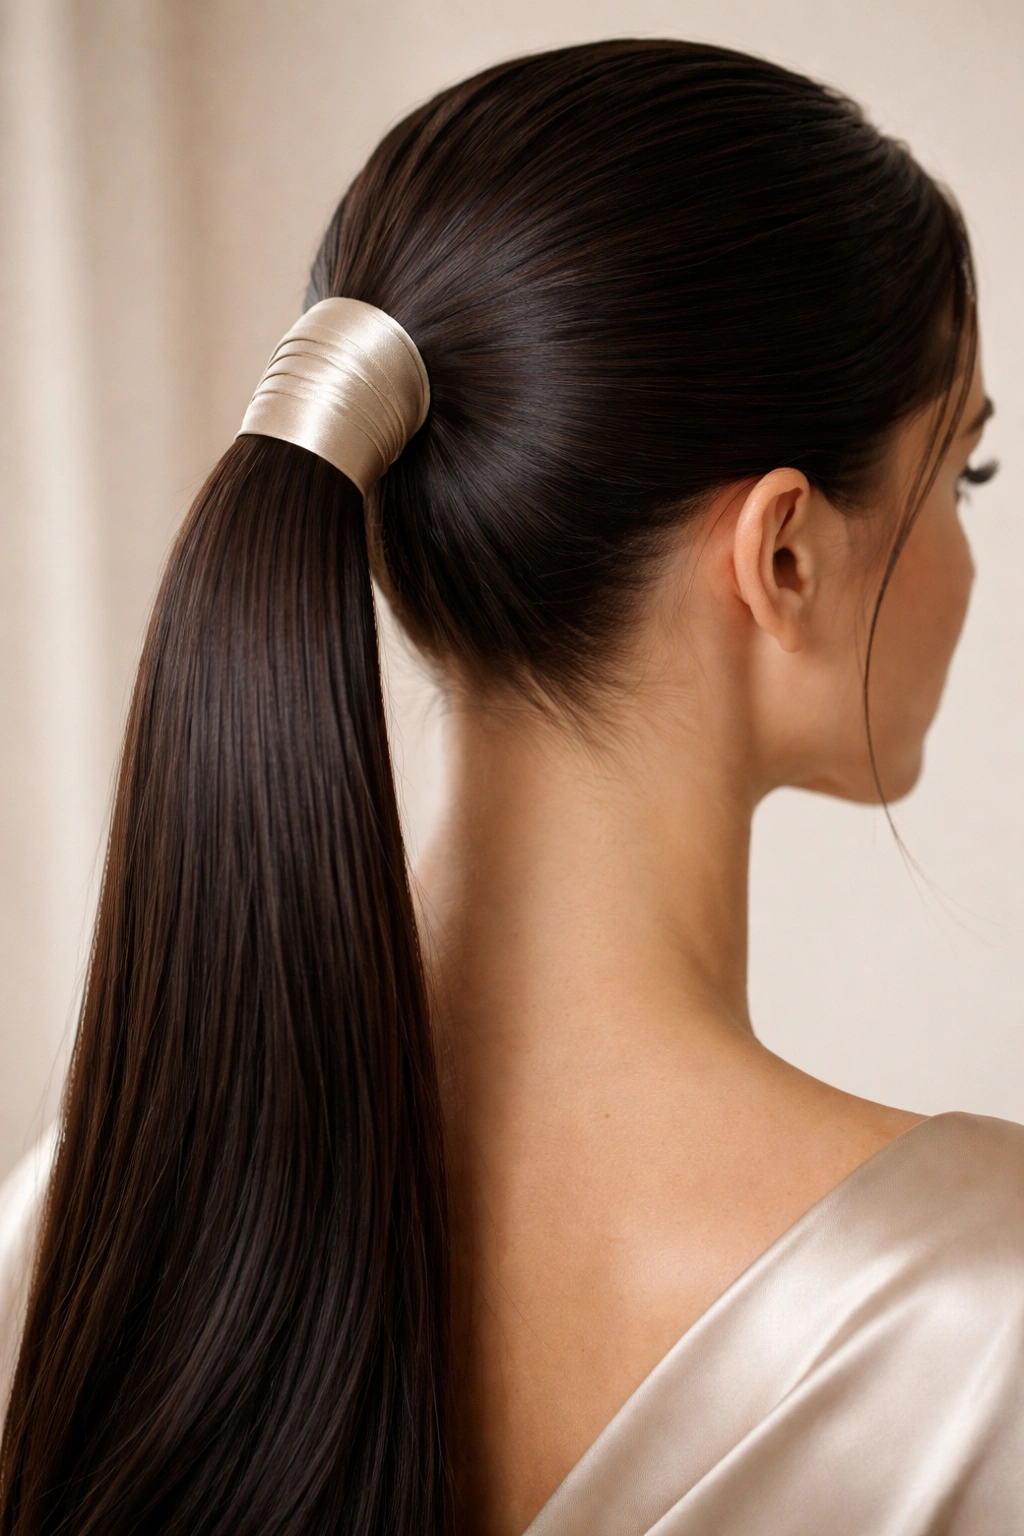
Wrapping the base of a sleek ponytail with a strand of satin ribbon or silk fabric elevates the entire style instantly. This detail transforms a simple ponytail into something that looks professionally done and incredibly polished. The wrap covers the elastic, adds a luxe texture contrast, and can introduce color or metallic shimmer for extra visual interest.
Why the Wrap Is a Game-Changer
A sleek wrap serves multiple purposes: it conceals the elastic (which always looks more refined), it adds a tactile element of luxury, and it gives you a chance to introduce color or shimmer without changing your entire outfit. The wrap also makes the style feel intentional and editorial—it’s the kind of detail that separates “pulled-back hair” from “intentional style.” For formal events or professional settings, a wrap instantly communicates effort and polish.
How to Wrap Like a Pro
- Secure your sleek ponytail first using a clear elastic
- Choose a satin ribbon, silk strip, or even a thin strand of hair from the ponytail itself
- Wrap the material tightly around the base of the ponytail, covering the elastic completely
- Secure the end of the wrap with a small clear elastic or by tucking it underneath and pinning with a bobby pin that matches your hair color
- Smooth the wrap so it sits flat and looks intentional—no bunching or awkward angles
- The wrap should be tight enough to look polished but not so tight that it creates tension or discomfort
Pro tip: A metallic or jewel-toned satin ribbon wrap instantly makes a simple ponytail feel special. Gold wraps work with warm-toned hair, silver or holographic wraps feel futuristic, and jewel tones like emerald or sapphire add unexpected richness.
6. Double Sleek Ponytails for Texture and Interest
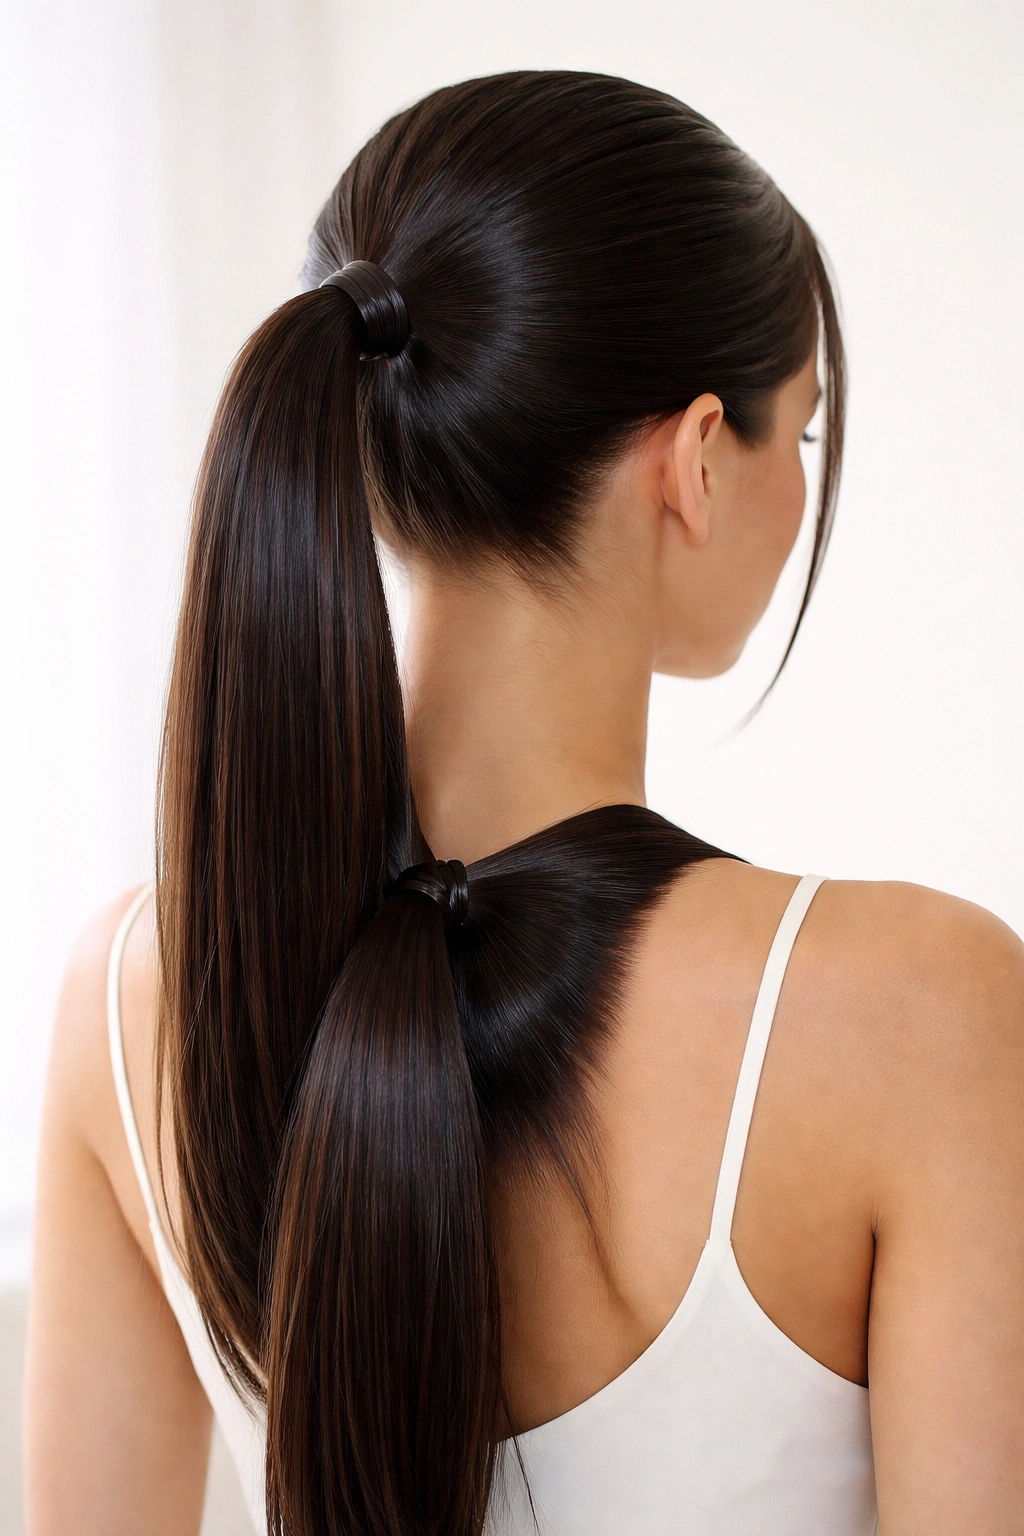
Double ponytails—one positioned high and one positioned lower on the back of the head—create visual interest and movement while maintaining that clean, sleek aesthetic. This style works beautifully on straight hair and has a playful-yet-polished quality that’s surprisingly versatile. The two-ponytail approach breaks up a solid block of pulled-back hair and creates the illusion of more texture and dimension.
The Appeal of the Two-Ponytail Approach
Double ponytails avoid the severity of a single, tight gather while still keeping hair completely off the face and neck. The technique creates visual sections and breaks up the monotony of a single sleek line. This style is fantastic for straight hair because the two-ponytail placement actually showcases the smoothness and shine—the sleekness is repeated twice rather than compressed into one dense ponytail. The double approach also feels modern and somewhat trendy, which appeals to anyone wanting something beyond the basic single ponytail.
Creating Double Ponytails with Precision
- Gather the top half of your hair (from the center part line, above the ears, backward toward the crown) and secure with a clear elastic into a high ponytail
- Smooth this upper ponytail to ensure it’s completely polished before moving on
- Take the remaining hair at the back and lower sides of your head and gather it into a second, lower ponytail positioned about two to three inches below the first
- Ensure both ponytails are pulled equally tight and smooth—any lopsidedness breaks the effect
- Smooth both ponytails with a comb to eliminate any bumps or flyaways between the elastics
- Optional: Wrap both ponytails separately or use a single wrap that covers the bases of both elastics
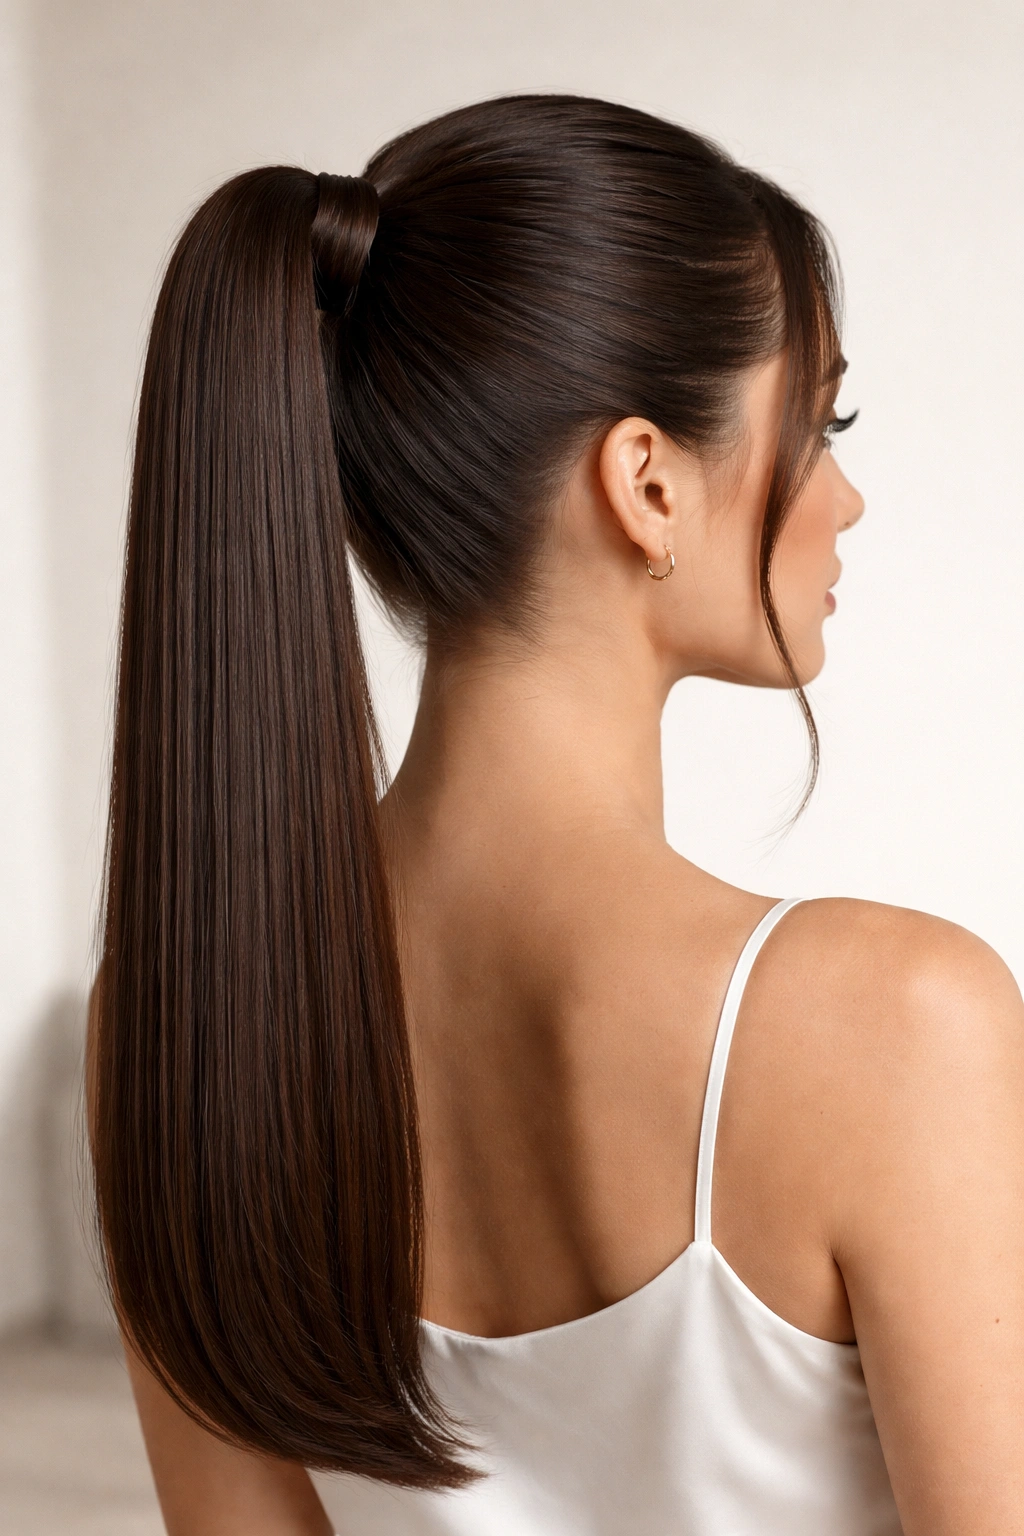
7. The Sleek Wrap-Around Ponytail
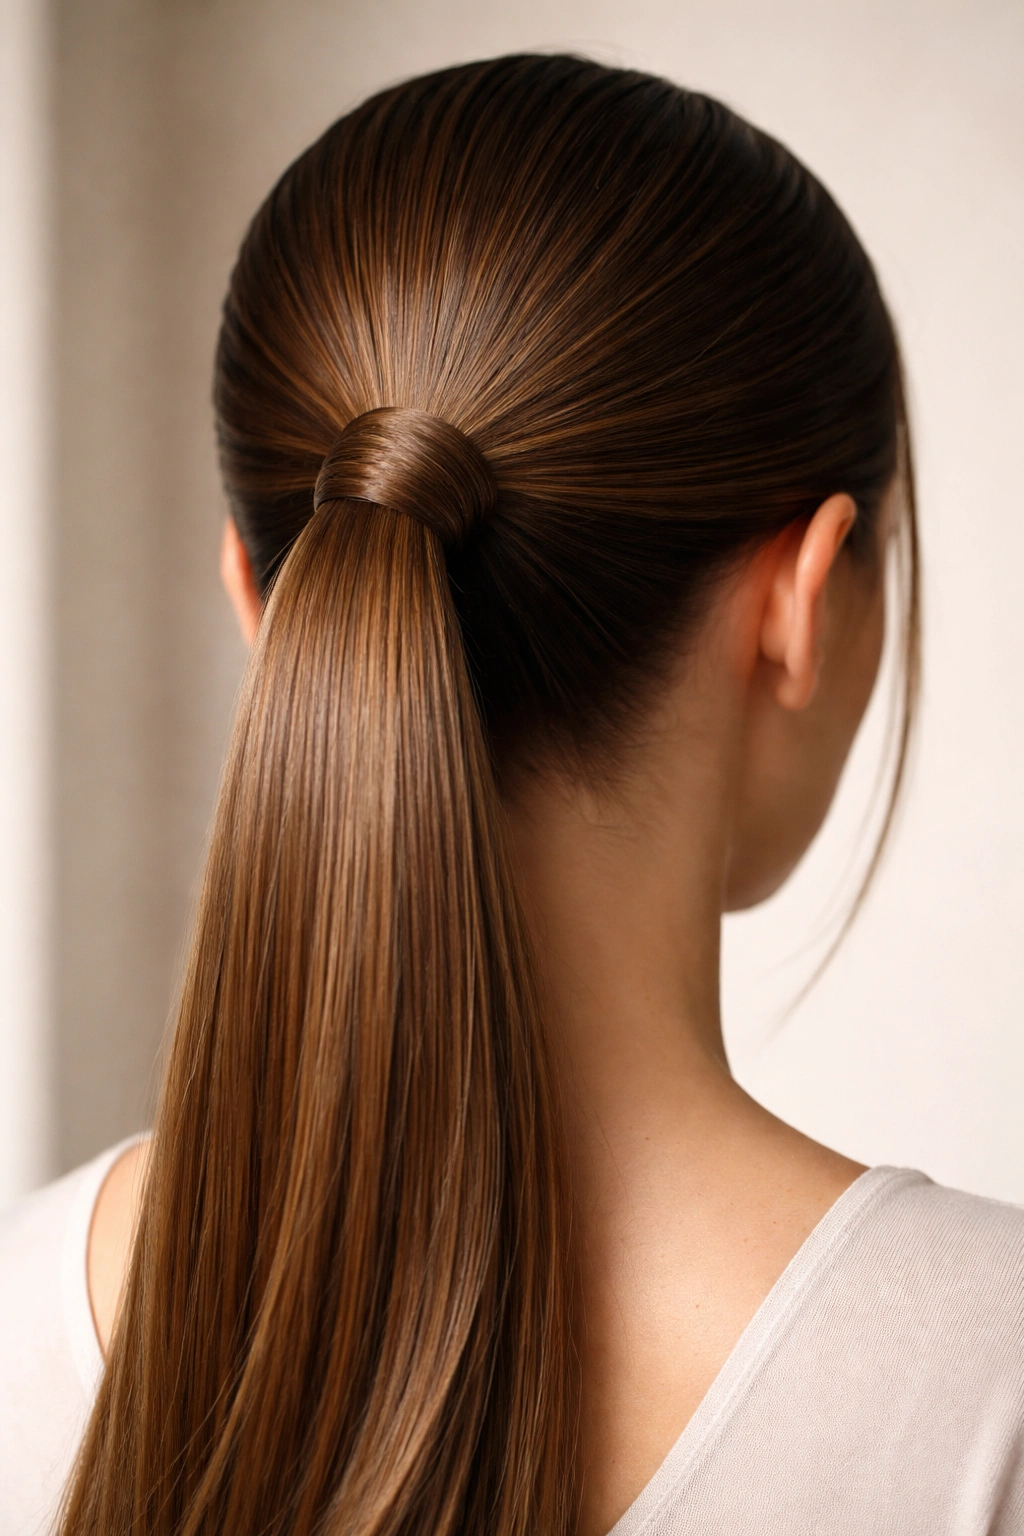
A wrap-around ponytail uses a thin section of hair from the ponytail itself to conceal the elastic, creating a seamless, polished finish that looks incredibly refined and put-together. This technique gives the appearance of a more intricate style than it actually is, and it’s one of the easiest ways to make a simple sleek ponytail feel professional and intentional.
Why This Finishing Technique Matters
The wrap-around detail eliminates the visibility of the elastic, which is critical for a truly polished look. Instead of a visible hair tie, viewers see only smooth hair wrapped elegantly around the base. This technique works particularly well on straight hair because the wrapped section sits flat and smooth against the base—no texture or puffiness to distract from the clean lines. The wrap also prevents the elastic from being yanked or catching throughout the day.
Step-by-Step Wrap-Around Technique
- Secure your sleek ponytail tightly with an elastic at your desired height
- Take a thin vertical section of hair from the underside of the ponytail (about half an inch to an inch wide) and carefully release it by gently sliding a bobby pin or small section separator under it
- Pull this released section up and around the base of the ponytail, covering the elastic completely
- Cross the end of this section over itself and pin it in place at the base using a bobby pin that matches your hair color
- Smooth everything so the wrap sits flat and looks intentional—no bumps or visible pins
- For extra security and polish, a second bobby pin crossed under the first creates an X-shaped anchor that holds everything in place for hours
Worth knowing: The wrap-around technique works best when your ponytail is pulled very tightly—any looseness in the base makes the wrap slip and slide throughout the day. Tight is your friend here.
8. The Half-Up Sleek Ponytail
A half-up style gathers only the top portion of your hair, leaving the bottom length loose while still maintaining the sleek, polished aesthetic of a ponytail. This hybrid style is perfect for days when you want a put-together look without the full commitment of a complete ponytail. It’s also flattering because it removes hair from your face and neck while still showcasing the length and shine of your straight hair.
When Half-Up Is Your Best Move
The half-up style is ideal when you want to feel polished but not overly formal, or when you want the ponytail functionality (hair off your face, secure hold) without the intensity of full hair commitment. This style works beautifully with straight hair because the contrast between the sleek gathered top and the smooth, straight lengths below is visually striking. Half-up is also fantastic for days when you’re running late but want to look intentional—it reads as “styled” even though it takes just ninety seconds.
Achieving the Perfect Half-Up Placement
- Use a comb and smoothing serum to brush the top section of your hair (roughly from ear to ear across the crown) smoothly backward
- Gather this top section at the crown or slightly higher, pulling it tightly back
- Secure with an elastic that matches your hair color, keeping the elastic as close to your scalp as possible for a polished look
- The gathered section should be snug and smooth, with no flyaways or bumps disrupting the clean line
- Leave the bottom length completely loose and let it fall naturally down your back
- Smooth any face-framing strands with edge control if desired, or let a few pieces frame your face softly
Pro tip: A half-up with a wrap-around (using a thin section of the half-up ponytail to wrap the base) elevates this style instantly from casual to polished.
9. The Sleek Bubble Ponytail
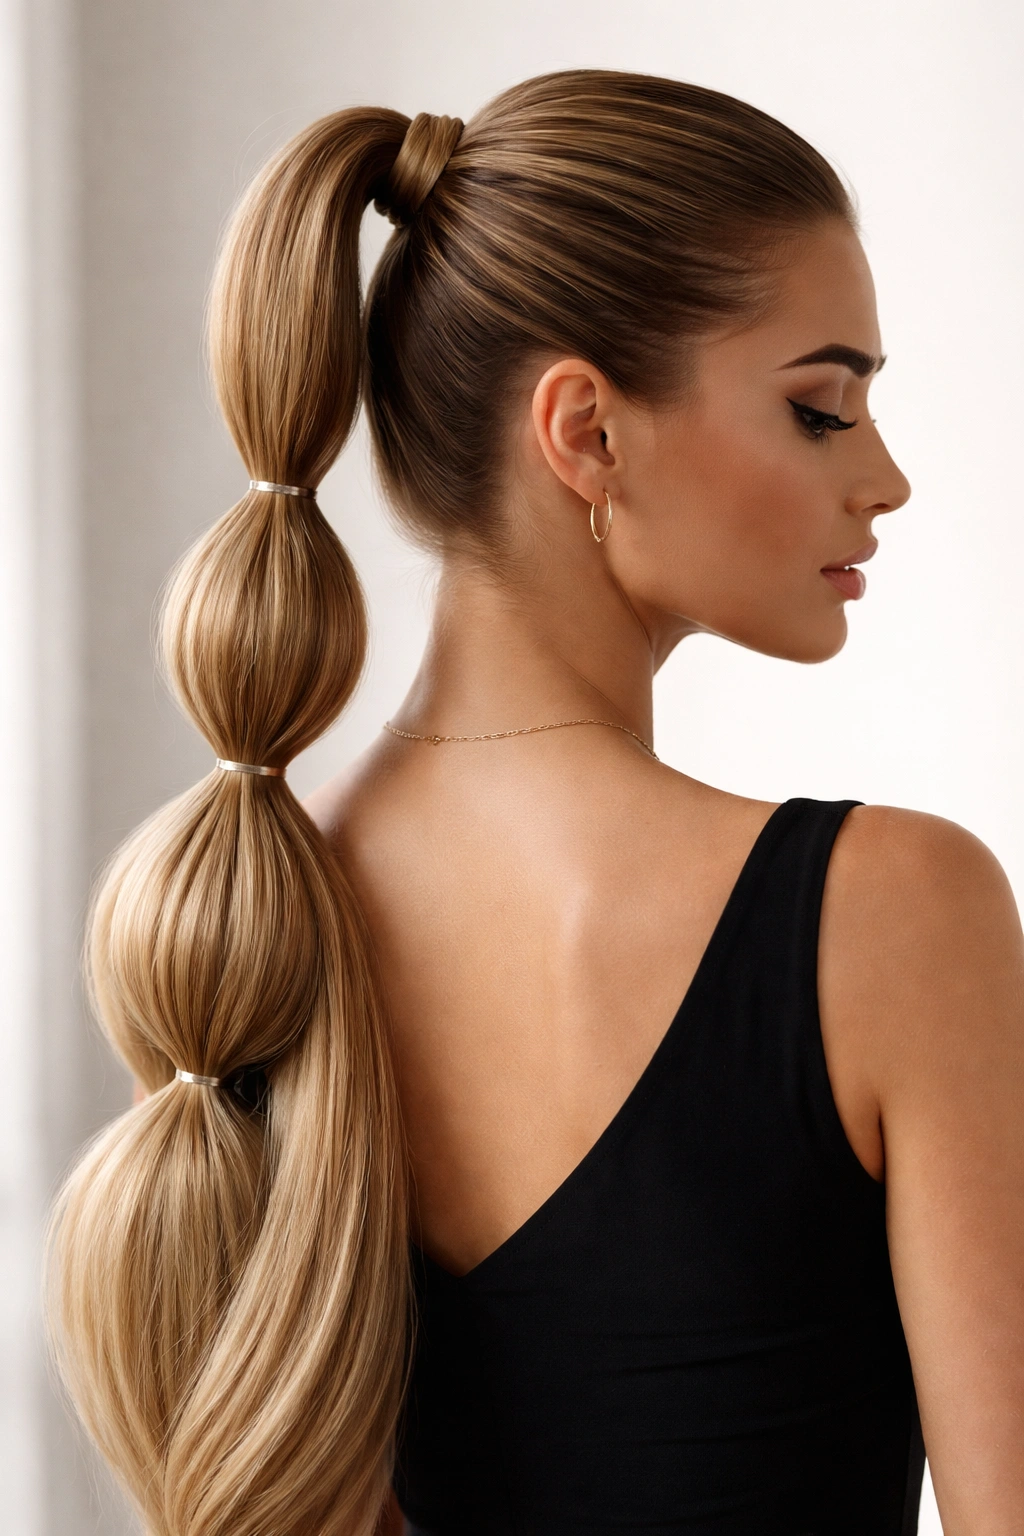
A bubble ponytail creates playful, defined sections along the length by securing the ponytail with multiple elastics at intervals, creating bubble-shaped puffs of hair between each elastic. While bubbles introduce some softness and movement, you can keep the overall aesthetic sleek by ensuring the hair between each section is smooth and the bubbles are uniform and intentional rather than random or messy.
Making Bubbles Look Intentional and Polished
A bubble ponytail on straight hair is absolutely stunning because the smooth texture shows off each bubble’s shape and definition beautifully. Unlike on wavy or curly hair, where bubbles have a naturally textured appearance, straight hair bubbles are crisp and graphic. The key to keeping this style sleek rather than playful or childish is maintaining smooth hair between each bubble section, using evenly spaced elastics, and ensuring the bubbles are proportionate and intentional.
Creating Sleek, Defined Bubbles
- Begin with a sleek, secured high or mid-height ponytail
- Starting about two to three inches below the first elastic, place a second elastic around the ponytail
- Gently push the hair between the two elastics upward to create the first bubble—this releases some tension and creates shape without making it look loose or unintended
- Continue placing elastics at two to three-inch intervals all the way down the ponytail length
- After securing each new elastic, gently fluff the section above it by pushing upward, creating a defined bubble shape
- Ensure each bubble is approximately the same size and the sections between elastics remain smooth and sleek
- Use a lightweight smoothing serum on each section to maintain shine and sleekness despite the multiple elastics
10. The Sleek Low Side Ponytail
A low side ponytail combines the sophistication of a low placement with the asymmetry and subtle femininity of a side direction. This style is incredibly wearable and flattering, hitting that perfect sweet spot between polished and relaxed. It works beautifully for both formal occasions and casual-chic settings, making it one of the most versatile sleek ponytail options.
The Elegance of Low and Sidelong
A low side ponytail feels inherently more romantic and less austere than a centered high ponytail, yet maintains all the polish and intentionality of the sleek aesthetic. The side positioning introduces just enough asymmetry to feel personable and modern, while the low placement maintains elegance and sophistication. This style is particularly flattering on longer hair and works well for anyone wanting to feel put-together without feeling overly formal or severe.
Steps to Achieve Low Side Perfection
- Smooth your entire head of straight hair using a comb and lightweight smoothing serum
- Sweep all hair toward one side, allowing it to gather at the low nape area on that side
- Position the gathering point about two to three inches to the side of center, keeping it low on the back of your head
- Secure tightly with an elastic that matches your hair color—the tightness is essential to the polished effect
- Use a fine-tooth comb to smooth any bumps or loose pieces
- Apply edge control around your hairline and temples, particularly on the side from which you’ve swept the hair
- Adjust the side sweep so it feels balanced and intentional when you look straight ahead
Insider note: A low side ponytail is particularly stunning when you add subtle waves or a gentle curve to the lengths of the ponytail itself. While the base remains sleek and smooth, a slight wave to the ends adds dimension and romance without compromising the polished aesthetic.
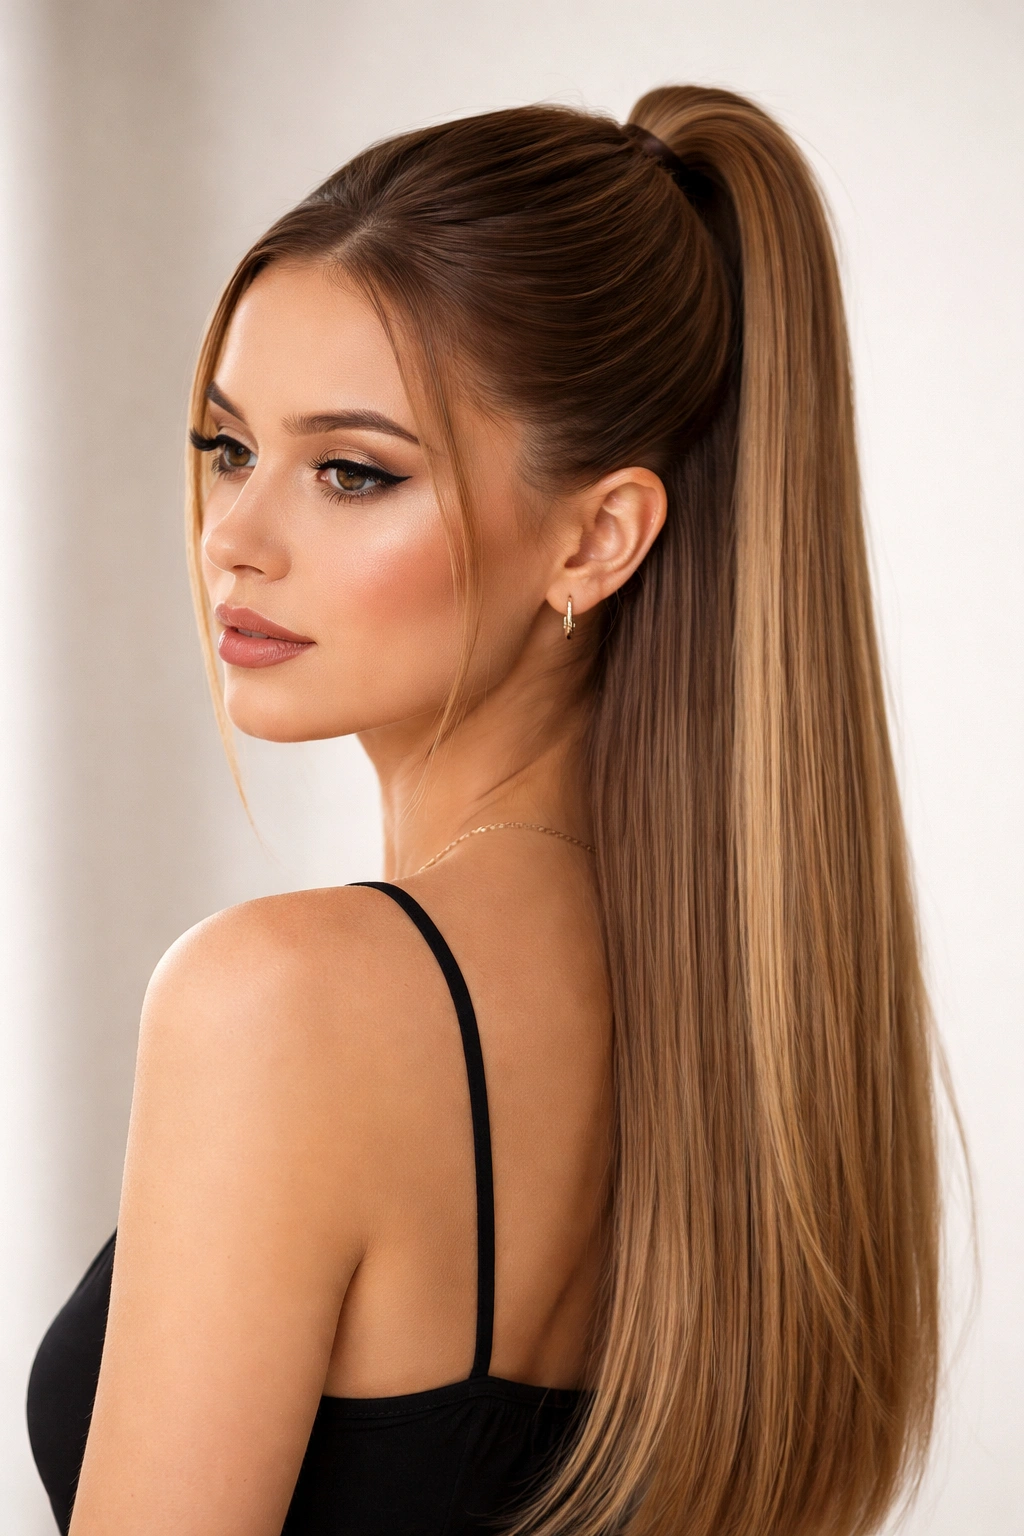
11. The Sleek Ponytail with Crown Volume
This style maintains the sleek, pulled-back aesthetic while adding subtle height and volume at the crown. The technique involves gathering hair in a way that creates some lift at the top while keeping the rest of the style perfectly smooth and controlled. This style is ideal if you want the polish of a sleek ponytail without the severity of a completely flat crown.
Adding Volume Without Losing Sleekness
Many people worry that adding any volume to a sleek ponytail compromises the aesthetic, but the truth is that a bit of strategic height at the crown actually makes the style look more sophisticated and flattering. The volume should be subtle and intentional—not a full backcombed teased section, but rather a gentle pouf created through strategic hair placement and blow-drying technique. On straight hair, this volume reads as intentional and controlled rather than messy or undone.
Technique for Crown Volume
- Blow dry your hair at the roots, directing heat and the brush upward at the crown area to create natural volume
- Gather the very top section of hair (about an inch or two from your part line forward) separately and tease gently at the roots using a fine-tooth comb
- Smooth the surface of this teased section to maintain polish while keeping the volume underneath
- Gather all hair—the volumized crown section plus the rest of your hair—back into a sleek ponytail at your desired height
- As you secure the ponytail, leave the crown area slightly loose so it maintains height rather than pulling completely flat
- Smooth the sides and back while allowing the crown to keep its subtle lift
- This creates the visual impression of more fullness without compromising the overall sleek aesthetic
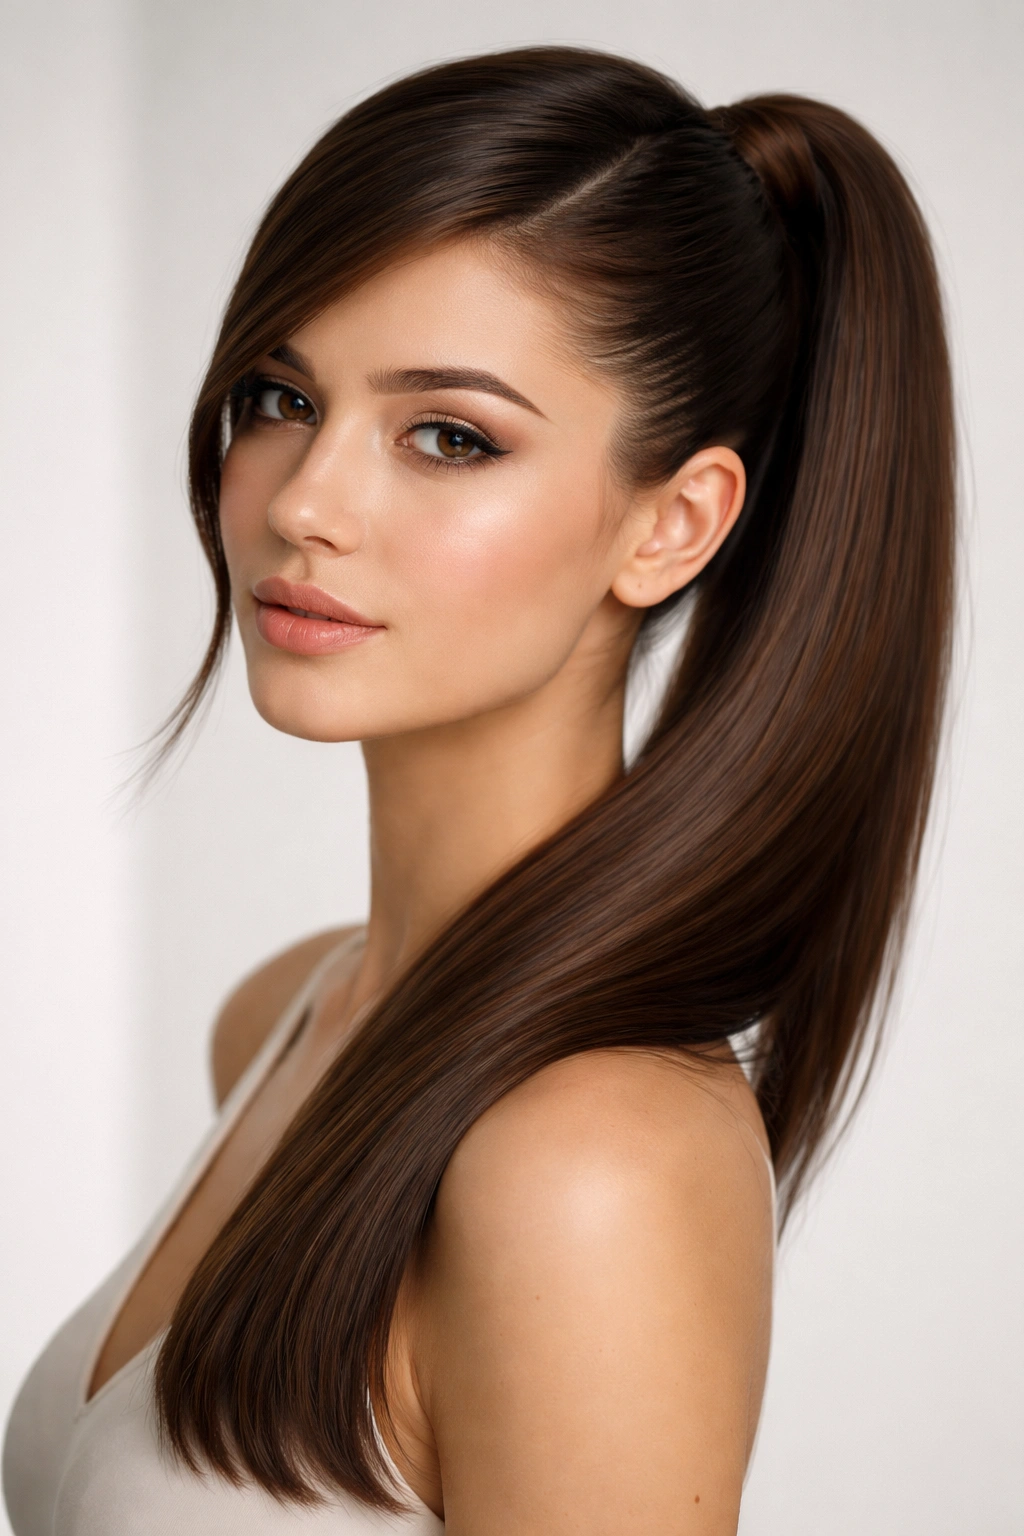
12. The Sleek Polished High Ponytail with Face-Framing
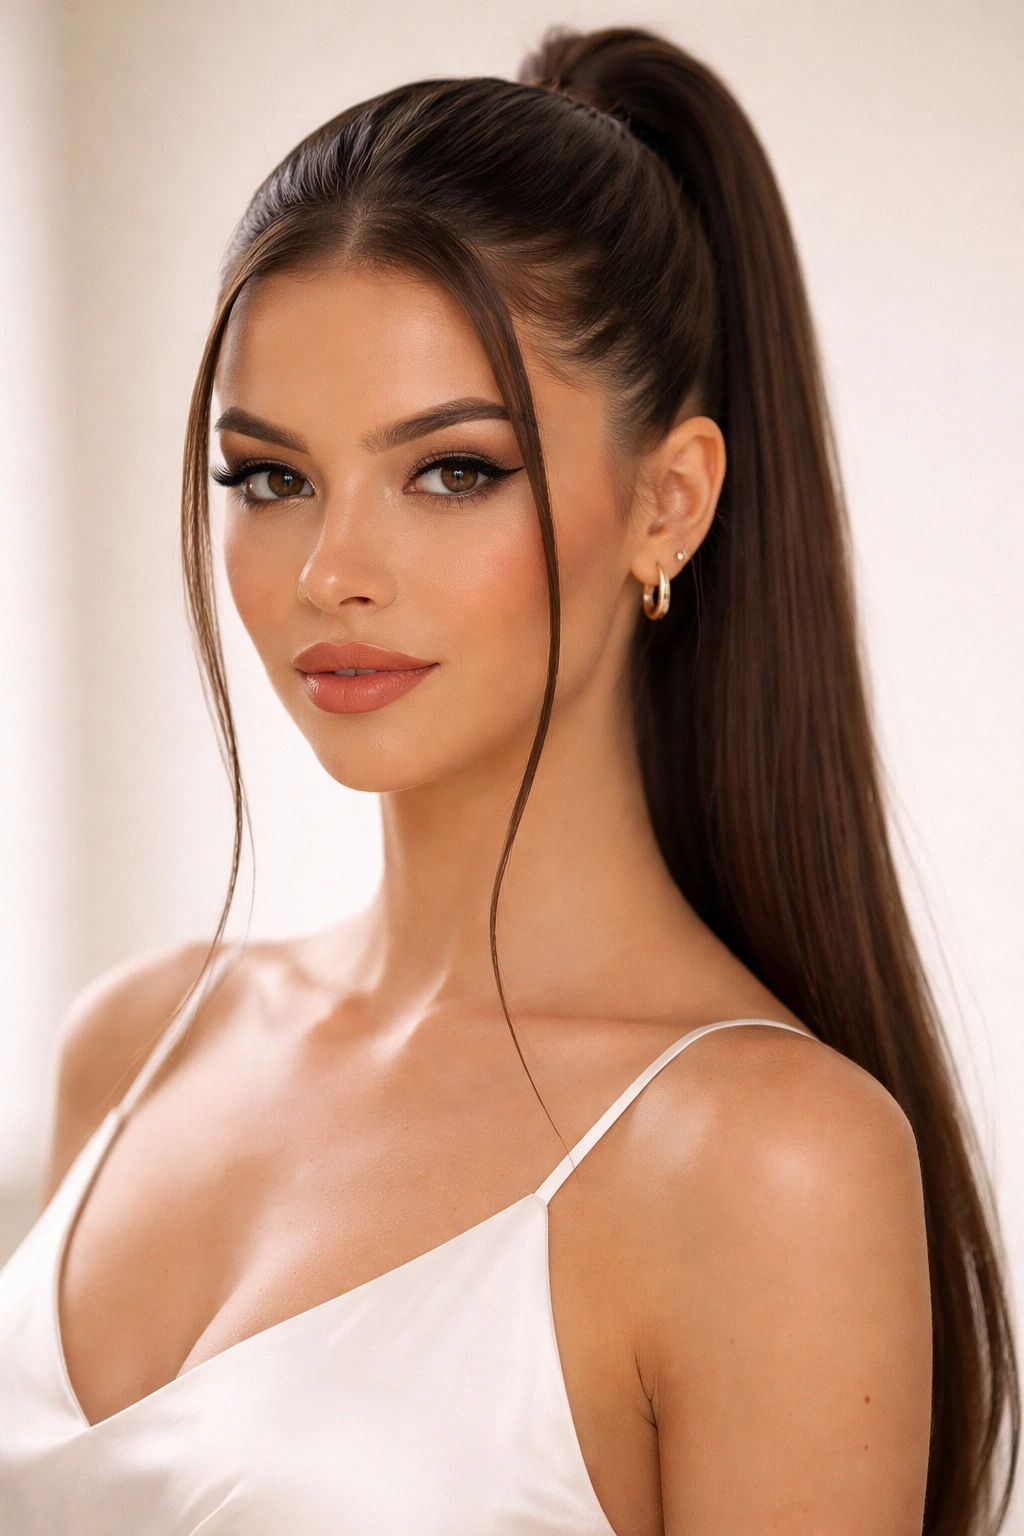
This final style keeps the core sleek ponytail intact but incorporates two or three thin, intentional face-framing pieces that create softness and draw attention to the face. The face-framing strands maintain the overall sleek aesthetic while introducing just enough softness to prevent the style from feeling austere or overly severe.
Softening with Intentional Face-Framing
Face-framing pieces on a sleek ponytail create a subtle balance between polish and approachability. Rather than pulling every single strand straight back, you deliberately leave two thin sections—one on each side of the face—out of the ponytail gather. These framing pieces should be sleek and smooth (not tousled or curled), creating a refined femininity that complements rather than detracts from the polished base style.
Creating Intentional Face-Framing
- Before gathering your ponytail, identify which pieces you want to frame your face—typically a thin section at the temple on each side, about an inch to an inch-and-a-half wide
- Secure these sections separately with tiny bobby pins to keep them out of the way while you gather the rest of your hair
- Gather the remaining hair into a sleek high ponytail and secure tightly
- Release the two face-framing sections and use a fine-tooth comb to smooth them, ensuring they lie flat and sleek against your head
- Keep these pieces the same length as the rest of your hair (they should curve naturally with the contour of your face and head)
- Use a smoothing serum or lightweight gel on the face-framing pieces to ensure they stay in place and maintain sleekness throughout the day
Why This Detail Matters
The face-framing approach is particularly flattering on angular face shapes, as it softens jawlines and cheekbones with curved, forward-falling pieces. For round faces, the side-falling pieces create visual lengthening. For heart-shaped faces, the pieces draw attention to the eyes rather than the wider forehead. Regardless of face shape, intentional face-framing prevents a sleek ponytail from feeling harsh or severe—it’s the difference between a style that looks polished and one that looks austere.
Pro tip: Keep your face-framing pieces sleek and smooth using the same smoothing serum and techniques you use for the rest of your hair. Frizzy or textured face-framing pieces look accidental rather than intentional and break the overall polish of the style.
Final Thoughts
Sleek ponytails on straight hair offer endless possibilities, from minimalist elegance to playfully polished styles that incorporate multiple elements. The beauty of straight hair is that it naturally cooperates with sleek styling—you don’t need complicated tricks or excessive product to create a refined, intentional look. What matters most is understanding how placement, tightness, smoothing technique, and finishing details like wraps and face-framing pieces work together to transform a basic ponytail into something truly special.
The styles in this guide give you a full toolkit of options. Some days you’ll want the graphic simplicity of an ultra-high tight ponytail; other days, a low side-swept version with subtle face-framing will feel right. The wrap-around technique and bubble variations give you creative room for play, while the half-up and crown-volume styles offer polish without total commitment. With straight hair as your foundation and these techniques in your styling arsenal, you’ve got the ability to create a sleek ponytail for any occasion, any mood, and any vision of how you want to look.
The real secret to mastering sleek ponytails isn’t some proprietary technique—it’s understanding the fundamentals (smoothing serum, tight securing, edge control, and finishing details) and then playing with variations that suit your face shape, lifestyle, and personal style. Your straight hair is already doing the heavy lifting; all you need to do is learn how to direct it, secure it, and polish it into something memorable.