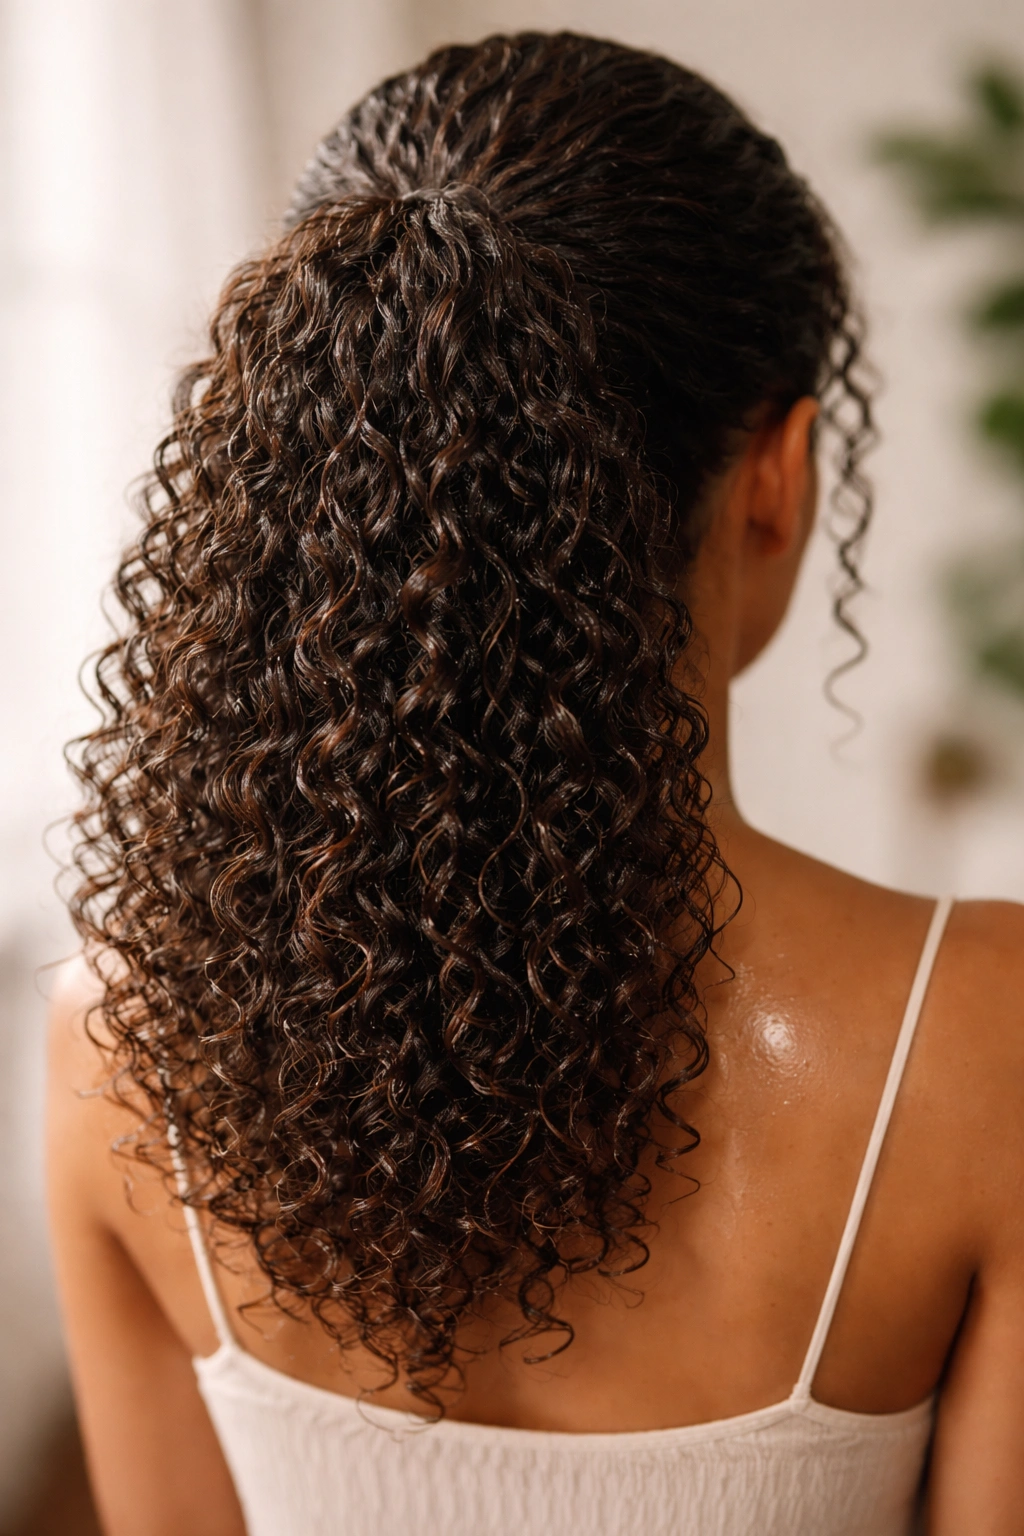
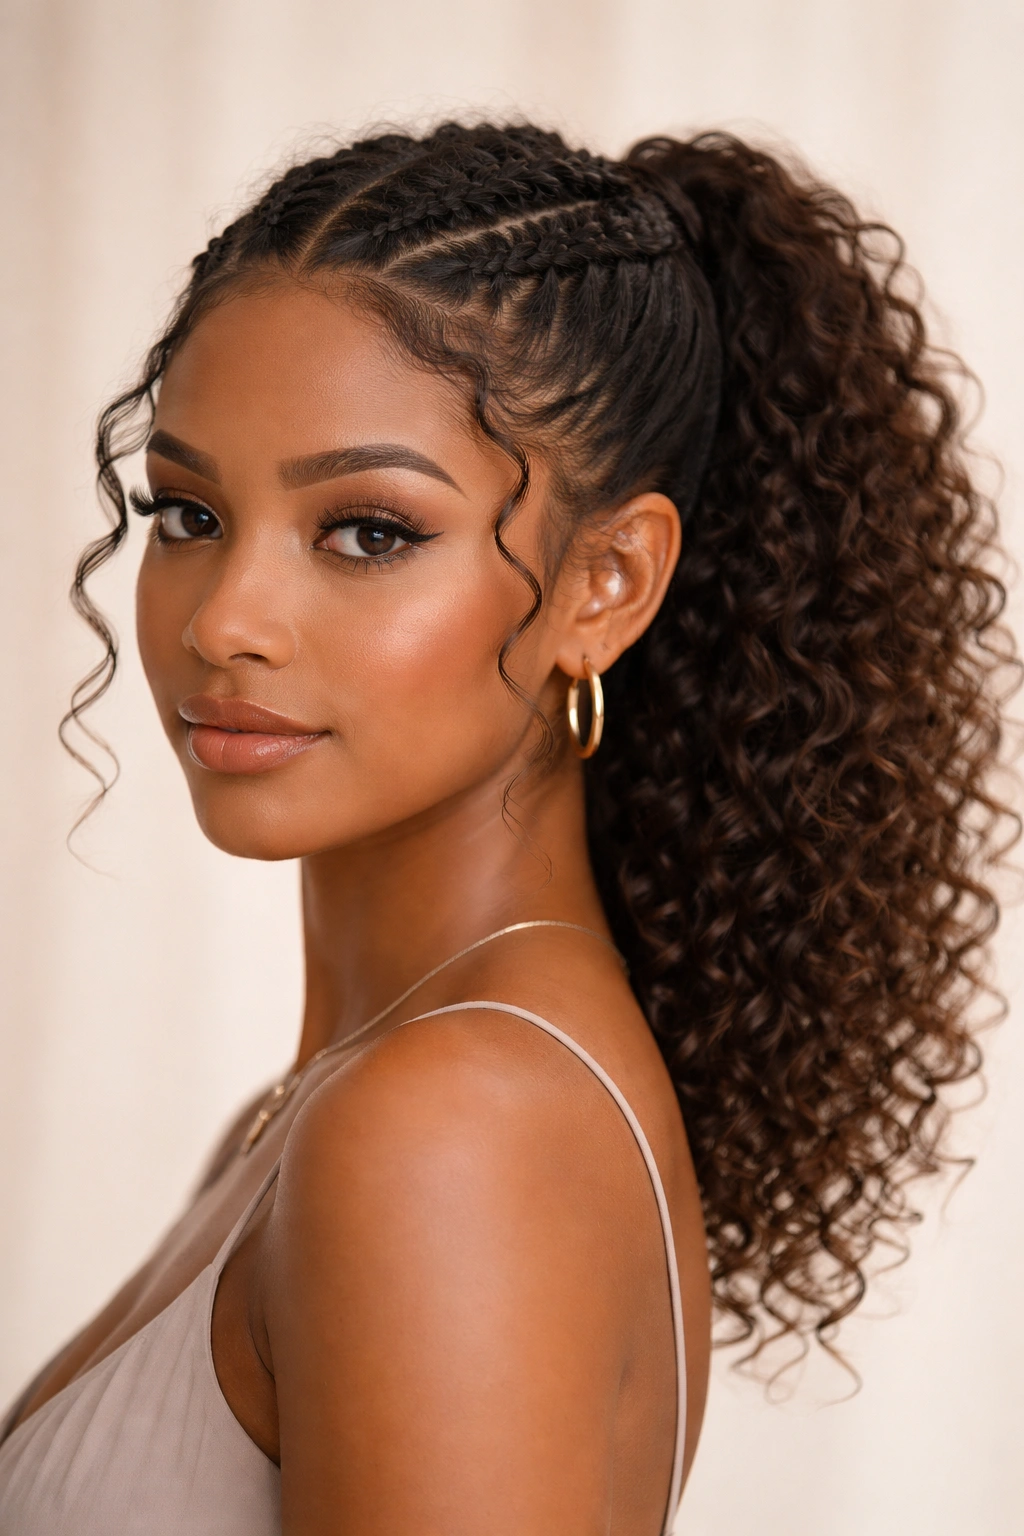
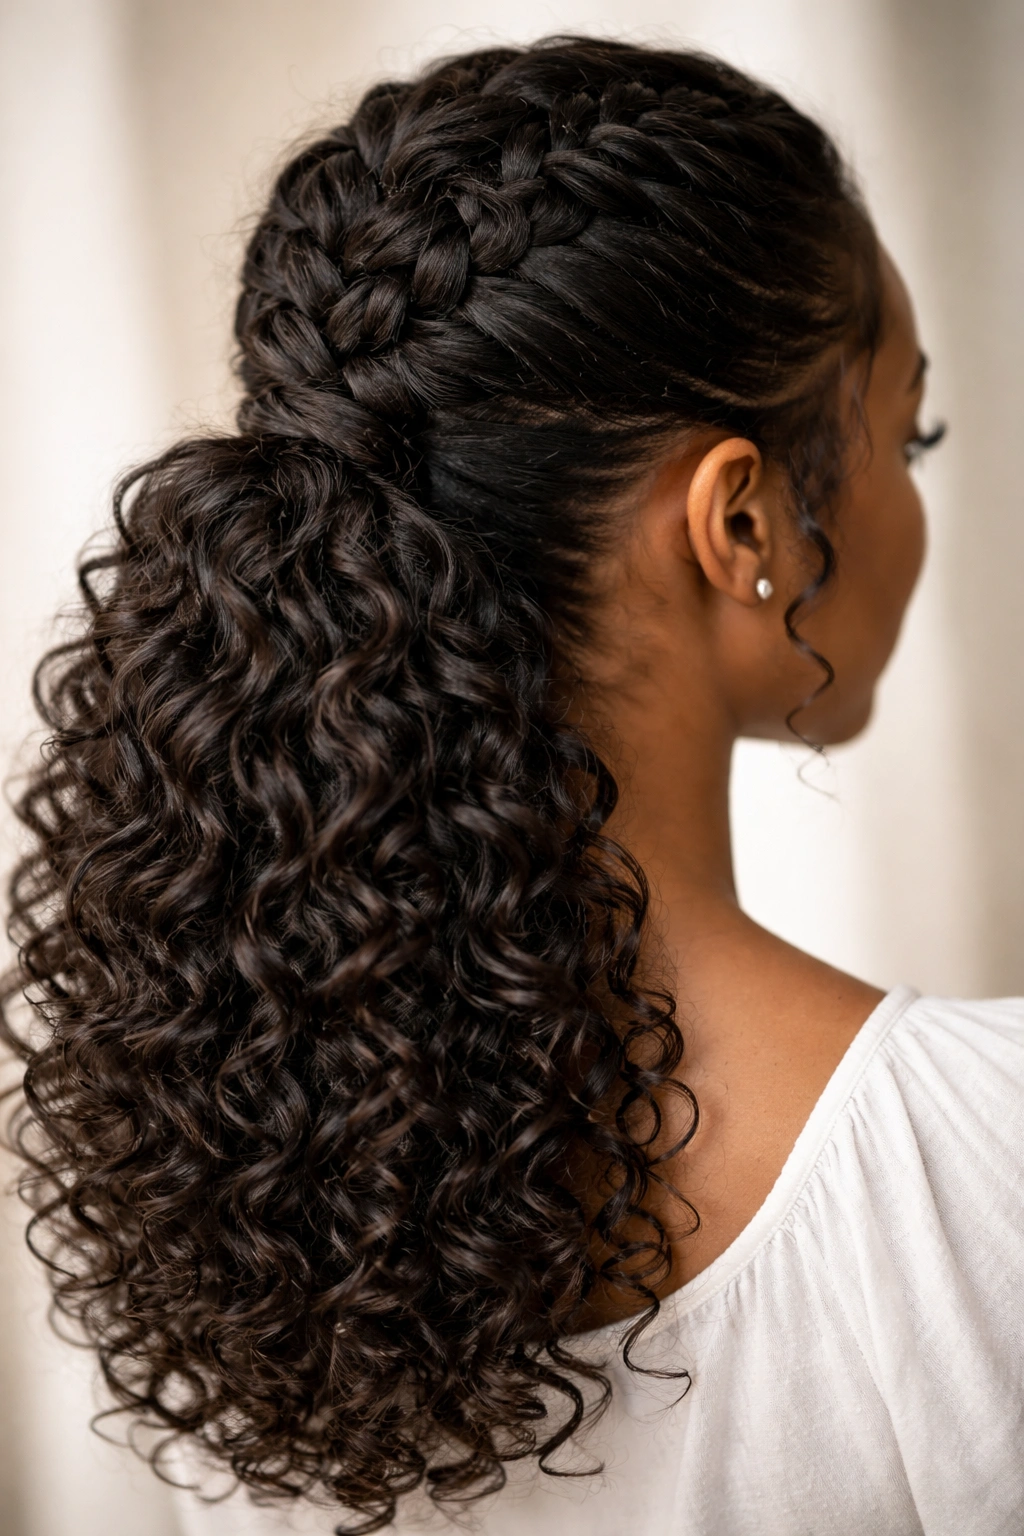
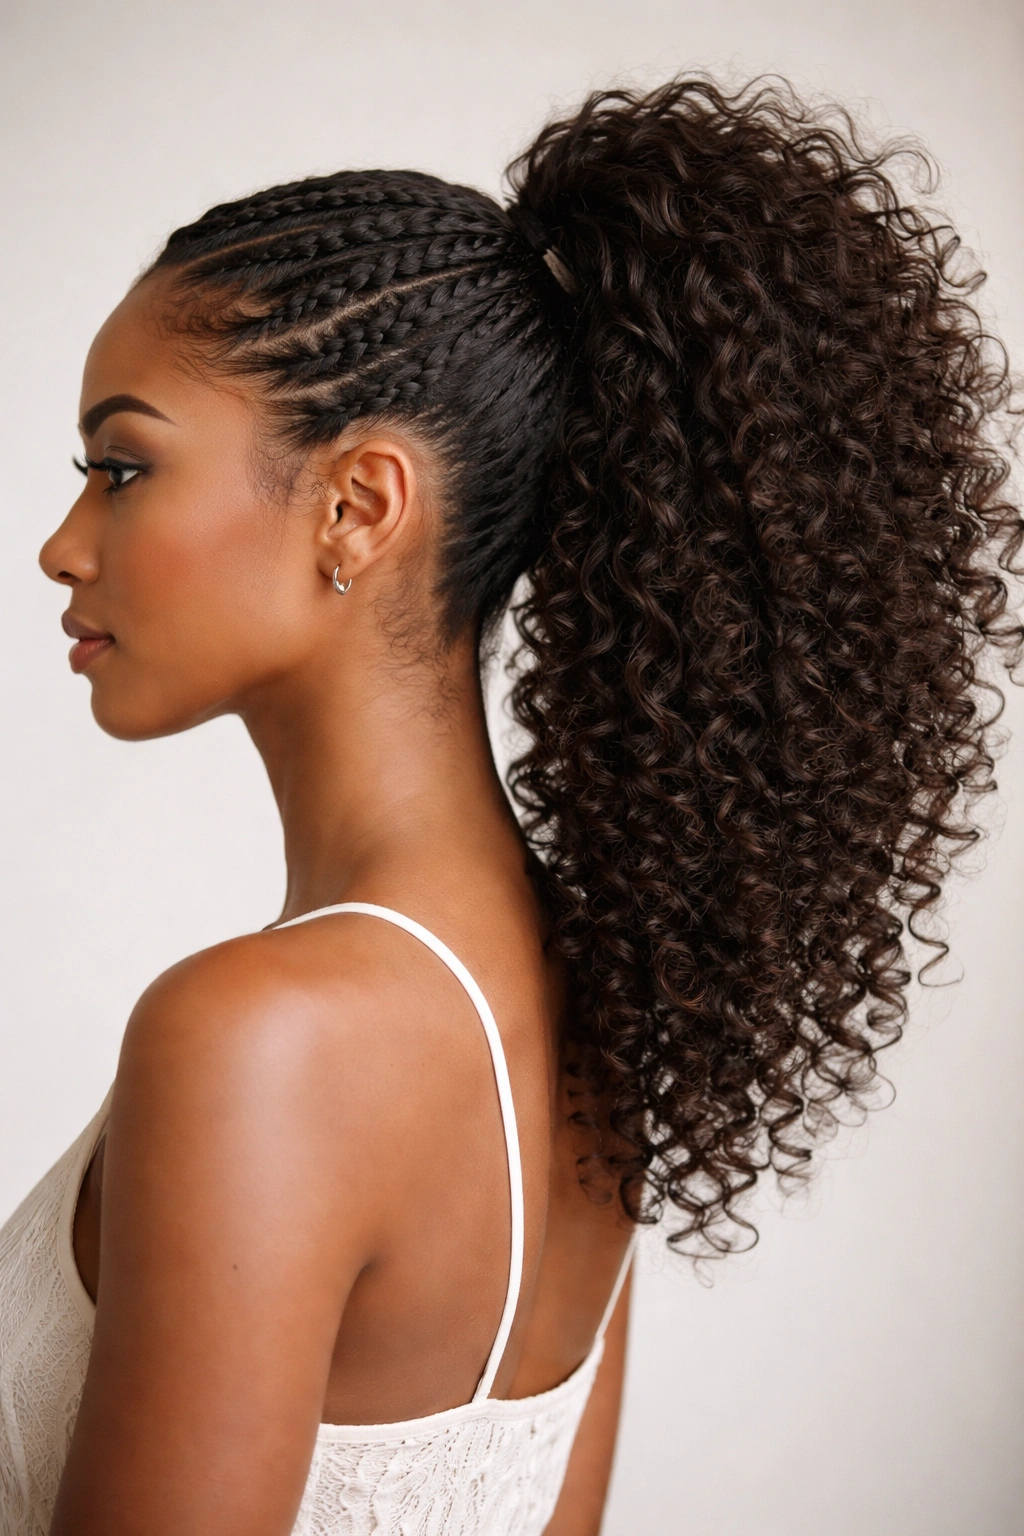
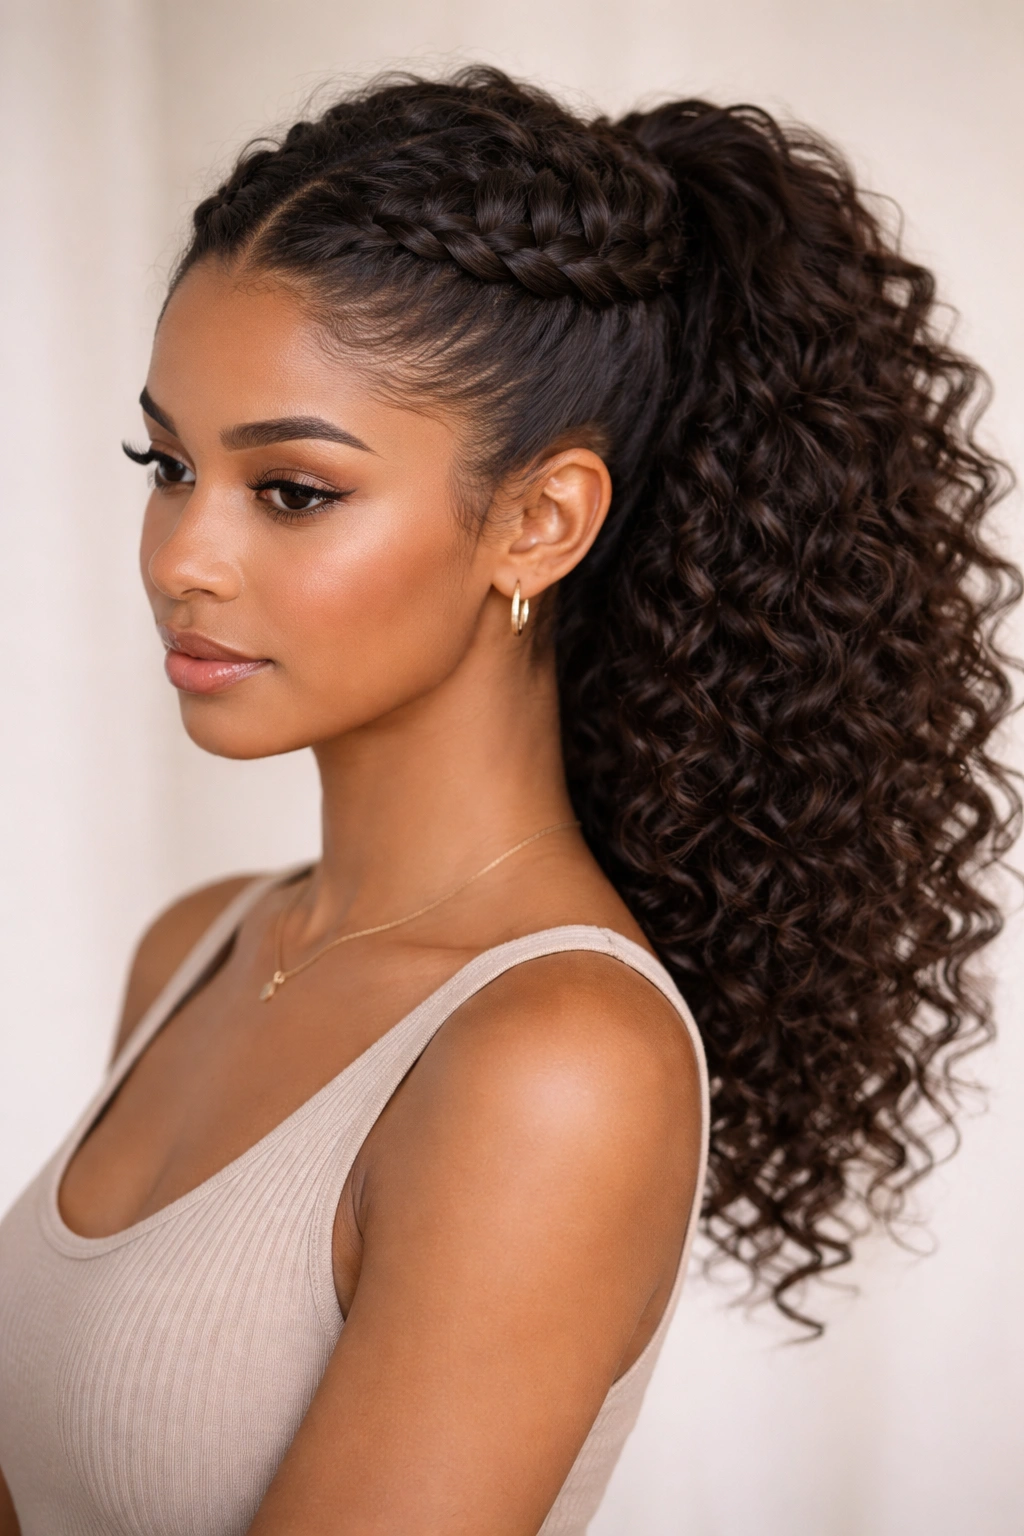
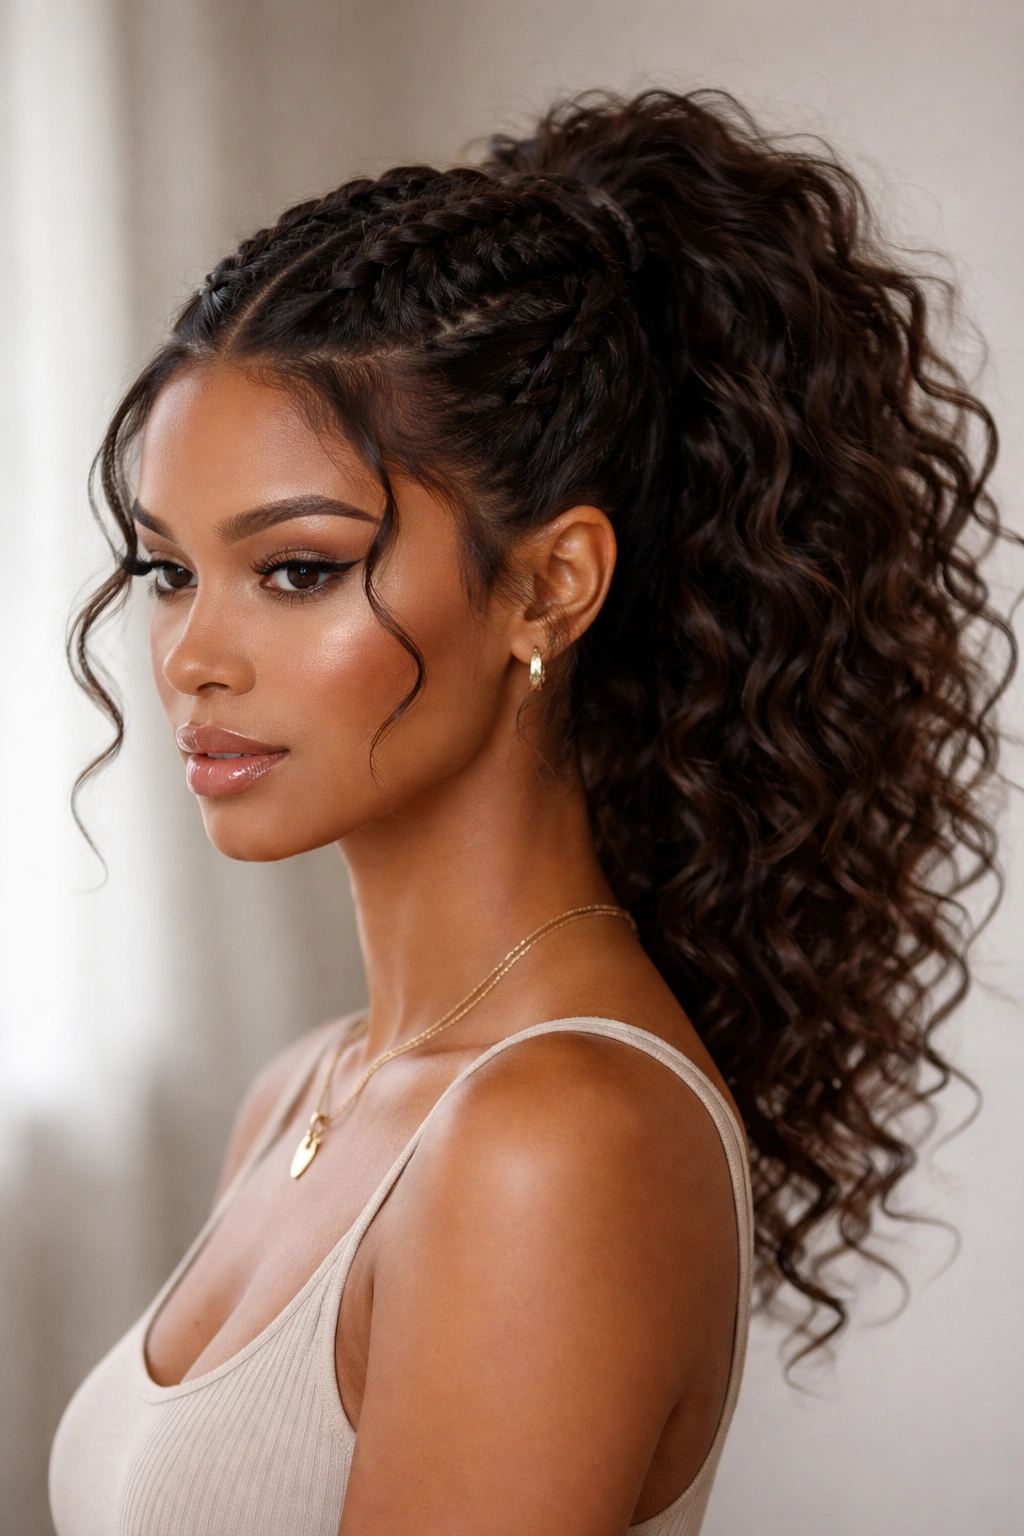
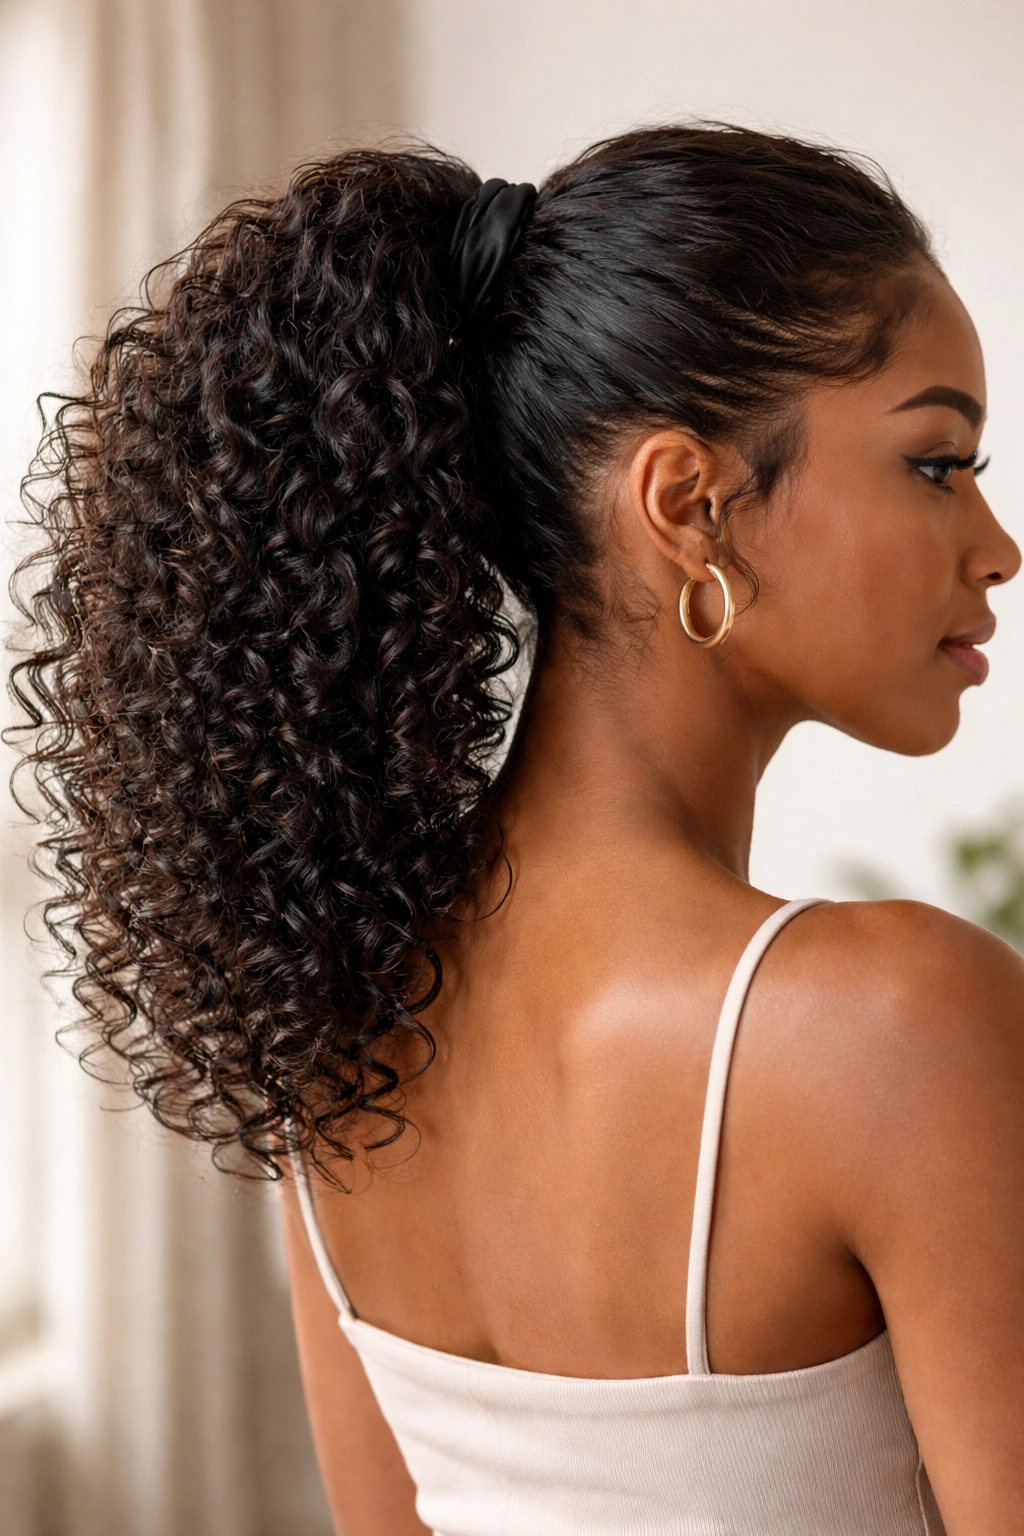
Curly hair has its own set of styling challenges and beautiful possibilities, and mid weave ponytails sit at the perfect intersection of protective and chic. The mid-length placement isn’t too high on the crown and isn’t tucked down at the nape—it hits that sweet spot where your curls can move freely while still being gathered and polished. Unlike traditional weaves that require cornrows from root to tip, mid weave ponytails work with your natural hair texture, keeping tension minimal while giving you that sleek, finished look that photographs beautifully.
The key to nailing a weave ponytail with curly hair is understanding that your curls want movement, and that’s exactly what these styles deliver. You’re not flattening your texture into a single-minded direction; you’re channeling it into a cohesive shape that still lets your natural pattern breathe and show. Whether you’re prepping for a special occasion or just want a polished everyday look that keeps your curls protected and out of your face without the commitment of a full braided protective style, mid weave ponytails offer flexibility that few other styles can match.
The versatility of these ponytails also means you can adapt them to your specific curl pattern—whether you’re working with tight coils, loose waves, or something beautifully in between. Each style I’m sharing below works with different curl densities and thicknesses, so you’ll find options that truly complement your hair’s individual character. The mid placement also makes these styles work for nearly every hair length, from shoulder-grazing to waist-length curls.
Why Mid Weave Ponytails Work So Well for Curly Hair
Mid weave ponytails sit at the ideal height for curly-haired people because they use strategic braided sections to anchor and guide your curls without flattening your natural volume. The weave component—thin braids that blend into your ponytail base—creates a secure foundation that holds all day long without slipping or requiring constant adjustment. This matters when you’re working with curls, which naturally want to move, shrink, and shift throughout the day.
The placement itself is genius for curly hair specifically. A high ponytail can create tension on delicate curls at the crown and cause breakage along your hairline over time. A low ponytail, meanwhile, sits against your neck where friction and moisture from sweating can cause frizz and matting. A mid-height ponytail? It gives you the best of both worlds—your curls sit off your neck and shoulders, reducing friction and frizz, while the tension sits in the less delicate mid-section of your hair.
These styles also offer serious protection for your curls. When you’re weaving sections of your hair into braids that support your ponytail, you’re creating a contained style that reduces manipulation, breakage, and drying from constant styling and restyling. Your curls stay bundled together, which means less surface area exposed to environmental damage and less need to reapply moisturizing products throughout the week.
Creating the Perfect Foundation with Moisturized Curls
Before you even think about weaving, your curls need to be in prime condition. Start with deeply moisturized hair—you’re ideally working with freshly washed and conditioned curls that have been detangled gently while they’re wet. The detangling phase matters enormously because you want your curls to have already found their natural groupings and pattern before you begin sectioning for the weave.
Apply a leave-in conditioner and a curl-defining cream to damp curls, scrunching upward to encourage your natural curl pattern. If your curls are prone to frizz, use a lightweight gel or mousse as well—you want something that’ll hold the curl definition without flaking or creating crunch that makes weaving difficult. Let your curls air-dry completely or use a diffuser on your blow dryer set to low heat. Never attempt a weave ponytail on damp or wet curls, as they’ll shrink further once they dry, and you’ll lose the style definition you worked to create.
The timing also matters here. Your curls are usually at their best on day two or three after washing, when they’ve fully set into their pattern and oils from your scalp have distributed through the length. This is also when they’re most cooperative for weaving, since they’re not actively drying and shrinking like they do on fresh wash day.
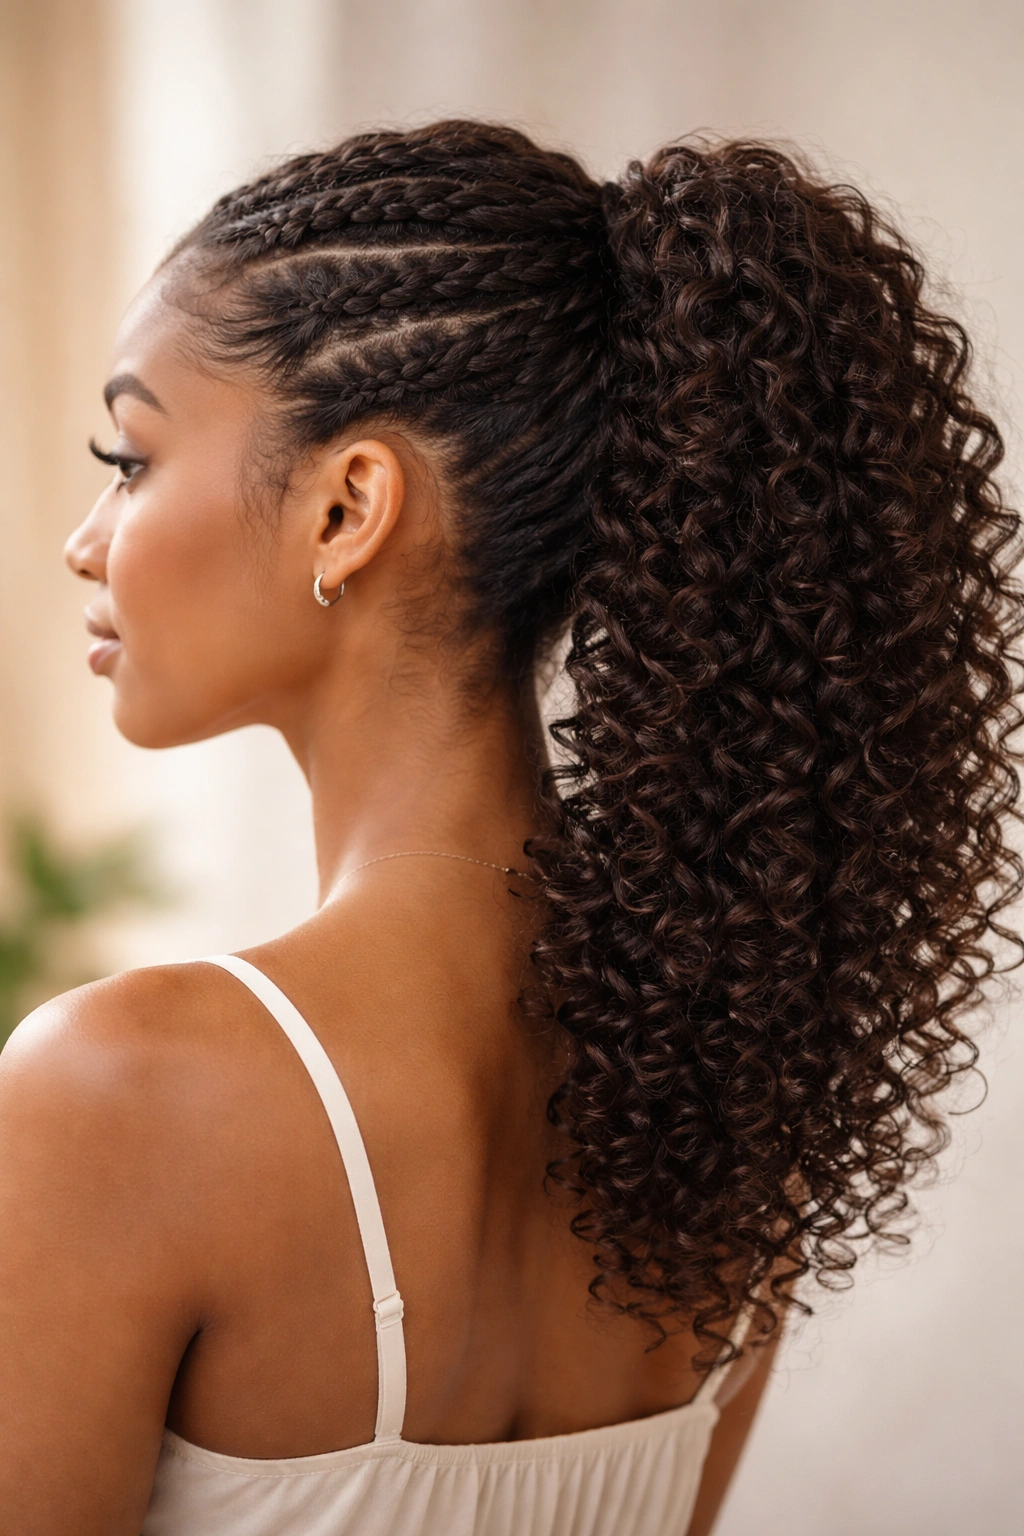
1. The Sculptural Twist Weave
This style starts with a clever technique where you take a small section from one side of your head and twist it continuously as you move toward the back, creating a spiral effect that becomes the anchor for your ponytail. The twist serves double duty—it looks gorgeous and intricate from the side, while also gathering your curls in a way that feels intentional and elevated. The remaining curls tumble into a mid-height ponytail that sits at the base of where your twist ends.
How to Execute This Look
Begin by parting a clean, moisturized curl section from your temple back toward your ear. Take a small subsection of curls (about the thickness of a pencil) and start twisting it from root to end, making sure you’re maintaining the twist’s definition as you work. As you progress backward toward the center of your head, gradually incorporate more curls into the twist—this creates that sculptural, tapered effect where the twist gets thicker as it moves back. Once you’ve twisted to the center back of your head and your twist feels secure, gather all your remaining curls into a mid-height ponytail and secure it with a stretchy elastic or a hair tie that matches your curl color.
The Real Advantage Here
The twist creates texture and visual interest that a simple weave can’t quite match, plus it’s actually easier on your curls than tightly braiding them. Twisting distributes tension more evenly across the strand, which makes it gentler long-term, and the technique is surprisingly quick once you get the hang of it. This works beautifully for both tighter curl patterns and looser, wavier curls because the twist reads clearly on any texture.
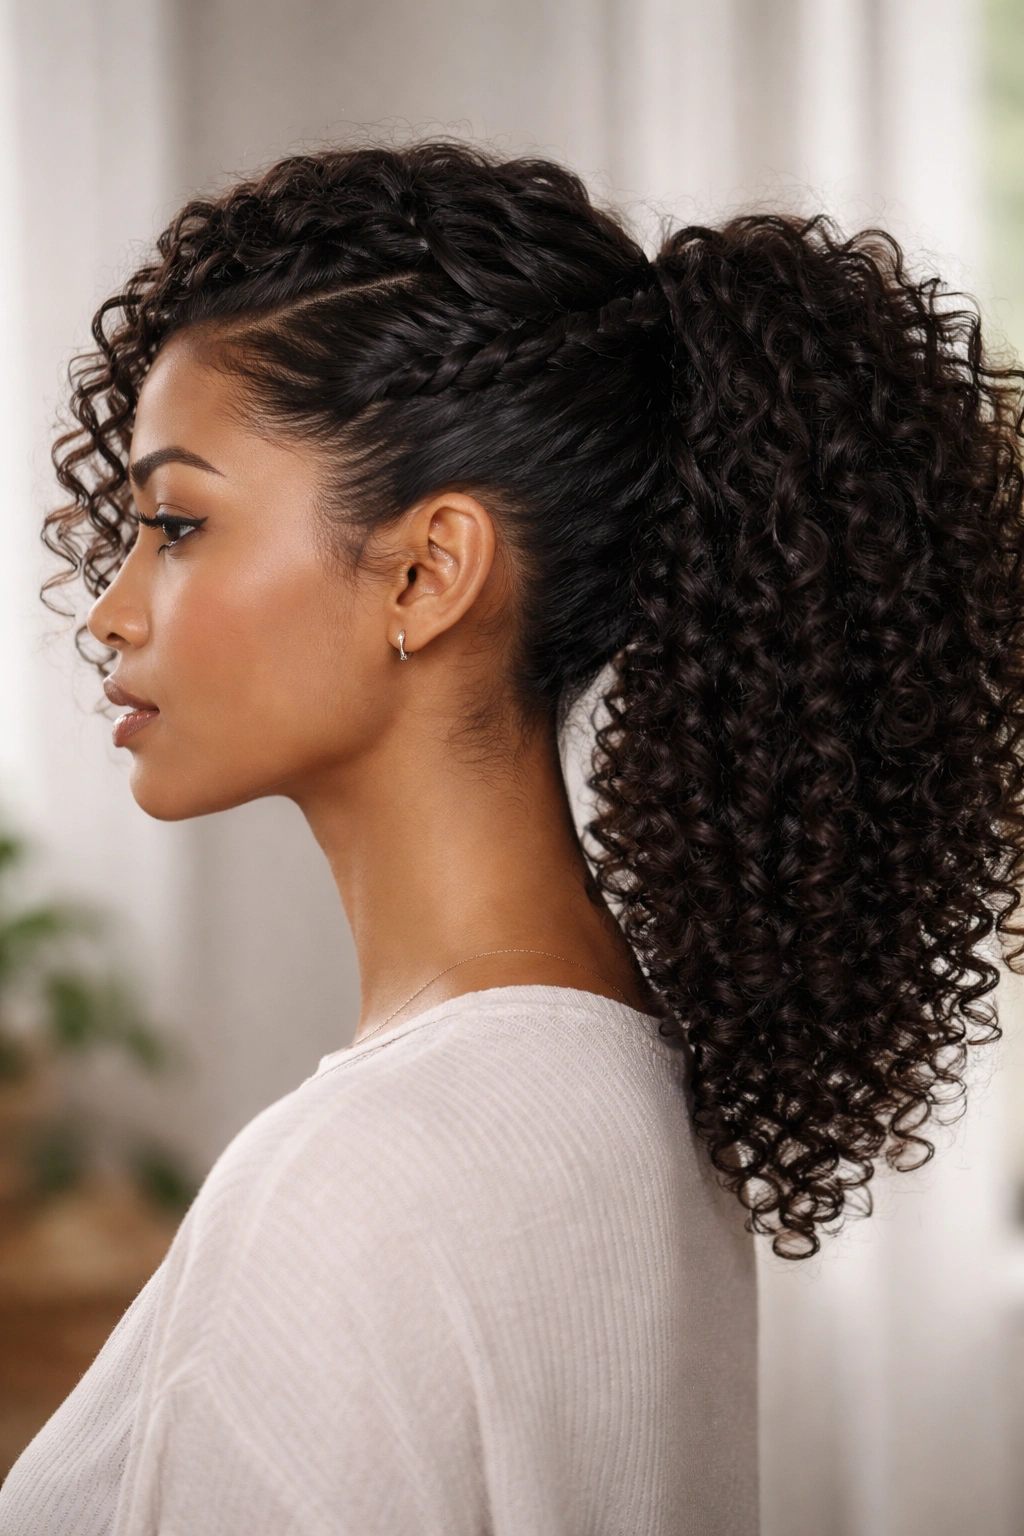
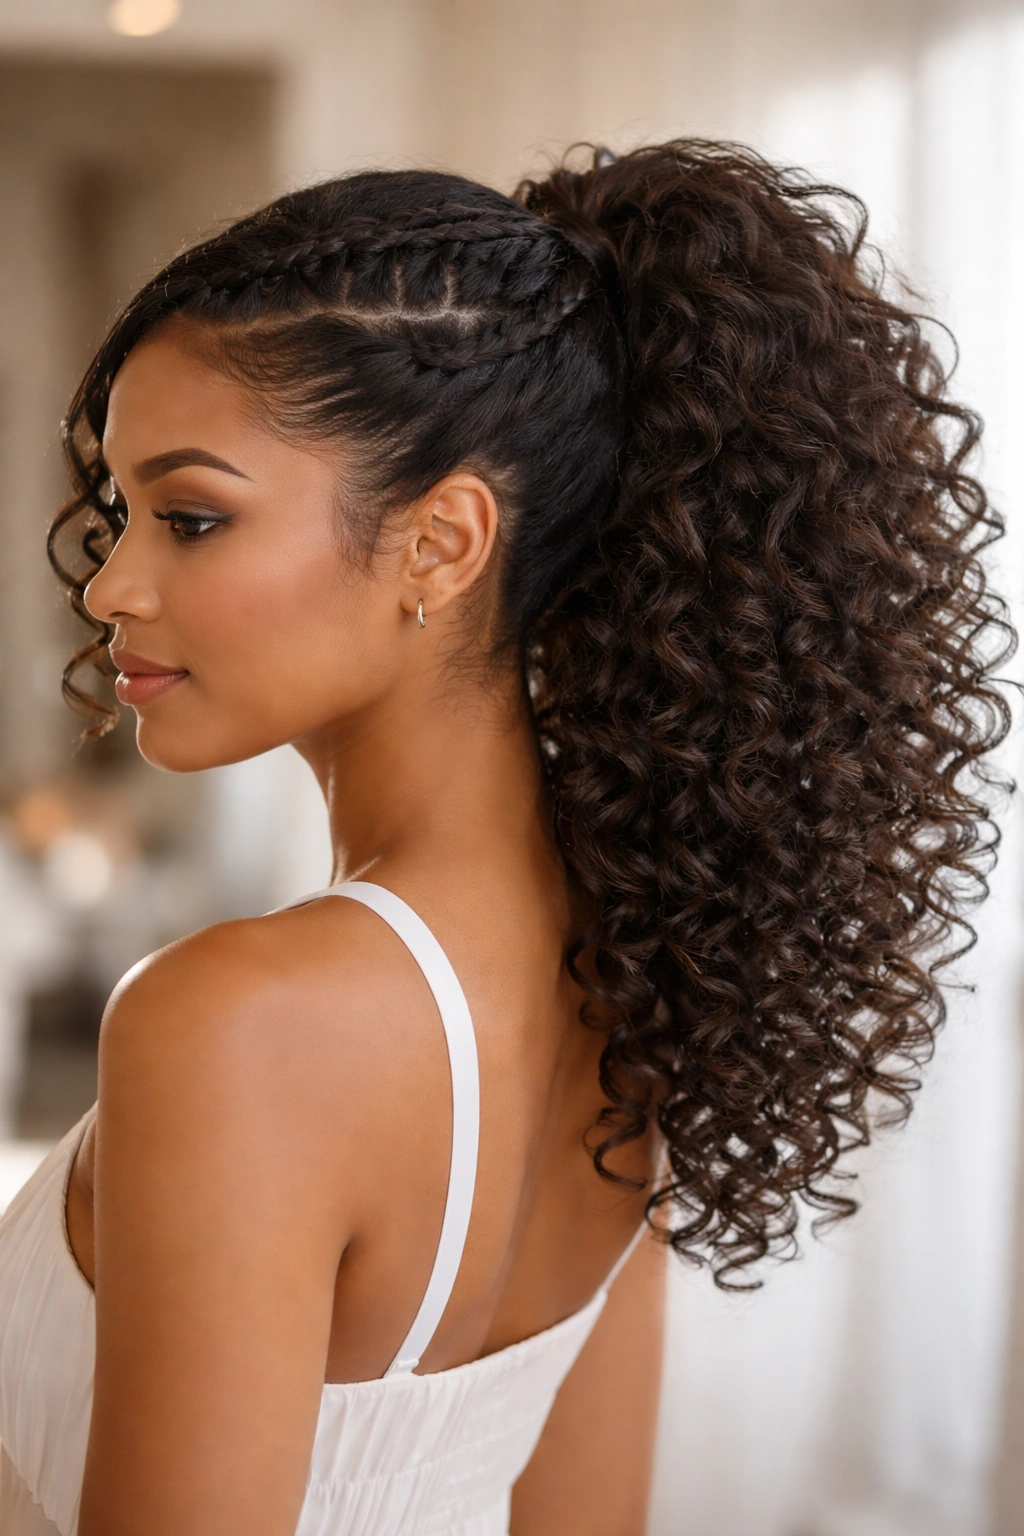
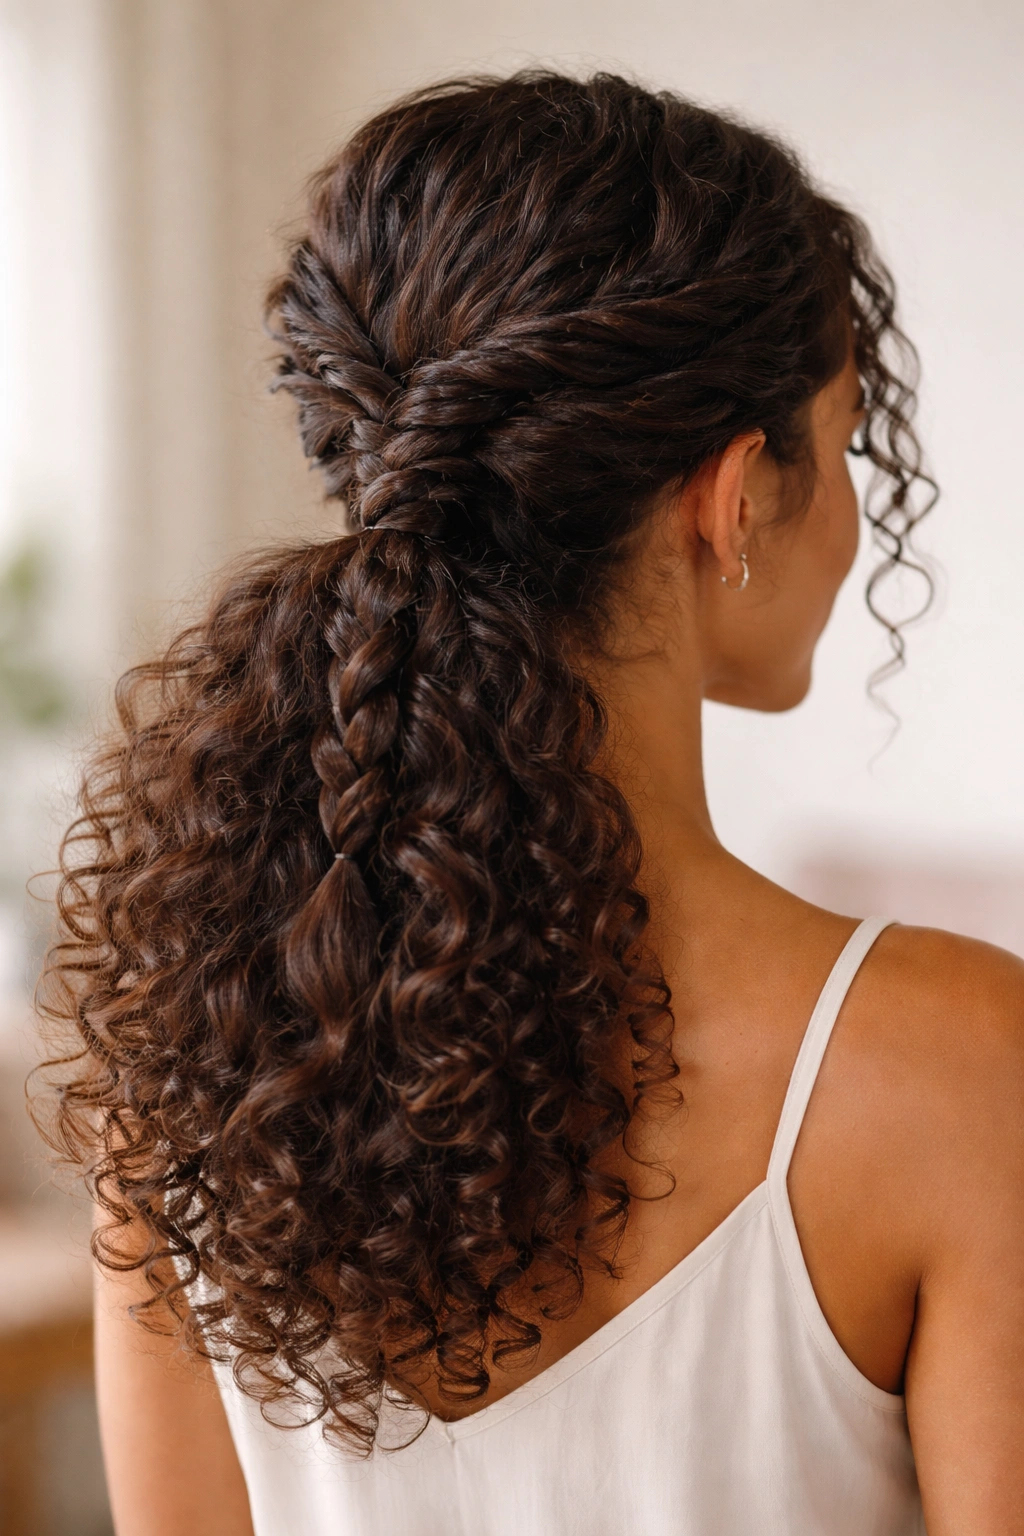
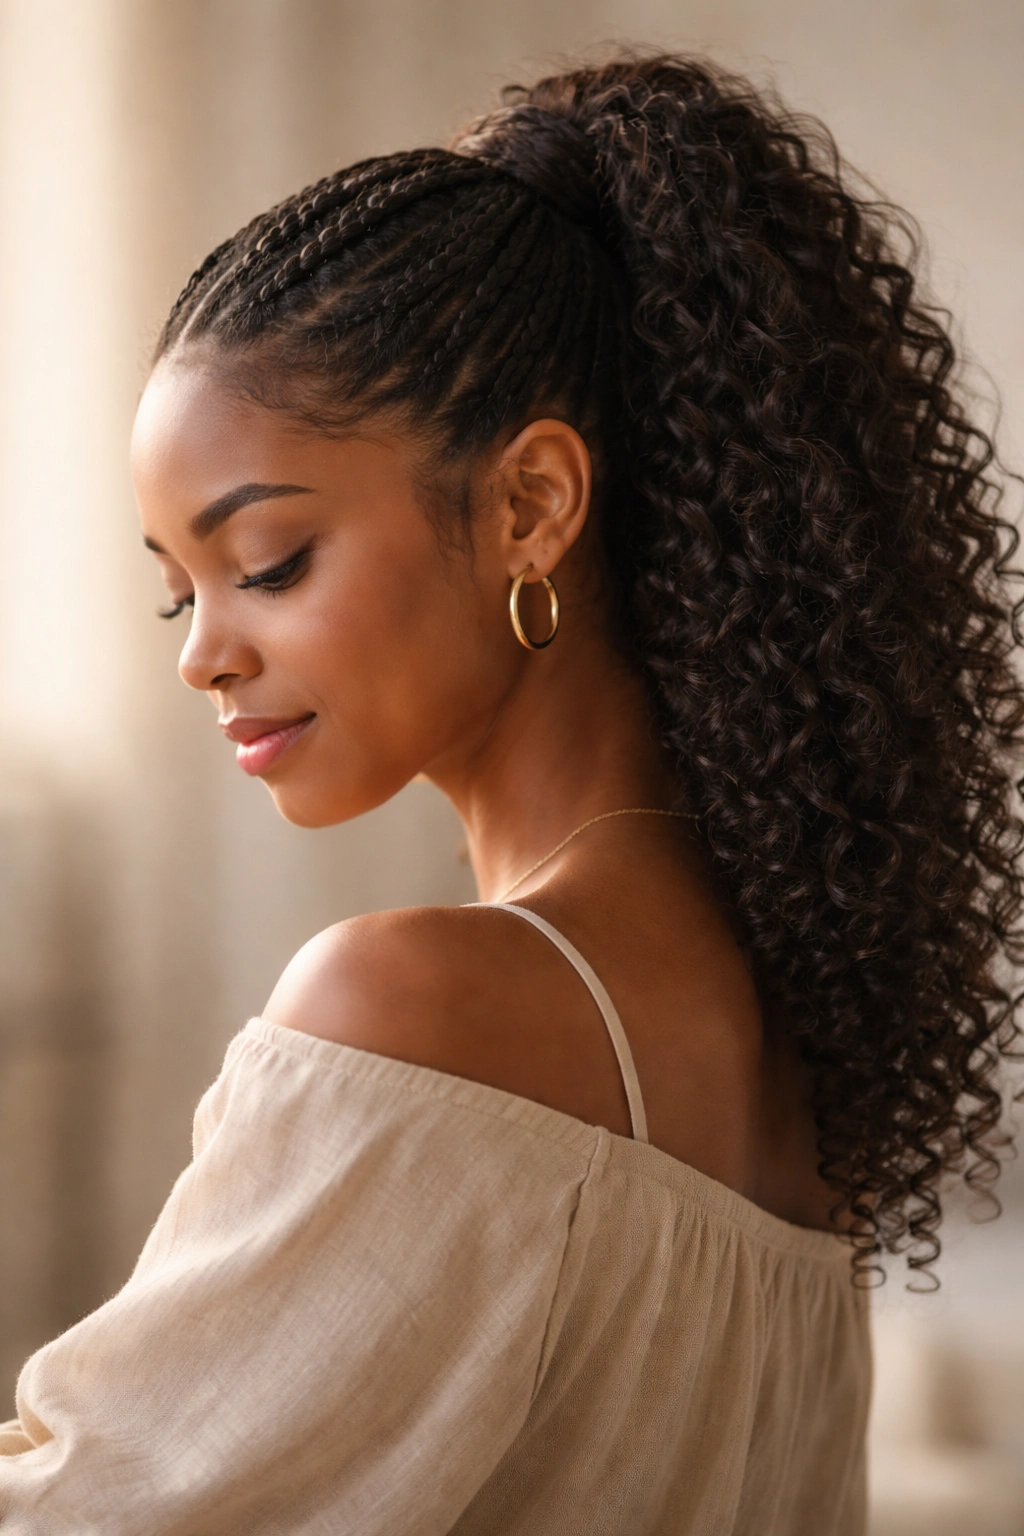
2. The Double-Braid Weave with Defined Curls
This style uses two thin braids that start at each temple and weave backward, meeting at the center back where they anchor your ponytail base. The double-braid approach creates lovely symmetry and a slightly more formal aesthetic than a single weave, which is why it photographs so well. Your curls frame the braids on the sides and create soft volume at the crown, while the ponytail itself sits in that perfect mid-placement sweet spot.
Building This Step by Step
Start by sectioning your curls vertically from each temple. Take a small, defined curl section from one side and begin braiding it tightly back toward your ear, keeping the braid as close to your head as possible. You’re creating a French-braid-adjacent effect, but you’re working with your actual curls rather than trying to incorporate new sections as you go. Once the braid reaches about the midpoint of your head, secure the end temporarily with a small clip. Repeat on the opposite side, mirror-matching the braid from the first side.
Now gather the loose ends of both braids, plus all your remaining curls, into a mid-height ponytail and secure everything together. For extra definition, you can gently unravel the braids slightly—just a tiny bit of loosening—to make them appear softer and to show off your actual curl texture within the braided sections.
Why This Matters for Curly Hair
The double braid gives you a framework that makes your ponytail sit exactly where you want it without slipping, and because you’ve created symmetry, the whole look reads as intentional and polished. The braided sections are also narrow enough that they don’t create bulk at the crown, which is crucial for curly hair where you already have natural volume.
3. The Curved Weave from Side-Swept Section
This variation starts with weaving from one side of your head, curving your braid in an arc across the back of your head before it meets the main ponytail. The curved path creates an asymmetrical, more fashion-forward aesthetic compared to a straight-back braid, and the asymmetry somehow makes the whole look feel less formal and more playful. Your curls show off maximum texture and movement, especially at the crown and in the main ponytail body.
Creating the Curved Path
Section a generous curl portion from one temple area. Begin braiding from this side, but instead of heading straight back, angle your braid in a gentle arc across the back of your head toward the opposite side. You’re essentially creating a curved line from one temple to a point behind the opposite ear. This takes a little practice to make the curve smooth and intentional rather than accidental, but the effect is absolutely worth it. Once your braid reaches its endpoint, secure it temporarily and gather all remaining curls, including the braid tail, into your mid-height ponytail.
The Visual Payoff
The curve draws the eye across your head in a flattering way and creates dynamic visual interest that photographs beautifully from any angle. This style also works particularly well if you have a wider face shape, as the curved line helps balance proportions in a way that a straight-back braid sometimes doesn’t.
4. The Thin-Weave Multiple Ponytail
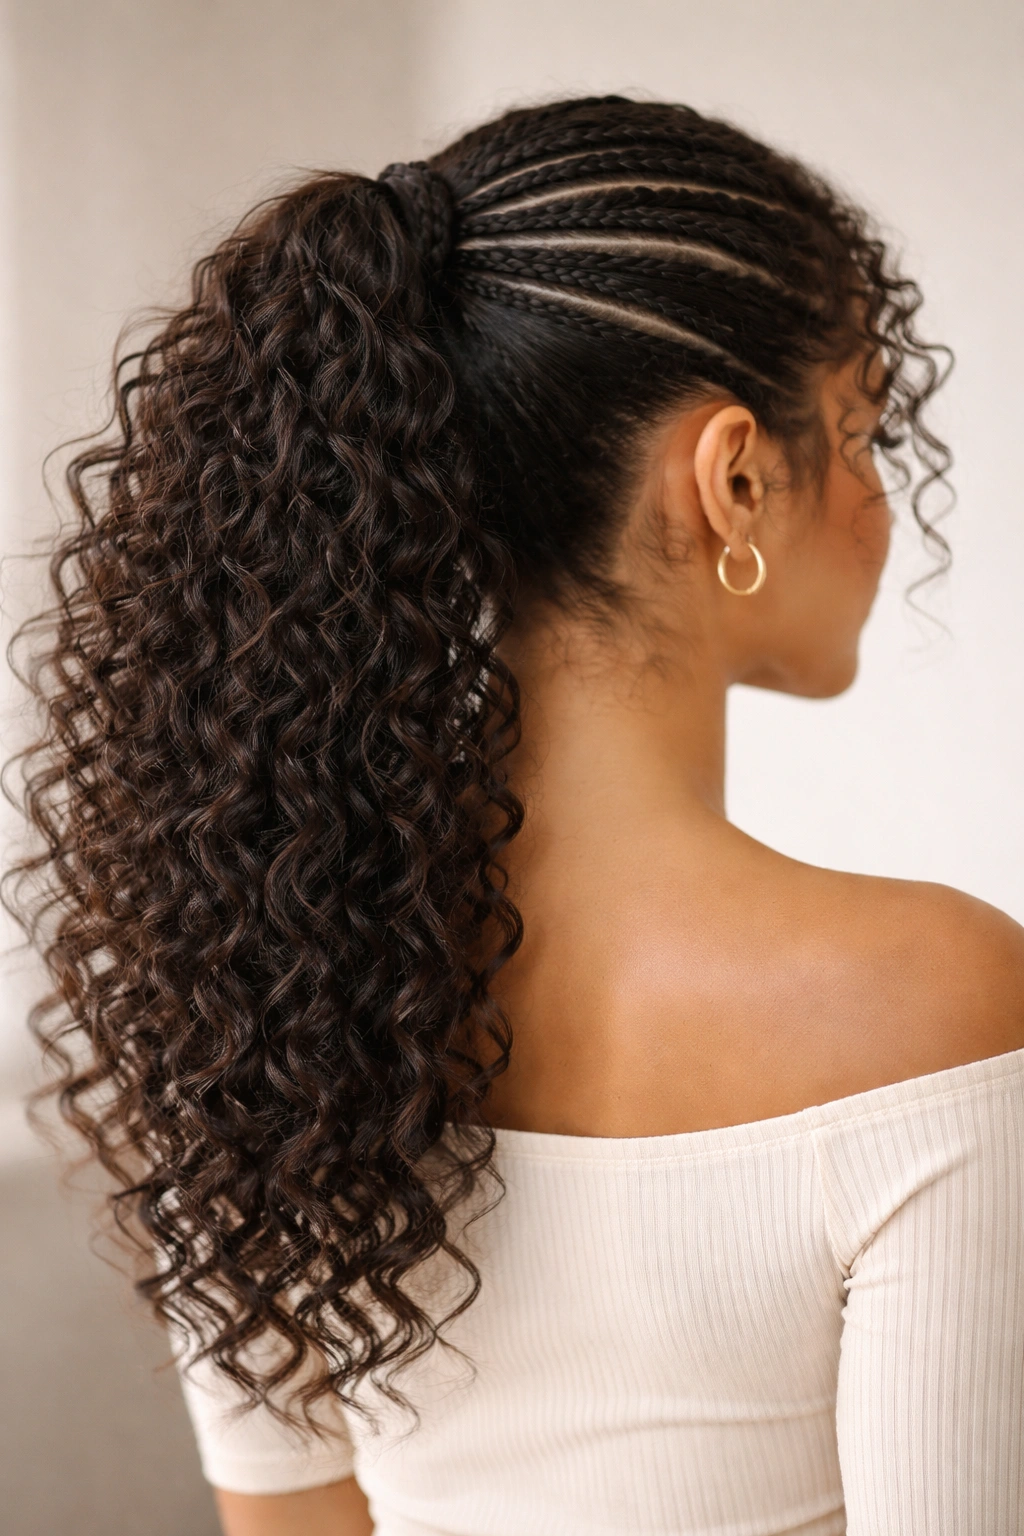
Instead of one weave creating one anchor point, this style uses two or three very thin braids running parallel to each other down the back of your head, with each braid contributing to the ponytail’s overall security and structure. It’s a slightly more intricate technique, but the payoff is a remarkably polished, almost formal look that feels special without being overdone. Your curls get maximum freedom because the weaves are so thin that they’re not creating bulk or tension.
The Technical Approach
Divide your hair into the sections you’ll be weaving—if you’re doing three thin weaves, mentally divide your head into three vertical zones. From each zone, take a thin subsection of curls (think toothpick thickness) and braid each one separately, working from your crown area down toward the back center of your head. All three braids should end at roughly the same point—the center back where your ponytail will be gathered. Secure all three braids together, then add the rest of your curls into a unified mid-height ponytail.
Why Thin Braids Matter
Multiple thin weaves distribute the weight and tension across more surface area, which means less stress on any single section of your hair. This approach is especially smart if you’re concerned about damage or breakage, or if you’re wearing this style frequently. The thin weaves also disappear slightly into your curl pattern, creating a subtler, more blended effect than one thick braid would.
5. The Loose Feed-In Weave with Cascading Curls
This style uses a feed-in braiding technique where you gradually incorporate more curl into the braid as you work from your crown down the back of your head. The feed-in approach is gentler than a tight braid because you’re distributing the hair and tension more gradually, and it also creates a textured, dimensional look where your actual curls remain visible within the braid itself. The cascading curls in the ponytail maintain serious definition and bounce.
Executing the Feed-In Technique
Start at your crown with a small section of three curl strands. Begin a loose braid, and as you complete each rotation, add a new thin layer of curl from the surrounding area into the braid. You’re continuously feeding hair in, which is why it’s called a feed-in braid. Keep the braid loose—this is the secret to this style working beautifully with curly hair. A tight feed-in braid defeats the purpose; you want the braid to feel gentle and to show off the texture of your curls as they wind through the braid structure.
As you work toward the back, the braid naturally gets thicker and more substantial, but it maintains that soft, textured quality because you’ve kept it loose throughout. Once you reach your desired endpoint, gather everything into your mid-height ponytail.
The Gentle Advantage
Feed-in braids are genuinely one of the gentlest weaving techniques for curly hair because they never create isolated points of extreme tension. Your curls get to maintain their definition and pattern, and the overall effect looks more fashion-forward than a typical tight braid.
6. The Side-Weave into High-Volume Ponytail
Start your weave on one side of your head and let it curve back, but instead of ending at the center back, let the weave anchor just behind one ear. This creates an off-center ponytail that has serious visual interest. The curls on the unweaved side of your head get maximum volume and movement, creating an asymmetrical silhouette that’s instantly more eye-catching than a centered ponytail.
Styling This Asymmetrical Look
Take a defined section from your temple area and braid it loosely back toward the back of your head, angling slightly toward one ear. The braid should feel more like a decorative element and less like a functional structure—keep it loose enough that your curls are clearly visible within it. Once your braid reaches the point where you want your ponytail to sit (just behind one ear on the back of your head), secure the braid and gather all your remaining curls, the braid tail, and curls from the opposite side into a mid-height ponytail positioned off-center.
This creates a lopsided silhouette that somehow reads as more intentional and designer-ish than a perfectly centered ponytail. Your curls have maximum freedom to show off their texture, especially on the unweaved side.
Who Should Try This Style
This look works gorgeously if you have a strong curl pattern that deserves showcasing, or if you want a style that feels fresh and different from what you normally see. It’s also excellent for when you’re having a “one side of my curls is cooperating and the other isn’t” kind of day—you can weave the less cooperative side and let the cooperative side shine front and center.
7. The Crown Halo Weave with Defined Sections
Imagine weaving a braid in a curved arc across your crown area, creating almost a halo effect, then gathering your curls into a mid-height ponytail underneath. The halo braid sits visibly above your ponytail, framing your face and adding an unexpected element of elegance. This works particularly well for curly hair because your curls at the ponytail maintain serious texture and definition, and the halo creates a lovely contrast between the defined braid and the free-flowing curls.
Creating the Halo Arc
Start by taking a section of curls from one side of your head near your temple. Begin braiding toward the opposite side in a gentle arc across your crown area—you’re creating a curved line that echoes your hairline. Keep this braid loose so your curl texture shows through. Once your halo arc is complete, tuck the loose end of the braid slightly into the section where you’ll gather your ponytail, securing it there. Now gather all your remaining curls into a mid-height ponytail directly underneath the halo.
The effect is magical—you’ve created a framing element that draws attention to your face while maintaining the natural beauty of your curls.
The Face-Framing Magic
A halo weave naturally draws the eye to your face, making this an excellent choice for special occasions or anytime you want to feel a little more put-together. The style also works across different curl patterns and hair thicknesses because the braid sits independent of your main ponytail structure.
8. The Zigzag Weave Pattern
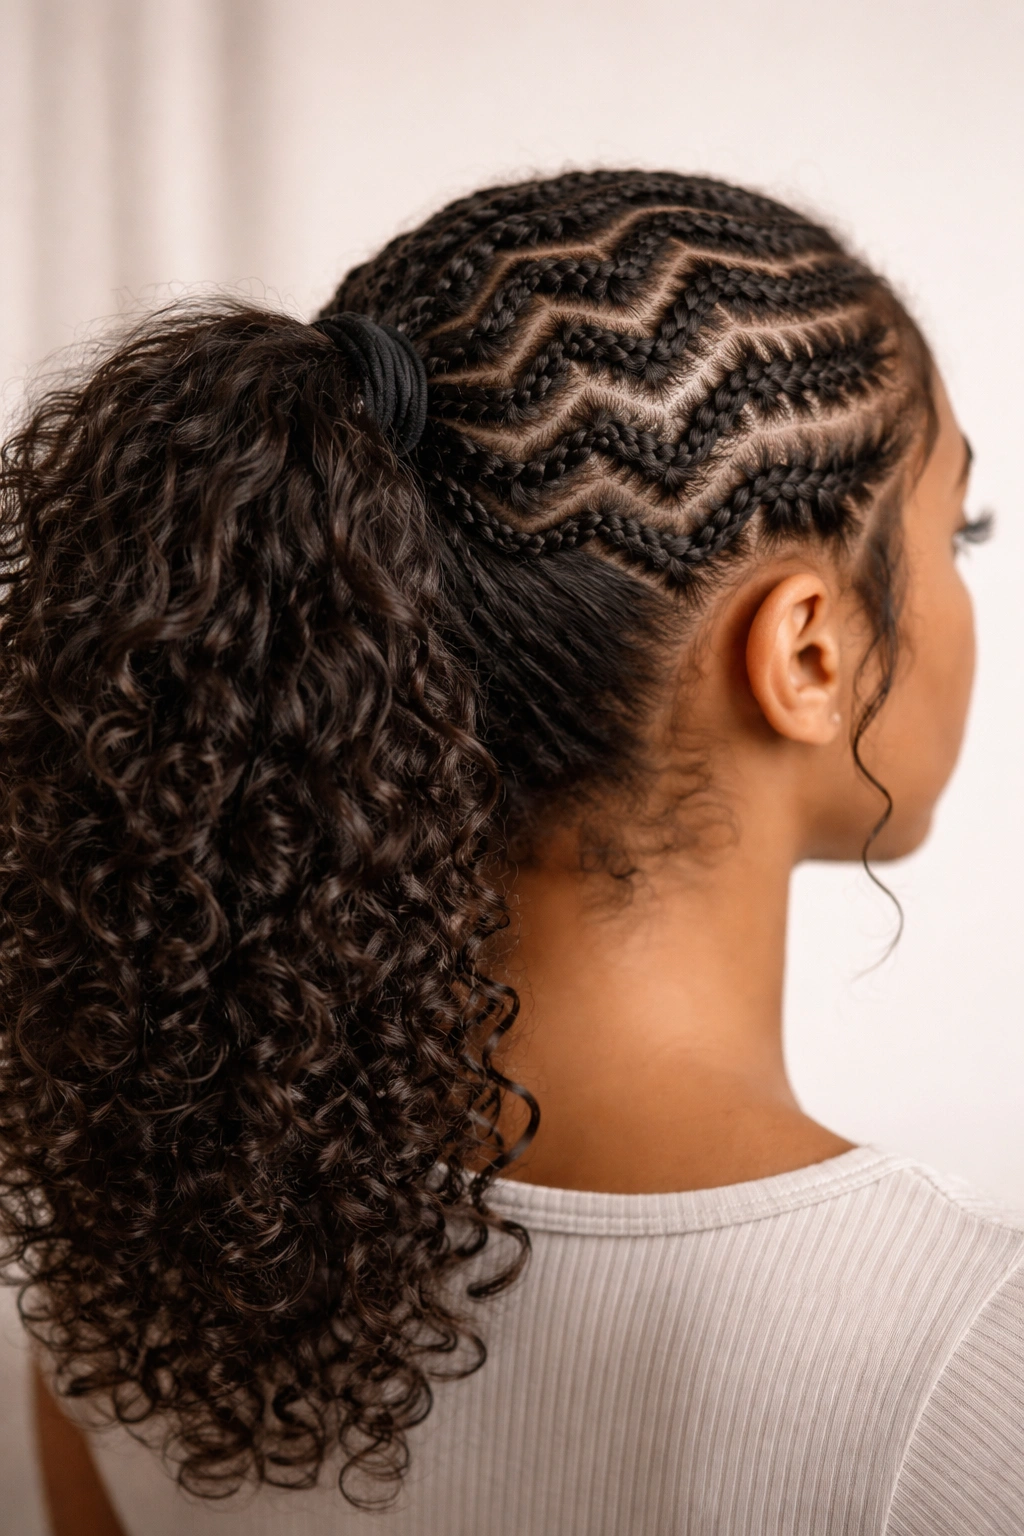
This creative variation uses multiple thin braids that zigzag back across your head instead of following a straight path. You’re creating two or three braids that alternate sides as they move toward the back, creating a visual pattern that’s more intricate and eye-catching. The zigzag keeps the look dynamic and prevents that sometimes-predictable straight-back aesthetic.
The Zigzag Execution
Divide your head mentally into vertical sections again. Start a thin braid on one side of your head, let it travel back for a few inches, then end it. Start a second thin braid on the opposite side, let it travel back, slightly overlapping the path of the first braid to create that zigzag effect. Continue alternating sides until you’ve created however many braids feel right for your hair density—usually two or three creates the perfect visual impact without feeling overdone.
Secure all the braid ends together at your desired ponytail anchor point, then gather all remaining curls into your mid-height ponytail. The zigzag creates instant visual interest and makes the style feel special.
Why Curly Hair Loves This Approach
The zigzag pattern means each individual braid is short and therefore doesn’t create sustained tension in any one area. This distribution of tension is genuinely gentler on your curls, plus the visual impact is strong enough that even a relatively simple execution reads as sophisticated.
9. The Twisted Weave Hybrid
This style combines the gentleness of twisted sections with the structure of a weave by twisting one or more sections of your curls, then braiding them together where they meet at your ponytail anchor point. You’re getting the soft, textured look of twists plus the sculpted definition of a braid, all in one style. The visual effect is incredibly dimensional and shows off your curl pattern beautifully.
Combining Twists and Braids
Take one section from each side of your head and twist each section loosely from crown toward the center back. As you’re twisting, incorporate a small amount of new hair as you go—not quite a full feed-in technique, but a gentle gathering that lets you incorporate more hair without tightening the twist. Once your two twists meet at the center back, braid the two twisted sections together for just a few rotations, then gather everything into your mid-height ponytail.
The result is a style that has multiple layers of texture and visual interest. Your actual curls remain prominent, and the twists and braid add sculpted definition without flattening your hair.
The Textural Richness
This style works beautifully if you want people to notice the detail and craftsmanship in your hair. It’s not a quick style, but it’s worth the extra few minutes because the payoff is genuinely stunning.
10. The Thick Weave with Loose Curl Escape
This final style ditches the “all your curls need to be perfectly gathered” approach and instead embraces a slightly undone aesthetic where a thick, defined braid creates the main structure, but you intentionally leave some curls loose and framing your face. It’s the weave ponytail for people who love the polished look but also love the softness of curls framing their features. The braid sits prominently and provides structure, while the loose curls add approachability and movement.
Creating Intentional Loose Curls
Section your hair so that you’re leaving out a face-framing section on each side—take a curl section from near each temple and set it aside for now. With the remaining hair, create one thicker, more substantial braid from the crown back toward your mid-head anchor point. Keep this braid slightly loose so your curls are visible, but make it thick and prominent enough to be a visual focal point.
Now take those face-framing curl sections you set aside earlier and gently arrange them around your face, letting them frame your features. Gather everything else into your mid-height ponytail. The loose curls create softness and youth, while the prominent braid gives you that polished structure.
When This Approach Works Best
This style is perfect for when you want the benefits of a protective, gathered style but also want to feel like you’re not wearing a heavy protective style. It’s ideal for work settings or formal events where you want polish without severity. The framing curls also elongate your face beautifully and create a softer overall aesthetic.
Essential Styling Tips for Weave Ponytails on Curly Hair
Your foundation matters more than anything else when you’re working with curly hair and weaves. Start with curls that are genuinely moisturized—we’re not talking about damp curls, but rather curls that have been treated with leave-in conditioner, curl cream, and possibly a light gel, then allowed to dry completely so they’ve set into their actual pattern. Damp or partially dry curls will continue to shrink as they finish drying, and this shrinkage will loosen your weave and cause your ponytail to slip throughout the day.
The tension you apply while weaving matters enormously for both the longevity of the style and the health of your curls. You want your weaves tight enough that they’ll hold throughout the day without slipping, but not so tight that they create visible stress on individual strands. A good rule of thumb is that you should be able to comfortably fit one finger under the weave at your scalp—if it’s tighter than that, you’re creating unnecessary tension; if it’s looser than that, it’ll likely slip by midday.
Use hair ties or elastics that are curl-friendly—avoid elastics with metal components, which can snag and break curls, and choose stretchy fabric-covered options whenever possible. When you’re securing your ponytail, wrap the elastic around your gathered curls two or three times rather than creating one tight wrap. This distributes the tension across more curl strands and reduces the risk of breakage.
Maintaining Your Weave Ponytail Throughout the Week
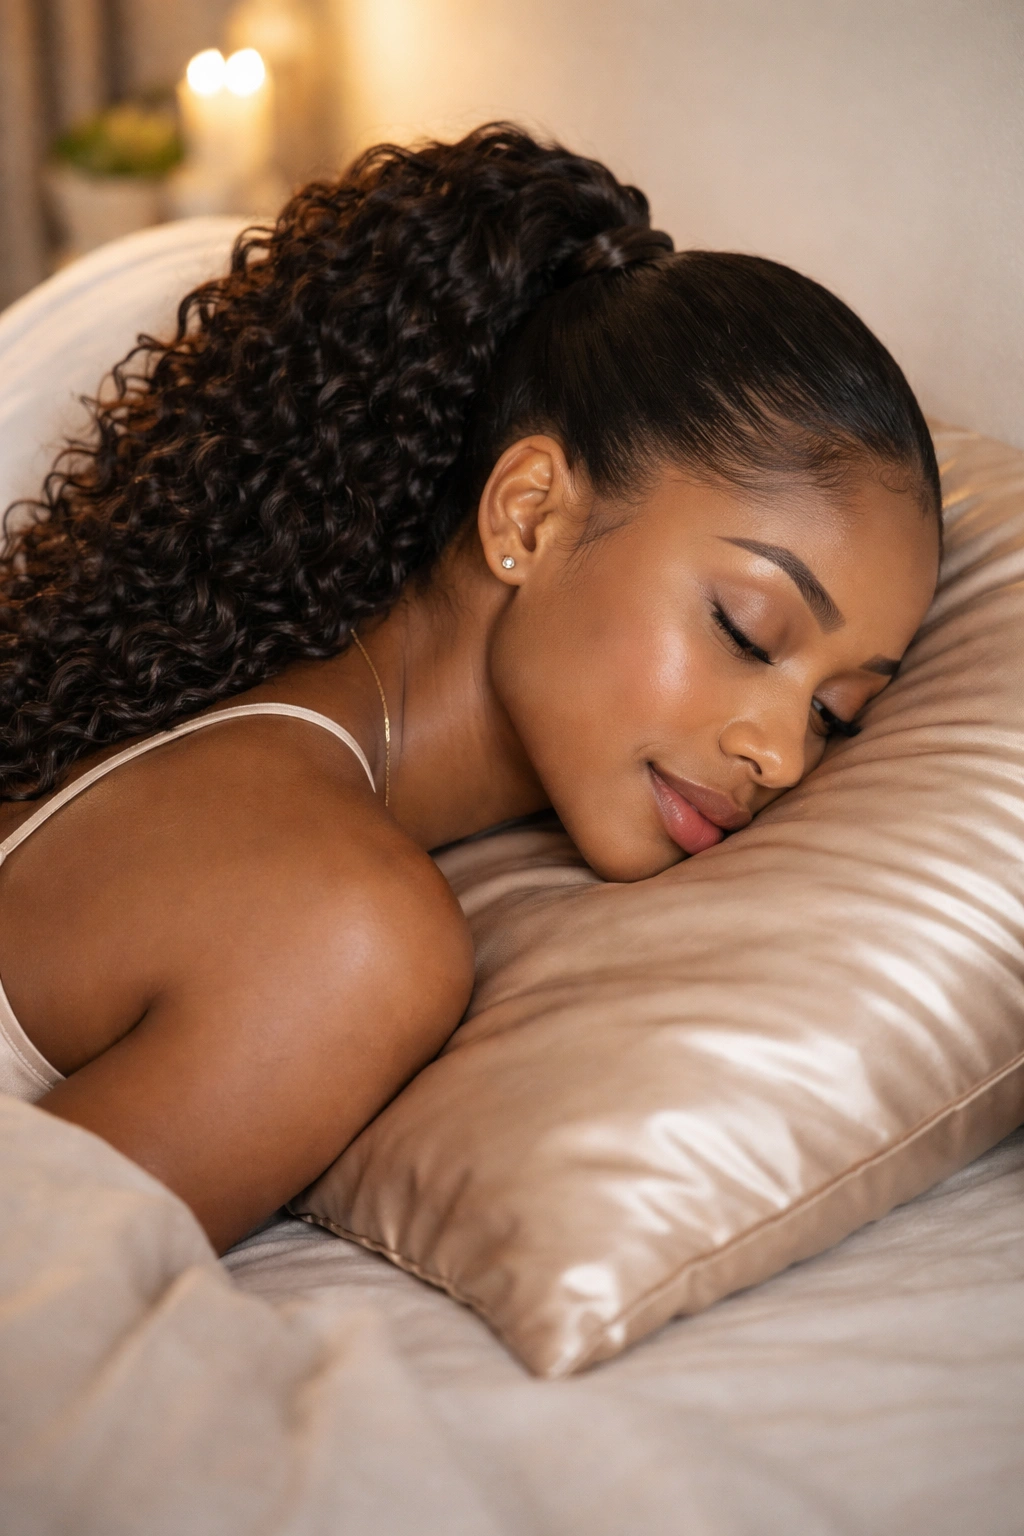
A weave ponytail can easily last three to five days with proper care. Sleep on a silk or satin pillowcase to reduce friction and frizz while you’re sleeping, and consider using a silk or satin bonnet if you want maximum protection. This is non-negotiable if you want your style to last and your curls to remain healthy—cotton pillowcases create friction that damages curls and disrupts your weave.
Refresh your curls as needed during the day by spritzing them lightly with a curl refresher spray or water mixed with a tiny bit of leave-in conditioner. Use your fingers to gently re-scrunch the curls to encourage them to return to their original pattern. If frizz develops, a tiny bit of hair gel applied with your fingertips to specific frizzy spots is more effective than trying to smooth them down with your hands.
When you’re ready to take the style down, be intentional and gentle. Don’t just pull the elastic out and expect your curls to bounce back—that’s asking for breakage. Instead, gently unravel your ponytail with your fingers, loosening the curls as you go. Detangle the entire section with your fingers or a wide-tooth comb before you shampoo or condition.
Final Thoughts
Mid weave ponytails offer something genuinely special for curly hair—they provide the security and polished aesthetic of a gathered style while still honoring and showcasing your natural curl texture. The mid-placement means you’re not creating tension on your delicate hairline, and the weaving technique itself distributes that tension across a wider area of hair, making it one of the gentler protective styling options available.
The real beauty of these ten styles is that they all start from the same foundational concept—a weave that anchors a mid-height ponytail—but each one offers a different visual flavor and different level of complexity. Whether you’re drawn to the sculptural elegance of a twisted weave, the symmetry of double braids, or the understated sophistication of a feed-in technique, you’ll find a version here that matches your personal style and your hair’s specific needs.
Your curls are beautiful as they are, and these styles celebrate that beauty rather than fighting against your natural texture. Each weave you create is an opportunity to work with your curls, not against them—to create something that looks intentional and polished while keeping your hair healthy and happy for the long term.