There’s something undeniably sophisticated about a well-executed low ponytail with a middle part. It’s polished enough for the office, elegant enough for an evening out, and genuinely flattering on most face shapes because it keeps hair off your face while the middle part creates balance and symmetry. Unlike high ponytails that can feel athletic or casual, a low ponytail sits closer to the neck, right at that sweet spot between casual and refined.
The magic of adding a middle part to a low ponytail is that it transforms an otherwise basic style into something with intention and editorial polish. The vertical line created by the middle part elongates your face, while the low placement emphasizes your cheekbones and jawline. Whether you’re working with stick-straight hair, natural waves, or thick curls, there are multiple ways to style this combination to suit your hair texture and personal aesthetic.
What makes these styles so wearable is their versatility. You can dress them up with sleek finishes for professional settings, add texture and movement for casual days, or incorporate decorative elements like clips and ties for a more fashion-forward approach. The variations below aren’t one-size-fits-all — they’re designed to work with different hair types, face shapes, and occasions, so you can find the version that feels authentic to your everyday look.
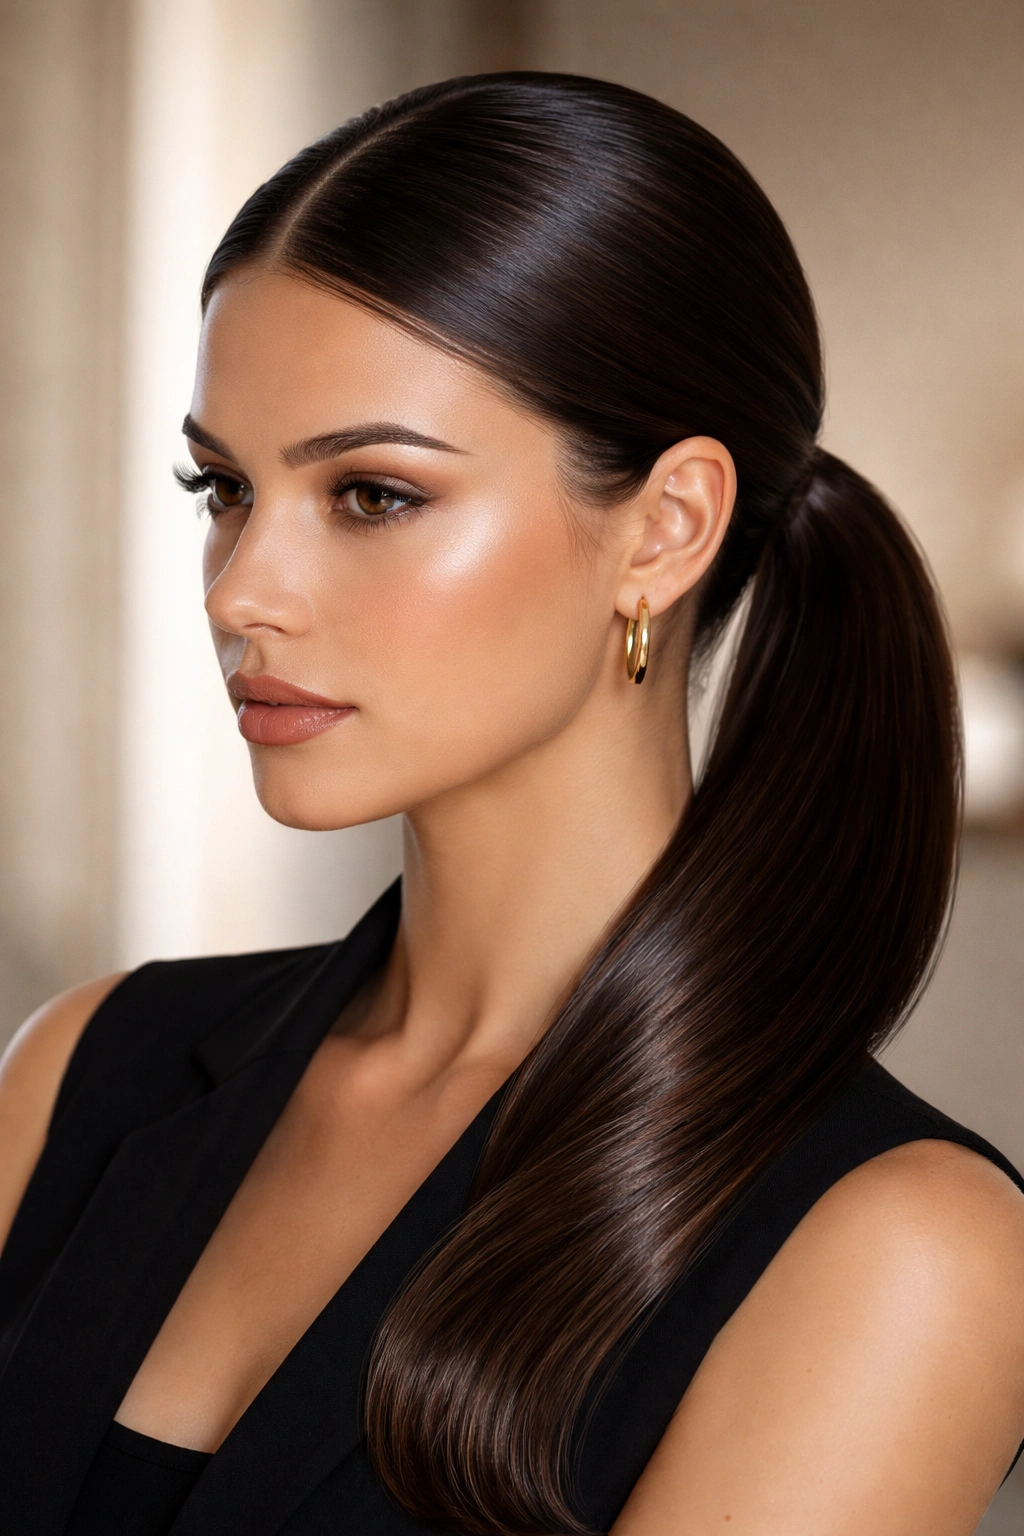
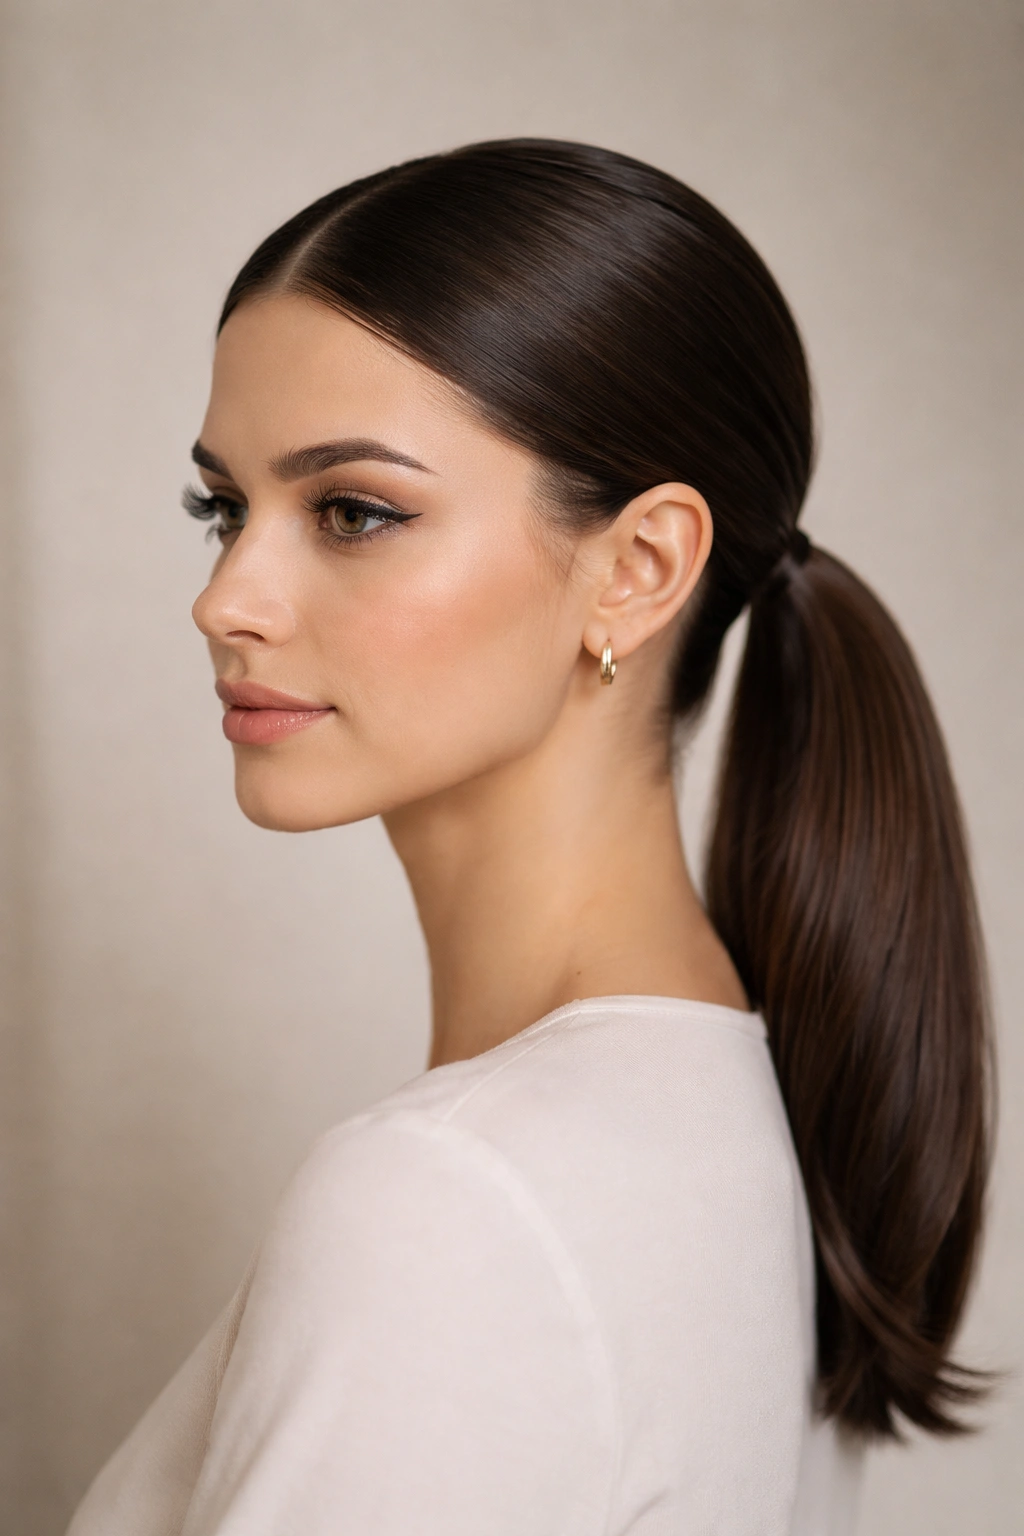
1. Sleek Low Ponytail with Silk Ties
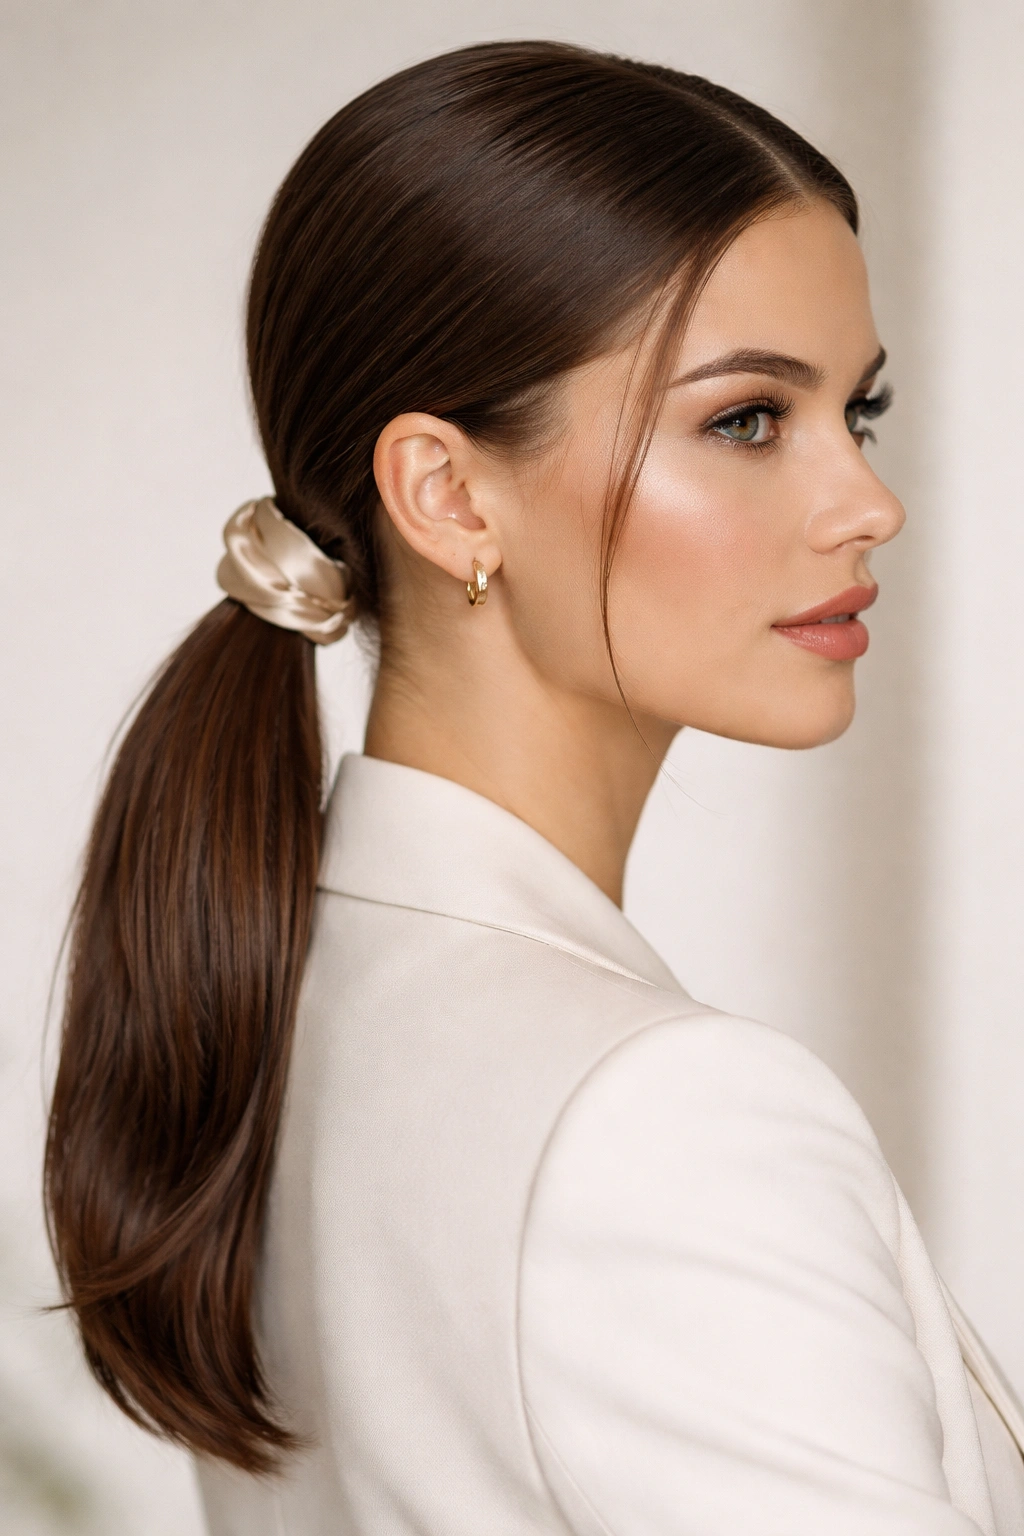
This is the minimalist version of the low middle-part ponytail — stripped down to pure elegance. You’ll create a sharp middle part from your hairline all the way down to the nape of your neck, then gather your hair into a low ponytail at the base of your skull. The key is using a silk or satin hair tie instead of a traditional elastic, which reduces friction, prevents breakage, and gives the finished style a more refined appearance. The silk tie also catches light beautifully, adding an subtle luxury feel.
Why It Works for Polished Settings
This style is the go-to for professional environments, job interviews, and formal events because it’s immediately recognizable as intentional and put-together. The slickness creates clean lines that suggest precision and control, and the low placement feels appropriately formal without being overdone. A sharp middle part signals attention to detail — it says you took time with your appearance without looking like you tried too hard, which is exactly the balance professional settings reward.
How to Achieve the Sleek Finish
- Apply a smoothing serum to damp hair before blow-drying to tame flyaways and create shine
- Use a fine-tooth comb to create a razor-sharp middle part, working from your forehead down to the nape
- Blow-dry each side of the part smooth, directing the hair down and slightly back
- Gather hair into a low ponytail and secure with a silk tie, then use a edge-control product to smooth any baby hairs around your hairline and temples
- For extra longevity, wrap a small section of hair around the base of the ponytail and pin it to hide the elastic entirely
Pro tip: Refresh this style between washes using dry shampoo on the roots and a straightening iron on the ponytail itself — you’ll restore the sleekness in under five minutes.
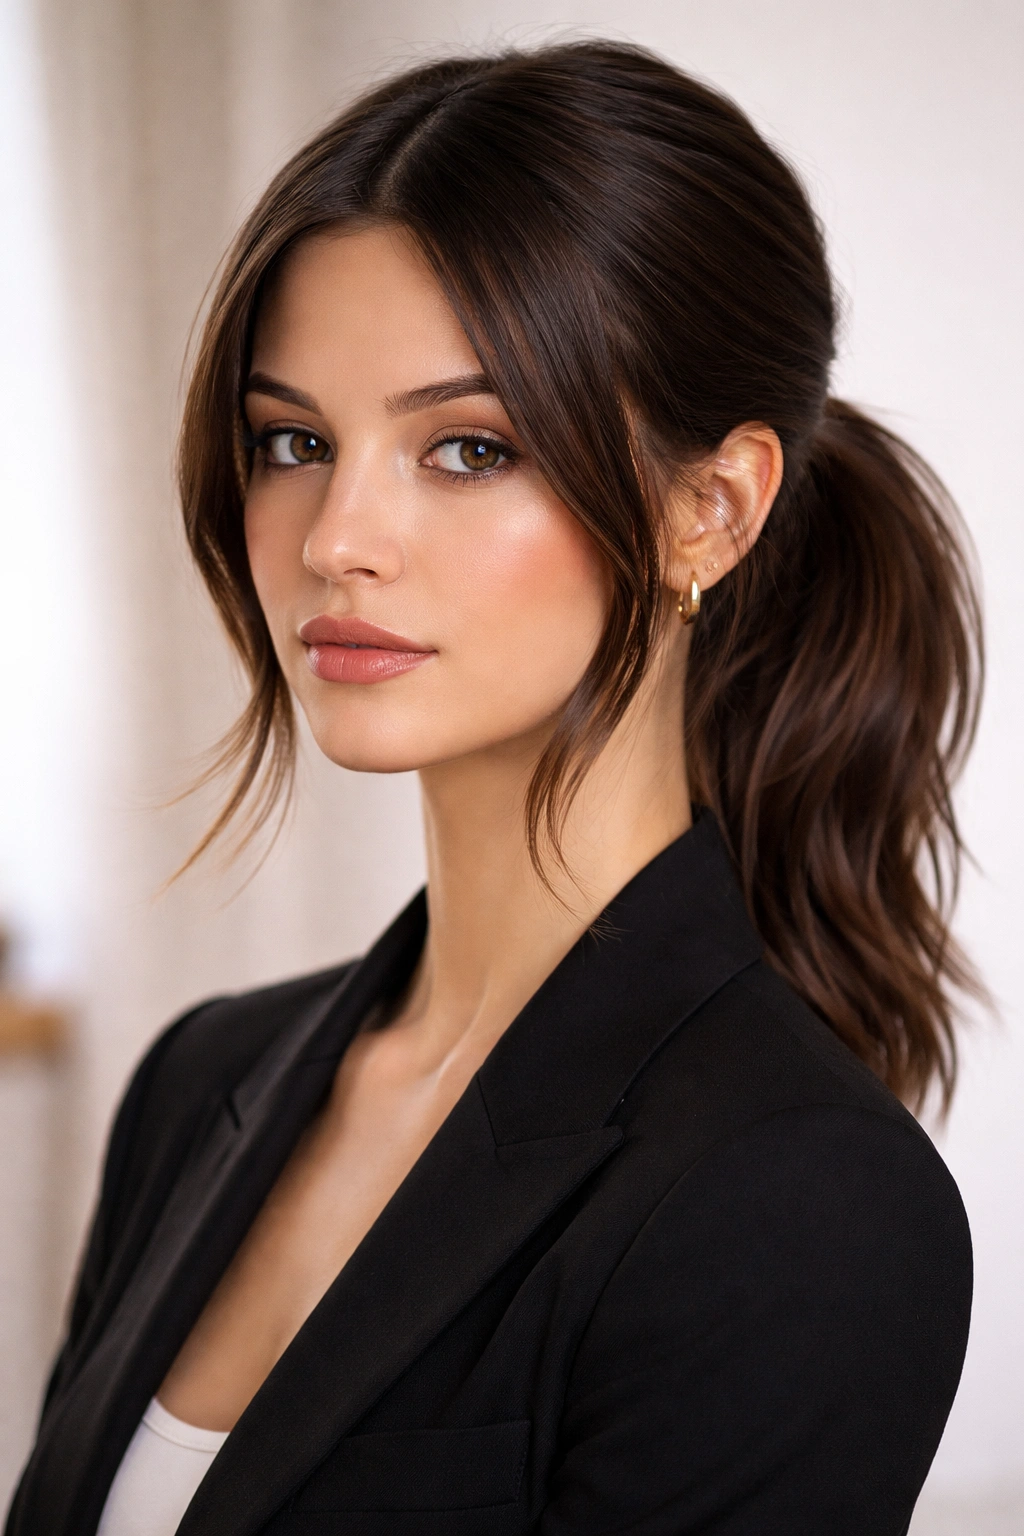
2. Textured Low Ponytail with Face-Framing
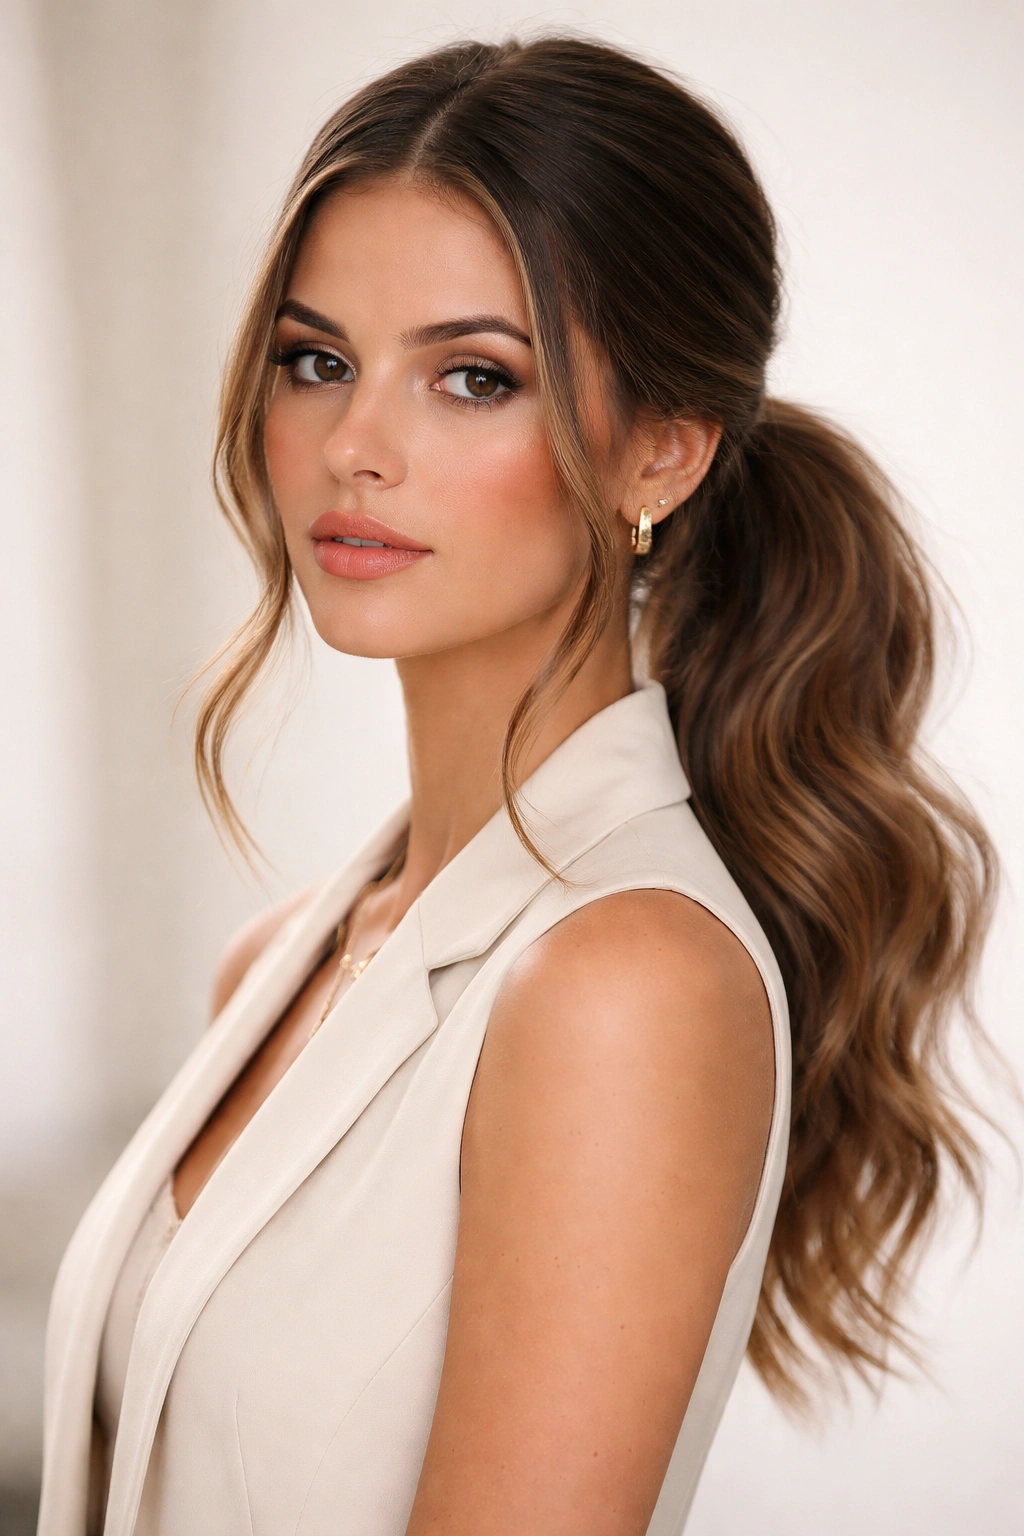
This variation keeps the middle part sharp but embraces softer, piecey texture throughout the ponytail itself. Start with a defined middle part, but instead of gathering everything smoothly, you’ll intentionally leave a few face-framing pieces loose — about an inch-wide section on each side of your face that stays down rather than being pulled back. The rest of the hair goes into a low ponytail, but here’s the trick: tease or backcomb the crown area before gathering to create subtle volume, then use a curling iron to add loose waves or spirals throughout the ponytail.
Why It Works for Modern Elegance
The combination of a structured part with textured, undone ponytail feels current and effortlessly put-together — not stiff or overly formal. The face-framing pieces soften your face and add a touch of femininity, while the middle part keeps things grounded and intentional. This is the style that looks like you didn’t try too hard, even though you absolutely did, which is a hallmark of genuinely polished styling.
Best Practices for This Look
- Create your middle part first on damp hair, then blow-dry smooth
- Tease the crown area gently using an old toothbrush or fine-tooth comb, focusing on the roots
- Use a curling iron to wave the hair in sections, curling away from your face for a flattering frame
- Gather the bulk of your hair into a low ponytail, leaving those face-framing pieces intentionally loose
- Curl or wave the ponytail itself in sections for cohesive texture
- Use a lightweight hairspray rather than a heavy hold product, which keeps everything looking natural
Worth knowing: This style holds best on hair that’s been blow-dried — the texture lasts longer and the part stays sharper than on air-dried hair.
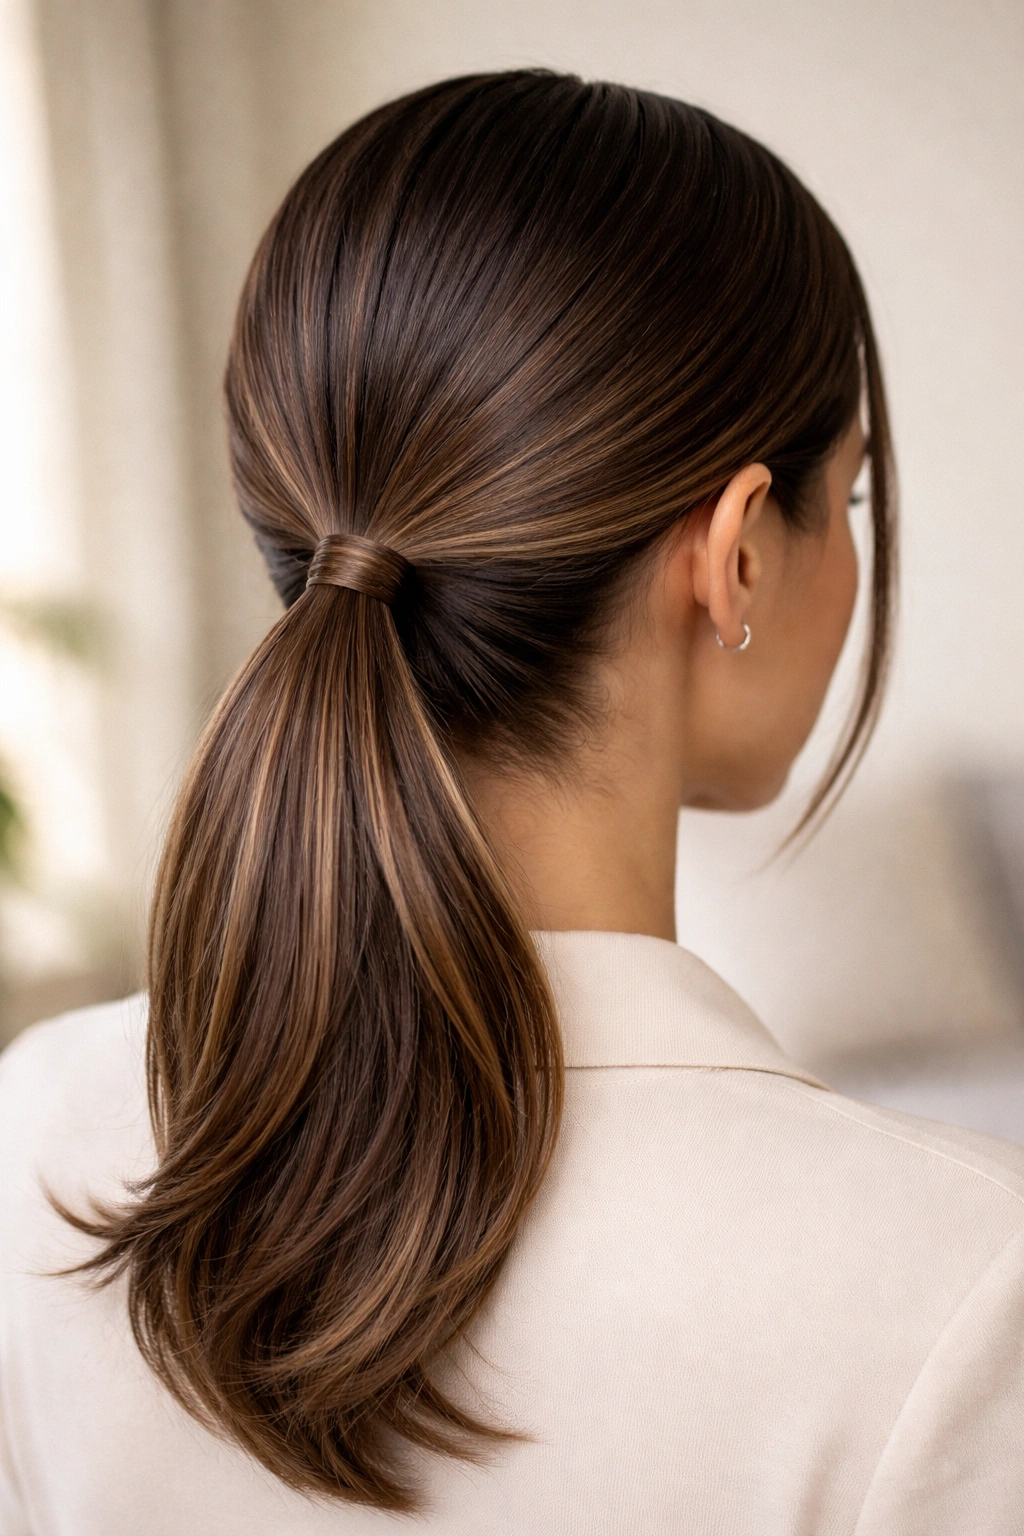
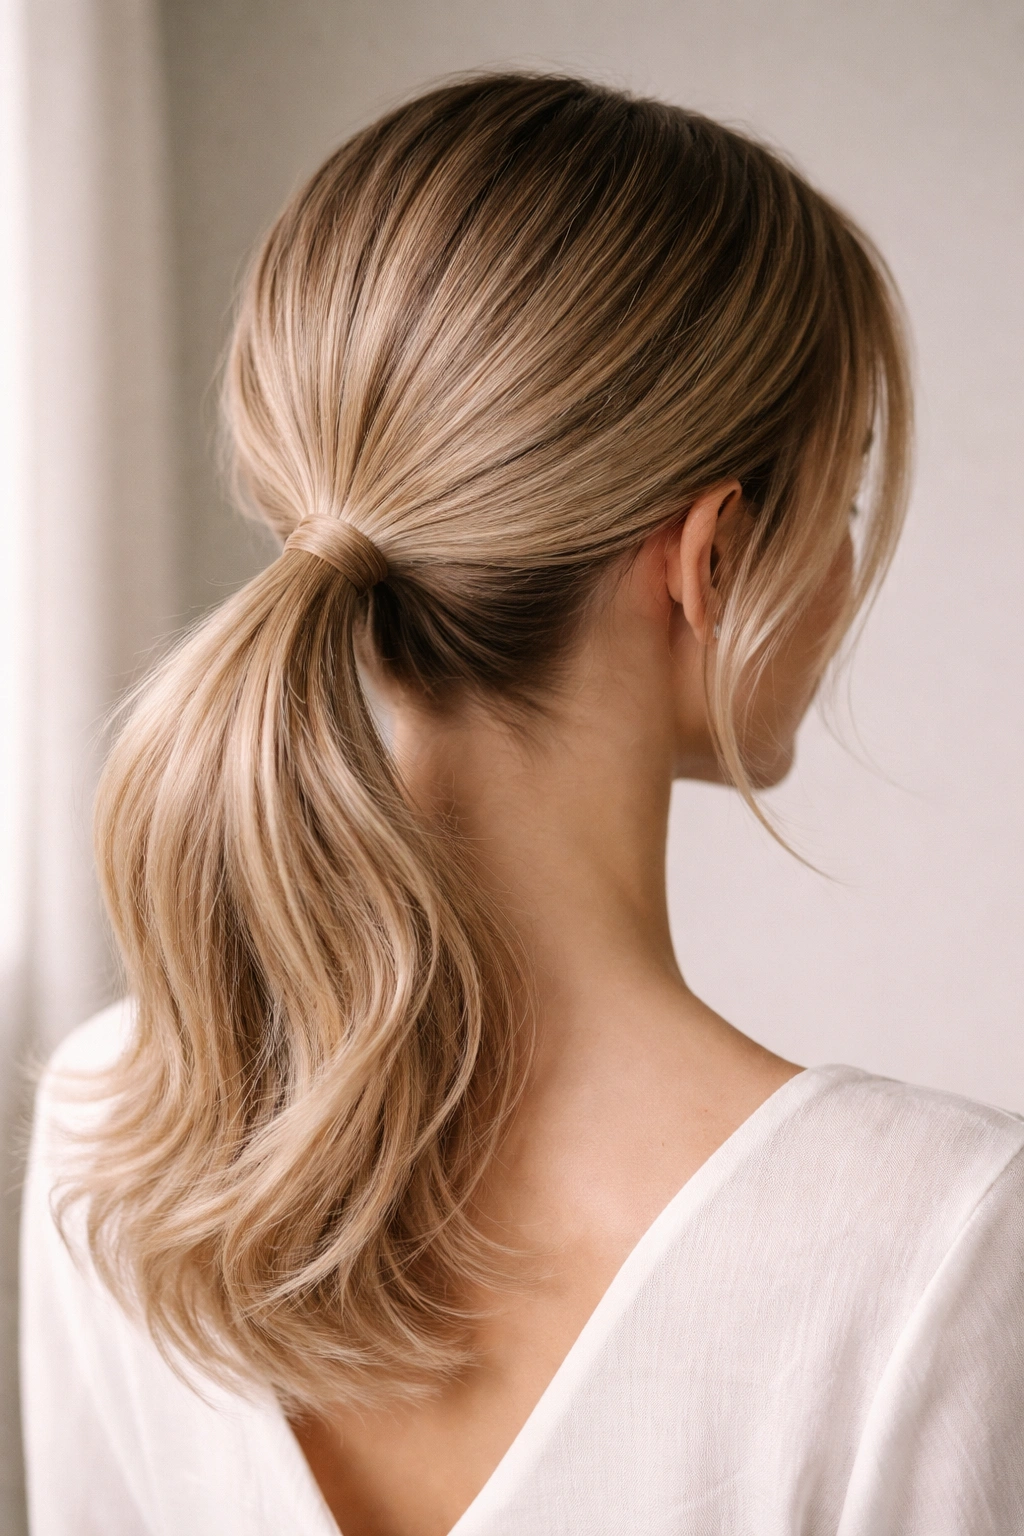
3. Low Ponytail with Wrapped Section
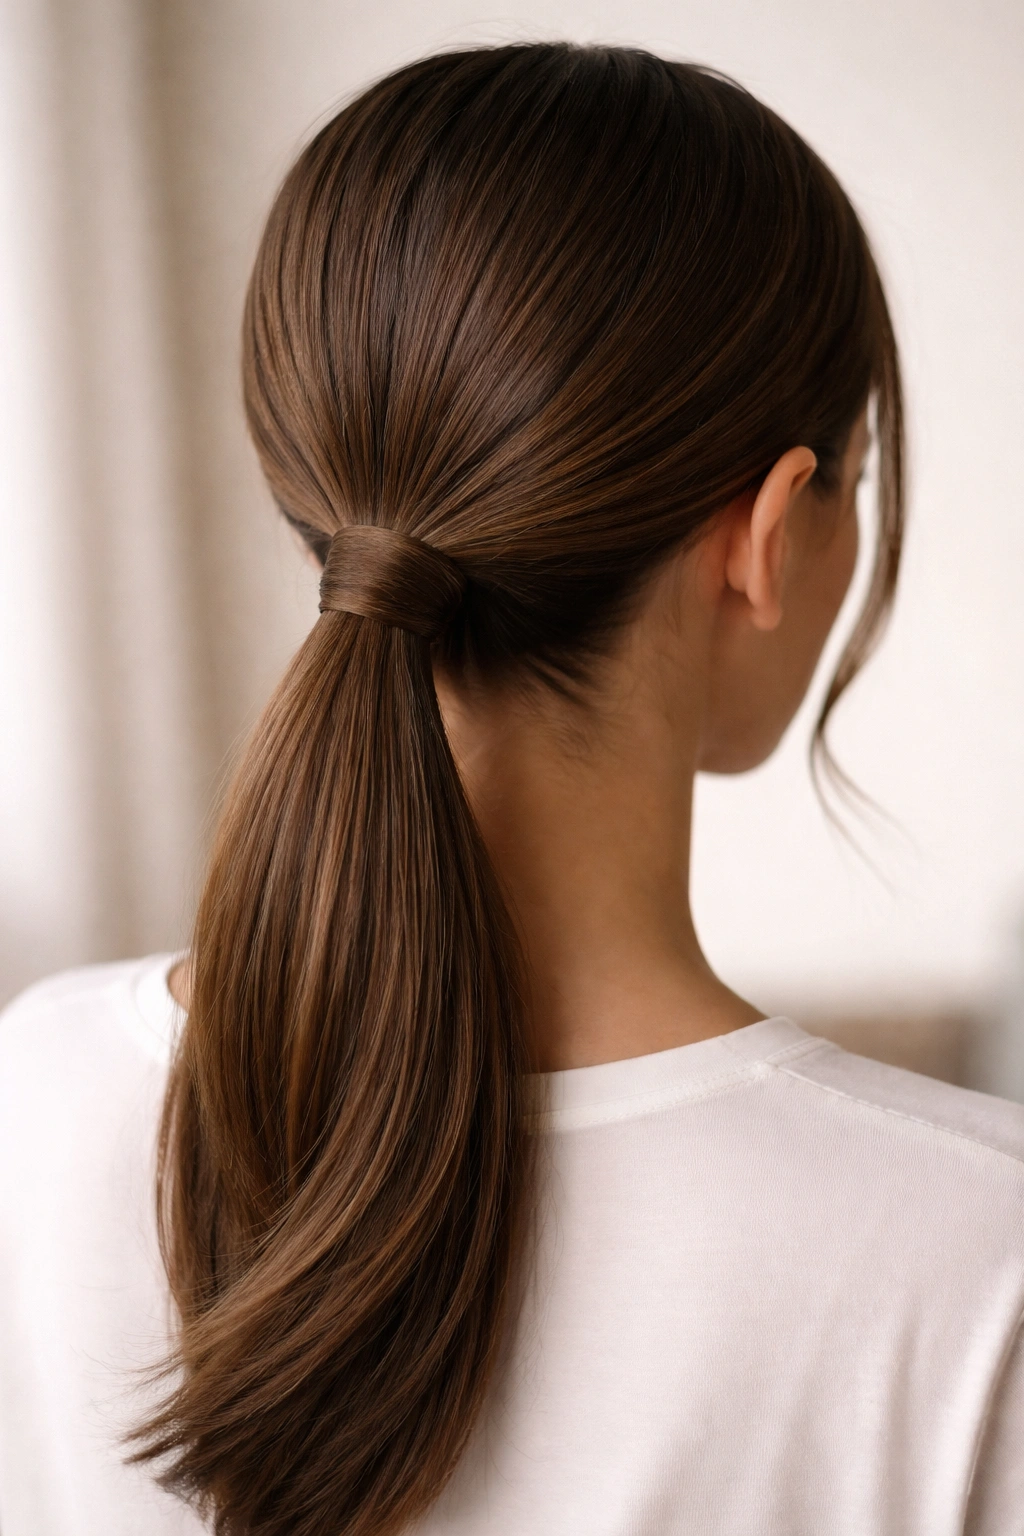
This version elevates a basic ponytail with a simple but eye-catching technique: wrapping a thin section of hair around the elastic at the base. Create your middle part as usual, gather your hair into a low ponytail, and secure with an elastic. Then, take a thin one-inch section from the underside of the ponytail, wrap it tightly around the elastic at the base, and pin the end underneath so it’s hidden. This creates a polished, seamless look where the elastic disappears completely.
What Makes This Technique Feel Expensive
The wrapped section is a signature move of professional stylists and high-end salons because it instantly elevates any ponytail from casual to refined. It shows intention and precision — those are hallmarks of polished styling. The wrapped hair also creates visual interest and a three-dimensional quality that a plain elastic can’t achieve. Even though it takes literally 30 seconds to execute, it transforms the entire aesthetic of the style.
Step-by-Step Application
- Gather your ponytail low and secure with a clear elastic
- Select a thin section of hair from the bottom layer of the ponytail (about one inch wide)
- Wrap this section tightly around the base of the ponytail, covering the elastic completely
- Secure the end of the wrapped section with a bobby pin tucked underneath the ponytail
- Smooth the wrapped section and the ponytail with a flat iron for a seamless, finished look
- You can make the wrapped section match your hair color or use a contrasting shade for visual pop
Pro tip: If you have very fine hair and wrapping feels too thin, use a thicker section of hair — it’s still effective and looks just as polished.
4. Voluminous Low Ponytail with Teasing
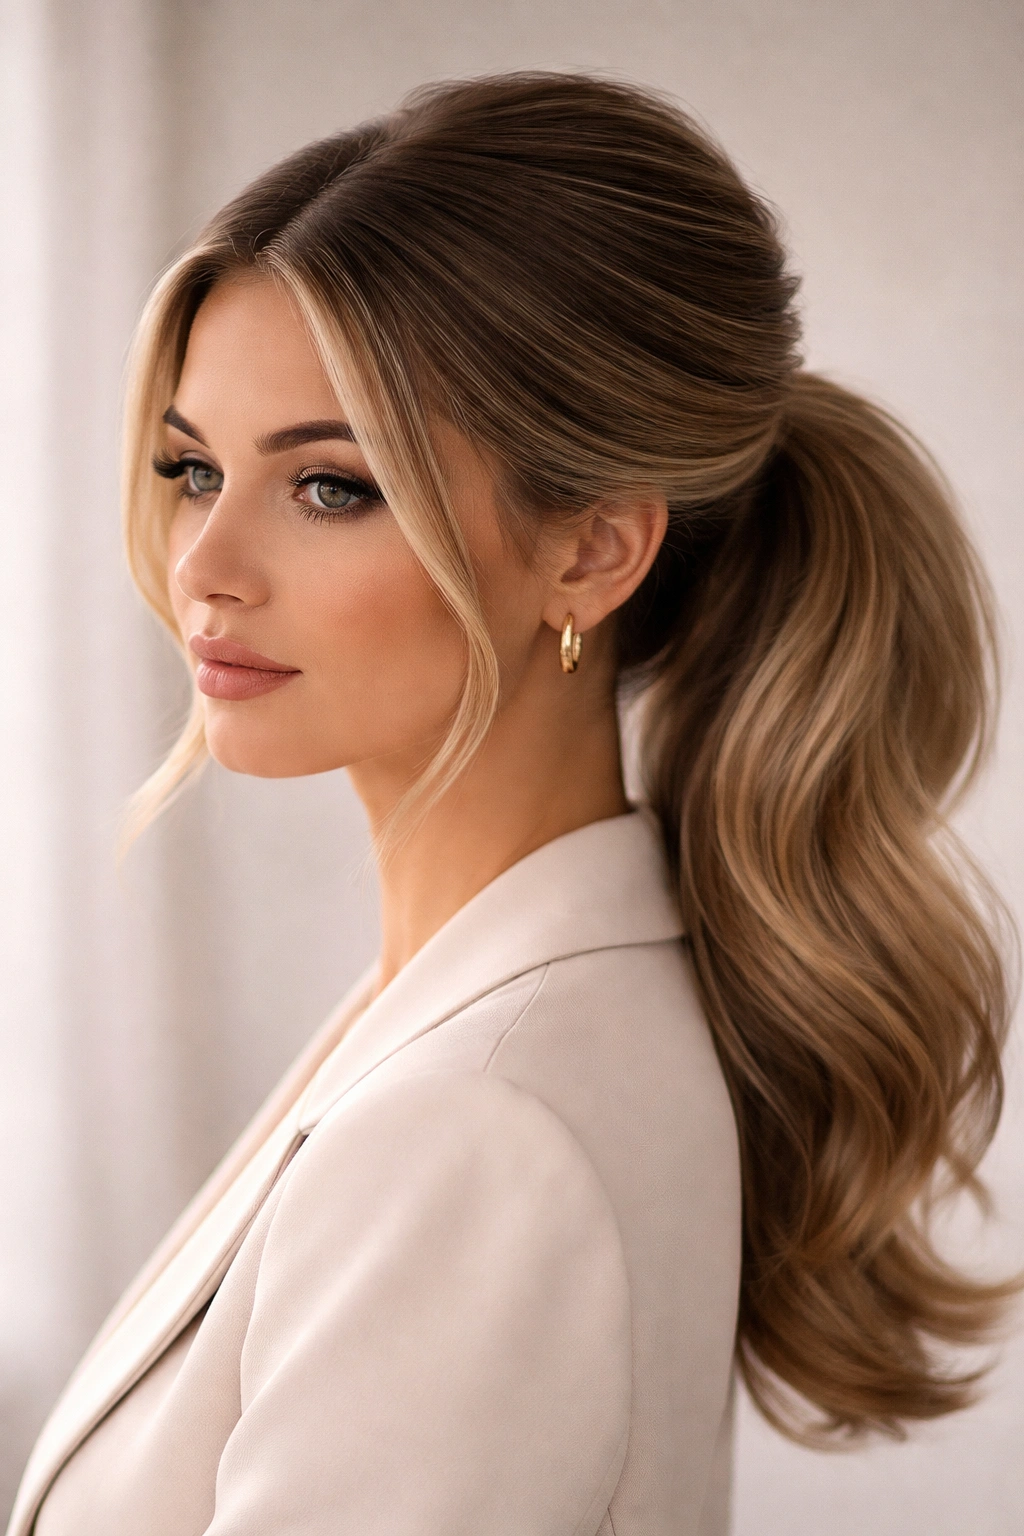
This is your option when you want maximum impact without the height of a high ponytail. Start with your middle part, then spend time building volume strategically. Using a teasing brush or fine-tooth comb, backcomb gently at the crown, just behind the part, to create a slight lift. Smooth the top layer gently so your styling looks intentional rather than ratty. Gather everything into a low ponytail, then tease the base of the ponytail itself to create a rounded, full shape rather than a flat tail.
Why Volume Changes Everything
A voluminous low ponytail has more presence and sophistication than a sleek version. It suggests fullness and health, which reads as polished and well-maintained. The teased texture also gives the style a bit of movement and dimension that catches light differently than a smooth ponytail. This variation works particularly well if you have finer hair, since teasing creates the appearance of much more density than actually exists.
Teasing for Polished Results, Not Damage
- Use a high-quality teasing brush (preferably with natural bristles) rather than a comb, which can cause breakage
- Backcomb gently in small sections, working in the direction of your hair growth
- Tease the crown area, the sides near your temples, and the base of the ponytail where it will be gathered
- Smooth the outer layer of hair gently to create shape without exposing the backcomb underneath
- Use a light hairspray between layers as you build to help everything hold longer
- When you wash out, use a dedicated brush and detangling conditioner to carefully remove the tease — never force it
Real talk: Teasing does create some texture on your hair, so if you do this regularly, use a deep conditioning treatment weekly and consider getting your ends trimmed every 6-8 weeks to prevent splitting.
5. Low Ponytail with Pearl Clips
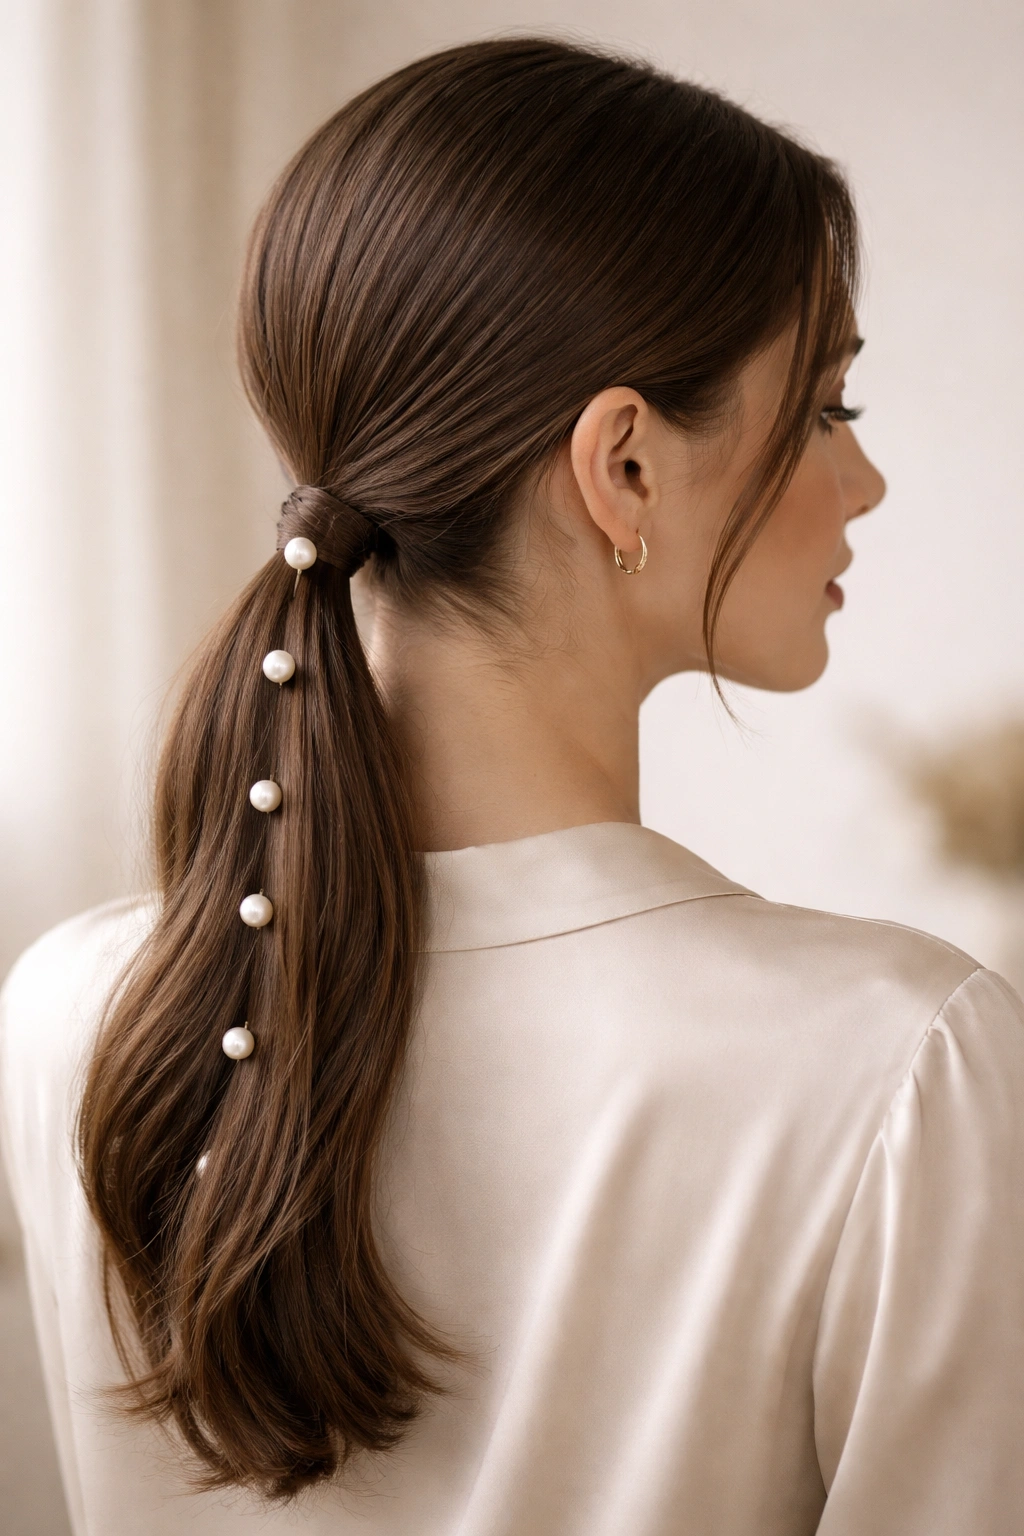
This variation keeps the ponytail itself relatively simple but adds an element of accessory polish. Create your middle part and gather a low ponytail as usual, but instead of hiding the elastic, let it be part of the style. Use a sleek elastic in a color that matches your hair, then clip the ponytail in one or two places down its length using small pearl hair clips or decorative hair clasps. Space them about two inches apart for visual interest without looking cluttered.
How Accessories Elevate the Overall Look
Pearl clips and decorative hair clasps instantly add a fashion-forward element to an otherwise simple ponytail. They signal that you’ve thought about your overall aesthetic and made intentional styling choices. Pearls particularly read as elegant and timeless — they work equally well with casual daytime looks and evening outfits, which is why they’re such a reliable accessory choice.
Selecting and Positioning Clips for Best Effect
- Choose pearl clips that are proportional to your hair thickness — small clips work best for fine hair, larger clips for thick or very full hair
- Cluster two clips close together (about half an inch apart) for a more intentional look, or space them further apart for a subtler effect
- Position clips roughly two inches below the elastic and again about four inches down the length of the ponytail
- Make sure clips are actually gripping the ponytail securely — if they slip, they’ll slide down as you move throughout the day
- Metal clips in gold or silver coordinate differently with your coloring, so choose based on whether warm or cool tones flatter you best
Quick thought: Pearl clips work best on ponytails with some texture — sleek, smooth ponytails can look a bit costume-y with heavy accessories, so pair clips with a slightly textured or wavy ponytail.
6. Twisted Low Ponytail
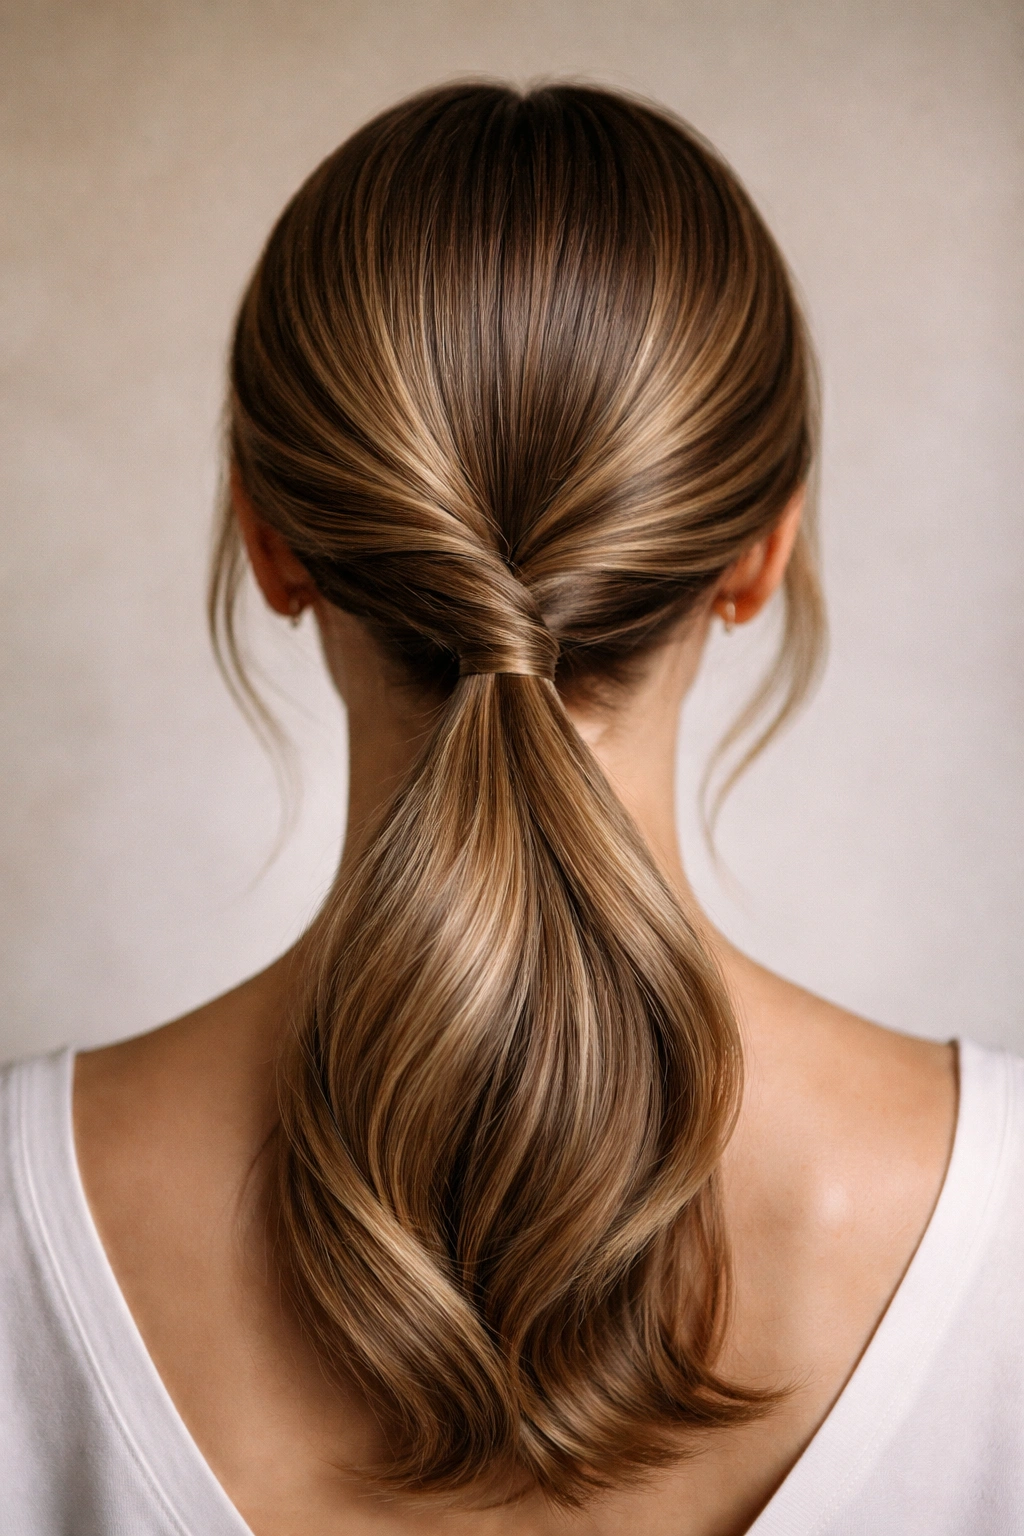
This variation adds visual interest by creating a spiral or twisted effect before gathering the ponytail. After making your middle part, divide your hair into two sections on either side of the part line. Twist each section gently away from your face, then cross the two twisted sections over each other and secure everything into a low ponytail at the base of your skull. The result is a sophisticated twisted crown effect that frames your face beautifully.
The Appeal of Twisted Styling
Twists are instantly more interesting than straight hair but less formal-looking than braids, making them perfect for that polished-but-not-overdone aesthetic. The twisting also creates natural texture and volume that makes your hair look fuller and healthier. Because the twist follows the natural direction of your hair growth, it feels organic rather than constructed, which adds to the refined, effortless quality.
Creating Defined, Long-Lasting Twists
- Start with slightly damp or textured hair — completely smooth hair doesn’t hold a twist as well
- Create your middle part, then divide your hair into two sections
- Take the right section and twist it tightly away from your face, working down to the nape of your neck
- Take the left section and twist it tightly away from your face in the same direction
- Cross the two twisted sections over each other at the back of your head
- Gather the twisted sections and any remaining hair into a low ponytail
- Use bobby pins to secure the twisted sections before fastening with an elastic
- Lock everything in place with a flexible hairspray
Styling note: You can make the twists loose and romantic or tight and structured — tighter twists feel more formal and polished, while loose twists feel more casual and lived-in.
7. Braided Low Ponytail
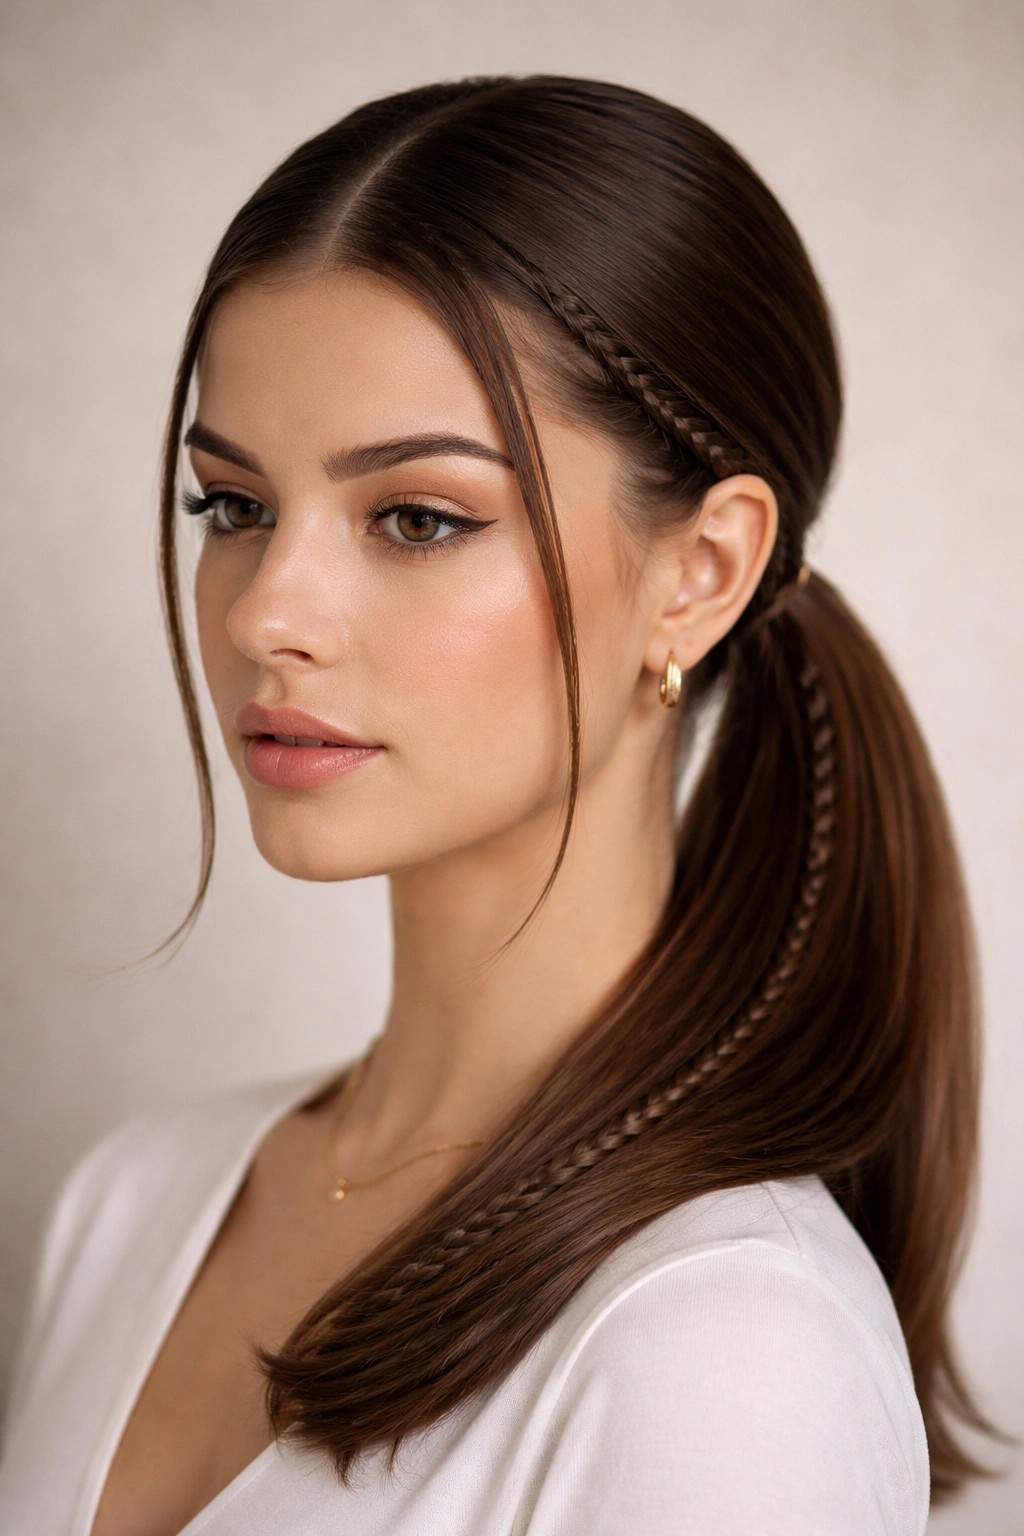
For maximum polish and visual impact, incorporate a braid into your low ponytail style. Create your middle part as usual, then instead of twisting, take a small braid from each temple area down toward the nape of your neck. You can do tight, defined three-strand braids or loose, romantic braids depending on your vibe. Once the braids reach the nape, incorporate them into your low ponytail by gathering them along with the rest of your hair and securing everything with an elastic.
Why Braided Ponytails Feel Especially Polished
Braids are instantly recognizable as requiring effort and skill, which adds an aura of intentionality to your overall presentation. They also keep hair in place beautifully throughout the day, so a braided style maintains its polish even after hours of wear. The braid-to-ponytail transition creates visual complexity and interest that elevates the style beyond a simple ponytail.
Braiding Technique for Best Results
- Create clean sections for your braids by using a fine-tooth comb and a bit of gel to define the parting lines
- Take three-strand braids from your temples toward the nape, incorporating hair as you go (Dutch braids work beautifully too — they’re braids that sit on top of the hair rather than being woven into it)
- Keep tension consistent so braids don’t look wonky or twisted
- Tease the base of the ponytail gently before gathering braided sections to add volume and roundness
- Secure with a clear elastic and use a wrapped section to hide it if you want maximum polish
- Consider straightening the finished braids with a flat iron for a sleeker look, or let them stay textured and romantic
Pro tip: Dutch braids are slightly more structured and formal than regular three-strand braids, so use those if you want the style to feel especially polished for professional settings.
8. Low Ponytail with Underneath Section
This technique creates the illusion of thickness and dimension even if your hair is relatively fine. Create your middle part and gather most of your hair into a low ponytail, but before securing, take a two-inch section from the underneath layer and leave it out momentarily. Secure your main ponytail with an elastic, then pull the underneath section down over the elastic and secure it with a second elastic or bobby pins. This creates a layered, multi-dimensional effect that looks expensive and intentional.
How Layering Creates Visual Richness
The underneath section catches light and creates shadow and dimension that a single-layer ponytail cannot. This technique is used extensively in high-end salons because it transforms an ordinary ponytail into something with apparent depth and sophistication. Even if you have fine or thin hair, this method makes your ponytail look significantly fuller and more substantial.
Building the Underneath Section Correctly
- Create your middle part and divide your hair into sections
- Gather most of your hair into a low ponytail, but consciously leave the underneath layer out
- Secure your main ponytail with an elastic
- Take the underneath section and pull it gently down over the elastic
- Secure the underneath section either with a second elastic below the main one, or use bobby pins positioned invisibly at the base of the ponytail
- Use a fine-tooth comb to smooth the underneath section and make sure it sits neatly over the elastic
- Curl or wave both layers of the ponytail for cohesive texture
Worth knowing: This style works best if you tease the base of the main ponytail slightly before adding the underneath section — it creates more visual separation and makes the layering effect more obvious.
9. Low Ponytail with Side Shag
This variation brings edge and personality to a low ponytail while maintaining its polished vibe. Create your sharp middle part, but cut or style your layers so they’re noticeably longer in the front and shortest in the back. The front-facing layers frame your face with movement and texture, while the back is gathered into a low ponytail. This creates an interesting visual contrast between the styled layers and the controlled ponytail.
The Modern Appeal of Layered Texture
A shag-style ponytail reads as intentional and fashion-forward without looking overly trendy. The movement in the front layers keeps the style from feeling too severe or pulled-back, and it’s particularly flattering if you have a rounder face shape since the layers add height and elongate your features. This is the style for people who like polish but also want a touch of personality and edge.
Styling Layered Hair Into This Look
- You’ll need actual layers cut into your hair for this style to work — ask your stylist for longer layers in the front that can frame your face
- Create a clean, sharp middle part from your hairline to the nape
- Style the front-facing layers with a curling iron or your preferred texture method
- Gather the shorter back layers into a low ponytail at the base of your skull
- You can leave the layered front completely down, or tuck small sections behind your ears for a refined look
- Use a light hairspray so the layers maintain their texture and movement throughout the day
Reality check: This style requires regular trims to keep the layers looking intentional and shapely — typically every 6-8 weeks if you want to maintain the shag effect.
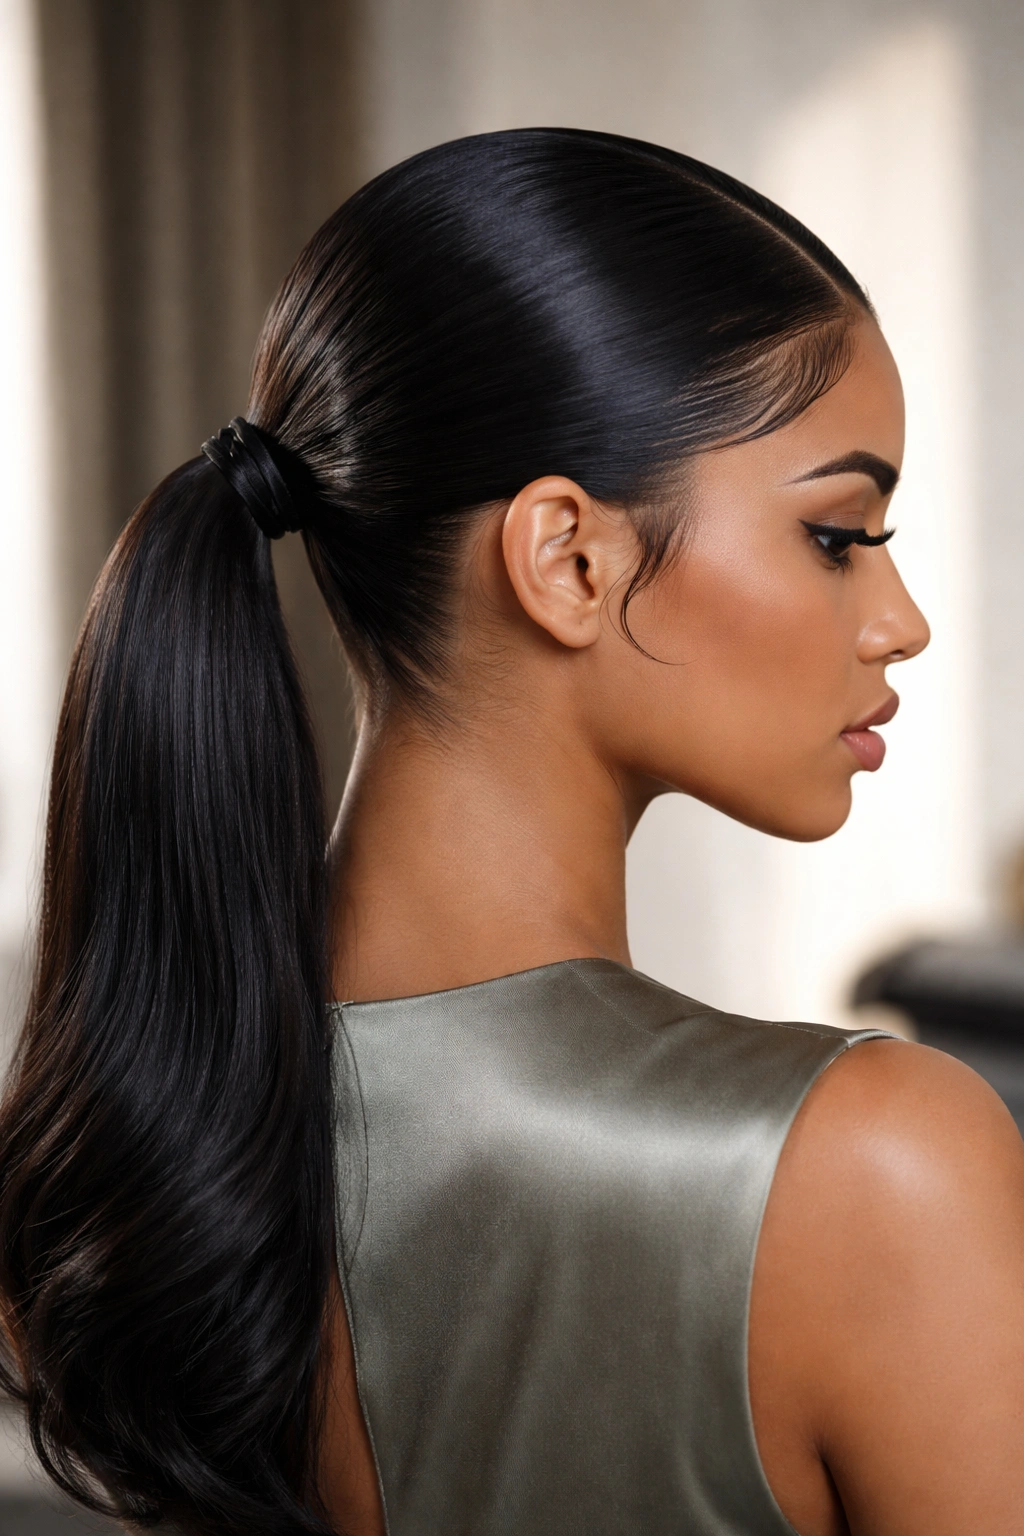
10. Smooth Low Ponytail with Shine Serum
Sometimes the most polished version is also the simplest: a smooth, shiny low ponytail that catches light and screams healthy hair. Create your middle part with precision, smooth your hair back with a lightweight gel or serum, and gather it into a low, tight ponytail. The secret to polish here is the shine serum — apply a tiny amount to your hands and smooth it over the finished ponytail, which gives it a luminous, high-gloss finish that reads as expensive and well-maintained.
Why Shine Matters in Polished Styling
Dull hair reads as tired or poorly maintained, no matter how well-executed your style. Shine, on the other hand, instantly signals health, hydration, and attention to detail. This is why high-end salons always finish styles with a shine product — it’s the final touch that elevates everything from basic to polished. The light reflection also makes your style photograph beautifully, which matters in professional and social contexts.
Choosing and Applying Shine Products
- Select a shine serum or oil that matches your hair type — lightweight serums work best for fine hair, while richer oils suit thick or curly hair
- Apply the serum to your hands first (usually just a rice-sized amount), then smooth it over your finished ponytail
- Focus on the mid-lengths and ends, which tend to show dullness more than the roots
- You can also apply a tiny amount along your part line and the front hairline for extra polish
- Be conservative with application — too much serum makes hair look greasy rather than glossy
- Reapply throughout the day as needed, especially if you’re in dry environments
Insider note: Silicone-based serums create immediate shine but can build up over time, while natural oils (like argan or jojoba) are gentler for regular use.
11. Low Ponytail with Wispy Ends
This variation focuses on the bottom of your ponytail, where the ends get special treatment to look intentionally soft and romantic. Create your middle part and gather your hair into a low ponytail as usual, but before you finish, use a curling iron to create soft waves or loose spirals in the last three inches of your ponytail. You can also gently tease the ends very slightly to create a feathered, piece-y effect that looks less blunt and more refined.
The Refined Quality of Softened Ends
Blunt, flat-cut ends on a ponytail can read as harsh or utilitarian, while intentionally softened, textured ends feel more thoughtfully styled. This technique also adds movement and dimension to your ponytail, making it look more interesting without requiring any complex braiding or twisting. It’s a small detail that makes a significant difference in overall polish.
Creating Soft, Textured Ends
- Curl the ends of your ponytail with a curling iron, working in small sections and curling away from your face
- Let the curls cool completely before touching them so they hold longer
- For a piece-y effect, very gently tease just the last inch of your ponytail with a fine-tooth comb
- Lightly smooth the top layer of the teased section so it looks intentional rather than messy
- Use a light hairspray to hold the texture without making it feel crunchy
- The softened ends should look romantic and intentional, not undone or damaged
Pro tip: This technique works best on slightly textured or wavy hair — if your hair is super straight, the curled ends might fall flat by midday unless you use a strong-hold product.
12. Structured Low Ponytail with Gel Definition
For maximum polish and precision, this final style uses an edge-control gel to create sharp, defined lines throughout. Create your middle part with geometric precision using a fine-tooth comb and gel. Smooth your hair back toward the ponytail, using gel to define your hairline and the outer edges of your head. Gather your hair into a tight, low ponytail, and use gel again to define any flyaways and create a polished finish around your hairline and temples.
Why Gel Definition Creates a Luxury Aesthetic
Professional stylists use edge control and defining products not to create a harsh look, but to create intentionality and precision. When your edges are clean and defined, the entire style reads as controlled and refined — like you’ve visited a salon, not like you threw your hair back casually. This is particularly effective for formal events, professional settings, and photography.
Applying Gel for Polished Results
- Use a gel with a light hold rather than maximum hold — you want definition without stiffness
- Apply gel to your hairline along your middle part, using the brush applicator to create a clean line
- Define your temples and the area behind your ears, smoothing any flyaways back toward your ponytail
- Use a small amount around your face and hairline to sleek everything back without looking wet
- Allow the gel to dry slightly before gathering your ponytail — wet gel can slip and cause your ponytail to come loose
- Once your ponytail is secured, apply a tiny amount of gel to your hairline one final time for a finished, intentional look
- Use a light hairspray to set everything without adding extra stiffness
Worth knowing: Not all gels are created equal — cheaper formulas can feel sticky or flaky, while salon-quality gels smooth cleanly and blend invisibly into your hair.
Final Thoughts
A low middle-part ponytail doesn’t need to be complicated to feel polished and intentional. Whether you choose sleek simplicity, textured movement, decorative elements, or precision gel definition, the foundation is the same: a sharp middle part, a low gathering point, and attention to the details that signal care and intention. Most of these styles can be executed at home in less than ten minutes once you practice the technique, and they hold beautifully throughout the day because the low placement is inherently stable.
The beauty of these variations is that you’re not locked into one approach. You can wear a sleek version on Monday, add texture and face-framing pieces on Wednesday, and incorporate clips or braids for the weekend. The middle part and low ponytail combination is flexible enough to move seamlessly between casual and professional settings, which makes it genuinely practical for real life. The polish comes from intentionality and precision, not from how much time you spend styling — so choose the variation that matches your hair type and lifestyle, and lean into the details that make it feel refined.