Braids aren’t just for long hair—short hair is actually the perfect canvas for experimenting with intricate braid styles, and when you combine them with ponytails, you get a look that’s both polished and playful. Short hair gives your braids definition and texture in a way that longer lengths sometimes can’t achieve, and the resulting ponytail sits at just the right spot to showcase your braid work without looking overwhelming. Whether you’re dealing with hair that hits your shoulders or something even shorter, braided ponytails offer a surprising amount of versatility—from sleek and professional to romantic and textured.
The beauty of braided ponytails on short hair is that they work for nearly every occasion and hair type. You can create them on straight hair, curly hair, wavy hair, and everything in between. They require nothing more than basic styling tools that you probably already own, and most can be styled in under ten minutes once you know the technique. Best of all, they solve the eternal short-hair dilemma of wanting an updo that feels special without needing the length to work with traditionally long hairstyles.
Here are twelve braided ponytail styles that’ll prove short hair can be just as dramatic and detailed as any longer length.
1. The Classic Three-Strand Braid Ponytail
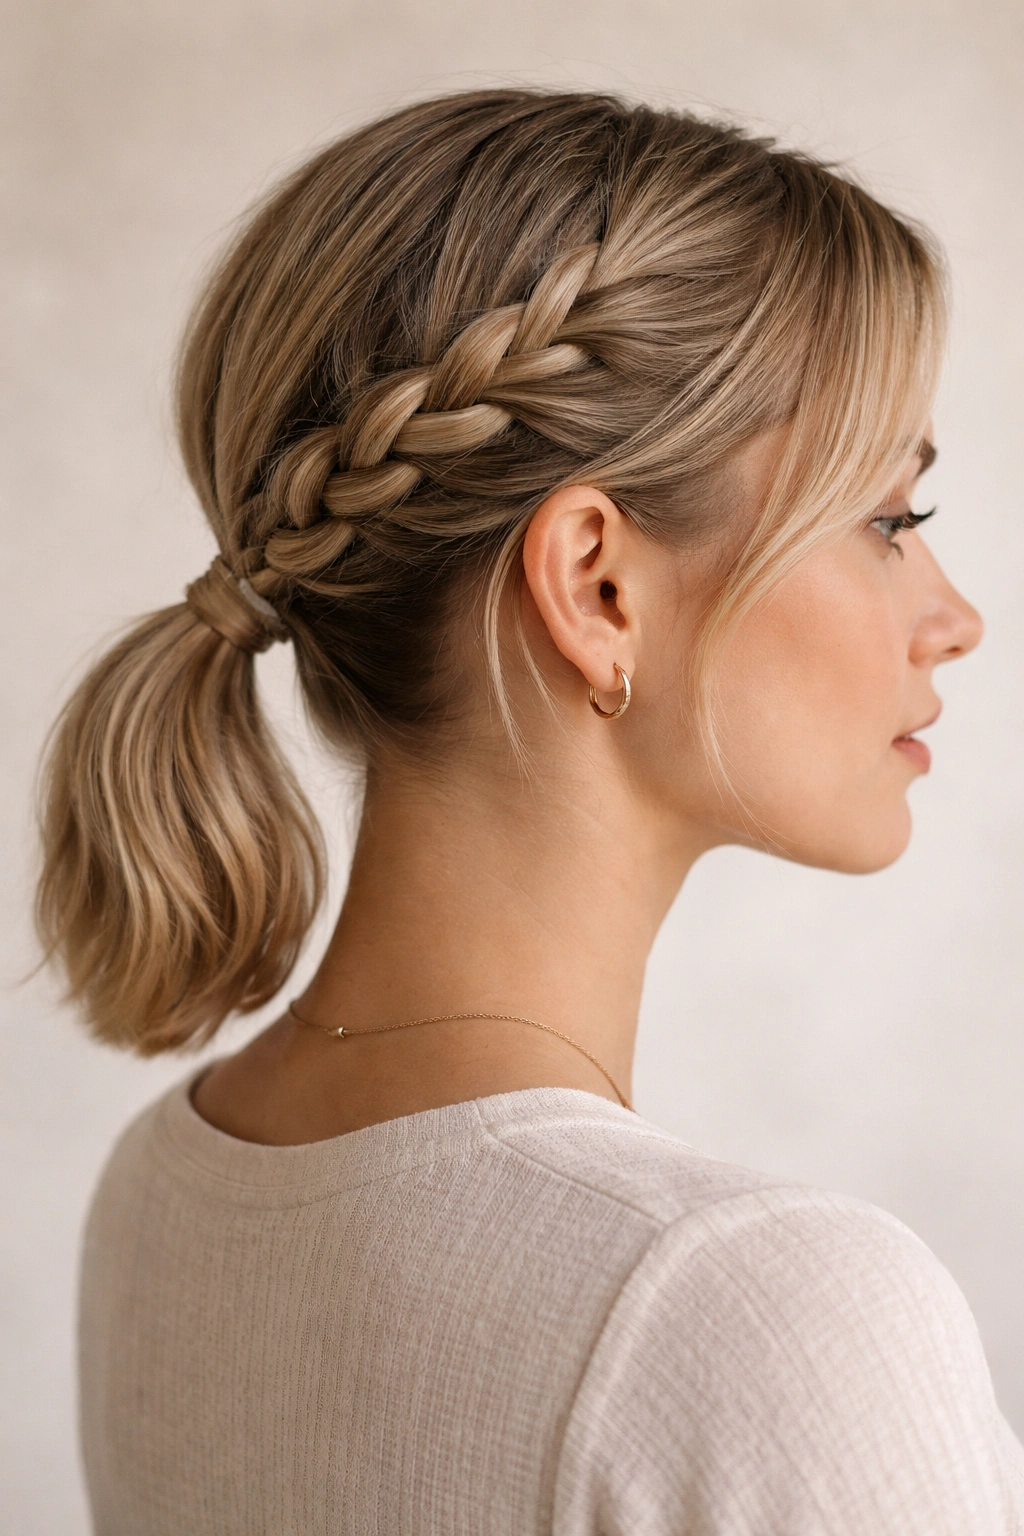
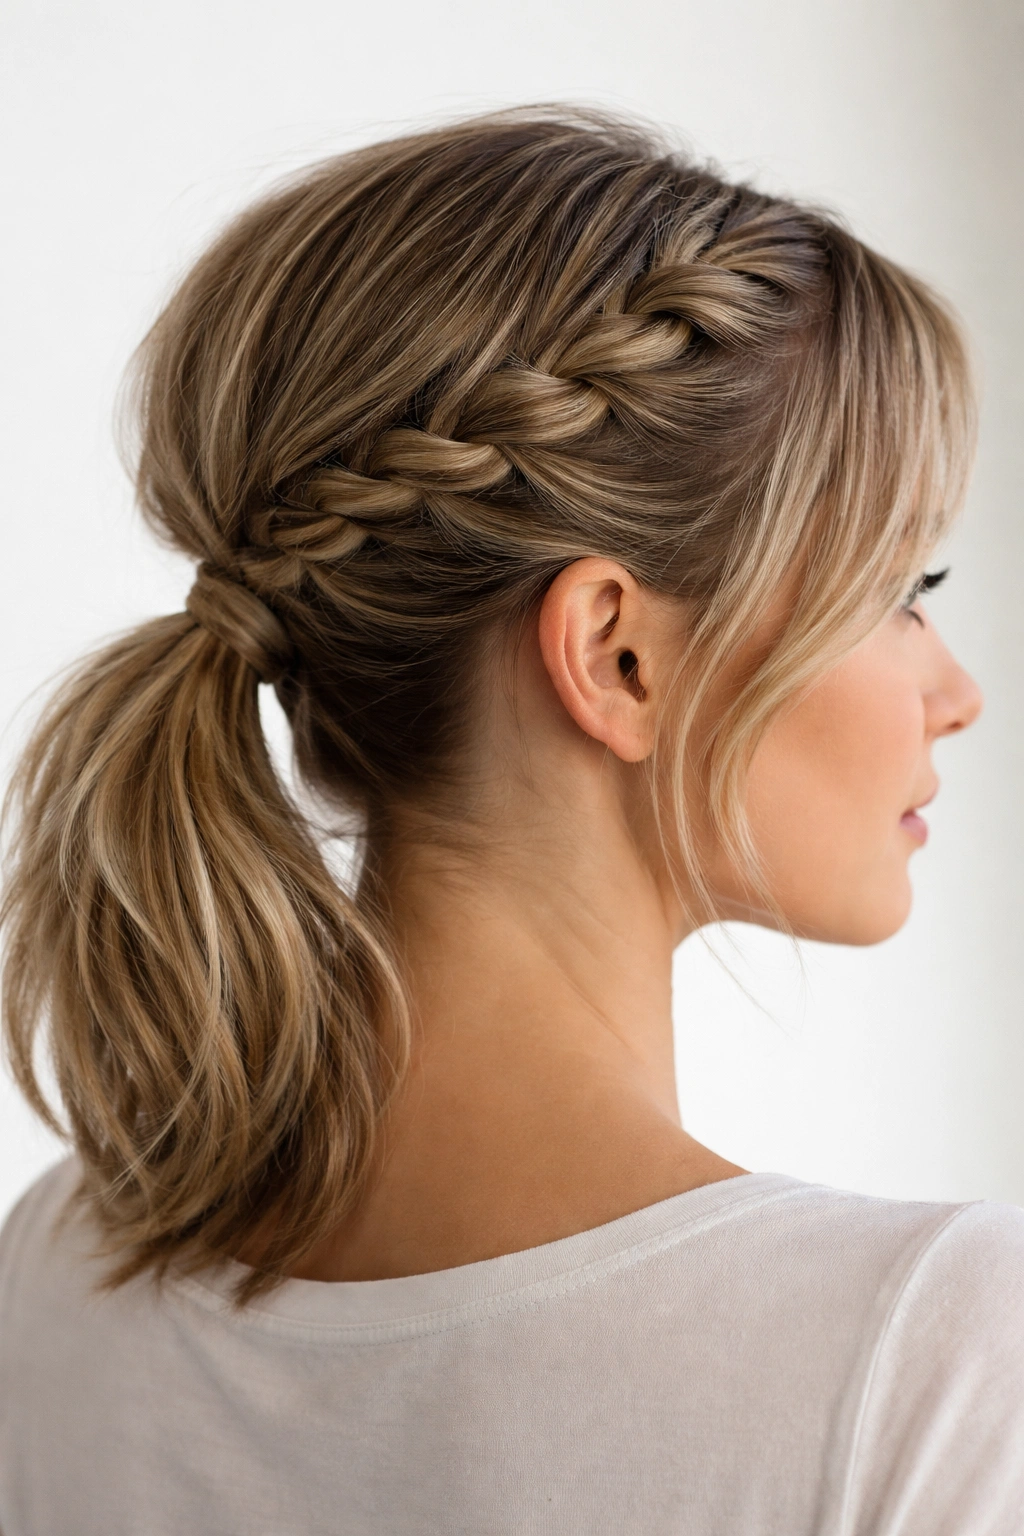
This is the foundation for understanding braided ponytails on short hair—a traditional three-strand braid that runs from one side of your head straight into a low ponytail at the nape of your neck. The braid starts at your temple and wraps around, making the entire style feel intentional and polished rather than a simple ponytail. Since short hair doesn’t have the weight of longer strands, the braid stays exactly where you’ve placed it without gradually slipping down throughout the day.
Why It Works for Short Hair
The three-strand braid is compact and elegant on short hair, which means you see the entire intricate pattern without it getting lost in length. The braid begins to tighten naturally toward the base of your skull because of how short the hair is, creating a neat, finished appearance that actually looks more refined than the same style on long hair.
How to Achieve It
- Section off hair starting at your right temple, about an inch wide
- Begin a standard three-strand braid (right strand over middle, left strand over middle, repeat) and move the braid diagonally toward your left ear
- As you braid, you can weave in small sections from underneath to make the braid thicker and more textured
- When you reach the nape of your neck, gather all your hair including the braid into a low ponytail
- Secure with a hair tie and pull out a few face-framing pieces for softness
Pro tip: Backcomb the section you’re about to braid for two seconds—this creates just enough grip that the braid holds its shape on short, slippery hair without looking messy.
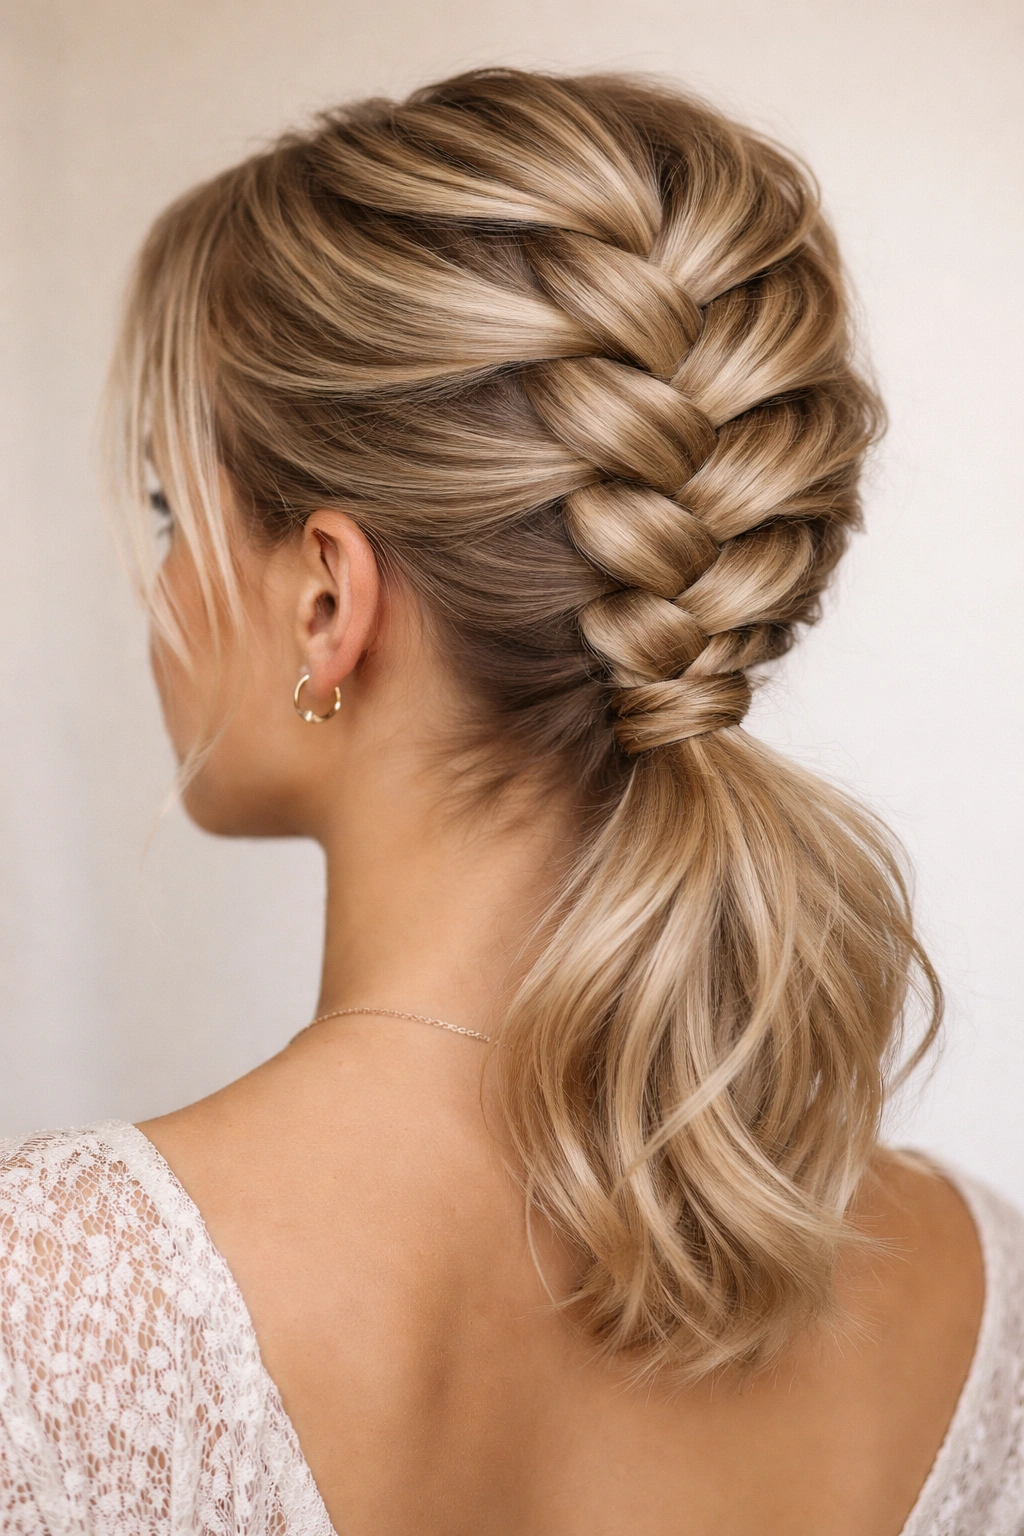
2. The Bubble Braid Ponytail
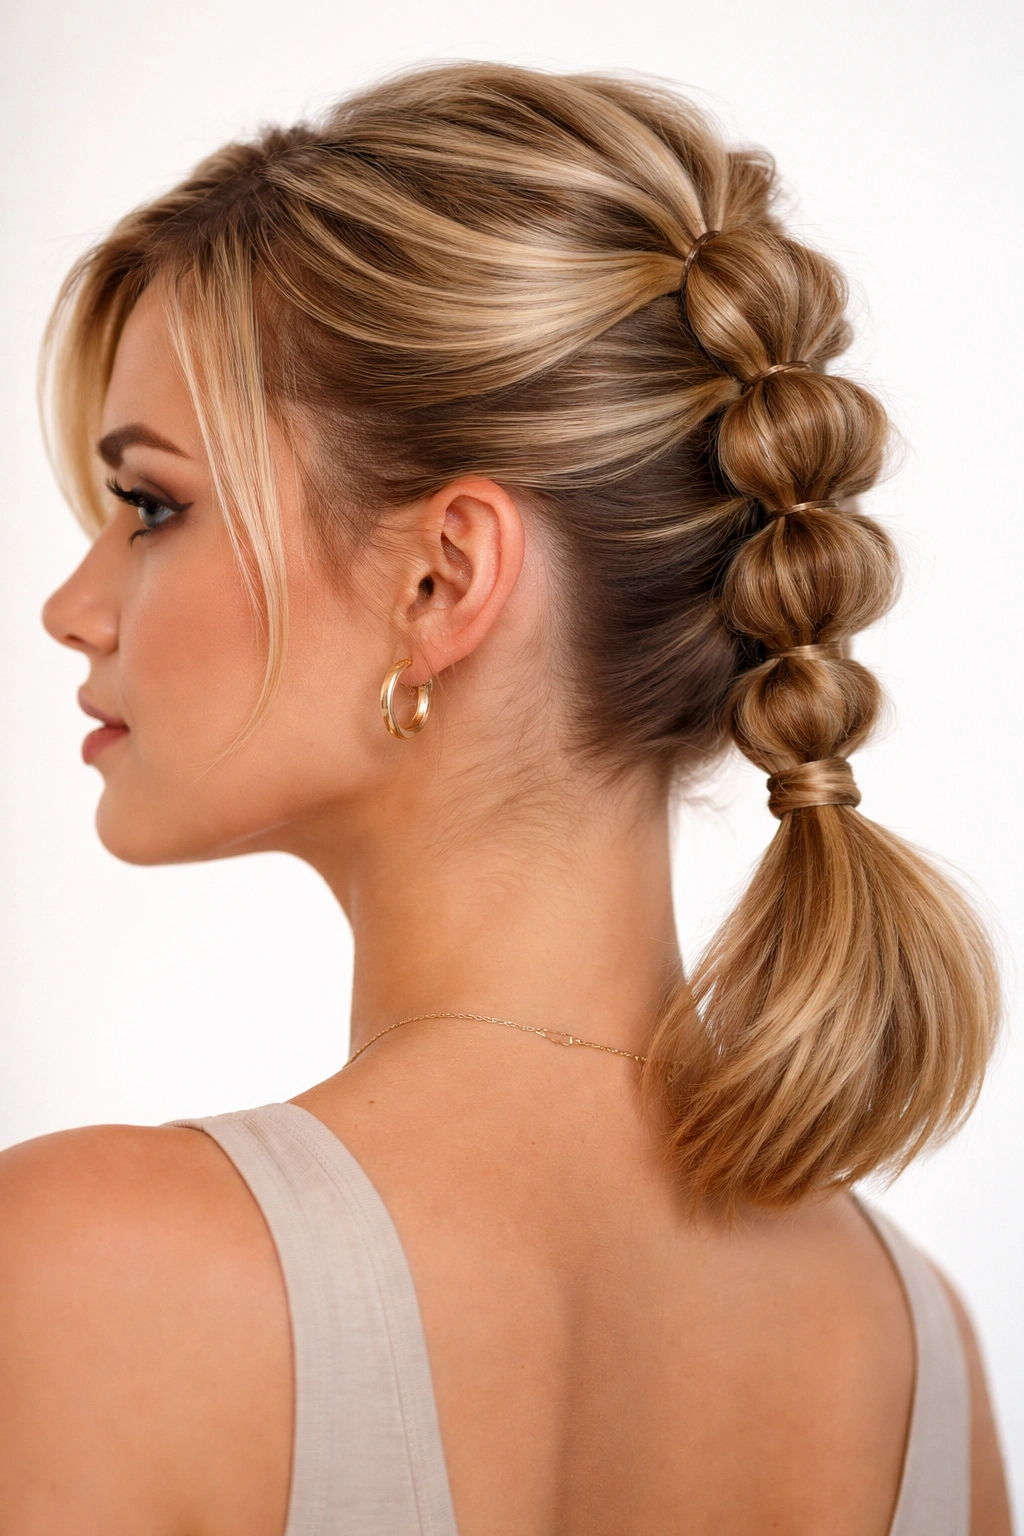
A bubble braid is essentially a braid where you gather sections of hair at intervals, creating puffy bubble-like segments along the length. On short hair, this becomes a compact, sculptural style that looks far more intricate than it actually is. The bubbles stack neatly into your ponytail, creating a 3D effect that photographs beautifully and catches light from every angle.
What Makes This Style Special
Bubble braids are surprisingly forgiving on short hair because each individual bubble is small and defined. The style works on any hair texture—curly hair makes the bubbles look voluminous and textured, while straight hair shows off the clean architectural lines of the style.
Step-by-Step Process
- Create a basic three-strand braid starting at the crown
- After about two inches, pull a small ponytail right below where your braid ends, securing it with a tiny elastic
- The hair above this elastic will puff out slightly—this is one bubble
- Resume braiding below that first elastic
- Repeat the ponytail-then-braid pattern 2-3 more times as you move toward your nape
- Gather everything into your final ponytail
Worth knowing: Use clear elastics if you want the bubbles to be the star; use matching elastics if you prefer the braids themselves to stand out visually.
3. The Twisted Braid Ponytail
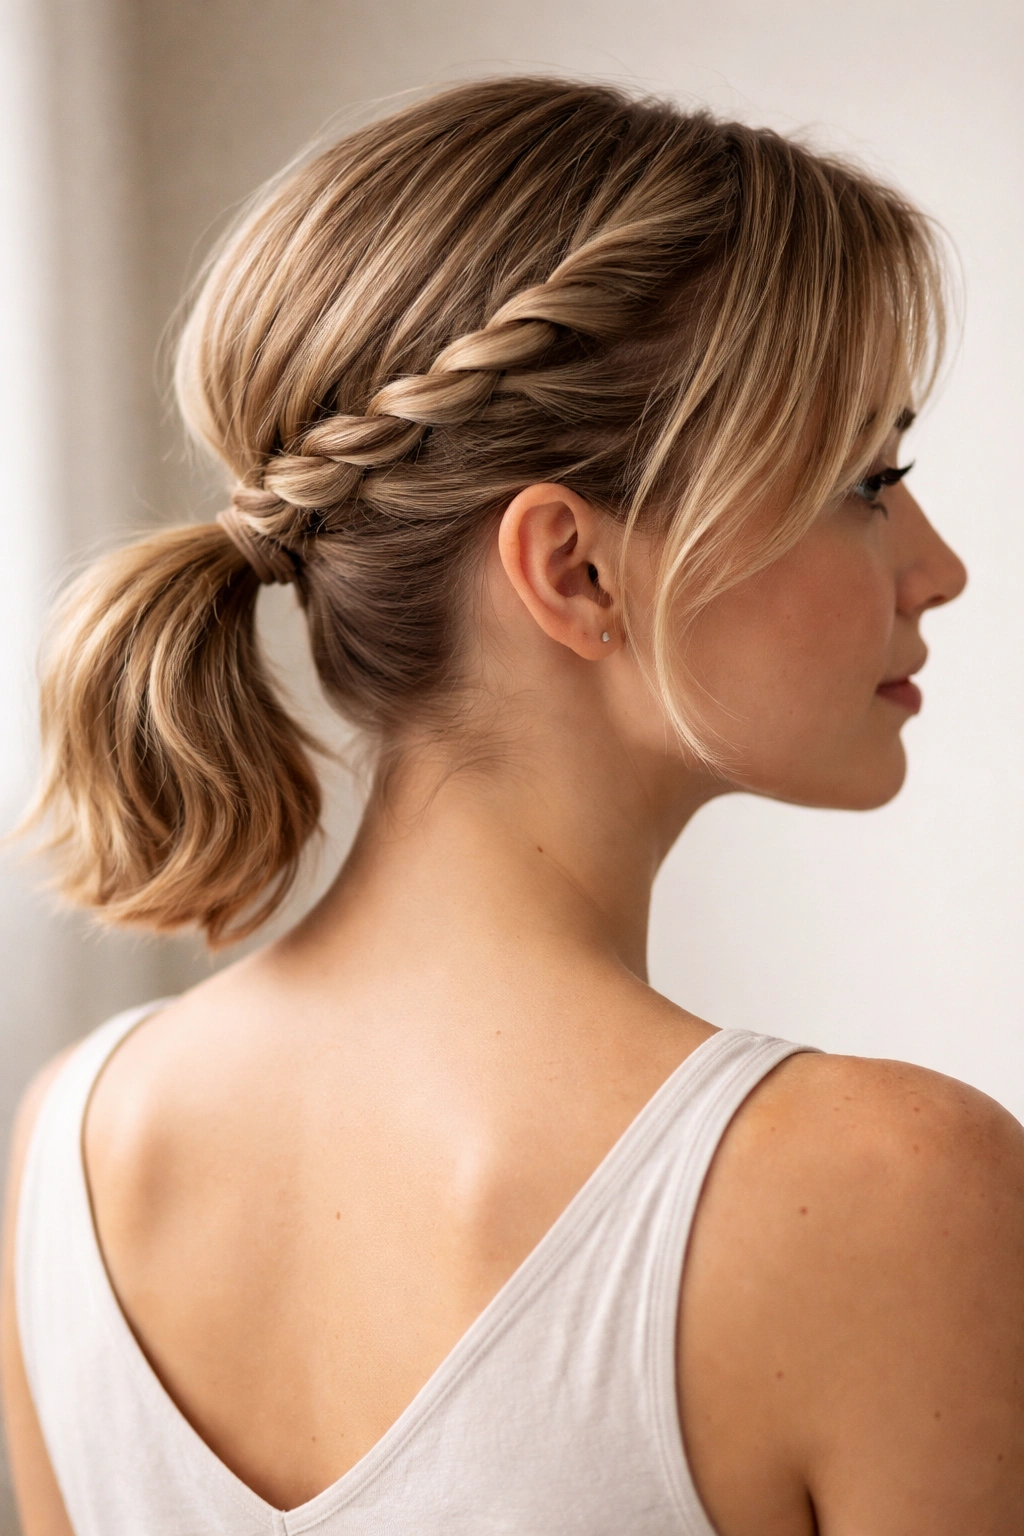
Instead of a traditional three-strand braid, this style uses two sections of hair twisted around each other—it’s simpler to execute than a classic braid, but because of how short the hair is, it looks just as intricate and refined. The twisted effect creates a rope-like texture that’s softer and more romantic than a traditional braid, making it perfect when you want polish without severity.
Why Twisted Braids Suit Short Hair
Twists can feel fragile on long hair because they unravel more easily, but on short hair they lock into place naturally. The tension created by your scalp and the shorter length keeps the twist intact without requiring you to braid tightly.
How to Create the Twist
- Section off a piece of hair at your temple about an inch wide
- Divide it into two equal subsections
- Twist one section clockwise while twisting the other section counterclockwise around it
- As you move toward your ear, pick up small sections and incorporate them into your twist
- Continue until you reach the nape, then secure everything into your ponytail
- Gently pull on the outer edges of the twist to widen and texturize it
Insider note: If your hair is very straight and slippery, twist a bit more tightly than feels natural—it’ll relax into the perfect texture within an hour.
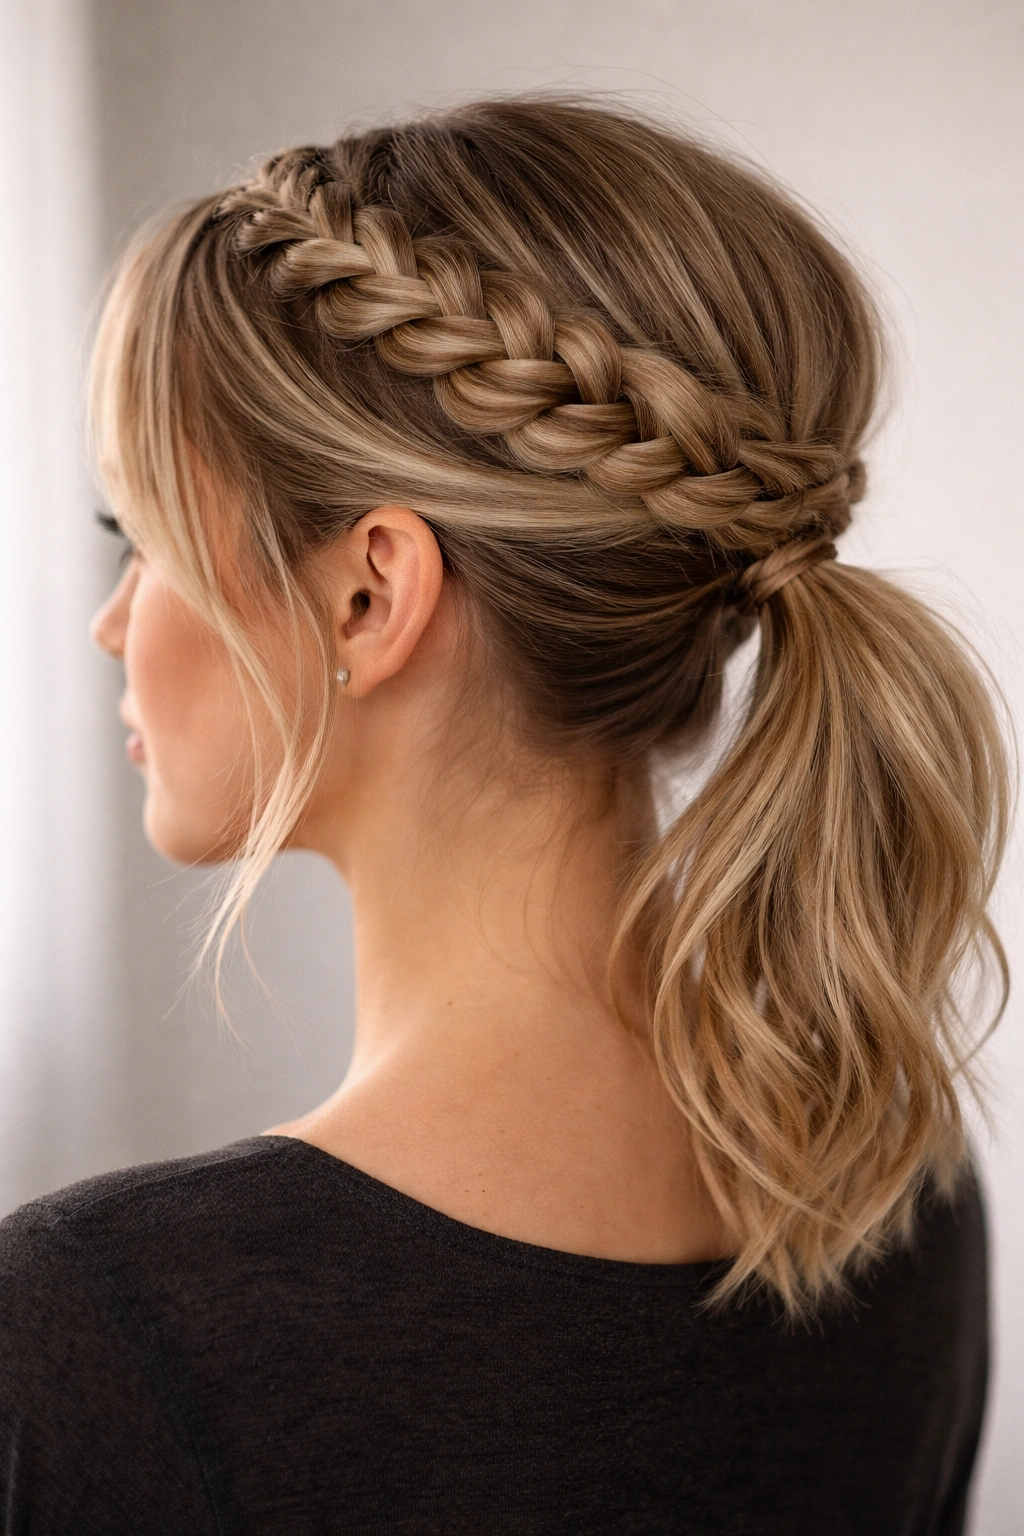
4. The Dutch Braid Ponytail
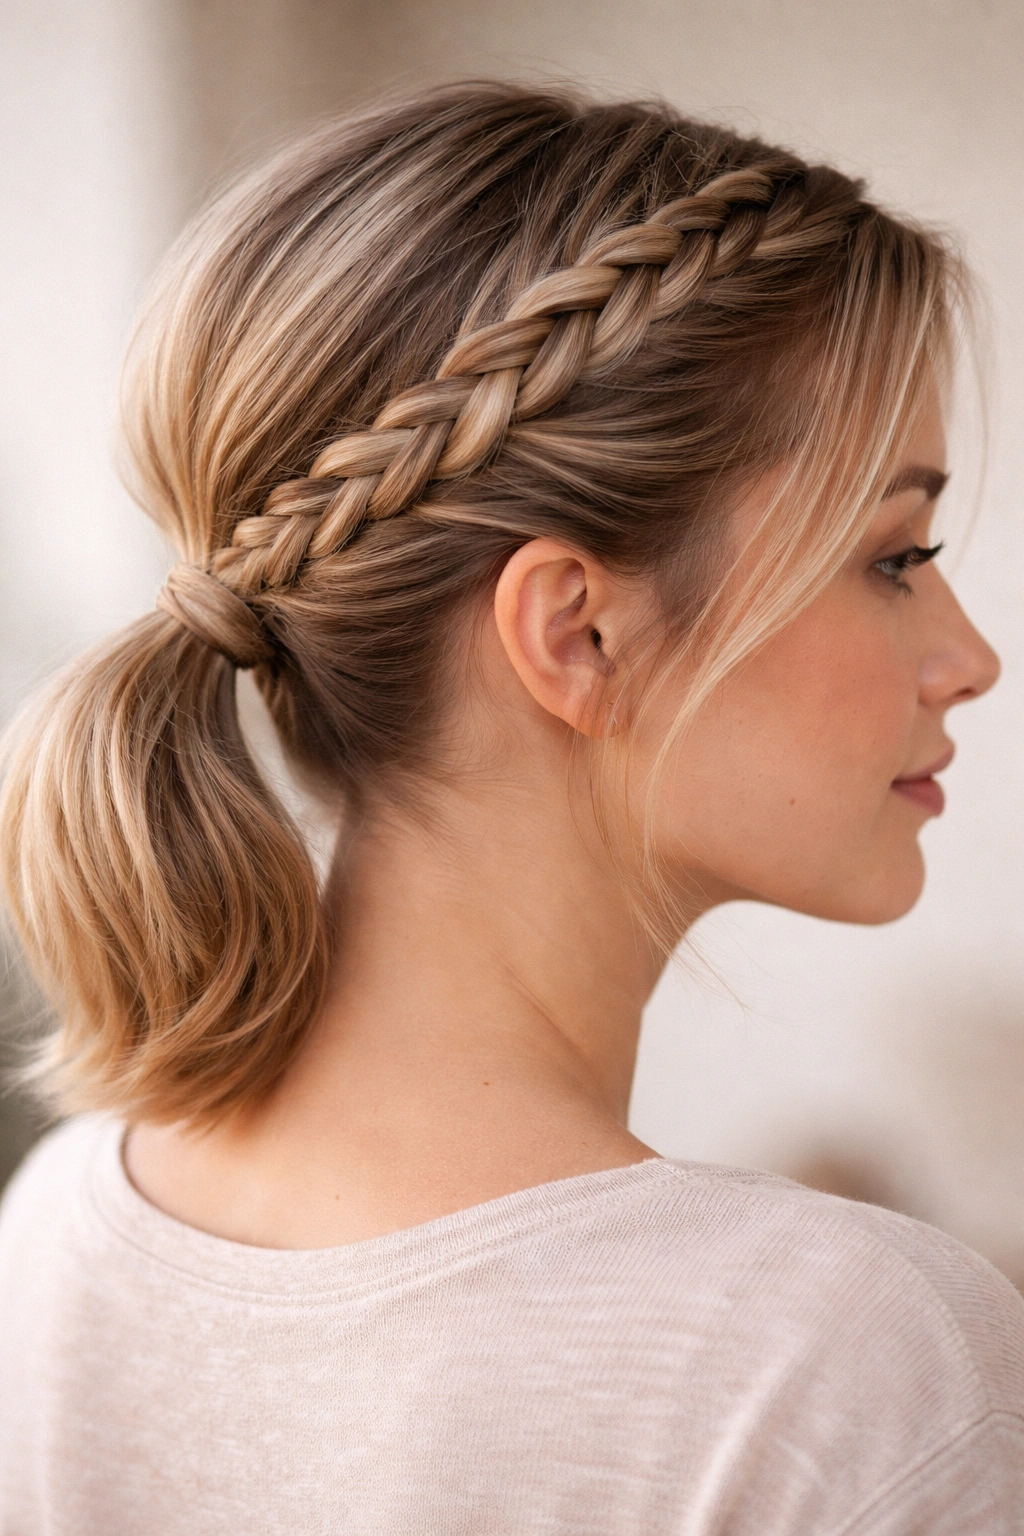
A Dutch braid is an inside-out version of a traditional braid, where you cross strands under instead of over. This creates a braid that sits on top of your head and looks thicker and more prominent than a regular braid. On short hair, a Dutch braid ponytail feels like a crown because the dimension is visible from every angle, and the braided texture stands out against your head rather than blending into your hair.
The Visual Impact
Dutch braids have an almost 3D quality that photographs incredibly well and draws eyes to your face. On short hair, the braid is compact enough that it looks sophisticated rather than athletic or utilitarian.
Execution Details
- Begin at your crown with three strands of hair
- Cross the right strand under the middle strand (instead of over)
- Cross the left strand under the middle strand
- As you continue, pick up small sections and incorporate them while maintaining the under-cross pattern
- Braid all the way to your nape or until you’ve incorporated most of your hair
- Secure the remaining hair and your completed braid into a low ponytail
Pro tip: Dutch braids show every imperfection in your parting, so use a rattail comb to create a clean, straight line as your starting point.
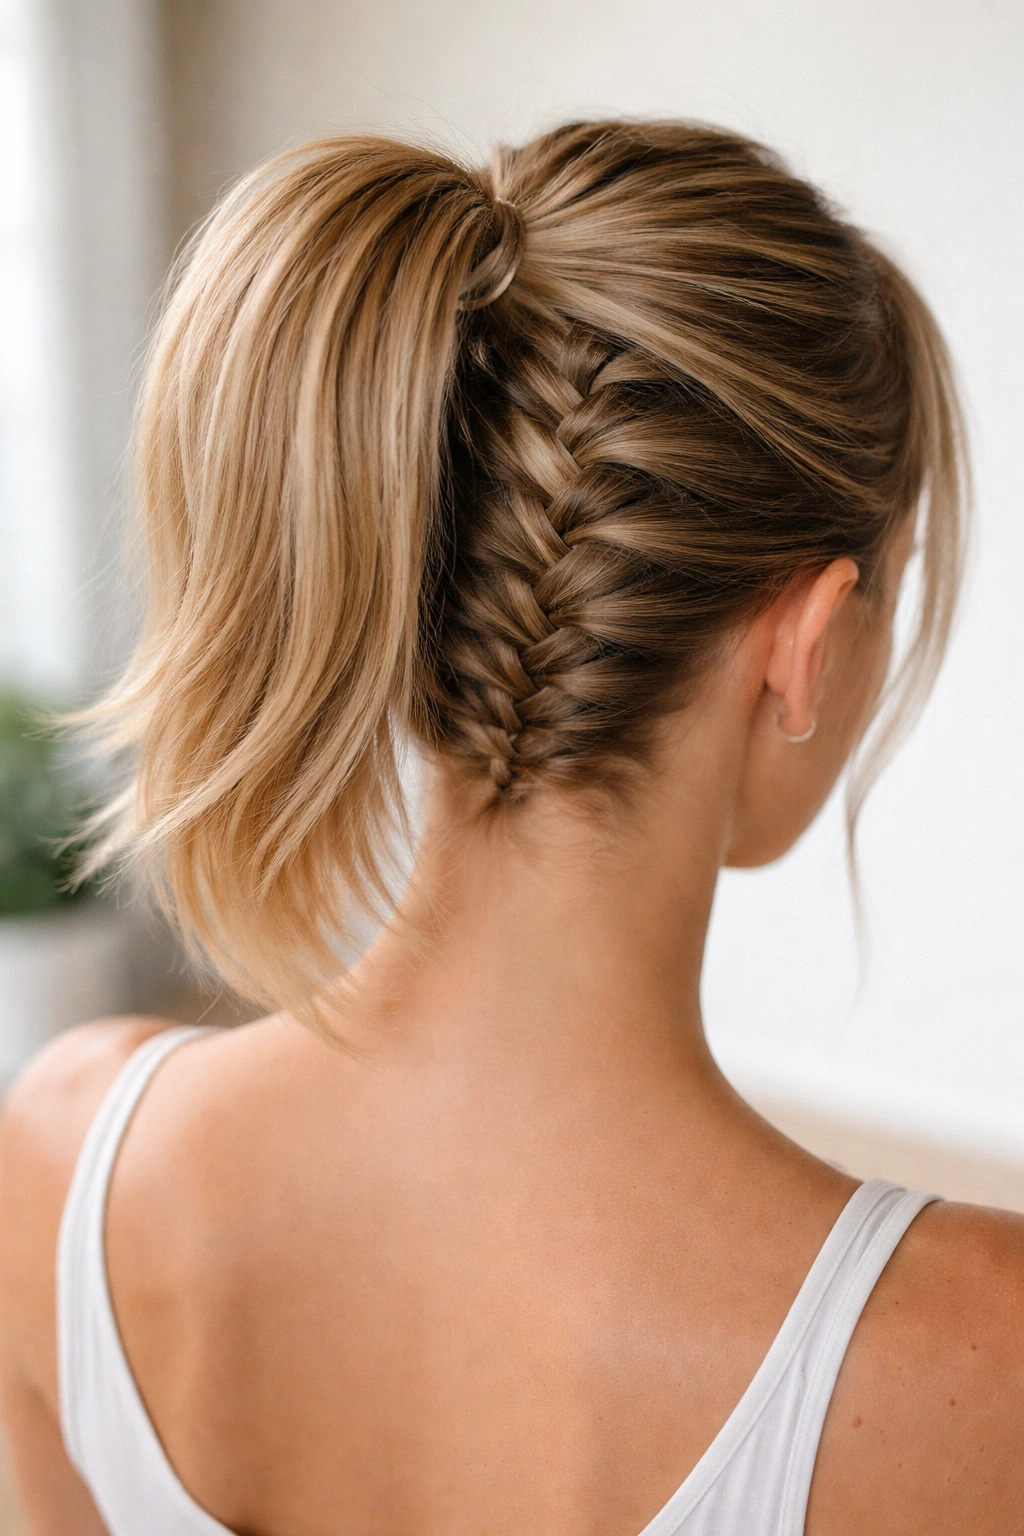
5. The Fishtail Braid Ponytail

A fishtail braid uses four sections of hair instead of three, creating a delicate, intricate-looking pattern that’s narrower and more feminine than a traditional braid. The fishtail pattern creates a textured, almost woven appearance that’s mesmerizing. On short hair, a fishtail braid ponytail is surprisingly doable and looks like you spent far more time on it than you actually did.
Why Fishtails Work on Short Hair
Fishtail braids appear more intricate than they are, which makes them perfect when you want a wow factor without spending hours styling. The narrower width of a fishtail braid is proportional to short hair, so the style feels balanced rather than overdone.
Creating a Fishtail Braid
- Divide a section of hair into two equal parts
- Take a tiny section from the outside of the right half and cross it over to the left side
- Take a tiny section from the outside of the left half and cross it over to the right side
- Repeat this over-under pattern, taking the same size sections each time
- As you move toward your nape, you can incorporate additional hair from your scalp if you want a fuller braid
- Secure into your ponytail and gently pull the braid to widen and texturize the pattern
Worth knowing: Fishtails are more forgiving of uneven sections than traditional braids, so they’re an excellent style for building confidence with braiding.
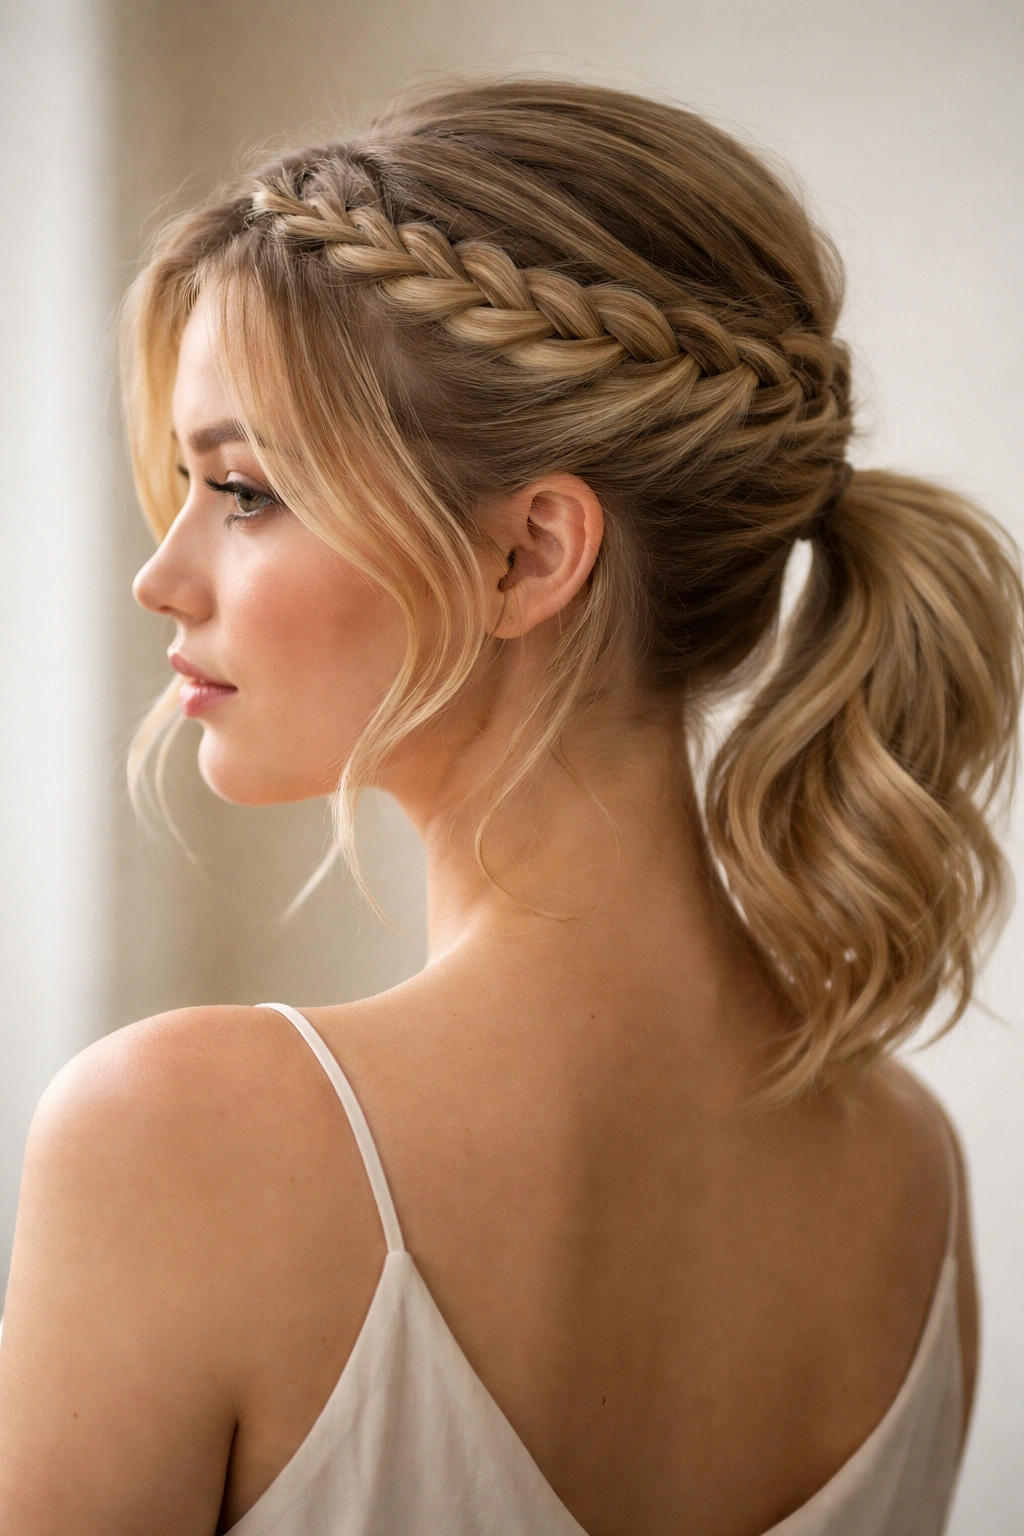
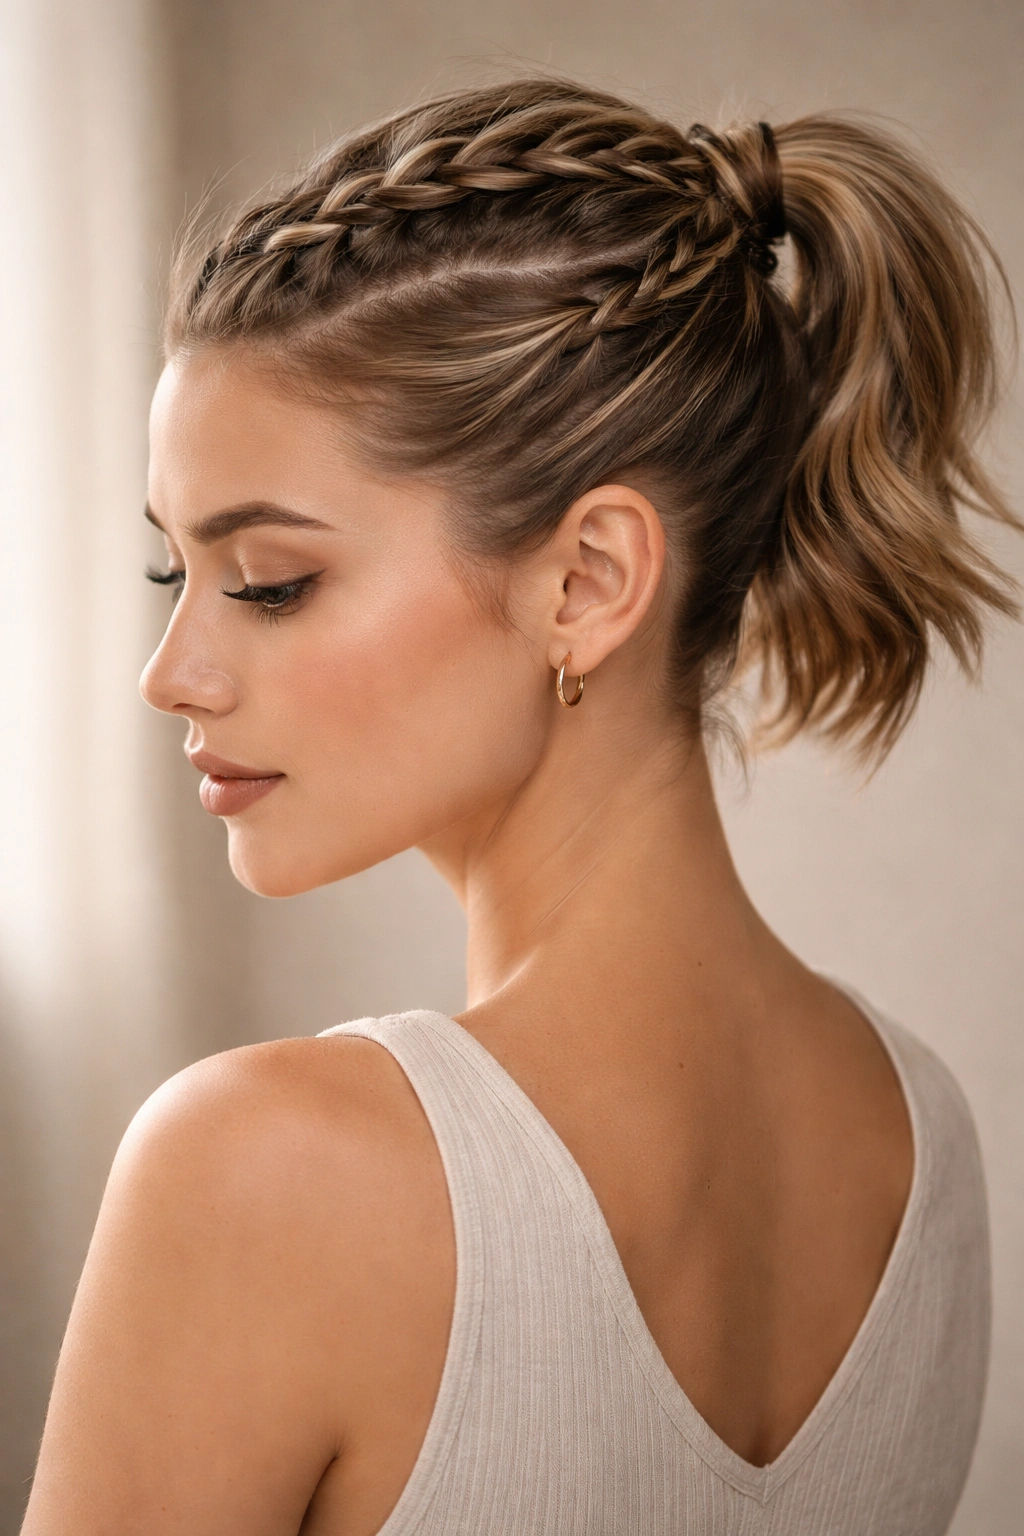
6. The Side-Swept Crown Braid Ponytail
This style starts at one ear and sweeps across the back of your head in a diagonal line, creating an asymmetrical look that’s both flattering and modern. The braid wraps partially around your head before transitioning into a ponytail, which means you’re showcasing braid work from multiple angles. It’s particularly flattering if you have a longer face shape or want to draw attention to one side.
The Asymmetrical Appeal
Asymmetrical styles instantly update your look and add movement and visual interest. On short hair, a side-swept braid feels like a deliberate style choice rather than just managing hair you couldn’t put up any other way.
Step-by-Step
- Start at your right ear with a small section of hair
- Create a basic three-strand or Dutch braid, moving diagonally toward your left ear
- Weave in small sections as you move across the back of your head
- When you reach your left ear, gather all your hair into a ponytail positioned slightly off-center
- The braid will wrap around and frame one side of your face
Pro tip: Use a light hairspray as you braid to keep flyaways from escaping from underneath the braid—this keeps the style looking clean and intentional.
7. The Double Braid Ponytail
This style uses two braids instead of one, creating more volume and textural interest than a single braid. Each braid starts at a different point on your head and curves toward the center back, where both braids converge into a single ponytail. The effect is fuller and more dramatic than any single braid, yet still manageable on short hair where you’re not fighting excessive weight or length.
Why Two Braids Make an Impact
Double braids make short hair look thicker and more voluminous because you’re braiding more of your total hair volume. The symmetry is visually satisfying, and the style reads as more formal and put-together than a single braid.
How to Create Two Braids
- Part your hair down the center from your forehead to the crown
- Create one three-strand or Dutch braid starting at your right temple, moving toward your left ear
- Create a second braid starting at your left temple, moving toward your right ear
- Both braids should curve gently as they move toward the back center of your head
- When both braids meet at the nape, secure all your hair including both braids into a single low ponytail
- Pull out the braids slightly to add texture and volume
Worth knowing: If you find two traditional braids feels too symmetrical or schoolgirl-ish, make one a traditional braid and one a twisted section for visual contrast.
8. The Halo Braid Ponytail Hybrid
A halo braid wraps partially around your head like a crown, and in this variation, the braid transitions into a ponytail at the back. It’s less extreme than a full halo braid (which wraps completely around), making it more practical for short hair and easier to execute. The effect is ethereal and romantic, especially if you use a gentle texture or waves in your hair.
The Romantic Factor
Halo braids have an inherent softness that makes them feel special occasion-appropriate, yet the ponytail element keeps them practical enough for everyday wear. This style is particularly stunning on wavy or curly short hair where the texture does half the work for you.
Execution Steps
- Start a three-strand braid at your right temple
- Move the braid horizontally across your head toward your left ear, weaving in small sections as you go
- Stop when you reach your left ear or slightly past it
- Gather all your hair, including the halo braid, into a low-center ponytail
- Leave a few face-framing pieces loose for softness
Pro tip: This style works beautifully on second-day hair when you have a bit of natural texture already built in—you won’t need to add as much texture artificially.
9. The Pancaked Braid Ponytail
Pancaking is a technique where you gently pull sections of your braid outward and flatten them, creating a thicker, more voluminous-looking braid. On short hair, this transforms even a thin, delicate braid into a statement piece. The pancaked braid catches light differently at every angle, creating movement and dimension that photographs beautifully.
The Texture and Dimension
Pancaking makes any braid look twice as thick as it actually is, which is ideal when you’re working with fine or thinner hair. The texture also softens the look of more structured braids like Dutch braids or fishtail braids.
How to Pancake Your Braid
- Create your preferred braid style (Dutch, three-strand, fishtail—any works)
- Starting from the bottom of the braid, gently pull on the outer loops of the braid, flattening them outward
- Work your way up the entire braid, being careful not to pull so hard that you distort the pattern
- The braid should now look significantly thicker and fluffier
- Secure into your ponytail and pancake it as well if you’d like extra volume at the base
Worth knowing: Pancaking works best on braids you’ve created while your hair is slightly damp—they hold the flattened shape longer throughout the day.
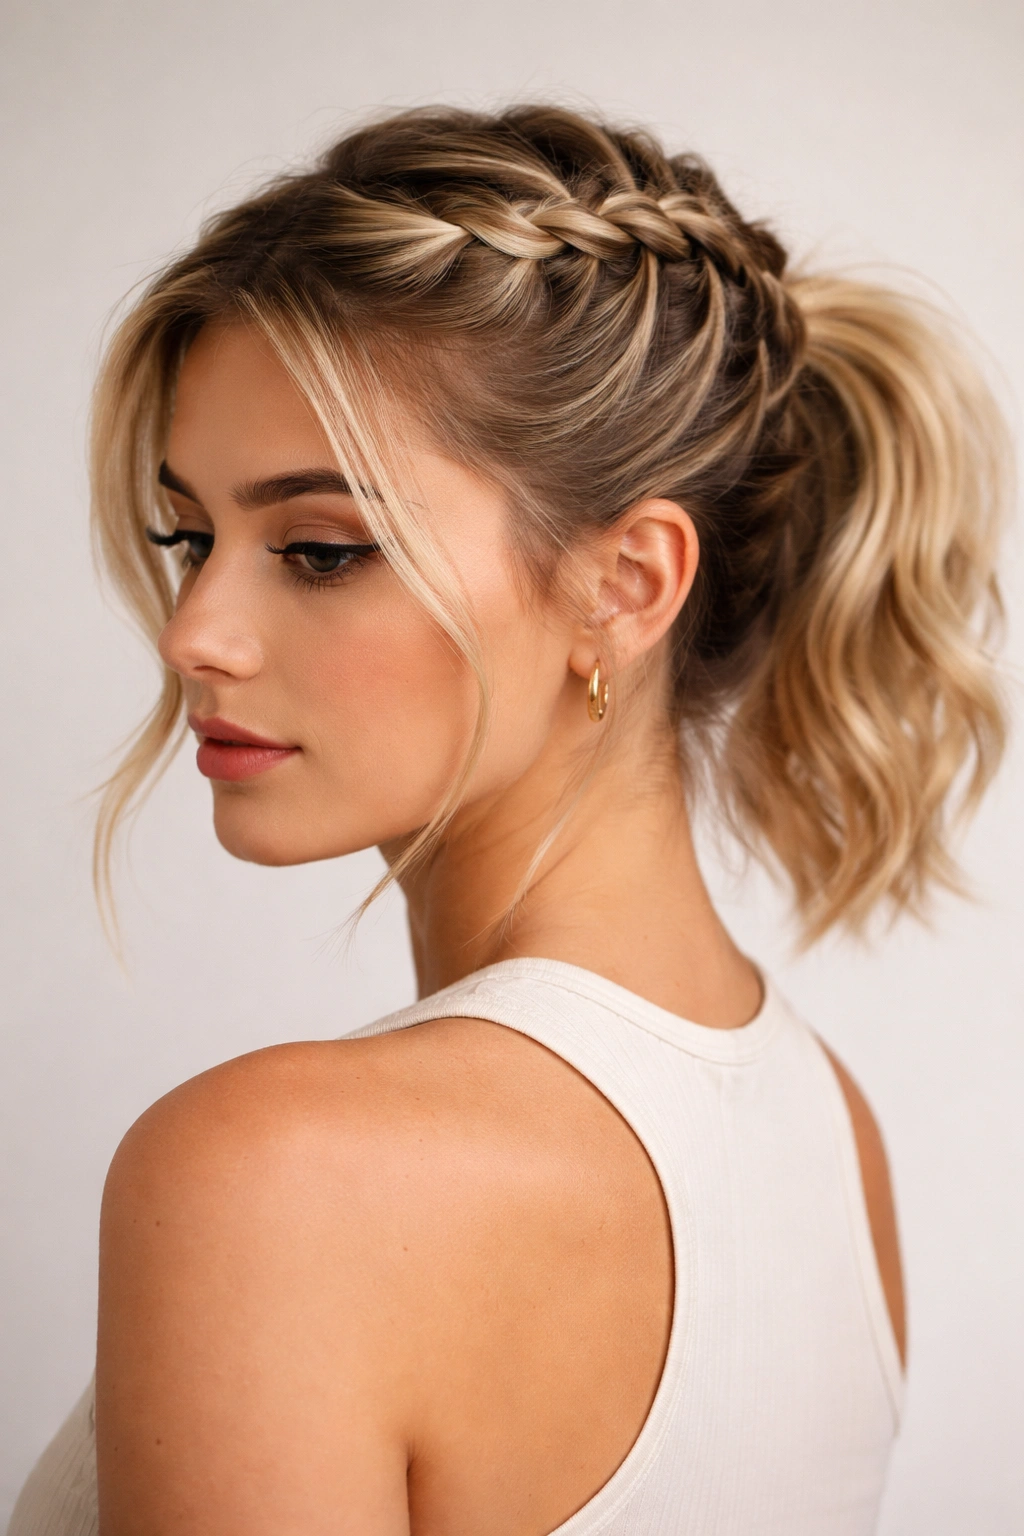
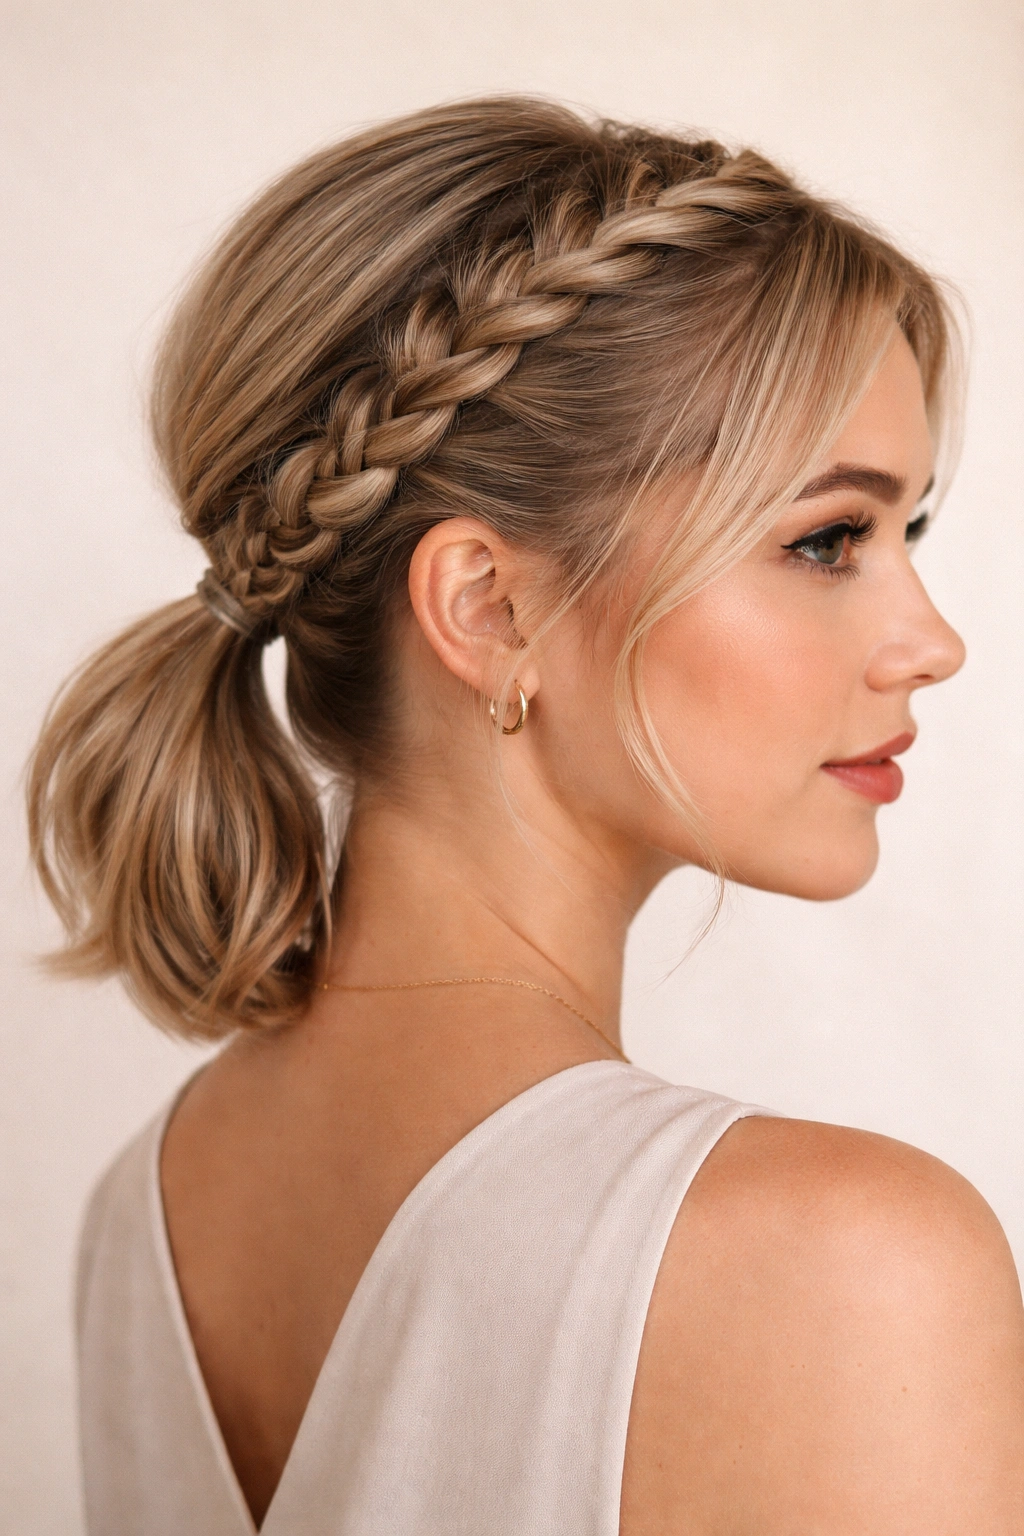
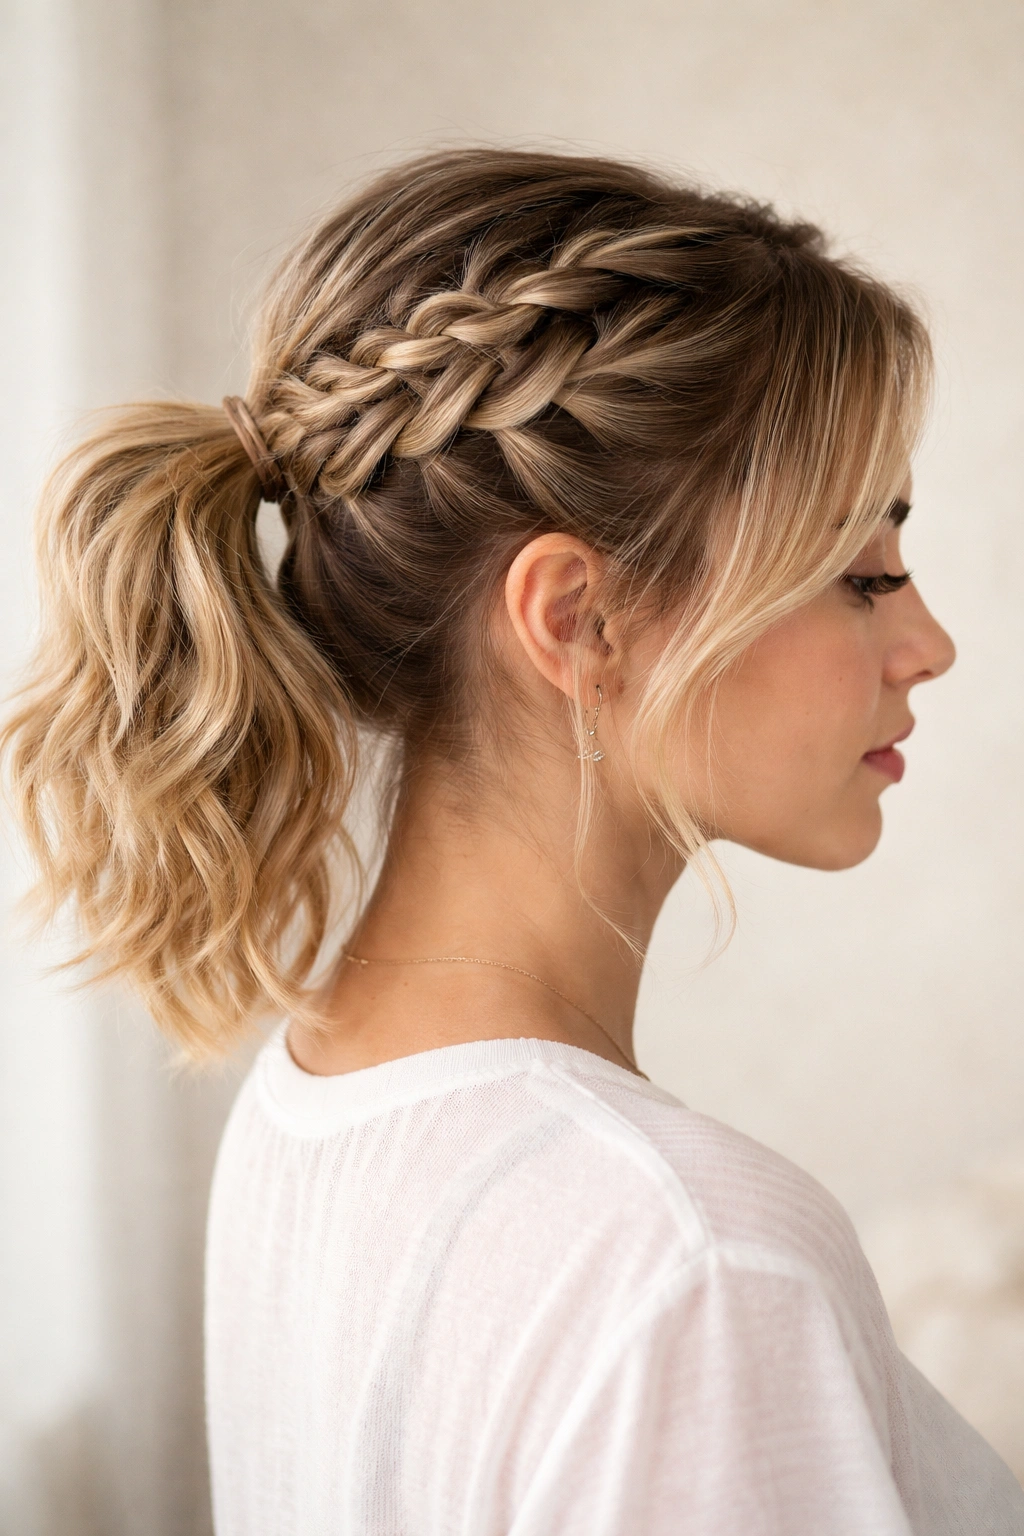
10. The Braided Crown with Low Ponytail
This style creates a braid that forms a partial crown across the top of your head, with the main volume of your hair left down in a ponytail beneath it. It’s the perfect middle ground between a fully braided style and a simple ponytail—you get the detail and romance of a braid with the ease and practicality of a ponytail. On short hair, the crown braid sits beautifully proportioned to your head rather than looking overwhelming.
The Practical Romance
This style offers the visual interest of an updo with the simplicity of wearing your hair mostly down. It’s ideal when you want to feel put-together without committing to a full braid or complicated updo.
Creating the Look
- Start a braid at your right temple using three strands
- Move the braid across the crown toward your left ear, weaving in small sections as you go
- When you reach your left ear, stop braiding and secure that braid section into your hair with bobby pins, letting it sit against your head like a crown
- Gather all your hair below the braid into a low ponytail at the nape of your neck
- Pull out a few face-framing pieces for softness and movement
Insider note: Use bobby pins that match your hair color and tuck them underneath the braid—they’ll be completely invisible while the braid stays locked in place.
11. The Reverse Braid to Ponytail
This style starts with a traditional or Dutch braid at the nape of your neck and braids upward toward your crown, then gathers all your hair into a ponytail at the top of your head. It’s an unusual variation that catches people’s attention because it’s the opposite of what they expect. The reverse direction creates visual interest and a unique silhouette, especially on short hair where every angle of the style is visible.
Why Reverse Works
Reverse braids are slightly more challenging to execute but the effort is rewarded with a genuinely unusual style that stands out. The braid becomes a central focal point running down the back of your head toward your crown rather than away from it.
How to Execute
- Flip your head forward so you’re looking at the ground
- Start a three-strand braid at the nape of your neck, using three sections of hair from that area
- As you braid, move upward toward your crown, weaving in small sections of hair as you go
- When you reach your crown, flip your head back to normal
- Gather all your hair including the completed braid into a high ponytail at your crown
- Flip back down briefly to secure and adjust if needed
Pro tip: This style is easier to execute if you have someone help you, or use a mirror at an angle that lets you see the back of your head while you braid.
12. The Textured Waterfall Braid Ponytail
A waterfall braid is a three-strand braid with a twist—as you braid, you occasionally let one strand drop and replace it with a new section from above, creating a cascade or waterfall effect. On short hair, this creates a delicate, intricate-looking pattern that’s perfect for special occasions. The dropped strands create a softer, more romantic aesthetic than a traditional braid.
The Romantic and Intricate Look
Waterfall braids are often thought to require long hair, but on short hair they’re actually easier to execute and look just as stunning. The cascade of dropped sections creates movement and dimension, and the overall effect is far more complex than the technique actually is.
Creating a Waterfall Braid
- Start a three-strand braid at your temple with three sections of hair
- Complete one full braid cycle (right over middle, left over middle)
- On the next cycle, instead of crossing the right strand over, let it drop and pick up a new section of hair from above to replace it
- The dropped section falls freely, creating part of the waterfall
- Continue across toward your ear, dropping a strand and picking up a new one with each cycle
- When you’ve created the waterfall effect to your satisfaction, secure everything into a ponytail
- The dropped strands will frame the side of your face beautifully
Worth knowing: Waterfall braids show best when you have some texture or waves in your hair—add heat-free waves before styling if you’re working with stick-straight hair.
Final Thoughts
Braided ponytails transform short hair into something with dimension, personality, and polish that belies how quickly you can create them. The key is understanding that short hair actually makes braids show better because each strand has more definition and the entire style is visible from every angle. Once you master one or two basic techniques—whether that’s a three-strand braid, a Dutch braid, or a twist—you can adapt them endlessly into different styles that feel fresh and intentional.
The beauty of these twelve styles is that they span the spectrum from classic and professional to romantic and playful, so you can choose based on your mood, the occasion, or simply what your hair is cooperating with on any given day. Most of them take under ten minutes once your hands know the pattern, and they all benefit from the same foundational skills—clean sections, consistent tension, and the willingness to pancake and adjust once you’ve finished. Short hair isn’t a limitation for braided ponytails; it’s actually the ideal length to make them look effortless, intricate, and undeniably polished.