If you’ve ever stood in front of the mirror wondering how to create that effortlessly polished look without spending an hour at the salon, you’re already thinking about sleek ponytail buns. There’s something genuinely transformative about a well-executed bun hairstyle—it instantly lifts your appearance, keeps your hair off your face, and projects a sense of put-together confidence that works whether you’re heading to the office, a social event, or just running errands.
The beauty of ponytail buns is that they’re endlessly adaptable. Whether your hair is straight, wavy, or textured, thick or fine, there’s a sleek bun style that’ll work with your natural texture and lifestyle. What separates a mediocre bun from one that actually looks polished is understanding the specific technique, the right products, and the subtle styling tricks that make the difference. A truly sleek bun doesn’t happen by accident—it’s the result of knowing exactly how to control your hair, where to position the base, and what finish will actually hold all day.
The best part? Most of these styles take between five and fifteen minutes once you understand the method. You don’t need expensive tools or products, though a few staples like a good smoothing serum, fine-tooth comb, and quality elastics will absolutely elevate your results. These ten sleek ponytail bun styles range from minimalist and corporate-appropriate to slightly more textured and creative, so you’ll have options depending on your mood, your outfit, and what occasion you’re dressing for.
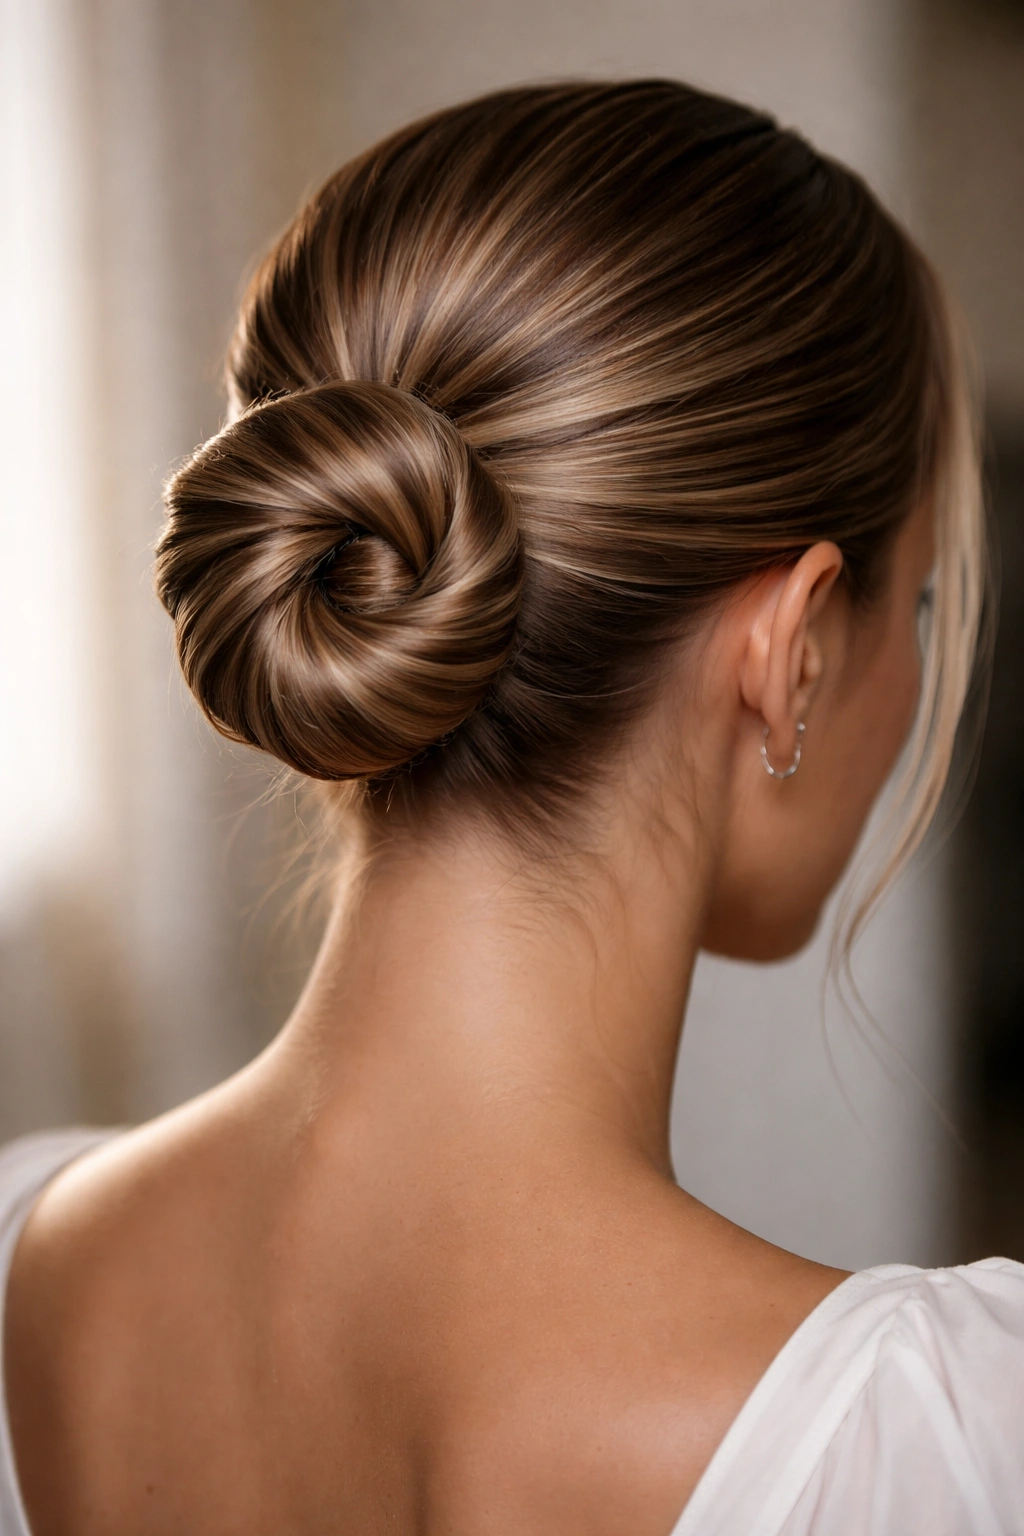
1. The Low Sleek Bun
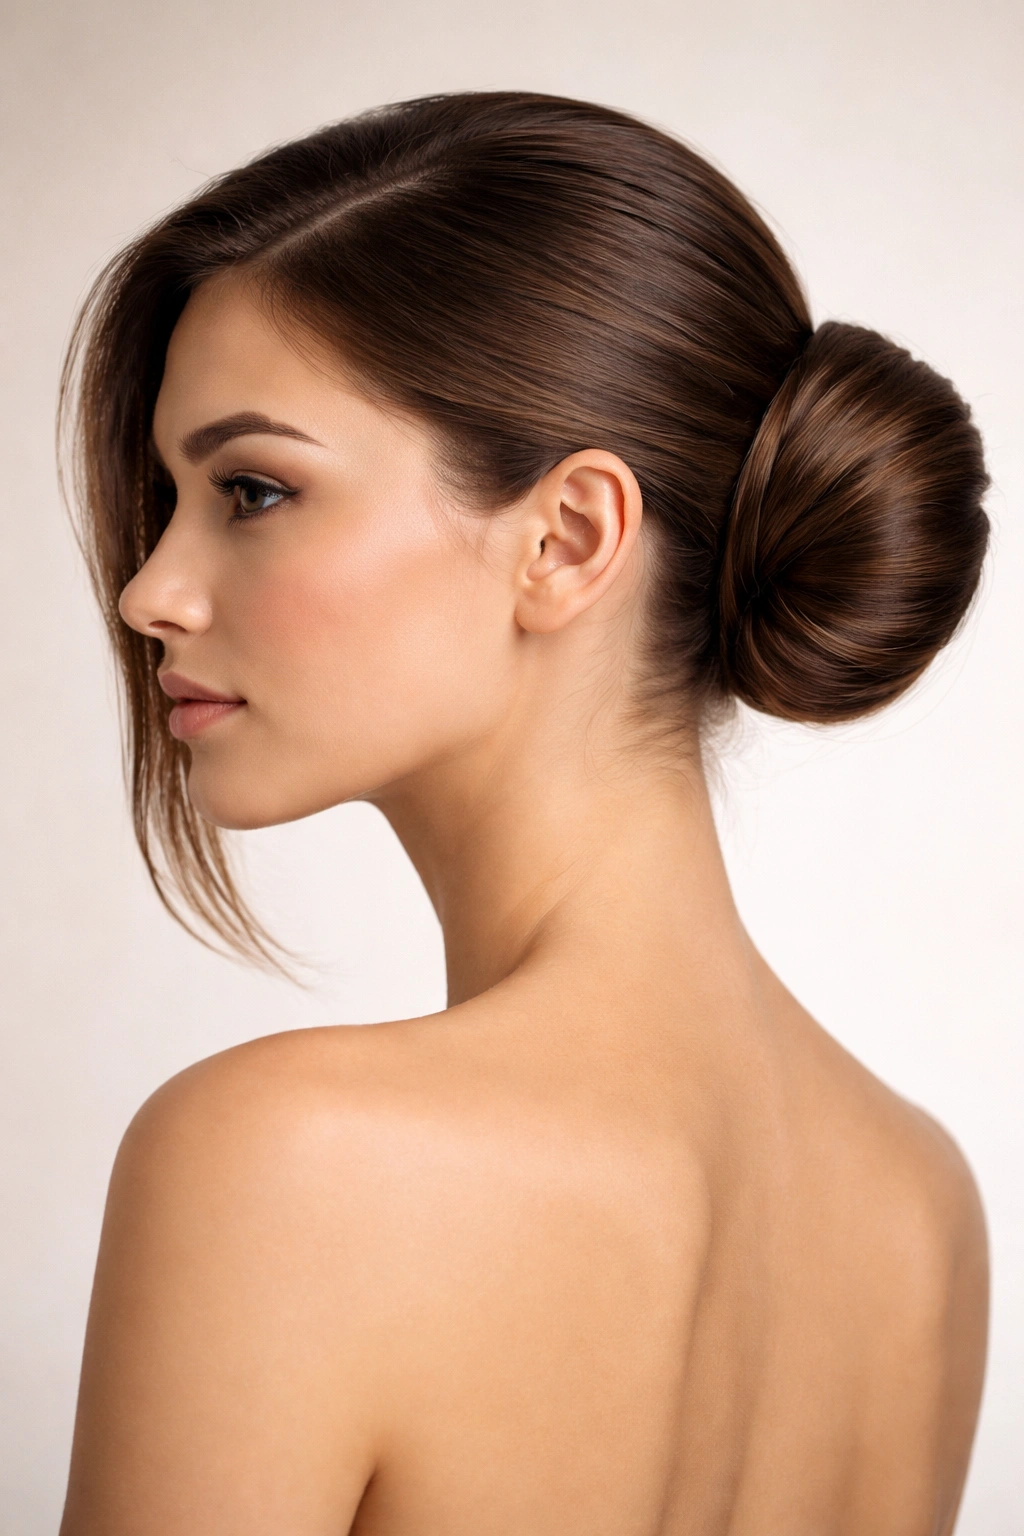
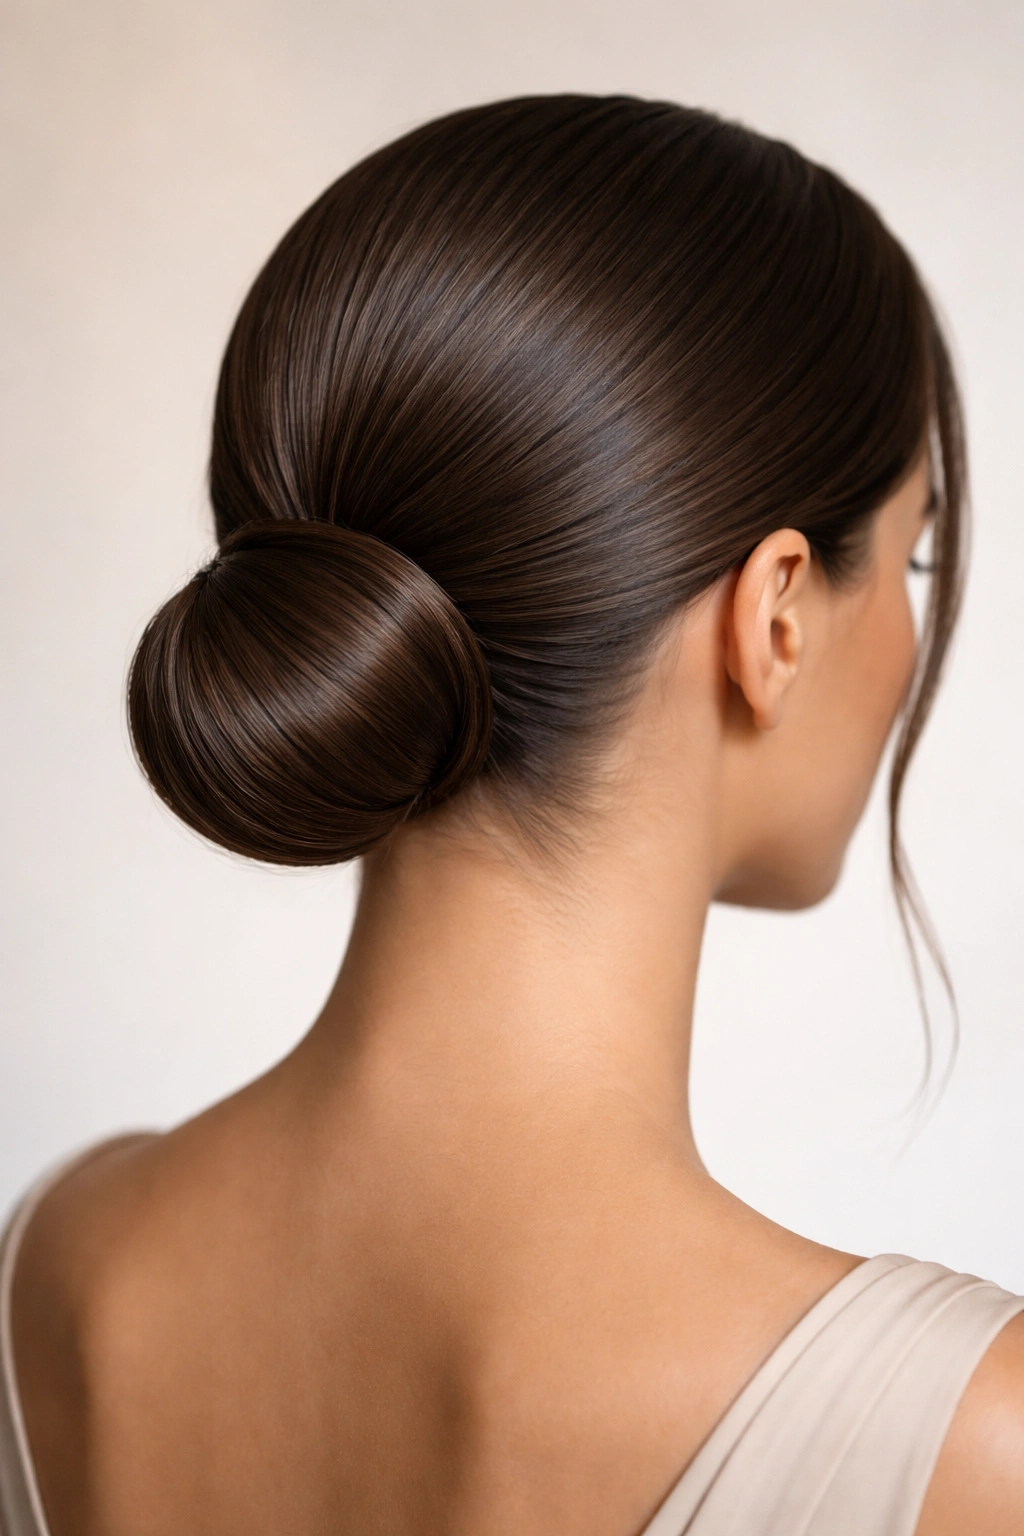
This is the foundation style—the one that works in virtually every situation and flatters nearly every face shape. A low sleek bun sits at the nape of your neck, creating a graceful line down the back of your head while keeping your face completely open and unframed. It’s the hairstyle you see on professionals, at formal events, and whenever someone pulls off that “I woke up like this” polished vibe without actually looking effortless.
Why It’s the Gold Standard
The low position is incredibly flattering because it lengthens the back of your neck and creates vertical proportion that balances most face shapes. Unlike a high bun, which can sometimes emphasize certain facial features, the low placement sits in that sweet spot where it’s universally becoming. It also reads as more formal and refined, which is why you’ll see it at job interviews, gallery openings, and anywhere first impressions matter.
How to Create the Perfect Low Sleek Bun
- Start with clean or second-day hair (texture holds better than freshly washed hair)
- Apply a smoothing serum or lightweight gel to damp hair, focusing on the front layers and crown
- Blow-dry your hair straight or with minimal wave, directing the brush downward to smooth the cuticle
- Create a low ponytail about two inches above the nape of your neck, using a fine-tooth comb to smooth any flyaways
- Take a small section from the ponytail, wrap it around the base, and secure with bobby pins
- Use a fine-mist hairspray to lock everything in place and tame any stray pieces
- Pro tip: Straighten your ponytail hair with a flat iron before wrapping it around the base—this creates an almost liquid-smooth finish that screams polished.
2. The High Polish Bun

A high-positioned bun creates drama and draws attention upward, opening up your face and creating an instant sense of lift. This style sits at the crown or just slightly behind it, which is why it works beautifully for showing off your cheekbones, your neck, and any jewelry you’re wearing. The “high polish” version emphasizes extreme smoothness and shine—nothing wispy, nothing intentionally loose, just immaculate geometry.
What Makes It Stand Out
The height changes your entire silhouette. A high bun makes you look taller, more youthful, and more alert because it literally lifts the focal point of your head upward. It’s the style you’ll see on dancers, athletes, and anyone who needs their hair completely off their face while maintaining maximum visual interest. The polish component means no texture, no undone strands—just clean lines and shine.
Best For Creating This Look
- Hair that’s naturally straight or blow-dried perfectly smooth
- Situations where you want maximum face visibility (presentations, performances, competitions)
- Days when you want your hairstyle to make a statement rather than blend into the background
- Creating the illusion of longer hair (the high placement and tautness create this optical effect)
- Anyone with a longer neck who wants to show it off completely
- Styling with statement earrings or an updo comb accessory for extra polish
Step-by-Step Creation
Start by brushing your hair straight back from your face with a fine-tooth comb or slicker brush—don’t be gentle, smooth the hair firmly so it stays in place. Apply a smoothing product and blow-dry if needed, directing heat downward. Create your high ponytail by gathering hair at the crown, pulling it up and slightly back. The key is tension: you want this taut but not painfully tight. Secure with an elastic, then twist the ponytail and wrap it around the base, pinning securely. Finish with hairspray to seal any flyaways.
3. The Twisted Wrap Bun
This style introduces subtle visual interest without sacrificing that sleek aesthetic. Instead of a simple wrap, you twist sections of the ponytail before winding it around the base, creating texture and dimension that catches light beautifully. It’s the thinking person’s sleek bun—polished on first glance, but with enough detail that it doesn’t feel boring or overdone.
The Key to Nailing It
The twist creates the illusion of thicker, fuller hair because the spiraling sections catch light differently than a flat wrap would. It also hides imperfections better—if your ponytail isn’t perfectly uniform in thickness, the twisting motion camouflages irregularities while adding intentional design. The final effect looks more curated and thoughtful than a basic wrap, which elevates the entire style.
How to Achieve This Twisted Texture
- Create a smooth, sleek ponytail at your desired height (low, mid, or high)
- Divide the ponytail into 2-3 sections vertically
- Twist each section tightly away from your face, maintaining equal tension
- Wrap the twisted sections around the base in a spiral pattern, pinning as you go
- Tuck the ends under the bun and secure everything with bobby pins
- Use a fine-tooth comb to smooth any bumps on the outside of the bun
- Finish with flexible hold hairspray (not too stiff—you want some movement)
Worth knowing: This style actually looks better on hair that’s a day or two old, so skip the wash if you’re planning to create this look.
4. The Braided Crown Bun
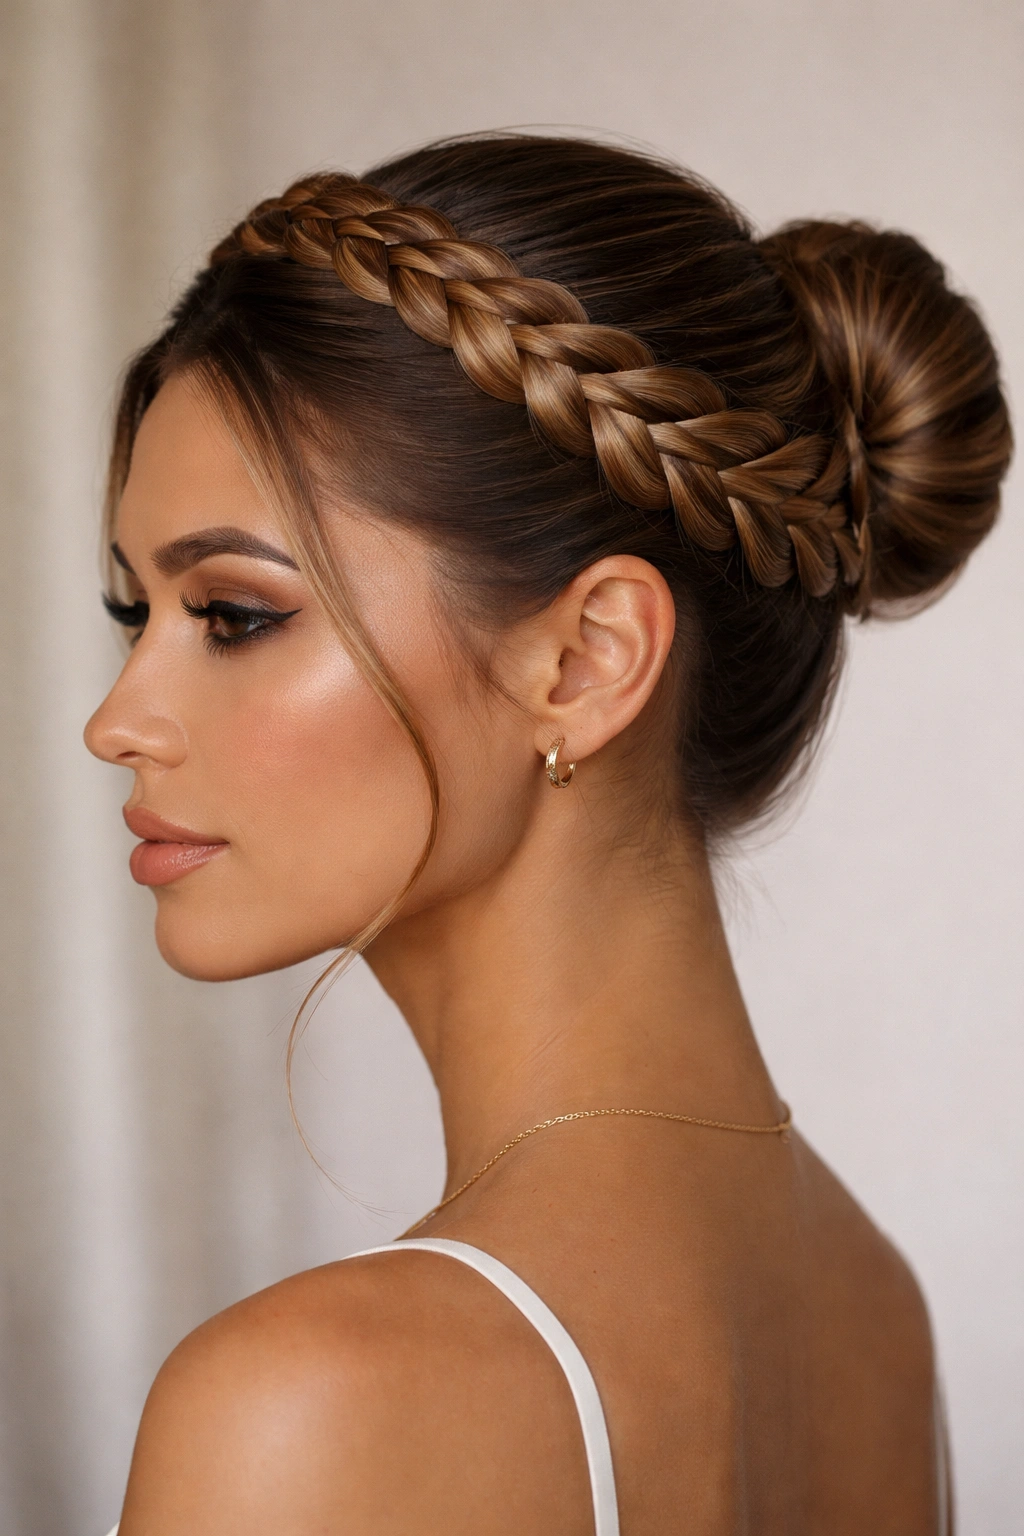
This style weaves elegance directly into the structure. You’re essentially creating a braided halo around your head before gathering everything into a bun, which transforms an ordinary updo into something that feels both intricate and refined. It works beautifully for events where you want to look special without looking like you tried too hard, or for anyone who loves the softness of braids but needs the practicality of a secured bun.
What Makes This Style Special
The braided crown adds dimension and visual complexity that a smooth bun simply can’t achieve on its own. The braid frames your face, softens the overall look, and creates texture that’s inherently flattering. Even if your braid isn’t perfectly executed, the bun incorporates it seamlessly, so minor imperfections become part of the design rather than visible flaws. This is the style to choose when you want to look intentional and thoughtful about your appearance.
Creating the Braided Foundation
- Start with smooth, brushed hair (apply a light smoothing serum first)
- Take a section from one temple and braid it around to the other side of your head, creating a halo effect
- Secure the braid with bobby pins, tucking the end behind your opposite ear
- Gather all your hair (including the braided section) into a low or mid-height ponytail
- Twist or wrap the ponytail around the base, pinning securely
- Gently pull on the edges of your braid to make it slightly fuller and more textured
- Use clear elastics at your base to blend everything together
This style requires a bit more time, but the result is genuinely showstopping and absolutely worth the extra five minutes.
5. The Slicked-Back Bun
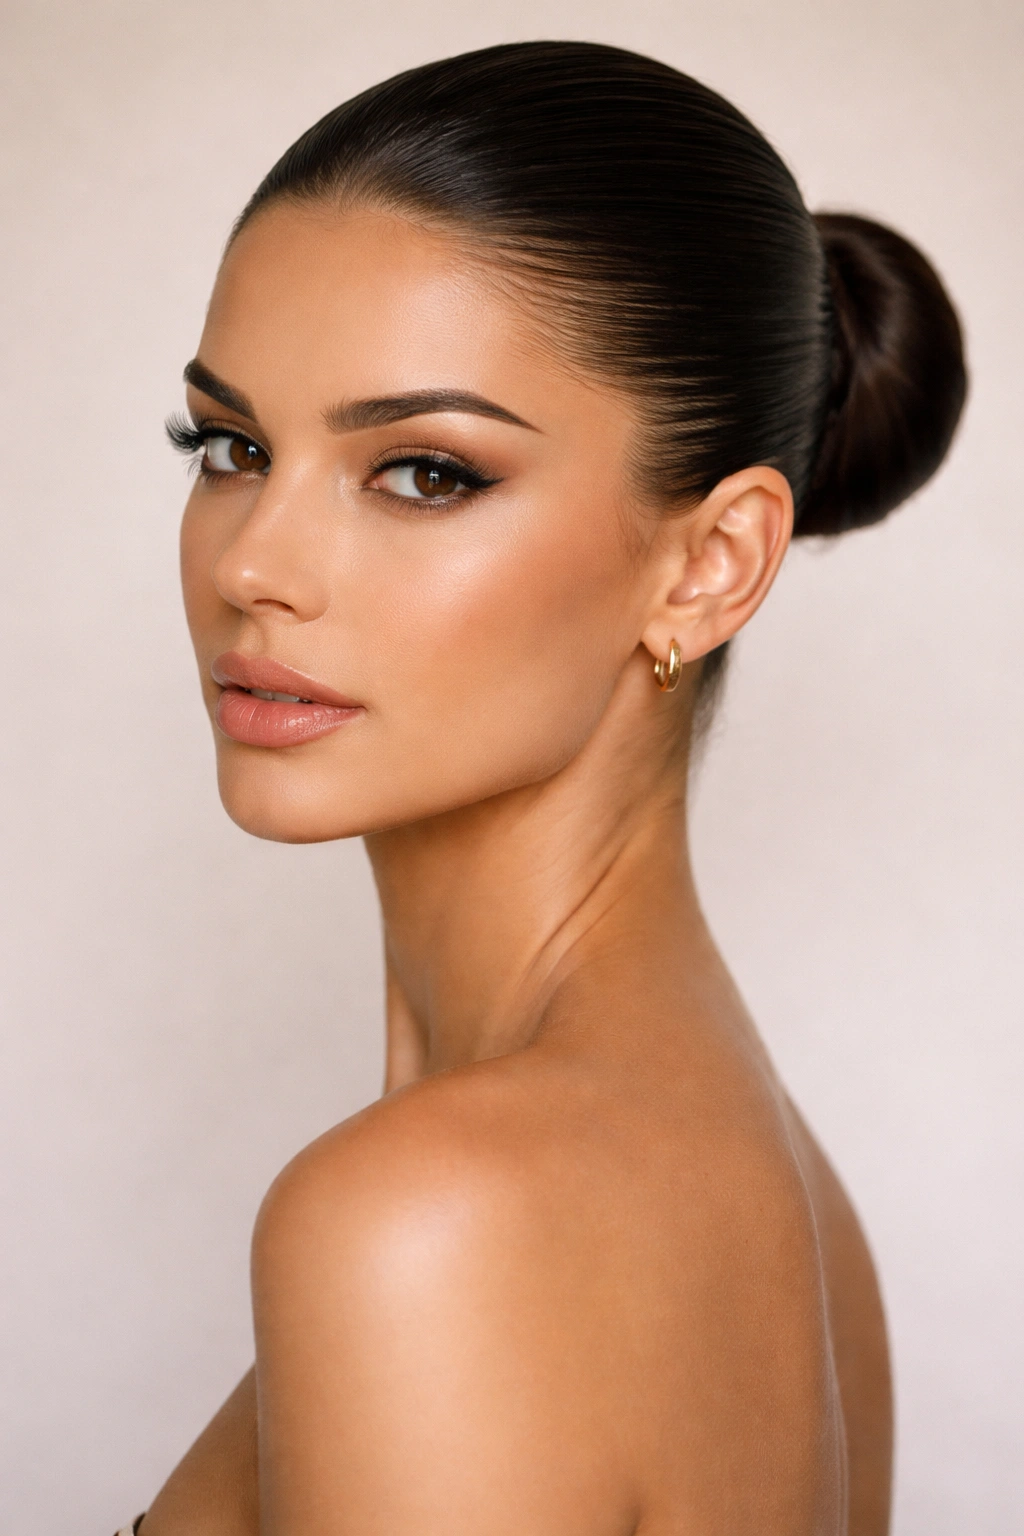
Sometimes the most elegant choice is the most minimal. A slicked-back bun pulls your hair straight back from your face with zero texture, zero waves, zero variation—just pure, refined geometry. It’s the hairstyle choice of ballet dancers, fashion editors, and anyone who understands that sometimes restraint is the ultimate luxury. This style requires commitment to the sleek aesthetic, but when it’s done well, it’s nearly impossible to improve upon.
Why Slicked-Back Reads as Instantly Sophisticated
There’s something inherently confident about showing your entire face with absolutely no framing. It demands clear skin (or at least comfort with your skin), strong bone structure visibility, and a willingness to be bold with your presentation. The slicked aesthetic is intentional and decisive—there’s no apology in it, no softening, just straightforward polish. This makes it feel expensive and editorial, even if you’re creating it at home with basic products.
The Smoothing Products and Technique
- Use a gel-based smoothing product (not just serum) for this style—you need real hold
- Apply the gel to damp hair, working from the roots outward with a fine-tooth comb
- Blow-dry your hair completely straight, directing heat from the roots to the ends
- Create a tight, perfectly centered part if you prefer, or sweep everything straight back
- Gather hair into your ponytail at the desired height, pulling firmly so the hairline is smooth
- For maximum polish, wrap a small section around the base and pin securely
- Use a gel or wax on any baby hairs around the hairline to eliminate flyaways completely
- Finish with a strong-hold hairspray designed to combat humidity
Pro tip: Apply your gel to completely damp hair and let it dry naturally while you’re getting ready—this creates smoother results than trying to apply gel to dry hair.
6. The Textured Topknot
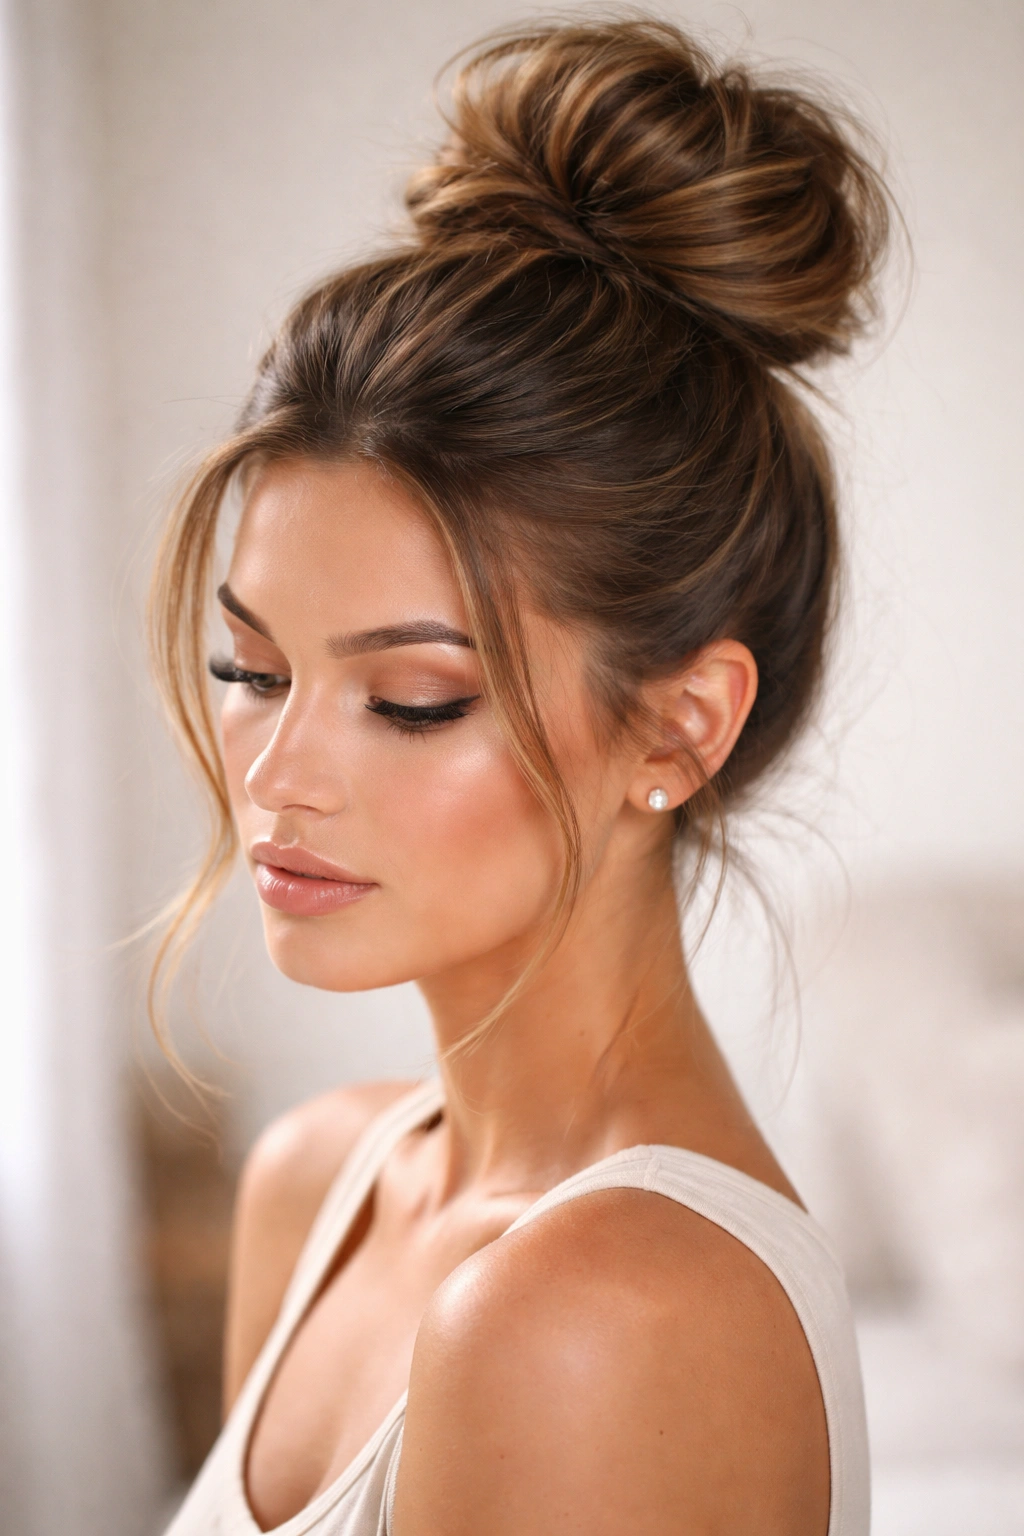
This style embraces dimension while maintaining overall polish. Instead of striving for that liquid-smooth finish, you’re deliberately creating texture and volume at the crown, then gathering everything into a bun that sits on top of your head. It’s the sweet spot between effortlessly undone and deliberately styled, which makes it perfect for anyone who wants to look polished but not overly formal.
How Texture Changes the Vibe
A textured topknot reads as more relaxed and creative than a completely smooth bun, yet it’s still clearly intentional and put-together. The texture gives your hair the appearance of more volume, which is why this style works beautifully on fine hair or hair that’s slightly limp. It also photographs well because the dimension catches light in interesting ways that a flat bun won’t.
Building Volume Into Your Topknot
- Start with slightly textured or wavy hair (sleep waves, a light wave spray, or intentional waves work perfectly)
- Tease the crown area gently to create volume—don’t go overboard, just enough for visible dimension
- Smooth the teased section lightly so it looks intentional rather than chaotic
- Create a high ponytail at the crown, incorporating the textured volume you just created
- Wrap the ponytail loosely around the base, letting some dimension show rather than flattening everything
- Pin securely but don’t pull too tightly—you want the bun to maintain its fuller shape
- Gently pull on the outside edges of the bun to create a slightly “lived-in” appearance
- Use a light-hold hairspray so the texture stays movable and natural-looking
This style is incredibly forgiving and actually looks better if it’s not perfectly executed—imperfection is the whole point.
7. The Side-Swept Bun
A side-swept bun positions your ponytail off-center, creating asymmetrical balance that’s both romantic and modern. One side of your face and neck remains exposed, while the bun sits toward the opposite side of your head. This style works beautifully for adding visual interest without looking overly done, and it’s incredibly flattering because it draws attention to whichever side of your face you want to emphasize.
Why Asymmetry Creates Polish
Asymmetrical hairstyles actually read as more intentional and thoughtful than centered styles. They suggest you’ve considered the composition of your look, rather than just pulling your hair straight back. The side-swept bun also has a slightly romantic or playful quality, which makes it perfect for dates, events, or anytime you want your hairstyle to add personality to your appearance.
Styling the Perfect Side-Swept Position
- Create a deep side part, sweeping your hair toward one side of your head
- Brush everything smooth, directing the hair toward the direction you want the bun to sit
- Secure a low or mid-height ponytail slightly off-center—the further off-center, the more dramatic the look
- Twist or wrap the ponytail around the base, keeping the bun positioned toward your chosen side
- Pin the bun securely, using additional bobby pins on the underside to ensure it won’t slip
- Soften the look by gently pulling a few face-framing pieces loose near your temples
- Use a light smoothing serum on those face-framing pieces and spiral them slightly with your fingers
- Finish with flexible-hold hairspray to keep everything in place while maintaining some movement
The asymmetry should feel intentional but not severe—you’re aiming for elegance, not drama.
8. The Bubble Bun
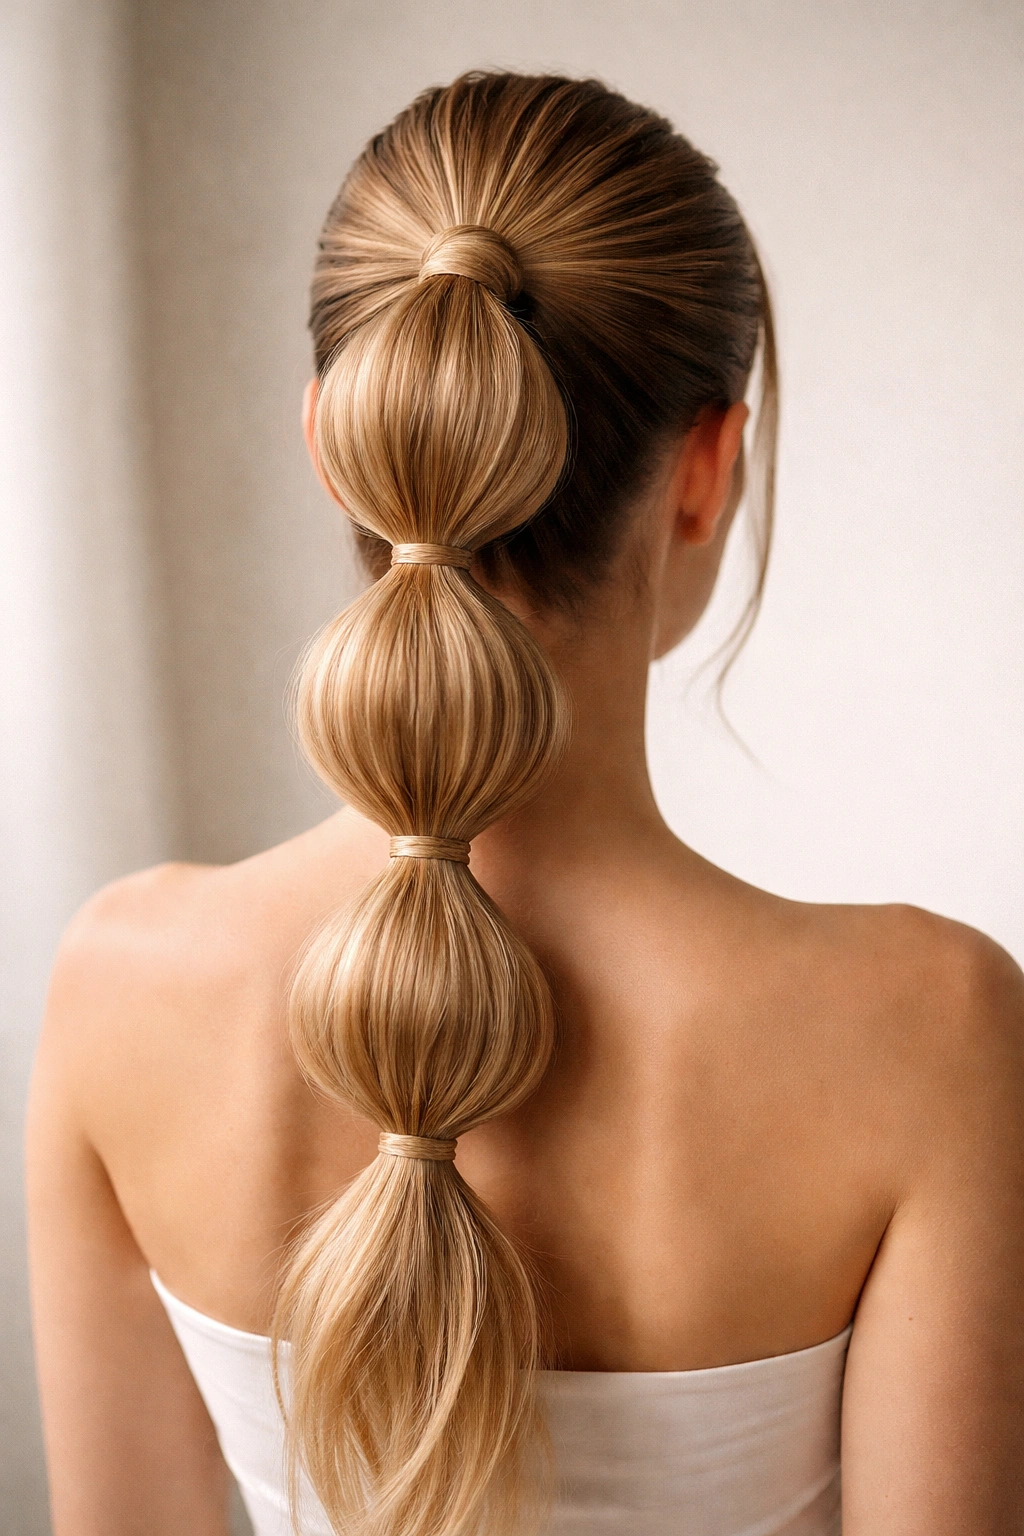
This style stacks multiple ponytail sections vertically, creating the appearance of a series of textured bubbles that climb up the back of your head. It’s playful without being childish, visually interesting without sacrificing polish, and genuinely easy to create once you understand the method. The bubble effect also provides surprising volume and texture that works beautifully on any hair type.
What Makes Bubble Buns So Visually Compelling
The stacked effect creates vertical lines that elongate your overall silhouette, which is why this style is incredibly flattering. The texture catches light constantly, making your hair look thicker and shinier. It’s also a clever technique if you have fine or thin hair—the bubble method creates the illusion of much fuller hair than you actually possess. Plus, it’s modern enough to feel current without ever looking dated.
Creating Your Stacked Bubble Effect
- Start with smooth hair in a high or mid-height ponytail, secured with a clear elastic
- Create your first “bubble” by gently pulling the ponytail out and gathering it slightly, then securing with another elastic just a few inches down
- Repeat this process 2-3 times, depending on your hair length, creating bubbles that progress down your ponytail
- Gently tease each bubble section slightly to create fullness and texture
- Take the final section of your ponytail and twist it around the base of the last bubble, securing with bobby pins to create the actual bun
- Use your fingers to gently pull and shape each bubble so they’re evenly sized and attractively rounded
- Finish with texture spray or light hairspray to keep everything in place
Worth knowing: This style looks better with slightly textured or wavy hair—try creating it on second-day hair for the best results.
9. The Layered Volume Bun
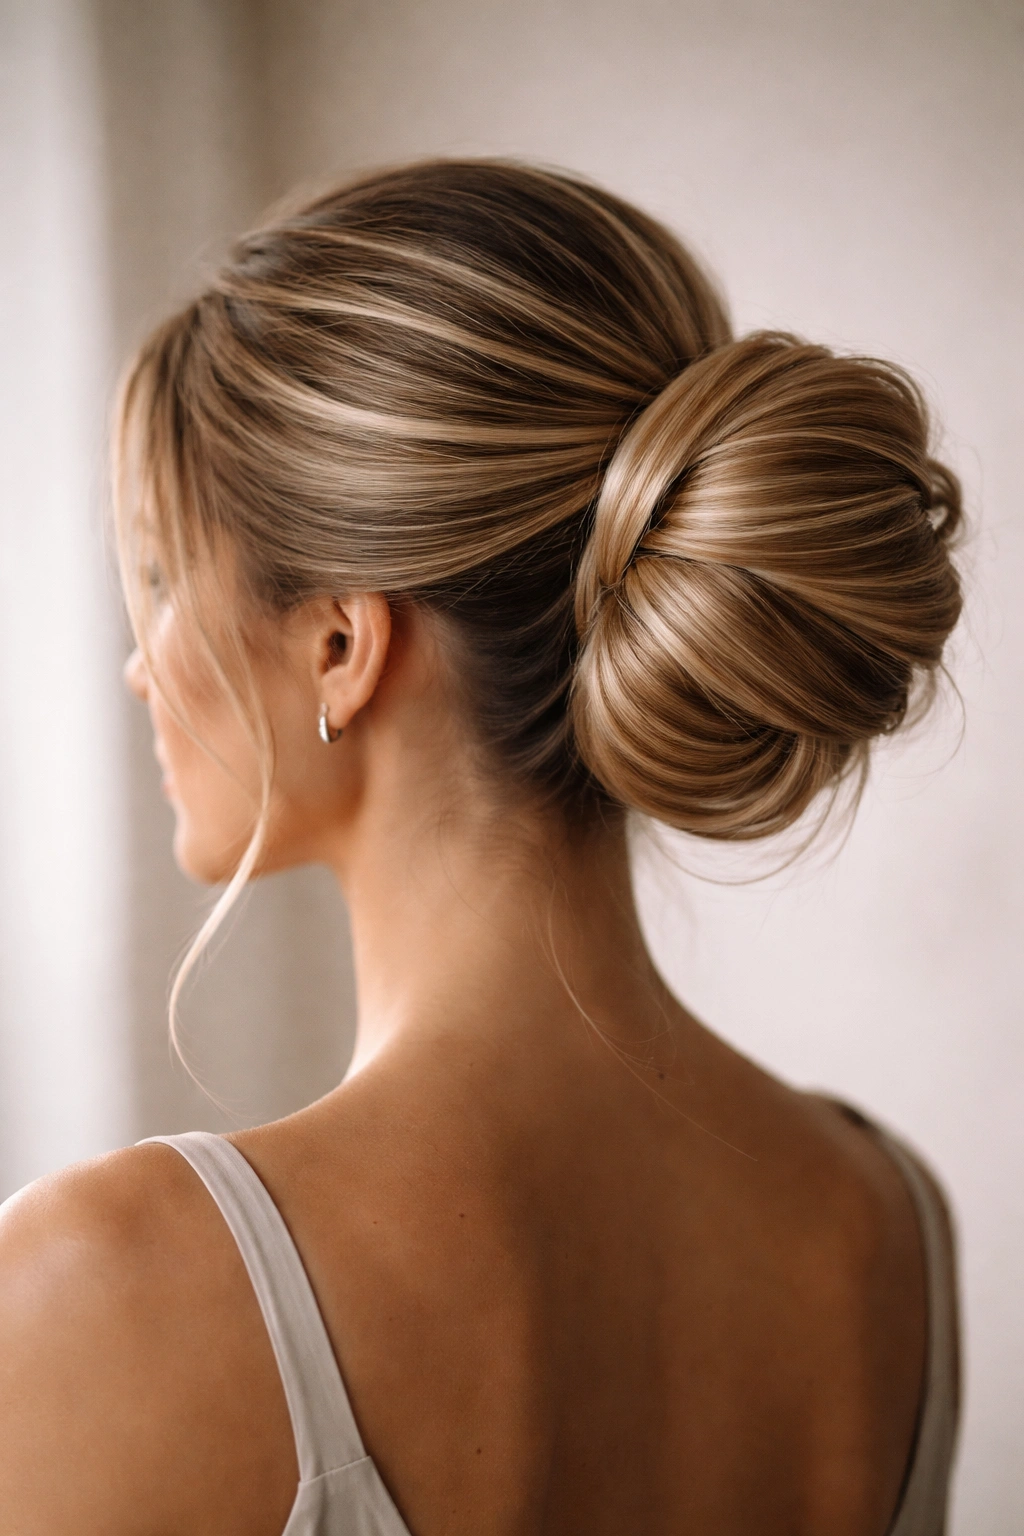
This technique uses strategic sectioning to build dimension and apparent volume throughout your bun. Instead of creating a single bun from one ponytail, you’re working with multiple sections that overlap and layer, creating depth that reads as inherently fuller and more luxurious. It’s the technique that upscale salons use when they want to create truly impressive bun hairstyles, and it’s absolutely achievable at home.
Why Layering Creates Dramatically Better Results
Layering works because it breaks up the visual plane of your bun, preventing that flat, thin appearance that some bun styles can create. Each layer catches light differently, making your bun look multi-dimensional and sophisticated. The technique also works beautifully on fine or thin hair because you’re essentially redistributing your hair across multiple layers rather than gathering it into one dense point.
Building Your Layered Bun Structure
- Create a ponytail at your desired height and secure it with an elastic
- Divide your ponytail into 2-3 sections horizontally—think of them as top, middle, and bottom layers
- Take the bottom section and wrap it around the base of your ponytail, pinning it to form the foundation of your bun
- Take the middle section and wrap it around, overlapping slightly with the first layer and pinning securely
- Take the top section and wrap it around, completing the bun with this final layer
- Gently shape and adjust each layer so they’re evenly distributed and the bun appears full and rounded
- Use a fine-tooth comb to smooth the outer surface, removing any visible bumps or irregularities
- Finish with a strong-hold hairspray to keep all layers secure throughout the day
This technique takes a bit longer than basic methods, but the visual impact is genuinely impressive.
10. The Wrap-Around Bun

This style is the polished cousin of your casual “twist and wrap” bun. Instead of using your ponytail hair for the wrap, you take a separate section and use it to create a decorative band around your bun’s base. It’s incredibly elegant, creates clear visual separation between your bun and your neck, and reads as far more intentional than a standard wrap.
The Design Power of the Wrap-Around Element
The wrap-around section creates a finished appearance that transforms a simple bun into something that looks salon-created. It also provides a visual anchor point that makes the entire style read as more structured and polished. The wrap can be smooth, twisted, braided, or even studded with bobby pins for visual interest—the variations are endless, but the basic concept remains the same.
Executing the Wrap-Around Technique Flawlessly
- Create a smooth, polished ponytail at your desired height and secure it firmly with an elastic
- Don’t wrap the ponytail yet—instead, take a very small section (about one inch) from the underside of your ponytail and clip it aside
- Create your bun using the main body of your ponytail, wrapping it around the base and pinning securely
- Now take that small reserved section and smooth it with a fine-tooth comb
- Wrap this section around the base of your bun, completely concealing the elastic and the bobby pins
- Secure the wrap with bobby pins tucked underneath where they won’t be visible
- Optional: Twist, braid, or crimp the wrap section before wrapping for added visual interest
- Use a fine-mist hairspray to seal everything in place
Pro tip: For extra polish, use a small piece of decorative tape or a thin, coordinating scarf to wrap around the base instead of just hair—this adds intentional visual interest and reads incredibly thoughtful.
Final Thoughts
A sleek ponytail bun isn’t just a hairstyle—it’s a statement that you’ve taken care with your appearance and that you understand how to present yourself with confidence. The styles above offer genuine variety, whether you’re dressing for a formal event, navigating a professional environment, or simply wanting to look put-together on a regular Tuesday. The common thread connecting all of them is intention: each style requires conscious choices about where the bun sits, what texture you’re incorporating, and how much your technique contributes to the overall polish.
What’s genuinely valuable about mastering bun hairstyles is that they work with your hair, not against it. You don’t need perfectly straight hair or a specific hair type to create beautiful results—you just need to understand the techniques specific to your texture and hair thickness. A textured bun works beautifully on wavy or curly hair; a sleek bun flatters straight hair; a bubble bun creates the appearance of volume for anyone. The method adapts to your hair, not the other way around.
The most polished versions of these styles come from practice and small refinements. Try a style once and note what worked and what didn’t. Use fewer bobby pins next time, or add more smoothing product, or adjust the position slightly. Your hair will teach you exactly what it needs to look its absolute best, and within a few attempts, you’ll develop the muscle memory and intuition to create these styles on autopilot. That’s when a ponytail bun transforms from something you’re creating to something you’re simply wearing, and that’s when it truly reads as effortlessly polished.