Ponytail buns have become a cornerstone style in Black hair culture, offering the perfect balance between protection, versatility, and elegance. Whether you’re dealing with natural curls, locs, braids, or relaxed hair, there’s a ponytail bun variation designed specifically for your hair type and lifestyle. These styles work beautifully for everything from casual work days to formal events, and they’re particularly valuable because they keep your ends tucked away—a crucial benefit for anyone focused on hair health and growth.
The beauty of ponytail buns lies in their adaptability. You can wear them sleek and polished for professional settings, voluminous and textured for weekend vibes, or embellished with jewelry and accessories for special occasions. Many of these styles also serve a protective purpose, meaning you’re not just looking good—you’re actively caring for your hair. The right ponytail bun can be left in for several days, requires minimal daily styling once set, and reduces manipulation that can lead to breakage.
What makes Black hair styling unique is understanding how to work with your hair’s natural texture rather than against it. The styles in this guide take that reality into account, offering techniques that enhance curl patterns, accommodate different hair densities, and celebrate the versatility of Black hair. Some styles work best with extensions or added hair, while others shine with your natural texture alone. The key is finding the variations that fit your hair’s specific needs, your lifestyle, and the occasions you dress for most often.
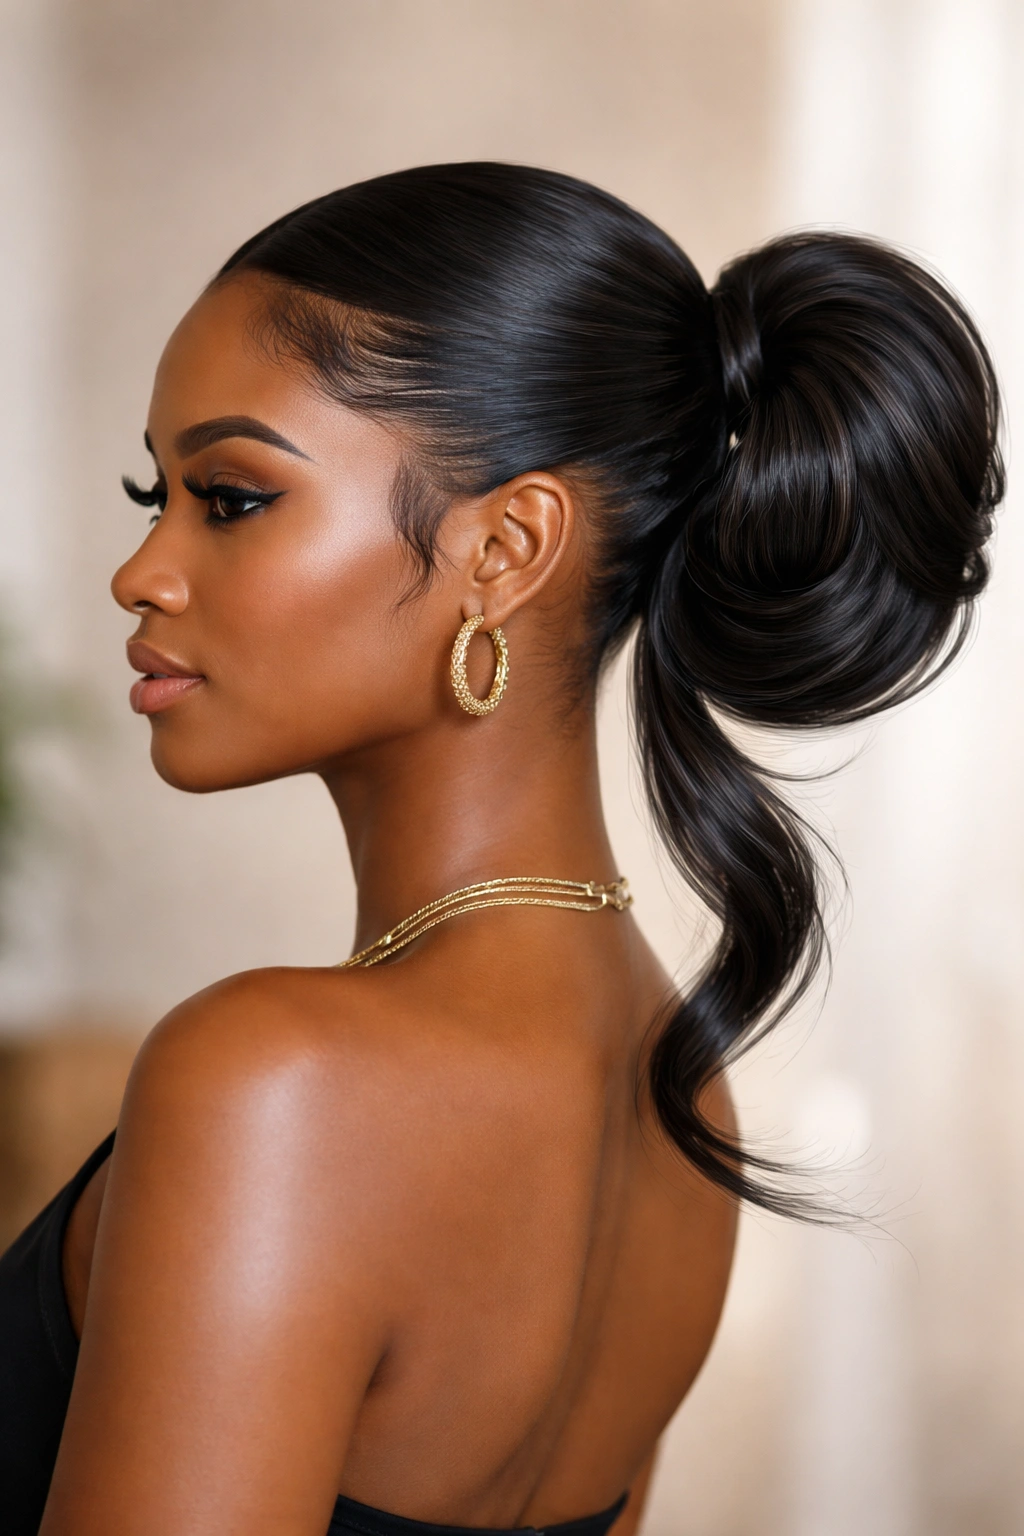
1. The High Sleek Ponytail Bun

The high sleek ponytail bun is the polished, professional workhorse of Black hair styling. This style pulls hair straight up from the crown and gathers it into a smooth, tight base before wrapping it into a low bun at the back of the head. The result is a streamlined silhouette with clean, pressed edges that looks equally at home in a boardroom or at a formal event.
Why It’s a Timeless Choice
The high sleek ponytail bun works because it emphasizes your facial features, elongates the neck, and projects an air of put-together sophistication. This style demands precision in the laying of edges—smoothed with edge control product and a fine-tooth comb—which creates that signature polished finish that reads as intentional and professional. The tension is moderate when done correctly, which means you can comfortably wear it for a full workday without scalp discomfort. Many women find they can refresh this style for 2-3 days in a row, simply retying the bun and reapplying edge control to maintain the sleek finish.
How to Get the Look Right
- Use a clarifying or smoothing shampoo beforehand to remove buildup and create a slick base
- Apply a lightweight leave-in conditioner or smoothing cream before blow-drying for extra slip
- Blow dry your hair straight, paying special attention to smoothing the hair as you dry
- Use a fine-tooth comb with edge control to brush your hair into a high, centered ponytail
- Secure the ponytail low at the nape with a sturdy elastic (a coated elastic prevents breakage better than rubber bands)
- Wrap a small section of hair around the elastic base, then pin the ends into a neat bun shape
- Smooth and define your edges with edge control and a toothbrush for that signature polished look
Pro tip: Apply your edge control the night before and let it set while you sleep—this gives you sharper, longer-lasting edges than applying it fresh on the morning of.
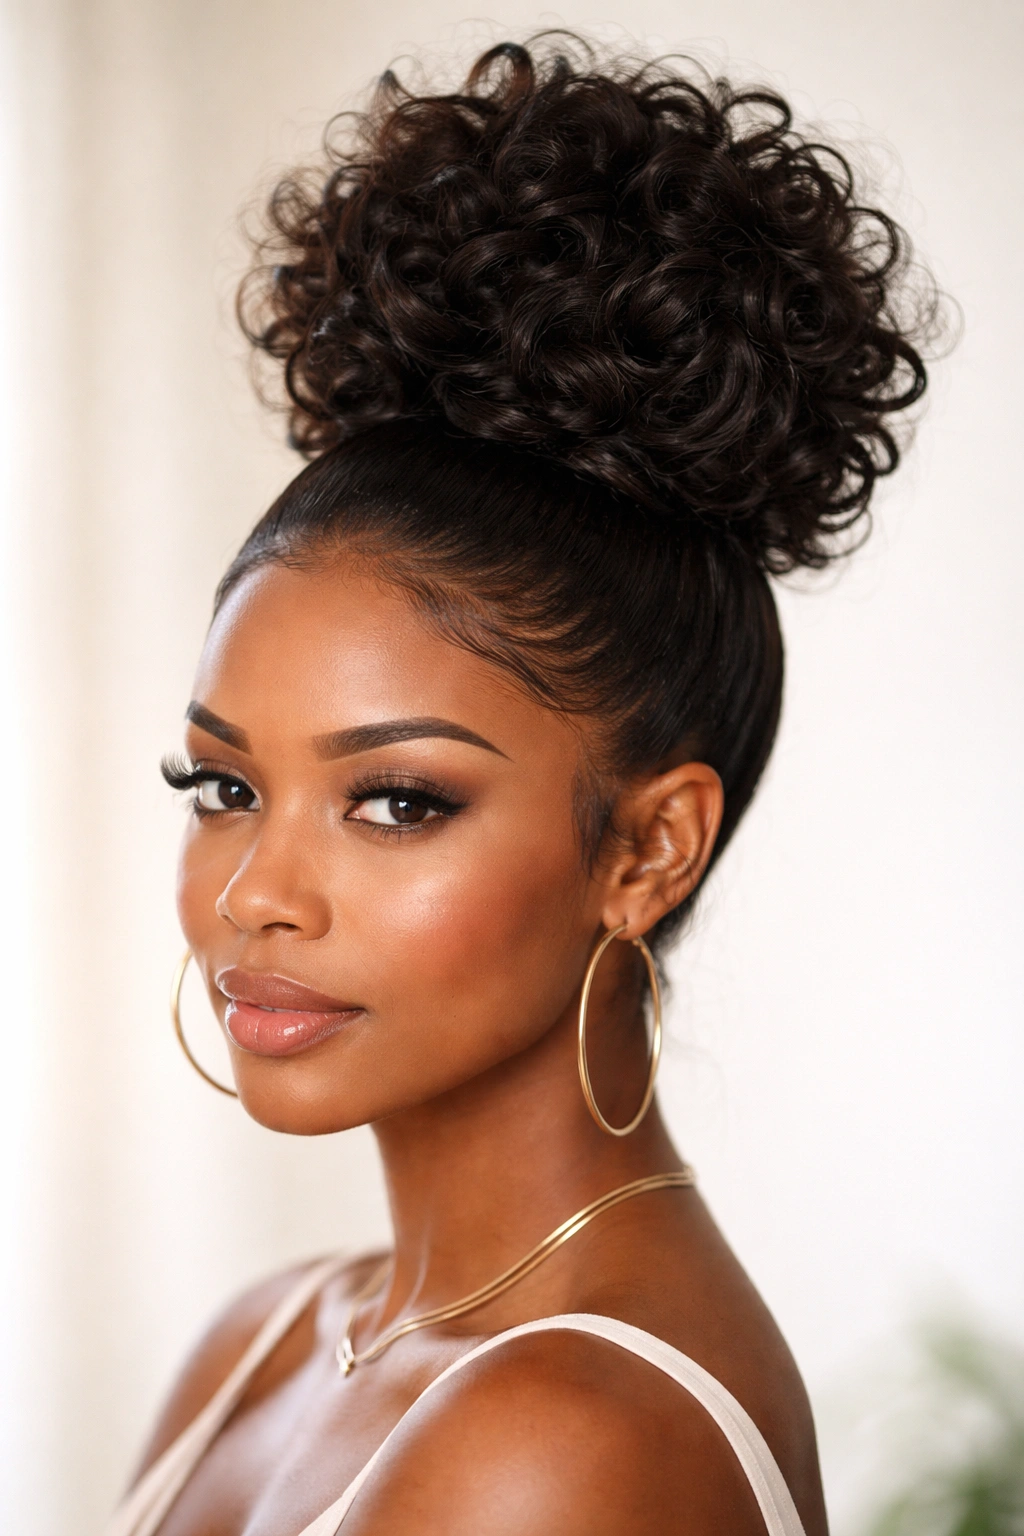
2. The Curly High Bun

The curly high bun is the playful, textured cousin of the sleek version, celebrating your natural curl pattern rather than pressing it flat. This style gathers hair into a high ponytail that maintains its bounce and volume, then coils it up into a voluminous bun at the crown. It’s ideal if you’re natural, transitioning, or simply want to showcase your curls while keeping them secured.
Why Texture Shines in This Style
A curly high bun works beautifully because curls have built-in visual interest and dimension—you’re not fighting against your hair’s natural texture, you’re amplifying it. The height of the bun draws attention upward and makes even moderate curl density appear full and generous. This style also works wonderfully for refreshing curls between wash days; you can take it down and fluff, and your curls spring back with movement and definition. Depending on your curl pattern and the products you use, this style can hold strong for 3-5 days.
Building Volume Without Frizz
- Start with hydrated curls (day-old curls actually work better than freshly washed)
- Apply a curl-defining cream or gel to damp or lightly misted curls
- Use a wet brush or your fingers to gently gather hair into a high ponytail at the crown—don’t brush aggressively, as this disrupts curl clumps
- Secure with a smooth clip or coated elastic to minimize breakage
- Gently coil the ponytail around the base and pin securely with bobby pins that match your hair color
- Flip your head and gently separate the bun into sections to create dimension and volume
- Set with a light hold spray to maintain definition without crunchiness
Worth knowing: Refreshing this style between wears is simple—mist lightly with water, reapply a tiny amount of gel to any frizzy sections, and re-fluff the bun for another 1-2 wears.
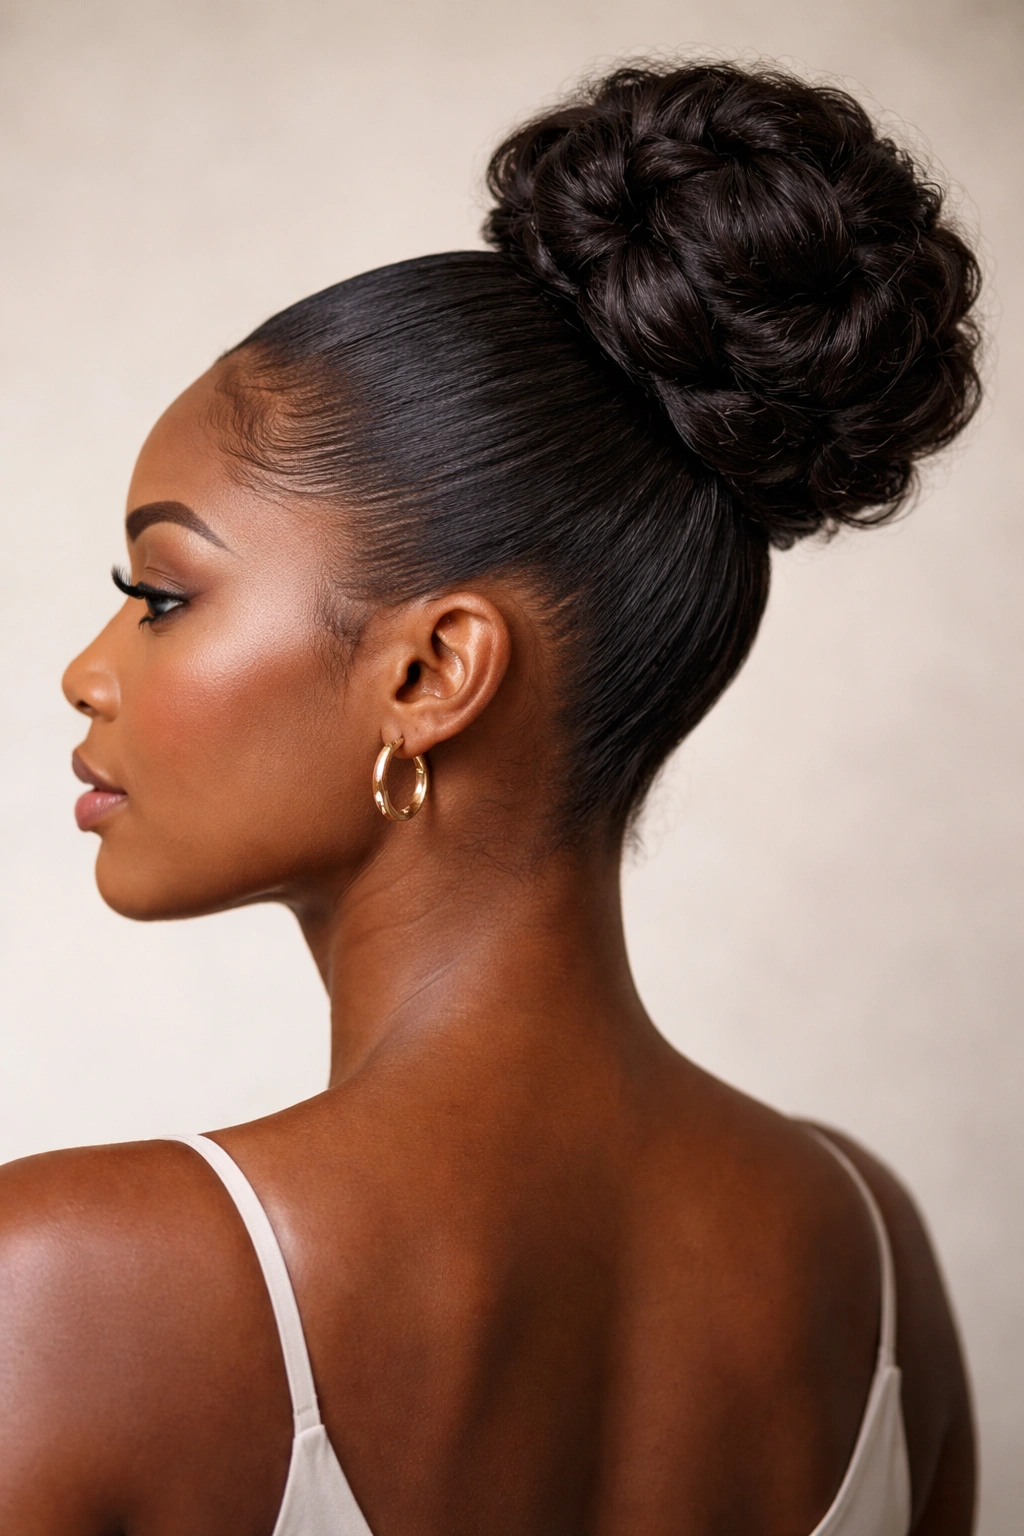
3. The Twisted Rope Bun
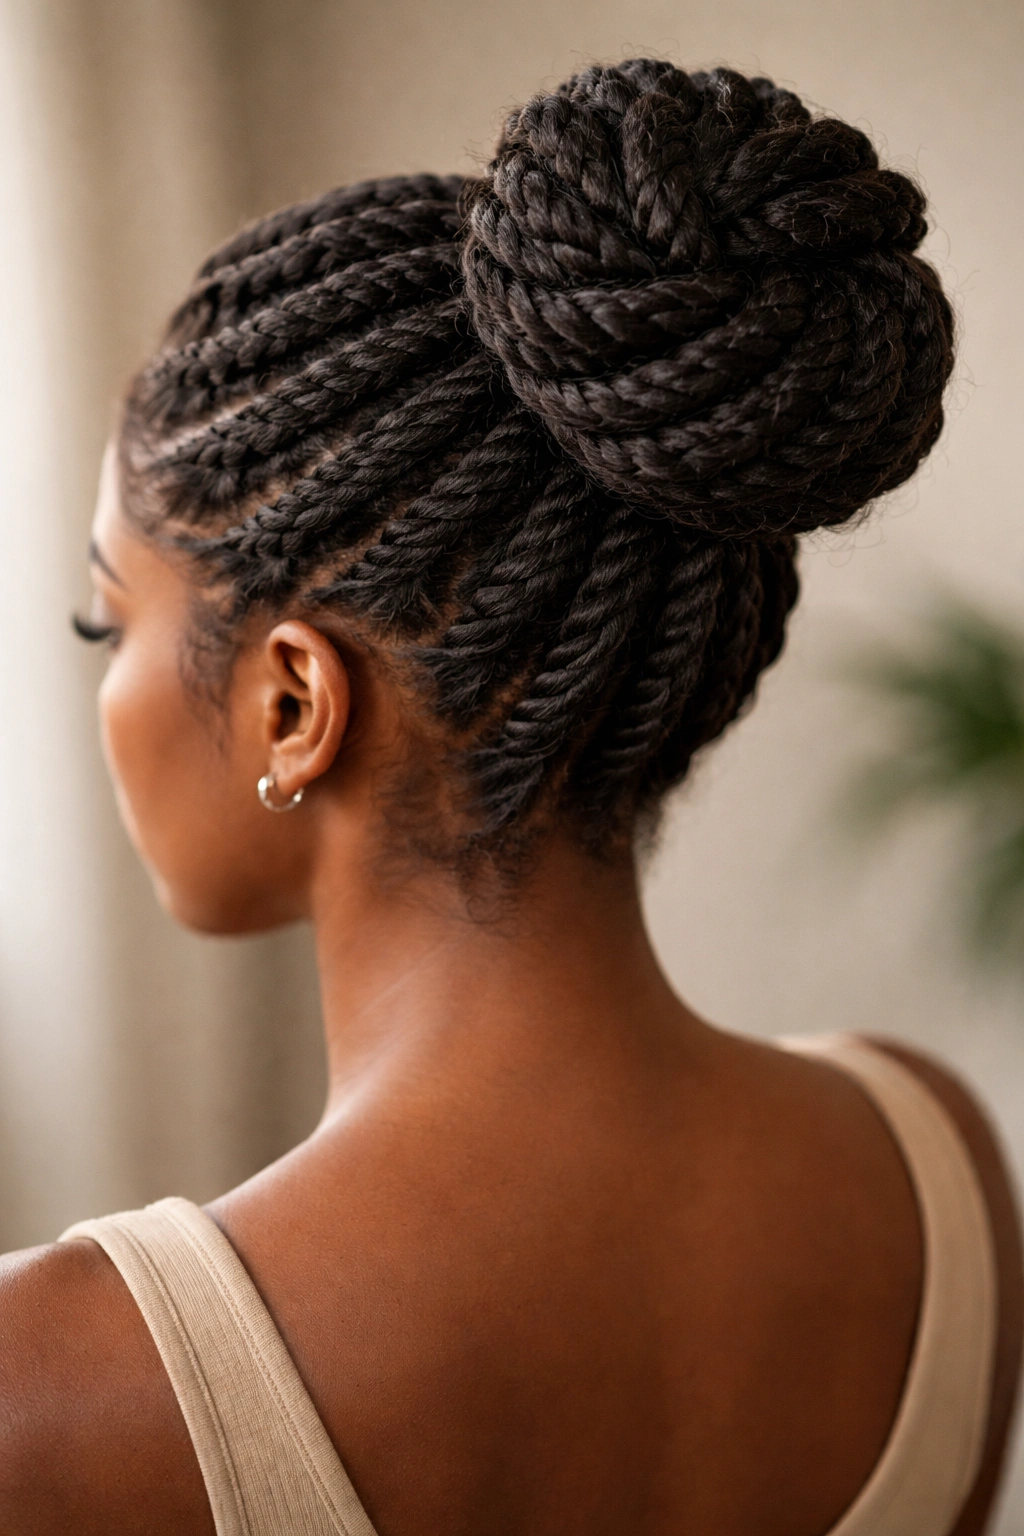
The twisted rope bun creates a beautiful, intentional texture by twisting sections of hair before coiling them into the bun. This style works wonderfully on natural, relaxed, and transitioning hair, and it adds a sophisticated visual detail that reads as more polished than a simple gathered bun. The twists catch light and add dimension, making even finer hair textures appear fuller.
The Appeal of Intentional Texture
Twists are transformative in Black hair styling because they define and organize hair while maintaining movement and texture. When twisted sections are coiled into a bun, they create a pattern that’s visually interesting and structurally sound—the twists hold the bun’s shape better than loose hair alone, meaning less slippage and fewer pins required. This style is also protective because twists prevent individual strands from being exposed to friction or environmental stress. You can typically wear a twisted rope bun for 4-7 days depending on how well your twists hold.
Creating Clean, Defined Twists
- Start with hydrated, detangled hair (use a leave-in conditioner and work through knots gently)
- Apply a smoothing or defining product appropriate for your hair texture
- Section your ponytail into 4-6 equal parts using small clips
- Work with one section at a time: take two strands and twist them firmly around each other, keeping tension consistent
- Once you reach the ends, secure that twist temporarily with a small clip
- Repeat with remaining sections until your entire ponytail is divided into twists
- Coil each twist around the ponytail base, securing with bobby pins as you go
- Gently smooth flyaways with edge control if desired
Insider note: If your twists loosen after a few days, you can tighten them by misting with water and retwisting slightly—no need to take the entire bun down for a quick refresh.
4. The Braided Crown Bun
The braided crown bun combines two protective styling techniques into one elevated look. One or more braids begin at the hairline and wrap around the head, eventually gathering into a bun at the back. This style is stunning for events, offers excellent protection for your ends, and works beautifully on hair of almost any texture from very loose waves to tightly coiled natural hair.
Why Braids Make Everything Better
Braids are foundational to Black hair culture because they protect ends, distribute tension evenly across the scalp, and allow hair to retain length over time. When braids feed into a bun, you’re essentially creating a protective style within a protective style—maximum security for your hair while maintaining an elegant, intentional appearance. A braided crown bun can stay in for 5-7 days or even longer, making it an excellent choice for busy weeks when you want a finished look without daily styling. The braids also frame your face beautifully and can be customized with extension hair for added volume.
Mapping and Executing the Crown Braid
- Start with moisturized, detangled hair and apply a smoothing or braiding cream
- Part your hair down the center back or create a side part, depending on the look you want
- Begin a three-strand braid at your hairline on one side, picking up hair as you braid toward the back of your head (this is called a dutch braid or reverse french braid, depending on the braiding direction)
- Continue braiding until you reach the nape of your neck
- Repeat on the other side if creating a symmetrical crown, or create one large braid that wraps fully around if you prefer an asymmetrical look
- Gather the loose ends of your braids plus any remaining hair at the nape into a low ponytail
- Coil that ponytail into a bun and secure with pins, ensuring the braids are pinned securely too
- Smooth edges with edge control and set with a light hold spray
Pro tip: Use a braid spray or lightweight oil as you braid to keep your hands lubricated and prevent friction—this keeps your braid looking smoother and your hands from getting fatigued.
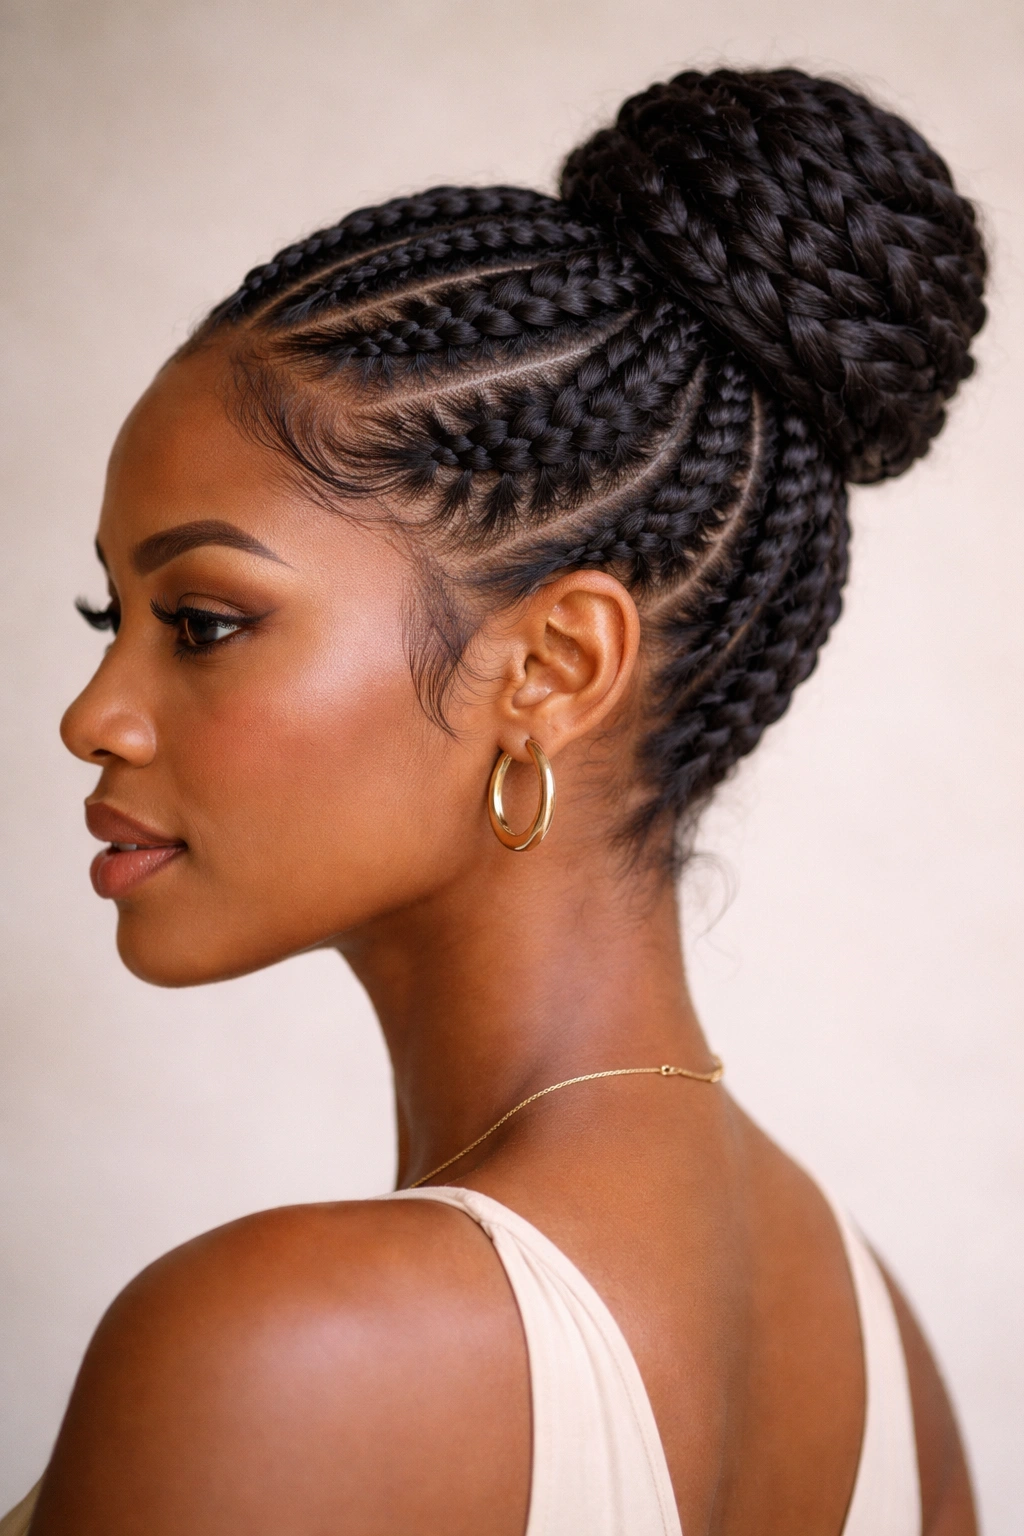
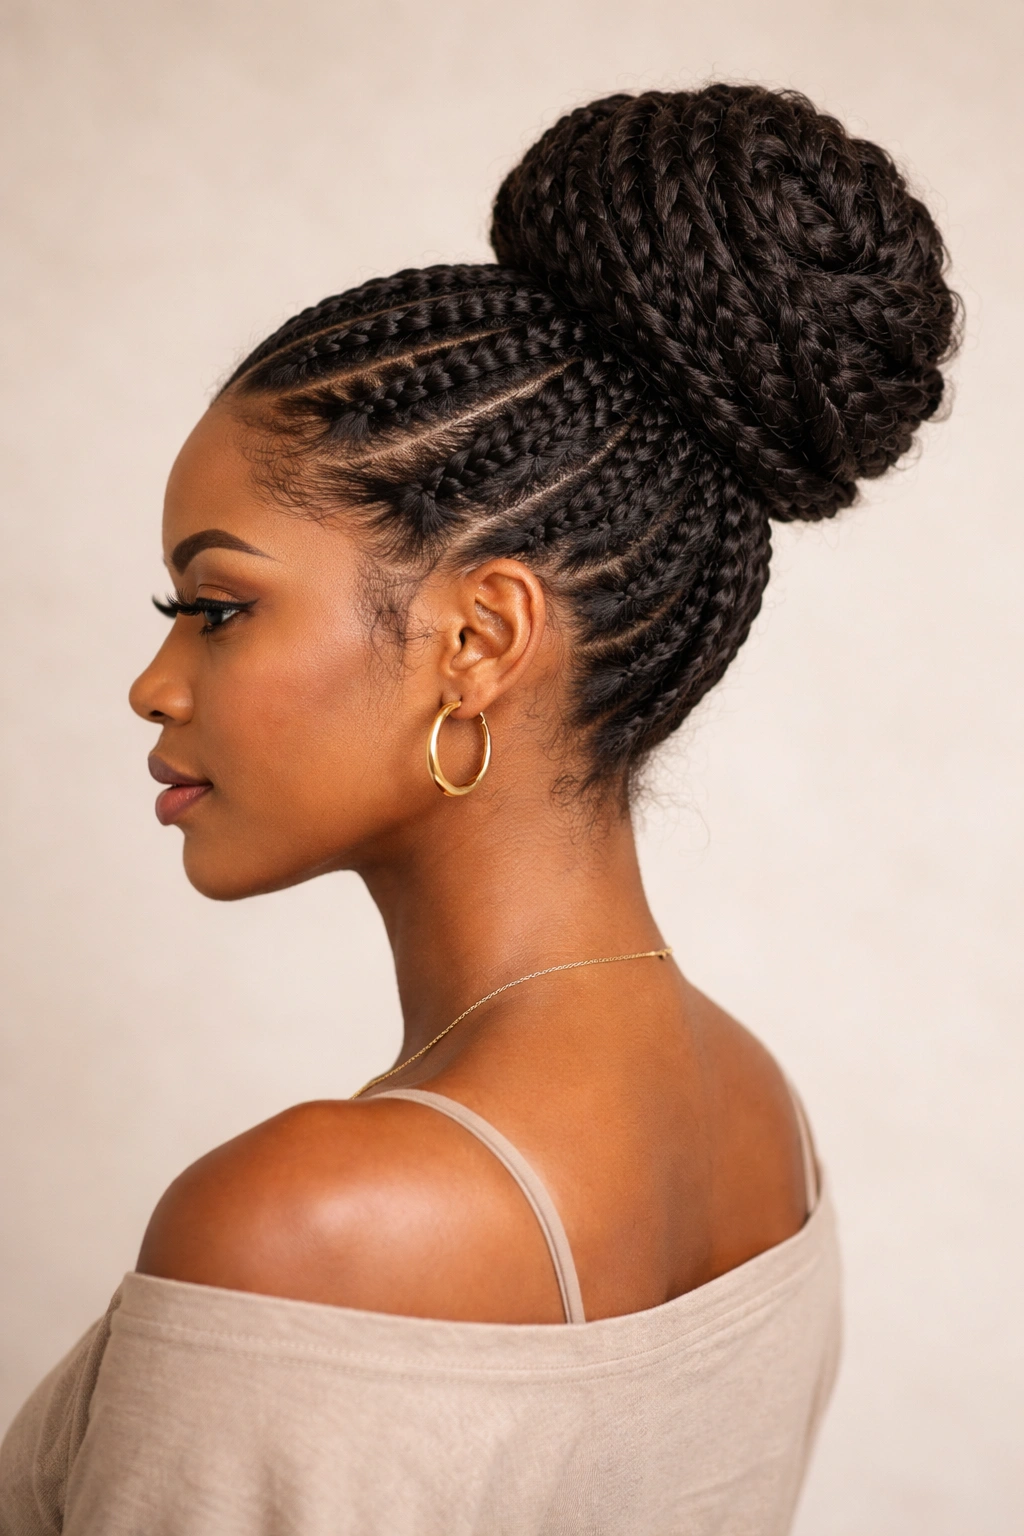
5. The Feed-In Cornrow Bun
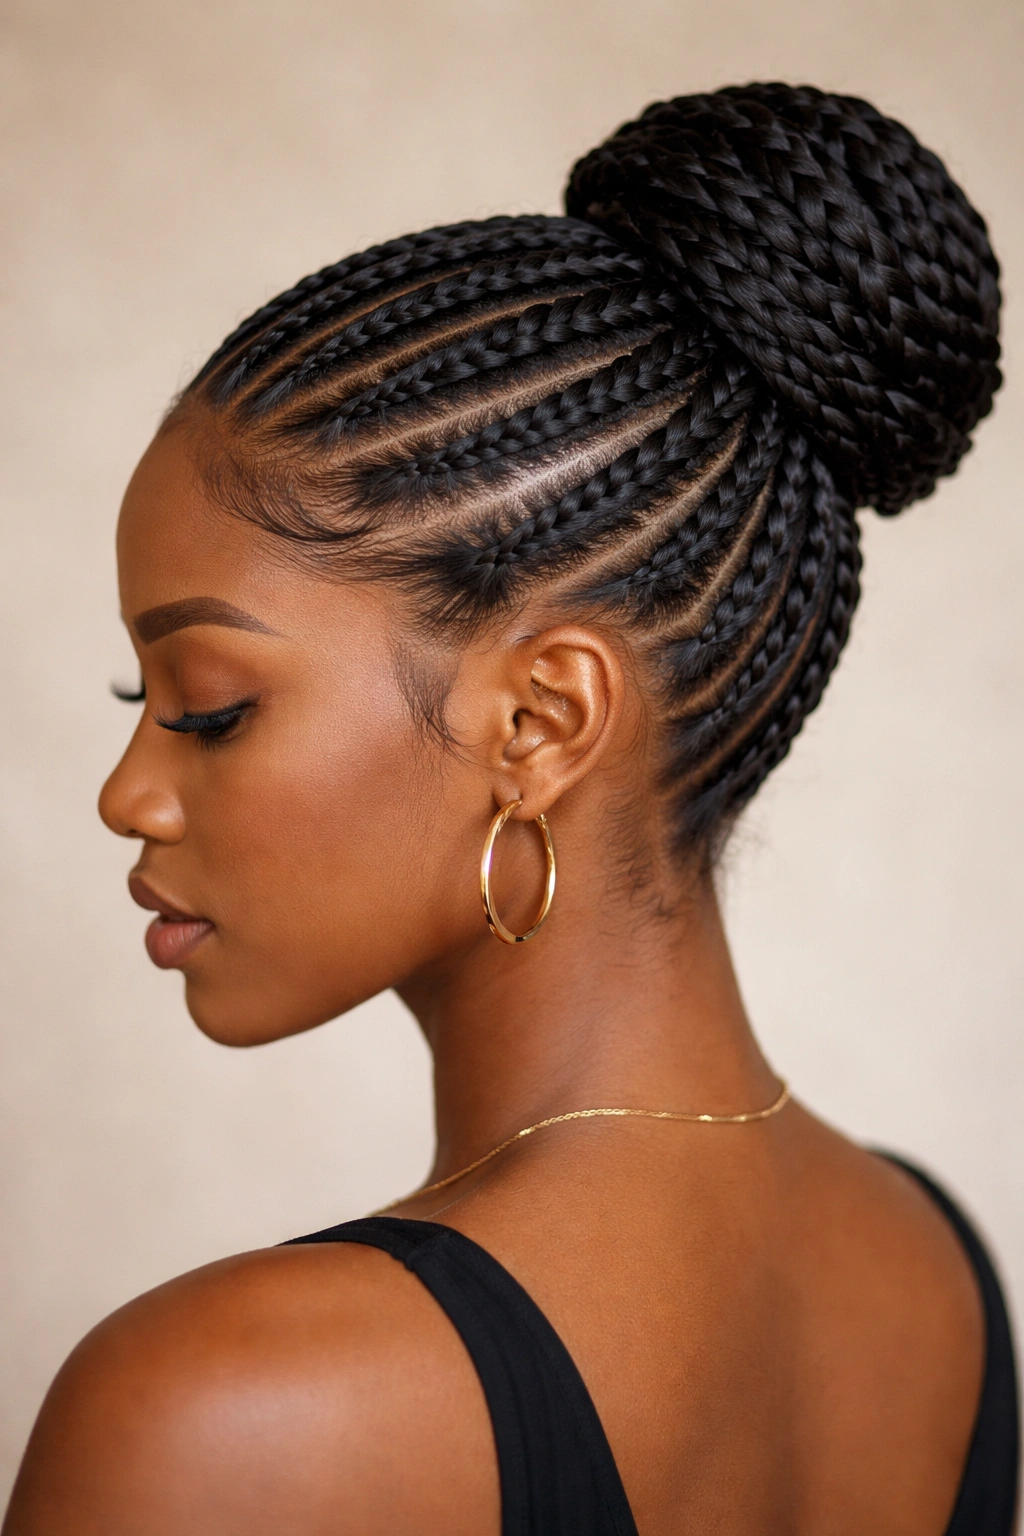
The feed-in cornrow bun uses cornrows that begin small at the hairline and gradually incorporate more of your natural hair as they progress toward the back. These cornrows feed directly into a bun made from either your natural hair or extension hair. This is one of the most protective styles available and works exceptionally well for anyone focused on hair growth and length retention.
The Protection Factor and Longevity
Feed-in cornrows distribute tension gradually and evenly, which is why dermatologists and hair health professionals often recommend them for protective styling. The tension never concentrates in one spot, reducing the risk of scalp irritation or tension alopecia. When these cornrows flow into a bun, you’re protecting not just your scalp and roots but also your midlengths and ends—the most fragile parts of your hair. This style can comfortably last 7-10 days, and many women wear it for two full weeks if they do proper maintenance. The bun itself requires minimal daily attention once installed.
Technique for Smooth Feed-In Rows
- Clarify your scalp and hair beforehand to remove all buildup
- Apply a moisturizing leave-in conditioner and light oil to your hair
- Begin at your hairline with a small three-strand braid using only extension hair (if adding length) or a very small section of your natural hair
- As you braid backward, add more natural hair gradually—this is the “feed-in” technique
- Continue cornrowing until you reach the nape, by which point your cornrow should incorporate most of your natural hair
- Create 3-4 cornrows this way, spacing them evenly across the back of your head
- Gather the ends of your cornrows and loose hair at the nape into a ponytail
- Coil into a bun and secure firmly with bobby pins that match your hair color
- Use a soft edge control on your hairline to smooth baby hairs and protect them
Worth knowing: On day 3-4, gently smooth your cornrows with your fingertips or a soft brush—this refreshes their appearance and redistributes any product buildup that’s creating frizz.
6. The Passion Twist Bun
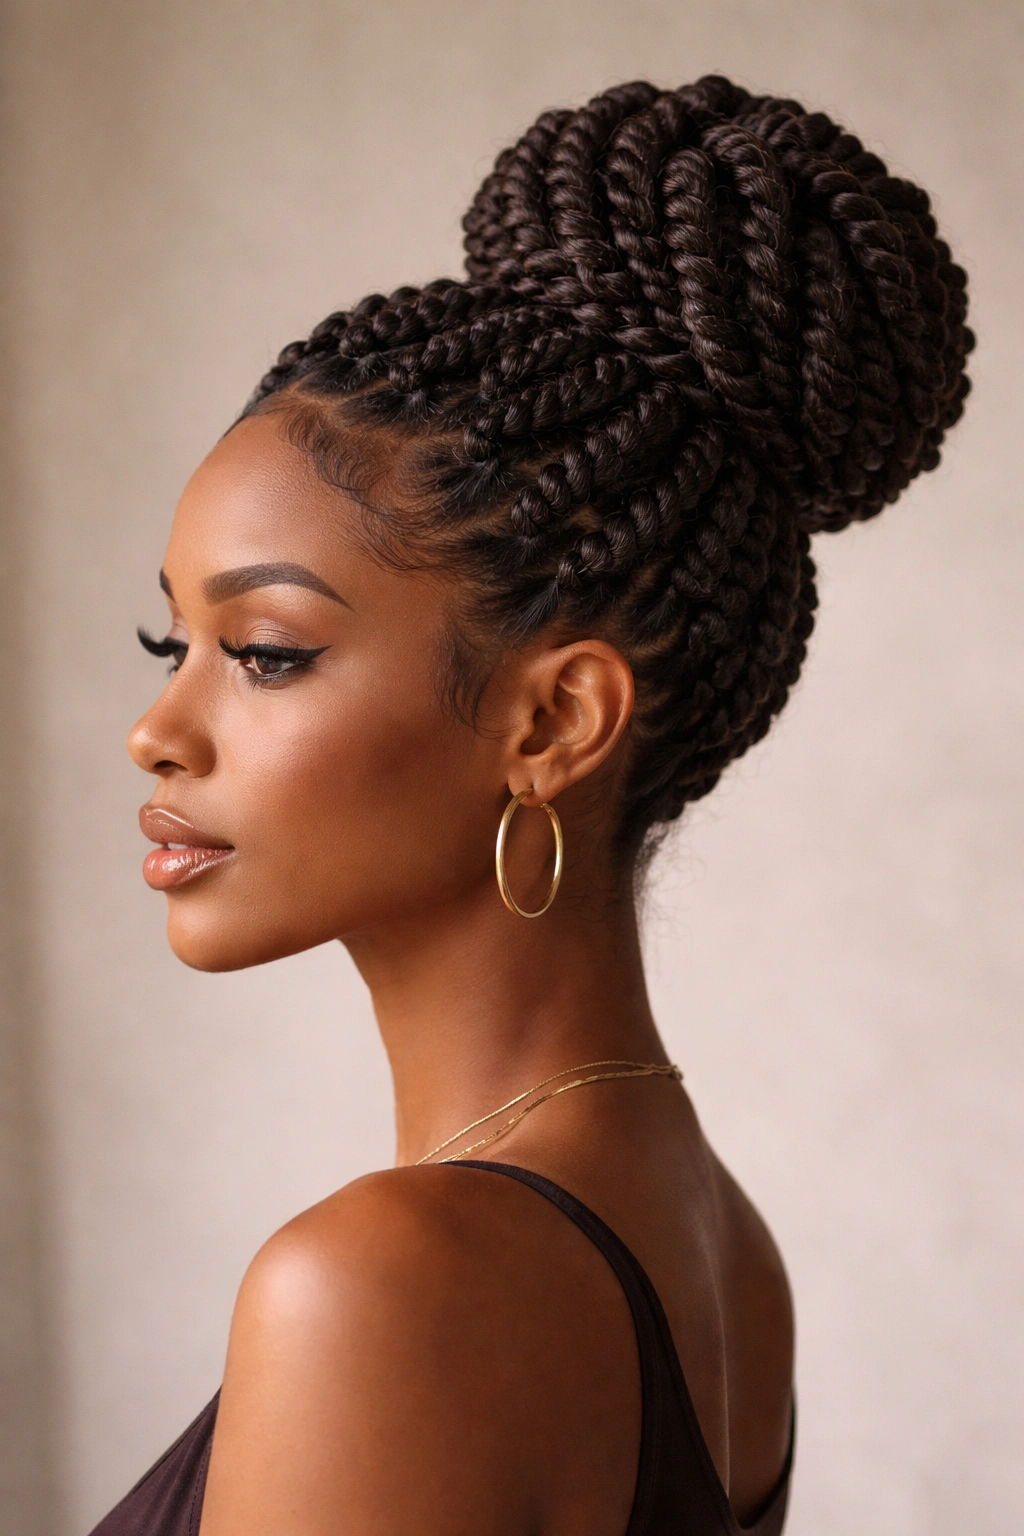
Passion twists are two-strand twists made with extension hair, creating a chunky, textured, almost rope-like appearance that’s visually stunning. When gathered into a bun, passion twists create serious volume and visual impact while being remarkably protective for your natural hair underneath. This style is ideal if you love texture and don’t mind a bold, statement-making look.
The Aesthetic and Protective Power
Passion twists have exploded in popularity because they offer the protection of a protective style with the aesthetic appeal of a hairstyle you actually want to wear. The chunky texture is visually interesting from every angle, and the way they move and bounce gives you the flexibility and movement that some protective styles lack. Because you’re using extension hair, your natural hair is completely protected underneath—zero manipulation, zero friction against external elements. A passion twist bun typically lasts 5-7 days, and many women find they’re comfortable enough to sleep in without damage.
Installing Passion Twists for a Bun
- Section your hair into 4-6 sections depending on desired thickness of twists
- Secure each section with a clip while you work on the others
- Take one section and divide it into two strands
- Grab a section of extension hair and fold it in half around your natural hair section
- Twist your natural hair and the extension hair together firmly, maintaining consistent thickness
- Once you reach the ends, secure the twist temporarily so it doesn’t unravel
- Repeat with all sections
- Gather all your twists at the crown and coil them into a bun shape
- Secure with multiple bobby pins, ensuring the bun feels sturdy and won’t slip
Pro tip: Use passion twist hair that’s slightly thinner than you think you want—twists look fuller once they’re completed and settled, and thinner twists are more comfortable to sleep on than very thick ones.
7. The Half-Up Half-Down Bun
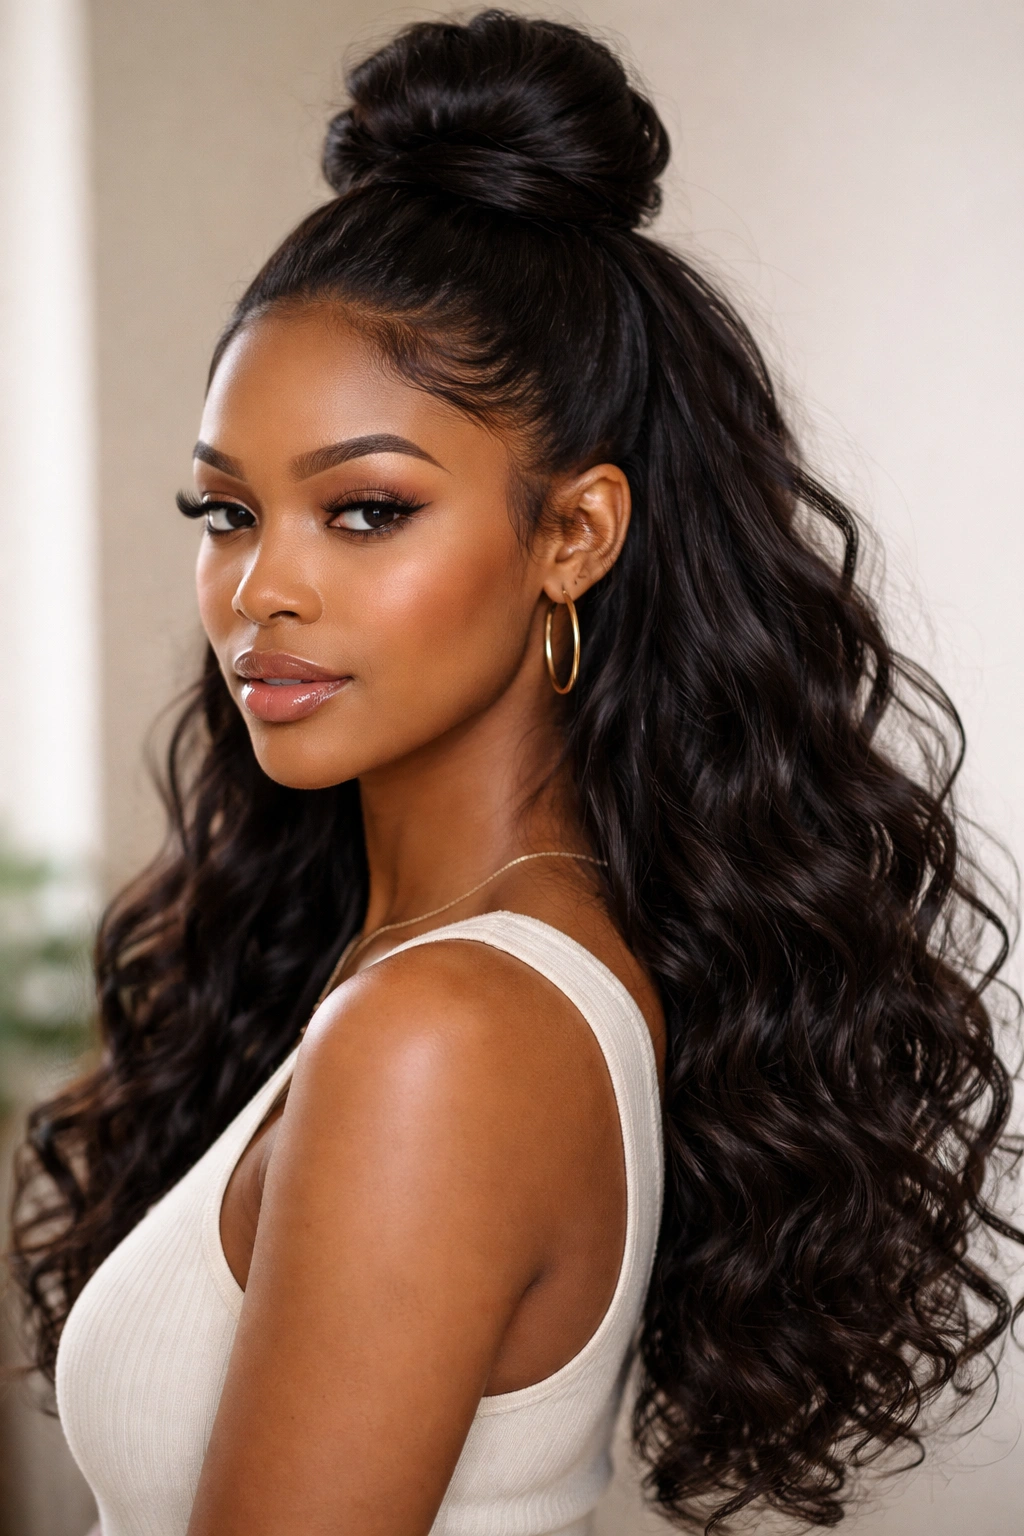
The half-up half-down bun keeps the top half of your hair secured in a bun while leaving the bottom half down to flow freely. This style is perfect for showing off length while managing volume on top, and it works beautifully on natural curls, waves, or relaxed hair. It’s casual enough for everyday wear but polished enough for professional settings or events.
Versatility and Everyday Wearability
This style sits in the sweet spot between “fully up” and “fully down”—it’s protective enough to be functional but relaxed enough to feel casual and approachable. You get the benefit of managing volume at the crown while still showcasing your hair’s length and texture at the bottom. Half-up buns are also relatively easy to refresh; you can redo them even after your hair has been down for part of the day. This style works beautifully on both natural and relaxed hair, and it’s a great option for workdays when you want polished but not overly formal.
Creating a Balanced Half-Up Bun
- Section your hair horizontally across the crown from ear to ear, clipping the bottom half out of the way temporarily
- Brush or comb the top section smoothly backward toward the crown
- Secure this section into a ponytail at the crown with a coated elastic
- Wrap a small section of hair around the elastic base and pin to create a neat bun shape
- Release the bottom half of your hair and let it fall freely
- If you want more volume in the bun, gently fluff and separate the pinned sections
- If your style is natural curls, use a curl refresher or mist and defining product on the bottom half to reactivate curl clumps
Insider note: If you’re wearing this style for work, take the bun down during your commute and let your curls or waves loosen slightly—this makes the overall look feel more relaxed and intentional rather than slightly undone.
8. The Sleek Low Bun with a Face Frame
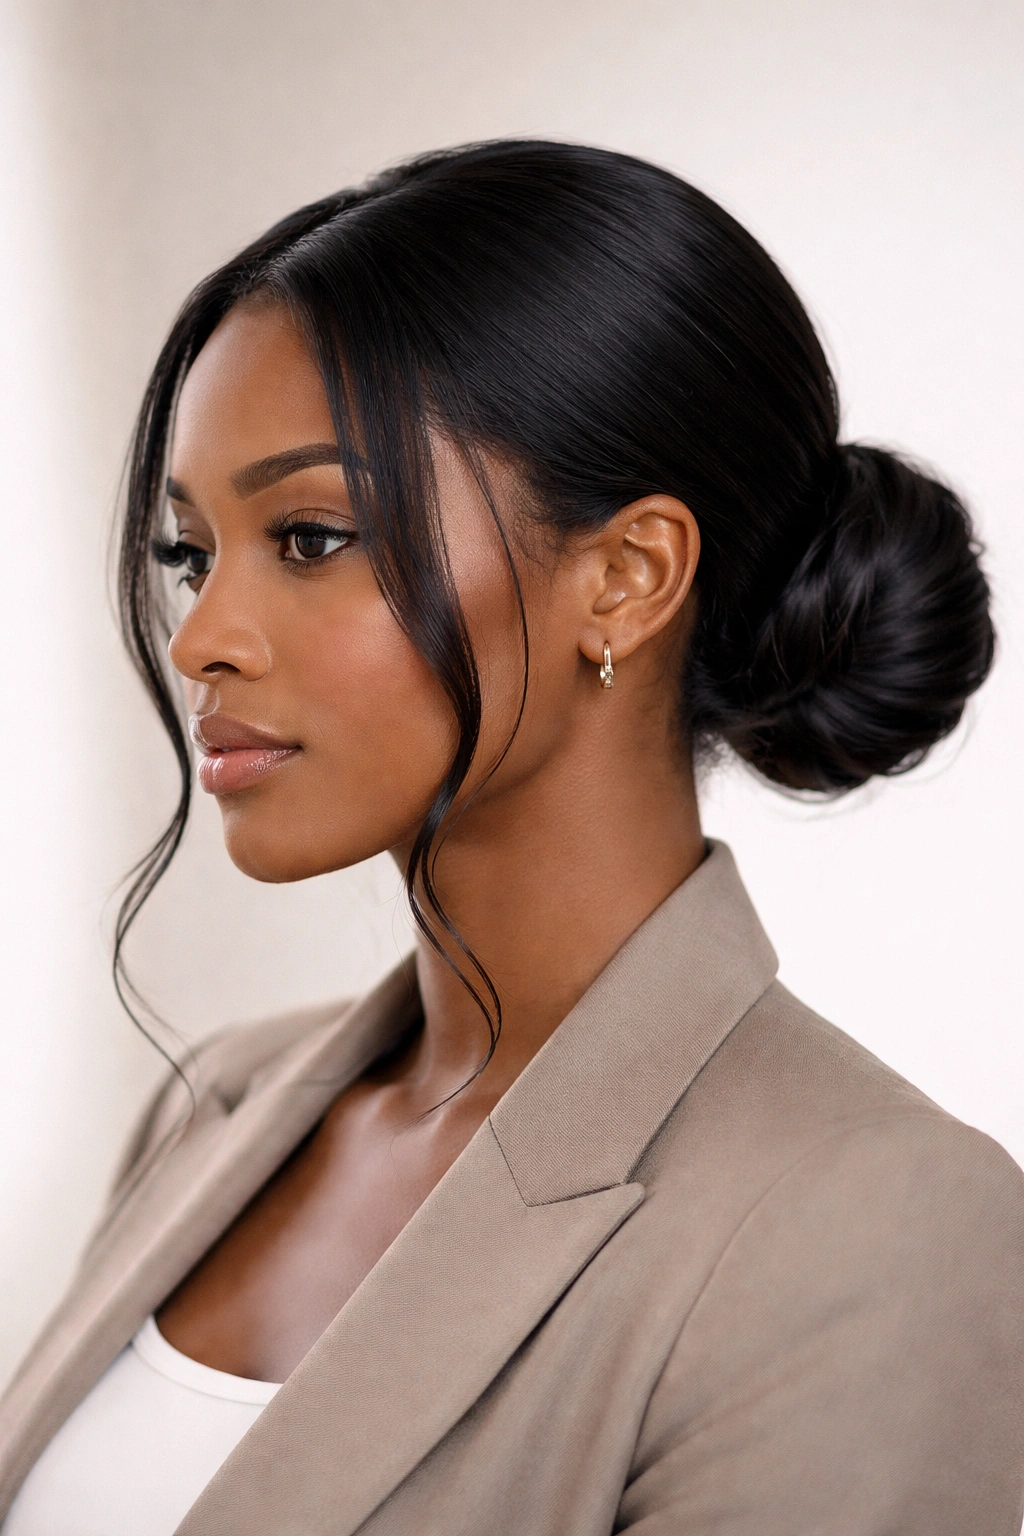
This style gathers hair into a low ponytail at the nape, then coils it into a bun while leaving small pieces of hair loose around the face. These face-framing pieces soften the overall look and add a romantic, intentional element that works beautifully for both professional and social settings. This version works particularly well if you have a rounder face or prefer a less severe hairstyle.
The Psychology of Face Framing
Face-framing pieces change the entire energy of a bun style. Instead of appearing severe or overly polished, the small loose pieces create softness and approachability while still keeping most of your hair secured. This is why this style is popular in professional environments—it reads as polished without feeling aloof. The face-framing pieces also allow a bit of movement when you walk, which adds life to the overall look. You can wear this style for 2-3 days, and the face-framing pieces help conceal any second-day texture changes or frizz around the hairline.
Releasing Intentional Face-Framing Pieces
- Brush your hair smoothly backward and gather it into a low ponytail at the nape
- Before securing the elastic, release small sections on each side of your face (about the thickness of a finger or slightly thicker)
- These pieces should fall naturally in front of your ears
- Secure the rest of the hair into a ponytail with a coated elastic
- Coil the ponytail into a neat bun at the nape and pin securely
- Define your edges with edge control, paying special attention to the hairline
- Take your face-framing pieces and gently curl them around your fingers or a small barrel curling iron for soft waves
- Smooth flyaways with a light wax or edge control, but don’t make them too rigid—they should move naturally
Pro tip: When you take this style down, those face-framing pieces will have set in a wavy pattern—perfect for refreshing your hair on day two.
9. The Braided Bun with Extensions
This style incorporates extensions from the moment you start braiding, creating a full, voluminous bun that might not be possible with your natural hair alone. Braiding with extensions allows you to control the exact thickness and volume of your bun, and it creates a style that can last 7-10 days comfortably. This is an excellent option if you have fine hair, thinning areas, or simply want to experiment with more volume than your natural hair alone provides.
Working with Extensions for Extra Impact
Extensions are a game-changer for Black women because they allow you to protect your natural hair while still achieving the volume and length you want to display. When you braid with extensions from the start, your natural hair is completely protected underneath, and you control exactly how much extension hair goes into the style. This means zero tension on your hairline if you choose, and the ability to create buns that feel full and voluminous without requiring a massive amount of your own hair. The visual result is a style that looks abundant and intentional.
Building a Full Braided Bun
- Start with moisturized, detangled natural hair
- Apply a braiding cream or smoothing product
- Begin by braiding your natural hair with extension hair, starting small at your hairline and gradually feeding in more extension hair as you progress
- Continue until you reach the nape of your neck, or divide your hair into multiple braids if you want a fuller bun
- Gather your braids (and any remaining natural hair) at the nape into a ponytail
- Coil all of the braided sections together into a large, voluminous bun
- Secure tightly with bobby pins, using more pins than you might for a natural-hair-only bun
- The bun should feel sturdy and shouldn’t shift when you gently pull on it
- Smooth your hairline with edge control to complete the look
Worth knowing: Because you have extension hair in the bun, you can actually sleep on this style for 5+ days before you need to take it down and refresh it—the extensions help the braids hold their shape better than natural hair alone.
10. The Wrapped Low Bun with Accessories
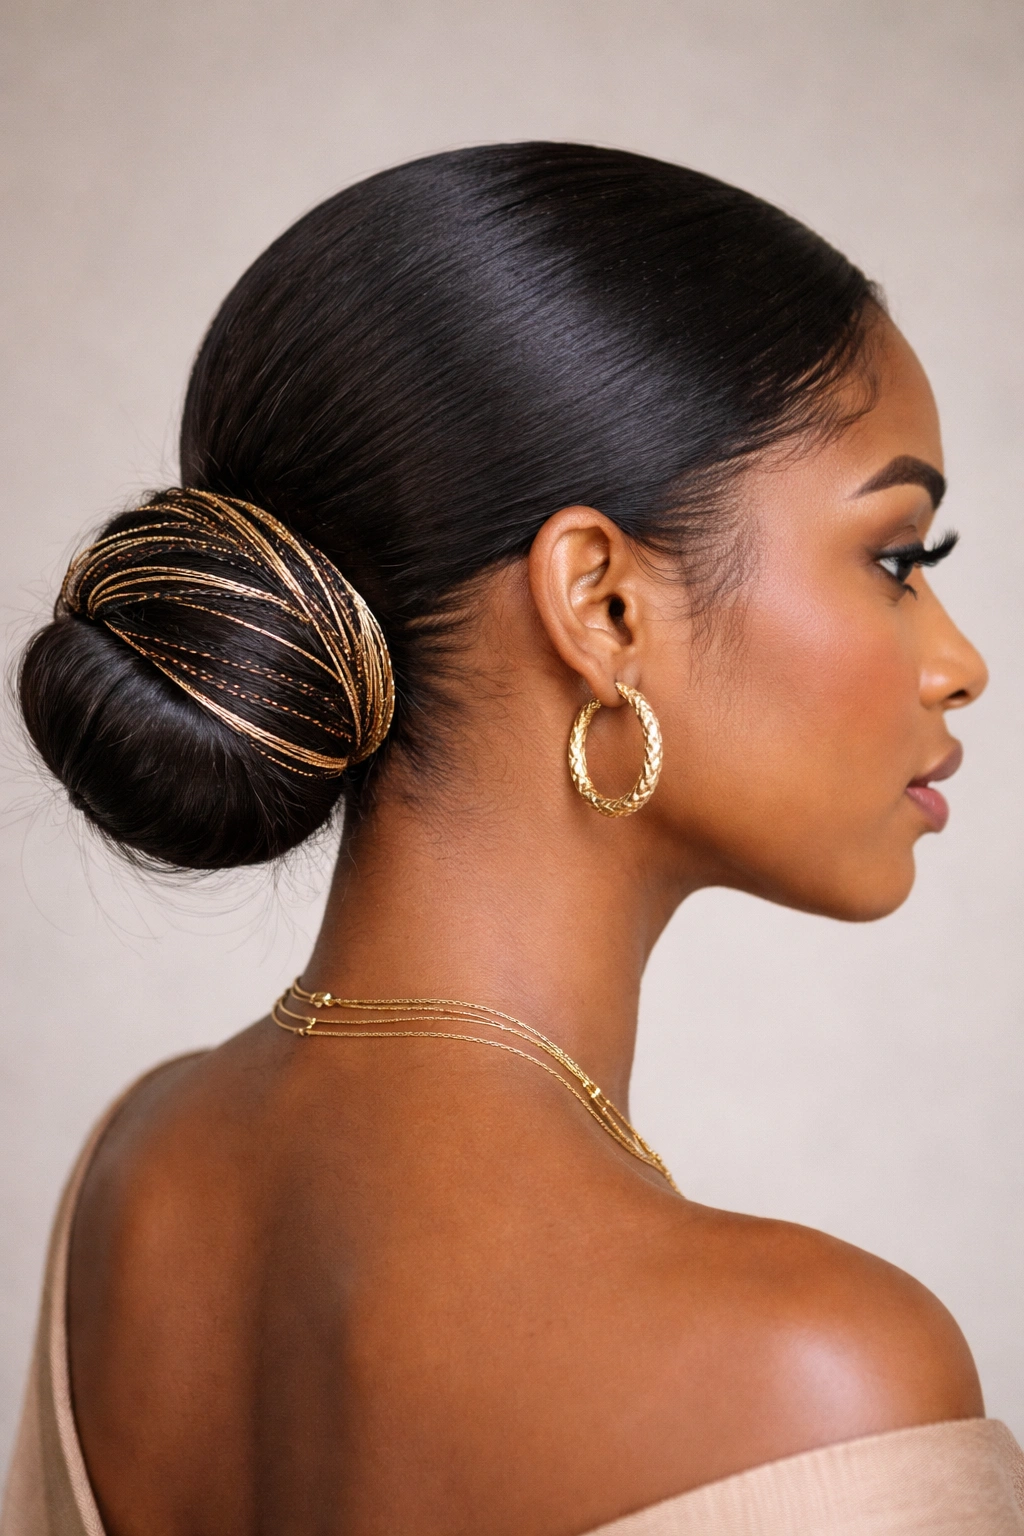
This style creates a sleek, low bun and then wraps decorative hair, thread, or yarn around the bun in a spiral pattern. The wrapping serves both functional and aesthetic purposes—it secures the bun while adding visual interest and allowing you to play with color and texture. This is a perfect style for special occasions or whenever you want to elevate your look with intentional styling details.
Personalization Through Accessories
The wrapped low bun is where styling becomes personal expression. You can wrap with gold thread for elegance, colorful yarn for a bold statement, or metallic cord for sparkle. The wrapping technique is both practical (it actually helps hold the bun together better) and decorative, making it ideal for events, date nights, or any occasion when you want a style that shows intention and thought. The wrapping also makes the bun appear fuller and more polished than an unwrapped bun, even if the base is identical.
Technique for a Secure Wrapped Bun
- Create a sleek, low ponytail and coil it into a neat bun, securing with bobby pins
- Choose your wrapping material (thread, yarn, thin braid, ribbon, or decorative cord)
- Secure one end of your wrapping material at the base of the bun by pinning it under the first coil
- Begin wrapping your material around the bun in a spiral, working from the base upward
- Keep the wrapping tight enough that it holds the bun securely but not so tight that it creates tension
- Continue spiraling until you reach the top of the bun
- Secure the end of your wrapping material by tucking it under the final coil and pinning
- Fluff and shape your bun gently to ensure it looks full and intentional
- Add additional bobby pins if any sections feel loose
Pro tip: If you’re using thread or thin yarn, wrap it in pairs (hold two strands together) to create more visual impact and better structural support than a single strand.
11. The Curved/Side Bun
The curved or side bun shifts the bun off-center, creating an asymmetrical, fashion-forward look that works beautifully for events, nights out, or whenever you want your style to make a statement. The bun sits lower and to one side, and the ponytail curves gracefully to that side as well. This style is elegant and modern while still being completely wearable and practical.
The Appeal of Asymmetry
Asymmetrical hairstyles instantly feel more current and fashion-conscious than perfectly centered styles. A side bun draws attention to one side of your face and neck, which is a styling trick makeup artists and hairstylists use to balance proportions and create visual interest. The curved motion of the ponytail feeding into the side bun creates a graceful line that’s flattering and elongating. This style works beautifully with face-framing pieces or a completely sleek finish, depending on the occasion and your preference.
Creating a Smooth Curved Line
- Brush your hair smoothly back and to one side—let’s say the right side
- Gather your hair into a ponytail that sits low on the right side of your nape
- Make sure the ponytail curves smoothly with the contour of your head—avoid any sharp angles
- Secure with a coated elastic
- Coil the ponytail around the base into a neat, tight bun positioned at the base of the curve
- Pin securely with bobby pins, ensuring the curve of the ponytail is visible and graceful
- Define your edges with edge control, emphasizing the part line and face framing if desired
- If you want a more glamorous version, spritz lightly with a flexible hold spray
Insider note: This style is particularly stunning if you leave one small section of hair loose on the opposite side of your head (the left side in this example) and gently wave or curl it for an ultra-polished, intentional look.
12. The Textured Bun with Loose Curls on Top
This creative style coils your hair into a bun at the crown while leaving curls or waves loose on top of the bun itself. It’s a playful, voluminous look that works beautifully on natural hair and creates serious visual impact. This style is perfect for events, date nights, or any occasion when you want your hair to be the focal point of your overall look.
Maximum Volume with Intentional Structure
By securing a bun at the crown and arranging loose curls on top of it, you’re creating a style with substantial height and volume that looks far more complex than it actually is. The bun provides the structural base while the loose curls provide texture, movement, and visual interest. This style celebrates your natural curl pattern (or your ability to create curls through styling) while keeping the bulk of your hair secured so it won’t fall into your face throughout the day. It’s an excellent option if you want to feel glamorous and polished without feeling overly restrained.
Stacking Curls for Dramatic Impact
- Create a high or mid-crown ponytail and coil it into a secure bun, using multiple bobby pins
- Release a section of hair from the crown area before you created the ponytail—this should be a 2-3 inch section from the very top
- Divide this loose section into 3-4 smaller sections
- Use a curling iron or curl-setting method to create defined curls in each section
- Arrange these curls so they cascade over and around the bun, creating the illusion that the curls are growing directly from the bun
- Pin loose curls gently with bobby pins that match your hair color to keep them in place
- Set with a flexible hold spray so the curls maintain their shape throughout the day
- Gently separate the curls slightly to create dimension and prevent them from looking too clumpy
Pro tip: Create your loose curls at least 15-20 minutes before you plan to style the rest of your hair—this gives them time to cool and set fully, so they hold their shape much longer once pinned into place.
Key Takeaways
Ponytail buns offer Black women the rare combination of protection, versatility, and beauty all in one styling solution. The 12 styles covered here represent a spectrum of options—from sleek and professional to textured and playful, from simple enough for a Tuesday to elaborate enough for a special event. Each style protects your ends, reduces daily manipulation, and can last multiple days, all while allowing you to express your personal style.
The most important thing to remember when wearing any ponytail bun is that tension matters. Your style should feel secure but never painful; if you’re experiencing scalp sensitivity or tenderness, it’s a signal to loosen it slightly. Choose styles that align with your natural hair texture rather than constantly fighting against it—a natural curl pattern that’s celebrated actually holds a bun better than natural curls that are force-pressed straight. And don’t be afraid to modify any of these styles to work with your hair’s specific characteristics, your lifestyle, and your personal aesthetic.
Your ponytail bun should make you feel confident and beautiful while protecting your hair’s health and supporting your growth goals. Whether you’re reaching for a sleek polished look for the office or a voluminous textured style for the weekend, these styles have you covered.