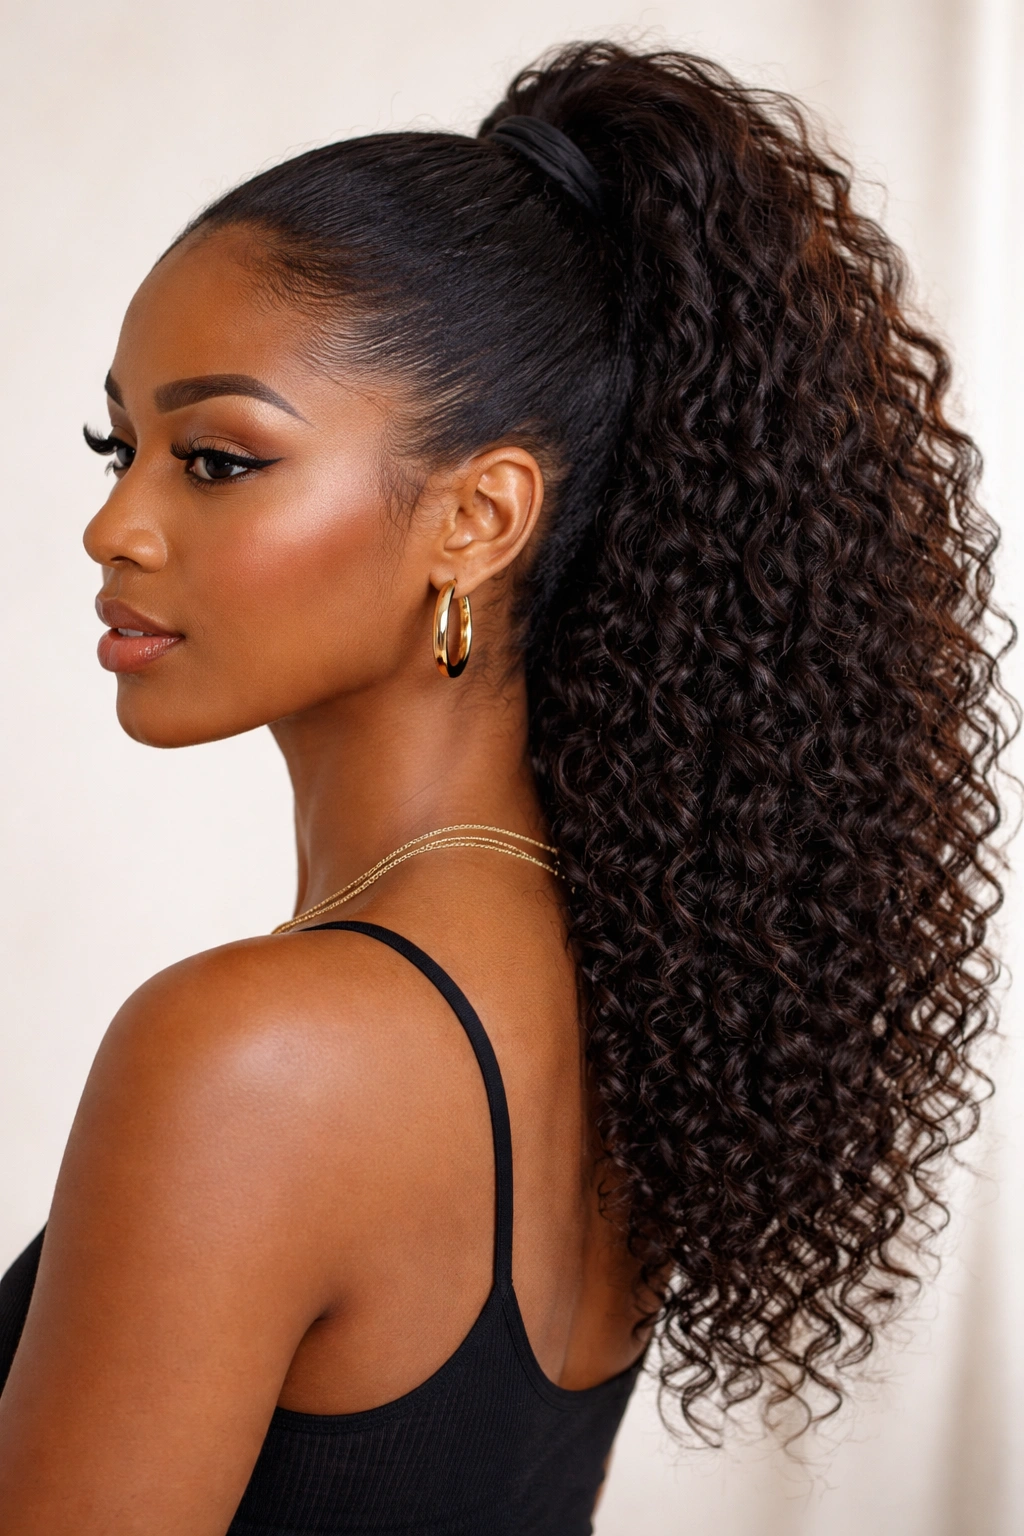
Natural hair thrives when you give it the right structure and intention. A high ponytail isn’t just a quick fix—it’s a statement, a protective style, and a way to transform your look in minutes. The beauty of high ponytails on natural hair is their versatility. Whether your curls are coils, coarser strands, or waves, a well-executed high ponytail can elevate your entire aesthetic while keeping your edges neat and your crown protected from daily friction and breakage.
What makes natural hair ponytails different from other hair types is the way texture plays a role. You’re not fighting your curl pattern; you’re working with it. A high ponytail on natural hair can showcase your volume, highlight your natural texture, or create a sleek, polished look depending on which technique you choose. The key is understanding your specific hair type—whether you have loose waves, defined curls, dense coils, or a combination—and choosing a style that complements rather than fights against your natural structure.
The styles I’m sharing here range from sleek and professional to textured and bold. Some prioritize protective styling and scalp health, while others celebrate the fullness and bounce of your natural hair. Each one works best when you understand the specific technique, the right products for hold and shine, and how to execute it without causing tension or damage. Let’s explore twelve stunning high ponytail options that work beautifully on natural hair.
1. Classic High Ponytail with Edge Control

This is the foundation for every other high ponytail variation. A truly classic high ponytail on natural hair starts with a clean, moisturized base and careful sectioning. The difference between a sloppy ponytail and a polished one comes down to how you gather your hair and smooth your edges—not by flattening your curls, but by directing them intentionally.
How to Execute It Perfectly
Start with damp or freshly styled hair and apply a lightweight leave-in conditioner to your crown section. This keeps your curls defined while providing slip for easy gathering. Using a fine-tooth comb or detangling brush, gently gather your hair at the crown—aim for the area just above the top of your head, not directly on the crown. Secure with a silk or satin elastic, which prevents breakage far better than rubber bands.
Edges and Styling Details
- Use a gel or edge control product specifically designed for natural hair to smooth flyaways and lay your baby hairs flat without crunchiness
- Apply edge control with a soft-bristled brush or your fingertip, using gentle downward and outward strokes
- For longevity, seal your edges with a light hairspray after gelling—this keeps them smooth throughout the day
- Smooth the front hairline first, then work around the sides and back in sections for even coverage
- Consider parting your front hairline slightly to one side for a more intentional, styled appearance rather than a severe center part
Pro tip: The height of your ponytail matters as much as the technique. Positioning it too low creates strain on your hairline; too high can look harsh. The sweet spot is usually about two fingers’ width above where your natural hairline ends.
2. Sleek High Bun Wrap
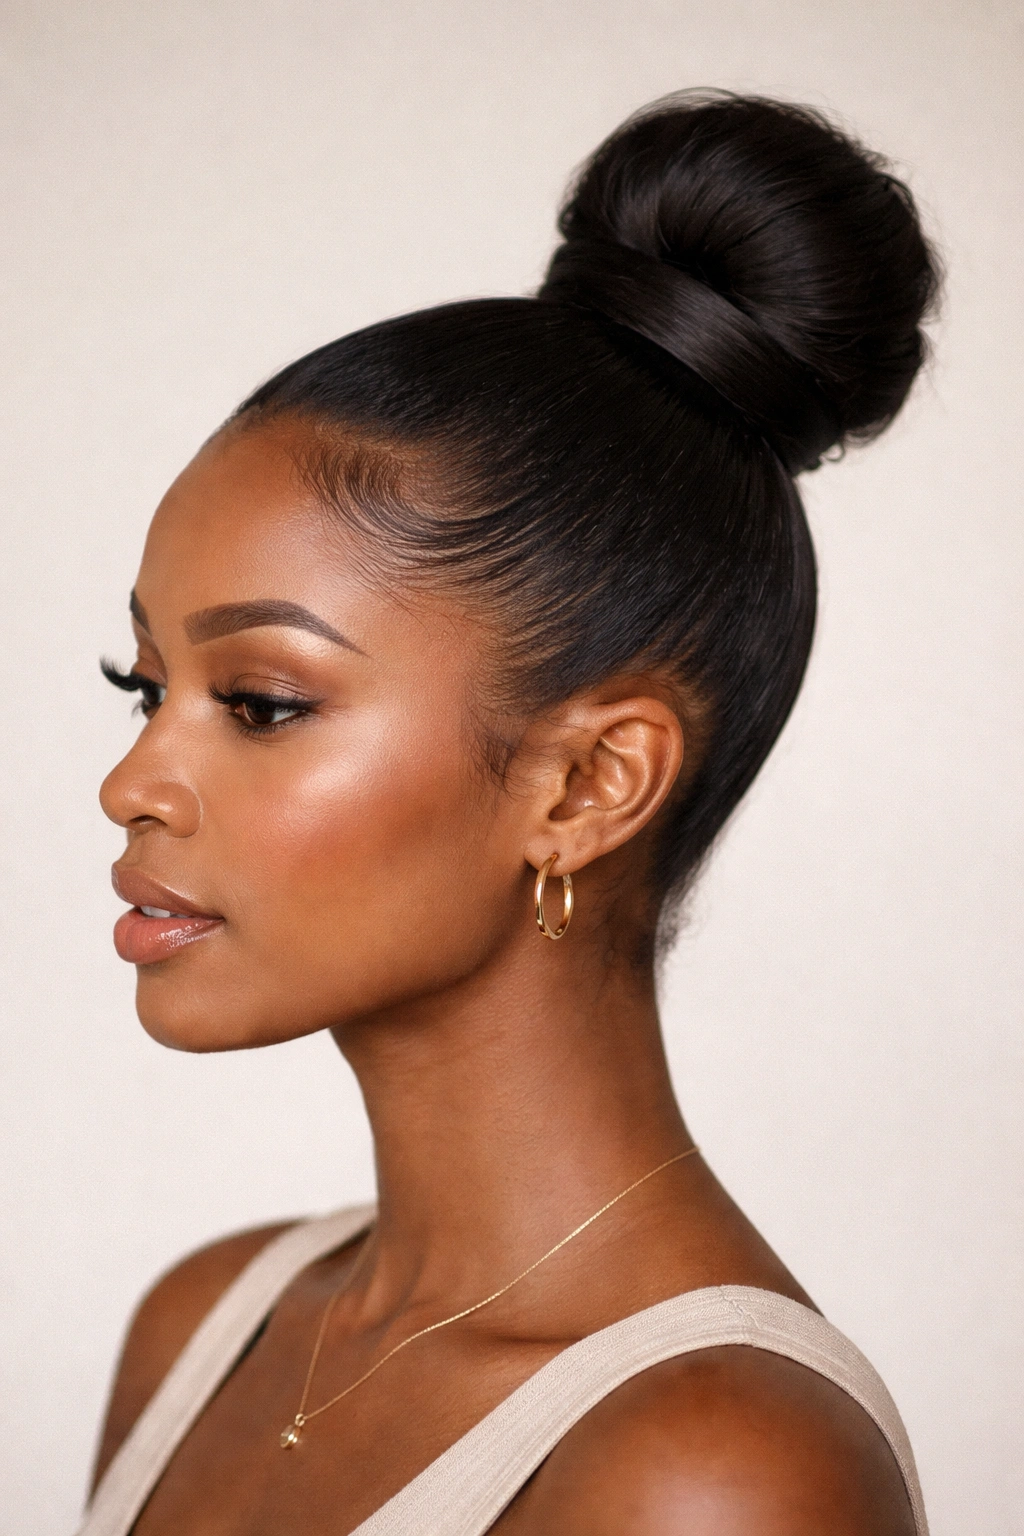
A sleek high ponytail with a wrap creates one of the most polished, versatile looks in your arsenal. The wrap—whether it’s a thin strand of your own hair, a silk ribbon, or a decorative cuff—instantly elevates the entire style from simple to intentional. This style works beautifully on all curl patterns because the wrap gives definition to the entire look.
Building the Wrap
Gather your high ponytail as described above, but this time you’re going to add a secondary element. Once secured with your elastic, take a thin section of hair from the underside of the ponytail base (about the thickness of a pencil) and wrap it tightly around the elastic, covering it completely. Pin the end underneath with a bobby pin that matches your hair color.
Variations on the Wrap Technique
- Silk ribbon wrap: Thread a silk ribbon through the ponytail elastic before gathering, then wrap it around the base alongside your hair for extra visual interest
- Decorative cuff method: Use a claw clip, metal cuff, or beaded band instead of wrapping hair—position it at the base of the ponytail for instant elevation
- Twisted wrap: Instead of wrapping hair straight, twist it gently as you wind it around the elastic for a more dimensional effect
- Double wrap: Use two thin strands of hair crossing over each other for a braided appearance at the base
The wrap serves a practical purpose too—it covers the elastic and helps secure loose curls that might slip from the gathering elastic, keeping your ponytail intact longer.
3. High Ponytail with Wrap-Around Braid
This style bridges sleek and textured beautifully. You’re creating a high ponytail, but instead of a simple wrap, you’re incorporating a three-strand braid that winds around the base. This adds visual dimension and texture while maintaining the clean, put-together look of a high ponytail. It’s protective, interesting, and works on virtually every curl pattern.
Step-by-Step Execution
Gather your high ponytail and secure it loosely with an elastic. From the underside of the gathered hair, take three thin sections (about the width of a pencil each) and begin a traditional three-strand braid, weaving these sections around the elastic base. Keep the braid tight and close to the ponytail base so it sits snugly without gaps.
Securing and Finishing
- Pin the braid end with a bobby pin tucked underneath so it’s invisible
- You can leave the remainder of the ponytail in its natural texture, twist it, or even braid it for added interest
- If your ponytail slips while braiding, secure it with a temporary clip or second elastic and remove it once the braid is secured
- To prevent the braid from unraveling throughout the day, seal the end with a light-hold gel or hairspray
The wrap-around braid keeps everything in place longer than a simple wrap and creates visual interest that makes the style feel intentionally designed rather than hastily thrown together.
4. Layered High Ponytail for Volume
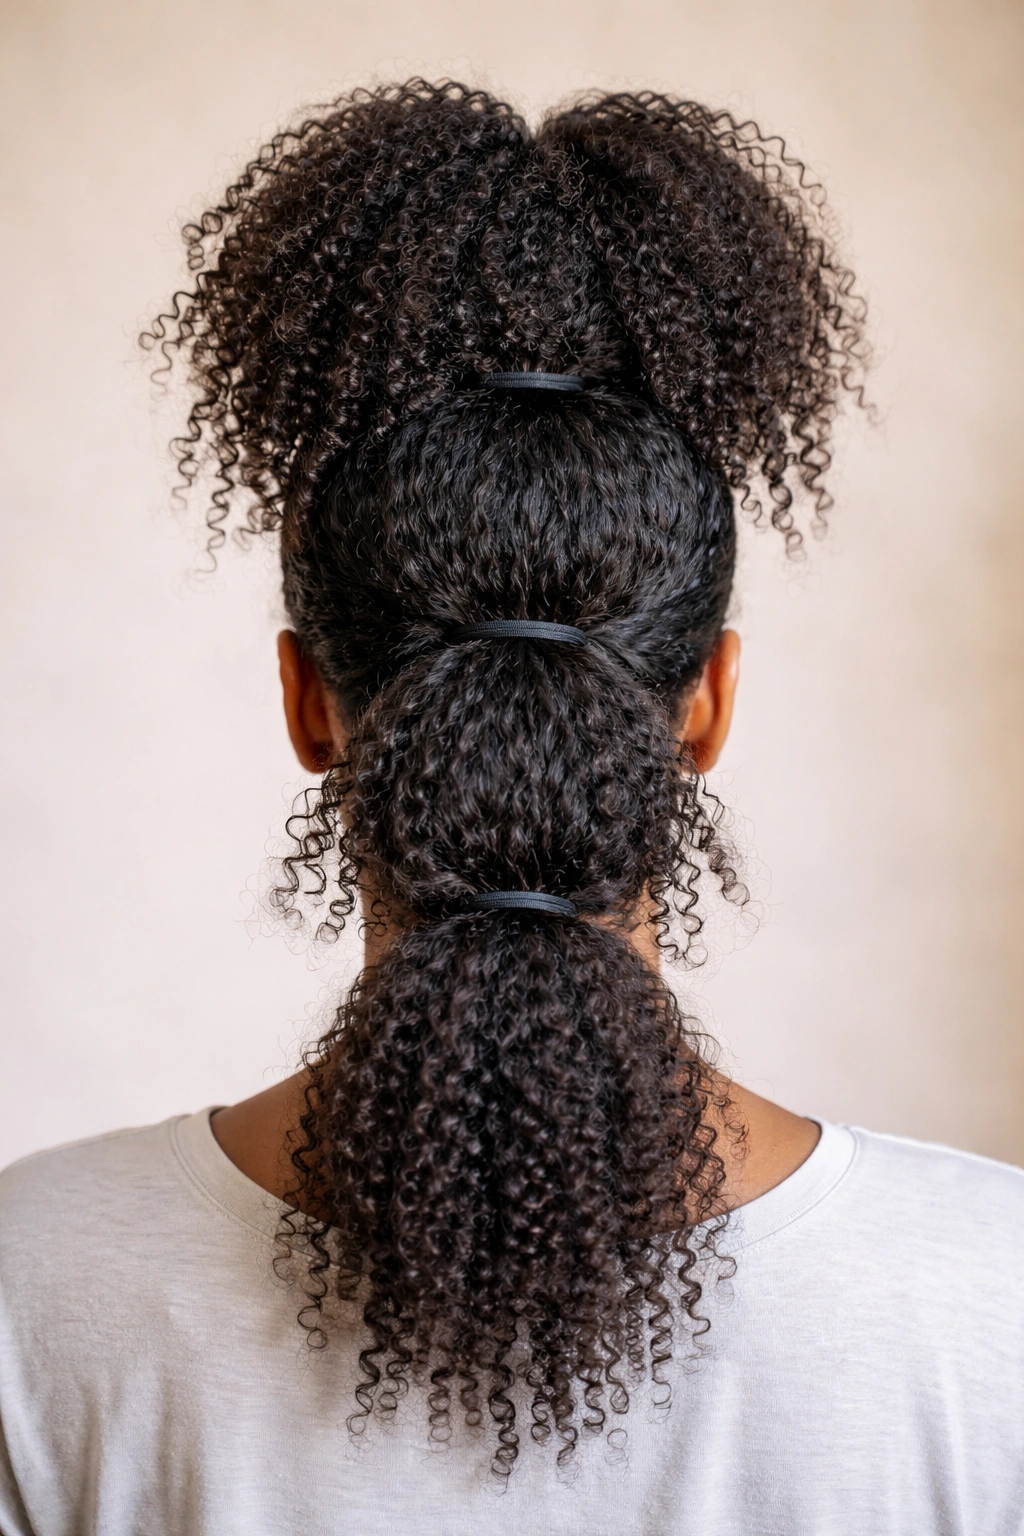
If you have denser natural hair or you want maximum fullness, a layered ponytail creates that coveted three-dimensional effect. This technique involves creating multiple ponytails stacked vertically, each one sitting just above the previous. It looks complicated but is remarkably simple to execute, and it distributes tension across a wider area of your scalp, making it safer for frequent wear.
Creating the Layered Effect
Divide your hair into three horizontal sections using clips or your fingers. Gather the bottom section into a ponytail at the nape of your neck. Then gather the middle section into a ponytail just above it, and finally gather the top section into your high ponytail. Use elastics that match your hair color for each layer. Once all three are secured, gently pull and fluff each section outward to create fullness.
Why Layering Matters for Natural Hair
- Distributes tension across multiple areas rather than putting all the weight on one point on your scalp
- Creates visual fullness and height without requiring as much hair volume
- Allows you to style each section slightly differently for added dimension
- Makes it easier to work with thicker or denser natural hair that might be difficult to gather into a single high ponytail
- The stacked effect is actually quite popular in contemporary natural hair styling
Pro tip: Don’t make your layers identical in size. Make your top ponytail slightly smaller than your middle one and your middle slightly smaller than your bottom—this creates a more dynamic, flattering silhouette than perfectly even sections.
5. High Ponytail with Side-Swept Bang Section
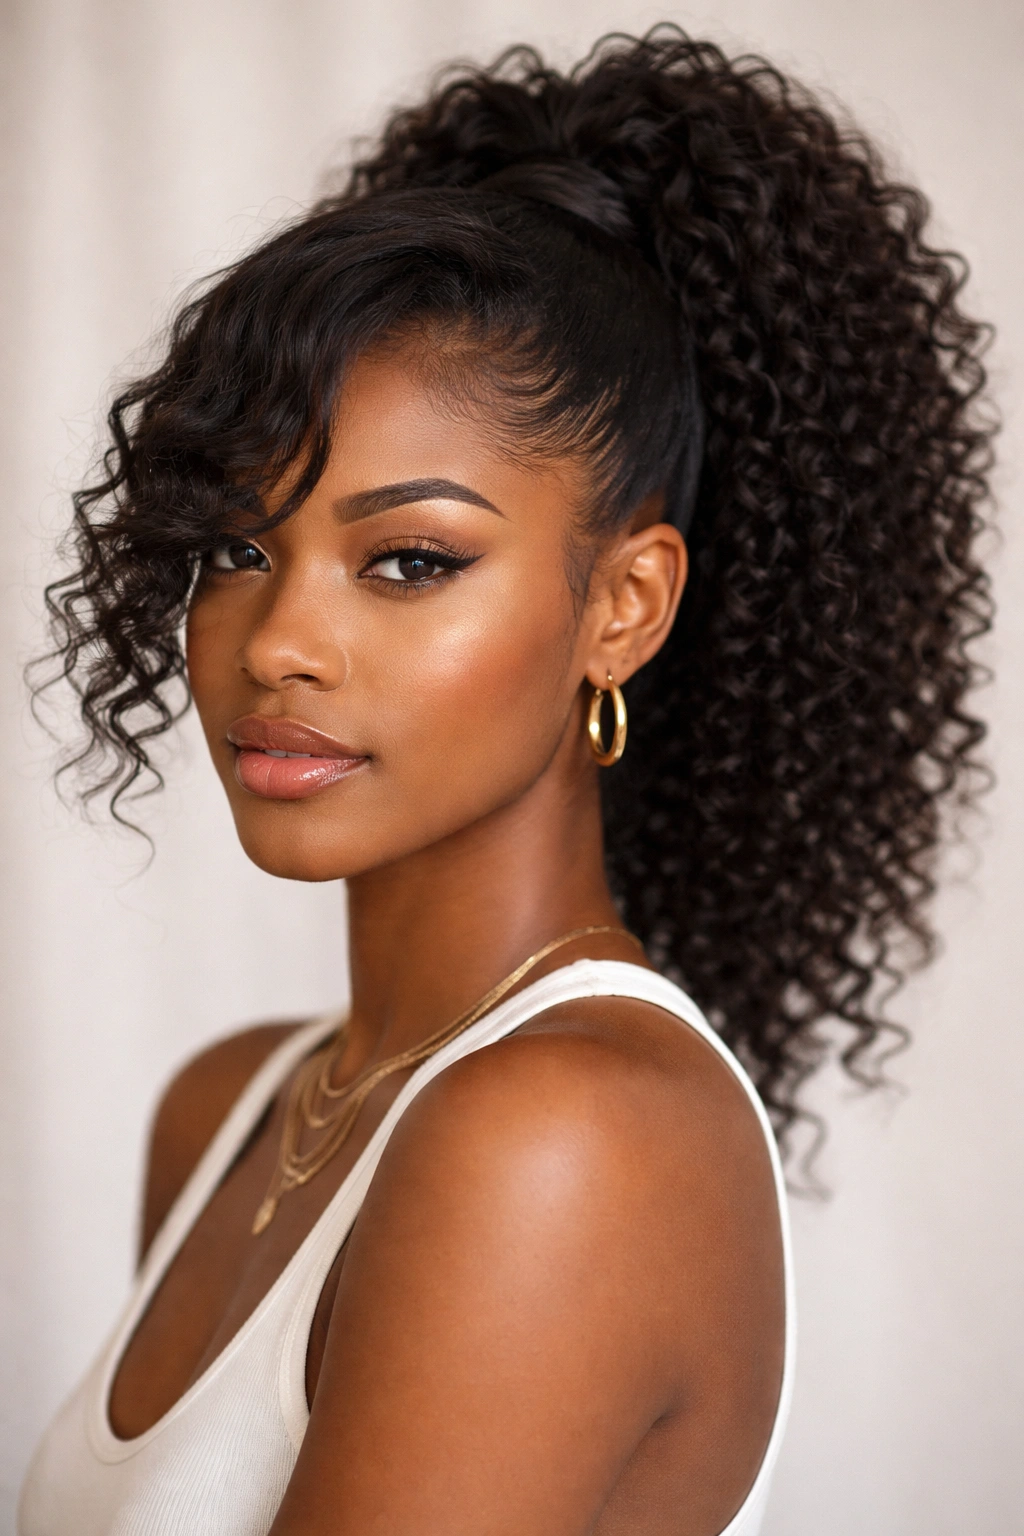
This style combines a high ponytail with a textured bang section that frames your face on one side. It’s perfect for days when you want your hair secured but still want some face-framing movement. The bang section can be curly and wild or twisted for definition—you’re in complete control of how much texture you show.
Creating the Side-Swept Section
Before gathering your full high ponytail, take a section from the front hairline on one side of your face (roughly from your temple to the side of your part). Twist, braid, or leave this section loose while you create your high ponytail with the remainder of your hair. Once the ponytail is secured, you can style this bang section however you like—let it curl naturally, twist it and pin it to the side, or braid it and drape it across your ponytail.
Styling Options for the Bang Section
- Full wave and drape: Leave the section loose so your curls hang naturally, framing your face
- Twisted detail: Gently twist the section and pin it to the side of your head or let it fall alongside your face
- Braid integration: Create a side braid and either pin it to the back of your ponytail or let it frame your shoulder
- Zigzag pattern: Create a zigzag part through the bang section for visual interest
- Two-strand twist: Divide the section into two and twist them together for a defined, intentional look
This style is particularly flattering because the face-framing section draws attention to your features while keeping everything else organized and off your neck.
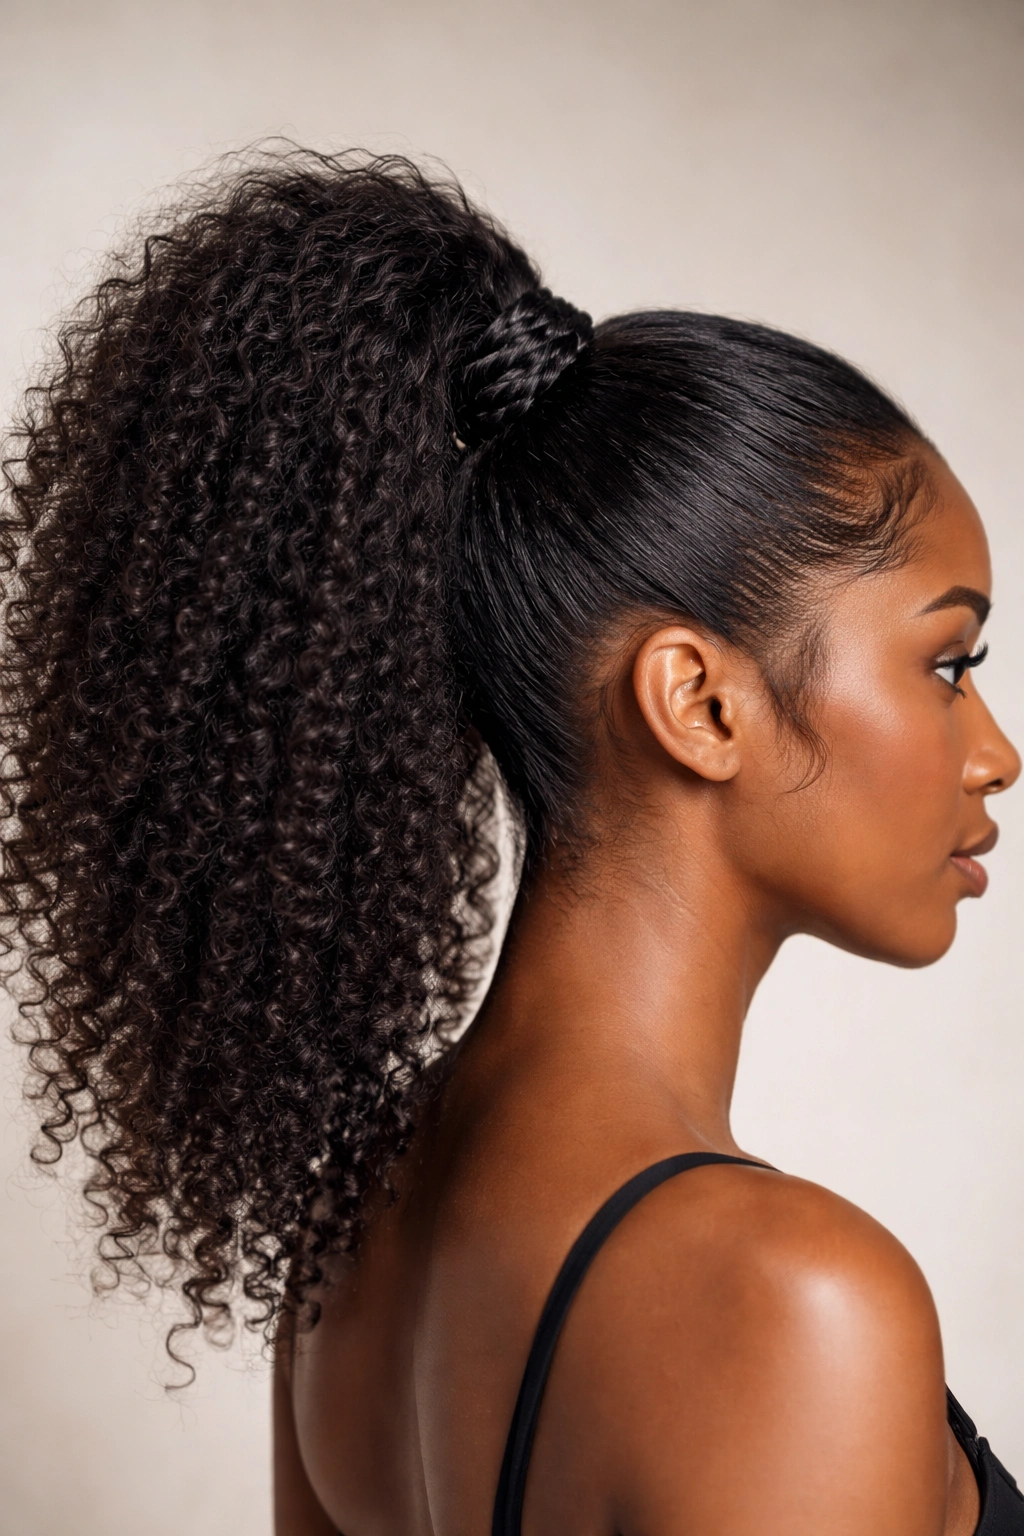
6. Two-Strand Twist High Ponytail
For textured natural hair, twisting creates defined structure and visual interest. A two-strand twist high ponytail gives you the security of a gathered style with the beautiful texture of twists. This works especially well on tighter curl patterns or coily hair where twists hold beautifully and create that gorgeous spiral dimension.
How to Execute Two-Strand Twists in Your Ponytail
Gather your hair into a high ponytail but don’t finish the style yet. Divide the ponytail into two thick sections and begin two-strand twisting them around each other. The tighter you twist, the more defined your twists will be; looser twists create a more flowing, stretched-out appearance. Continue twisting all the way to the ends of your hair. For extra hold, lightly mist the twists with a light-hold spray as you work.
Variations and Styling Ideas
- Solo twist: Keep the twists as one unified element within your ponytail for a bold, defined look
- Multiple twisted sections: Divide your ponytail into three or four thinner sections and twist each individually for a more intricate appearance
- Twisted base with loose ends: Twist only the first few inches where the ponytail gathers, then let the remaining hair hang naturally
- Spiral pin: Roll your twisted ponytail into a spiral bun shape and pin it for an entirely different look
- Wrap with twists: Use your twisted ponytail sections as the wrapping element around your base elastic
Two-strand twists are protective, beautiful, and completely texture-appropriate for natural hair. They also last longer than loose ponytails because the twisting creates friction that holds everything in place.
7. High Ponytail with Decorative Cuff

This is the quickest way to transform a basic ponytail into something that looks intentionally styled and elevated. A decorative cuff—whether it’s a metal ring, a beaded band, a silk scrunchie, or a pearl claw clip—sits at the base of your ponytail and instantly makes the entire look feel more polished. It’s minimal effort with maximum visual impact.
Choosing the Right Cuff for Your Style
Metal cuffs and rings create a modern, sometimes edgy aesthetic. They work beautifully on sleek ponytails and look especially striking against contrasting hair colors or when worn with multiple cuffs stacked together. Beaded bands add texture and can incorporate your personal style through color and pattern choices. Silk cuffs or scrunchies are gentler on your hair and add luxury without bulk.
Positioning and Stacking
- Position a single cuff directly at the base of your elastic for clean, minimal styling
- Stack two or three cuffs together for a bolder, more statement-making look
- Layer different textures—try a metal cuff underneath a beaded band for visual interest
- Leave your ponytail elastic visible if it’s a complementary color, or hide it completely under the cuff
- Consider the overall tone of your outfit and choose cuff colors or styles that coordinate
A cuff takes about three seconds to add but completely changes the perceived effort level of your entire look. It signals intentionality and style awareness, which is why this simple addition works so well.
8. Feed-In Braid High Ponytail
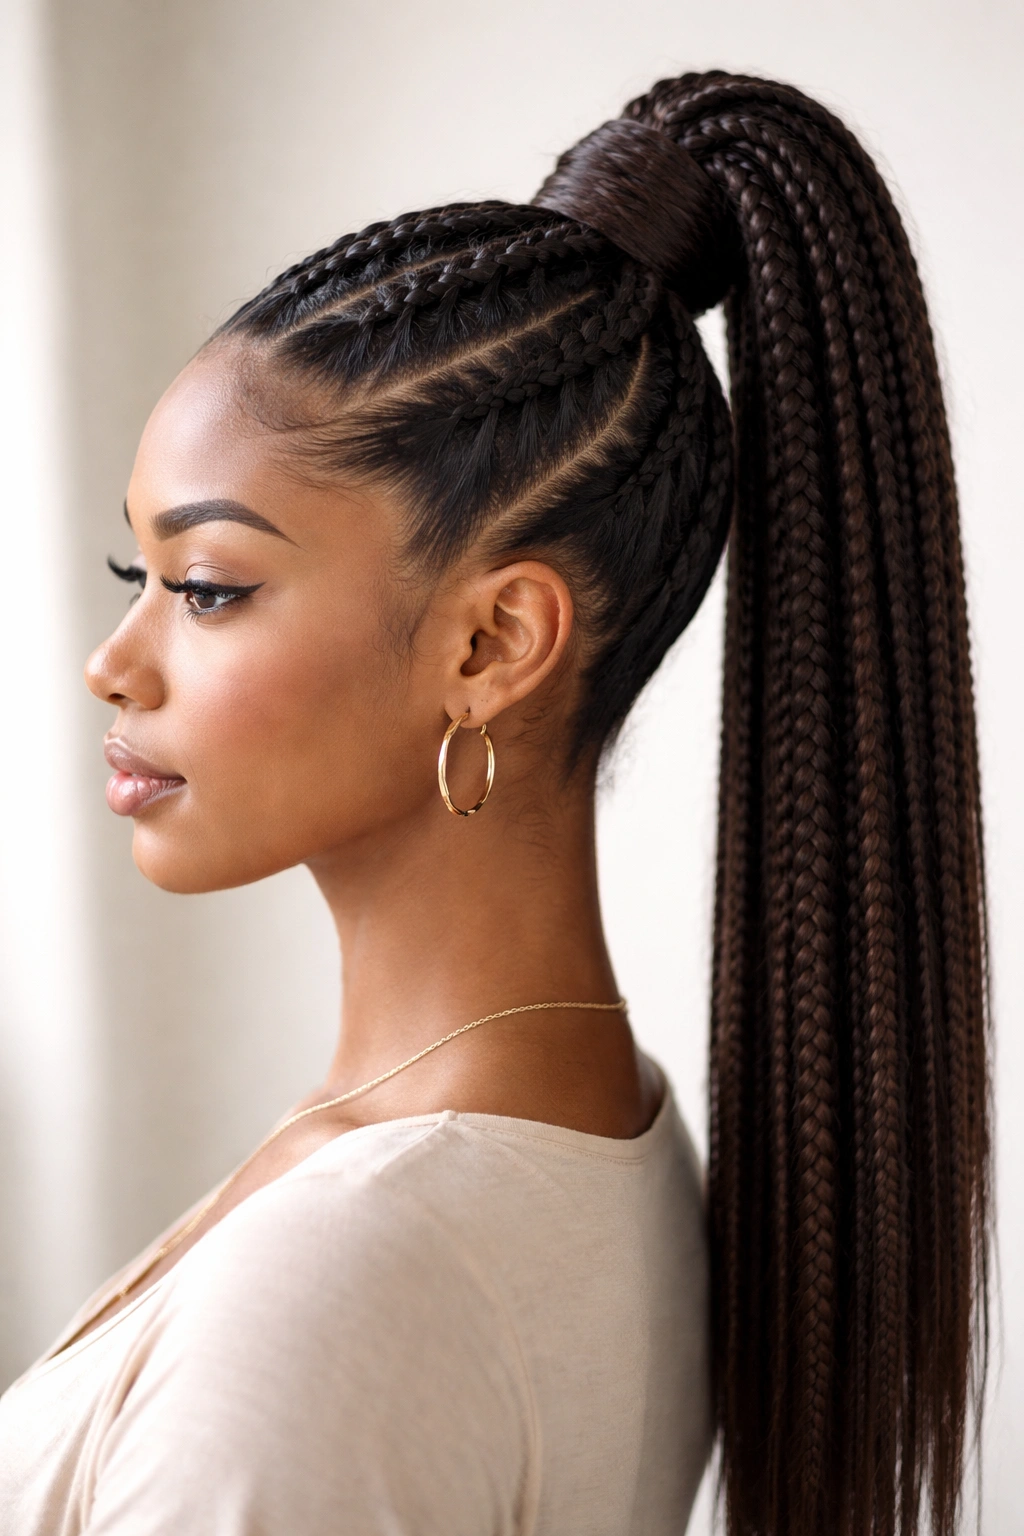
This is a more advanced but absolutely stunning technique that creates the appearance of braids feeding into your high ponytail base. It looks intricate and professional while being totally doable at home. The key is understanding how to build the braids so they lead naturally into your gathered hair.
Understanding the Feed-In Technique
Instead of pulling all your hair straight up into a ponytail, you’re creating two or more braids on either side of your head that feed upward and merge into your high ponytail. Start each braid from your temple or upper ear area and braid upward and inward, adding hair as you go (this is called French braiding). As you approach the crown, release the braids and gather all the hair—including the braid sections—into your high ponytail.
Step-by-Step Breakdown
- Create a clean side part on one side of your head
- Start a feed-in braid on each side from behind your ears, braiding upward
- Braid all the way to the crown, adding hair gradually as you approach it
- Once both braids reach the crown, stop braiding and gather all your hair (including the braided sections) into a high ponytail
- Secure with an elastic and optionally wrap the base or add a decorative cuff
- To make the braids more visible, gently pull on the edges of each braid to create a fluffier appearance
This style requires practice and patience, but it’s worth mastering because it looks so polished and intentional. It also distributes tension more evenly than a simple high ponytail, making it protective for long-term wear.
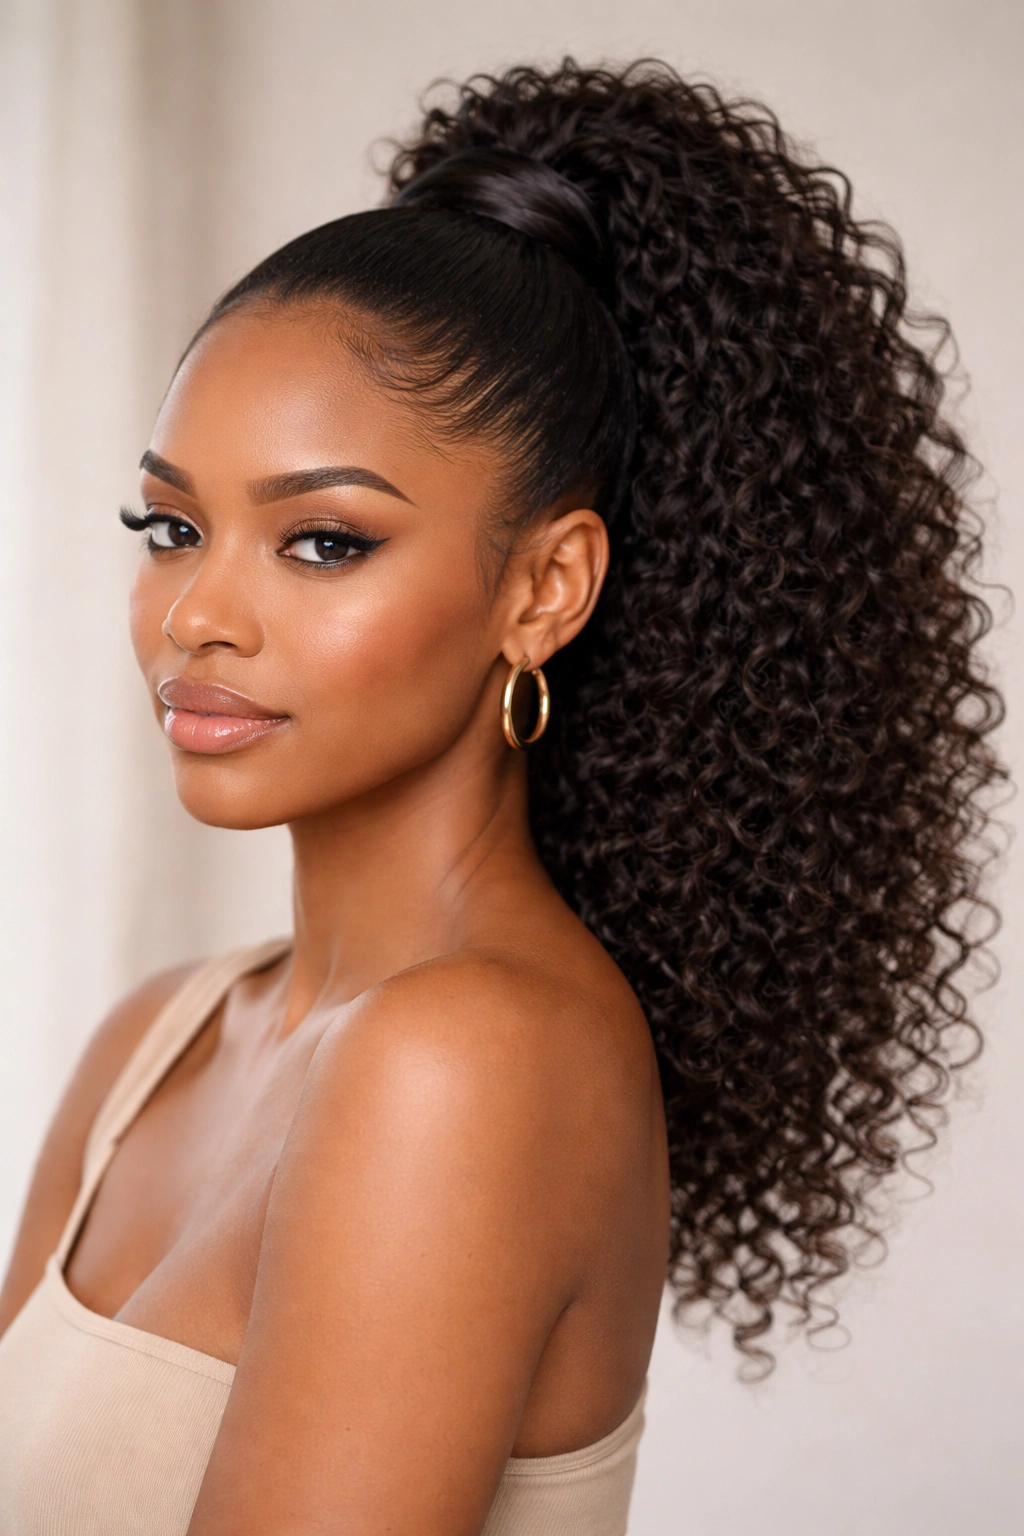
9. High Puff with Sleek Sides
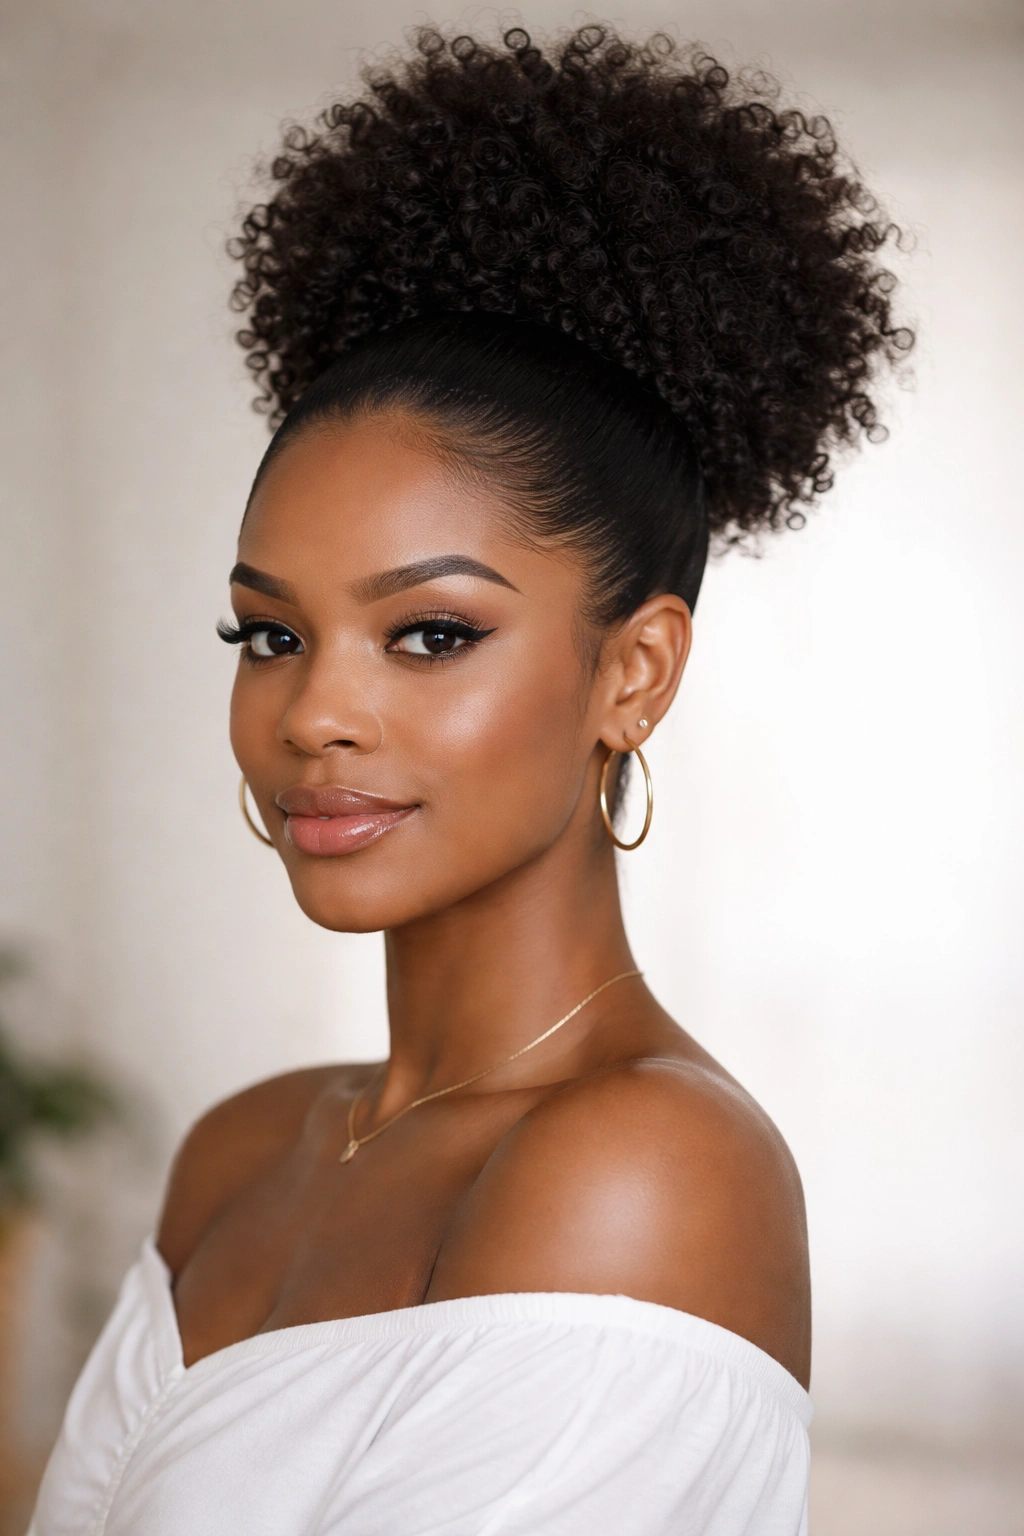
A high puff is technically a ponytail gathered at the crown but styled into a full, rounded shape rather than hanging down. It’s one of the most iconic and flattering natural hair styles because it celebrates your volume and texture. The sleek sides provide contrast and keep the overall look polished rather than chaotic.
Creating Your High Puff Base
Gather your hair into a high ponytail at the crown. Rather than letting it hang, hold the gathered ponytail and gently tease it backward and upward with your fingers or a brush, creating a rounded pouf shape. Smooth the sides and back of your head with edge control and a fine-tooth comb for a sleek contrast. The goal is a full, rounded crown with smooth, controlled sides.
Achieving the Perfect Puff Shape
- Use a volumizing mousse or lightweight styling cream on your ponytail section before gathering to enhance fullness
- Tease gently, starting from the base of the gathered ponytail and working outward
- Use a large barrel brush or your hands to shape the puff into a round or slightly oval shape
- Smooth your baby hairs and edges last with gel or edge control
- Pin or secure the puff shape from underneath with bobby pins if it needs extra support
A high puff is incredibly versatile. You can wear it simple and elegant for professional settings, or add wraps, twists, or braids to the puff base for a more textured, styled appearance. It’s also one of the best protective styles for natural hair because it keeps your ends tucked in and protected from friction and manipulation.
10. High Ponytail with Clip-In Extensions
If you want maximum length, volume, or the option to switch up your look without manipulating your real hair daily, clip-in extensions work beautifully with high ponytails on natural hair. This gives you flexibility and protection—you’re not creating tension on your own hair constantly, and you can remove the extensions each night.
Selecting Extensions That Work for Natural Hair
Not all extensions work well with natural hair texture. Look for extensions with a texture that matches or is close to your natural curl pattern. Straight extensions against very curly natural hair will look jarring and obvious. You want the transition between your natural hair and the extension to blend seamlessly. Human hair extensions are typically the best option because they can be styled, curled, and cared for just like your own hair.
Installation and Blending Technique
- Gather your natural hair into a high ponytail but don’t fully secure it yet
- Clip extensions into the underside of your gathered hair (usually 2-3 clips distributed around the base)
- Secure your natural hair with an elastic that coordinates with your extensions
- Arrange the ponytail so your extensions blend seamlessly with your natural hair
- Gently separate and blend the two textures with your fingers or a brush for a cohesive look
- Style the ponytail as you would naturally—twist it, braid it, or leave it loose
Extensions give you styling flexibility while keeping your own hair protected. Just remember to remove them nightly and condition both your natural hair and the extensions regularly to maintain their health and appearance.
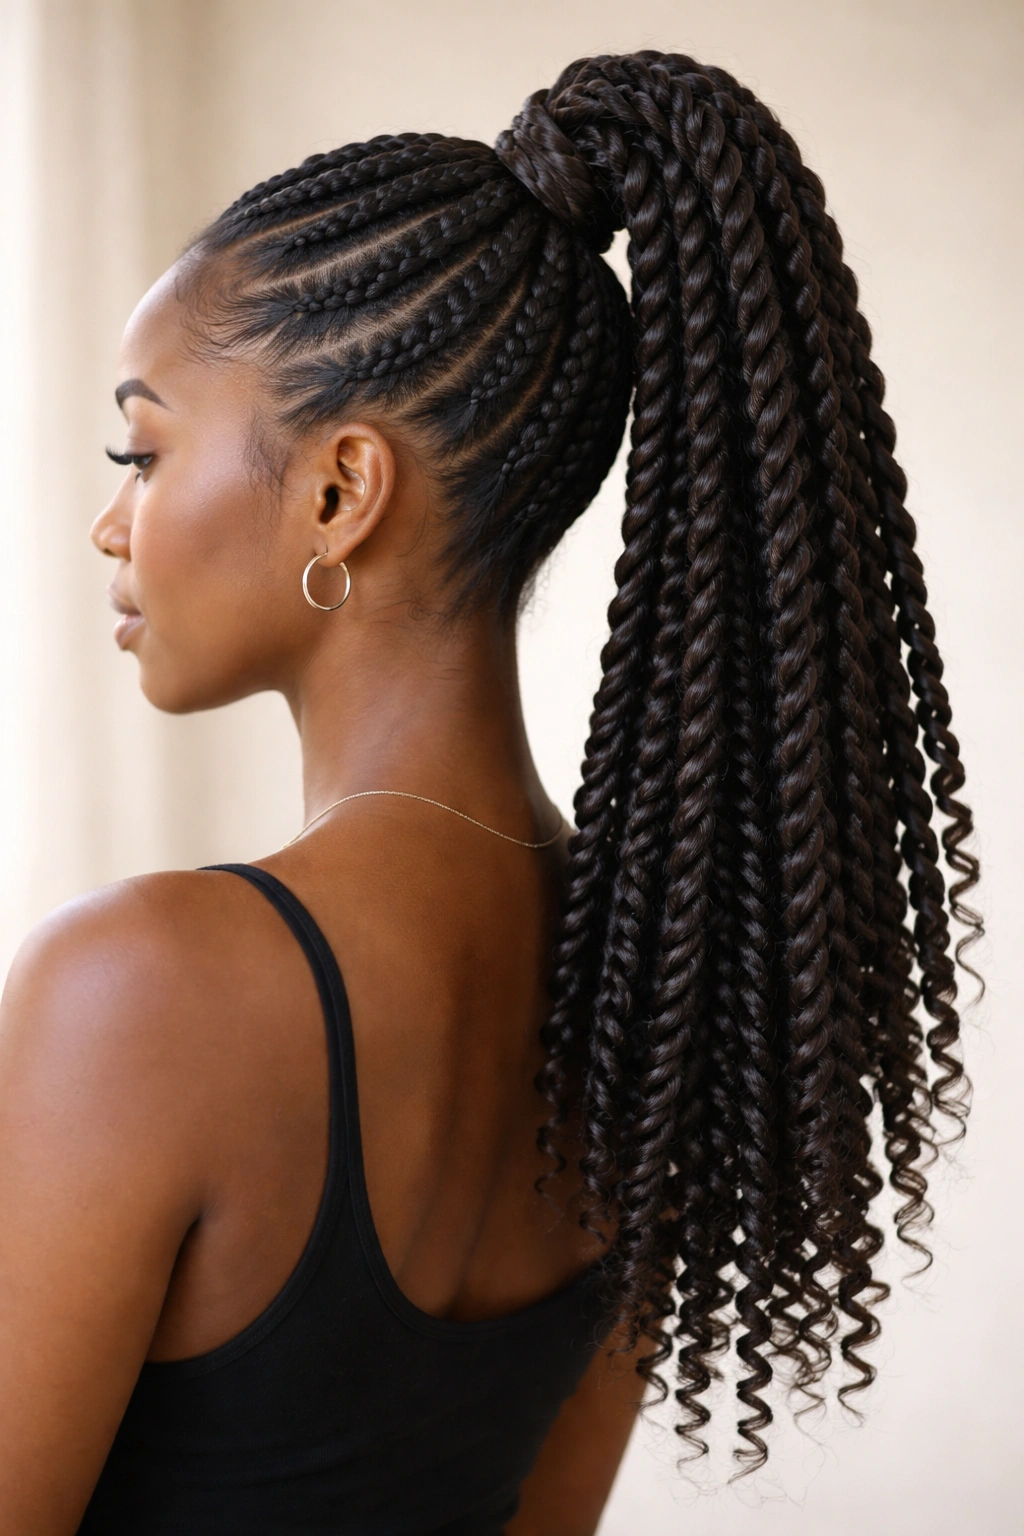
11. Twisted High Ponytail with Full Volume

This style celebrates both texture and fullness. You’re creating a high ponytail but incorporating twists throughout the entire length, creating defined spiral texture from root to end. It’s protective, beautiful, and looks especially striking on coily or tightly textured natural hair.
Building Texture Through Strategic Twisting
Gather your high ponytail as usual. Divide the gathered ponytail into four to six thinner sections, depending on how much texture you want. Two-strand twist each section from the base all the way to the ends. These individual twisted sections will sit together, creating an overall textured, dimensional look that’s far more interesting than a straight ponytail.
Enhancing and Maintaining the Twists
- Use a light-hold gel or curl cream on each section before twisting to enhance definition and hold
- Keep each twist relatively tight if you want crisp, defined spirals, or looser for a more relaxed, flowing appearance
- Mist lightly with hairspray after twisting to lock the texture in place
- Pin the twist ends if they feel loose or if you want to wrap them into a bun shape
- This style lasts beautifully for several days, especially if you refresh with a light spritz of water mixed with leave-in conditioner
- Sleep on a silk pillowcase or bonnet to preserve the twists overnight
Twisted ponytails are protective because the twisting creates friction that minimizes friction-induced breakage. They’re also gorgeous because twists showcase your natural texture in the most flattering way possible. This is a style that works across nearly every curl pattern and hair type.
12. High Ponytail with Accessory Styling
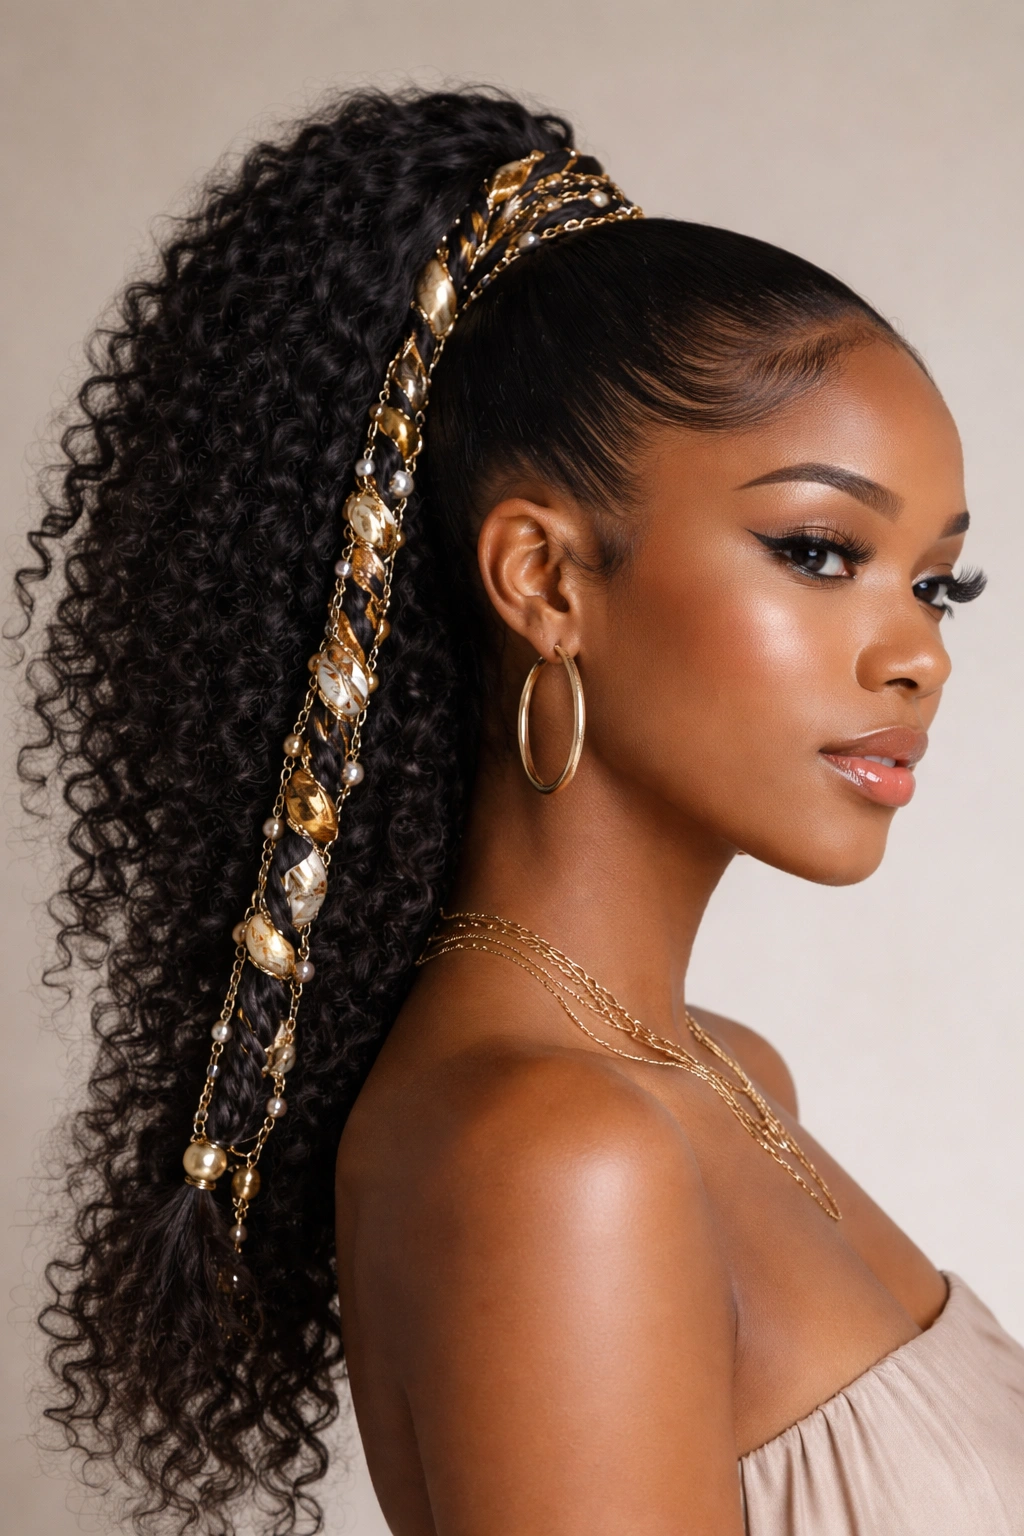
This is where personality shines. The same basic high ponytail becomes completely different based on what accessories you choose. Beads, pearls, strings, chains, or scarves can be woven through, wrapped around, or layered with your ponytail to create a personalized, statement-making look.
Accessory Integration Methods
You can weave thin chains or strings through the twists or coils of your natural ponytail hair, thread beads onto individual sections, wrap a silk scarf around the base, or tie decorative strings at intervals down the length of your ponytail. Each method creates a different vibe. Chains feel modern and edgy. Beads add texture and cultural significance. Scarves add color and dimension. Strings feel playful and fun.
Creating Your Unique Signature
- Choose accessories in colors that coordinate with your overall style or outfit
- Mix textures—try metallic chains with soft silk scarves for visual and tactile contrast
- Consider the occasion—minimal accessories for professional settings, bolder choices for casual or creative spaces
- Weave or wrap accessories while your ponytail is freshly styled for easier integration
- Secure everything firmly so nothing shifts or falls out throughout your day
- Don’t overcrowd your ponytail—sometimes one or two statement accessories are more effective than many
This approach transforms a simple high ponytail into an expression of your personal style. The same base hairstyle becomes completely different when you accessorize intentionally, which means you get more versatility and visual interest from your styling routine.
Final Thoughts
A high ponytail on natural hair is far more than just a quick fix—it’s a statement of style, a protective choice, and a celebration of your natural texture. Whether you choose a sleek classic style, an intricate feed-in braid, or a textured twist situation, the foundation is the same: gather intentionally, secure properly, and take care of your edges and scalp.
The beauty of these twelve styles is that they work across different curl patterns, hair densities, and texture combinations. You can rotate through them based on your mood, the occasion, or what your hair needs that day. Some styles are protective, some are maximally flexible with your texture, and some just make you feel incredible and confident.
What matters most is executing each style with care—using products formulated for natural hair, preventing tension and breakage, and remembering that your ponytail is only as good as the foundation you build. Invest in silk or satin elastics and scrunchies, keep your edges moisturized and protected, and don’t hesitate to take breaks between protective styles to let your hair recover. Your natural hair is strong, versatile, and deserves to be celebrated in all its textured glory.