Straight hair offers incredible versatility, and Black women with naturally straight textures or those wearing straight hair extensions have a gorgeous palette of ponytail styles to explore. Whether you’re looking for sleek sophistication, voluminous texture, or trendy contemporary looks, straight hair holds shape beautifully and allows you to create clean lines, dramatic height, and polished finishes that other hair textures sometimes struggle to achieve. The key to mastering ponytails with straight hair lies in understanding how to work with the hair’s natural fall, create dimension without it looking flat, and choose styles that complement your face shape and lifestyle.
What makes straight ponytails particularly appealing is their longevity—these styles hold for days or even weeks without losing definition, they photograph beautifully in any lighting, and they require far less daily maintenance than curly or textured looks. However, straight hair can sometimes appear one-dimensional if you’re not intentional about adding texture, movement, or sculptural elements to your ponytail. The styles below showcase exactly how to leverage straight hair’s strengths while adding personality, dimension, and visual interest through placement, styling technique, and creative details that make each look uniquely yours.
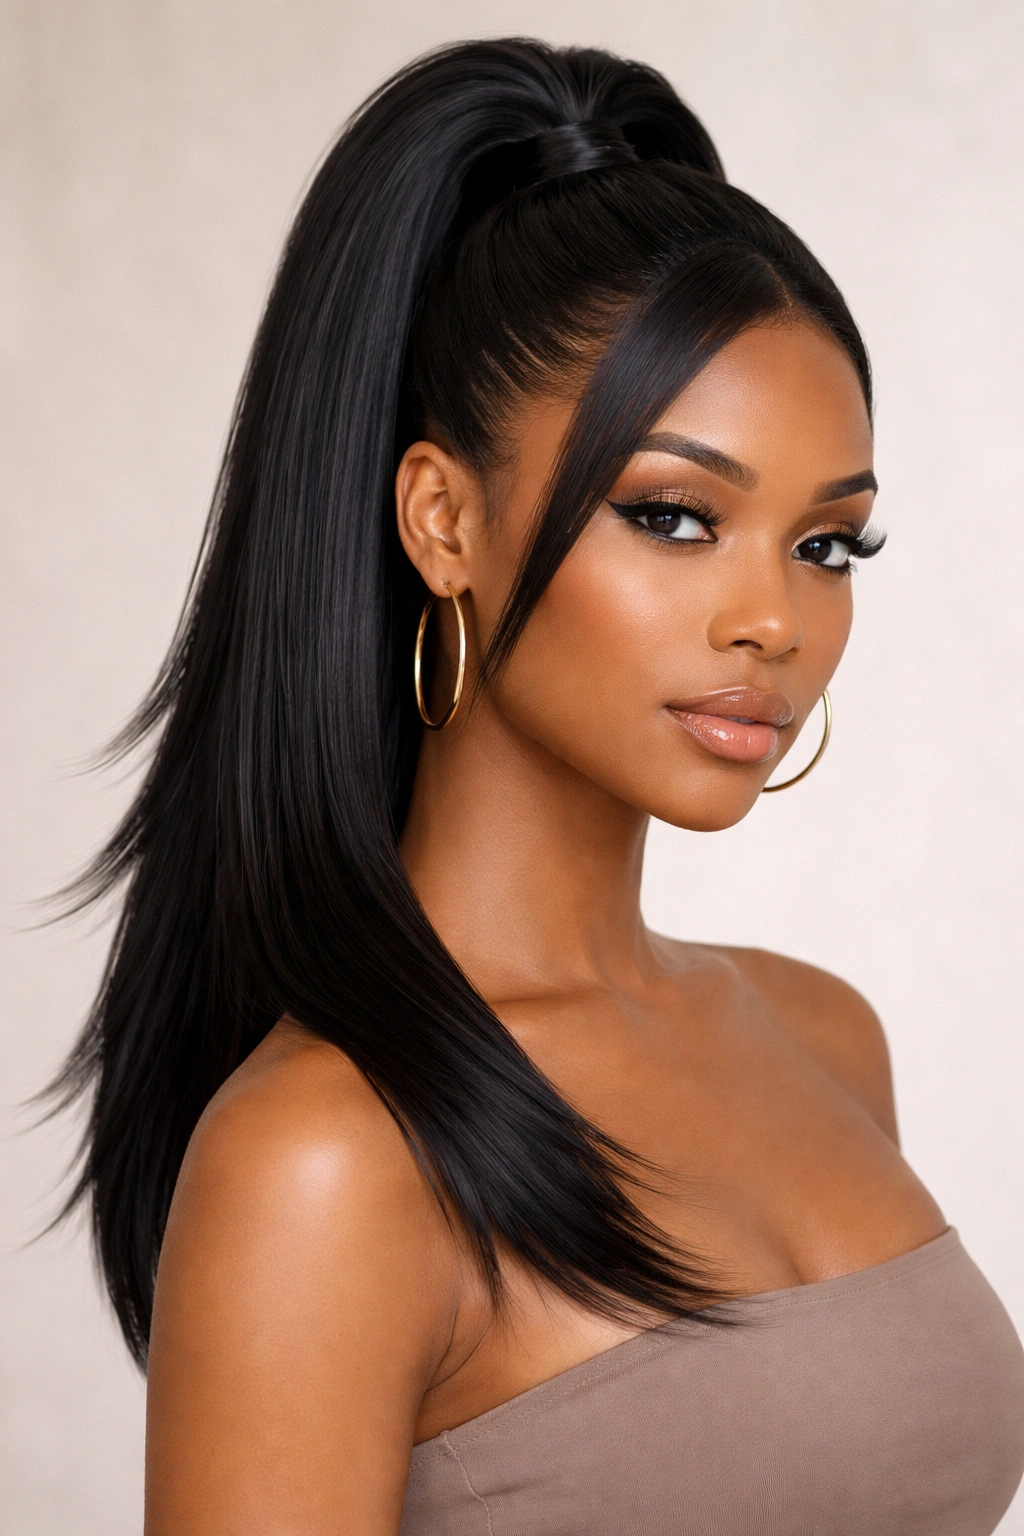
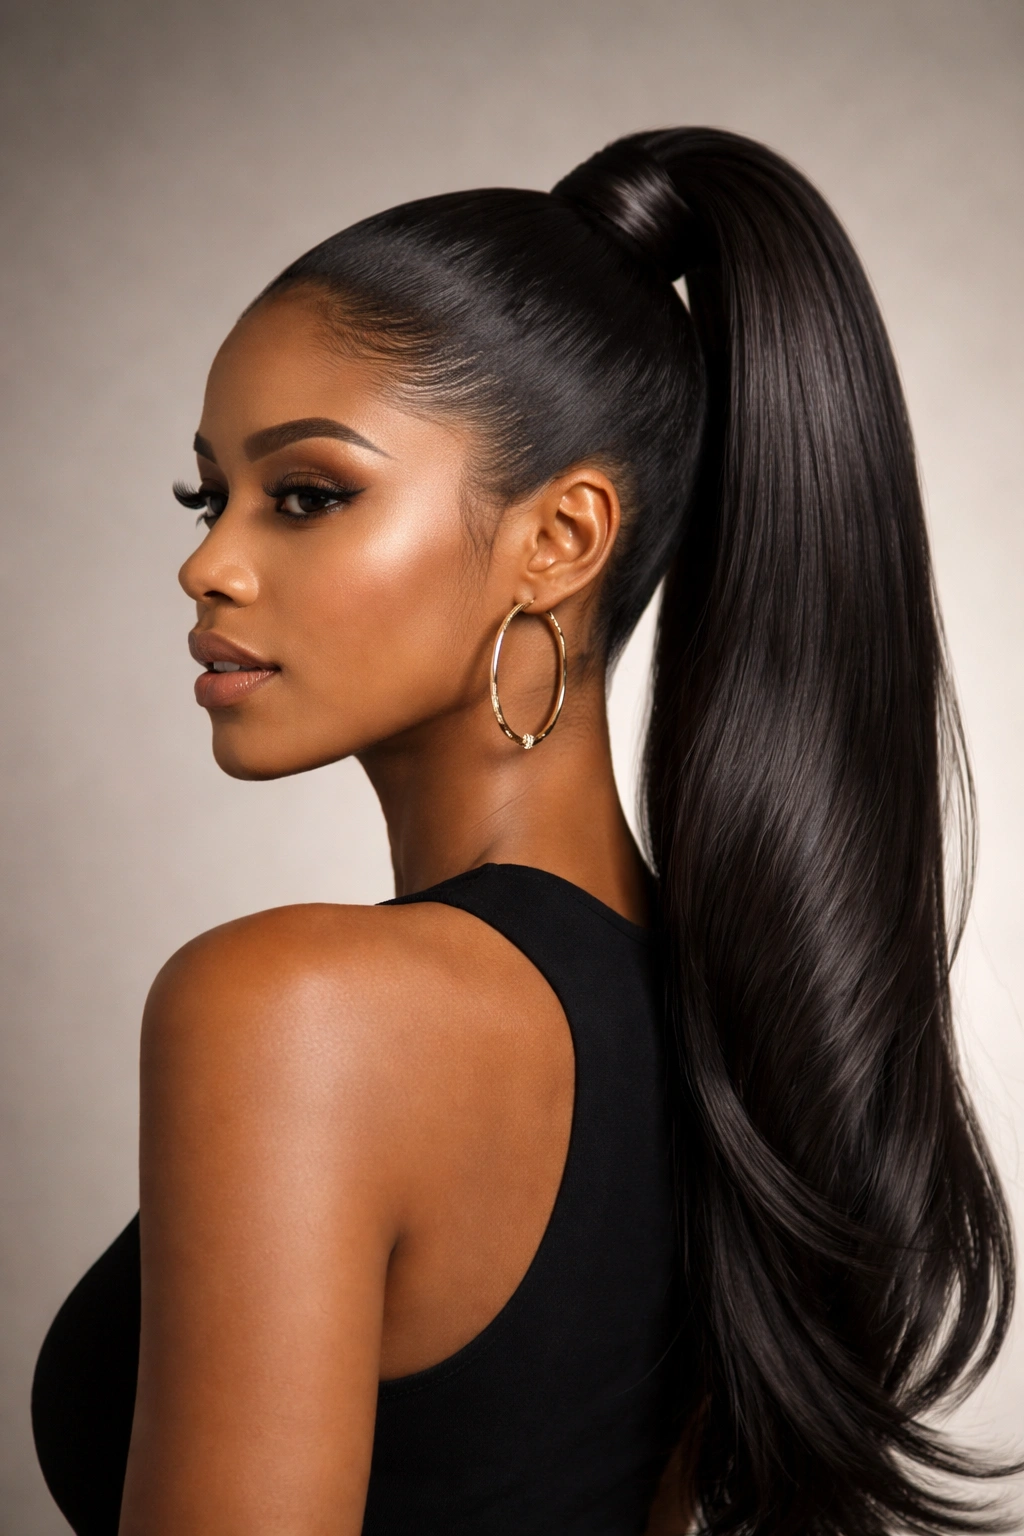
1. The Sleek High Ponytail with Curved Face-Frame
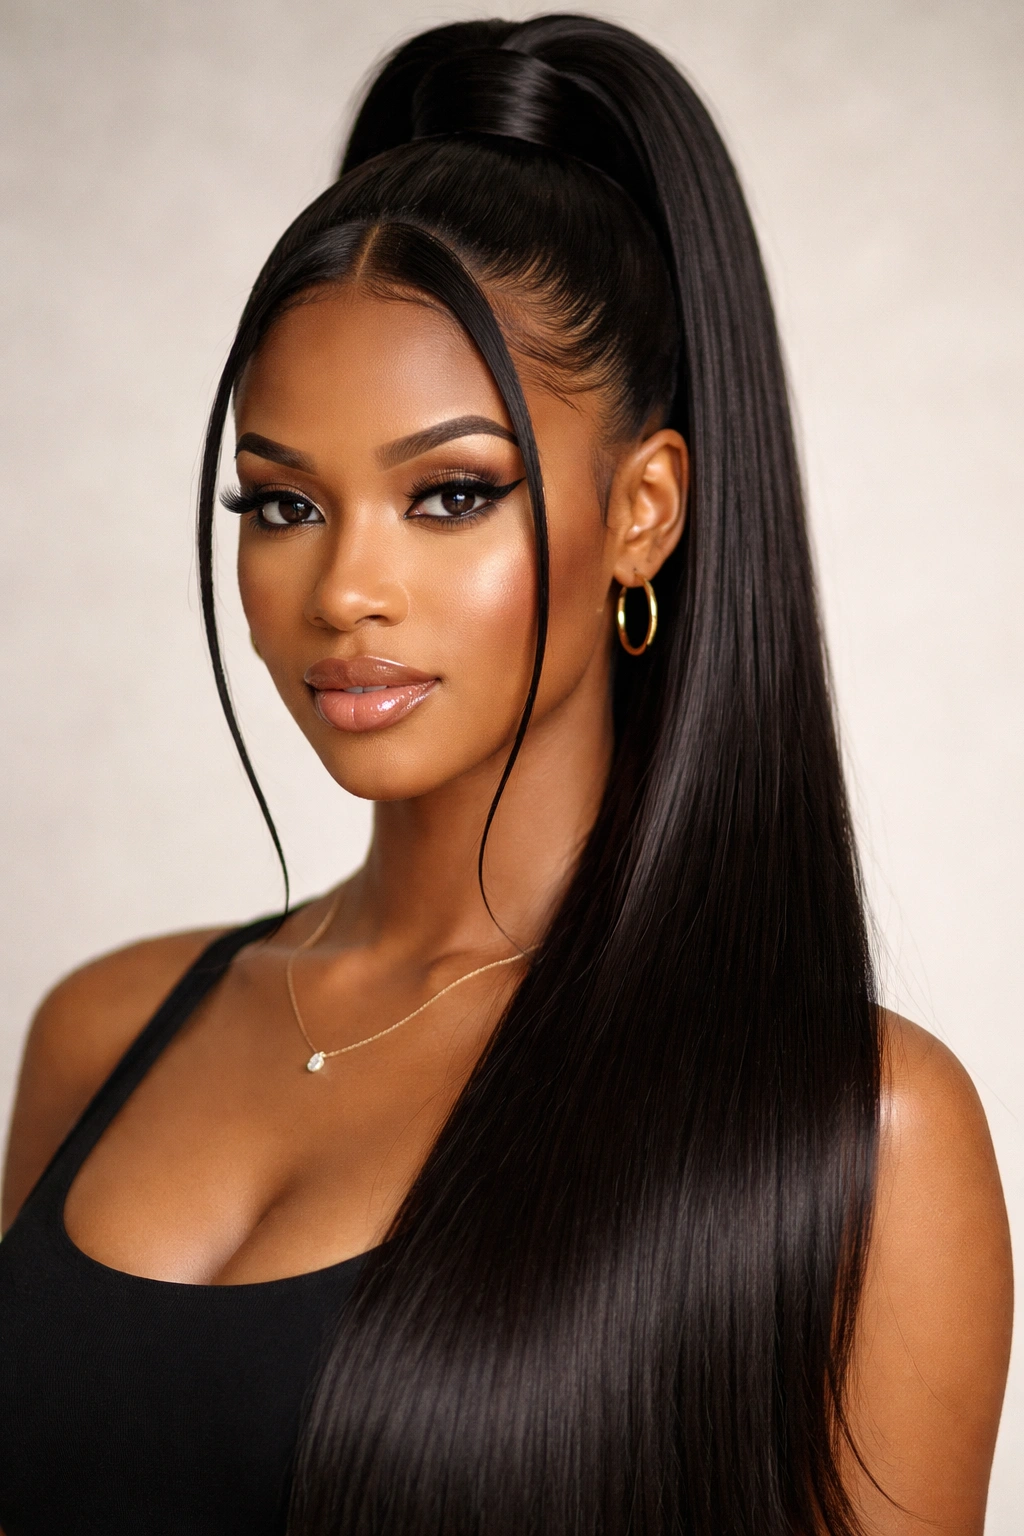
The sleek high ponytail is the foundation of polished styling, and when executed with intentional detail, it becomes far more interesting than a basic pulled-back look. Position your ponytail at the crown of your head rather than the very top—this placement is more flattering to most face shapes and creates the illusion of height without looking severe. The secret detail that transforms this from basic to elevated is pulling out two thin, curved sections from the front hairline and letting them curve softly around your face, framing your cheekbones and softening the overall effect.
How to Achieve the Perfect Curve
Start with completely smooth hair—use a fine-tooth comb and smoothing cream to eliminate any flyaways. Create the curved face-frame sections by taking small triangular sections from each temple and using a flat iron to curve them gently inward toward your face. These sections should be thin enough that they create a delicate frame rather than chunky layers. Secure your main ponytail with a strong elastic band, then smooth the front sections over the elastic so they blend seamlessly into the ponytail.
Why This Style Works
This look strikes the perfect balance between polished and approachable—it’s professional enough for the office or formal events, yet the curved face-frame adds personality and prevents the style from feeling severe or overly severe. The placement of the ponytail at the crown creates an elongated neckline and draws attention upward, making it flattering for most face shapes. Straight hair holds these curves indefinitely, so you can wear this style for multiple days without the curves falling flat.
Pro tip: Smooth a tiny amount of edge control product along the curved sections and the hairline to lock the shape in place and keep flyaways contained for hours.
2. The Bubble Ponytail with Texture
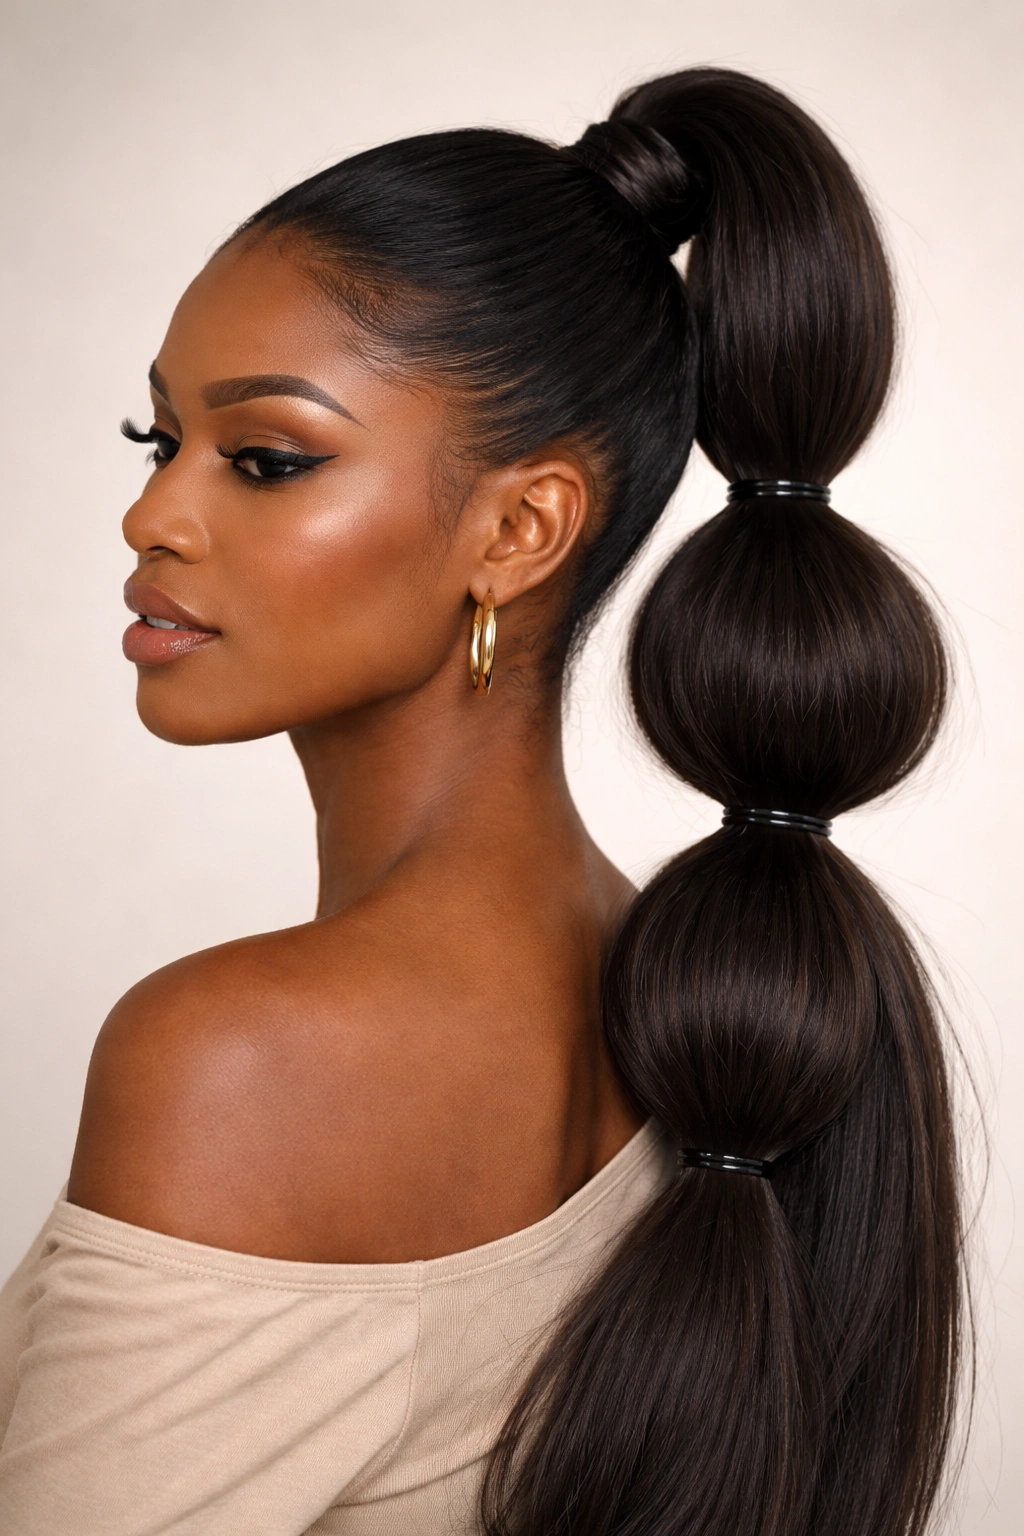
The bubble ponytail creates visual interest and dimension by dividing a single ponytail into distinct sections separated by elastic bands, creating a stacked bubble effect down the length. This style transforms straight hair from potentially looking flat into something with movement and sculptural shape. The technique works especially well with straight hair because the defined sections stay crisp and visible rather than blending together the way they might with curly hair.
Creating Defined Bubble Sections
Secure your main ponytail high on the crown, then take elastic bands and divide the ponytail into 3-4 sections depending on length and desired impact. Space each elastic about 2-3 inches apart. After securing each section, gently tease or fluff the hair between the elastic bands so each “bubble” puffs outward with volume. For straight hair, this gentle teasing creates the illusion of texture and prevents the sections from looking too neat or flat.
Design Options and Variations
You can create this style with matching elastic bands for a minimalist look, or use contrasting colored elastics for a bolder statement. Some women wrap thin sections of hair around each elastic band to hide it completely, creating a seamless bubble effect. Others add metallic hair cuffs or decorative clips at each elastic point for glamour.
Worth knowing: The bubble ponytail works best with thick, healthy straight hair—fine hair can look wispy between the sections, so if you have finer hair, space the bubbles further apart and use very gentle teasing rather than aggressive backcombing.
3. The Smooth Ponytail with Woven Ribbon Detail
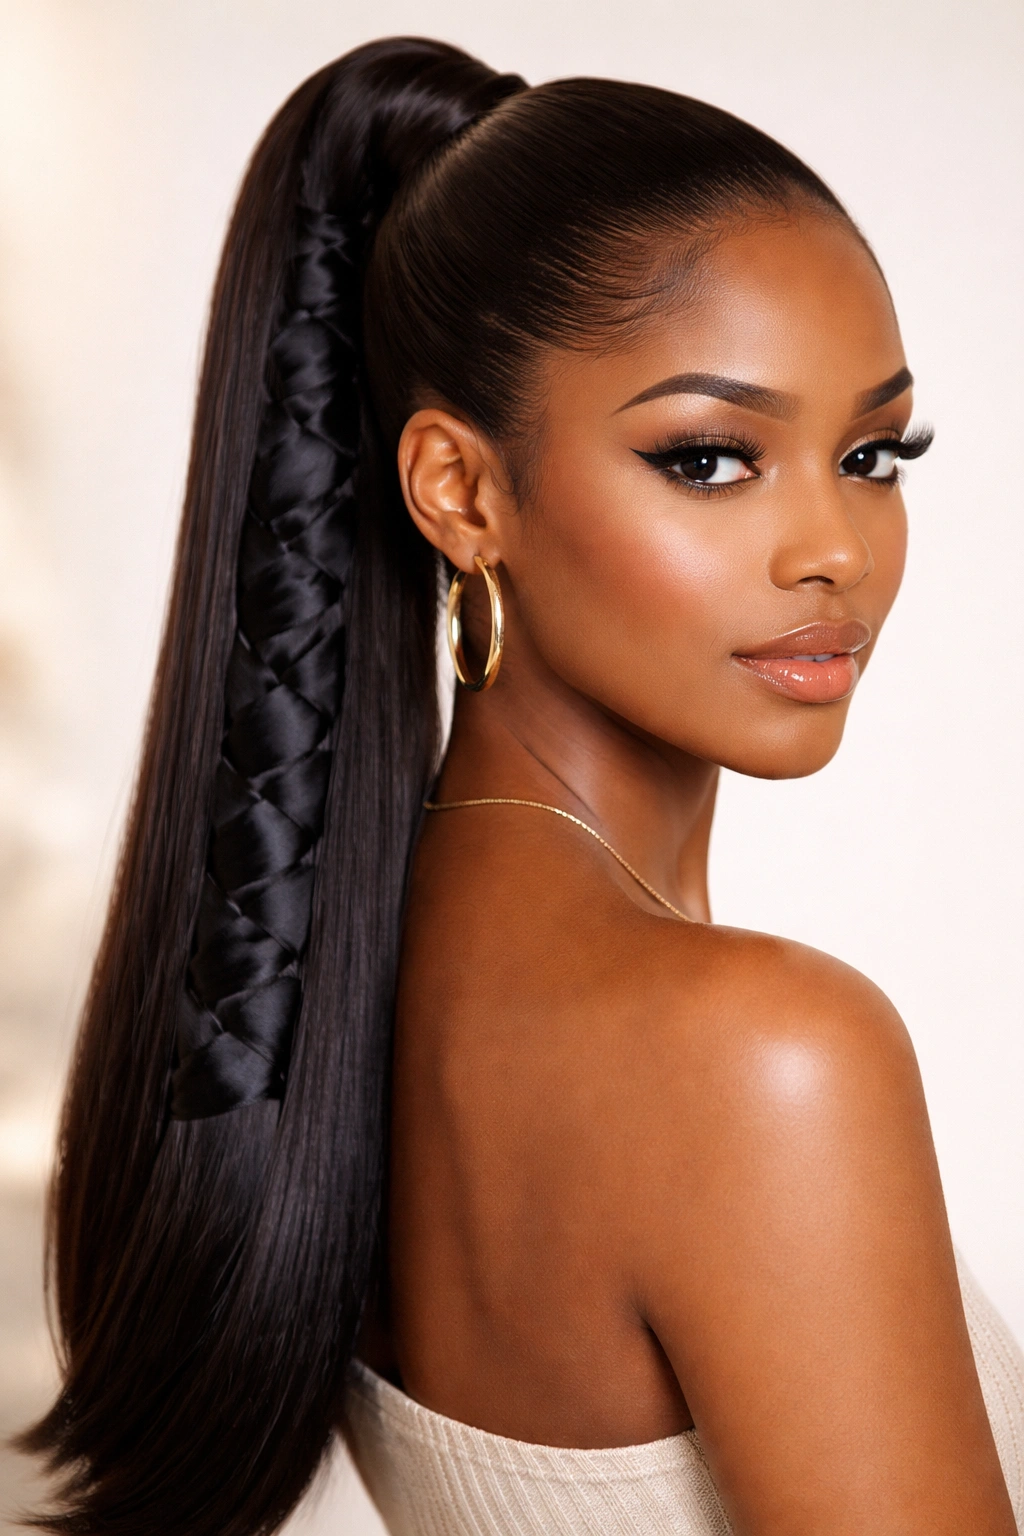
Adding ribbon or decorative elements to a ponytail elevates a simple style into something that feels special and intentional. With straight hair, ribbon details are particularly striking because they contrast sharply against the smooth texture and don’t get lost in wave or curl patterns. Choose ribbons in widths and materials that coordinate with your overall aesthetic—satin ribbons for elegance, silk for hair-friendly wear, or metallic ribbons for edgier looks.
How to Weave Ribbon Through Straight Hair
Secure your ponytail first, then take a length of ribbon and thread it under and over sections of the ponytail starting near the elastic. The weaving technique creates a wrapped, woven effect that looks intricate but requires only a few minutes to execute. For an even more dramatic effect, braid the ribbon together with a section of hair from your ponytail, creating a unified braid that runs through the style.
Styling Combinations That Work
Ribbon details pair beautifully with side ponytails worn over one shoulder, or with high ponytails where the ribbon can be seen and admired. You can use ribbon in your hair’s color family for subtle sophistication, or choose a contrasting color for visual pop. Some women use multiple ribbons of complementary colors for a more artistic, playful look.
Insider note: Secure the ribbon ends with clear nail polish or fabric glue so they don’t unravel during wear, extending the life of your styled look.
4. The Sleek Side Ponytail with Diagonal Part
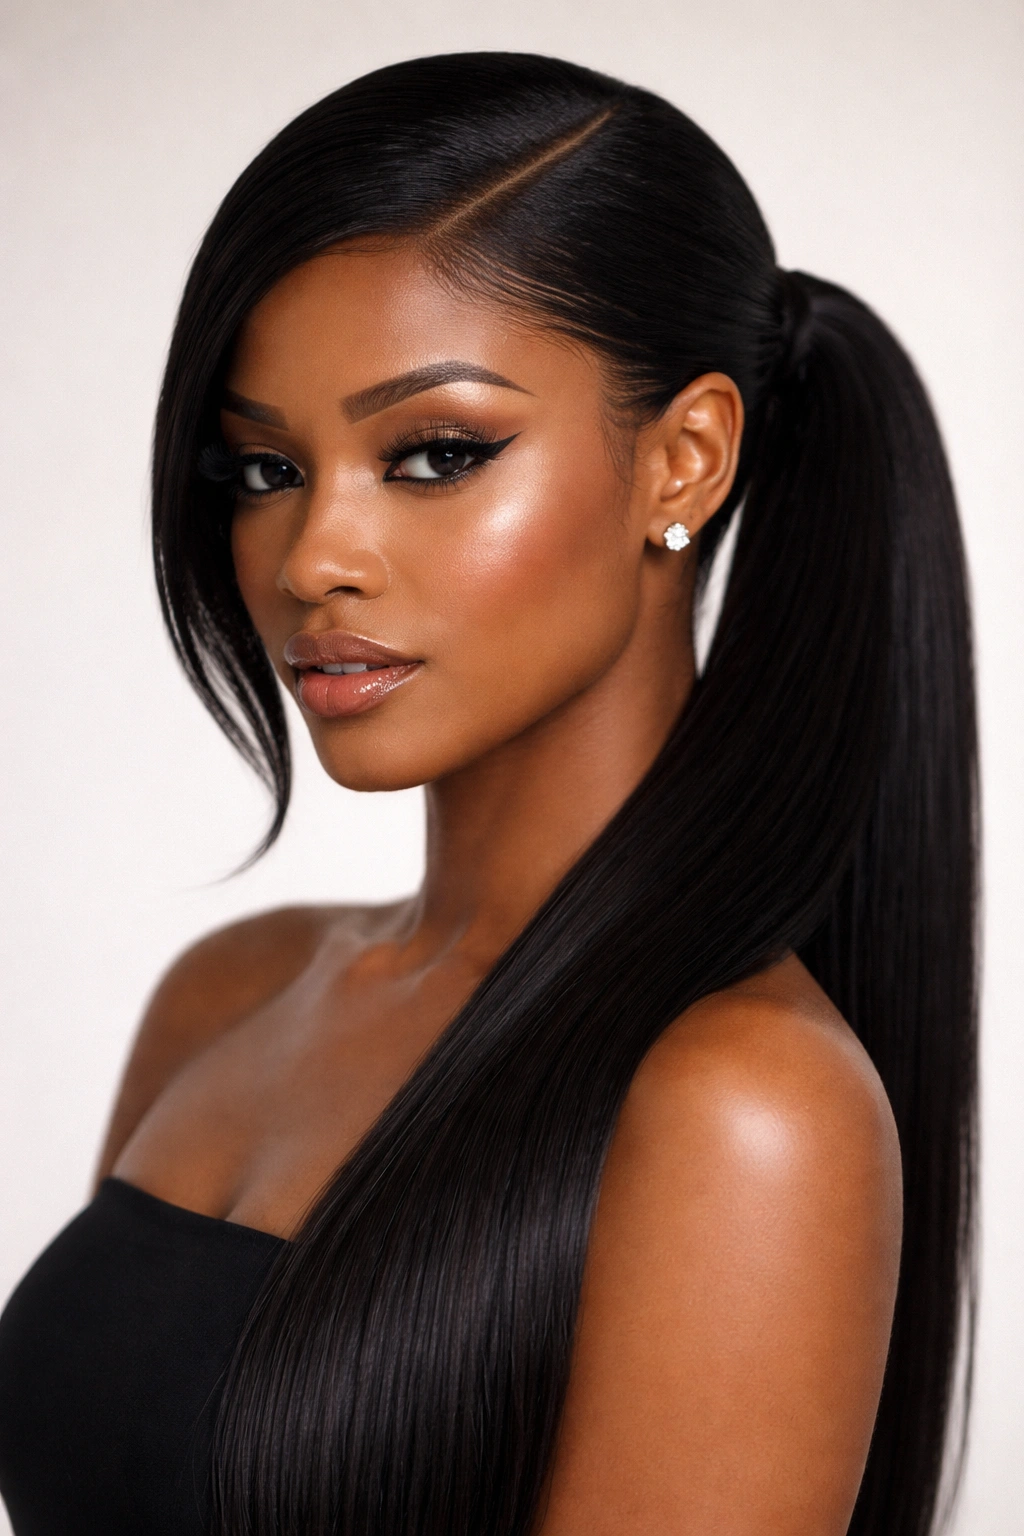
The side ponytail repositions your ponytail to one side of the head, often paired with a dramatic diagonal part that sweeps across your scalp. This style elongates the face, creates an asymmetrical line that’s more interesting visually than centered styles, and gives you the ability to show off one side of your face or your profile. With straight hair, the part remains razor-sharp and the ponytail hangs at a beautiful angle.
Creating the Perfect Diagonal Part
Start by creating a part that runs from your temple at a diagonal angle toward the back of your head. The steeper the diagonal, the more dramatic the effect. Use a rattail comb for precision, and smooth each section as you work. Gather all your hair to one side—left or right depending on which direction feels more flattering for your face shape—and secure it into a low or mid-level ponytail depending on the occasion.
When to Wear This Style
This asymmetrical look is particularly flattering for people with round faces (the diagonal line creates height and elongation) or for those wanting to show off jewelry or facial features on one side. It’s also highly practical for work or activities where you need hair pulled back but want something more visually interesting than a centered ponytail.
Pro tip: Smooth the parted sections with a flat iron before securing the ponytail so the part remains visible and crisp even after hours of wear.
5. The High Ponytail with Layered Length Variation
This style creates the illusion of movement and dimension by incorporating subtle length variations within the ponytail itself. You achieve this by gathering your hair into a ponytail but leaving the very bottom layer slightly longer than the layers above, creating a subtle stepped effect. With straight hair, these length variations read as intentional design rather than uneven cutting.
How to Create the Layered Effect
Secure your ponytail at your desired height, then gently divide the ponytail into 2-3 horizontal layers. Take the top layer and secure it with an additional elastic band positioned lower on the ponytail, leaving about 1-2 inches of the bottom layer visible. This creates a subtle tiered effect that adds visual interest and prevents the ponytail from looking like a solid column of hair.
Hair Length Considerations
This style works best with hair that’s at least bra-length or longer—shorter hair doesn’t have enough length to show noticeable variation. The effect should be subtle rather than dramatic; you’re creating a hint of dimension rather than obvious sections. For straight hair, keep the layers soft-edged rather than blunt so the variation feels intentional rather than choppy.
Worth knowing: You can enhance this effect by adding texture to just the bottom layer using a large-barrel curling iron, creating volume and movement where the layers separate.
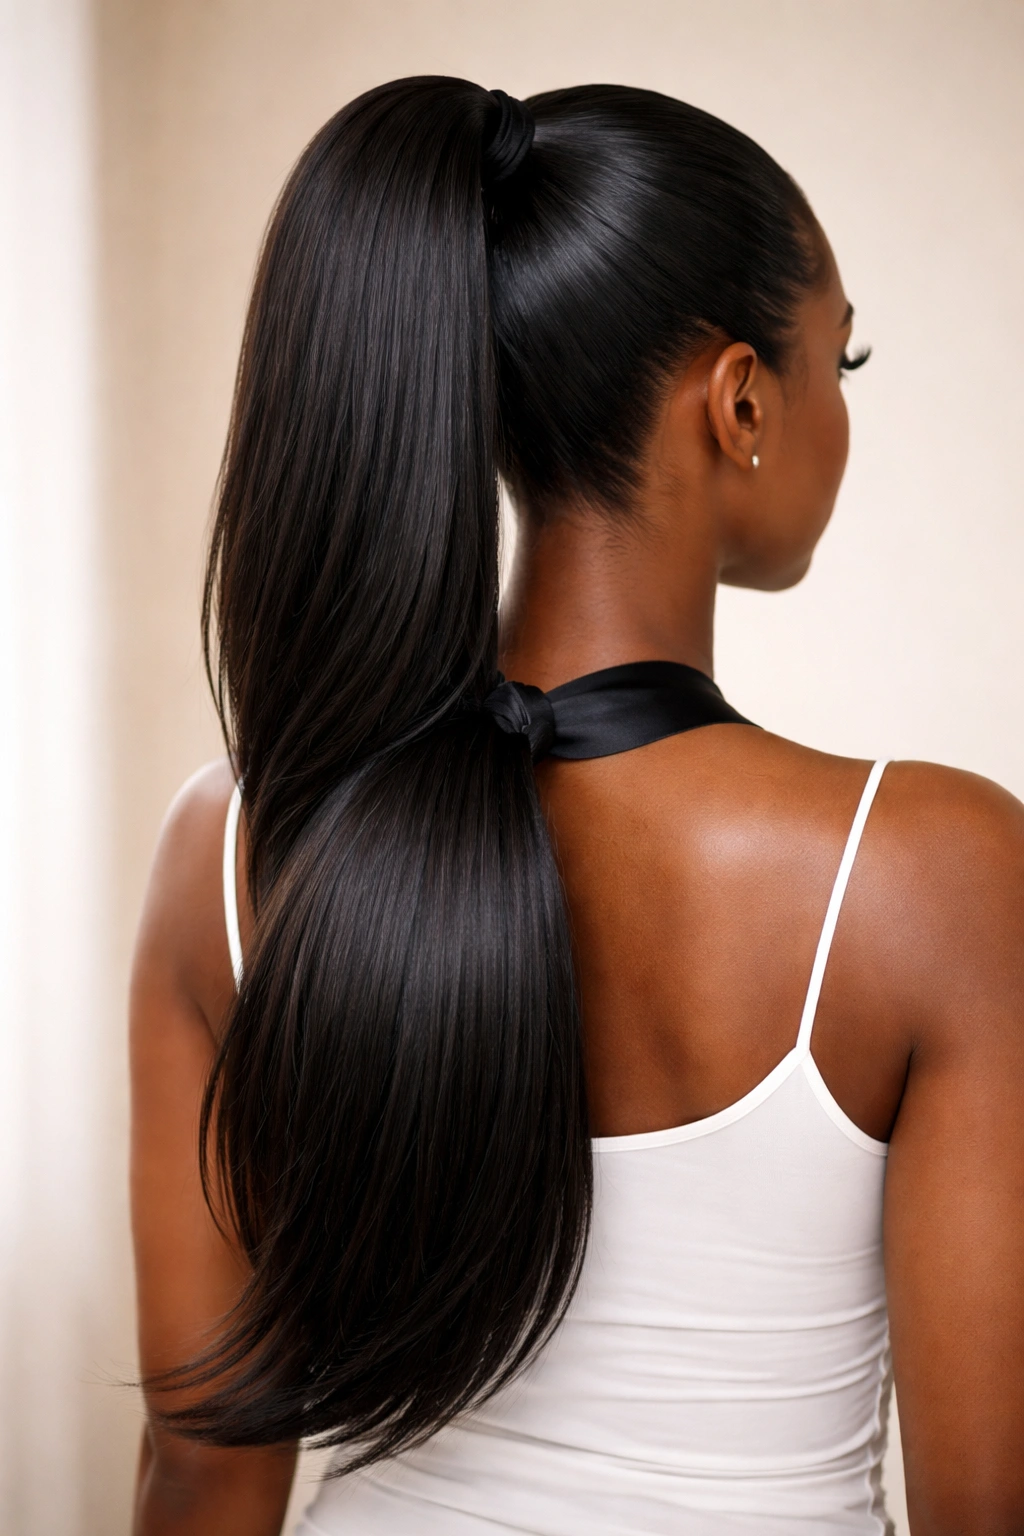
6. The Sleek Low Ponytail with Wrapped Base
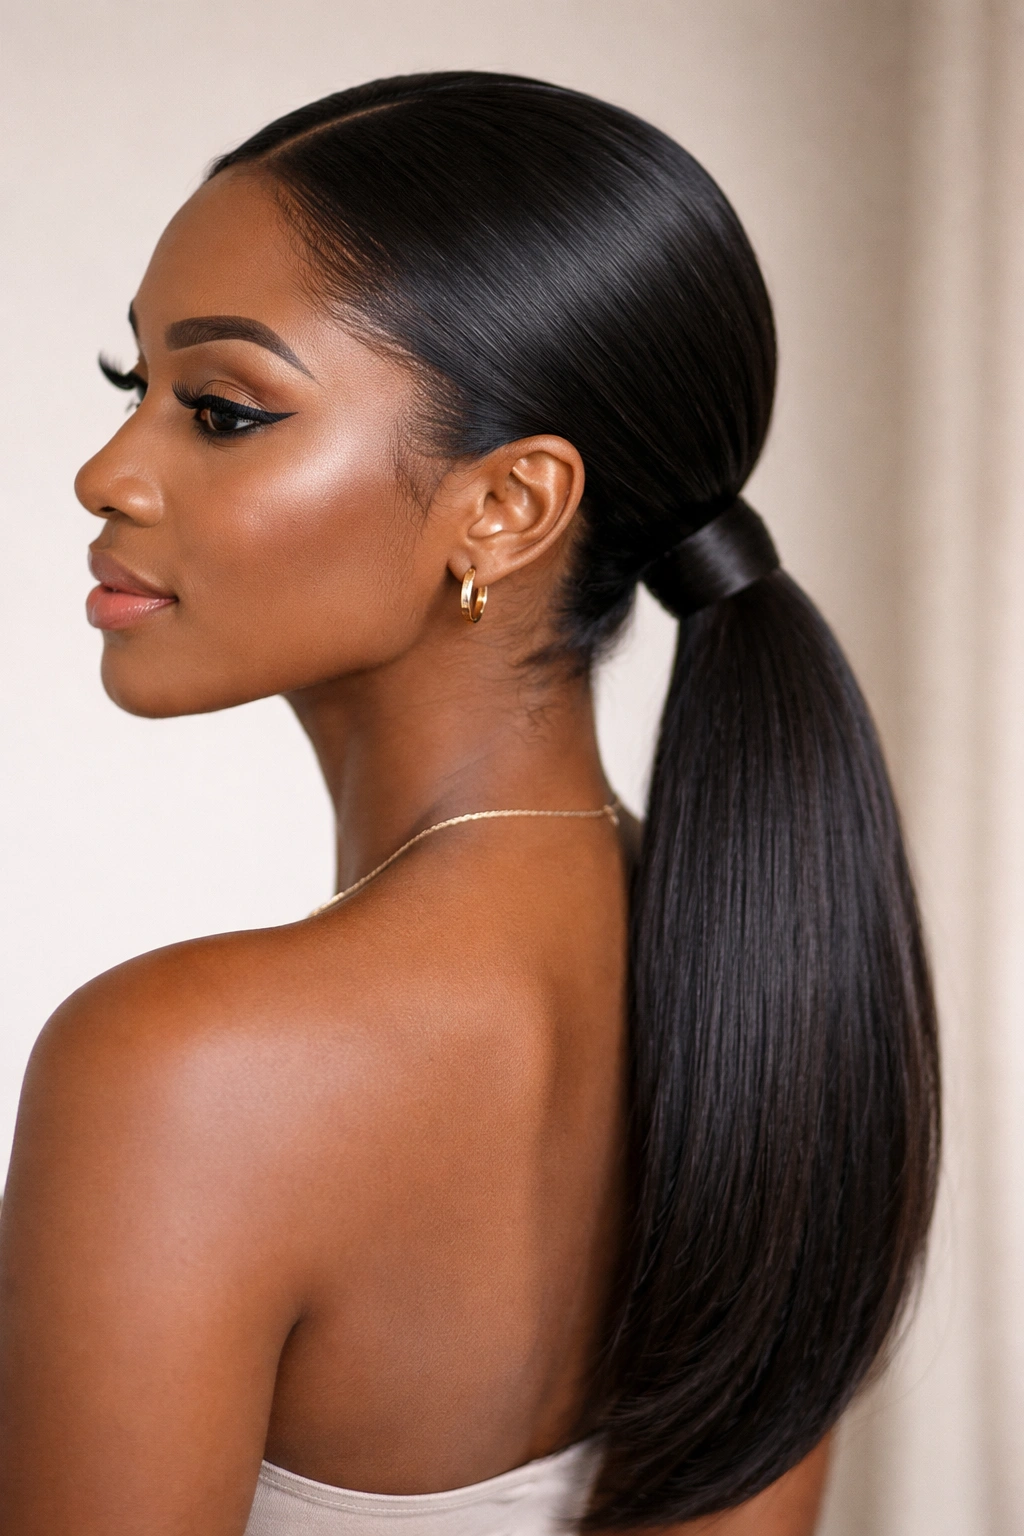
The low ponytail is the epitome of casual elegance—placed at the nape of your neck rather than high on the crown, this style looks effortlessly polished and works for nearly every occasion from casual hangouts to professional settings. The wrapped base transforms the style from simple to refined by covering the elastic with a thin section of hair, creating the illusion of no elastic band at all. This detail takes about 30 seconds to execute but completely elevates the finished look.
Wrapping Your Ponytail Base
After securing your low ponytail with an elastic band, take a thin section of hair from the underside of the ponytail and wrap it around the base of the elastic, securing it with a bobby pin hidden underneath. This technique works beautifully with straight hair because the wrapped section stays smooth and polished, creating clean, intentional lines around the base.
Styling Variations
You can wear this style with a deep center part for maximum face-framing, a side part for asymmetry, or a middle part for balance. Adding face-frame sections that curve softly around your cheekbones elevates this further. Some women add subtle waves or bends using a flat iron for texture, while others keep it perfectly straight for maximum polish.
Pro tip: Use a light hold hairspray after wrapping the base so the wrapped section doesn’t slip or come undone throughout the day.
7. The Curved Ponytail with Graphic Geometric Clips
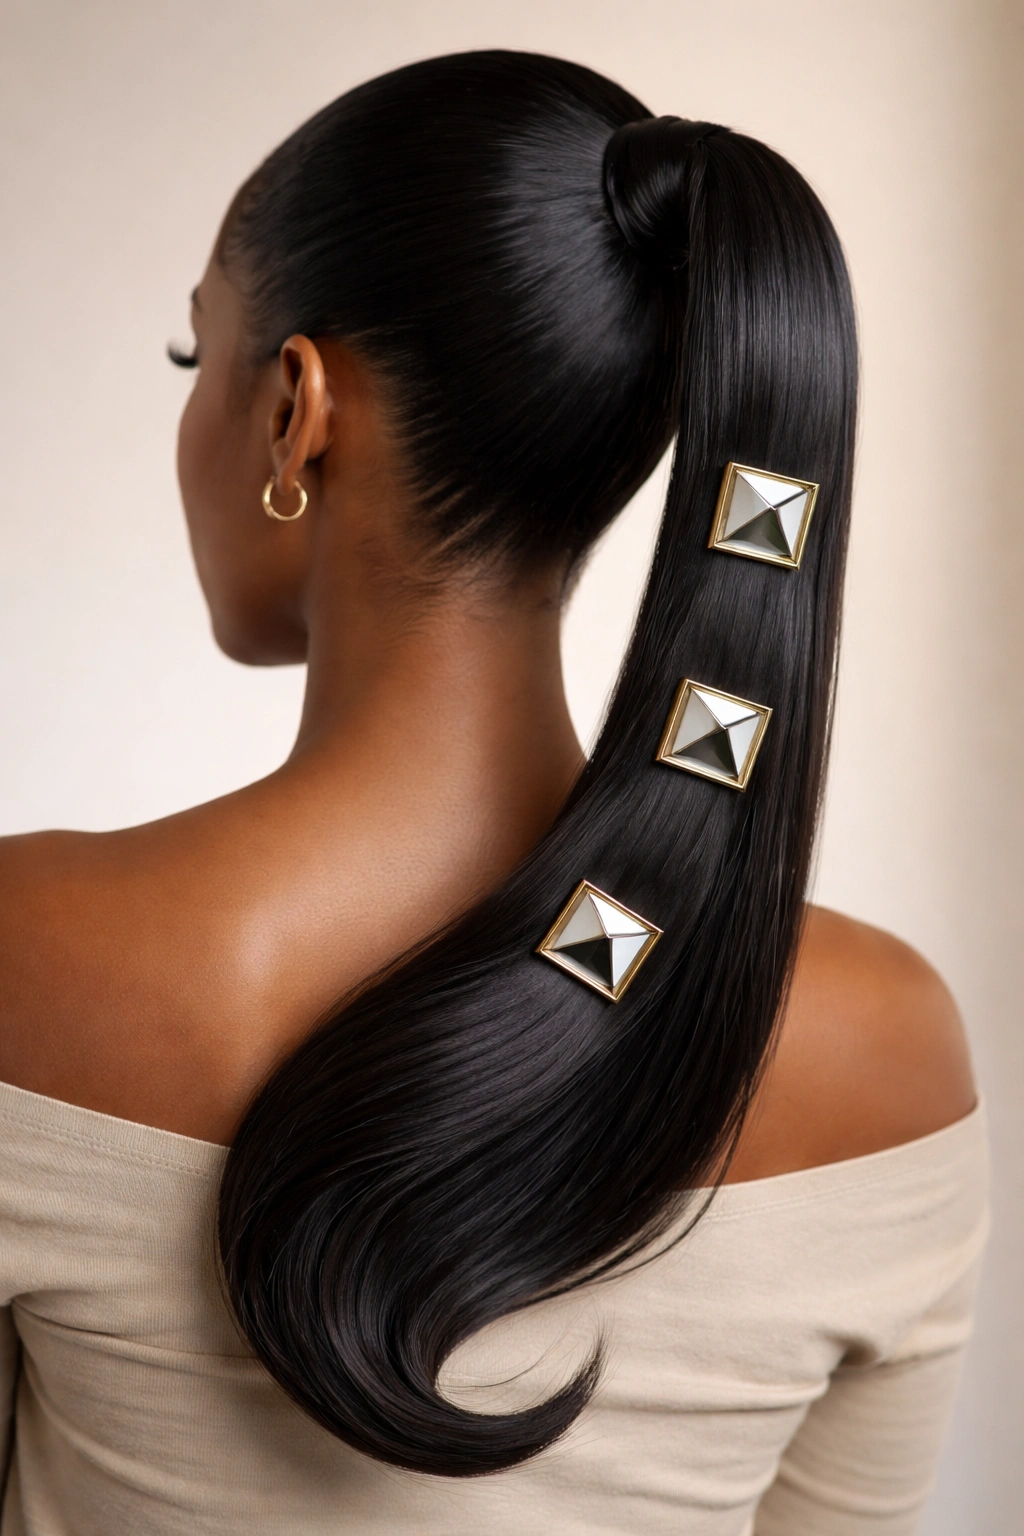
This contemporary style uses multiple clips positioned strategically along the ponytail to create a geometric pattern or visual design element. Graphic clips in metallic finishes, bold colors, or minimalist shapes sit beautifully against straight hair, creating a statement look that reads as intentional and editorial. The straight texture allows each clip to sit flat and visible rather than disappearing into waves or curls.
Positioning Clips for Maximum Impact
Secure your ponytail, then position clips in a repeating pattern—three clips at equal intervals running down the length, or a cluster of clips near the base for concentrated visual impact. The positioning matters: spacing clips too close together creates a cluttered look, while spacing them with intention creates clean, graphic lines. Experiment with vertical stacking, diagonal arrangements, or asymmetrical placements depending on your aesthetic.
Clip Material and Style Choices
Metallic clips (gold, silver, rose gold) create an elegant, modern look. Matte black or tortoiseshell clips read more editorial and fashion-forward. Colorful enamel clips or gemstone-adorned clips make a bolder statement. The key is choosing clips that coordinate with your overall styling and personality rather than looking like an afterthought.
Insider note: Secure clips tightly so they don’t slip down the ponytail during wear—test the grip before leaving the house and adjust as needed.
8. The Extra-Long Ponytail with Straight Extensions
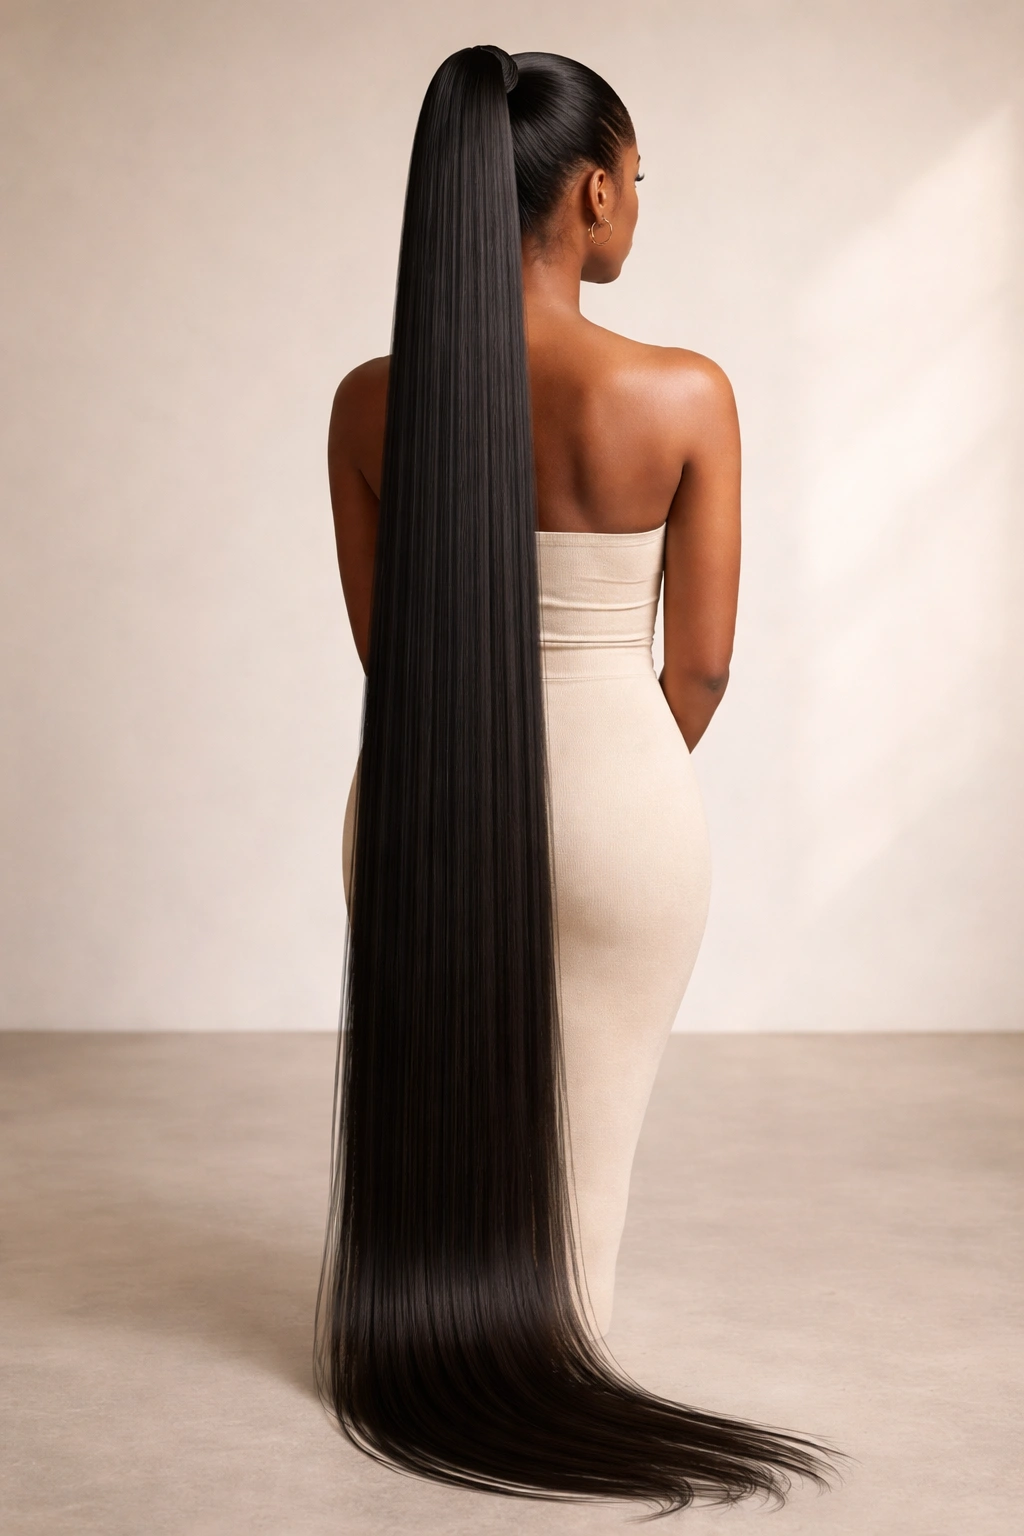
Achieving floor-length or nearly floor-length ponytails requires extensions, and with straight hair as your base, extensions blend seamlessly and create a stunning statement look. Whether you’re using clip-in extensions for a temporary transformation or permanent extensions for sustained length, straight textures allow you to create one unified, cohesive ponytail that looks completely natural. The advantage of straight hair is that you can match extensions perfectly to your hair texture, creating a look where the seam between your natural hair and extensions is virtually invisible.
Choosing and Installing Extensions
Select extensions that match your hair color perfectly and share the same straight texture as your hair. Clip-in extensions offer flexibility and allow you to add length for special occasions while protecting your hair on everyday wear. Sew-in extensions create a more permanent solution for those wanting sustained extra length. With straight hair, the installation process is straightforward because your natural hair and extensions share the same texture and weight distribution.
Maintaining Extra-Long Ponytails
Long extensions require diligent care—regular deep conditioning, gentle handling, and protective measures during sleep to prevent tangling and matting. Using silk pillowcases or wrapping your ponytail in a silk scarf overnight protects extensions from friction damage. Avoid chlorine and saltwater, which can damage and dry out extensions rapidly.
Worth knowing: Extra-long ponytails create tension on your hairline and scalp, so avoid wearing the same style daily and give your hair regular breaks from extensions to prevent traction alopecia.
9. The Mid-Length Ponytail with Thick Statement Elastic
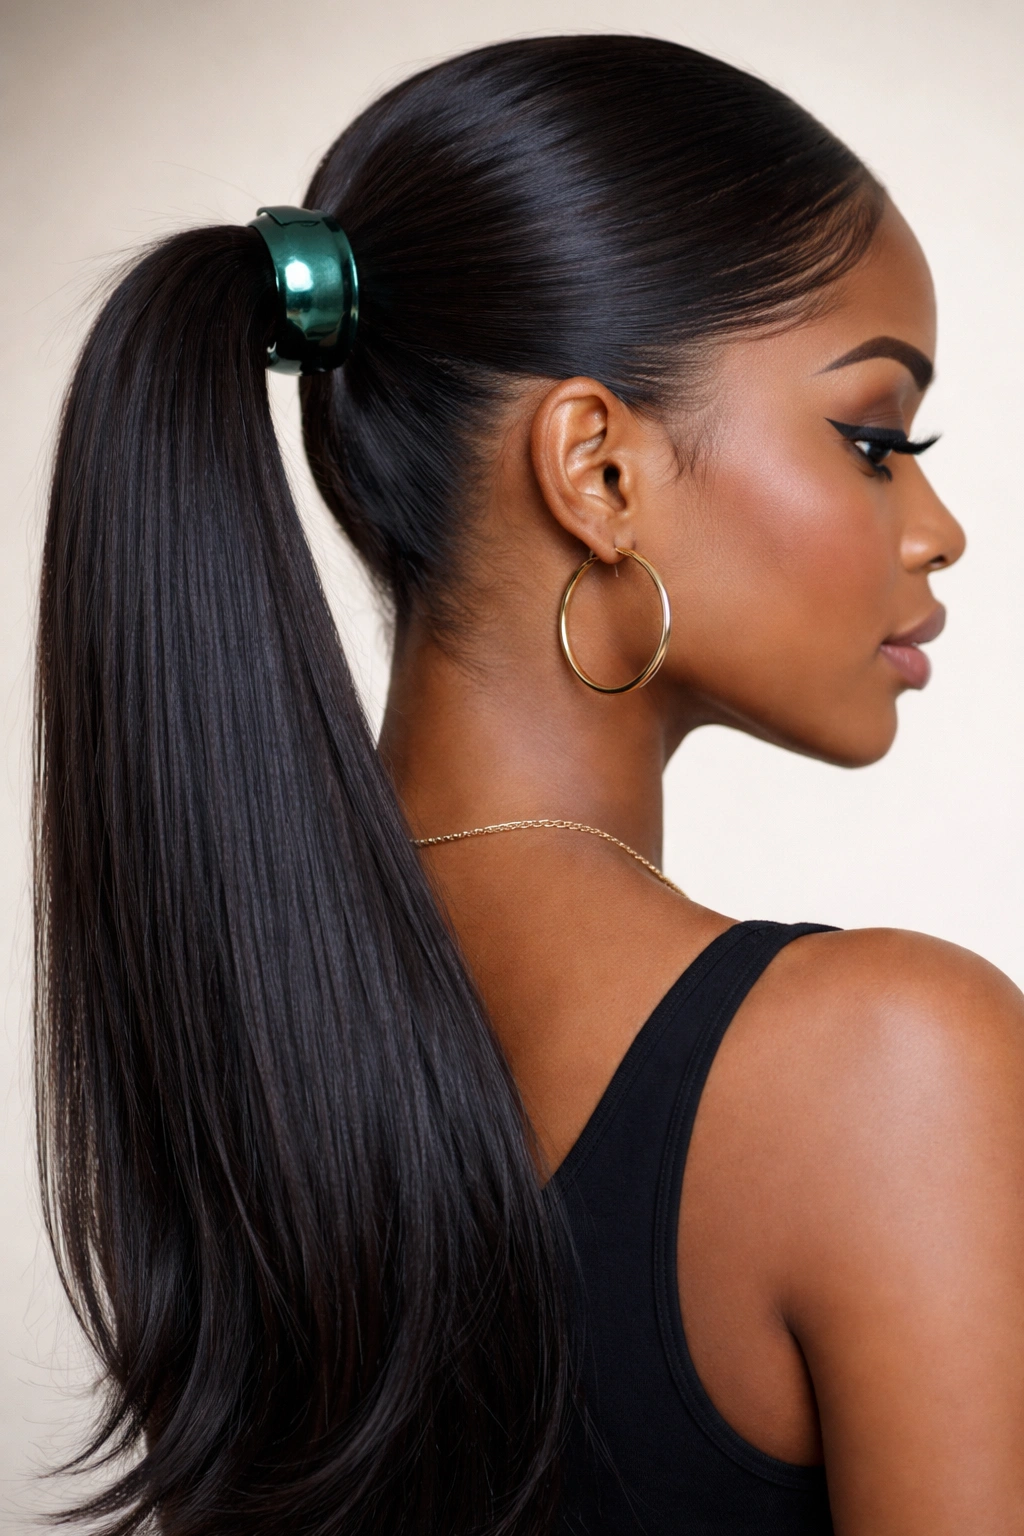
Instead of hiding your elastic band, this style celebrates it by using a thick, oversized hair tie in a complementary color or material that creates a statement visual element. Velvet elastics, metallic cuffs, or thick satin bands sit prominently at the base of the ponytail, functioning as both functional and decorative. With straight hair, these bold elastics read as intentional styling choices rather than practical necessities. The clean lines of straight hair make bold accessories pop visually rather than becoming lost in texture.
Choosing Your Statement Elastic
Velvet elastics in jewel tones (emerald, sapphire, burgundy) create luxe, sophisticated looks. Metallic cuffs or gold-trimmed elastics add glamour. Thick satin bands in neutral tones work for professional settings. The elastics should coordinate with your outfit or personal color palette, creating a cohesive, intentional appearance.
Occasions for Bold Elastics
This styling choice works beautifully for casual everyday wear where you want personality and intention to show. It’s particularly popular for younger styling or editorial/fashion contexts. You can change your elastic band to match different outfits throughout the week, creating variety without changing your actual hairstyle.
Pro tip: Thicker elastics are gentler on hair than thin rubber bands, so upgrading to quality statement elastics actually benefits your hair health while improving your style.
10. The Sleek Ponytail with Curved Bottom Section
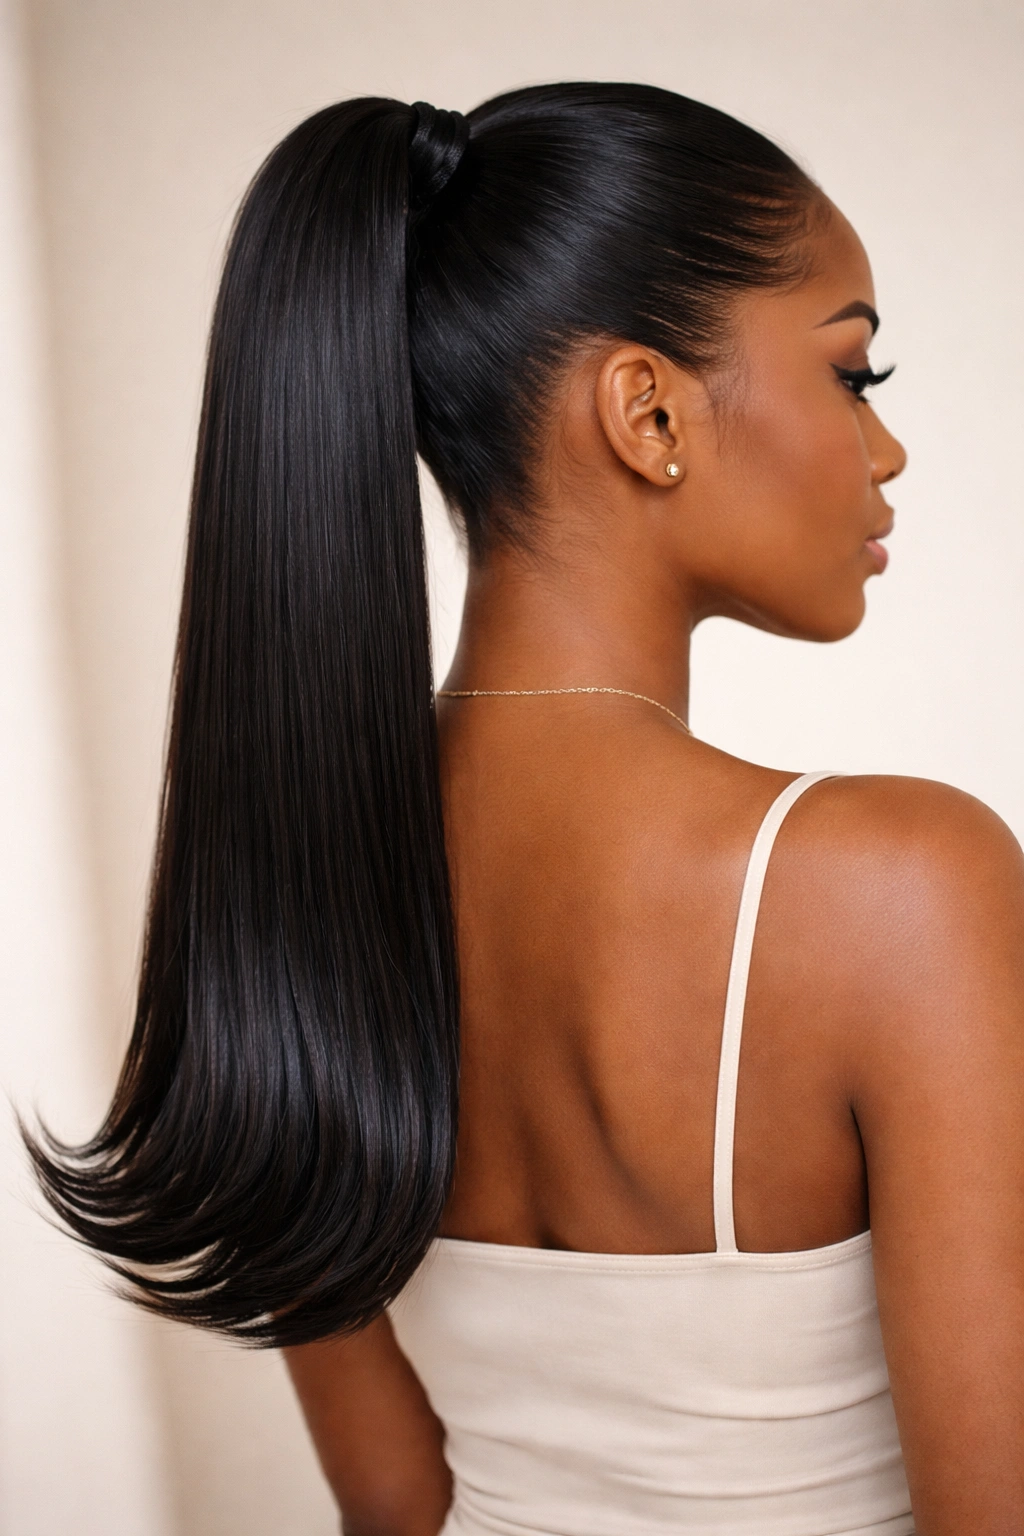
This advanced technique involves using a flat iron to curve or bend the entire bottom section of your ponytail outward, creating a subtle “C” shape or arc that adds movement and dimension to what would otherwise be a straight, flat look. The curve catches light differently and creates visual interest that prevents the style from appearing one-dimensional. This technique works exceptionally well with straight hair because the curve holds perfectly and reads as a distinct styling choice.
Creating the Curved Effect
After securing your ponytail, divide it into sections and use a large-barrel flat iron to gently curve the bottom 4-6 inches outward. The key is gentle pressure and slow movement through the hair—aggressive heat can damage straight hair and create damage. The resulting curve should be subtle rather than dramatic, creating a graceful arc rather than a tight curl.
Combining with Other Details
This technique pairs beautifully with face-frame sections, ribbon details, or graphic clips. The added movement makes the entire style feel more dynamic and contemporary. It’s particularly effective for creating visual softness around the shoulders and elongating the neckline.
Worth knowing: Curved ponytails require light hairspray to hold the bend throughout the day, especially in humid conditions where the curve may relax.
11. The Double Ponytail (Stacked High and Low)
The double ponytail uses two separate elastic bands to create two distinct ponytails stacked vertically—one high on the crown and one mid-way down the back of the head. This creates extreme visual height and volume while maintaining the polished aesthetic of a ponytail. With straight hair, the two distinct sections read as clean, intentional layers rather than accidentally messy hair. This style is particularly effective for creating the illusion of significant volume and length.
How to Execute the Double Ponytail
Secure your first ponytail high at the crown, then gather the hair below that first ponytail and secure it into a second ponytail. For maximum visual impact, tease gently between the two ponytails to create separation and volume. The first ponytail can be left full, or you can divide it into the bubble ponytail technique described above for even more dimension.
When to Wear This Look
This style is dramatic and eye-catching, making it perfect for special occasions, performances, or any time you want to make a statement. It’s less practical for everyday wear due to the maintenance involved, but for occasions where impact and visual interest matter, this style delivers.
Insider note: The double ponytail works best with thick hair that can support two distinct ponytails without appearing thin or wispy. Fine hair may need extensions to achieve the same impact.
12. The Half-Up Ponytail with Twisted Crown Detail
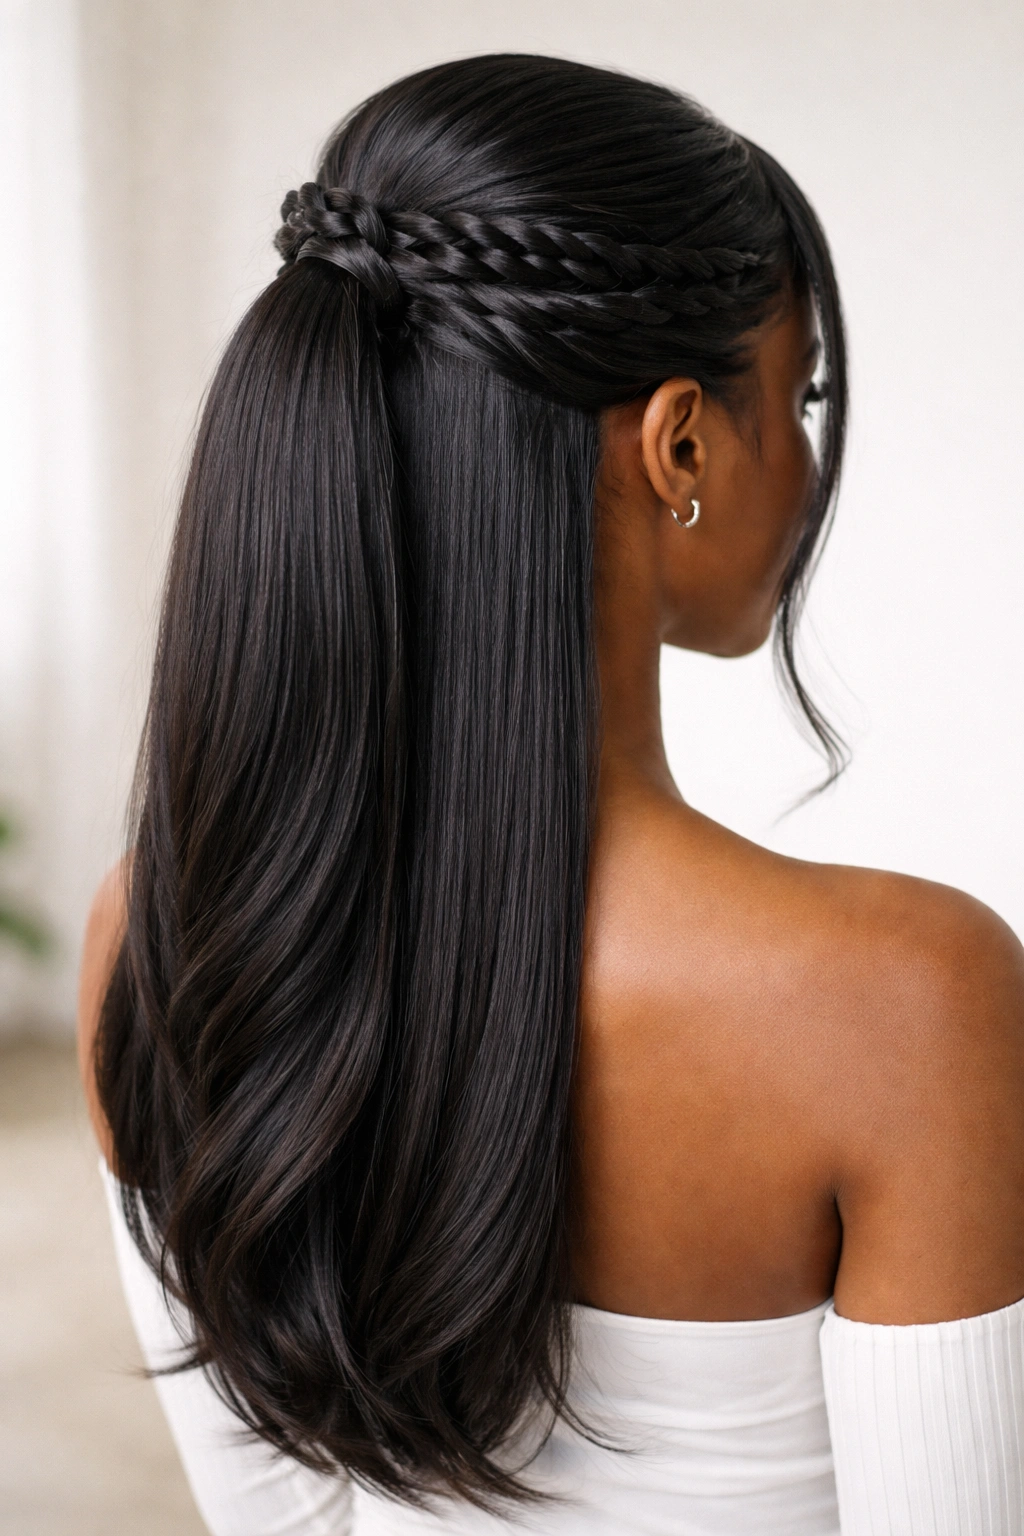
The half-up ponytail elegantly balances gathered and loose hair, creating a style that’s more interesting visually than a full ponytail while maintaining the practicality of pulled-back hair. By adding a twisted crown detail that wraps around the sides of the head before meeting the gathered section, you create a more sophisticated, intentional look than a simple half-up style. With straight hair, the twist remains crisp and visible, creating clean lines that emphasize the style’s construction.
Building the Twisted Crown
Start with completely smooth, brushed hair. Take a section from one side of your head near the temple and twist it gently toward the back of your head, securing it temporarily with a bobby pin. Repeat on the other side so you have two twisted sections meeting at the back. Gather all your hair—including the twisted sections—into a ponytail at the crown or mid-level depending on your preference. The twisted sections should be visible wrapping around your head like a crown, creating visual interest and a more polished appearance than a plain half-up.
Occasions and Styling Flexibility
This style bridges casual and formal perfectly—it’s polished enough for professional settings or special occasions, yet relaxed enough for everyday wear. You can dress it down with loose waves in the bottom section or keep everything perfectly smooth for maximum polish. Adding face-frame curls or leaving delicate pieces out of the ponytail creates softness.
Pro tip: Smooth the twisted sections with a flat iron before securing the ponytail so the twists remain visible and structured throughout wear rather than relaxing and disappearing.
Final Thoughts
Straight hair offers an incredible foundation for ponytail styling—the texture holds shape beautifully, creates clean lines, and allows decorative details to stand out rather than disappearing into curl or wave patterns. Whether you’re drawn to sleek, minimalist aesthetics or bold, statement-making details, these twelve styles showcase the range and versatility available with straight hair. The key to preventing straight ponytails from looking flat or one-dimensional is adding intentional dimension through curved sections, texture techniques, decorative details, or strategic volume placement.
Building a rotating collection of ponytail styles keeps your hair fresh and interesting without requiring constant cutting or chemical treatments. Practice each technique on days when you have extra time, so you develop muscle memory and speed. Pay attention to which styles feel most natural and flattering for your unique face shape and lifestyle—the best style is one you’ll actually wear repeatedly because it makes you feel confident and comfortable. With straight hair and these twelve foundational techniques, you have the tools to create countless personalized variations that work for every occasion from casual Saturdays to professional presentations and special celebrations.