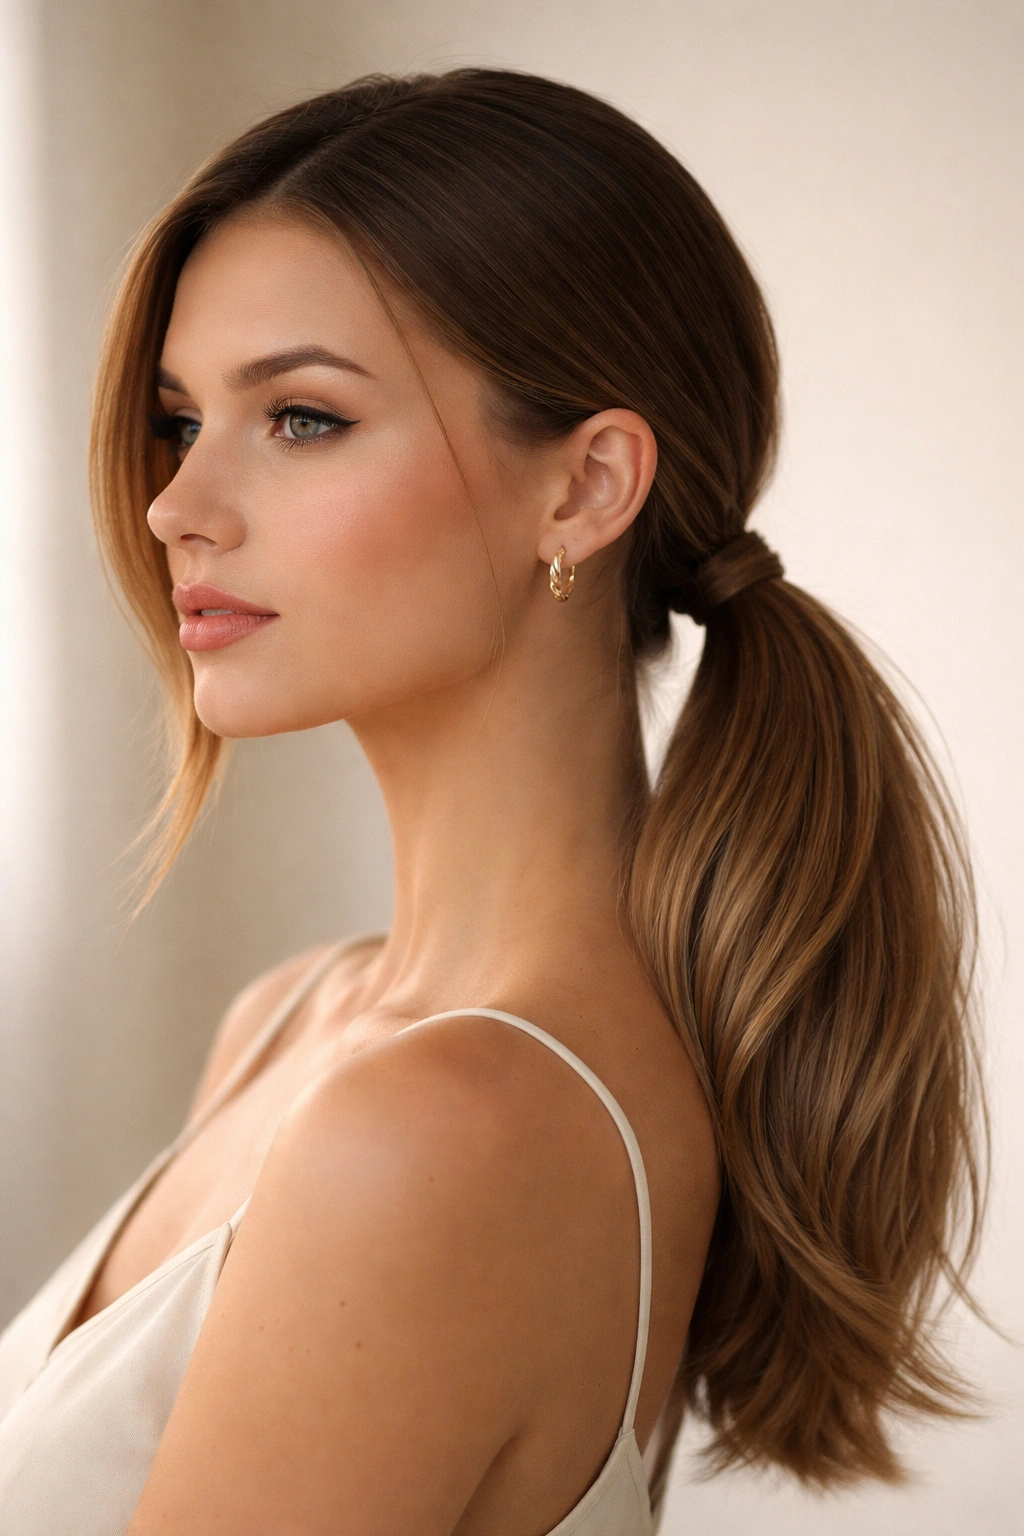
If you’ve ever thought straight hair was boring or hard to style, a low ponytail is about to become your secret weapon. There’s something about a well-executed low ponytail that looks effortlessly polished—whether you’re heading to the office, a casual dinner, or just trying to get your hair out of your face while looking put-together. The beauty of a low ponytail is that it’s versatile enough to work with virtually any outfit, from athletic wear to formal dresses, and it sits at that perfect sweet spot between casual and refined.
What makes low ponytails especially flattering on straight hair is the clean lines and natural shine. Straight hair doesn’t hide texture or imperfections the way waves and curls do, which means your low ponytail’s sleekness becomes a feature rather than a flaw. You can play with placement, add details at the base, introduce subtle twists, or weave in ribbons and accessories—and the result always looks intentional and polished. The straight strands catch the light beautifully, and the low positioning creates a long, elongating line that’s incredibly flattering on most face shapes.
The best part? Most of these low ponytails take five to ten minutes to create, even without professional styling skills. Whether you’re a minimalist who loves a sleek, simple look or someone who enjoys adding intricate details, there’s a low ponytail style here that fits your personality and your daily routine. Let’s explore twelve distinct approaches that showcase what’s possible with straight hair and a clear elastic.
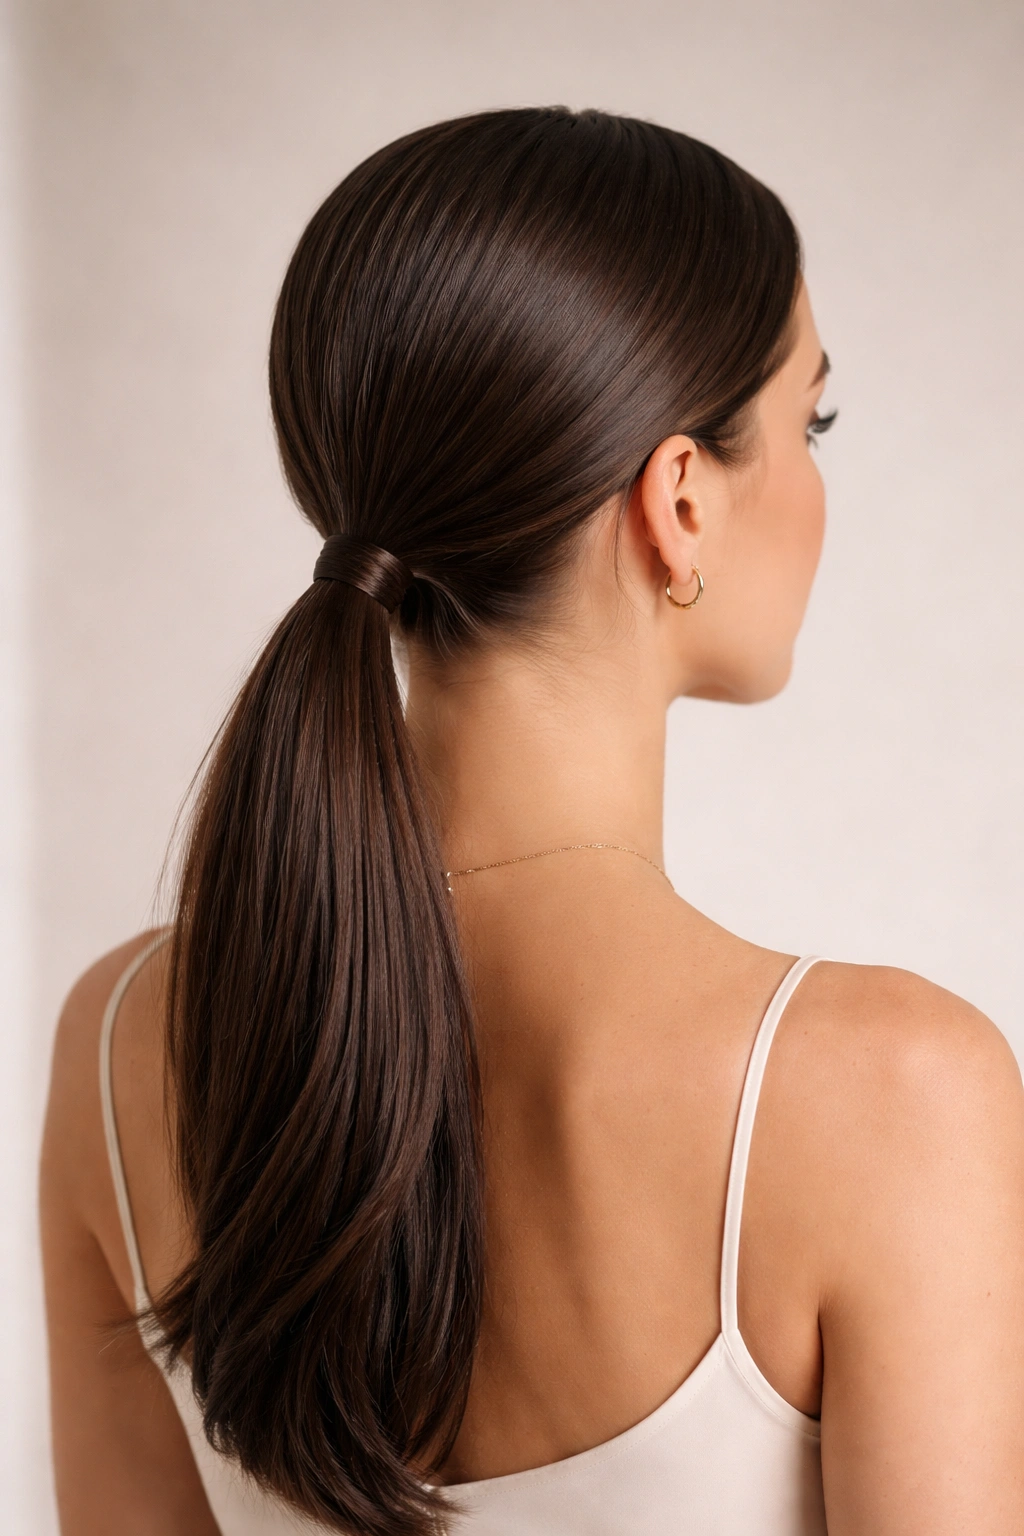
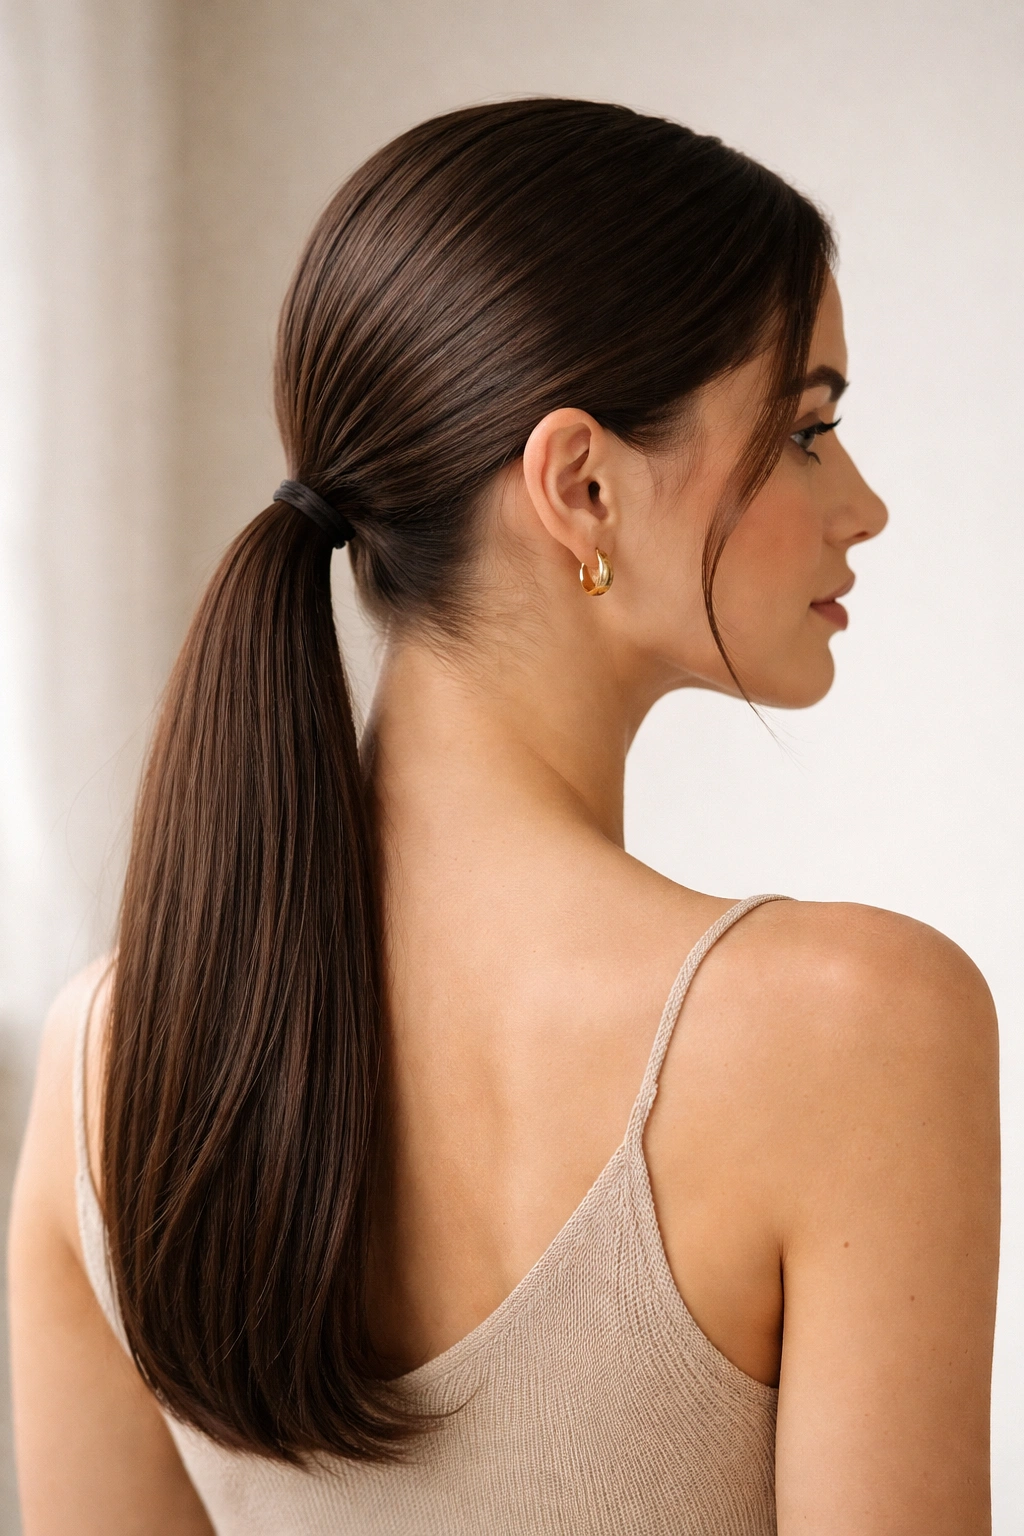
1. Sleek Low Ponytail
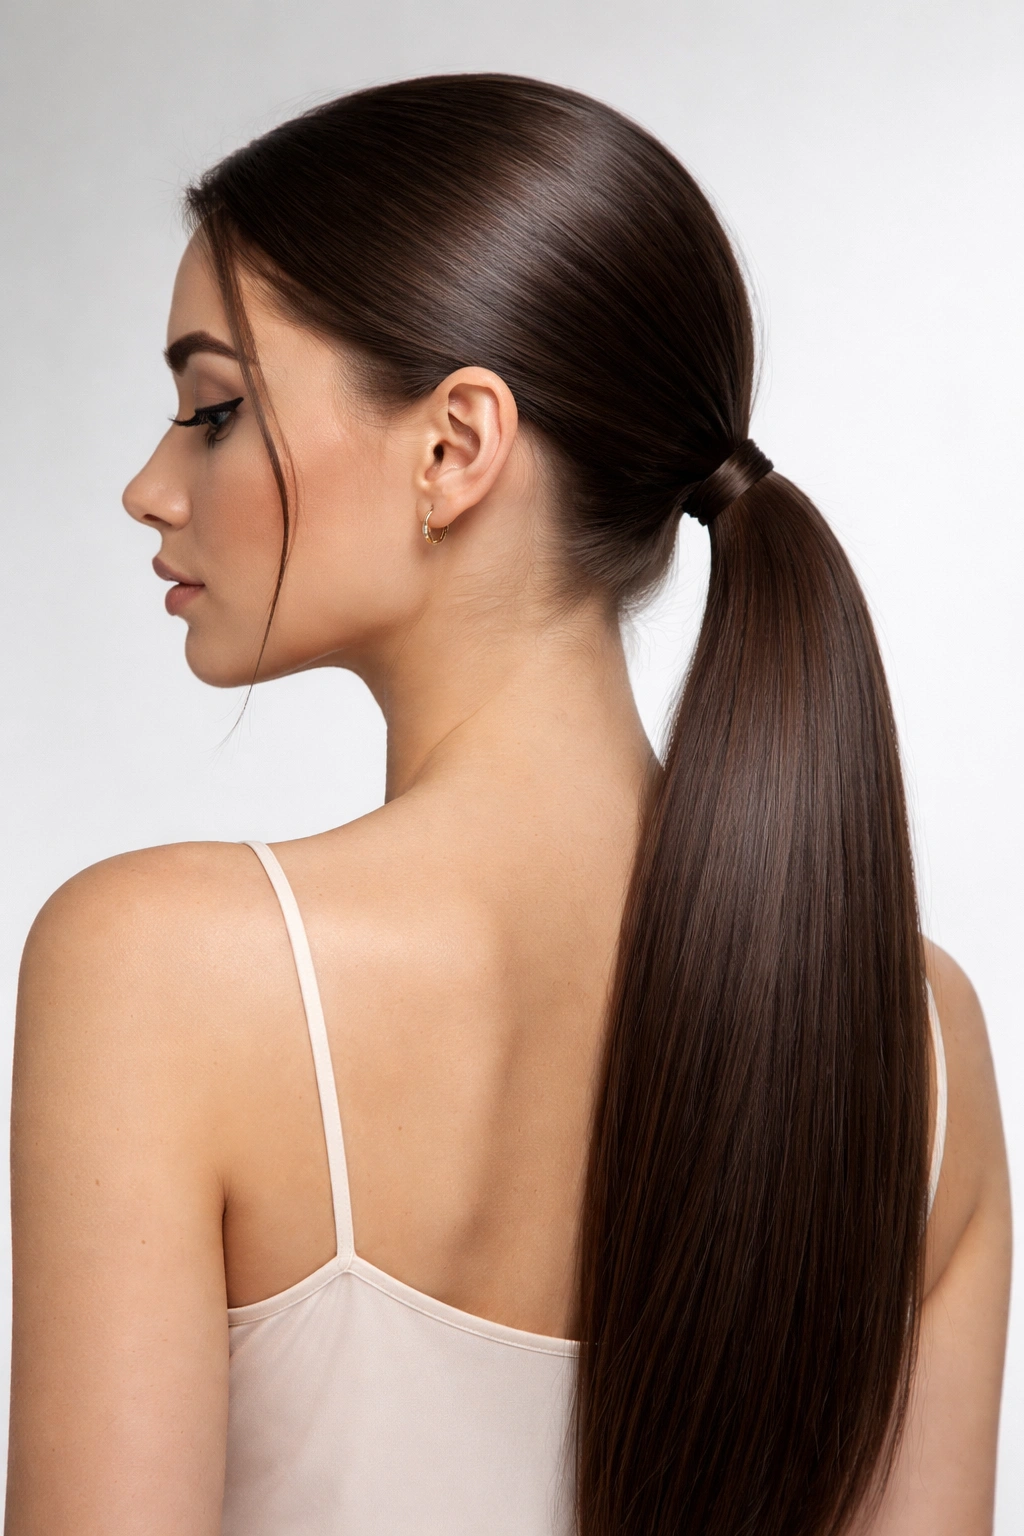
The sleek low ponytail is the foundation of all ponytail styling—clean, polished, and timeless. This is the style you reach for when you want sophistication without effort. Start with brushed hair that’s been smoothed with a paddle brush to eliminate any flyaways, then gather your hair at the nape of your neck and secure it with an elastic band.
Why It’s a Go-To for Every Occasion
The sleek low ponytail works because there’s no room for error when hair is this clean and controlled. Every strand lies exactly where it should, creating mirror-smooth lines from roots to ends. This style elongates your neck and brings focus to your face, which is especially flattering if you have strong cheekbones or a defined jawline. The simplicity is also its superpower—it reads as intentional and deliberate, never accidental or undone.
How to Achieve Maximum Sleekness
Use a blow dryer on a cool shot after applying smoothing serum to damp hair for the sleekest possible base. If you’re not blow-drying, apply anti-frizz cream to towel-dried hair and brush it through thoroughly. When gathering the ponytail, start with brushing the hair back gently, then gather it at the nape and smooth any flyaways with a fine-tooth comb or toothbrush before securing with your elastic.
Pro tip: Use a gel or edge control product along your hairline to smooth baby hairs completely—it’s the difference between looking polished and looking like you just threw your hair up in a rush.
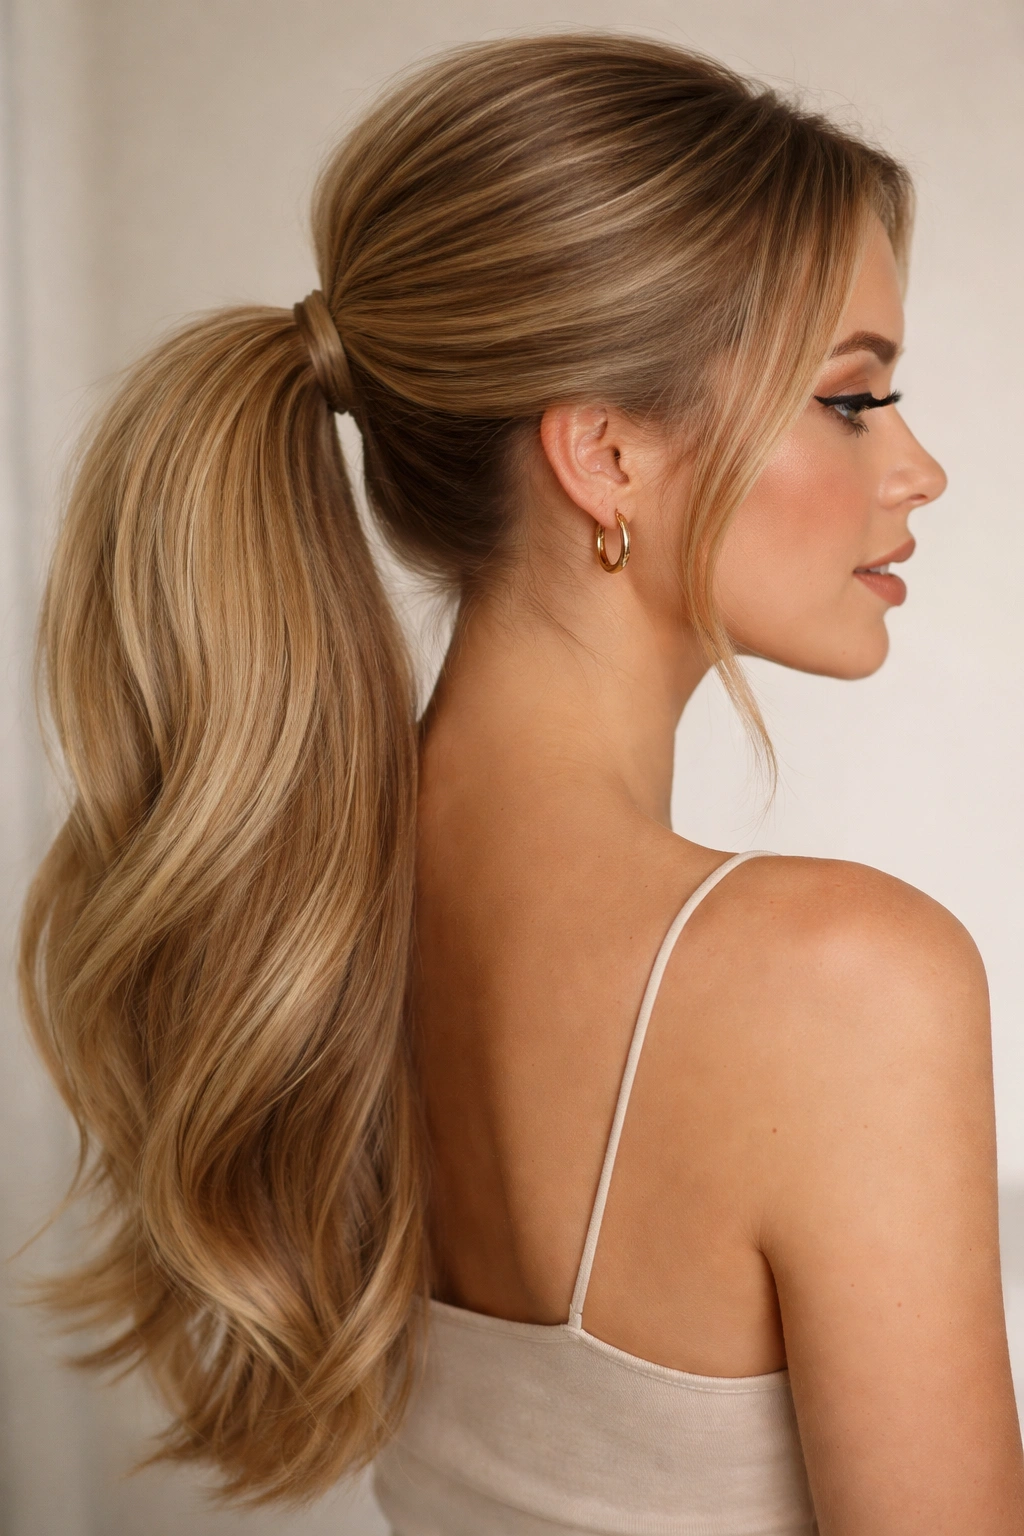
2. Low Ponytail with Texture
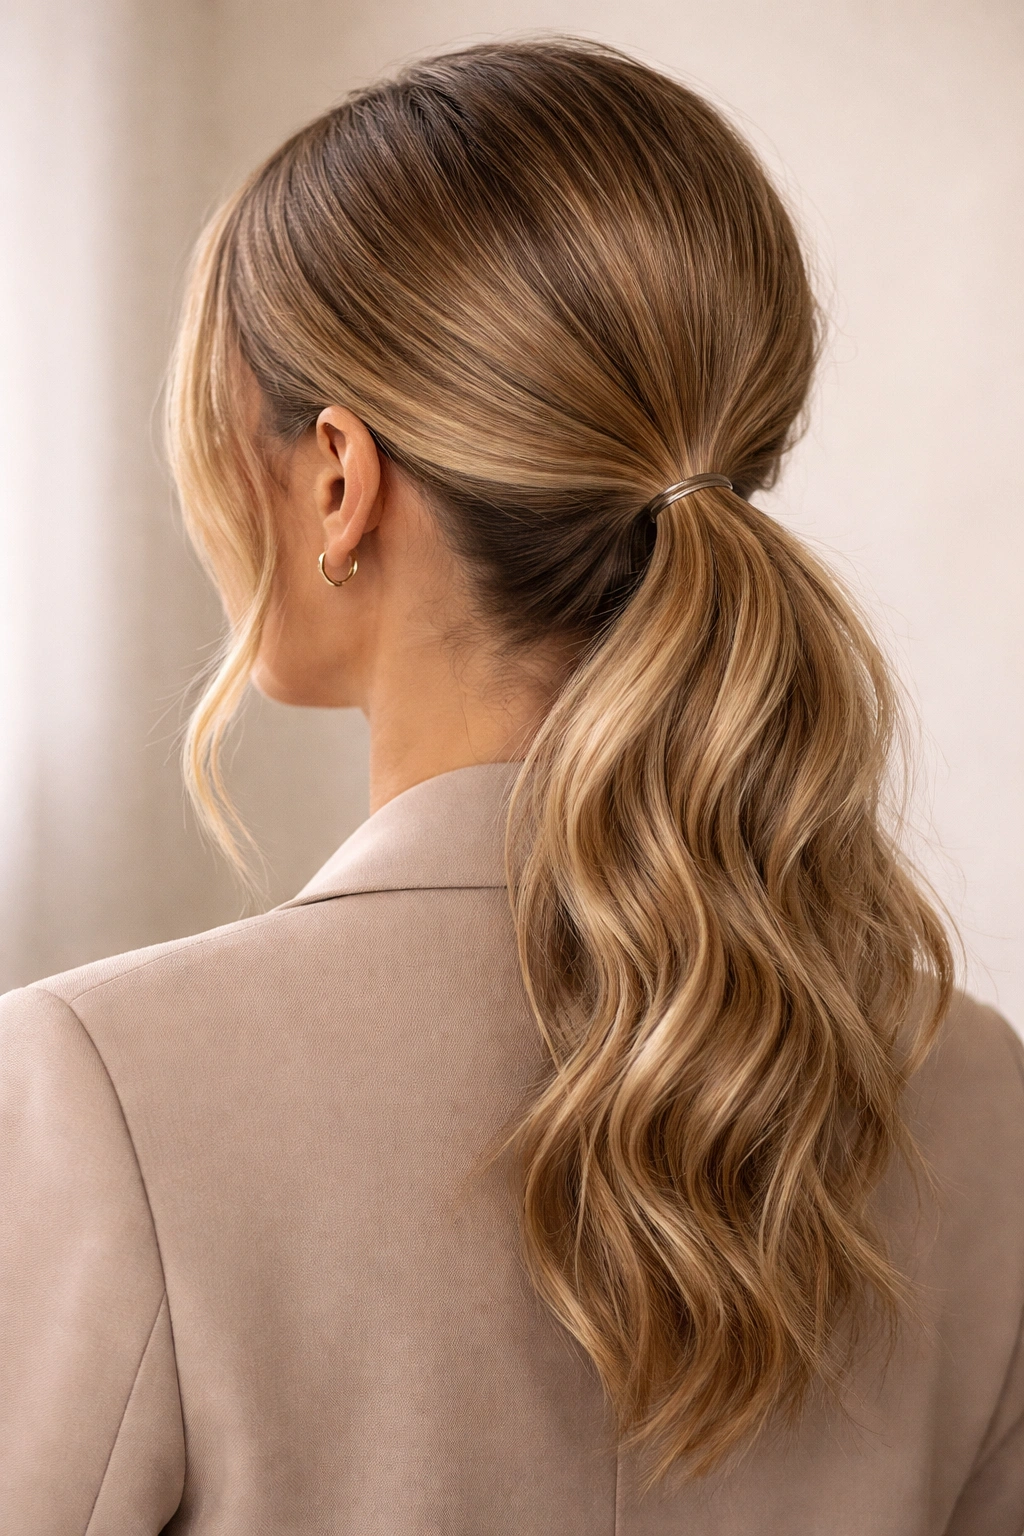
Add texture to your low ponytail and suddenly it feels more interesting and less austere. This version keeps the same low placement and sleek base, but introduces intentional waves or crimping to the ponytail section itself. It’s the style for days when you want sophistication with movement.
Creating the Textured Effect
After securing your ponytail at the nape of your neck, section off the ponytail into three or four smaller sections. Use a curling iron on a medium heat setting (around 350°F) to add loose waves to each section, curling away from the face for a softer look. You’re not aiming for tight ringlets—think gentle, rolling waves that catch light and add visual interest without looking fussy. Alternatively, lightly brush through the waves with your fingers to create a softer, more undone texture.
When This Works Best
Textured low ponytails excel at casual-professional settings where you want to show personality. They’re perfect for Friday office environments, brunches with friends, or creative industry events. The texture keeps your style from feeling severe, which is especially helpful if you have an angular face shape or prefer your styling to feel approachable rather than stark.
Worth knowing: Straight hair holds waves beautifully because the texture isn’t already fighting you—the waves show clearly and elegantly without the bulk that texture can add to naturally wavy hair.
3. Low Side Ponytail
Shift the placement of your ponytail slightly to one side and you’ve instantly created asymmetry that’s visually interesting. A low side ponytail sits just behind one ear, creating a romantic, slightly feminine take on the classic ponytail. This placement is especially flattering on round or square face shapes.
The Placement That Matters
A true low side ponytail sits about two inches to one side of your center back, roughly where your ear ends. You’re not creating a full side ponytail that sits at your shoulder—that’s a different style altogether. Instead, gather your hair lower and shift it just slightly off-center. This subtle asymmetry creates a flattering line that elongates the neck and adds visual interest without feeling overdone.
Hair and Face Shape Considerations
If you have a round face, try the side ponytail on the side opposite your wider cheek—the shift in ponytail placement creates a flattering visual balance. For square faces, the side placement softens your angles beautifully. If you have an oblong face, you can go either direction without worrying; the side placement will look lovely either way.
Quick styling fact: Use a velvet hair tie in a matching color to your hair—it’s gentler on straight strands and won’t create the creasing that elastic bands sometimes do.
4. Bubble Ponytail

A bubble ponytail is a series of small, rounded sections created by adding multiple hair ties to a single ponytail, then gently teasing out each section to create bubble-like bulges. It’s playful, textured, and modern—perfect for days when you want to feel fun without sacrificing polish.
The Step-by-Step Technique
Start with a smooth, secure base ponytail at your nape. Then, roughly three inches down from the elastic, place a second elastic band. Gently tease the hair between the two bands upward to create a small bulbous section. Continue adding elastic bands every three inches down the length of your ponytail, teasing out each section between the bands. The result looks sculptural and playful, catching light at each “bubble” point.
Customizing the Bubble Size and Spacing
For a delicate, refined look, use smaller bubbles spaced two inches apart. For a bolder, more statement-making style, space them four inches apart and tease out more hair for bigger bubbles. You can also vary the bubble size—larger near the top and smaller as you move down—for a modern, asymmetrical feel that still reads as intentional.
Insider note: This style photographs beautifully because the light hits each bubble and creates dimension and shadow that reads as purposeful styling, not accidents.
5. Low Ponytail with Face-Framing Pieces
Pull most of your hair back into a low ponytail while intentionally leaving two thin face-framing pieces in front of each ear. This hybrid style is incredibly flattering and adds softness to your face while keeping the rest of your hair neatly secured. It’s the perfect compromise if you want your hair out of the way but don’t want a completely severe look.
Selecting and Positioning the Face-Framing Pieces
Before gathering your ponytail, identify which pieces you want to frame your face—typically a section about half an inch to one inch wide from each temple. Clip these pieces away from your ponytail-gathering area. Once your low ponytail is secured, release these pieces and curl them gently with a one-inch curling iron, or leave them straight for a more modern take.
Why Face-Framing Works for Straight Hair
On straight hair, these pieces catch the light beautifully and draw attention to your eyes and cheekbones. They also create a soft perimeter around your face that feels less harsh than a completely pulled-back style. This is especially valuable if you have strong features or a longer face—the pieces add balance and visual softness.
Pro tip: Tuck the face-framing pieces behind your ears occasionally throughout the day for a different look without taking down your entire ponytail.
6. Twisted Low Ponytail
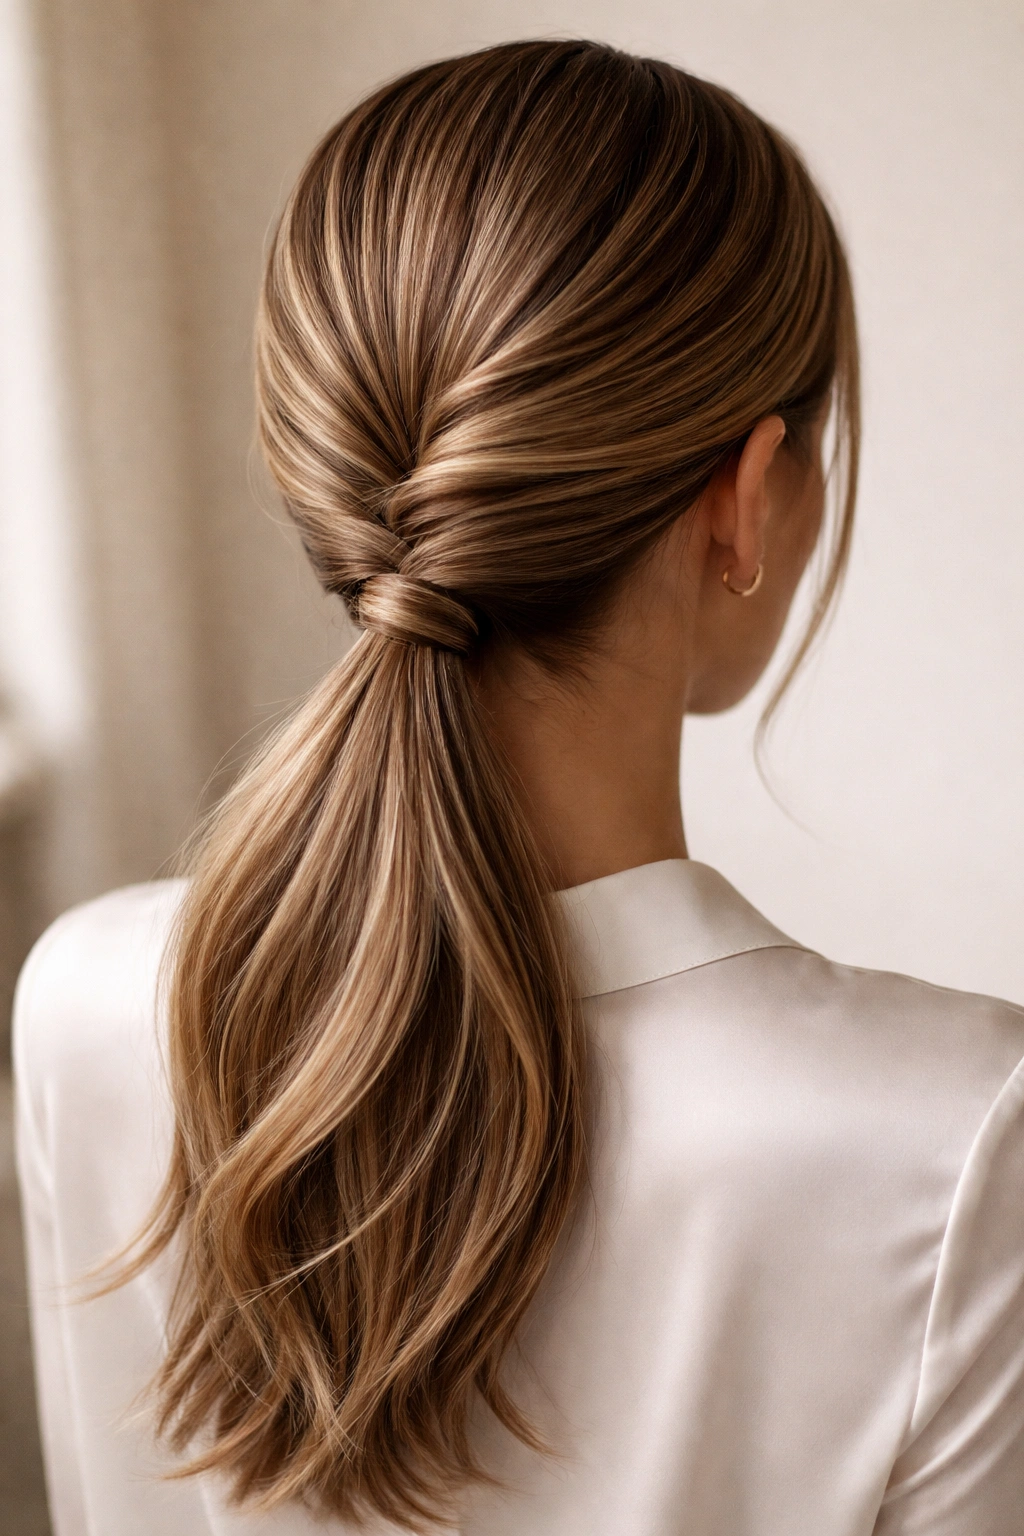
Instead of a straight, clean gather, twist sections of hair as you move toward the nape, then secure everything into a low ponytail. The twists add visual interest and texture while maintaining the sophistication of a low ponytail. This style feels polished but not plain.
Creating the Twist
Brush your hair back and divide it into two sections at the crown, one from each side. Gently twist each section as you bring it toward the center back, crossing them over each other as you move downward. Once you’ve reached the nape of your neck, gather both twisted sections plus any remaining hair into a ponytail elastic. The result looks like a twisted crown that feeds into a ponytail.
Different Twisting Approaches
For a loose, romantic look, twist loosely and don’t tighten the twists—let them feel almost natural. For a more dramatic, refined style, twist tightly and smoothly, which creates a sculptural, defined look. You can also create multiple thinner twists instead of two large ones for a more intricate appearance.
Worth knowing: Twisted ponytails are less prone to looking messy on day-two hair because the twist actually hides tiny flyaways and gives texture more texture to work with.
7. Low Ponytail with a Ribbon or Scarf
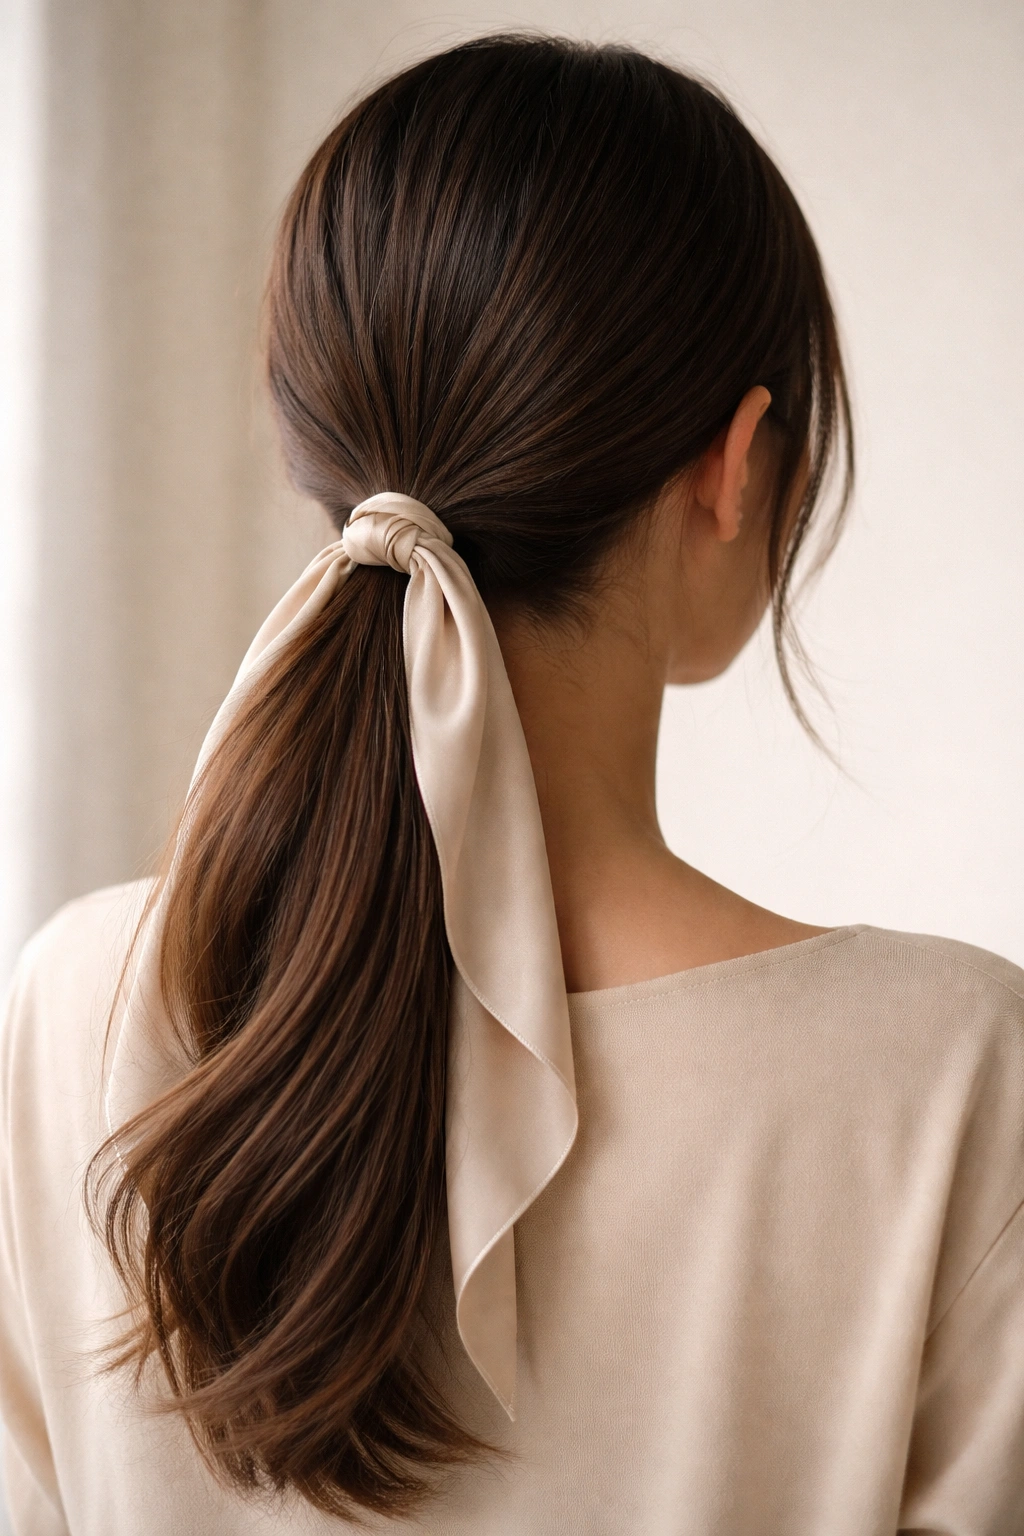
Wrap a silk ribbon, velvet band, or patterned scarf around the base of your low ponytail to add color, pattern, or visual interest. This is one of the simplest styling upgrades you can make, and it completely transforms the feel of your ponytail from basic to intentional and curated.
Material Choices That Matter
Silk ribbons and velvet bands are gentler on your hair than traditional elastics, and they add a luxe, finished feel. A silky scarf knotted around the base feels bohemian and artistic. Metallic ribbons read more formal and modern. Choose a material and color that complements your outfit or your personal style—this is your chance to add personality without changing your actual hairstyle.
How to Secure the Ribbon
Secure your ponytail with a small elastic band first, then wrap your ribbon around the base, completely covering the elastic. Tie it off with a small knot at the back, or let the ends hang down the center of the ponytail for a playful, decorative effect. You can also use a bobby pin to secure the ribbon knot if you want it completely hidden.
Quick fact: This tiny change makes your low ponytail feel intentional and styled, not just functional—it’s a five-second upgrade that reads as proper grooming.
8. Low Ponytail Wrapped with Hair
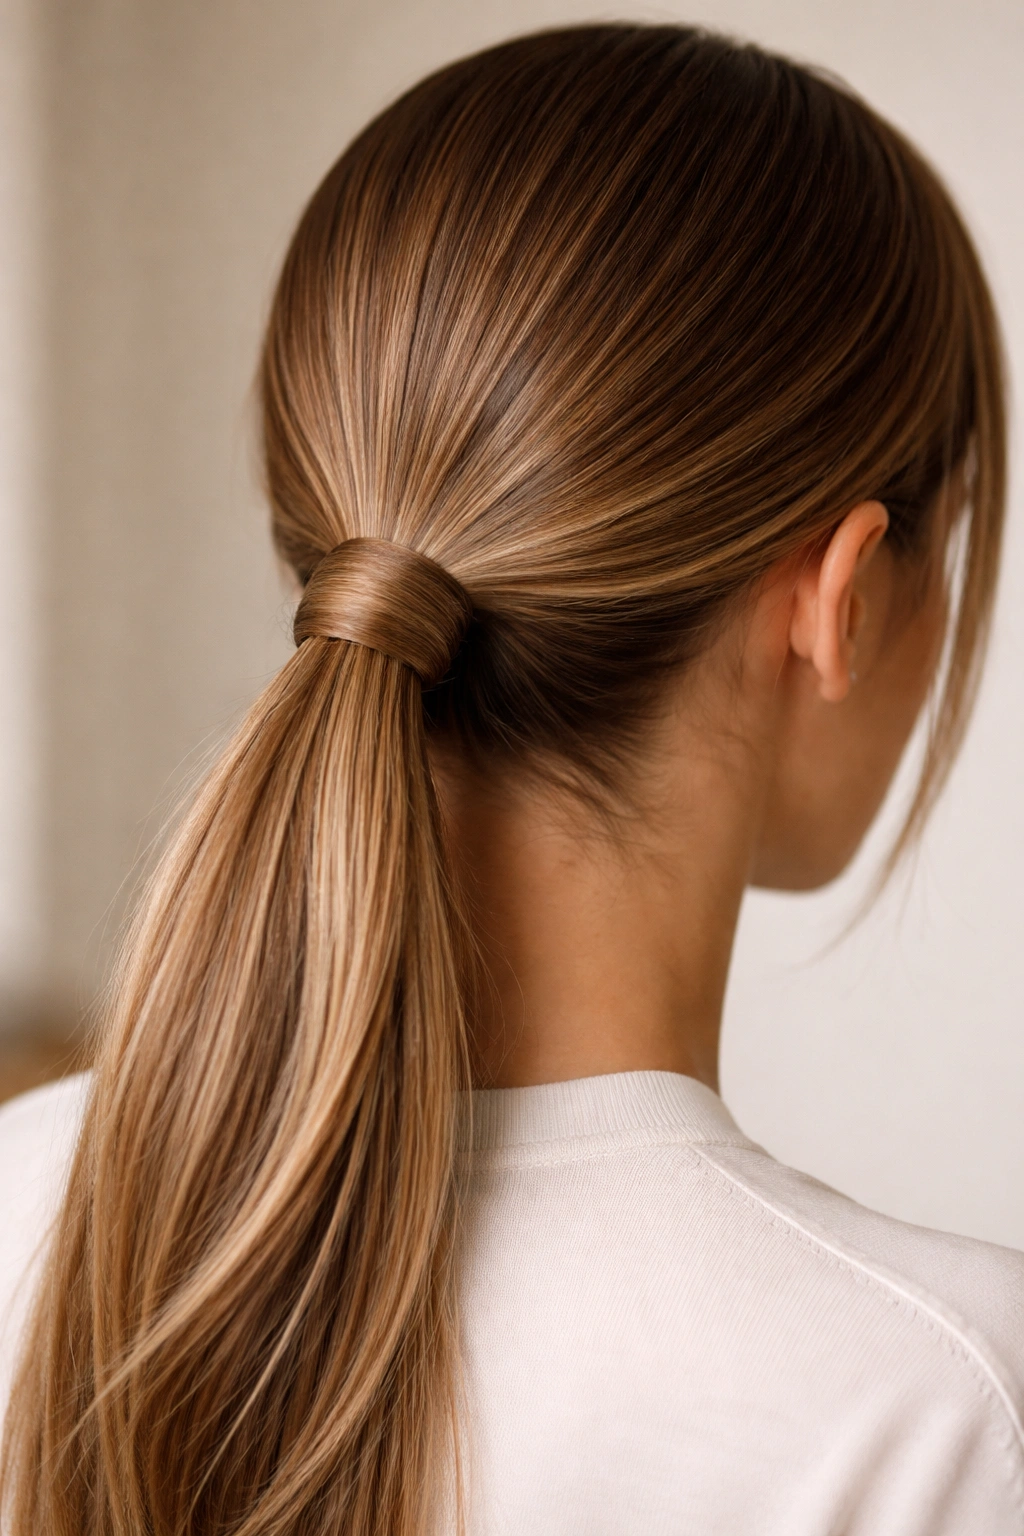
Instead of using an elastic or ribbon, wrap a small section of your own hair around the base of your ponytail to create a polished, completely blended look. This takes a bit more technique but creates an incredibly refined, salon-quality finish that looks expensive and intentional.
The Hair-Wrap Technique
Gather your ponytail loosely and secure it with a small elastic. Then, take a thin section of hair from underneath the ponytail (from the back side) and wrap it around the base, covering the elastic completely. Secure it with a bobby pin tucked underneath and into the wrapped section. The result looks like your ponytail was never held by an elastic at all—just seamlessly wrapped with a piece of your own hair.
Why This Works So Well for Straight Hair
On straight hair, the wrapped section blends seamlessly with the rest of the ponytail because there’s no texture difference to create a visible line. It looks incredibly polished and professional, which is why this is the method used in high-end salons and red carpet styling.
Pro tip: Use a thin bobby pin in a matching hair color, slightly angled downward, so it disappears completely into the wrapped section.
9. Low Ponytail with Braided Detail
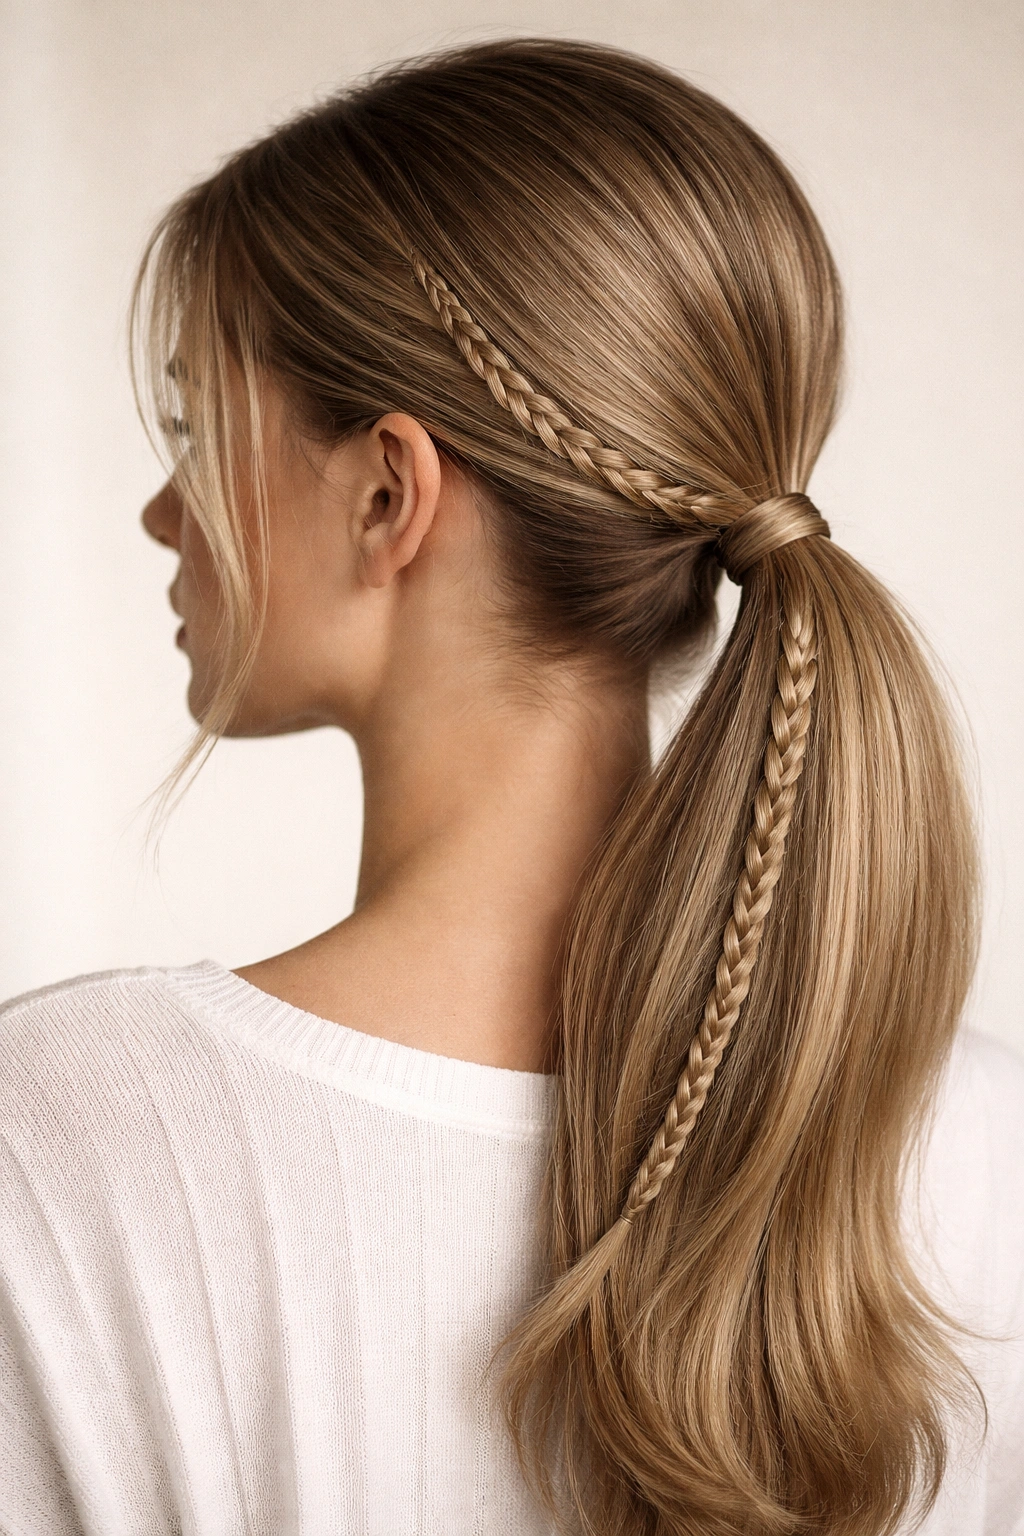
Add a thin braid to one or both sides of your low ponytail for a romantic, intricate-looking style that’s simpler to execute than it appears. The braid doesn’t have to be complicated—even a simple three-strand braid adds visual interest and moves your ponytail from basic to special.
Creating a Side Braid Addition
Gather your low ponytail as usual. Then, take a thin section from the side of the ponytail (about half an inch wide) and create a loose three-strand braid traveling vertically down the side of the ponytail. Stop braiding about three inches from the end and secure with a small clear elastic or bobby pin. Leave the rest of the ponytail un-braided. The asymmetry of a single braided side feels modern and intentional.
Variations on Braided Styling
You can create matching braids on both sides for a more symmetrical, romantic look. Or wrap a thin braid around the entire base of the ponytail like a crown before it fans out below. For a looser, more relaxed approach, French braid a section on one side as you move toward the nape, then finish the ponytail with the braid folded in.
Worth knowing: Three-strand braids actually blend beautifully with straight hair because the clean lines of the braid create their own visual interest.
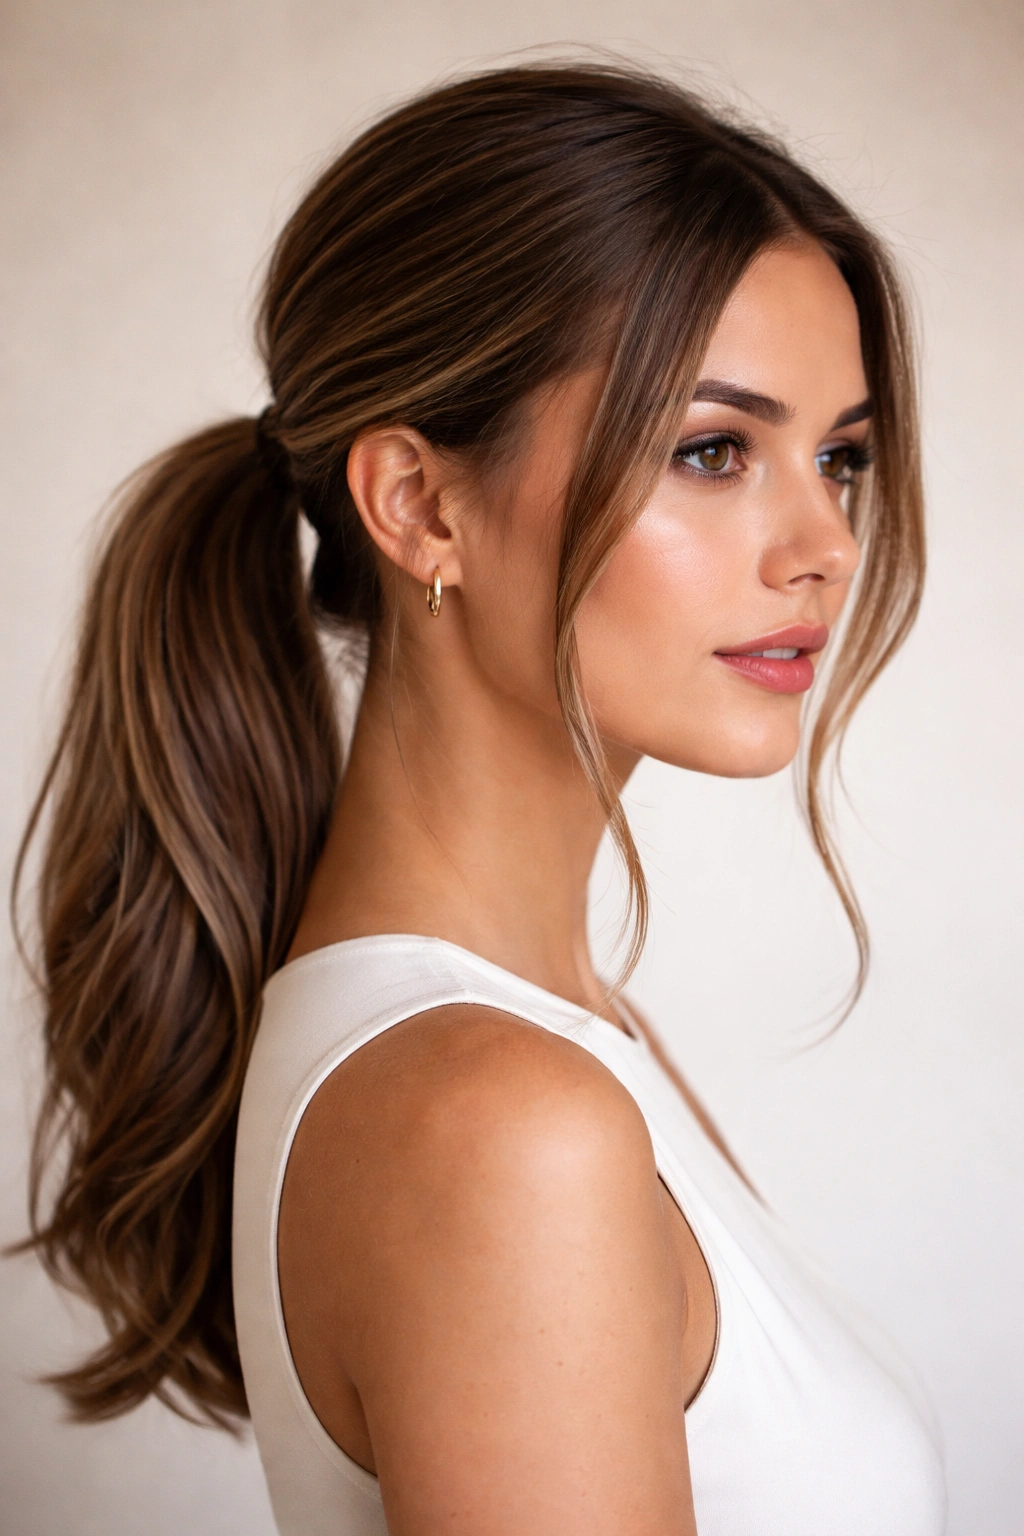
10. Center-Part Low Ponytail
Begin with a clean center part—a precise line from your forehead to the nape of your neck—then gather your low ponytail directly at your center back. This symmetrical style is incredibly flattering and feels modern and intentional. The center part creates a balanced, face-framing effect that works beautifully on most face shapes.
Creating a Precise Center Part
Use a tail comb (the thin, pointed comb end) to create a straight line from the center of your forehead, between your eyebrows, straight down the back of your head to your nape. This is your guide for your ponytail placement. Gather everything with the part running through the center of your ponytail base, creating two symmetrical sections behind your ears.
Why Center Parts Work on Straight Hair
A center part is most flattering on straight hair because the clean lines emphasize facial symmetry. It creates a flattering frame if you have an oblong or rectangular face shape, and it looks incredibly polished and intentional. The part also keeps your hair from hanging entirely on one side, which can feel unbalanced.
Quick styling tip: Create your center part on damp hair and let it dry completely—the part will stay much more defined and visible throughout the day.
11. Voluminous Low Ponytail
Add volume and body to your low ponytail by teasing gently at the crown before gathering, or by blow-drying your roots with your head flipped upside down. A voluminous low ponytail feels more substantial and luxurious than a sleek version, and it’s especially flattering if you have fine or thin hair—it creates the illusion of more density.
Creating Volume Without Teasing Damage
Instead of traditional backcombing, use a volumizing mousse on your damp roots before blow-drying. Blow-dry with your head tilted downward and using your fingers to lift the hair away from your scalp. Once dry, flip your head back and gently smooth the surface layer with your paddle brush to eliminate visible texture while keeping the underneath voluminous.
The Aesthetic of a Full, Rounded Ponytail
A voluminous low ponytail creates a rounder, fuller silhouette at the nape of your neck. This is especially flattering if you have a longer neck or a narrower face shape—the volume balances proportions. It also feels more polished than a thin, sleek ponytail if you’re going for a formal occasion.
Insider note: Volumizing products add texture that actually helps straight hair hold a fuller shape, so don’t skip them thinking they’ll weigh you down—they do the opposite.
12. Low Ponytail with Accessory Wrap
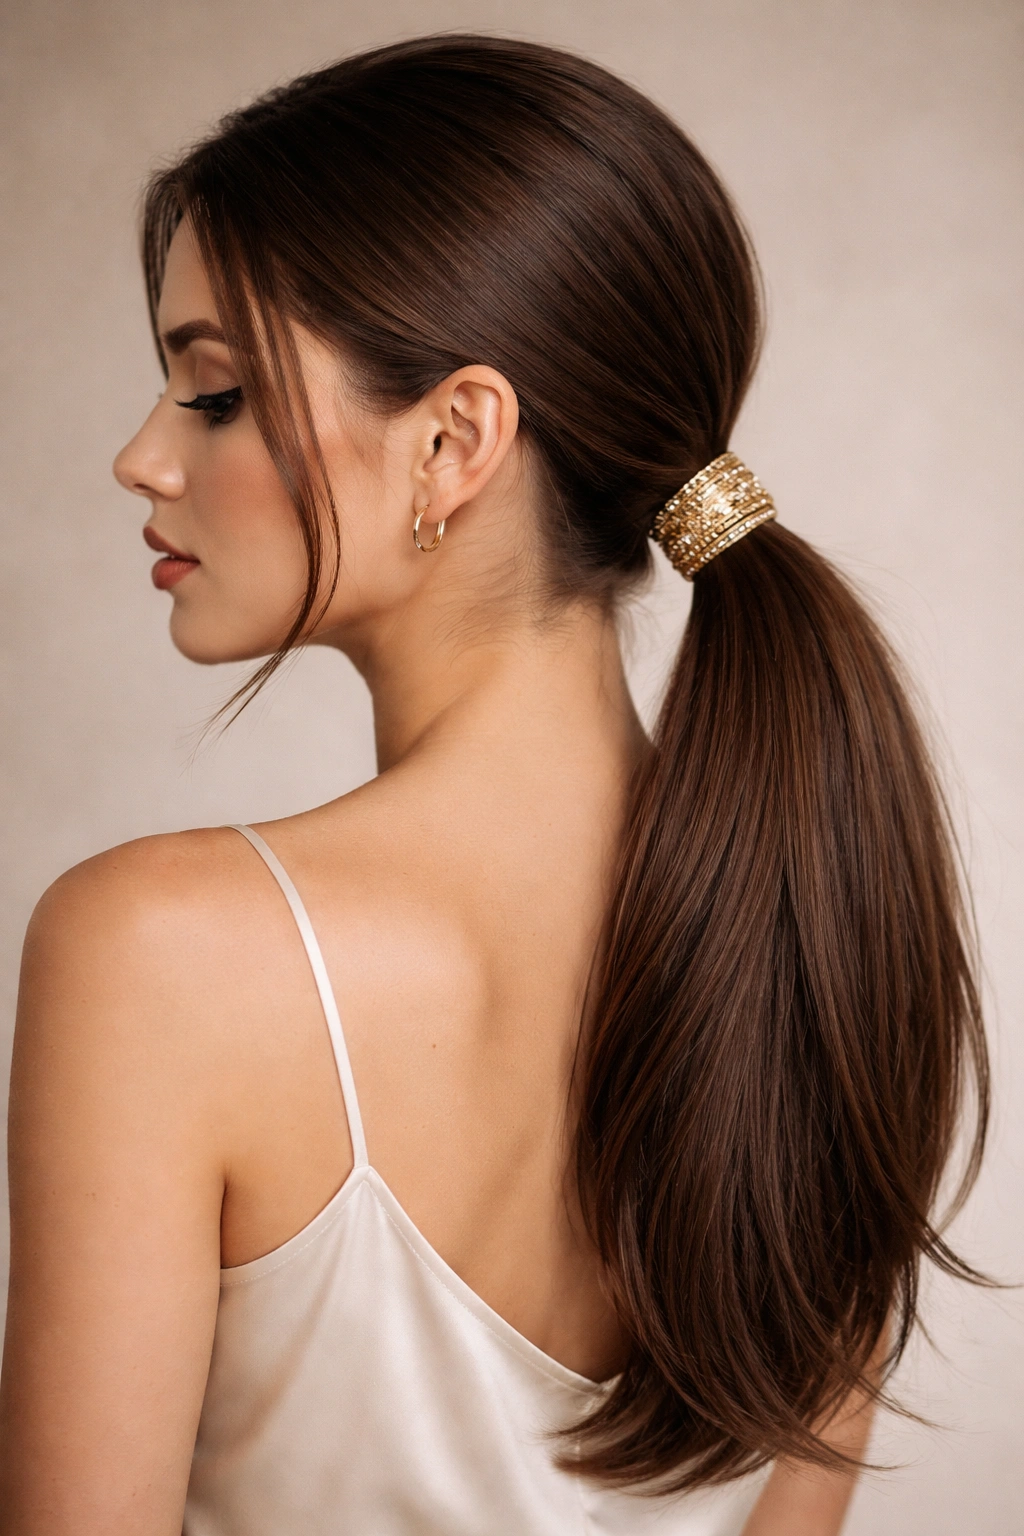
Go beyond a simple ribbon and wrap your low ponytail base with a decorative accessory—think a gold cuff, a beaded band, a leather wrap, or even a chunky chain-link bracelet. This turns your ponytail into a statement piece and is perfect for adding personality to a simple style.
Accessory Styles That Work Best
Metal cuffs and bands add modern edge and work with both casual and formal outfits. Beaded wraps add bohemian, artistic flair. Leather wraps feel edgy and cool. Chain-link elements feel trendy and fashion-forward. The key is choosing something that either matches your personal style or complements your outfit’s color story.
How to Secure Accessories Without Damaging Hair
Wrap your accessory around the ponytail base and ensure it’s loose enough that you’re not pulling your hair tightly. You want the accessory to sit snugly but not create tension that could cause breakage. Secure the back with a bobby pin or hair elastic if the accessory doesn’t have its own closure mechanism.
Pro tip: Oversized or chunky accessories work best because they create visual impact without needing to be wrapped super tightly around your hair.
Final Thoughts
A low ponytail is one of the most versatile, flattering, and easy-to-execute hairstyles available, and straight hair shows off every variation beautifully. Whether you’re drawn to sleek simplicity, textured interest, braided details, or accessory-driven styling, there’s a low ponytail approach that fits your personality and your daily life.
The real magic of mastering low ponytails is that you create a library of quick styles that always look polished and intentional. Some days you’ll reach for the sleek version when you want minimal effort and maximum polish. Other days you’ll add twists, texture, or face-framing pieces because you’re feeling more creative. What matters is that each variation is achievable in five to ten minutes, and every single one looks like you actually tried—even when you’re just in a time crunch.
Straight hair’s clean lines and natural shine are perfect for showing off the detail work in these styles. Every twist catches the light, every bubble has definition, and every braid reads clearly. Start with the simplest versions and work your way up to the more detailed ones as you gain confidence. Before long, low ponytails will become your go-to solution for good hair days and bad hair days alike.