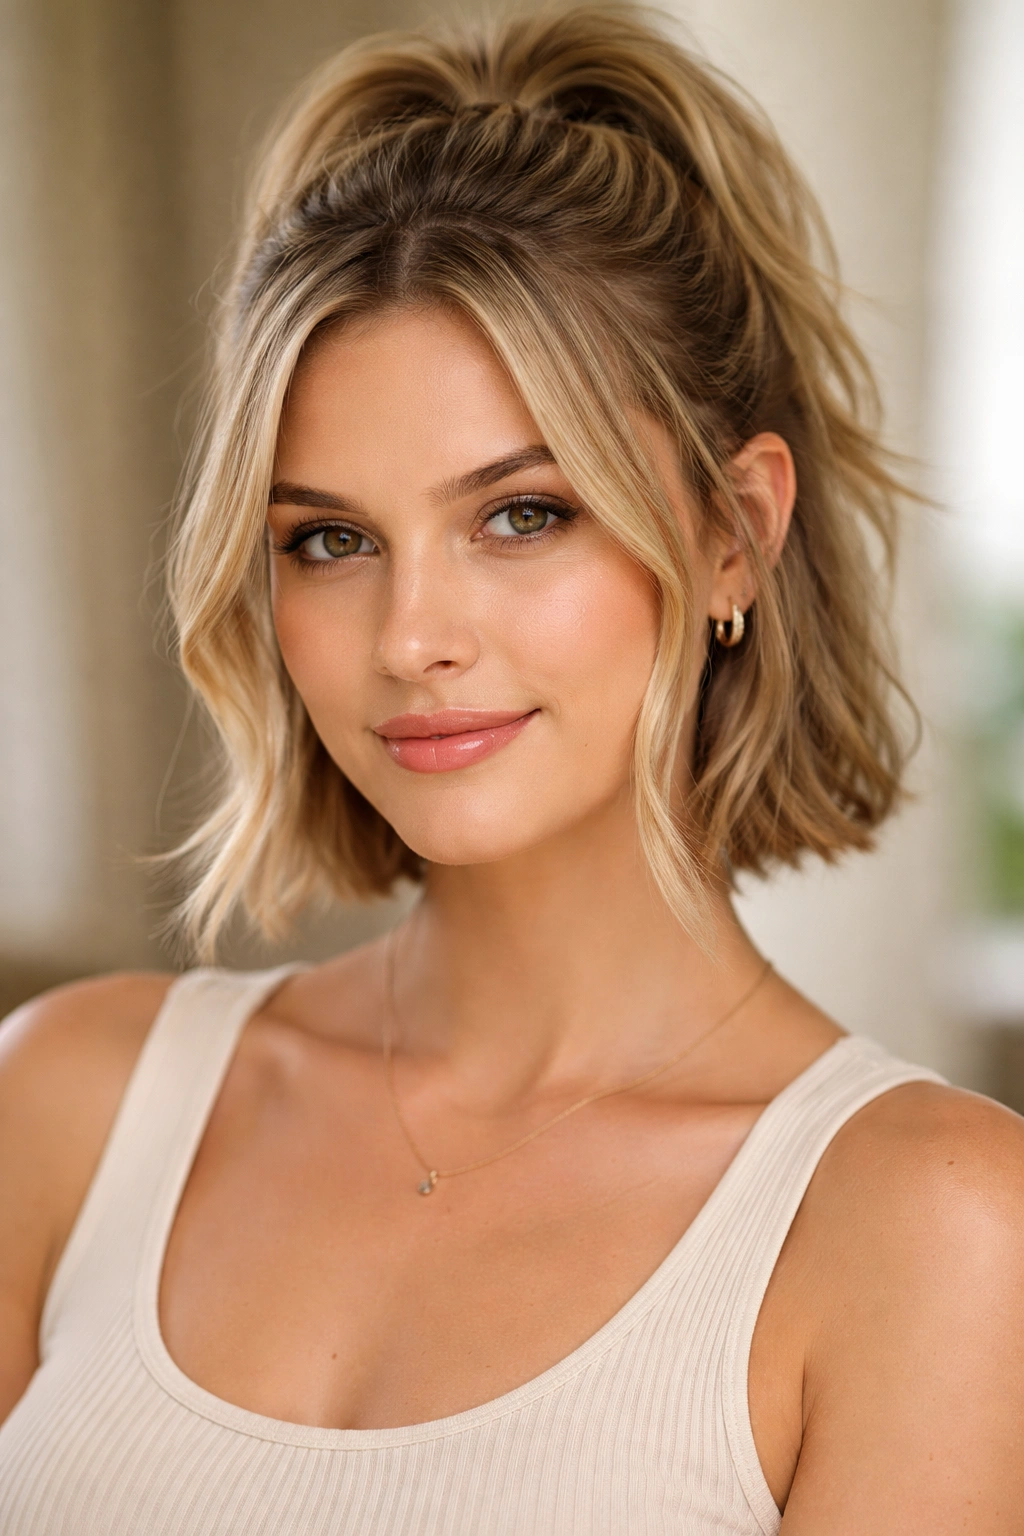
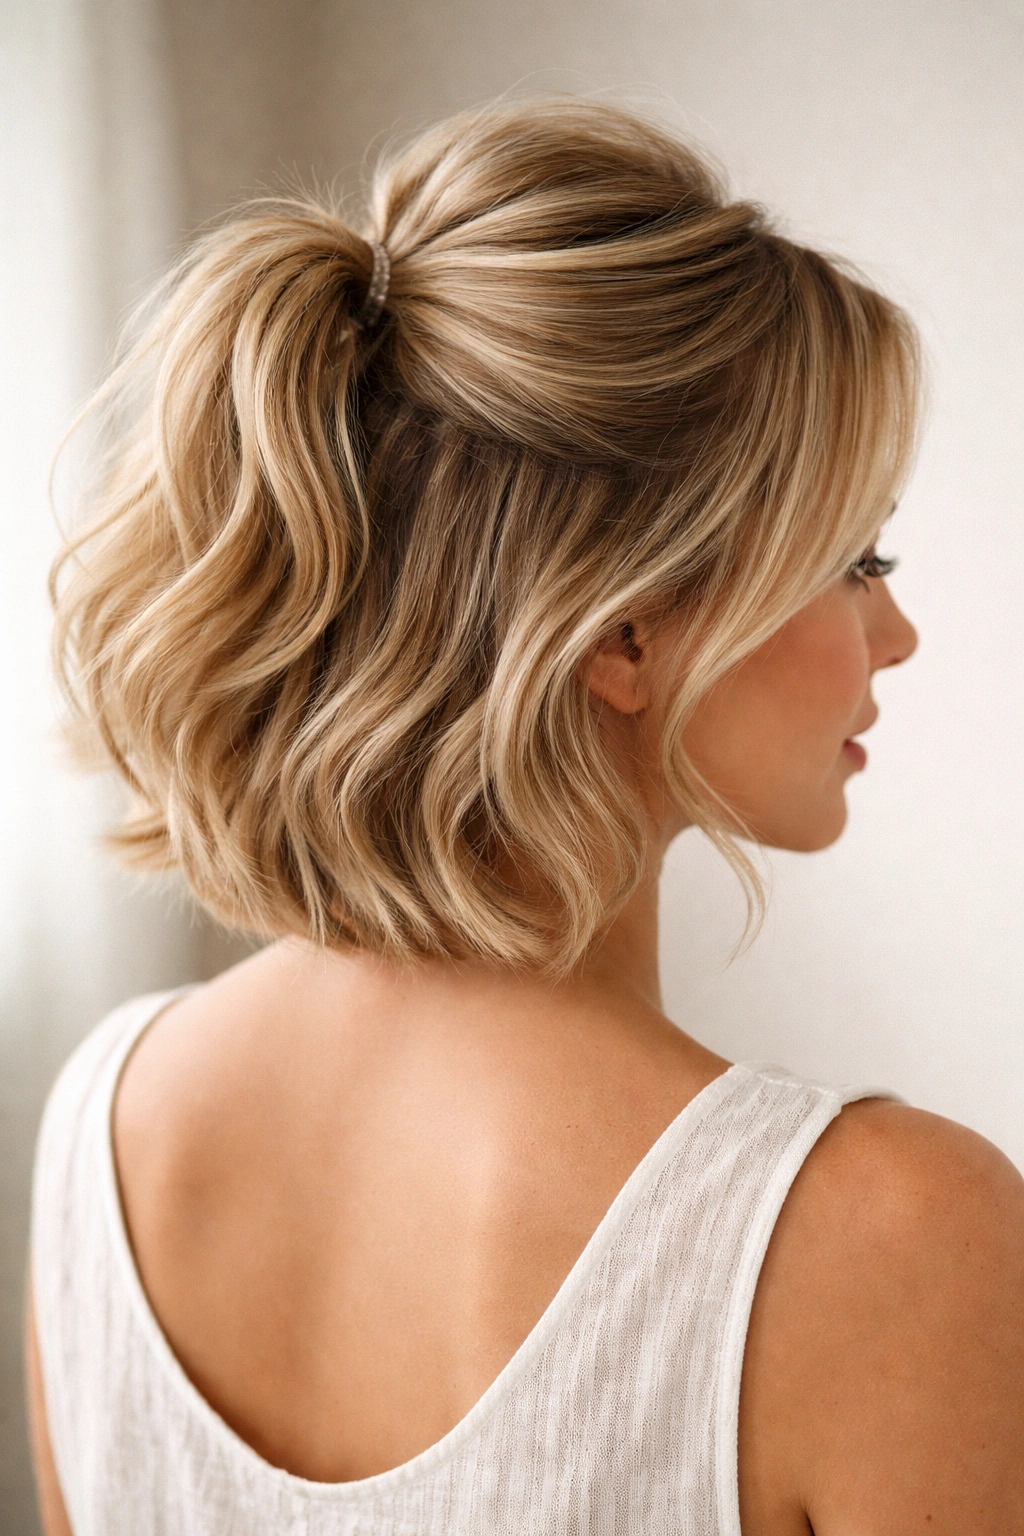
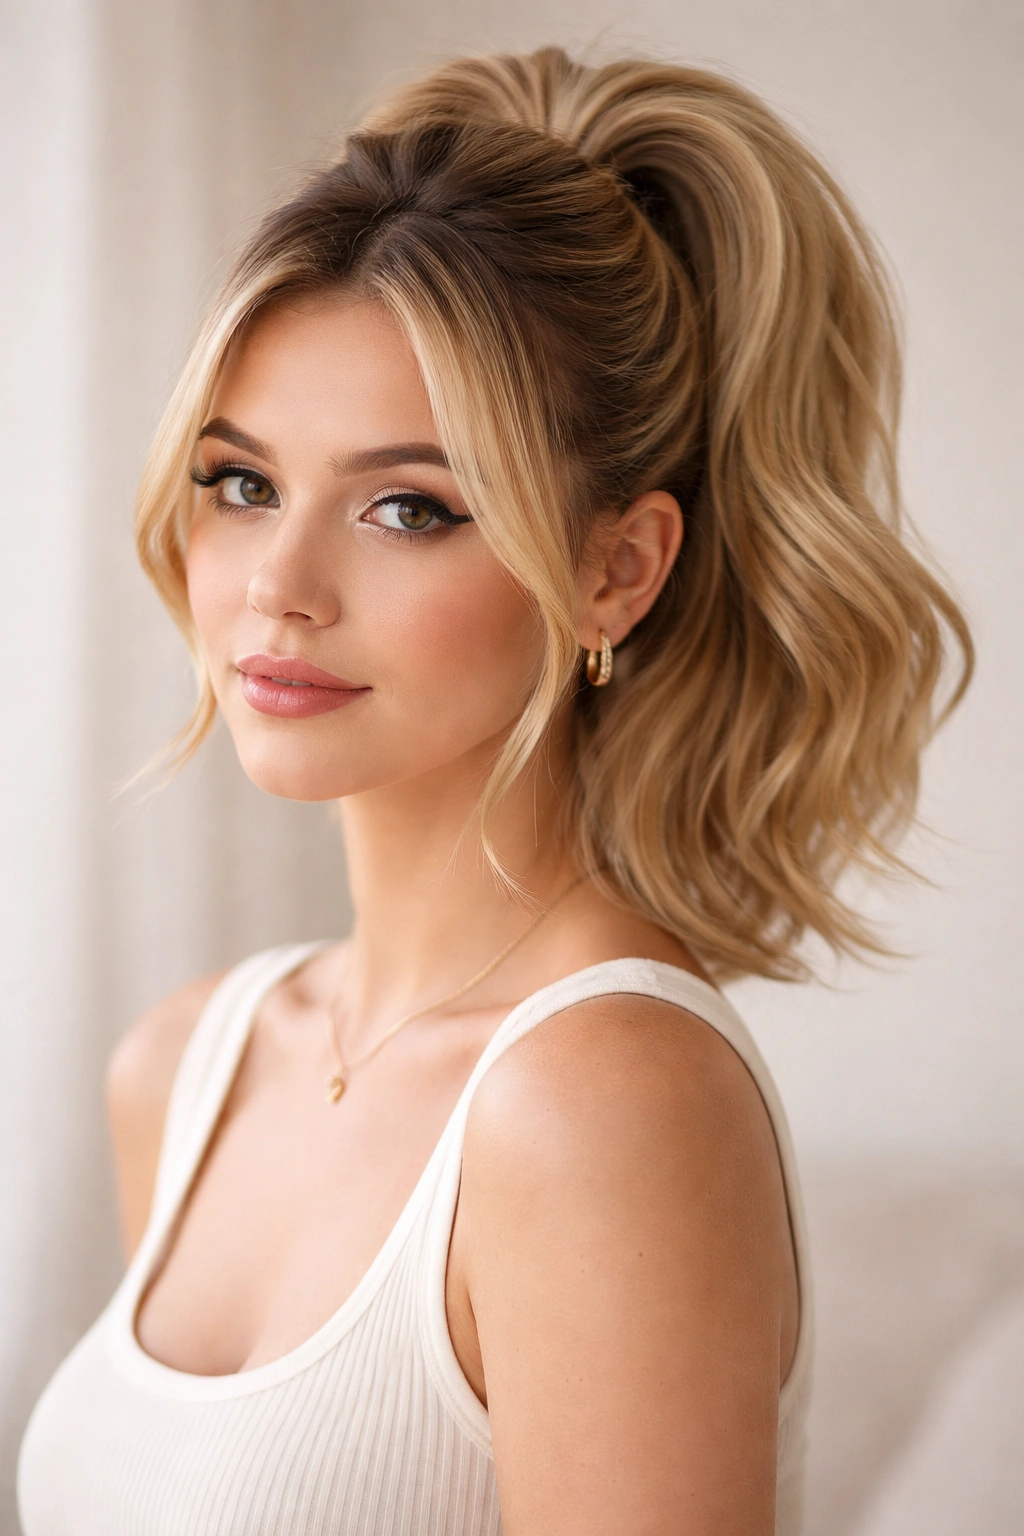
Short hair doesn’t mean you’re limited to the same old styles day after day. In fact, short hair opens up a whole world of half-up ponytail possibilities that longer locks simply can’t pull off with the same impact. A half-up ponytail sits at that perfect sweet spot—it keeps hair off your face while maintaining softness and movement, and it works whether you’re heading to the office, meeting friends for brunch, or getting ready for a night out. The beauty of a half-up style on short hair is that it creates instant dimension and visual interest without requiring complicated techniques or excessive styling time.
The key to nailing half-up ponytails on short hair is understanding how to work with your length. What makes these styles shine on shorter hair is how they interact with the face and balance the overall proportions. You’re not trying to corral tons of length here—you’re using strategic placement, texture, and the right finishing touches to create styles that look polished, intentional, and genuinely flattering. The foundation is always the same: section off the top or sides of your hair, secure it, and let the rest fall freely. But from there, the variations become endless.
Whether you’re working with chin-length hair, a textured pixie, a modern lob, or shoulder-skimming layers, there’s a half-up ponytail here that’ll work with what you’ve got. Some of these styles lean minimal and professional, while others are playful and textured. All of them take five to ten minutes to create, which means you can actually use these on regular mornings, not just special occasions.
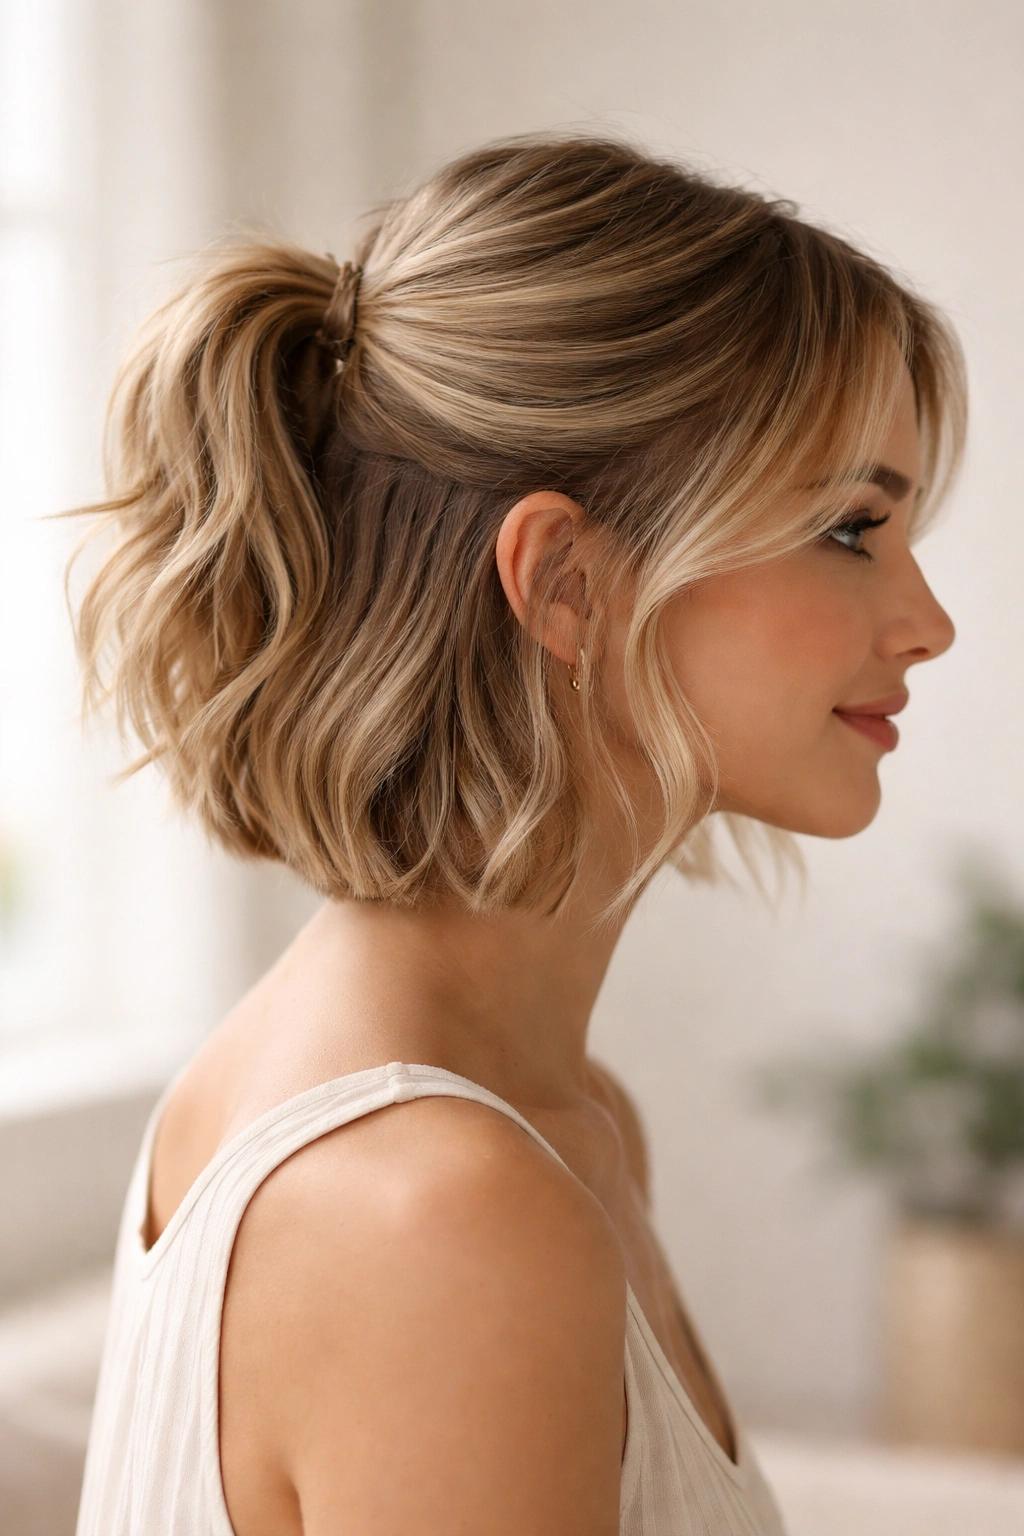
1. The Sleek and Polished Centerline
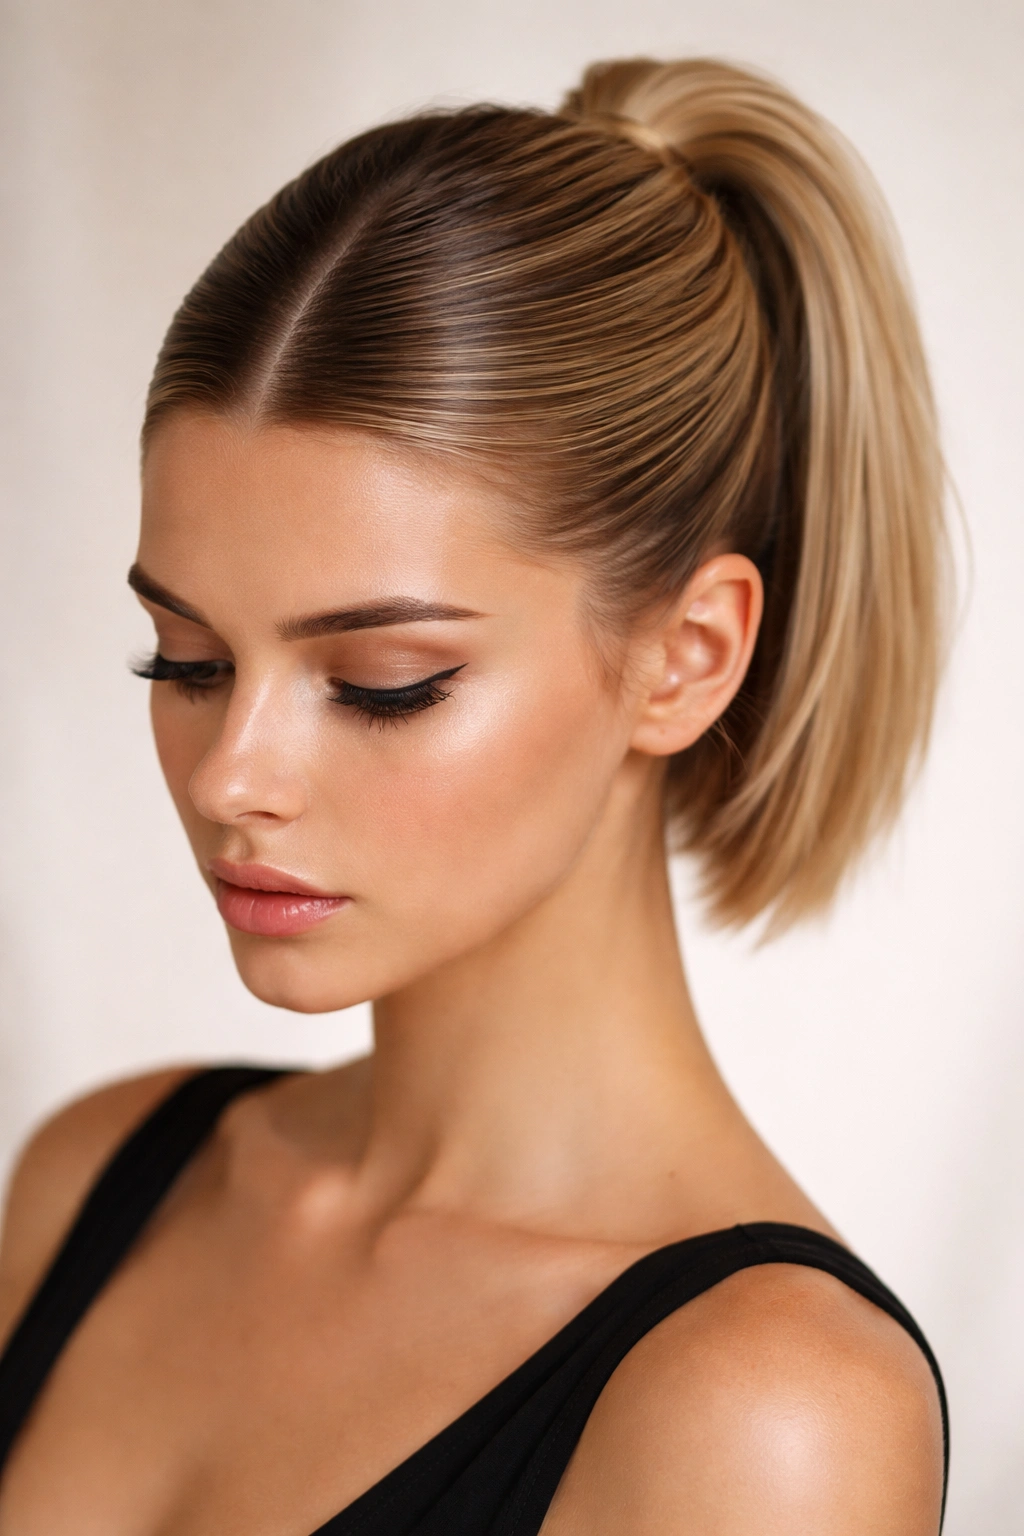
This is the clean, no-nonsense half-up that works in virtually every setting. You’re pulling the top section straight back from the center of your crown and securing it low enough that it sits against the back of your head rather than floating awkwardly mid-scalp. The key here is making it genuinely sleek—think wet-look gel or smoothing serum worked through the pulled-back section until it’s completely smooth and shiny. This style works especially well on textured or wavy short hair because the contrast between the super-polished top and the softer texture below is visually striking.
Why It Works for Short Hair
On short hair, this style immediately creates the illusion of a longer silhouette because the gathered section elongates the visual line at the back of your head. There’s something about that centered ponytail that reads as intentional and elevated rather than casual. The sleekness also prevents that “too much hair being pulled back” look that can sometimes happen when you’re working with limited length.
How to Perfect the Look
- Apply a smoothing serum or anti-frizz cream to damp hair before blow-drying
- Blow-dry your hair straight or use a flat iron to smooth any texture in the pulled-back section
- Use a fine-tooth comb to brush the top section back without any flyaways
- Secure with a clear elastic or a sleek metal hair clip positioned low at the nape area
- Finish with a light hairspray to lock down any baby hairs around your face and part line
Pro tip: If you want extra shine and polish, finish with a tiny dab of gel on your fingertip and smooth it over the hair around the elastic—this makes the gathered section look intentionally glossy, not just slicked back.
2. The Textured and Tousled Effortless
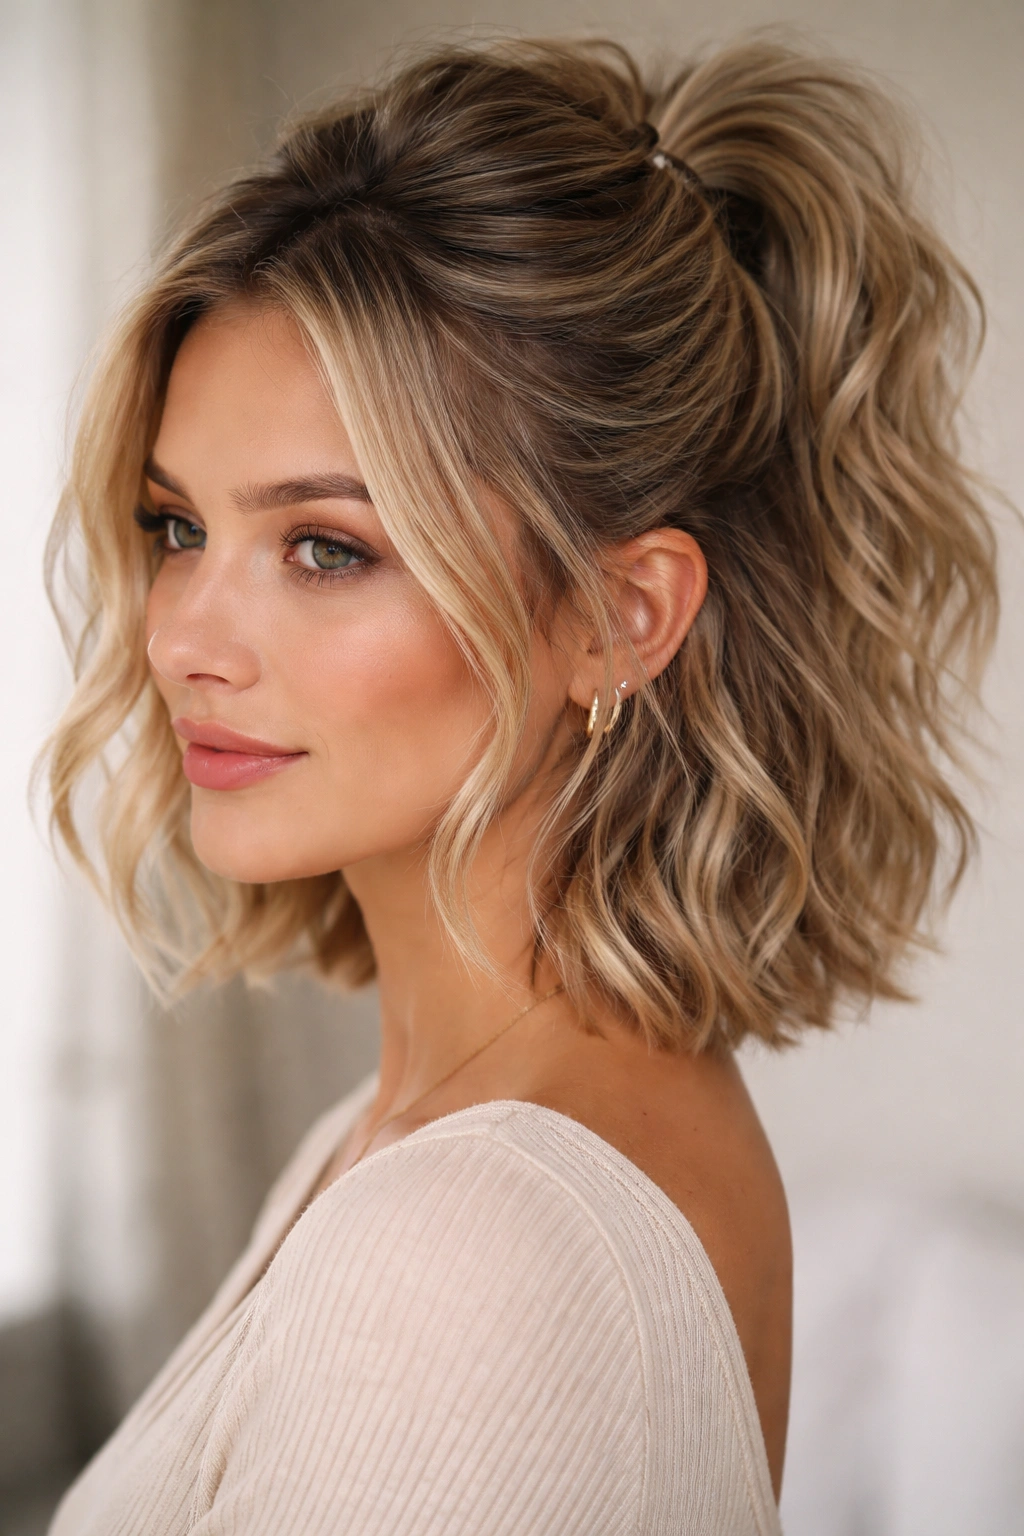
This version deliberately leans into texture and movement rather than fighting it. You’re pulling back a section from the crown, but instead of making it sleek, you’re keeping the texture intact and even encouraging a slightly messy, undone quality. This works beautifully on short hair with natural waves, curls, or layers because it creates volume and visual interest without looking like you’re trying too hard. The contrast between the gathered section and the loose texture falling below is what makes this style feel contemporary and intentional.
What Makes This Different
The textured half-up isn’t about perfection—it’s about capturing and controlling some of your natural hair texture while letting the rest flow freely. It gives short hair an instant upgrade because it reads as more styled than simply wearing it down, but maintains the relaxed vibe that makes short hair so easy to love. This is the half-up you wear on days when your hair is cooperating with its natural pattern.
How to Create the Textured Look
- Start with slightly damp hair or use a texturizing spray on dry hair
- Blow-dry with a diffuser attachment if you have waves or curls, or use a round brush to create gentle waves if your hair is naturally straight
- Use your fingers rather than a comb to gather the top section—this maintains the texture rather than flattening it
- Secure loosely with a textured scrunchie or a simple elastic; don’t pull it super tight
- Gently pull a few small pieces of hair loose around your face and temples for a softer frame
- Optional: use a light-hold styling cream to piece out individual sections and enhance the dimension
Pro tip: Apply a sea salt spray to your damp hair before styling—it’ll give you instant grip and texture that makes the half-up hold all day without looking stiff.
3. The Twisted Half-Up with Hidden Texture
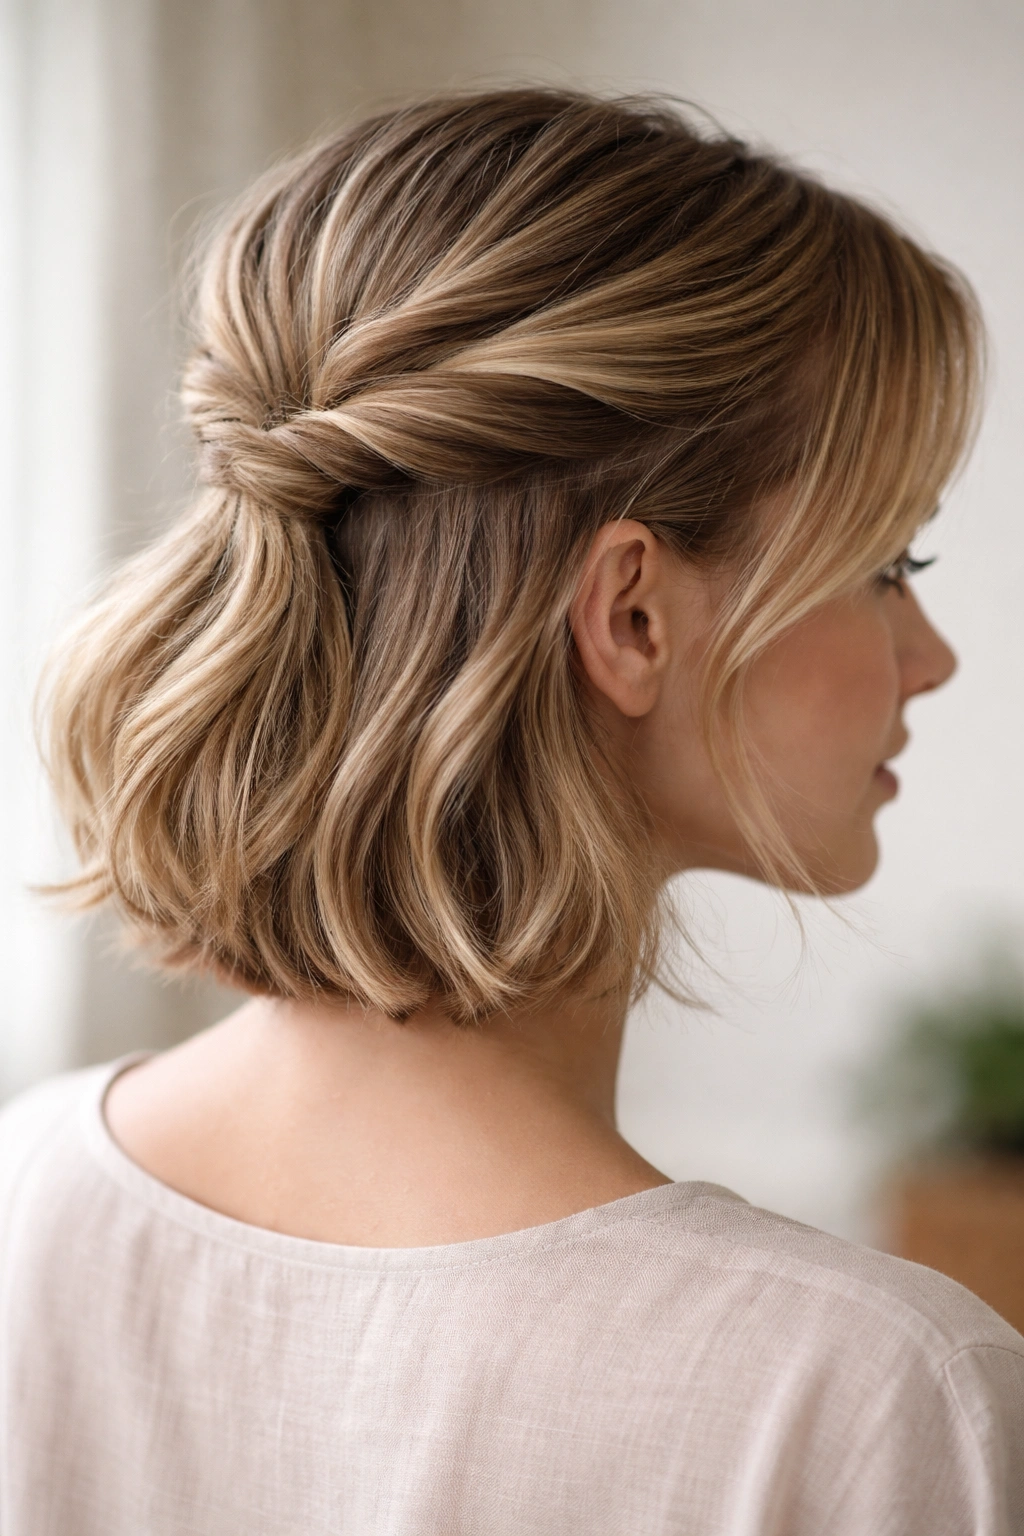
This style takes the basic half-up and adds a twist (literally) that creates visual complexity and keeps hair from looking flat or boring. You’re pulling back the top section, then twisting it loosely before securing it. This works beautifully on short hair because the twist adds dimension and makes the style feel more intentional and designed. Even with shorter length, that twist creates movement and visual interest that a straight-back ponytail sometimes lacks. The twist also naturally accommodates any loose or wispy pieces, making the overall look feel purposefully undone rather than messy.
Why Twists Transform Short Hair
A single twist adds an instant layer of sophistication to what might otherwise feel like a basic style. It’s the kind of small detail that makes people notice you put thought into your appearance, even if the actual time investment is minimal. On short hair specifically, a twist helps create the visual impression of thickness and dimension by breaking up the line of the gathered hair.
Step-by-Step Twist Technique
- Section the hair from your crown down to about mid-ear on both sides, creating a wide rectangular section at the top
- Bring this section together at the back of your head and secure temporarily with a clip while you prep the twist
- Take the gathered section and divide it into two equal strands
- Twist the strands loosely around each other (not tightly—you want it to look relaxed and textured)
- Wrap the finished twist around the base of your ponytail, covering the elastic
- Secure the twist end with bobby pins hidden underneath, or wrap it with another small elastic for a double-tie effect
- Leave a few small wisps loose around your face for softness
Pro tip: The looser your twist, the better it looks on short hair—tight, controlled twists can sometimes look too severe when you’re working with limited length.
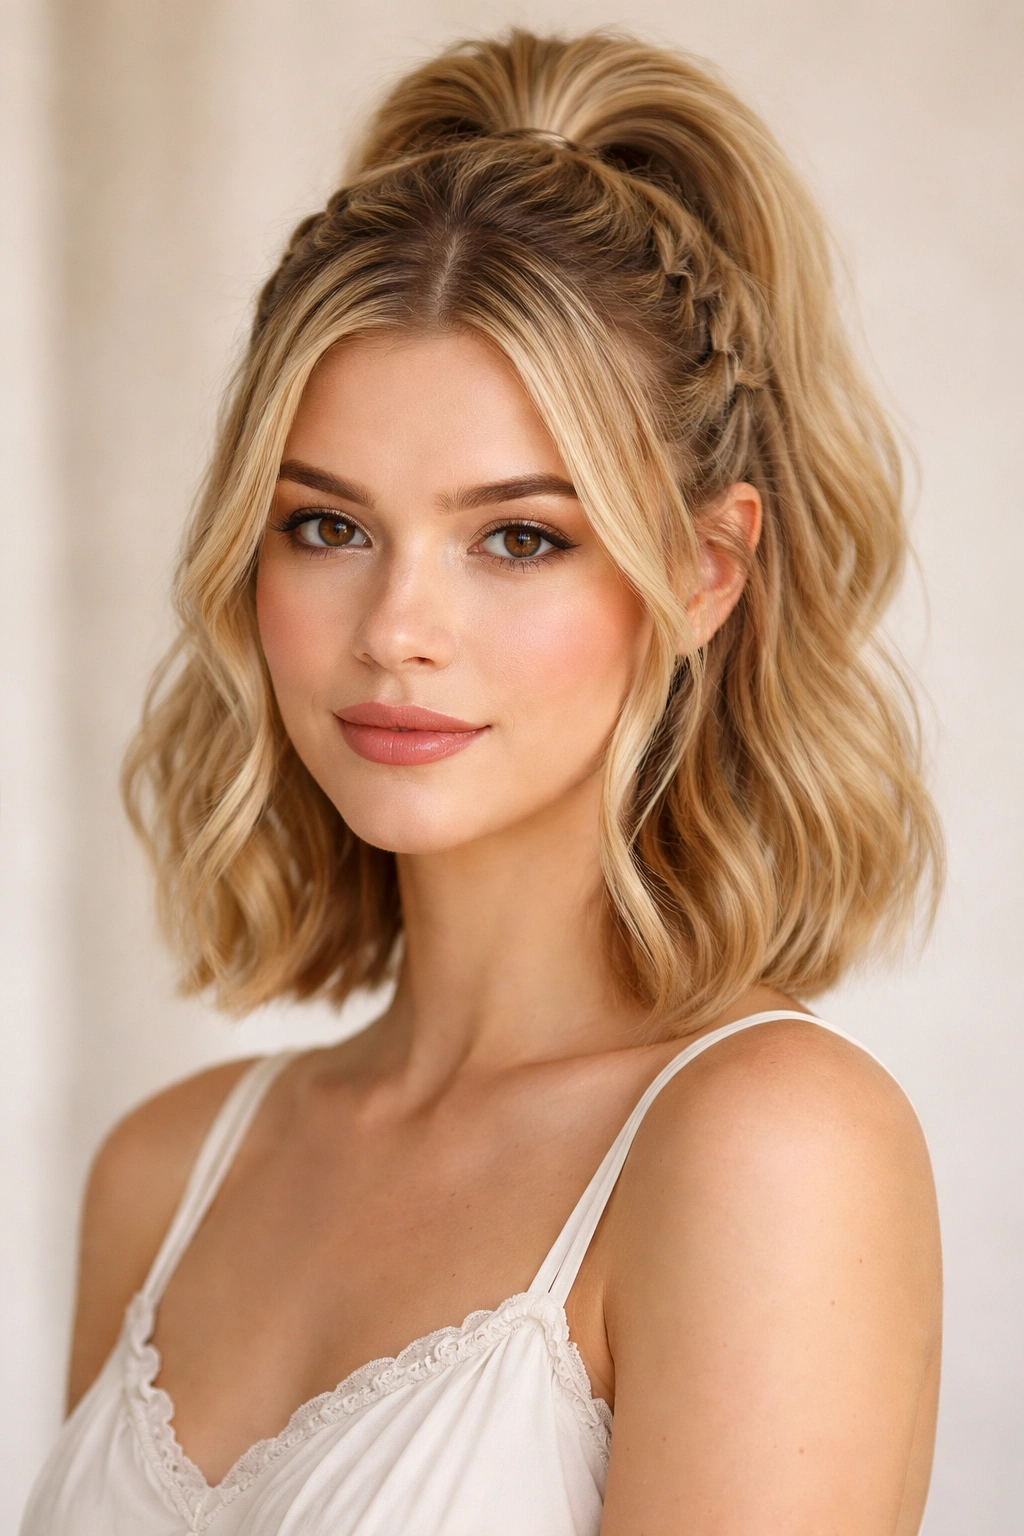
4. The Braided Crown Half-Up
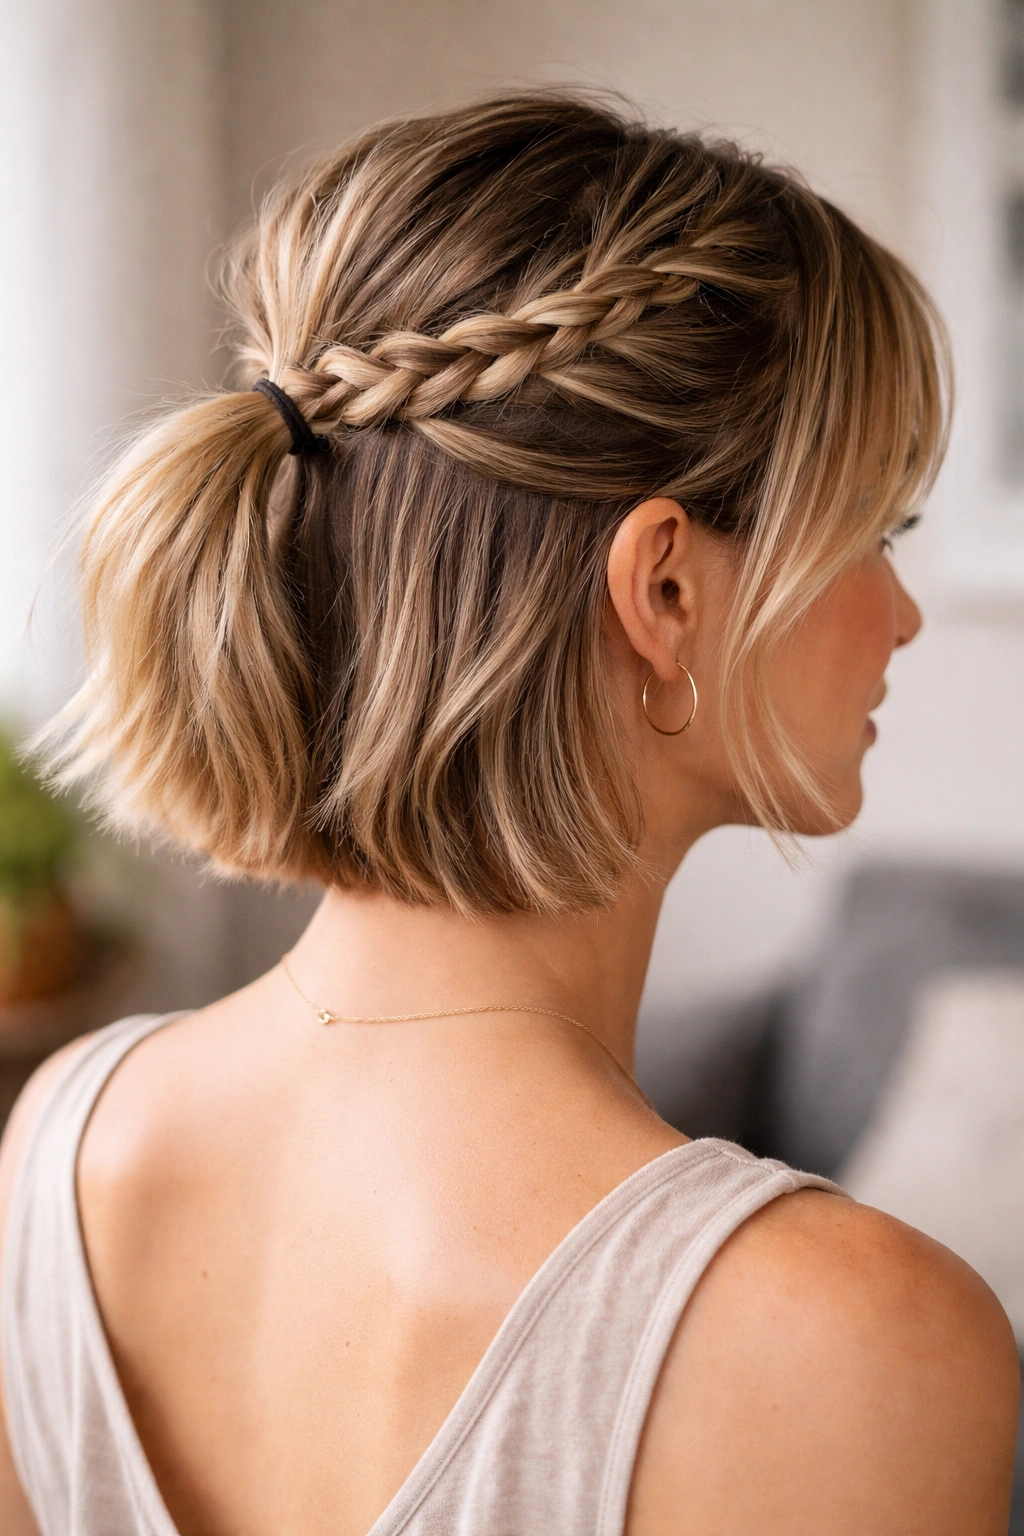
This style incorporates a braid into your half-up, but instead of a full French braid down the back, you’re creating a smaller braid that becomes part of the gathered section at the back. You start with a three-strand braid at one temple, weave it back toward the crown, and then incorporate it into your half-up ponytail. This is intricate-looking enough to work for special occasions, but simple enough to master in regular rotation. The braid adds structural interest and makes even very short hair feel polished and designed.
How Braids Enhance Short Hair Styles
A braid adds perceived dimension and movement to short hair without actually requiring you to have long hair to work with. The overlapping strands create visual texture, and the way the braid weaves back creates a flattering line toward your crown. This style particularly suits short hair because the braid is visible and becomes a feature rather than disappearing into a mass of length. It’s also surprisingly forgiving—slight imperfections in the braid look intentional and textured rather than messy.
Creating a Braid-Incorporated Half-Up
- Start at one temple with a section of hair about two inches wide
- Begin a loose three-strand braid and gradually add more hair as you braid backward (French braid style)
- Braid toward the back of your head, keeping the tension loose and relaxed
- When you reach the crown, finish the braid and secure it temporarily with a small clip
- Gather the remaining top section of hair plus the finished braid together into one group
- Secure everything together with your main elastic at the back of your head
- Pull gently on the braid strands to make it look fuller and more textured
- Smooth or tousle the rest of your hair depending on the vibe you’re going for
Pro tip: If you’re nervous about your braiding skills, start with just one small braid on one side—this is actually more modern-looking than symmetrical braids anyway.
5. The Half-Up with Face-Framing Pieces
This version is all about balance and framing. You’re pulling back a section of hair, but strategically leaving pieces at both temples and around your face to create a softness that prevents the style from feeling too severe. This works particularly well on short hair because leaving those face-framing pieces prevents the look from pulling too much, which can sometimes be unflattering on smaller frames or shorter faces. The released pieces also break up the line and add movement, making even very structured hair look softer and more intentional.
The Art of Strategic Framing
Face-framing pieces aren’t just about aesthetics—they’re about balance. On short hair, where the entire style is relatively close to your face, those released pieces create a visual break that makes the gathered section feel less tight or controlling. It’s the difference between a style that looks like you had to pull your hair back and one that looks like you chose to style it this way. The framing pieces also work with your natural hairline to create a more flattering overall proportion.
Placement Technique for Maximum Flattery
- Identify strands about one to two inches thick at each temple—these become your intentional face-framers
- Gently pull these pieces away from the gathered section before you secure your ponytail
- For a polished look, keep the framing pieces straight or slightly waved
- For a softer look, curl or wave the framing pieces loosely to create movement around your face
- If your hair naturally wants to curl or wave, let it—this actually enhances the face-framing effect
- The back section should be secured lower, around the nape area, so the framing pieces have space to move
Pro tip: Lightly curl or wave your framing pieces with a small barrel curling iron right before finalizing your ponytail—the timing matters because curls set better when you do them right before the style is complete.
6. The Half-Up with a Decorative Hair Clip
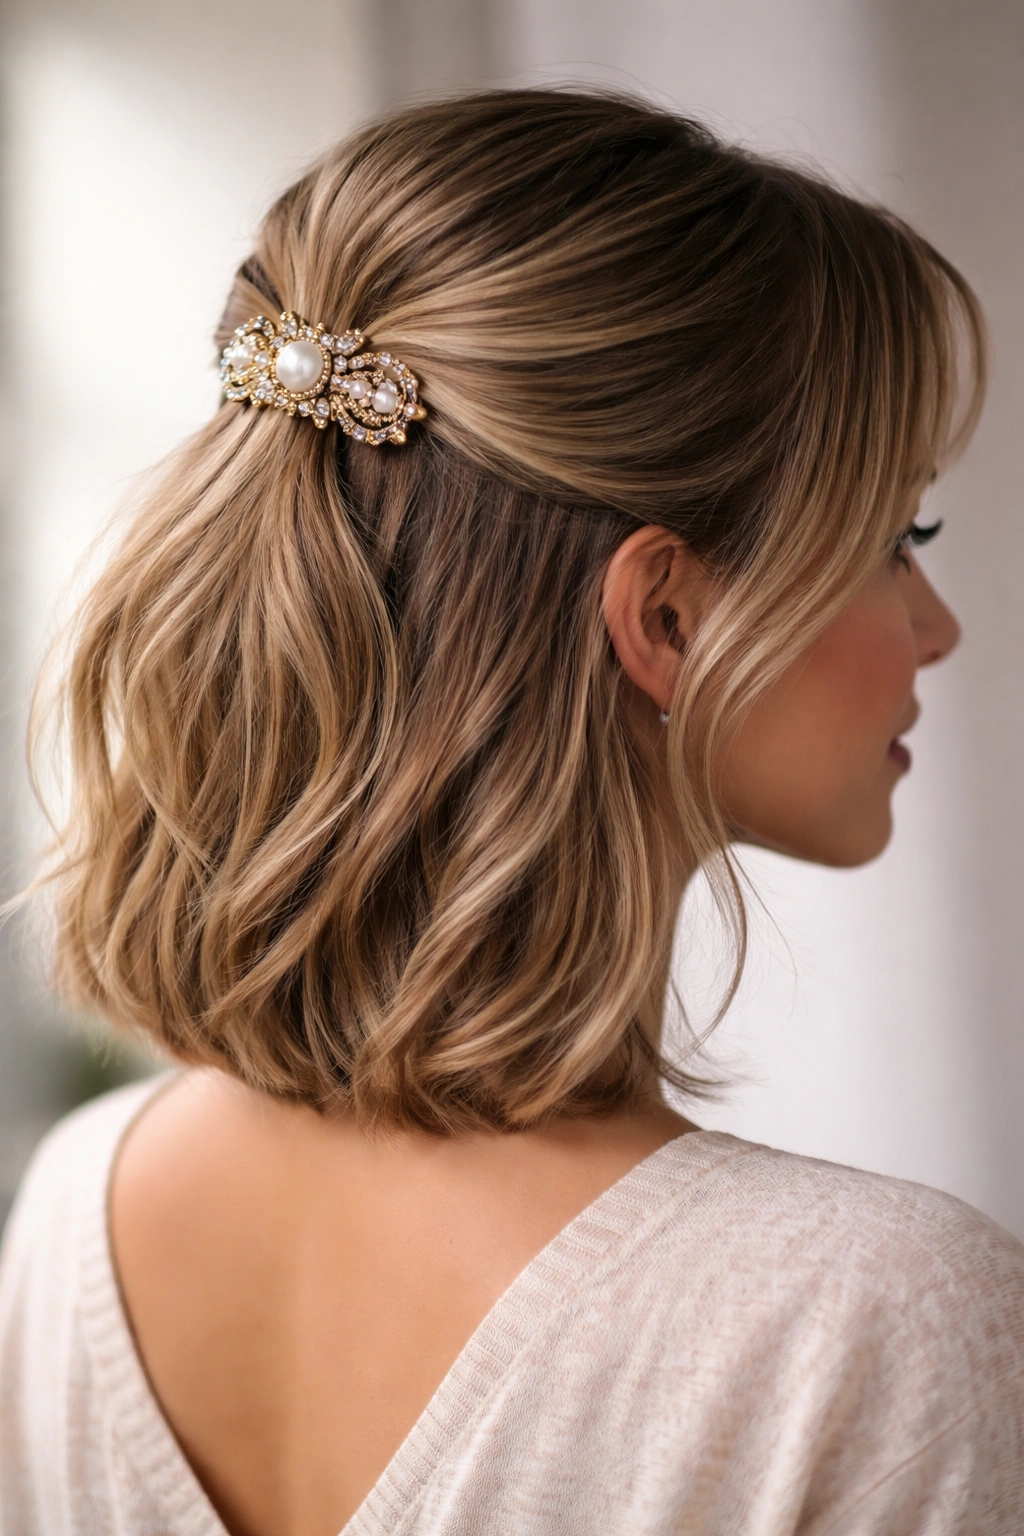
Sometimes the magic is in the accessory. This style is a straightforward half-up—pull back the top section and secure it—but the star is the clip or clamp you use to fasten it. Using a decorative clip instead of an elastic completely changes the vibe of the style. Tortoiseshell clips, metal barrettes, pearl-studded clips, or vintage-style clamps instantly elevate a simple half-up into something that feels intentional and fashion-forward. On short hair, the clip becomes a visible design element because it’s closer to the face and not hidden under layers of length.
How Accessories Transform Simple Styles
A decorative clip does more than just hold hair—it signals that you’ve thought about your look and chosen a specific aesthetic. On short hair, where there’s less to work with visually, accessories become more impactful. A well-chosen clip can coordinate with your outfit, your jewelry, or your overall style in a way that makes the entire look feel cohesive and intentional. It’s one of the easiest ways to make a basic half-up feel elevated and special.
Choosing and Positioning the Right Clip
- Select a clip that complements your hair color and skin tone (tortoiseshell works for nearly everyone; metal clips suit cooler skin tones especially well)
- Gather your half-up section as you normally would
- Instead of using an elastic, position the clip at the gathering point, about an inch or two back from the crown
- The clip should sit horizontally across the gathered hair, covering the elastic if you use one underneath
- Make sure the clip grips securely—test it by gently tugging on the ponytail section to ensure it won’t slip
- For a polished look, position the clip centered; for a more modern, off-kilter vibe, position it slightly off-center
Pro tip: Use a small elastic under your clip for extra security, especially if your hair is slippery or fine—the clip looks like the main fastener, but the elastic underneath ensures the style lasts all day.
7. The Half-Up with Undercut or Shaved Detail
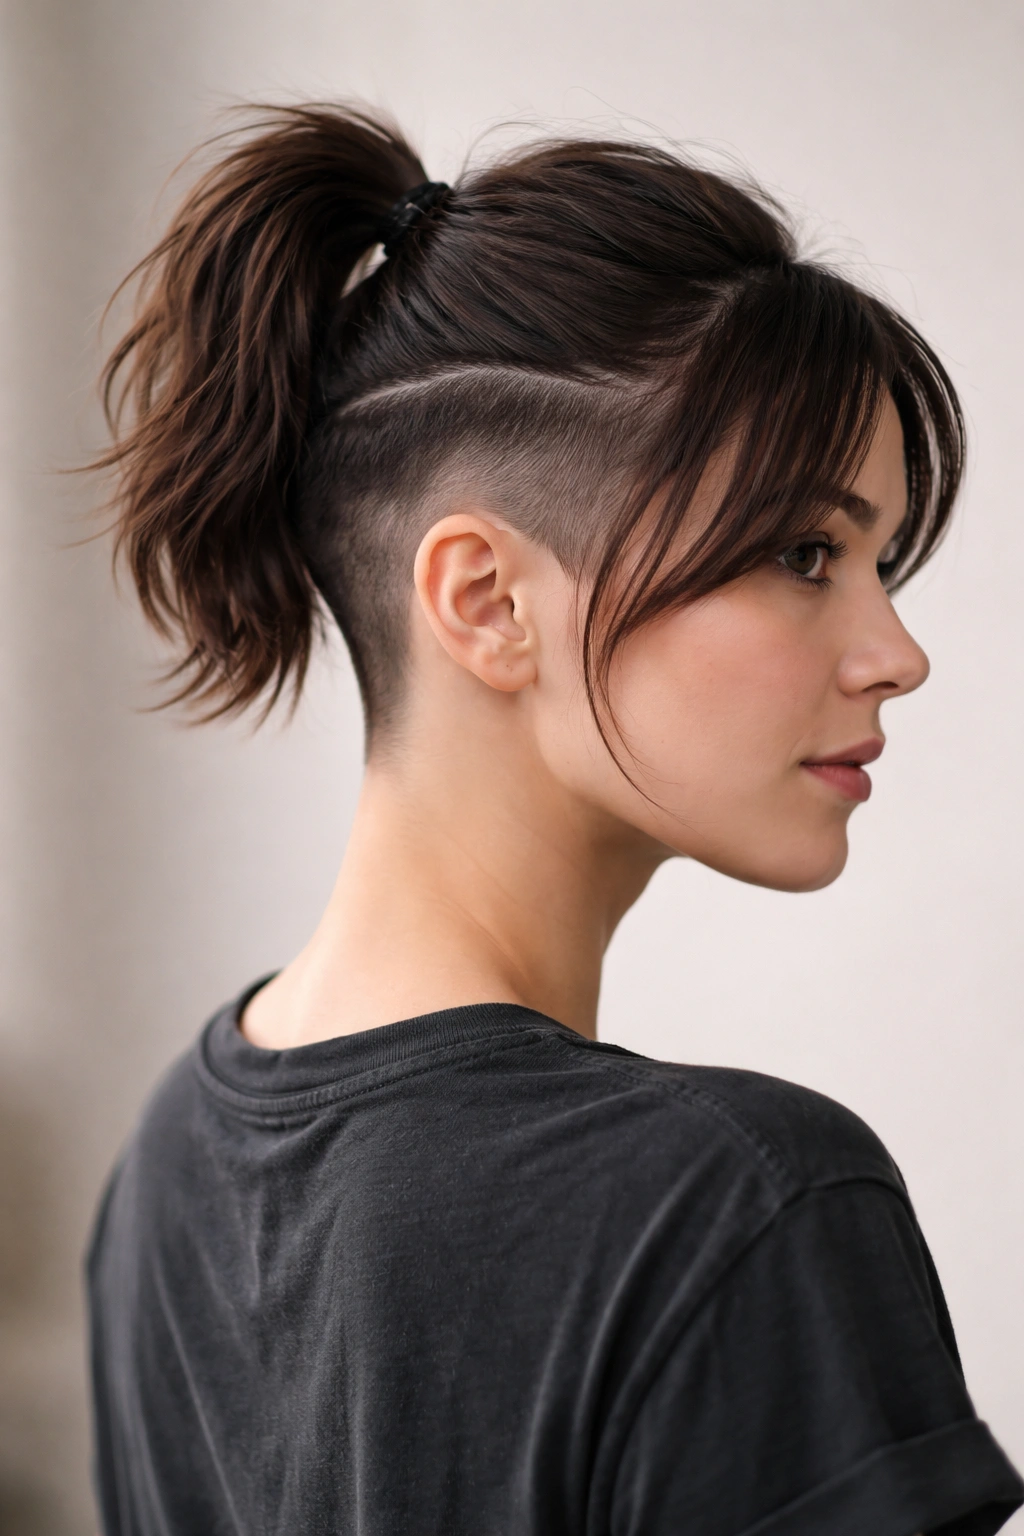
If you have an undercut, shaved section, or faded detail on the sides or back of your head, a half-up is the perfect style to showcase it. By pulling hair up and back, you expose the contrast between the longer top section and the shorter detail beneath. This is a modern, edgy look that works beautifully on pixie-length cuts or on short hair with intentional fade details. The half-up becomes less about controlling hair and more about creating a striking visual contrast that makes your haircut feel intentional and design-forward. It’s sophisticated and sculptural without being over-the-top.
Making Architectural Details Pop
An undercut or fade detail is an investment in your haircut, and a half-up style is the perfect way to highlight that investment. Rather than letting the longer hair hide the detail, the half-up puts it on display while still keeping the longer section off your face. This creates a compelling visual that reads as bold and intentional. The key is making sure the detail is actually visible—which means you need to pull the top section back far enough to expose it, but not so far that you’re pulling everything from your head.
Styling to Showcase Your Detail
- Position your half-up gathering point a bit lower and further back than you normally would, so the undercut or fade is clearly visible
- Keep the top section smooth and sleek so it doesn’t flop down and hide your detail
- Consider styling the top section with a bit of texture or waves—the contrast between the smooth gathered section and the wavy hair, combined with the clean lines of the undercut, creates visual depth
- If your undercut is a solid color or pattern, keep the rest of your styling relatively clean and minimal so the detail stands out
- A light hairspray will keep the gathered section in place and prevent it from drifting down
Pro tip: If you have a temporary undercut or don’t want to fully shave one, you can create the same effect by taking an undercut clipper or very short guards and making a thin line at the nape of your neck—it creates definition without committing to a full cut.
8. The Half-Up with Crown Texture and Volume
This style is about maximizing height and volume at the crown while keeping the bottom section controlled. You’re teasing or backcombing the top section before you pull it back and secure it. This creates a lifted, textured look that’s especially flattering on short hair because it creates the illusion of more volume and length than you actually have. The texture and height at the crown draw the eye upward, making your face appear longer and more defined. This style works beautifully for people with fine or thin hair because the teasing creates the appearance of density without adding actual thickness.
The Science Behind Backcombing for Volume
Backcombing isn’t just about creating texture—it’s about lifting and separating hair to create air and space within the style. On short hair, this technique is particularly valuable because a few strategic backcombed sections can change the entire visual weight and presence of your hair. The volume at the crown also helps balance the face, making wider faces appear narrower and round faces appear more angular. It’s a surprisingly transformative technique that feels like you’re doing more work than you actually are.
The Proper Backcomb Technique
- Take a small section of hair at the crown (about one inch thick) and hold it straight up from your scalp
- Using a fine-tooth comb or a specialized teasing brush, brush downward against the direction of hair growth repeatedly, creating a cushion of texture
- Don’t go overboard—you want textured volume, not a matted mess. Four to five brushes backward should be enough
- Smooth the outer layer of the section gently with your comb to create a polished appearance while keeping the volume underneath
- Repeat with one or two more sections around the crown area, spreading them out rather than concentrating them in one spot
- Gather the textured top section back and secure it with your elastic
- Tease the gathered section slightly at the base to create even more volume where the elastic sits
Pro tip: Backcomb a little at a time and check your progress—it’s easier to add more texture than to remove it. Start conservative and build up to the volume level you want.
9. The Half-Up with Ribbon or Hair Wrap
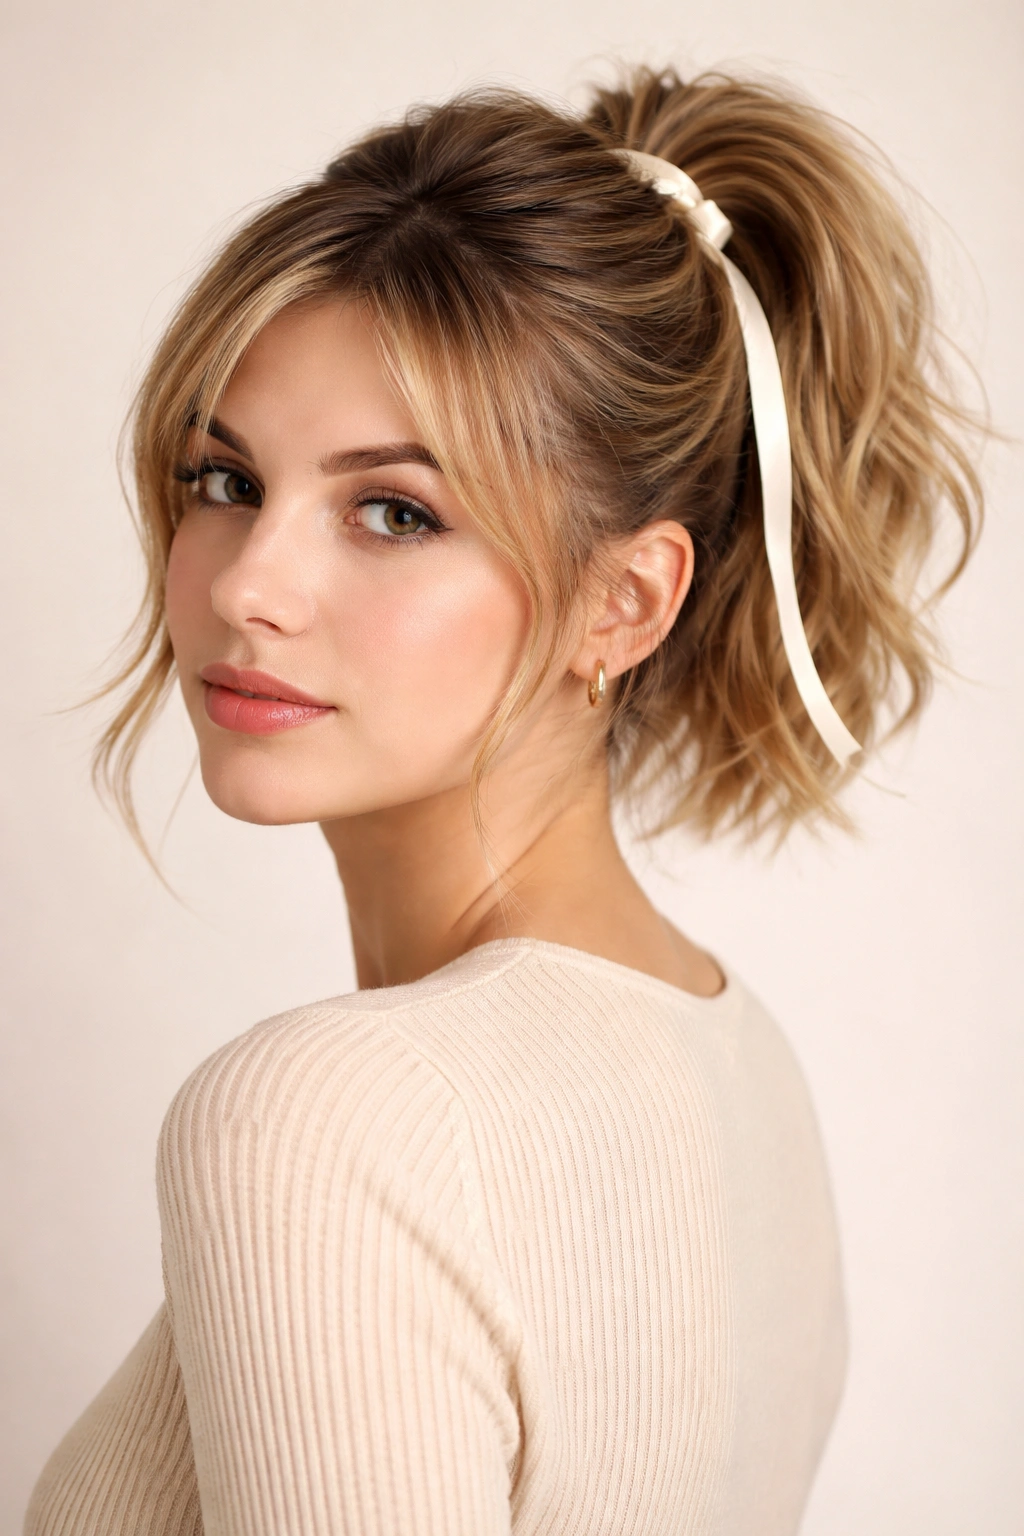
Add a thin ribbon, silk hair wrap, or decorative thread woven through or wrapped around your half-up ponytail. This is a sweet, feminine touch that transforms a basic style into something that feels intentional and styled. The ribbon can match your outfit, coordinate with your jewelry, or create an intentional contrast with your hair color. On short hair, the ribbon becomes a visible, important design element rather than getting lost in length. This works beautifully for both casual and dressy occasions depending on what material and color you choose. A velvet ribbon feels upscale and special, while a thin silk ribbon feels elegant and timeless.
Ribbon as a Style-Elevating Detail
A ribbon adds movement, color, and visual interest without requiring you to actually style your hair differently. The magic is purely in the accessory. This technique is also incredibly forgiving—if your ponytail isn’t perfectly sleek or smooth, the ribbon actually helps hide slight imperfections while adding a polished finishing touch. On short hair, where every detail is visible, a well-chosen ribbon makes all the difference between a basic style and something that looks intentional and fashionable.
How to Wrap Ribbon Into Your Half-Up
- Gather and secure your half-up ponytail with an elastic as usual
- Choose a ribbon in your desired width and length (you’ll need at least 12-18 inches to work comfortably)
- Hold one end of the ribbon and wrap it around the base of your ponytail, covering the elastic completely
- Wrap the ribbon multiple times if you want full coverage, or create a spiral effect by wrapping it up the length of your ponytail
- Secure the ribbon end by wrapping it once more around the ponytail and tying it off with a small knot, or by using a bobby pin to tuck the end underneath the wraps
- Adjust and fluff your ponytail so the wrapped section looks intentional and evenly distributed
Pro tip: Use a double-sided ribbon or a ribbon with a sheen on both sides—this way, every wrap looks polished and finished, and the ribbon doesn’t show a dull back side.
10. The Half-Up with Clip-In Extensions for Volume
If you have short, fine, or thin hair and want more volume in your half-up, clip-in extensions designed specifically for half-ups are a game-changer. You’re clipping small sections of hair-matched extensions directly into your ponytail section, instantly adding thickness and volume without having to grow your hair out. This is particularly effective if you have a very short cut or very fine texture. The extensions sit hidden within your gathered section, creating the impression that you have naturally thick, voluminous hair. This is not about creating a fake or obviously extended look—it’s about enhancing what you have.
Extensions as a Confidence Tool
Clip-in extensions aren’t just for people with very short hair. They’re also amazing for anyone who has thin hair, is growing hair out, or simply wants more volume in their styles without committing to permanent length. On short hair, extensions in a half-up give you the best of both worlds: the easy manageability of short hair with the volume and fullness impression of longer hair. They clip in in seconds and are completely removable when you want them out.
Choosing and Placing Half-Up Extensions
- Select clip-in extensions that match your hair color exactly or are slightly darker (they read more naturally)
- Purchase extensions specifically designed for half-ups or ponytails—these are smaller and blend seamlessly into gathered sections
- Create your half-up ponytail as usual, securing it with an elastic
- Section your ponytail into two or three parts depending on how much volume you want
- Clip one section of extensions into each part, positioning clips as close to the elastic or at the top of each section as possible
- Gently combine the extension strands with your natural hair, mixing them throughout so the blend is seamless
- Style the combined ponytail—the extensions give you more hair to work with, so curls, waves, or texture shows up beautifully
Pro tip: Always choose extensions one or two shades lighter than your hair color if you’re in between shades—lighter blends more naturally than too-dark extensions, which can read obviously fake.
11. The Half-Up with Messy Bun Ending
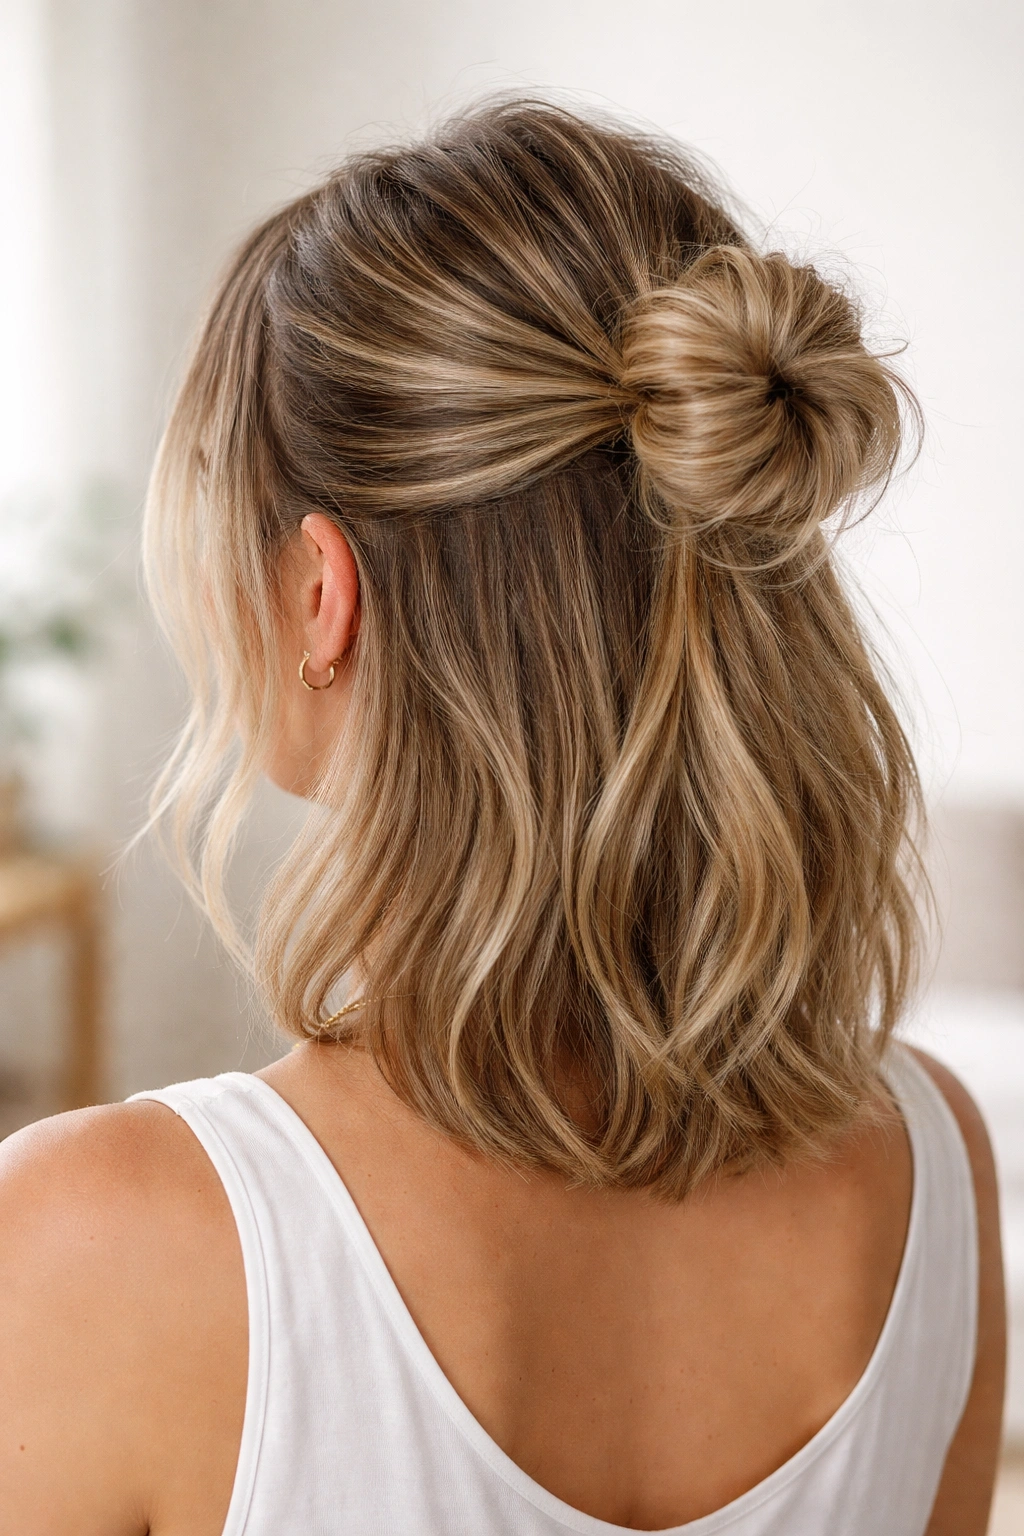
Instead of a traditional ponytail tail hanging down, gather your half-up section and finish it in a small, textured bun right at the back of your head. This creates a compact, sophisticated style that’s especially flattering on very short hair where a flowing ponytail tail might be tiny or sparse. The bun ending also means zero hair in your face and a more finished, intentional look than a simple half-up. You’re creating definition and structure without length. This works beautifully for workouts, busy days, or when you want a polished style that stays in place all day.
Why Bun Endings Work on Short Hair
A bun is actually easier to create on short hair than on long hair because you don’t have tons of length to manage. The bun sits compactly at the back of your head, and the gathered half-up section provides enough hair to create a textured, interesting bun without looking sparse or thin. This style reads as both casual (the messy texture) and polished (the gathered + bun combination) simultaneously, which makes it incredibly versatile.
Creating a Textured Half-Up Bun
- Gather your half-up section as usual, but don’t secure it with an elastic yet
- Twist the gathered section loosely or section it into two or three strands and braid it gently
- Take the twisted or braided section and wrap it around itself, creating a small bun shape at the back of your head
- Secure the bun with bobby pins, positioning them at different angles for maximum hold
- Gently pull and tease small pieces of the bun to create a textured, undone appearance
- Use a light hairspray to hold everything in place
Pro tip: Do this style on second-day hair rather than freshly washed hair—the slight oil buildup gives your bun better grip and makes it hold all day without slipping.
12. The Half-Up with Braided Sides and Center Part
This final style combines elements of multiple techniques: a center part, face-framing pieces, and small braids on each side that get gathered together into a single center ponytail. You’re essentially creating a romantic, princess-like style that works beautifully on short hair, especially if you have layers or texture. The braids add visual complexity and structure, while the center part creates symmetry and balance. This is the most elaborate option on this list, but it’s actually not as complicated as it sounds once you understand the structure. It’s perfect for special occasions or days when you want to put extra thought into your appearance.
The Art of Combining Multiple Techniques
When you layer techniques—a part, braids, face-framing pieces, and a gathered section—you create a style that feels intricate and design-forward. On short hair, where you’re working with limited length, this strategic combination creates visual complexity that makes your style feel like you spent way more time on it than you actually did. The key is making sure each element (the part, the braids, the framing, the gather) is executed clearly so they read as intentional rather than accidental.
Step-by-Step Construction
- Create a clean center part from your hairline down the back of your head
- On each side, take a section from your temple area and create a small Dutch braid (braiding so the braid sits on top of the hair rather than underneath)
- Braid toward the back of your head, weaving loosely and keeping the braid relaxed
- Gather the finished braids together at the back of your head along with a center section from the back
- Combine all three gathered sections into one and secure with an elastic
- Leave small wisps of hair loose around your face for softness
- Gently pull on the braids to add texture and volume
- You now have a half-up style with braided sides and a clean center part—it’s the kind of thing that looks complicated but reads as intentional
Pro tip: Practice this style when you don’t have anywhere to be—it takes a bit longer than the other styles, so give yourself time to master the braiding and gathering without pressure.
Final Thoughts
The beauty of half-up ponytails on short hair is that they’re simultaneously practical and creative. You get hair off your face while maintaining the softness and movement that makes short hair so easy to love. Whether you’re going for sleek and polished, textured and effortless, or elaborate and romantic, there’s a version here that fits your hair type, your lifestyle, and your personal style.
The most important thing to remember is that short hair is a canvas—these styles work because they’re designed with your specific length in mind. Don’t try to recreate a half-up style you see on someone with shoulder-length hair and expect identical results. Instead, adapt the concept to your length: adjust where you’re gathering, modify the proportions, and use the variations here as starting points for styles that work specifically for you.
The more you practice these styles, the faster they become. What takes fifteen minutes the first time you try it will take five minutes once your hands understand the movements. That’s when half-ups become your go-to move on busy mornings or when you simply want to feel a little more put-together. Your short hair is an asset, not a limitation—these styles prove it.