There’s something almost magical about a side braided ponytail that actually stays put through an entire day. You know the frustration—you spend 15 minutes weaving and twisting, pull it into place, and two hours later you’re fishing out bobby pins and retying elastic because half of it has already surrendered to gravity. Side braids feel delicate, almost decorative, so people assume they can’t possibly hold up to real life. That’s where the real secret lives: the right technique, the right braid structure, and the right understanding of how to anchor everything so it becomes practically immovable.
The beauty of a side braided ponytail is that it accomplishes something most other hairstyles can’t do simultaneously—it looks intentional and polished while actually working as a functional everyday style. You’re not sacrificing practicality for appearance; you’re getting both. Whether you’re at the gym, running between meetings, or spending the day outdoors, a properly constructed side braided ponytail keeps your hair secure without that tight, scalp-pulling tension that comes with overly aggressive styles. It’s sophisticated enough for professional settings, casual enough for weekend wear, and reliable enough that you can genuinely forget about it once it’s in.
The 12 styles below represent different interpretations of what a side braided ponytail can be—some are intricate and Instagram-worthy, others are streamlined and practical, and all of them share one critical characteristic: they actually stay in place. Each one includes the specific techniques and anchoring methods that separate a style that holds from one that doesn’t, because understanding the why behind the hold is what lets you nail any of these whenever you want.
What Makes a Side Braided Ponytail Hold So Well
A side braided ponytail doesn’t hold by accident. The real staying power comes from three converging factors: the geometric way the braid creates tension across your scalp, the way the ponytail anchor sits at the side of your head (a more stable placement than center), and the specific way you secure the base where braid meets elastic.
When you braid hair, you’re literally creating intersecting pressure points that lock strands in place more effectively than a simple tie ever could. The side placement matters because you’re not fighting gravity the same way you would with a center ponytail—the weight distributes differently, and the angle creates natural security. But here’s what separates a braid that holds from one that slips: how tightly you braid during those first few inches. A loose braid right at the scalp gives you nothing to anchor to, and you’ll feel it loosening within an hour.
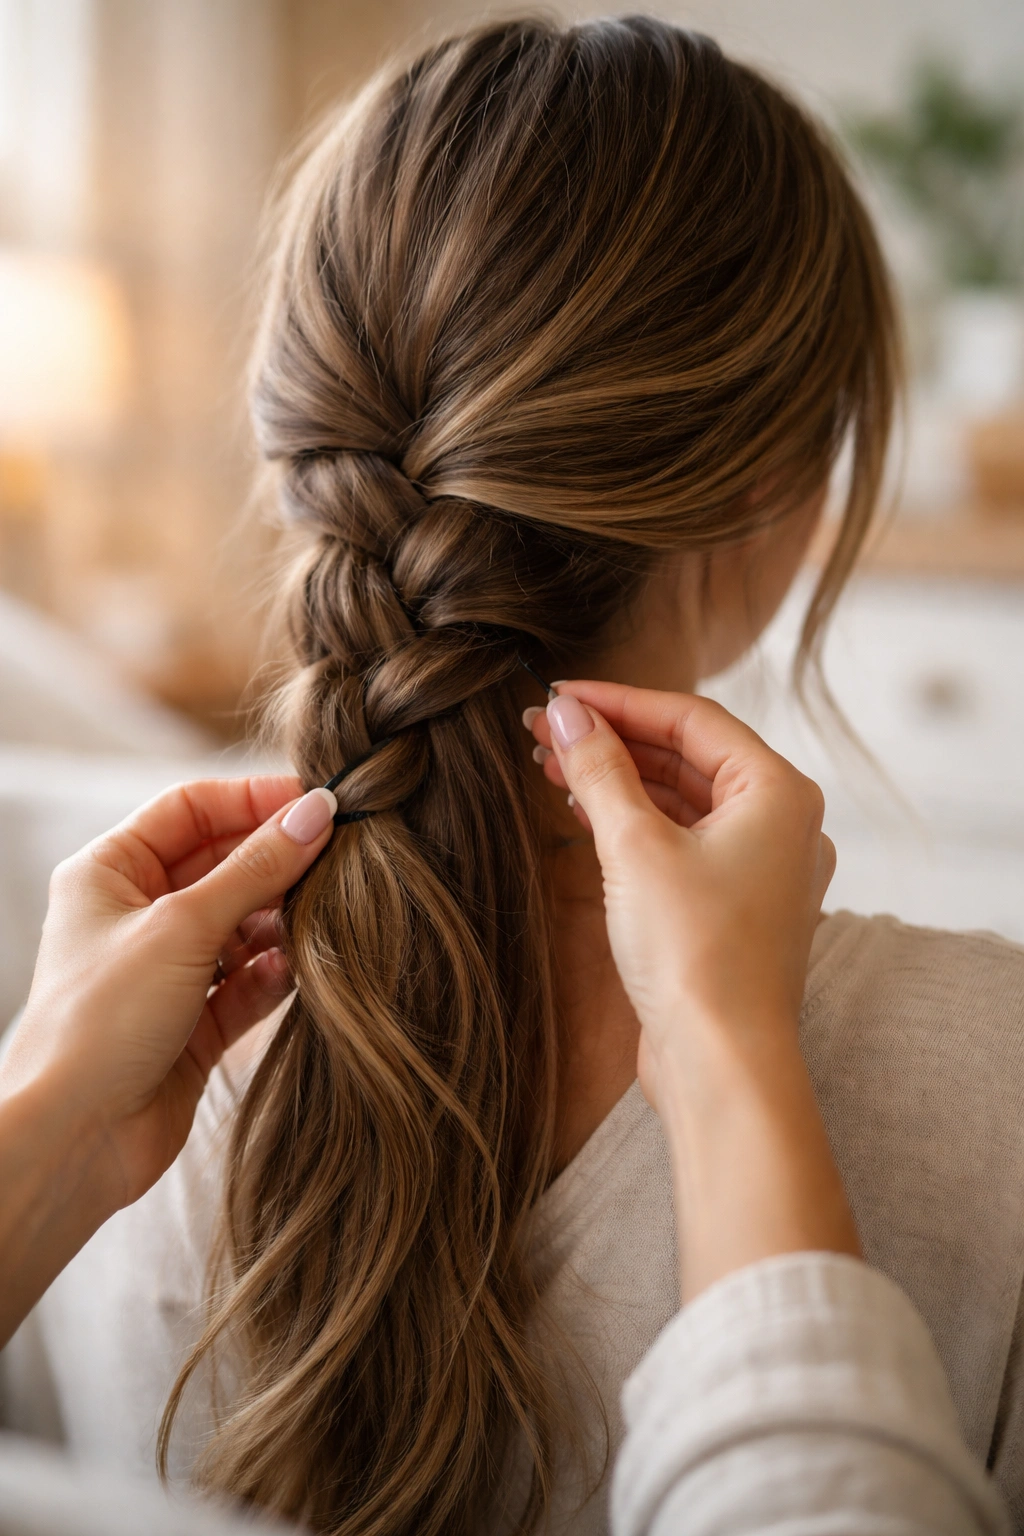
The absolute game-changer is how you secure the base. Wrapping elastic around both the braid and a small section of the remaining loose hair creates a triple-lock effect—the braid tension, the elastic grip on the hair itself, and the friction between the braid and loose hair working together. Add a few bobby pins threaded through the base of the braid and angled upward into the scalp, and you’ve essentially made your side braided ponytail unmovable without active effort to take it down.
Start every side braid at a section of hair at your temple, on one side of your face. Pull upward and slightly back toward your ear, creating an angle rather than a straight vertical line. This natural angle, combined with the braid’s geometric structure, creates immediate stability that a straight-back braid simply can’t match.
The Right Hair Texture Makes All the Difference
Your starting point matters far more than most people realize. Fine, silky hair will slip more easily than coarser, textured hair. This doesn’t mean you can’t create a hold-worthy side braided ponytail with fine hair—it just means your technique has to be sharper and your securing method more deliberate.
If you have fine or slippery hair, commit to a slightly tighter braid than you might see in a tutorial (without pulling so hard you’re uncomfortable). Tight doesn’t mean painful; it means each crossover point is snug rather than loose. Use a small elastic—this matters more than most stylists mention—because a large elastic sitting loosely on a fine-haired braid is basically guaranteed to slip.
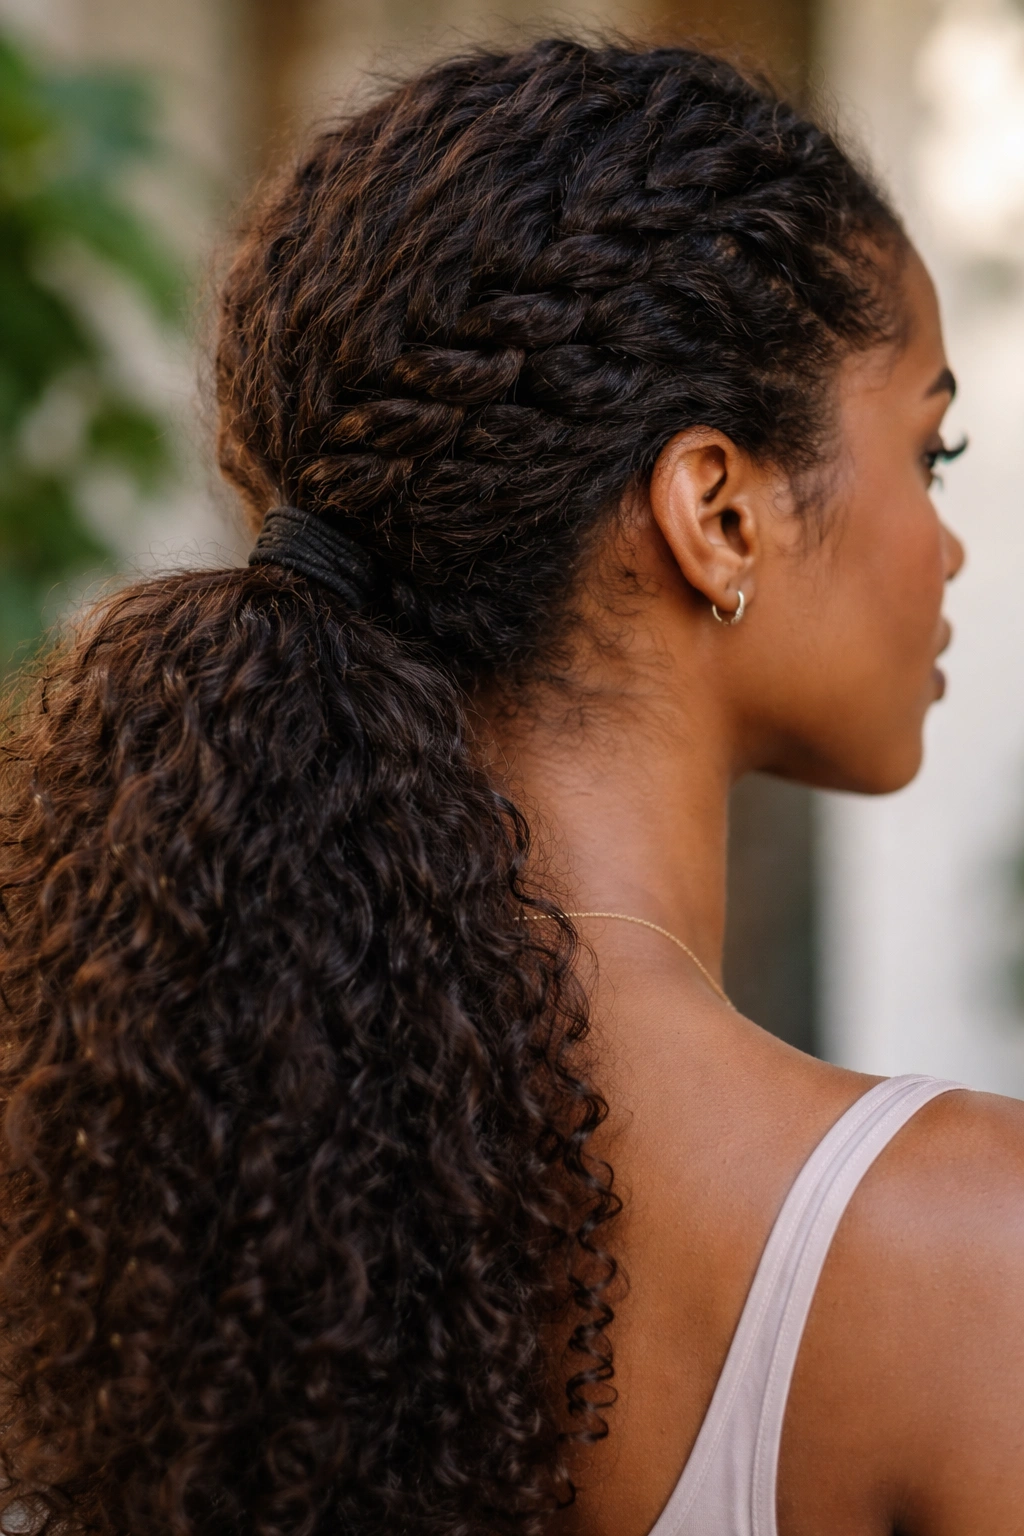
Texture works in your favor. Wavy, curly, or naturally textured hair grips itself and holds braids without much effort. If you have this hair type, you’ve probably noticed you can do a fairly loose side braid and it’ll hold beautifully. Lean into that advantage, but don’t become careless about your base—a loose braid base will still slip eventually, even with textured hair. The texture helps, but securing technique is still the real workhorse.
Consider the texture of your hair that day. Second-day hair or hair with a bit of dry shampoo has significantly more grip than freshly washed hair. If you’re planning a side braided ponytail for an important event or a long day, doing it on day-two or day-three hair actually makes sense—it’s not laziness, it’s physics. The slight oil and texture give your braid something to hold onto.
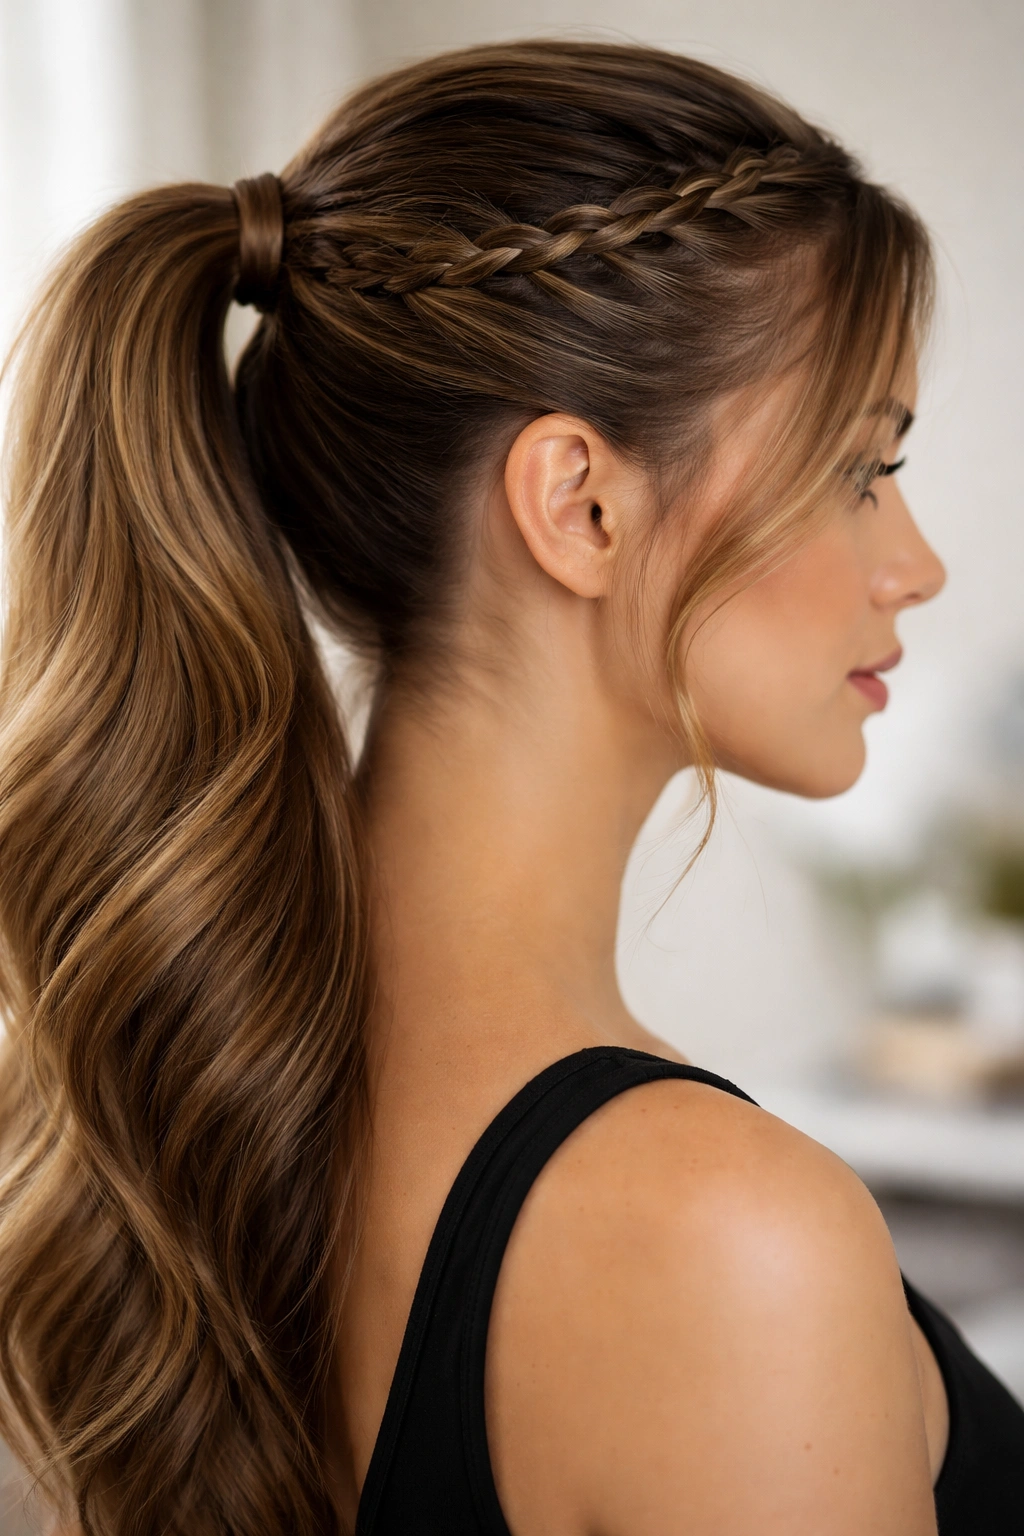
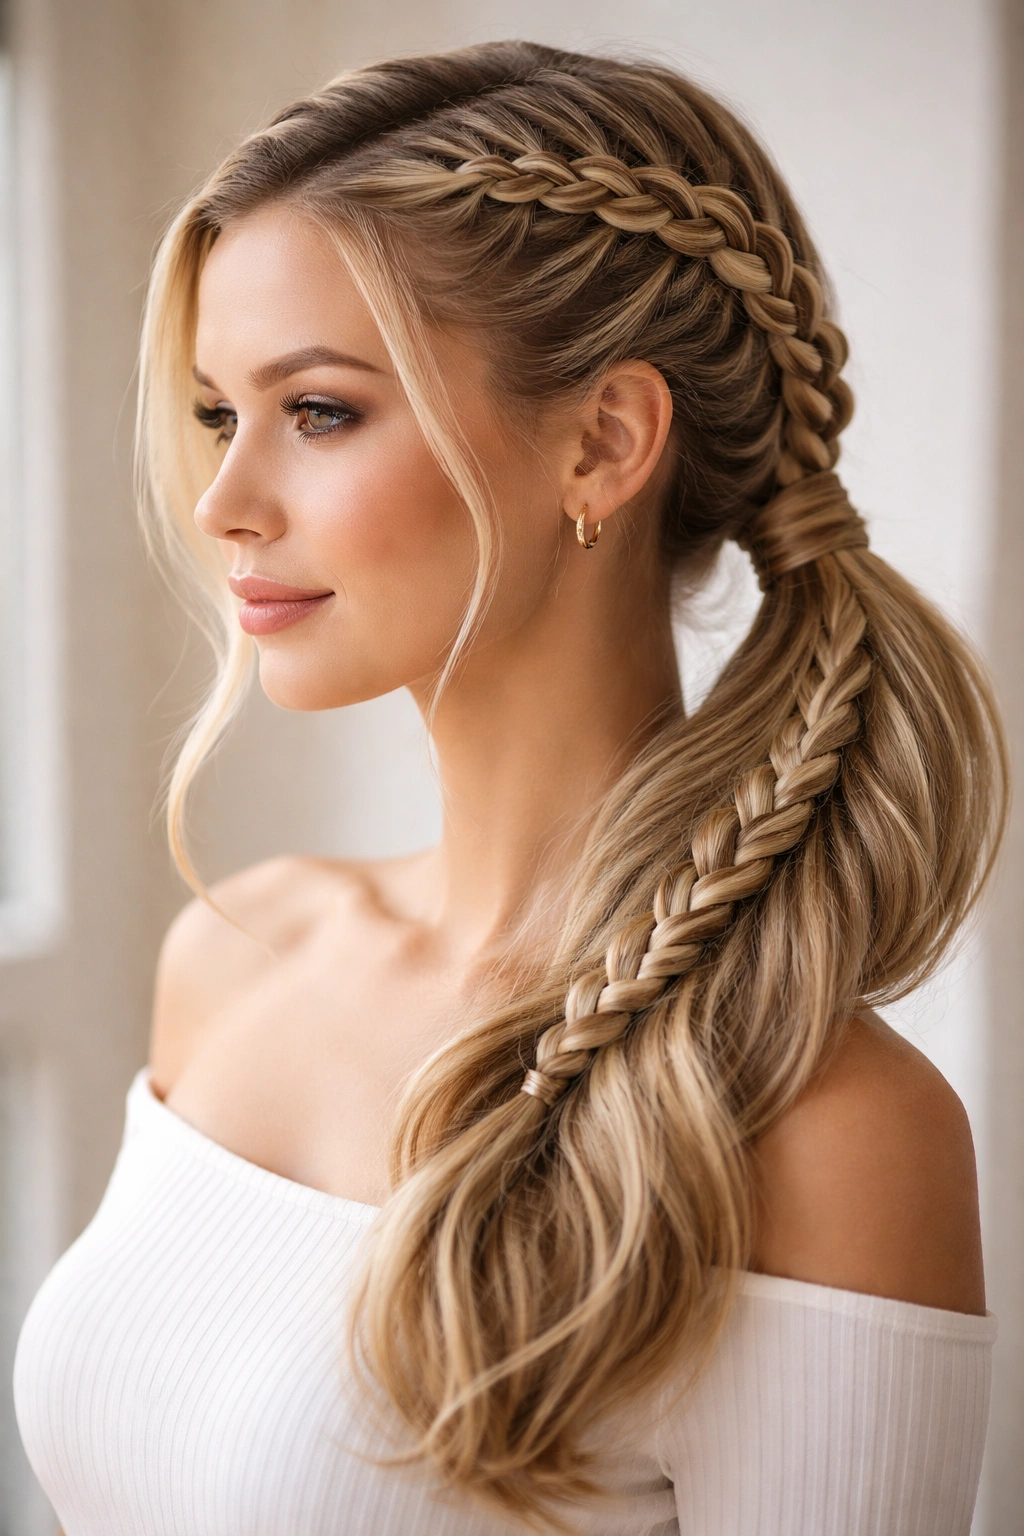
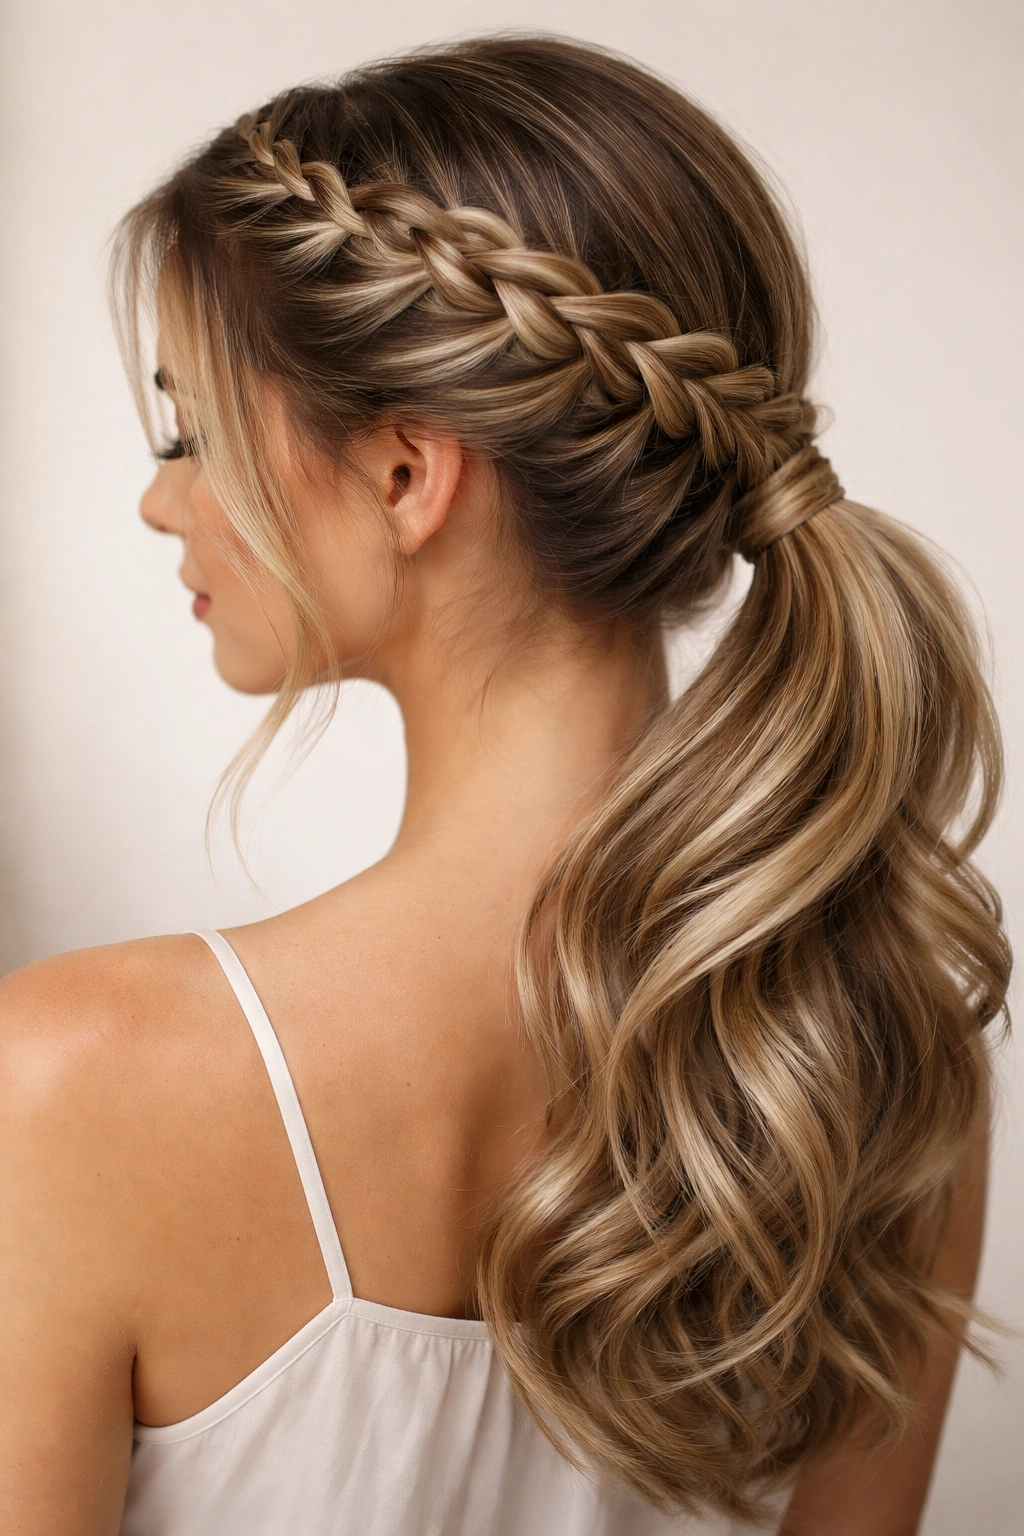
1. The Classic Side Dutch Braid Into Wrapped Ponytail
This is the foundation style—the one that works for literally every hair type and every occasion from boardroom to beach. The Dutch braid (where you braid under instead of over) naturally creates more surface area and grip than a standard three-strand braid, and pulling it to the side gives you maximum security right from the base.
How to Braid It Tight Enough to Hold
Start at your temple on one side, gathering a section about two inches wide. Take that section and divide it into three strands. Dutch-braid down toward your ear, adding small sections of hair with each pass, keeping tension steady and even. Here’s the part that makes the difference: don’t do loose Dutch braids you see in soft, romantic tutorials. This needs to be snug—each crossover should feel deliberate and tight. Braid all the way down past your shoulder, then gather your remaining hair and secure it into a ponytail at the side of your head, with the braid forming one edge of that ponytail cluster.
Key Security Elements
- Start with damp hair if your hair is very fine or slippery—this increases grip dramatically
- Use a small elastic (no larger than a regular hair tie) wrapped at least three times
- Wrap a tiny section of loose ponytail hair around the base of the elastic, then pin it back into the ponytail cluster with a bobby pin angled upward
- Add one more bobby pin through the base of the Dutch braid itself, angled slightly downward and backward into your scalp
This combination creates three independent anchor points, and it’s basically impossible for the style to loosen once it’s in.
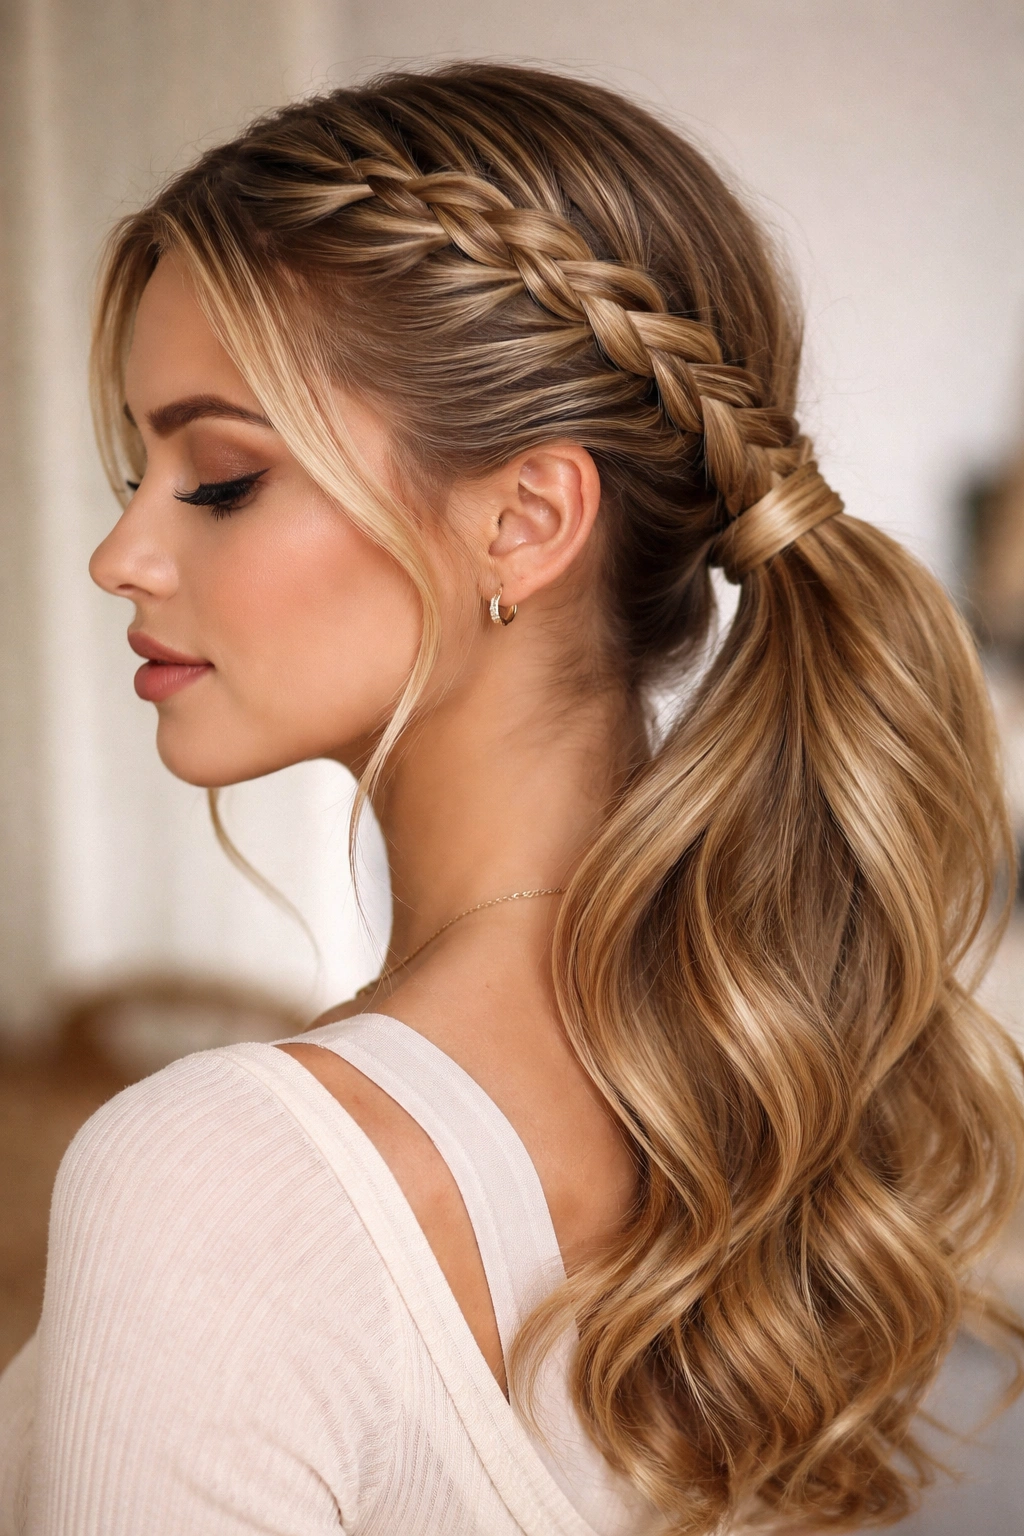
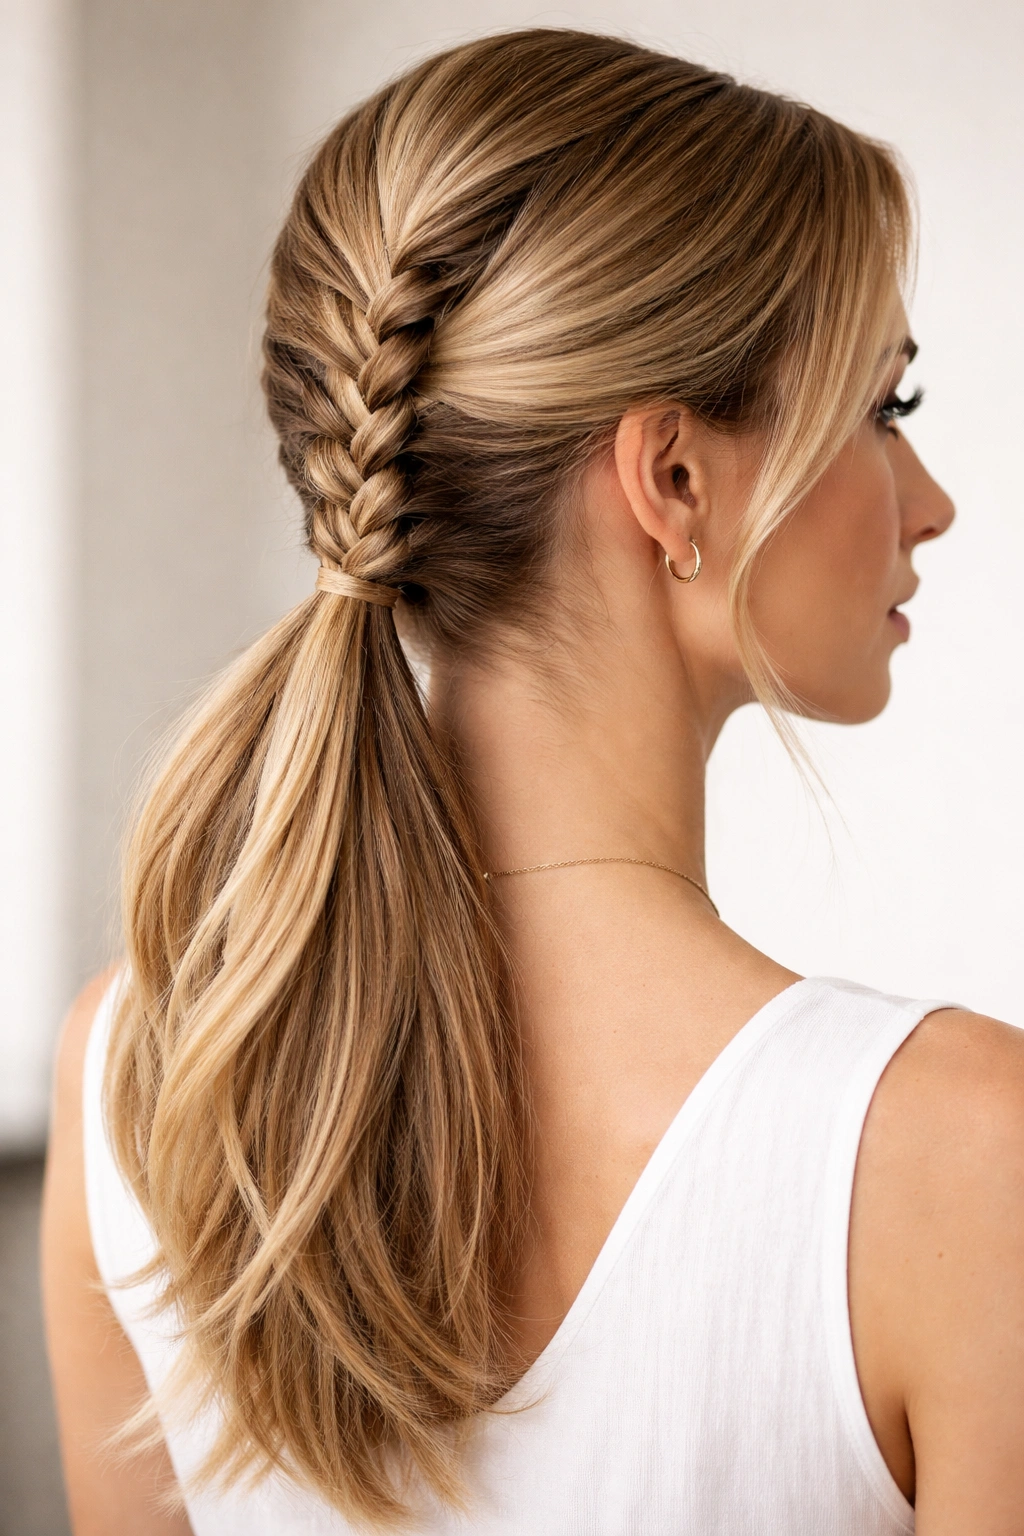
2. The Side French Braid Waterfall Effect
This style looks more intricate than it actually is, and it’s genuinely beautiful for both casual and dressed-up occasions. The waterfall effect—where you let small sections of hair fall free as you braid—keeps it from looking too severe while maintaining serious hold.
Creating the Illusion of Movement
Start your French braid at your temple, but instead of adding all hair to your braid like a traditional French braid, you’re going to add hair on your top side and let small sections fall free on your bottom side. This creates a cascading look. The French braid structure itself—with hair being pulled over rather than under—gives you excellent control and hold.
What Actually Keeps It Secure
- Braid down to just past your ear, maintaining consistent tension the entire way
- Gather your ponytail slightly lower than center-back, which makes the waterfall effect more visible
- Secure with a small elastic wrapped multiple times, then wrap a thin section of loose hair around the elastic
- Pin two bobby pins through the braid base itself—one on each side of where the braid meets the ponytail
The security here comes from the braid being part of the ponytail’s structural integrity, not just decorative. It’s anchoring the whole style from multiple points.
3. The Double-Sided Side Braid
This one looks surprisingly elaborate, but it’s actually just two side braids that meet and form one ponytail. It’s especially stunning if you have thicker hair or if you want maximum security—literally twice the anchor points.
Mirror-Image Symmetry
Part your hair down the middle. Take the left side and start a Dutch braid at your left temple, braiding down toward your shoulder. Do the exact same thing on the right side. Both braids should end around the same point at the back of your head, just shy of center. Then gather both braids plus your remaining hair into one side ponytail (pull it slightly to one side rather than dead center—this is the “side” element that makes it interesting).
Double the Hold
- Each braid is snug and tight, pulling toward the back at approximately a 45-degree angle
- Where the two braids meet at the back, you’ve got four anchor points instead of one
- Secure with a small elastic, wrap loose hair around it, and pin both braids at their base, one bobby pin per braid, angled upward
This style essentially cannot loosen because you’ve distributed the weight and tension across two completely independent braid structures.
4. The Wrapped Side Braid With Hidden Pins
This is the sleek, minimal version—a single side braid that’s secured so subtly you can barely see the mechanics. It’s perfect if you want sophisticated polish without obvious texture.
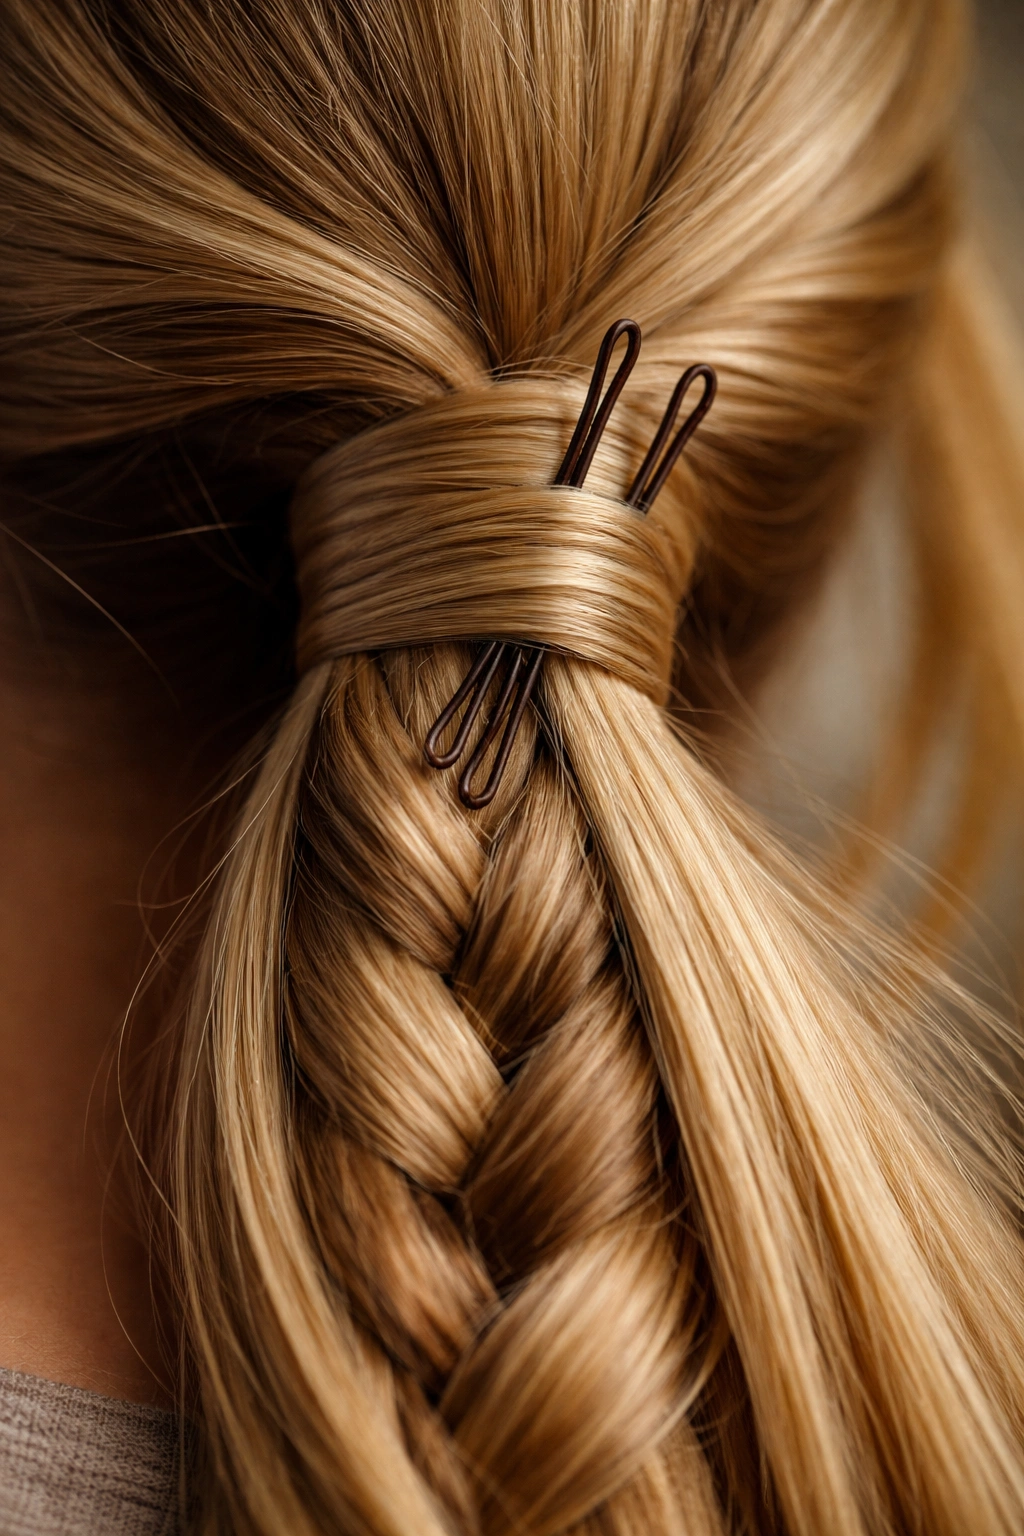
The Invisible Security System
Do a single Dutch or French braid from temple to about mid-back. Gather it into a side ponytail. The magic is in how you pin: instead of two or three obvious bobby pins, use four or five very thin bobby pins (the kind designed for fine hair or detail work), and insert them through the braid itself, not just near it. Thread each pin under a strand of the braid, which locks that strand in place against your scalp.
Why This Actually Works
- When you pin through the braid itself rather than just the base, you’re creating mechanical locks at multiple points along the braid
- The pins are essentially invisible because they’re embedded in the braid texture
- The braid, weighted down by the ponytail, has its own downward tension that works with your pins rather than against them
- This creates a hold so secure that even vigorous movement doesn’t loosen it
Spend the extra minute threading pins correctly—it’s worth it.
5. The Twisted Side Braid With Volume
If you love the idea of a side braid but want more texture and movement than a traditional braid provides, a twisted version gives you security with more visual interest and bounce.
The Twist vs. the Braid
Instead of weaving three sections over and under, you’re taking two larger sections and twisting them around each other. Start at your temple, divide your hair into two sections, and twist them around each other as you move downward, adding small pieces of hair with each rotation. Twist all the way down to your shoulder, then gather into a side ponytail.
Why Twists Hold Just as Well
- The rotation creates pressure and tension almost identical to a braid, with more surface area
- The thicker sections create a more secure grip than three-strand braiding
- The texture of a twist photographs better and photographs differently than a braid—more relaxed, more modern
- When combined with the proper ponytail base securing, it’s equally as stable as any braid
Twists also work brilliantly if you have very long hair, because they create less visual heaviness than a detailed braid would.
6. The Rope-Braided Side Ponytail
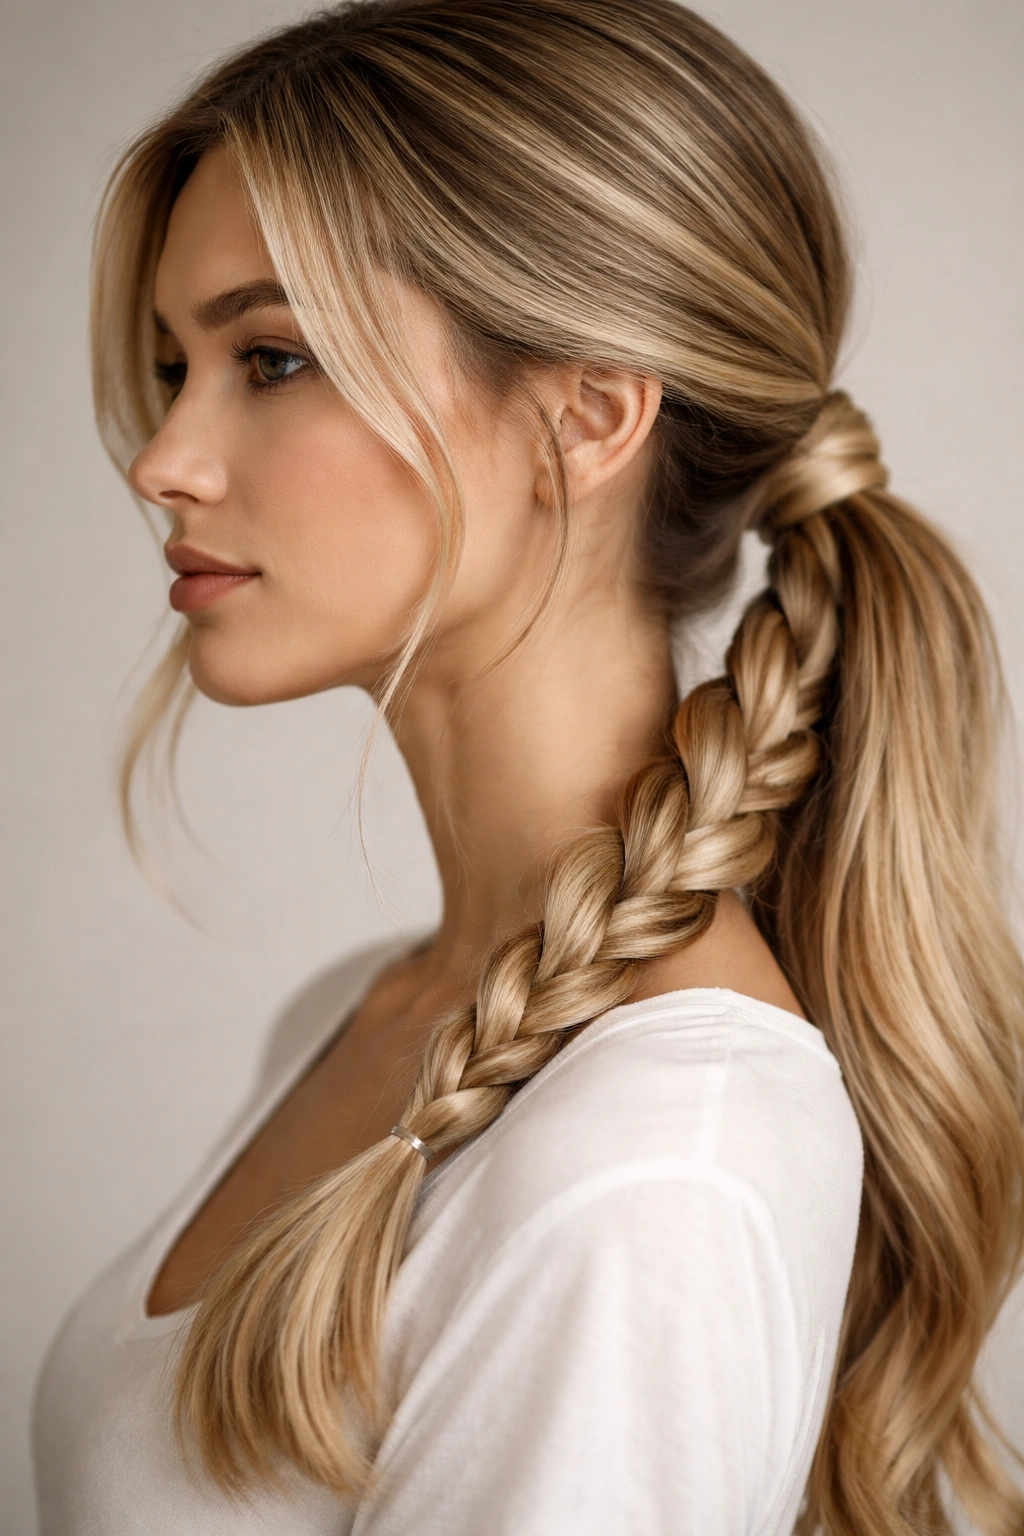
This is a braid that looks deceptively simple but feels absolutely luxe—it’s just two sections twisted around each other, but done in a specific way that creates a rope-like texture.
Creating Rope-Braid Texture
Take two equal sections of hair at your temple and twist them around each other, but with a specific twist: as you move down, you’re rotating each section on its own axis while rotating around the other. This double-twist creates a rope effect. It sounds complicated but becomes automatic after you’ve done it a few times.
The Hold Advantage
- Rope braids create more friction between the twisted sections than a simple two-strand twist does
- The spiral pattern means there are more pressure points locking the hair in place
- Rope braids work especially well with longer hair because the length creates natural weight and tension
- Secure the same way you would any other braid: small elastic, wrapped hair around the base, bobby pins through the braid
This style feels romantic but is actually very low-maintenance and extremely secure.
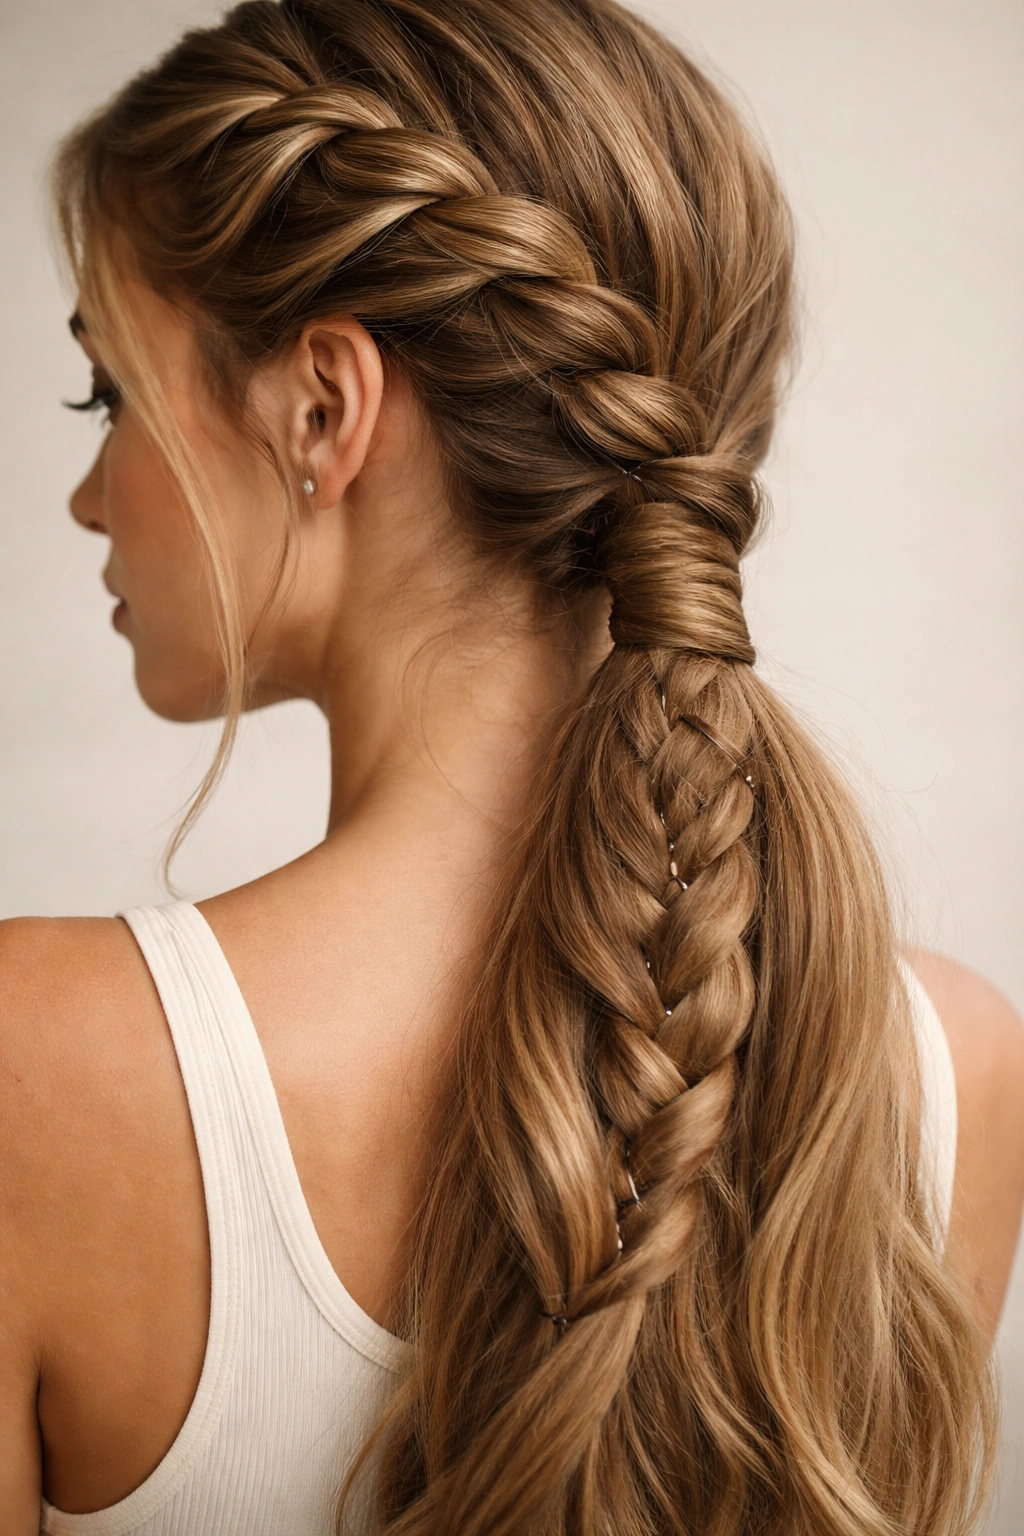
7. The Fishtail Side Braid
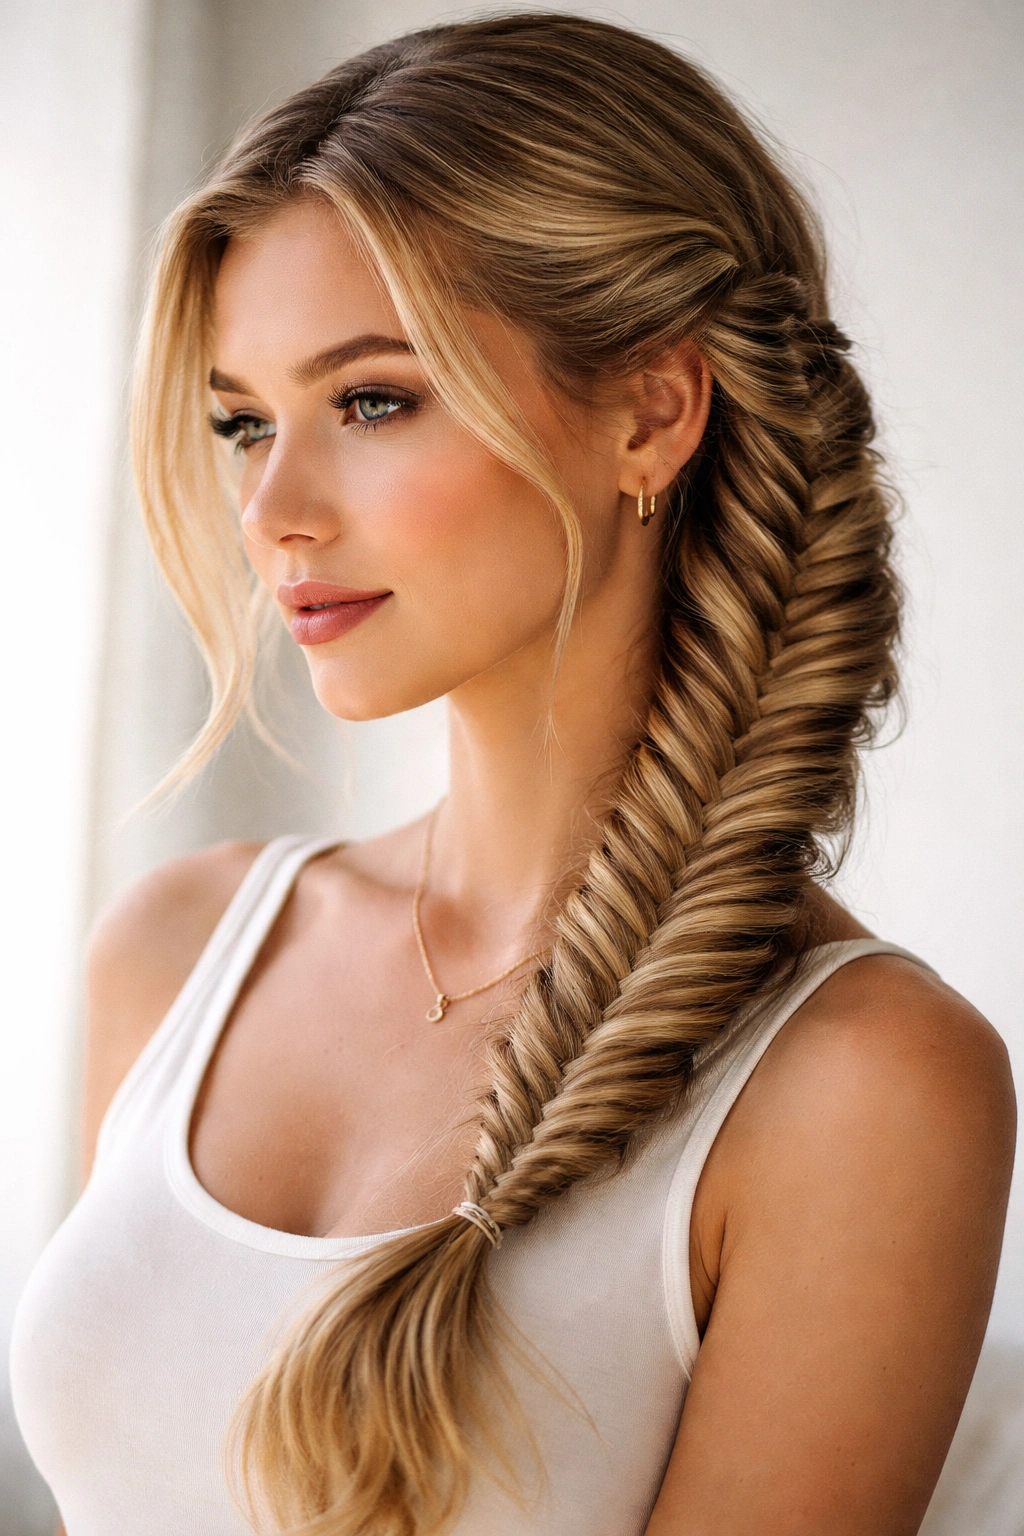
Fishtails look delicate and intricate, which makes people assume they’re fragile. They’re actually exceptionally secure because the weave pattern creates so many individual lock points.
The Fishtail Technique
Instead of three sections, you’re working with two very thick sections. Take your left section and pull a thin piece of hair from the outer edge. Cross that thin piece over and add it to your right section. Then take a thin piece from the outer edge of your right section and cross it over to your left. Continue alternating. It sounds fiddly, but the result is a dense, textured braid.
Why Fishtails Are Unexpectedly Secure
- The thin cross-sections create dozens of individual pressure points
- Each tiny piece of hair is locked by the larger sections on both sides
- The overall pattern is so interconnected that the whole structure has to move as one unit
- Once a fishtail is in, it’s genuinely difficult to loosen without actively trying
Start your fishtail at your temple and braid all the way down to your shoulder. The final style looks almost fragile, but it’s one of the most stable braids you can do.
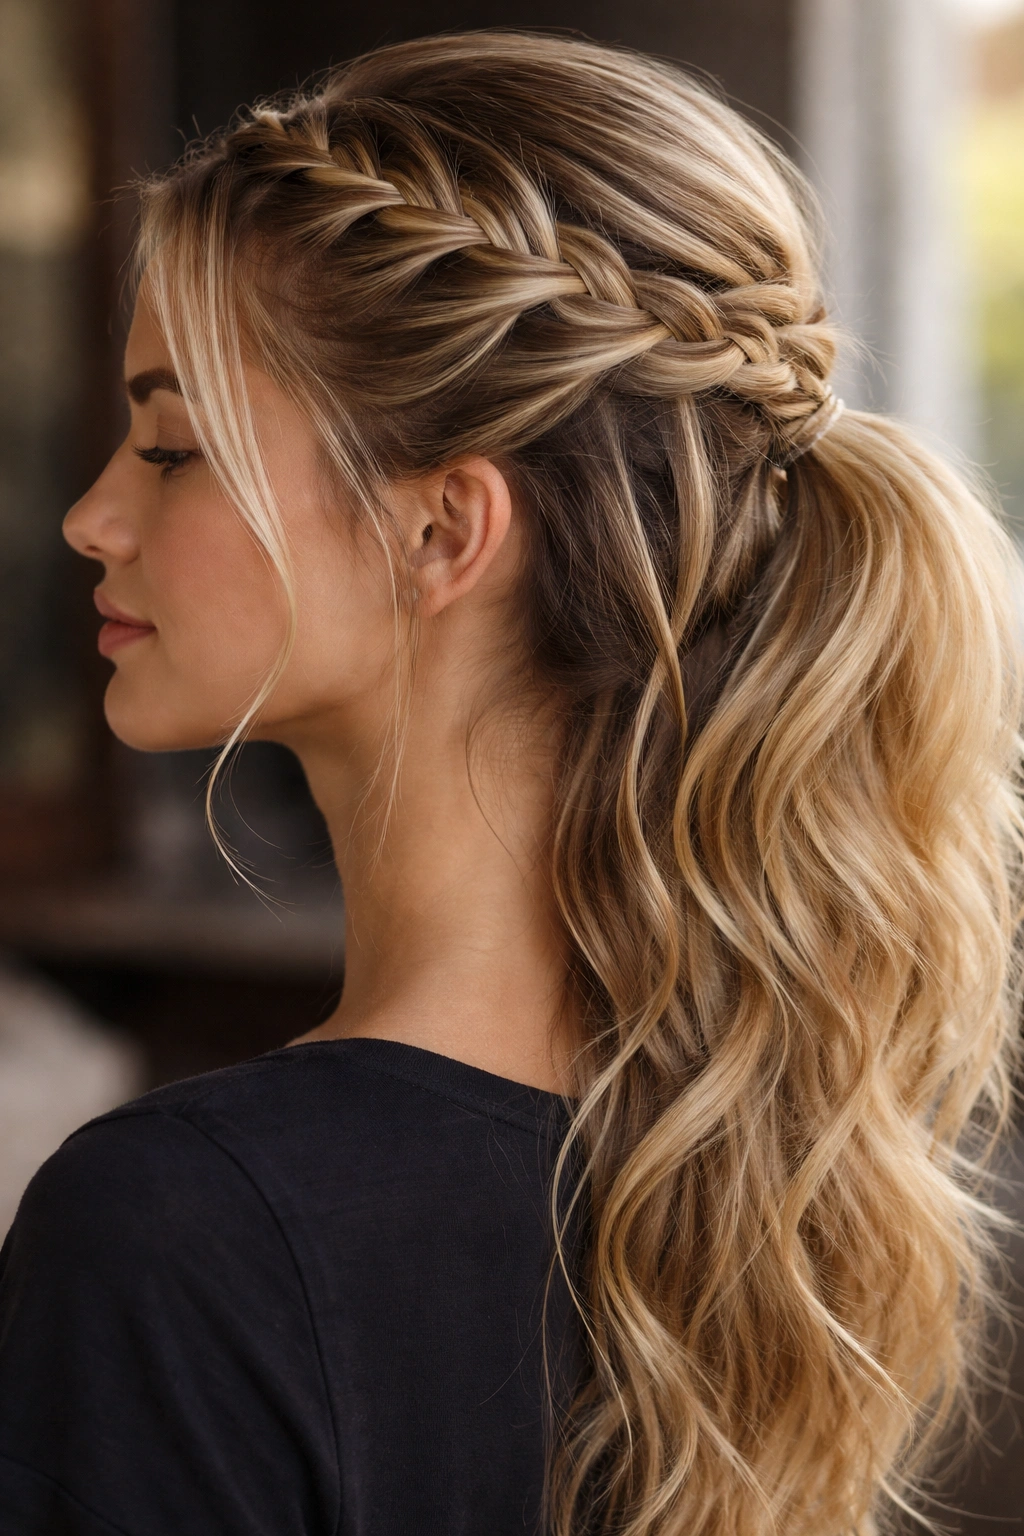
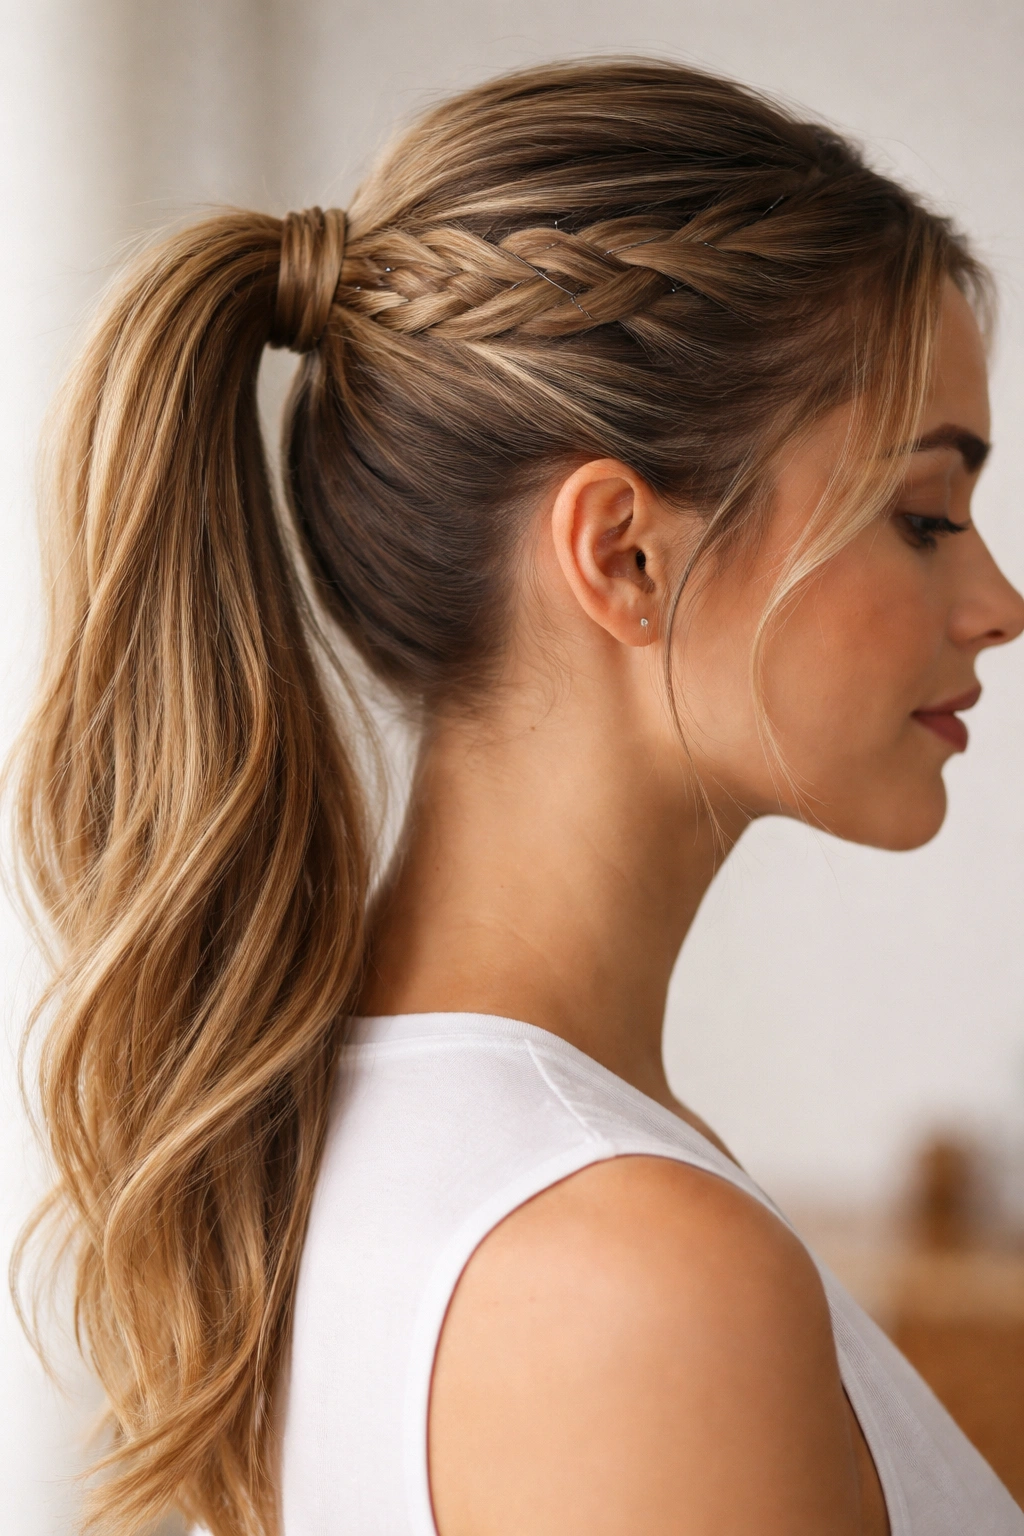
8. The Braided Crown Into Side Ponytail
This style wraps a braid around the side of your head like a crown, then pulls everything into a side ponytail. It’s higher-impact than a simple side braid and looks especially good for events.
Creating the Crown Effect
Instead of starting at your temple and braiding straight down, you’re starting at your temple and braiding diagonally back and up, following the natural curve from your temple toward the back of your head. You’re essentially creating a line that hugs your skull. Braid all the way around until you reach the opposite side. Then gather all your hair—the braid plus everything else—into a side ponytail.
How This Locks Into Place
- The braid curves around your head, which means it’s already anchored at multiple points by your scalp structure itself
- The path of the braid creates natural tension that works against any downward slip
- When you gather everything into a ponytail, the braid is integrated into the structure, not just sitting on top
- Pin at the base where the braid meets the ponytail, and the crown element is completely secure
This is the version to choose if you want something that looks special but doesn’t require any more technique skill than a standard side braid.
9. The Split Ponytail With Integrated Braids
This is sculptural—you’re dividing your side ponytail into sections and braiding some of those sections separately before they re-join. It looks complex and feels elegant.
Creating Separate Braid Sections
Create your side ponytail first, securing it tightly. Then divide it into three vertical sections. Braid the center section, leaving the outer sections plain. Secure each section separately, then bring them back together at the bottom with another elastic. You now have one main ponytail with braided detail integrated into it.
The Multi-Level Security
- Your base ponytail is secured normally with a tight elastic and wrapped hair
- Each individual braid section has its own tiny elastic at the bottom
- The braids are locked in place not just by their own elastic, but by being surrounded by the unbraided sections
- This creates a style that’s mechanically locked at three separate points
This version is perfect if you want visual interest without the difficulty of managing multiple separate braids.
10. The Side Braid With Wrapped Hair Detail
This one incorporates a wrapping technique where you’re literally winding a thin section of hair around your braid. It adds texture and detail while actually increasing security.
The Wrapping Technique
Do your normal side Dutch or French braid down to your shoulder. Once your braid is complete, take a very thin section of loose hair (from your ponytail section) and wrap it tightly around the base of the braid, starting at the top where the braid begins and winding downward. Secure with bobby pins, pinning the wrap at two or three points.
Why Wrapped Sections Hold Better
- The wrap creates an additional mechanical lock by holding the braid in place with a separate piece of hair
- The wrapping tension adds downward pressure that actually works with gravity instead of against it
- The wrap distributes weight differently, which means the whole structure is more balanced
- You can wrap sections of the braid at multiple points for a more textured look while simultaneously increasing security
This is the version that looks most styled without looking like you spent hours doing it.
11. The Dutch Braid With Undone Texture
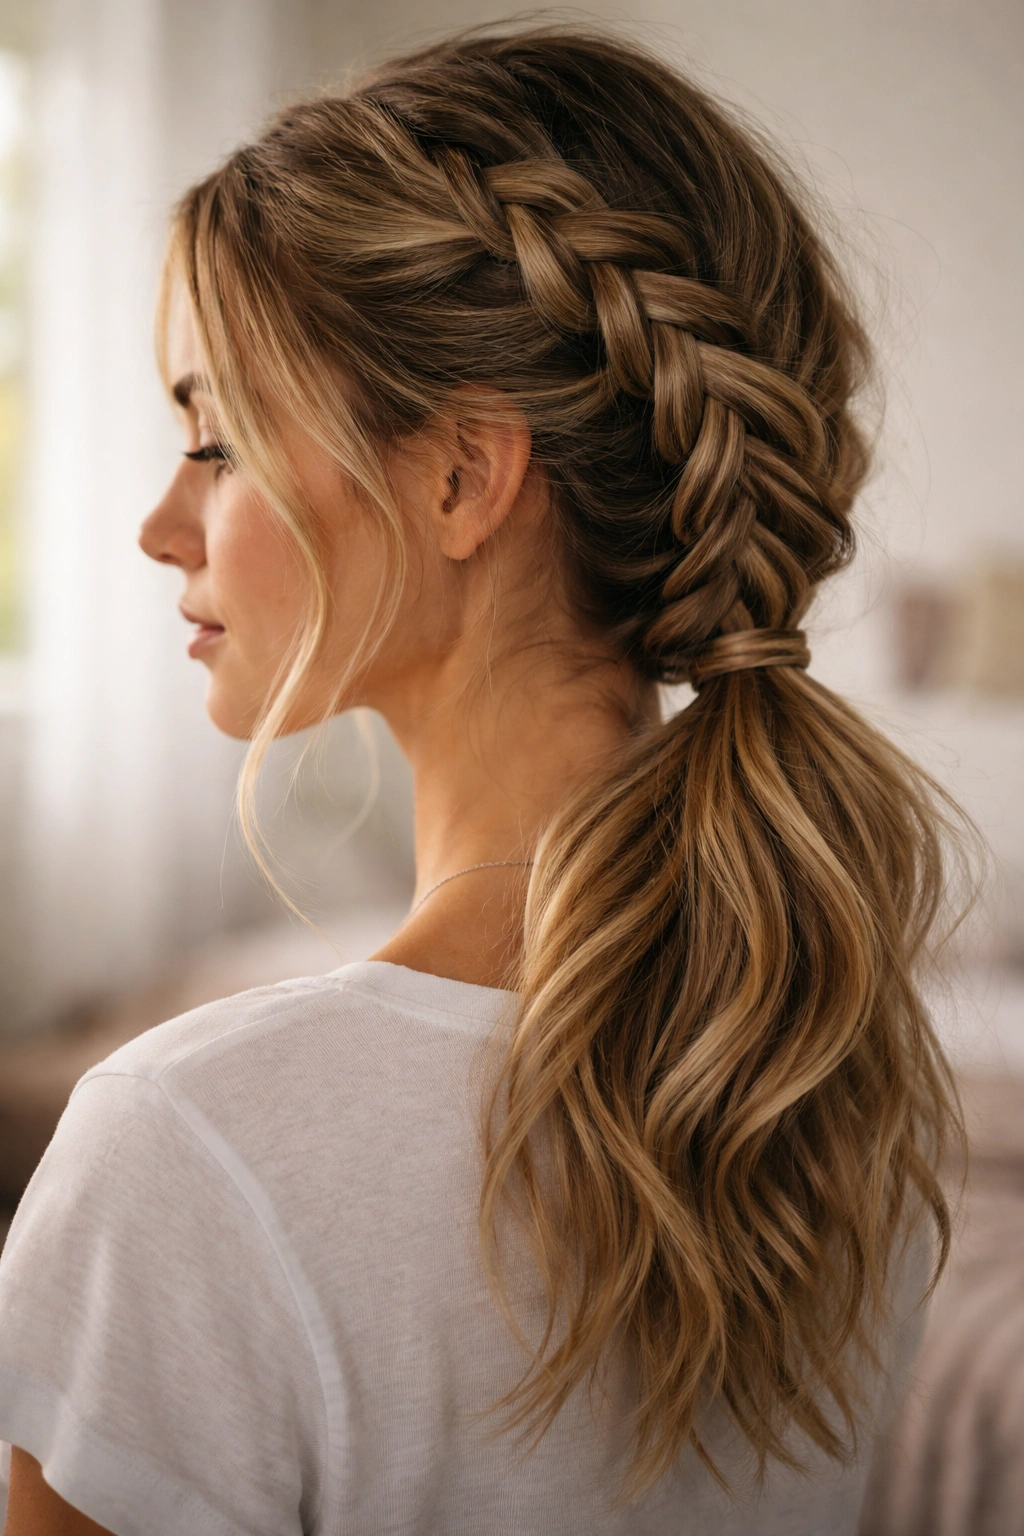
This is the lived-in, casual version—a braid that’s intentionally slightly loose and textured, but secured at the base in a way that keeps it from actually falling apart.
Achieving Intentional Looseness
Do your Dutch braid, but don’t obsess over making it perfectly tight. Let it have some texture. Once your braid is done, gently pull on the outer edges of the braid to loosen it slightly and create a fuller, more textured appearance. Then secure into your side ponytail with your usual process.
Why Loose Braids Need Secure Bases
- A loose braid without a solid base elastic absolutely will unravel
- The security doesn’t come from braid tension; it comes from the elastic and pins
- Use a small elastic wrapped extra times (at least four), wrap a section of hair around it, and add two bobby pins through the braid base
- You’re essentially compensating for the loose braid with an extra-secure base
This version is perfect if you want to look effortlessly put-together rather than perfectly polished.
12. The Side Braid With Looped Ponytail
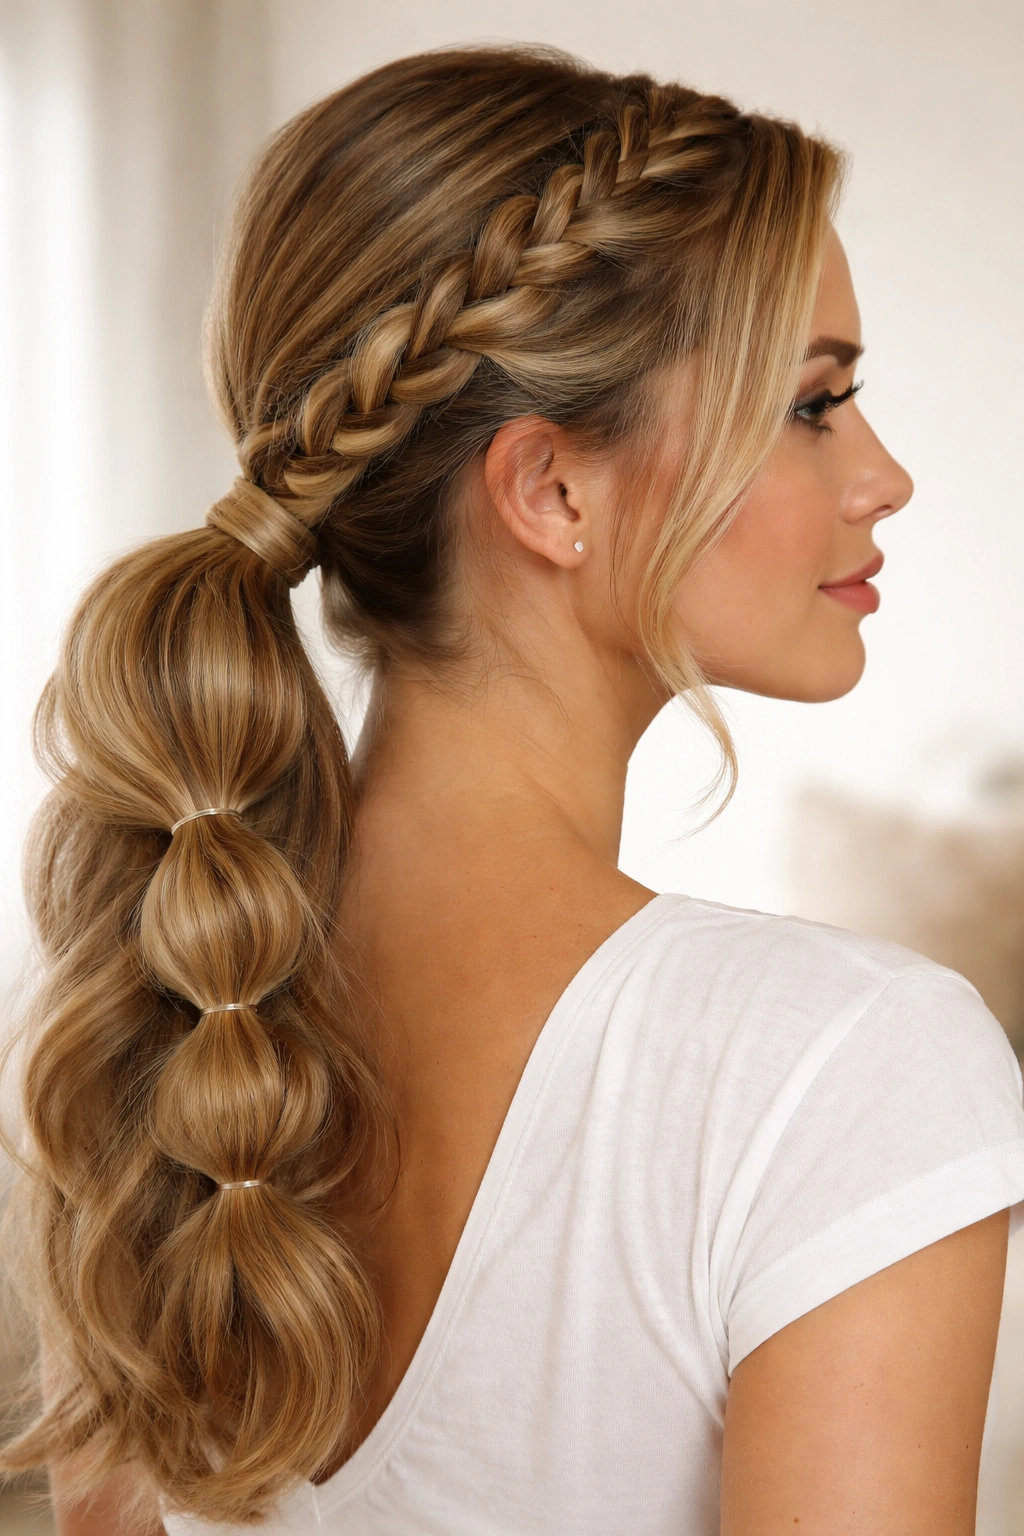
This is the most visually interesting version—you’re not creating a standard ponytail but rather gathering your ponytail and looping it back up, creating volume and structure.
Creating the Looped Effect
Do your side braid as normal. Gather your hair into a side ponytail, but instead of letting it hang straight, create two to four loops, securing each loop with a small elastic. The loops create a rounded, voluminous shape rather than a flat ponytail.
Maximum Structural Security
- Your braid is secured as always at the base
- Your initial ponytail is secured with your main elastic, wrapped hair, and pins
- Each individual loop is secured with its own tiny elastic, which means you’ve got five or six separate anchor points
- The loops create their own internal tension because they’re pulling upward against the main ponytail elastic
- This version is virtually impossible to loosen
This one works best with longer hair (at least mid-back length) because you need enough length to create the loops while still having a substantial main ponytail.
The Technical Details That Make All The Difference
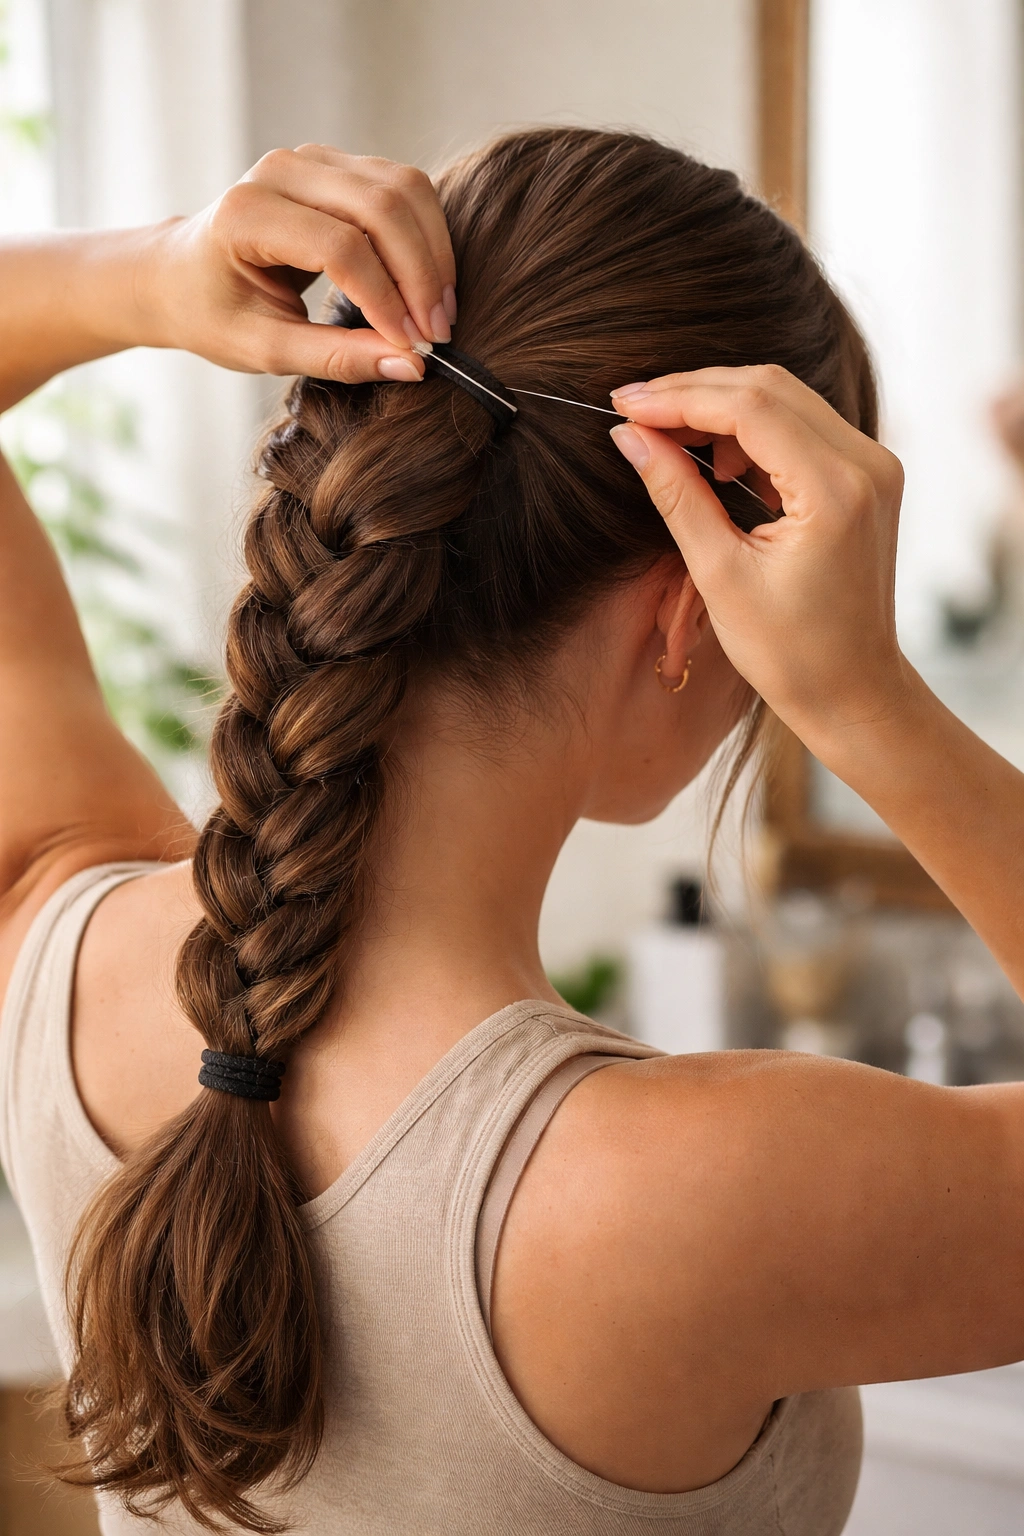
The actual braid technique matters, but the securing method matters more. Most side braided ponytails fail because the base isn’t secured properly, not because the braid comes undone.
Here’s your non-negotiable base security routine: use a small elastic (no bigger than a regular hair tie), wrap it at least three times around your ponytail base, then take a thin section of your loose ponytail hair and wrap it tightly around the elastic, covering it completely. This wrapping serves two purposes—it looks polished, and it creates friction that locks the elastic in place. Then insert two bobby pins through the base of the braid itself (not just next to it), angling them upward and slightly backward into your scalp. These pins are doing the real work; they’re literally anchoring your braid to your head.
For fine or slippery hair, this base routine isn’t optional; it’s essential. For thicker or more textured hair, you might get away with slightly less, but why would you? It takes an extra 20 seconds and makes the difference between a style that lasts all day and one that’s loose by noon.
Tension in the braid itself matters too. If you can braid comfortably without any strain, you’re probably not tight enough. Your braid should feel snug but not painful—there’s a difference. Tight enough that you can see the braid is structured and defined, loose enough that you’re not giving yourself a headache.
The angle at which you start your braid affects everything. Starting right at your temple and pulling backward creates an angle that uses gravity in your favor—the weight of your ponytail naturally pulls the braid back into place. If you start more toward the center of your head, you lose that geometric advantage.
Products That Help (But Aren’t Necessary)
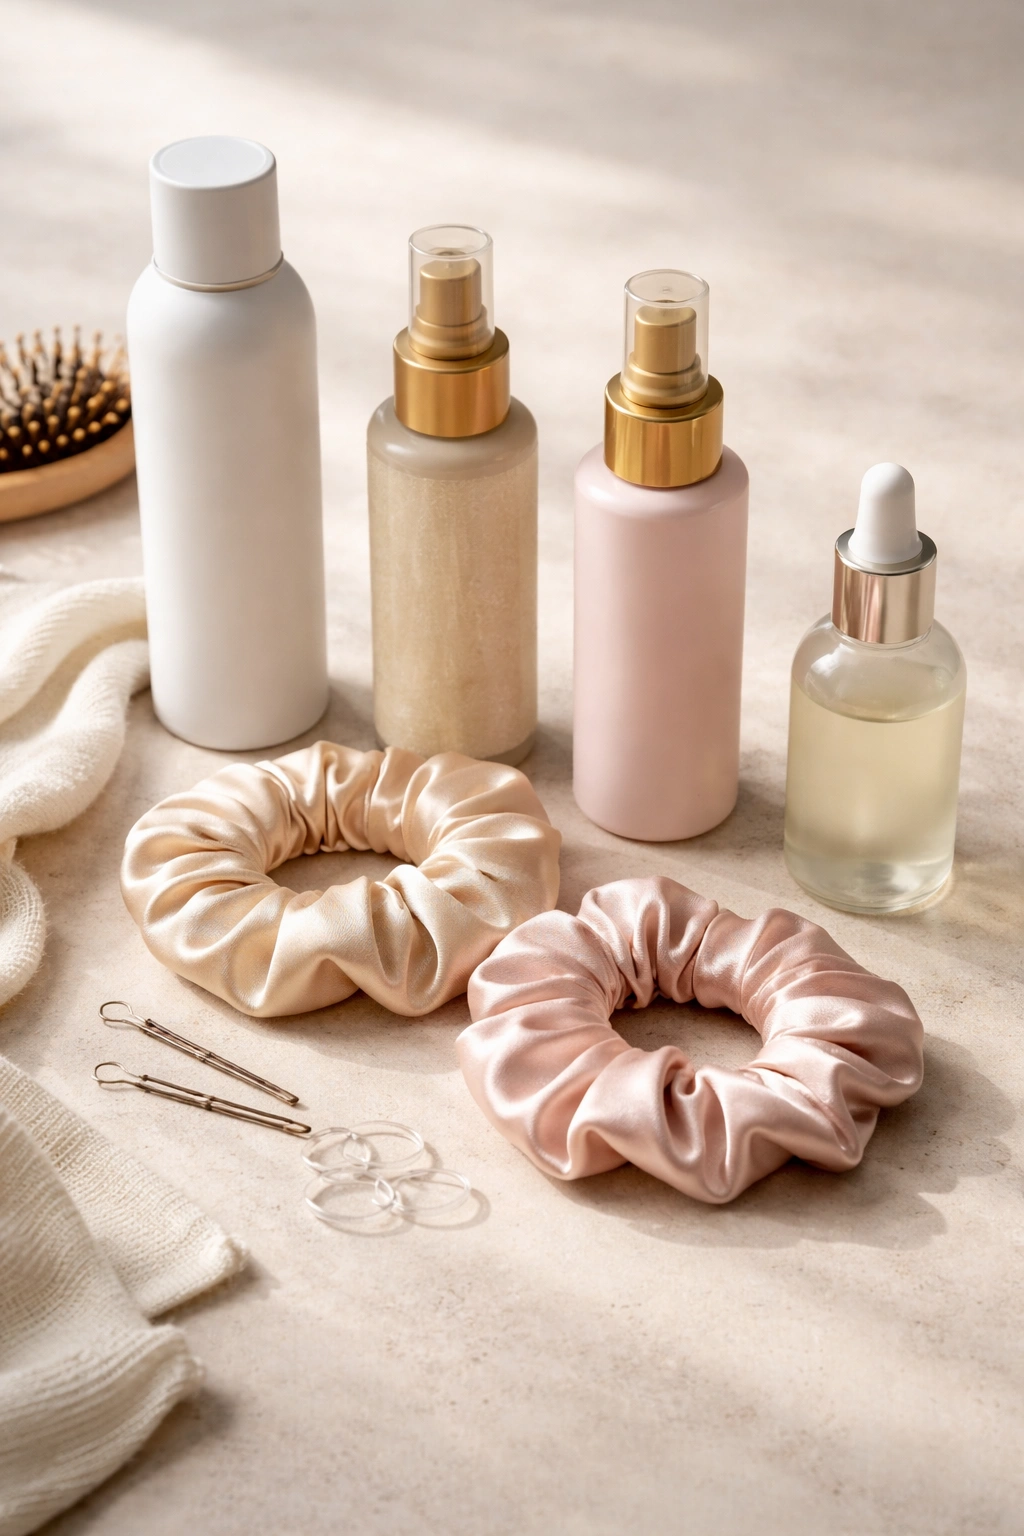
Dry shampoo or texturizing spray adds grip to your hair, which means your braid stays tighter longer. You don’t need to use it, but if you have very fine or very smooth hair, it’s worth keeping on hand for important days. Use it before you style, working it through your scalp and running your fingers through your hair to distribute it evenly. The slightly gritty texture gives your braid something to grip.
Light hairspray isn’t a game-changer, but it helps maintain the shape of your braid once it’s in. Spray lightly after you’ve secured everything, hitting the braid itself and your ponytail. You’re not creating a concrete-hard style; you’re just setting the shape.
Silk scrunchies or fabric elastics are genuinely gentler on your hair than standard elastics, and they grip slightly better too. They’re worth the investment if you wear braided styles regularly.
You don’t need specialty products to create a side braid that holds. Good technique does almost all the work.
Long-Term Maintenance While Wearing It
Once your side braided ponytail is in, it doesn’t need constant adjustment if you’ve done it correctly. But there are ways to maintain it throughout the day if you’re wearing it for 12+ hours or doing particularly active things.
If you notice loosening after a few hours, don’t take the whole thing down and redo it. Instead, tighten the elastic by adding another elastic above the first one (around the same group of hair). This adds compression without disturbing the braid itself. Alternatively, add another bobby pin through the braid base at a slightly different angle.
If your ponytail is sagging or the braid is slipping slightly, gently pull the braid backward (not upward) to re-tighten it. You’re using the geometry of your head and gravity to your advantage—pulling backward creates tension that locks it back into place.
For overnight wear (if you’re doing a protective style and planning to sleep in it), add a silk scarf or bonnet, which keeps the braid from rubbing against fabric and loosening. Protective sleeping is a completely different technique, but it’s worth knowing that your side braided ponytail can work as a protective style with the right nighttime precautions.
Taking It Down Without Damage
After 8-12 hours of wear, your braided ponytail’s time is up—it’s ready to come out. This matters more than people think, especially if you’re doing this style regularly.
Remove it in reverse order: take out your bobby pins first (they’re just holding the braid in place, not the main security). Remove the elastic around your ponytail. Unwind the wrapped section of hair. Only then, gently unwind or unbraid your braid. Don’t pull it straight out; work through it methodically. You’re trying to release the tension gradually so your hair doesn’t experience sudden strain.
Once it’s down, run your fingers through your hair or use a wide-tooth comb to gently separate any sections that are still woven together. If you’re noticing breakage, you’re either leaving the braid in too long or pulling too hard when you remove it—adjust one of those factors.
If you have very long or very fine hair, consider taking the braid out before bed rather than sleeping in it. A fully braided side ponytail worn overnight can create dents and texture that don’t release quickly, and for some hair types, it can lead to breakage from the tension of lying on it.
Final Thoughts

A side braided ponytail that actually stays in place isn’t magic—it’s just the combination of three things: a tight, well-structured braid, an angle that uses your head’s geometry to your advantage, and a securing method that understands where the real security comes from. Most side braids fail at that third part, which is why so many people assume the style doesn’t work. It does, once you understand that the braid is the visible element, but the invisible anchor points are what make it functional.
Pick whichever of these 12 styles resonates with your hair type, your lifestyle, and your aesthetic. They all work. What matters is that you’ve got the knowledge to execute whichever one you choose correctly—tight enough, angled right, and secured at the base so it genuinely stays in place. Once you’ve done one side braided ponytail that lasts all day without loosening, you’ll understand why this style has so much staying power.