Long hair deserves more than a basic elastic-and-go situation. If you’ve ever scrolled through styling inspiration and thought, “That looks effortlessly perfect,” you’ve probably landed on a messy ponytail—and there’s actually serious technique behind what looks like you threw your hair up without trying. The beauty of a messy ponytail is that it walks the line between polished and casual, making it work for everything from casual coffee runs to date nights to professional environments (depending on the version you choose).
The thing about messy ponytails for long hair is that they’re surprisingly versatile. Long hair gives you the canvas to create texture, dimension, and intentional “dishevelment” that actually requires more skill than a sleek, tight ponytail. Whether you’re working with naturally straight hair, waves, or curls, there’s a messy ponytail technique that’ll suit your hair type and the vibe you’re going for. The key is understanding which style matches your hair texture, how much time you want to invest, and what kind of hold you need to make it last through your day.
This isn’t about looking like you just rolled out of bed—this is about looking like you woke up, put thought into your look, and landed on something undeniably chic. Let’s walk through 12 distinct messy ponytail styles that work beautifully on long hair, along with exactly how to achieve each one.
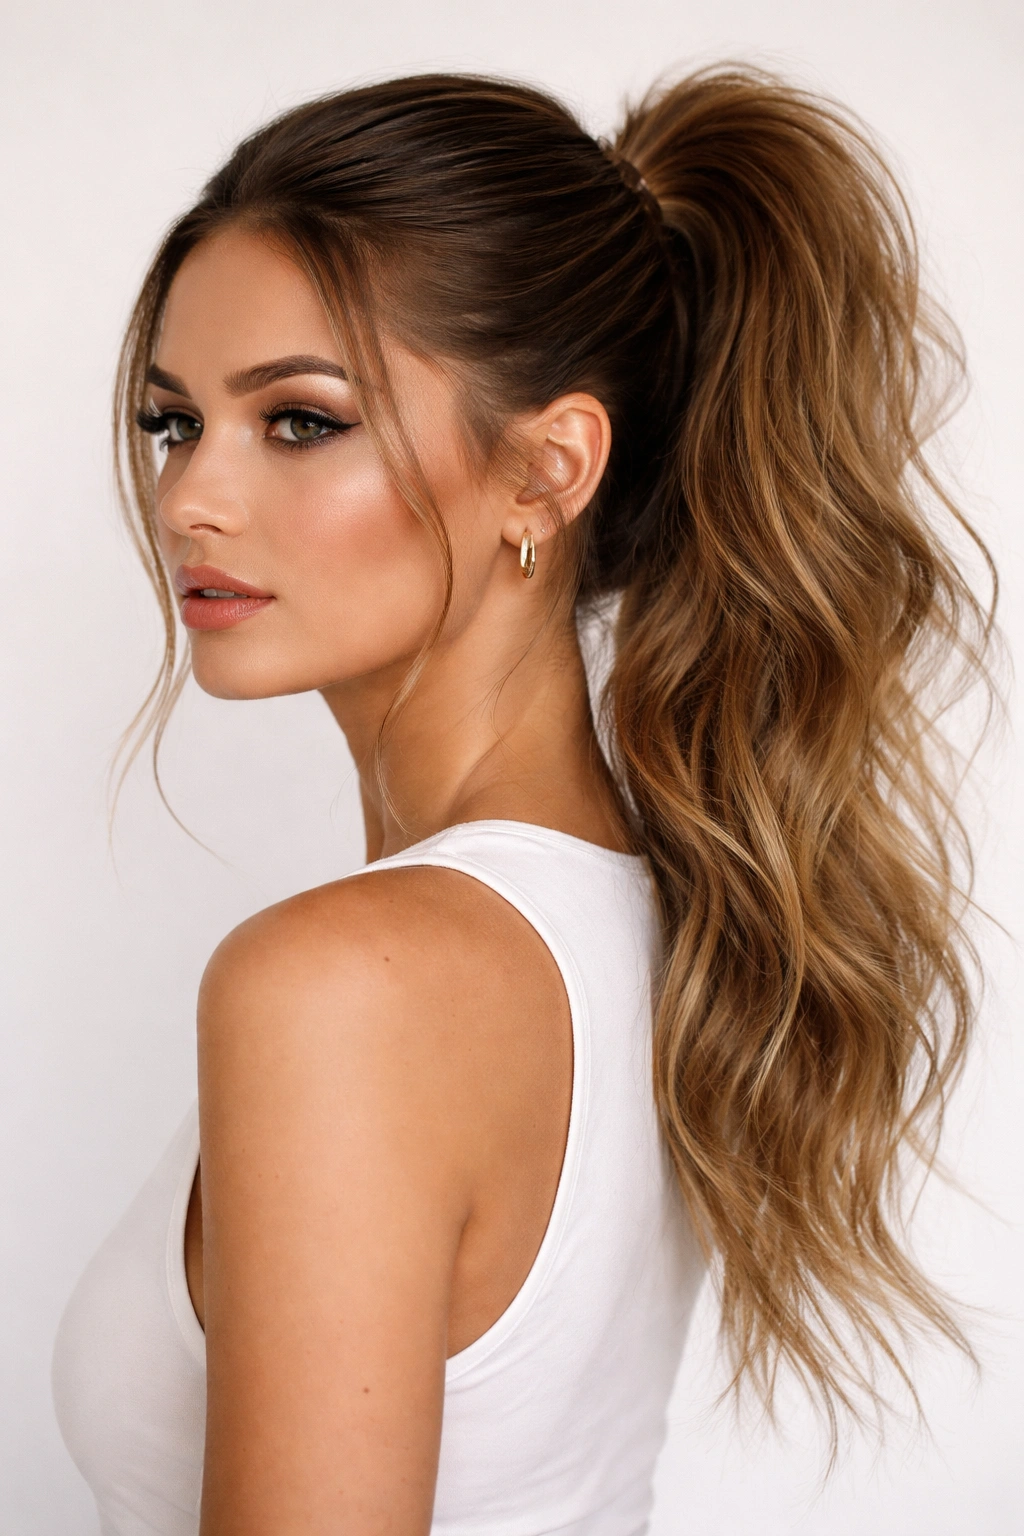
1. The Undone High Ponytail
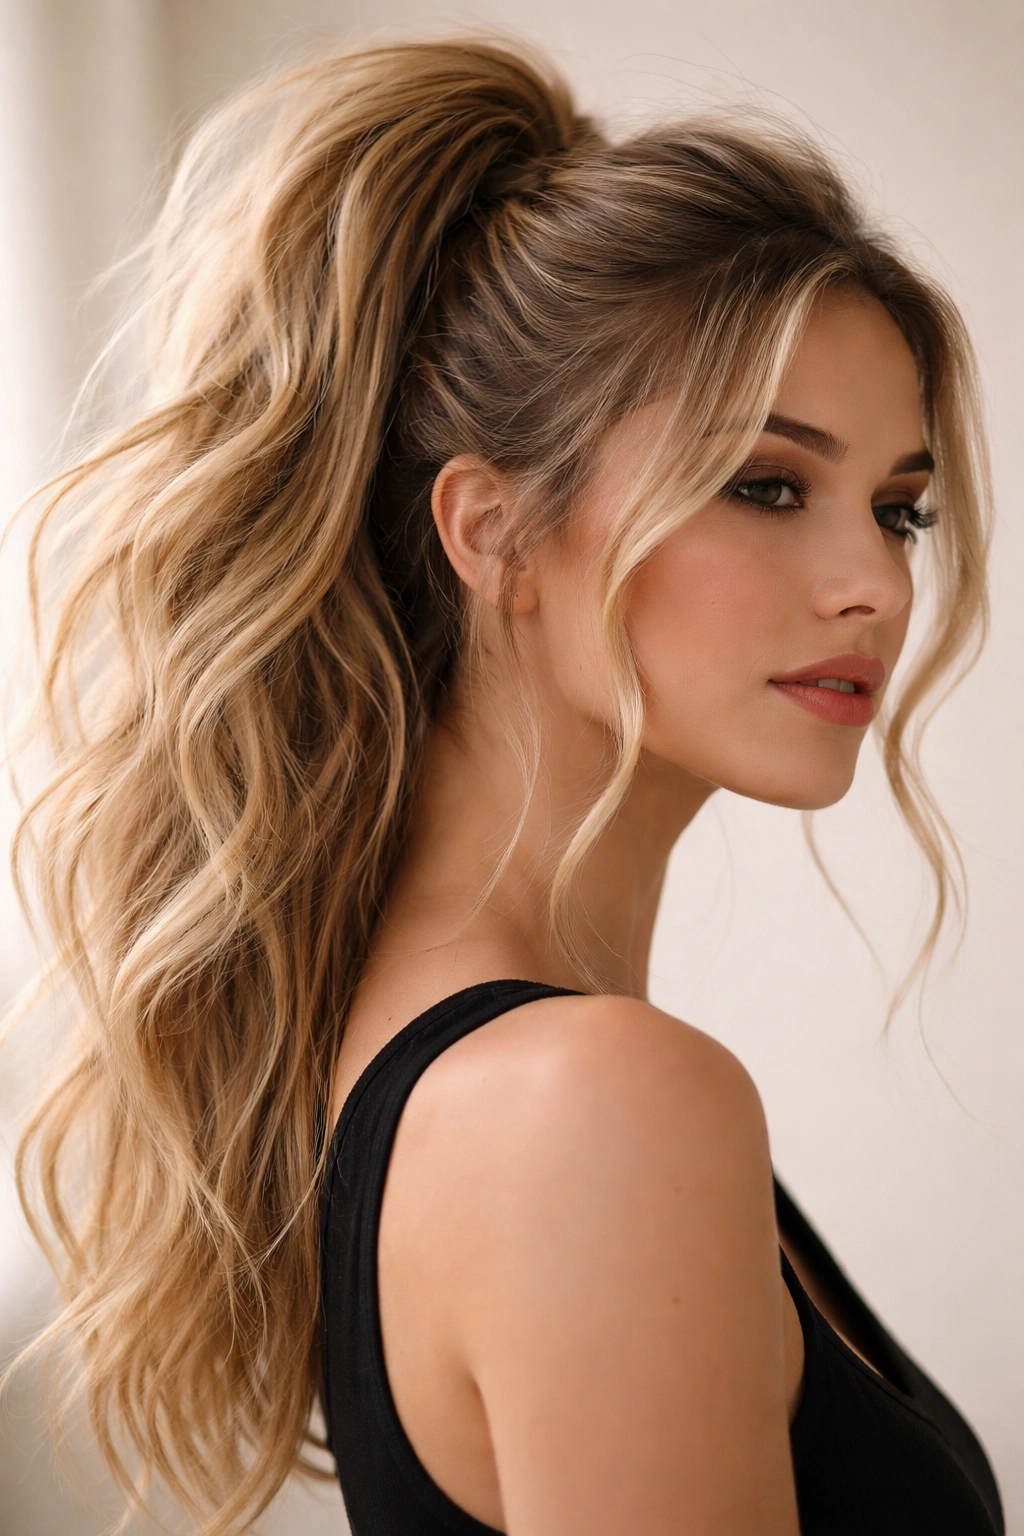
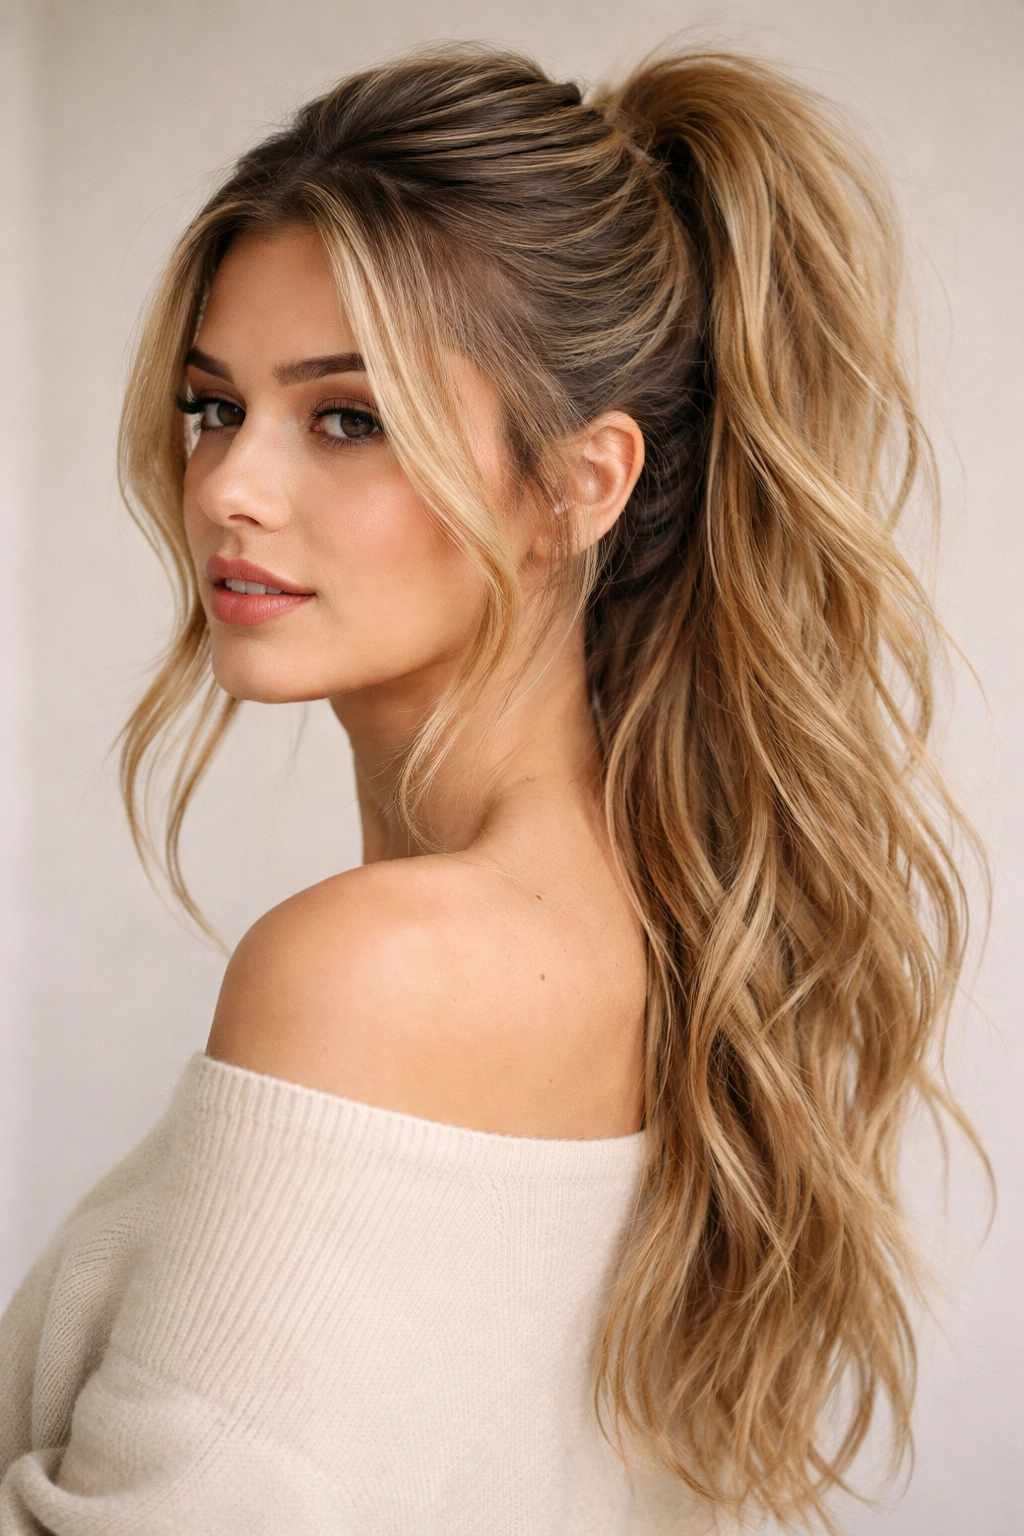
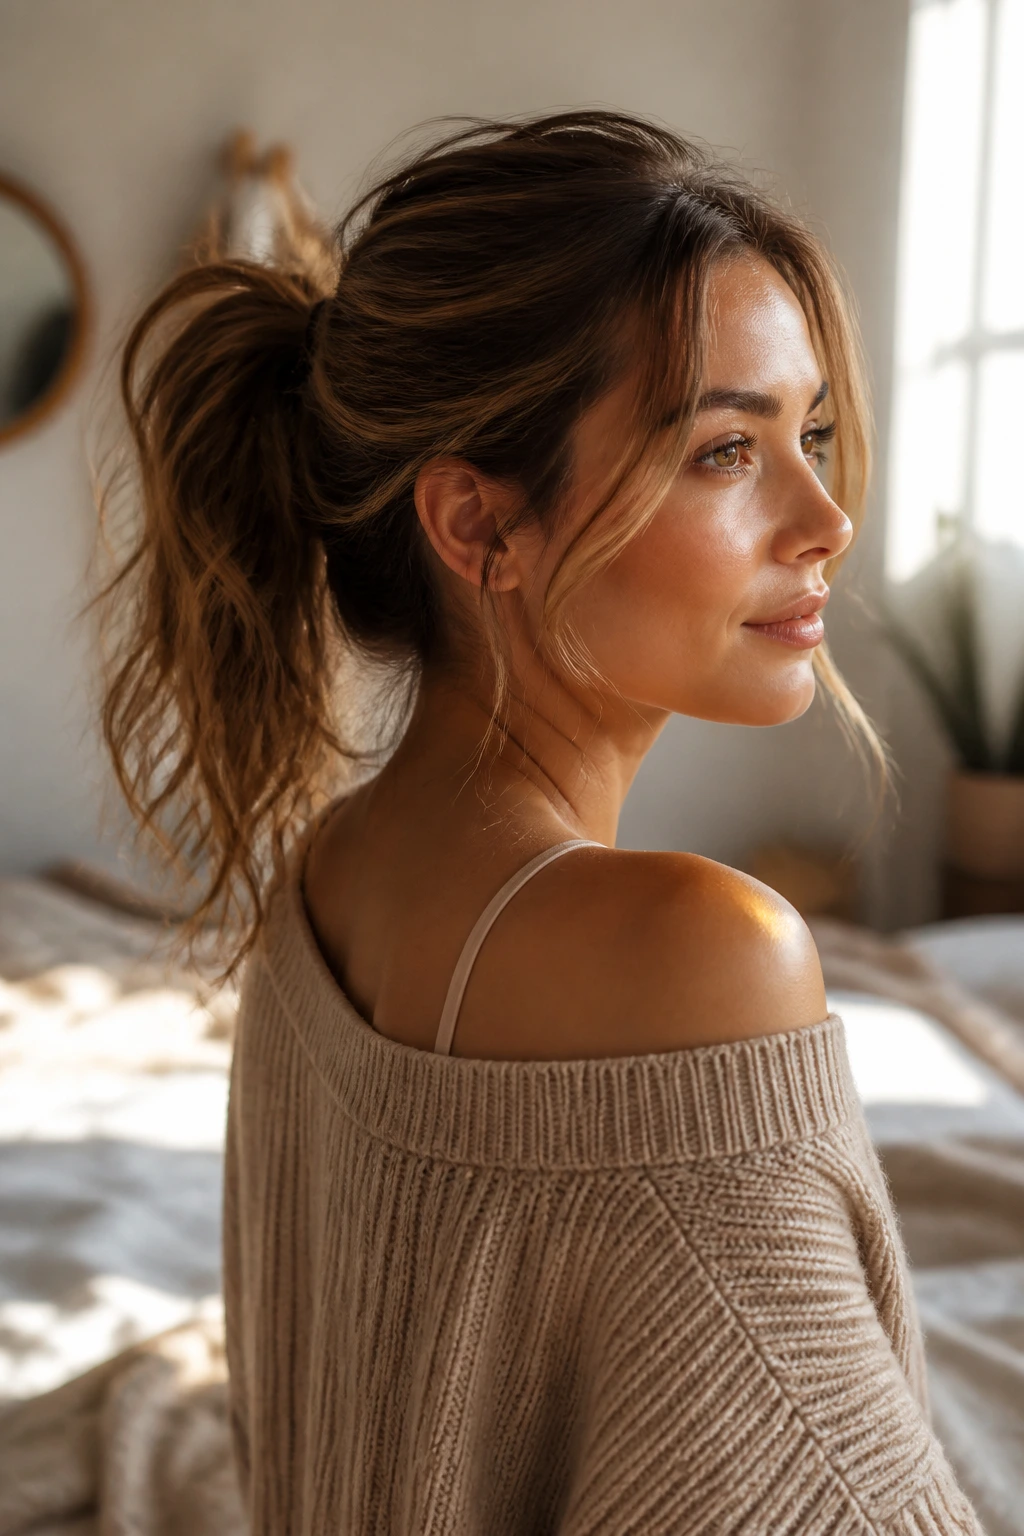
This is the classic messy ponytail that’s been everywhere for a reason—it’s genuinely foolproof once you understand the technique. The undone high ponytail sits at the crown, gathered loosely but securely, with face-framing pieces intentionally left out and the rest of the hair tousled and textured. It looks casual and cool, like you grabbed your hair on the way out the door, but it’s actually built on precision.
How to Create This Look
Start with hair that has some texture or movement to it. If your hair is freshly washed and completely smooth, spray a dry texturizing spray or sea salt spray onto the mid-lengths and ends—this creates grip and makes the hair easier to work with. Gather your hair into a high ponytail at the crown, but don’t pull it tight. Secure it with a clear elastic or a hair tie that matches your hair color.
Once the ponytail is secured, gently pull and tease the ponytail itself to create volume and texture. Use a fine-tooth comb or a teasing brush to backcomb small sections throughout the ponytail—not your entire head, just the gathered hair itself. This roughness creates that intentional, undone quality. Smooth the top layer lightly with your comb so it doesn’t look matted, but keep that texture underneath.
Finishing Touches That Make the Difference
Pull a few face-framing pieces out from the front and sides—these should look slightly intentional, not accidental. Curl these face-framing pieces with a curling iron or let them wave naturally if your hair holds texture. Wrap a small section of hair from your ponytail around the base of the elastic to hide it—this automatically makes the look more polished and intentional. Secure that wrapped section with a bobby pin that matches your hair color.
Finish with a light hairspray to hold everything in place without making it look stiff. The best messy ponytails still move and flow; you’re just preventing flyaways and keeping pieces in place, not freezing your hair completely.
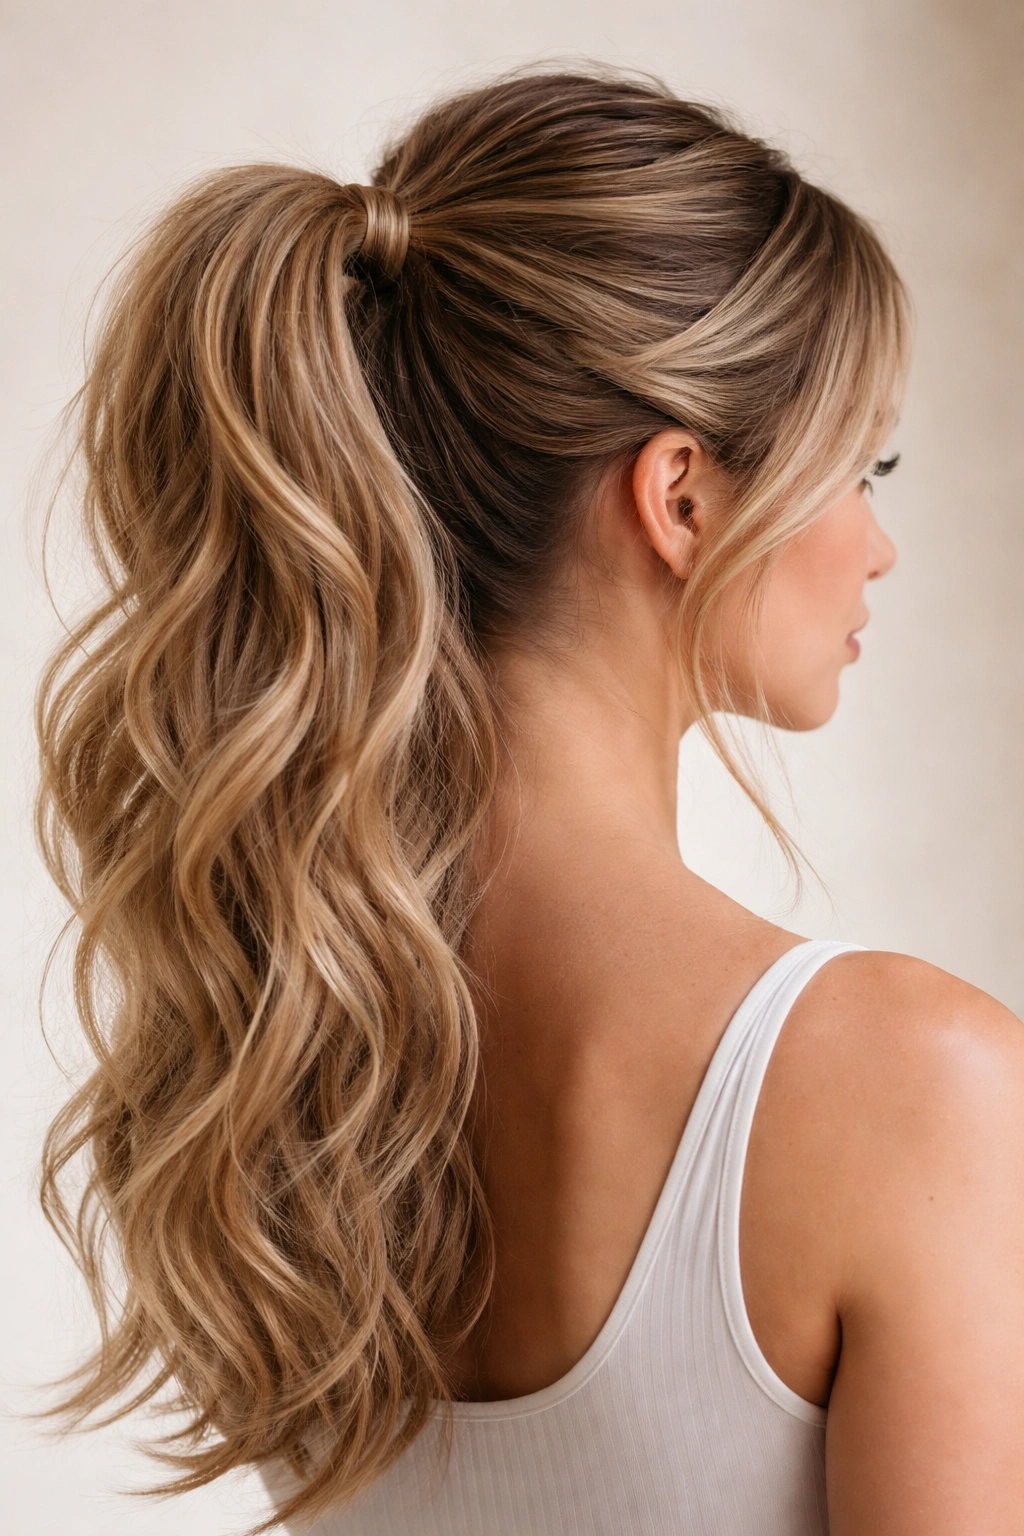
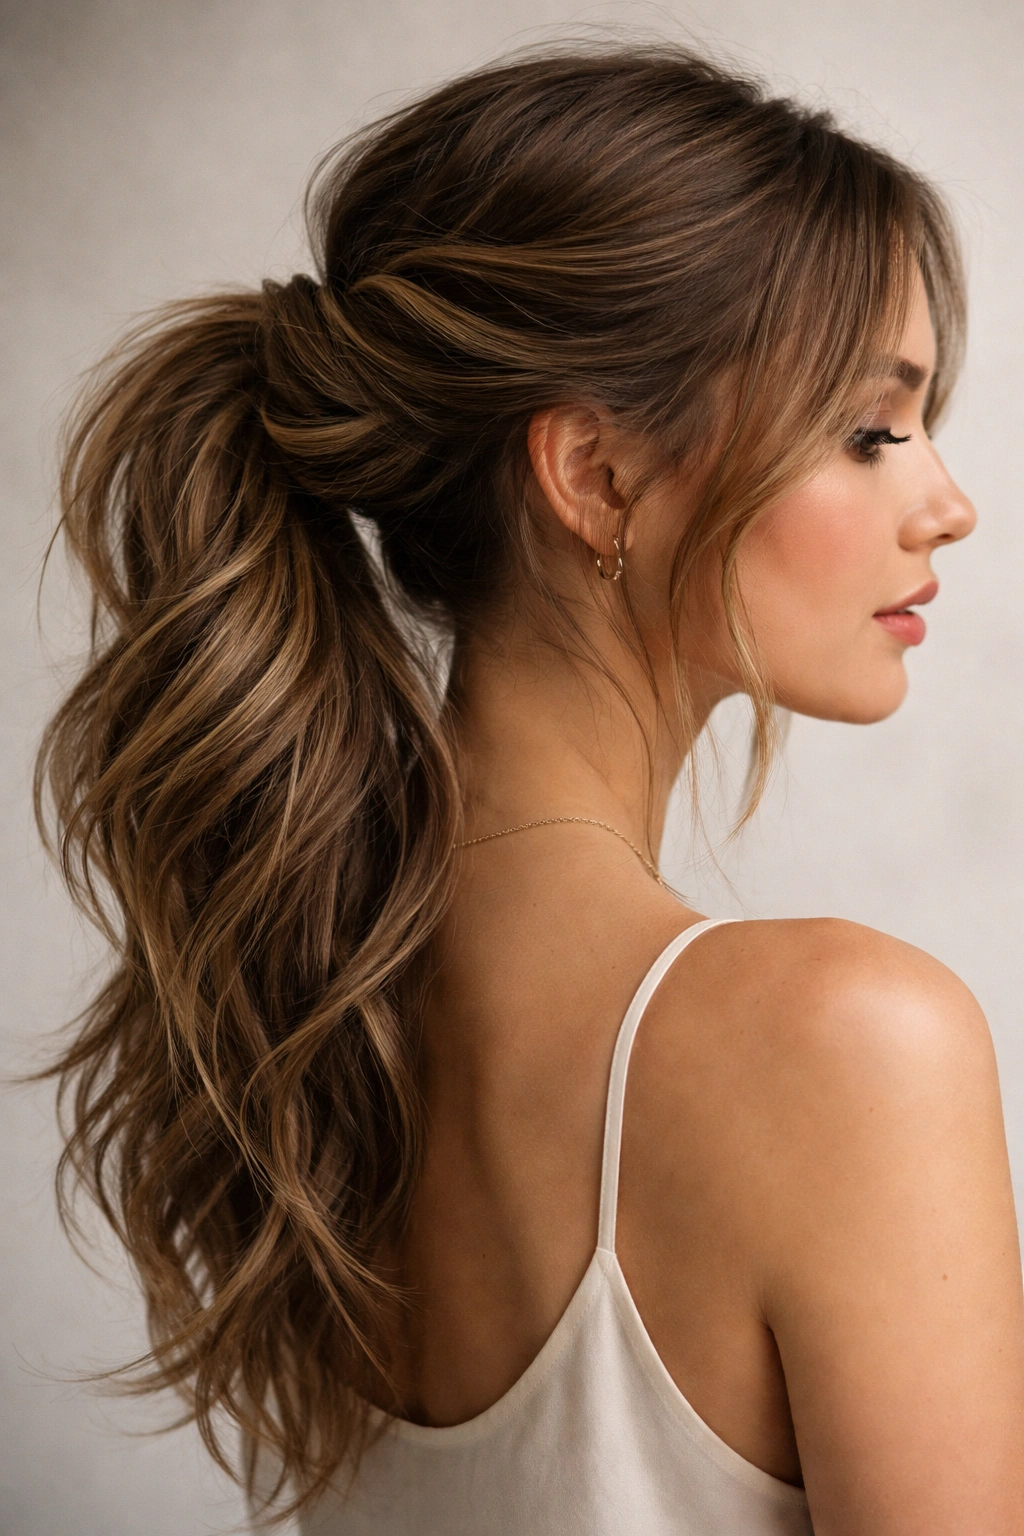
2. The Textured Low Ponytail
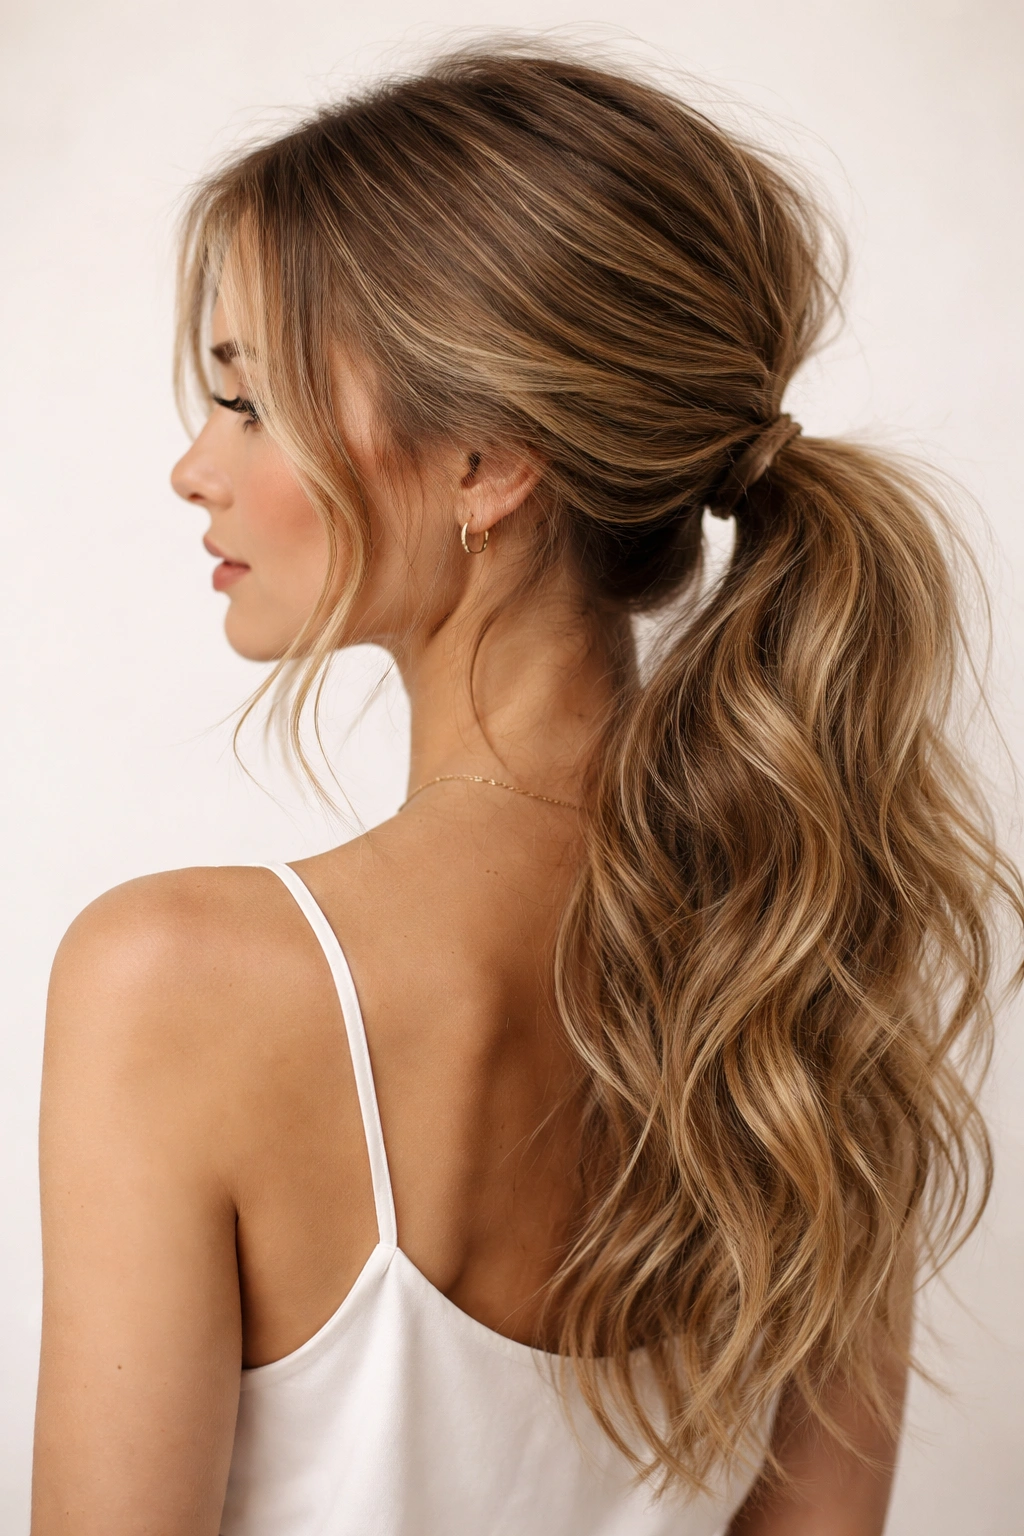
Lower ponytails read differently than high ones—they’re more sophisticated, often more professional, and they highlight the length of long hair beautifully. The textured version adds movement and interest without looking sloppy. This style works especially well if you’re heading to work, a dinner out, or anywhere you want to look put-together but not stiff.
Building Texture Into Long Hair
The secret to this style is creating texture throughout your hair before you even pull it into a ponytail. If you have naturally wavy or curly hair, you’re already halfway there. If your hair is straight, you’ll need to add some texture. Use a curling iron or wand to create loose waves throughout—aim for a mix of textures rather than uniform curls, so it reads as naturally textured rather than curled.
Alternatively, use braids to create texture. The night before, braid damp hair loosely and sleep in the braids, then undo them in the morning for waves throughout. This creates a softer, more natural texture than hot tools.
Gathering the Ponytail
Place your low ponytail at the nape of your neck, roughly where it would sit if you dropped your arms to your sides. Don’t gather it too tightly—you want it to feel secure but loose enough that texture shows through. Use a clear elastic or a thin hair tie that won’t create a harsh line. Leave a few pieces around your face loose; these should wave naturally and frame your face softly.
Styling the Finished Ponytail
Once gathered, gently pull apart sections of the ponytail to increase volume and showcase the texture you’ve created. Think of it like fluffing a pillow—you’re separating the layers slightly so texture is visible throughout. Wrap a small section around the base of the elastic, and if you want extra polish, tuck the end of that wrapped section underneath so it’s completely hidden.
3. The Wrapped Base Ponytail
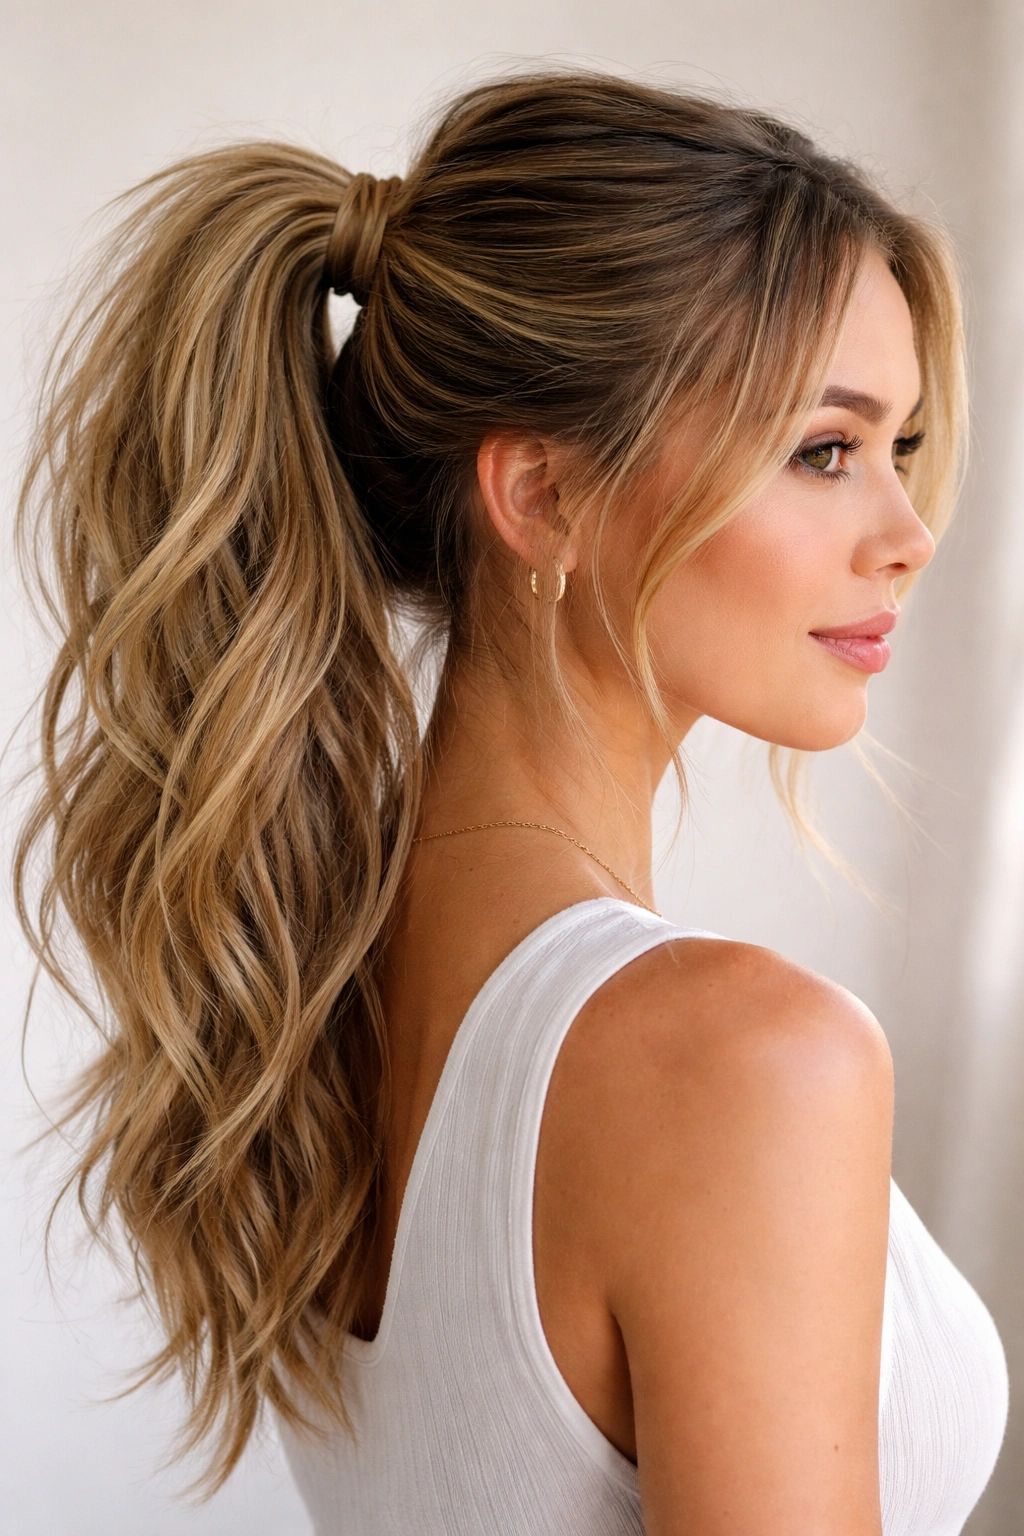
This style is all about making your ponytail look expensive and intentional through one key detail: the wrapped base. Instead of letting your hair tie show, you wrap a section of your ponytail around the elastic and secure it with bobby pins. It transforms even a simple ponytail into something that looks salon-done and carefully considered.
Creating a Secure Foundation
Gather your hair into a high or mid-height ponytail—this works at any height, though it’s particularly striking at higher placements. Use a standard elastic to secure it initially, but make sure the base is pulled snugly so it won’t slip down as you work. The wrapped section will be visible all day, so this foundation matters.
Before you do anything else, take a small horizontal section from the bottom of your ponytail—something about the thickness of a pencil or slightly thicker. This is the section you’ll wrap around the base. Curl or wave this section slightly if your hair is naturally straight; texture makes the wrap look more intentional and less uniform.
Wrapping and Securing
Wrap this section around the elastic tightly, covering it completely. As you wrap, keep the wrapped section close to the base so it looks neat and controlled. Once you’ve wrapped it around completely, secure the end with 2-3 bobby pins that match your hair color, pinning underneath so they’re hidden. You can tuck the end of the wrapped section into the ponytail itself or secure it underneath the wrap for an extra-polished finish.
Finishing Details
The wrapped section should look smooth and deliberate, like you’re intentionally framing the ponytail. If you want, you can add a small hair accessory—like a thin claw clip, a decorative bobby pin, or a small hair cuff—right at the wrapped base. This adds another layer of intentionality and gives the look a finished, styled-on-purpose quality.
4. The Tousled Side Ponytail
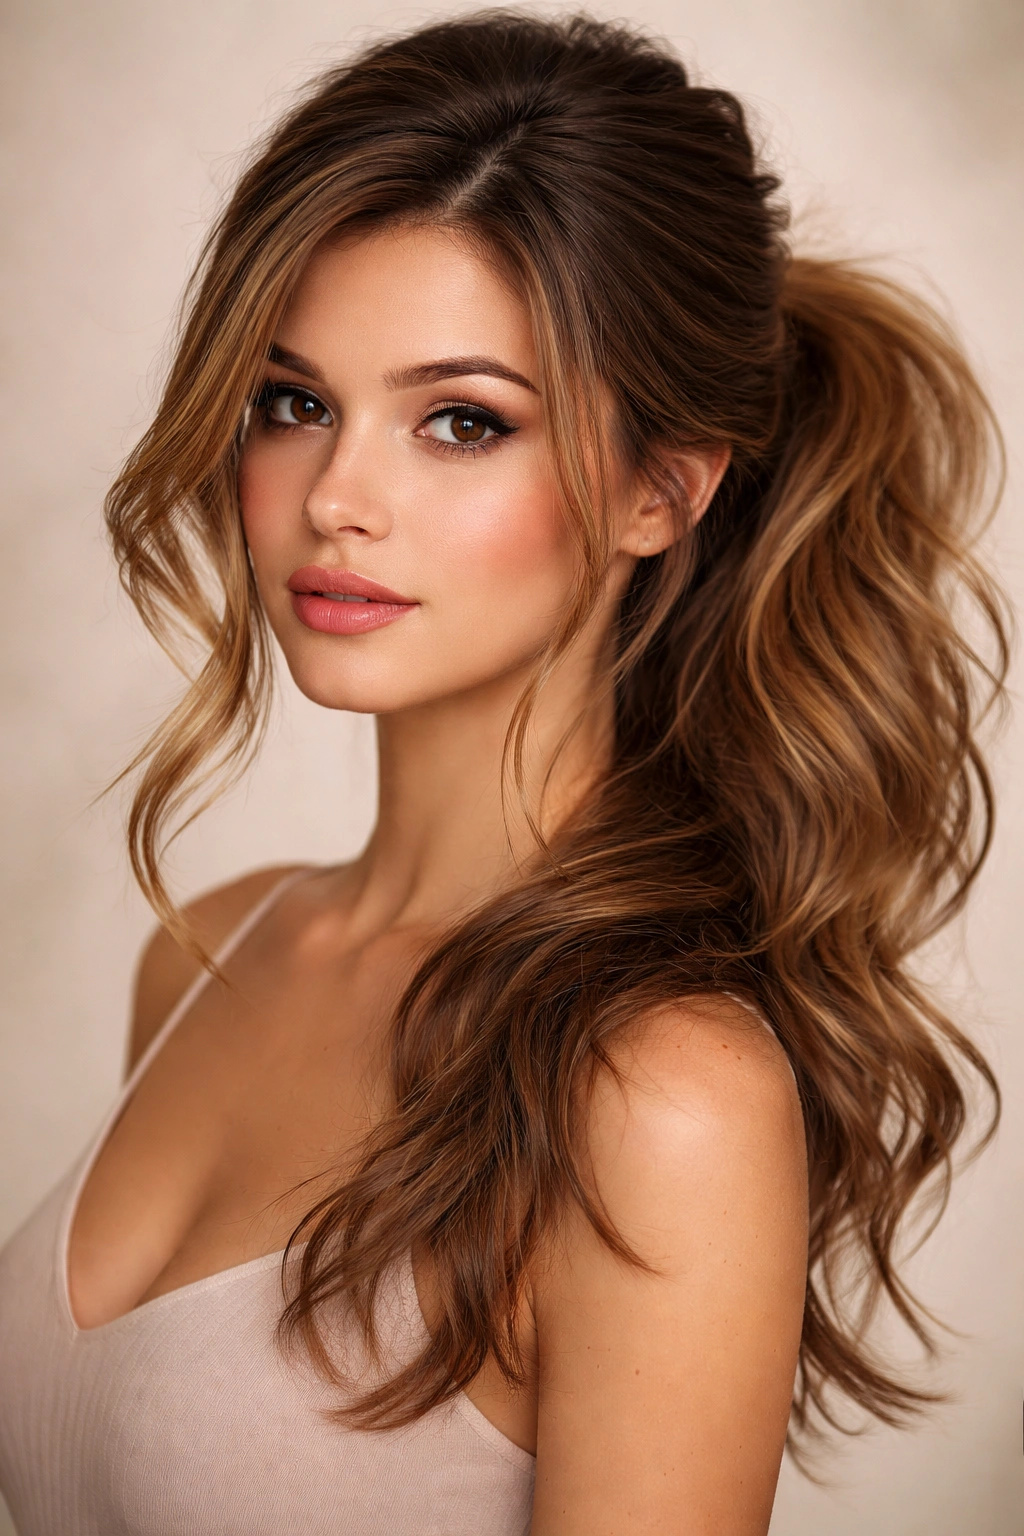
Side ponytails have a flirty, feminine quality that works beautifully with long hair. The tousled version adds texture and movement, so it doesn’t read as overly formal or styled. This is perfect for nights out, dates, or occasions where you want to look polished but approachable and relaxed.
Creating Dramatic Side-Swept Movement
Start with textured or wavy hair. If you don’t have natural texture, create it with a curling iron, wand, or braiding technique the night before. You want soft, flowing waves throughout your hair, not tight curls. This texture is essential because it creates volume on one side of your head, which is what makes a side ponytail visually interesting.
Position yourself at an angle and gather your hair to one side—typically toward your stronger side or whichever side you prefer. The ponytail should sit roughly at ear level or slightly lower, creating a dramatic drape of hair down one side of your body. Leave face-framing pieces out intentionally; these should be slightly longer than the rest of your face-frame pieces, creating asymmetry.
Building Volume and Interest
Once gathered, don’t pull it tight. Instead, gently pull and tease the gathered hair to create volume and texture in the ponytail itself. The whole point is that this looks abundant and full, not sleek. Smooth the outer layer so it’s not matted, but keep that volume and texture inside. Secure with an elastic, then wrap the base as described above.
Styling the Face-Frame
The loose pieces around your face make or break a side ponytail. Curl or wave them to match the texture in your ponytail, and position them so they frame one side of your face delicately. You want them to look intentional, not like they just escaped from your ponytail. Sweep one side more dramatically than the other if you want real asymmetrical interest.
5. The Braided Crown Ponytail
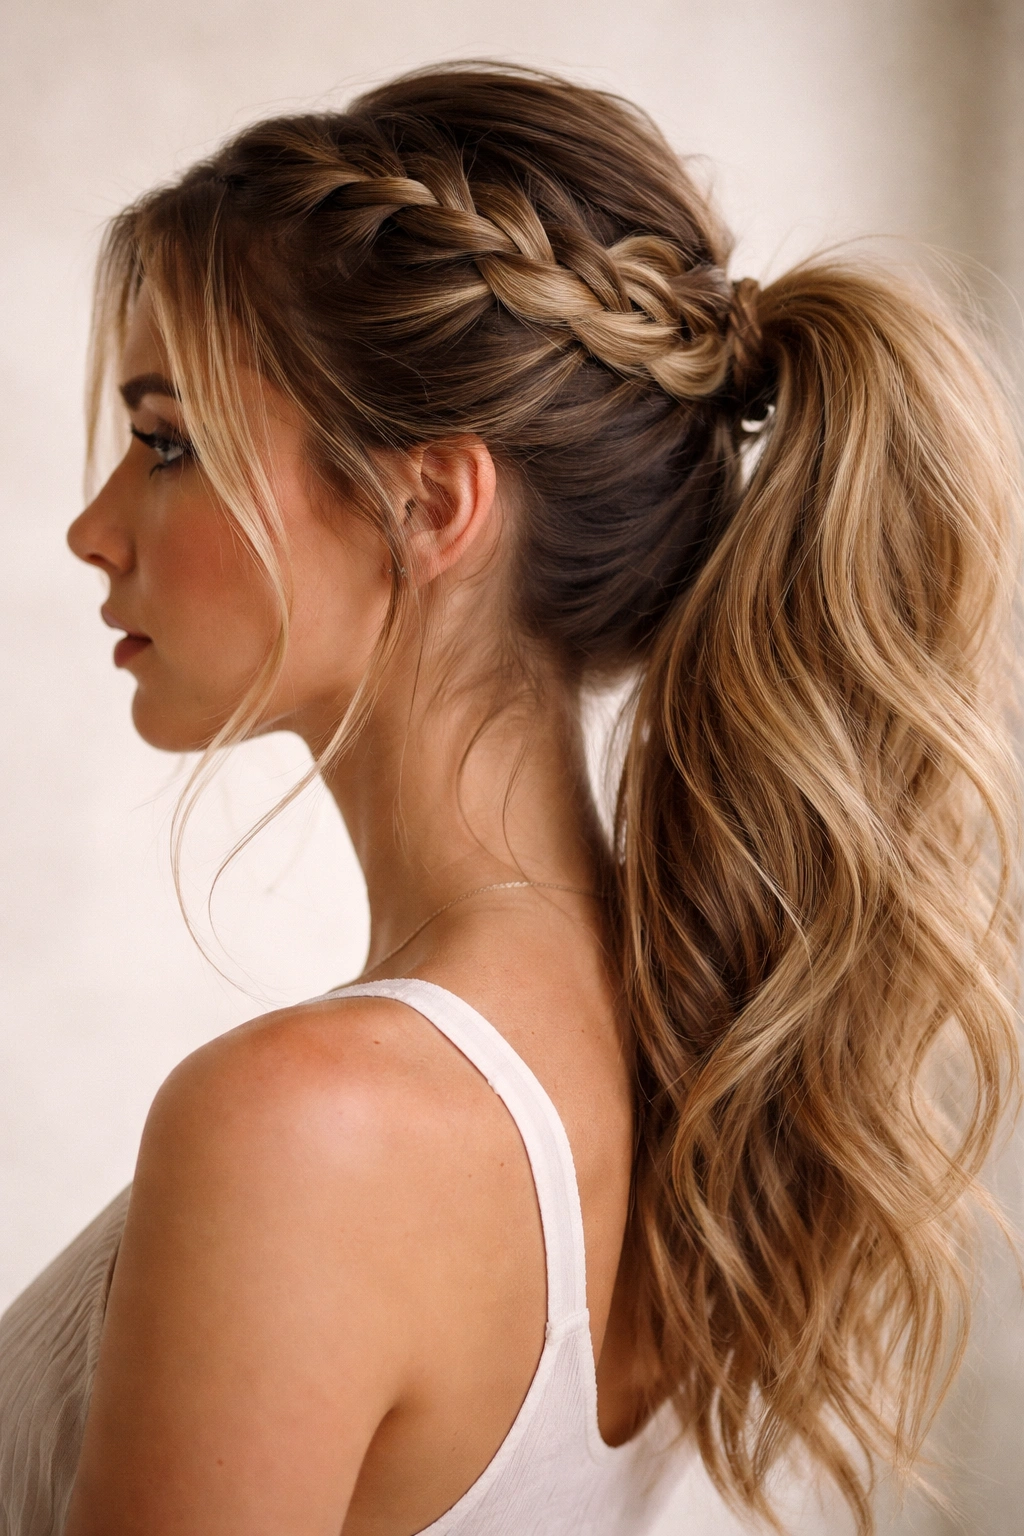
If you want to elevate your messy ponytail game, adding a braid element makes it automatically look more complex and intentional. A braided crown ponytail combines the casual vibe of a messy ponytail with the intricate details of braiding. The result is something that looks like you spent real time styling, even if the process is actually quite straightforward.
Starting the Braid
Begin on one side of your head, roughly at ear level. Take a small section of hair and start a Dutch braid (braiding under instead of over, which creates a raised, dimensional look) moving toward the back of your head. Don’t braid tightly—a loose, textured braid looks much more modern and interesting than a tight one.
As you braid, gradually incorporate more hair from your head, picking up pieces from the side you’re braiding on. This picks up volume as you move back. Continue braiding all the way to the back of your head, where you should have a substantial amount of hair incorporated into the braid.
Gathering Into a Ponytail
Once your braid reaches the back, release the braiding tension and gather all your hair (including the braid and the hair that wasn’t braided) into a ponytail. The braid should be part of the gathered hair, not a separate element. Secure everything with an elastic, and the braid will peek through the ponytail, adding visual interest and texture.
Finishing the Look
Gently pull apart the braid strands slightly to make it look fuller and less refined—this softens the look and makes it feel less formal. You can also pull gentle strands out of the braid to create flyaway-looking pieces that soften the whole style. Wrap the base of the ponytail with a small section of hair, and you’ve created a style that looks significantly more complex than the effort required.
6. The Two-Tone Faux Hawk Ponytail
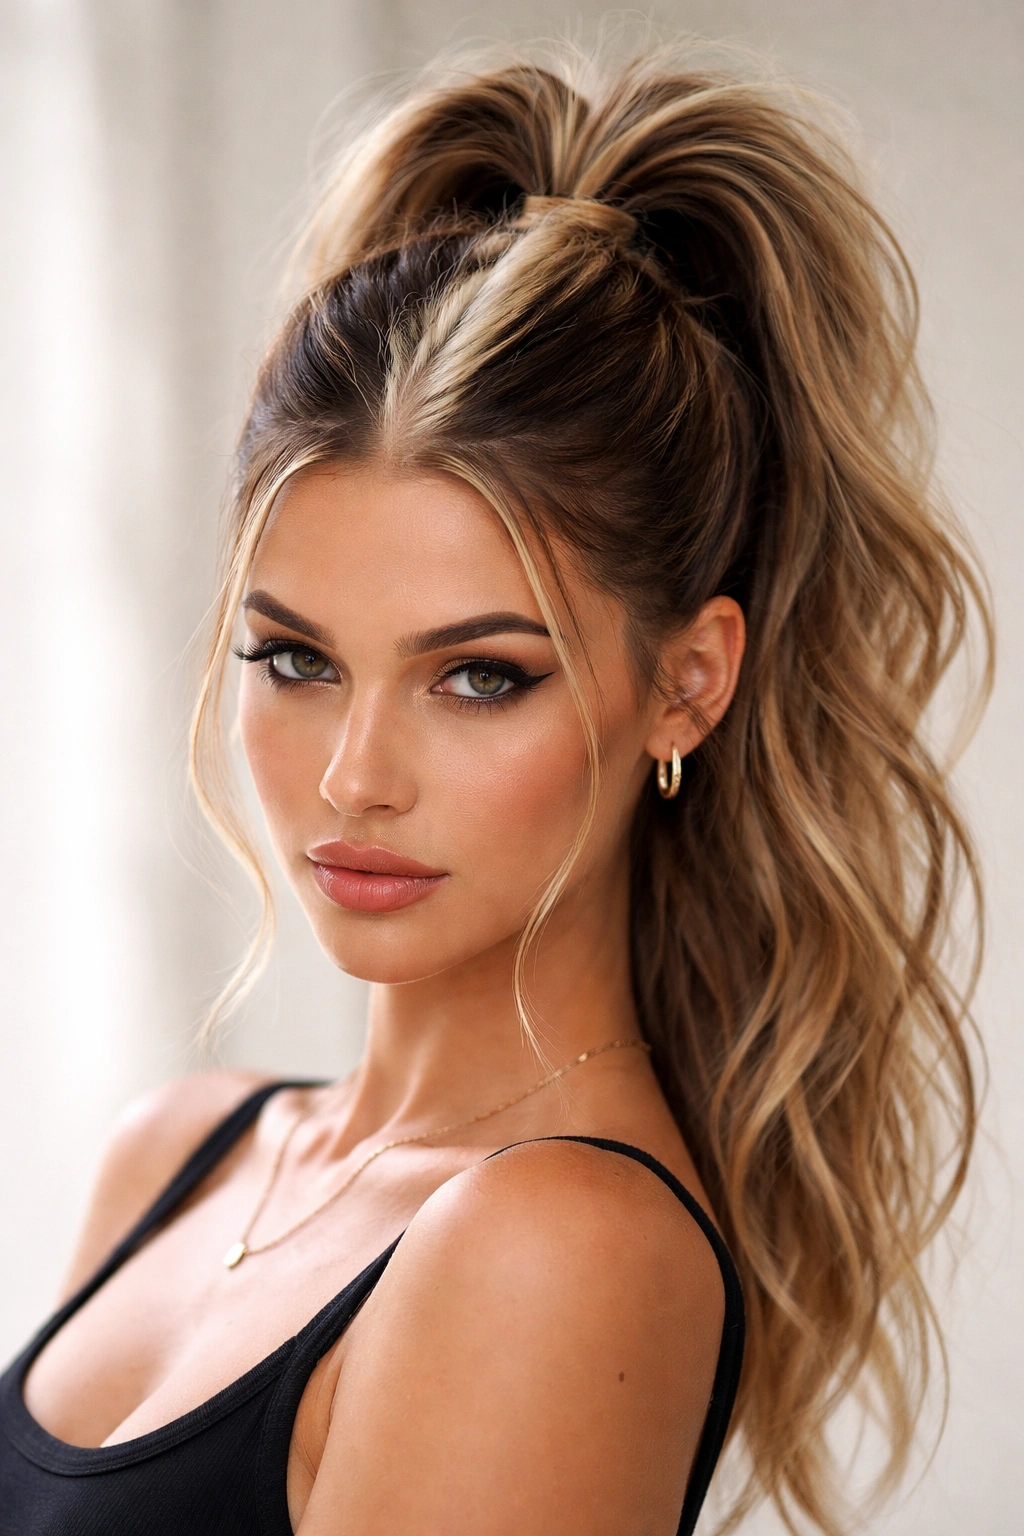
This style is for when you want to make a statement. It combines the edginess of a faux hawk with the wearability of a ponytail, creating something that’s bold but still functional and not over-the-top. The “two-tone” effect comes from alternating sections of sleek and textured hair down the center of your head.
Creating the Center Division
Start by parting your hair down the center from your forehead to the back of your head. On one side of the part, you’ll be creating sleek strands. On the other side, you’ll be creating textured, messy strands. This alternating pattern creates visual interest and a subtle stripe effect.
On the sleek side, use a smoothing serum and flatten your hair down toward the ponytail point. You want this side to look intentionally polished and smooth. On the textured side, backcomb or tease sections to create volume and roughness, then use a fine-tooth comb to smooth just the surface, leaving texture underneath.
Gathering the Ponytail
Gather all of your hair—both the sleek side and the textured side—into a high ponytail at the crown. The contrast between the two sides creates a visually striking center stripe effect. Secure with an elastic, making sure your ponytail is pulled up and back enough that the two-tone division is visible and intentional.
Polishing the Statement
Smooth the sleek side down into the ponytail. Leave the textured side slightly rough and full. Wrap the base of the ponytail, and you’ve created a style that looks bold and intentional without being over-styled or impractical.
7. The Twisted Ponytail
Twists are simpler than braids but create a similar visual interest. A twisted ponytail uses one or two twisted sections incorporated into or wrapped around a loose ponytail, creating dimension and texture that reads as effortfully styled without requiring serious skill. This works beautifully if you don’t braid or if you want something quicker to create.
Creating the Twist Foundation
Start by creating one or two twisted sections on the sides of your head. Take a section of hair from one side (roughly at temple level) and twist it loosely back toward the center back of your head. You’re not braiding—you’re simply twisting two sections of hair around each other. Don’t twist tightly; a loose twist looks modern and intentional.
If you want symmetry, create a matching twist on the other side of your head. Both twists should meet at or near the center back. Secure each twist temporarily with a small bobby pin or by incorporating it into the next step.
Building the Ponytail
Gather all your hair—including the twisted sections—into a ponytail at your desired height. The twists become part of the gathered hair. Secure with an elastic, and the twists will peek through the ponytail, adding visual texture and interest. The twists essentially give your ponytail an added element without being separate from it.
Creating the Finished Texture
Gently pull apart the ponytail sections to create volume and showcase the twists you’ve created. Pull a few small pieces out of the twists to soften them and create a less-uniform, more organic look. Wrap the base with a section of hair, and you’ve created a style that looks intricately styled.
8. The Sleek-Meets-Messy Hybrid Ponytail
Sometimes the best look is about contrast. The sleek-meets-messy ponytail creates visual interest by keeping the crown smooth and controlled while the gathered ponytail itself is tousled and textured. This works for professional settings where a completely messy ponytail might feel too casual, but you still want personality and movement.
Smoothing the Crown
Smooth your hair down from your crown toward where your ponytail will gather. Use a smoothing serum or light cream, and ideally blow-dry your hair straight or with minimal texture in this area. The crown should look intentionally sleek and polished. You can create a center part or a side part for added intention.
Creating Texture in the Ponytail
Gather your hair into a ponytail, but before securing, tease the hair you’re about to gather to create texture and volume. This means backcomb it gently, or use a teasing spray for more grip. The result is a ponytail that looks full and textured even though the crown is sleek.
Styling the Gathered Section
Once secured, gently pull apart the ponytail to create even more volume and showcase the texture you’ve built. Smooth only the outer layer so it doesn’t look matted, but leave the interior textured and full. Wrap the base with a smooth section, and the contrast between the sleek crown and the full, textured ponytail becomes the main visual feature.
9. The Bubble Ponytail
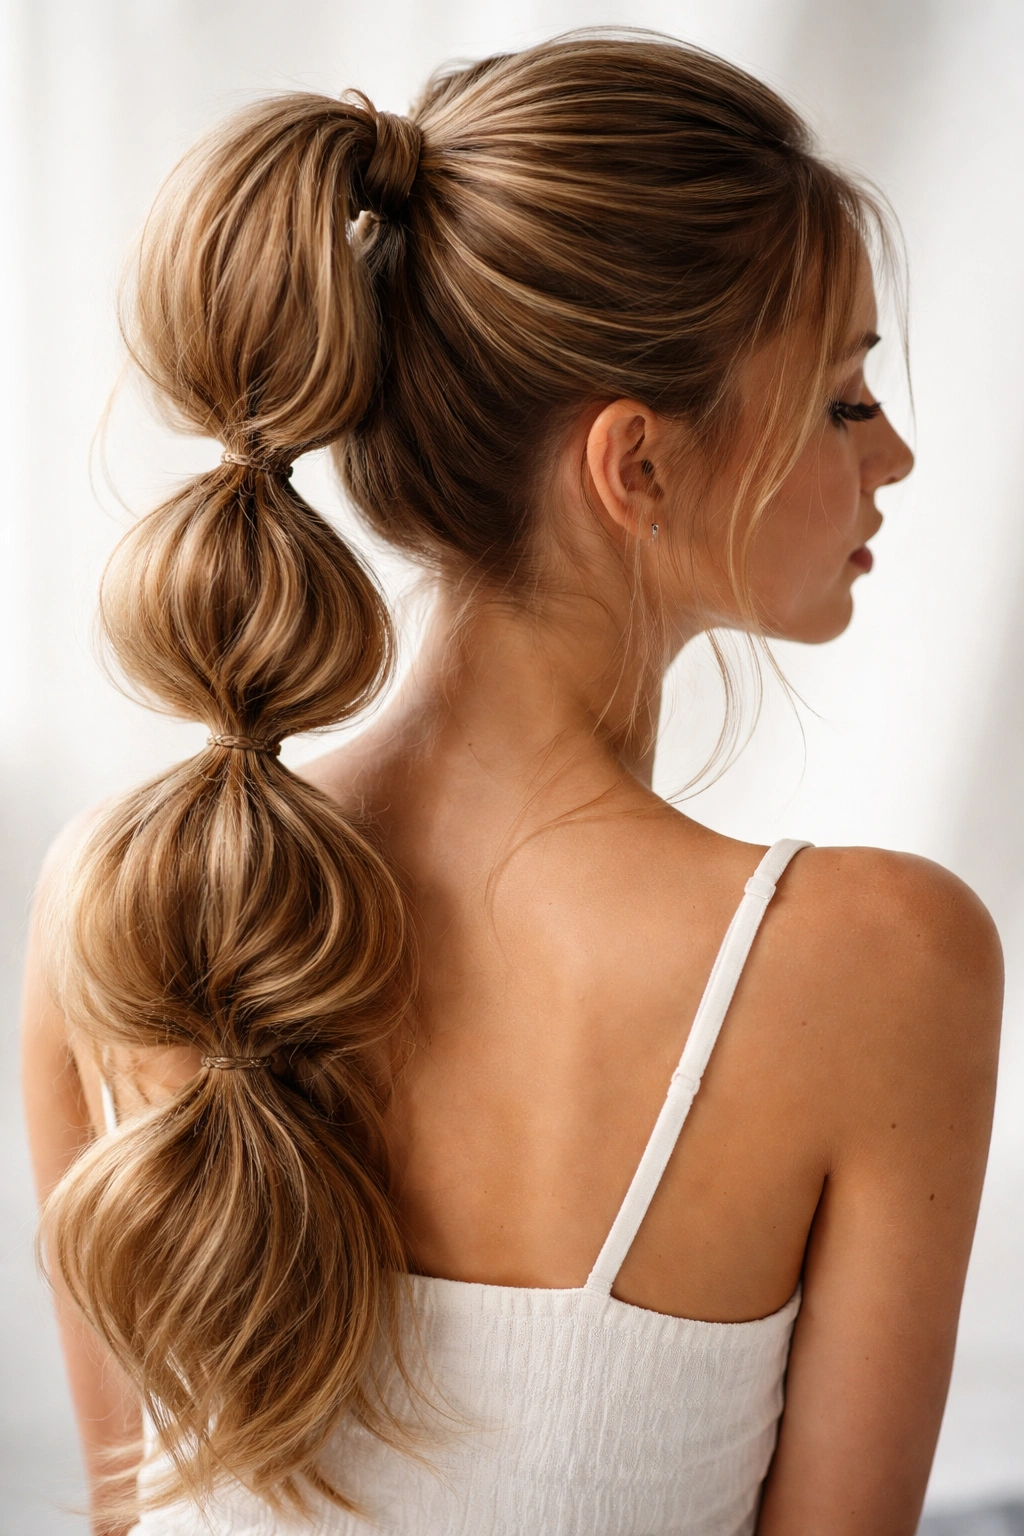
Bubble ponytails have a playful, youthful quality that works beautifully on long hair. Instead of one continuous ponytail, you create a series of gathered sections down the length of your hair, each secured with its own elastic, creating bubble-like pouches of hair. It’s more fun than messy, but the tousled styling within each bubble keeps it from looking too polished.
Creating the First Bubble
Gather your hair into a high ponytail and secure it with an elastic. This is your first bubble. Instead of leaving it as a simple ponytail, gently pull and tease this first section to create texture and volume. Smooth the outer layer so it’s not ratty, but keep the interior full.
Building Subsequent Bubbles
About 3-4 inches down from your first elastic, gather all the hair (including the first ponytail) into a second ponytail and secure with another elastic. Gently pull this section apart to create texture and volume, just like your first bubble. Repeat this process down the length of your hair, spacing bubbles roughly 3-4 inches apart. Each bubble should be tousled and textured.
Styling Tips
The more you pull apart and tease each bubble, the fuller and more intentional they look. Make sure each bubble has actual volume—they should puff out slightly from your head, not lie flat. If you want extra texture, curl the ends of your ponytail after you’ve created all your bubbles. This creates a playful, dimensional look.
10. The Half-Messy Ponytail
The half-up, half-down style is all about balance. You’re pulling back the top half of your hair into a loose, textured ponytail while leaving the bottom half down and flowing. This works beautifully on long hair because it shows off length while keeping hair off your face and neck. It’s casual enough for everyday but polished enough for going out.
Gathering the Top Section
Take the top third to half of your hair and gather it at the crown. Don’t pull it too tightly; this should be a loose gathering that maintains the casual vibe. The gathering point should be at the very top of your head or slightly toward the back, depending on whether you want a more forward or more traditional placement.
Tease this gathered section to create texture and volume. Smooth the outer layer so it’s not matted, but keep plenty of texture inside. Secure with an elastic, making sure it’s secure enough not to slip but loose enough that texture shows through.
Styling the Gathered Section and Face-Frame
Wrap the base with a small section of hair for a polished finish. Pull a few pieces out from the gathered section to create face-framing, and let these pieces wave or curl naturally. The bottom half of your hair should be left down and, ideally, textured or wavy. Curl the ends slightly if they’re not already textured, creating flow and dimension.
Creating Visual Interest
The contrast between the gathered, tousled top and the flowing, wavy bottom is what makes this style work. Make sure the gathered section has actual volume and texture—it shouldn’t look like you just pulled your hair back. And make sure the bottom half is flowing and has movement, not just hanging flat.
11. The Curly Texture Ponytail
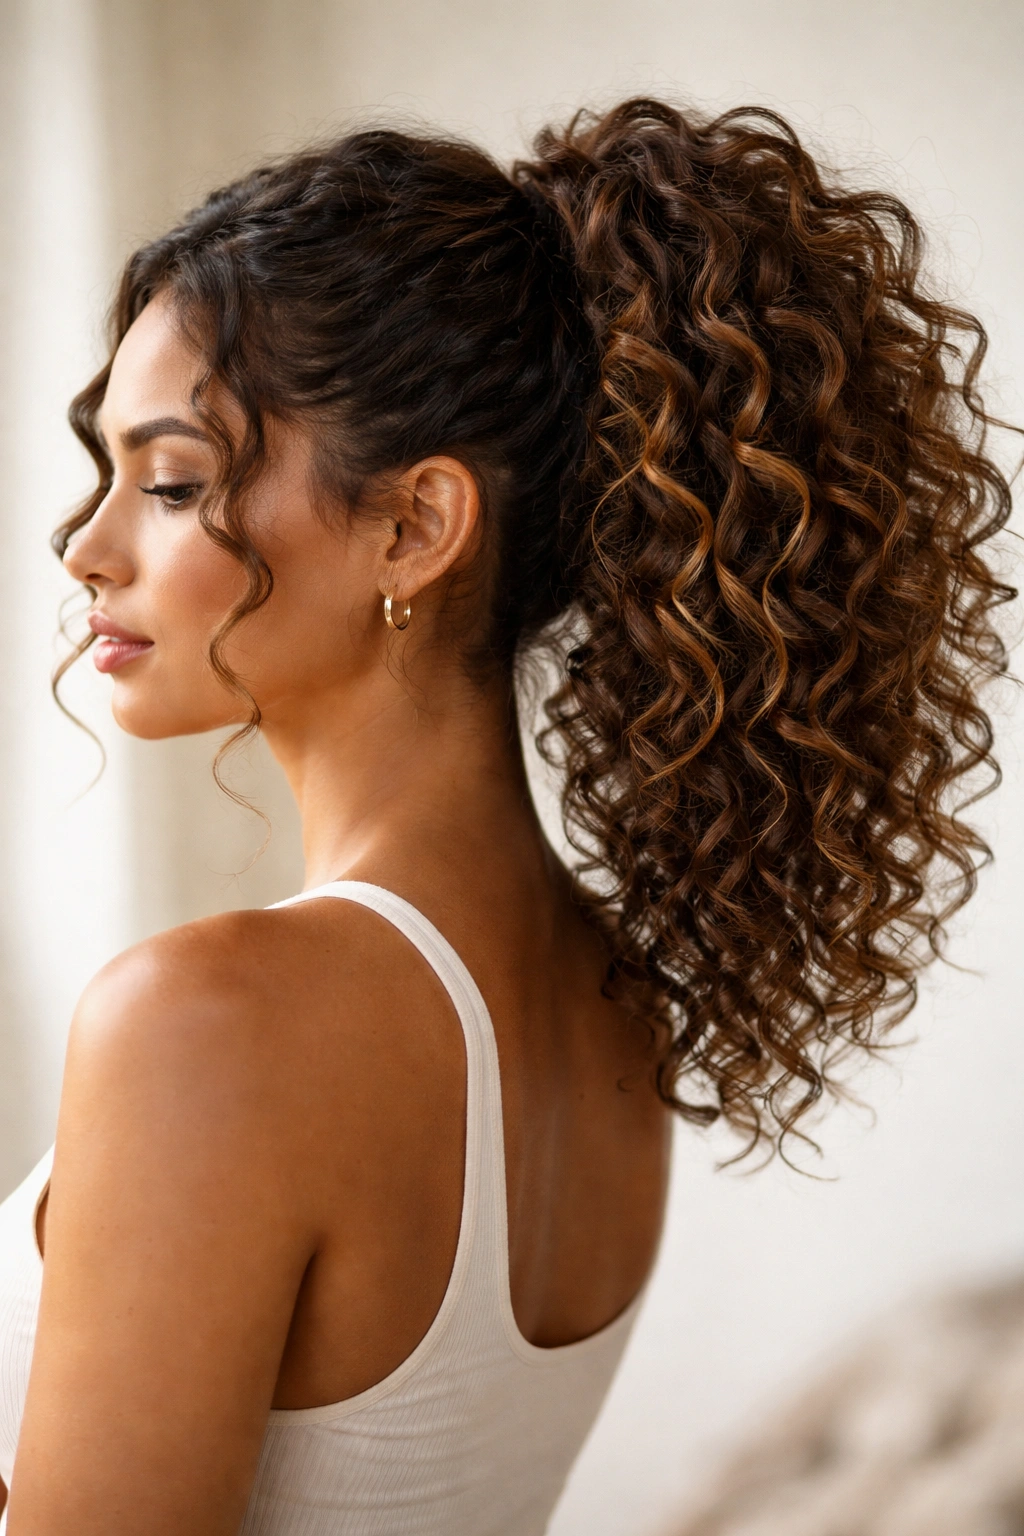
If you have curly or coily hair (or if you create curls on straighter hair), a curly texture ponytail is your secret weapon. Instead of fighting your texture, you’re leaning into it completely. The result is a ponytail that looks voluminous, intentional, and celebrates the natural movement of your hair.
Preparing Curly Hair
If you have naturally curly hair, start by enhancing your curl pattern. Use a curl-defining cream or gel, and either air-dry or diffuse your hair to bring out your curl pattern. You want your curls to be as defined and bouncy as possible. If you’re creating curls on straighter hair, use a curling iron or wand to create curls throughout, then scrunch and separate them slightly so they’re not uniform.
Gathering Into a Ponytail
Gather your curly hair into a high or mid-height ponytail. Don’t pull it too tightly—curly hair benefits from a looser gathering that allows texture and volume to show through. Secure with an elastic, being careful not to crush your curls as you secure.
Showcasing the Curl
The magic here is gently separating and fluffing your curls once they’re gathered. Use your fingers to gently pull apart sections of the curly ponytail, creating more volume and showcasing the individual curl pattern. Avoid using a brush or comb, which will disrupt your curl pattern and create frizz.
Wrap the base with a smooth section of hair, or wrap with a curly section for a more textured look. Secure with bobby pins, and you’ve created a ponytail that looks full, intentional, and celebrates your hair’s natural (or created) texture.
12. The Tucked and Pinned Ponytail
This final style is for when you want something that looks intricate and carefully constructed. Instead of a traditional ponytail, you’re creating texture and gathering through strategic tucking and pinning—layering small twisted or braided sections and securing them with bobby pins to create a shape that’s ponytail-adjacent but more sculptural and intentional.
Creating Texture Sections
Start by creating several small twisted or braided sections around your head. These don’t need to be symmetrical or uniform—in fact, the more organic and varied they are, the better. You can have two twists on the sides, a small braid in the back, and some loose, textured sections left out. Each section should be secured temporarily with a bobby pin.
Tucking and Pinning
Gradually tuck the ends of each section underneath the layer below it, creating a layered, tucked effect that looks like an elaborate updo or a very constructed ponytail. Each section tucks under or into the next, and you secure everything with bobby pins that match your hair color. This creates a shape that’s held together by strategic pinning rather than a single elastic.
Building the Final Shape
As you add each tucked section, the overall shape becomes more apparent. You’re creating a silhouette that’s fuller at the crown and gradually narrower toward the nape, with texture and dimension throughout. Make sure every section is secure—this style requires more pins than a traditional ponytail, but it’s worth it for the intricate, intentional look.
Adding the Finishing Touch
Leave some pieces out around your face to soften the look, and make sure any visible bobby pins are matched to your hair color. This style works beautifully with a few pieces framing your face and softening the overall structure.
Final Thoughts
Messy ponytails for long hair aren’t actually about looking like you didn’t try—they’re about creating intention, texture, and personality in a style that’s still functional and wearable. Whether you choose the effortless undone version, the braided crown style, the bubble ponytail, or the more intricate tucked and pinned option, the key is understanding your hair type, knowing which techniques create the texture you want, and being intentional about which pieces you leave out or emphasize.
The beauty of long hair is that you have the canvas to experiment. A messy ponytail can be casual or professional, playful or sophisticated, textured or sculptural—it all depends on which style you choose and how you style it. Start with the styles that appeal to you most, practice the technique until it feels natural, and then experiment with variations. Mix elements from different styles—add a twist to your undone ponytail, create a half-up version of the braided crown style, or wrap the base of your bubble ponytail for extra polish.
The most important thing is that your messy ponytail should feel good to wear, stay secure throughout your day, and make you feel confident and put-together. Once you master a couple of these styles, you’ll have go-to options for any occasion, and you’ll understand the underlying techniques well enough to create variations that feel uniquely yours.