The messy bun gets a bad reputation—people assume it’s what you wear when you’ve given up on your hair. But that’s a fundamental misunderstanding of what a great messy bun actually is. The difference between a bun that looks like you literally rolled out of bed and one that looks intentionally undone is surprisingly small, and it all comes down to strategic texture, purposeful placement, and knowing which parts to keep somewhat structured. The best messy buns sit at that sweet spot where they look effortlessly put-together, like you spent two minutes instead of twenty—even though you absolutely did.
What makes a messy bun read as “polished casual” instead of just “messy” is the foundation you build before you even begin twisting and tucking hair. The texture you add, the face-framing pieces you leave out, and the way you deliberately loosen specific sections all work together to create a look that reads as intentional rather than accidental. This is why messy bun tutorials that simply tell you to “rough it up” miss the mark completely—that approach leads to a lumpy, unbalanced result. The best messy buns follow an actual framework: you decide what level of “messy” works for your face shape and hair type, you prep your hair correctly, and you style with precision before you make it look imprecise.
The versatility of the messy bun is one of its greatest strengths. You can wear one to the gym, to brunch, to the office if your workplace is casual-leaning, or even out on a casual date night if you style it well. It works with every face shape when you adjust where the bun sits and which pieces you pull out. It’s equally at home on fine hair (where a tight bun would look sparse) and thick hair (where a tight bun would be impractical). Whether you’re heading into your workday, running errands, or meeting friends, there’s a messy bun variation here that will look like you put genuine thought and care into how you look—while still feeling comfortable and wearable.
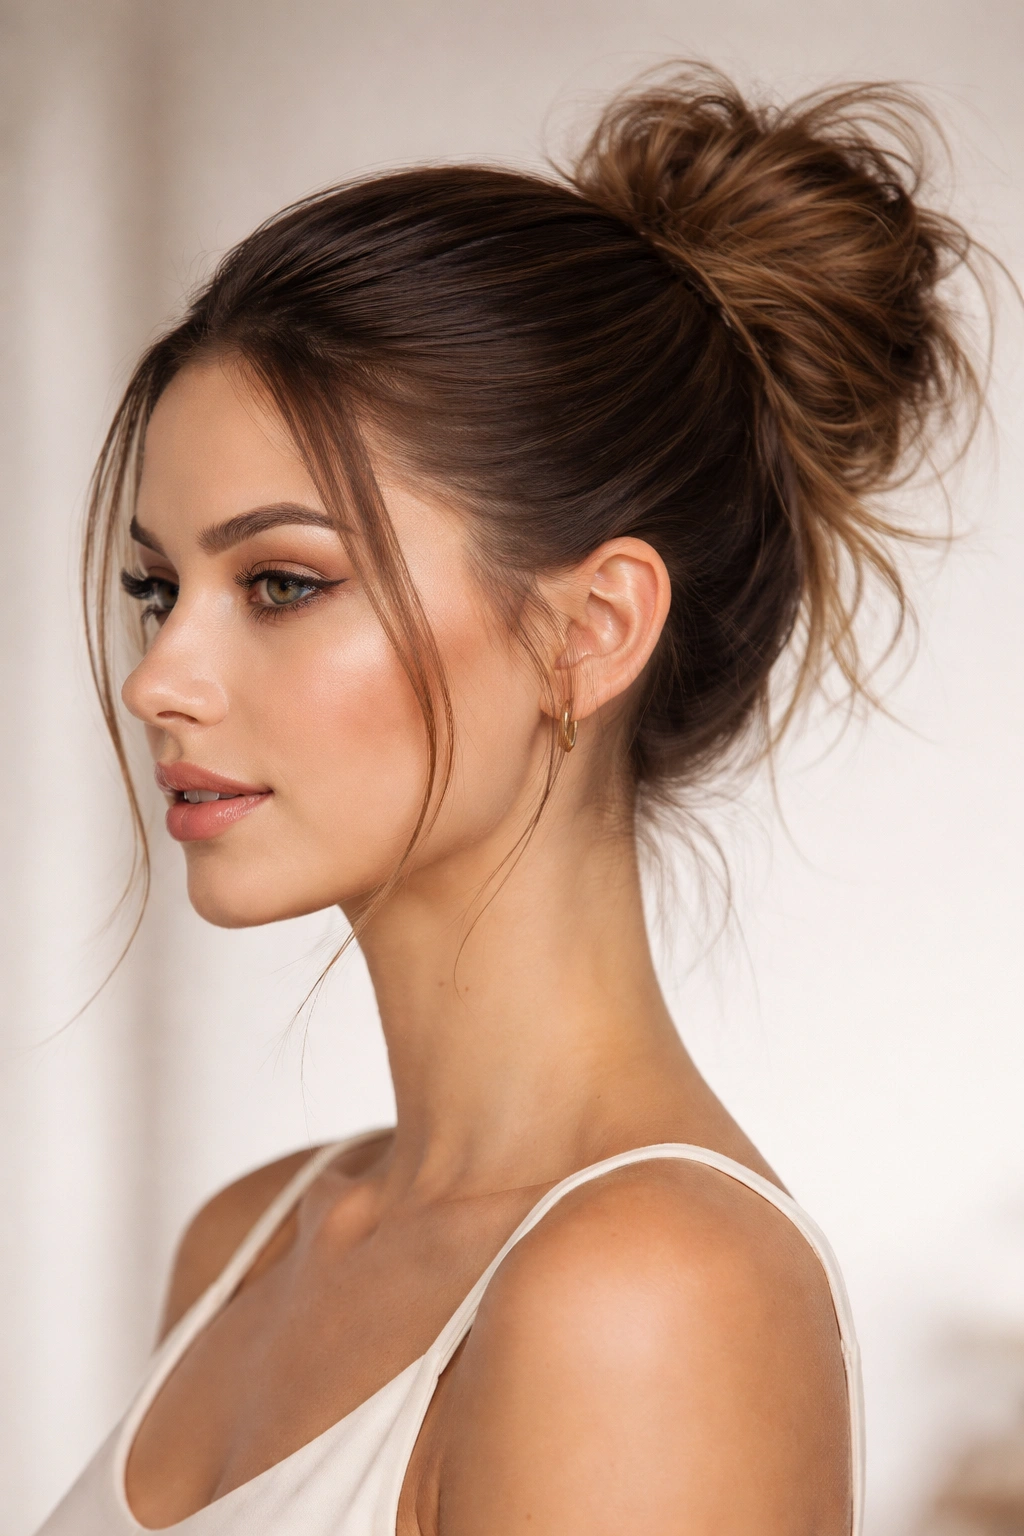
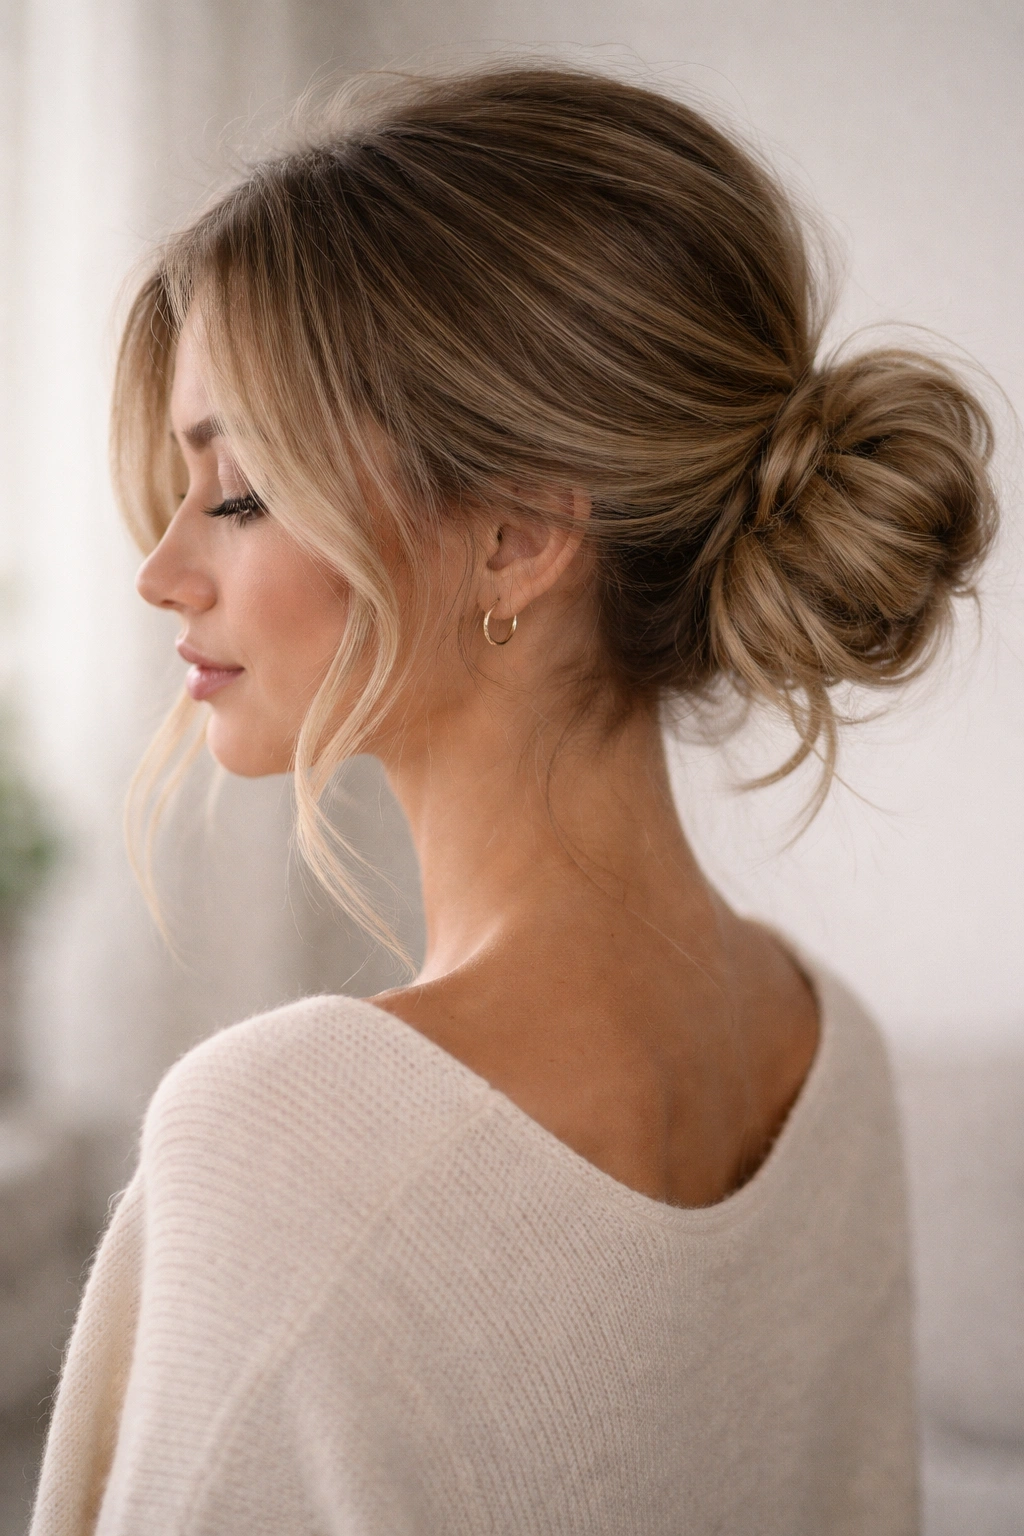
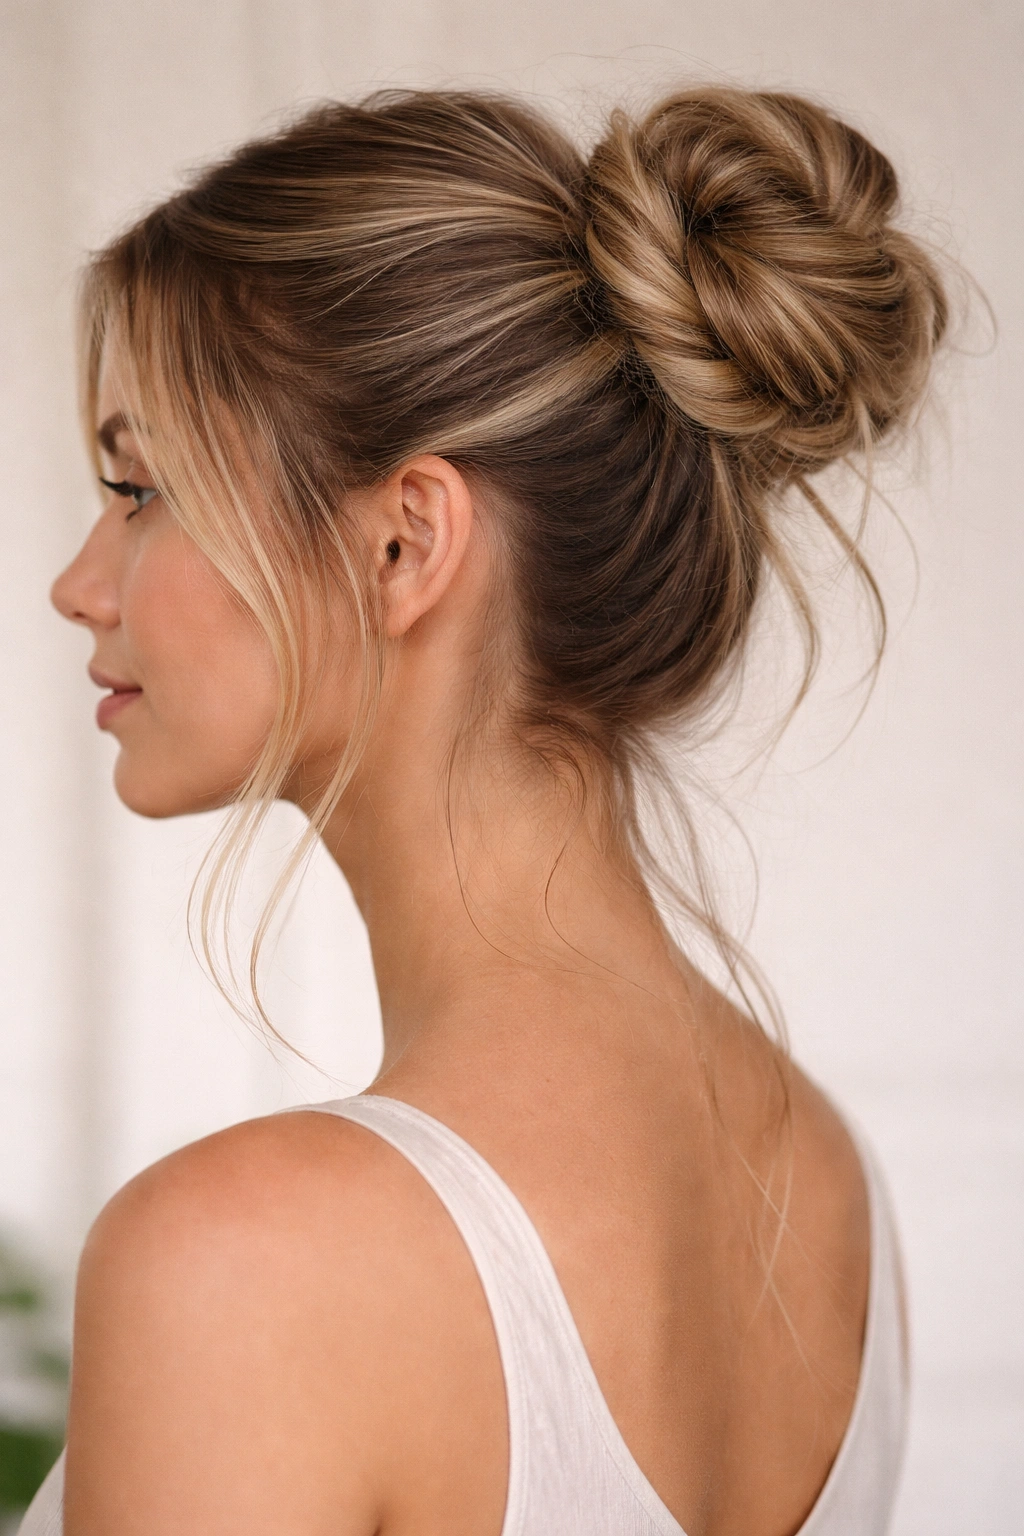
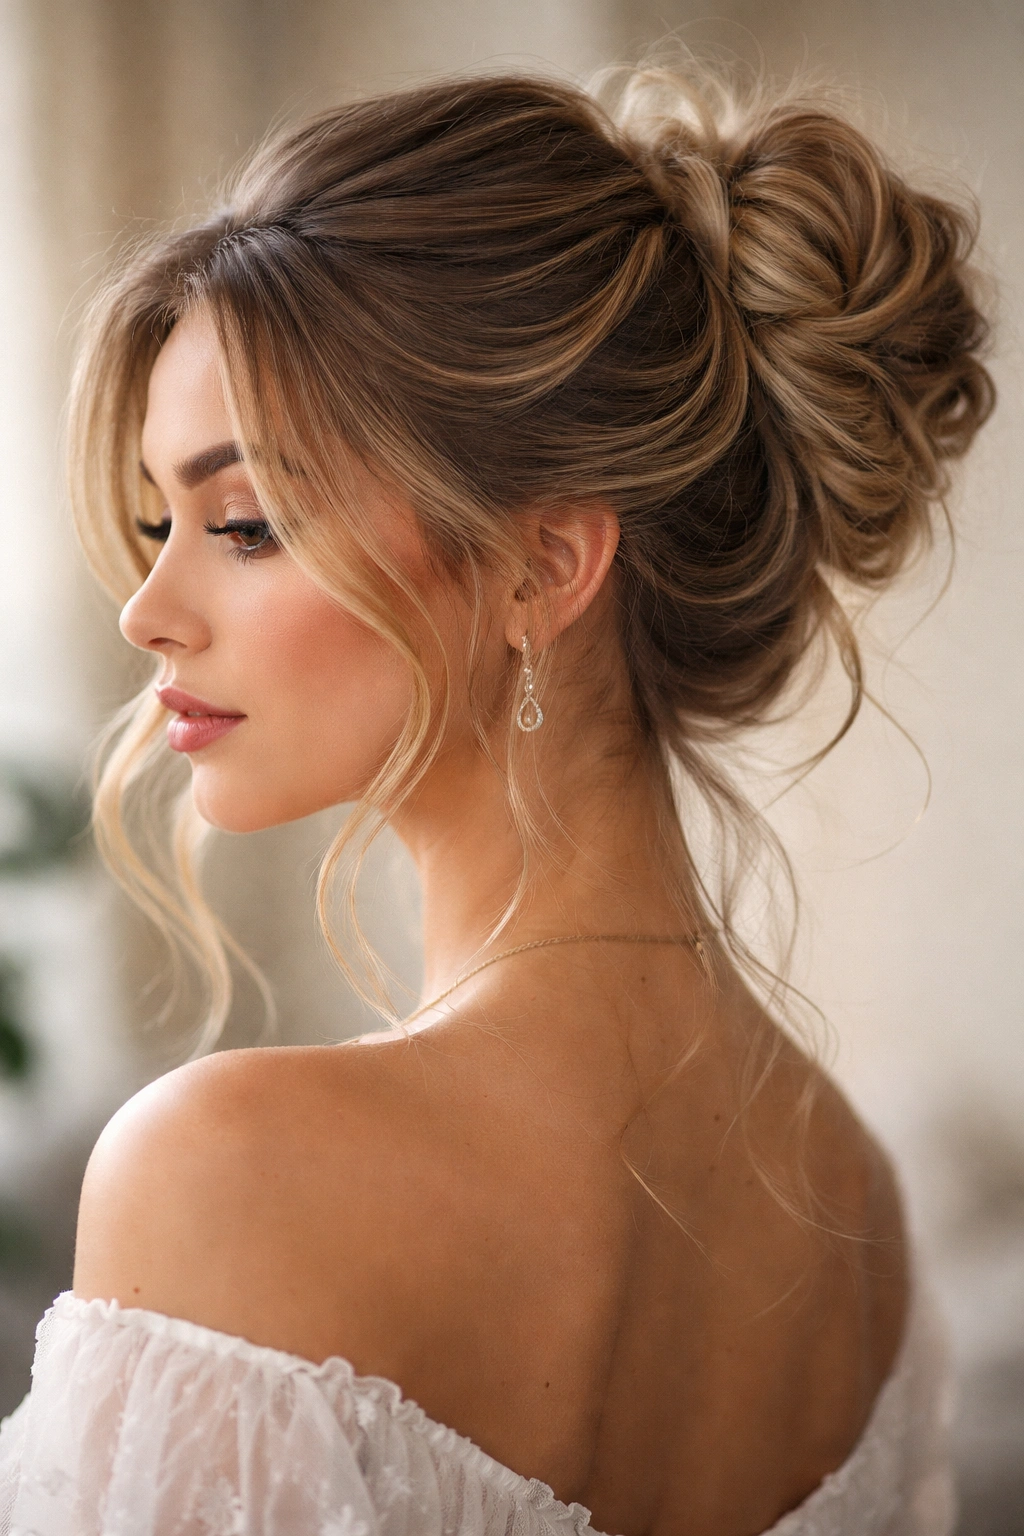
1. Classic Messy High Bun with Face-Framing Pieces
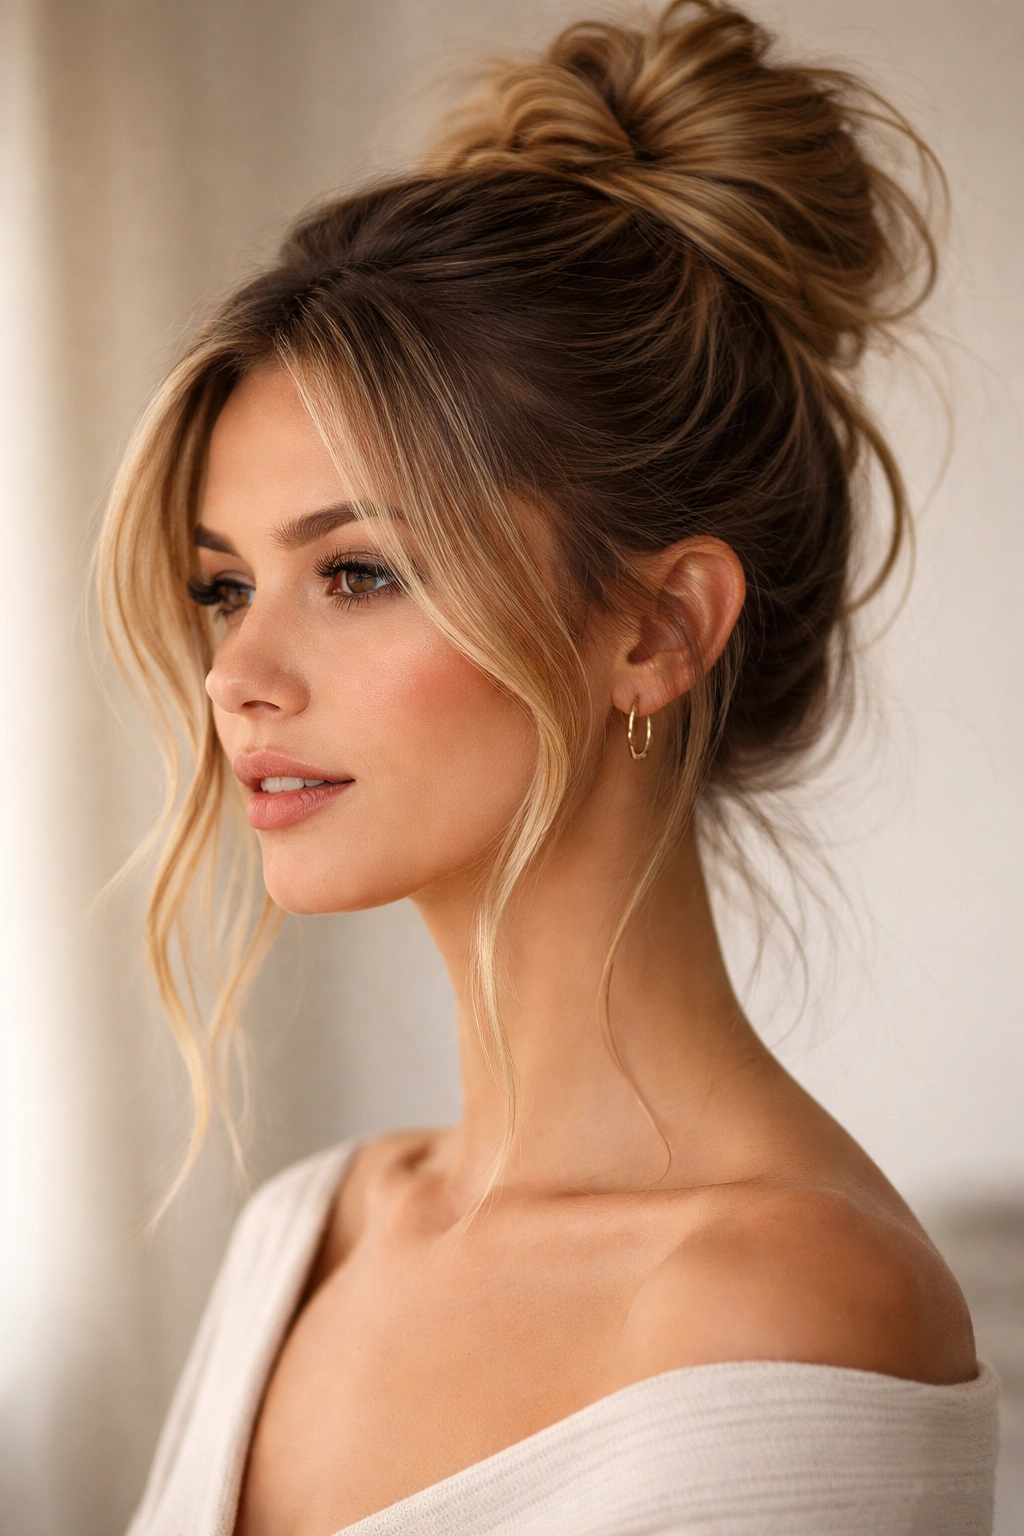
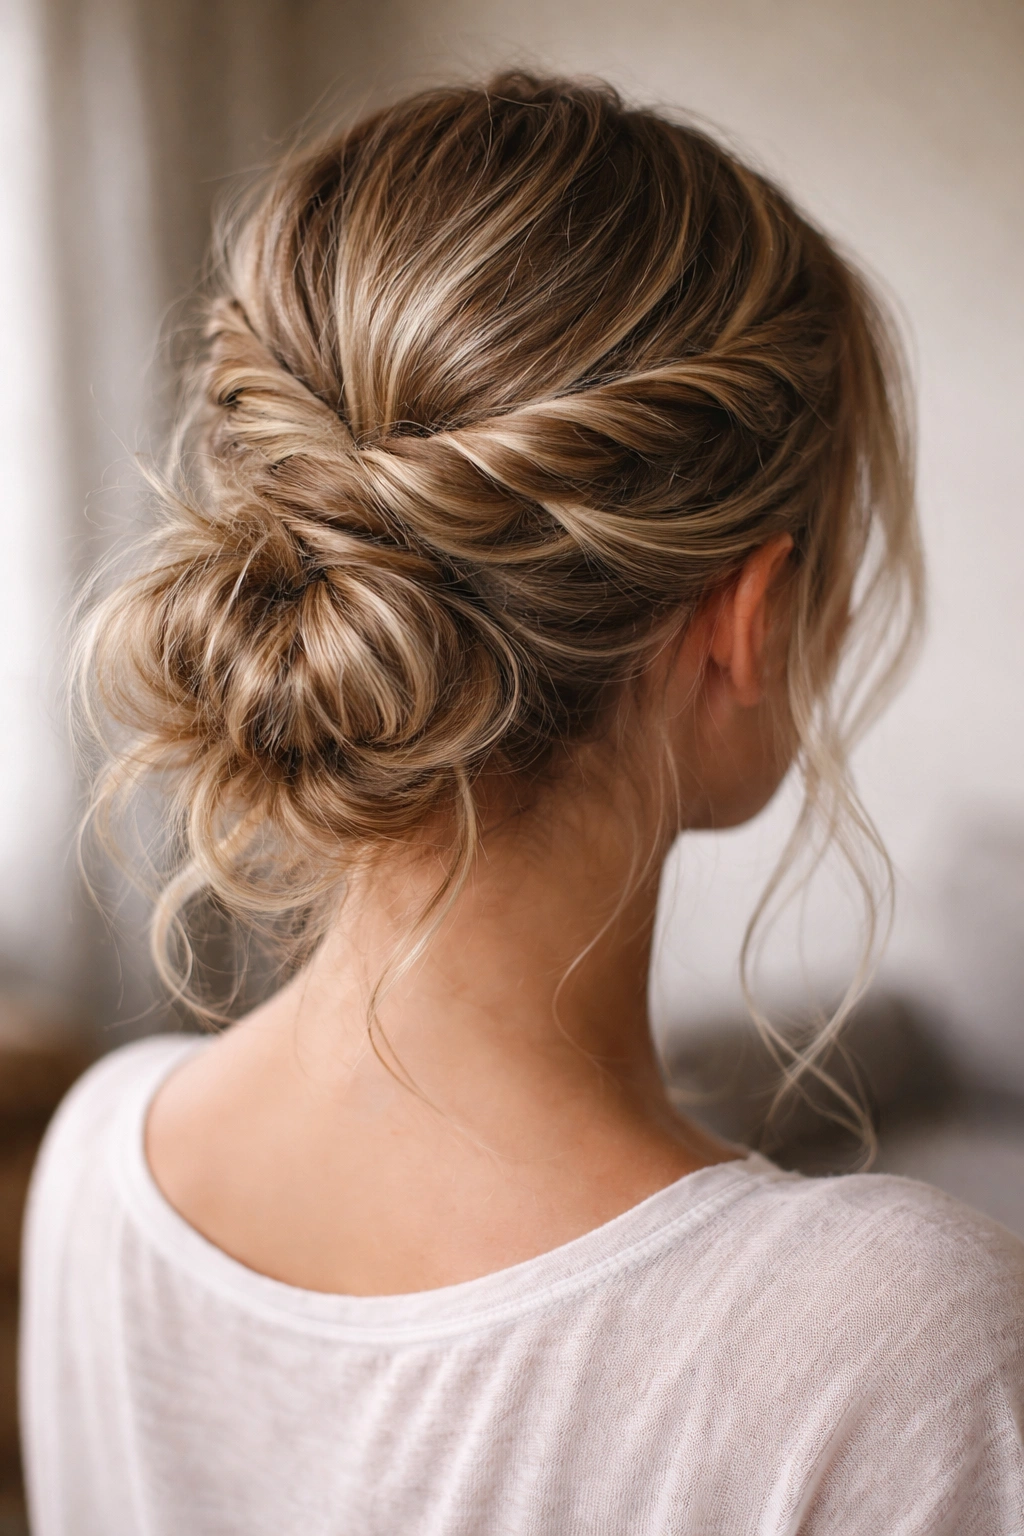
The high bun is the foundation of almost every great messy style—it’s elevated, it keeps hair off your face, and it’s surprisingly flattering on most face shapes when you do it right. This version works because you’re not trying to hide the texture; you’re celebrating it. The face-framing pieces are crucial: they soften the look around your cheekbones and jawline, making a high bun feel less severe and more intentionally romantic. This is the messy bun that works everywhere, from a coffee run to a casual dinner, because it reads as put-together without trying too hard.
How to Create the Framework
Start with hair that has at least a day or two of texture—second-day hair is ideal because it holds a bun structure much better than freshly washed, slippery hair. If your hair is freshly washed, apply a light texturizing spray or dry shampoo at the roots before you start styling. Flip your head upside down and brush all your hair up into a high ponytail at the crown, securing it with a small elastic. Before you twist the ponytail, pull out a small section of hair on each side of your face at ear level—these will be your face-framing pieces that you’ll keep slightly separated from the main bun.
Building the Intentional Texture
Once you have your high ponytail secured, twist the entire tail loosely and begin wrapping it around the base of the elastic in a circular motion, tucking the ends under as you go. Don’t aim for a perfectly smooth wrap; in fact, let the twist show slightly in places and allow bits of the ponytail to stick out organically. Pin everything down with bobby pins that match your hair color. Now for the magic part: using your hands, gently pull and tease out small sections of the bun to create deliberate texture and volume. You’re not trying to make it look falling-apart; you’re making it look three-dimensional and lived-in.
Key styling details:
- Use a fine-tooth comb to tease gently at the base of your high ponytail before twisting—this creates grip and prevents slipping
- Keep the face-framing pieces slightly twisted or waved with a curling iron for a polished contrast against the texture of the bun
- Finish with a light texturizing spray or flexible-hold hairspray that sets without stiffening
- If you have a baby-hair issue at your hairline, tame those pieces with a small amount of gel on the very tip of your finger
- The bun should look like it has actual volume and dimension when viewed from the side, not like a flat disk
2. The Textured Low Bun with Braided Detail
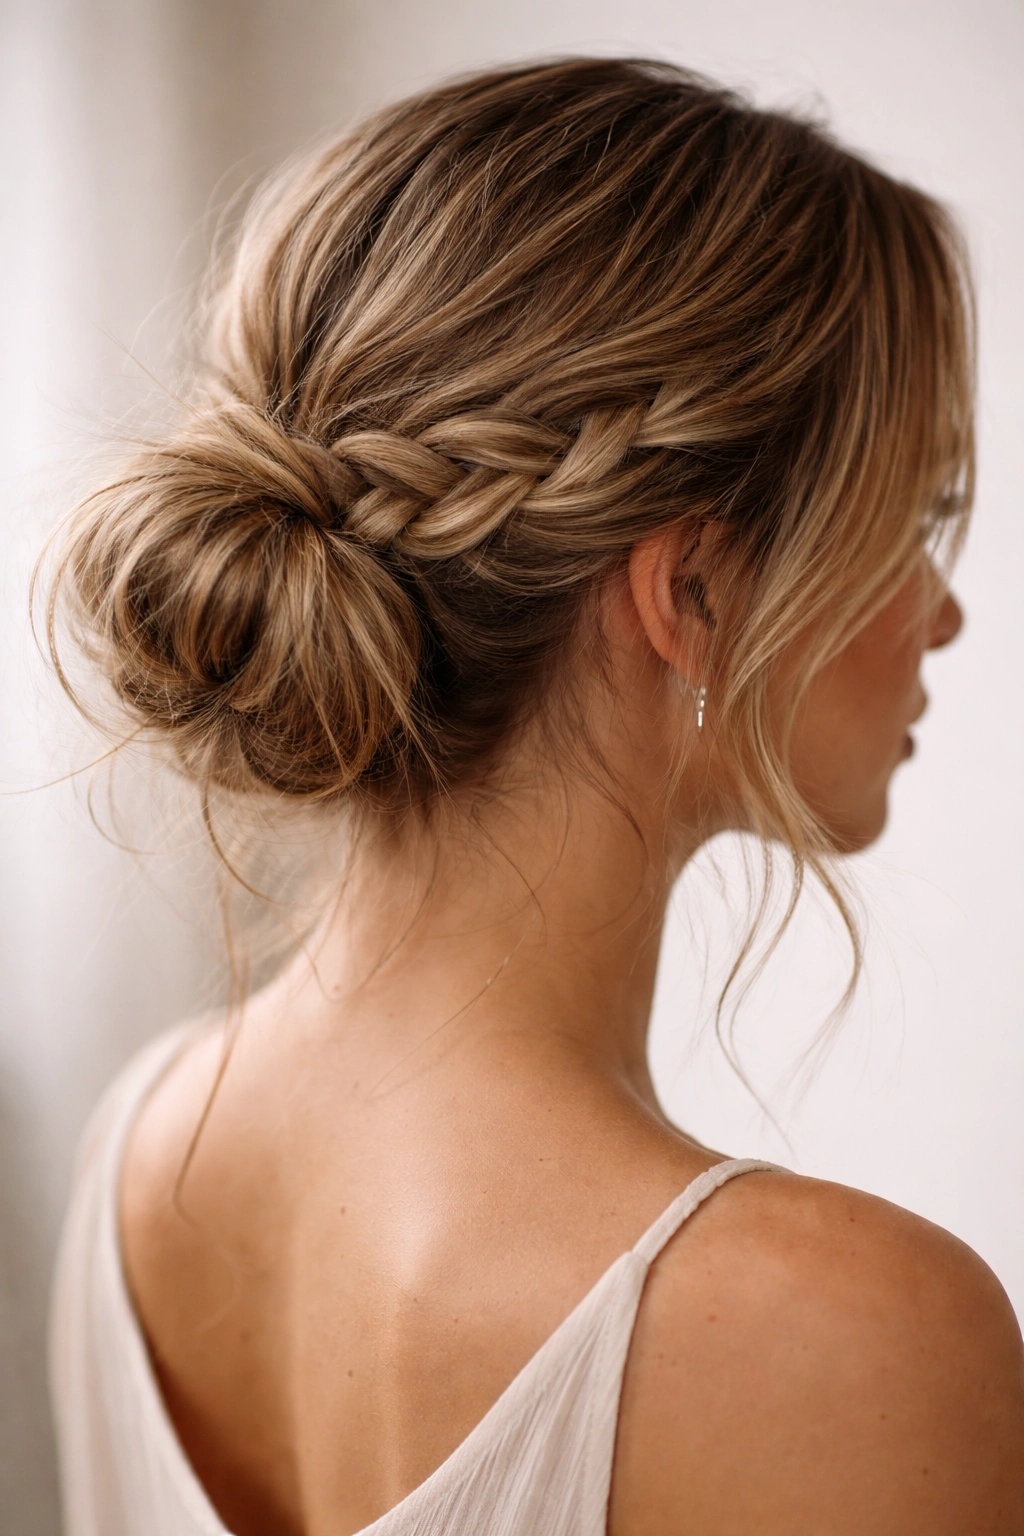
A low bun hits differently than a high bun—it feels more sophisticated, slightly dressier, and works particularly well if you have a longer face or prefer styles that sit closer to your neck. Adding a braided element transforms this from a basic low bun into something that looks intentional and creative without requiring advanced braiding skills. The braid doesn’t need to be perfect; in fact, a slightly loose, undone braid is exactly what you’re aiming for here. This style reads as “I spent time on this” while remaining completely practical and wearable all day.
Preparing Hair with Texture and Movement
Begin by creating actual texture in your hair before you style it. If you have naturally wavy hair, enhance those waves with a curl-defining cream or spray. If your hair is straighter, use a wave-creating spray or lightly wave sections with a curling iron—you’re not going for defined ringlets, just enough texture to give the final bun visual interest and prevent it from looking slick. Apply this texture throughout, paying special attention to the mid-lengths and ends of your hair, since those are the sections that will show in your finished bun.
Gather all your hair into a low ponytail at the nape of your neck, positioning it just above where your neck meets your shoulders. Don’t pull this ponytail tight—leave it slightly loose at the base, as this will give you room to work and create that intentionally undone feeling. Secure with an elastic that matches your hair color.
Building the Braid and Bun Structure
Take a small section of hair from one side of your ponytail and create a loose three-strand braid that wraps around the base of the elastic, securing the end of the braid with a small clear elastic. This braid becomes your anchor point. Now take the remaining ponytail and loosely twist it, wrapping it around the bun base and weaving it through and around the braid. Pin everything down with bobby pins, leaving some texture intentionally visible rather than tucking everything smoothly.
What to know about this specific style:
- The braid works best when it’s deliberately loose—tight braids read as formal and refined, defeating the “messy” aesthetic you’re going for
- Pull gently on the braid strands to widen and loosen it after you’ve braided, creating a lived-in appearance
- This style works beautifully with subtle highlights or balayage because the texture and dimension shows them off
- If your hair is on the finer side, tease gently at the base before creating the bun to build volume
- The low placement means this works well with both casual outfits and more dressed-up looks
3. Sleek-to-Messy Transition Bun
This style is brilliantly deceptive: the front and crown are relatively sleek and polished, while the back transitions into textured, undone territory. It’s perfect for anyone who wants the polish of a put-together style without the commitment of a fully structured bun. The contrast between the sleek section and the messy section creates visual interest and works especially well if you’re heading somewhere that calls for a professional appearance but you want to keep things approachable and not overly formal.
Creating the Sleek Front Section
Use a fine-tooth comb and a smoothing serum or anti-frizz cream to smooth the front and crown sections of your hair down and back. Apply the smoothing product first to damp hair or use it on dry hair where needed. Comb everything straight back and toward a ponytail position at the crown or high-back area. This front-to-back smoothing is the structural key to this entire style—if the front isn’t smooth, the contrast with the back won’t read as intentional.
Once you’ve smoothed the front, gather all your hair into a high or high-mid ponytail and secure it. Now here’s where the transition happens: take the back sections of hair (the sides and back pieces) and tease them gently to create texture, then wrap them loosely around the base of the elastic along with the main ponytail section, allowing visible texture and undone strands in the back half of the bun.
Styling the Contrast Point
The magic of this style lives in how deliberately you create the transition between sleek and messy. Use bobby pins to keep the sleek section smooth while allowing the textured back section to have visible dimension. If you have shorter baby hairs at your hairline, smooth those with a tiny amount of gel—this emphasizes the intentional sleekness of the front. For the back section, allow some strands to fall out and frame the bun naturally.
Essential execution tips:
- Apply a smoothing serum to damp hair and blow-dry the front section straight before you even begin styling
- The transition should happen gradually around the sides of your head—not an abrupt line, but a natural gradient from smooth to textured
- This style requires good bobby pin placement; invest in ones that match your exact hair color
- A light hairspray applied only to the smooth front section keeps it polished without affecting the messy back
- The messy back section should still have intentional texture from curling or teasing, not just randomly falling-out strands
4. The Half-Up Messy Bun
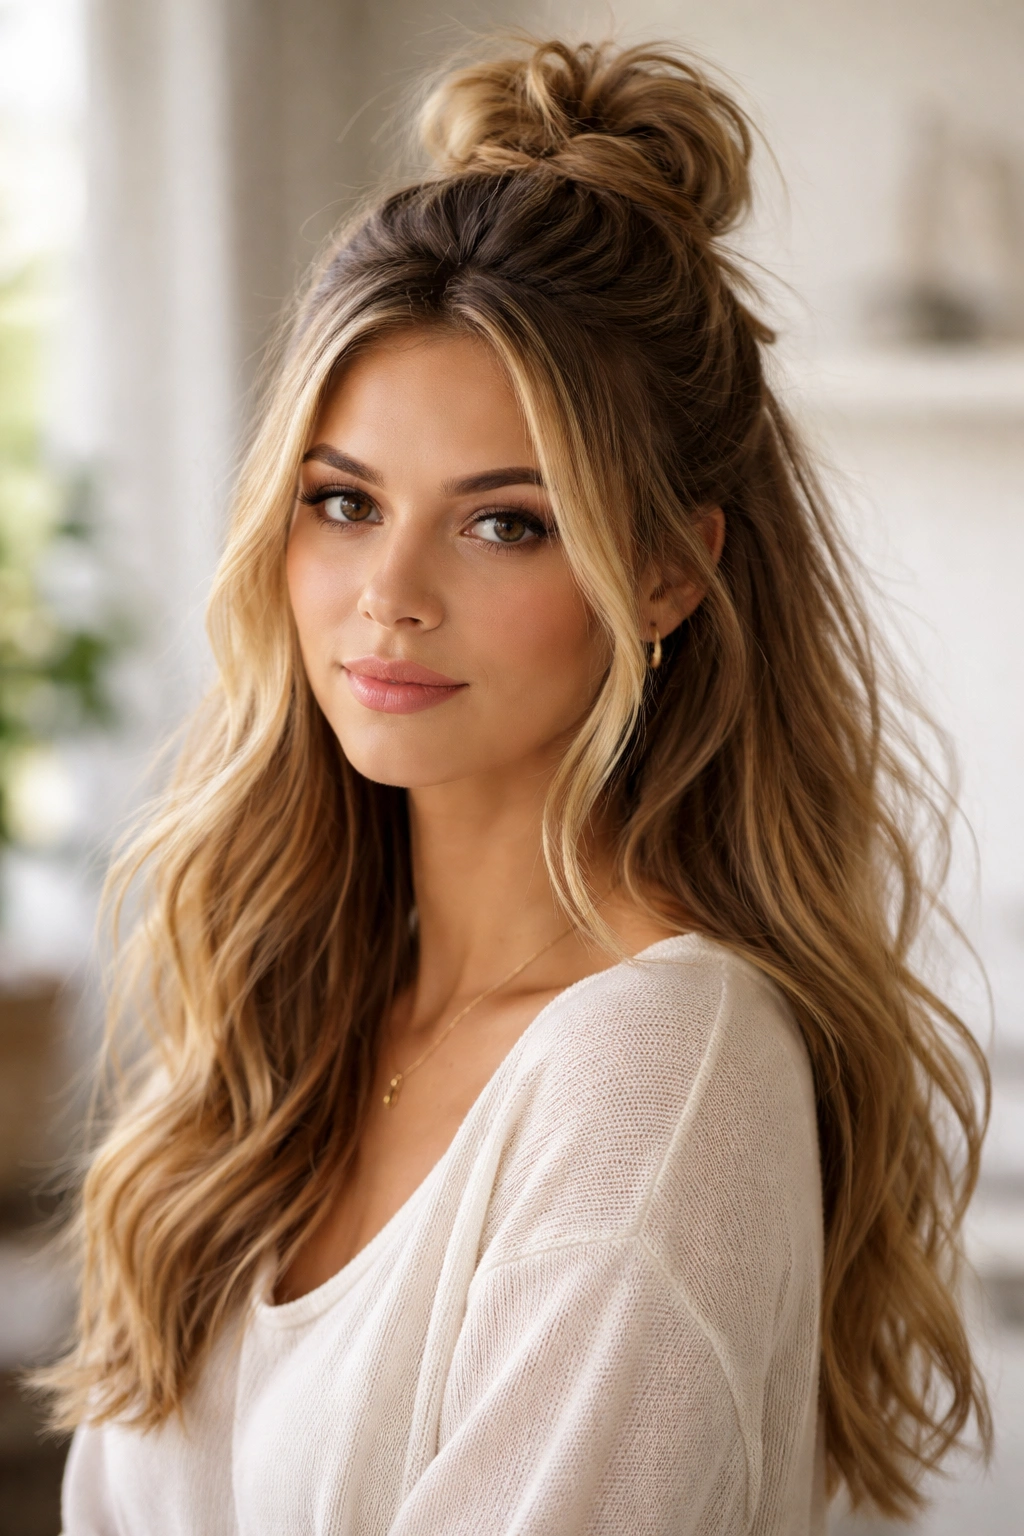
The half-up bun is technically a ponytail, but when you twist and bun just the upper section of hair, it creates a completely different vibe than a traditional half-up style. This works particularly well if you have medium to longer hair and want to keep some hair down while still getting it mostly off your face. It’s less formal than a full bun and more polished than wearing your hair completely down, making it perfect for days when you want that middle ground.
Sectioning and Gathering the Upper Half
Part your hair where you naturally would for a half-up style—usually about ear-level, maybe slightly above or below depending on your face shape and preference. Clip the bottom half of your hair out of the way so it doesn’t get mixed in with your half-up section. Take the top half and gather it into a ponytail at the crown, securing with an elastic. The position of this ponytail is crucial: too high and it looks like you’re going for a traditional high-pony; positioned just above the crown works perfectly for the half-up bun effect.
Texturing and Twisting into the Bun
Before you twist your half-up ponytail into a bun, apply a light texturizing spray to the ponytail section. Twist the ponytail loosely and wrap it around the base of the elastic, tucking the ends under and securing with bobby pins. Now pull out and tease small sections of the bun to create that intentional texture and volume.
Finishing the Lower Section
Release your clipped-down hair from the bottom half. This hair falls naturally from where your half-up bun begins, creating a beautiful visual separation. For maximum polish, lightly wave or curl the bottom section with a curling iron or wave-creating spray. The waves in the lower section complement the texture in the upper bun section, tying the whole look together.
Key details for this style:
- The ponytail for your half-up bun should sit slightly off-center rather than perfectly centered—this adds visual interest
- Tease the bun more aggressively than you would a full bun, since less hair is being styled
- The lower section of hair should have different texture than the bun—if the bun is teased and undone, the lower section works best with soft waves or curls
- Keep a few face-framing pieces: pull out a small strand on each side of your face before you secure the half-up section
- This style works beautifully with accessories like a claw clip placed slightly below the bun or a hair stick tucked through the center
5. Twisted Crown Messy Bun
A twisted crown is a hairstyle detail borrowed from braided styles, but adapted here into a messy bun for a romantic, textured look that reads as both creative and effortlessly put-together. Rather than gathering all your hair into a simple ponytail, you create two loose twists on either side of your head that meet at the back and form the foundation of your bun. This creates visual interest from every angle and looks genuinely intentional rather than defaulting to a basic style.
Creating the Twin Twists
Start at one temple and take a small section of hair about two inches wide. Divide this into two strands and begin twisting them around each other as you move backward toward the back of your head, gradually incorporating more hair as you twist. You’re not creating a tight spiral—keep this twist loose and allow some texture to show. When you reach the back of your head near your ear, pause and pin that twist temporarily with a bobby pin so it doesn’t unravel. Repeat this process on the other side of your head, creating a matching twisted section that also ends at the back.
Securing the Bun Base
Once both twists are in place and pinned, gather all the remaining hair (both the twisted sections and any hair that hasn’t been incorporated yet) into a ponytail at the back of your head where both twists meet. You’ll actually incorporate the twisted sections into this ponytail by releasing them from their temporary pins and folding them into the ponytail. Secure everything with an elastic.
Building Volume and Texture
Now take your full ponytail (which includes the twisted sections) and twist it loosely, wrapping it around the base of the elastic in a circular motion. Use bobby pins to secure, but leave plenty of visible texture. Gently pull sections of the bun outward to create dimension and the signature “intentionally undone” appearance. The twisted sections you created at the beginning should still be somewhat visible within the bun structure, adding visual complexity.
Styling specifications:
- The crown twists should be visible from the front, not hidden by other hair—this creates the entire appeal of this style
- Keep these twists relatively loose so they don’t look overly styled or severe
- Use a texturizing spray before you begin if your hair is too slippery or straightened
- The final bun should look fuller and more three-dimensional than a simple twisted bun
- This style works particularly well with medium to long hair; shorter hair may not have enough length for full effect
6. The Artfully Disheveled Knot Bun
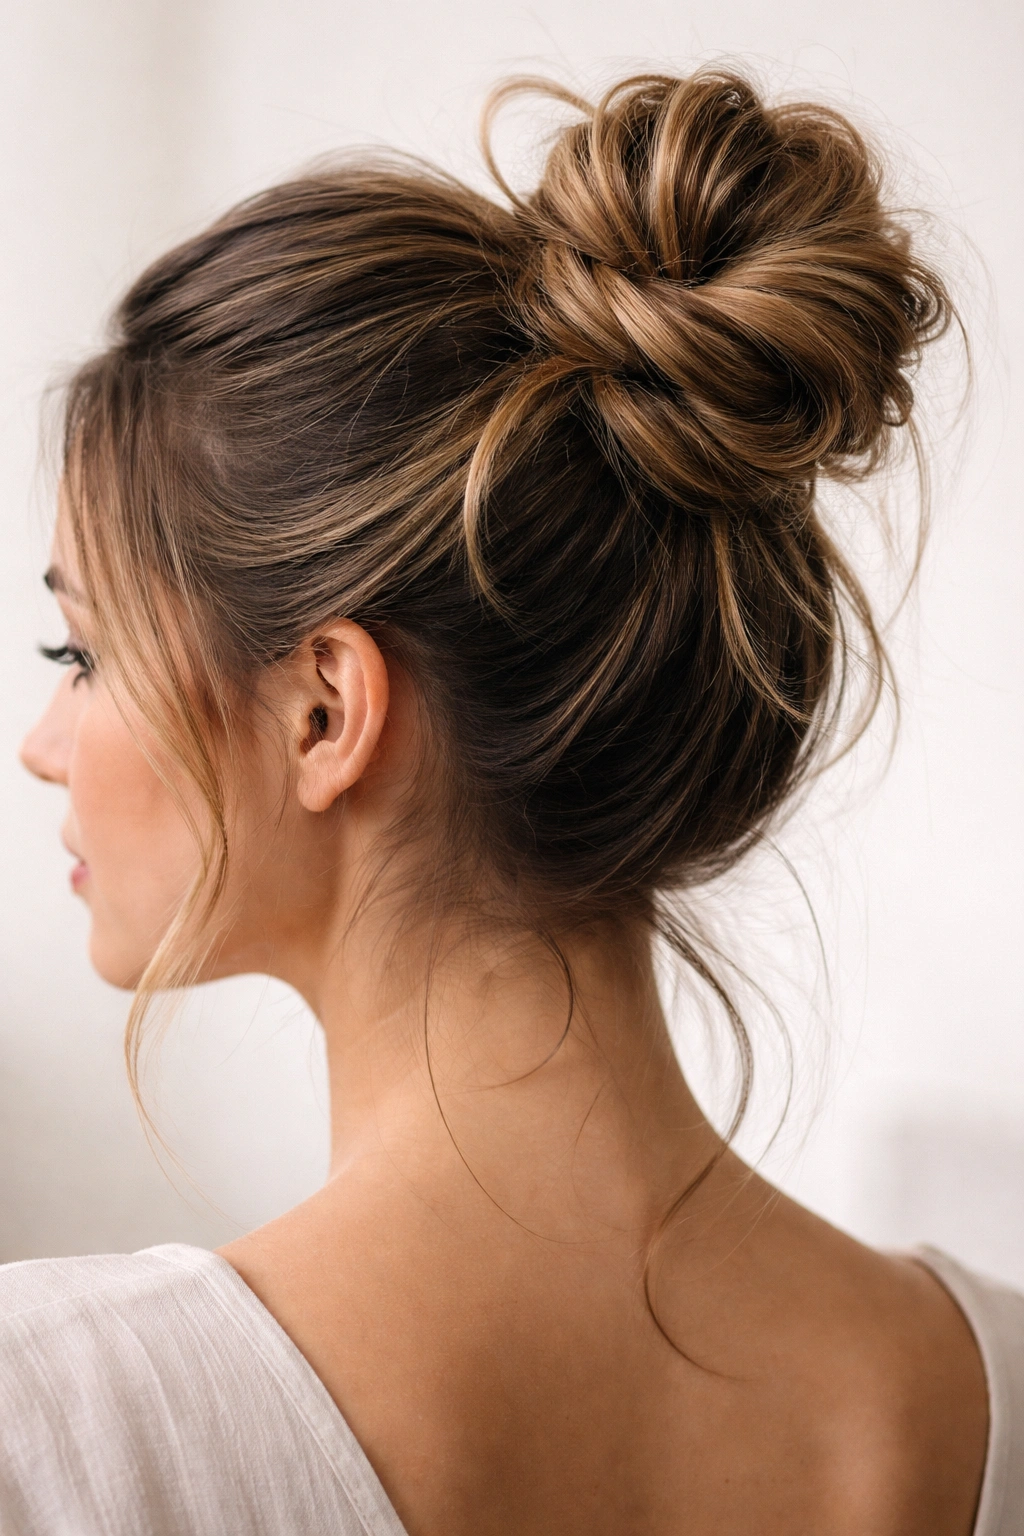
This bun gets its name from an actual knot you tie in your ponytail—yes, literally a knot—which creates built-in texture and an undone aesthetic that feels very modern and intentional. The knot prevents the bun from sliding down, and it naturally creates the lumpy, dimensional texture you’re going for without needing to tease or pull the bun apart extensively. It’s one of the easiest messy buns to execute while still looking like you’ve put real thought into it.
Tying the Actual Knot
Gather your hair into a high or mid-high ponytail and secure loosely with an elastic. Take the ponytail and literally tie it in a single overhand knot—the same knot you’d tie at the end of a string. Tighten the knot by pulling the two ends of the ponytail, but don’t pull it so tight that you’re straining your hair or scalp. The knot should sit snugly but not uncomfortably. This knot becomes the structural base of your entire bun.
Wrapping and Securing
Fold the knot up and over itself, creating a loop, and wrap the remaining ponytail ends around and through this loop. Secure everything with bobby pins that match your hair color. The beauty of this style is that the knot itself creates most of the texture and dimension—you don’t need to do much more work beyond that to achieve the messy aesthetic.
Adding Intentional Details
Once the basic structure is in place, pull out a few small sections around the bun perimeter to enhance the texture and add volume. Keep it subtle—you’re not trying to pull the whole thing apart, just emphasizing the texture that the knot already created. Leave a few wispy pieces around your face for softness.
Critical knot-bun information:
- This style works best on hair with at least some texture to it; slippery, freshly-washed straight hair can look too thin with this approach
- The size of your initial ponytail affects how the knot bun looks—thicker ponytails create chunkier, more obviously textured buns
- If you have fine or shorter hair, this might not create enough volume, so consider backcombing the base first
- The knot should sit at your crown area or just behind it for the best proportion and visual effect
- This is genuinely one of the fastest messy buns to create—perfect for mornings when you’re short on time
7. Braided Wrap Messy Bun
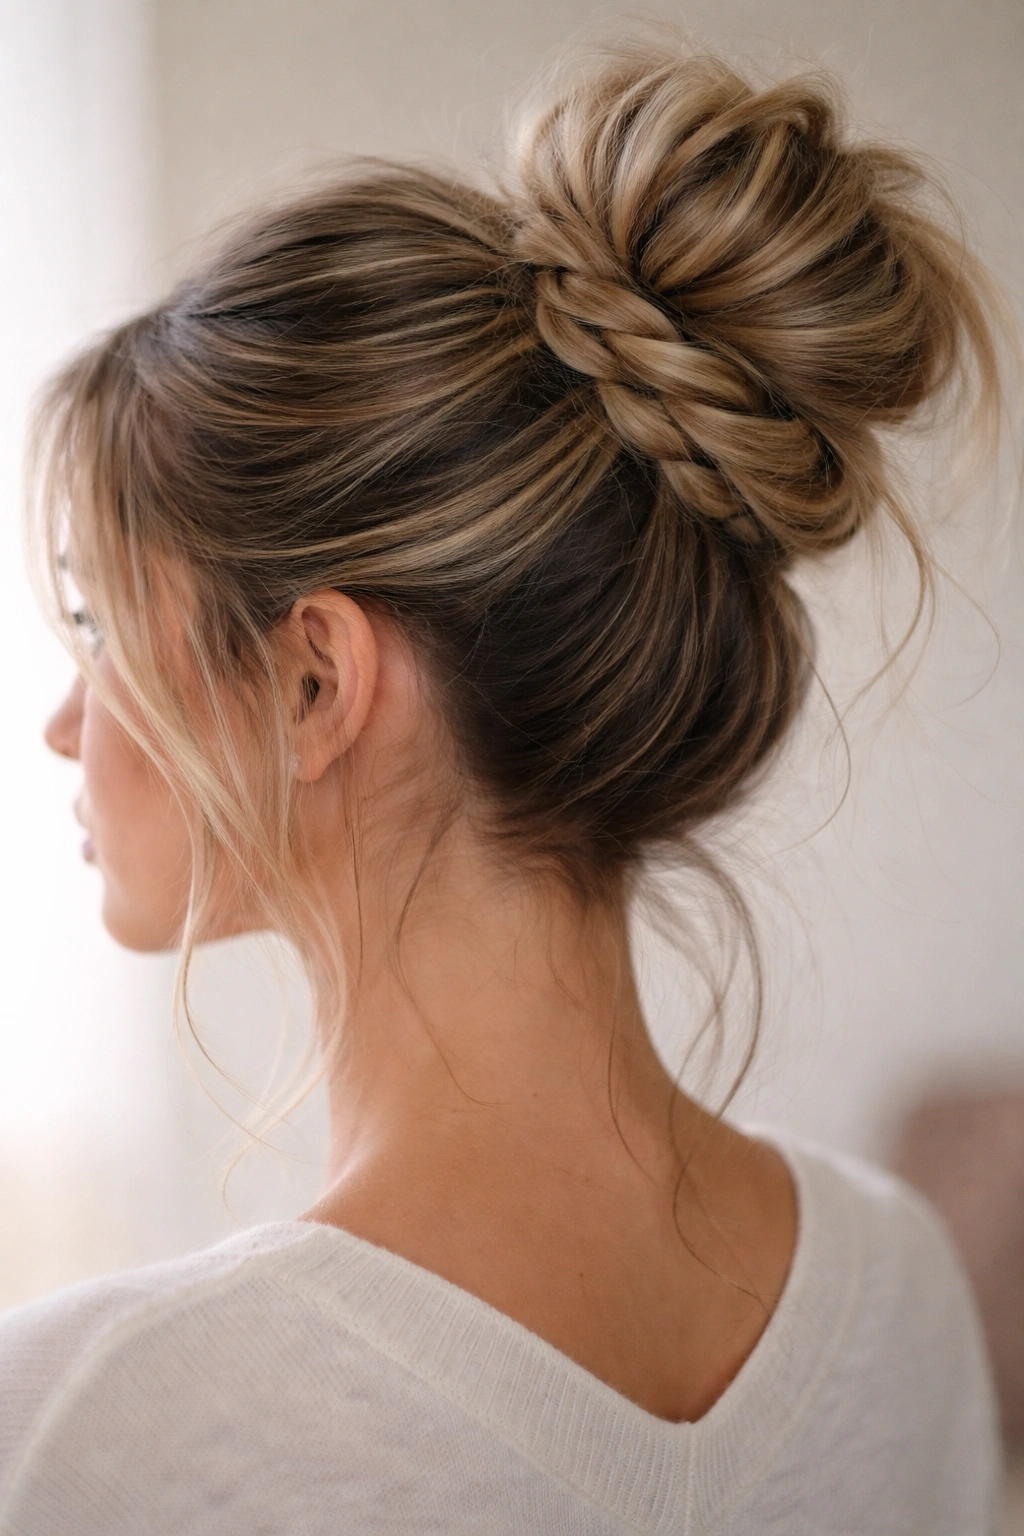
Instead of twisting your ponytail into a bun, this style uses a braid to wrap around the base, creating a detailed focal point that makes the entire bun look more intentional and polished. The braid doesn’t need to be flawless—in fact, a slightly loose, textured braid is exactly what works best here. This version works beautifully for people who want to incorporate a braid without doing an entire braided style, and it elevates a basic bun into something that looks genuinely crafted.
Creating Your Ponytail Foundation
Gather your hair into a high or high-mid ponytail at the crown and secure with an elastic. Apply a light texturizing spray to the ponytail before you begin styling if your hair needs it. The ponytail should feel slightly loose at the base rather than pulled painfully tight—this gives you room to work and creates that purposefully undone foundation.
Dividing and Braiding the Wrap
Divide your ponytail into three even sections. Create a loose three-strand braid using these sections, keeping the braid intentionally loose so you can see texture and dimension within it. Once you’ve braided all the way to the ends, secure the braid temporarily with a small clear elastic.
Wrapping and Securing
Now take the braided section and wrap it around the base of your original elastic, creating a bun effect. The braid naturally creates texture and visual interest as it wraps. Pin the braid down with bobby pins, tucking the end under and securing it firmly. Once the braid wrap is secured, take the remaining sections of hair (if you braided the entire ponytail) or loosen the braid slightly by pulling gently on the strands to enhance the textured, intentionally undone appearance.
Execution details:
- A three-strand braid is ideal for this—French or Dutch braids are too structured for this particular messy aesthetic
- Gently pull on the braid strands after braiding to loosen and widen the braid, creating visible texture
- You can incorporate the braided wrap around the base once, or spiral it around for a more intricate look
- The final bun should showcase the braid pattern, not hide it, so positioning and pinning matter
- This style works better on hair with existing texture or movement rather than perfectly straight hair
8. The Bubble Ponytail-to-Bun Hybrid
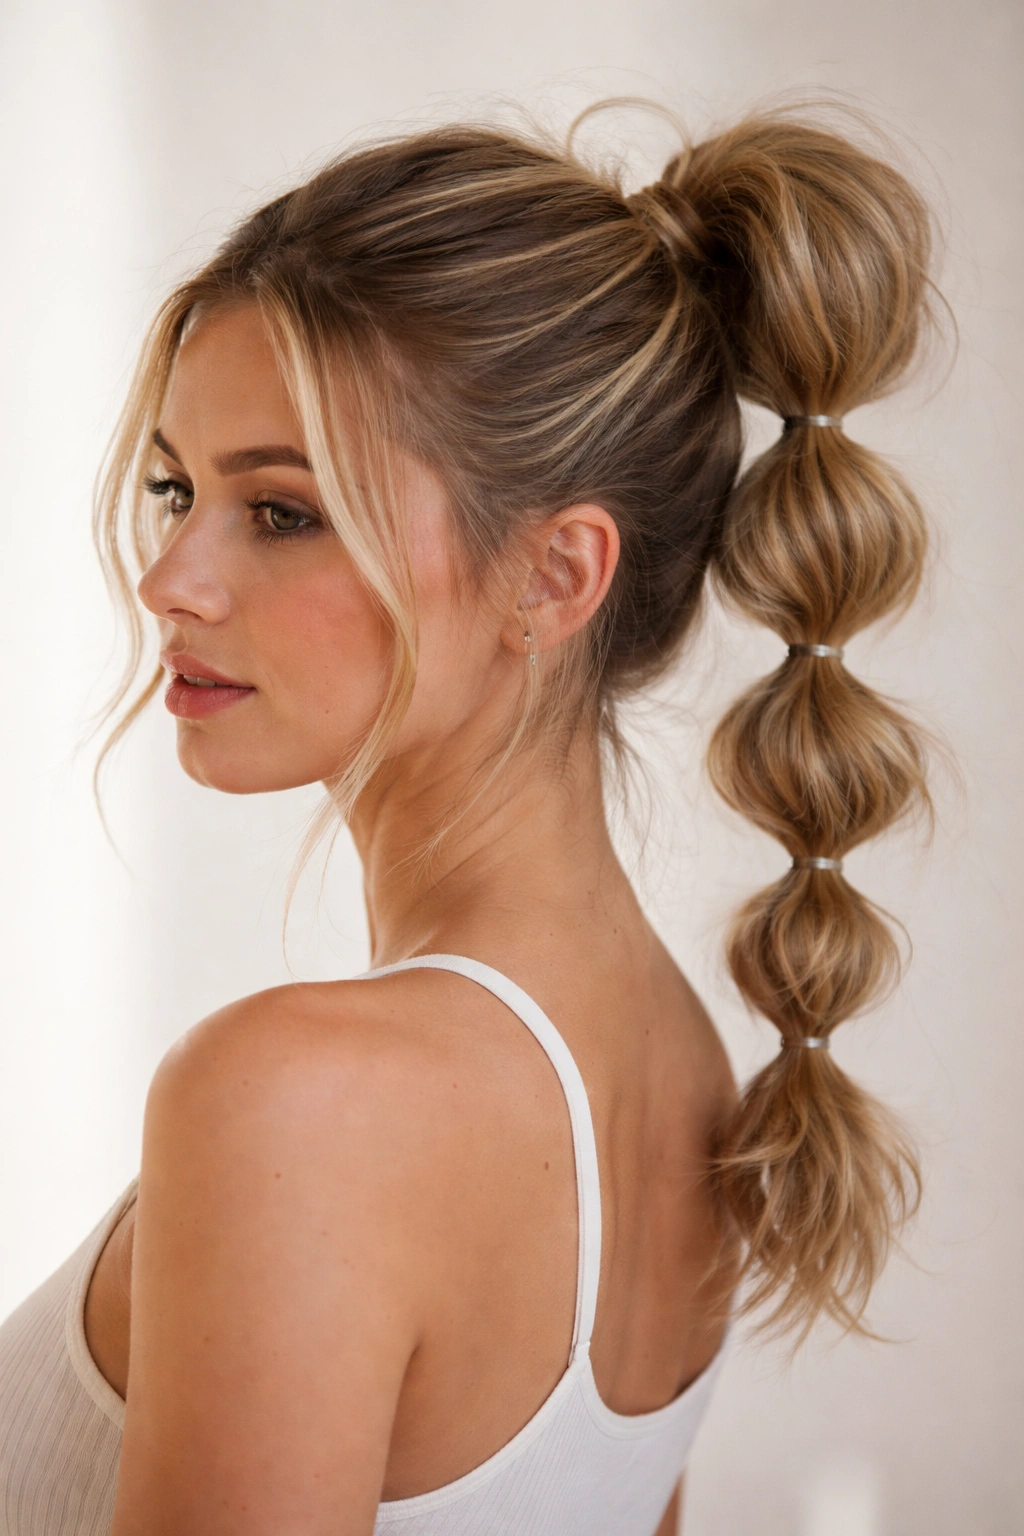
This style borrows the bubble ponytail technique—where you tie multiple elastics down a ponytail to create segmented bubbles of texture—and transforms the final bubble into a small bun. It’s more visually interesting than a standard ponytail and more wearable than a full bun, sitting in that perfect middle ground. The bubble sections create natural dimension and movement, while the final bun portion adds just enough polish to make the style feel intentional rather than like you couldn’t decide between two styles.
Creating the Bubble Base
Gather your hair into a high ponytail and secure with an elastic. Using a texturizing spray or dry shampoo at the base helps tremendously with grip and prevents slipping. Now, a few inches down from your first elastic, place a second elastic around your ponytail, creating the first “bubble” of hair between the two elastics. Make this bubble slightly loose and rounded rather than flat.
Building Multiple Bubbles
Continue placing elastics every two to three inches down your ponytail, creating 2-4 bubbles depending on your ponytail length and how dramatic you want the effect to be. After placing each elastic, gently puff out and loosen the bubble above it to enhance the rounded texture and volume. Pull the bubble edges slightly outward so they’re visible and clearly defined.
Converting the Final Bubble into a Bun
Stop placing elastics when you reach the lower portion of your ponytail—leave enough hair below your last elastic to create your final bun. Take this remaining hair and loosely twist it, then wrap it around the base of that final elastic to create a small bun. The bun becomes the finishing piece of the bubble ponytail structure. Pin it securely and add texture by gently pulling sections outward.
Key styling considerations:
- The size and placement of your bubbles should be relatively even—this creates a balanced, intentional look rather than random lumps
- Looser bubbles read as more intentionally messy; tighter bubbles look more deliberate and styled
- This style works best on hair with at least shoulder length or longer, since shorter hair doesn’t have enough length for multiple bubbles
- Use clear elastics for a cleaner look, or colored elastics that match your hair if you prefer them to be visible as a design element
- The texture spray is crucial here—it prevents the bubbles from flattening or slipping throughout the day
9. Side-Swept Messy Bun
A side-swept bun sits to one side of your head rather than centered at the crown or nape, creating a completely different visual proportion and vibe. This works particularly well for oval and round face shapes, and it looks more relaxed and playful than a centered bun while still reading as polished. The off-center placement creates natural asymmetry that feels effortlessly cool, and the angle of the bun makes face-framing pieces look particularly flattering.
Sweeping and Gathering to the Side
Flip your head to one side (opposite the side where your bun will sit) and brush all your hair back toward the side you’ve chosen for your bun placement. Gather the hair into a ponytail positioned at the side of your head, somewhere between your ear and the back of your head—exact placement depends on your face shape, but generally this side bun looks best when it sits about halfway between ear and nape on the side of your head.
Creating the Side Bun Structure
Secure your side ponytail with an elastic, keeping it relatively loose at the base. Apply a texturizing spray if needed. Twist the ponytail loosely and wrap it around the base of the elastic, tucking and pinning with bobby pins. Deliberately leave some wispy pieces around your face on both sides—these frame your face beautifully and soften the look of a side bun. Pull out and tease small sections of the bun to create texture.
Styling the Swept Hair
The hair on the opposite side of your head (the side without the bun) should have gentle waves or a soft, swept appearance. Use a curling iron or wave-creating spray to add subtle movement that complements the texture of the bun. The overall effect should feel balanced even though the bun itself is off-center.
Side bun styling notes:
- The side bun works best when you leave slightly more wispy face-framing pieces than you would with a centered bun
- Hair should be swept toward the bun side smoothly at the crown, not in a way that pulls your hair uncomfortably
- The ponytail position is crucial—too far back reads more like a regular low bun, and too far forward looks unbalanced
- This style photographs beautifully and looks particularly good from side-profile angles
- Lighter texturizing spray works better than heavy-hold products on side buns, which can make the side-swept hair look stiff
10. The Undone Bun with Wispy Layers

This style emphasizes purposeful texture by intentionally pulling out wispy pieces throughout the bun structure, creating a romantic, softly undone aesthetic that looks particularly beautiful and approachable. Rather than creating a bun and then making it messier, this approach builds the wispy elements in from the start. It’s perfect if you have naturally layered hair or if you’ve cut in some intentional layers, as those layers become a design feature rather than something to hide.
Building the Layered Ponytail
Gather your hair into a high or mid-high ponytail, but as you do, deliberately leave out small sections of shorter, layered hair around your face and temple area. These are your foundational wispy pieces—leave them intentionally disconnected from the main ponytail. Secure your main ponytail with an elastic.
Twisting and Bun Formation
Take your secured ponytail and twist it loosely, wrapping it around the base of the elastic to form your bun. Secure with bobby pins. This is where the approach differs from other messy buns: instead of pulling out random sections to create texture, you’re going to work with the layers you already left out and pull out additional small sections that sit at different depths within the bun structure.
Creating Intentional Wisps
Working around the perimeter of your bun, gently pull out small, thin sections—particularly any that are naturally shorter or from your visible layers. These wisps should frame your face and neck, and they should look like they’re meant to be loose rather than like they’ve escaped. Smooth these wispy pieces slightly with your fingers or a fine-tooth comb, optionally using a tiny amount of gel on the shortest pieces at your hairline for polish.
Wispy bun specifications:
- This style requires hair that has intentional layers or at least some variation in length throughout
- The wisps should be thin and delicate, not chunky pieces—they should feel romantic, not careless
- Approximately 6-10 small wisps total around the bun perimeter creates the ideal balance
- This style works beautifully with face-framing layers or longer layers that sit at shoulder-length or longer
- A light flexible-hold hairspray keeps the wisps in place without stiffening them or making them look glued down
11. Two-Strand Twist Messy Bun
A two-strand twist is technically simpler than a three-strand braid, but it creates beautiful, ropelike texture that’s visually interesting and holds surprisingly well. Using a two-strand twist instead of a regular twist or braid to create your bun base adds dimension and a crafted quality that makes the style feel more intentional. This version works particularly well if you want texture and detail without committing to a full braided style.
Creating the Twisted Ponytail
Gather your hair into a high or mid-high ponytail and secure with an elastic. Divide your ponytail into two even sections. Begin twisting these two sections around each other as if you’re creating a rope—one section goes over the other, then you introduce new hair into that section and repeat. You’re not weaving, you’re spiraling. Keep the twist loose so that texture is visible within the twist itself.
Wrapping the Twist into a Bun
Once you’ve twisted all the way to the ends, secure the twisted ponytail end temporarily with a small clear elastic. Now wrap this entire twisted ponytail around the base of your original elastic, creating a bun shape. Pin securely with bobby pins positioned to hold the structure but not flatten it.
Enhancing the Visible Texture
The two-strand twist naturally creates a ropelike pattern—you want this pattern to remain visible in your finished bun. Gently pull the entire bun slightly outward to enhance its roundness and to ensure the twist detail isn’t compressed against your head. You can also gently pull on individual strands of the twist to slightly loosen and widen it, making the texture even more pronounced.
Two-strand twist bun details:
- This twist looks best when it’s deliberately loose rather than tight—tight twists can read as overly structured
- Introduce texture spray before twisting if your hair is slippery or overly smooth
- The rope-like pattern of the twist should be visibly apparent in your finished bun when you look from behind
- This style works beautifully on all hair types and textures, unlike some styles that work better on specific hair types
- The two-strand technique is genuinely faster than a three-strand braid, making this ideal if you’re short on time
12. The Romantic Textured Updo Bun
This is the most intentionally styled option on this list—it’s not trying to look careless, but rather purposefully romantic and textured. This works beautifully for occasions when you want to look genuinely put-together but still soft and approachable rather than severely formal. The difference between this and a formal updo is that you’re emphasizing texture and a slightly undone quality rather than smooth polish.
Preparing Hair with Intentional Waves
Begin by creating defined waves or soft curls throughout your hair using a curling iron or by blow-drying with a curl-enhancing product. These waves become the foundation of your textured updo. The waves should be soft and flowing, not tight ringlets. Apply a light hairspray to set these waves so they hold their shape while you style.
Building the Bun Base with Texture Emphasis
Gather your hair into a high ponytail, but instead of creating a standard bun, you’re going to build this one with visible texture emphasis. Divide your ponytail into 2-3 sections and loosely braid or twist each section separately. Then wrap these multiple braided/twisted sections around your ponytail base, creating a bun that shows distinct texture from every angle rather than a smooth wrapped bun.
Adding Face-Framing and Polish
Pull out several wispy face-framing pieces and use your curling iron to enhance their wave or create defined curls in these pieces. These framing pieces are what elevate this from “basic messy bun” to “romantic textured updo.” The curls in the framing pieces should be visible and intentional. Pin your bun securely, and use bobby pins with care—position them so they’re not visible rather than scattered randomly.
Romantic updo specifications:
- The waves or curls you create at the beginning should be tight enough to hold through the day but soft enough to look romantic rather than costume-y
- Your framing pieces should have definition—not just wavy, but actually curled in a way that’s visible
- Use clear bobby pins or pins that match your hair color; visible pins undermine the polished effect you’re going for
- A flexible-hold hairspray (not a hard-hold) keeps everything in place while maintaining softness
- This style works best for evening occasions, fancy brunches, or date nights where you want to look intentionally beautiful
- Consider adding a delicate hairpin, comb, or decorative clip if the occasion warrants it—they work beautifully with this style
Final Thoughts
The common thread connecting all these messy bun variations is that none of them are actually accidental. Each one follows a specific structure, builds texture with intention, and uses strategic face-framing pieces to create balance and softness. The difference between a bun that looks effortlessly cool and one that just looks neglected is the framework you build and the deliberate choices you make about which sections to emphasize and which to polish.
The messy bun works because it’s honest about what’s possible in real life—your hair probably won’t stay perfectly smooth in a bun all day, and that’s fine. Instead of fighting that reality, these styles lean into it and make texture a feature rather than a flaw. You get to look pulled-together, keep your hair off your face, and feel genuinely comfortable, all at the same time. That’s not a small thing, and it’s why the messy bun remains endlessly versatile and genuinely wearable.
Find the version that resonates with your face shape, hair type, and the occasions you need it for, and practice it a few times so you can create it on autopilot. Once you’ve mastered one or two of these, you’ll have a go-to style that works for everything from your most casual days to moments when you want to look thoughtfully put-together.