Swoop ponytails aren’t just for straight-haired girls anymore—and honestly, curly hair makes them look even more stunning. When you work with your natural texture instead of against it, a swoop ponytail becomes this effortlessly glamorous, dimensional style that photographs beautifully and keeps wayward curls exactly where you want them. The key is understanding how to use your curls’ natural body and movement to create that signature sweeping motion, whether you’re going for polished and sleek or textured and undone.
The beauty of swoop ponytails on curly hair is that they’re genuinely more forgiving than on straight hair. Your curls naturally add volume and interest to the swooped sections, so you don’t need to tease or backcomb as much. Instead, you’re working with strategically sectioned curls that catch light, add dimension, and frame your face in the most flattering way. Whether your curls are tight coils, loose waves, or somewhere in between, there’s a swoop ponytail style that’ll work with your texture rather than requiring you to fight it.
These styles work for everything from casual weekend wear to black-tie events. You can dress them up with delicate hair pins and statement earrings, or keep them simple with a silk scrunchie for that polished-but-effortless vibe. The versatility is what makes swoop ponytails such a game-changer for curly-haired people—you get the functionality of a pulled-back style with the visual interest that only your natural texture can provide.
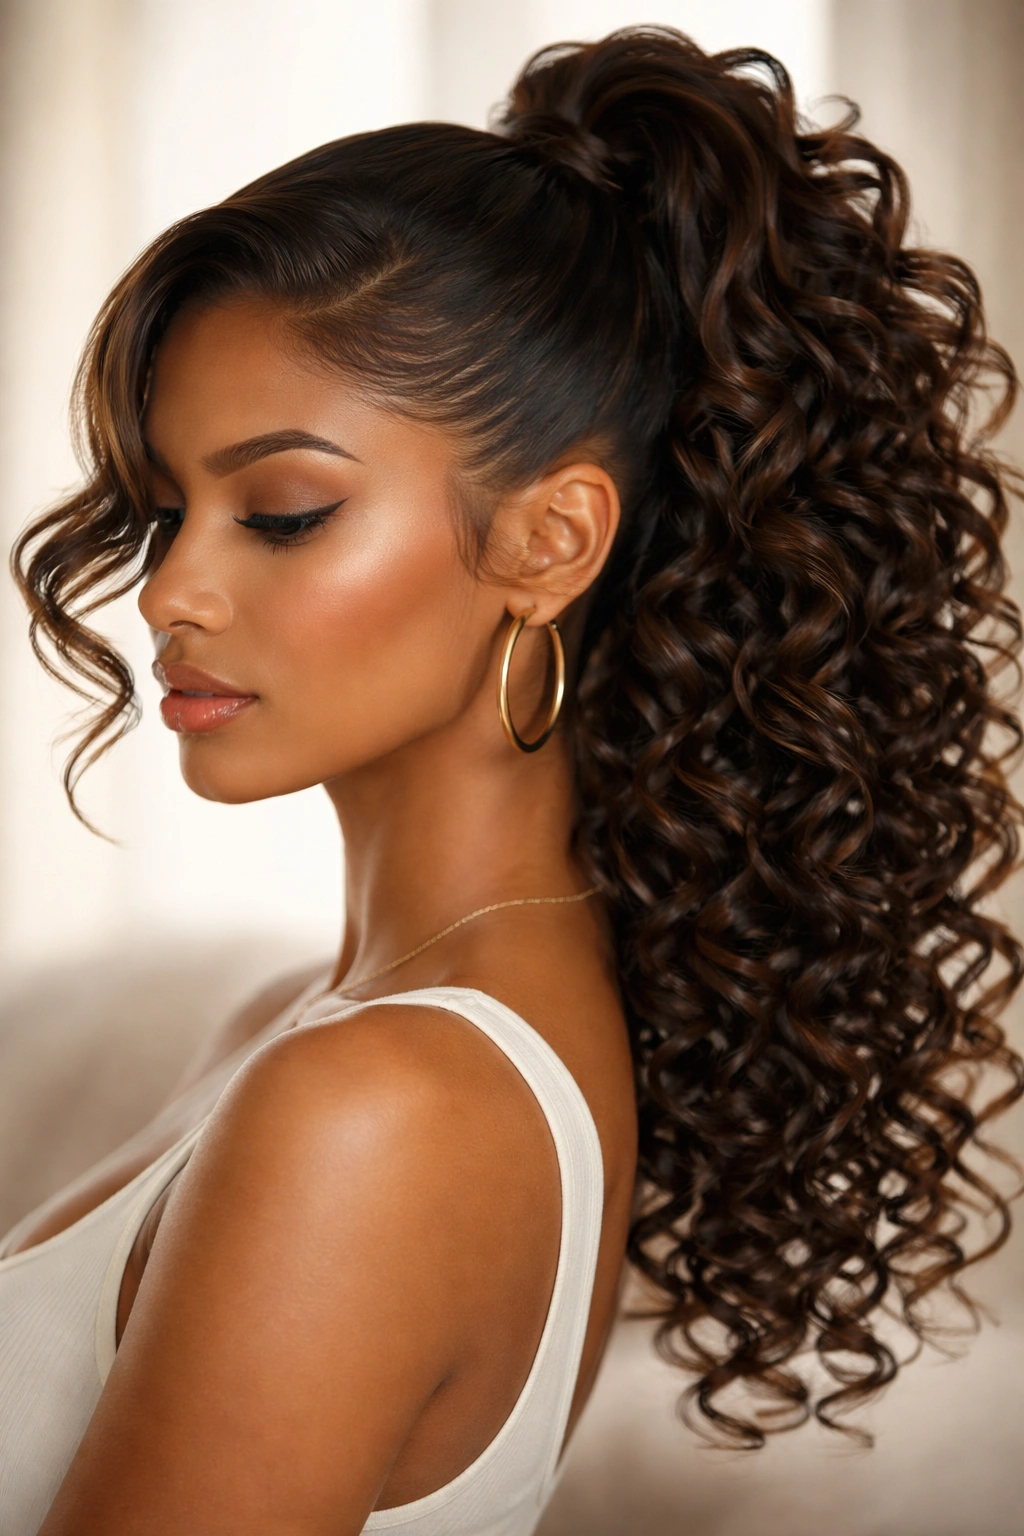
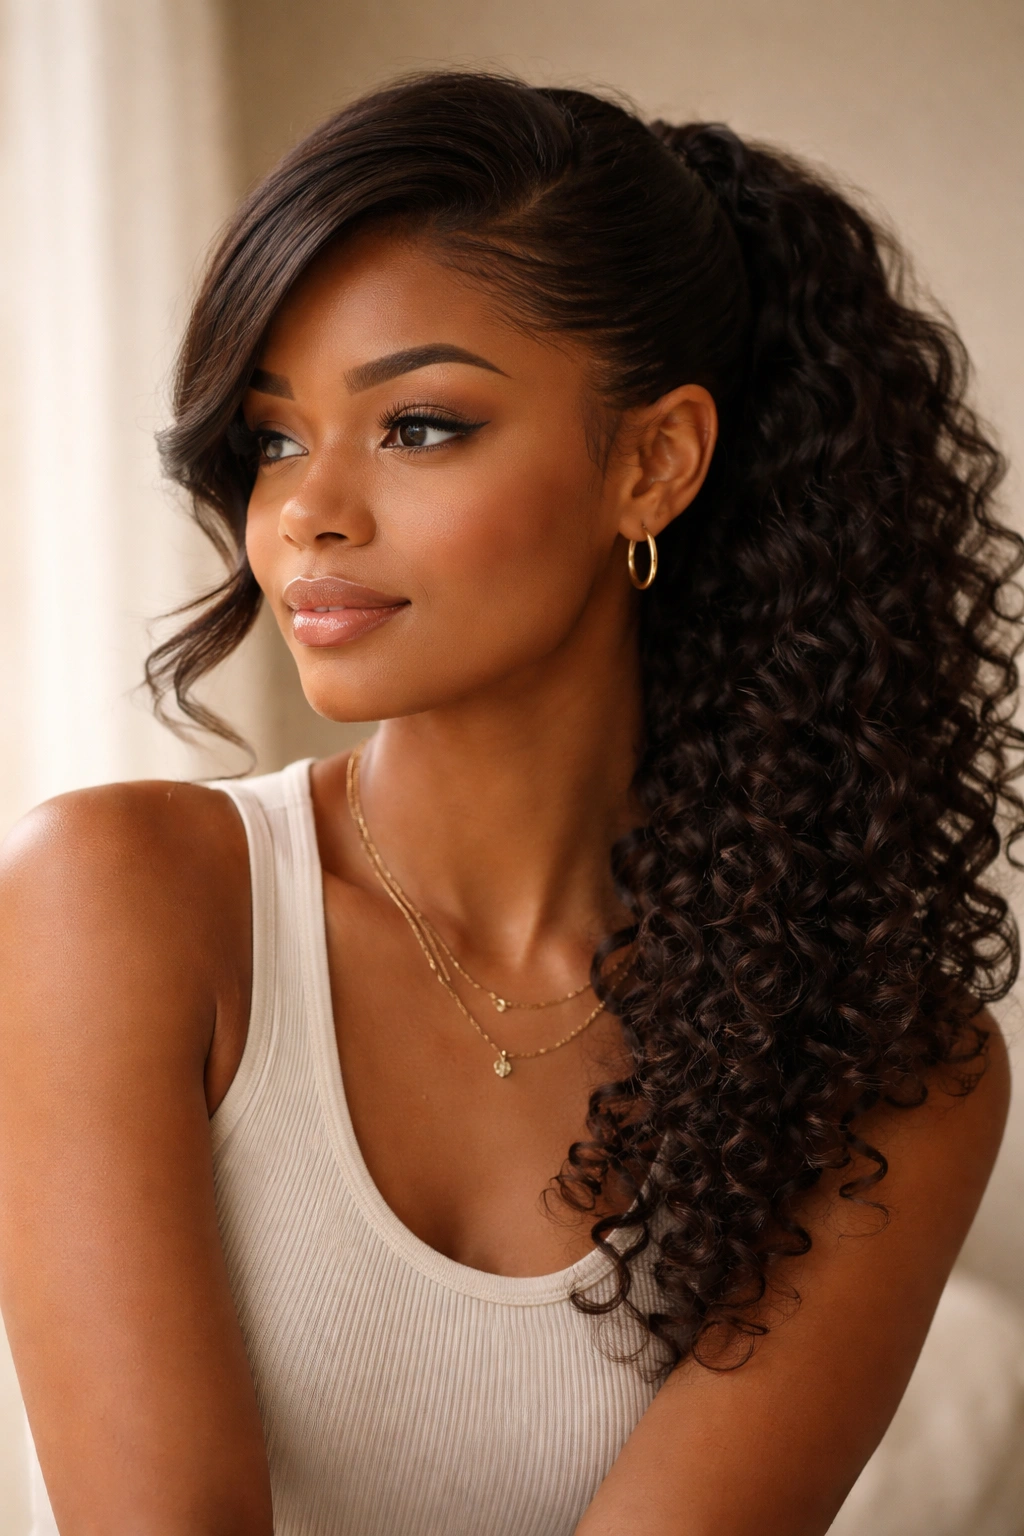
1. The High Swooping Pony with Face-Framing Curls
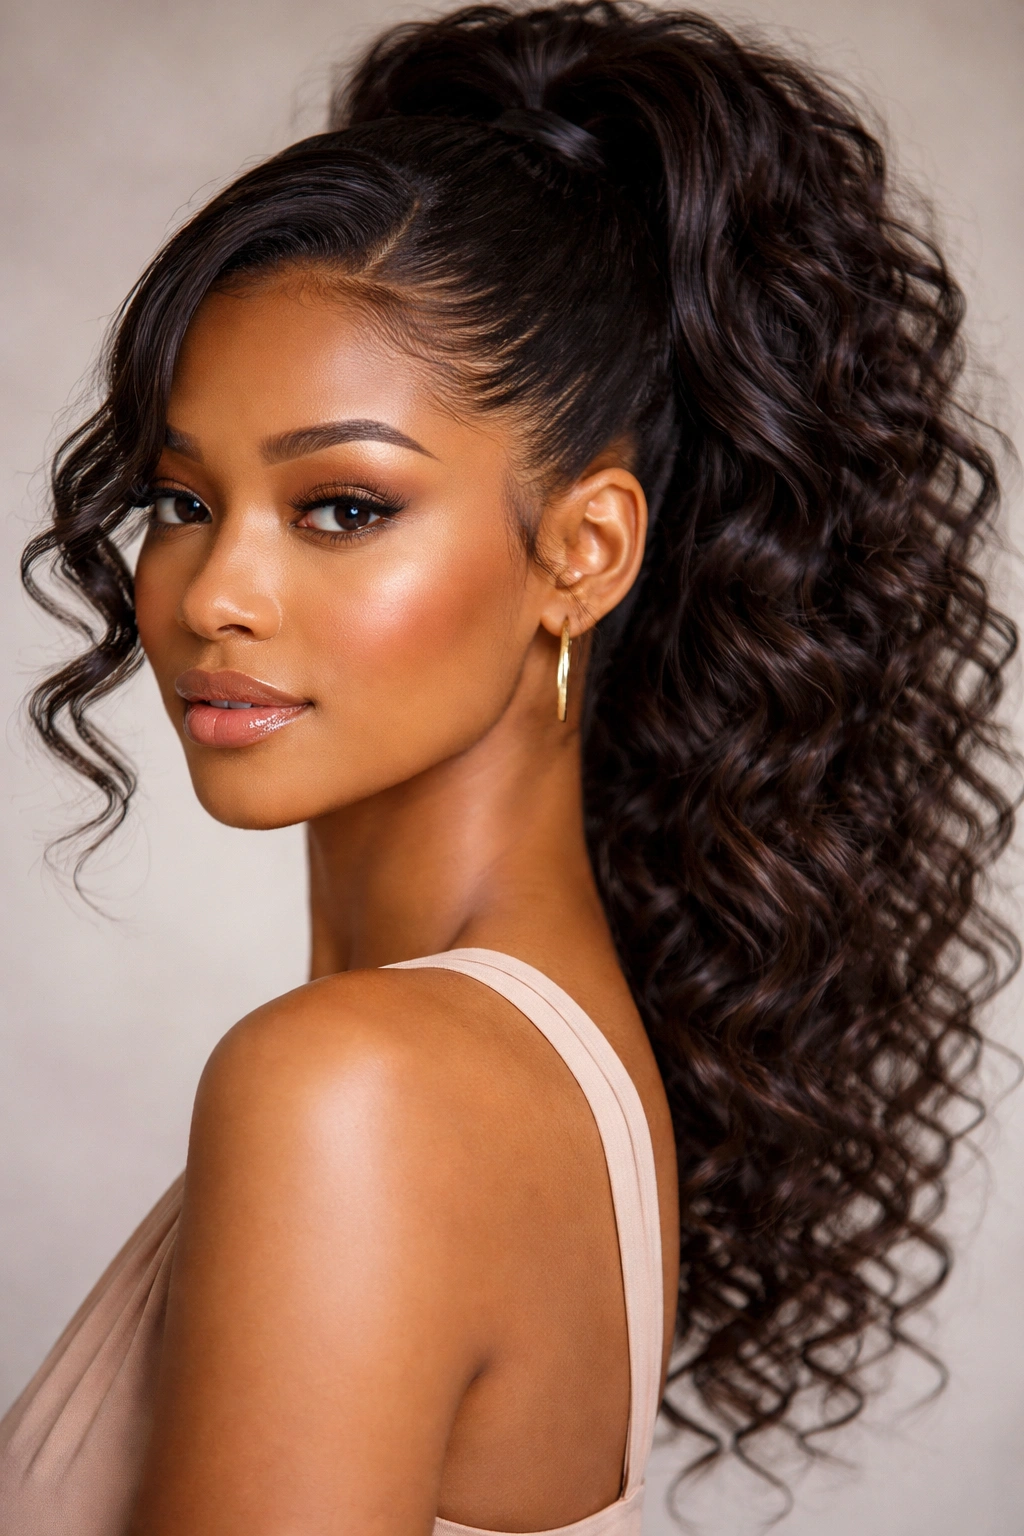
This is the style that catches everyone’s attention because it’s equal parts elegant and youthful. You’re gathering most of your hair into a high ponytail, but leaving strategically loose sections on both sides of your face that sweep back and anchor into the base of the pony. The face-framing curls catch light beautifully and soften what could otherwise feel too severe or pulled.
Why This Works for Curly Hair
Your natural curls create automatic texture and dimension in those swooped sections without any additional styling effort. Because curly hair naturally has body and movement, the swooped pieces fall just right and stay put without needing to be clamped down with product. The high placement of the ponytail makes the swoop more dramatic and visible, turning what could be a simple ponytail into a genuinely striking style.
How to Create It
- Brush or finger-comb your curls gently to smooth them while keeping their natural pattern intact
- Create a deep side part on whichever side you want the swoop to favor
- From the side with less hair, take a 2-inch-wide section from your temple area and sweep it back toward the crown
- Gather the bulk of your hair (leaving the swooped section loose) into a high ponytail at the crown
- Wrap the swooped section around the base of the ponytail and secure it with bobby pins that match your hair color
- Gently tousle the swooped curls and the ponytail itself to enhance your natural texture
- Finish with a light-hold hairspray so the swoop stays elegant but still moves naturally with your curls
Pro tip: Use a fine-tooth comb only on the swooped section if you want it smoother, but leave the ponytail itself to your curls’ natural pattern—the contrast between the sleeker swoop and the textured pony creates dimension.
2. The Side-Swept Low Swoop
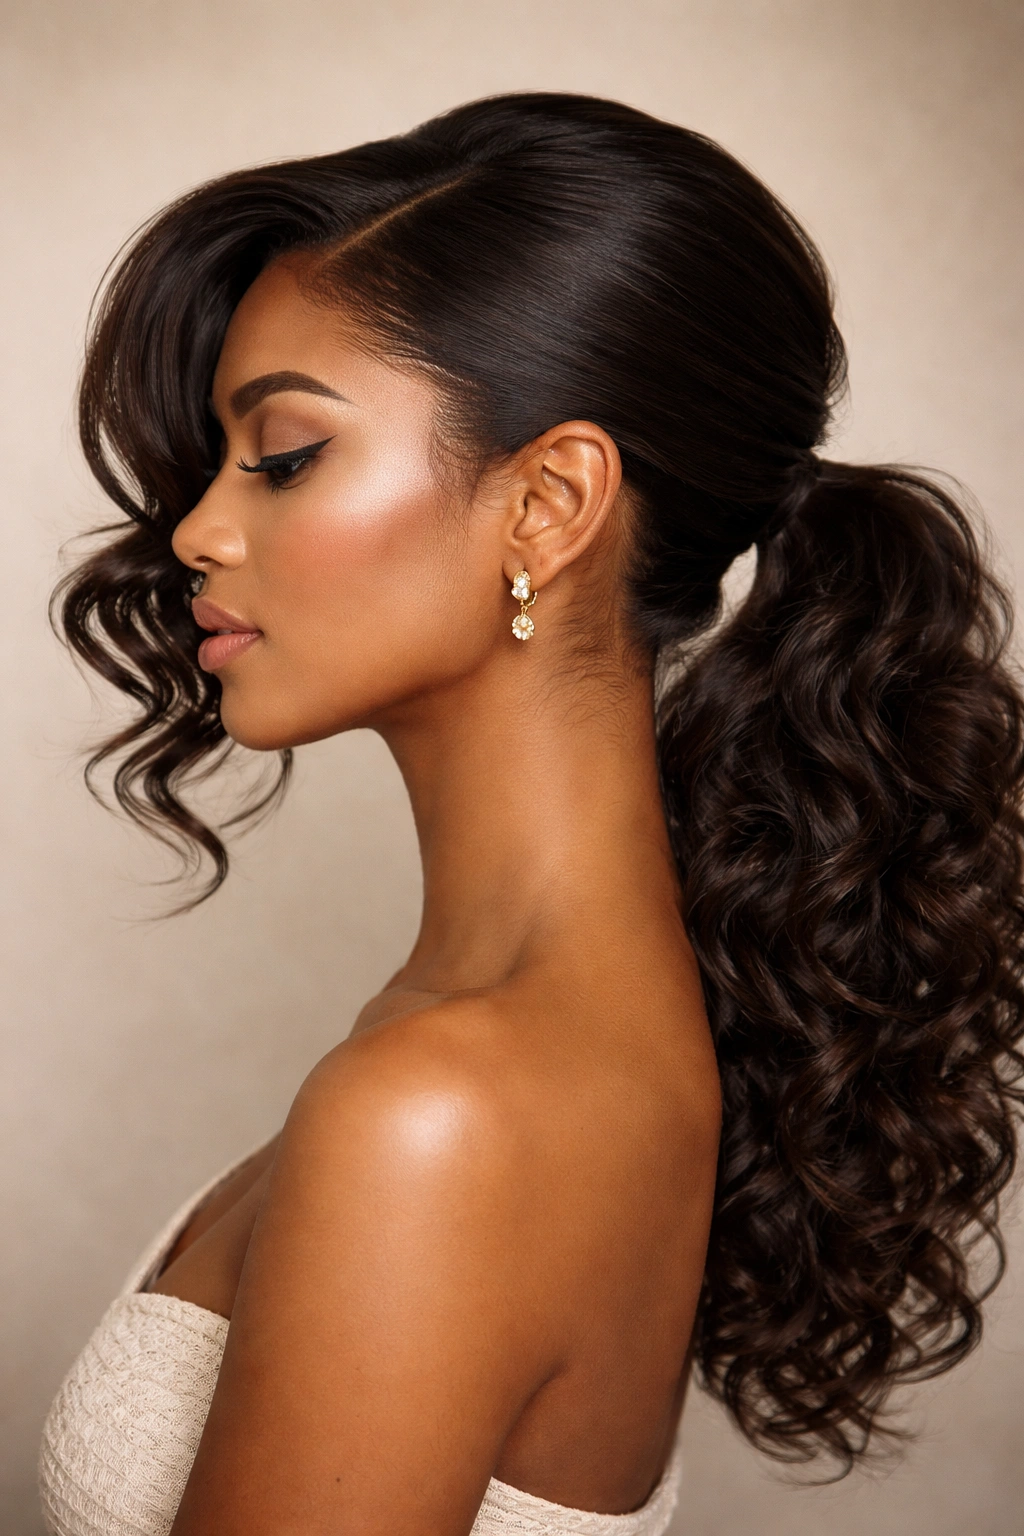
For a style that reads as effortlessly romantic rather than structured, the side-swept low swoop is your answer. This ponytail sits lower on the back of your head—closer to your neck than your crown—and the swoop comes from one side, creating an asymmetrical, undone-elegant look. It’s the kind of style that makes you look like you barely tried, even though you absolutely did.
What Makes It Stand Out
Low ponytails on curly hair can sometimes look droopy or loose, but the swooped section anchors everything and creates visual interest. Because you’re working lower on the head, your curls’ natural bounce makes the swoop look fuller and more textured than it would on straight hair. This style photographs beautifully from the side profile, which is why it’s become such a favorite for everything from engagement shoots to casual dinner dates.
Step-by-Step Guide
- Start with air-dried or refreshed curls that have their natural pattern intact
- Brush gently through your hair to detangle, working from the ends up
- Create a deep side part and determine which side will provide your swooped section
- Take a 3-inch section of hair from your temple on the side with more volume
- Twist this section loosely as you sweep it back toward the back of your head (this twist creates definition)
- Gather the rest of your hair into a low ponytail at the nape of your neck
- Wrap the twisted swooped section around the base and secure with bobby pins
- Leave a few small curls loose near your face for softness
- Use your fingers to gently pull and shape the swooped section so it has movement
Worth knowing: This style looks best when the swoop has some texture rather than being completely smooth—embrace your curl pattern in that section.
3. The Twisted Swoop with Crown Detail
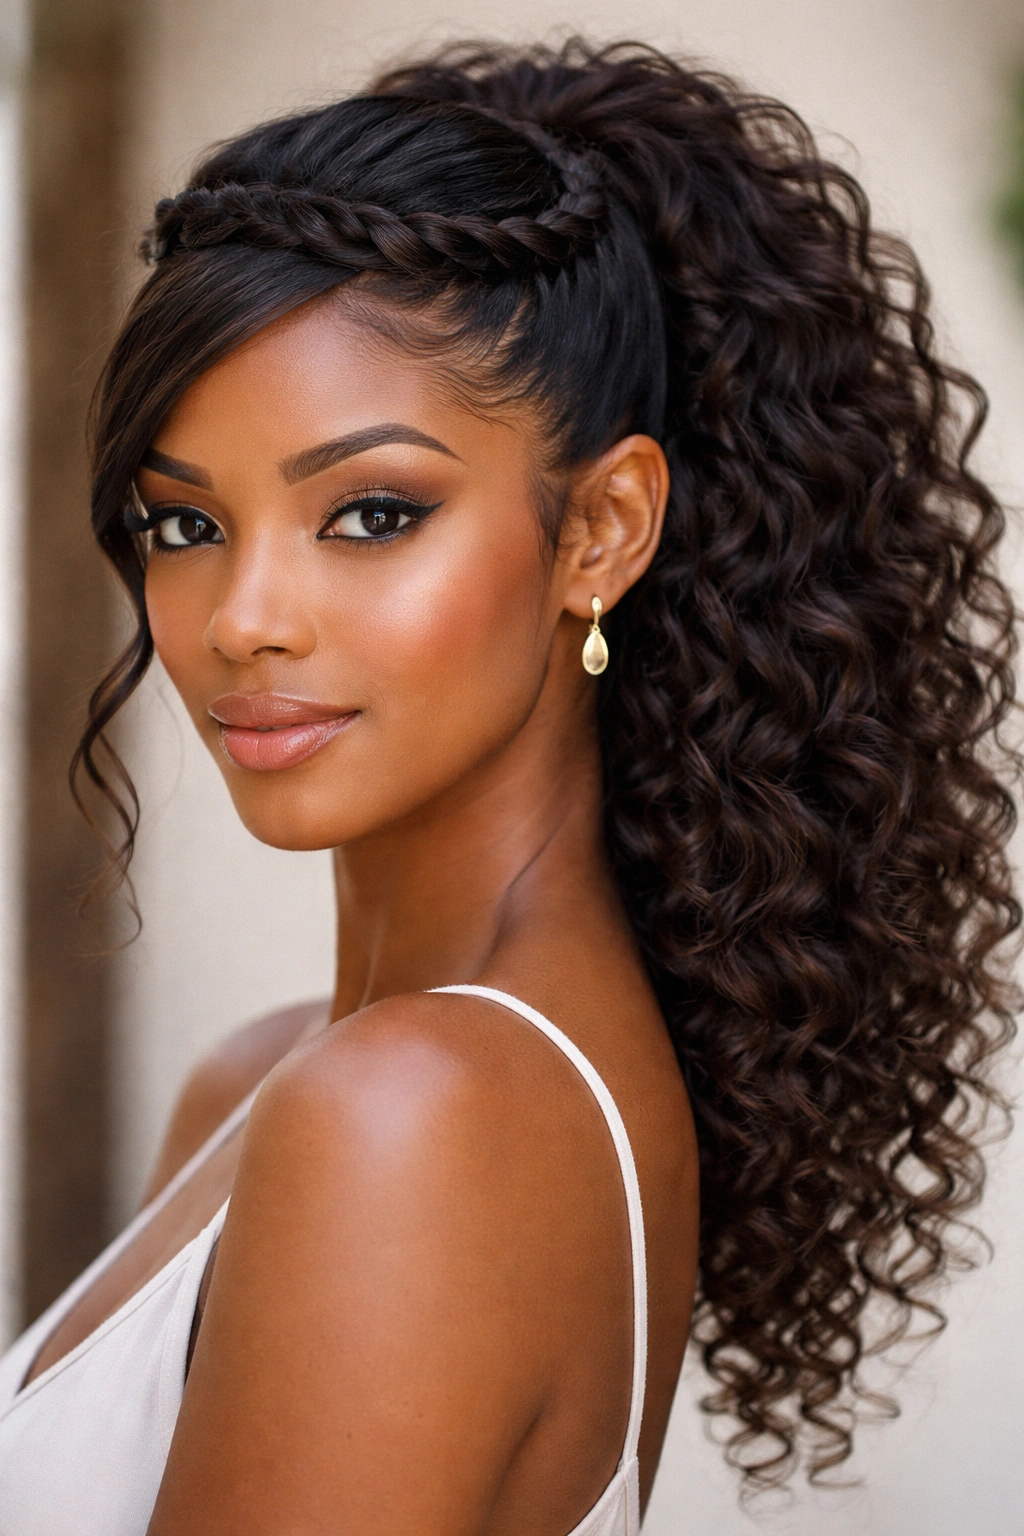
This style combines the sophistication of a crown braid with the soft practicality of a swoop ponytail. Instead of a simple sweep, you’re creating a twisted or braided detail that sits across the top of your head like a crown, with the ponytail gathered beneath it. The result is a style that feels special and intentional without being overly complicated.
Key Benefits of This Approach
The twisted crown detail adds visual interest and makes a simple ponytail feel instantly more polished and styled. On curly hair, the twist naturally shows off your texture, and because curls hold twists beautifully, the detail stays put throughout the day without needing excessive product. This is the kind of style that works equally well for a wedding guest look or a professional setting where you want to show intentionality.
How to Build It
- Start with moisturized, defined curls
- Create a side part and brush gently to distribute curls evenly across your head
- Take a 2-inch section of hair from the temple area on one side of your part
- Twist this section loosely, adding small sections of hair as you move toward the back of your head (like a twisted crown braid, but looser)
- Secure the other end of the twist with a bobby pin on the opposite side of your head
- Gather all hair below the twist line into a ponytail
- Wrap a thin section of hair from the ponytail around the elastic to hide it
- Gently tug on sections of the twisted crown to add volume and texture
- Secure everything with bobby pins as needed, particularly where the crown twist meets the ponytail base
Quick facts:
- Works beautifully with curls ranging from loose waves to tight coils
- Can be worn high or low depending on where you secure the crown
- Takes about 5-7 minutes once you get the hang of it
- Pairs perfectly with statement earrings or delicate drop earrings
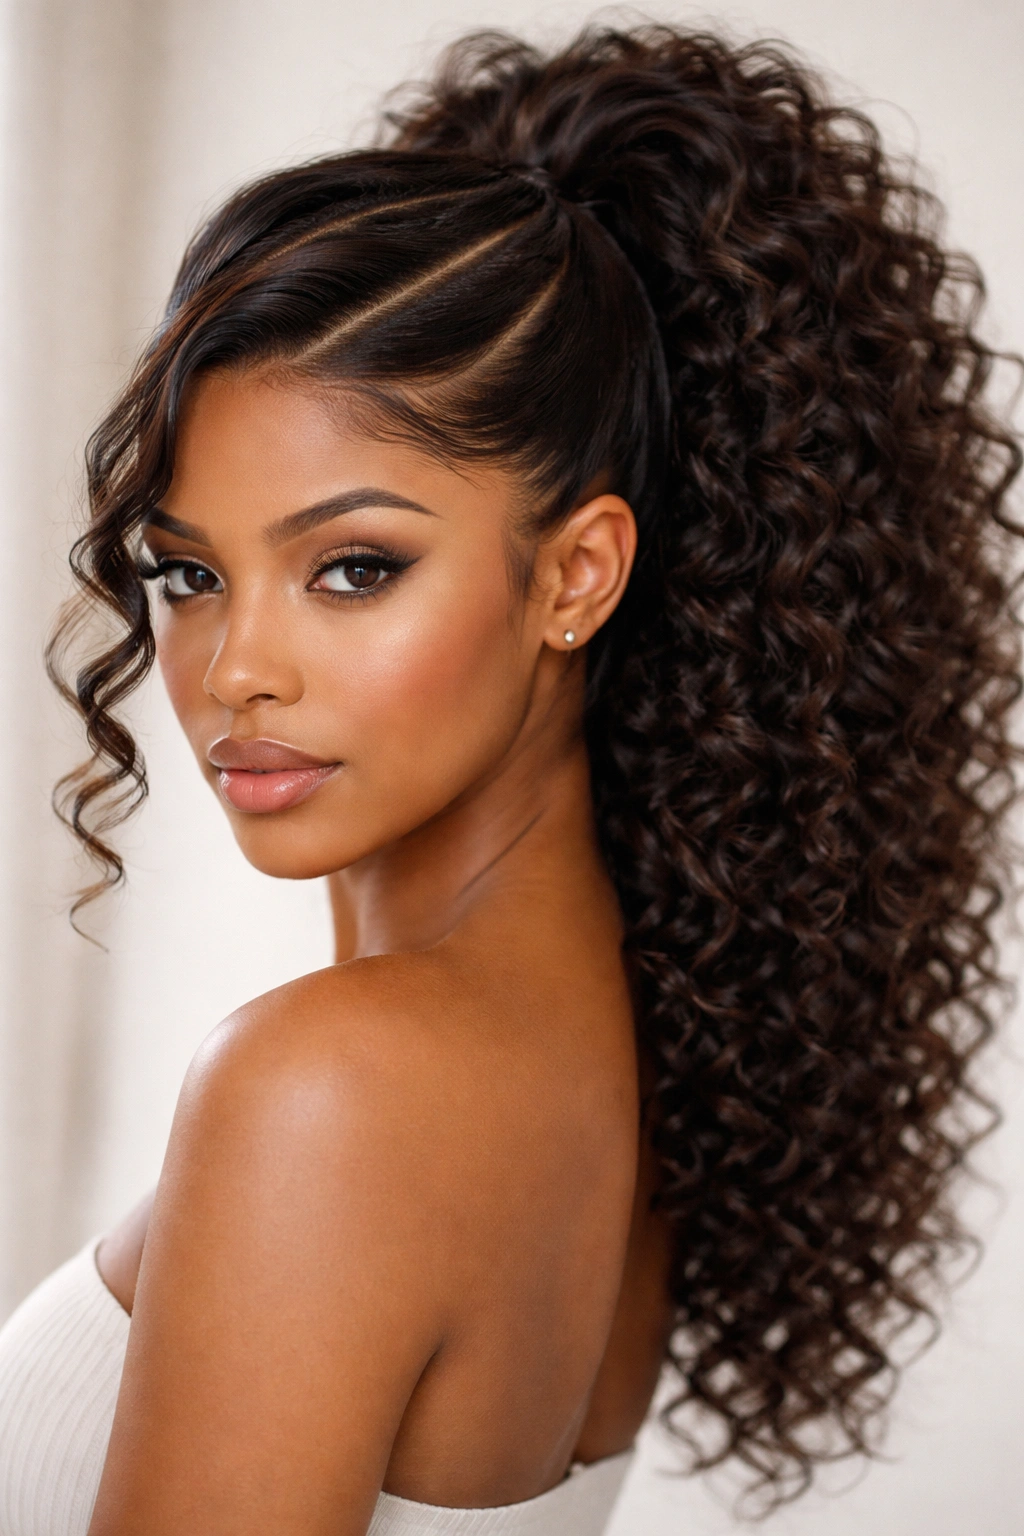
4. The Two-Toned Swoop Ponytail
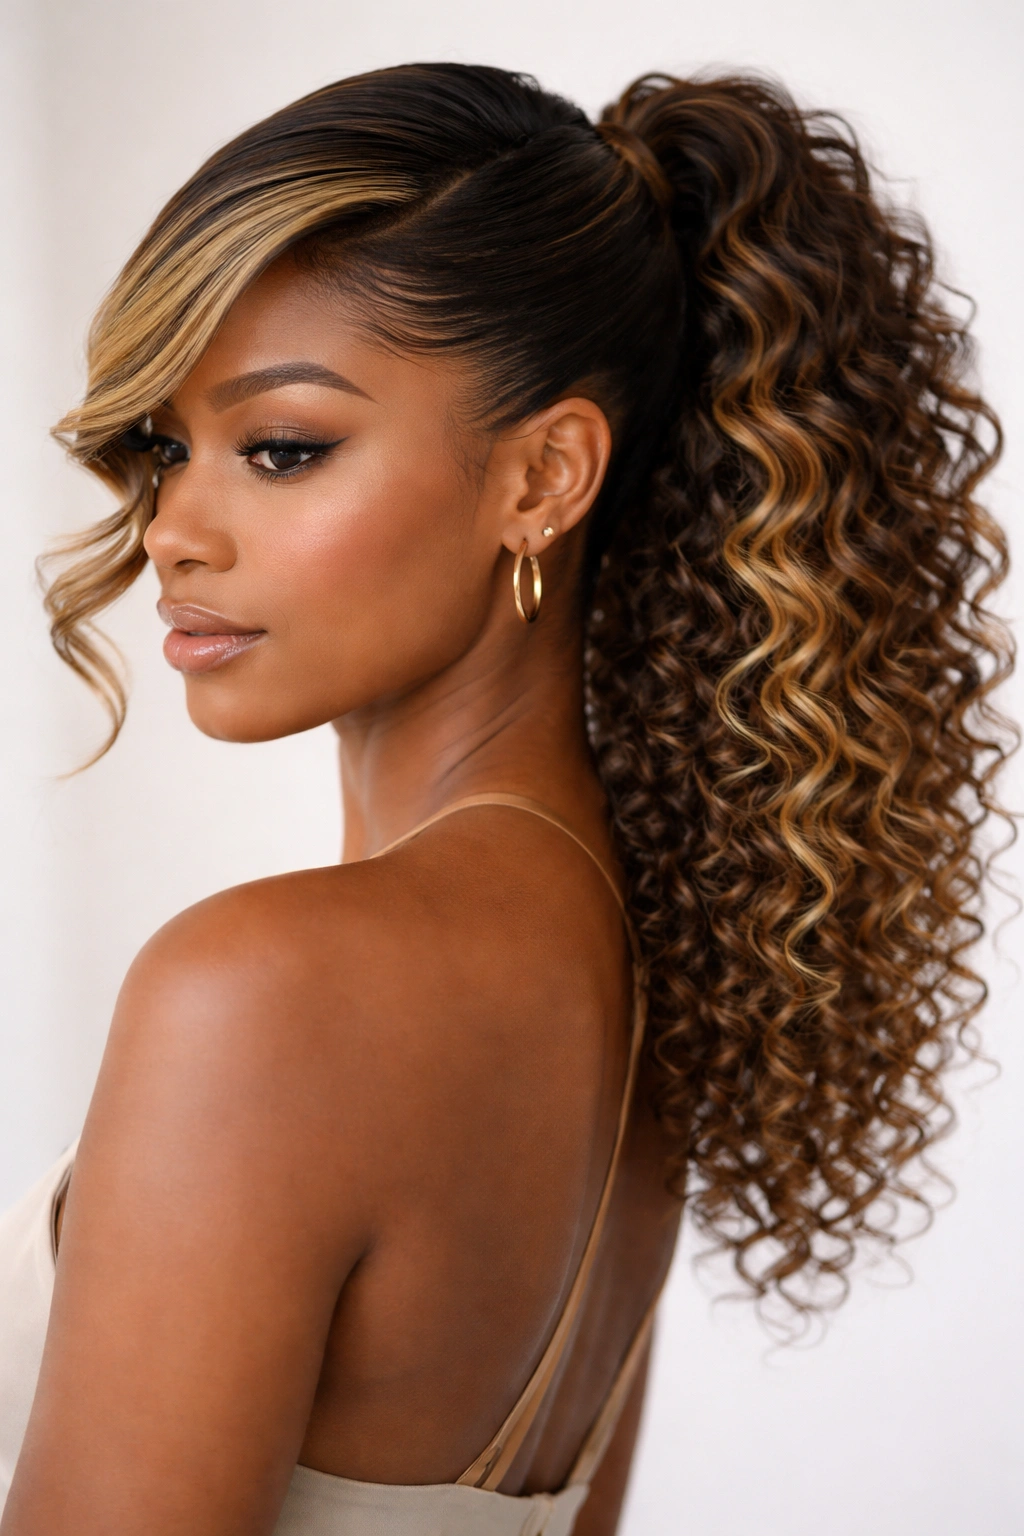
If your curly hair has natural color variation, dimension, or if you’ve added highlights, lowlights, or color melting, the two-toned swoop is designed to showcase that beautiful complexity. This style strategically sections hair to let different colors or tones be visible in both the swooped section and the ponytail, creating depth and visual richness.
Why Color-Conscious Styling Matters for Curly Hair
Curly hair naturally fragments light differently than straight hair does, which means you can have multiple tones visible at once without them looking chaotic. The swoop style actually emphasizes color dimension because the swooped section is positioned to catch light, and the ponytail sits just behind it, creating a natural color story from front to back. This is your opportunity to make those carefully colored curls work harder for your overall look.
Creating the Two-Toned Effect
- Identify which sections of your hair contain different tones or colors
- Section your hair so that at least two distinct tones are visible when pulled back
- If you have highlights or lighter tones near your face, make sure those appear in your swooped section
- Create a swoop from one side, ensuring the lighter (or your primary) tone is visible
- Gather the rest of your hair into a ponytail in a way that shows color variation
- The ponytail should reveal a secondary tone or depth that differs from the swoop
- Use minimal product so the natural light-catching properties of each tone come through
- Avoid heavy shine products that can muddy color dimension—instead use a matte finish hairspray
Insider note: This style is worth the effort if you’ve invested in dimensional color for your curls because it actually makes that investment more visible and valuable to your overall appearance.
5. The Voluminous Bubble Swoop
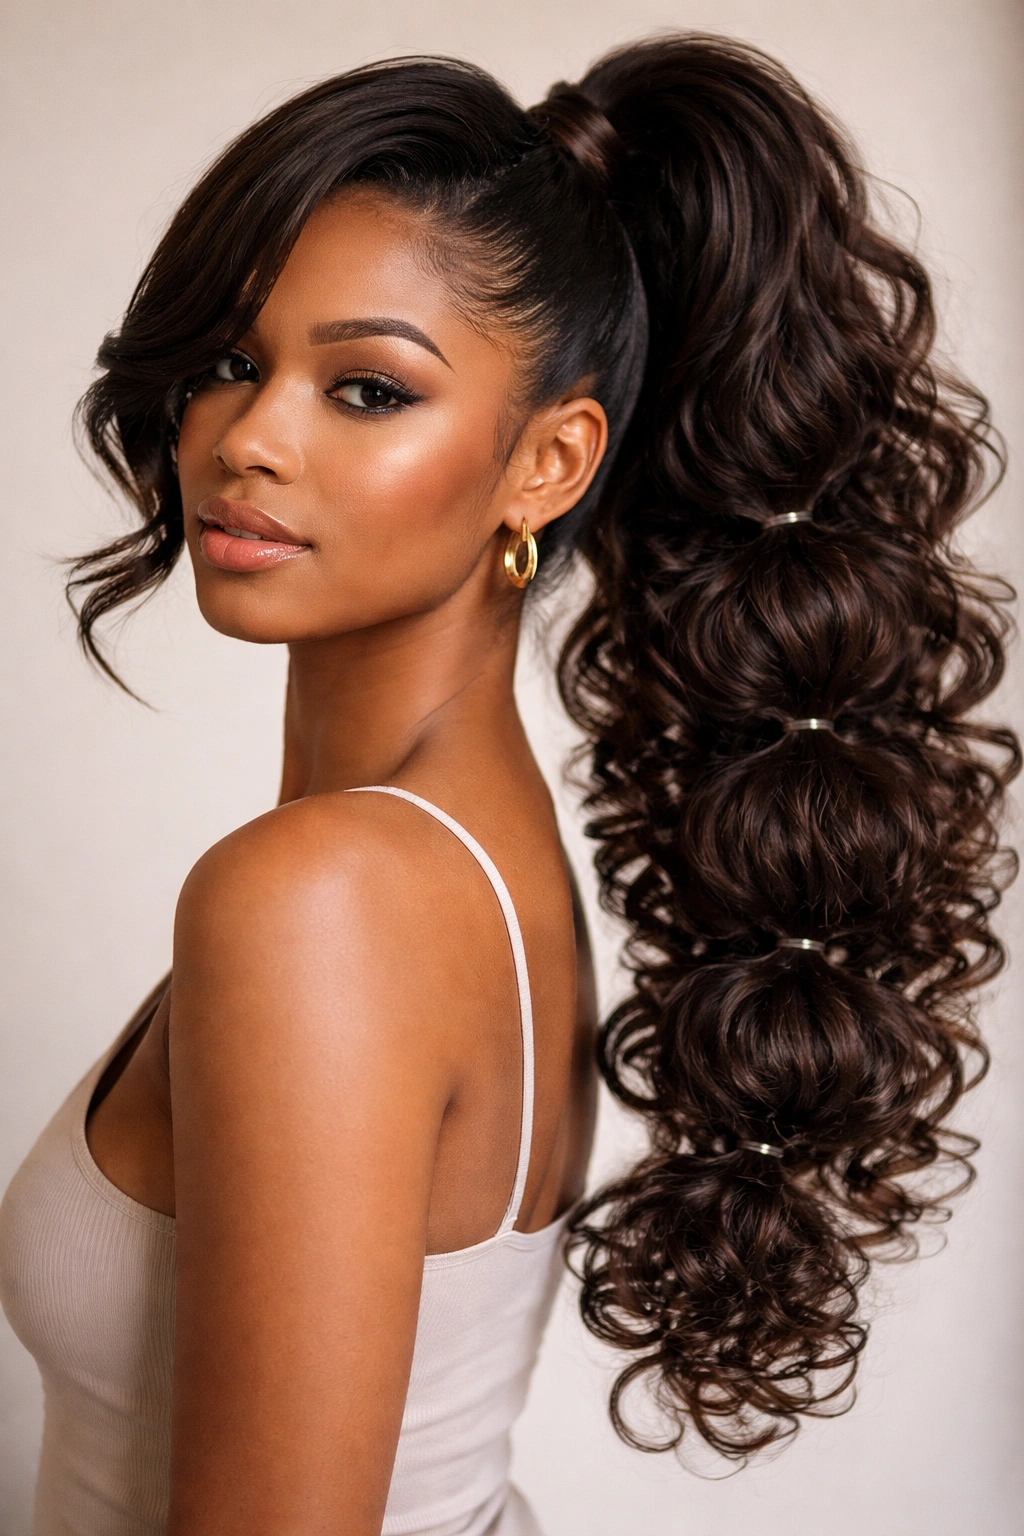
Think of this as your statement-making style—it combines the playful, textured look of bubble ponytails with the elegance of a swoop. You’re creating segmented sections in your ponytail with elastic bands to form little “bubbles” of curls, and the swoop section anchors the entire look with sophistication. The result is eye-catching and undeniably fun.
What Makes the Bubble Element Work
Curly hair is naturally suited to bubble ponytails because your texture creates organic separation and fullness in each bubble without needing to tease excessively. The swoop adds polish and keeps the style from reading as too juvenile or purely playful—instead, it feels contemporary and fashion-forward. Each bubble is an opportunity to let your curl pattern shine and move independently, creating movement and dimension that a regular ponytail simply can’t achieve.
Building Your Bubble Swoop
- Begin with well-moisturized, bouncily defined curls
- Create a side swoop from one temple, twisting gently as you move back
- Secure the swoop and the bulk of your hair into a high ponytail with an elastic
- Wrap a small section of hair around the elastic to hide it
- About 2 inches down from the ponytail base, place another elastic around your ponytail, gathering all the hair
- Gently pull the hair between the two elastics upward and outward to create your first bubble
- Repeat this process, adding elastics every 2-3 inches down the length of the ponytail
- After creating 3-4 bubbles, let the remaining length fall free as your final tail
- Use your fingers to gently tousle each bubble so your curls spring out and show their texture
- Finish with hairspray to hold the bubbles in place without making them feel stiff
What to watch for: Make sure your elastics are tight enough that the bubbles hold but not so tight that they crease your curls or cause breakage—you want tension, not pain.
6. The Textured Swoop with Micro Braids
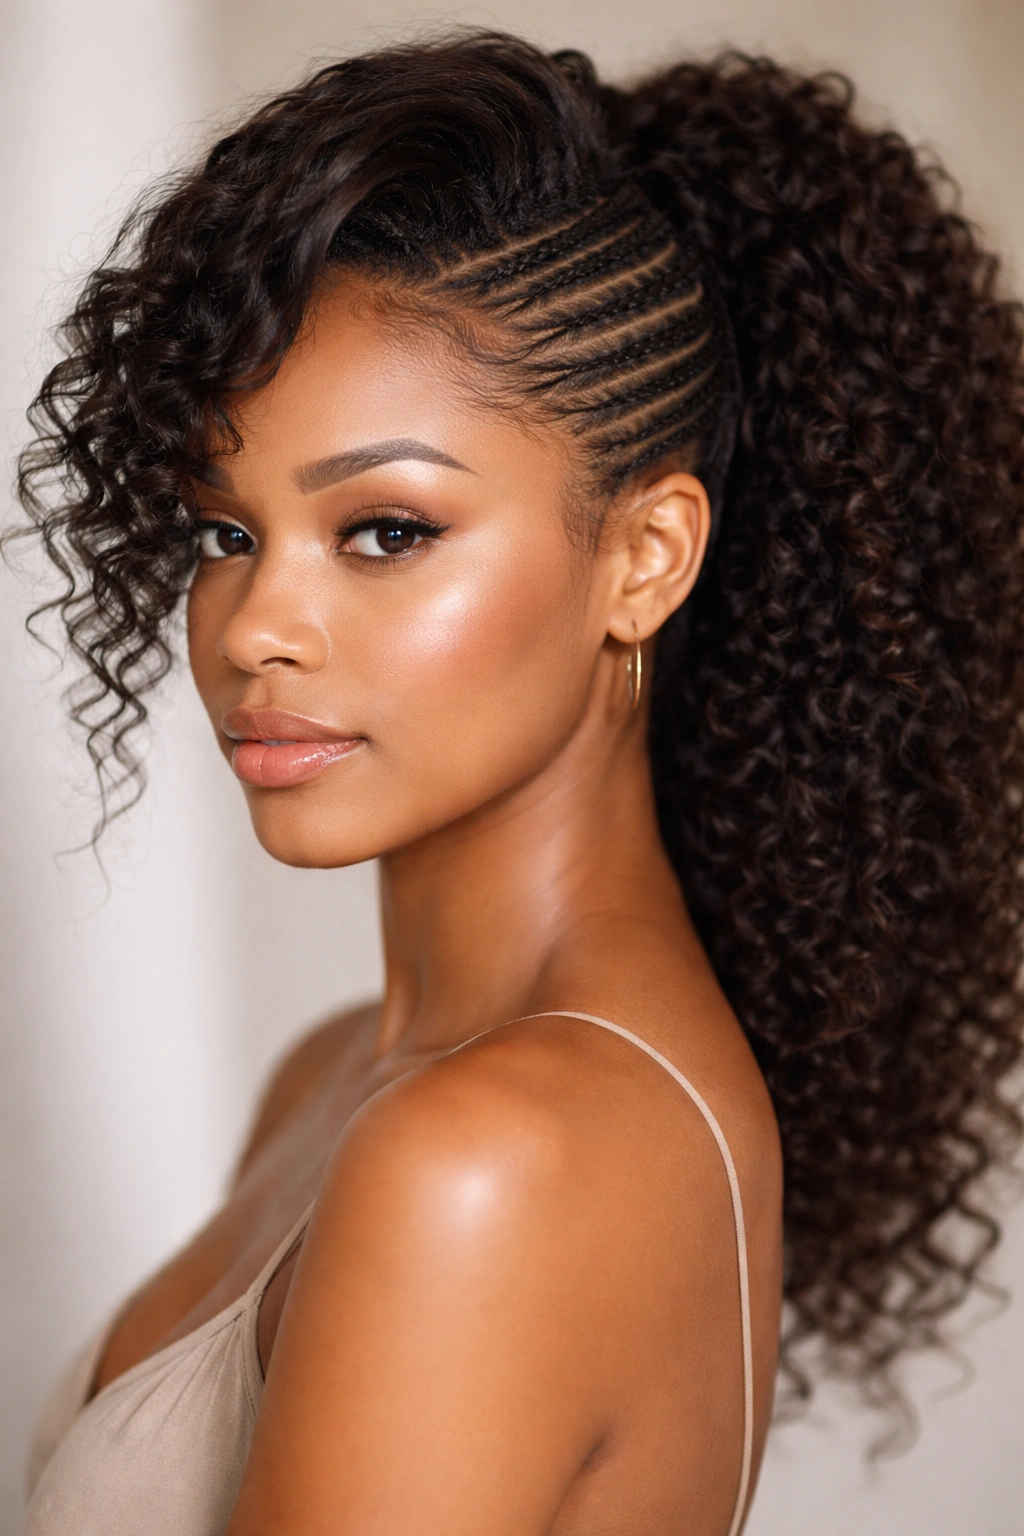
For a style that celebrates your curls while adding intricate detail, the textured swoop with micro braids is pure artistry. You’re incorporating tiny braids (either boxer braids, Dutch braids, or simple three-strand braids, depending on your patience level) into your swoop section, creating a style that’s both bohemian and polished.
How Micro Braids Enhance Curly Hair
Micro braids on curly hair don’t need to be perfectly tight or uniform—in fact, they look better slightly undone because your natural texture shows through and softens any perfectionism. The braids become a texture element that adds dimension without requiring smoothing products. When these braids are incorporated into a swoop, they create visual lines and structure that make even loose curls look intentional and styled.
Creating Braided Swoops
- Define your curls with your preferred styling products and technique
- Decide how many braids you want to incorporate (1, 2, or 3 work well for most)
- Take a section of hair from your temple area where you want the swoop to begin
- Create a simple three-strand braid using that section and hair as you move back toward your crown
- Don’t worry about making it perfect—a slightly loose, textured braid actually looks better on curly hair
- Secure the end of the braid with a tiny elastic
- Gather the rest of your hair (including any loose curls from the braid area) into a ponytail
- Wrap the braided section around the base of the ponytail and secure it
- Gently pull on the sides of the braid to loosen it and make the texture more prominent
- Leave a few face-framing curls loose if your swoop allows
- Use a flexible-hold product to keep everything in place while allowing movement
Pro tip: This style photographs beautifully because the braids add textural interest that reads clearly in photos—perfect if you’re documenting the style on social media.
7. The Sleek Swooped High Pony
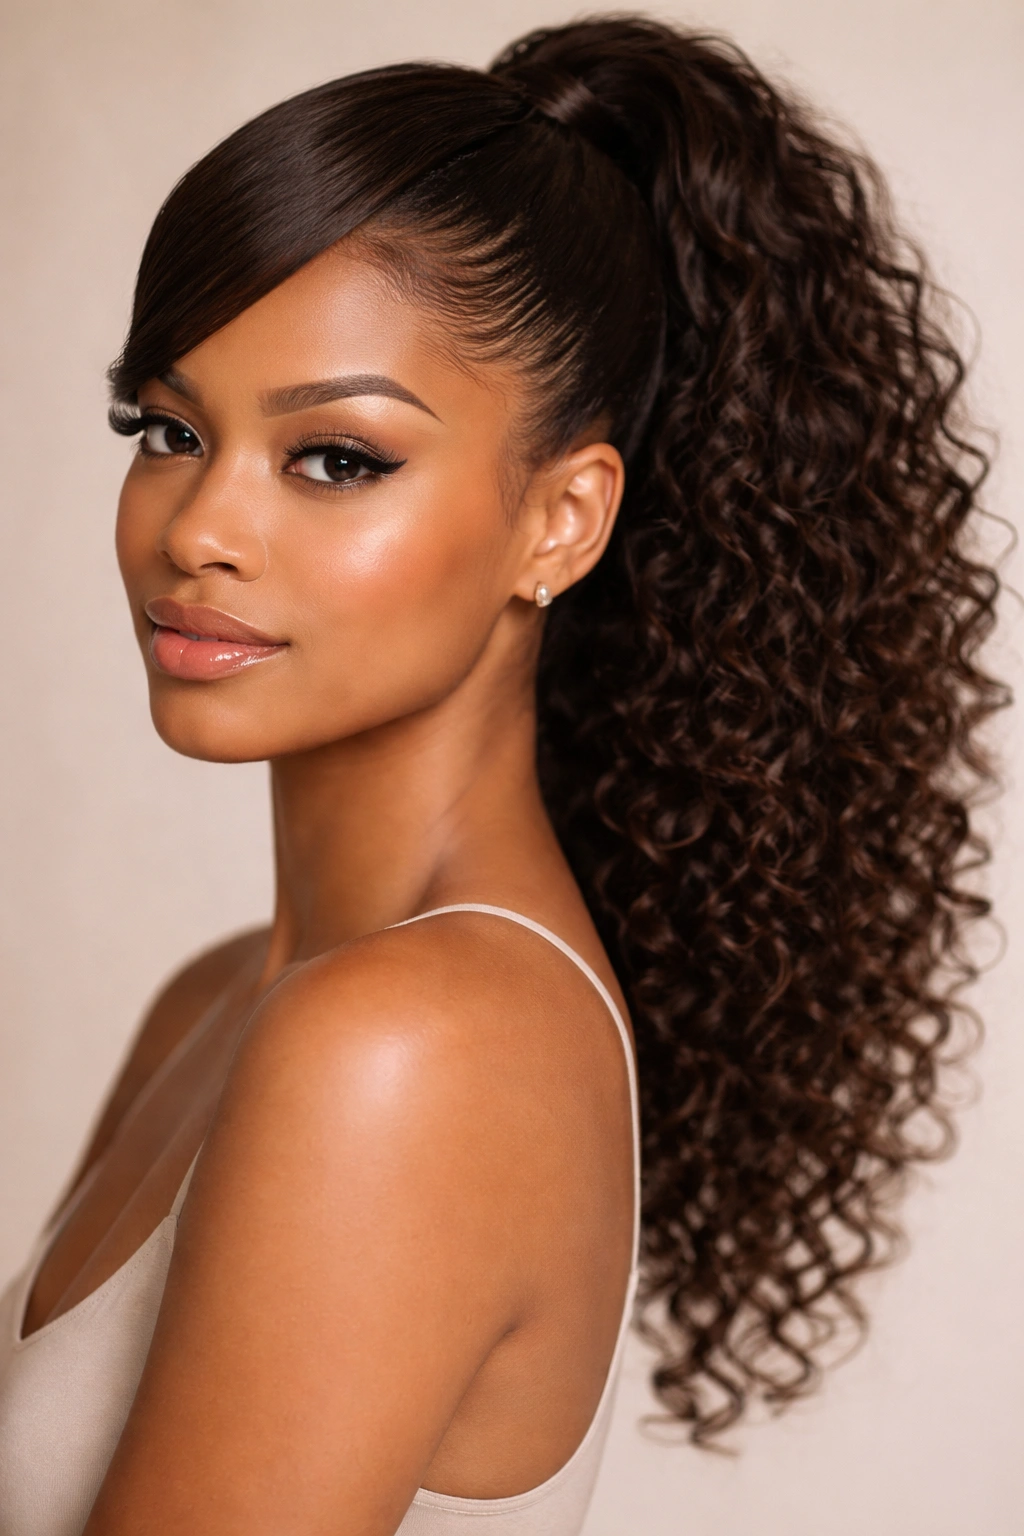
Sometimes what curly hair needs is a bit of intentional smoothness paired with softness and movement. The sleek swooped high pony combines a deliberately polished swoop section with a high ponytail, creating a style that bridges sporty and sophisticated. This is your go-to for looking put-together without sacrificing the texture you love.
Why Selective Smoothing Works
You’re not straightening your entire head—just smoothing the swoop section enough that it creates a visible contrast with the textured ponytail. This selective approach respects your curl pattern while showing intentionality and care. The high placement of the ponytail makes you look lifted and energized, while the sleek swoop adds an element of control and polish that reads as effortlessly competent.
Achieving the Look
- Start with clean, moisturized curls
- Apply a smoothing serum or lightweight cream to the section you’ll use for your swoop
- Brush or comb this section gently to smooth it while maintaining some texture
- You want it smoother than your natural curls but not completely straight—think “polished waves” rather than “flat”
- Create your swoop from this smoother section, sweeping it back and securing it
- Gather the rest of your hair into a high ponytail, leaving the ponytail itself curly and textured
- Wrap a thin section around the elastic to hide it
- The contrast between the sleek swoop and the curly ponytail is intentional and styled
- Finish with a medium-hold hairspray that won’t weigh down your curls
Quick facts:
- Can be worn to work, the gym, or a casual night out
- Takes about 5 minutes once you’re practiced
- Works on all curl types when you use appropriate smoothing products
- Pairs well with a sleek, minimal makeup look or a bold lip
8. The Half-Swoop, Half-Down Style
Not everyone wants a full ponytail, and this style gets that. You’re creating a swoop that gathers hair from both sides of your face and anchors it at the crown, while leaving the bulk of your curls down and loose. It’s the sweet spot between fully styled and completely casual—you get the face-framing benefit of a swoop without being fully pulled back.
The Appeal for Curly Hair
This style is perfect for days when your curls are having a particularly good texture day and you want to show them off without hair falling in your face. The swoop keeps your front sections controlled and framing, while the down curls get to do what they do best: look gorgeous. You’re getting the visual benefit of a styled look without the commitment or maintenance of a full ponytail—it’s genuinely practical for active days.
How to Execute It
- Start with freshly refreshed or air-dried curls
- Gently brush or finger-comb your hair to smooth without disrupting curl pattern
- Take a 2-inch section from your right temple and sweep it back toward the crown
- Take an equal section from your left temple and sweep it back to meet the first section
- Secure both sections together at the crown with bobby pins, hiding them under the top layer of curls
- You can also use a small elastic if you prefer more security
- Leave all the hair below the crown line completely down and curly
- Gently tousle the swooped sections and the down curls to enhance texture
- Use a light hairspray to keep the swoop secure while letting the down curls move naturally
Worth knowing: This style works especially well if you’re going to an event where you want to look nice but need to feel physically comfortable and unrestricted—it’s sophisticated without feeling formal.
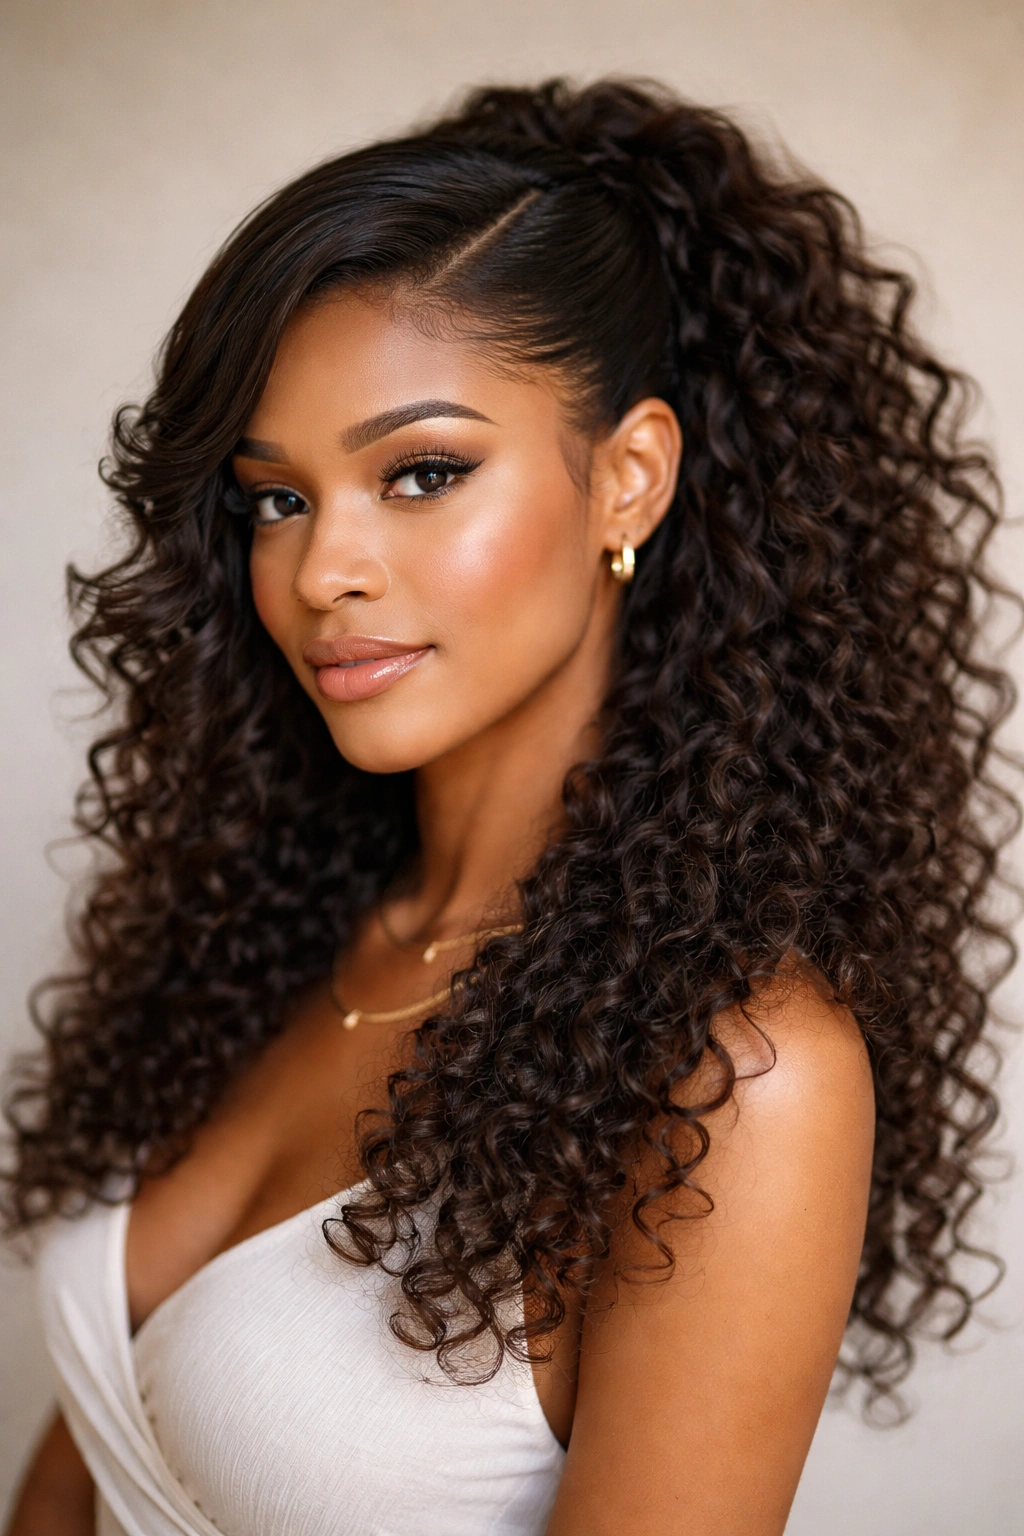
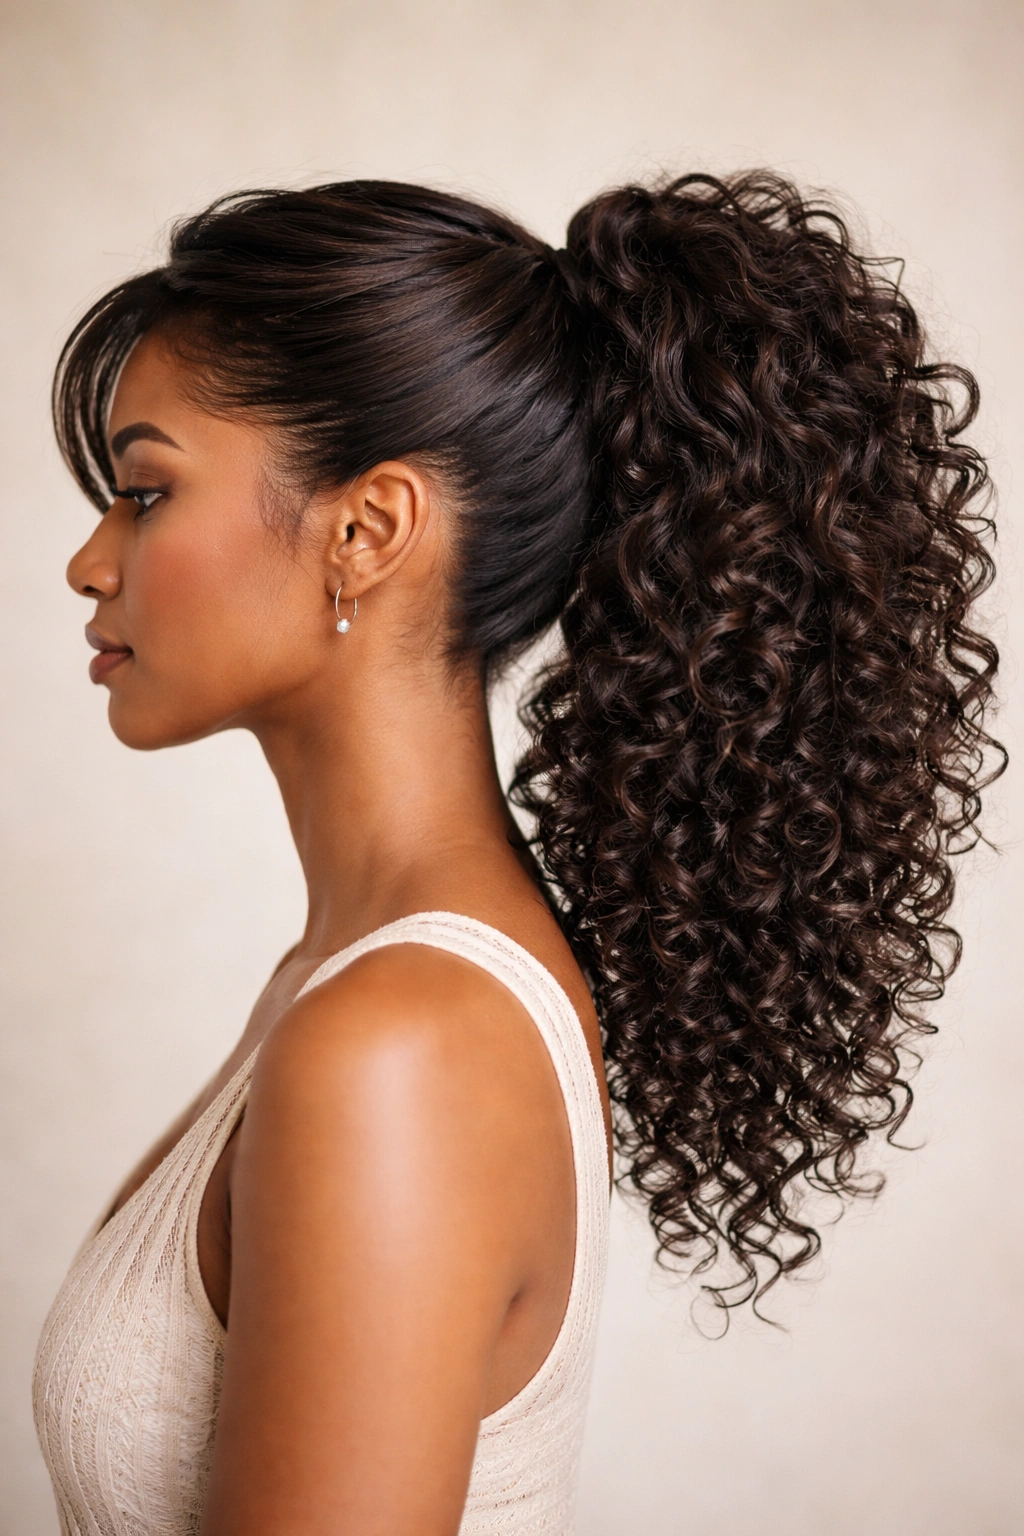
9. The Swoop Ponytail with Spiral Curls
If you have curls that spiral naturally or if you’ve enhanced them with curl-setting techniques, this style celebrates that spiral texture gorgeously. The swoop section showcases defined spirals, and the ponytail itself is gathered in a way that lets individual spiral curls bounce and shine. It’s a style that makes people ask what curl method or product you use.
Making Spirals the Star
Spiral curls have a specific visual impact—they catch light differently than looser curls, and they read as intentional and special. By featuring them in both your swoop and your ponytail, you’re making a statement that you understand and value your natural curl pattern. This style requires healthy, well-moisturized curls because the definition is everything, but the payoff in terms of visual impact is extraordinary.
Creating Spiral Definition
- Start with well-defined curls, either from overnight drying, plopping, or specific curl-setting techniques
- Apply a curl-defining gel or cream to sections of your hair, scrunching upward to encourage spiral formation
- Use a diffuser attachment on your blow dryer if you’re setting curls, or let them air-dry with products in
- Once your curls are completely set and dry, gently finger-comb sections to separate spirals without disrupting them
- Create a swoop from one side, being intentional about how you gather the spiral curls so they stay cohesive
- Secure the swoop, then gather the rest of your hair into a ponytail in a way that respects the spiral pattern
- Rather than gathering too tightly, let the spirals form the ponytail’s natural shape
- Use a flexible-hold hairspray that won’t make spirals feel crunchy or frozen
- Avoid touching the spirals too much once you’ve set them—minimal handling preserves definition
Insider note: This look is worth the extra effort if you’re photographing or recording yourself because spiral curls create texture that photographs beautifully in any lighting.
10. The Wrapped Swoop with Pearl Pin Details
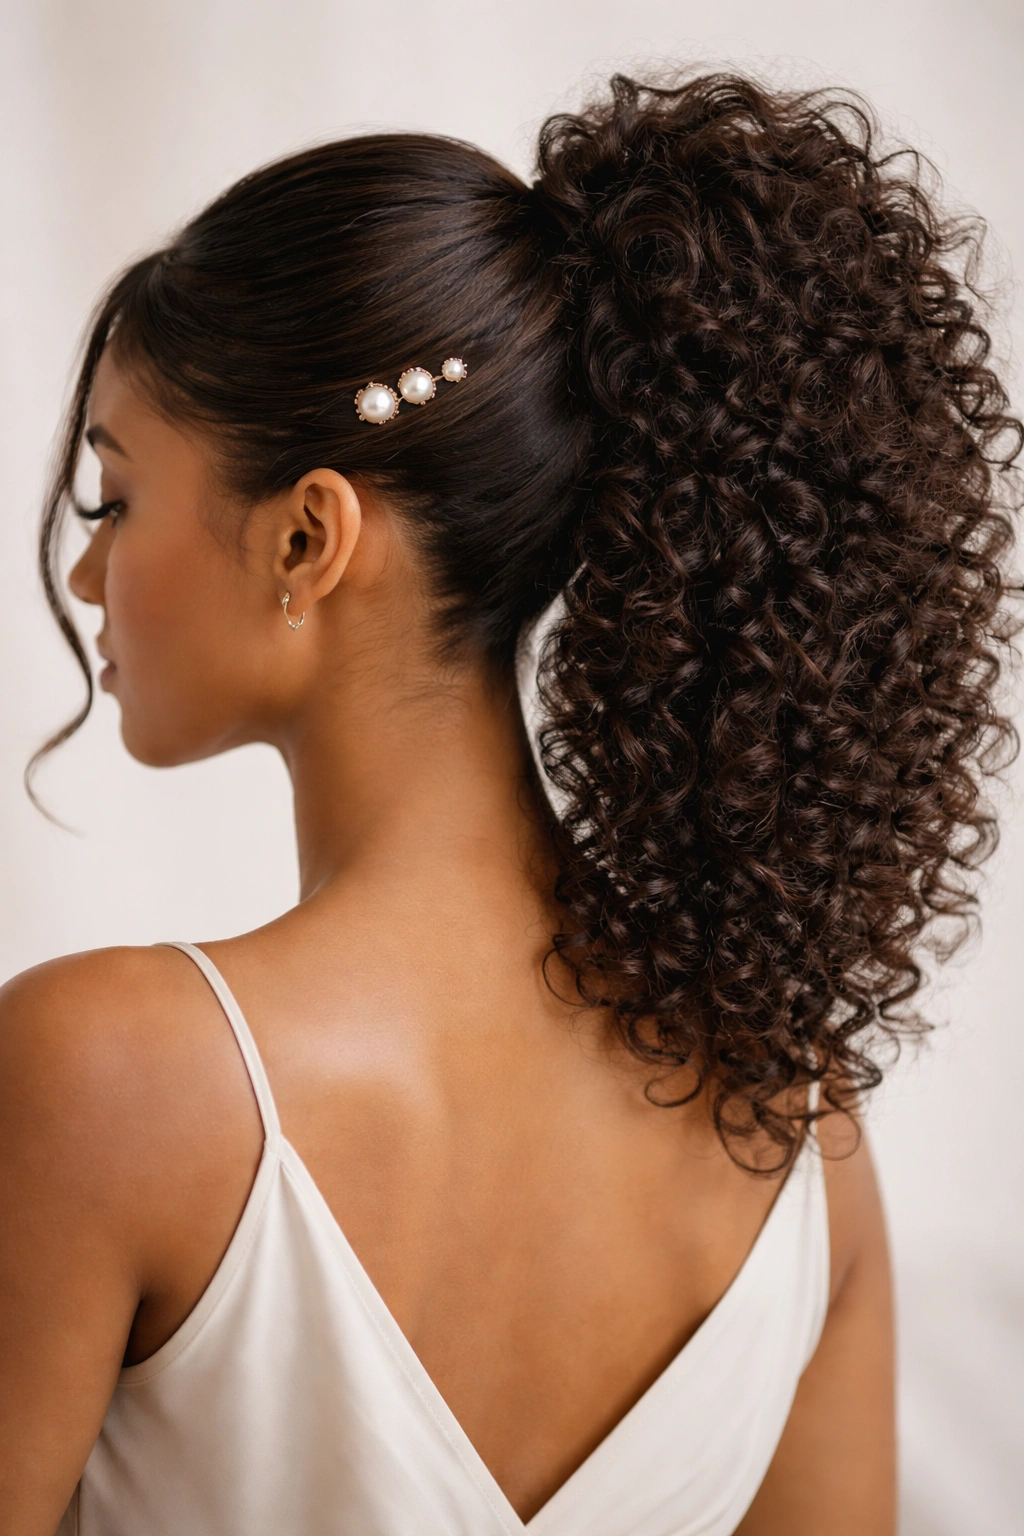
Elegance meets intricate detail in this refined style. You’re creating a swoop, then adding a wrapped section (where hair is wrapped around the elastic or bobby pin placement) and securing everything with decorative pearl pins. The result feels like something from a high-end salon or a magazine editorial.
Why Details Matter
The pearl pins aren’t just functional—they’re styling elements that draw attention to the swoop and add a luxe touch without being loud or overwhelming. On curly hair, these small details actually help emphasize your texture rather than distract from it, because you’re adding visual interest at a specific focal point. This is a style that makes people notice you’ve put thought and care into your appearance.
Building the Wrapped Swoop Look
- Start with defined, well-moisturized curls
- Create a side swoop from your temple, gathering hair as you move back
- Instead of using a simple bobby pin, secure the swoop with a decorative pearl pin or U-pin
- Gather the rest of your hair into a high or mid-height ponytail
- Use a silk or satin elastic to minimize breakage and frizz
- Take a thin section of hair from the ponytail (about 1 inch wide)
- Wrap this section around the elastic and the base of the ponytail, covering the elastic completely
- Secure the wrapped section with another pearl pin placed strategically
- You can add a second decorative pin if your style feels like it needs more balance
- Make sure the pins are placed securely so they won’t slip throughout your day
- Enhance your natural curls with a light hairspray that won’t make them feel stiff
- Leave a few tender curls loose near your face for softness
Pro tip: Pearl pins in gold, silver, or rose gold all work, but choose based on your skin tone and other metallic jewelry—consistency in metal tone makes the overall look feel more intentional.
11. The Layered Swoop Ponytail
This style uses strategic layering to create depth and dimension that’s particularly flattering on fuller, thicker curly hair. You’re creating multiple swooped sections at different heights, each one anchoring into a ponytail that shows off individual curls rather than appearing as one solid mass. The result is a style with serious visual complexity and movement.
How Layering Adds Dimension
When you layer swoops, you’re creating lines and depth that make your curls look more intentional and styled. Each layer is an opportunity to showcase different sections of your hair, and because curly hair naturally has texture, these layers automatically look multidimensional. This approach works beautifully on textured hair types that might otherwise feel heavy when pulled back into a single, solid ponytail.
Creating Layered Swoops
- Begin with clean, well-defined curls that have been gently brushed or finger-combed
- Identify at least two sections you’ll use for swoops—one slightly higher, one slightly lower
- Create your first swoop from the temple area on one side, securing it with a bobby pin at the mid-crown
- Create your second swoop from the temple area on the same side (slightly lower and further back), securing it at a slightly lower point
- These two swoops will create diagonal lines across your head
- Gather the rest of your hair into a high ponytail
- Secure both swooped sections into the ponytail, making sure bobby pins are hidden
- Wrap a thin section of hair around the elastic to finish the look
- Gently finger-style the ponytail so curls separate and show individual texture
- Avoid tight banding—your curls should be visible as distinct curls rather than one chunky mass
- Use a light-hold product that won’t weigh down the layers
What to watch for: This style is more complex, so make sure each layer is actually visible and contributes to the overall shape—if your layers blend together, you’ve lost the point of the style.
12. The Zigzag Swoop Pattern
This is your playful, fashion-forward style: instead of sweeping hair straight back, you’re creating a zigzag pattern with your swoop sections. You might sweep from right temple back, then incorporate a section that sweeps from the left side partway, creating an interesting geometric pattern. It’s modern, intentional, and absolutely worth the few extra minutes.
What Makes Zigzag Unique
A traditional swoop goes in one direction, but a zigzag adds visual interest and a contemporary edge. This pattern is particularly striking on curly hair because the texture of each zigzag section reads clearly and creates natural shadows and highlights. It’s the kind of style that makes you look like you have serious hair skills, even if it’s not as complicated as it appears.
Executing the Zigzag
- Start with your curls defined and smooth enough to work with, but not straightened
- Create your first swoop from the right temple, sweeping back and securing loosely
- Create a second swoop that starts from the left side but only goes partway back, creating a diagonal opposite from your first swoop
- The two swoops should create visible diagonal lines that form a subtle zigzag pattern
- Gather the remaining hair into a ponytail, allowing the swooped sections to remain somewhat independent
- Secure everything with bobby pins, making sure they’re hidden under the upper layer of curls
- Use your fingers to gently separate and shape each swooped section so the zigzag pattern is visible
- The ponytail itself should remain textured and curly, not pulled too tightly
- Finish with a flexible-hold hairspray that allows movement
Quick facts:
- Takes about 8-10 minutes once you understand the pattern
- Photos beautifully because the zigzag creates visible lines and dimension
- Works on all curl types and lengths
- Can be dressed up or down depending on your overall styling
Final Thoughts
Swoop ponytails on curly hair are genuinely one of the most flattering and practical styles you can master. The key is choosing a swoop style that matches your curl pattern, your lifestyle, and the occasion. Whether you’re going for sleek and polished, textured and bohemian, playful and dimensional, or something in between, there’s a swoop ponytail here that’ll work with your curls rather than against them.
The best part about these styles is that they’re all rooted in the same principle: strategically using your curl pattern to create visual interest while keeping hair off your face and neck. Once you understand that principle, you can adapt any of these looks to work with your specific texture, length, and the styling products you already have on hand.
Start with whichever style speaks to you most, and don’t worry about perfection on your first try. Your curls are inherently forgiving, and even a slightly loose or imperfect swoop usually looks intentionally undone rather than messy. Practice once or twice, and soon you’ll have another hairstyle that works for everything from lazy Sundays to important events.