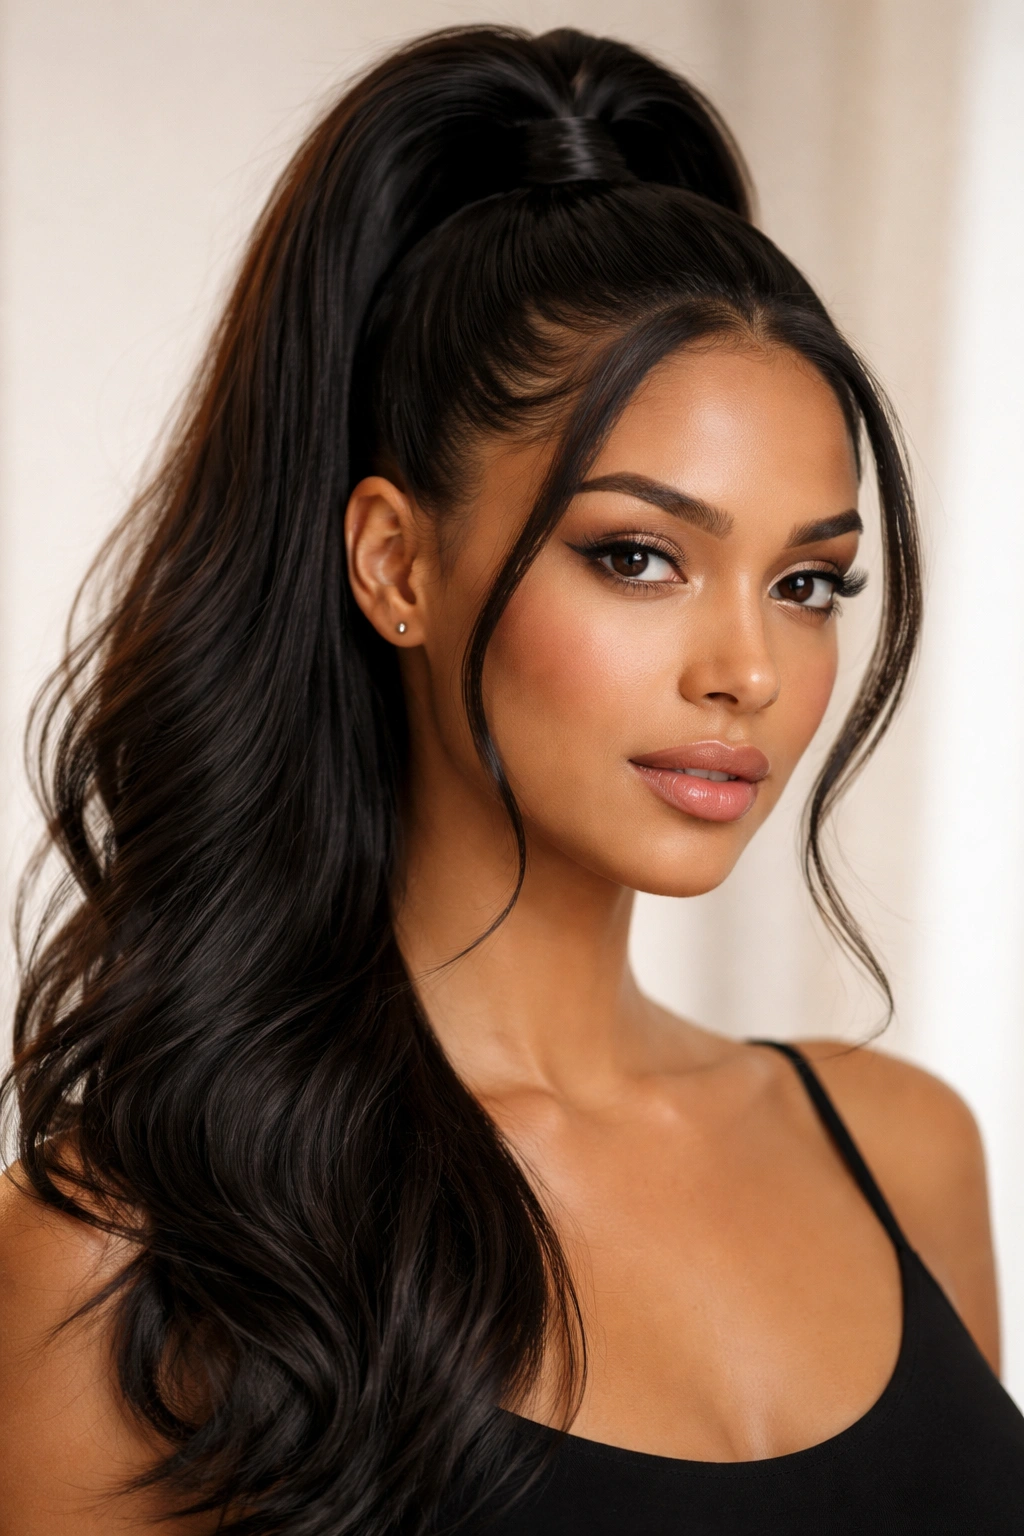
A frontal ponytail isn’t just a quick way to get your hair off your face — it’s a deliberate styling choice that frames your features, elongates your neck, and can transform your entire look depending on how you approach it. The key word here is seamless. A seamless frontal ponytail means no awkward gaps, no flyaways that scream “rushed,” and no visible clips or bumps at the base. It’s a polished, intentional style that works whether you’re heading to a business meeting, a weekend brunch, or a night out.
The truth is, not all frontal ponytails are created equal. Some sit higher on the crown, others hug lower, and a few blend multiple techniques to create a completely effortless look. What makes a frontal ponytail truly seamless is understanding the foundation — your base layer, your baby hairs, your grip tension, and the exact positioning. You might think you’ve been doing this for years, but there are likely several approaches you haven’t tried yet that could become your new go-to style.
This guide covers ten distinct frontal ponytail techniques, each with its own vibe and application. Some are sleek and polished, others are undone and romantic, and a few bridge the gap between structured and relaxed. Whether you have fine, thin hair or thick, textured locks, straight strands or natural curls, you’ll find options that work with your hair type and suit your personal aesthetic. Let’s walk through each one with the specific styling steps that make it actually look seamless.
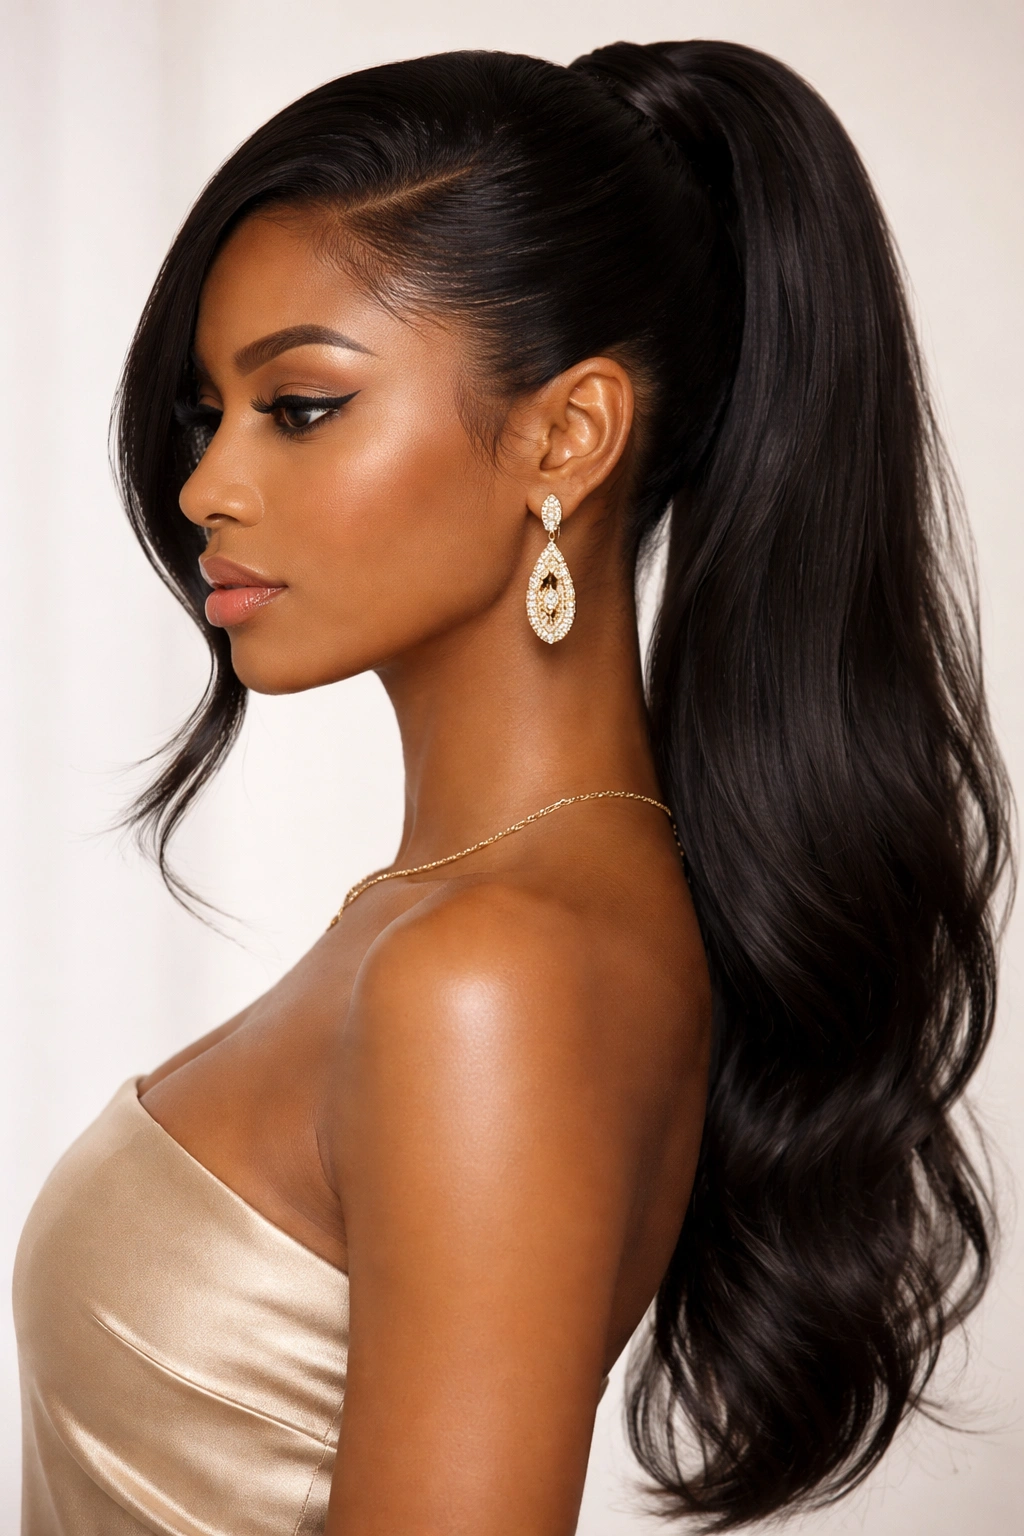
1. The Classic High Frontal Ponytail
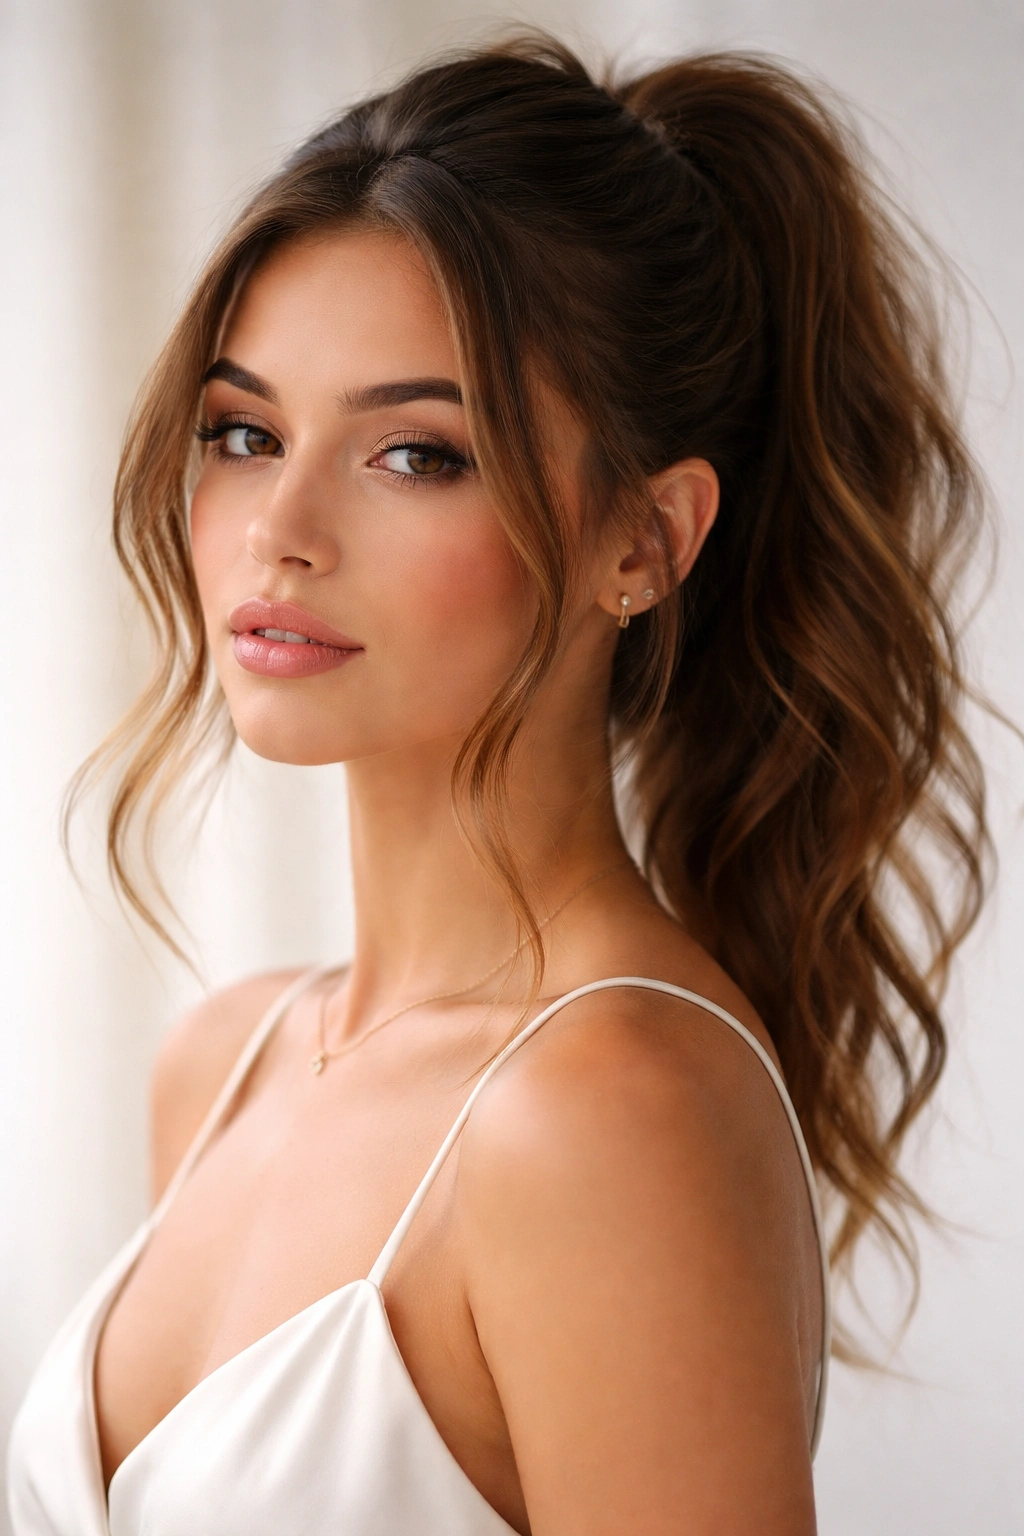
This is the foundation ponytail style that most people start with — and when executed correctly, it’s timelessly elegant. A classic high frontal ponytail sits at the crown of your head, pulling hair away from your face while keeping the look polished and professional. The “frontal” aspect means you’re intentionally leaving or gathering some face-framing pieces, either sleek or slightly softened, rather than pulling everything straight back into a tight top knot.
What Makes This Style Work So Well
The classic high frontal ponytail works because it’s adaptable to any face shape and hair texture. The key is positioning: your ponytail base should sit roughly at the top third of your head, not at the absolute crown (which can look too severe) and not too far back (which defeats the “frontal” purpose). This positioning naturally creates lift and volume while the face-framing pieces add dimension. The style reads as polished without feeling corporate, making it work for both casual and formal settings.
How to Get the Seamless Look Every Time
- Use a clear elastic or thin hair tie rather than thick scrunchies that create visible bumps at the base — the less bulk, the sleeker the ponytail looks
- Section off a small triangle of hair from your forehead to about two inches back before gathering the main ponytail; this becomes your front-facing frame
- Smooth the crown section with a fine-tooth comb and a light hairspray before securing — this prevents the under-layers from puffing out unevenly
- Wrap a small section of hair around the elastic to hide it completely; this transforms the base from utilitarian to intentional
- Tease gently at the crown before smoothing the top layer for subtle volume that reads as effortless, not flat
Pro tip: Use a texture spray or dry shampoo at the roots before styling — it gives your hair grip and prevents the ponytail from slipping down as the day goes on.
2. The Sleek Wet-Look Ponytail
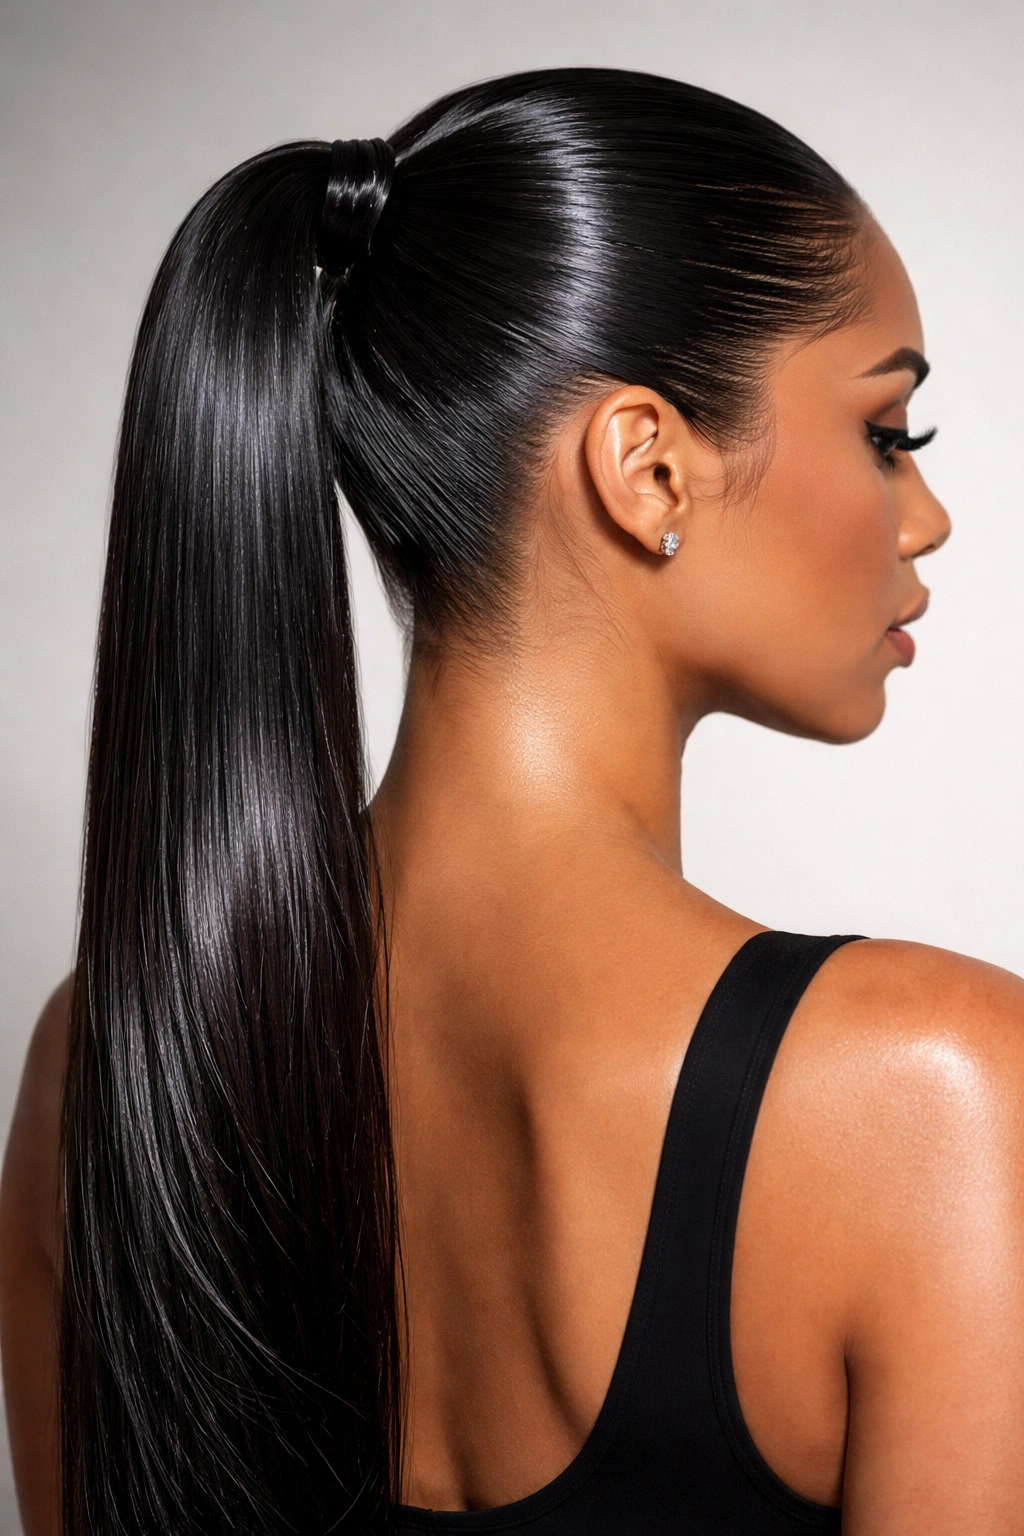
This is the style for when you want impact and polish in one move. The wet-look ponytail uses product strategically to create a shine and smoothness that looks intentional, almost glass-like, while keeping flyaways completely tamed. It’s become a red-carpet favorite because it photographs beautifully and feels ultra-modern, yet it’s surprisingly simple to achieve at home.
Why the Wet Effect Elevates a Frontal Ponytail
The wet-look finish works because it draws attention to the clean lines and smoothness of the style rather than texture or volume. When your ponytail is slicked and shiny, every imperfection becomes glaringly obvious — which is exactly why this style is so effective. It forces you to nail the technique, and the payoff is a look that feels expensive and editorial. The gel or pomade creates definition and keeps everything locked in place without looking stiff or product-heavy if you choose the right formula.
The Step-by-Step for a Seamless Wet-Look Finish
- Start with damp hair (not soaking wet, just freshly dampened) for the best grip and smoothness
- Apply a smoothing serum or leave-in conditioner to damp hair and comb through before blow-drying for a slick foundation
- Once dry, apply a shiny gel or pomade — a silicone-based formula works best for glass-like shine without the crunch
- Use a fine-tooth comb or brush to comb the gel through the hair you’re gathering, smoothing as you go
- Gather your frontal ponytail high and secure with a thin elastic, making sure the base is impossibly smooth
- Smooth any flyaways with a small round brush and the pomade; use hairspray to lock everything in place
- Wrap a thin strand of hair around the elastic and secure with bobby pins for a completely seamless base
Worth knowing: If you have naturally curly or textured hair, you’ll need a stronger hold gel to keep the wet-look effect intact throughout the day — test your product on a small section first.
3. The Braided Crown Ponytail
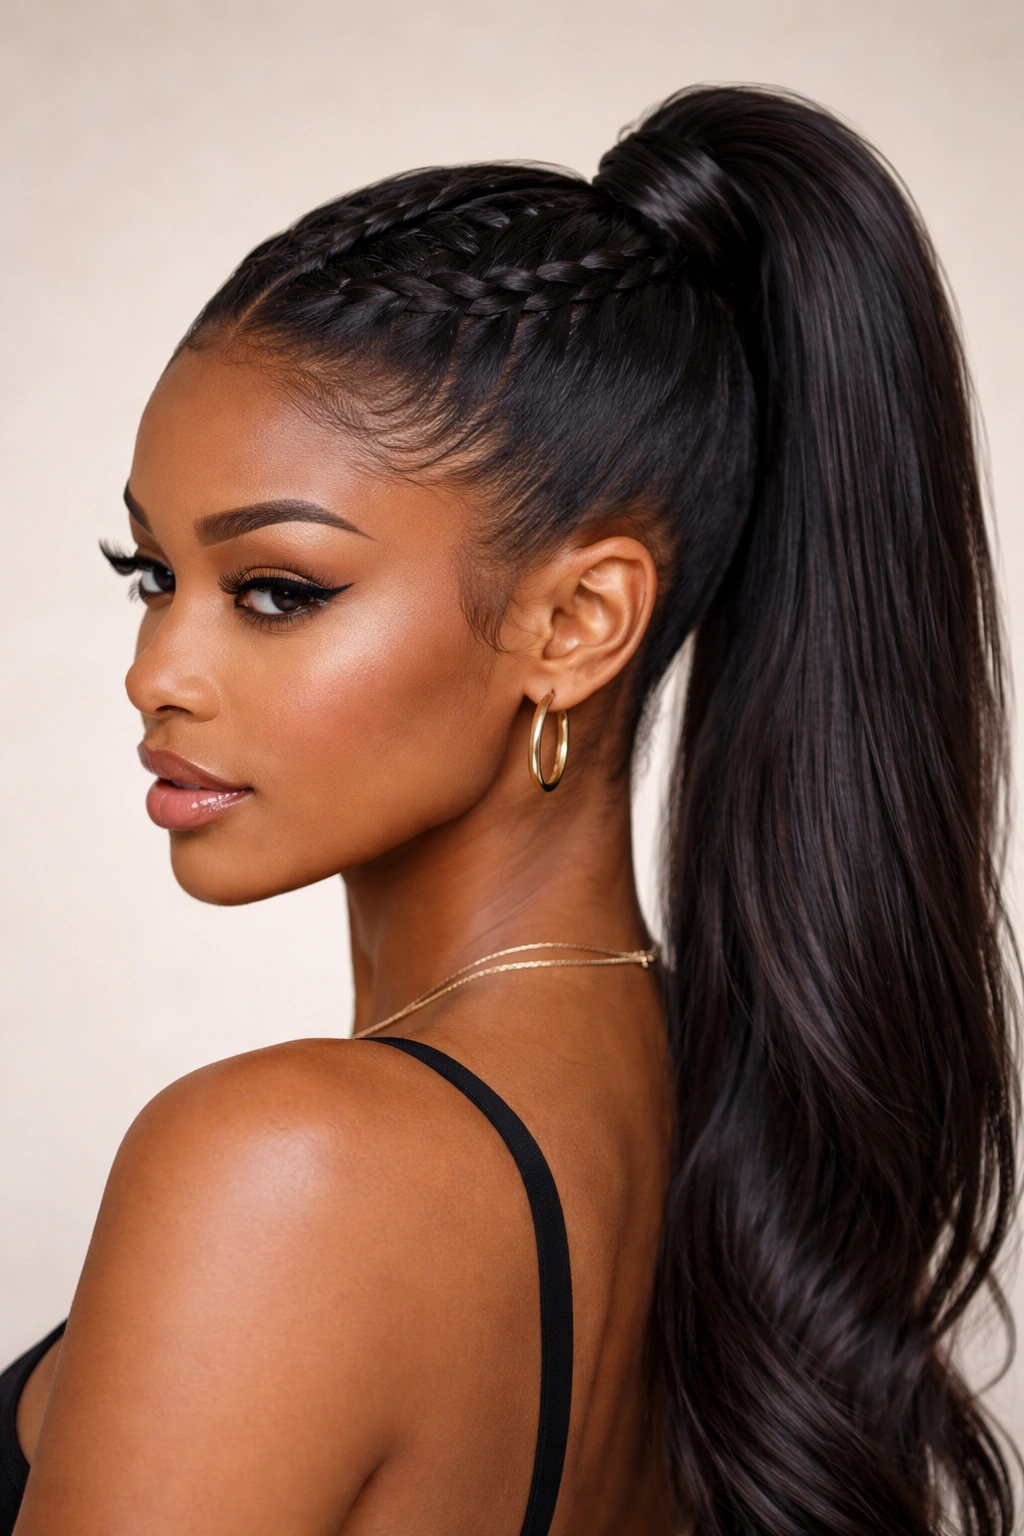
This style combines two techniques into one: a braided section that runs along the front of your head feeds directly into your ponytail base. It looks intricate and intentional, but it’s actually a smart way to add dimension and keep flyaways contained without looking overly fussy. This is the ponytail for when you want to look like you actually styled your hair, not just threw it up.
How Braiding Changes the Frontal Ponytail Game
A braid along the crown serves multiple purposes. First, it provides texture and visual interest that a simple gathered ponytail doesn’t have. Second, it gives you more grip at the base, so your ponytail holds tighter and longer throughout the day. Third, it’s an elegant way to frame your face while still pulling hair completely away — the braid becomes the design element, so you don’t need loose face-framing pieces falling around your features. It reads as romantic and polished simultaneously.
Braiding Your Way to a Seamless Look
- Start with slightly textured hair (day-two hair or hair with a light texture spray works perfectly)
- Take a small section from one side of your part, roughly from your temple
- Create a Dutch braid (braiding under instead of over for a bolder effect) that runs along the top of your head, toward your opposite ear or the back center
- As you braid, incorporate small sections of hair from the crown and temples to thicken the braid as it goes
- Once you reach the back, the braid becomes the anchor point for your main ponytail
- Gather any remaining hair into your ponytail, positioning it so the braid feeds naturally into the base
- Secure with a thin elastic and wrap with a small strand of hair to hide it
- Loosen the braid slightly for a softer, more romantic effect — this makes it look intentional rather than pulled tight
Insider note: Braid over damp hair and let it set while you do your makeup; the texture will hold beautifully and stay in place all day.
4. The Twisted Frontal Ponytail
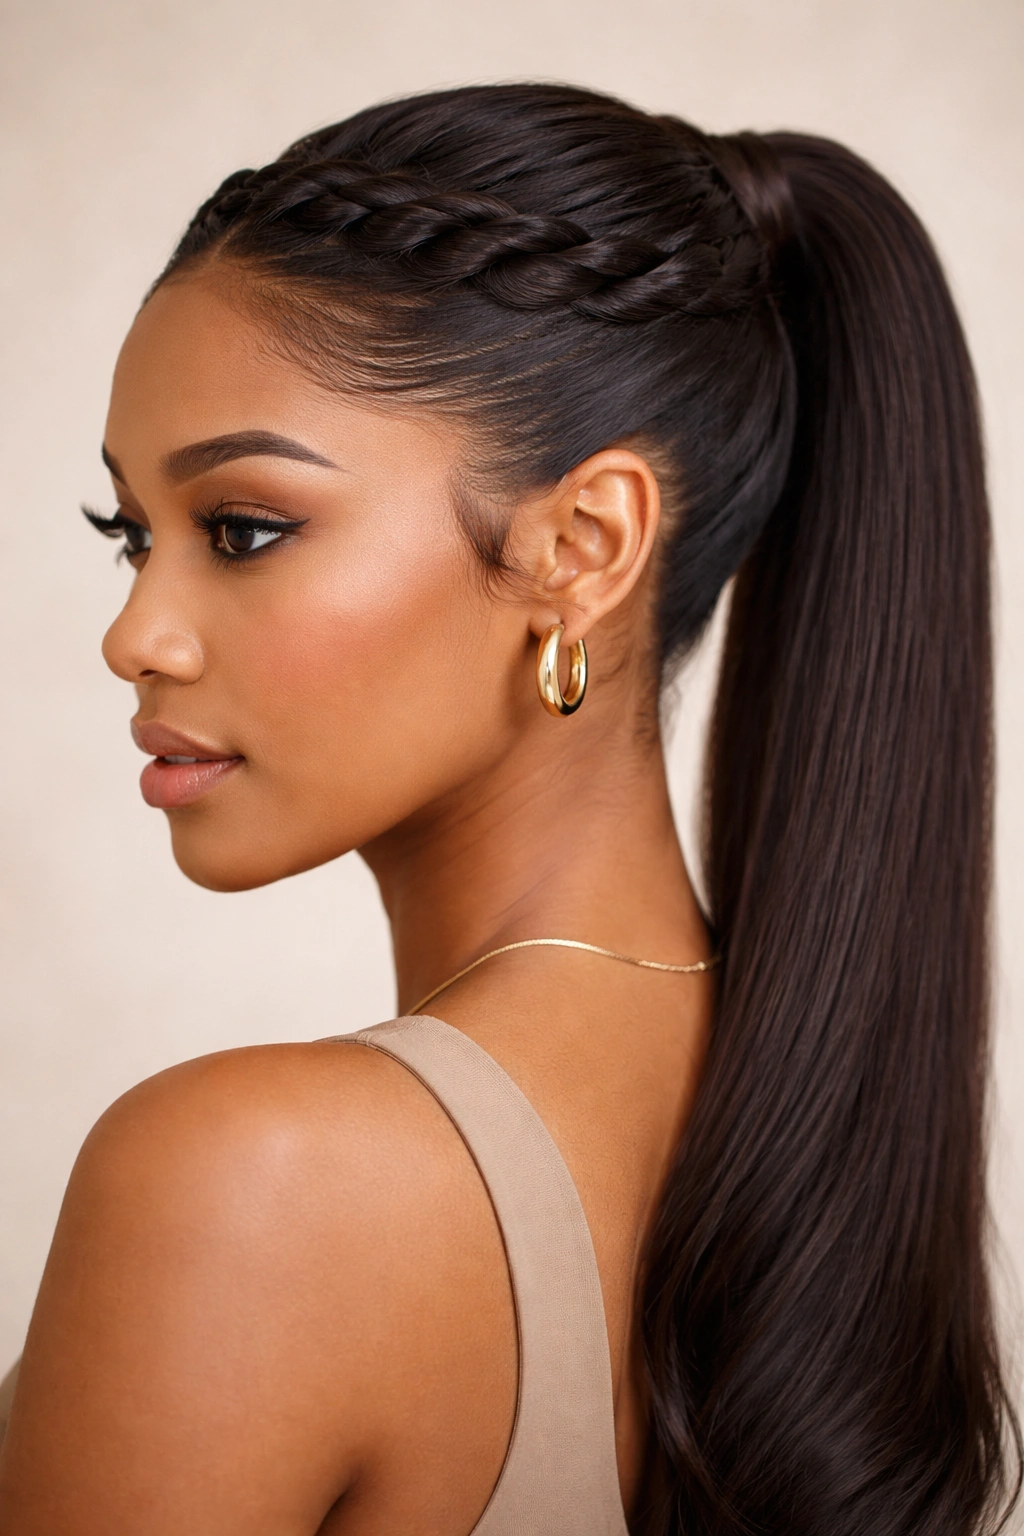
Similar to the braided version but simpler, the twisted frontal ponytail uses rope-like twists instead of braids to create dimension and control. This style works beautifully with finer hair or when you’re short on time because twists are faster than braids and create an equally elegant effect. The visual interest is softer and more modern than a braid, with a romantic rather than formal energy.
Why Twists Are an Underrated Technique
Twists are essentially two strands of hair wrapped around each other, which means they’re forgiving for hair that might slip out of a braid. They also create a different silhouette than braids — softer, less structured, more flowing. When you twist sections around the crown and feed them into a ponytail base, you get the grip and dimension of a braid without the formal feel. This makes the style perfect for everyday wear that still looks intentional and put-together.
Creating a Seamless Twisted Ponytail
- Take a small section of hair from one front temple, about two inches wide
- Divide it into two equal strands and twist them around each other, moving toward the back of your head
- As you twist, incorporate small sections of hair from the crown into one or both strands — this fattens the twist as you go
- Create one twist that runs along one side of the crown, or two matching twists that meet at the center back
- Secure your twists at the point where they meet the rest of your hair, then gather all hair (including the twists) into your main ponytail
- Use a thin elastic and hide the band with a wrapped strand
- Pull the twisted sections slightly to loosen them — this softens the effect and makes it look less engineered
Pro tip: Use a light hairspray before twisting to give your hair better grip and prevent slipping, especially if you have very straight or fine hair.
5. The Soft, Undone Frontal Ponytail
This is the ponytail for the “I didn’t try hard” aesthetic that actually takes quite a bit of intention to pull off. The soft, undone frontal ponytail has loose, face-framing pieces, texture throughout, and a relaxed grip at the base. It looks effortlessly elegant and works beautifully with wavy or textured hair, though you can absolutely create this look with straight hair too — it just requires the right prep and products.
The Art of Looking Like You Didn’t Try
The paradox of the soft, undone style is that it requires more precision than a sleek ponytail. You’re intentionally placing pieces, creating texture, and loosening specific sections to achieve that “just happened” vibe. The key is balancing structure (so it doesn’t actually fall apart) with softness (so it doesn’t look rigid). You want face-framing pieces that genuinely frame your face, not just hair that’s too loose to stay in the ponytail. Everything needs to be positioned deliberately.
Achieving Effortless-Looking Structure
- Start with textured or wavy hair — use a curling iron or waves spray if you’re starting with straight hair
- Don’t create a center part; instead, create a slightly off-center or side part for a more relaxed vibe
- Leave a small section of hair loose on each side of your face, roughly from your temples to your jawline
- Gather the back and crown section into a lower-to-mid ponytail, securing with a thick scrunchie or hair tie that reads as intentional
- Gently pull and loosen the pieces around your face so they have movement and softness
- Use a light hairspray to hold the style without making it feel stiff
- Tease lightly at the crown before smoothing the top layer for texture and volume that reads as organic
Worth knowing: This style works best when styled the day after washing — day-two hair has just enough texture to hold the waves and placement without looking greasy.
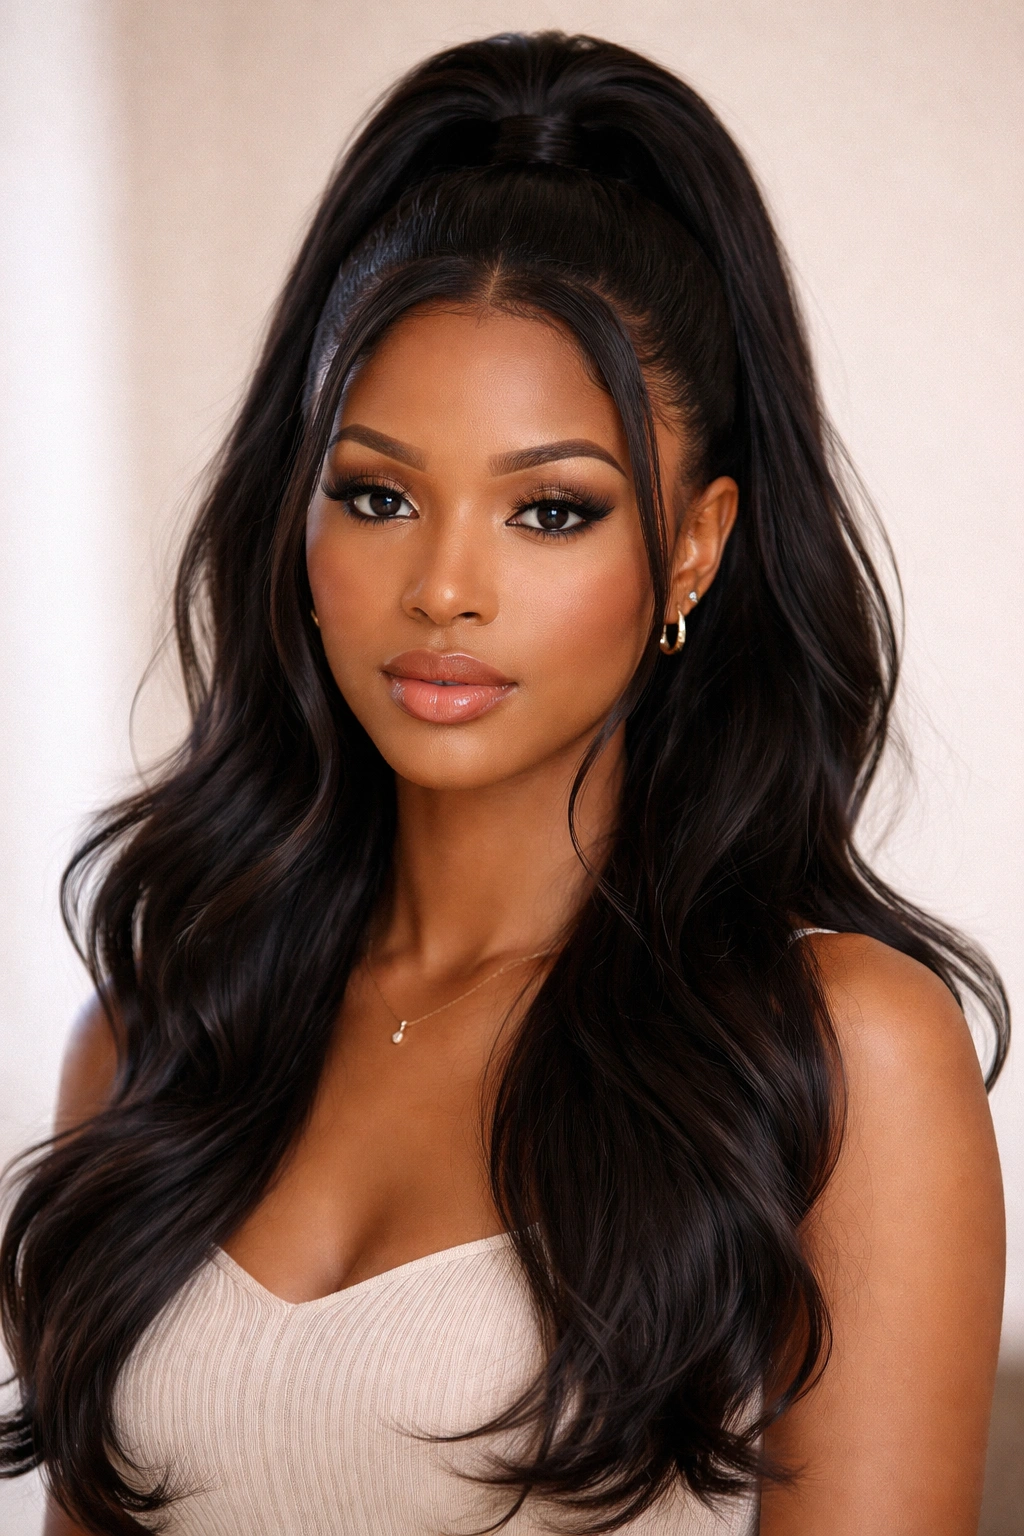
6. The High-Volume Bouncy Ponytail
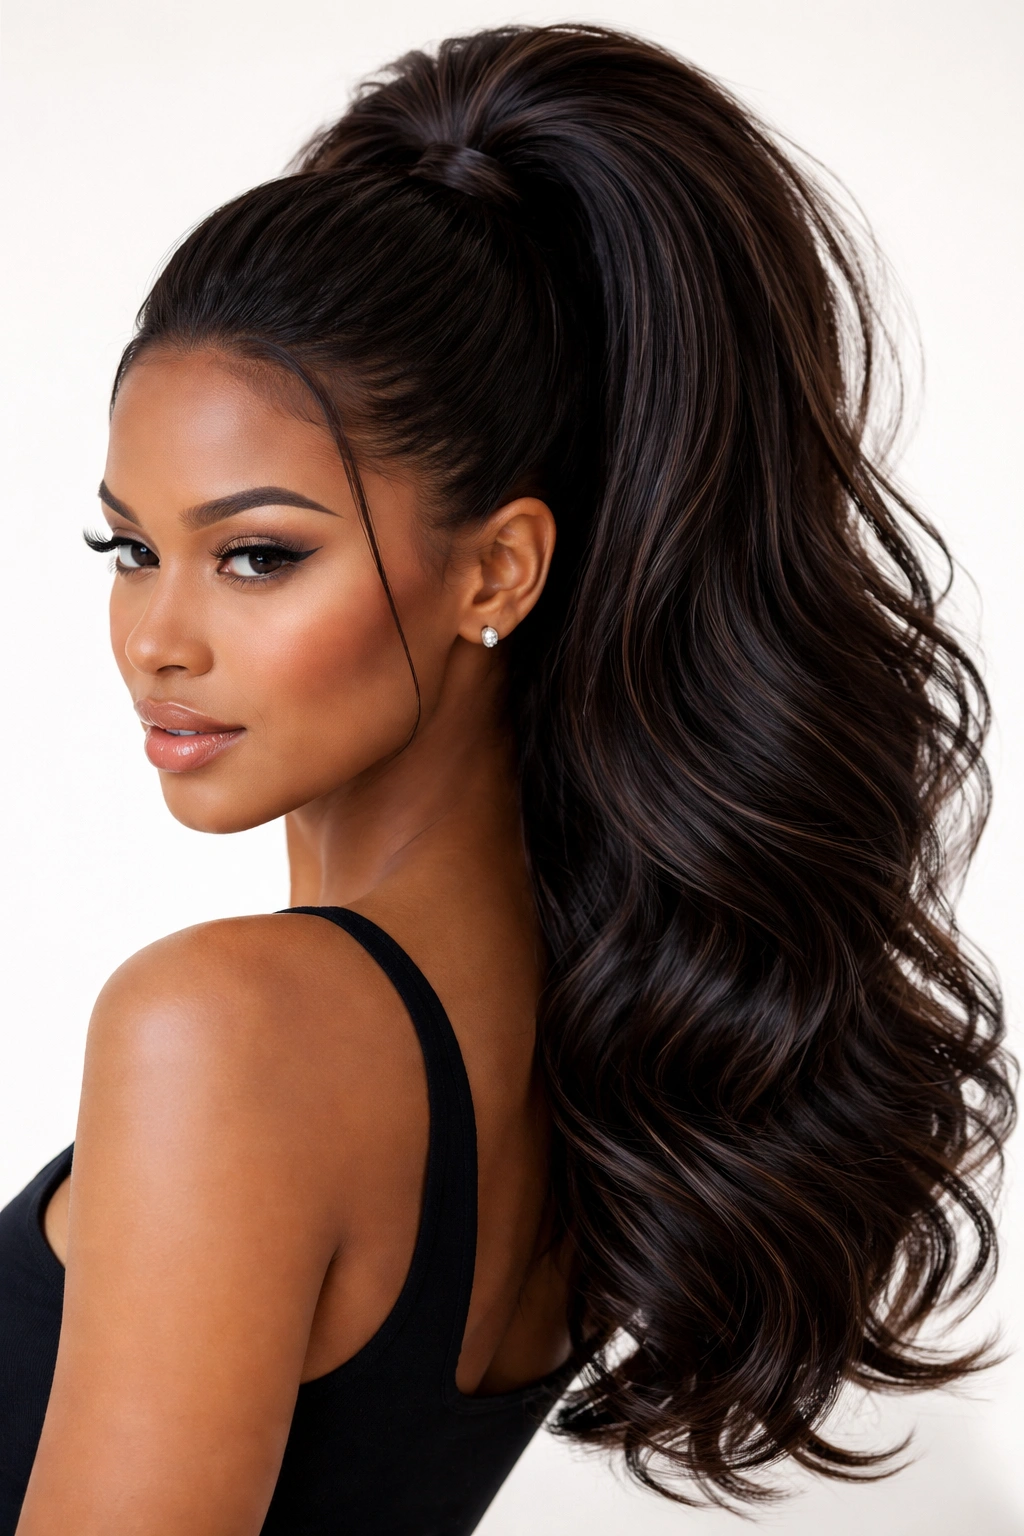
If you want a frontal ponytail that commands attention and photographs beautifully, this is your style. The high-volume bouncy ponytail uses teasing, strategic layering, and the right grip technique to create maximum fullness at the base and throughout the length. This style is especially flattering on those with finer hair, because the teasing and layering technique creates the illusion of thickness and density.
Building Volume That Looks Natural
Volume in a ponytail comes from three sources: teasing at the roots, leaving shorter layers at the base that catch light differently, and the way you gather and secure the hair. When you tease only the crown section (not all the way down the ponytail), you create volume without bulk. The shorter layers create movement and a more dimensional shape rather than a flat, one-dimensional tail. The visual effect is a ponytail that has lift, bounce, and presence.
Creating Bounce Without Looking Overworked
- Blow-dry hair with a large-barrel round brush, lifting at the roots and crown for natural volume
- Apply a volumizing mousse or texture spray to the crown before teasing
- Use a fine-tooth teasing brush or comb to backcomb gently at the roots and crown section only
- Smooth the top layer with a regular brush so you see the volume underneath without seeing the tease
- Gather your frontal ponytail high, using a secure elastic but not pulling so tightly that you crush the volume
- Wrap with a strand of hair to hide the elastic
- Mist with a flexible hairspray that holds without crunching or stiffening the hair
- Let the ponytail fall naturally; don’t straighten or smooth it — the waves and texture are what create the bounce
Pro tip: Use a blow dryer on low to gently wave the ponytail as it sets with hairspray for enhanced bounce and movement throughout the day.
7. The Sleek Low Frontal Ponytail
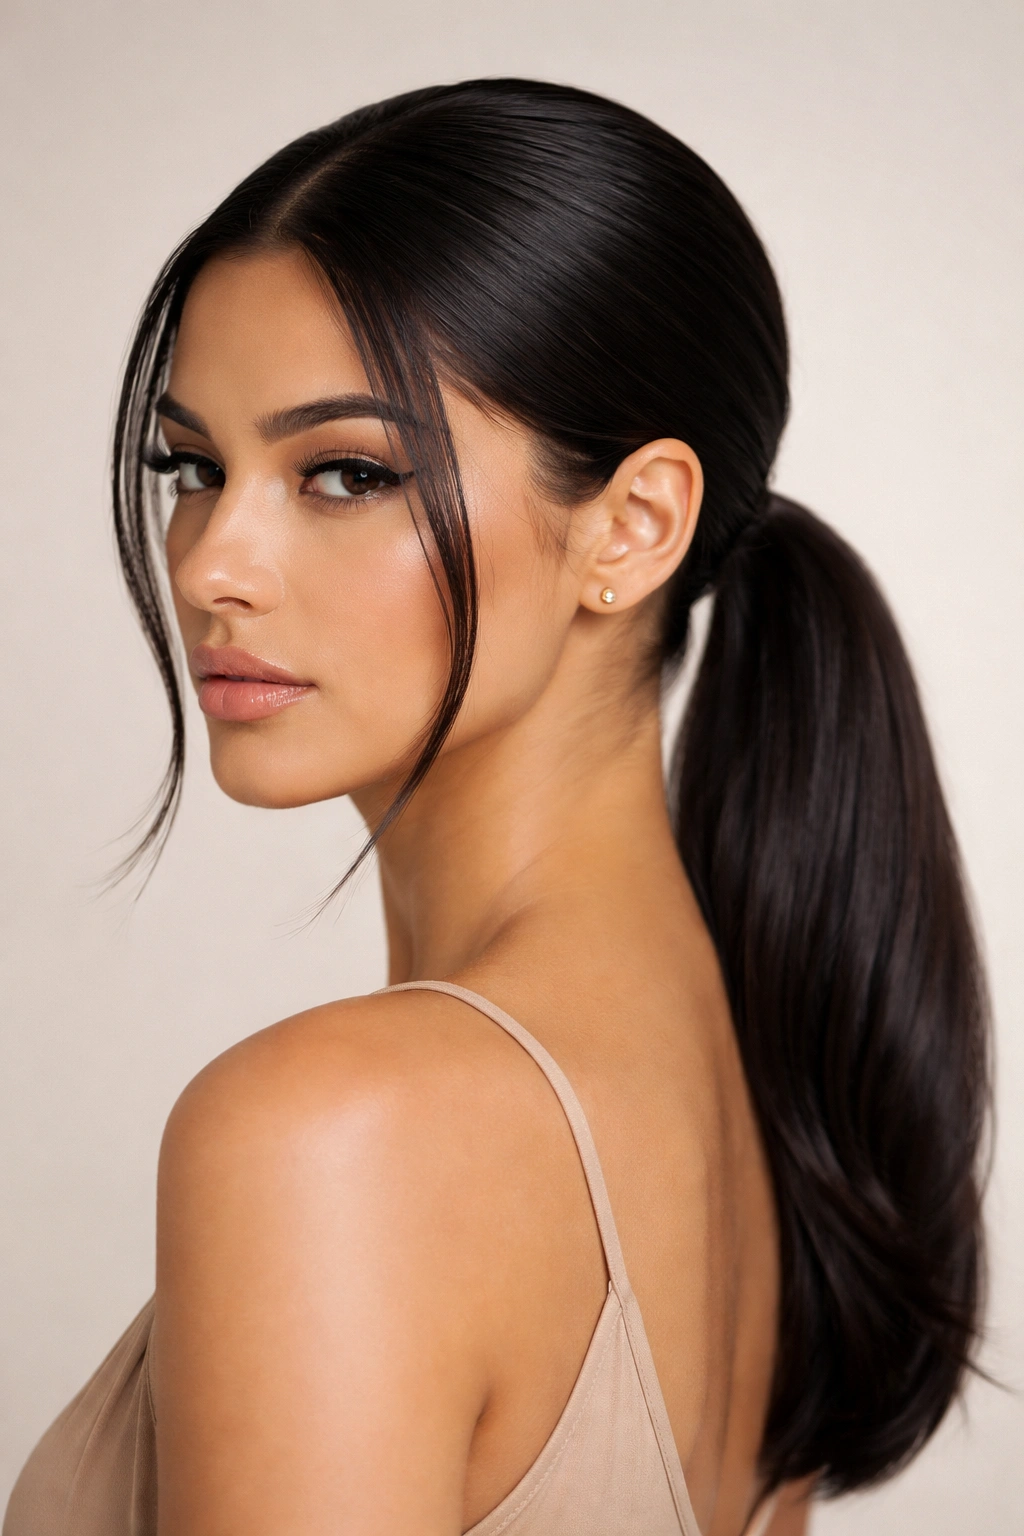
The low frontal ponytail is the sophisticated, modern alternative to the high version. It sits lower on the head — typically at the nape of the neck or just above it — which elongates the face and creates a more streamlined silhouette. This style is incredibly flattering for round or square face shapes and works beautifully for both casual and formal occasions. The “low” positioning with “frontal” framing pieces creates an interesting tension between relaxed and polished.
Why Low Positioning Changes Everything
A lower ponytail position immediately reads as more mature and refined than a high, playful ponytail. It creates different proportions on your face — it lengthens, rather than lifting. The lower position also puts less tension on your hairline, making it more comfortable to wear for long periods and gentler on your roots. The style feels modern and editorial without requiring the slicked-back severity of styles like a bun; it’s a happy middle ground between casual and formal.
Executing the Perfect Low Ponytail
- Part your hair slightly off-center or side-part for a modern feel
- Leave a piece of hair loose on each side of your face from temple to jawline
- Gather your ponytail lower than you think — at the nape of your neck or about two inches above it
- Smooth the crown and sides with a fine-tooth comb and light hairspray before securing
- Use a thin elastic or hair tie for a seamless, refined look
- Wrap a thin strand of hair around the elastic to hide it completely
- Smooth any flyaways around the base with a small amount of smoothing serum or gel
- The face-framing pieces should be left slightly wavy or textured for softness against the structured ponytail base
Worth knowing: If you have a longer face shape, avoid the very lowest positioning; instead, position your ponytail at mid-back height for the most flattering proportion.
8. The Bubble Ponytail

This playful, trendy style is pure fun — it’s a ponytail divided into sections with space between each one, created by smaller elastics spaced down the length. The bubble effect creates visual interest, movement, and a youthful, confident vibe. Despite looking intricate, it’s actually quite simple to create, and it photographs beautifully because of the dimensional texture and spacing. This works especially well with colored hair or highlights because the segmentation draws attention to multi-dimensional color.
The Modern Appeal of Bubble Ponytails
Bubble ponytails have become popular because they feel fresh and intentional without being overly complicated. Each “bubble” is created by gathering and securing a section of hair, then gently puffing it out for fullness and shape. The spacing between bubbles creates a rhythm and movement that reads as editorial and modern. The style is also versatile — you can make the bubbles tight and structured or loose and romantic depending on the occasion.
Building Seamless Bubbles That Actually Stay
- Create your main frontal ponytail high with the first elastic, pulling it snug
- Gently tease or brush the first section slightly for texture and fullness
- Position your second elastic about two to three inches down the ponytail
- Pull the section between the first and second elastic gently upward and outward to create a bubble shape
- Repeat this process down the length of your ponytail, spacing elastics about two to three inches apart
- The lower you go, the smaller your bubbles will naturally be — this creates a tapered, balanced look
- Use clear elastics so they blend seamlessly and don’t distract from the style
- Mist the entire ponytail with flexible hairspray to hold the puffed-out bubbles without stiffening them
- Gently separate the sections slightly so you see clear definition between each bubble
Insider note: Bubble ponytails hold better on day-two or textured hair; if your hair is freshly washed and slippery, use a light texture spray before creating the bubbles.
9. The Half-Up Frontal Hybrid
This style bridges the gap between down hair and a full ponytail — it’s the ultimate “best of both worlds” approach. The top half of your hair is gathered into a ponytail while the bottom half flows loose, creating a style that’s structured enough for professional settings yet soft enough for casual occasions. The frontal aspect means you have face-framing pieces either left out of the gathering or pulled slightly loose for softness around your features.
Why Half-Up Styles Are So Versatile
A half-up style gives you volume, height, and structure without pulling everything back severely. You get the polished effect of a ponytail where it matters (at the crown and back) while keeping the romantic, flowing feel of down hair for the length. The style is flattering on almost every face shape because the looseness softens features while the structured crown creates lift. It works equally well at the office, a casual dinner, or a date night — it’s incredibly adaptable.
Creating a Half-Up Ponytail That Stays Put
- Start with textured or wavy hair for the best hold and visual appeal
- Section off the top half of your hair at about ear level, creating an imaginary horizontal line from temple to temple
- Gather this top section into a ponytail at the crown, not pulling so tightly that it looks severe
- Secure with a thin elastic and wrap with a strand of hair to hide the band
- Leave the bottom half of your hair down and flowing
- Add soft waves or curls to the bottom section for texture and movement
- Gently pull some face-framing pieces from the top section slightly loose for softness
- Use a light hairspray to hold the style without stiffening the flowing bottom section
Pro tip: Tease very gently at the crown before creating your top ponytail — this adds subtle volume and keeps the style from looking too sleek or severe.
10. The Side-Swept Frontal Ponytail
This style takes the concept of a frontal ponytail and angles it to one side, creating an asymmetrical, dramatic effect. The side-swept ponytail is perfect for when you want visual impact and a modern edge. It works beautifully with longer hair and is especially flattering for those with longer face shapes because the angle creates proportion and balance. This style feels elegant and fashion-forward without requiring much extra effort beyond a regular ponytail.
The Geometry of a Flattering Side Sweep
A side-swept ponytail works because it creates visual angles and interest rather than the symmetry of a centered style. The off-center positioning naturally elongates the face and creates a more dynamic silhouette. When you sweep to one side, you’re also creating an opportunity for beautiful face-framing on the opposite side. The style reads as intentional and polished because of its clear directional movement — it’s not a “didn’t try hard” style; it’s a “I made a deliberate choice” style.
Achieving Seamless Side Placement
- Create a side part, pulling more hair to one side than the other
- Leave a piece of hair loose on the lighter side of your part to frame your face
- Sweep your main ponytail to the side of the heavier part of your hair — typically over one shoulder
- Position your ponytail base slightly lower than you would for a centered style to accommodate the side placement
- Secure with a thin elastic and wrap with a strand of hair
- Use a fine-tooth comb to smooth any flyaways and create clean, polished lines
- Gently smooth the ponytail itself with a brush so it drapes elegantly over your shoulder
- Apply a light hairspray to hold the side-swept shape and placement throughout the day
- Create gentle waves or curls in the ponytail itself so it has movement and doesn’t look flat against your shoulder
Worth knowing: The side-swept style works best when you have at least shoulder-length hair — anything shorter may not have enough length to create the elegant sweep effect.
Final Takeaway

The common thread running through all of these frontal ponytail styles is the same: intentionality in placement, care in execution, and understanding that “seamless” means every element — the base, the gather, the front-facing pieces — works together as a cohesive whole. You’re not just throwing your hair up; you’re positioning it strategically to frame your face, create proportion, and achieve a polished finish.
The style you choose should reflect your hair type, face shape, and the occasion, but it should also reflect how much time and energy you want to invest in styling. Some of these options (the sleek wet-look, the classic high ponytail) require precision but take just a few minutes. Others (the braided crown, the bubble style) need a bit more time but reward you with a more intricate, editorial look that photographs beautifully.
The real skill isn’t in executing any single style perfectly — it’s in understanding the principles that make each one work, then adapting those principles to your own hair, face, and personal aesthetic. Master the base positioning, the securing technique, and the face-framing pieces, and you’ll be able to create seamless frontal ponytails that look intentional, polished, and genuinely beautiful.