Natural hair demands a different approach to styling, and if you’ve ever struggled to find sleek braided ponytail options that actually work with your texture—this is for you. Braided ponytails aren’t just a protective style; they’re a canvas for creativity that celebrates the versatility and beauty of natural hair. Whether you’re looking for an everyday look, something that works for a special occasion, or a protective style that keeps your hair healthy while looking intentional and polished, braided ponytails deliver on all fronts. The key is understanding which braiding technique works best with your hair type, how to execute it properly, and how to wear it in ways that showcase your natural texture while keeping it protected and moving-free.
The beauty of braided ponytails for natural hair is that they work across different curl patterns, lengths, and densities. From tight coils to loose waves, you can adapt these styles to complement your specific hair characteristics. Many of these looks double as protective styles, meaning they reduce manipulation and breakage while looking undeniably stylish. Plus, braided ponytails have built-in longevity—most of these styles can last several days with proper care, making them practical for busy schedules and ideal for anyone looking to minimize daily styling time.
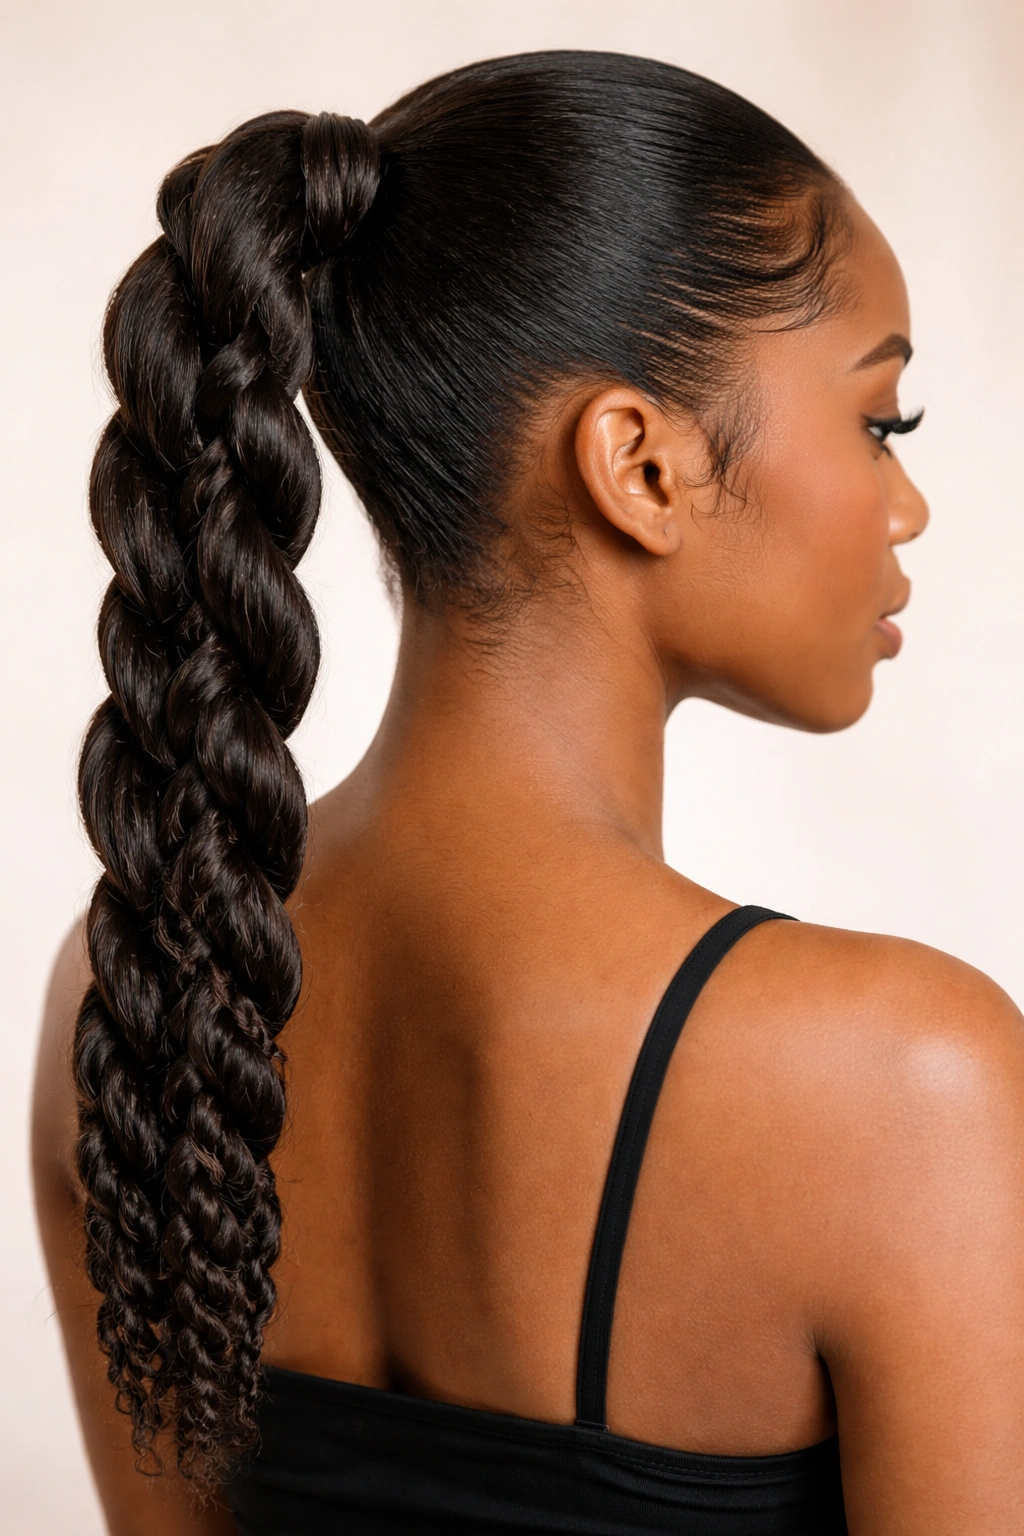
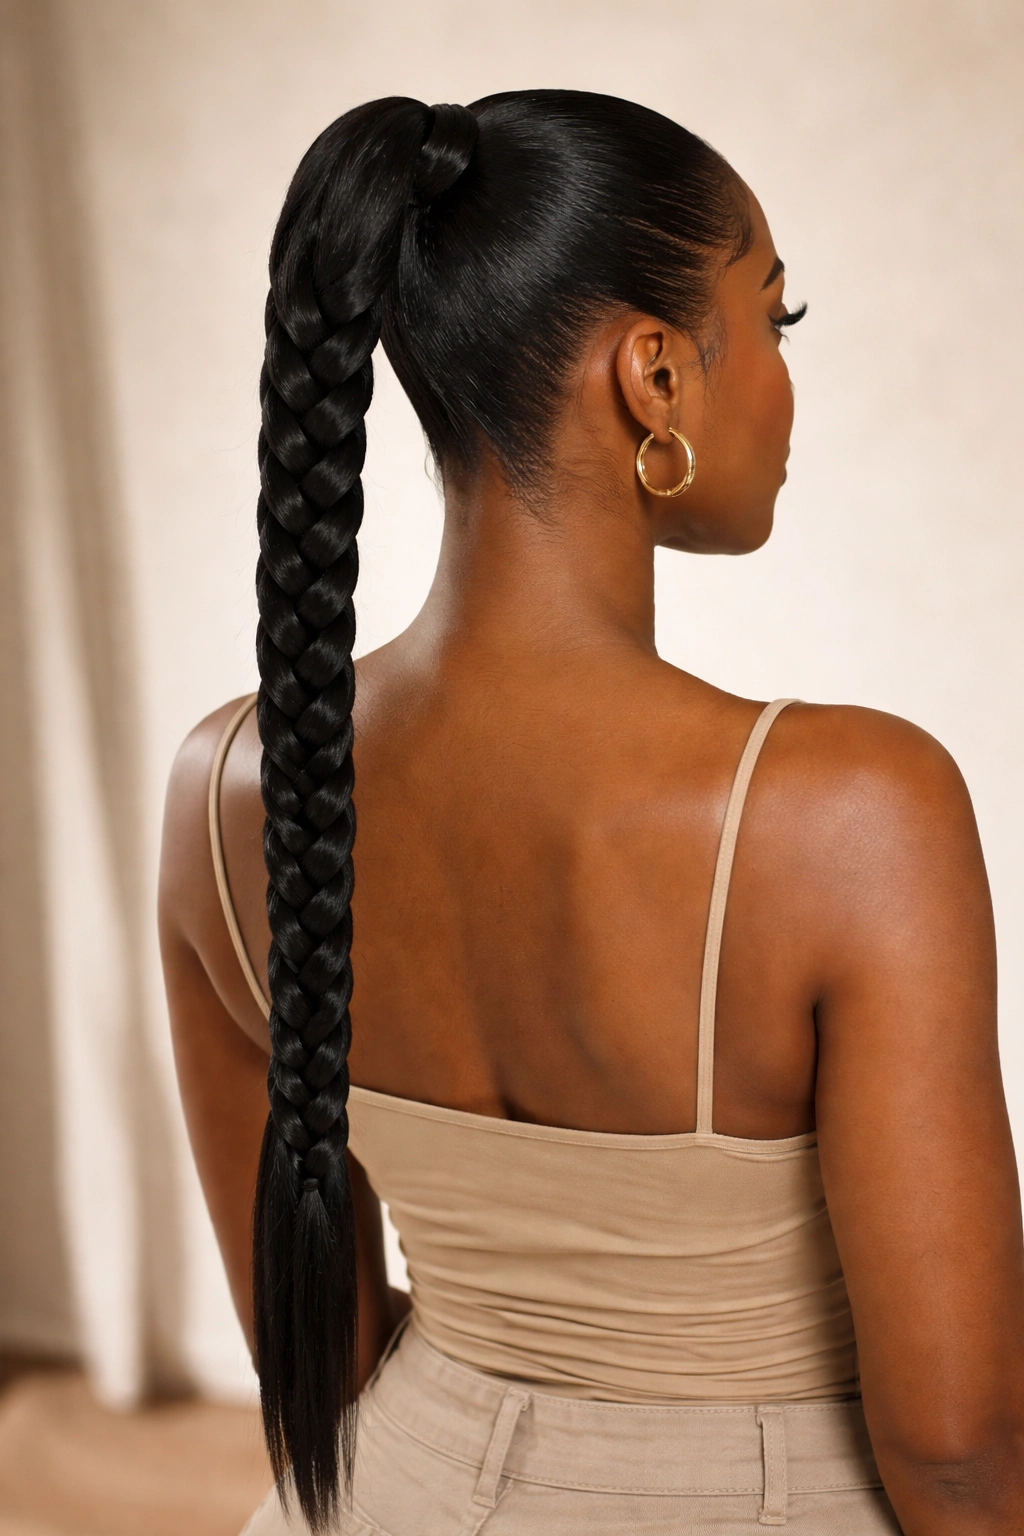
1. Classic Three-Strand Braided Ponytail
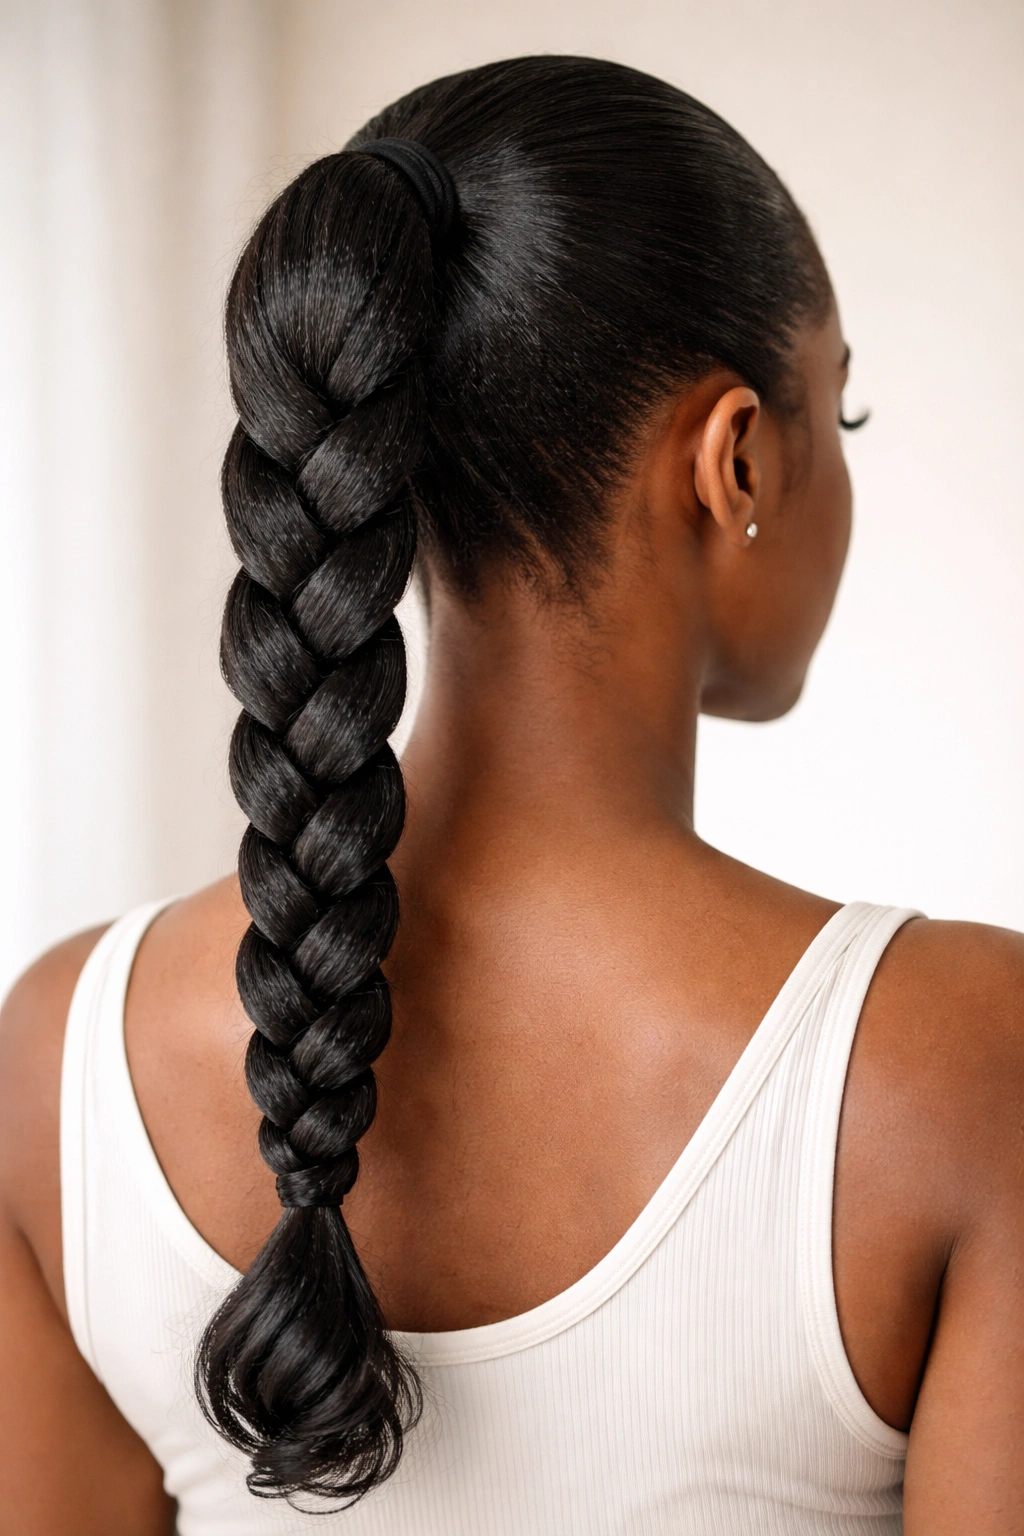
The three-strand braided ponytail is the foundation of natural hair styling, and there’s a reason it never goes out of style. This approach involves gathering your hair into a high or mid-level ponytail, then braiding the entire length from root to tip. What makes this work so beautifully with natural hair is that it contains your curls while allowing them to maintain their definition within the braid structure itself.
The Technique Behind Clean, Defined Braids
To execute this properly, start with hair that’s been moisturized and detangled. Use a leave-in conditioner or styling cream to give your hair slip and definition—this prevents frizz and makes the braid tighter and more refined. Gather your hair into a ponytail at your preferred height using a smooth elastic or scarf. Divide the ponytail into three even sections and begin braiding, keeping tension consistent throughout. The key is not pulling so tight that you create tension on your scalp, but firm enough that the braid appears neat and controlled.
Why Natural Hair Thrives With This Style
- The contained style reduces daily manipulation and friction that can lead to breakage
- Braiding actually helps define and enhance your natural curl pattern over time
- You can easily refresh the style every 2-3 days by simply re-braiding without washing
- The braid protects your ends, which are the oldest and most fragile part of your hair
- Works seamlessly on all curl types from 2C to 4C
Pro tip: Braid slightly looser for a fuller, more textured look, or tighter for a sleeker appearance. Your hand tension directly determines the final aesthetic.
2. Goddess Crown Braided Ponytail

This elevated, elegant style pairs two braids that frame the face and flow into a single braided ponytail. It’s the kind of look that feels intricate enough for a date night or professional event, but achievable in under 20 minutes once you’ve practiced it a few times. The style creates an intentional, thoughtful appearance while keeping hair off your face and neck.
How to Create the Crown Effect
Start by creating a deep side part on the side that suits your face shape best. Take a section of hair from that side and create a cornrow or standard three-strand braid that goes across the crown of your head, moving toward the opposite side. Secure this braid temporarily with a bobby pin. Repeat on the other side, creating a mirror-image braid. Once both braids are complete, gather all of your hair—including the two crown braids—into a low or mid-level ponytail. Finish by braiding the ponytail itself, which creates visual continuity and a polished, coordinated look.
What Makes This Style Stand Out
- Creates a romantic, sophisticated aesthetic that photographs beautifully
- The crown braids frame your face and draw attention upward
- Excellent for protecting braids while still being elegant enough for formal settings
- You can incorporate jewelry or hair cuffs into the braids for extra glamour
- Works particularly well on hair with definition and visible curl patterns
Insider note: Slightly underbraid the crown sections for a softer, more romantic look, or braid tightly for a sleeker, more structured aesthetic.
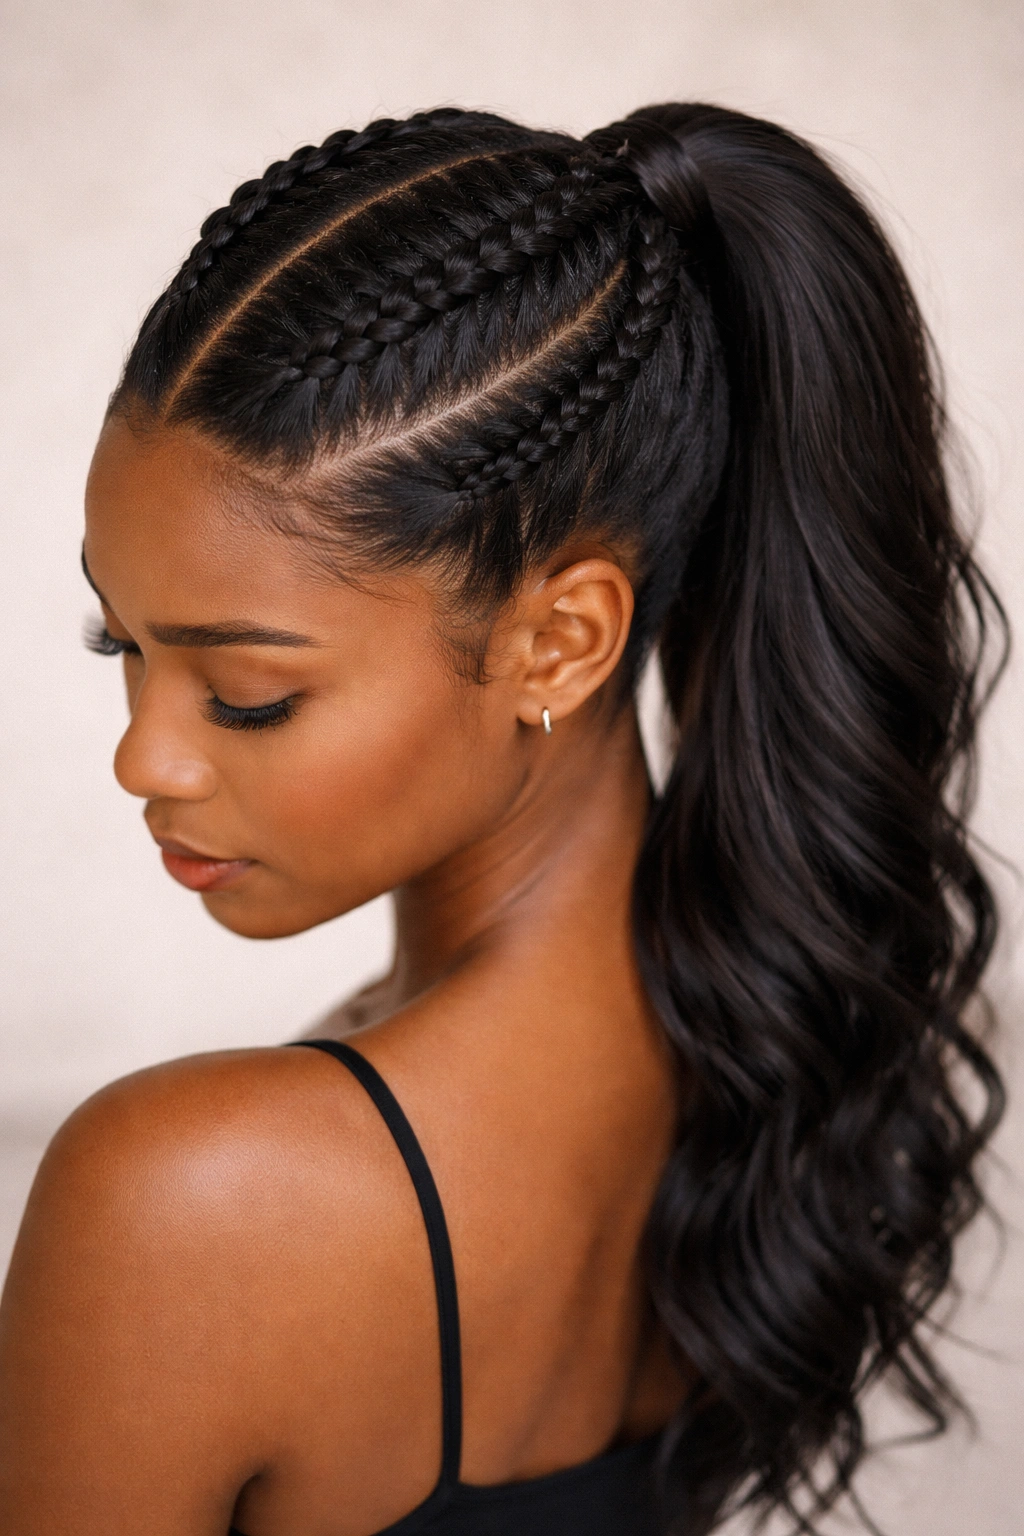
3. Stacked Braids Ponytail
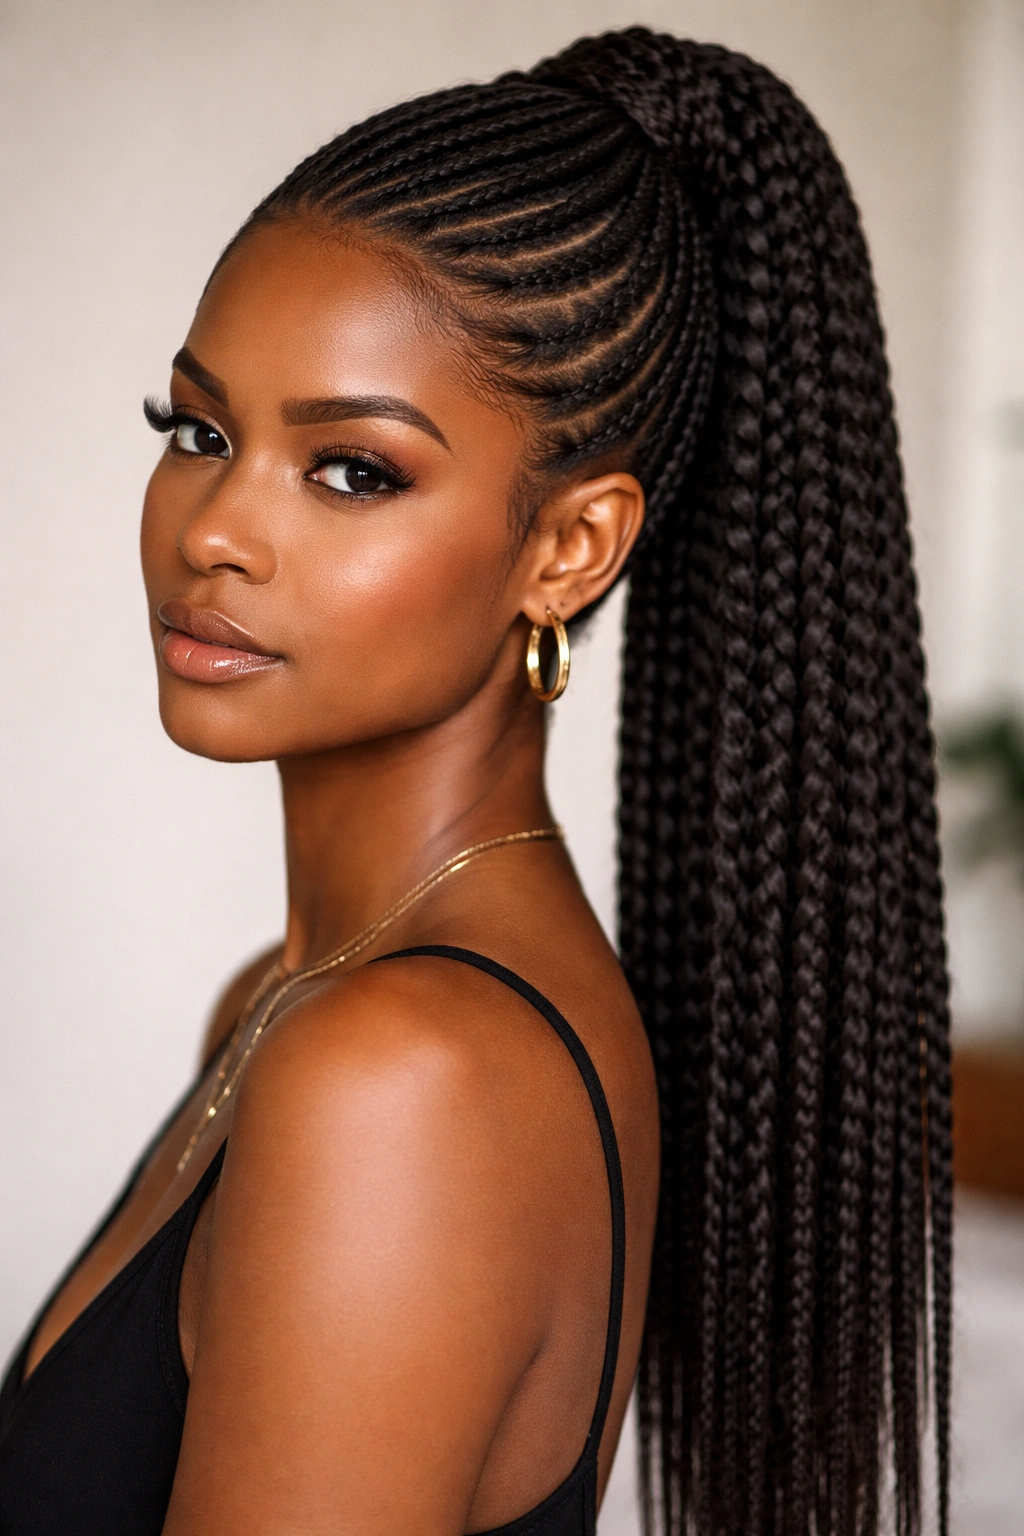
Stacked braids create incredible texture and visual interest by incorporating multiple braids stacked vertically into one ponytail. This style works by creating several individual braids at the crown, then gathering them all together to form a thicker, more voluminous braided ponytail. The stacked effect gives the illusion of more density and creates a stunning three-dimensional look.
The Stacking Technique Explained
Divide your hair into 3-4 vertical sections from your natural part to the back of your head. Braid each section separately, keeping the braids tight and close to the scalp for a polished look. Once all braids reach the nape of your neck, gather them together and secure with an elastic. From that point, you can either braid the stacked sections together or leave them as separate braids within one ponytail for an even bolder texture. Use bobby pins to secure any loose sections and smooth flyaways with edge control along your hairline.
Why Stacked Braids Work for Natural Hair
- Creates visible volume and texture, which complements natural curl patterns beautifully
- Each individual braid is smaller and more manageable, making it easier to keep the style looking fresh
- The stacking technique distributes tension across multiple sections rather than one ponytail, reducing stress on any single area
- Gives you options for different finishes—sleek or textured depending on your mood
- Can be styled with beads, cuffs, or ribbons threaded through the braids for extra flair
Worth knowing: This style works best on shoulder-length hair or longer, where you have enough length to create multiple braids with substance.
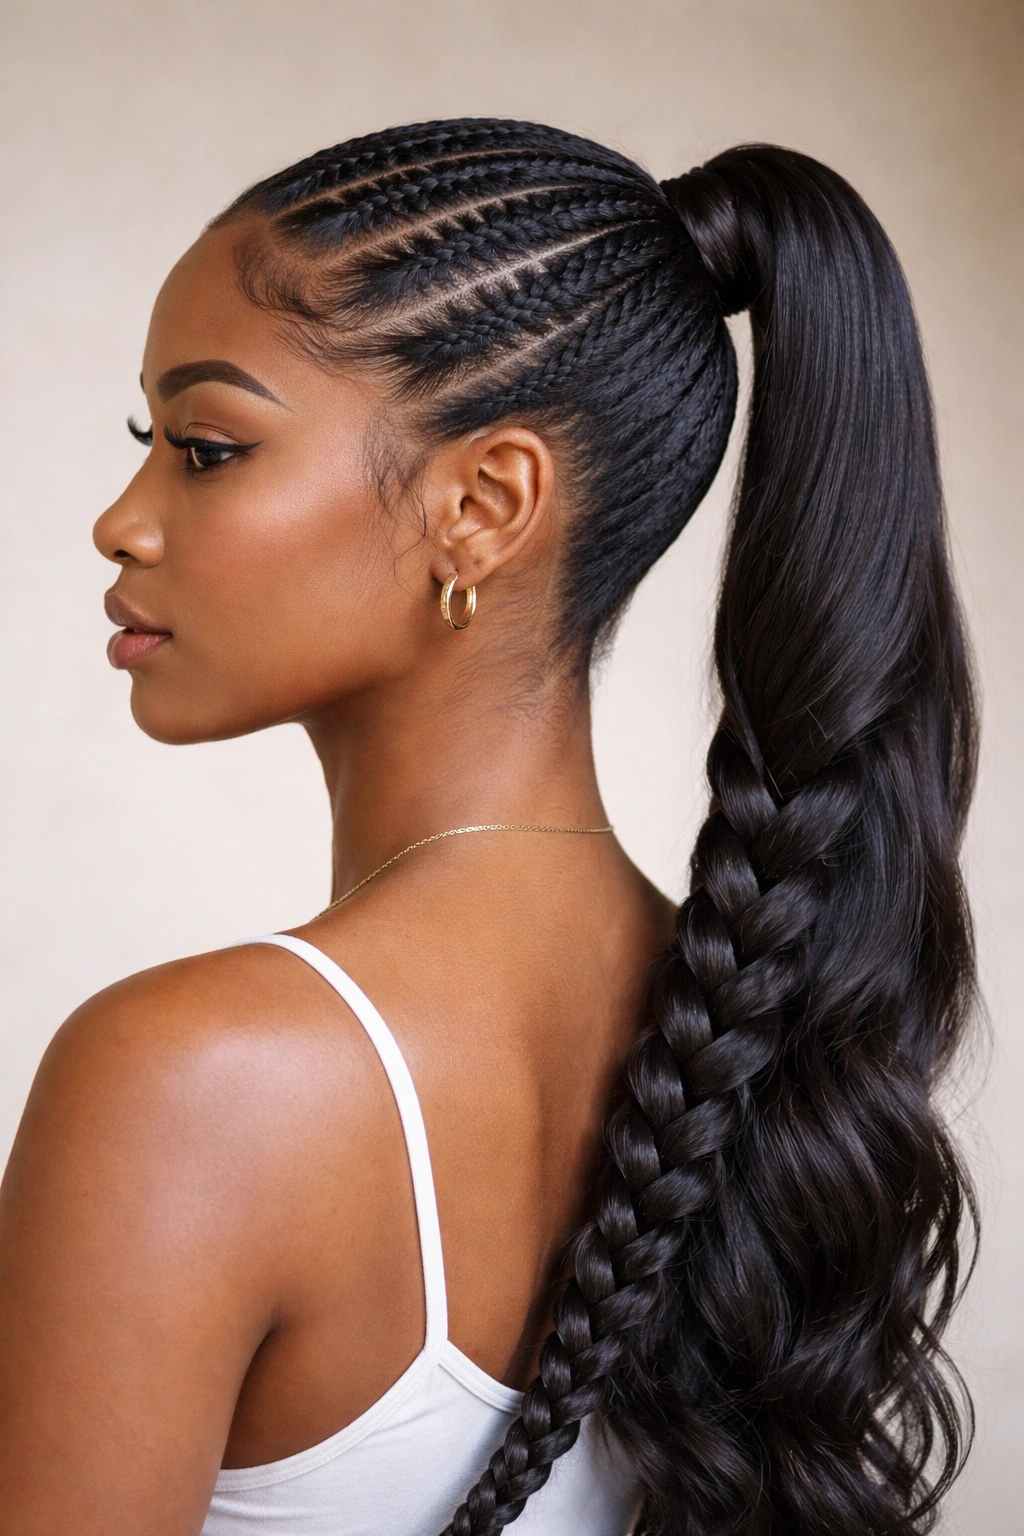
4. Cornrow to Braided Ponytail

This hybrid style uses cornrows that lead into a braided ponytail, creating a seamless transition from the crown to the tail. Cornrows are particularly flattering for natural hair because they hug the scalp and showcase your hairline while keeping hair thoroughly protected. The cornrow-to-braid transition is smooth and intentional, creating a cohesive look that appears professionally designed.
Cornrowing Into the Ponytail
Start with cornrows that begin at your hairline and travel back toward the crown or nape of your neck, depending on where you want your ponytail to sit. You can do two cornrows, three, or more—depending on the thickness you want. As you reach your desired ponytail starting point, transition from the cornrow into a standard three-strand braid by releasing the cornrow tension and braiding the loose hair into the ponytail. This transition should be smooth, with no visible break between the cornrow and the braid.
Why This Style is Brilliant for Natural Hair
- Cornrows protect your hairline and edges while still showcasing them beautifully
- The tight grip of cornrows keeps flyaways contained all day long
- You can wear this style for 5-7 days without re-doing the entire style
- Works on all hair densities and curl patterns because cornrows adjust to your hair’s natural texture
- Creates a look that’s polished enough for professional settings but casual enough for everyday wear
Quick facts:
- Plan for 30-45 minutes if you’re doing this style yourself for the first time
- Use cornrow cream or gel to define the cornrows and keep them smooth
- The style actually improves after the first day as hair settles
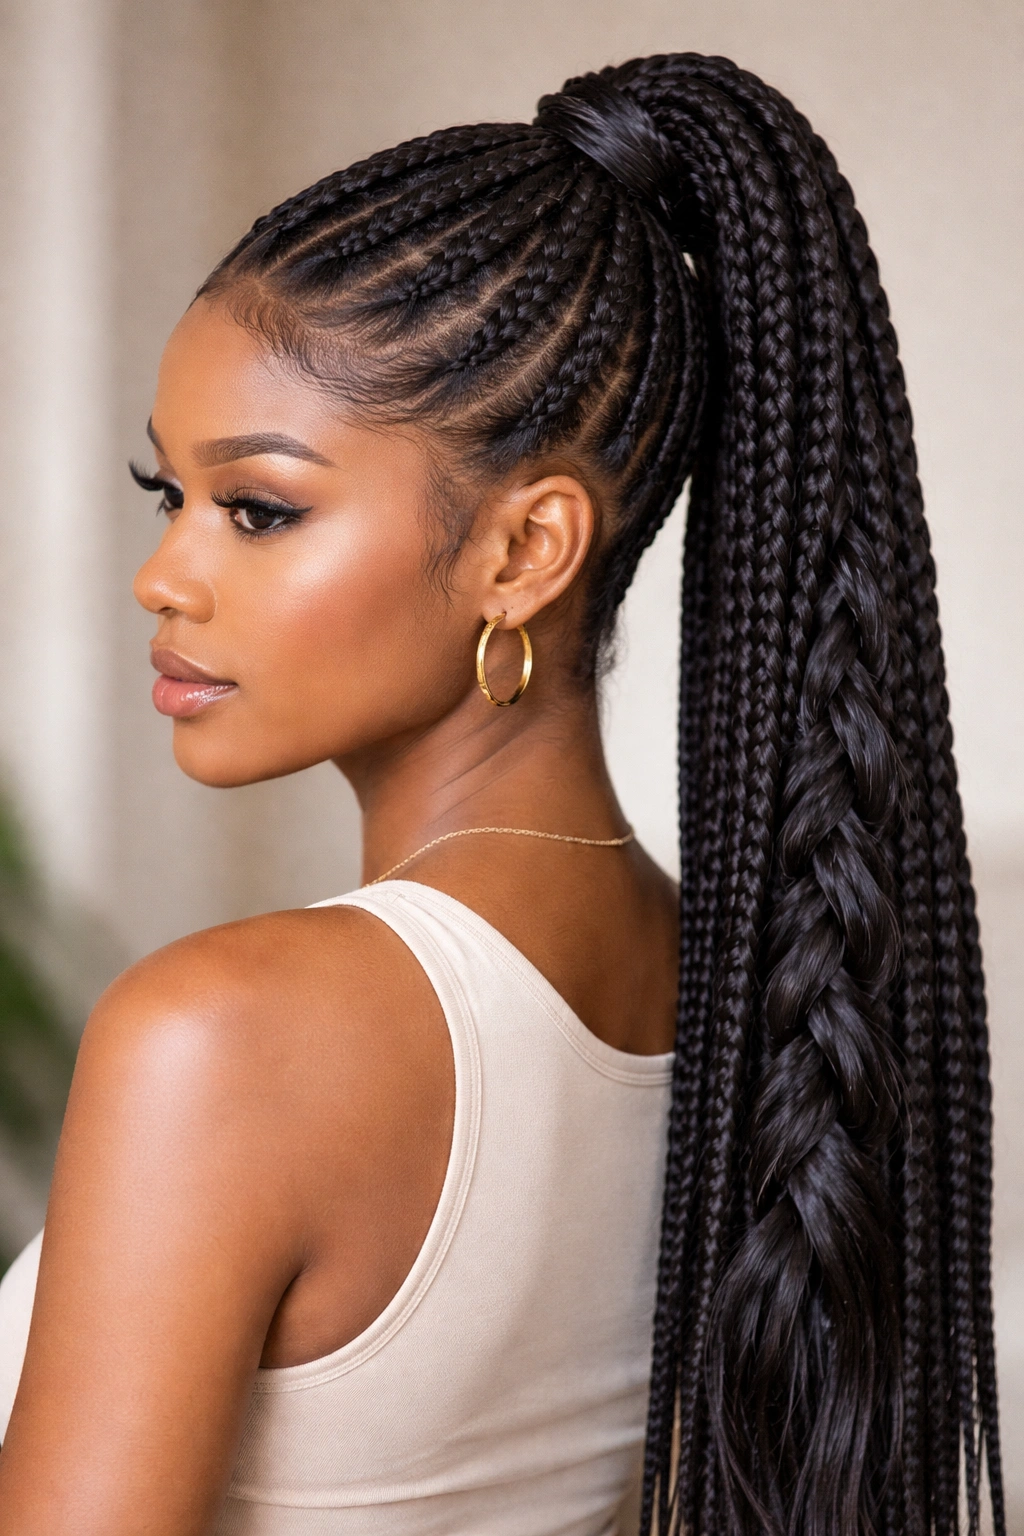
5. Feed-In Braided Ponytail
Feed-in braiding is a technique where you gradually add hair as you braid, creating a thinner braid at the root that thickens as you move down the length. This technique is especially popular in natural hair communities because it distributes weight evenly, looks incredibly refined, and is one of the most protective methods available. A feed-in braided ponytail shows off this technique beautifully while keeping everything off your face.
Mastering the Feed-In Technique
Start with a small section of hair at your hairline or part and begin a standard three-strand braid. As you complete each crossing motion, add a thin section of new hair to one of the three strands before the next crossing. This “feeding in” of new hair creates a gradient effect where the braid starts thin and becomes progressively thicker. Continue this technique along your entire scalp, then transition into a regular braid once you reach your ponytail section. The visual effect is a braid that appears to flow seamlessly from your scalp.
Why Feed-In Braids Are Game-Changing
- Distributes tension gradually across your scalp rather than pulling heavily at the crown
- Creates the most refined, intentional-looking braid texture because it starts small and builds
- Reduces breakage significantly compared to styles that pull heavily at the roots
- Looks incredibly neat and purposeful, showcasing the artistry of braiding
- Lasts longer than standard braids because the tension is more evenly distributed
- Works beautifully as a protective style while still being formal enough for professional environments
Pro tip: Practice the feeding motion separately before combining it with the actual braiding—many people find it easier to master one skill at a time.
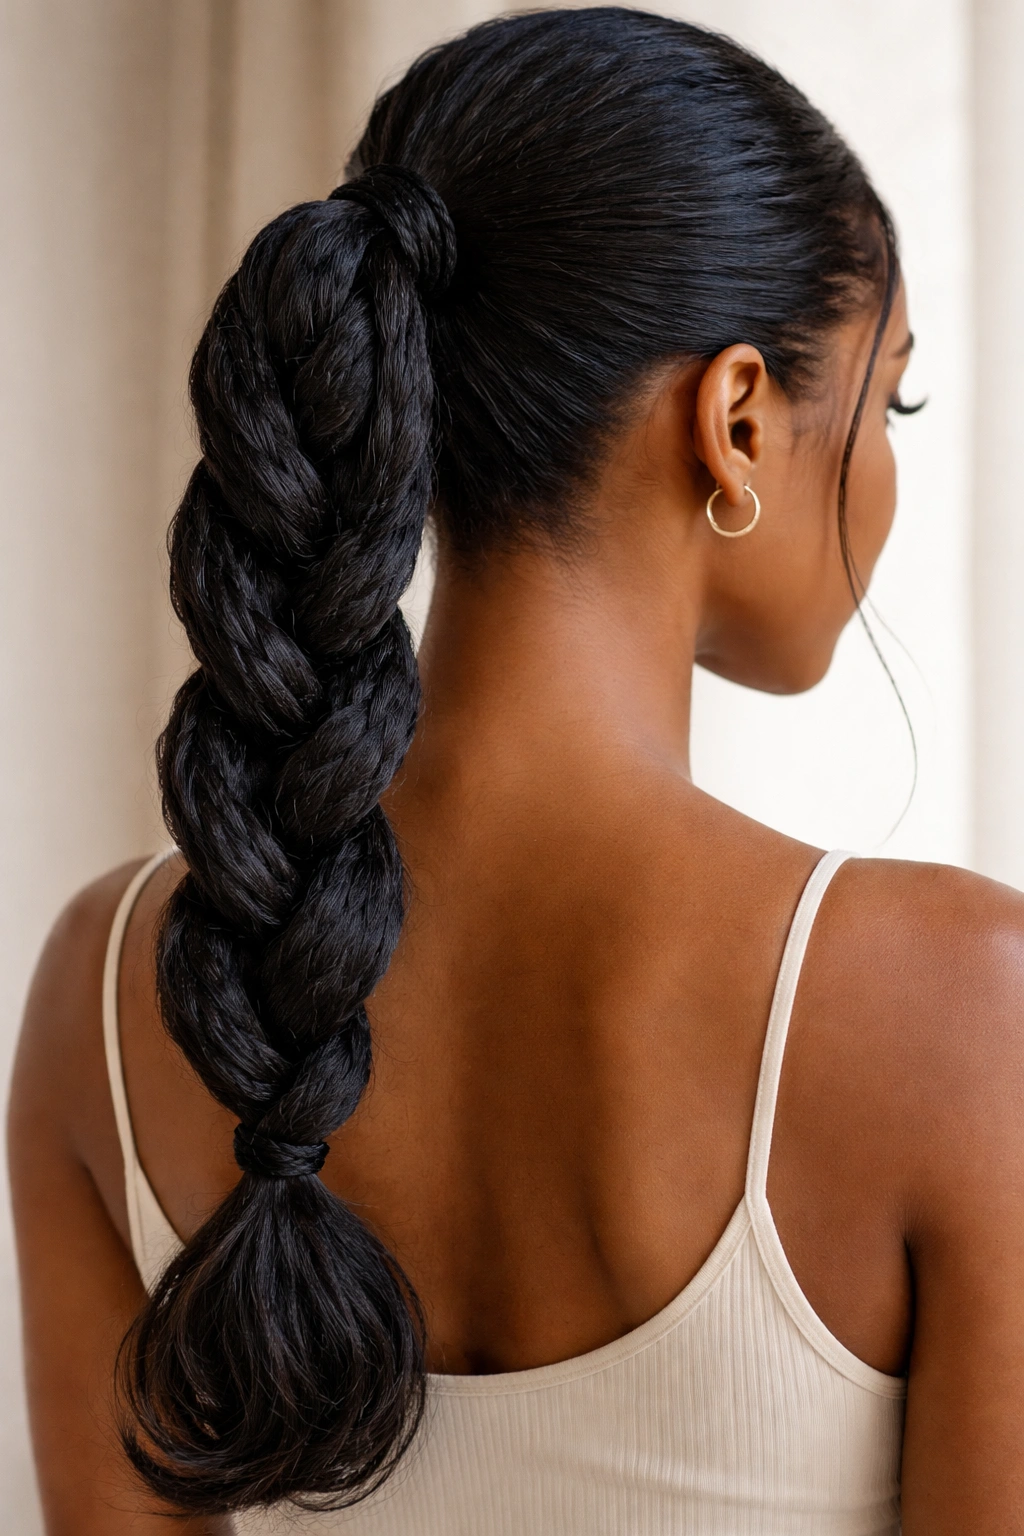
6. Bubble Braided Ponytail
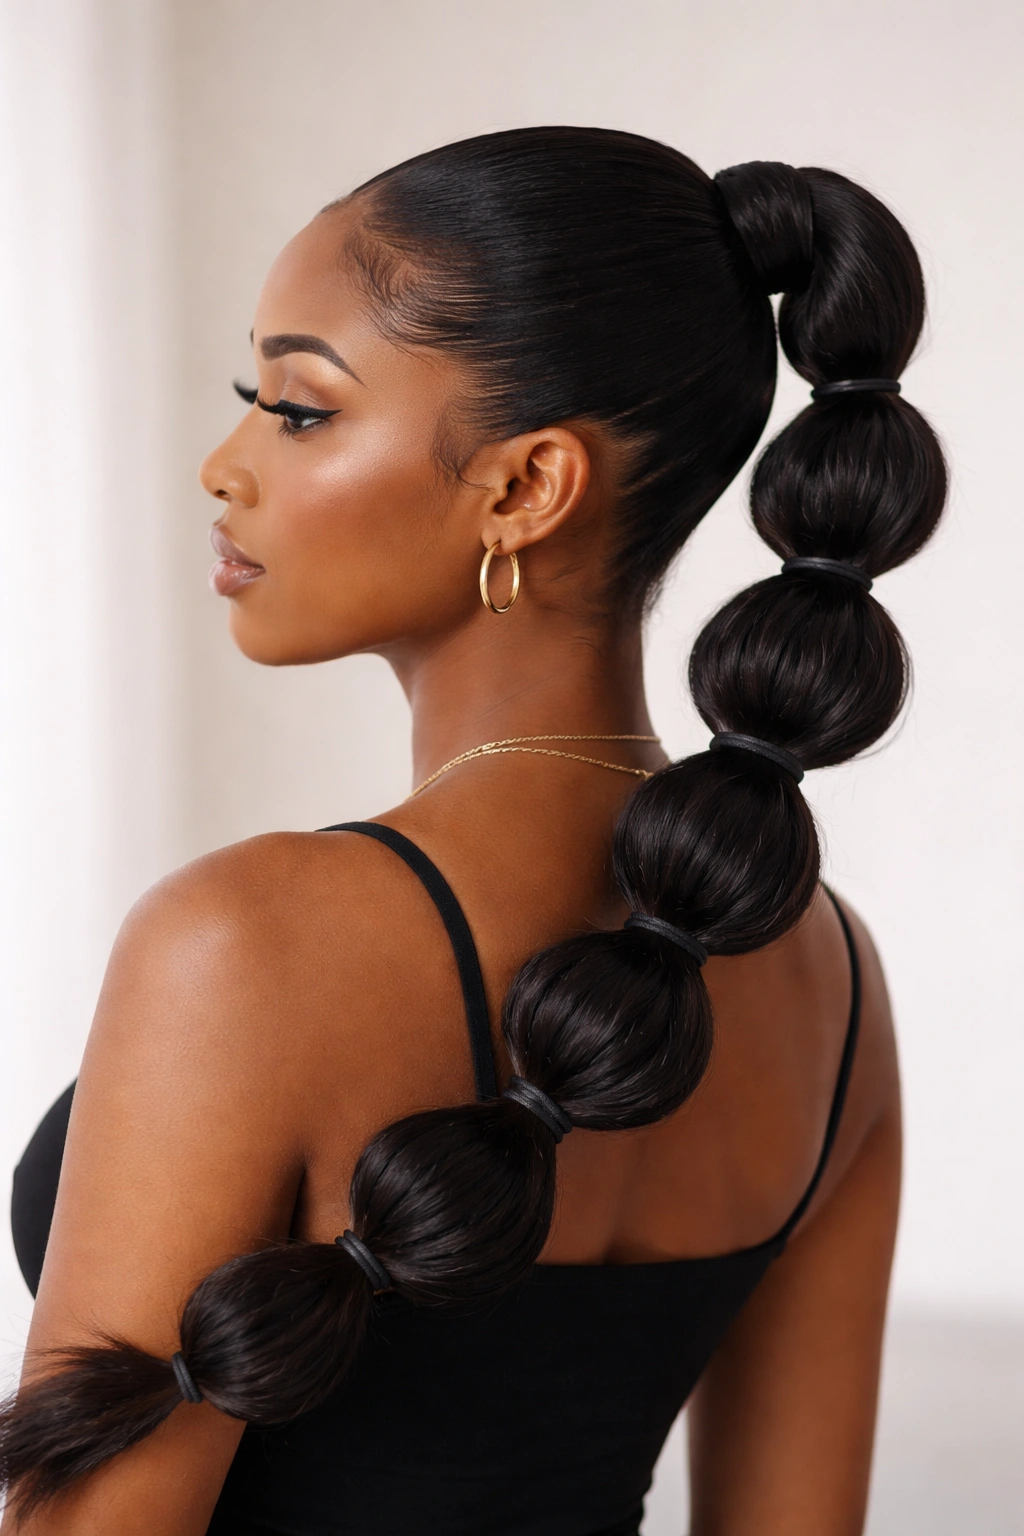
Bubble braids—also called looped braids—create a playful, textured aesthetic by using elastic bands to cinch the braid at intervals, creating bubble-like sections. This style is perfect when you want something that feels fun and youthful while still maintaining the protective benefits of a braided ponytail. The bubble effect adds visual texture and makes the style feel more dynamic than a traditional flat braid.
Creating the Bubble Effect
Braid your ponytail as normal, creating one continuous three-strand braid from root to tip. Once the braid is complete, place small elastic bands every 1-2 inches along the length of the braid. After placing each elastic, gently tease or fluff out the section between the elastics by pulling on the braid strands slightly to create a bubble shape. This loosens the braid intentionally and creates texture. The bubbles should be even in size and spacing for a polished appearance.
The Appeal of Bubble Braids for Natural Hair
- Creates instant texture and visual interest without requiring complex technique mastery
- The bubbling actually protects your braids from excessive tension by loosening them slightly
- Can be worn for special occasions or everyday, depending on how you style the bubbles
- Works on all hair types and curl patterns, though it shows up most dramatically on thicker, denser hair
- Easy to refresh if braids start looking tired—just fluff the bubbles again
- Can be customized with beads, cuffs, or colored elastics for a personalized look
What to watch for: Use small, thin elastics that won’t leave deep creases in your hair or create tension points. The goal is gentle gathering, not constriction.
7. Twisted Braided Ponytail
This style combines twisted sections with traditional braiding for a unique, textured hybrid look. Instead of using three strands, you create rope twists—two strands twisted together—which are then braided into the ponytail. Twists add a softer, less structured appearance than traditional braids while still being protective and intentional. The visual effect is more organic and flowing, which some people prefer.
Combining Twists and Braids
Gather your hair into a ponytail and divide it into sections. Create a two-strand rope twist by dividing a section into two parts and twisting them around each other rather than over and under the way traditional braids work. Create 3-4 of these rope twists from your ponytail. Once the rope twists are complete, gather the twisted sections together and braid them into each other, creating a braid made of twisted strands. The result is a textured, dimensional look that feels softer than a standard braid.
Why Twists Belong in Your Natural Hair Rotation
- Twists create less tension on your hair than tightly braided styles
- The softer aesthetic celebrates your natural curl pattern more visibly
- Easier for beginners because twisting is a simpler motion than braiding
- Can be worn loose for a more relaxed vibe or pulled tighter for a sleeker appearance
- Works beautifully with different hair densities—thin hair shows off the twist definition, thick hair creates impressive volume
- Takes slightly less time to execute than traditional braids
Real talk: Twisted styles frizz slightly faster than braids, so this works best if you’re planning to wear it for 2-3 days rather than a full week.
8. Double Dutch Braids Ponytail
Double Dutch braids are inverted braids where the strands go under rather than over each other, creating a braid that sits slightly raised on the scalp. This style pairs beautifully with a braided ponytail because the double Dutch braids create texture and visual interest along the crown while the ponytail keeps everything contained. The double Dutch braids essentially frame your entire head before flowing into the tail.
Creating the Double Dutch Effect
Part your hair down the middle from your forehead to your nape, creating two equal sections. On one side, start a three-strand braid at your hairline, but instead of crossing strands over the center, cross them under. This inverted motion creates the raised, dimensional look characteristic of Dutch braids. Continue this inverted braid along your scalp toward the back. Repeat on the other side. Once both braids reach the nape, gather all your hair—including the two Dutch braids—into a ponytail and braid the tail to complete the look.
Why Double Dutch Braids Elevate Your Style
- Creates a striking, visually dimensional look that works for any occasion
- The inverted technique makes braids appear thicker and more substantial
- Offers more texture variation than a single braided ponytail
- Works on all curl types but looks especially striking on hair with visible definition
- The symmetry of double braids is flattering and intentional-looking
- Dutch braids are slightly less prone to frizzing than standard braids because of how the strands sit
Quick facts:
- This style requires more practice than single braids, so don’t be discouraged if your first attempts feel wobbly
- Your Dutch braid skills will improve dramatically with each attempt
- Works best with a strong styling product to keep braids in place throughout the day
9. Box Braids to Ponytail
If you’re rocking box braids, you can absolutely style them into a sleek braided ponytail. This approach gathers your existing box braids into a ponytail and then braids the braids together, creating a thicker, more textured ponytail with incredible dimension. This style is perfect if you like wearing box braids but want variety in how you style them, or if you’re looking for a way to style box braids up and off your face.
Styling Box Braids Into a Ponytail
Simply gather your box braids into a ponytail at your preferred height, securing them with an elastic band. Once they’re gathered, take 3-4 of the braids and braid them together as a unit, or braid alternating braids together for a looser, more textured effect. You can also leave the box braids loose within the ponytail for a puffier look, or braid all of them together for a more unified, sleek appearance. The choice depends on the aesthetic you’re going for.
Why This Style Works for Protective Styling
- Extends the life of your box braids by keeping them off your shoulders and away from friction
- Allows you to style your existing braids in new ways without re-doing them
- Creates a completely different look while wearing the same protective style
- Box braid ponytails photograph beautifully with visible texture and dimension
- Low maintenance once you’ve gathered and braided them
- Works on any box braid thickness, from micro braids to jumbo braids
Pro tip: Use small bobby pins or braid clips to secure any loose braids within the ponytail, especially if your box braids are longer or thinner.
10. Rope Twist Braided Ponytail
This final style combines rope twists—two-strand twists that create a cable-like effect—with braiding to create a sophisticated, textured ponytail. The rope twist method creates a different visual than traditional three-strand braids, offering a softer, more organic look. A rope twist braided ponytail is perfect for anyone who loves the protective benefits of braids but prefers a less structured aesthetic.
Building the Rope Twist Braided Ponytail
Gather your hair into a ponytail at your desired height. Divide the ponytail into three sections. Create a rope twist by taking the first section, splitting it into two parts, and twisting them around each other. Repeat with the second and third sections, creating three rope twists from your ponytail. Once you have three rope twists, braid these twisted sections together, creating a braid made entirely of twisted strands. The result is a textured, dimensional ponytail with softer lines than a traditional braid.
What Makes Rope Twist Braids Special for Natural Hair
- Creates less tension than tight three-strand braids, making them ideal for sensitive scalps
- The rope twist motion is easier to learn than traditional braiding for some people
- Rope twists show off your natural curl pattern beautifully, especially around the edges
- Works gorgeously on all curl types, from loose waves to tight coils
- Can be executed slightly loose for a romantic, flowing look or tighter for a more polished appearance
- Twists actually blend beautifully with loose natural curls, so the transition is seamless
- Excellent for transitioning hair or hair with mixed textures
Worth knowing: Rope twists can be refreshed by retwisting them even after several days, without completely undoing the style, which extends the wear time.
Final Thoughts
Sleek braided ponytails aren’t just about achieving a neat aesthetic—they’re about working with your natural hair’s texture and characteristics to create styles that protect while looking intentional and beautiful. The ten techniques you’ve learned here offer different approaches depending on your skill level, the amount of time you have, and the specific look you’re going for. Some of these styles are protective, reducing daily manipulation and keeping your ends safe. Others showcase your curl pattern while keeping hair neatly contained.
Start by experimenting with the techniques that feel most accessible to you. The classic three-strand braided ponytail and rope twist variations tend to be easier for beginners, while feed-in braids and double Dutch braids require more practice but deliver stunning results once you’ve mastered them. Remember that your first attempt at any new style won’t look perfect—and that’s completely normal. Each time you recreate a style, your hands become more familiar with the motions, your tension improves, and the overall result becomes more polished.
The most important thing is choosing styles that feel sustainable for your lifestyle and routine. If you love spending time on your hair and enjoy detailed work, the more intricate styles like goddess crowns and feed-in braids might be your favorites. If you prefer quick, practical styles that still look polished, the classic braided ponytail and box braid variations will become your go-tos. Natural hair is infinitely versatile, and braided ponytails are just the beginning of what’s possible when you embrace your hair’s natural texture and work with it rather than against it.