If you’ve got curly hair and you’re trying to find a hairstyle that actually works with your texture instead of fighting against it, braided ponytails are seriously your answer. They’re not just beautiful — they protect your curls from daily manipulation and environmental stress while giving you that polished, styled look that works for everything from Monday meetings to weekend hangouts. The best part? When you combine braids with a ponytail, you get versatility that keeps your hair healthy while looking intentional and fierce.
The challenge most Black women with curly hair face is finding styles that showcase natural texture while actually being practical for everyday wear. Braided ponytails solve that problem. They’re protective, low-manipulation, and can be dressed up or down depending on what you’re doing that day. Whether you’re working with tightly coiled hair, loose waves, or something in between, there’s a braided ponytail style that’ll work perfectly with your curl pattern.
Let me walk you through ten beautiful braided ponytail styles that actually honor your natural hair and give you real styling options that last.
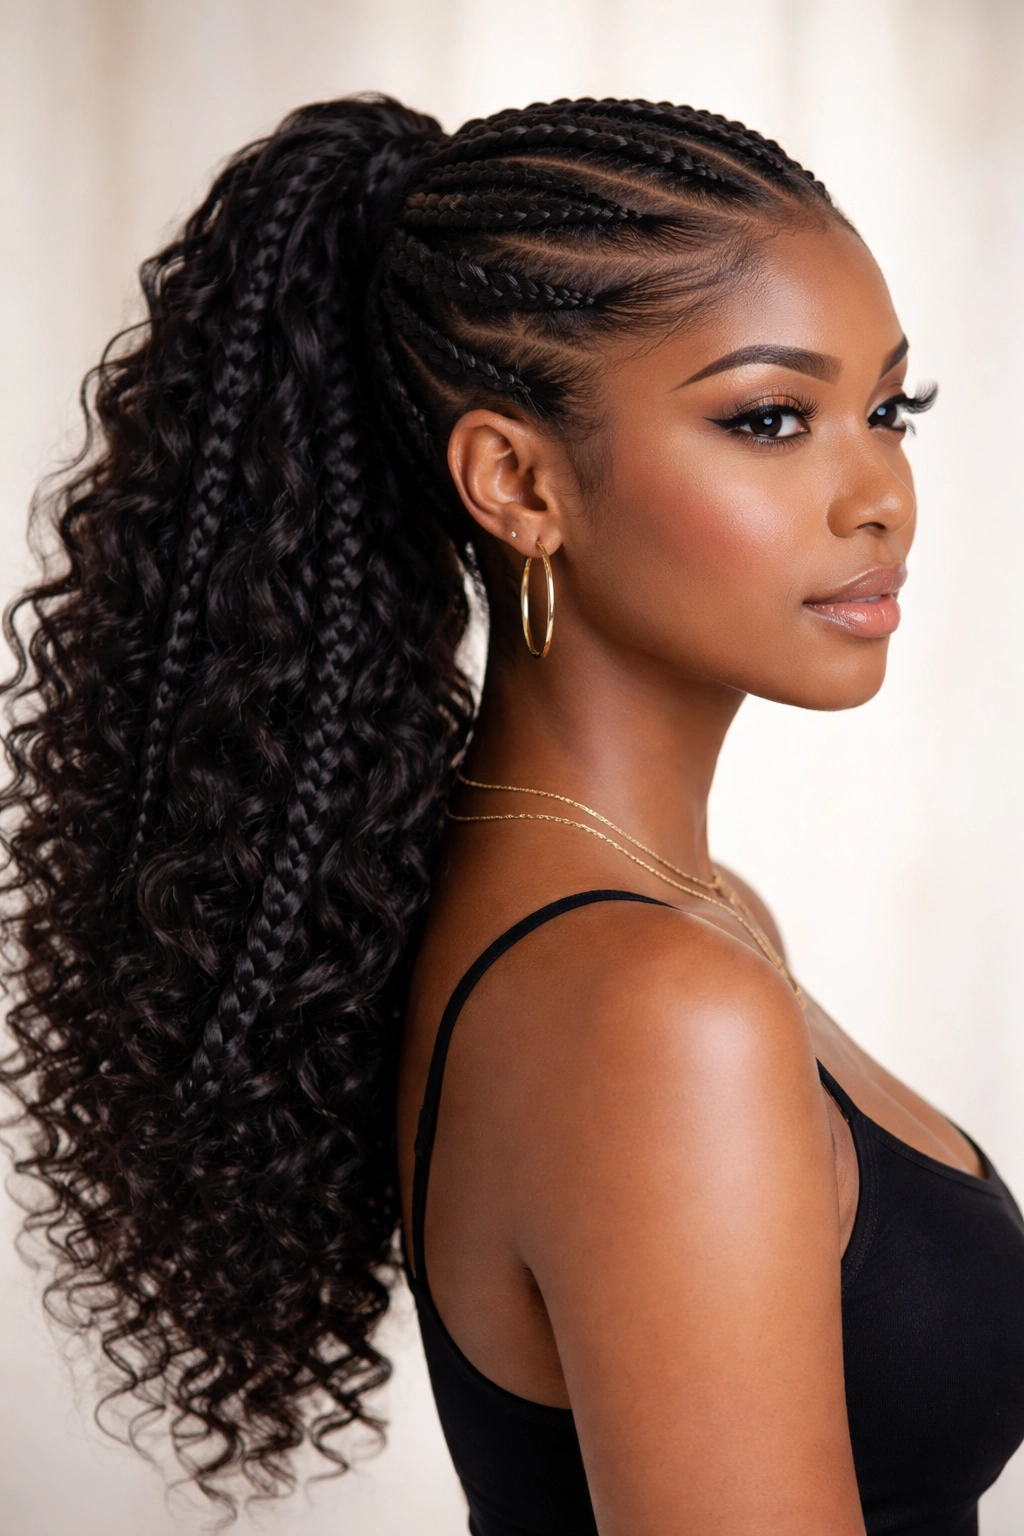
1. Classic Box Braid Ponytail
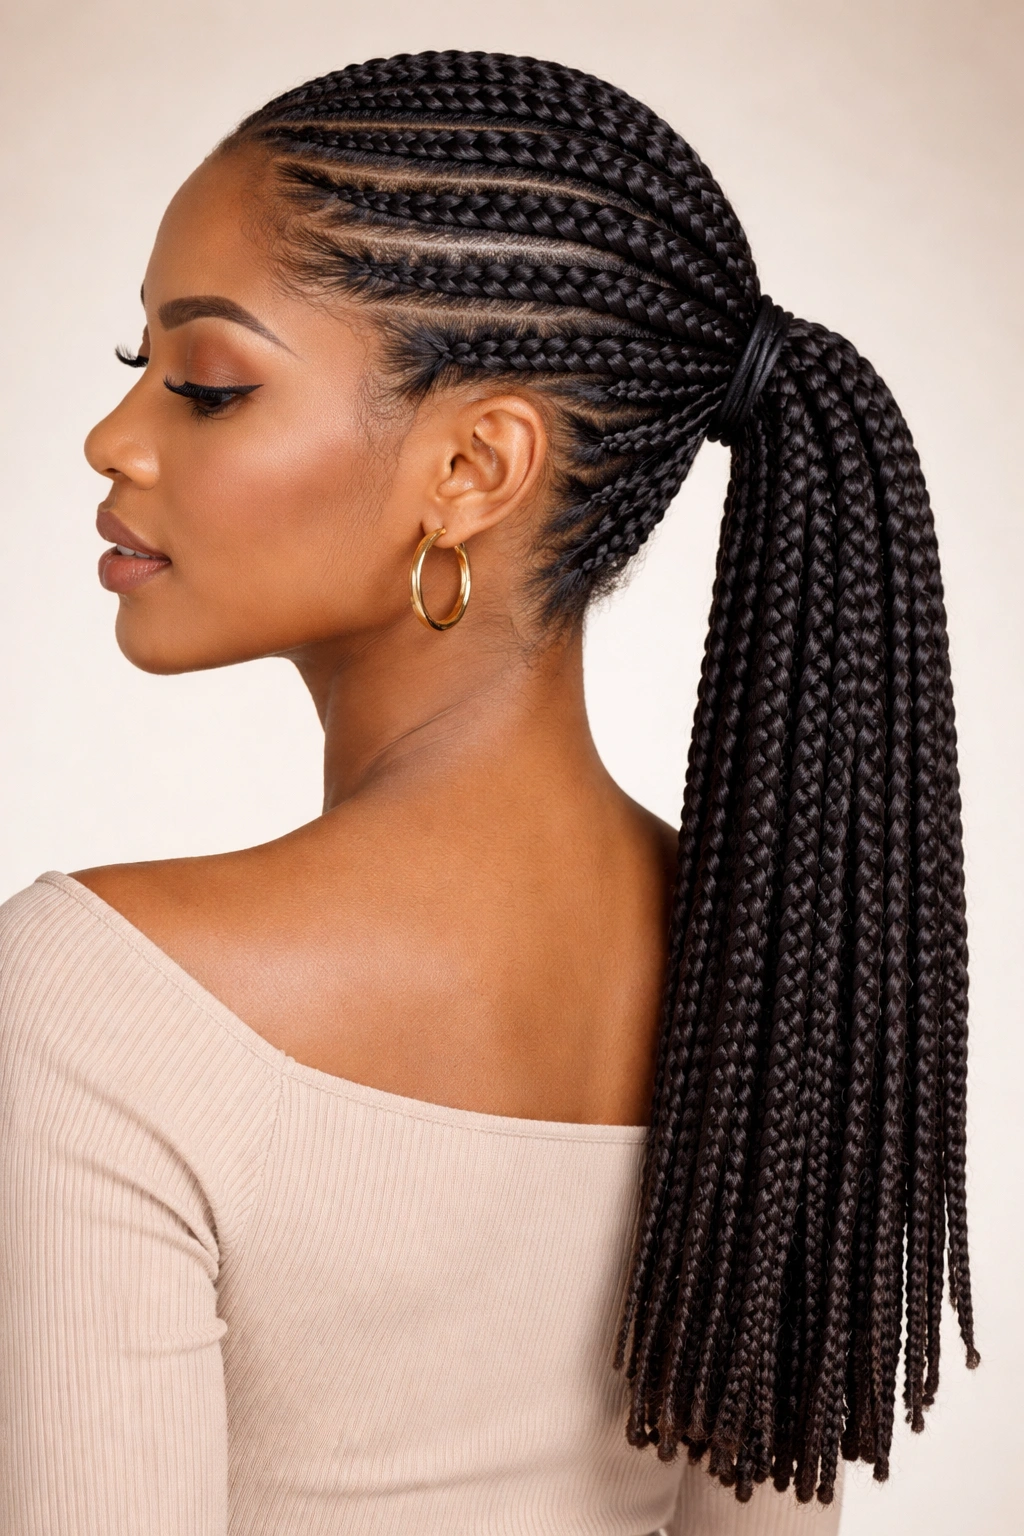
Box braids are the foundation of protective styling, and pulling them into a ponytail takes them to another level. This style combines the protective benefits of box braids with the neat, intentional look of a gathered ponytail — you’re getting both the protection and the polish in one go.
Why It’s a Timeless Choice for Curly Hair
Box braids create a clean, defined look that works beautifully on curly hair because they don’t try to hide or flatten your texture. Instead, they embrace the space and dimension your curls naturally have. When you gather them into a ponytail, you’re creating a style that looks put-together without requiring you to manipulate your actual curls daily. The braids protect your natural hair while the ponytail keeps everything contained and secure.
How to Wear It Best
- Gather your box braids at the nape of your neck for a low, sophisticated look
- Try a high ponytail if you want something more playful and youthful
- Use a silk or satin scrunchie to avoid breakage at the elastic point
- Add decorative cuffs or beads to individual braids for extra personality
- Refresh the style by taking down the ponytail every few days and re-gathering
Pro tip: Wrapping a small section of your braids around the base of the ponytail (like you’re creating a wrap around the elastic) hides the holder completely and looks infinitely more polished than a visible scrunchie.
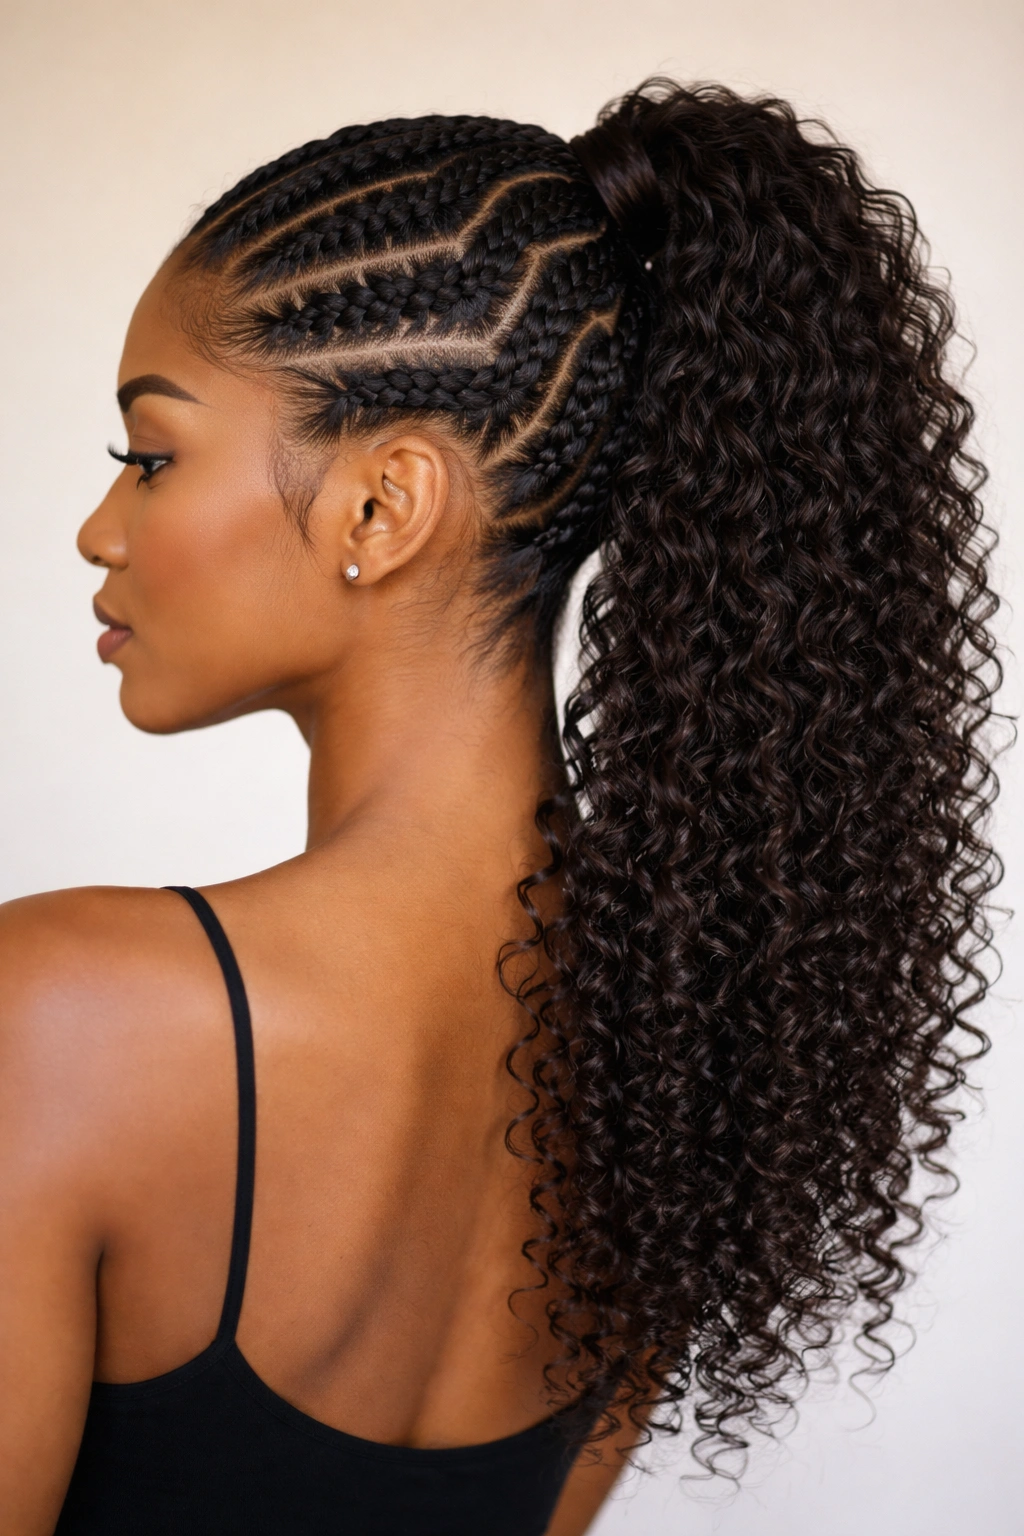
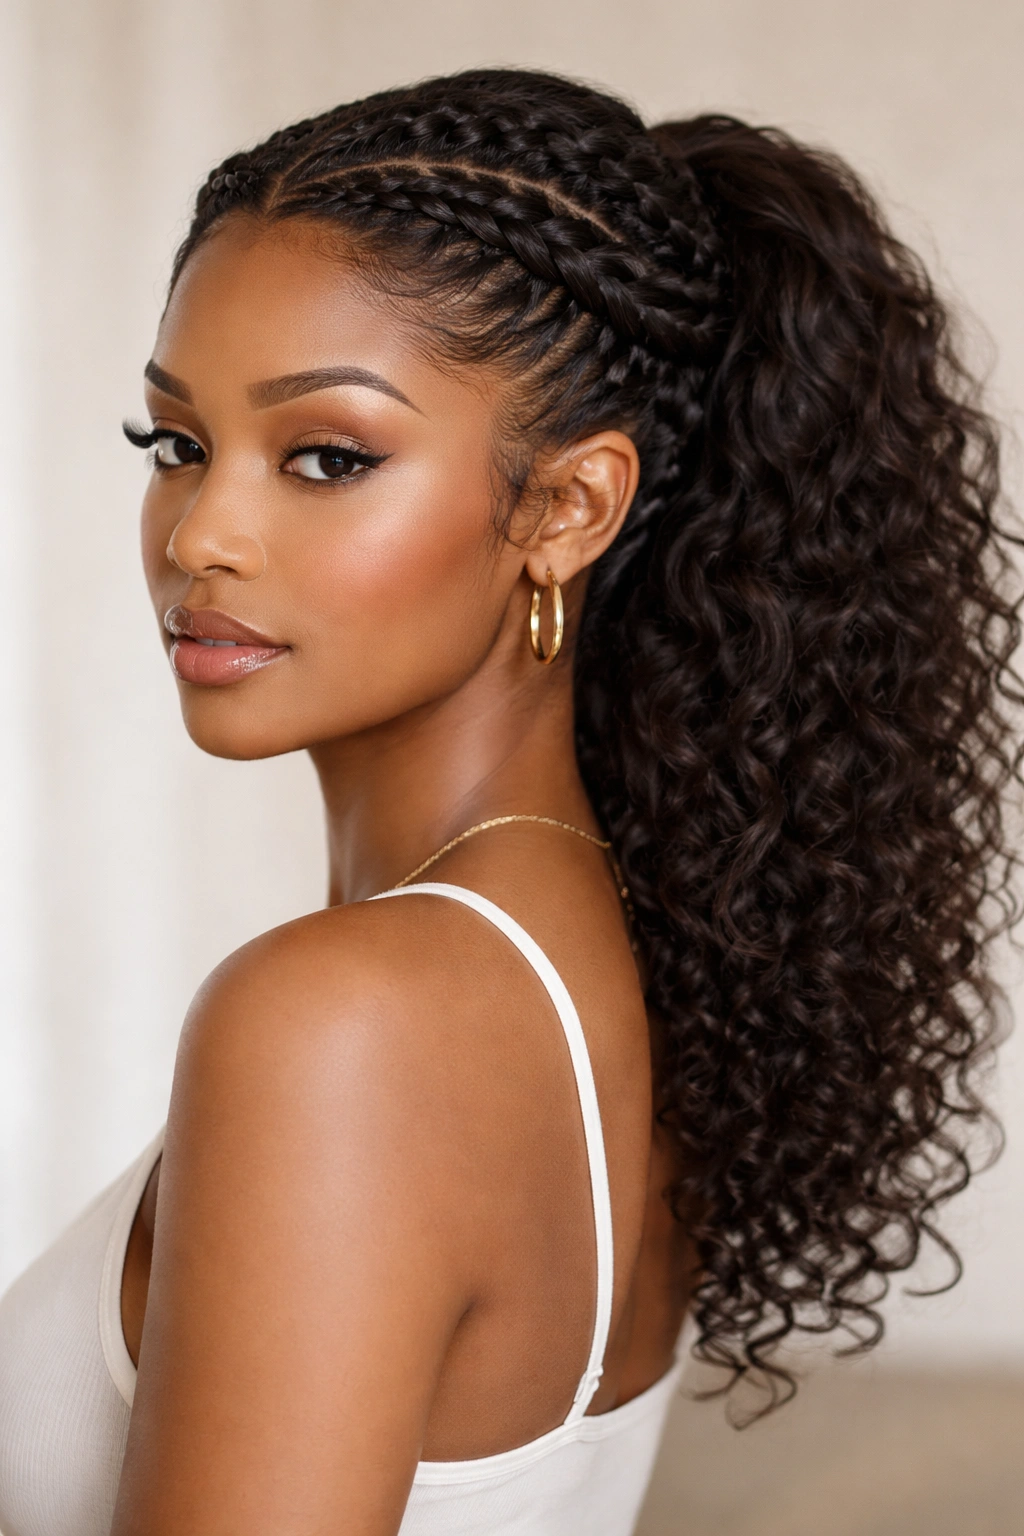
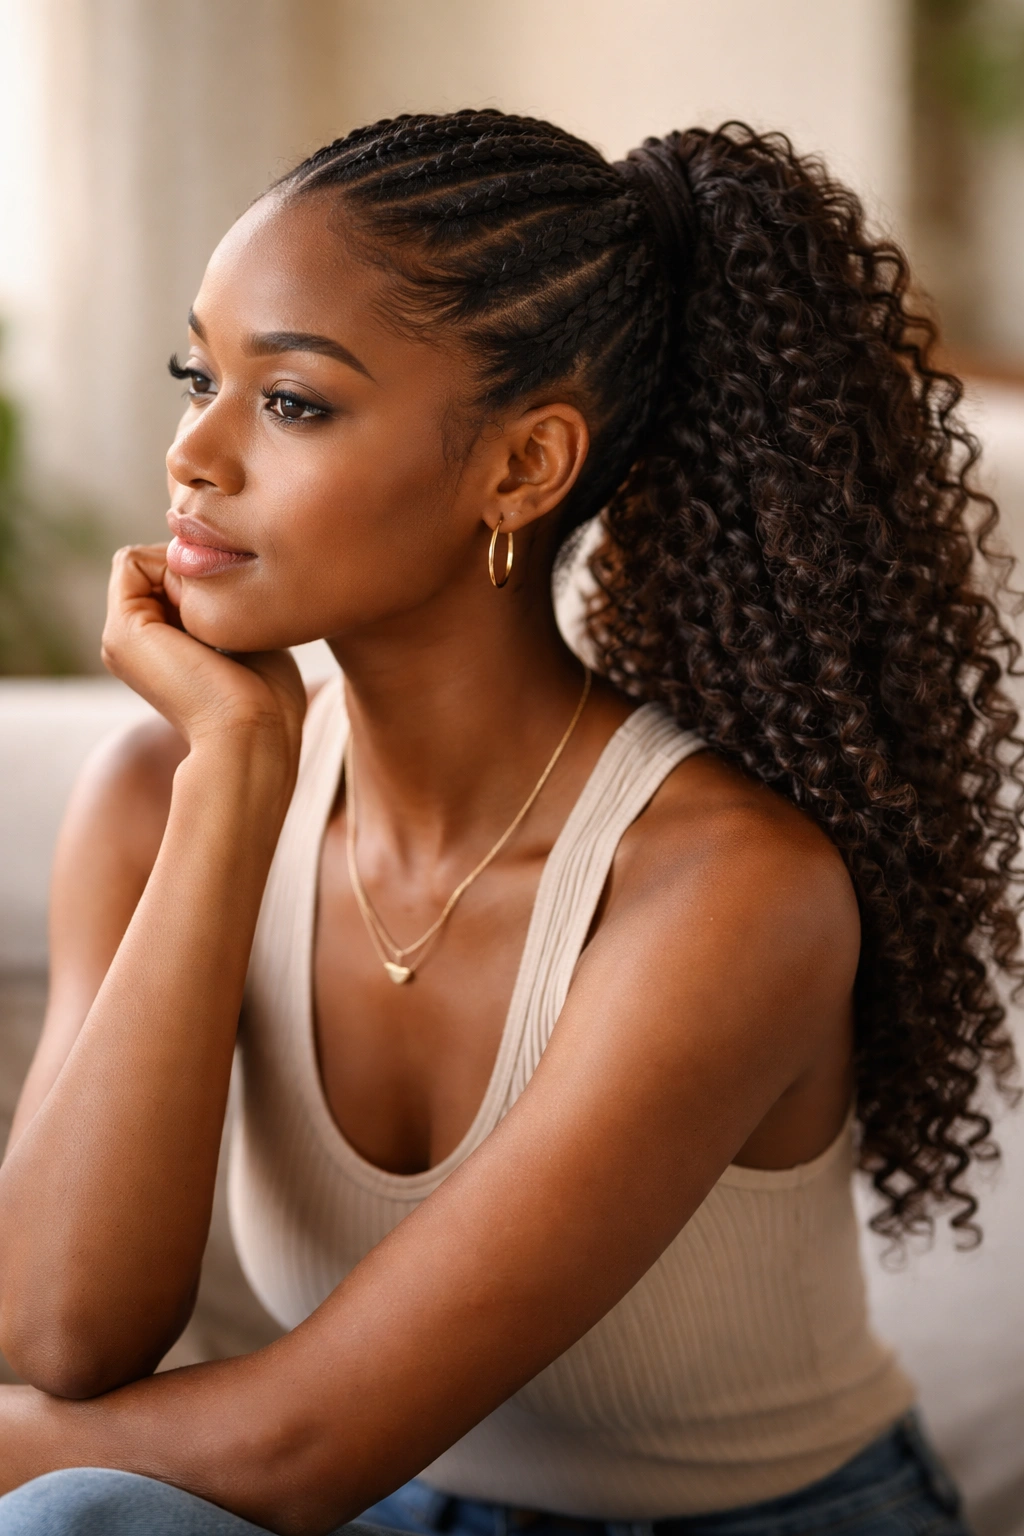
2. Feed-in Cornrow Ponytail
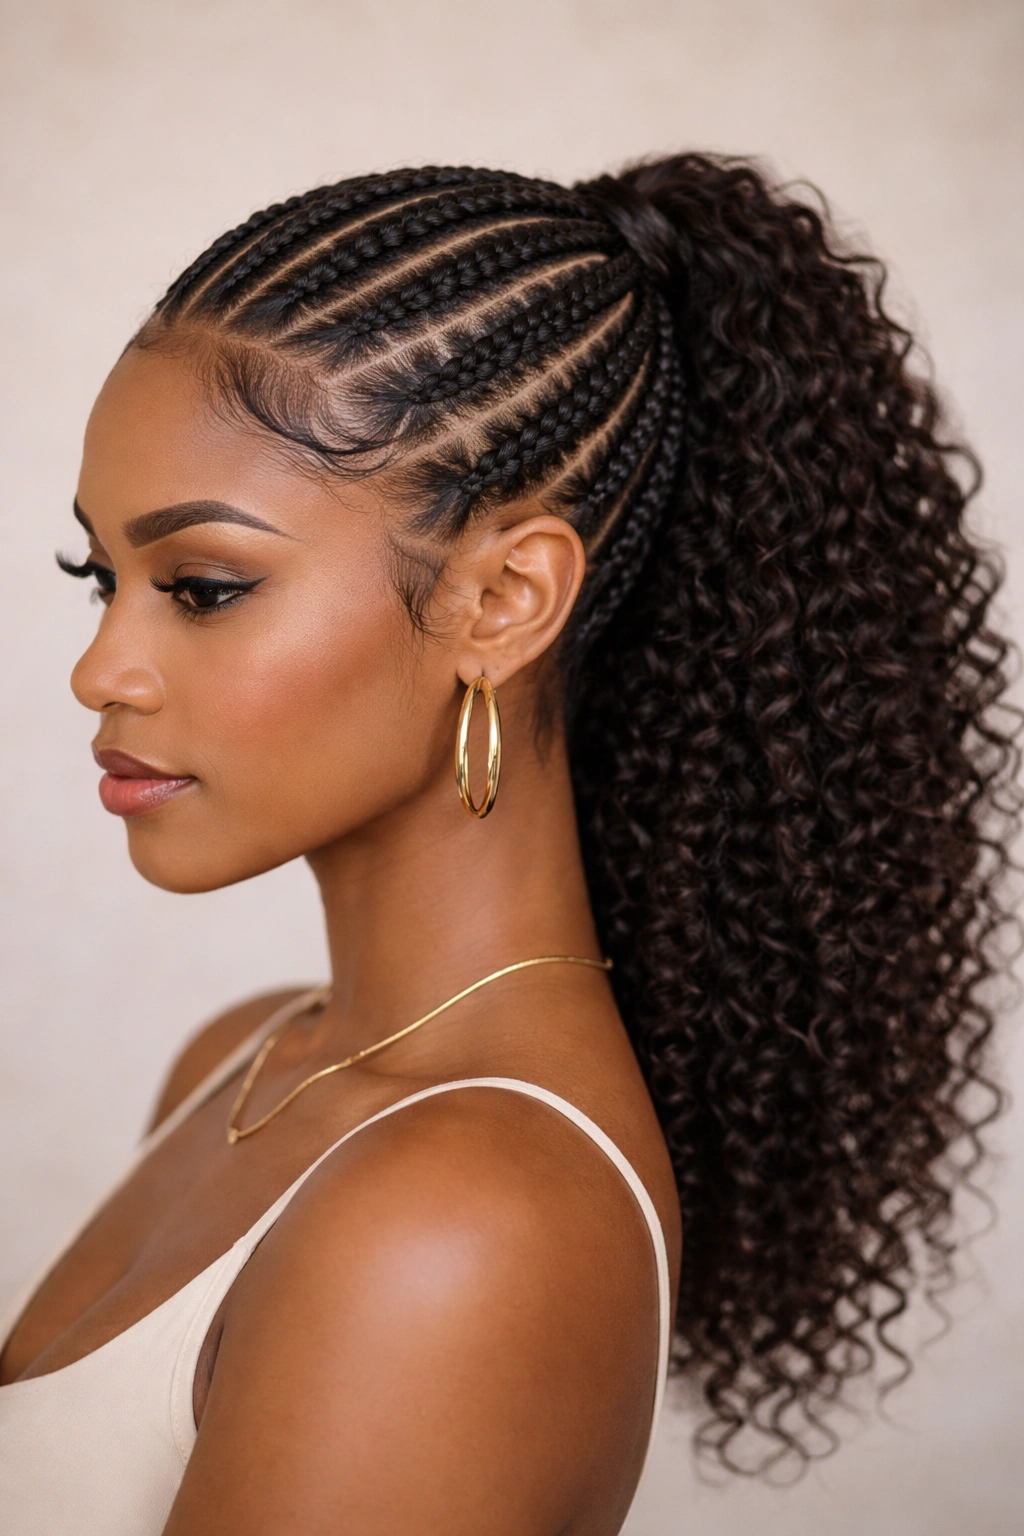
Feed-in cornrows are a game-changer for creating styles that look refined and last longer than other braid methods. When you feed-in cornrows leading back to a ponytail, you’re creating a style that’s both protective and visually striking — the cornrows draw all the eye to your face while the ponytail sits weightless and neat at the back.
What Sets This Style Apart
Feed-in cornrows are created by adding small sections of hair as you braid, rather than braiding only with the hair that’s already there. This creates a flatter, more sculpted look that sits closer to the scalp. For curly hair, this means the style stays looking fresh longer because there’s less stress at the scalp where your actual curls begin. The ponytail portion hangs freely, letting your curls live their best life at the ends without any tension.
Best Techniques for Your Curl Pattern
- Start your feed-in cornrows at the front hairline and angle them back toward where your ponytail will sit
- The feed-in method works on all curl patterns, but the tighter your curls, the more important proper tension becomes — too tight causes breakage at the scalp
- Use a lightweight moisturizing product while braiding to keep your hair hydrated and pliable
- Leave the ponytail portion loose and unbraided so your curls can move naturally
- This style typically lasts 2-3 weeks before needing maintenance
Worth knowing: The tension should feel firm but not painful — if your scalp is throbbing, the braids are too tight.
3. Twisted High Ponytail
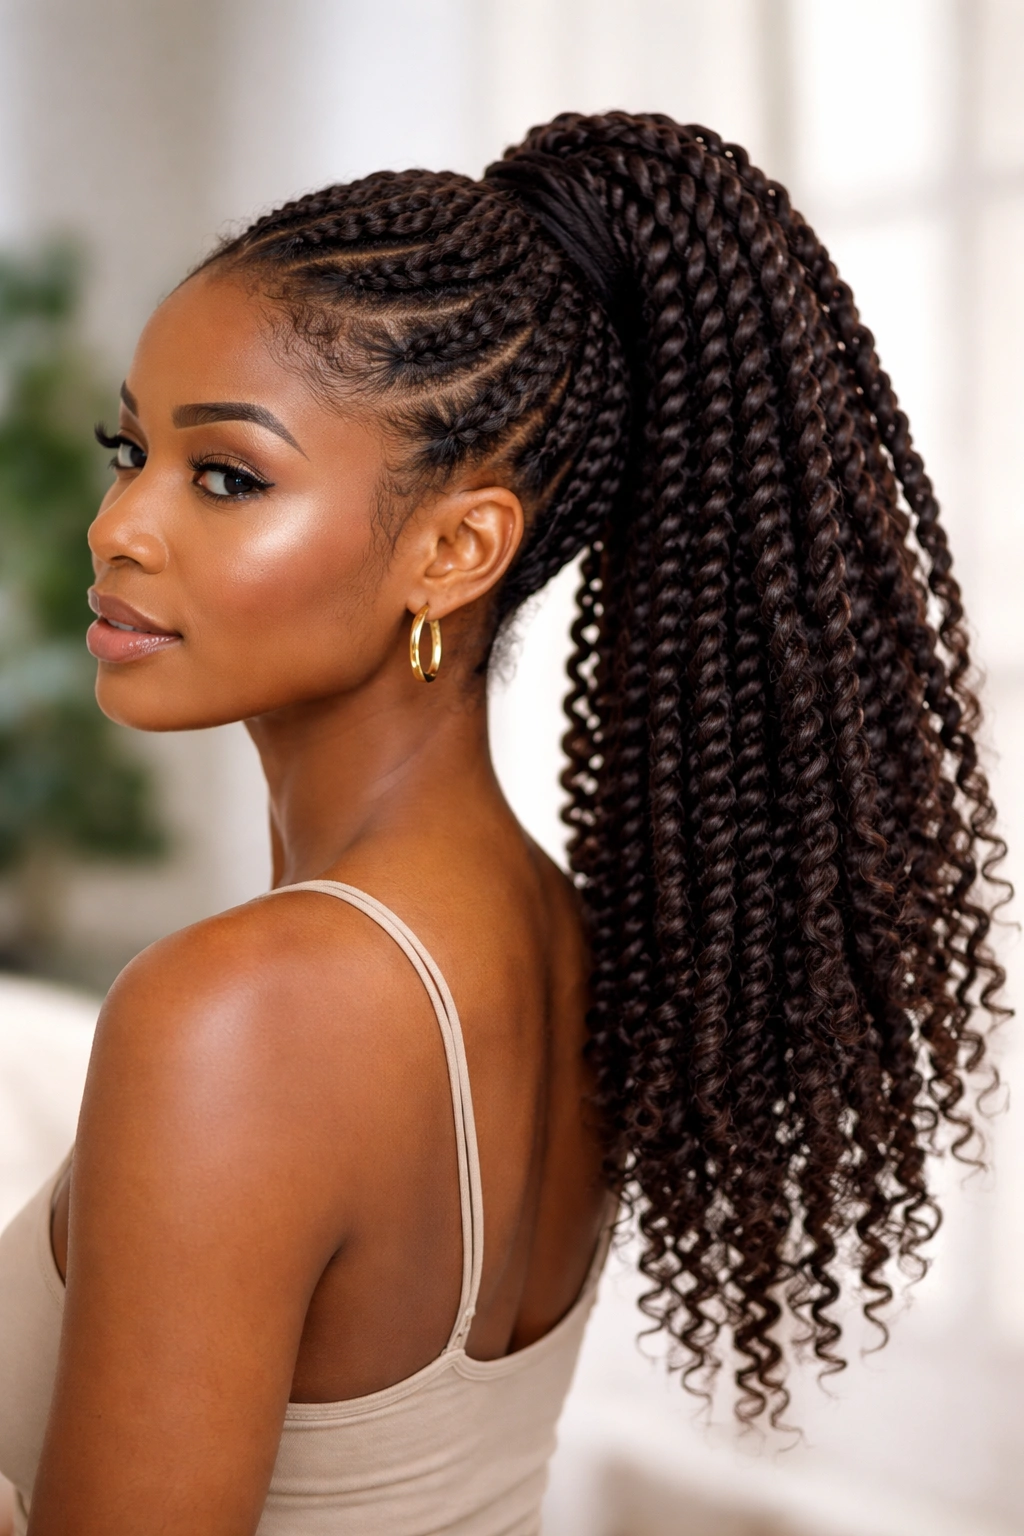
Twists offer a beautiful alternative to braids, and they’re particularly gorgeous on curly hair because the twist pattern creates a spiral effect that mirrors and celebrates your natural curl structure. A twisted high ponytail gives you that same protective benefit as braids but with a softer, more flowing aesthetic.
Why Twists Work So Well for Curls
Twists divide your hair into two strands that spiral around each other, and they require less tension than braids because there’s no three-strand interlocking creating stress. For curly hair, this means less manipulation and less risk of breakage. Two-strand twists actually look even more textured and dimensional on curly hair than on straight hair — your curls add volume and movement to the twist itself.
Creating the Style
- Divide your hair into sections, then twist each section by dividing it in half lengthwise and spiraling the two strands around each other
- Use a moisturizing cream or gel to keep the twists defined as you work
- Gather all the twists into a high ponytail, or create a few larger twists that frame your face and gather the rest
- You can keep the ponytail portion as loose twists or unravel them completely for defined curls
- This style holds beautifully for 7-10 days
Pro tip: If you want extra hold and definition, apply a light gel as you’re twisting, but don’t overdo it — too much product weighs down curls.
4. Dutch Braid Wraparound Ponytail
Dutch braids (the inside-out version of French braids) create an elevated, intricate look that feels fancy but is actually pretty straightforward to create. When you wrap a Dutch braid around your head and finish with a ponytail, you’re creating a statement style that showcases your hair’s natural movement.
What Makes This Style Special
Dutch braids sit on top of the hair rather than blending in, so they’re visually prominent and striking. On curly hair, this means the braid itself becomes a design element — the texture and dimension of your curls make the braid look more interesting and complex than it would on straight hair. The wraparound style creates a sort of crown effect before flowing into the ponytail, which reads as intentional and polished.
Step-by-Step Approach
- Start a Dutch braid at one side of your hairline, braiding away from your face
- Feed in hair as you braid around the back of your head
- Angle the braid toward where your ponytail will sit
- Transition the braid into a regular three-strand braid and gather it with the rest of your hair into the ponytail
- Leave some face-framing pieces loose if you want to soften the look
- Apply edge control along the braid for definition, not to flatten your curls
Insider note: Dutch braids photograph beautifully from the back, so this is an excellent choice if you’re going to an event where photos will be taken.
5. Goddess Braid Ponytail
Goddess braids are thicker, fuller braids that make a real visual statement. They’re created by feeding in larger sections of hair as you braid, which creates this gorgeous, voluminous braid that sits beautifully on curly hair. When you style them into a ponytail, you’re creating something that looks incredibly intentional and high-effort, even though the technique is pretty straightforward.
Why They Work for Curly Hair
Goddess braids look even more gorgeous on curly hair because the curls add natural volume within the braid itself. The combination of the thick braid plus your curl pattern creates this rich, textured look that reads as both protective and glamorous. These braids are also relatively quick to install compared to finer braids, and they last a long time — typically 3-4 weeks with proper maintenance.
Styling and Care Tips
- Create 4-6 goddess braids depending on how thick you want them and how much hair you have
- Feed in hair generously as you braid to create that full, voluminous effect
- Gather all the braids into a high or mid-height ponytail
- You can leave the ponytail portion loose and curly, or braid it too for a fully braided look
- Refresh the braids every few days by gently separating any sections that are fusing together
- Wrap your ponytail in a silk scarf at night to preserve the style
Quick facts about goddess braids:
- Installation typically takes 30-45 minutes for someone experienced
- They last longest when you sleep in a silk bonnet or wrap
- They work on all curl patterns but especially beautiful on textured hair
- You can add beads, cuffs, or ribbons to the braids for customization
- They’re thick enough to create a visual statement without needing tons of them
6. Zig-Zag Braid Ponytail
Zig-zag braids (also called zigzag braids or lightning bolt braids) are exactly what they sound like — braids that follow a zigzag or zigzagging pattern rather than a straight line. They’re more of a statement style than some of the other options, and they create an incredibly eye-catching effect, especially on curly hair where the texture adds even more visual interest.
What Makes This Style Bold and Beautiful
The zigzag pattern breaks up the monotony of straight-line braids and creates this dynamic, energetic look. On curly hair, zigzag braids actually look sharper and more defined because your curls add texture that emphasizes the geometric pattern. This style absolutely works for everyday wear, but it’s also a fantastic choice if you’re going somewhere and want your hair to be the conversation starter.
How to Create It
- Start at one side of your hairline, braiding diagonally across your head
- Instead of following a curved or straight path to the back, make sharp zigzag turns as you go
- Feed in hair as you braid to keep the pattern clean and defined
- Direct the braids toward where your ponytail will sit
- Gather all the braids into a ponytail at the back
- You can create one large zigzag or multiple zigzags depending on your vision
- Keep your edges smooth with a little edge control for that polished look
Pro tip: Practicing the zigzag pattern on yourself a few times before doing it on actual hair makes a huge difference. It feels weird at first, but it becomes natural pretty quickly.
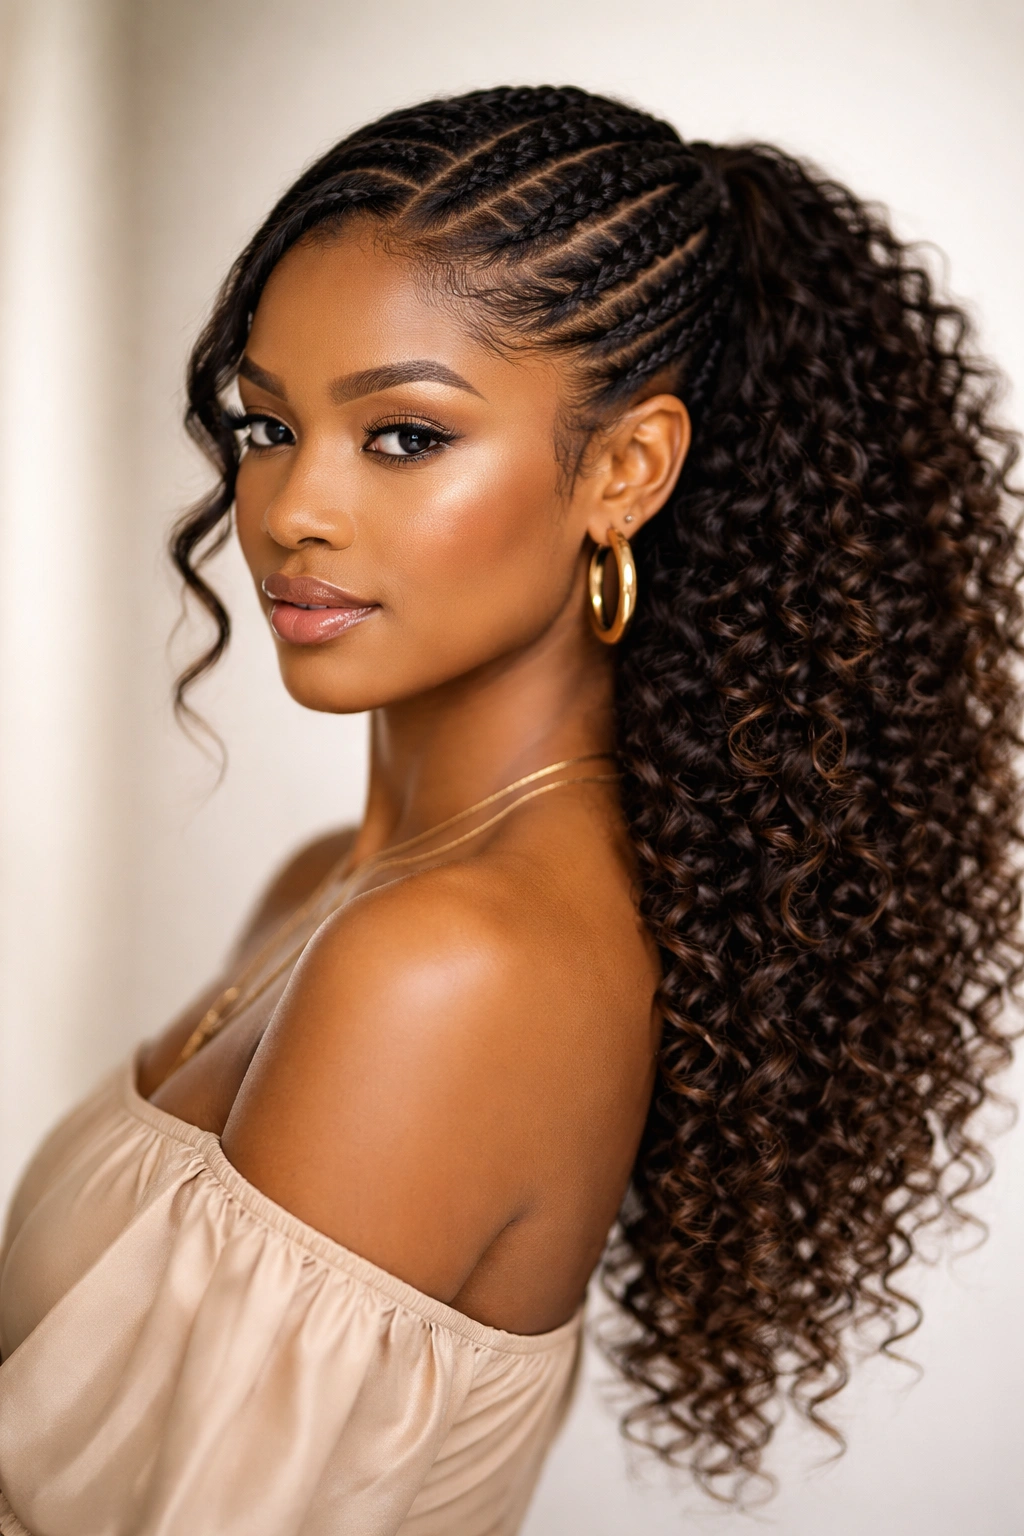
7. Tribal Braided Ponytail
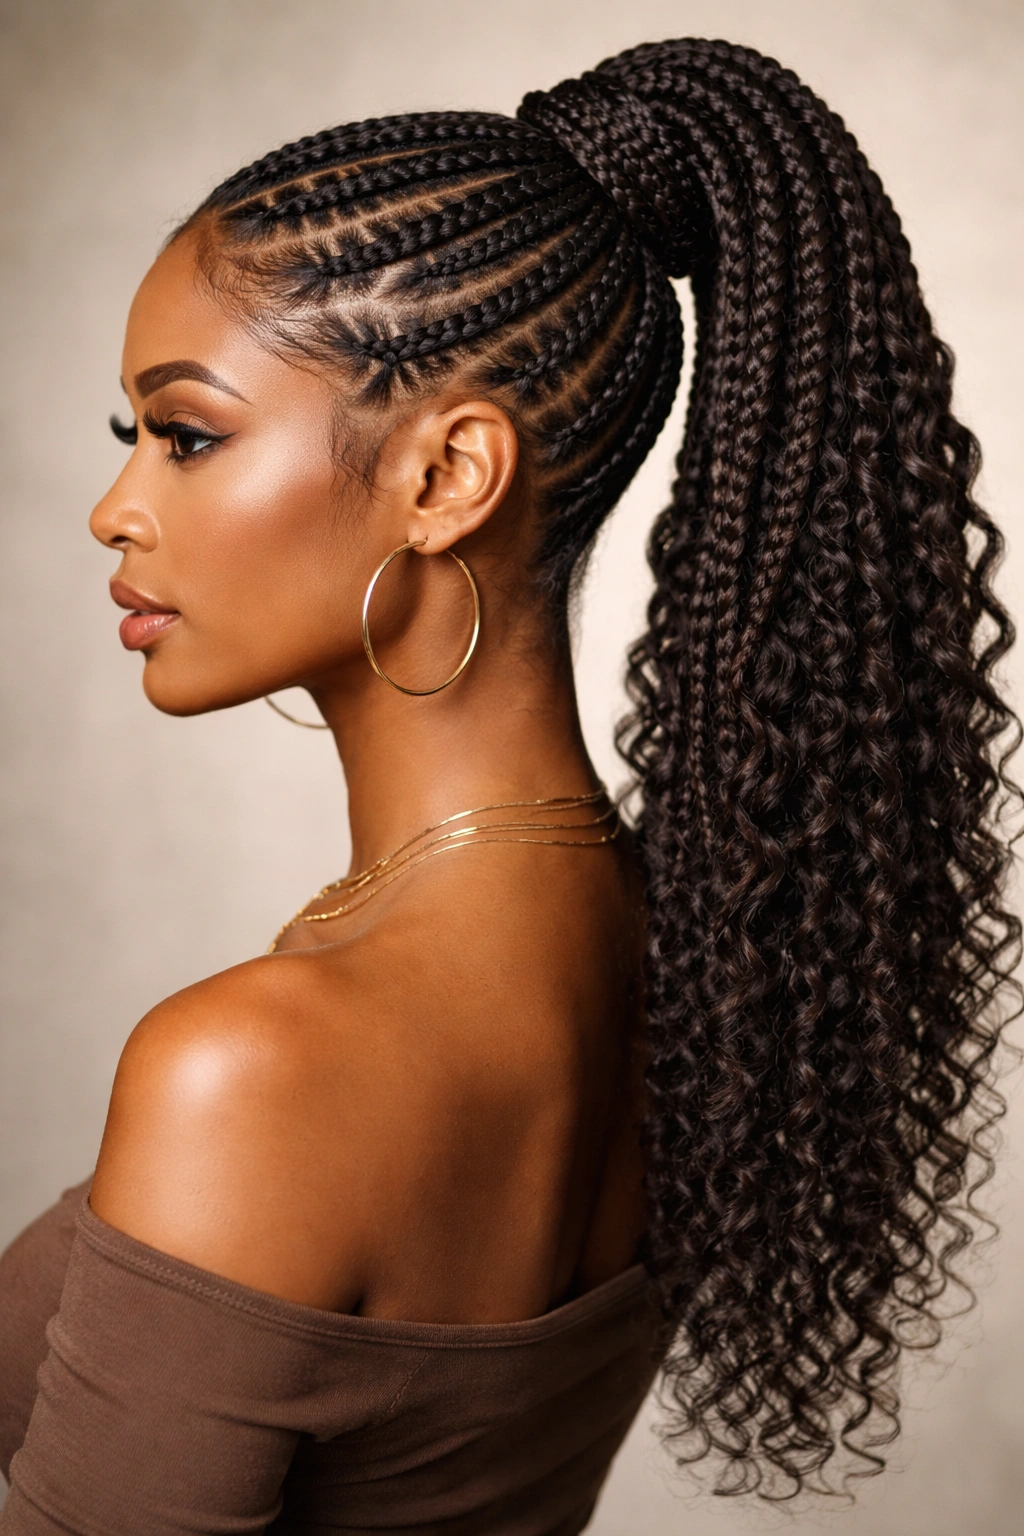
Tribal braids (also called lemonade braids) are named for their resemblance to cornrows but with a twist — they’re thick, bold, and often styled in more intricate patterns. When you take tribal braids and style them into a ponytail, you’re creating something that feels connected to cultural braiding traditions while being uniquely modern and wearable.
Why This Style Honors Texture and Tradition
Tribal braids celebrate the thickness and texture of natural, curly hair. They’re meant to showcase your hair’s volume and movement, not hide it. For Black women with curly hair, these braids are particularly meaningful because they represent a hairstyling tradition deeply rooted in African and African diaspora culture. The style works beautifully on all curl patterns but especially on tightly coiled and textured hair where the braids sit beautifully defined and dimensional.
Installing and Wearing Tribal Braids
- Create thick braids (usually 6-10 depending on hair thickness and desired look)
- Feed in generous sections of hair to make the braids visually bold
- Angle the braids toward the back of your head where the ponytail will sit
- Gather them into a high, mid, or low ponytail depending on your preference
- You can leave the ponytail portion as loose braids or unravel them completely
- These braids last 3-4 weeks and actually get more defined over time as your curls set the pattern
- Sleep in a silk bonnet to preserve the style
What you’ll need:
- Moisturizing cream or gel to keep braids looking fresh
- A silk or satin bonnet for sleeping
- A wide-tooth comb or your fingers for detangling loose sections
- Hair oil or leave-in conditioner for maintenance
- Patience during installation — these take time but look incredible when complete
8. Fulani-Inspired Braided Bun Ponytail
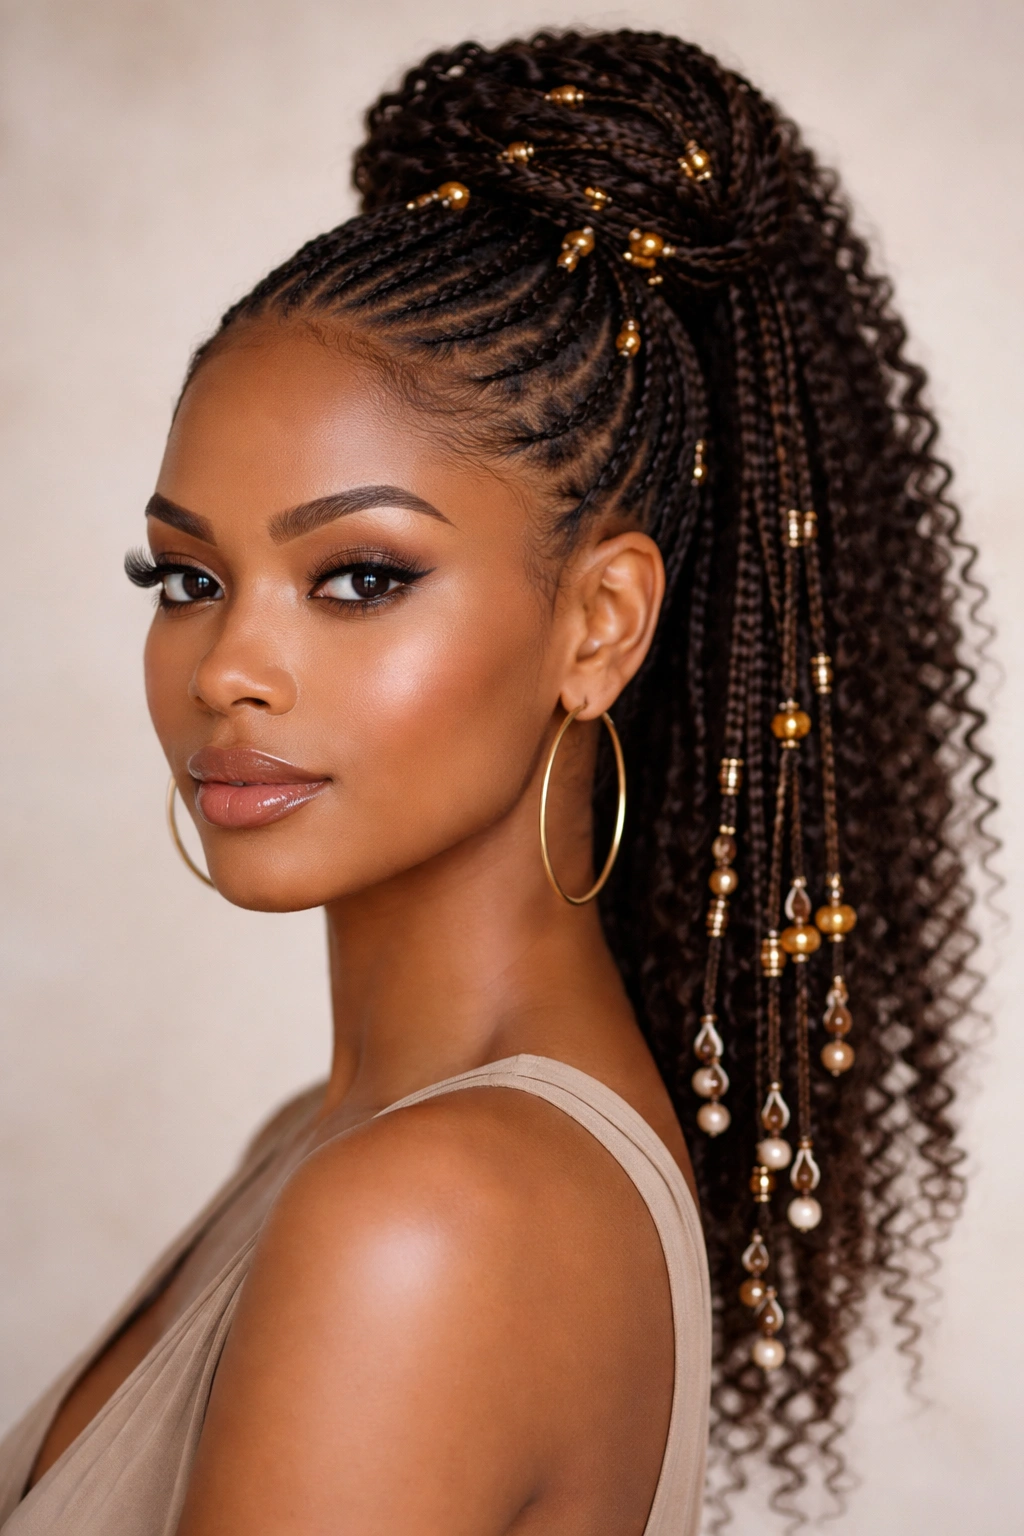
Fulani braids are characterized by thin braids with a distinctive center part and often beads or gold cuffs woven throughout. When you style Fulani-inspired braids into a high ponytail or bun, you’re creating something that’s absolutely stunning and speaks to a specific cultural heritage. The thin braids work beautifully on curly hair, and gathering them into a bun or ponytail creates this ethereal, elegant look.
The Cultural Significance and Modern Styling
Fulani braids originate from the Fula people of West Africa, and they’re traditionally worn as a sign of beauty, status, and cultural pride. Wearing this style as a Black woman with natural hair is a way of honoring that heritage while celebrating your own natural texture. The thin braids showcase your hair’s movement and volume in a way that thick braids simply can’t — they’re delicate and dimensional all at once.
Creating the Style Authentically
- Part your hair down the center or create a side part
- Create thin braids on both sides of the part, typically with braids that start at the front hairline
- Incorporate beads, gold cuffs, or decorative elements as you braid
- Gather all the braids into a high ponytail or a wrapped bun
- Leave some face-framing braids loose if you prefer
- The ponytail or bun can be as simple or as elaborate as you want — you could gather loose curls or create another braided bun
- This style can last 2-3 weeks and looks increasingly beautiful as your curls set around the braids
Important note: If you’re wearing Fulani braids, wear them with intentionality and respect. Understand the cultural roots and don’t dismiss the significance if someone mentions the style’s origin to you.
9. Side-Swept Braid Ponytail
A side-swept braided ponytail is exactly what it sounds like — instead of gathering your hair straight back, you’re sweeping braids to one side and creating the ponytail off to the side. This creates an asymmetrical, romantic look that’s different from the more structured styles and works beautifully on curly hair because the side placement showcases the dimension and movement of your curls.
Why the Side Placement Changes Everything
Positioning your ponytail to the side instead of center back creates a totally different vibe. It’s more playful and less formal than a center ponytail, which makes it perfect for casual settings, creative work environments, or anywhere you want to look effortlessly stylish. On curly hair, the side placement also shows off your curls from a different angle — curls that might look defined when pulled back straight can look even more textured and voluminous when swept to the side.
Building the Side-Swept Look
- Create braids along one side of your head, starting from the opposite side (so if you want them swept to the right, start braiding on the left)
- Feed in hair as you braid, angling toward where your side ponytail will sit
- Gather all your braids plus any loose hair into a ponytail positioned at the side of your head — usually mid-ear level or lower
- You can create just one thick braid or multiple thinner braids feeding into the ponytail
- Leave some hair loose and unbraided at the back if you want more volume
- Use a flexible hold product so your curls can still move naturally around the ponytail
Pro tip: This style is particularly flattering if you like to show off your face — the side placement doesn’t frame your face, so nothing is hidden.
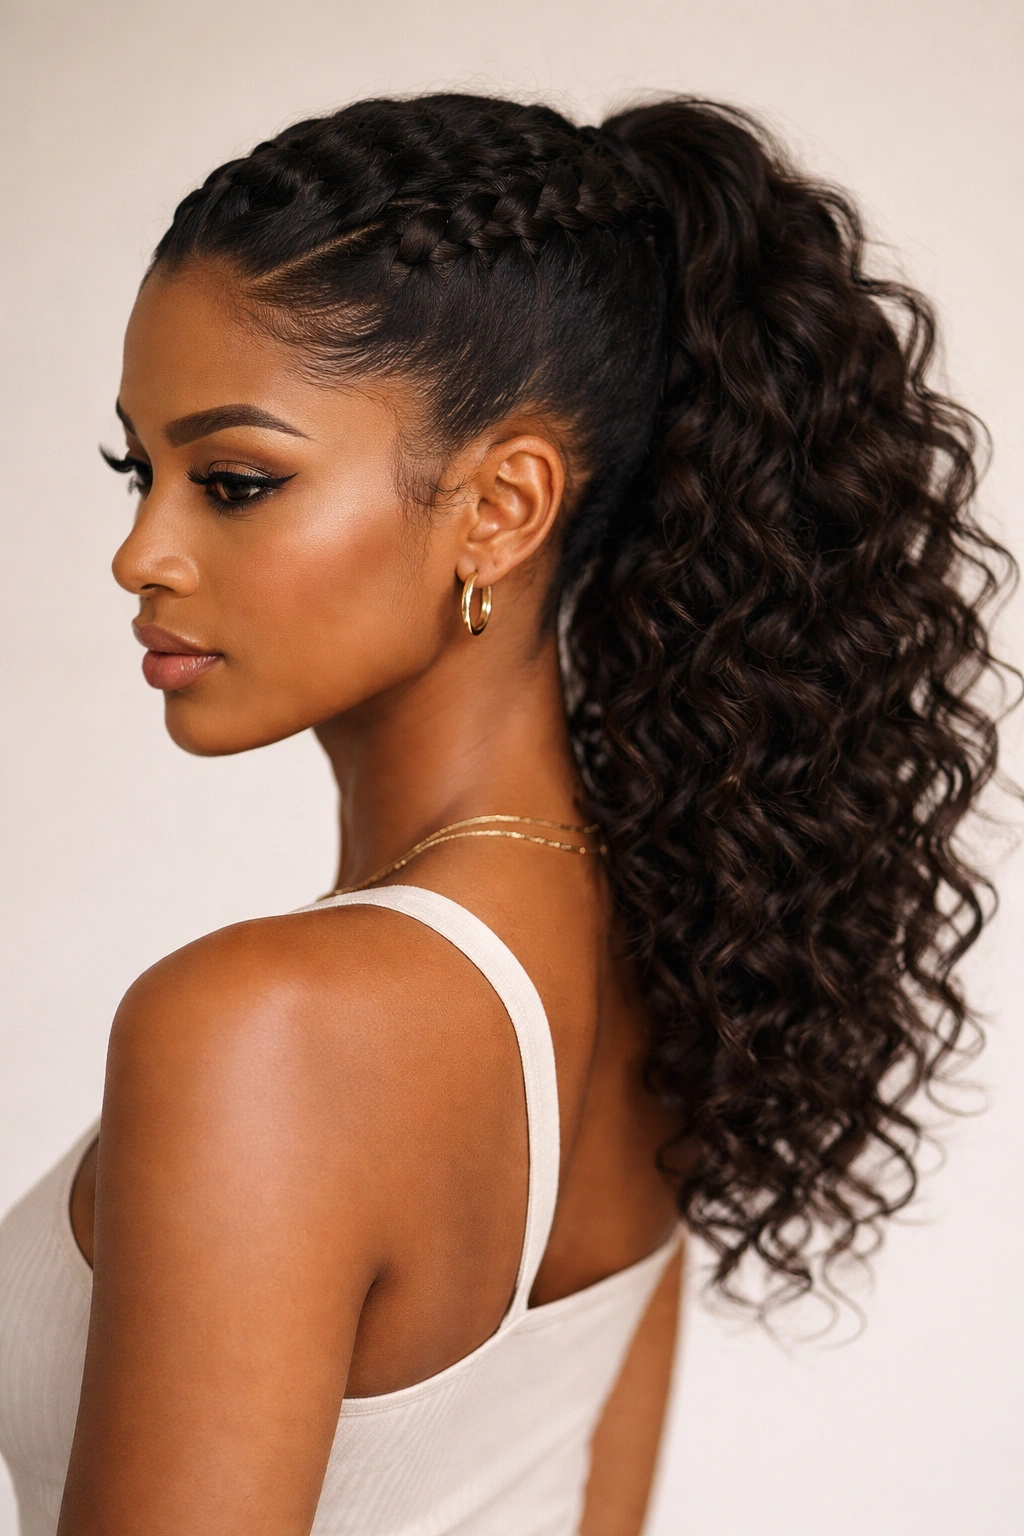
10. Crown Braid with Loose Ponytail
A crown braid means exactly what it sounds like — braids that travel around your head like a crown, creating this regal, special-occasion look. When you pair crown braids with a loose ponytail underneath, you’re combining the protective benefits of braiding with the freedom and movement of loose, defined curls. This is the style that looks fancy enough for a wedding or formal event while still keeping your natural hair protected.
Why This Style Is Perfectly Polished
Crown braids sit around the crown of your head (the area from ear to ear across the top), and they create a frame that draws attention upward and creates amazing dimension. When the ponytail underneath is loose, your curls hang freely with all their natural volume and definition showing. The contrast between the structured braids and the loose, bouncy curls creates visual interest that reads as both intentional and effortlessly chic.
How to Create the Crown
- Divide your hair into two sections — the upper section where the crown braid will sit, and the lower section that becomes the ponytail
- Create a French braid (or Dutch, depending on your preference) starting at one ear, angling across the top back of your head toward the other ear
- Feed in hair from the upper section as you braid
- The lower section stays separate and unbraided
- Once you’ve completed the crown braid, gather the lower section into a ponytail underneath or at the nape of your neck
- The ponytail curls can be left loose and bouncy, lightly defined with product, or gently twisted for more texture
- This style is beautiful for formal events and actually lasts pretty well — the braids protect that hair while the ponytail hangs freely
Quick facts about crown braids:
- They work on all hair lengths but look best on shoulder-length or longer hair
- The style is perfect for weddings, formal events, date nights, or anywhere you want to look intentionally styled
- Installation takes about 15-20 minutes once you get the hang of it
- The braids stay looking fresh for about a week
- You can add small flowers, delicate beads, or ribbons to the braid for extra elegance
- Sleeping in this style actually keeps the braids looking fresher longer because the braids sit on top rather than being manipulated
Final Thoughts
The beauty of braided ponytails for curly hair is that they give you real options. You’re not choosing between styling your hair and protecting it — you’re doing both at the same time. Whether you go with the timeless classic of box braids pulled into a sleek ponytail or you make a bold statement with zigzag braids, you’re choosing a style that works with your natural texture instead of against it.
What works best is going to depend on your curl pattern, your lifestyle, how much time you want to spend on installation, and honestly, just what’s calling to you at that moment. A style that feels perfect for one season might not be what you want the next — and that’s completely fine. The amazing thing about having ten different options is that you can switch it up whenever you’re ready for something different.
The most important thing? Make sure you’re using products that actually work for curly hair, you’re moisturizing regularly, and you’re being gentle with your hair during installation and while wearing the style. Protective styling is called that because it’s supposed to protect your hair — if a style is causing pain at your scalp or breakage at the line, it’s not the right style or the tension is too tight. Listen to your hair, adjust as needed, and enjoy the process of finding the braided ponytail that makes you feel like yourself.