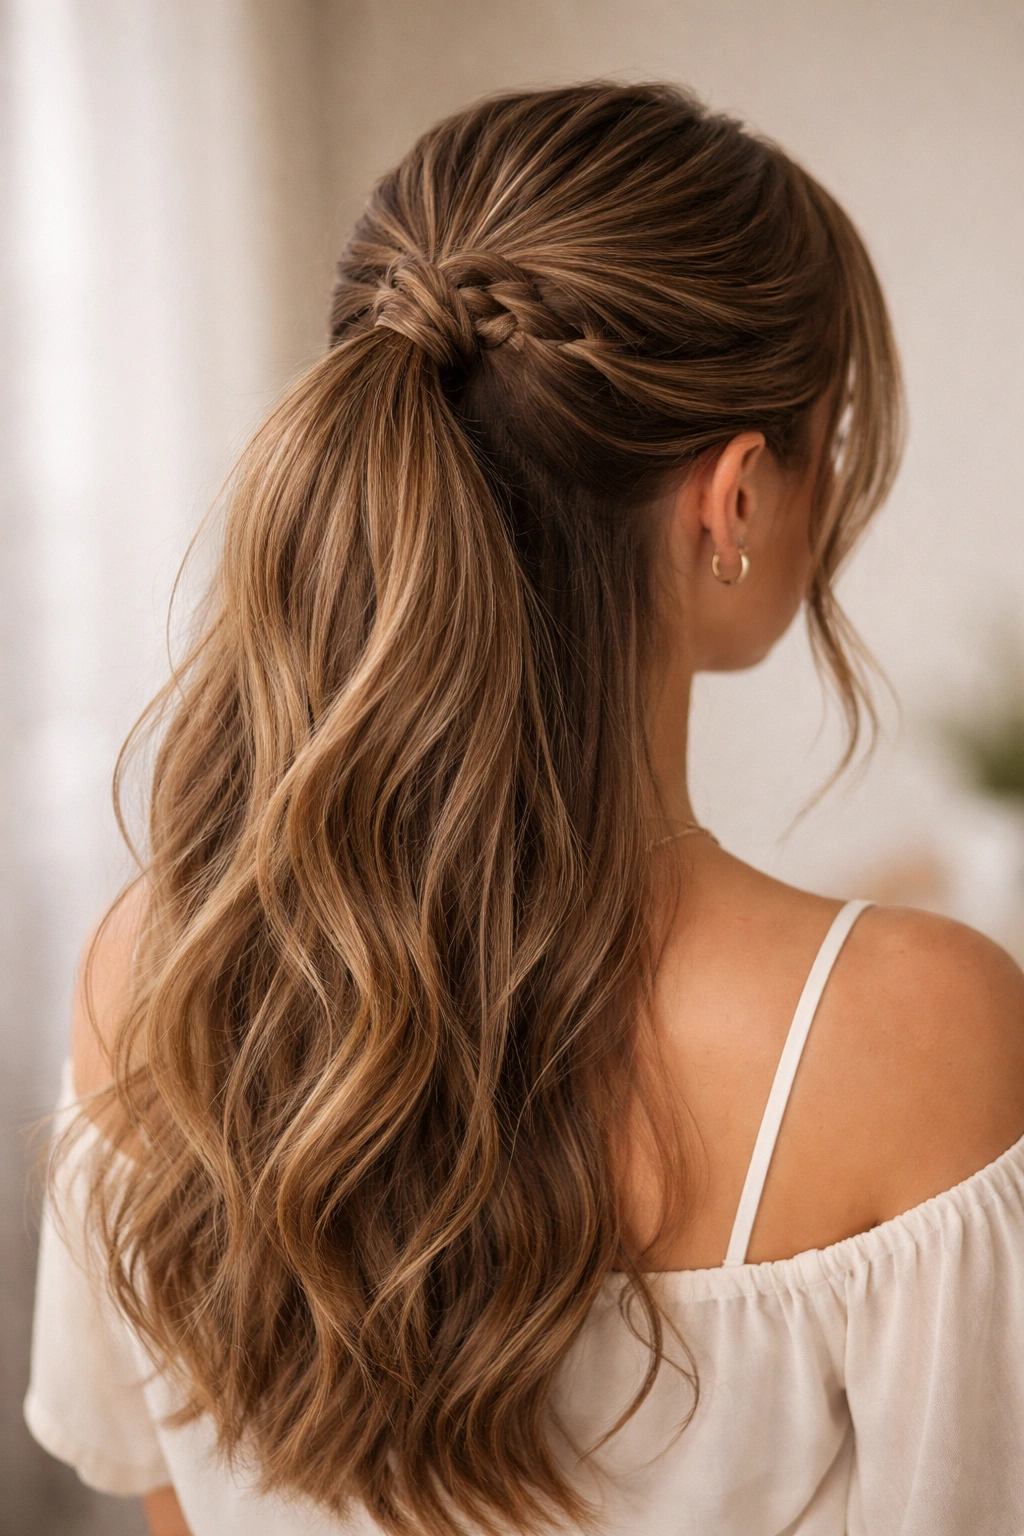
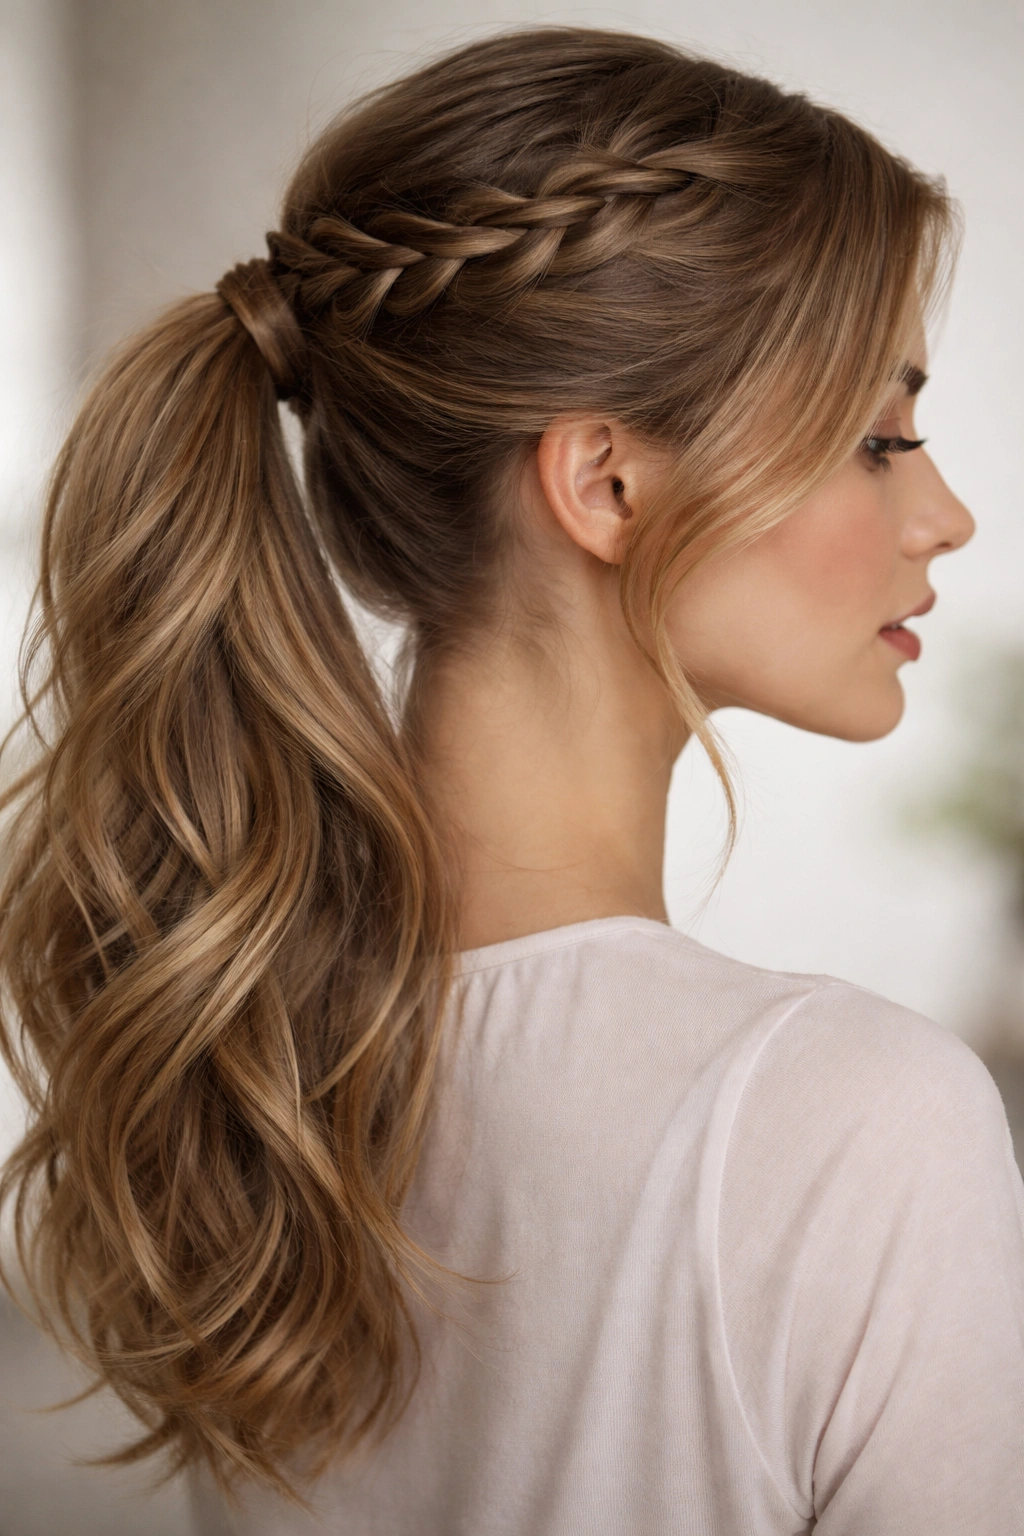
There’s something undeniably elegant about a braided ponytail positioned at mid-length height. It sits somewhere between playful and polished, casual enough for a weekend errand but refined enough to work at the office or out for dinner. Mid-length braided ponytails offer the perfect sweet spot—they’re secure enough to actually stay in place throughout your day, they show off braid detail without pulling too tightly at the roots, and they work beautifully on nearly every hair type and texture.
The beauty of mid braided ponytails is that they’re endlessly customizable. Whether you’ve got thick, coarse hair or fine, delicate strands, whether you prefer tight, structured braids or loose, romantic waves woven through your length, there’s a style waiting for you. Many people assume braided ponytails are just for those special occasions, but honestly, once you master even a few variations, you’ll find yourself reaching for them constantly. They’re practical enough for everyday wear, interesting enough to feel intentional, and they solve the eternal problem of “what do I do with my hair today?”
The key to nailing mid braided ponytails is understanding that the magic happens in two distinct parts: how you section and braid the top, and what you do with the tail itself. Get these two elements right, and you’ll have a hairstyle that looks professionally styled but takes just minutes to create. Let’s walk through twelve distinct approaches, each with its own character and best-use scenarios.
1. Classic Three-Strand Braided Ponytail
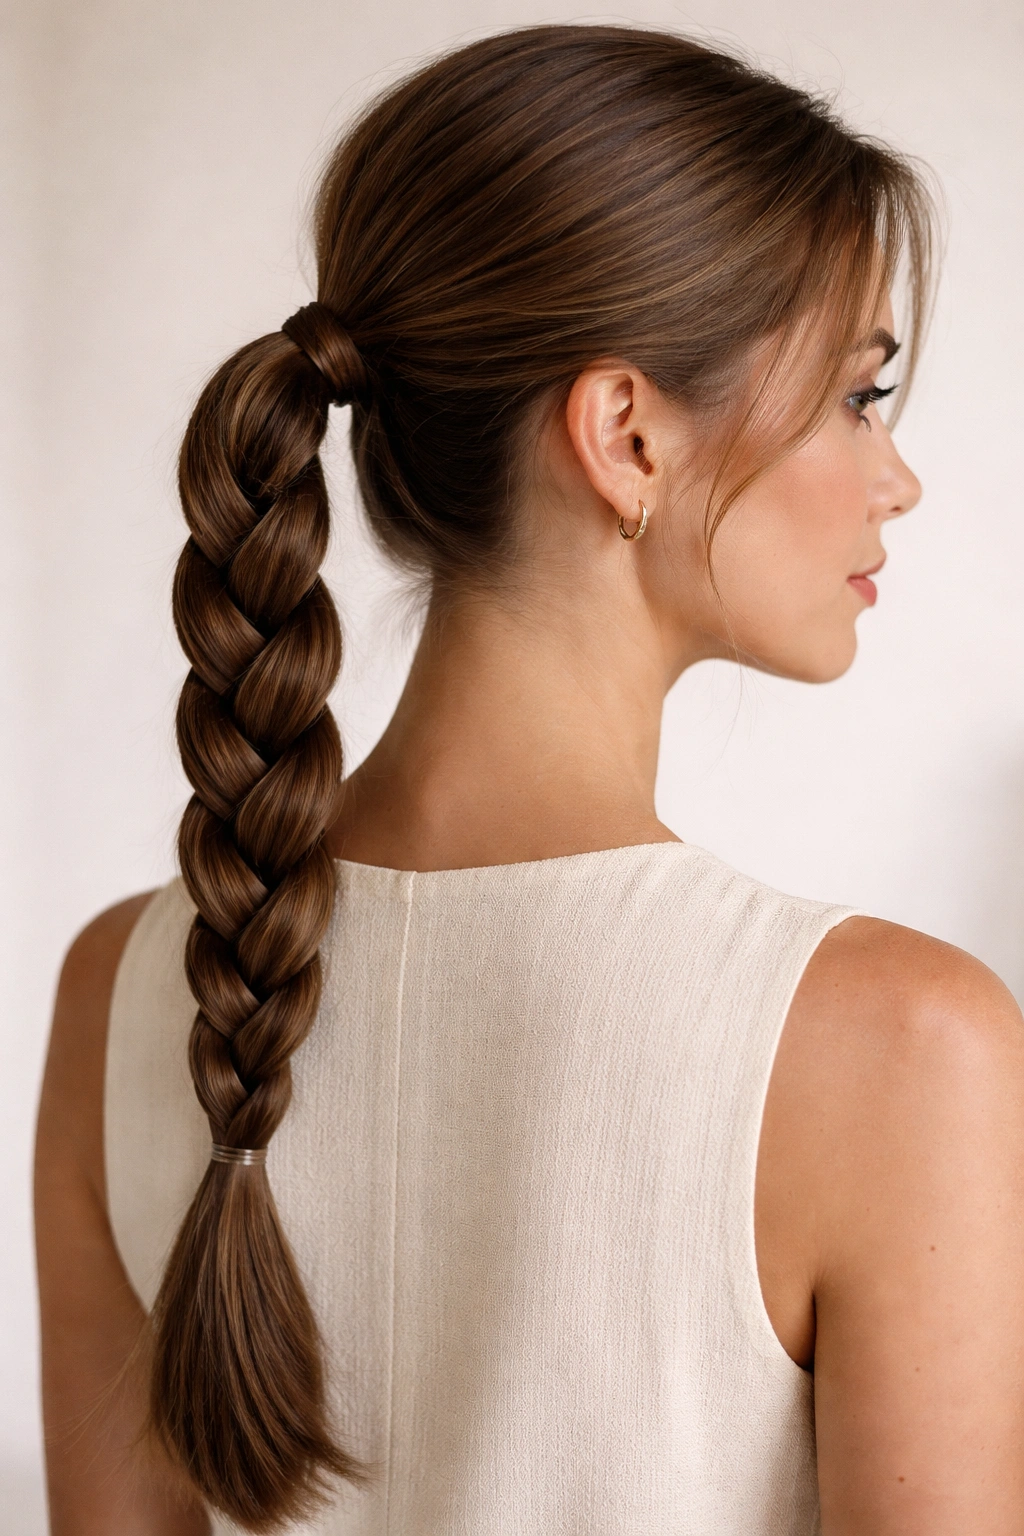
The three-strand braid is where most people start, and for good reason—it’s the foundation that every other braid variation builds from. For a mid-ponytail version, the three-strand braid works best when you create a sleek, tight braid all the way from where you gather the ponytail down through the length. The simplicity is actually its strength; there’s nowhere for imperfection to hide, which means the braid itself becomes the statement.
How to Create This Style
Start by brushing your hair thoroughly and gathering it into a mid-height ponytail at the back of your head, roughly where your ears align vertically. Divide the ponytail into three equal sections. The braiding process is straightforward: take the right section and cross it over the middle, then take the left section and cross it over the new middle. Continue this alternating pattern all the way down to the ends. The tension matters here—pull consistently and evenly to create a braid that’s snug but not painfully tight.
Why This Style Works
- Creates clean, structured lines that frame the face when viewed from certain angles
- Works beautifully with both natural hair texture and blow-dried straight hair
- Takes approximately 3-5 minutes once you’ve gathered the ponytail
- The braid becomes tighter and more secure as you work down, naturally supporting itself
- Perfect for active days because the braid won’t loosen or shift
Pro tip: If your braid feels too tight or pulls uncomfortably at the scalp, you’ve either gathered your ponytail too high or braided too tightly. Aim for gathering the ponytail low enough that you could comfortably fit two fingers under the elastic, and braid with just enough tension that the sections don’t slip, but your scalp isn’t protesting.
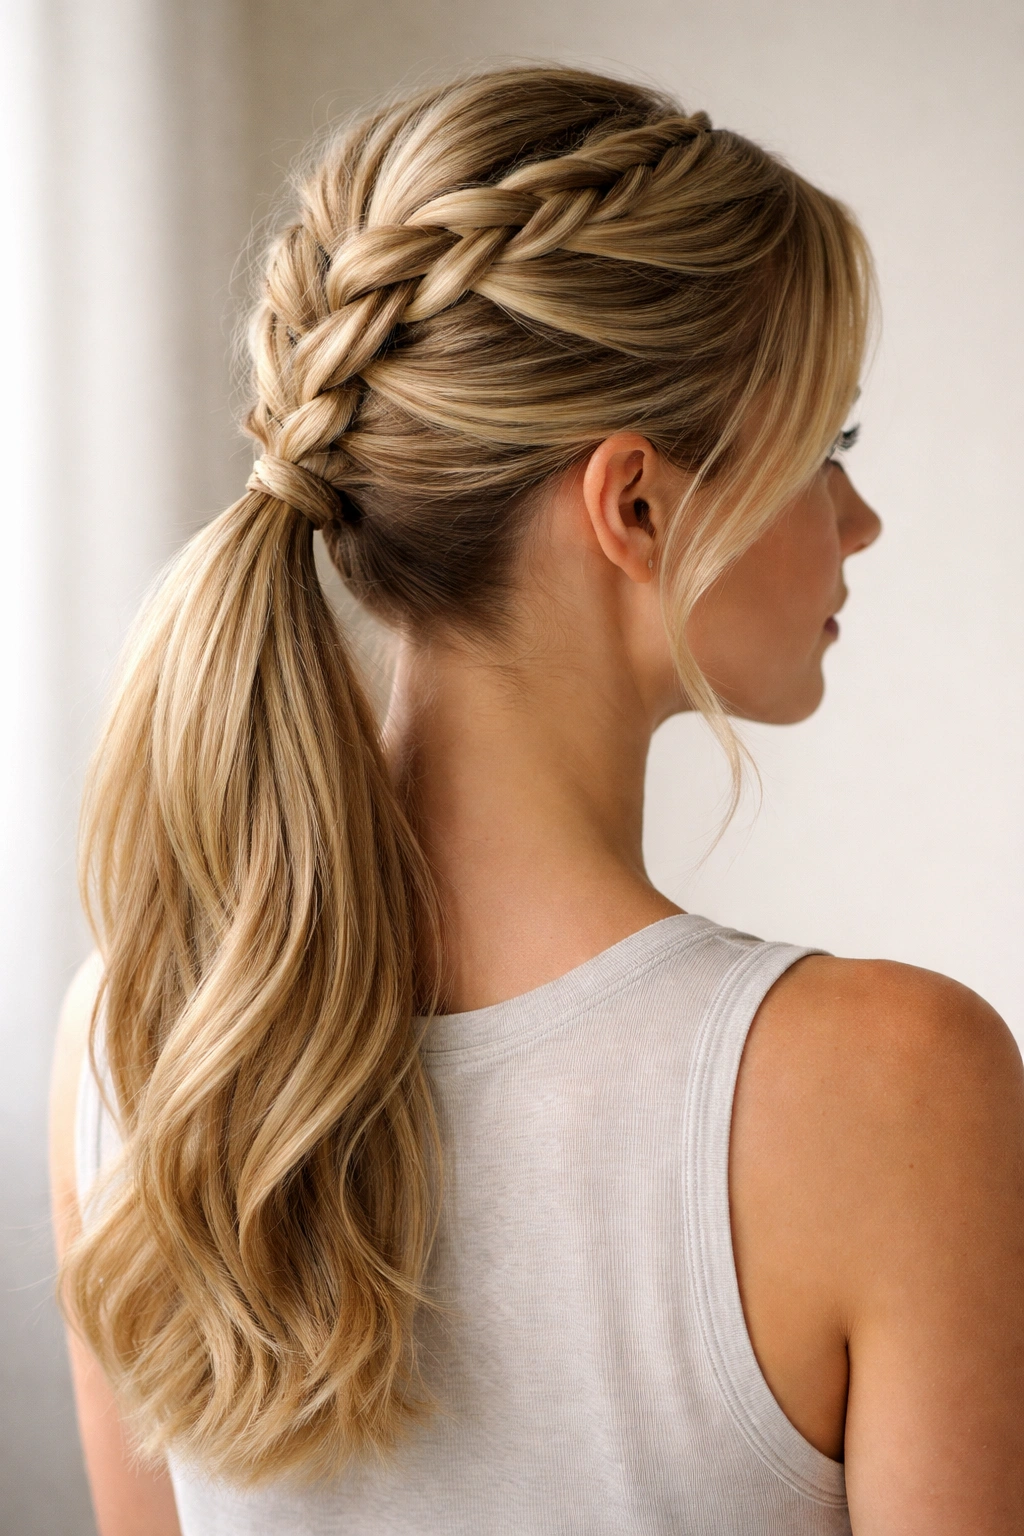
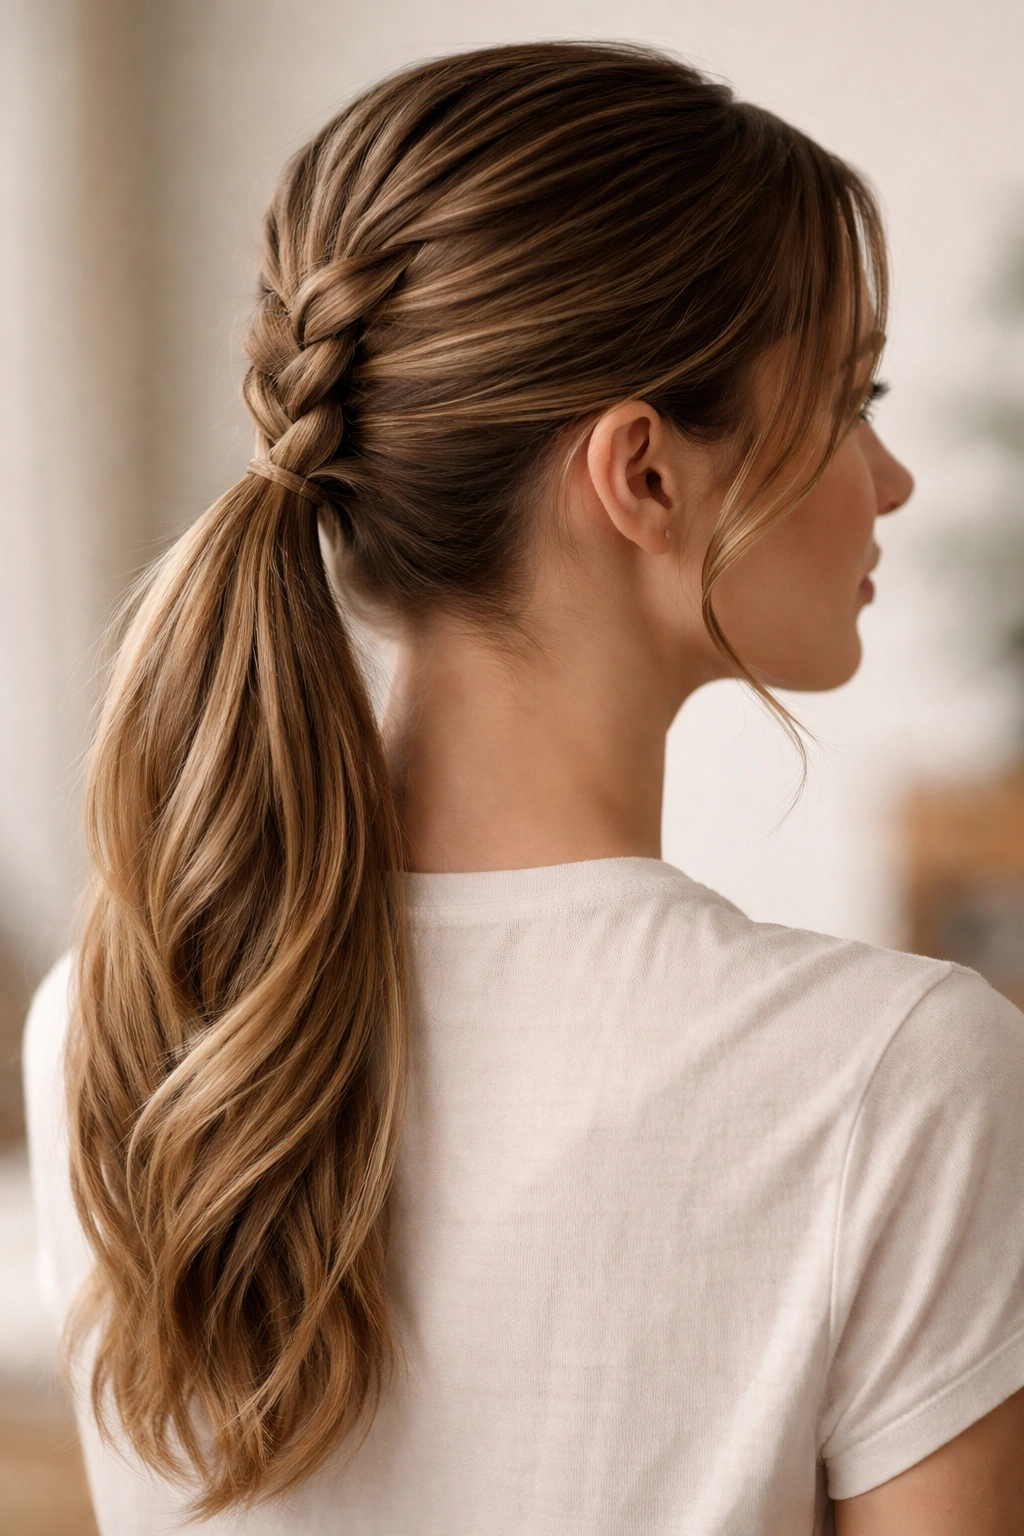
2. Dutch Braided Mid Ponytail
The Dutch braid is essentially the reverse of a French braid—instead of crossing sections over the middle, you cross them under. This creates a braid that sits on top of the hair rather than nestling into it, making it appear more prominent and graphic. A Dutch braided mid ponytail looks distinctly more modern and editorial than its French braid cousin, and it photographs beautifully.
The Key Difference From Three-Strand
A Dutch braid requires the same three-section foundation, but your technique reverses. Instead of crossing the right section over the middle and the left section over the middle, you cross the right section under the middle and the left section under the middle. This subtle shift creates that raised, almost sculptural appearance that makes Dutch braids so striking.
Best Scenarios for Dutch Braids
- Professional settings where you want to look intentional and put-together
- When you’re wearing your hair down or in a half-up style and want the braid to be the focal point
- Days when you want maximum visual impact with minimal effort
- Hair that’s on the finer or thinner side, because the raised braid appearance creates an illusion of volume
- Any situation where you want people to notice your hair—a first date, a presentation, a night out
The Dutch braid does require slightly more precision than a standard three-strand because the under-crossing motion feels less intuitive to most people. Spend a few practice rounds getting comfortable with the motion before you need to look polished, and it’ll become second nature.
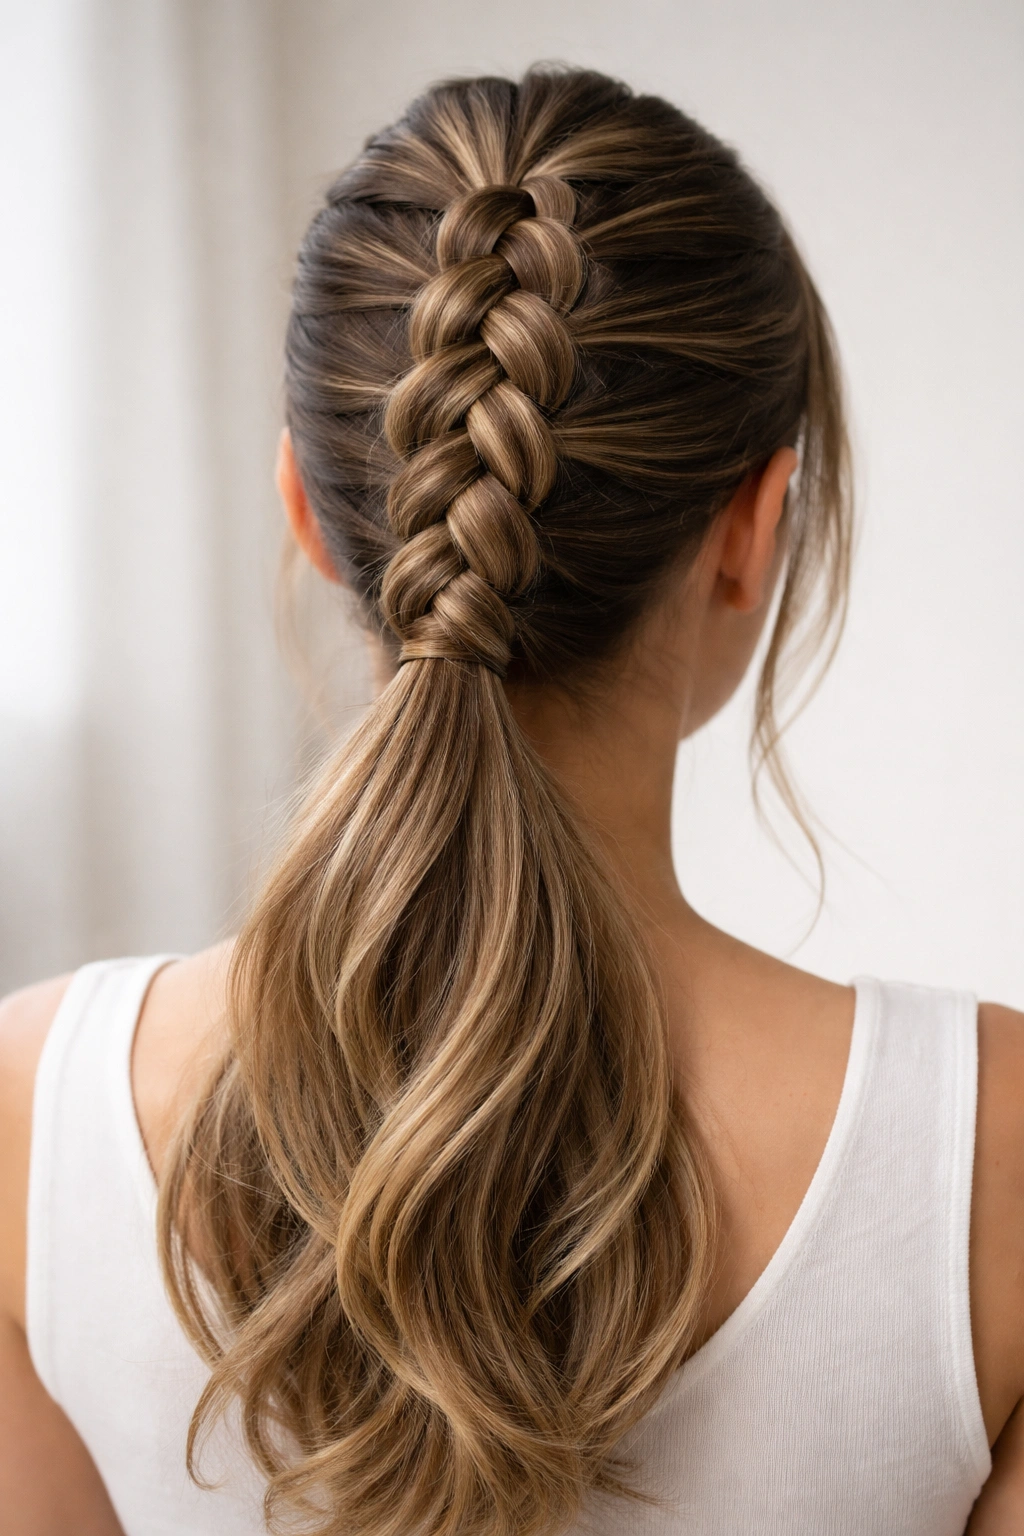
3. French Braid to Ponytail
This is the hybrid approach—you start with a French braid at the crown and gradually feed all of your hair into it as you move down the back of your head, then gather everything into a ponytail at mid-length. It’s more complex than a simple braided ponytail, but it’s also considerably more impressive looking and it feels incredibly secure because the braid is anchoring everything from the roots down.
How the Technique Works
Begin by separating a section of hair at your crown—roughly the size of your palm—and dividing it into three strands. Start a basic three-strand braid, but as you complete each crossing, pick up a new section of hair from the side of your head and add it to one of the three sections. Continue this pattern, working your way down the back of your head and gradually incorporating all of your hair into the braid. Once you’ve reached mid-length and all of your hair is incorporated, gather everything into a ponytail and secure it with an elastic. You can leave the ends as-is or continue braiding the ponytail itself for a fully braided look.
Why This Creates Such Impact
- The braid visible at the crown draws immediate attention and signals that you’ve put real effort into your styling
- Much more secure than a simple ponytail because the hair is already structured from the roots
- Works on all hair types and textures, though it does require enough length to grab sections comfortably
- Can be worn sleek or slightly loosened for a softer, more romantic feel
- Takes about 5-8 minutes depending on hair length and thickness
Worth knowing: This style works best if you have hair that’s at least shoulder-length, ideally longer. If your hair is very short, you won’t have enough length to create the incorporated sections, and the braid will feel thin and weak.
4. Side Braided Mid Ponytail
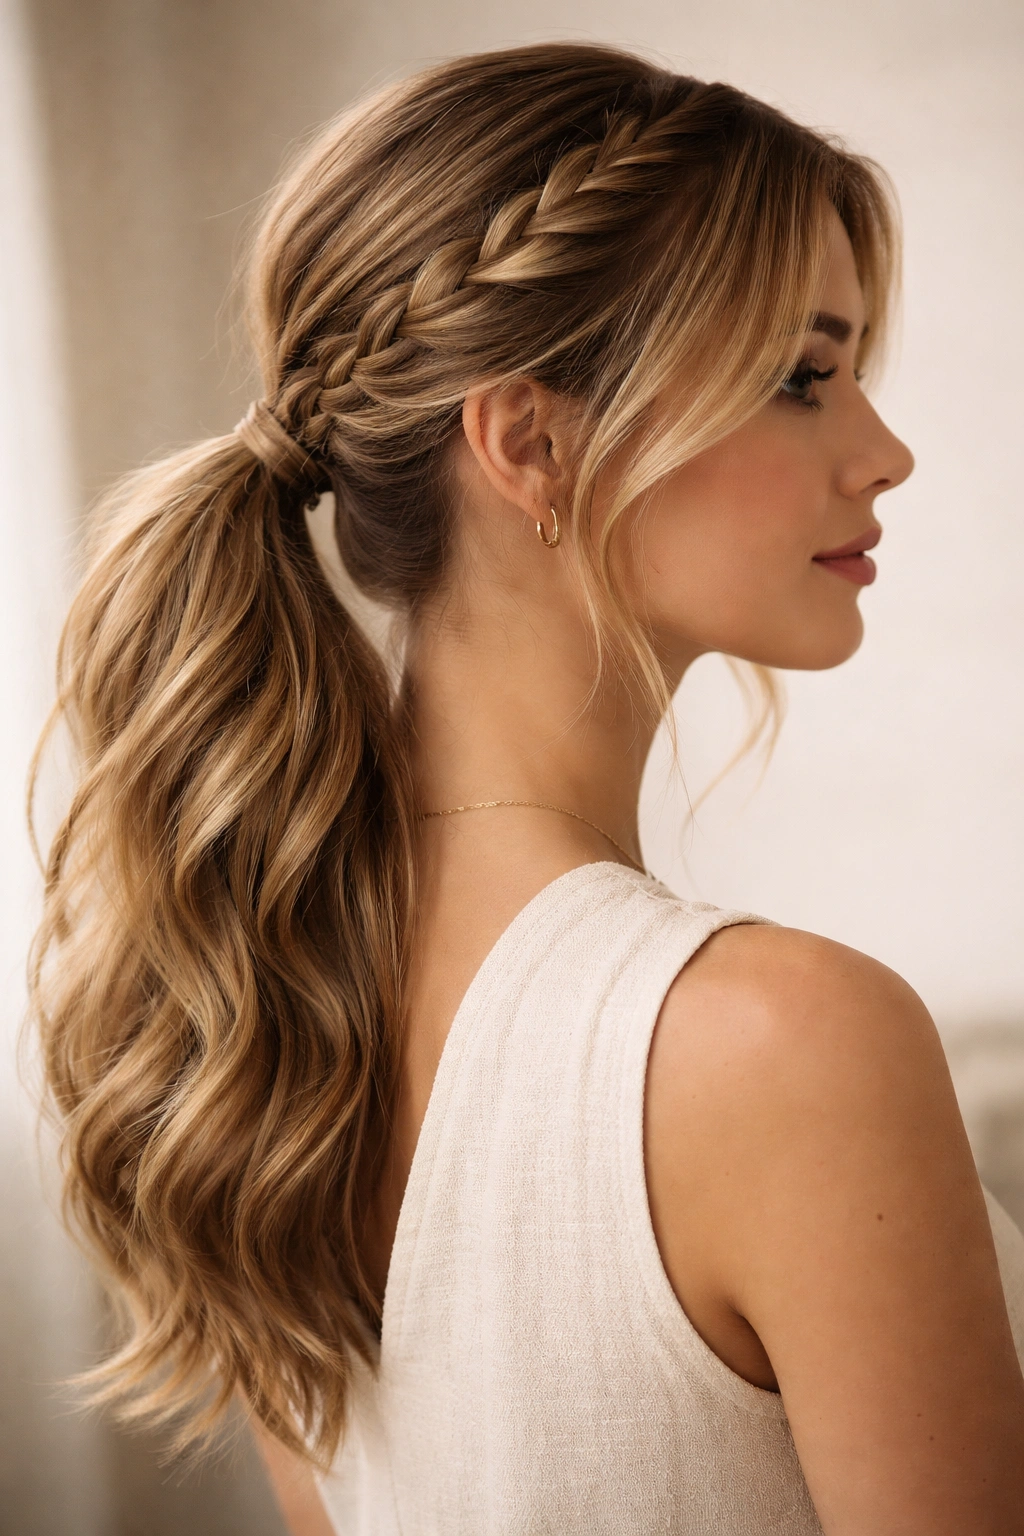
Instead of centering your ponytail at the back of your head, move it to one side and position your braid accordingly. A side braided mid ponytail has an asymmetrical, romantic quality that photographs well and feels less formal than a centered version. It’s particularly flattering if you have a side part or if you prefer wearing your hair swept to one side.
The Setup and Execution
Brush your hair to one side—let’s say to the right. Gather your hair into a mid-height ponytail on the right side of your head, roughly where the back of your ear aligns with the back of your head. Braid from this ponytail down, keeping the braid positioned on the right side of your neck and shoulder. The visual effect is a braid that’s visible from the front, which means this style works beautifully on its own without needing much additional styling.
When to Wear This Style
- Date nights or romantic occasions where you want to feel feminine and deliberately styled
- Any time you’re wearing your hair with a strong side part
- When you want visible texture and dimension on one side of your face
- Professional settings where asymmetry reads as “intentionally styled” rather than casual
- Days when you want the braid to be part of your silhouette, not hidden at the back
The side position also means your braid is less likely to get squished if you’re wearing a backpack or sitting against a chair, which makes this practical for active days despite its romantic appearance.
5. Double Braid Mid Ponytail
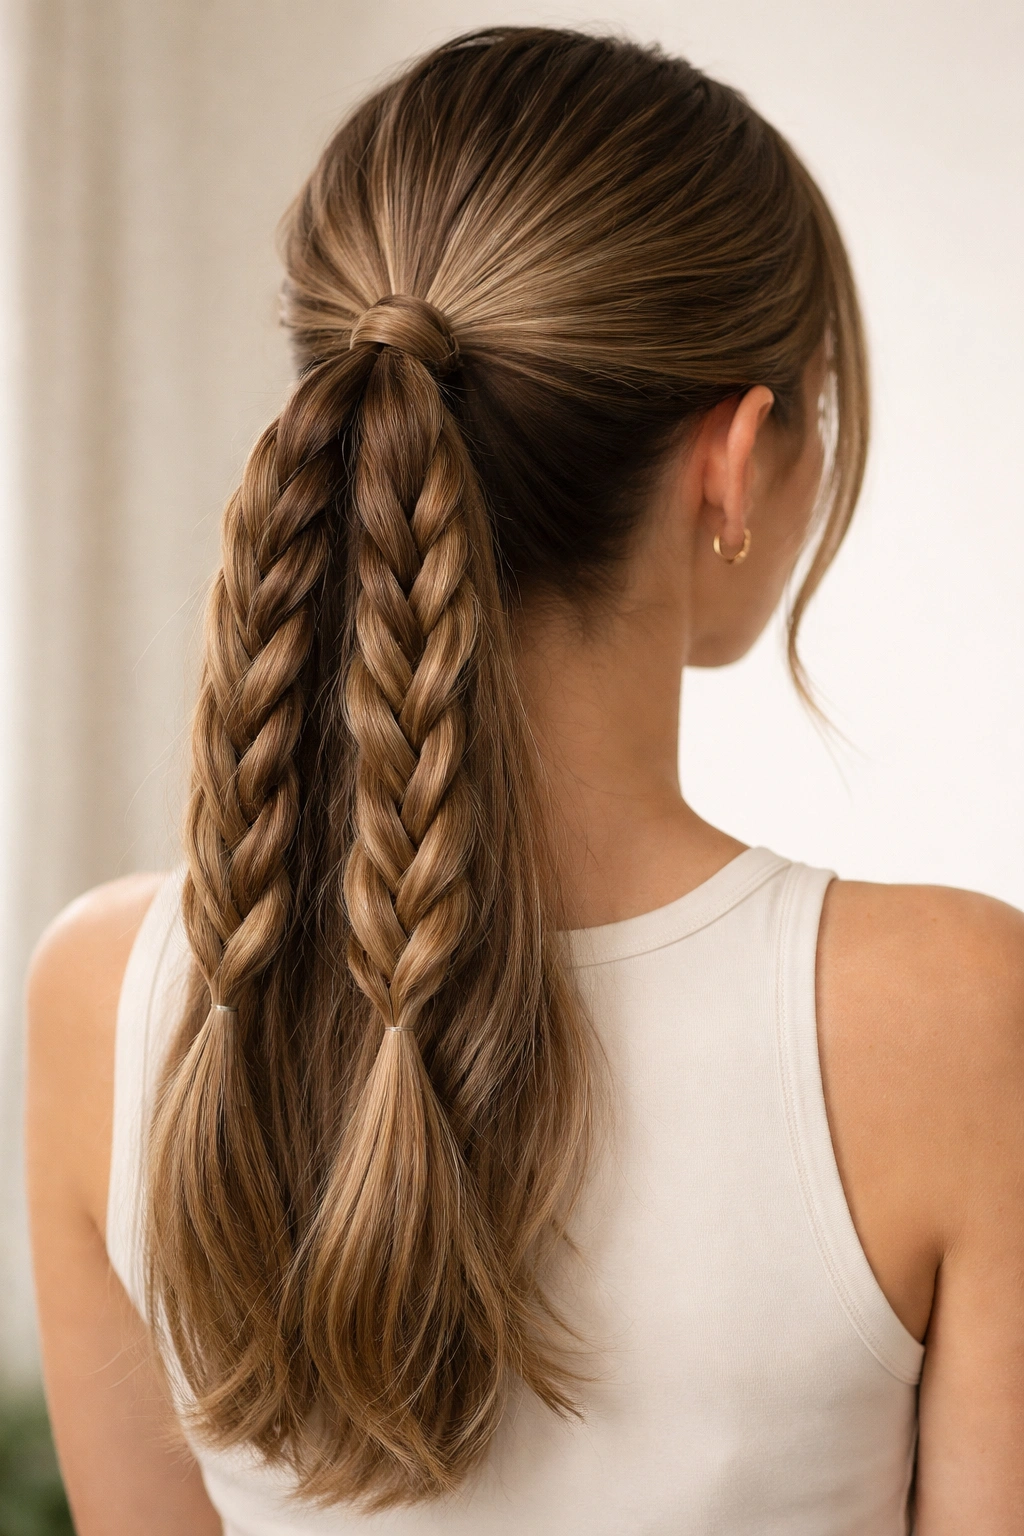
Create two separate braids instead of one. You can either gather two side-by-side ponytails at mid-length and braid each one independently, or you can create two braids within a single gathered ponytail by dividing it into two sections. Either approach creates visual interest and makes your hair appear thicker and fuller.
Two Approaches, Different Aesthetics
The first method—two separate ponytails braided independently—works best if you’re going for a playful, youthful vibe. Part your hair down the center, gather each side into its own mid-height ponytail, and braid each one. This creates a balanced, symmetrical look that’s perfect for casual wear, exercise, or any time you want to look energetic and fun.
The second method—dividing a single ponytail into two braids—is more sophisticated. Gather all your hair into one mid-height ponytail, then divide it vertically down the center into two equal sections. Braid each section separately. When you position the two braids side-by-side or slightly intertwined, they create a thicker, more textured appearance than a single braid would.
Why Double Braids Are Practical
- If your hair is very thick, one braid can feel heavy and pull uncomfortably; two braids distribute the weight
- On thinner hair, two smaller braids actually look fuller than one thick braid
- The doubled texture adds visual interest and makes even a simple three-strand braid feel more intentional
- Two braids can be loosened and undone separately if you want to transition from day to night styling
- Creates excellent hold for active days because the doubled structure is more secure
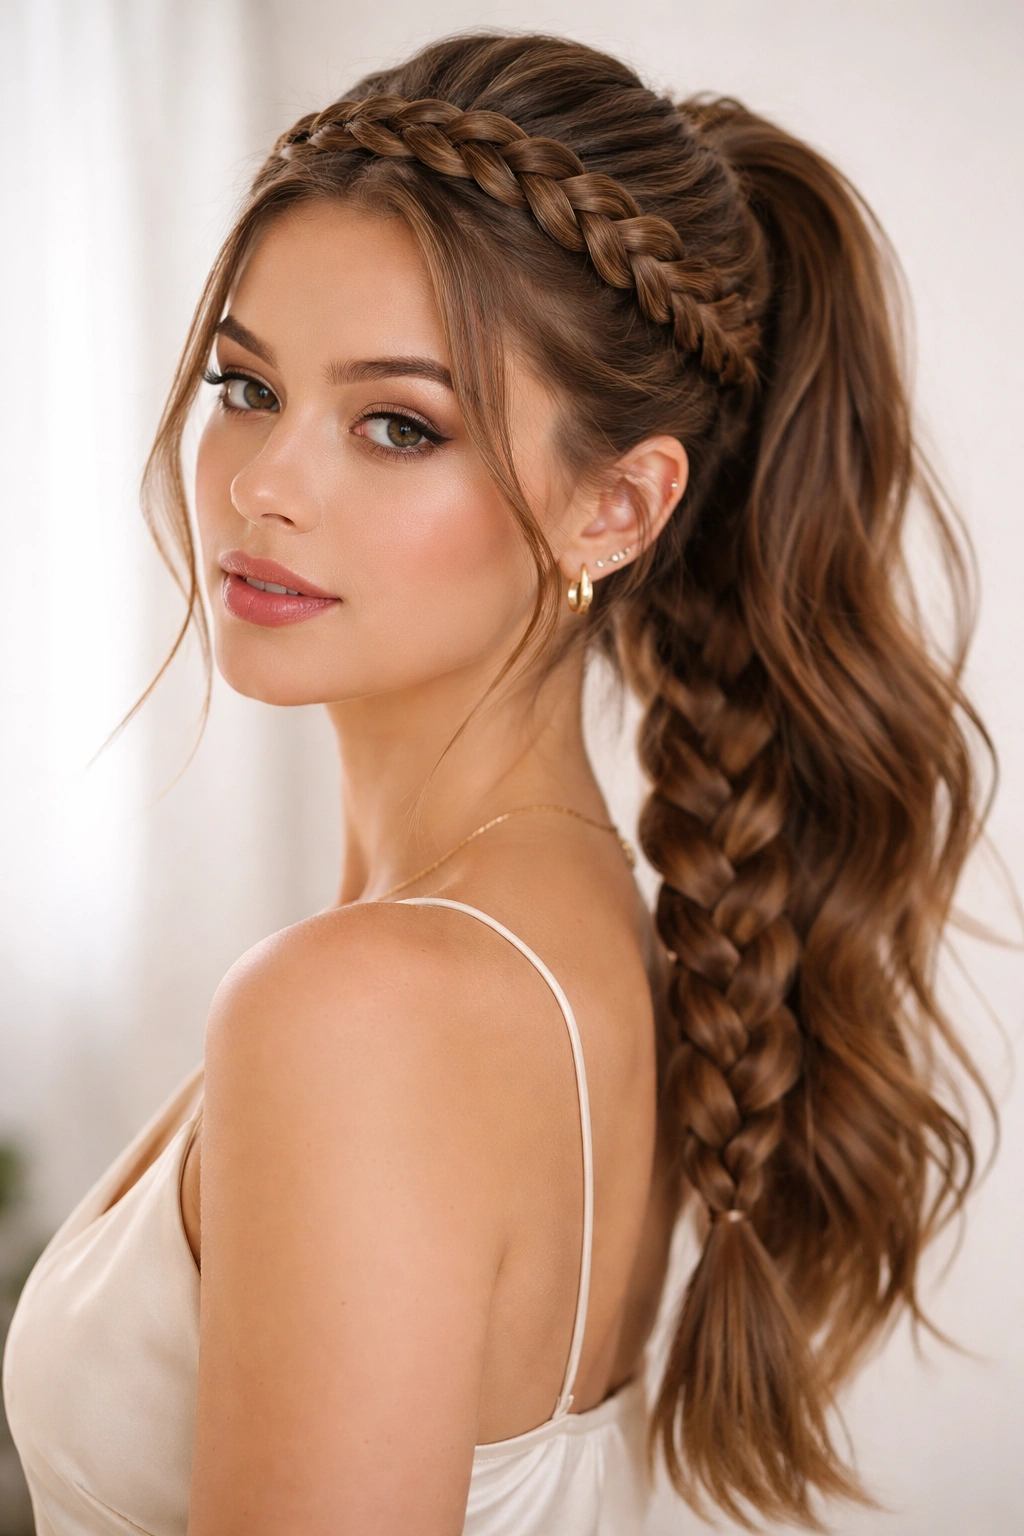
6. Fishtail Braided Mid Ponytail

A fishtail braid uses only two sections instead of three, creating an intricate, woven appearance that looks far more complex than it actually is. Despite the fancy name, a fishtail is arguably easier to master than a three-strand braid once you understand the basic technique. The resulting texture is beautifully fine and delicate, especially once you slightly loosen and undone the braid.
The Fishtail Technique Explained
Gather your hair into a mid ponytail and divide it into two equal sections. Take a thin piece from the outer edge of the right section and cross it over to the left section, weaving it in at the inner edge. Then take a thin piece from the outer edge of the left section and cross it to the right section. Continue alternating, always taking from the outer edge and crossing to the inner edge of the opposite section. The smaller your grabbed sections, the more intricate your finished braid will appear.
The Visual Magic of Fishtail Braids
- The weaving pattern creates the illusion of much more hair and texture than you actually have
- Even a loose, undone fishtail looks intentional and pretty rather than sloppy
- Works beautifully on wavy or textured hair because the waves add to the visual complexity
- The braid naturally gets wider as you work down, creating a romantic, feathered appearance
- Can be slightly pulled apart after braiding to create an even softer, fuller texture
Pro tip: Fishtails work best if you dampen your hair very slightly before braiding. Completely dry hair makes it harder to grab those thin outer sections, and damp hair gives you just enough grip to make the process smooth. Use a spray bottle with plain water—you’re not aiming for wet hair, just slightly dampened.
7. Half-Up Braided Mid Ponytail
This style combines a half-up, half-down approach with a braid. You gather only the top half of your hair into a mid-height ponytail and braid it, leaving the bottom half of your hair flowing loose. It’s a romantic, soft style that works beautifully with long hair and creates the appearance of fullness and dimension.
How to Build This Look
Brush your hair and create a deep side part if you prefer—though a center part works too. At about ear level, gather the hair from both sides of your head and the crown area into a ponytail at the very back of your head. This gathered section should include roughly the top half of your total hair volume. Braid this section down from the ponytail, and leave the bottom half of your hair loose to flow past the braid.
Best Hair Types and Occasions
- Incredibly flattering on long, straight, or slightly wavy hair
- Perfect for wedding guest looks or any romantic occasion
- Works beautifully if you have long layers, because the shorter layers on top feed into the half-up section while the longest pieces flow below
- Ideal for days when you want the security of a ponytail without the commitment of having all your hair pulled back
- Creates a lovely frame for your face because some hair remains loose around your shoulders
The half-up approach also means this style is quite forgiving on imperfect braids. The loose hair below camouflages any unevenness in your braid technique, making it a great choice if you’re still practicing.
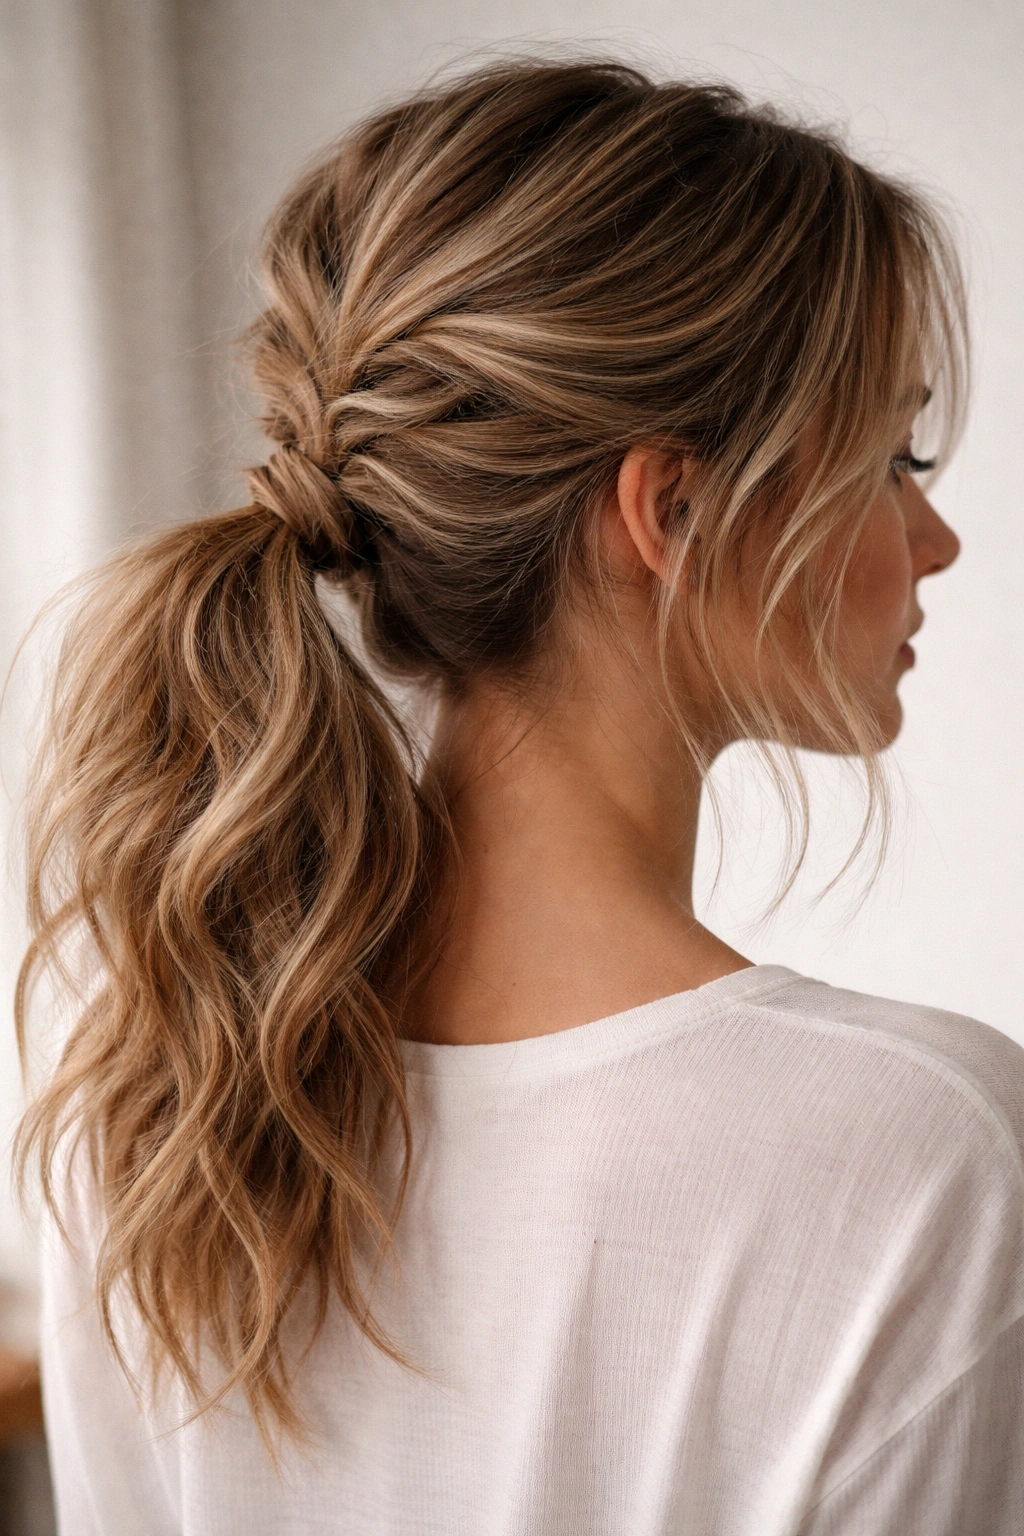
8. Twisted Braid Mid Ponytail
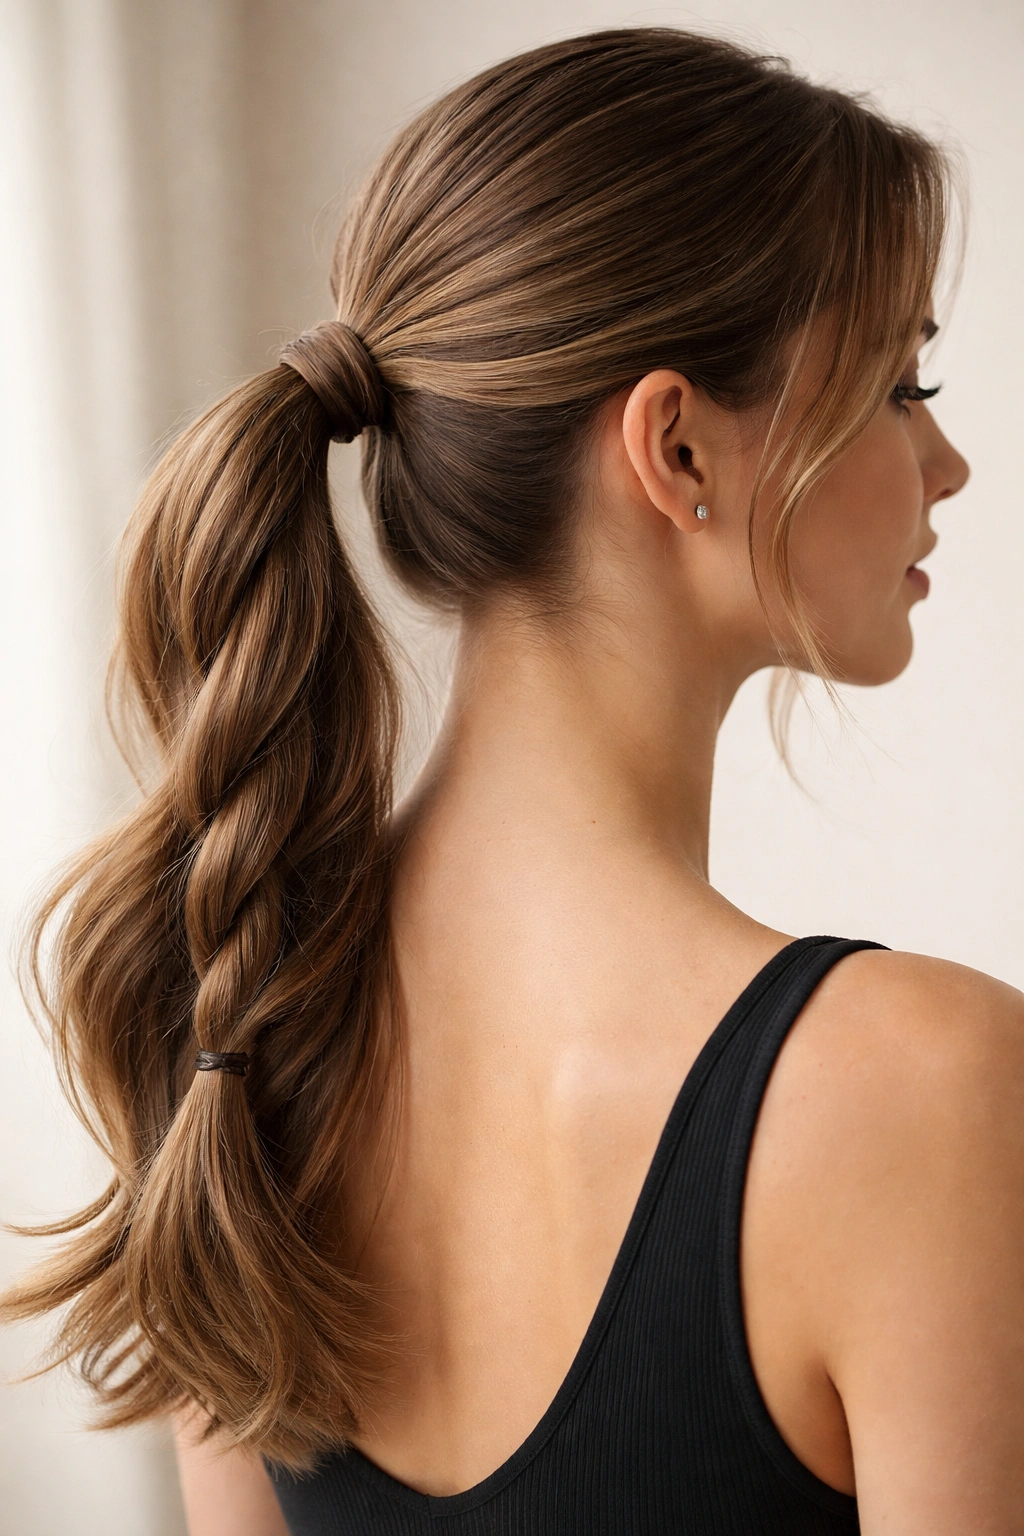
Instead of braiding in the traditional sense, create a ponytail and then twist the length itself around the elastic multiple times before securing the end. This creates a rope-like, spiral appearance that’s sleek and polished-looking while being significantly faster to create than an actual braid.
The Twist Technique
Gather your hair into a mid-height ponytail and secure it loosely with an elastic. Take the entire ponytail in both hands and twist it clockwise (or counterclockwise, depending on your preference) in one continuous motion all the way down to the ends. As you twist, the hair naturally wants to wrap around itself, creating a rope-like texture. Once you’ve twisted all the way to the ends, secure with a small elastic. For added interest, you can wrap a small section of hair around the base of the ponytail to hide the elastic, or you can use a decorative elastic that complements your style.
Why Twists Are Underrated
- Takes 2-3 minutes, making them perfect for rushed mornings
- The twisted texture appears more complex than the effort required
- Works beautifully on all hair types, including fine hair that might feel too thin for traditional braids
- Twisted ponytails look especially nice when slightly loosened or undone for a softer appearance
- Very secure despite the simplicity, because twisting creates natural grip and tension
The twisted approach is also easier on your scalp if you have sensitivity to tension, since you’re not pulling sections as tightly as you would when braiding.
9. Halo Braided Mid Ponytail
This ethereal style wraps a braid around your head like a crown, with a ponytail flowing from where the braid ends. It requires two steps—creating the halo braid around the back of your head, then gathering the remaining hair into a mid ponytail—but the result is romantic and elegant without being overly formal.
How to Create the Halo Effect
Start with a side French braid or Dutch braid at one temple. Rather than braiding straight down the back of your head, braid at an angle that takes the braid across the back of your head toward the opposite ear. As you work, gradually incorporate hair into the braid just as you would in a regular French braid. Once the braid reaches the opposite side of your head around ear level, gather all of your hair—including the end of the braid—into a ponytail at mid-height at the back. The braid now frames the top of your head like a halo while the ponytail falls below.
The Romantic Appeal of Halo Braids
- Creates a delicate frame that’s beautifully visible when wearing hair half-up or in an updo
- The crown effect feels special and intentional without being costume-like
- Works on shoulder-length hair and longer
- Especially flattering if you have a longer face shape, because the horizontal braid across the top creates balance
- Perfect for garden parties, brunches, or any occasion with a romantic dress code
This style does require a bit of practice to execute smoothly, but once you’ve done it a few times, it becomes intuitive.
10. Waterfall Braided Mid Ponytail
A waterfall braid creates the illusion of hair flowing or cascading down your head, which is where the name comes from. For a mid ponytail version, you create a partial waterfall braid that leads into a gathered ponytail, creating a style that’s visually intricate but actually quite simple to execute.
The Waterfall Technique
Begin a French braid at one side of your head, near your temple. As you create the braid, instead of incorporating every piece of hair, you’ll let strands drop out as you braid. Take a section, cross it over, but before you pick up a new replacement section, let one of the three original sections fall straight down. Pick up a new section from above to replace it. Continue braiding across the back of your head, letting sections drop as you go. Once you’ve braided across to the opposite side, gather all your hair—including the dropped strands—into a mid-height ponytail.
Why Waterfall Braids Feel Luxe
- The movement and flow create dimension and visual interest
- Even if your technique isn’t perfectly executed, the style still looks intentional
- Works beautifully on wavy or curly hair because the dropped strands blend with your natural texture
- The style reads as more advanced than it actually is, which makes you feel polished
- Perfect for warm weather when you want something that looks cool and romantic but isn’t as heavy as a fully gathered ponytail
The waterfall effect means you have some hair framing your face while still having the security of a ponytail at the back, striking a nice balance between structure and softness.
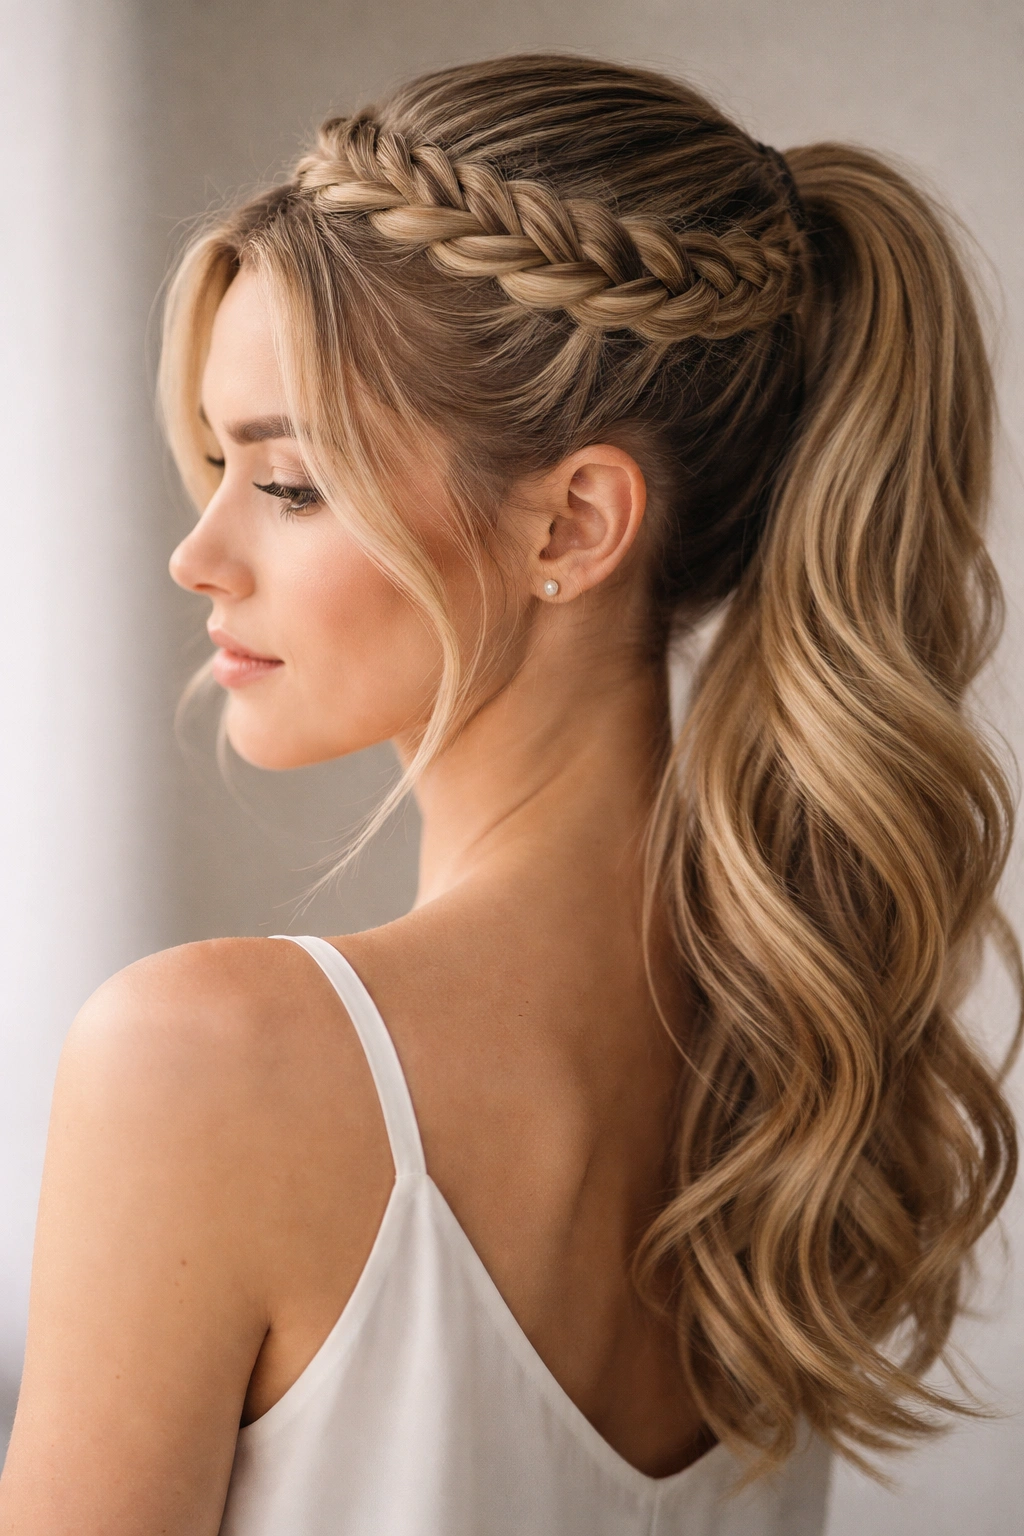
11. Crowned Braided Mid Ponytail
Create a braid that sits directly on top of your head like a crown or headband, with a separate braided ponytail falling behind it. This requires two braids—one for the crown and one for the ponytail—but they work together to create a style that feels special and intentional.
Two-Braid Strategy
Start by creating a Dutch braid or a French braid that runs from one side of your head to the other, sitting on top like a headband or crown. This braid should run roughly from behind your left ear to behind your right ear, skimming the top of your head. Once this crown braid is complete, gather all of your hair at mid-length at the back of your head—incorporating the ends of the crown braid—into a ponytail. Braid this ponytail with a three-strand, Dutch, or fishtail braid depending on your preference. The result is a style with two distinct braided elements working together.
When to Wear the Crowned Braid Look
- Festivals, outdoor events, or any bohemian-vibe occasion
- When you want maximum visual impact and don’t mind spending a few extra minutes styling
- Wedding guest looks that need to feel special but not formal
- Days when you want to feel creative and playful with your hair
- Any time you want people to ask “how did you do that?” because the style is clearly intentional
This style works best on hair that’s at least mid-back length, because you need enough length to create both the crown braid and a substantial ponytail.
12. Messy Textured Braided Mid Ponytail
The final style celebrates imperfection and softness. Rather than creating a tight, structured braid, you’ll create a looser braid and then deliberately pull sections apart to create a soft, undone, romantic appearance. This style is forgiving on technique, looks intentional even if your braid isn’t perfectly even, and works on every hair type.
The Art of the “Messy” Braid
Gather your hair into a mid-height ponytail and create a three-strand braid, but don’t pull tightly as you braid. Keep your tension loose and relaxed, allowing some hair to escape naturally. Once you’ve finished braiding, go back through the braid and deliberately pull small sections outward along the length. Start at the top of the braid and work downward, gently tugging each section to create fullness and dimension. Don’t rush this step—the more you pull and shape, the softer and more romantic the braid becomes.
Why Messy Braids Are Actually Elegant
- The soft, undone appearance feels effortless and chic rather than sloppy
- Works beautifully on wavy, curly, or textured hair where a perfect braid might feel at odds with your natural texture
- Takes the same time as a tight braid but looks more romantic and less severe
- The messiness actually camouflages imperfect braiding technique
- Perfect for situations where you want to look styled but not overly done—like a casual date, a weekend brunch, or running errands
- The loosened sections create volume and fullness that makes even fine hair look substantial
This approach is also comfortable for all-day wear. Tight braids can create tension headaches if you’re sensitive, but a loose, slightly undone braid feels secure without pulling.
Final Thoughts
Mid braided ponytails are genuinely one of the most versatile, practical hairstyles you can master. Whether you’re reaching for a simple three-strand braid before work, creating an elaborate halo braid for a special event, or embracing a soft, undone texture for the weekend, the techniques and variations above give you options for nearly any occasion and hair type.
The real secret to nailing these styles isn’t perfection—it’s understanding that a braid positioned at mid-height automatically looks more interesting than one at the crown or the nape of your neck. Combined with the fact that braids are genuinely secure and keep your hair off your neck and face without pulling tightly at your hairline, mid braided ponytails solve multiple styling problems simultaneously.
Start with whichever style appeals to you most and practice it a few times before you need to look polished. Your first attempt might not be perfect, but by the third or fourth time, your hands will understand the motion intuitively, and you’ll be able to create that style in just minutes. Once you’ve mastered one or two, pick up the next style that catches your eye. Soon you’ll have a whole toolkit of braided ponytail options ready to pull out depending on your mood, the occasion, and what your hair is doing that day.