Double braided ponytails are a styling powerhouse for Black women—they offer protection, versatility, and endless style potential in one cohesive look. Whether you’re dealing with natural curls, locs, coils, or relaxed hair, the combination of two braids flowing into a ponytail creates visual interest, keeps hair contained, and works for nearly every occasion from professional settings to casual weekends. The beauty of double braids is that they’re genuinely functional; the braid structure distributes tension across a wider section of hair rather than pulling from one center point, making them one of the gentler protective styles when done correctly.
What makes double braided ponytails stand out among other braiding styles is their flexibility. You can take the same basic concept and transform it completely just by changing where the braids start, how thick they are, where they meet, and what you do with the tail itself. The foundation is simple enough that beginners can master it with practice, but there’s enough room for creativity that experienced stylists can spend hours refining the details. The versatility also means you’re not locked into one look—you can wear your double braided ponytail to a boardroom meeting on Monday, convert it into a side-swept style for date night on Friday, and use it as a protective base for curling the tail on the weekend.
The key to making double braided ponytails work well for your hair is understanding your specific texture and working with it rather than against it. Different hair types benefit from slightly different approaches to braiding tension, product application, and tail styling. Throughout this guide, you’ll find specific techniques and adjustments for various textures, plus honest tips on what prevents breakage, what keeps everything looking fresh longer, and how to style each variation so it looks intentional and polished rather than accidental.
1. Classic Double Dutch Braids into Sleek High Ponytail
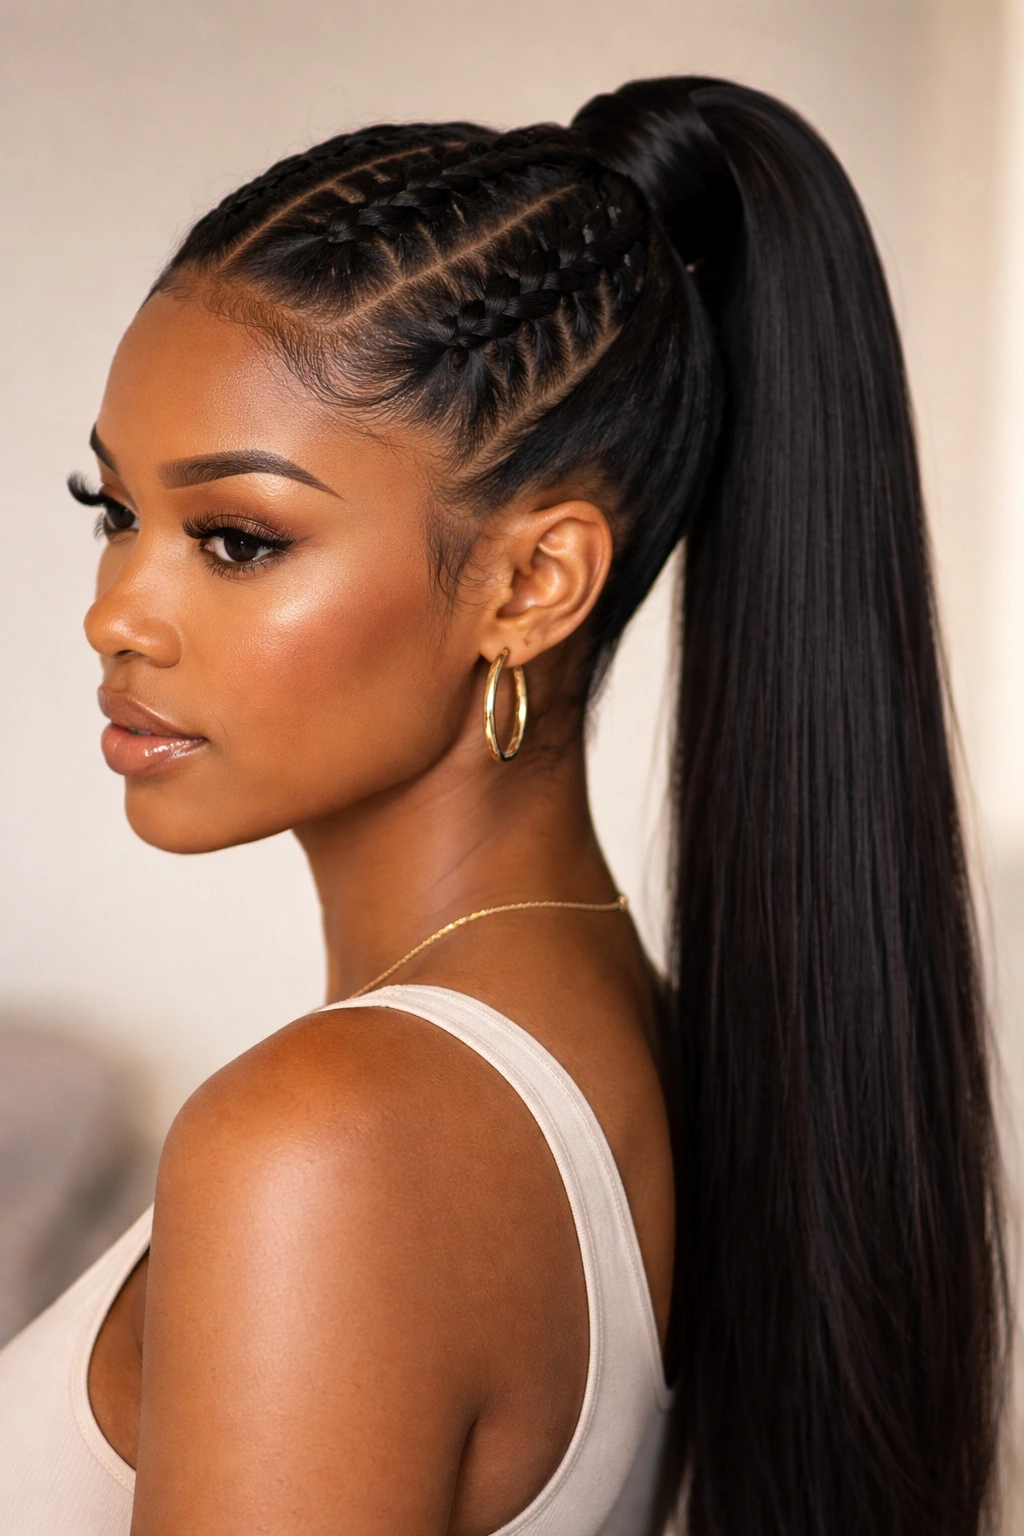
This is the foundational double braid style that works across every hair type and skill level. Two Dutch braids (which sit on top of the scalp) run parallel down the center of the head from the hairline all the way to the nape, where they release into a high, tight ponytail. The Dutch braid sits visually raised and defined, which is why this style reads as intentional and put-together even when you’re just running errands.
Why This Style Stands Out
The classic Dutch braid-to-ponytail transition is clean, symmetrical, and works for both formal and casual settings. Dutch braids naturally sit on top of your hair rather than being woven under, which creates a dimensional, sculptural look. For Black hair specifically, this style is protective when done with moderate tension—not so tight that it creates stress on the hairline, but tight enough to hold throughout the day. The high ponytail extension means all your hair is secured in one place, reducing manipulation and friction throughout the day and night.
Key Details to Perfect This Look
- Start the braids at the very top of your head, close to the hairline, and keep them evenly spaced (roughly 2-3 inches apart)
- Dutch braids should be thick enough to be visually prominent, but not so chunky that they look disproportionate to your head size
- Braid down to the nape of the neck and gather both braids plus the remaining loose hair into a high, centered ponytail
- Use a smoothing cream or edge gel on the base before braiding to keep flyaways at bay
- Secure the ponytail with a covered elastic that matches your hair color to keep it looking seamless
- The ponytail tail itself can be curled, straightened, or left in its natural texture depending on the occasion
Pro tip: If your edges are sensitive, avoid applying heavy product directly to the hairline—instead, use a lighter edge spray or gel, and never braid so tightly that you’re pulling the baby hairs visibly away from your face.
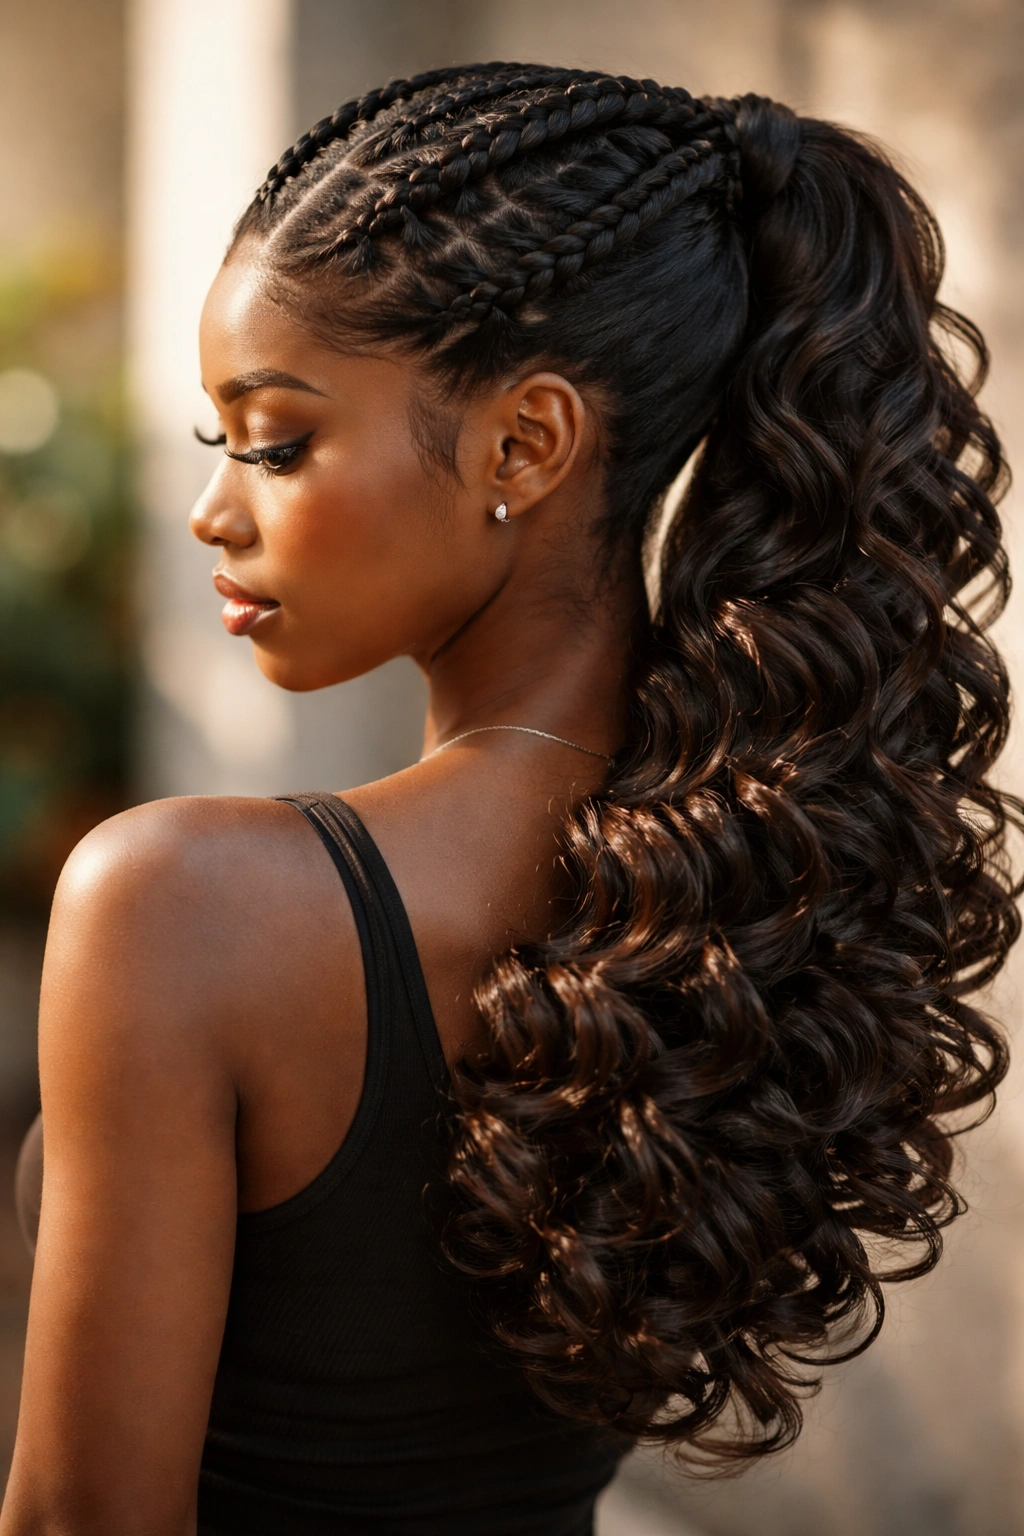
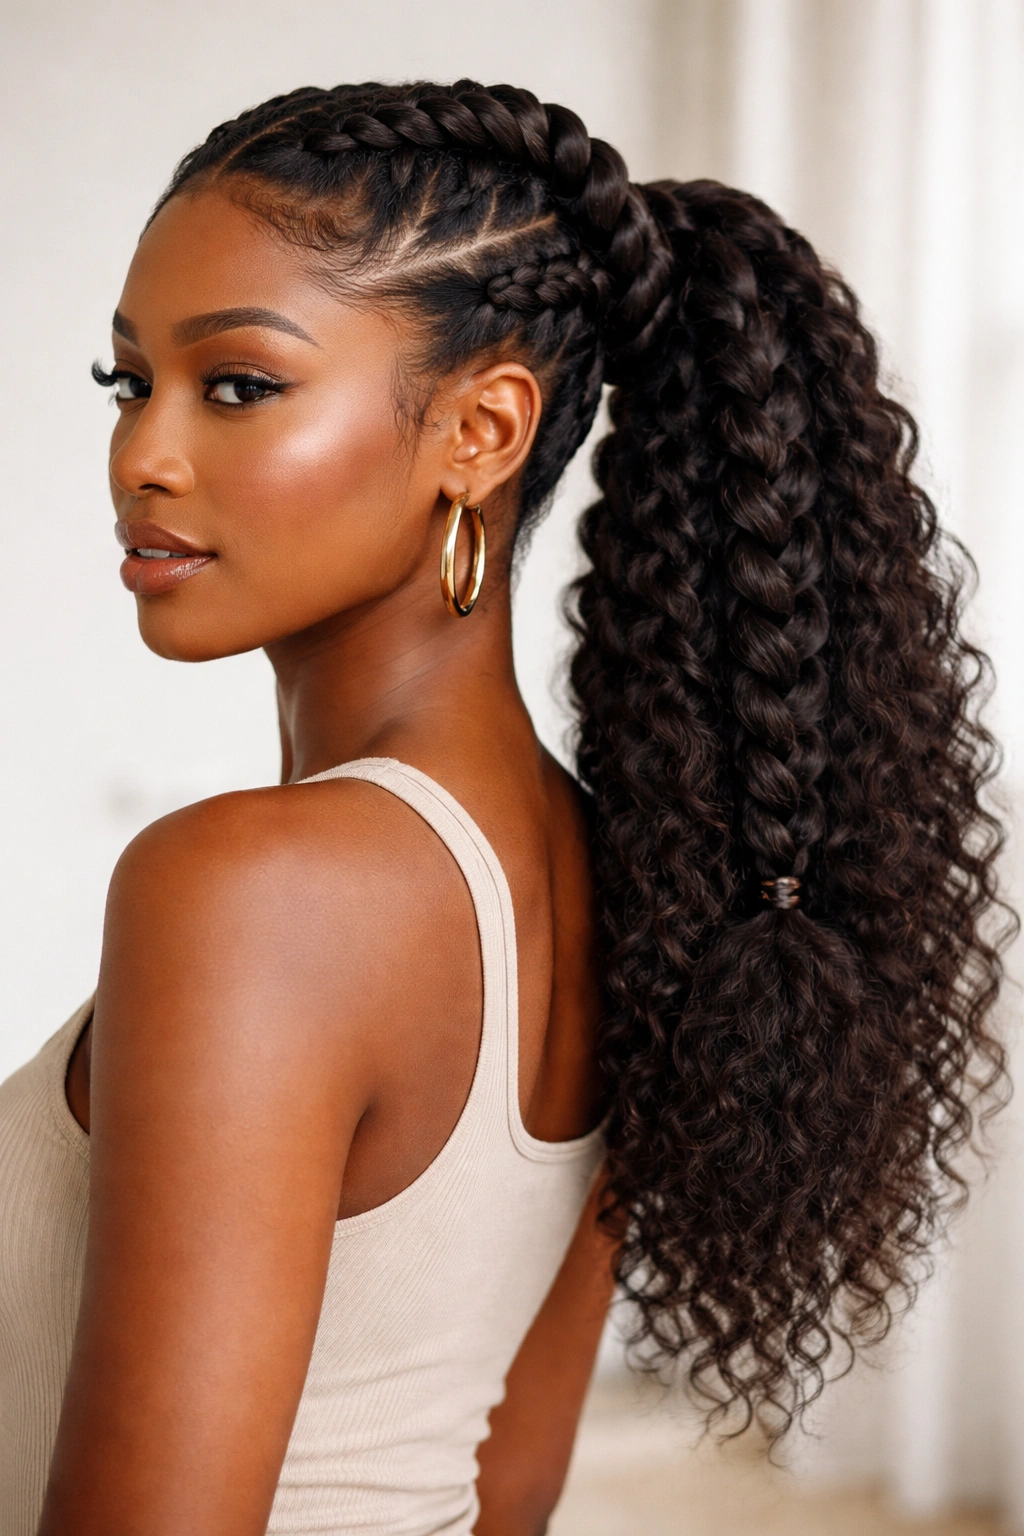
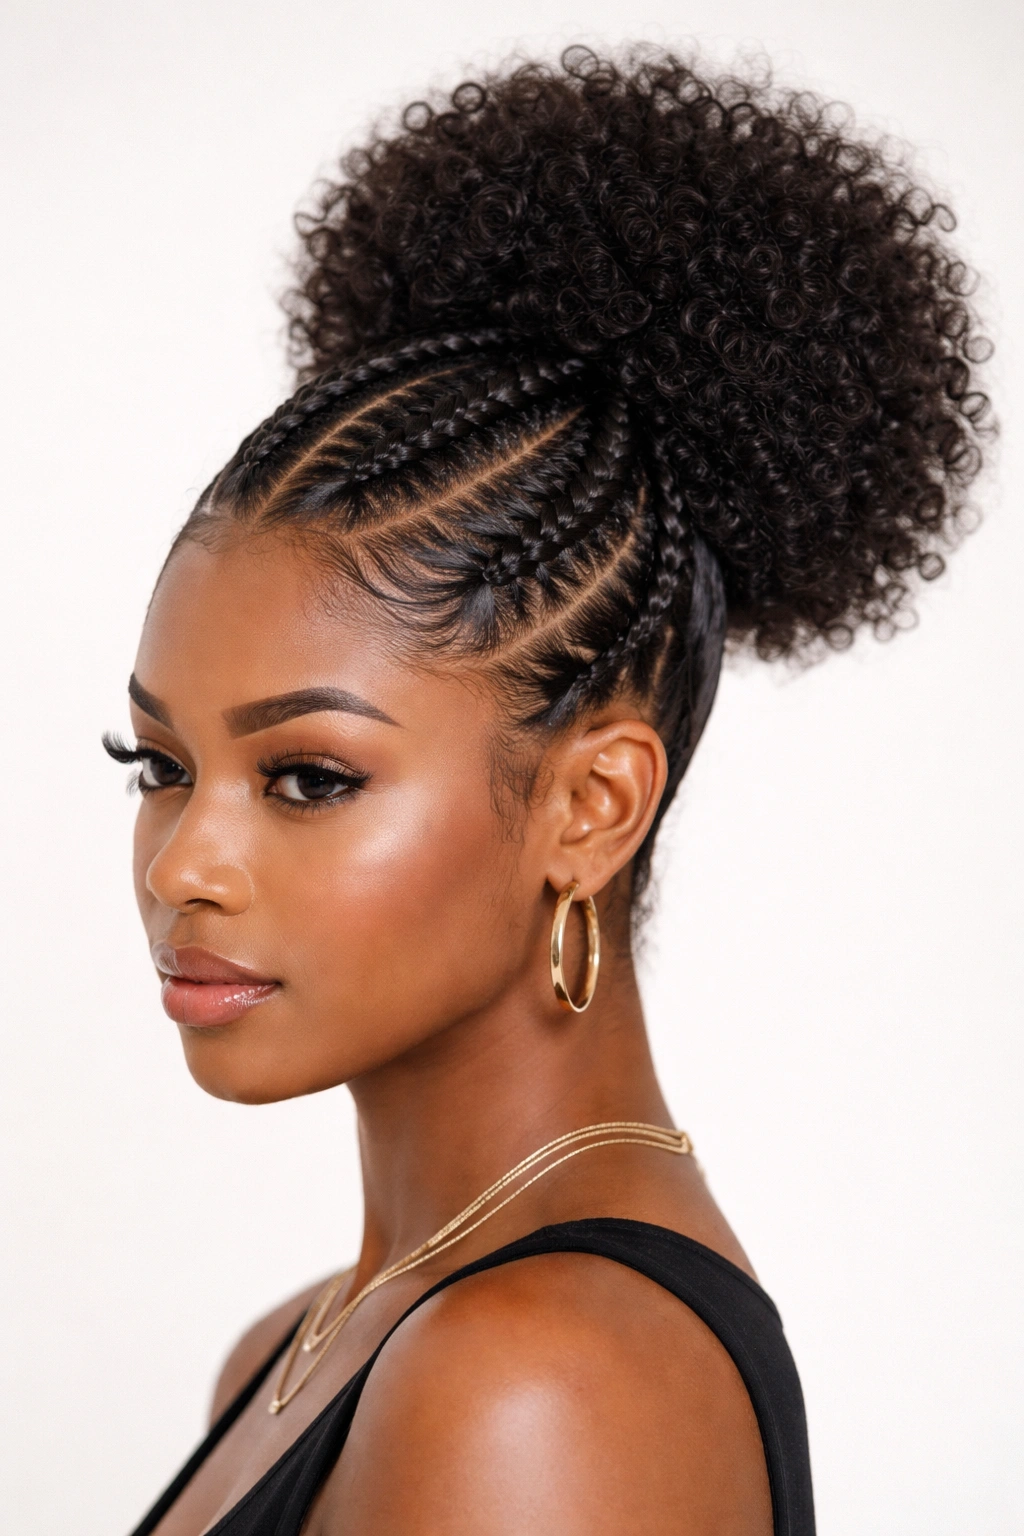
2. Twisted Double Braids with High Ponytail and Coil Definition
Instead of traditional three-strand braids, this style uses two thick twists that spiral down the back of the head. The twists themselves create a rope-like texture that’s visually distinct from regular braids. When you combine two twists into a high ponytail and curl or coil the tail itself, you get a style that reads as high-effort and intentional while actually being one of the quickest double-braid variations to create.
What Makes This Variation Different
Twists are gentler on hair than braids because they distribute tension differently—instead of weaving three strands over and under, twists wind two sections around each other, which can reduce stress on each individual strand. For Black women with naturally textured hair, twists can actually blend beautifully with natural coils, creating a style that looks intentionally cohesive rather than contrived. The twist-to-ponytail style is also easier to maintain because the twists don’t loosen as quickly as some braid styles.
How to Execute It with Precision
- Divide clean, product-treated hair into two sections vertically (left and right side of the center)
- Starting at the crown, twist one section down to the nape by wrapping each side around the other
- Repeat on the second side so both twists are parallel and roughly the same thickness
- Gather both twists plus remaining hair into a high ponytail
- For extra hold and definition, apply a lightweight gel to the twists as you create them
- The ponytail tail looks especially stunning when curled with flexi-rods, perm rods, or a wand to create defined coils
Worth knowing: Twists work particularly well if your hair is slightly damp when you start (not soaking wet, but with moisture). The dampness helps the twist hold its shape as your hair dries, and it reduces frizz in the final result.
3. Feed-In Double Braids with Low Ponytail and Gathered Crown
Feed-in braids are created by adding small sections of hair gradually as you braid down the scalp, which creates a thinner, more refined line at the top that gradually gets thicker as you move toward the nape. Using the feed-in technique for a double braid ponytail creates an elegant, sculptural look that’s particularly flattering if you prefer a low ponytail aesthetic.
Why Feed-In Braids Require a Different Approach
Feed-in braids sit flatter against the scalp than regular Dutch braids because you’re not pulling as much hair into the braid at once. This means the style looks less bulky at the crown and more elegant overall. The distributed tension also makes feed-in braids one of the gentlest braiding options for hair that’s prone to breakage or thinning. Because you’re feeding in hair gradually, you also have more control over the braids’ final thickness and the look of the overall style.
The Technique That Makes This Style Work
- Start with a small triangular section of hair at the crown (roughly the size of a quarter)
- Begin a basic three-strand braid and feed in thin sections of hair from the scalp as you braid downward
- Keep the braid relatively close to the scalp, and feed in hair at a consistent rate so the braid looks even
- Create two feed-in braids that run parallel down the back of the head toward the nape
- Gather both braids plus remaining hair into a low ponytail at the nape or just below the crown
- This style looks particularly polished if you smooth the crown area with edge gel before starting
- Consider adding a decorative hair cuff or wrap at the ponytail base for extra visual interest
Insider note: Feed-in braids look best when worn for the full day or event—they refine and settle into their final shape as your hair acclimates to the style, so resist the urge to adjust or re-braid if they look slightly loose in the first few hours.
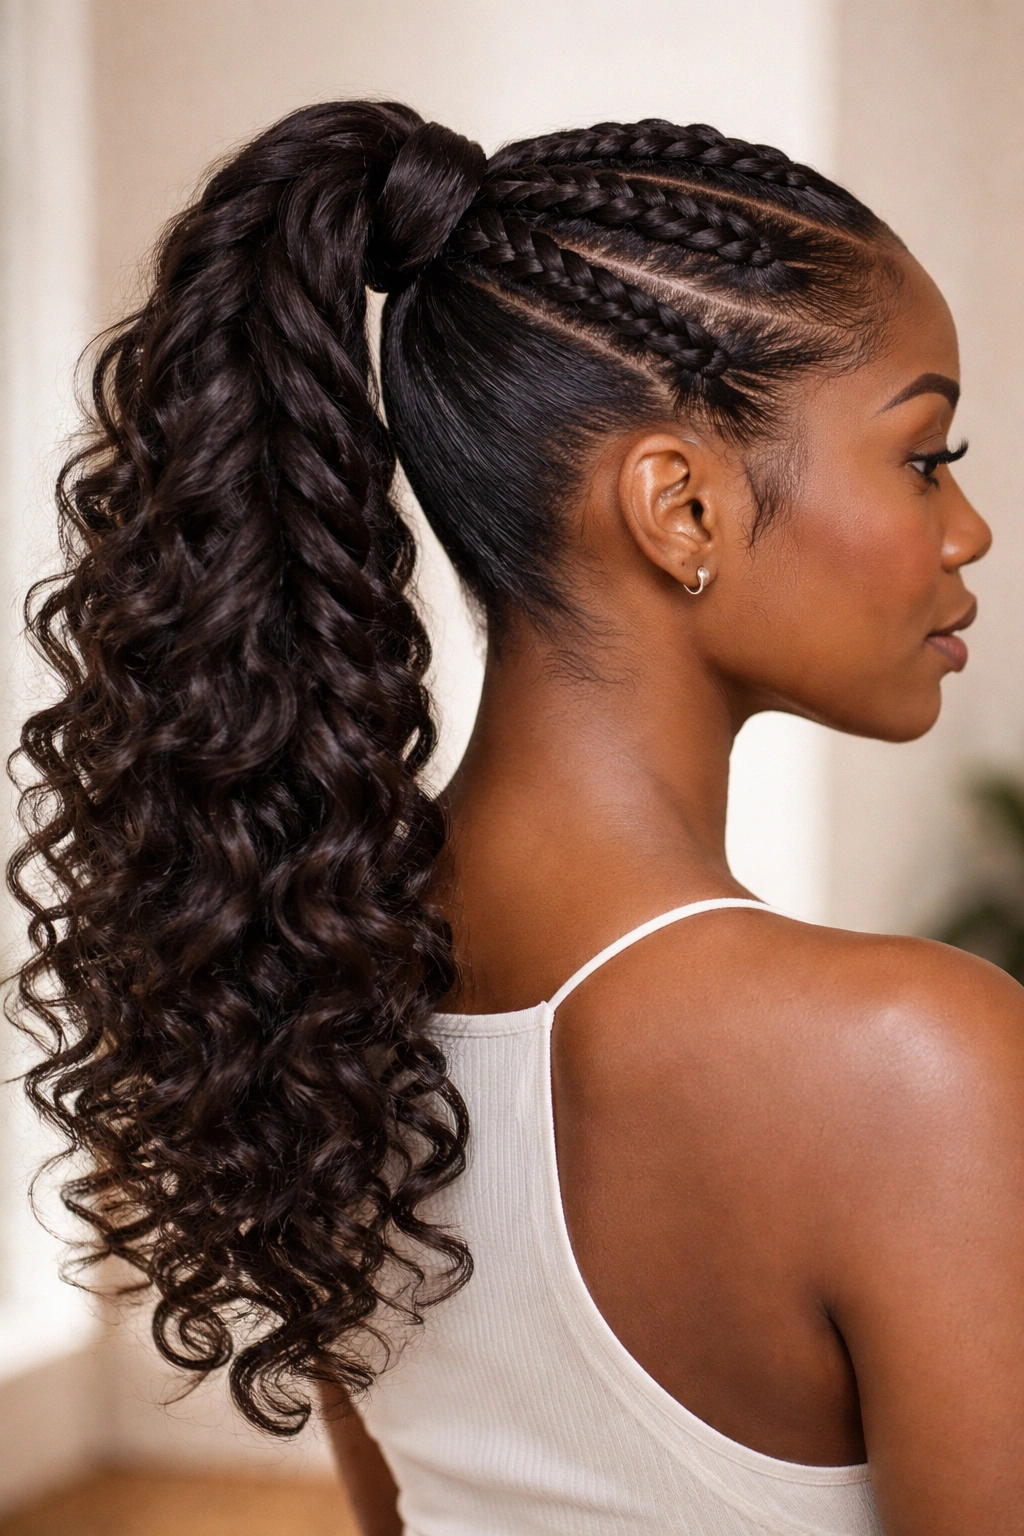
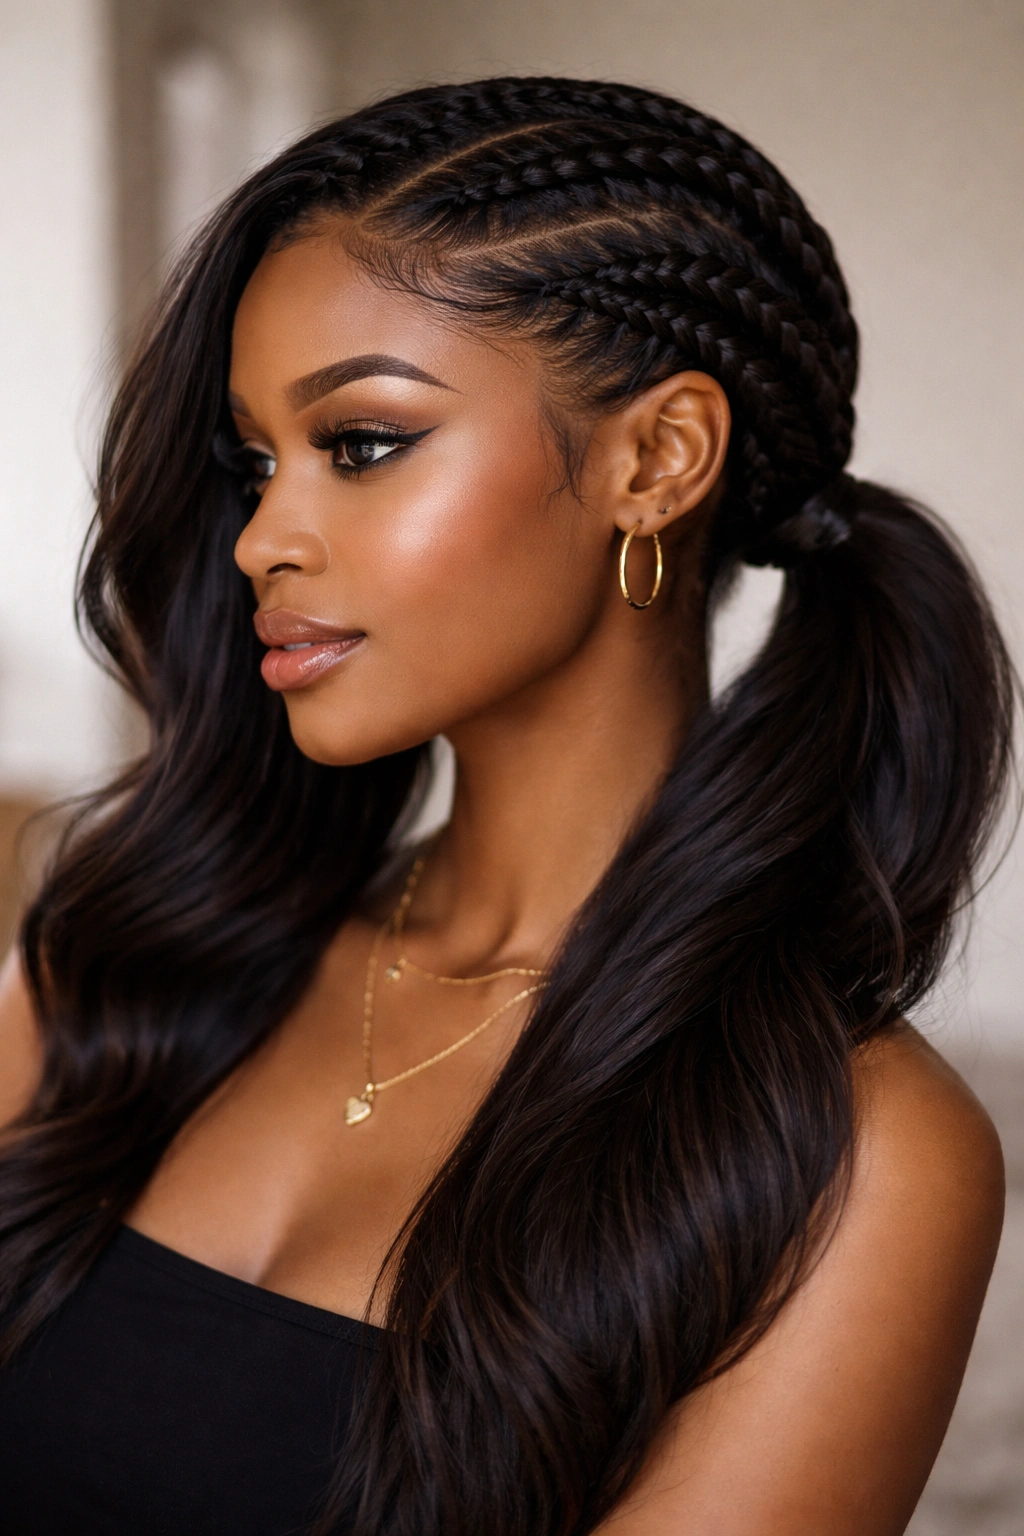
4. Double Braids with Curled and Coiled Ponytail Tail
This variation keeps the braids simple and focused while treating the ponytail tail as the statement element. The braids serve as the foundation and frame, while the curled or coiled tail becomes the focal point that draws eyes. This is an excellent choice if you want a protective style that still shows off your natural texture or allows you to experiment with temporary curl definition.
What Makes the Tail a Game-Changer
When you put effort into curling or coiling only the ponytail portion rather than the entire head, you create a sophisticated visual contrast. The neat, sleek braids at the top read as polished and intentional, while the curled tail conveys movement, dimension, and personality. This style also reduces overall styling time because you’re only heat-styling (if you choose to) or setting a small section of hair rather than your entire head. For natural hair, this approach is particularly smart because you can maintain protective braids while still enjoying the visual appeal of defined curls.
The Step-by-Step Approach to Perfect Curls
- Create two double Dutch braids or feed-in braids and secure them into a high or mid-height ponytail
- Apply a curling cream, styling mousse, or lightweight gel to the ponytail tail (damp hair curls better than completely dry hair)
- For defined coils, use perm rods, flexi-rods, or a smaller curling wand; for bouncy curls, use larger rods or a regular curling iron
- If using heat, apply a heat protectant spray first—this is non-negotiable for maintaining hair health
- Set the curls by allowing them to cool completely before removing the rods (10-15 minutes minimum)
- For heatless curling, set the rods overnight or for at least 6-8 hours before releasing
- Gently separate the curls with your fingers rather than a brush to maintain definition and avoid frizz
Pro tip: The texture and thickness of your ponytail tail determines which curling tool works best. Thicker, denser hair holds curls better with perm rods or a curling iron, while thinner ponytails might look better with flexi-rods or a wand because they’re lighter weight and less likely to drag the hair down.
5. Side-Swept Double Braids into Low Ponytail
This style takes the standard double braid concept and tilts it—rather than braids running down the center-back, they start at opposite sides of the head, sweep across toward the opposite side, and gather into a low ponytail at the side or center-back. The asymmetry creates visual interest and has a distinctly more relaxed, fashion-forward vibe than centered braids.
Why Asymmetry Transforms the Entire Look
Side-swept braids instantly make a protective style feel less utilitarian and more intentional, like you’re making a deliberate aesthetic choice rather than just containing your hair. The sweeping motion also works beautifully to frame the face and show off your features—if you’re someone who enjoys showcasing your face shape, this variation delivers. The asymmetrical placement also means the style looks completely different from every angle, which keeps it feeling fresh throughout the day.
How to Create the Sweep Effect
- Divide your hair into two sections, but not down the center-back—instead, create your parting line from the right or left temple area
- Start the first braid on the right side of your head (or your dominant side) with a Dutch or feed-in braid that runs diagonally toward the left side of the nape
- Start the second braid on the left side, angling toward the right side of the nape, so the two braids cross or run closely parallel
- Bring both braids together into a single ponytail positioned to one side or at the center-back nape
- The side placement of the final ponytail is key—if it’s too centered, the effect becomes less dramatic; if it’s too far to the side, it can look unbalanced
- A low ponytail works best with this style because it emphasizes the asymmetry of the braid pattern
- Consider adding a decorative detail (a metal cuff, a fabric wrap, or ornamental pins) to draw attention to the ponytail base
Worth knowing: This style photographs beautifully from the side, so it’s an excellent choice if you know you’ll be taking photos or attending events where you’ll be seen from the side profile.
6. Lace Braids with High Puff Ponytail Extension
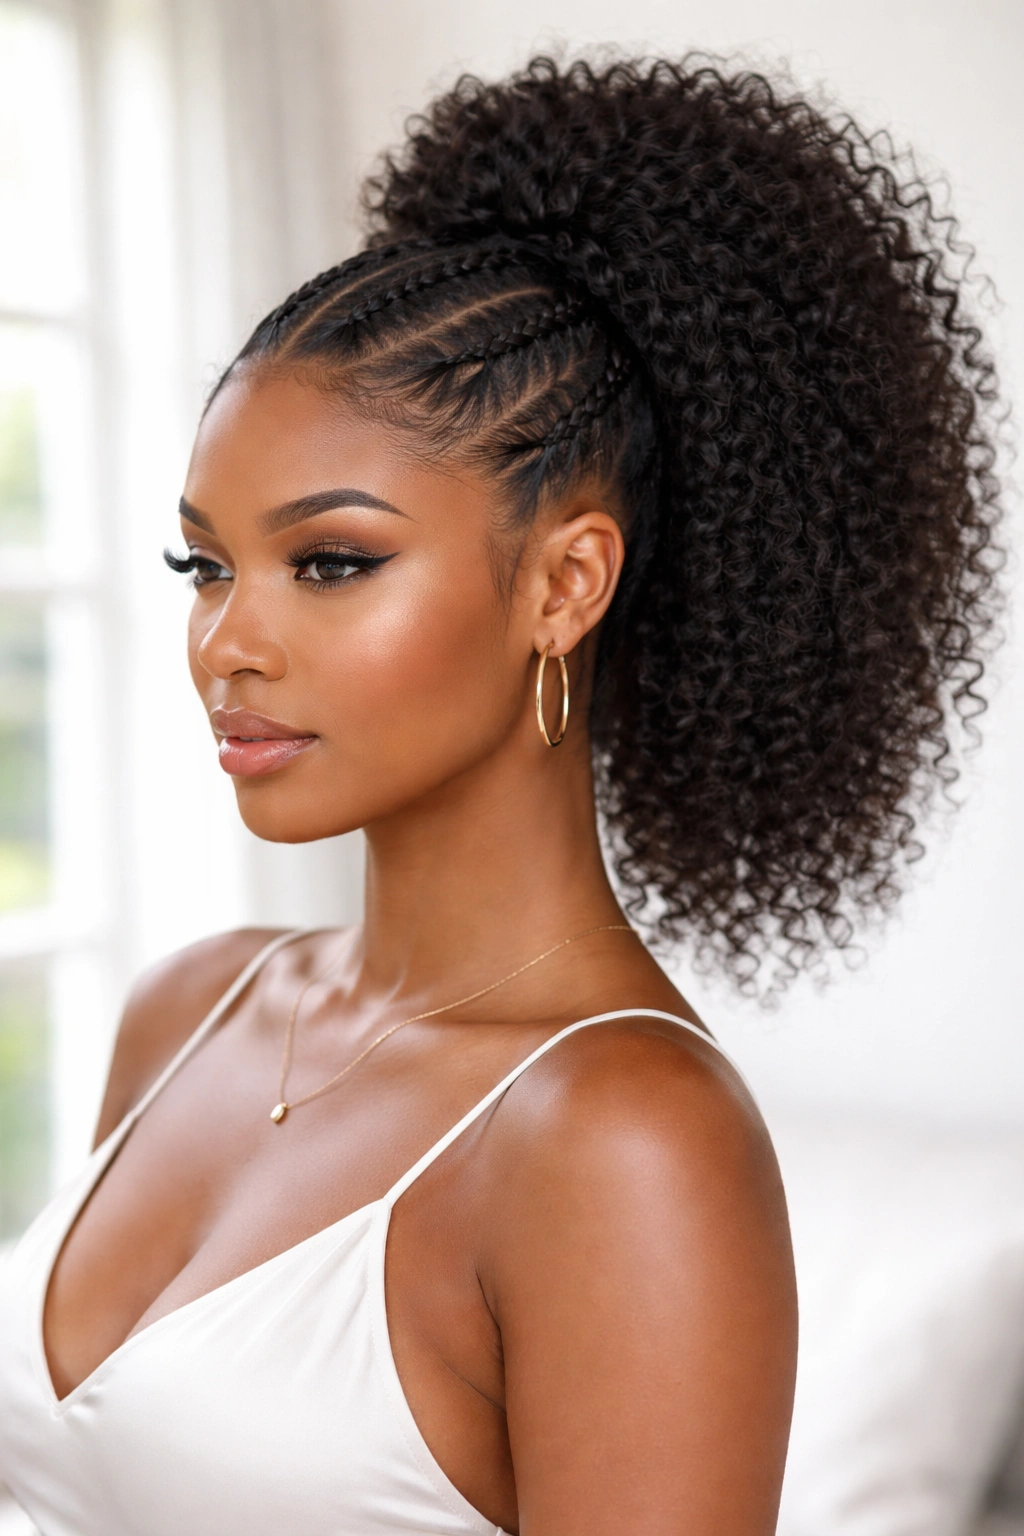
Lace braids are ultra-refined—they’re a variation of feed-in braids where the feeding-in process is so subtle that only one thin line of hair is visible along the edge of the braid, creating the appearance of delicate lace. Combined with a high ponytail that includes a hair extension or pony clip for added volume and length, this creates a sophisticated, statement-making style perfect for special occasions.
The Elegance of Lace Braids
Lace braids sit so flat and refined against the scalp that they almost disappear visually while still keeping all your hair secured. This makes them ideal if you want a protective style that doesn’t read as “protective style”—it looks like a choice, not a necessity. The lace braid effect requires more skill and patience than a regular braid, but the payoff is a polished look that’s distinctly more elevated than standard braids. When paired with a voluminous puff at the crown, lace braids create a balanced, editorial look.
The Technique for Achieving True Lace Braids
- Start with very clean, slightly moisturized hair and a parting tool or rat-tail comb
- Create a precise vertical parting line from the crown to the nape
- Begin with a small triangular section at the crown and start a basic three-strand braid
- As you braid, feed in hair extremely gradually—the key difference from regular feed-in braids is that you’re only picking up 2-3 fine hairs with each pass, creating that lace-like appearance
- Braid both sides, keeping the lace effect as refined and consistent as possible
- Gather both braids plus loosened hair into a high ponytail
- Add a hair extension or pony clip at the base of the ponytail to create height and volume
- Arrange the extension or natural hair into a puff shape by gently gathering and teasing
- Smooth the crown area with edge gel and a fine-tooth comb for a polished finish
Pro tip: Lace braids are best created on hair that’s at least one or two days post-wash, because freshly washed hair can be slippery and difficult to braid with the precision lace braids require.
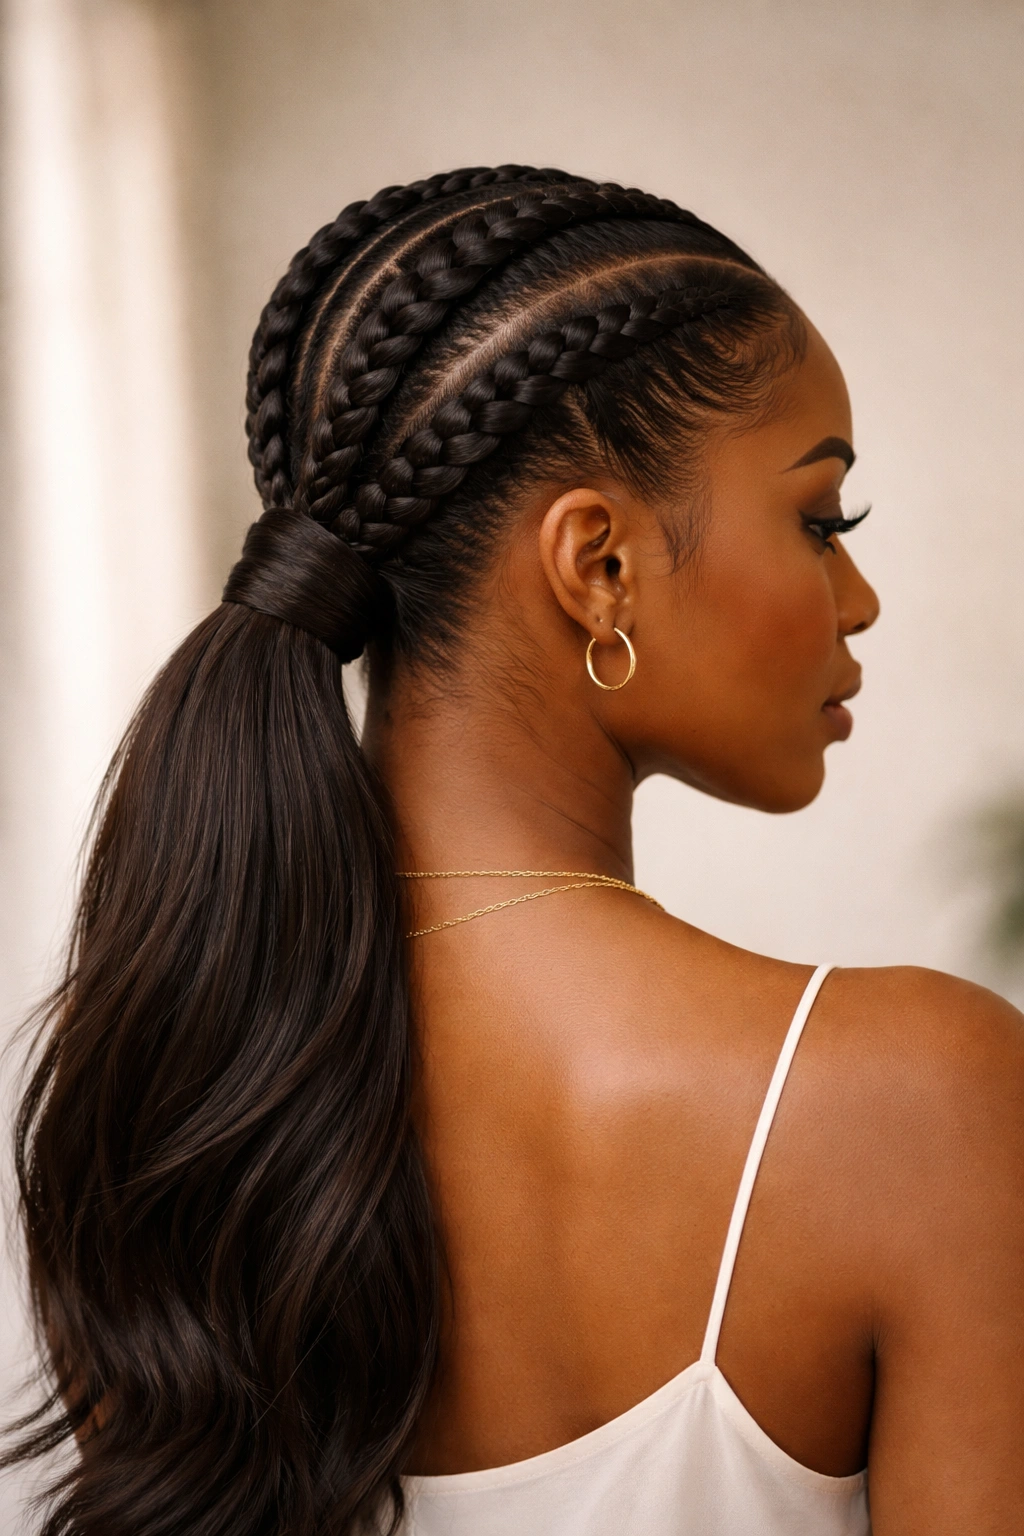
7. Double Cornrows into Sleek Straight Ponytail
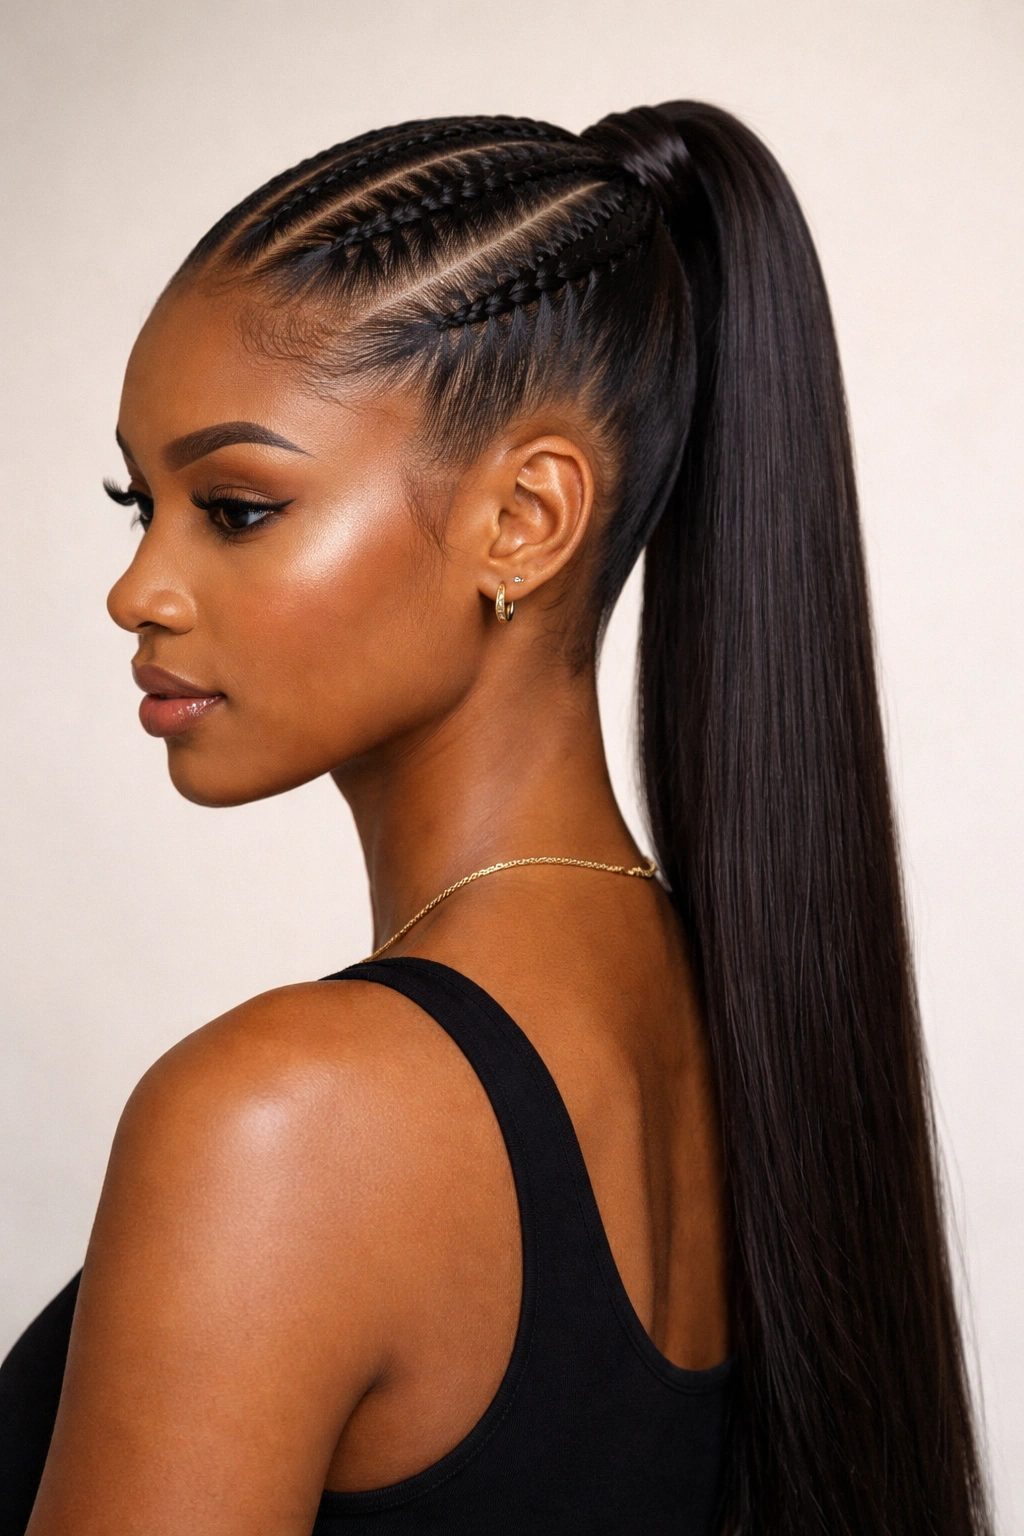
Cornrows are braids that start at the scalp and sit flush against it by design, creating geometric, sculptural lines. When two cornrows meet at a ponytail and the tail is straightened or blown out, you get a style that’s undeniably sleek, modern, and striking. This variation emphasizes clean lines and geometric precision, making it an excellent choice for professional settings or when you want a sharp, intentional aesthetic.
Why Cornrows Read as a Distinct Style
Cornrows have a completely different visual impact than looser braids because they sit so close to the scalp that the shape of your head becomes part of the design. The straight ponytail tail emphasizes this geometric aesthetic—it’s not soft or romantic, it’s sharp and deliberate. Cornrows are also practical for Black hair because they’re traditionally braided at the scalp level, which keeps the braids secure and reduces the tension on loose ends. The style is infinitely customizable in terms of the number of cornrows, their spacing, and the thickness of each one.
Creating the Cornrow-to-Ponytail Flow
- Decide on your cornrow placement—you can do two thick cornrows, three medium cornrows, or multiple thinner ones for a more intricate pattern
- Starting at the hairline, pick up three sections of hair and begin braiding while pulling the braid tight against the scalp (this is what defines a cornrow)
- Continue braiding downward toward the nape, continuously pulling pieces of hair from either side of the braid into the three main sections
- The braid should sit completely flush against your scalp with no gap between the braid and your head
- Repeat for the second (and any additional) cornrow, ensuring all cornrows are roughly the same thickness and spacing
- At the nape, release the braids from the cornrow pattern and gather all braids plus remaining hair into a single ponytail
- For the signature sleek look, straighten or blow-dry the ponytail tail completely smooth and apply a smoothing serum for shine
Worth knowing: Cornrows last longer than looser braids when you’re protecting your edges properly. Avoid pulling the braid too tightly at the hairline (which can cause traction alopecia), and always use a lightweight edge product rather than heavy pomades.
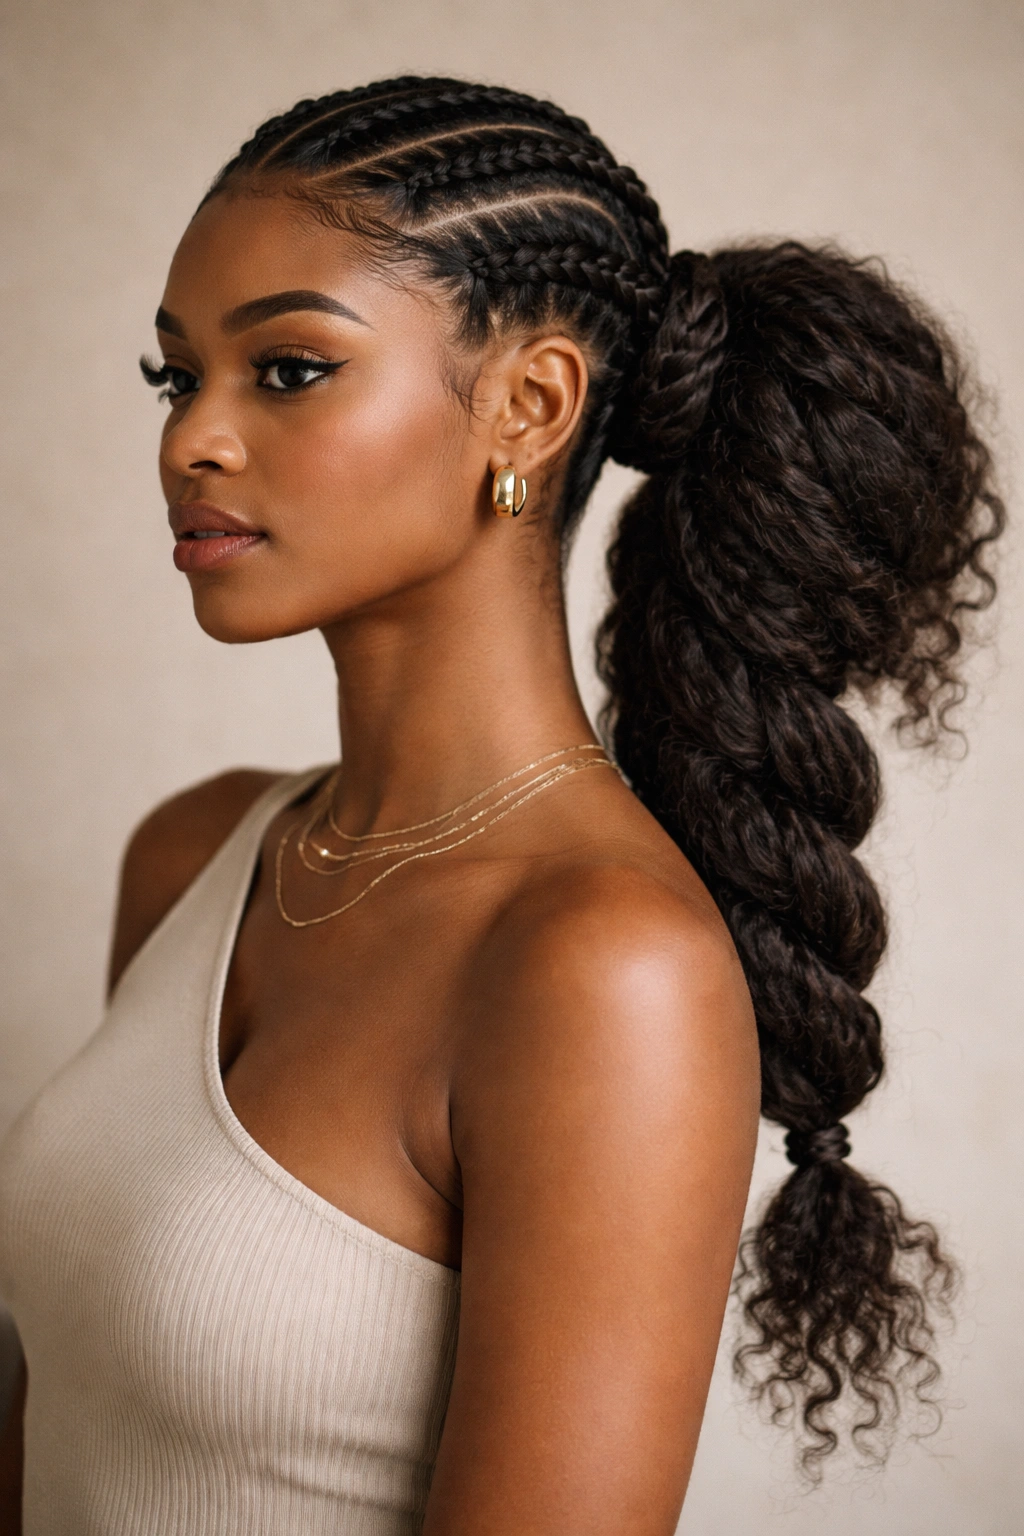
8. Chunky Double Braids with Thick Texturized Ponytail Tail
This style prioritizes boldness and presence—the braids are intentionally thick and chunky (using only large sections of hair), and the ponytail tail is left in its natural texture or texturized with a specific technique to maximize volume and movement. This is perfect if you have naturally thick, dense hair and you want a style that celebrates rather than minimizes that texture.
What Makes Thick Braids a Statement
Chunky braids have a completely different energy than thinner, delicate braids. They feel bold, confident, and deliberately maximized rather than refined. When you pair thick braids with a voluminous, textured tail, you create a style with serious presence. This variation works particularly well for people with dense, coily, or textured hair because it showcases the natural fullness of your hair rather than trying to flatten or minimize it. The style is also quicker to create because you’re working with fewer, larger sections.
Building Volume and Presence Intentionally
- Divide your hair into just two sections vertically for the base braids
- Create two simple three-strand braids using thick, generous sections of hair from each strand
- Don’t aim for precision or refinement here—intentional boldness is the goal
- Secure both braids into a high or mid-height ponytail
- For the tail, you can leave it in its natural texture, or texturize it further by:
- Applying a lightweight mousse or texturizing spray before drying
- Using a diffuser while blow-drying to enhance natural curl and texture
- Creating defined sections with a styling cream and allowing them to air-dry
- Gently separating natural coils with your fingers for maximum dimension
- The goal is a tail that looks full, dimensional, and undeniably textured
Insider note: If your natural texture is coily or very curly, you don’t need to do anything special to the tail—your natural texture is the statement. Just apply a good curl cream and let your hair do its thing.
9. Reverse Double Braids with High Coil Puff Ponytail
Reverse braids (also called inside-out braids) are created by braiding the strands under instead of over, which creates the appearance of a braid that sits slightly raised on the scalp and has a distinctly different texture than a traditional over-braid. When you combine two reverse braids with a high ponytail transformed into a coily puff, you get a style that’s visually complex and playfully textured.
The Visual Impact of Reverse Braids
Reverse braids create a dimensional, almost 3D effect on the scalp because the braid sits differently than a regular braid. The texture looks thicker and more pronounced, which is particularly flattering for people who want their braids to be a visible design element. Reverse braids also feel slightly more relaxed and casual than regular braids, even when they’re done with precision, which makes them versatile across multiple occasions. The technique is straightforward once you understand the motion—it’s just braiding backward—but it creates an entirely different visual outcome.
How to Braid in Reverse and Create the Puff
- Start with clean, moisturized hair and create a vertical parting line from the crown to the nape
- Beginning at the crown with a small triangular section, create a basic three-strand braid, but instead of crossing strands over the middle, cross them under
- This creates a braid that sits slightly raised and has more texture than a regular braid
- Continue braiding down to the nape, and create a second reverse braid on the other side
- Gather both reverse braids plus loosened hair into a high ponytail
- Use a scrunchie or elastic, but then:
- Gently tease the ponytail at the base to create a puff shape
- Smooth the outer layer of the puff with edge gel or a smoothing cream
- The interior stays textured and voluminous while the exterior appears polished
- If desired, separate the puff into sections and apply curl cream to enhance coil definition
Pro tip: Reverse braids are easier to execute if you work with slightly damp hair—the moisture makes the strands easier to manipulate under instead of over.
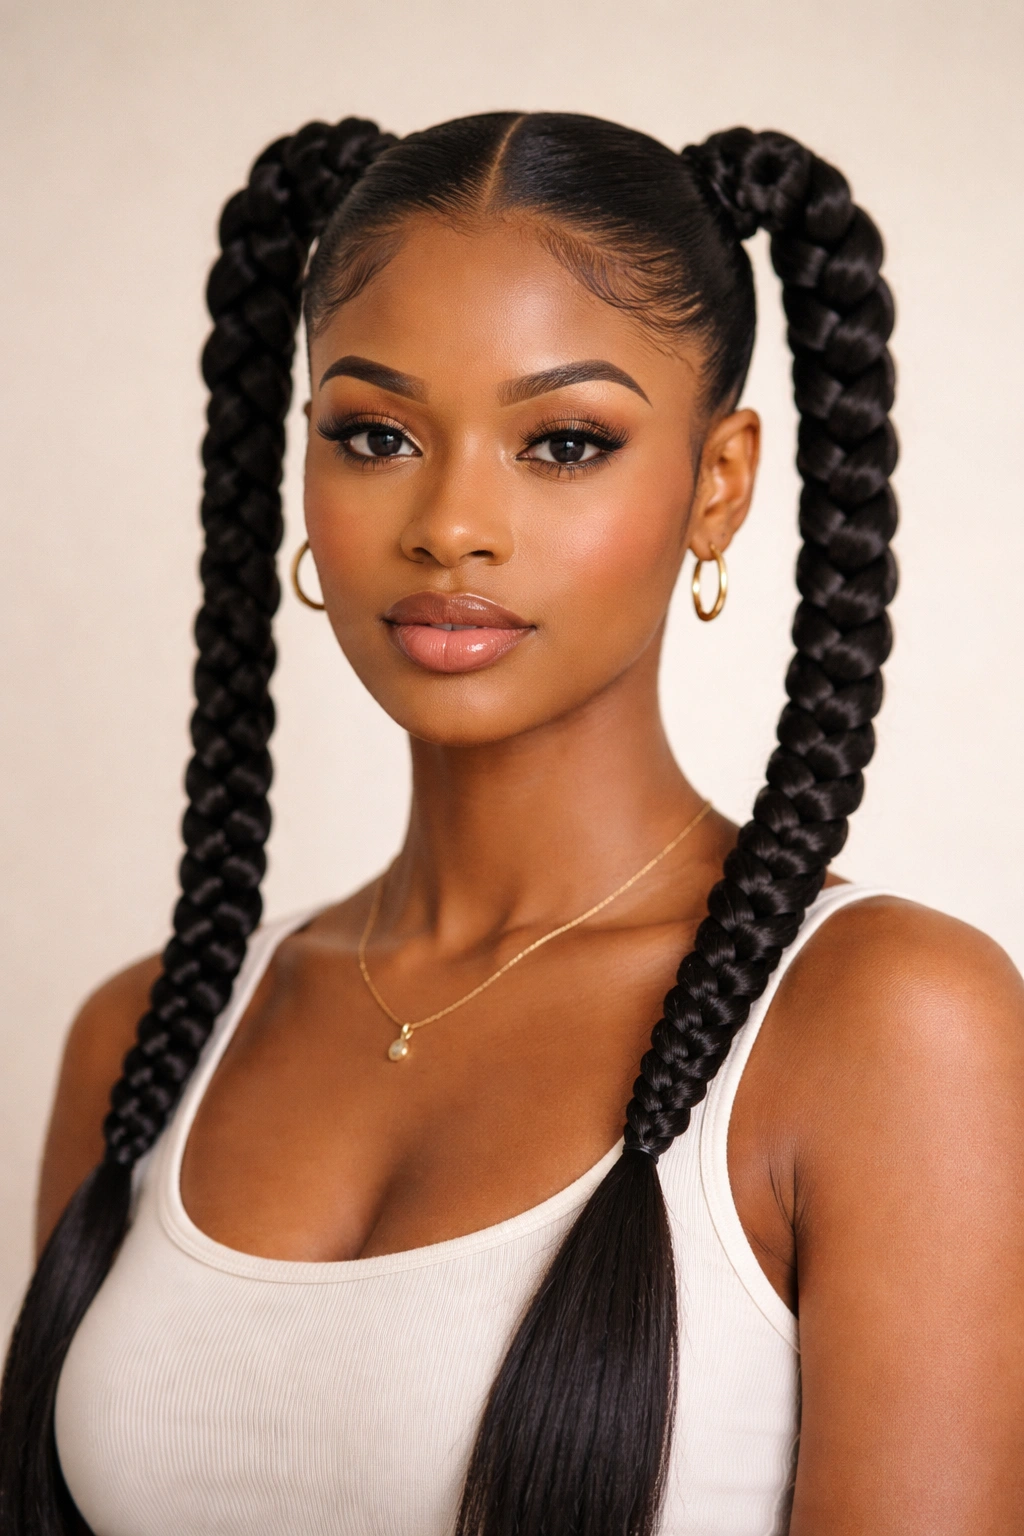
10. Asymmetrical Double Braids with Side-Gathered Twisted Puff
This final variation combines asymmetry with an unconventional ponytail placement—one braid is positioned higher than the other, they don’t run parallel, and they gather into a side-positioned ponytail that’s twisted and puffed rather than sleek. This style is distinctly creative and modern, perfect if you want to stand out and make a bold aesthetic statement.
Why Asymmetrical Everything Reads as Intentional
When both the braids and the ponytail placement are asymmetrical, you move beyond a protective style into editorial territory. The asymmetry signals that you’re making deliberate, creative choices rather than following a formula. This variation requires more confidence and comfort with styling because it’s not relying on symmetry to create balance—instead, balance comes from the overall composition and the confidence with which you execute it. The style also allows for maximum personality and self-expression.
The Technique for Bold Asymmetry
- Create an asymmetrical parting that’s clearly off-center (a deep side part or even an angled part)
- Create one thicker braid starting from the temple area on one side, running toward the opposite nape
- Create a second thinner braid starting from the opposite side, angled toward the first braid
- The braids should cross or run closely parallel but clearly not be mirror images of each other
- Gather both braids plus loosened hair into a ponytail positioned at the side (not centered)
- At the ponytail base, divide the ponytail into 2-3 sections and twist each section
- Pin or wrap the twisted sections into a puff shape, creating an intentionally textured, voluminous look
- Leave small face-framing pieces loose if desired for a softer, more fashion-forward effect
- Secure with bobby pins that match your hair color and smooth the front hairline with edge gel
Worth knowing: This style is more editorial and experimental than the other variations, so it works best for occasions where you want to make a statement—events, photoshoots, or days when you’re feeling especially creative.
Final Thoughts
Double braided ponytails offer Black women a protective styling option that’s simultaneously practical, beautiful, and endlessly customizable. The core technique is forgiving enough for beginners to learn, but flexible enough that experienced stylists can innovate for years. What makes these styles work is understanding that small variations—the placement of the braids, the thickness, the location of the ponytail, and what you do with the tail itself—completely transform the overall aesthetic while maintaining the same foundational approach.
The key to making any double braided ponytail work for your hair is paying attention to tension, moisture, and your specific hair’s needs. Protective doesn’t mean sacrificing style; it means being intentional about how you create and maintain the style so your hair stays healthy while you get to enjoy something that makes you feel confident. Start with one variation that resonates with you, master it, and then branch out to others as your comfort grows.
These styles genuinely work across different hair textures, lengths, and densities because the core concept is so adaptable. Whether you have natural coils, locs, relaxed hair, or anything in between, there’s a double braided ponytail variation here that will work for you and your lifestyle. The time you invest in creating and maintaining these styles pays off in both hair health and the confidence that comes from a style you love wearing.