A high swoop ponytail that actually stays put throughout the entire day is legitimately one of the hardest hairstyles to master. You nail the curve, the ponytail looks absolutely effortless and polished for the first three hours, and then gravity wins and the whole thing starts sagging and twisting sideways by noon. The swoop is supposed to curve gently from one side of your head, sweeping across the crown before gathering into a sleek or textured ponytail at the back. But without the right technique, the right products, and the right anchor points, that beautiful swoop collapses faster than you’d think possible.
The real secret to a swoop that lasts isn’t just about hair spray — though that definitely helps. It’s about understanding where to place your bobby pins so they actually catch the hair structure and hold the curve against gravity. It’s about how you tease the crown to create volume that won’t deflate. It’s about using the right foundation products that grip your hair without flaking or feeling crunchy. And honestly, it’s about choosing a swoop style that matches your hair texture, hair thickness, and how many hours you actually need it to survive.
The 12 swoop styles below are the ones that consistently hold their shape through a full day of activity — whether you’re sitting at a desk, working out, or running between meetings. Each one has a specific hold mechanism that keeps the swoop lifted and the ponytail secure, even when you’re moving around actively. Some work brilliantly on fine hair, some are built for thick hair, and a few are genuinely foolproof for anyone willing to spend five minutes getting the technique right. Pick the style that matches your hair type and your style preference, and you’ll finally have a swoop that looks fresh at the end of the day as it did when you finished styling.
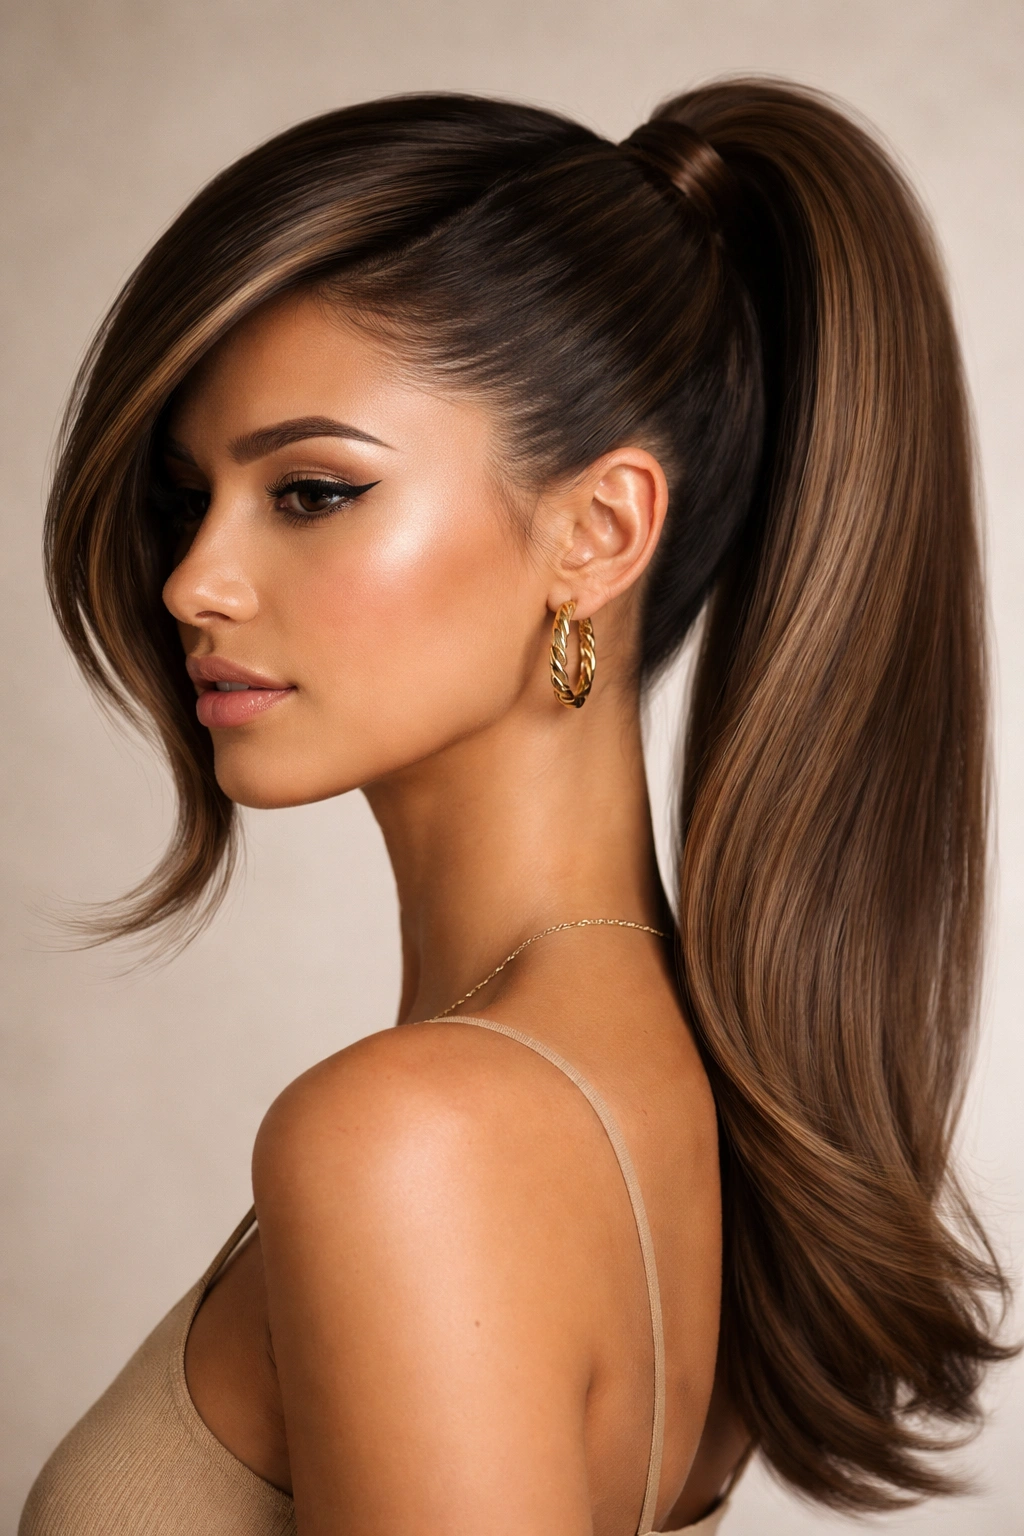
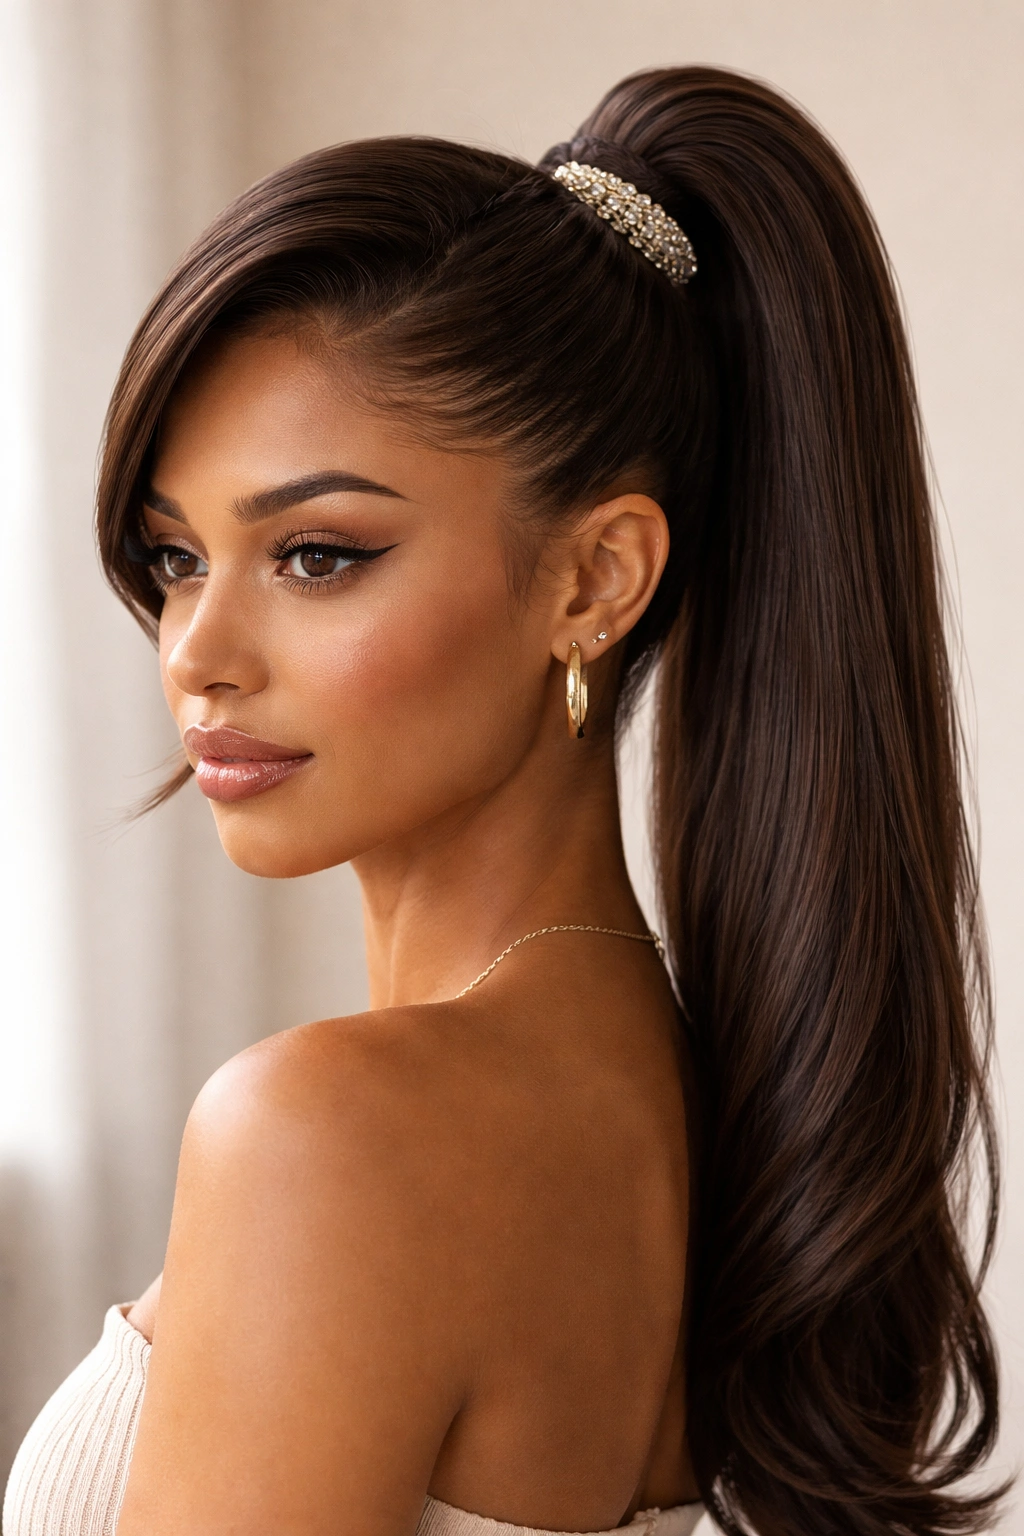
1. The Sleek High Swoop
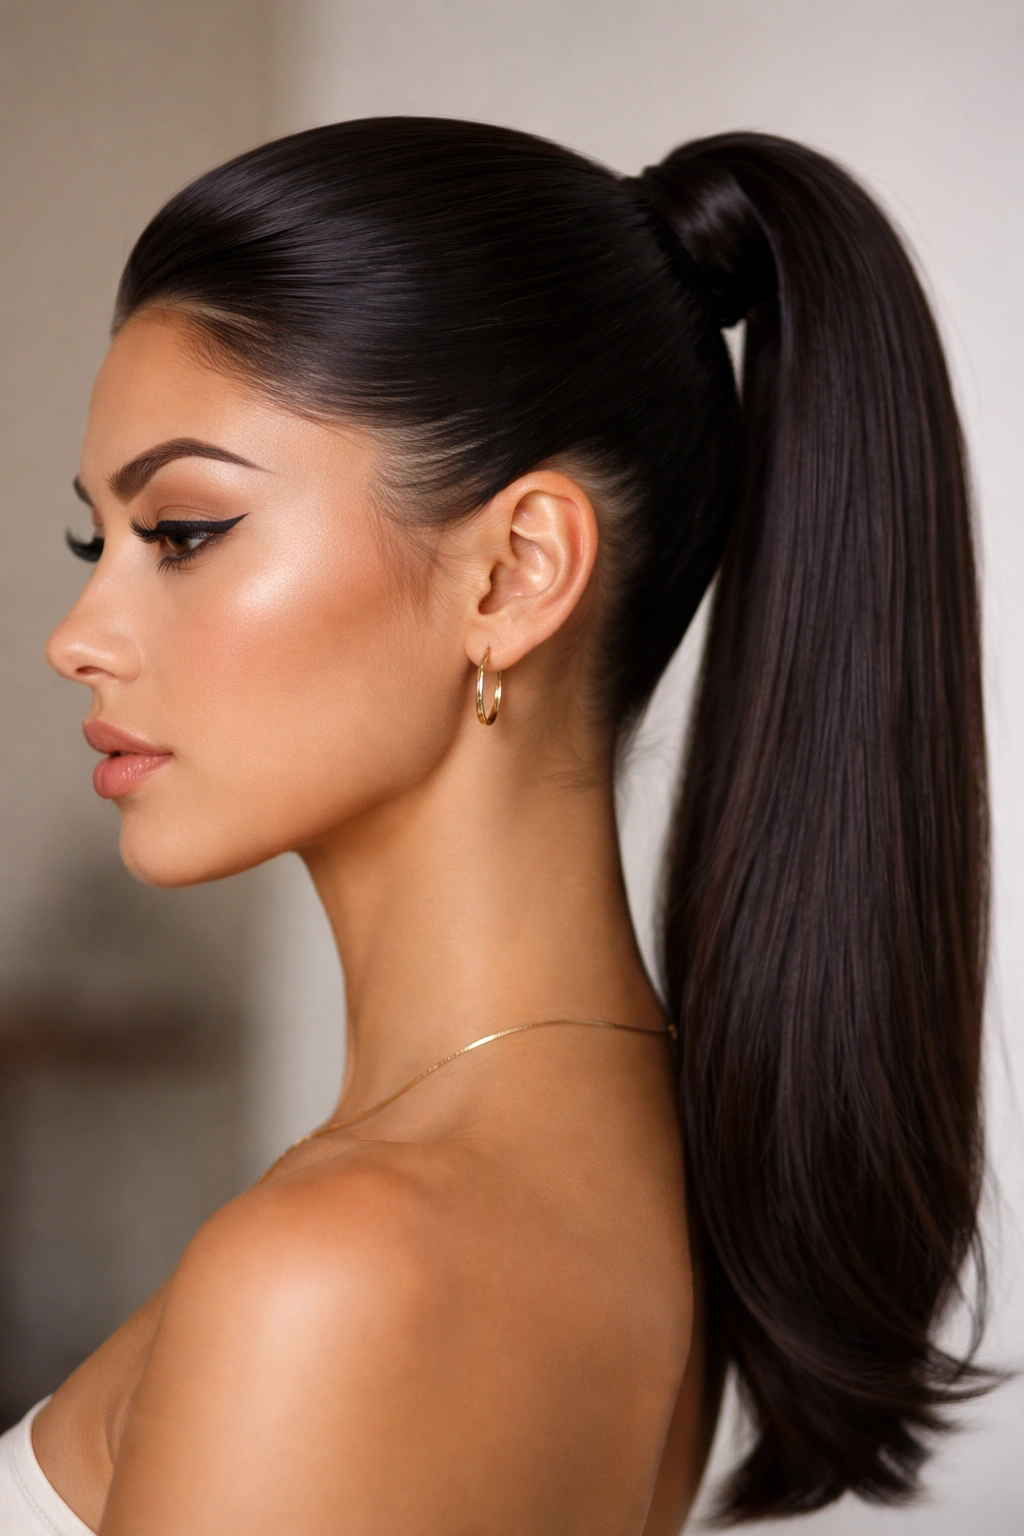
This is the most polished, most professional version of the swoop ponytail — the one that looks like you spent 20 minutes on it when it actually only took 10. The swoop curves smoothly from one side, sits against your head almost like an invisible frame around your face, and delivers into a silky-smooth, tightly secured ponytail at the nape of your neck. What makes this version stay put is the combination of smoothed-down hair, serious grip at the base, and strategic pinning that anchors the curve without visible bobby pins.
Why It Holds So Well All Day
The sleek swoop creates a tight seal against your scalp with the flat iron or with smoothing products, which means there’s natural friction keeping it in place. When you combine that with a tight elastic at the base and bobby pins that are actually inserted perpendicular to your head (not at an angle), the whole structure locks into place. The weight of the ponytail actually helps keep the swoop pressed against your head because there’s tension running down from the gathering point. This particular style is also forgiving because any slight loosening just looks intentionally effortless rather than messy.
How to Build This Swoop and Keep It There
- Apply a smoothing serum or lightweight gel to damp hair before blow-drying, focusing on the crown area where the swoop will sit — this creates a slick surface that resists gravity
- Blow-dry your hair smooth with a paddle brush, directing the swoop area back and to the side as you dry
- Use a flat iron to smooth the top layers of hair completely, checking that you’ve smoothed the swoop region in particular
- Start gathering at one temple and sweep the hair back smoothly, holding the swoop in place with bobby pins inserted horizontally (parallel to the ground)
- Secure the ponytail with a medium-hold elastic, then wrap a small section of hair from the ponytail around the base to hide the elastic
- Finish with a flexible hold spray (not a stiff one) that won’t make the hair feel sticky
Pro tip: If your swoop starts to droop after a few hours, you can discretely tap a bobby pin back into place from underneath without messing up your smooth finish — the horizontal pin angle makes it easy to add extra security mid-day.
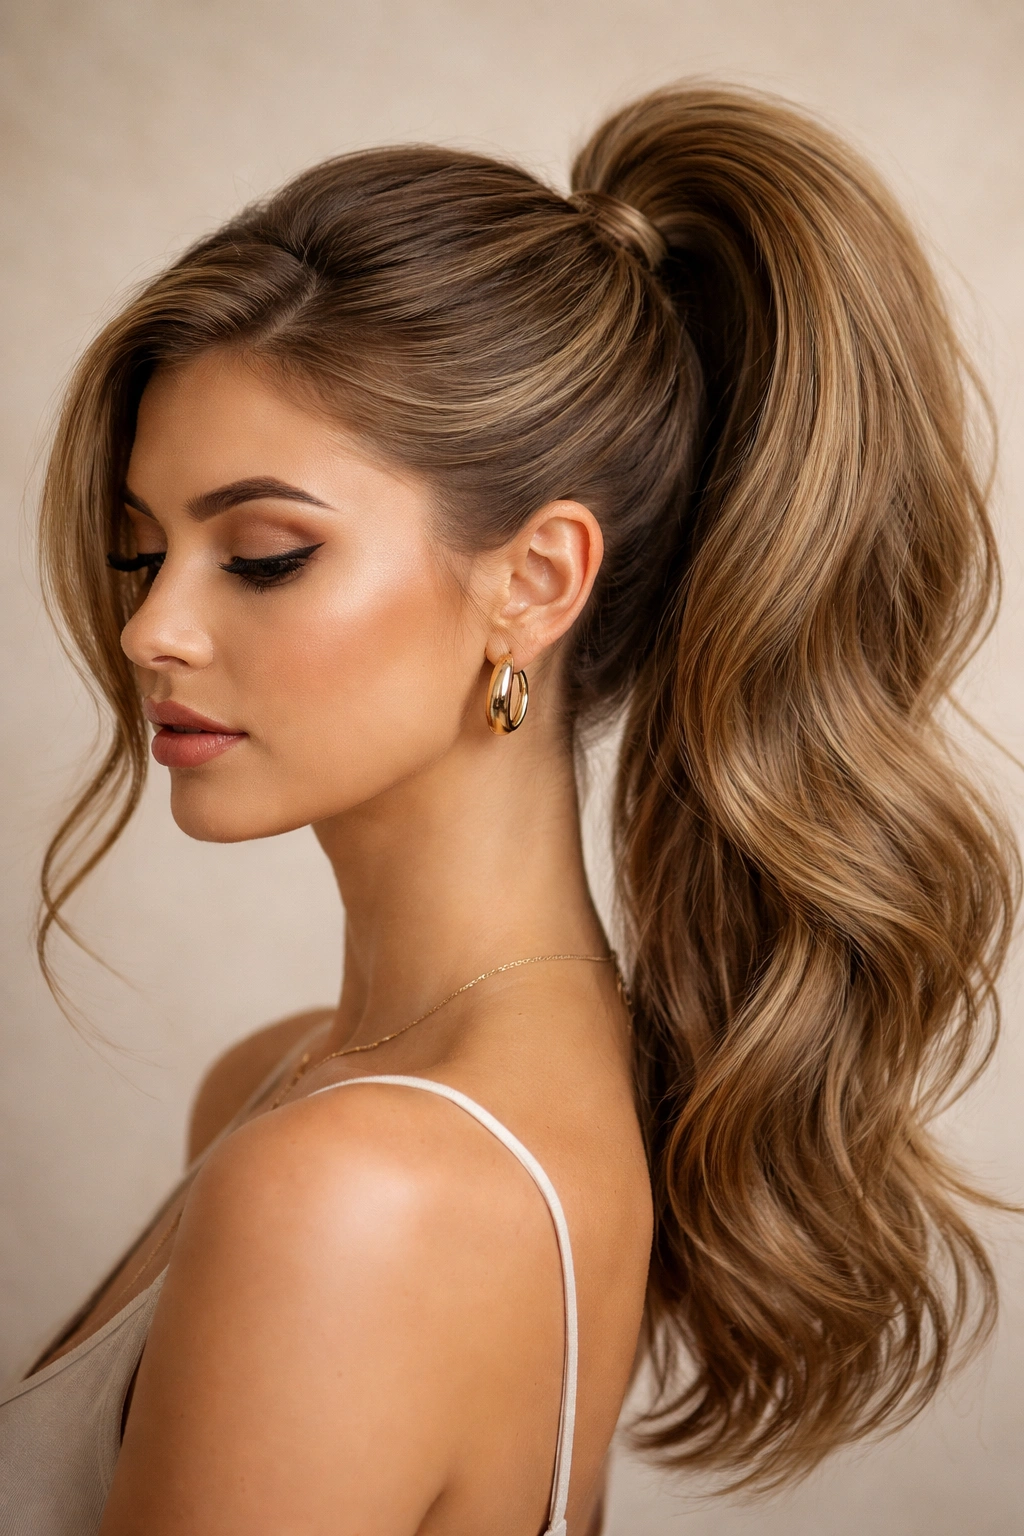
2. The Voluminous High Swoop

Here’s the opposite energy from the sleek version: full, bouncy, visibly textured volume that creates a swoop with real dimension and movement. The curve of this swoop is almost sculptural because it’s built on teased, backcombbed hair that creates a cushioned foundation. This style is perfect if you have fine or medium hair and want to create the illusion of much more thickness, or if you’re going for a polished-but-still-fun vibe rather than strictly sleek.
What Creates That Lasting Volume Structure
Backcombing is the secret here — it’s not about making hair look tangled, it’s about creating micro-texture that lets hair grip against itself. When you backcomb the crown and swoop area, you’re essentially creating thousands of tiny catch points where the hair fibers lock together. That interlocking texture holds the curve in place much more effectively than smooth hair does, because there’s natural friction resisting any movement or gravity. Add a volumizing mousse to damp hair before blow-drying, and you get air-lifted fibers that stay separated and bouncy rather than falling flat.
Building the Texture Without Looking Messy
- Apply volumizing mousse to the roots at the crown and swoop area while hair is damp
- Blow-dry with your head tilted to one side so the swoop area dries with maximum lift
- Once completely dry, gently backcomb just the swoop region with a fine-tooth comb — use short, quick strokes against the direction of hair growth
- Backcomb the crown area as well to create a cushioned base
- Lightly brush over the backcombed section with a paddle brush to smooth the surface while keeping the texture underneath
- Clip the swoop into place with bobby pins inserted into the backcombed texture
- Gather the ponytail, and use an elastic that grips well (a velvet elastic or one with a rubber coating works better than a smooth elastic on textured hair)
- Spritz with a medium-hold spray to set the texture
Worth knowing: This style benefits from being done on second-day hair that already has some natural oils and texture — freshly shampooed hair can be too slippery to backcomb effectively.
3. The Braided High Swoop
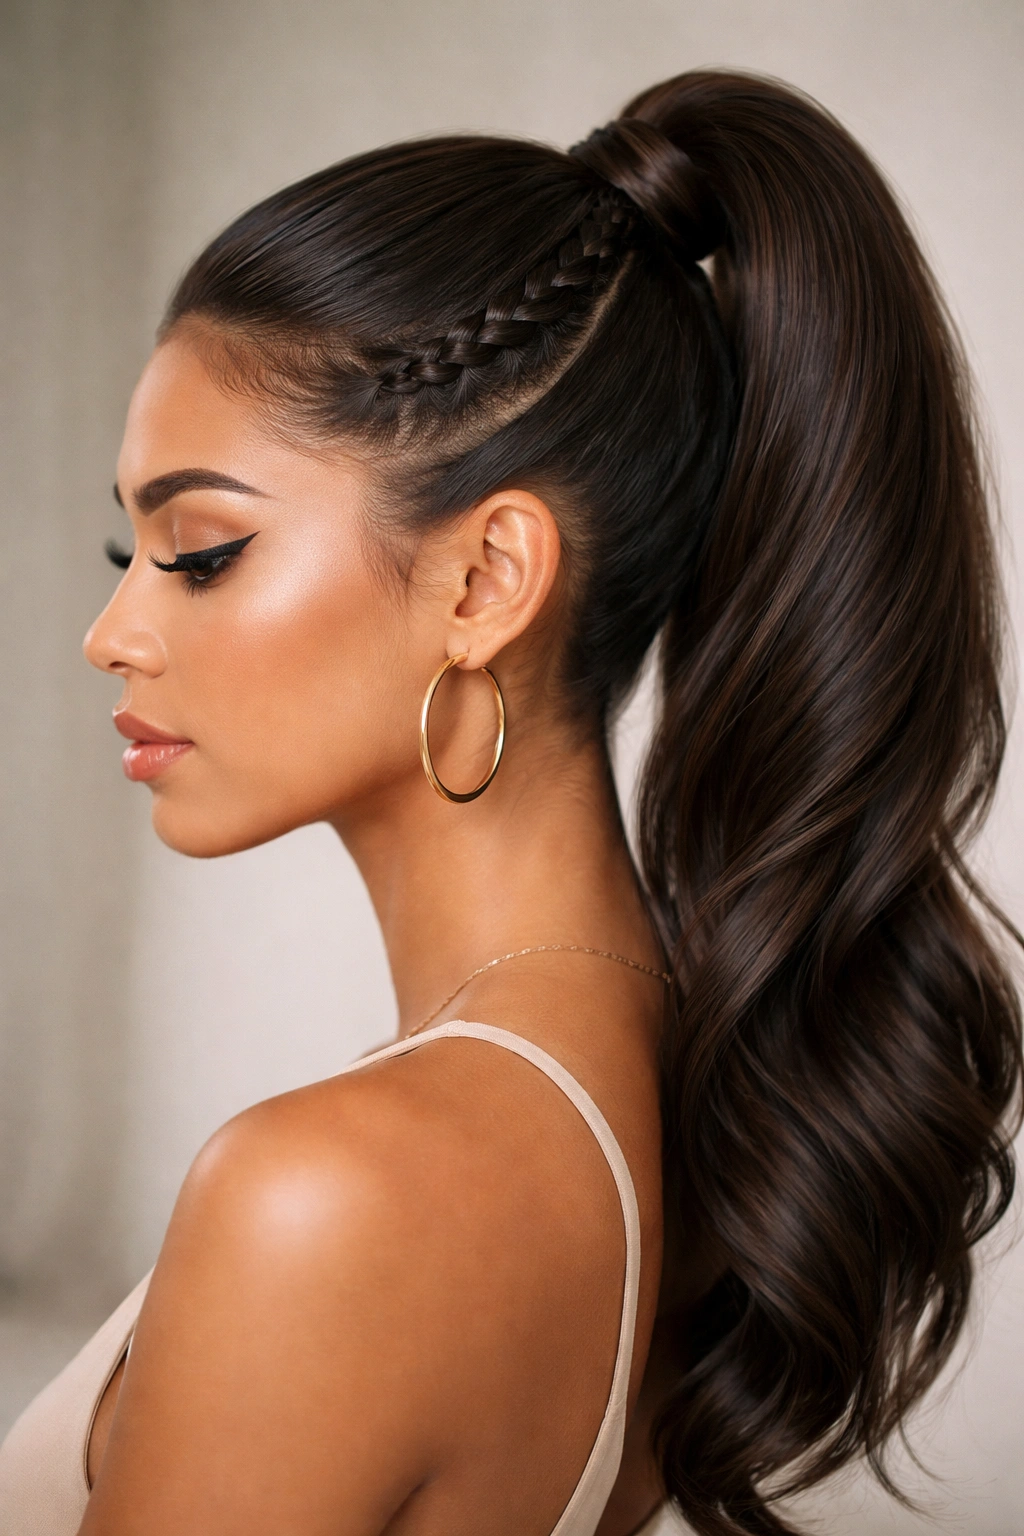
A braid running along the swoop curve adds both visual interest and mechanical holding power that’s genuinely hard to beat. The braid essentially becomes a built-in anchor — it creates its own secured pathway that guides the swoop and keeps it lifted. You can do this with a simple three-strand braid, a Dutch braid, or even a loose, wispy braid depending on your style preference. The braid starts at your temple or ear, weaves along the swoop curve, and feeds into the base of your ponytail.
How a Braid Keeps the Swoop Locked in Place
A braid is structurally brilliant for holding hairstyles because it compresses multiple sections of hair into a unified cord that’s physically very stable. When you braid along the swoop curve, you’re creating a internal supporting structure that can’t flatten or collapse the way unbraid hair can. The braid also acts as a visual guide that keeps the swoop’s curve consistent throughout the day — as long as the braid stays put, the swoop stays put. And because each strand in the braid is already secured by the other strands, you need far fewer bobby pins than you would with an unbraid swoop.
Creating a Braid-Based Swoop That Lasts
- Start the braid at one temple or just in front of your ear
- Use a thin Dutch braid (which sits slightly raised and looks elegant) rather than a regular three-strand braid, which can sit too close to the scalp
- Follow the natural curve where your swoop will sit, angling the braid back and upward as it travels across the crown
- Add hair to the braid as you go (you’re not doing a closed Dutch braid — you’re picking up sections as you move) so the braid is thick enough to anchor the swoop
- Once you reach the back of your head, gather the braid and any remaining hair into a ponytail
- Secure with a strong elastic — the braid is already doing so much of the holding work that you don’t need to over-tighten the elastic
- Pull small wisps of hair gently out of the braid to soften it, which makes it look less severe and more romantic
Pro tip: A braided swoop is especially effective on second-day hair because the slight greasiness helps the braid stay neat and the swoop grip better to your scalp.
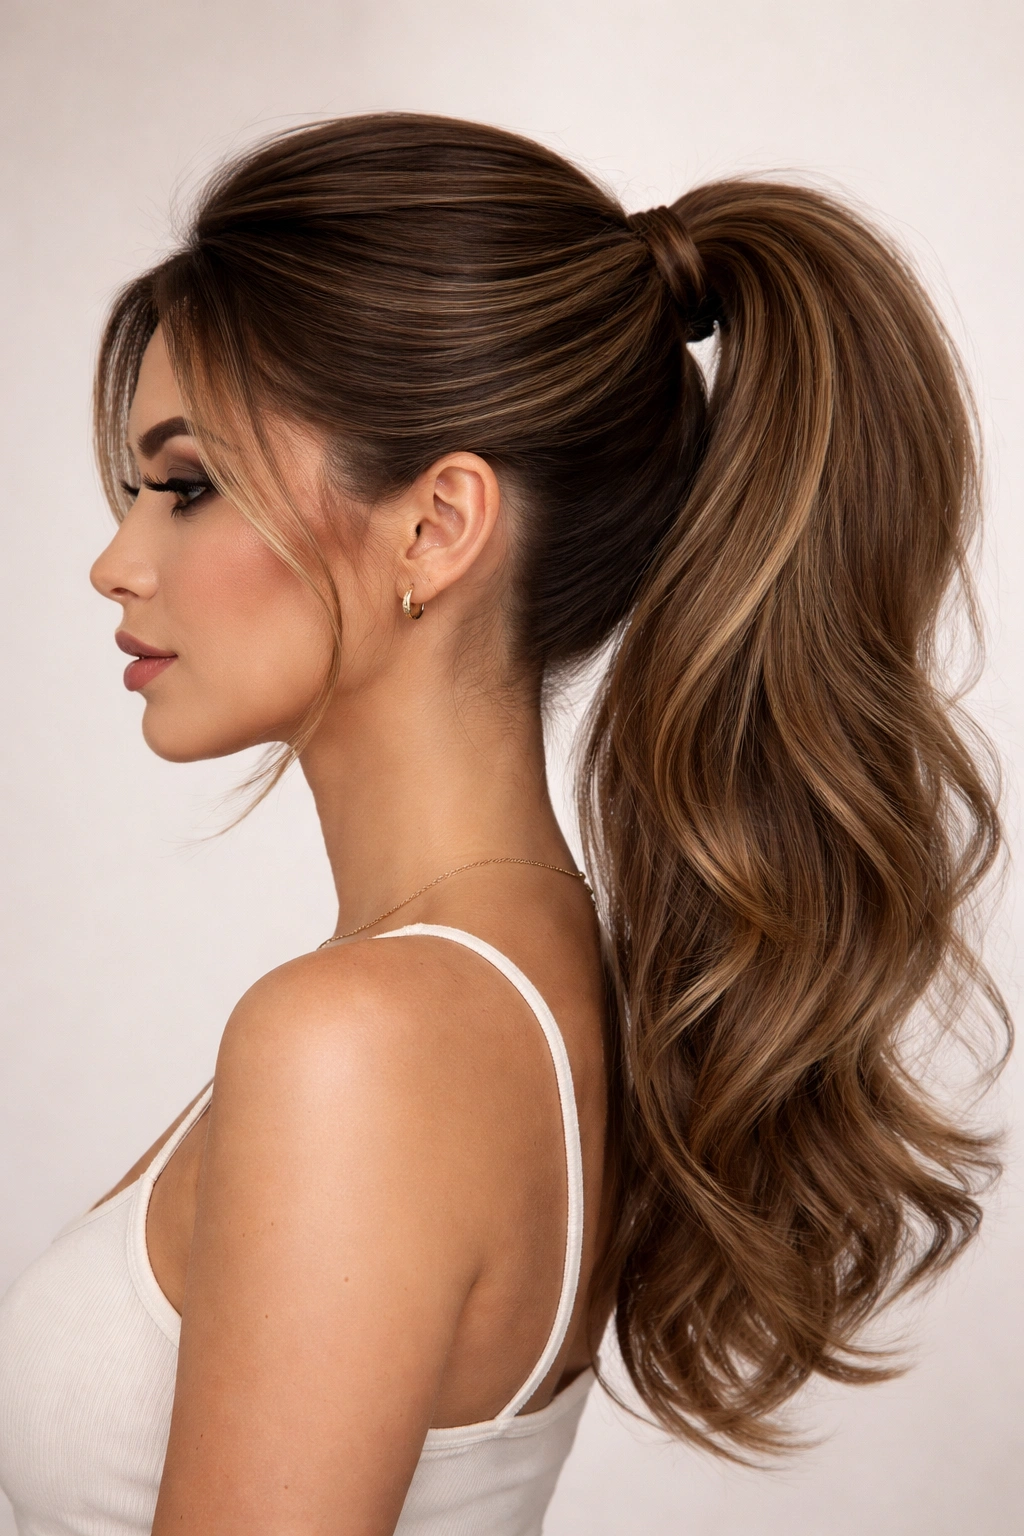
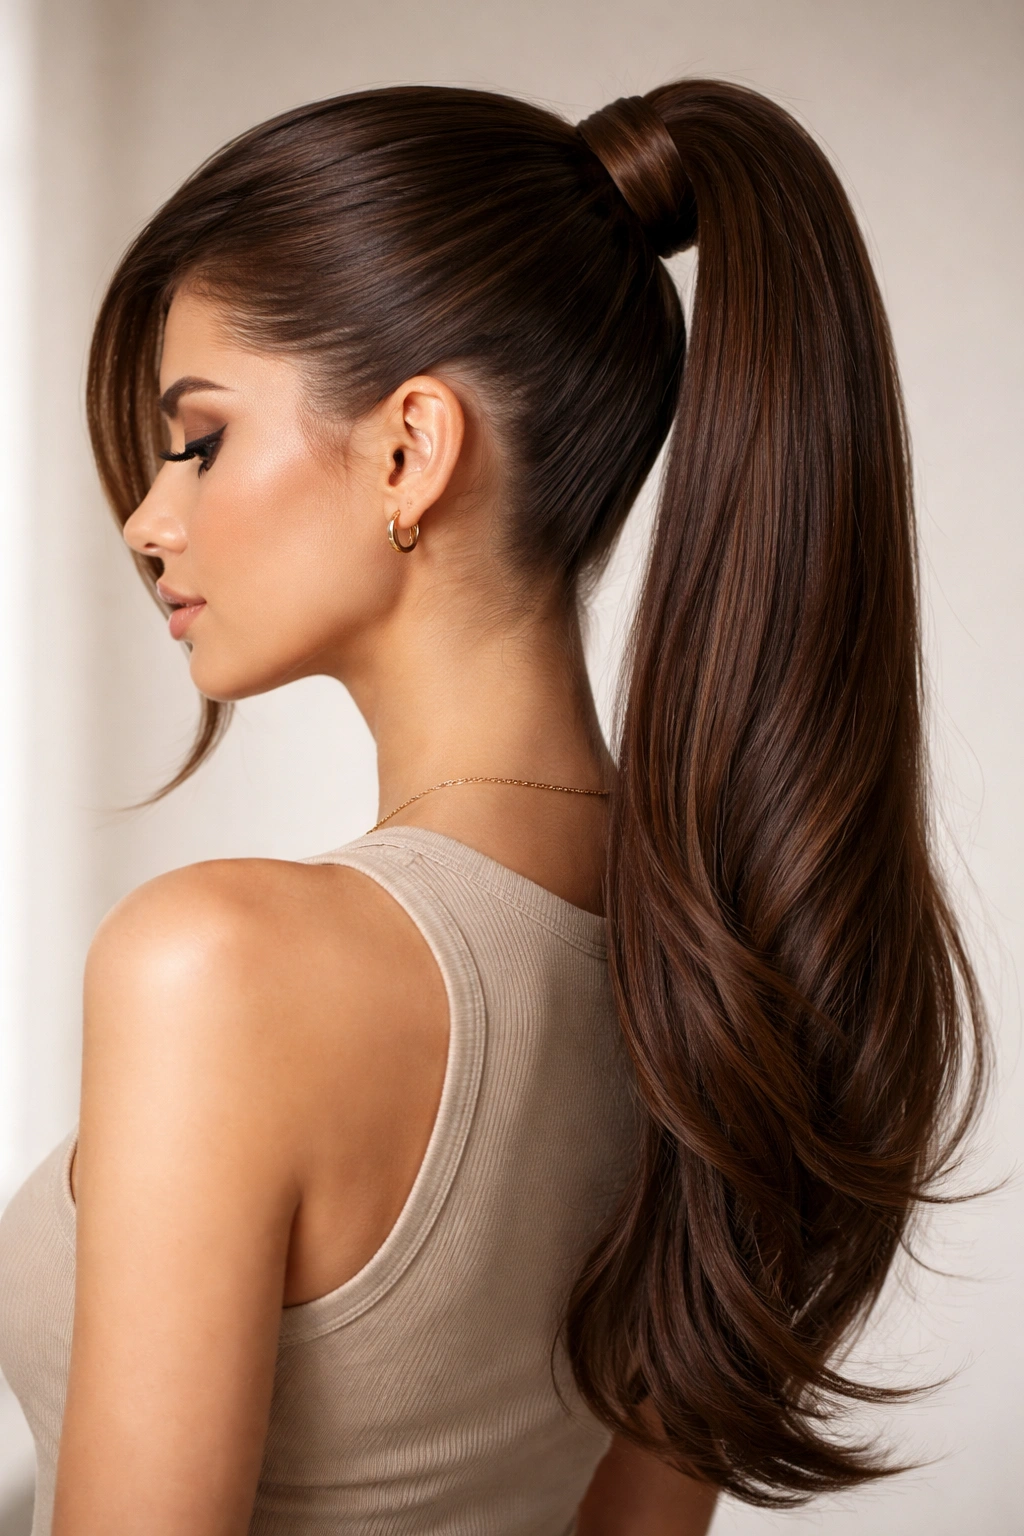
4. The Curved Swoop with Texture and Wave
This is the sweet spot between sleek and voluminous — your hair has genuine texture and wave, but it’s controlled and directional so the swoop curves perfectly rather than frizzing in random directions. You’re working with your hair’s natural texture here instead of fighting it, which automatically makes it easier to maintain all day. The wave gives the swoop weight and presence without requiring intense backcombing or flat-ironing.
Why Textured Hair Actually Holds a Swoop Better
Wave and texture create natural grip against your scalp because the hair fibers aren’t lying completely flat and smooth. Each wave form catches and holds against your skin, resisting gravity much more effectively than straight hair. The texture also tends to matte slightly where it’s pinned, which means bobby pins catch much more securely in waved hair than in slick, straight hair. And because you’re not fighting your hair’s natural texture, the swoop looks fresher and more natural throughout the day — it’s supposed to have movement, so natural loosening just makes it look intentional.
Styling a Textured Swoop That Stays Shaped
- Apply a curl-defining cream or wave cream to damp hair, focusing on the mid-lengths and ends
- Blow-dry with a diffuser attachment if you have natural waves, or use a regular nozzle if you’re creating waves with a wavy iron
- Once dry, use a 1.25-inch curling iron or wavy iron to create soft waves throughout, especially in the swoop region — you’re not going for tight curls, just gentle S-waves
- Direct the waves to curve in the direction of your swoop as you iron
- Let the waves cool completely before touching them (cooling sets the wave structure in place)
- Create the swoop by gently sweeping the waved section back and pinning with bobby pins — the wave texture grips automatically, so you need fewer pins
- Anchor the ponytail with a sturdy elastic
- Finish with a light texture spray (not heavy hairspray) to set the waves without making them look stiff
Worth noting: This style genuinely gets better as the day progresses — the waves relax slightly and look even more natural and effortless by evening.
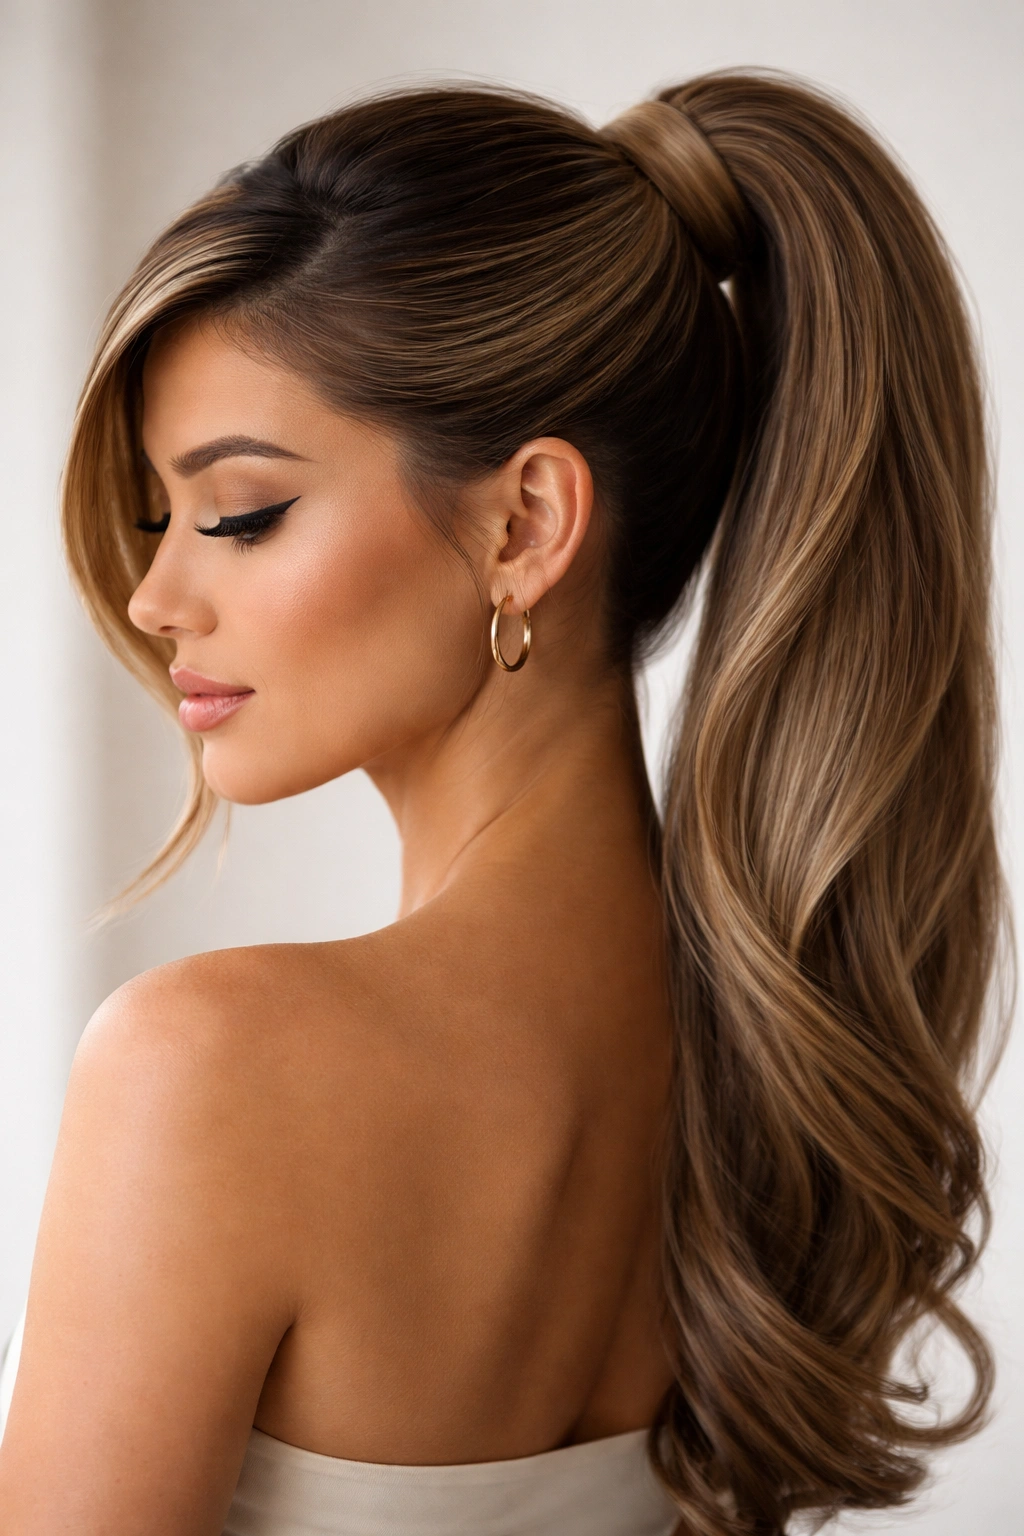
5. The Twisted High Swoop
Two or three twisted sections create a swoop that’s both visually interesting and mechanically bulletproof. A twist is essentially a two-strand braid, and like all braided structures, it creates its own support system that resists gravity and keeps the swoop lifted. You can twist the entire swoop section, or you can do two smaller twists that spiral into the ponytail base. This style works especially well on medium to thick hair, and it’s forgiving enough that slight unraveling just makes it look softer and more romantic.
The Holding Power of Twisted Hair
A twist is deceptively strong because two strands of hair intertwined create a unified structure that doesn’t easily separate or flatten. Unlike a braid, which has three strands and looks slightly more formal, a twist feels modern and effortless. The twist also compresses the hair slightly, which means it mats together just enough to grip both your scalp and any bobby pins you use. And because you’re twisting, you’re also naturally shortening the length of that hair section, which means less weight pulling down on the swoop curve.
Building Twists Into a Reliable Swoop
- Start at one temple or ear with a small section of hair roughly 1.5 inches wide
- Divide this section into two strands
- Twist the two strands around each other, adding small sections of hair as you move backward along the swoop curve
- Continue twisting until you reach the back of your head
- You can do a second twist (starting from a different point) that spirals in and meets the first twist, or just do one thicker twist depending on your hair thickness and style preference
- Secure both twists together with the rest of your hair into a single ponytail
- Use bobby pins to anchor the visible twist sections to your head as you go
- Tighten the ponytail with a secure elastic
- Optional: gently pull small wisps out of the twists to soften the overall look
Pro tip: If you do two separate twists that spiral into the ponytail, they create an almost sculptural effect that’s immediately eye-catching and also basically impossible to flatten throughout the day.
6. The Curved Side Swoop
Instead of a central high ponytail, this version sweeps your hair to one side of your head, creating an asymmetrical swoop that sits lower and flows down toward your opposite shoulder. The ponytail itself sits at the back-side of your head rather than directly at the nape. This style is brilliant for people with one side of their face they prefer to show, or for anyone who wants a swoop that reads as more fashion-forward and less traditionally polished.
Why Asymmetrical Scoops Hold Without Extra Effort
The sheer weight and length of a side ponytail actually becomes a holding asset rather than a problem. The ponytail’s weight naturally pulls the swoop into place and keeps it pressed against your head. Because the ponytail sits to the side rather than directly below, gravity works with you instead of against you — the swoop isn’t fighting a downward pull; it’s being stabilized by lateral tension. Side scoops are also very forgiving because movement and slight loosening actually make them look more relaxed and intentional.
Creating a Side Swoop That Maintains Its Shape
- Blow-dry your hair smooth or with slight waves, depending on the vibe you want
- Part your hair on one side, allowing more hair to fall toward the side where the swoop will be
- Starting at the opposite temple, begin sweeping hair back and around toward the side ponytail point
- The swoop should curve gradually, not sharply — think of it as a gentle crescent shape
- Gather the ponytail at a point roughly behind your right ear (or left, depending on which direction your swoop goes)
- Use bobby pins along the swoop curve to anchor it, angling the pins so they follow the curve of your swoop
- Secure the ponytail with a thick elastic that will grip the hair well
- You can leave the ponytail straight and sleek, braid it, or curl it — all versions hold well with a side placement
Worth knowing: Side scoops are especially effective on fine or thin hair because the asymmetrical gathering means less hair is bunched in one spot, so the ponytail doesn’t feel as heavy or look as thin.
7. The Layered Swoop Ponytail
Instead of gathering all your hair into one ponytail, you create the swoop with just the top layers of your hair, leaving the underneath layers down. This creates a stunning multi-dimensional look where the swoop sits on top like a crown, and the rest of your hair falls freely underneath. The visual impact is immediate and fashion-forward, and the holding mechanism is brilliant because the swoop section has far less weight pulling on it.
Why Removing Weight Makes Everything Hold Better
This is pure physics: a swoop with only half your hair’s weight is dramatically easier to keep lifted and in place than a swoop holding all your hair. You can use lighter bobby pins, a lighter elastic, and less product. The section you are swooping is also sitting on top of a stable base (the unswooped layers), which acts like a cushion that helps prevent the swoop from slipping. Plus, because the visual effect is so striking, any slight loosening or softening of the swoop throughout the day just makes it look more intentional and relaxed.
Creating a Layered Swoop With Clear Separation
- Create a clean horizontal part at roughly ear level, running from one ear to the other and around the back of your head (this is where the layering happens)
- Leave the bottom section down completely — blow-dry it smooth or add waves, whatever your style is
- Work only with the top section to create your swoop
- Create the swoop as you normally would with this top-layer section, using bobby pins to anchor the curve
- Gather just the top section into a ponytail at the base of your swoop
- The bottom section stays down around your shoulders — you can curl it, leave it straight, or braid it
- Secure both sections with different elastics at different points, or use a single elastic that catches both
- For the most polished look, make sure the line where the swoop section begins is clean and intentional
Pro tip: This style is especially stunning if you do a sleek swoop on top and loose waves on the bottom section — the contrast between structured and relaxed creates a really high-impact look.
8. The Wrap-Around Swoop
Instead of using bobby pins to anchor the swoop, you create it by literally wrapping a section of hair around your head like a band. You section off the swoop area, sweep it across, and then wrap it around the back of your head where it’s secured by being tucked into the ponytail. This creates a look that’s almost like a soft crown, and the wrapping mechanism is genuinely unbreakable because the hair is physically wound around your skull.
How Wrapping Creates Mechanical Security
When hair is wrapped around your head, gravity can’t pull it down because it’s already anchored at both ends — the starting point and the ending point where it tucks into the ponytail base. The wrapping also creates compression that makes the hair matt together slightly, which adds grip. And because you’re not relying on bobby pins, there’s no risk of pins sliding out or losing grip as the day goes on. The wrapped hair essentially becomes part of the structure that holds the ponytail secure, so the more securely you anchor the ponytail, the more secure the swoop becomes.
Executing a Wrap-Around Swoop
- Section off the area where your swoop will start — usually from one temple or ear going back
- Create the section by clipping the rest of your hair out of the way
- Take this section and sweep it smoothly back and around your head in a gentle curve
- As you bring it around to the back, position it so it will wrap around the base of where your ponytail will be
- Continue wrapping until the end of the swoop section reaches the opposite side of your head
- Now gather your remaining hair (the swoop section and any hair left down) into a ponytail
- As you secure the ponytail with an elastic, tuck the end of the swoop section underneath the elastic so it’s anchored in place
- The wrapped section will sit around your head like a gentle band, and the ponytail will sit right where it starts
- You can leave the ponytail smooth, braid it, or curl it — the wrapping holds regardless
Worth knowing: This style works beautifully with second-day hair that has a bit of natural grip and texture, because the wrap holds better when there’s slight friction between hair layers.
9. The Bouffant High Swoop
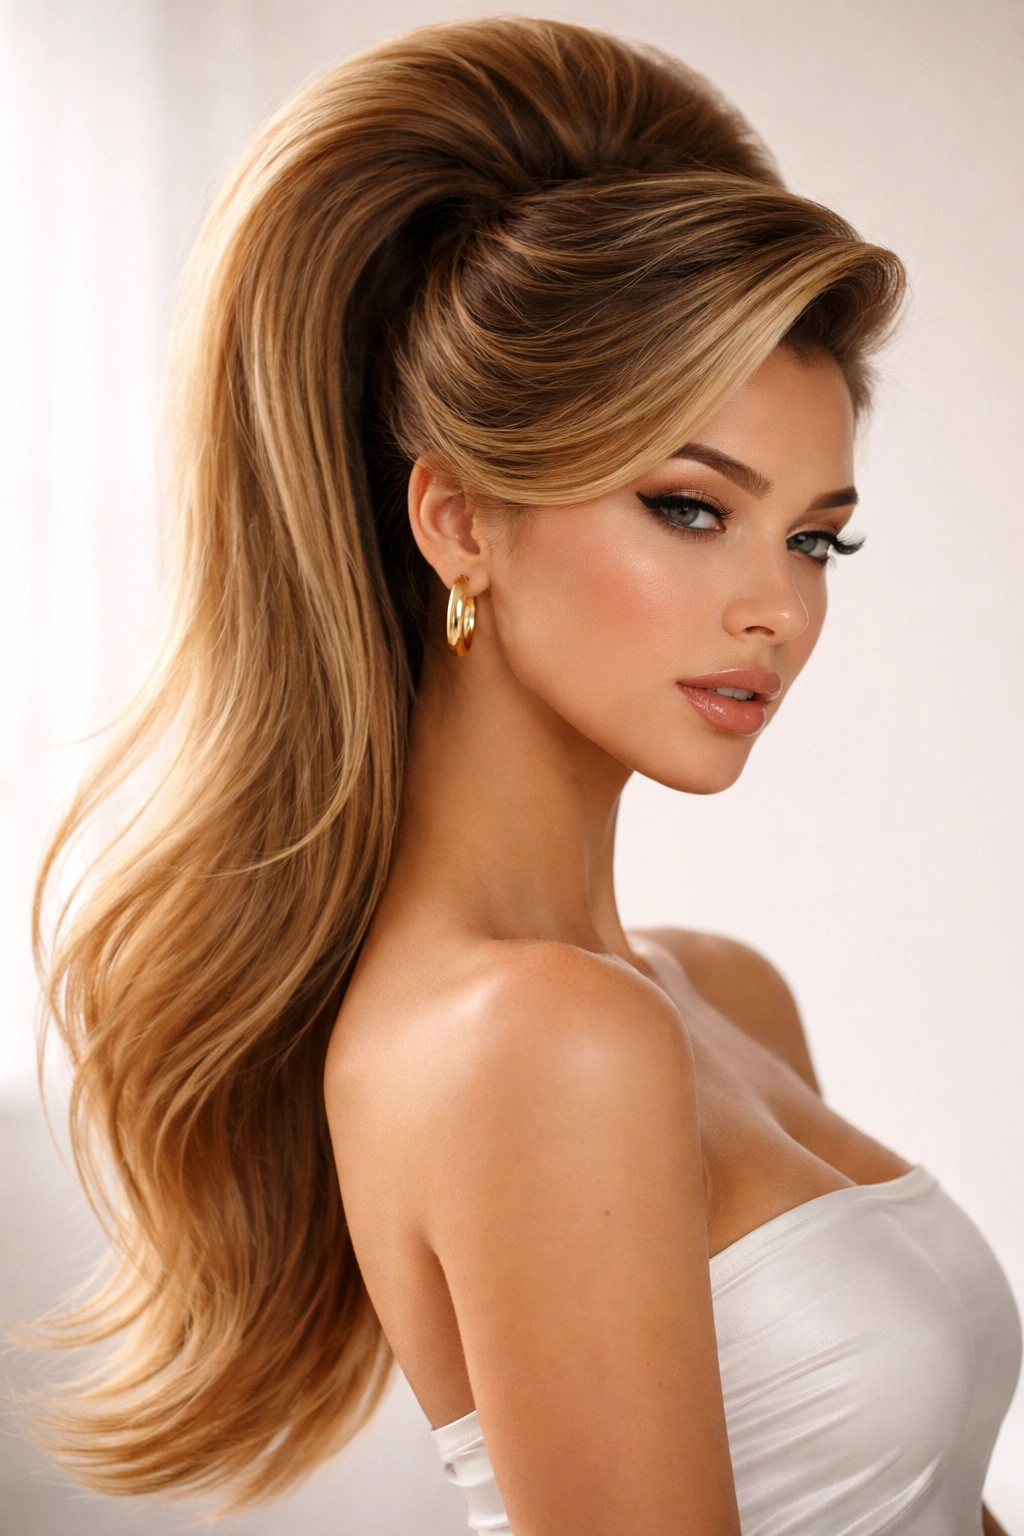
Maximum volume at the crown combined with a swoop that’s exceptionally full and rounded — this is the most dramatic, most eye-catching version of the swoop ponytail. You’re creating genuine bouffant structure at the crown (big, gravity-defying volume), and then the swoop curves down from that voluminous base. This style is perfect if you want seriously polished, seriously styled hair, and you don’t mind spending a few extra minutes on the creation and a bit more product on the hold.
Why Bouffant Structure Creates Unshakeable Scoops
A bouffant is built on heavily backcombed, teased hair that’s smoothed on the surface but massively textured underneath. That internal texture creates an incredibly stable structure that doesn’t collapse or flatten easily. When you build a swoop from a bouffant base, you’re starting with hair that’s already stabilized, so the swoop sits on a cushion of texture and volume that naturally resists gravity. The bouffant also raises your swoop starting point higher on your head, which means less distance for gravity to pull. And because the overall effect is so visibly styled and intentional, the bouffant reads as intentionally voluminous all day long, even as it gradually relaxes slightly.
Building a Bouffant-Based Swoop
- Apply volumizing mousse to damp hair at the crown and throughout
- Blow-dry with your head tilted forward to maximize lift at the roots
- Once completely dry, section off the area directly above your crown and clip the rest away
- Using a fine-tooth backcomb or teasing brush, gently backcomb this section with short strokes against the direction of hair growth — work from the scalp upward
- Create volume all the way across the crown section, not just one small spot
- Gently smooth the top surface of the backcombed section with a paddle brush so it looks polished rather than teased
- Clip this voluminous section up temporarily
- Now release your swoop-area section and backcomb it as well, though not quite as aggressively — you want the swoop to be full but slightly more refined than the crown
- Create the swoop by sweeping this full, textured section back and up toward the bouffant crown
- Pin the swoop securely into the bouffant structure using bobby pins — the bobby pins will grip the backcombbed texture firmly
- Gather everything into a high ponytail and secure with a strong elastic
- Smooth the surface of the bouffant gently with a brush so it looks polished
- Set everything with a flexible-hold hairspray that won’t make the hair feel stiff
Pro tip: A bouffant swoop is one of the few styles that genuinely improves throughout the day as it relaxes slightly — it’s massive and perfect right after styling, and by evening it looks effortlessly gorgeous without looking droopy.
10. The Curved Swoop With Accessories
This version emphasizes that your swoop is intentional and styled by adding an accessory — a hair clip, a decorative comb, a pearl barrette, a ribbon, or even an ornate bobby pin — right into the swoop curve or at the base of the ponytail. The accessory isn’t just decorative; it actually helps anchor and hold the swoop in place by providing an additional grip point. You can hide the accessory (so it reads as minimal and elegant) or make it a statement (so it’s obviously intentional and adds visual interest).
How Accessories Provide Both Function and Hold
An accessory placed strategically into the swoop curve essentially works as an additional anchor point that spreads the load and keeps the hair from shifting. A metal hair clip grips hair more firmly than a single bobby pin does, and it covers a larger area. A decorative comb has teeth that catch the hair’s texture and hold it securely. And because an accessory is visible (or partially visible), it signals that the swoop is intentional and styled, which makes any natural loosening throughout the day read as intentional relaxation rather than hair falling out.
Styling a Swoop That Centers an Accessory
- Create your swoop using your preferred method (smooth, textured, twisted, etc.)
- As you pin the swoop, leave one or two bobby pins out of the most visible part of the curve
- Insert your accessory (a clip, comb, or barrette) into the swoop at this point, positioning it so it catches the hair securely
- The accessory should sit roughly where a bobby pin would, anchoring the swoop curve
- You can use the accessory as your only visible anchor (removing other bobby pins from that area) or combine it with hidden pins for extra security
- Gather your ponytail as usual and secure with your elastic
- The accessory both holds the swoop and makes it clear that you’ve intentionally styled
- Optional: add a second coordinating accessory at the base of the ponytail (a hair cuff, a scrunchie, or a bow) to create a coordinated look
Worth knowing: Metallic clips and tortoiseshell combs read as instantly polished and work with almost any outfit, while decorative bows or ribbons add a playful, romantic element.
11. The Tousled Swoop Ponytail
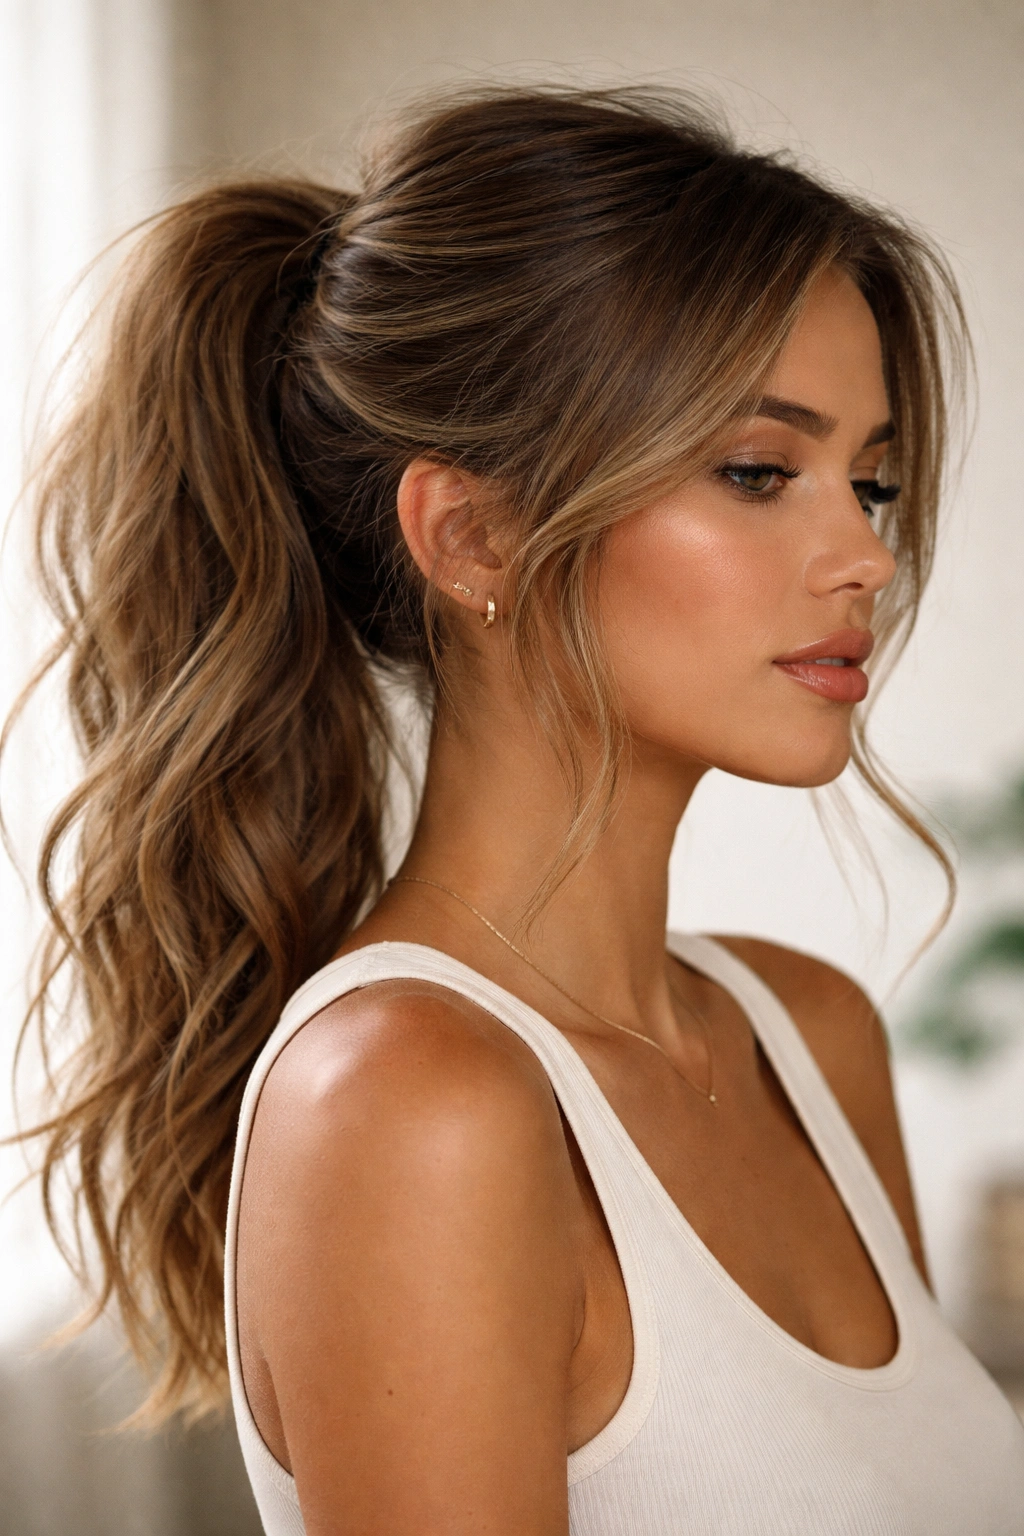
This version prioritizes a deliberately undone, lived-in aesthetic where the swoop is still clearly shaped but looks like it happened by accident rather than by design. Your hair has visible texture, slight waves, and isn’t smoothed to a shine — it reads as effortlessly beautiful rather than painstakingly styled. This is perfect for everyday wear, when you want to look put-together but not overdone, or when you’re working with curly or textured hair and want to lean into it rather than fight it.
Why Relaxed Texture Makes Scoops More Forgiving
Textured, slightly undone hair is actually more forgiving and holds better than you’d think. The texture creates natural grip, the slight waves guide the swoop curve naturally, and movement looks intentional rather than messy. Because the overall vibe is relaxed, any softening or loosening throughout the day just makes the swoop look even more effortlessly beautiful — it’s supposed to look slightly tousled. You also need fewer products (no slicking gel, no stiff hairspray) which means less weight and less stiffness, and ironically, that makes the swoop more stable because there’s less product drag.
Creating a Tousled Swoop
- Blow-dry your hair with a regular nozzle (not a diffuser), directing air loosely in the general direction of your swoop
- Don’t try to smooth or perfectly shape the swoop area while blow-drying — just let it dry with natural movement
- Once dry, use a texture spray (a sea salt spray or matte spray works perfectly) throughout your hair, focusing on the lengths and ends to add grit and definition
- Create your swoop by gently sweeping the textured section back, not smoothing it or trying to make it sleek
- Pin the swoop using bobby pins, but don’t aim for invisibility — let the pins sit where they naturally fall
- Gather the ponytail, and use a soft elastic (a velvet elastic or a fabric scrunchie) rather than a tight, shiny elastic
- You can leave the ponytail straight, add loose waves with a curling iron, or even braid it — all versions of tousled scoops work well with slightly undone styling
- Finish with a light texture spray rather than a heavy hairspray — you’re setting the tousled vibe, not gluing anything in place
Pro tip: Tousled scoops actually stay in place better throughout the day than heavily styled versions because there’s less product weight and the texture creates natural grip.
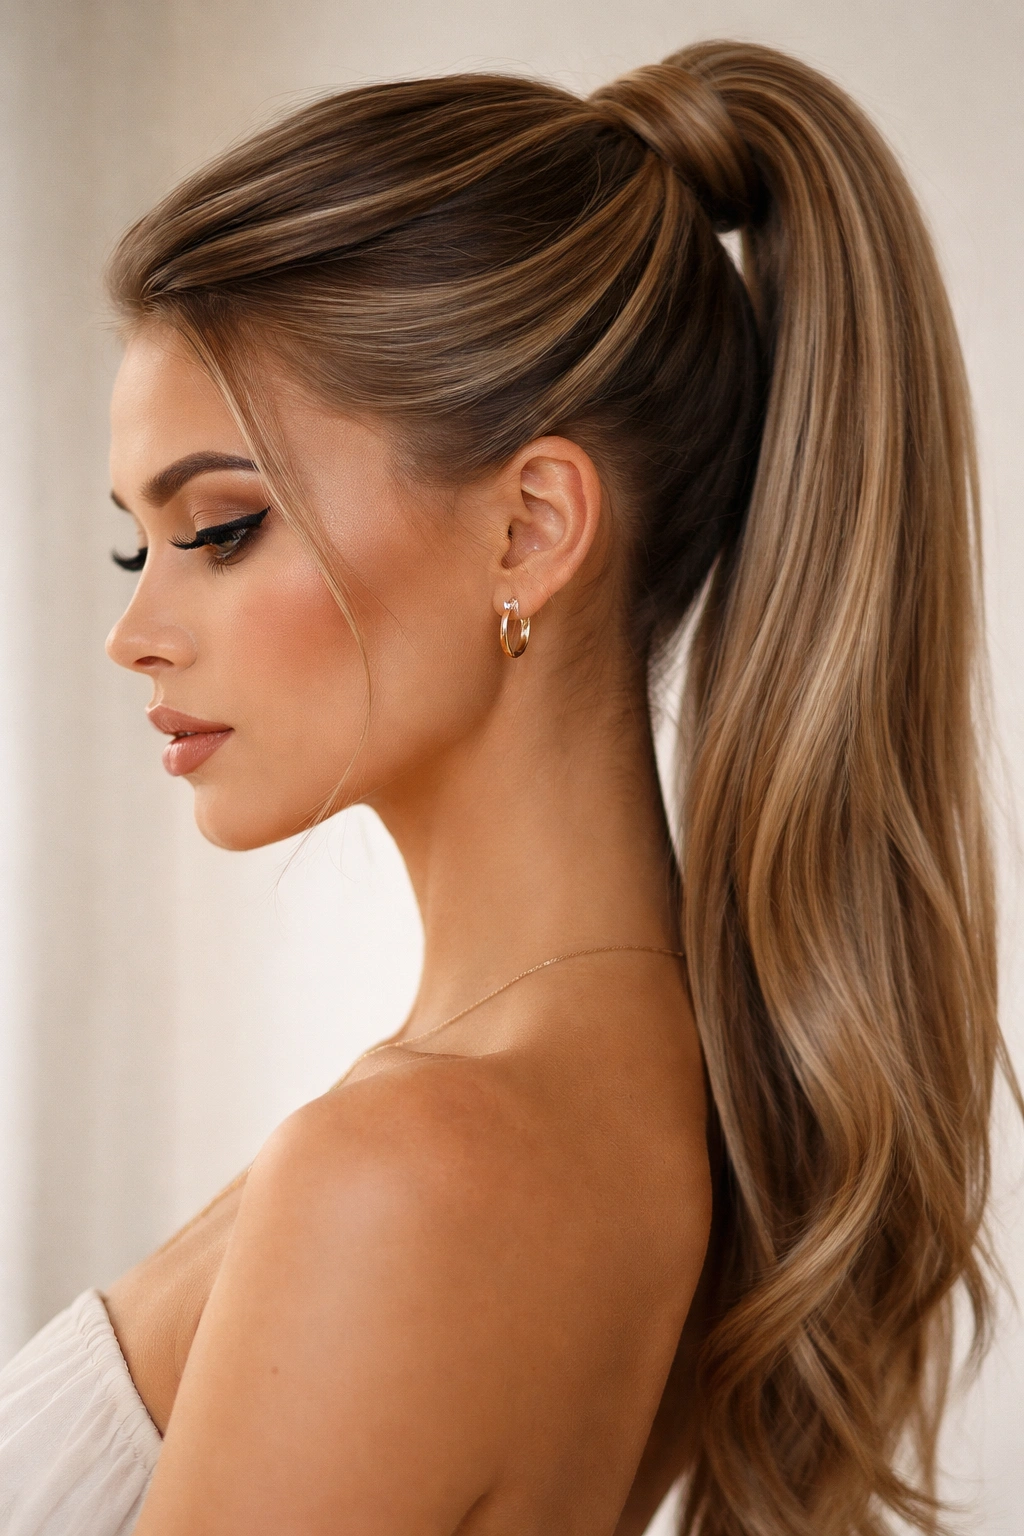
12. The Sleek Low-to-High Swoop
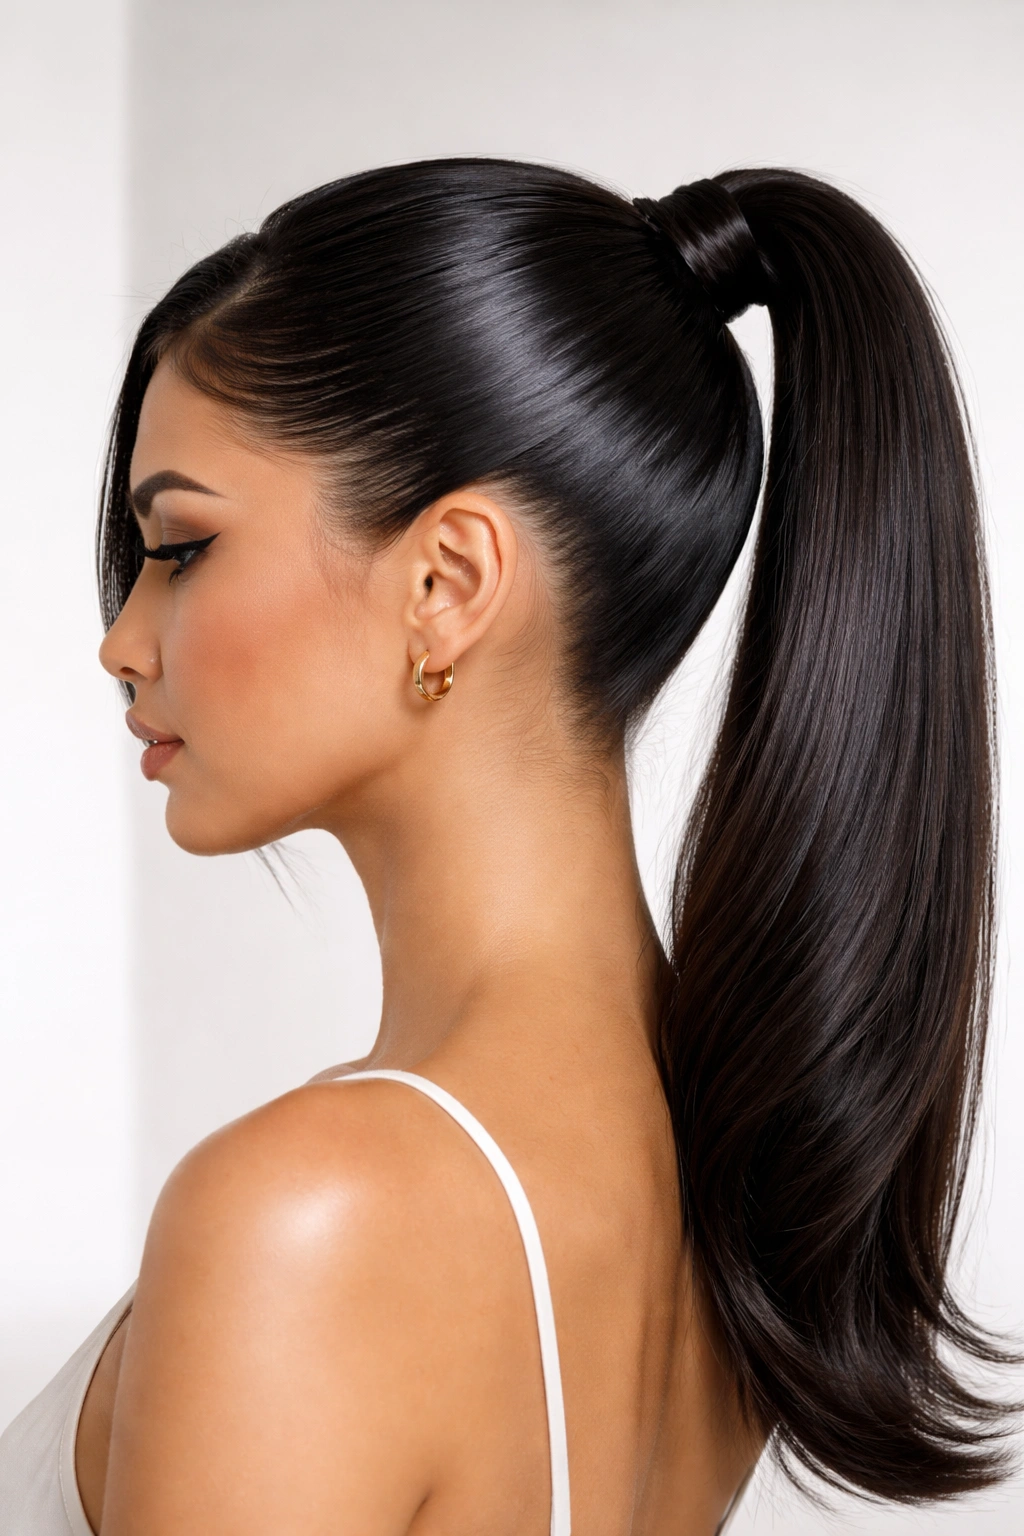
This version starts your swoop lower (roughly ear level) and sweeps it up and back at a steep angle, creating a dramatic upward curve instead of the gentle, horizontal swoop of traditional styles. The visual effect is modern and graphic, and the mechanics are brilliant because the upward angle naturally creates tension that keeps the swoop pressed against your head. This style is perfect if you want something that reads as immediately fashion-forward and also happens to be one of the most secure swoop variations.
Why an Upward Angle Creates Superior Hold
When your swoop curves upward rather than horizontally, gravity actually works with you instead of against you. The ponytail sits high enough that its weight pulls the swoop up along the back of your head rather than pulling it down and away. The angle also creates internal tension throughout the swoop section — the hair is constantly pulling back toward the gathering point, which keeps the curve locked in place. This is also one of the few swoop styles where you can get away with minimal bobby pins because the angle and the weight distribution do most of the holding work.
Creating a Steep, Secure Upward Swoop
- Blow-dry your hair smooth or with slight waves, depending on your style preference
- Create a section starting from one ear or temple, angling upward and back
- This section should curve upward dramatically rather than sitting flat — imagine you’re drawing a steep arc across your head
- Smooth the swoop section with a flat iron, directing the iron to follow the upward angle
- Begin pinning the swoop, starting at the lower point and working backward, following the upward curve
- Pin strategically: you need more pins at the lower part of the swoop (where gravity pulls harder) and fewer pins at the upper sections
- Gather all your hair into a very high ponytail — higher than you might normally do — which emphasizes the dramatic swoop angle
- Secure with a strong elastic that won’t slip
- Wrap a small section of hair from the ponytail around the elastic to hide it and add polish
- You can leave the ponytail sleek and glossy, or add soft waves for contrast
- Finish with a flexible-hold spray that won’t weigh down the swoop
Worth knowing: This style is especially stunning on people with medium to long hair, because the length allows for a more dramatic upward arc and creates more visual impact.
Final Thoughts
A swoop ponytail that holds strong all day isn’t actually about luck or impossibly good hair genetics — it’s about matching your swoop style to your hair type, understanding the mechanical principles that make each style secure, and using the right products and techniques for that specific swoop. Some of these scoops rely on weight distribution and angle (the side swoop and the low-to-high swoop), others depend on texture and grip (the braided swoop and the bouffant), and some work because of how you’re anchoring and pinning (the wrap-around and the layered versions).
The key is to pick a swoop that genuinely matches your lifestyle and how much styling time you’re willing to invest. If you’re going for effortless and minimal product, the tousled swoop and the curved swoop with wave are your best bets. If you have the time and you love the drama of a fully styled look, the bouffant swoop and the braided swoop deliver impact that lasts. And if you’re somewhere in the middle and just want something that looks polished and feels secure, the sleek high swoop and the twisted swoop are reliable choices that work beautifully whether you’re at a desk, at the gym, or running errands all afternoon.
The real secret is that any of these scoops will stay put if you nail the fundamental technique: smooth or textured base (depending on your chosen style), bobby pins inserted at the right angle and catching actual texture, a secure elastic, and the right lightweight or moderate-hold product for your swoop type. Master those basics, pick your swoop, and you’ll finally get to the end of the day wondering why this hairstyle ever seemed difficult in the first place.