There’s something about a middle part that instantly elevates your entire look — it’s the kind of detail that seems small until you try it, and then you wonder how you ever styled your hair any other way. When you pair a center part with a sleek ponytail, especially if you have straight hair, you unlock a style that works equally well for casual weekday errands, professional settings, or polished evening plans. The geometry is just right. The balance feels intentional. And straight hair, with its natural smooth texture and ability to hold clean lines, is essentially the ideal canvas for this particular look.
The beauty of a middle part ponytail is its versatility within a unified aesthetic — you can dial the polish up or down depending on occasion, play with height and placement, add texture or keep things minimal, and still maintain that cohesive, intentional vibe that a center part creates. Whether you’re drawn to sleek, severe styling or prefer something with movement and dimension, there’s a middle part ponytail version waiting for you.
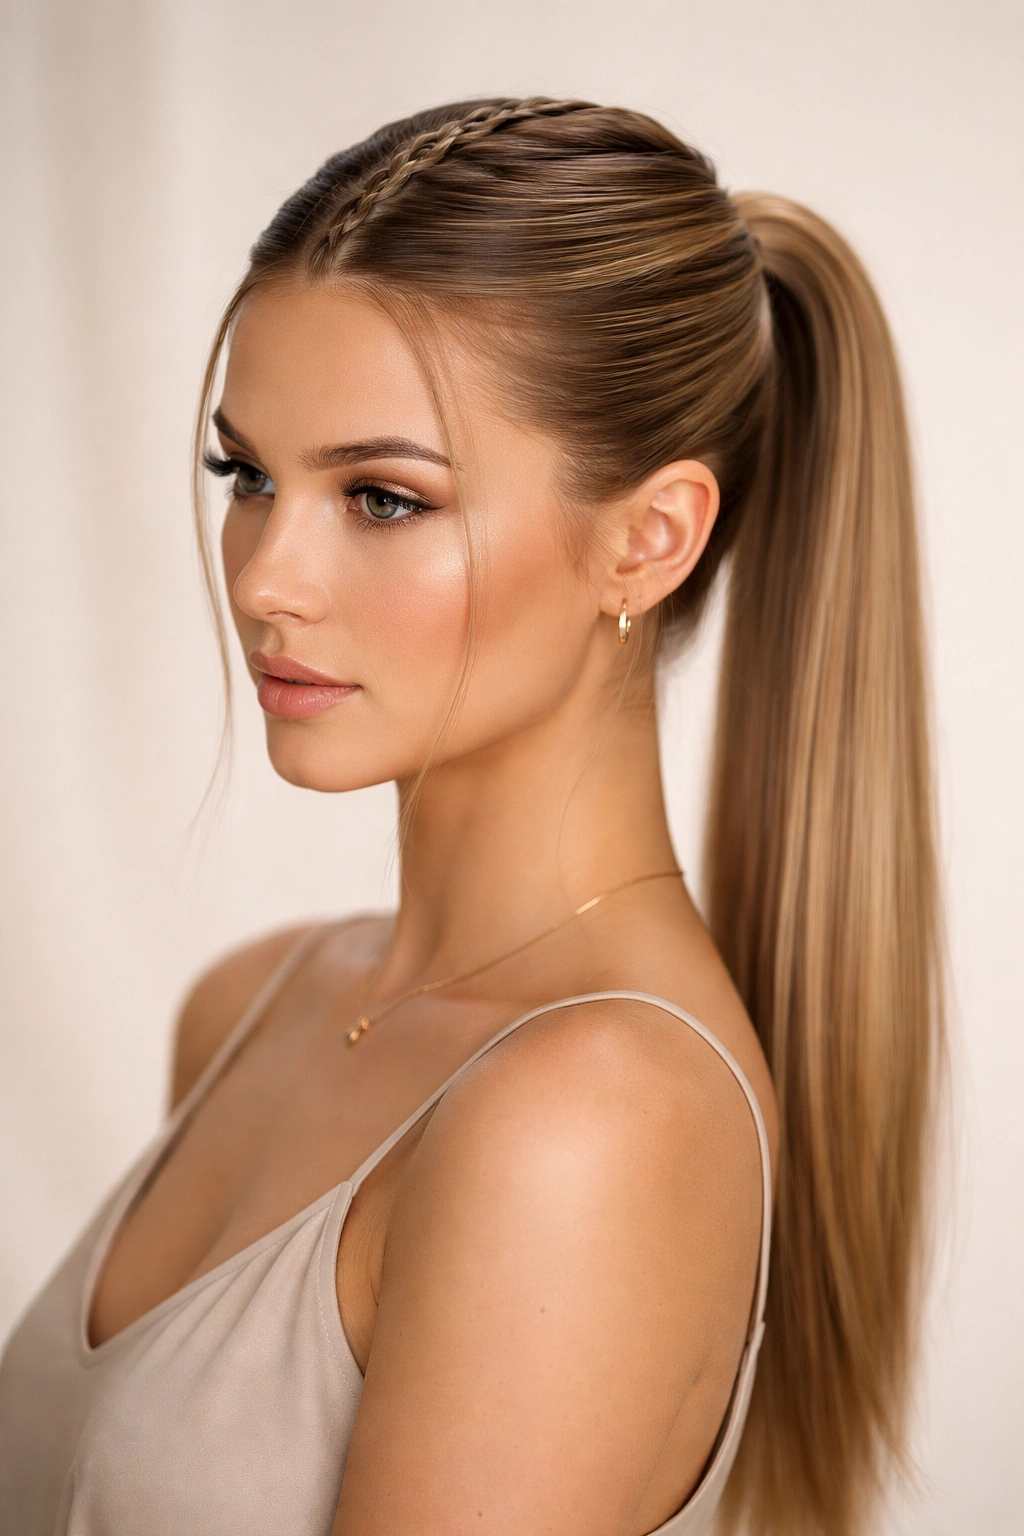
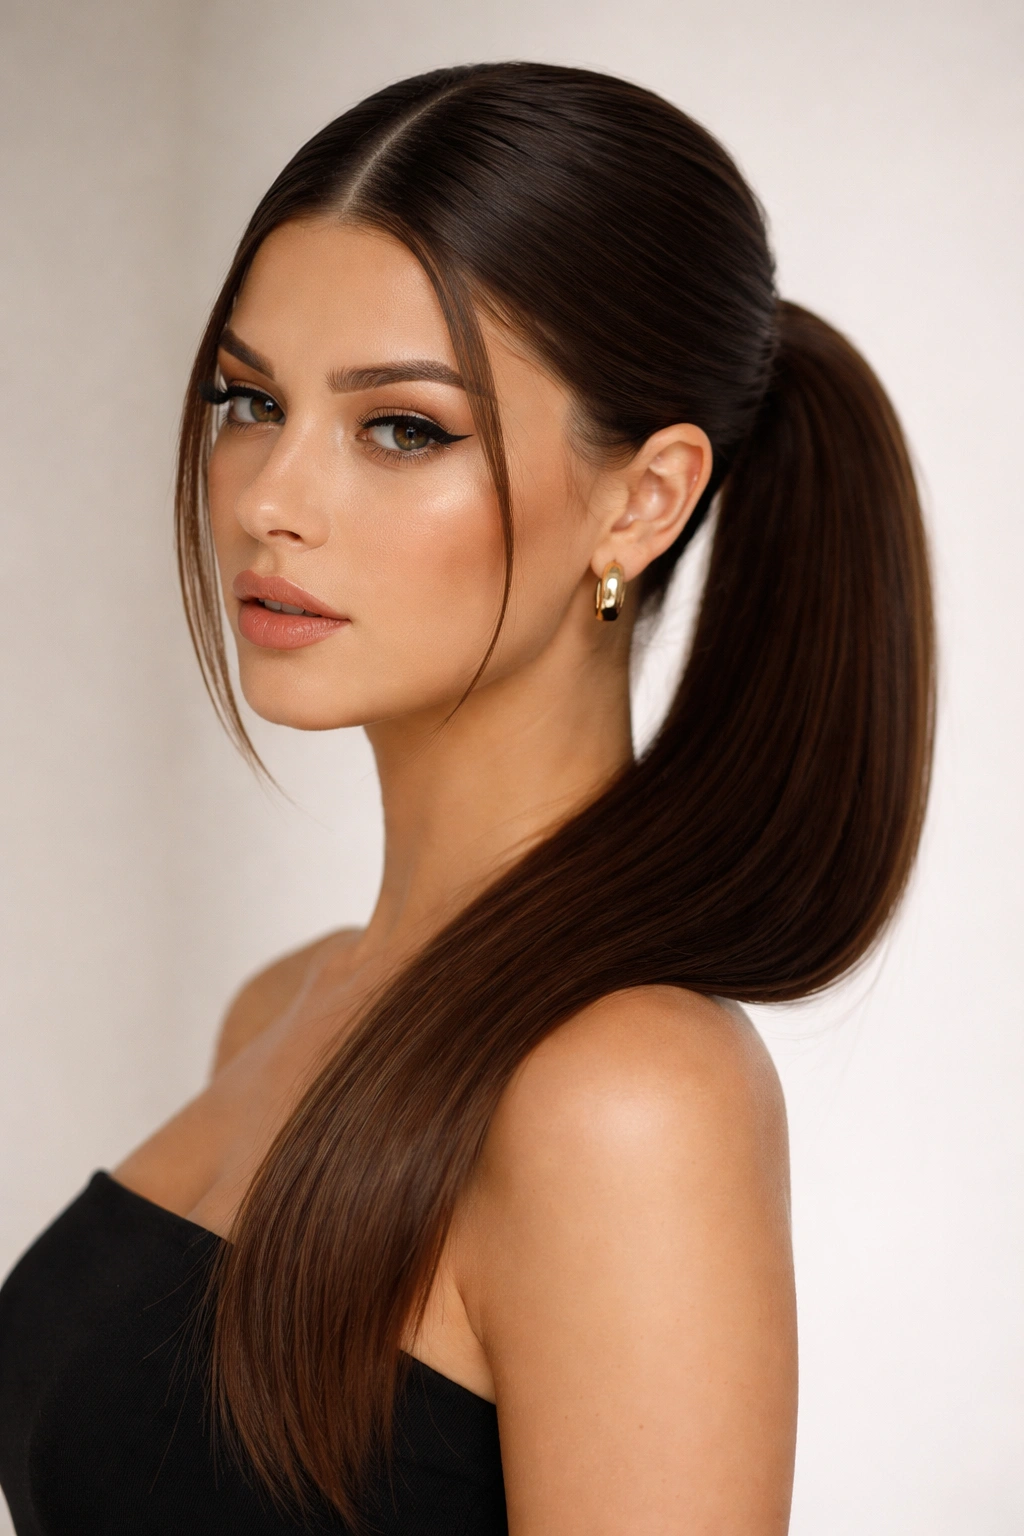
1. Classic Middle Part High Ponytail
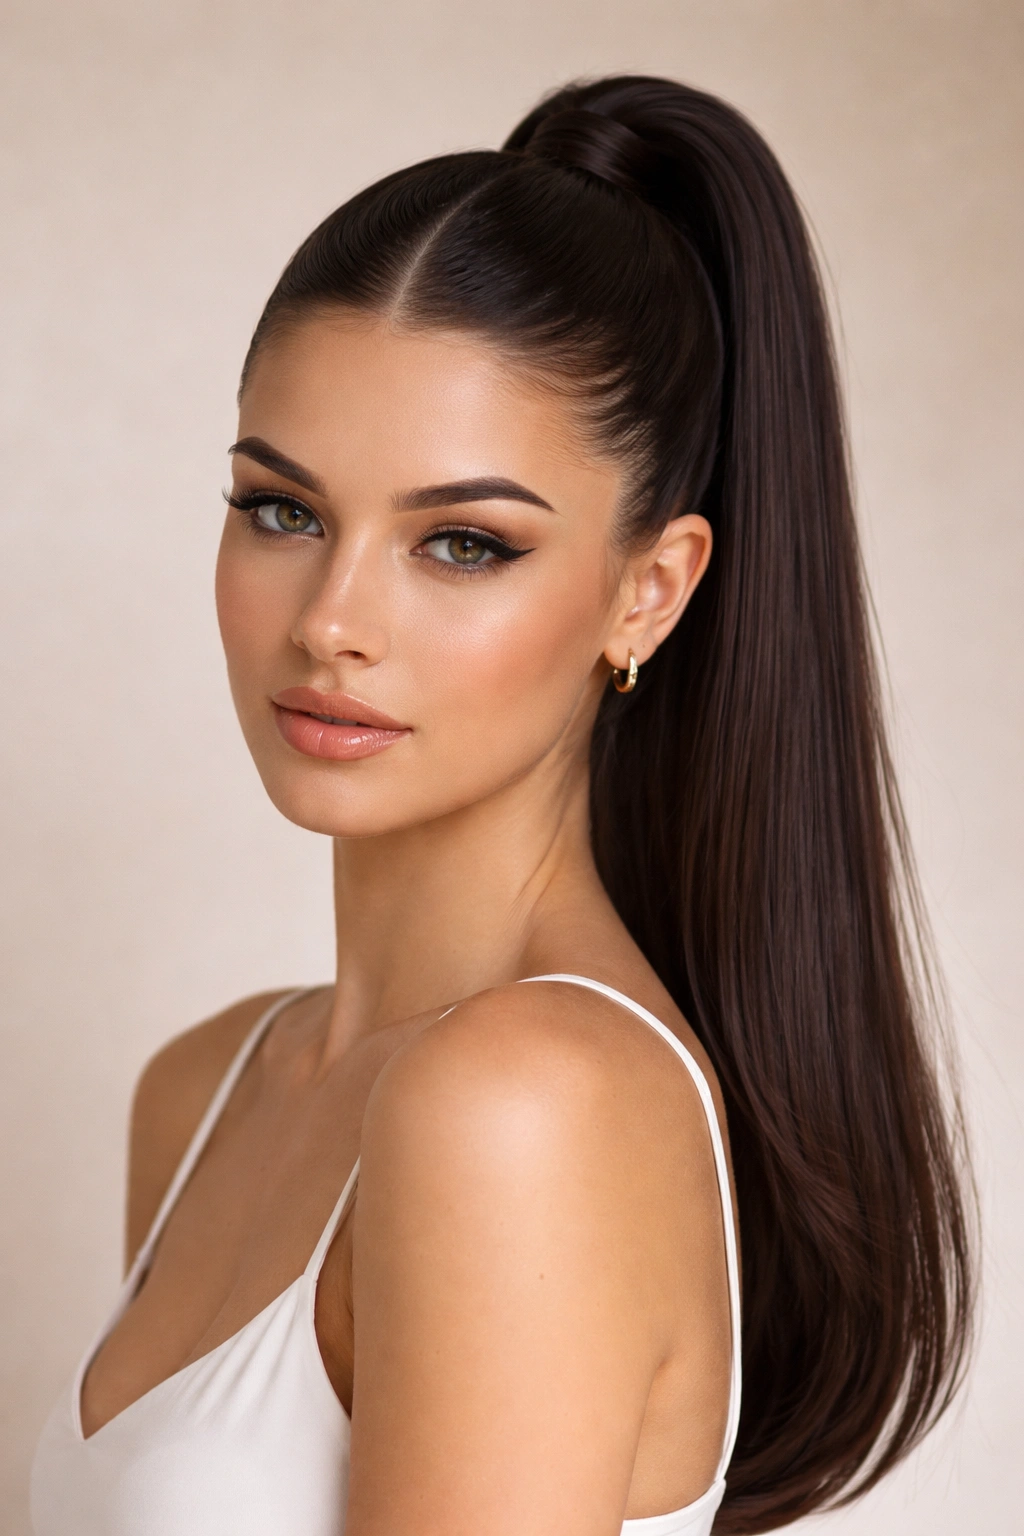
This is the foundation style that everything else builds from — a clean, high-positioned ponytail anchored by a perfectly centered part that runs from your forehead straight back through the crown. It’s the kind of look that photographs beautifully and works across every context imaginable, from gym sessions to date nights. The high placement gives it immediate energy and lift, while the middle part grounds everything visually and creates perfect symmetry from every angle.
Why This Style Looks So Polished
A high ponytail with a middle part elongates your face and emphasizes your bone structure because nothing is hidden or asymmetrical. The center line draws the eye straight up and forward, creating an elegant through-line from your part to the crown of your head. For straight hair, this style capitalizes on the natural smoothness — you’re showcasing the texture’s best quality by working with it rather than against it. The simplicity is where the sophistication lives.
How to Create the Perfect High Ponytail
- Start with a clean part: Use a fine-tooth comb or the pointed end of a teasing brush to create a precise line from the center of your forehead straight back to the nape of your neck, dividing your hair into two equal sections.
- Gather at crown height: Sweep both sections back and gather them at roughly the level of your crown — approximately 2-3 inches above your ears if you were to draw a horizontal line across the top of your head.
- Secure tightly but not painfully: Use a covered elastic or silk hair tie to secure the ponytail. Make sure it’s snug enough to hold throughout the day but not so tight that you get a tension headache after an hour.
- Smooth out flyaways: Take a fine-mist hairspray or a smoothing serum applied to a small brush, and work over any baby hairs or wispy pieces along the part line and hairline to keep everything clean and intentional-looking.
- Consider an underlay wrap: Take a thin section of hair from underneath the ponytail base, wrap it around the elastic to hide it, and secure with a bobby pin hidden inside the wrapped section — this finishing touch looks significantly more polished.
Pro tip: If your straight hair tends to fall flat at the roots, create subtle volume at the crown by gently teasing the hair at the base of your ponytail before securing it. You’ll maintain that sleek, intentional look while getting the lift you need.
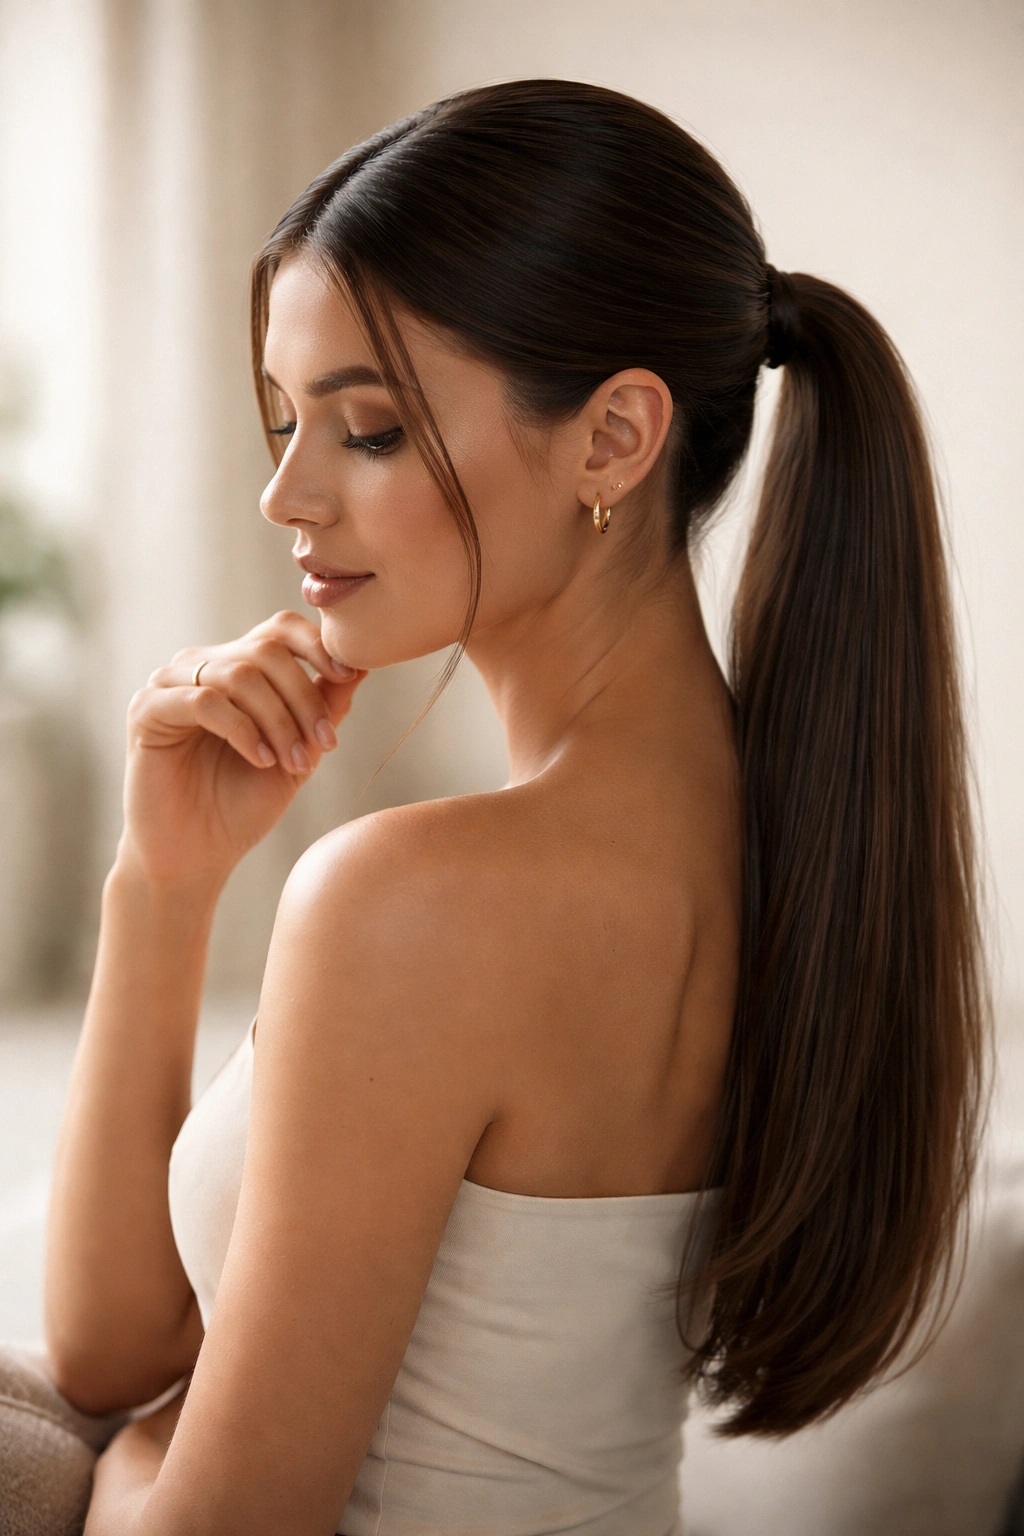
2. Sleek Middle Part Low Ponytail with Wrap
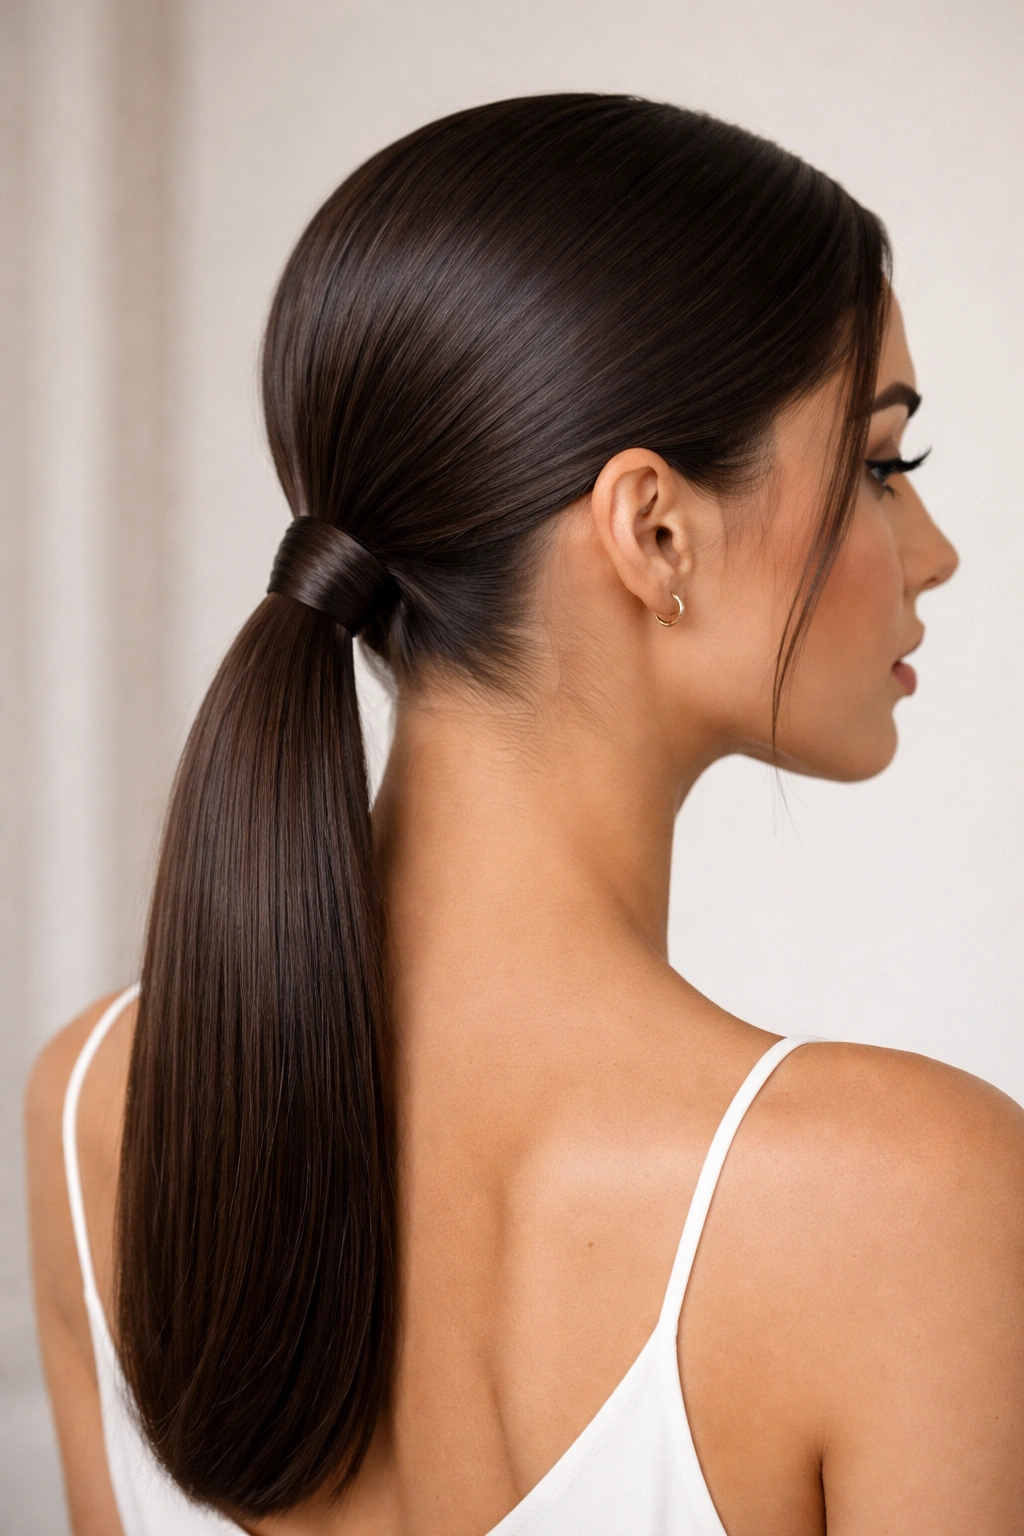
A low ponytail positions the gathered hair at the base of your neck or slightly below — think of it as sitting where the bottom of your hairline meets your neck. This placement feels more relaxed and modern than its high counterpart, especially when paired with a sharp middle part and a wrapped elastic. It’s the go-to for sophisticated workwear styling, elevated casual looks, and any scenario where you want to appear intentional but not overly done.
What Makes This Version Feel Elevated
The wrapped elastic is the non-negotiable finishing detail here. Rather than leaving a visible elastic band, you’re using a thin strand of your own hair to encircle the base, which instantly elevates the entire style from casual to considered. Combined with the low placement and middle part, this creates a silhouette that reads as effortlessly polished — the aesthetic that people spend actual money trying to achieve. Straight hair holds this look beautifully because there’s nothing competing with the clean lines and sophisticated geometry you’ve created.
Step-by-Step Execution for This Style
- Locate your center part precisely: If your hair is freshly washed, use a spray bottle of water to dampen your hair slightly before parting — this helps the part stay defined and centered.
- Gather hair low: Bring both sections of your parted hair together at the base of your neck. The gathered section should feel balanced between your two ears when you look straight ahead.
- Secure with a small, smooth elastic: Use a thin, covered elastic or a metal hair cuff to secure the ponytail base. For maximum sophistication, choose an option that matches your hair color.
- Create the wrap: Carefully remove a thin section of hair (roughly the thickness of a pencil) from underneath your secured ponytail, before you’ve tightened everything fully. Wrap this section around the elastic base 2-3 times, then secure the end with a small bobby pin, sliding it inside the ponytail so it’s completely hidden.
- Finalize with smoothing product: Apply a lightweight smoothing serum or anti-frizz cream to your hands, then run them over the ponytail surface to ensure everything looks sleek and refined.
Worth knowing: A low ponytail with a middle part works especially well if you have a longer face shape, as the lower placement and balanced part create visual width and proportion. If you prefer a slightly higher low ponytail, position it at the base of your skull rather than your neck — it’s still distinctly “low” but offers a touch more lift.
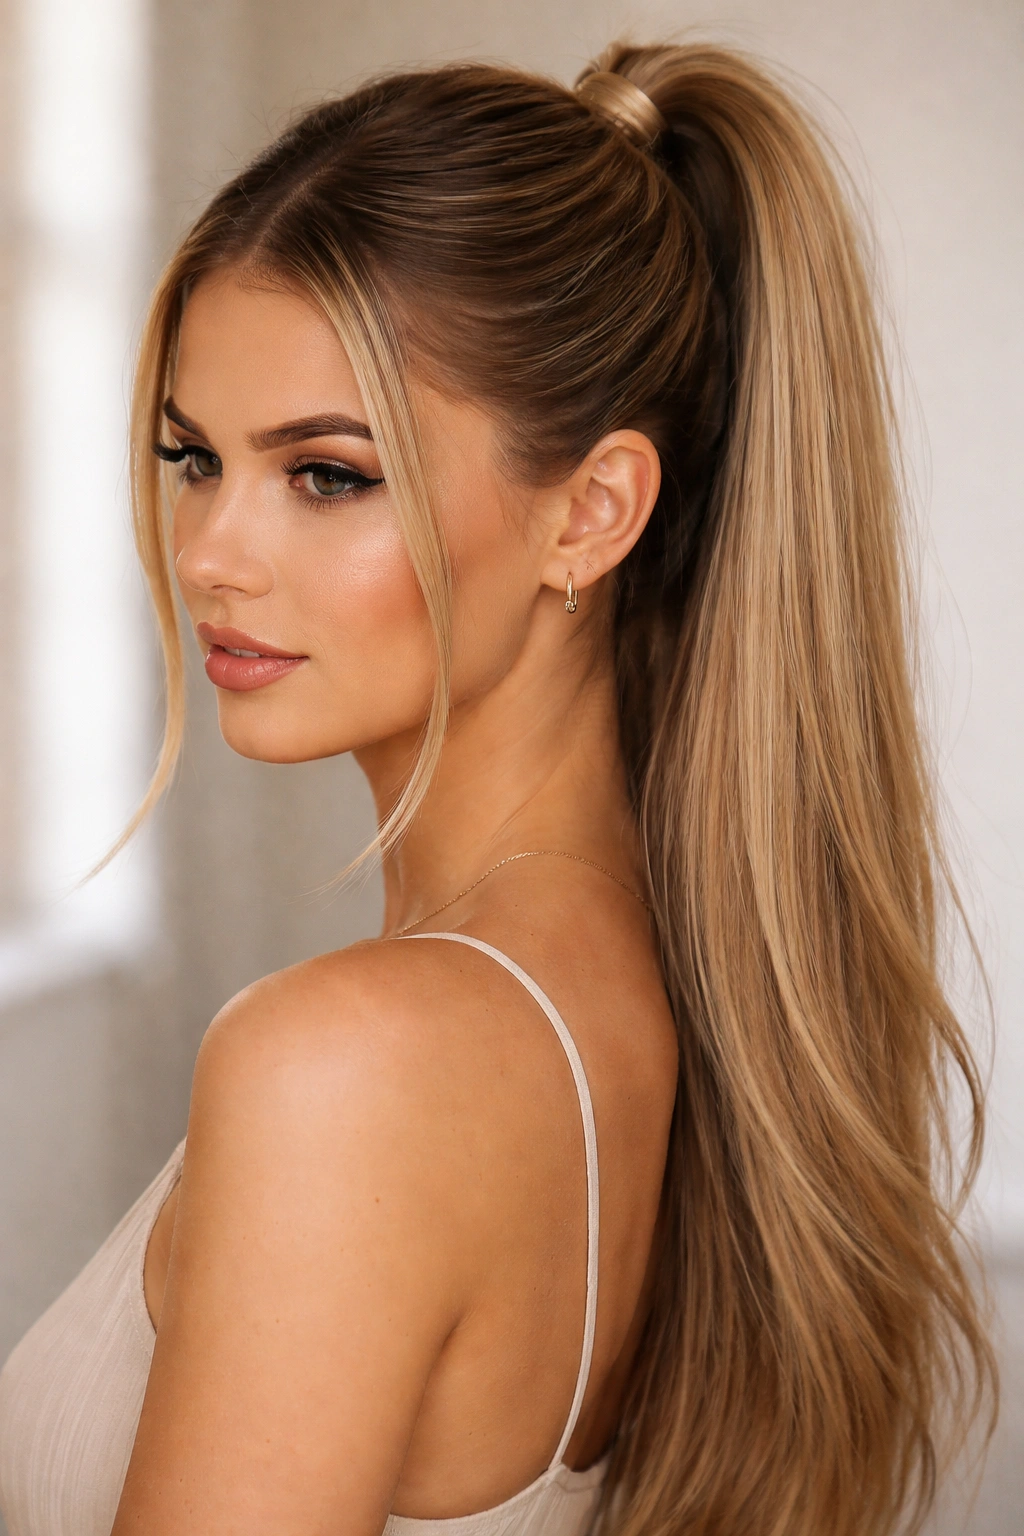
3. Voluminous Middle Part Ponytail with Face-Framing Layers
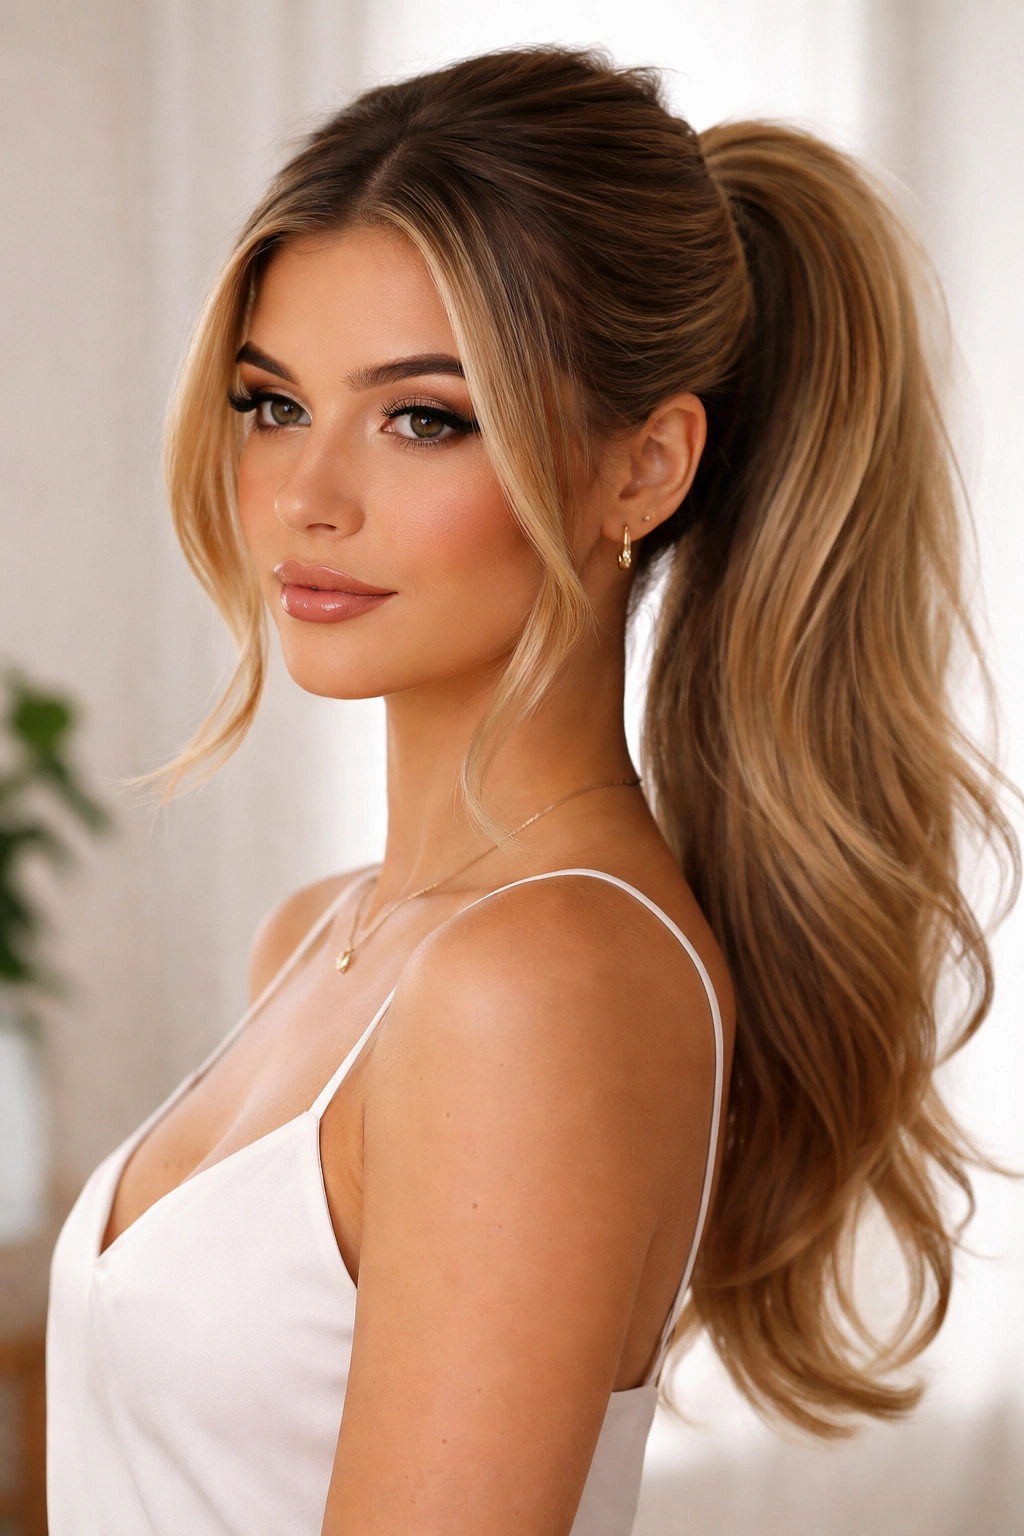
This version trades extreme sleekness for dimension and movement, while still maintaining the visual anchor of a center part. You’re using strategic teasing and layering techniques to build volume throughout the ponytail itself, creating a fuller silhouette that bounces when you move. It’s especially flattering if your straight hair is on the finer side, or if you want a style that feels more youthful and playful without sacrificing the polished middle part aesthetic.
Building Volume Without Losing the Middle Part Structure
The key to this style is strategic teasing in specific zones. You’ll tease heavily at the crown (directly behind your part line) to create lift and foundation, then tease selectively throughout the mid-shaft of the ponytail to build dimension without making it look fuzzy or unkempt. The middle part stays crisp and clean because you’re not disturbing the actual part line — the volume sits behind and within the ponytail itself. For straight hair, this means you’re creating the illusion of texture and movement while the part remains a clean, defining line.
Technique Details for Voluminous Styling
- Create the foundation with backcombing: After establishing your middle part, take a fine-tooth comb and gently backcomb (tease) the hair at your crown, working in small sections about 1 inch wide and 2 inches long. Focus on the area directly behind where your part line ends — roughly 2-3 inches back from your hairline.
- Gather and tease the mid-shaft: Once you’ve created crown volume, gather your hair loosely at your chosen ponytail height (high, mid-height, or low — any position works here). Before securing, tease small sections throughout the length of the gathered hair using the same backcombing technique, spacing the teased sections about 2 inches apart.
- Secure and smooth the exterior: Use a covered elastic to secure the ponytail, then gently run a soft brush over the surface to smooth it. You want the outside to look intentionally voluminous, not tangled or messy — the teasing is creating internal structure, not external texture.
- Add a light hairspray layer: Use a fine-mist hairspray (not a heavy-duty hold product) over the teased sections to set the volume without making your hair feel stiff or crunchy.
- Wrap and refine: Add a wrapped elastic detail as described in the previous style to elevate the overall appearance and hide any visible elastic bands.
Insider note: The best time to style a voluminous teased ponytail is on second-day hair — the natural oils and slight texture make it significantly easier to build and maintain volume than freshly washed hair, which can be slippery and resistant to teasing.
4. Twisted Middle Part Ponytail
This style incorporates two smooth twists that wrap around the ponytail base, adding texture and visual interest without relying on braids. Each section of your parted hair is twisted individually as you bring it back, and the two twists wrap around each other before being secured into the ponytail. The result is a style that feels more intricate and intentional than a basic ponytail, yet remains achievable in under five minutes once you’ve practiced it a few times.
The Mechanics of the Twist Wrap
After you’ve established your middle part, you’re essentially creating two mirror-image twisted sections that work together. Start twisting each side of your parted hair as you bring it toward the back of your head, keeping the twist fairly snug so it holds its shape. The twists naturally converge at the back, where they wrap around each other before being gathered into your ponytail base. The beauty of this approach is that straight hair’s natural smoothness makes the twists look clean and deliberate — there’s no fight with texture or frizz to distract from the actual styling work.
How to Execute the Twisted Wrap Technique
- Establish your middle part and divide your hair into two equal sections, left and right.
- Begin twisting on the left side: Starting at your temple, take the left section and begin twisting it toward the back of your head. Keep the twist moderately snug — not so tight that you’re creating tension, but tight enough that the twist holds its shape as you work toward the back.
- Mirror the twist on the right side: Simultaneously (or immediately after), repeat the same twisting motion on the right side, starting at your temple and working toward the back. Both twists should reach the back of your head at approximately the same time.
- Wrap the twists around each other: Once both twists reach the nape of your neck or crown (depending on your desired ponytail height), gently wrap one twist around the base of the other, creating a wrapped effect. Secure this twisted foundation with a bobby pin.
- Gather the remaining hair: Pull all remaining hair down into a ponytail at your chosen height and secure with a covered elastic. The twisted foundation you’ve created adds visual interest at the base.
- Smooth and finish: Lightly brush over the twists to ensure they’re smooth and intentional-looking, then add a light hairspray to hold the shape throughout the day.
Pro tip: Practice this style on damp hair the first few times — it’s easier to control and the twists hold their shape better as your hair dries. Once you’re comfortable with the technique, you can execute it on dry hair in seconds.
5. Braided Middle Part Ponytail
A Dutch braid or French braid running down the center of your parted hair adds structure and visual sophistication to a middle part ponytail. Rather than bringing your hair straight back, you’re braiding it as it moves toward the back of your head, creating a defined line that mirrors and reinforces the middle part concept. This style works beautifully for longer hair and feels dressy enough for events while remaining practical for everyday wear.
Why Braiding Enhances the Middle Part Aesthetic
A centered braid literally is the continuation of your middle part — it creates one unbroken line from your forehead straight down the back of your head. This visual continuity makes the entire style feel more intentional and geometric. For straight hair, the braid definition is crisp and clean, especially if you use a Dutch or reverse braid (where sections are braided under rather than over the main strand), which creates a raised, textured appearance that stands out visually against your smooth hair.
Detailed Braiding Instructions for a Clean Result
- Create your middle part and gather the hair into two sections as you would for any parted style.
- Begin a Dutch braid at the center of your head: Starting at the crown or just behind your hairline, section off a small amount of hair from the center of your parted hair — roughly 1 inch wide. Divide this section into three equal strands.
- Execute the braid correctly: Dutch braiding works by bringing each strand under the center strand rather than over it. Take the right strand and pull it under the center, then take the left strand and pull it under the (new) center. Continue this under-braiding pattern as you move down the back of your head.
- Incorporate hair as you braid: With each pass, add a small section of hair from the right side to the right strand, then add a small section from the left to the left strand. This is what makes it a full-head braid that incorporates all your hair rather than just a small section.
- Braid down the center: Continue the braid all the way down the back of your head to the nape of your neck, maintaining consistent tension and size throughout.
- Gather into a ponytail: Once you’ve braided as far as you can, gather all your hair (including the braid end) into a ponytail at your desired height and secure with a covered elastic.
- Loosen the braid gently: Carefully pull on the outer edges of the braid to make it look fuller and softer — this makes the style feel less severe and more romantic, while still maintaining the crisp middle part definition.
Worth knowing: If you’re new to braiding, practice on damp hair and use a small amount of smoothing serum or gel on your hands before you start. This helps the hair stay in place as you work and makes the braid look significantly more refined.
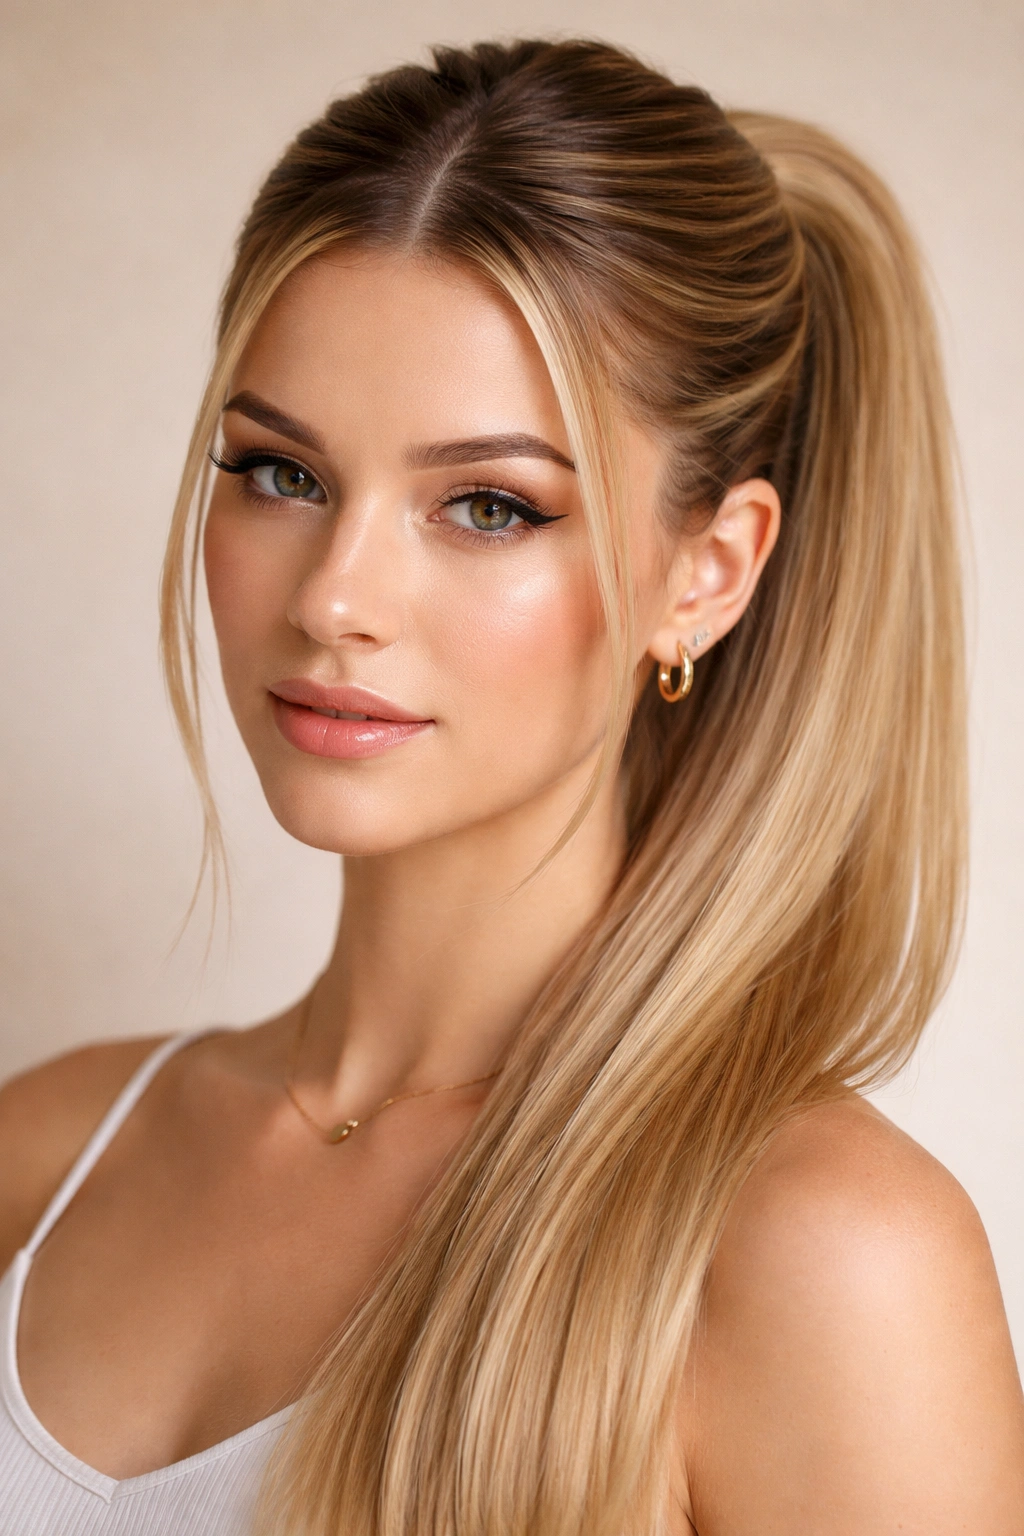
6. Middle Part Half-Up Ponytail
This style is the bridge between a full ponytail and loose hair — you’re gathering only the upper portion of your hair into a ponytail while leaving the bottom section flowing free. With a sharp middle part and straight hair, the visual result is incredibly balanced. The gathered upper section frames your face and shows off the middle part, while the length below adds movement and softness. It’s the perfect choice when you want a styled look that still feels relaxed and wearable.
The Elegance of the Half-Up Silhouette
A half-up ponytail inherently feels more casual and modern than a full ponytail, but when you add a precise middle part, it gains unexpected sophistication. The part becomes even more visually prominent because it’s framing your face rather than disappearing toward a full ponytail at the back. For straight hair, the contrast between the structured upper section and the flowing lower section creates dimension and visual interest without requiring any texture work.
Creating a Polished Half-Up Ponytail
- Start with your middle part: Create a clean, precise center part that runs from your forehead all the way to the crown of your head — you’ll be working primarily with the hair above this line.
- Determine your gathering point: You want the ponytail to sit roughly at the level of your ears, or slightly below — approximately 1-2 inches above your natural ear level when you draw an imaginary horizontal line across your head.
- Gather only the upper half: Take hair from the sides (at roughly temple height) and sweep it back toward your crown, gathering it with the hair from the upper back of your head. The lower half of your hair remains untouched and loose.
- Secure with a small elastic: Use a covered elastic or decorative clip to secure the gathered section. A clip actually works wonderfully here because it’s visible and can be a styling feature rather than hidden.
- Smooth and refine: Gently brush over the gathered section to eliminate any bumps or loose pieces, and run your fingers through the loose lower section to ensure it falls smoothly and has no awkward angles.
- Optional texture for the lower section: You can leave the bottom section completely straight for a sleek look, or use a light curling iron or straightening iron to add subtle waves or bends to the lower half — this creates movement that contrasts beautifully with the structured upper section.
Pro tip: If your hair is very thick and heavy, the weight of the lower section might pull down the upper ponytail throughout the day. Solve this by using a stronger-hold elastic or clip for the upper section, or by securing it with two bobby pins hidden inside the gathered section for extra reinforcement.
7. Textured Middle Part Ponytail with Subtle Waves
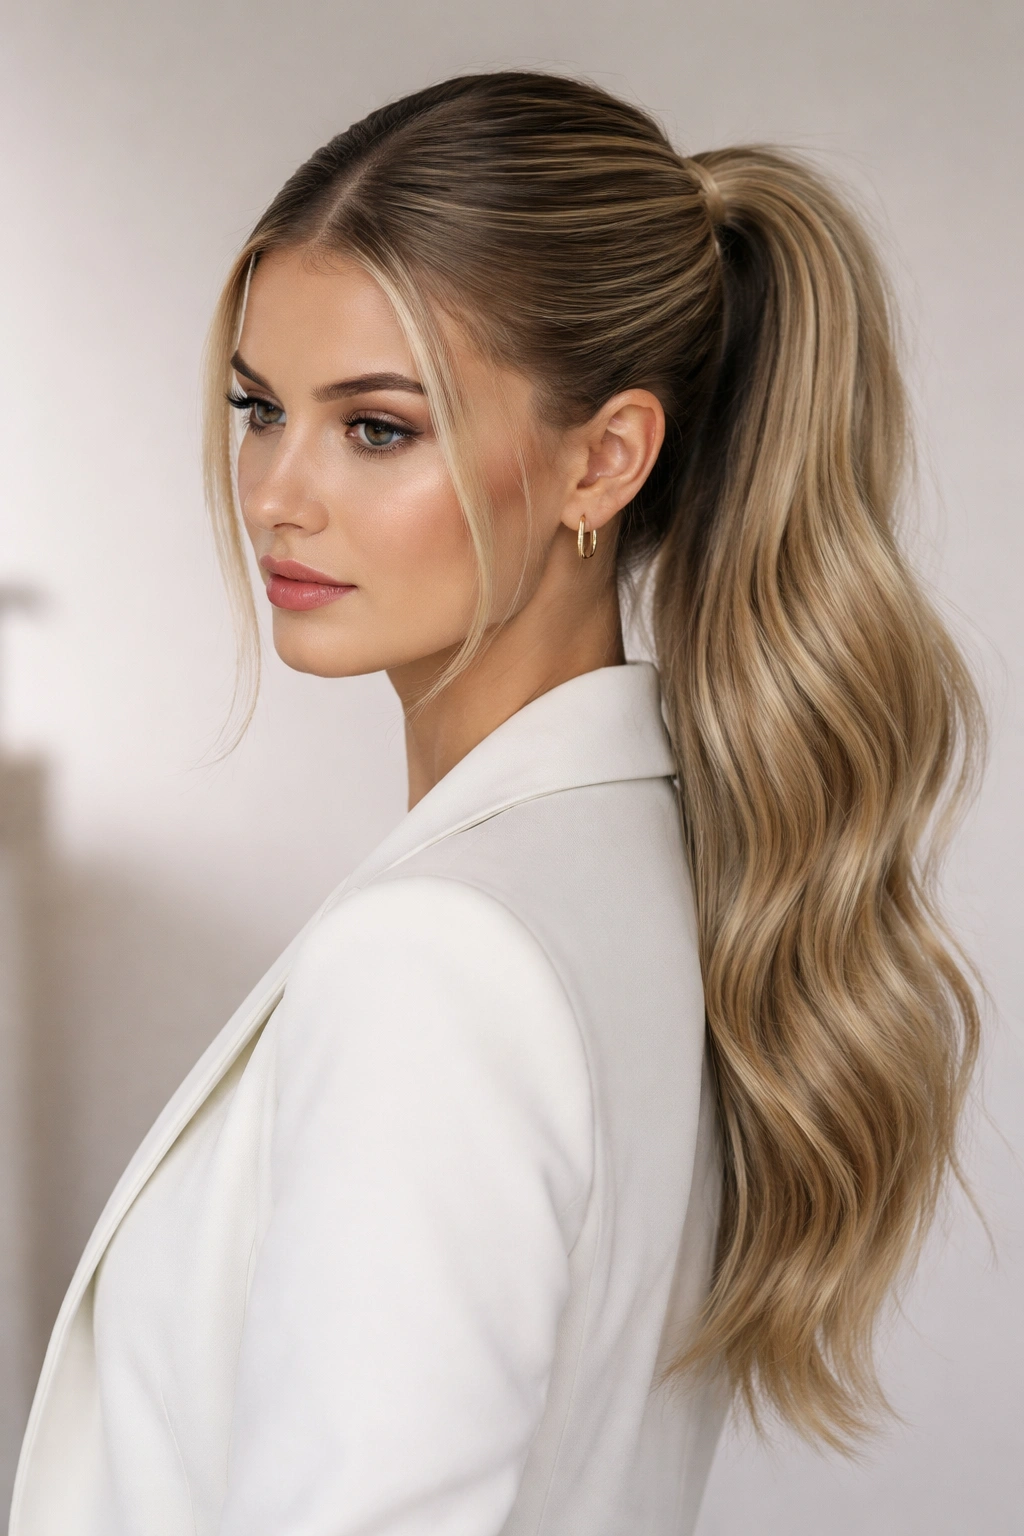
While your hair is straight, you’re using a curling or straightening iron to create soft, deliberate waves throughout the ponytail itself. The waves are subtle enough to not look obviously styled — they’re more like natural movement and dimension — but they’re intentional enough to add visual interest and sophistication. The middle part stays crisp and clean while the ponytail has softness and flow, creating a beautiful contrast between structure and movement.
Building Subtle Waves Into Straight Hair
The goal here isn’t to create obvious curls or heavy texture — it’s to add dimension by interrupting the perfect straightness with gentle curves that catch light and create movement. You’re essentially giving your straight hair a slight undulation that makes it look more voluminous and interesting without reading as “curled” or “permed.” This works particularly well for professional settings where you want polish without obviously styled texture.
The Technique for Subtle Wave Texture
- Start with a clean middle part and gather your hair into a ponytail at your desired height.
- Prepare your straightening iron: Use a standard straightening iron (1-1.5 inches wide), and set it to a medium heat setting appropriate for your hair thickness — usually around 300-350°F for fine to medium straight hair, up to 400°F for thicker, coarser straight hair.
- Create waves section by section: Working with the ponytail, take a 1-inch section of hair and run the straightening iron down the length of it, but as you move the iron downward, simultaneously twist the iron 45 degrees one direction. Once you’ve gone 4-5 inches down, release and reset. On the next section, twist the iron in the opposite direction. This creates a wave pattern that runs down the ponytail.
- Space your sections consistently: Work in roughly 1-inch sections, and complete the entire ponytail using this alternating-direction method. The spacing and consistency make the wave pattern look intentional rather than random.
- Finish with texture spray: Use a light texture or sea salt spray over the finished ponytail to enhance the subtle waves and add grip so they hold their shape throughout the day. Avoid heavy hairspray, which can make waves look stiff.
- Optional: Loosen and separate: Once the waves have cooled and set, you can gently separate and fluff them with your fingers to make them look even more natural and less obviously styled.
Insider note: This technique works best on hair that’s at least slightly textured or has a bit of grip — freshly conditioned, super-silky straight hair can be slippery and the waves might not hold. If that’s your situation, blow-dry your hair without any smoothing products before styling, which gives it slightly more grip and tooth.
8. Middle Part Sleek Low Bun-Ponytail Hybrid
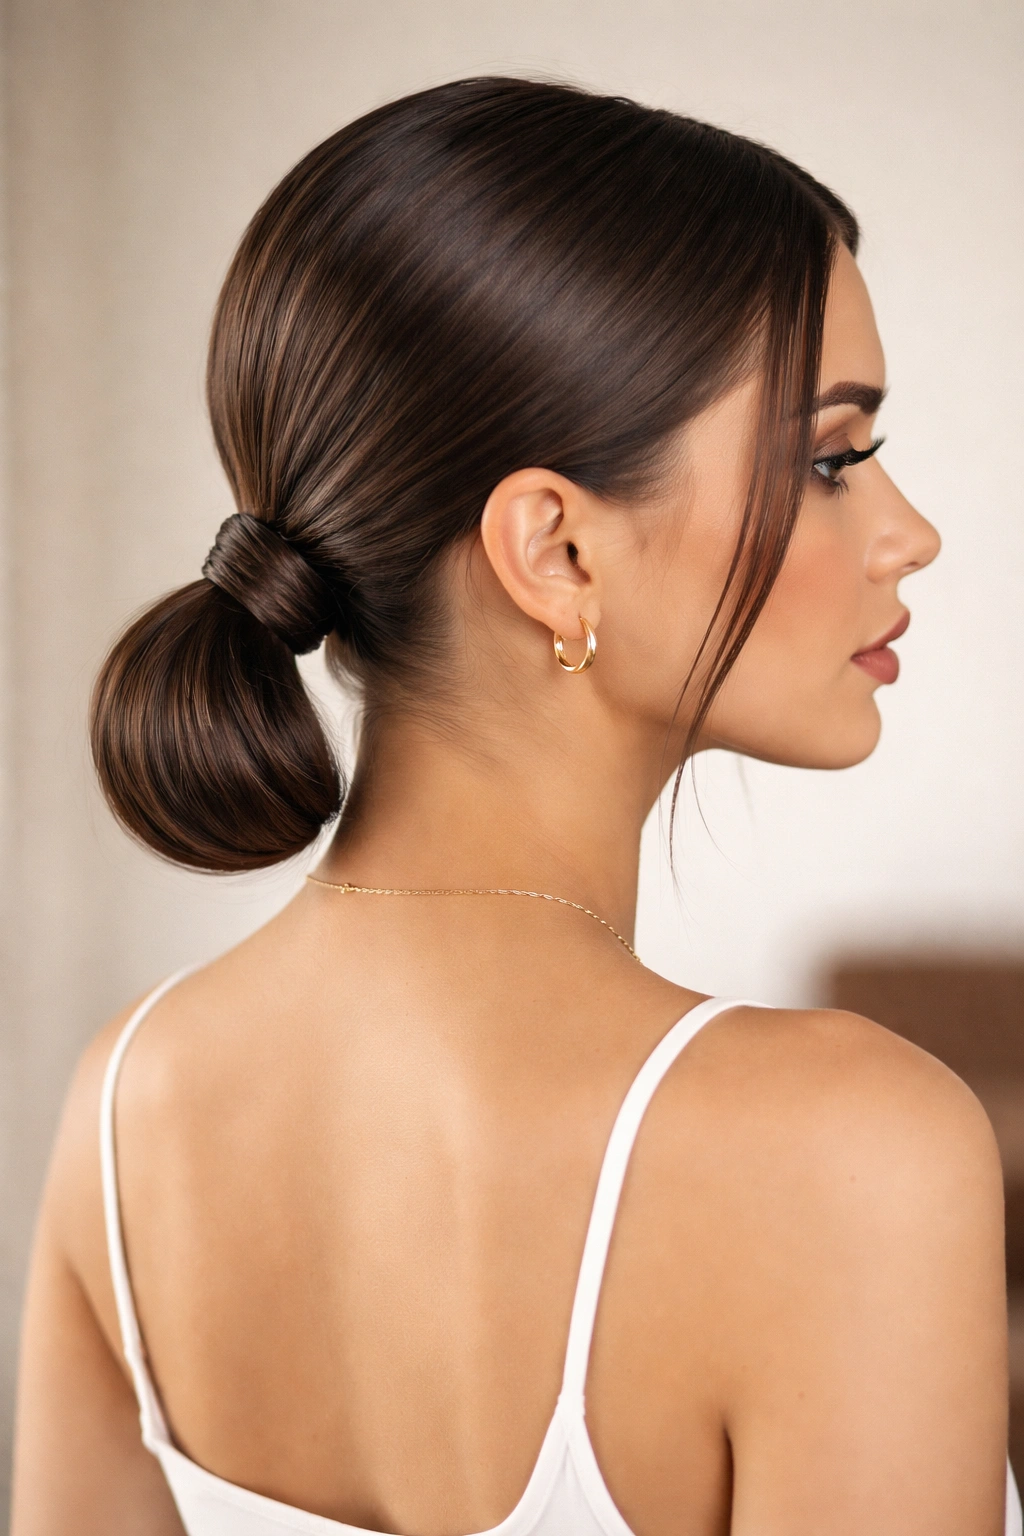
This style splits the difference between a ponytail and a bun — you’re gathering hair into a ponytail base but then twisting or folding the tail itself into a wrapped, bun-like shape that sits close to your head. It’s more elegant than a standard bun because of the ponytail gathering method, but more compact and refined than a full ponytail. The middle part remains visible and centered, anchoring the entire updo.
Why This Hybrid Style Works So Well
A traditional bun can sometimes read as overly formal or ballet-inspired, but a bun-ponytail hybrid feels modern and sophisticated. You’re getting the neatness and compactness of a bun with the contemporary vibe of a ponytail. For straight hair, the smoothness of the style is striking — there are no flyaways or messy textures competing for attention. It works equally well for professional settings, casual outings, and special occasions.
Creating the Bun-Ponytail Hybrid
- Establish your middle part and gather hair into a low ponytail, securing it with a covered elastic.
- Divide the ponytail: Once secured, gently divide the ponytail into two equal sections — left and right of the elastic.
- Twist each section: Take the left section and twist it tightly toward the right, and simultaneously twist the right section toward the left. The two twists will naturally wrap around each other, creating a twisted bun-like shape.
- Wrap around the base: Continue twisting until the entire ponytail is incorporated into the twisted shape. Then wrap this twisted bundle around the base of the original ponytail gather point, using bobby pins to secure it in place underneath. You should have a compact, wrapped shape sitting right at the base of where you secured the original ponytail.
- Tuck and secure: Tuck the very end of the ponytail underneath the wrapped shape and secure with another bobby pin. Everything should look compact and intentional, with no flyaway ends visible.
- Smooth and finish: Use a fine-tooth brush to smooth any small wisps or pieces, and apply a light hairspray to hold everything in place without making it look stiff or over-processed.
Worth knowing: The tighter you twist the ponytail sections, the more compact and refined the final bun shape will be. If you prefer a slightly looser, softer appearance, twist a bit less tightly — the tradeoff is slightly less holding power throughout the day.
9. Middle Part Ponytail with Statement Accessory Detail
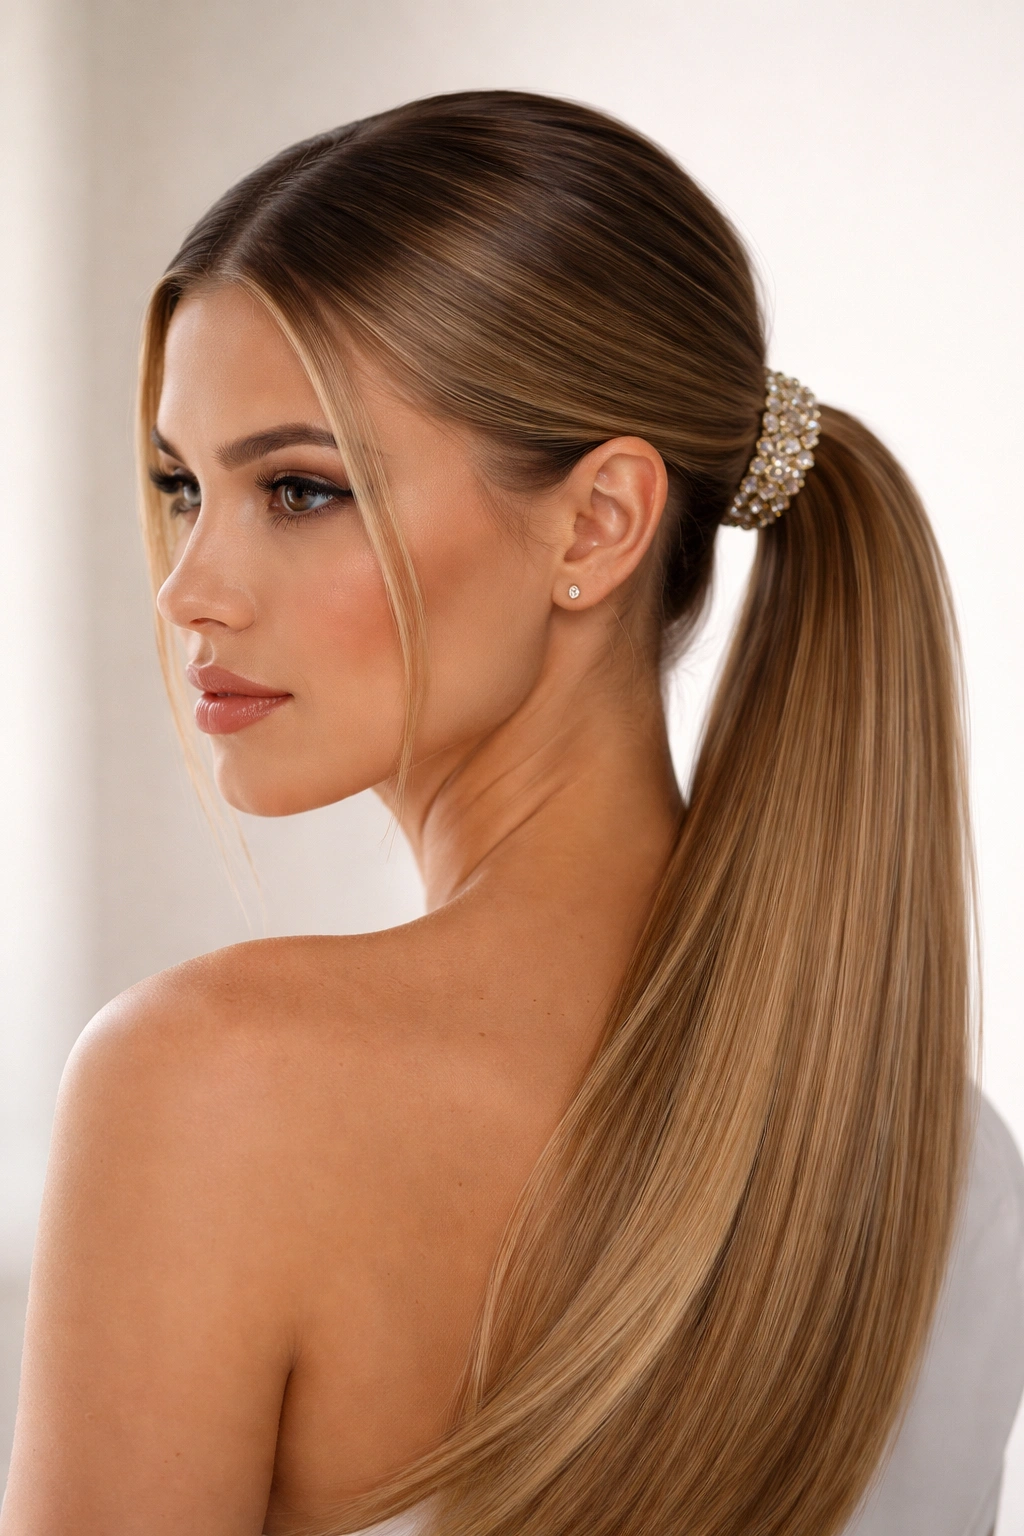
You’re styling a sleek middle part ponytail (any height, any level of texture) and adding a bold hair accessory at the base — think a decorative clip, a beaded elastic, a velvet hair cuff, or a jeweled bobby pin detail. The accessory becomes the focal point and styling statement, which allows you to keep the ponytail itself minimalist. It’s an easy way to dress up a simple ponytail or add personality to a more formal style.
Choosing an Accessory That Complements Your Look
The accessory you choose completely changes the vibe of the style. A sleek metal hair cuff reads polished and modern; a tortoiseshell clip reads more relaxed and retro; a beaded or jeweled detail reads festive or special-occasion-appropriate; a silk or velvet cuff reads luxe and textured. The key is choosing something that coordinates with what you’re wearing and feels intentional, not like an afterthought. Because your ponytail itself is simple and clean, the accessory becomes the actual design element doing the visual work.
Styling Strategies for Accessory-Forward Ponytails
- Choose your base ponytail style: You can use any of the previous styles as your foundation — high, low, textured, braided, or twisted — because the accessory will be the real statement.
- Secure the ponytail: Gather your hair into your chosen ponytail style and secure it with a basic elastic first.
- Apply the accessory: Depending on the accessory type, you’ll either wrap it around the elastic base (like a hair cuff), clip it to the side of the ponytail, or pin it into place with bobby pins for decorative brooches or combs.
- Coordinate the accessory with your outfit: If you’re wearing metallics, choose a gold or silver accessory that matches. If you’re wearing warm tones, pick warm-toned accessories. If you’re wearing jewel tones, a complementary jeweled piece works beautifully.
- Consider asymmetry: You don’t have to place the accessory directly centered on your ponytail base — shifting it slightly to one side can create a more interesting, modern look.
Pro tip: A single statement accessory is more impactful than multiple small ones. Choose one really beautiful piece and give it room to be the focal point rather than cluttering the ponytail base with several competing details.
10. Middle Part Side-Swept Sleek Ponytail
This final style plays with the concept of a middle part by beginning with one but allowing the gathered ponytail to shift slightly to one side as it comes together. It’s a subtle asymmetry that adds visual interest and movement to an otherwise structured style. The middle part provides the polished, intentional foundation, but the ponytail gathers and falls with a gentle bias toward one side, creating a more dynamic silhouette than a perfectly centered ponytail.
The Visual Balance of a Side-Swept Placement
A purely centered ponytail, while clean, can sometimes feel rigid or overly formal. A side-swept version maintains the sophistication of the middle part while introducing just enough asymmetry to feel modern and interesting. The part itself stays centered, but the gathered ponytail settles to the left or right, creating a subtle directional flow. This works beautifully for people who want a polished look that still feels approachable and contemporary.
How to Execute the Side-Swept Placement
- Create a precise middle part: Start exactly as you would for any middle part style, establishing a clean center line from your forehead to the back of your head.
- Gather toward one side: Rather than gathering directly at the center back of your head, gather your hair slightly to the left or right — roughly 1-2 inches off-center. This creates the side-swept effect while maintaining the visible middle part at your hairline and crown.
- Choose your height intentionally: A side-swept ponytail works at any height — high, mid, or low — but the effect is usually most striking with a high or mid-height ponytail where the shift is clearly visible.
- Secure and smooth: Use a covered elastic to secure the side-swept ponytail, then smooth everything carefully. You want the side-swept positioning to look intentional and balanced, not like an accident or misplacement.
- Optional: Add texture to enhance the movement: Because you’re already introducing asymmetry with the side-swept placement, adding subtle waves or texture to the ponytail itself can enhance the sense of movement and flow.
- Refine the part line: Make sure the middle part remains visible and crisp at your hairline and crown — this is what makes the side-swept placement feel intentional rather than careless.
Insider note: If your hair naturally gravitates to one side (left or right side part tendency), honor that by sweeping your ponytail in that same direction. This works with your hair’s natural inclinations rather than against them, making the style easier to maintain throughout the day and less likely to shift or loosen.
Final Thoughts
A middle part ponytail is one of those deceptively simple styles that actually offers far more versatility than it first appears. Whether you’re drawn to sleek, minimal refinement or prefer adding texture, volume, and accessories, there’s a version of this look that fits your aesthetic and your straight hair perfectly. The middle part itself is doing the heavy lifting visually — it creates symmetry, frames your face, and conveys intention — which means you have tremendous freedom to play with height, texture, and finishing details without losing the core elegance of the style.
The true power of this combination is that it feels effortless even when you’ve put real thought and technique into it. That’s the hallmark of good styling — the polish shows, but the struggle doesn’t. Start with whichever variation speaks to you, practice it a handful of times until your hands remember the motions, and then enjoy having a genuinely sophisticated, endlessly rewearable style in your regular rotation. Your straight hair is the perfect foundation for making any of these options look clean, intentional, and undeniably polished.