Prom night is one of those rare occasions where your hair gets to steal the spotlight alongside your dress, and an updo ponytail strikes the perfect balance between polished sophistication and youthful freshness. Unlike stiff traditional updos, pony-based styles offer movement, texture, and personality — they work with your hair rather than imprisoning it, which means you can actually enjoy dancing without feeling locked in place. Whether you prefer sleek elegance, romantic braids, voluminous glamour, or edgy texture, there’s an updo ponytail that’ll make you feel absolutely confident walking into that ballroom.
The beauty of prom ponytails is their versatility. You can dress them up or down depending on your gown, they photograph beautifully from every angle, and — this matters — they actually hold up through hours of dancing, mingling, and humidity. Most importantly, an updo ponytail lets your face, neck, and shoulders shine, which is exactly what you want when you’re wearing statement jewelry or a dress with a gorgeous neckline. The right style also gives you options: keep it sleek and modern, add romantic waves, weave in delicate braids, or go full Hollywood glamour with maximum volume.
Each of these twelve styles works for different hair textures, face shapes, and dress aesthetics. Some are timeless classics you can wear with confidence no matter what year it is; others lean into current preferences for texture and dimension. The good news? Most of these can be created by a skilled stylist or even DIY if you’re comfortable with a curling iron and bobby pins. Read through all twelve, save the ones that speak to you, and bring photos to your stylist consultation — that visual reference makes all the difference.
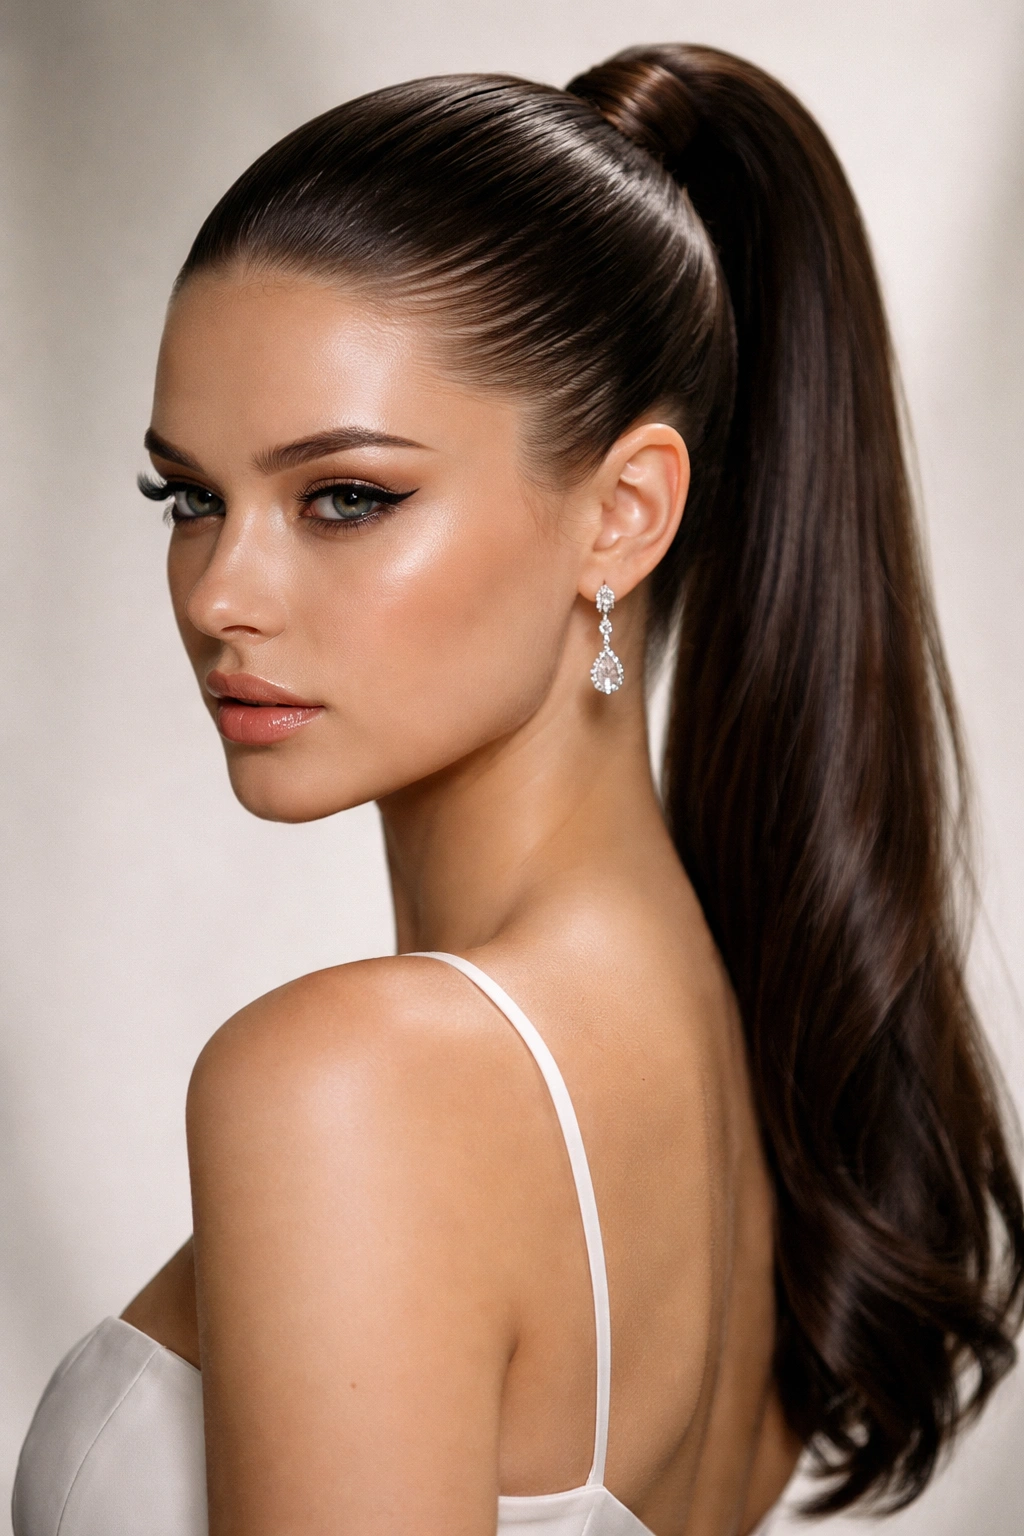
1. Classic High Polished Pony
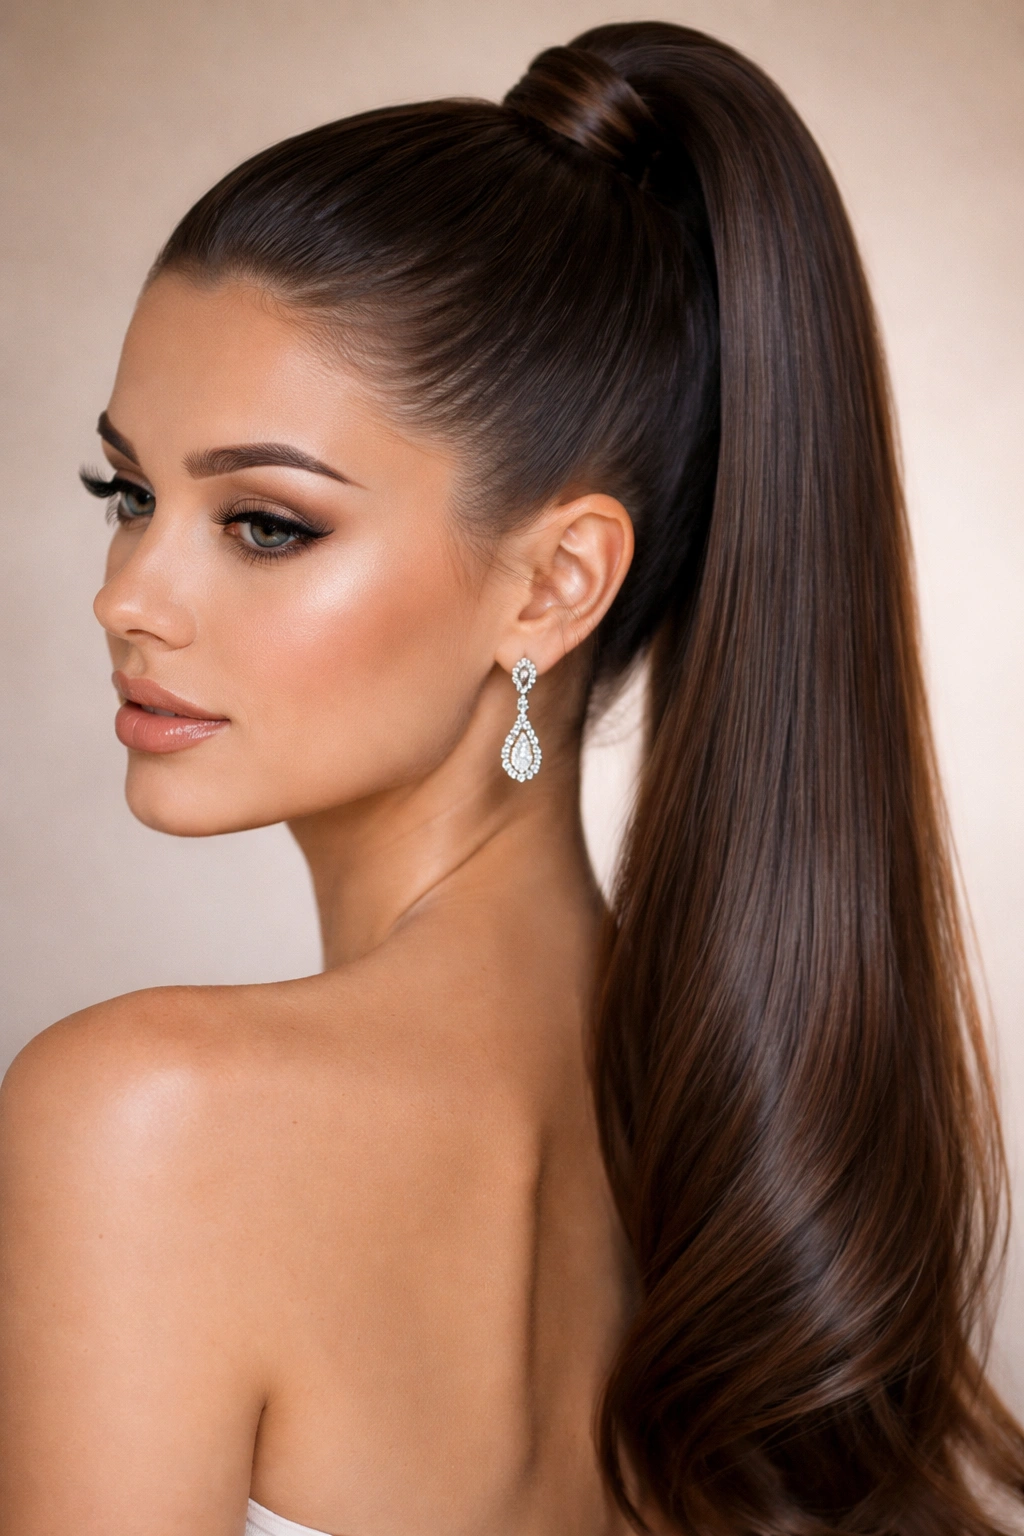
This is the foundation of all updo ponytails — sleek, elegant, and undeniably timeless. Everything rides high on the crown, pulled so smoothly you could see your scalp in certain light, then the hair at the base of the ponytail is smoothed down and often wrapped with a small section of your own hair or a thin metallic wrap. It’s incredibly feminine without a single wave or braid, and it works beautifully with any dress aesthetic, from minimalist modern to full ball gown.
Why It’s the Gold Standard
A polished high pony elongates your neck and face, draws attention upward, and photographs like absolute perfection. The sleekness requires precision, which is why this style reads as expensive and intentional — exactly the energy you want for prom. Your stylist will use smoothing serum and hairspray to eliminate every flyaway, creating that almost wet-look finish that’s been favored on red carpets for decades.
How to Achieve Maximum Smoothness
- Apply smoothing serum to damp hair before blow-drying to tame frizz and add shine
- Blow-dry with a paddle brush for straight, polished texture; avoid any wave or curl in the initial style
- Use a fine-tooth comb to gather hair at the crown, pulling it tight enough to feel secure but not so tight you get a headache
- Smooth the hairline with edge control and a small brush for that refined finish
- Wrap a small section of hair around the base to hide the elastic, then secure with bobby pins that match your hair color
- Lock everything with light hairspray — go easy so it doesn’t look stiff or crunchy
Pro tip: Ask your stylist to tease ever-so-slightly at the very crown before smoothing — this creates an imperceptible lift that keeps the style from looking thin or pinned-flat, and it photographs better.
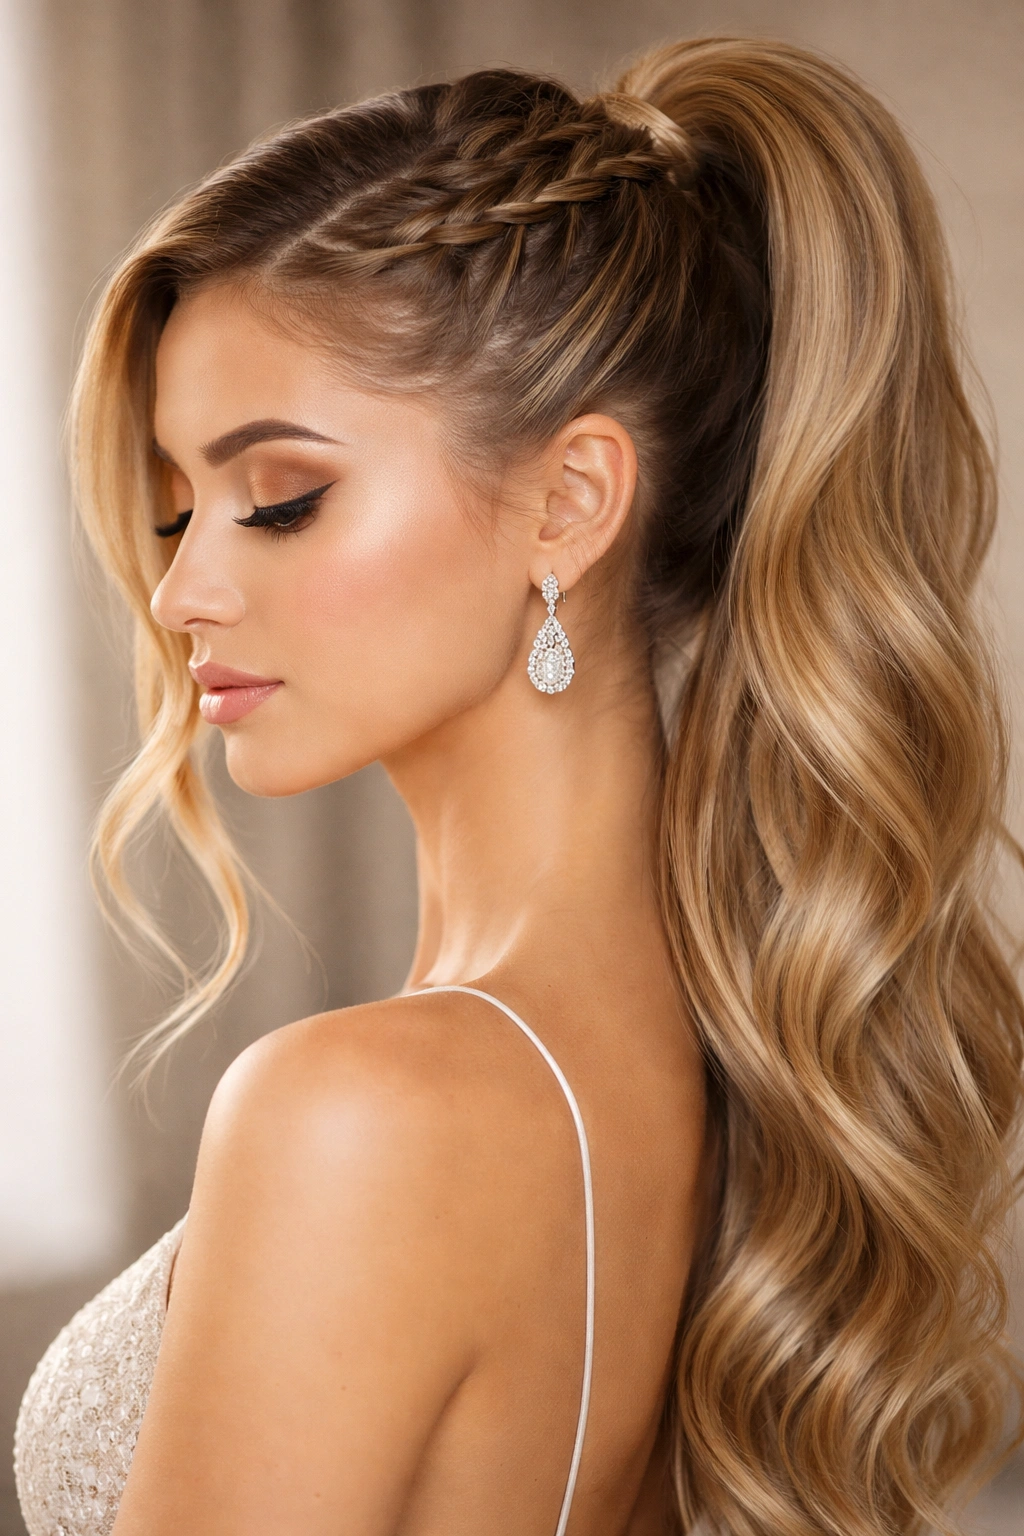
2. Romantic Braided Crown Pony
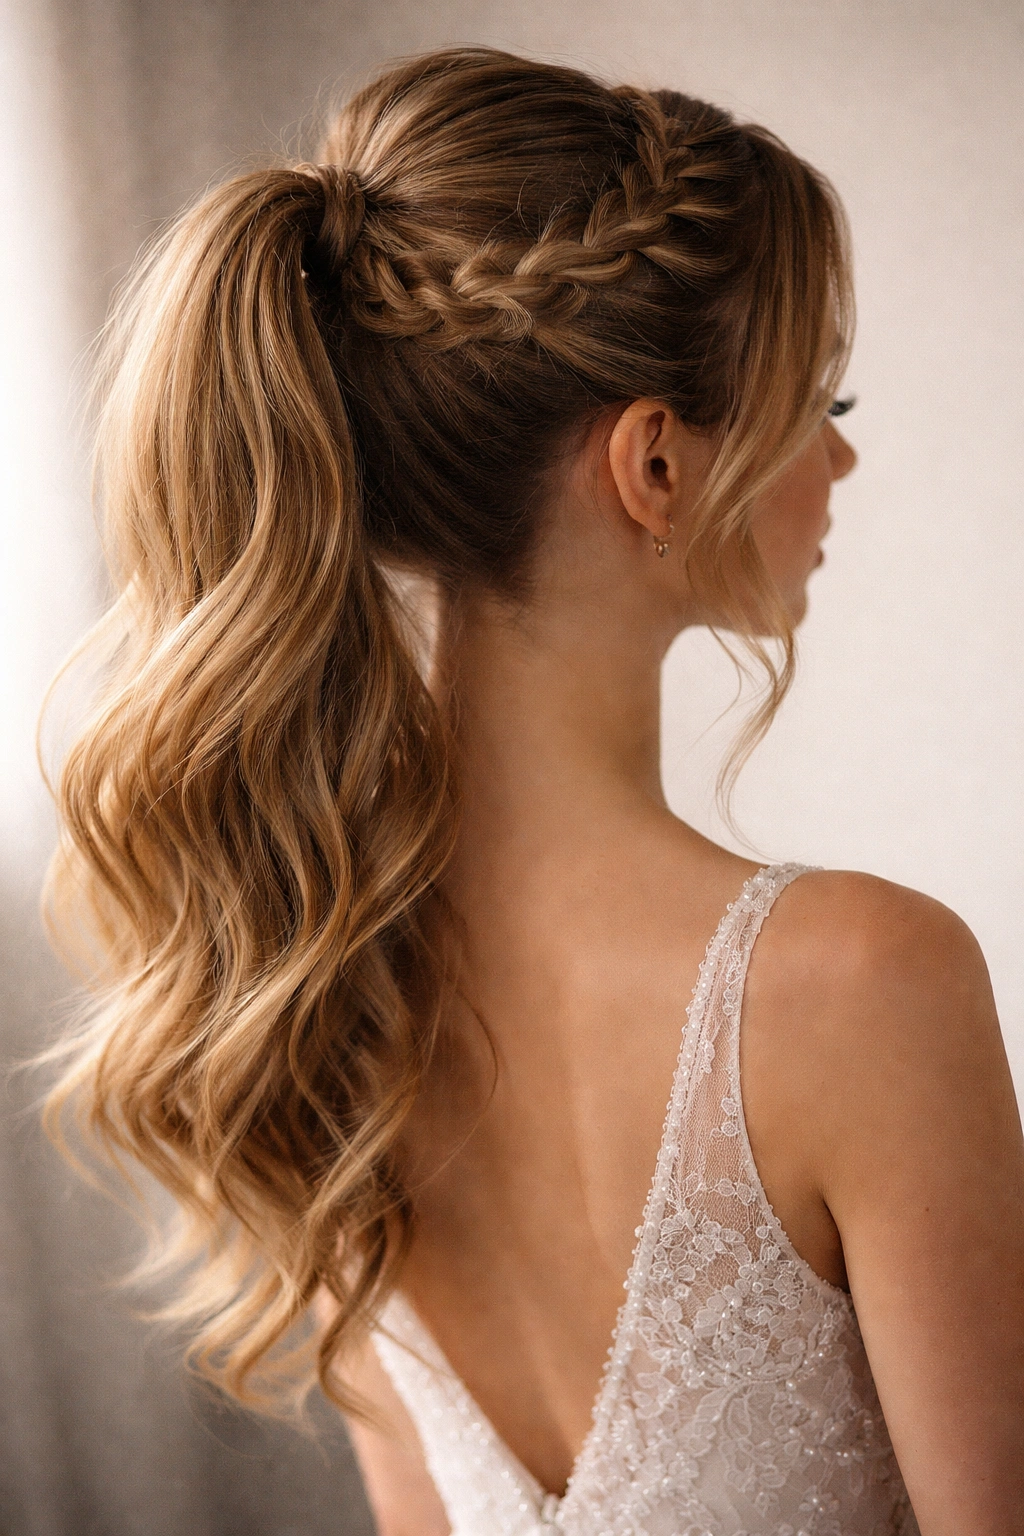
Take that polished high pony and weave a Dutch braid around the back of the crown before securing the ponytail, and suddenly you’ve got a style that reads as both elegant and effortless. The braid pulls hair away from the face while adding texture and visual interest, and it feels distinctly romantic without being over-the-top. This works especially well if you’re wearing a delicate gown or have a sweetheart neckline — the braided detail adds an extra layer of sophistication.
What Sets This Apart
The braid serves two purposes: it creates visual dimension on the back of the head (which matters in photos and when people see you from behind), and it naturally gathers hair in a way that feels intentional and designed rather than simply pulled back. You get the sleekness of a ponytail with the romantic texture of a braid, combining the best of both worlds.
Building the Braided Foundation
- Start by creating a zigzag part down the center of the back of your head — this helps you see where you’re placing the braid
- Begin a Dutch braid (reverse braid, where you cross sections under instead of over) on one side at ear level
- Incorporate hair as you move backward, keeping the braid loose and romantic — this is not a tight, structured look
- When you reach the center back, do the same on the other side, mirroring the first braid
- Let both braids meet at the center crown, then gather all hair into a high ponytail that incorporates the braid ends
- Tease the base of the ponytail slightly, smooth the top layer, and wrap with a section of hair for a finished look
Worth knowing: This style requires advance planning with a stylist — ask about practice sessions if your hair is very thick or if you’ve never worn a braid crown before.
3. Sleek Low Bun with Ponytail Accent

This hybrid style tricks the eye beautifully: the back of your head shows a smooth, sculptural bun right at the nape, but in front you have a graceful ponytail that starts high and flows down the side or center. It’s the ultimate in polished sophistication, giving you the elegance of an updo with the contemporary feel of a ponytail. Think Old Hollywood meets modern chic.
Why This Works for Prom
A low bun is inherently elegant and takes years off your look through its sculptural simplicity. When paired with a side-swept ponytail, you get movement and a more youthful silhouette without sacrificing sophistication. This style also keeps hair completely off the neck and shoulders, which is perfect if you’re wearing a strapless dress or a gown with an ornate back.
Creating the Dual-Element Look
- Blow-dry hair straight and apply smoothing serum for a sleek base
- Create a deep side part, slightly off-center, for a dramatic effect
- Gather hair at the nape of your neck as if you’re making a low ponytail, but twist it gently and wind it into a flat spiral bun
- Secure the bun with bobby pins, then smooth flyaways with edge control
- From the part, take a section of hair from the fuller side and gently pull it down and around toward the back, anchoring it into or above the bun
- Tease this side section very slightly before smoothing the surface for a voluminous but polished appearance
- Finish with flexible hold hairspray so the ponytail section has movement but maintains its shape
Pro tip: The bun works best when it’s truly flat and close to the head — resist the urge to make it puffy or textured, which would cheapen the overall sophisticated vibe.
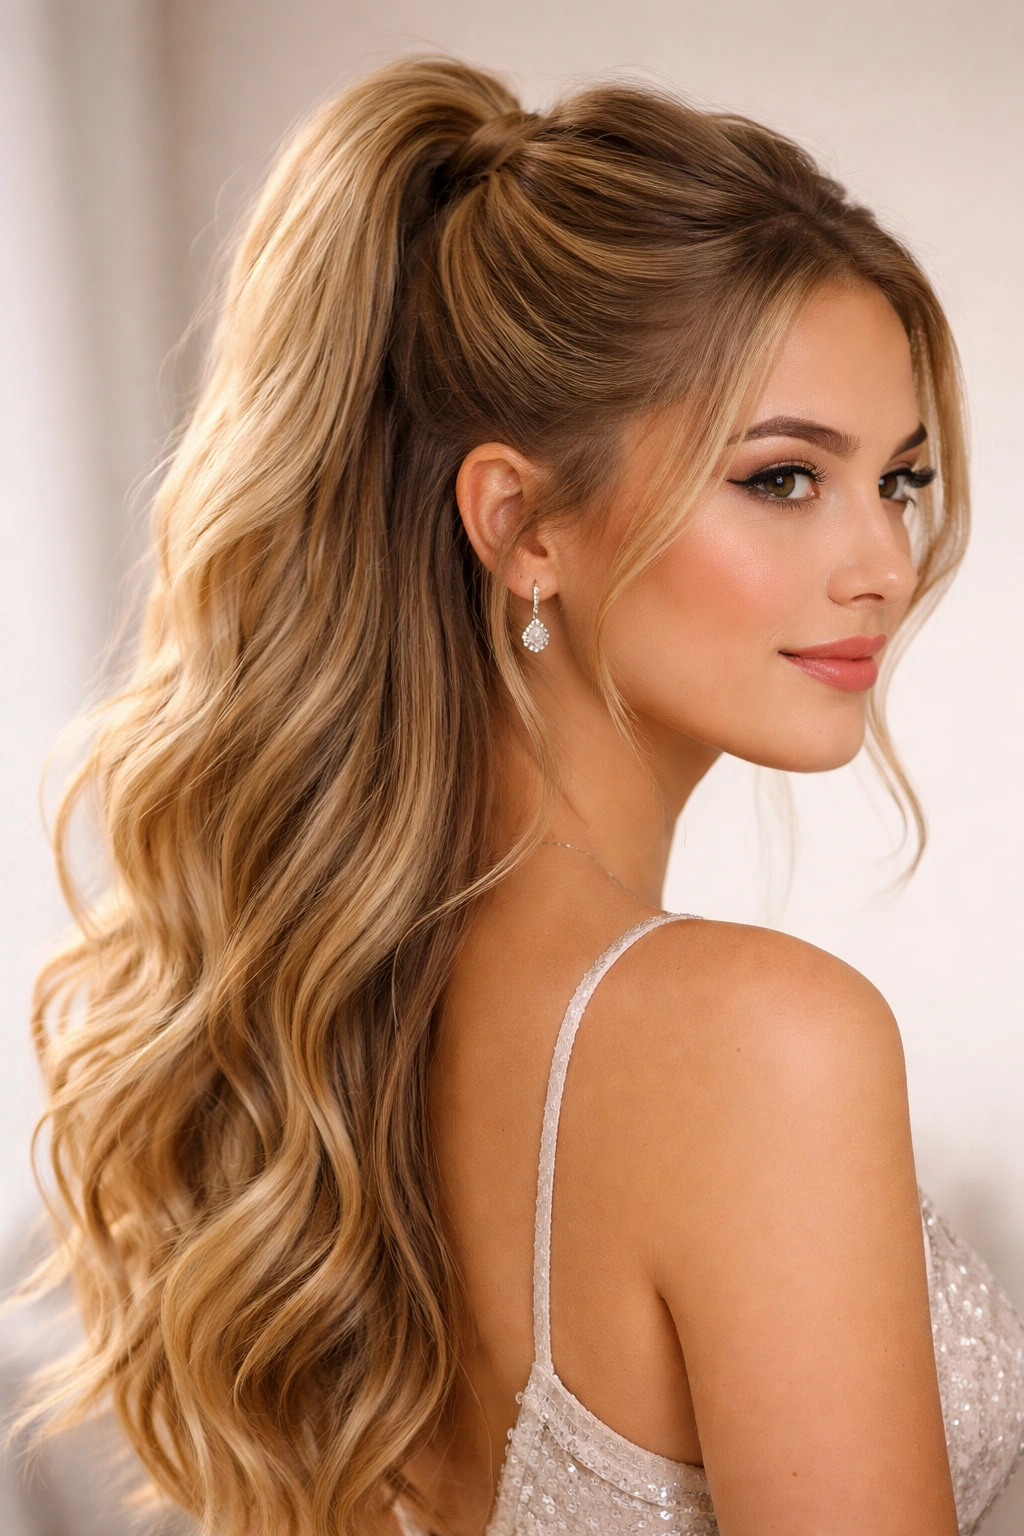
4. Voluminous Teased Pony
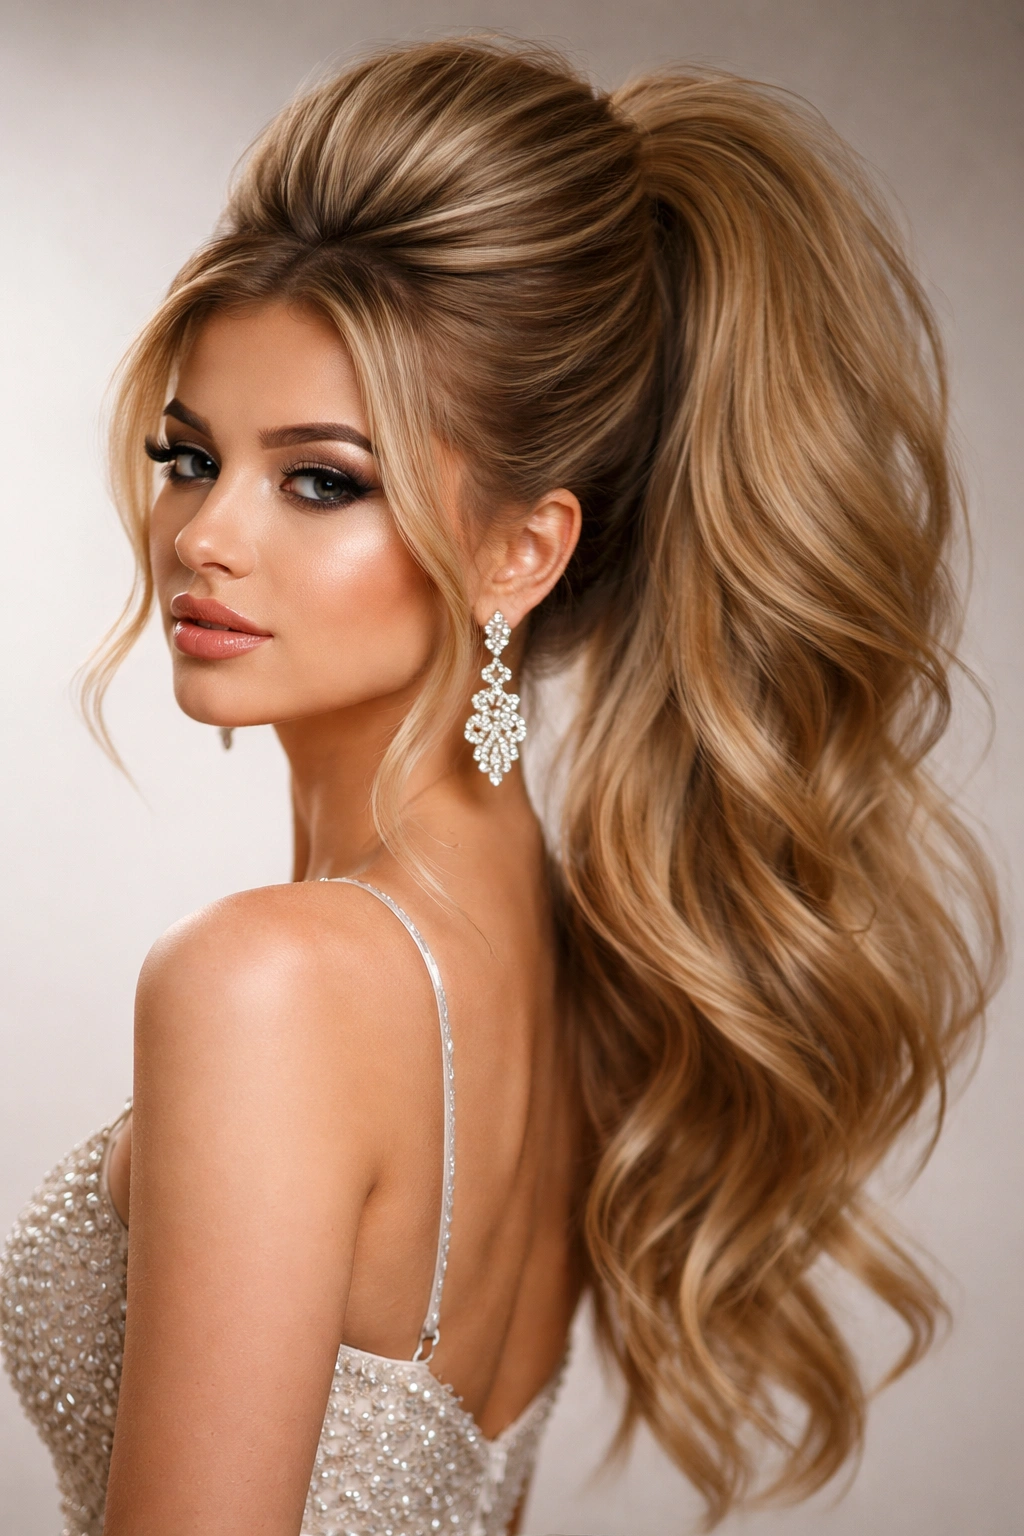
This is prom hair at its most dramatic and glamorous. Everything starts with serious teasing at the crown to create maximum volume, then it’s all smoothed into a high, thick, visibly full ponytail that has presence and movement. If you want to turn heads the moment you walk into the room, this is your style. It works beautifully with ball gowns, A-line dresses, or any look where you want to make a bold statement.
The Science of Teasing Done Right
Teasing creates texture and grip in your hair, allowing you to build volume without damaging the hair shaft — when done correctly, it’s completely reversible. The key is using the right technique: backcomb specific sections rather than rough brushing, which tangles hair less and creates a stronger, more voluminous base.
Building Maximum Volume
- Blow-dry hair with a round brush to create baseline volume and movement
- Section the crown area (roughly from your forehead to the crown) into three sections: center and two sides
- Tease each section using a fine-tooth backcomb, working from the roots about three-quarters of the way up the hair shaft
- Create significant volume but don’t go overboard — you want full, not cartoonish
- Smooth the outer layer of each teased section with a paddle brush, creating a sleek surface over the textured base
- Gather all hair into a high ponytail, ensuring the teased sections are incorporated fully into the base
- Smooth the sides and front hairline with edge control for a refined finish
- Wrap the base and secure with bobby pins, then mist with flexible hold hairspray that allows movement
Worth knowing: Teased hair needs to be treated gently when you take it down — use a detangler spray and a wide-tooth comb, working from the ends upward, and never brush roughly through teased sections while they’re dry.
5. Twisted Wrap Ponytail
Create sophistication through movement and dimension with a twisted wrap style: instead of pulling hair straight back, you gently twist sections as you gather them, then wrap additional twisted sections around the base for a sculptural, three-dimensional effect. It’s more texture-forward than a classic pony but still incredibly polished. This style suits gowns with intricate beadwork or interesting silhouettes because it doesn’t compete — it complements through subtle movement and depth.
What Makes Twisted Details Elegant
Twists create visual interest without the formality of braids. They’re faster to execute, slightly forgiving if the sections aren’t perfectly even, and they photograph beautifully because they catch light and create shadow detail. A twisted ponytail reads as intentional and designed, suggesting you spent time on this (even if you didn’t).
The Twisted Assembly Process
- Start with hair that has gentle waves or a slight curl — this gives the twists grip and makes them hold longer
- Take a section from one side of the crown and begin a simple two-strand twist, incorporating hair as you go, working toward the center back
- Repeat on the other side, creating a mirror image
- Bring both twisted sections together at the center back and secure with a bobby pin, then gather any remaining hair into a ponytail
- Take two small sections from underneath the ponytail base and twist them together, then wrap this twisted section around the elastic base
- Pin the wrapped twist in place, letting the end fall loosely into the ponytail for a finished appearance
- Tease the ponytail itself slightly for volume, then smooth the outer layer
- Finish with light hairspray that allows movement
Pro tip: Ask your stylist to leave the very ends of your ponytail slightly textured or loosely curled — this prevents the style from looking too structured and adds a romantic finishing touch.
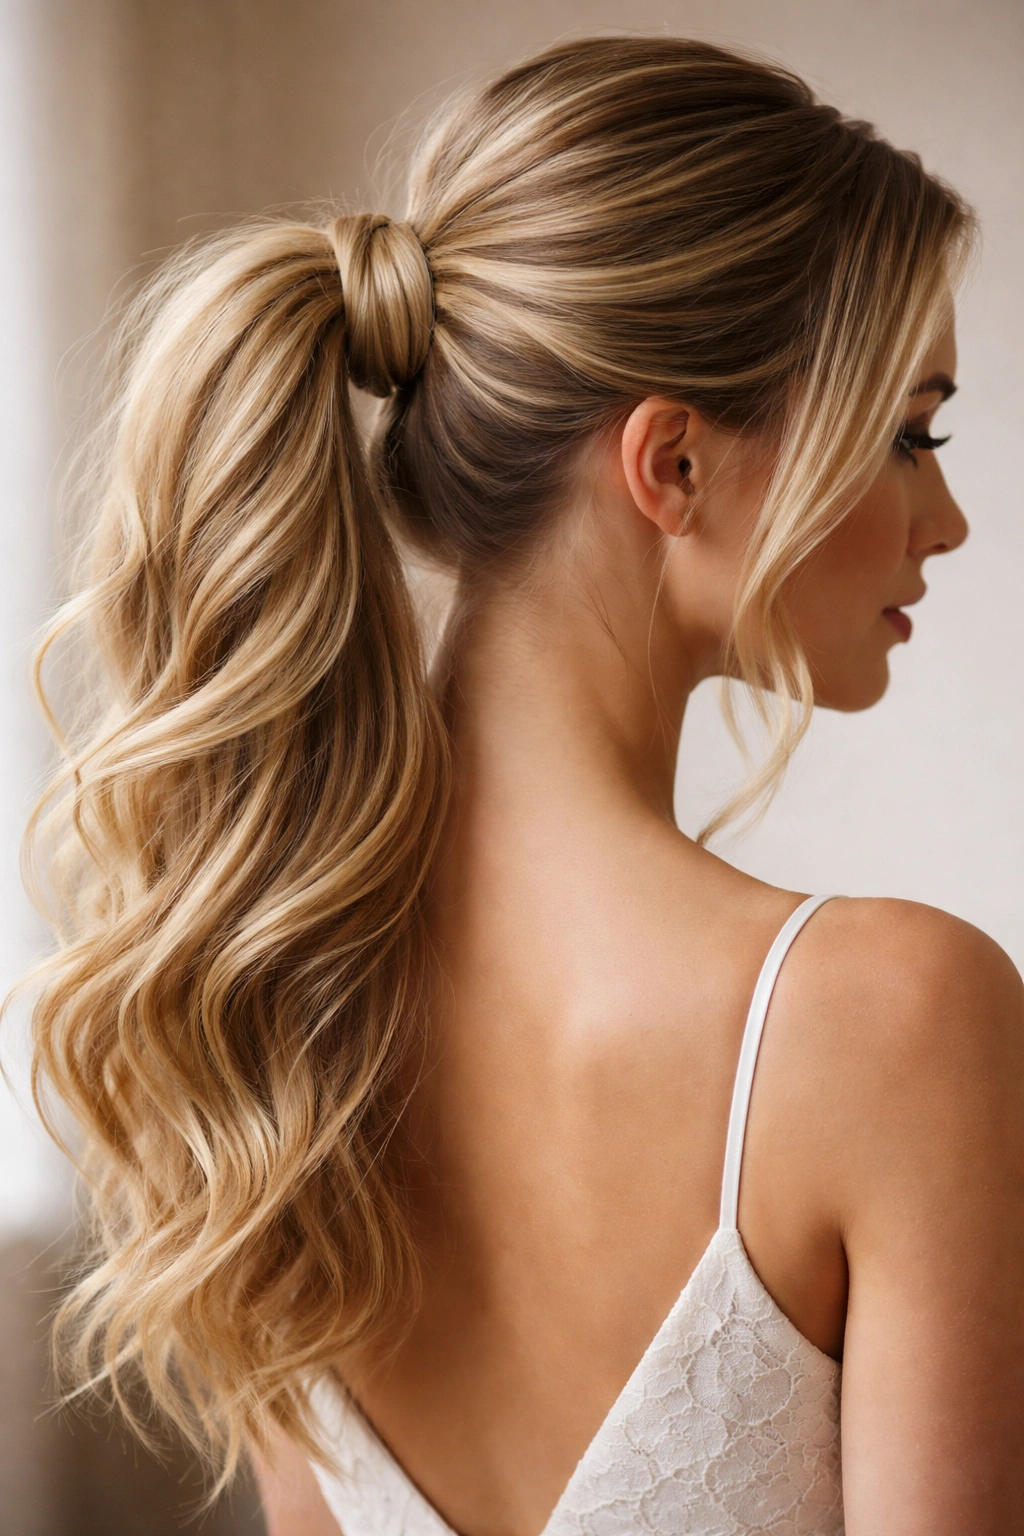
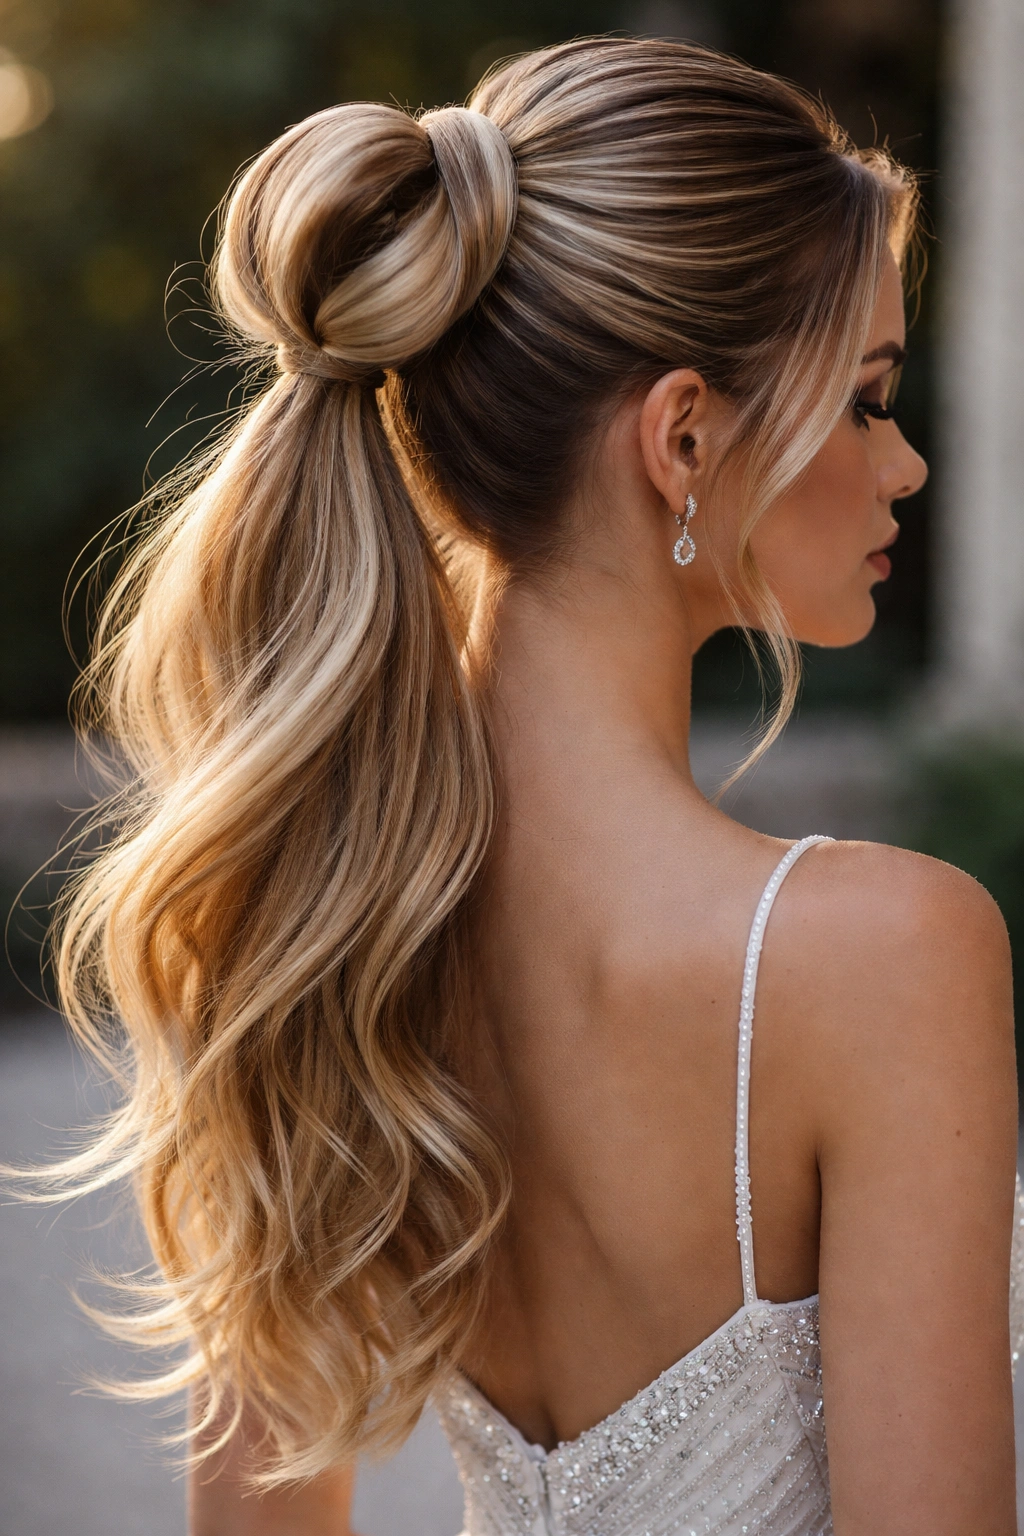
6. Half-Up Crown Pony
This is the perfect choice if you want to show off beautiful long hair while still getting it off your face and neck. The hair is pulled up from the crown area and secured into a ponytail, while the bottom half remains down, creating a hybrid style that’s youthful, romantic, and surprisingly versatile. You can wear it sleek or textured, add braids or keep it simple, and it works with every dress aesthetic from ballroom gown to slinky slip dress.
Why This Style Feels Modern
Half-up styles have moved past their preppy origins and now feel contemporary and intentional. They’re also incredibly forgiving because they don’t require the precision of a full updo, yet they accomplish the same goal of face-framing and nape-exposure. This style lets you show off both the back and front of your dress and body in a way a full updo doesn’t.
Creating Dimensional Half-Up Structure
- Start with curled or waved hair — this adds texture and body that makes the style feel fuller
- Create a part at the crown, slightly off-center, and tease very gently at the crown for lift
- Take two sections from the front on either side of the face and twist them back, incorporating hair as you go
- Bring the twisted sections together at the center back and secure with bobby pins and an elastic
- You now have your half-up base; the lower section will fall loose
- For extra detail, take a small section from the front and wrap it around the elastic base, securing with a bobby pin that blends with your hair color
- Wave or curl the loose bottom section with a large-barrel curling iron for movement and softness
- Finish with flexible hold hairspray so everything moves naturally as you dance
Worth knowing: This style works best on hair that’s at least bra-strap length — shorter hair can look sparse in the loose section.
7. Dutch Braid Accent Pony
Instead of weaving a braid around the crown like in style #2, this version creates a bold, clearly visible Dutch braid on one side that runs from the temple to the crown, where it merges into a sleek high ponytail. The braid becomes a deliberate design element rather than a subtle accent, making it ideal for someone who wants texture and detail to be obviously intentional. This style pairs beautifully with an asymmetrical dress or one with dramatic side draping.
The Visual Impact of a Visible Braid
When a braid is meant to be seen, it transforms the entire look from “delicate” to “designed.” You’re making a statement that you chose this specific detail. Dutch braids catch light differently than regular braids, creating shadow and dimension that photographs beautifully and looks especially striking from the side.
Executing the Statement Braid
- Blow-dry hair straight or with a slight wave for texture grip
- Create a deep side part, exaggerating it more than usual — this sets up the asymmetry
- From the deeper side (the fuller side of the part), take a section at the temple and begin a Dutch braid
- Braid closely to the head, following the natural line from temple toward the crown, incorporating hair as you go
- Keep the braid itself fairly thick and visible — this is not a delicate detail
- When you reach the crown, secure the braid end temporarily with a small bobby pin
- Gather all hair including the braid into a high ponytail and wrap the base
- Remove the temporary pin and let the braid end flow naturally within the ponytail
- The contrast between the smooth, sculpted braid and the voluminous or wavy ponytail creates visual interest
- Finish with hairspray that holds the braid but allows the ponytail to move
Pro tip: This style looks stunning when you curl the ponytail ends into loose, romantic waves — the contrast between the structured braid and soft curls is incredibly photogenic.
8. Textured Messy Updo Pony

Sometimes the most elegant look is the one that appears effortless, and a textured, slightly undone updo ponytail delivers that vibe perfectly. Everything is teased and textured for volume, nothing is smoothed flat, and there’s a deliberate softness around the face and nape. It’s sophisticated without being fussy, modern without looking unfinished, and it’s especially stunning if you have medium to thick hair or natural texture to work with.
Why Textured Looks Trend at Prom
More and more, prom hair is moving away from the pageant-perfect aesthetic toward something that feels more authentically “you.” A textured ponytail allows personality to show through while still being fully styled and intentional. It also photographs beautifully because the texture catches light in a way that flat, slick styles don’t.
Building Intentional Texture
- Blow-dry hair with a round brush to create volume and soft waves
- Use a curling iron to add loose waves or curls throughout — this is your texture foundation
- Tease the crown and upper back sections generously but leave the teasing visible under a thin, smoothed layer
- Gather hair into a high ponytail, but instead of smoothing everything down, maintain the textured appearance
- Don’t wrap the base with hair — instead, use a decorative metal cuff or hair wrap that coordinates with your dress
- The ponytail itself should be full and have visible texture, not smooth and slick
- Gently pull a few soft pieces around the face and at the nape to create softness and movement
- Use texture spray or sea salt spray to enhance the slightly undone feel, then finish with flexible hold hairspray
Worth knowing: This style actually requires more skill to execute than it appears — there’s a fine line between “textured and intentional” and “looks like you didn’t try,” so work with a stylist who understands the aesthetic you’re going for.
9. Flower Crown Pony
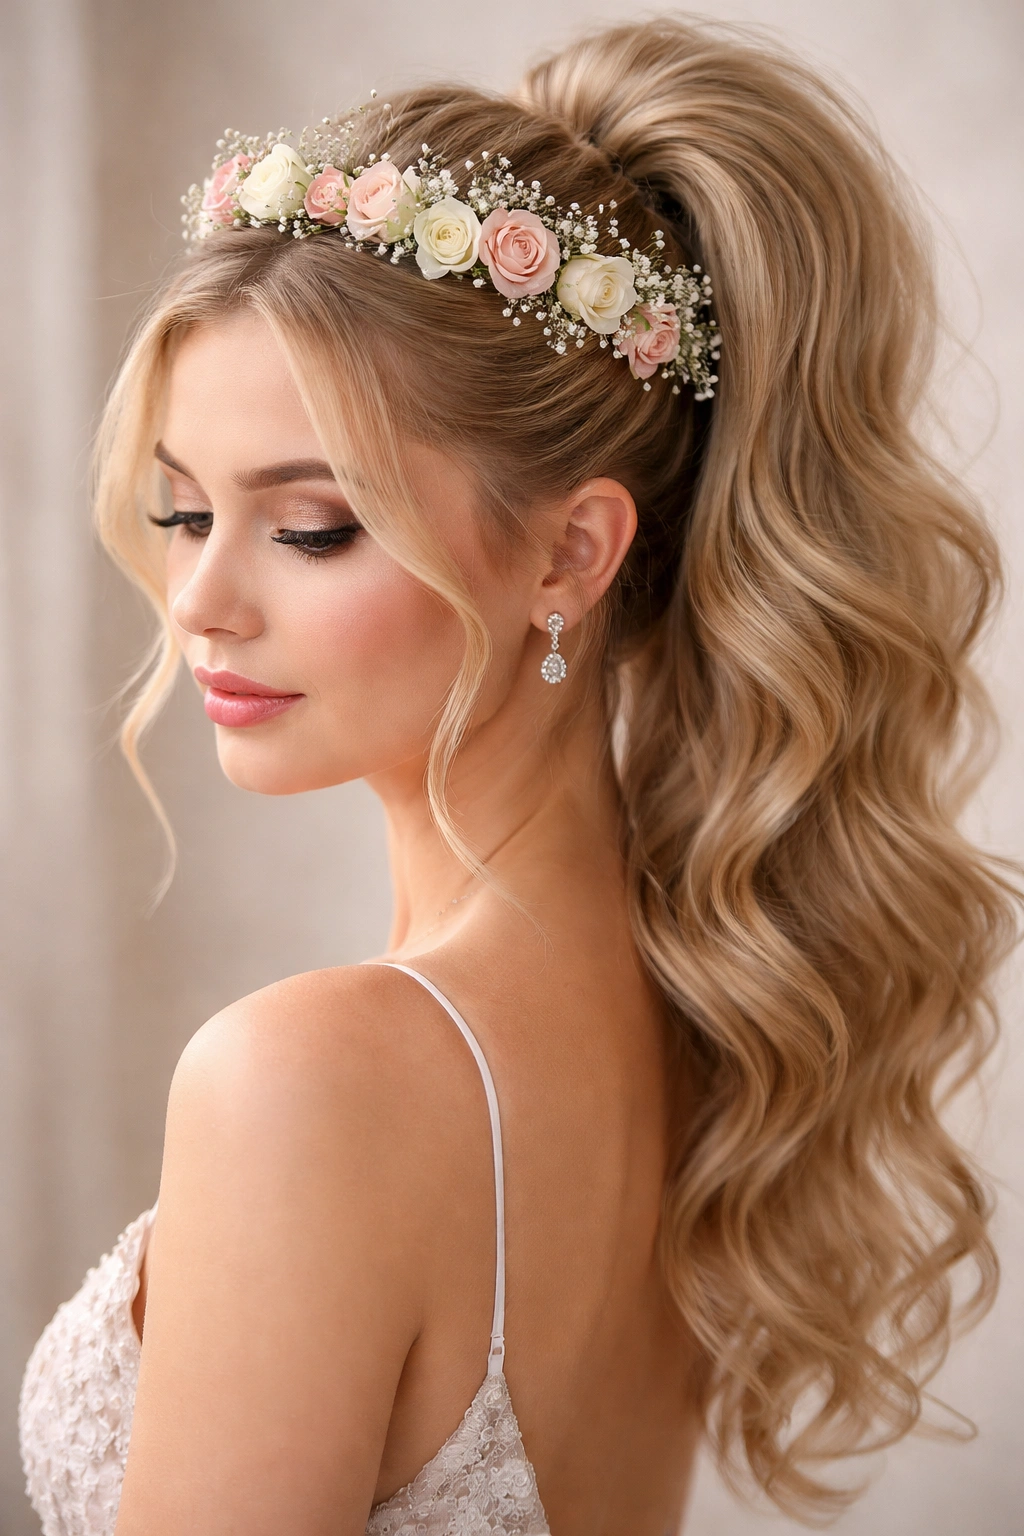
Perfect for a romantic, garden-inspired, or outdoor prom, a flower crown integrated with an updo ponytail is absolutely ethereal. The flowers sit at the crown where the ponytail begins, creating a halo effect, while the ponytail itself flows gracefully below. You can go with fresh flowers (which require careful conditioning throughout the night), faux flowers (which last all evening without maintenance), or even a delicate metal flower crown for a more modern interpretation of romance.
Creating the Floral-Pony Fusion
A flower crown doesn’t replace your ponytail base — it enhances it. The flowers sit on top, held in place with the same bobby pins and hair that secure the ponytail itself. The effect is one of ultimate femininity and romance, but it’s also surprisingly wearable for hours of dancing and movement.
Building Your Flower-Adorned Style
- Style your hair in a high ponytail using the classic method — sleek or slightly teased depending on your preference
- Secure the ponytail base and wrap it with hair for a finished look
- Position your flower crown at the crown of the head, where the ponytail begins
- Secure it with bobby pins that are hidden beneath flowers or woven into your hair
- Use floral wire or small U-pins to anchor individual flowers if needed for security
- The ponytail itself should be full enough to provide visual balance to the flowers — don’t let it look thin
- Curl or wave the ends of the ponytail for added romance and movement
- If using fresh flowers, ask the florist about preservative mist or conditioning spray that keeps them fresh longer
Pro tip: Visit with your florist at least two weeks before prom to discuss which flowers hold up best under temperature changes and moisture — roses and carnations are sturdier than delicate orchids.
10. Slicked-Back Gel Pony
For an ultra-modern, sleek aesthetic, a gel-slicked ponytail pushed back as far as possible on the crown reads as edgy, confident, and undeniably contemporary. Everything is pulled back tightly with styling gel or strong-hold pomade, creating an almost architectural look with a high, prominent ponytail. This style suits angular face shapes beautifully, shows off statement jewelry, and works especially well with minimalist or avant-garde dress choices.
The Confidence Factor
A slicked-back pony requires serious self-assurance because your entire face is exposed. But when you wear it with confidence, it’s one of the most striking styles possible. This is the ponytail for someone who wants to make an unmissable impression and doesn’t mind the boldness of showing every angle of their face and head shape.
Achieving Sculptural Smoothness
- Start with clean, damp hair for the best hold
- Apply a smoothing serum to the damp hair, concentrating on the mid-lengths and ends
- Blow-dry with a paddle brush for completely straight texture — any wave or curl will disrupt the sleek effect
- Apply styling gel or pomade to the hairline and throughout the crown and sides, working it through with your fingers
- Use a fine-tooth comb or a gel brush to smooth every hair back and away from the face
- Gather into a high ponytail, pulling back as far as the hair will comfortably go
- Smooth every flyaway and baby hair back with gel and a small brush, creating an almost wet appearance
- Wrap the base with a hair-colored elastic or a decorative cuff
- The finished look should be so slick you can see your scalp, and no hair should be loose or escaping
Worth knowing: Strong-hold styling products can feel heavy or stiff, so ask your stylist to use a flexible gel or pomade that still allows a tiny bit of movement rather than a cement-like product.
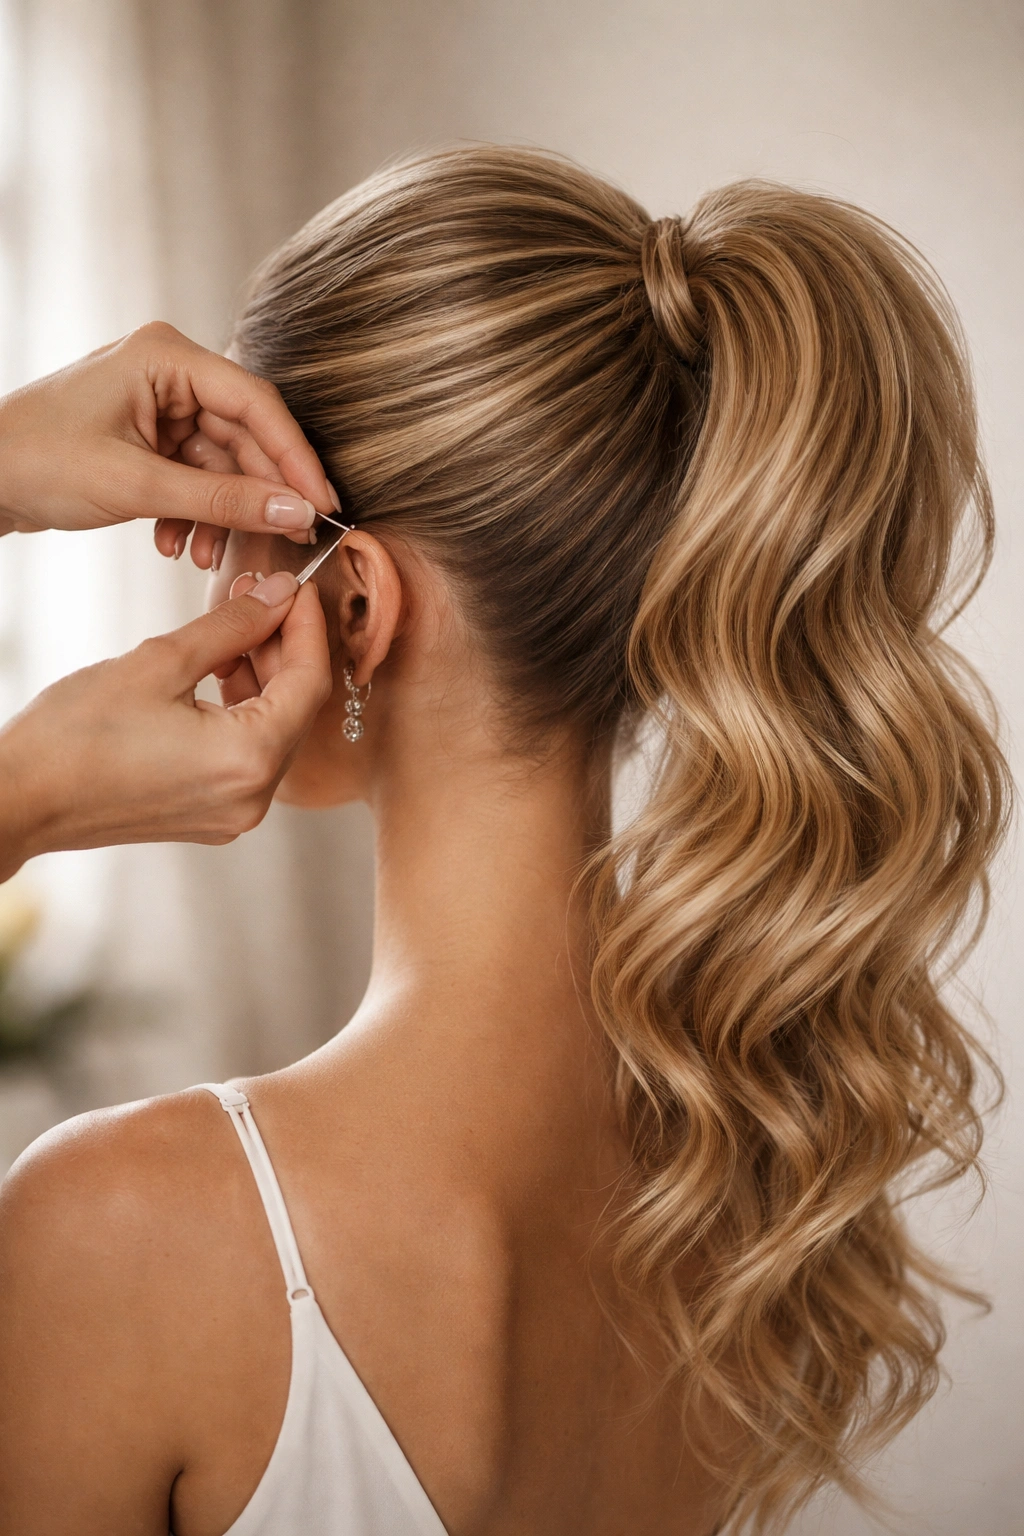
11. Curled Ends Cascade Pony

Bring major glamour and movement to a high ponytail by curling the ends into loose, romantic spirals that cascade down the back or down one side. The ponytail base stays smooth and polished, but the length becomes a feature — waves and curls create dimension, light reflection, and a definitely-getting-dressed-up energy. This style especially suits heavier hair because the curls give it somewhere to go, preventing it from looking one-note or flat.
Why Curled Ends Create Impact
Straight ponytails can read as simple or severe depending on how you style them. But the moment you add curled ends, the entire aesthetic shifts to “I got ready for something important.” The curls add femininity, movement, and visual interest without compromising the polished ponytail base.
Building the Cascade of Curls
- Style the ponytail base using the classic or voluminous method, depending on how much crown presence you want
- Secure the elastic and wrap the base
- Divide the ponytail into 4 to 6 sections, depending on thickness and the tightness of curl you want
- Using a 1.25-inch curling iron, wrap each section around the barrel, holding for 10 to 12 seconds
- Curl away from the face if the ponytail is centered, or all in the same direction if it’s to one side
- Let each curl cool on the iron before releasing — this sets the shape
- As curls cool, they’ll tighten; once fully cooled, gently separate the curls with your fingers to create soft, loose waves rather than tight ringlets
- The ends should look flowing and romantic, not structured or uniform
- Finish with flexible hold hairspray that allows movement — you want these curls to bounce as you move
Pro tip: Schedule your stylist appointment late enough that the curls can be done close to when you leave for prom — curls hold much longer on freshly done hair and will stay bouncy all night.
12. Infinity Loop Pony
Create visual intrigue with a more modern, sculptural approach: the ponytail is folded or looped back on itself and secured at the crown, creating a figure-eight or infinity symbol effect when viewed from behind. The result is unexpected, artistic, and completely Instagram-worthy. This style suits someone who wants to stand out with something genuinely different, rather than executing a classic style perfectly.
The Artistic Appeal
An infinity loop ponytail is a conversation starter. It’s not something everyone sees at prom, so it makes a statement about creativity and individuality. From the front, it reads as a sleek, modern updo; from the back, it’s a sculptural element that shows clear intentionality and artistry.
Creating the Loop Structure
- Blow-dry and smooth your hair, then gather it into a very high ponytail at the crown — higher than typical
- Secure with a strong elastic; this is your base
- Take the entire ponytail and fold it back down and then up again, creating a loop that sits above the elastic
- The ponytail end now hangs down from this loop
- Use additional bobby pins to secure the loop in place, hiding them within the looped hair
- You’ve essentially created a figure-eight: the top loop and the hanging tail form the shape
- The ponytail tail can be left straight and sleek, or you can curl the very ends for softness
- Smooth the crown area to show off the architectural shape of your loop
- Finish with flexible hold hairspray that maintains the shape without looking stiff
Worth knowing: This style requires a stylist with experience and creativity — bring a clear photo or description, and ask about how it will look from both front and back before committing.
Wrapping It Up
Your prom ponytail is more than just hairstyle; it’s part of how you present yourself on one of the most memorable nights of your life. Whether you choose timeless polish, romantic texture, modern edge, or artistic flair, the right updo ponytail should make you feel confident, beautiful, and like the best version of yourself.
The most important step is booking a consultation with your stylist at least two to three weeks before prom. Bring photos of your favorite styles, discuss your hair type and length, mention your dress and neckline, and be honest about how much time you want to spend on hair maintenance during the night. A great stylist will adjust these styles to work with your specific hair and face shape, and might even suggest a hybrid that takes elements from two styles to create something uniquely suited to you.
Remember that your hair needs to feel as good as it looks — if a style makes your scalp hurt or feels so heavy you can’t enjoy yourself, it’s not the right choice no matter how stunning it appears in photos. The goal is feeling like yourself, just elevated and polished. Dance, laugh, take pictures from every angle, and enjoy knowing your hair will look impeccable the whole night through.