Braided ponytails have become a cornerstone of Black hairstyling, offering the perfect blend of protection, versatility, and undeniable style. Whether you’re heading to the office, the gym, or a special occasion, sleek braided ponytails deliver that polished look while keeping your hair secure and healthy. The beauty of these styles lies in how they work with your natural texture, celebrate your hair’s natural movement, and can be customized endlessly to match your personal aesthetic and lifestyle needs.
What makes braided ponytails so transformative is their ability to serve dual purposes—they’re both a protective styling method that minimizes manipulation and environmental damage, and a genuine fashion statement that commands attention. A well-executed sleek braided ponytail isn’t just about pulling your hair back; it’s about creating clean lines, intentional texture, and a finished look that shows you’ve invested time in your appearance. From intricate cornrow patterns that feed into a ponytail to layered braid combinations that create dimension, the range of possibilities is genuinely vast.
The following styles showcase different braiding techniques, positioning options, and finishing methods that work beautifully on Black hair. Each one offers distinct advantages depending on your hair length, texture, thickness, and the occasion you’re dressing for. Whether you prefer minimalist elegance or bold, statement-making complexity, there’s a sleek braided ponytail here that’ll become your go-to style.
1. The Classic Cornrow Ponytail
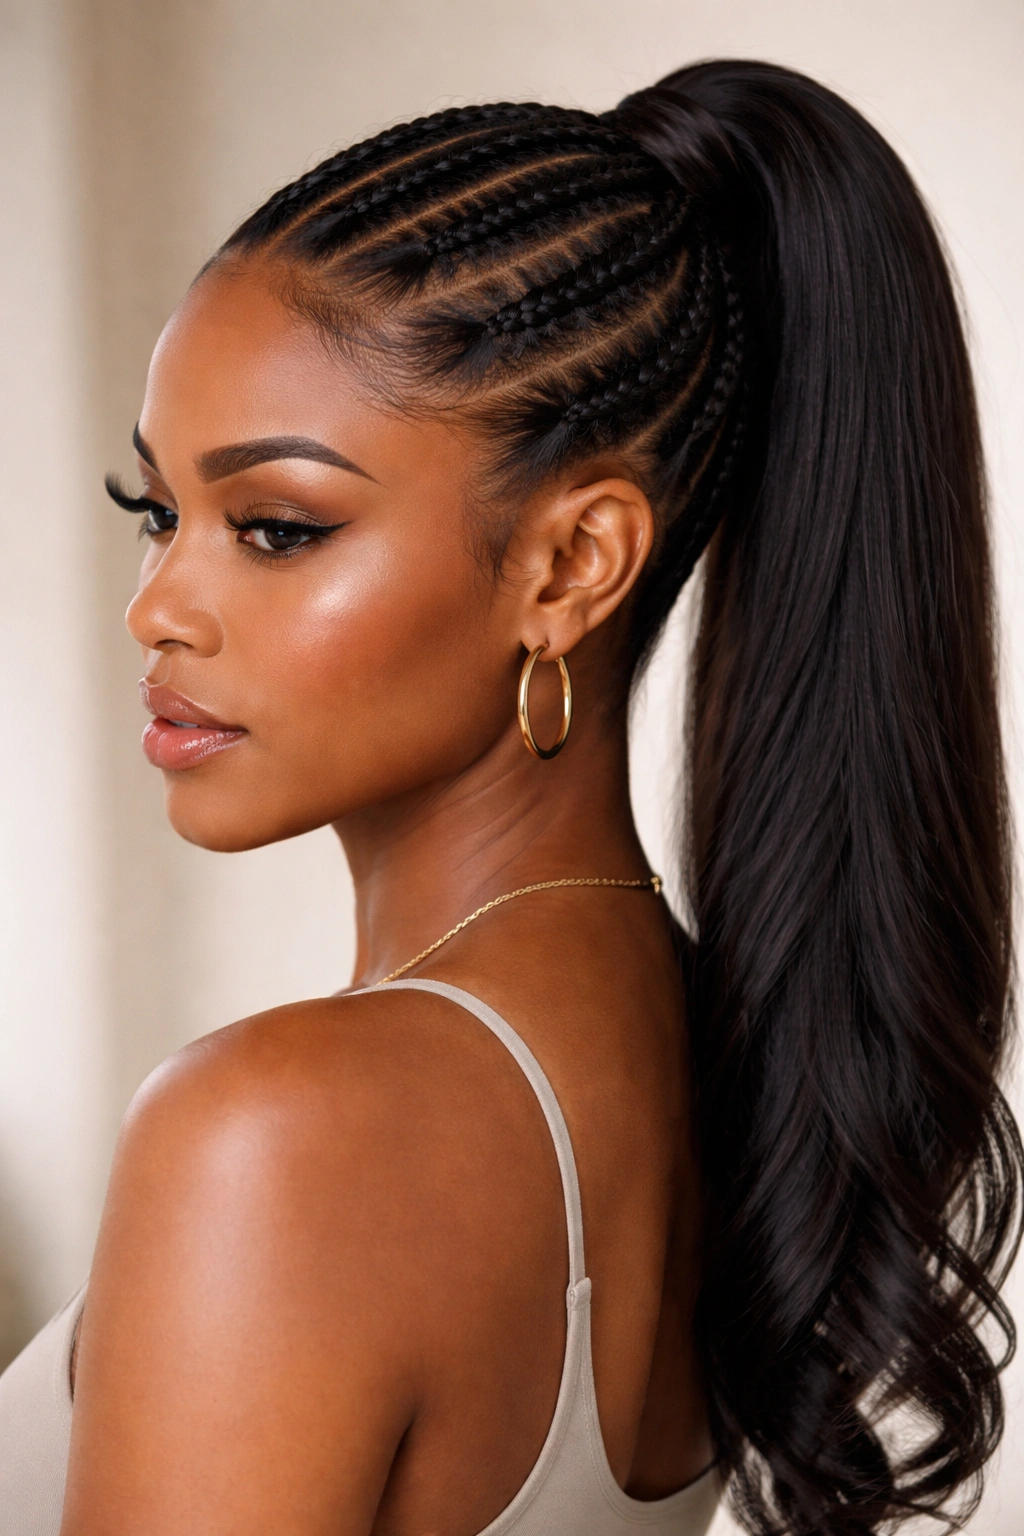
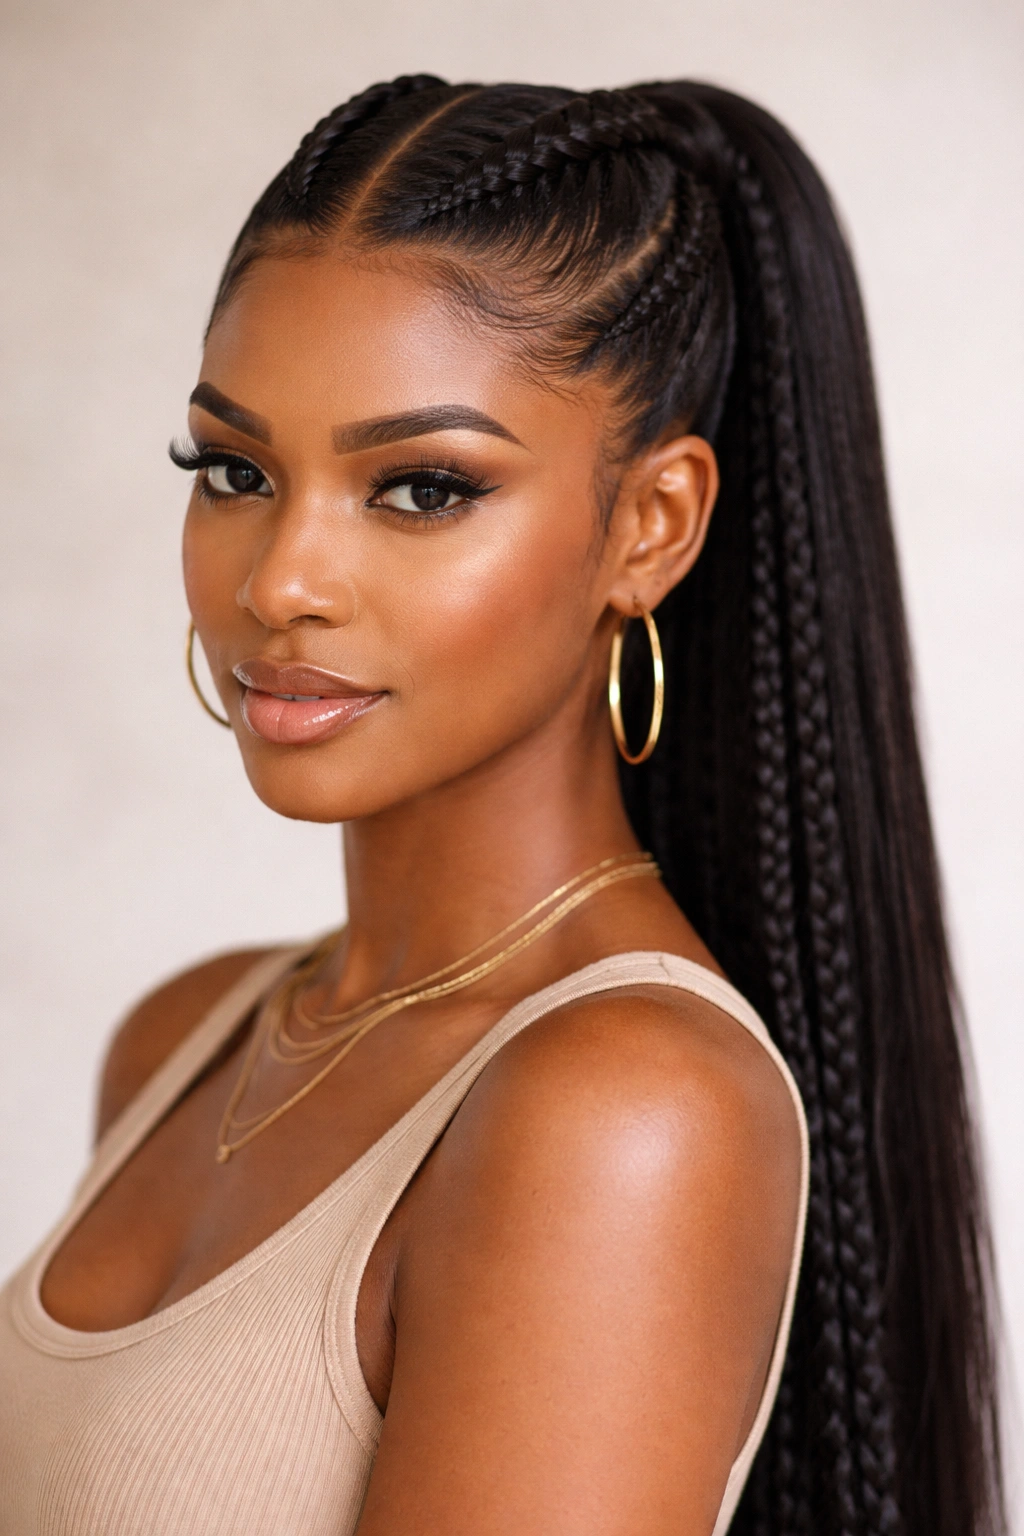
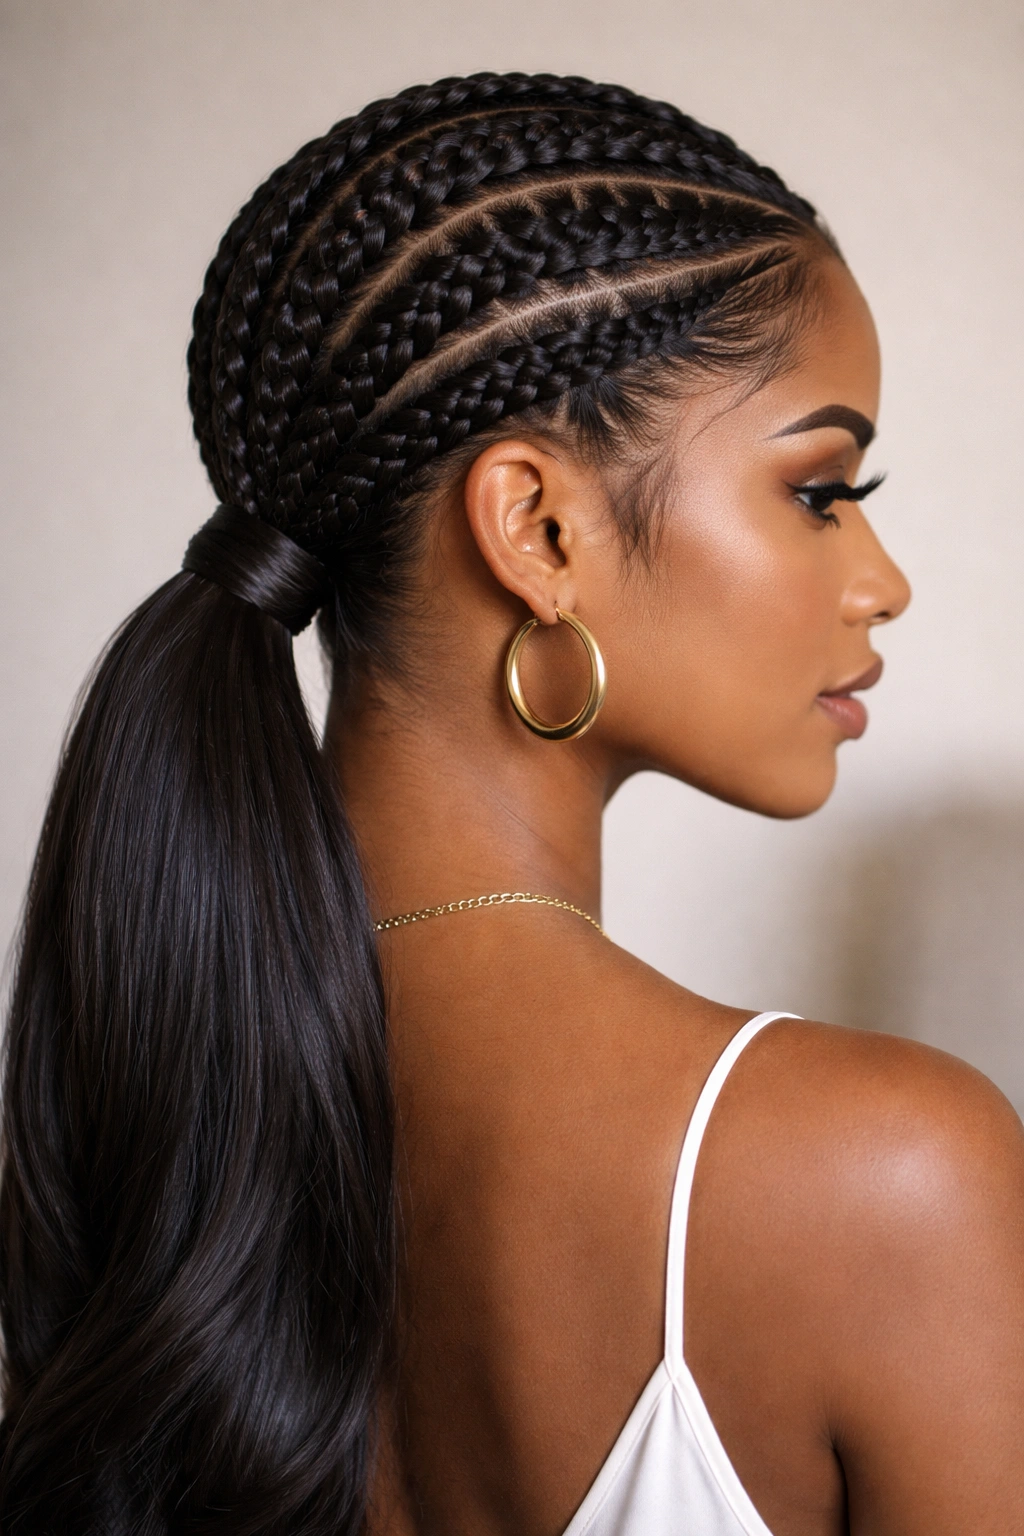
The classic cornrow ponytail is the foundation style that never goes out of fashion. This look features two, three, or four cornrows running from the front hairline straight back and feeding into a full, voluminous ponytail at the crown or nape. The cornrows create clean, defined lines while the assembled ponytail can be worn loose, braided further, or wrapped with an accent piece.
Why This Style Endures
Cornrows offer both protection and versatility in one package. They’re tight enough at the scalp to look intentional and polished, but the added volume of the ponytail prevents that overly-pulled sensation that can sometimes feel uncomfortable. The contrast between the structured cornrows and the free-flowing ponytail creates visual interest, and you can adjust the positioning—whether you route the cornrows to the crown, the side, or straight back—to flatter your face shape and personal style.
How to Perfect the Execution
Start by detangling your hair thoroughly and applying a lightweight gel to smooth the baby hairs. Divide your hair into clean sections using a rattail comb, keeping your lines straight and even. As you cornrow from the front hairline backward, maintain consistent tension—not so tight that you create unnecessary stress, but tight enough that the braid sits close to the scalp and looks intentional. When you reach the crown or nape (depending on where you want your ponytail), gather all your hair into an elastic, making sure your cornrows blend seamlessly into the ponytail body. For maximum sleekness, smooth any flyaways with edge control and set with a light mist of hairspray.
Pro tip: Use a mirror positioned behind you or ask someone to check the back, ensuring your cornrow lines are parallel and evenly spaced—this attention to detail is what separates a sloppy cornrow ponytail from a genuinely sleek one.
2. Side-Swept Braided Ponytail
The side-swept braided ponytail angles all your cornrows or braids toward one side of the head before gathering them into a ponytail positioned over the shoulder. This creates an asymmetrical, romantic look that’s ideal for dates, formal events, or when you want to showcase your profile.
Creating the Directional Flow
Begin by sectioning your hair so that your braids naturally lead toward one side. If you’re angling toward the right, your left side should have fewer, larger braids while your right side can feature multiple thinner braids—this asymmetry is what makes the style visually interesting. As you braid, keep the direction intentional, ensuring each braid follows the same diagonal path backward. When you reach your gathering point (which should be positioned slightly behind and below one ear, rather than centered), secure everything into a ponytail that falls naturally over that shoulder.
Styling for Maximum Impact
This style benefits from a softer finish than the classic cornrow ponytail. Consider leaving a few face-framing pieces loose, or gently pulling a few strands from the braids to create a slightly undone texture. If you’re wearing this for an event, you might wrap the ponytail base with a coordinating ribbon, metallic wire, or even a thin braid to add polish. The side-swept angle automatically flatters most face shapes because it creates vertical lines and opens up one side of your face.
Worth knowing: This style works particularly well with longer hair because the side positioning creates the appearance of added length and movement.
3. Wrapped Braid Ponytail with Accessory
This variation takes any braided ponytail—cornrowed, Dutch braided, or otherwise—and wraps the base with either another braid, a ribbon, thread, wire, or beads. The wrapping completely transforms the ponytail from casual to polished and allows for significant creative expression through color and texture choices.
The Wrapping Technique
After you’ve gathered your braids into a secure ponytail and smoothed any flyaways, take a thin braid (which you’ve either pre-made or create using hair extensions) and wrap it tightly around the elastic at the base of your ponytail. Secure the end of the wrapping braid with a small elastic or bobby pins hidden underneath the wrap. Alternatively, you can wrap with embroidery thread in a contrasting color, metallic wire that you’ve shaped into spirals, or even silk ribbon for a luxe finish. The key is wrapping tightly enough that everything feels secure but gently enough that you’re not adding unnecessary tension to your edges.
Design Possibilities
The color and texture of your wrap is where you can inject personality. A gold or silver metallic wrap adds instant elegance for professional settings. Coordinating your wrap color to your outfit creates a cohesive, intentional look. If you’re using beads on the wrap, space them out evenly for a balanced appearance rather than clustering them all at once.
Quick styling note: This wrapping technique works beautifully on ponytails you plan to wear for multiple days—the wrap helps maintain the shape and can be refreshed each morning with minimal effort.
4. Feed-In Braid Ponytail
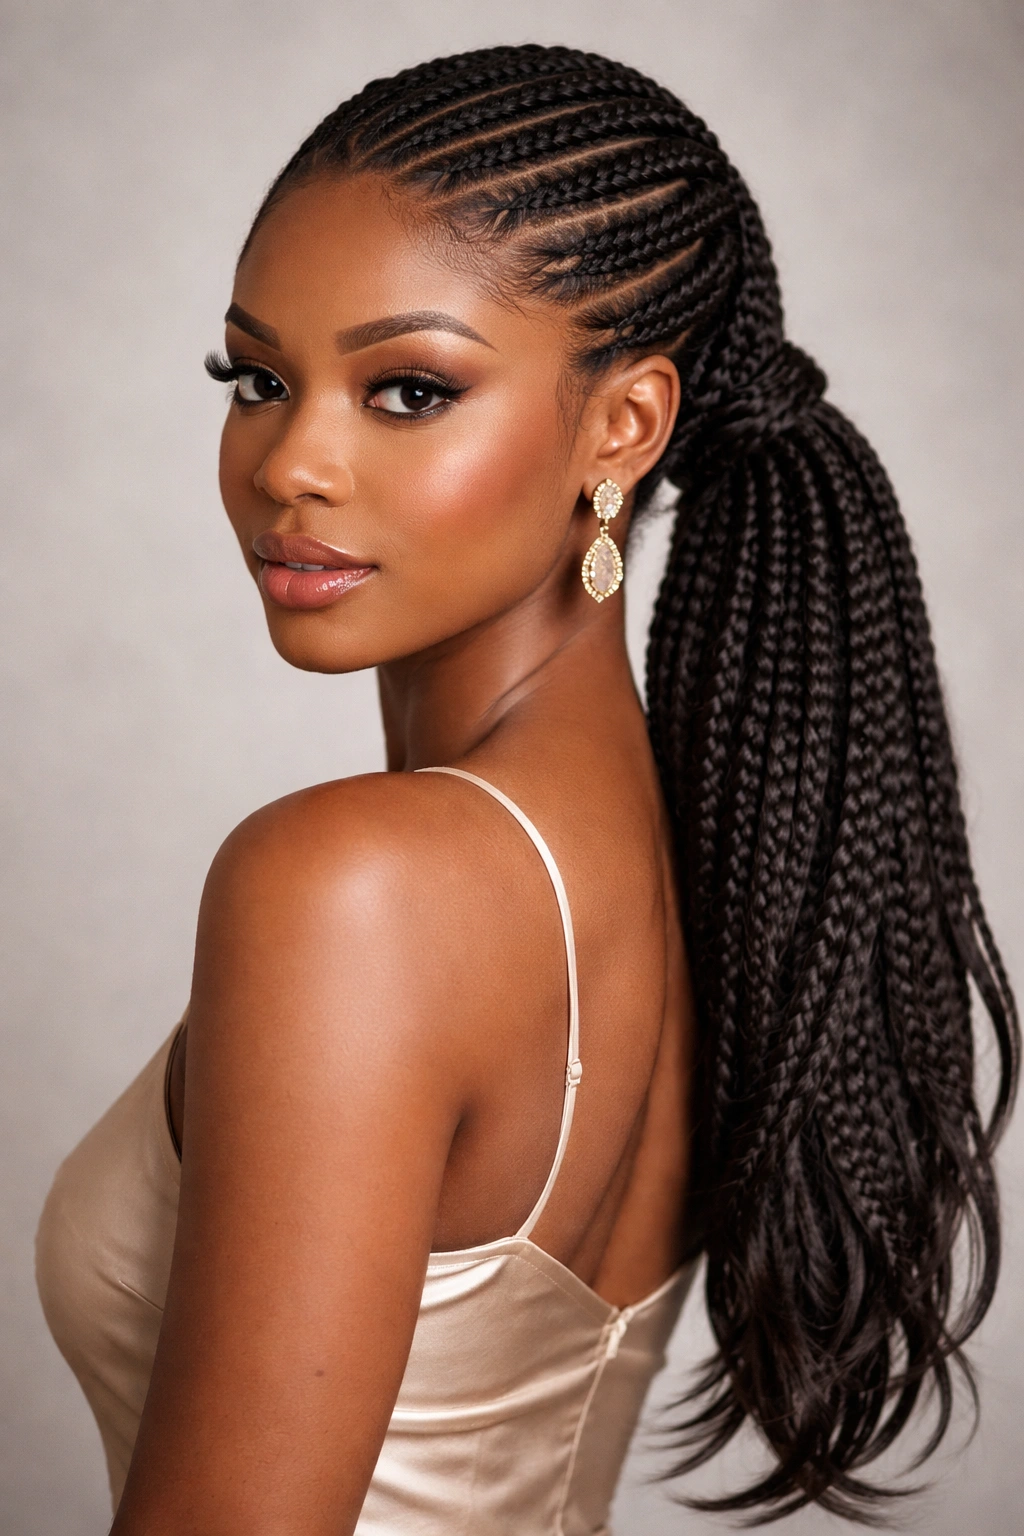
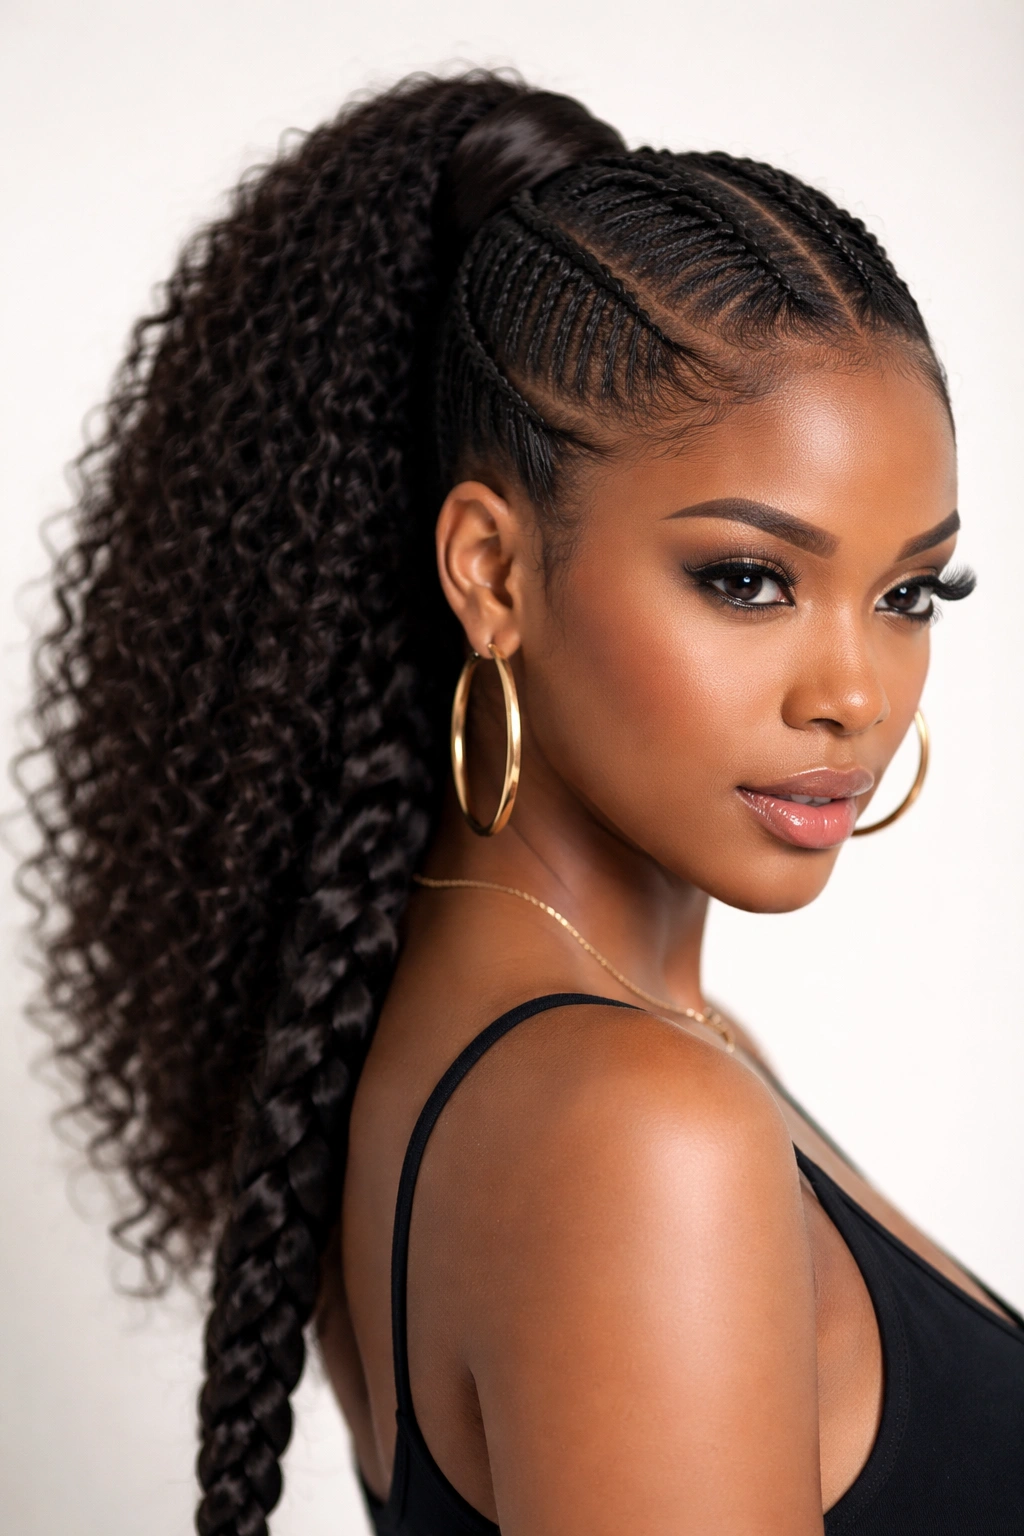
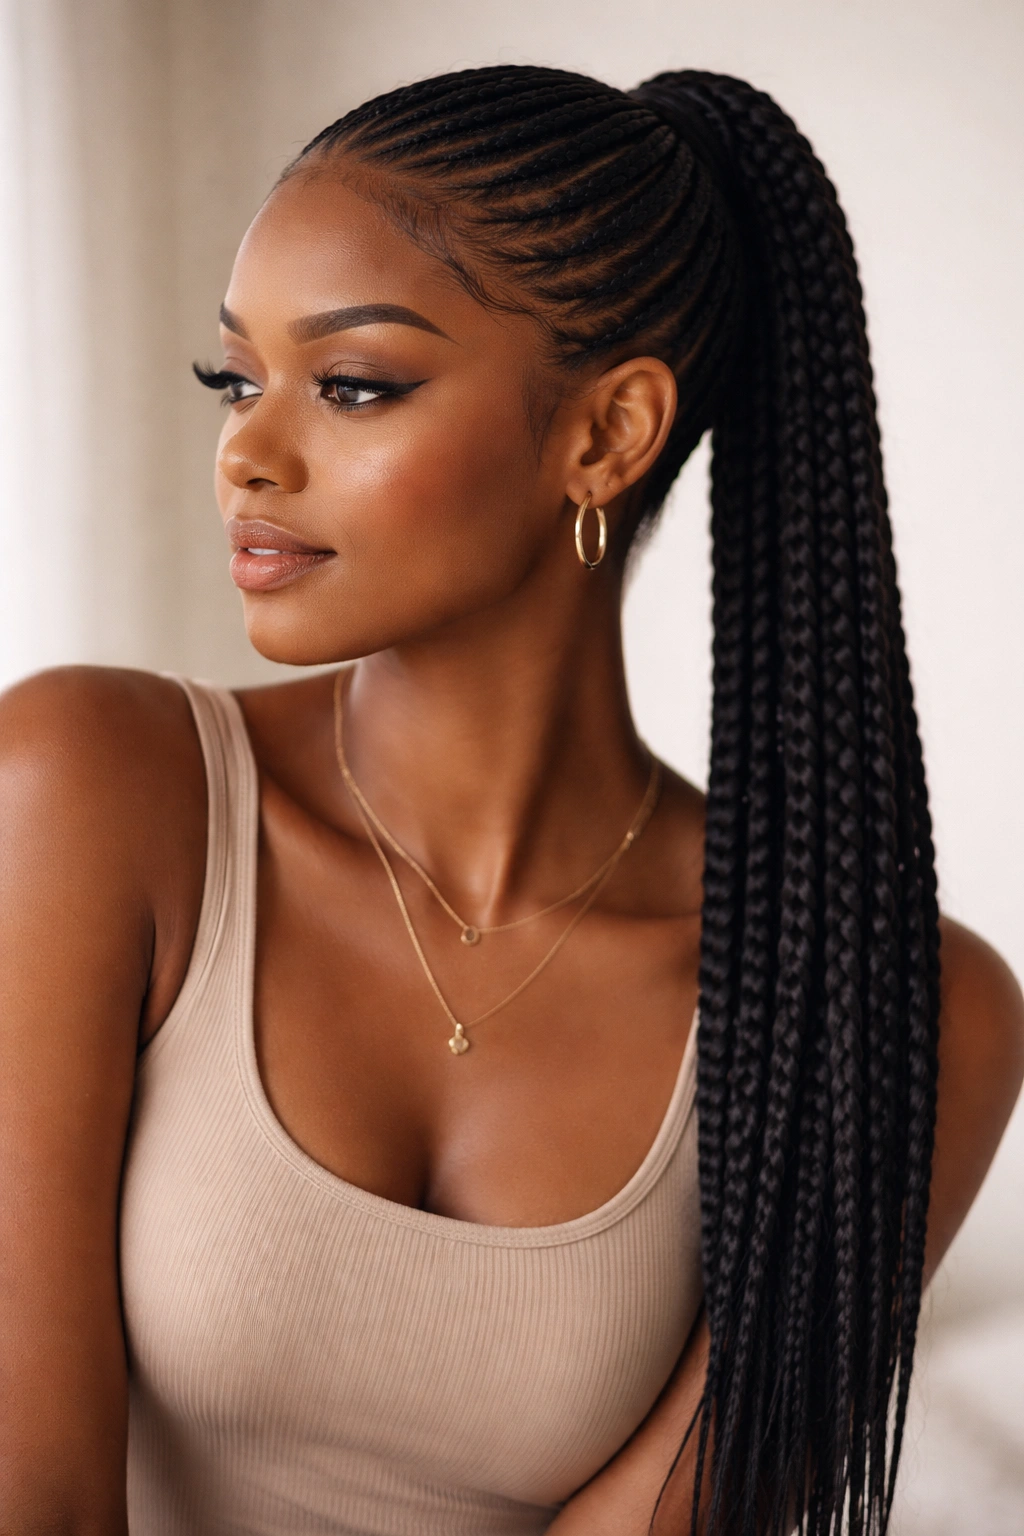
The feed-in braid technique gradually adds hair as you braid, creating a thinner, more refined braid line compared to cornrows. When feed-in braids are gathered into a ponytail, they create an elegant, intricate look that reads as high-effort and fashion-forward.
The Feed-In Method Explained
Unlike cornrows where you’re directly braiding your hair into a tight pattern on the scalp, feed-in braids start with a thin three-strand braid near your hairline, and with each wrap of the braid, you add more of your natural hair into the braid pattern. This creates a braid that appears delicate at the start and becomes thicker as it travels toward the back of your head. When multiple feed-in braids are created and fed back to meet at a central ponytail point, the overall effect is refined and intentional.
Execution and Styling
Create your feed-in braids following your desired pattern—whether that’s from each temple toward the back, from the sides toward the crown, or any other directional choice. Make sure each braid is adding hair consistently and smoothly so they appear uniform in thickness progression. Once all your braids reach your gathering point, secure them tightly into an elastic, and smooth the entire style with edge control and hairspray. The beauty of feed-in braids is that they’re naturally sleek without requiring as much product as cornrows.
Insider detail: Feed-in braids work exceptionally well on fine or medium-textured hair because the gradual hair addition prevents the overly-tight scalp tension that can sometimes accompany traditional cornrows.
5. Double Braided Ponytail with Center Part
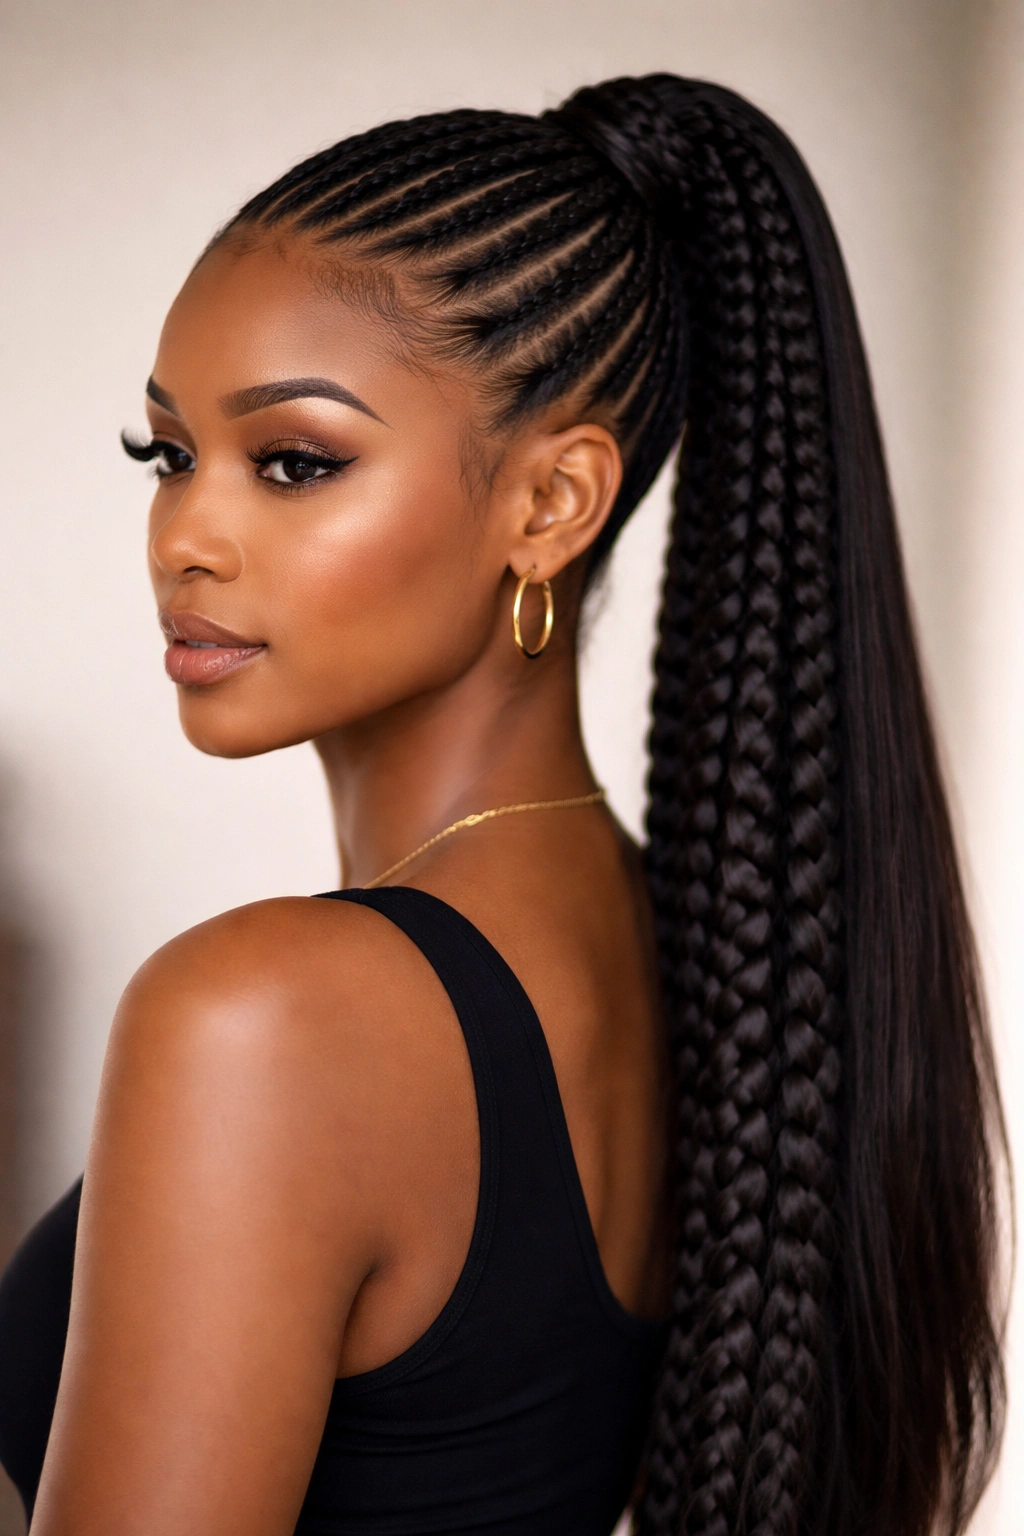
This style features two larger braids running down the center of your head from a crisp center part, feeding into a full ponytail. The center part creates symmetry and balance, while the two braids frame your face beautifully and draw attention upward.
Achieving the Crisp Center Part
Use a rattail comb to create a clean, straight line down the exact center of your head from your hairline to your nape. This line should be precise—take your time with it because this center line is the foundation of the entire style’s visual impact. Smooth each side with edge control as you work to ensure the part line stays sharp throughout the styling process.
Braiding the Center Section
Starting from your hairline, create two full braids—one on each side of the center part—and run them straight back toward the crown or nape where you want your ponytail gathered. These braids should be uniform in thickness and tension so the style reads as balanced and intentional. As you braid, keep each braid close to the center line without letting them veer outward. Once you’ve reached your gathering point, secure both braids along with any remaining hair into a full, voluminous ponytail.
Finishing Touches
The beauty of this style is in its simplicity and the sharpness of the center part. Smooth any baby hairs at the hairline with edge control, ensuring they follow the center line. The rest of the style can remain relatively natural, or you can add extra polish with a wrap around the ponytail base, beads threaded through the braids, or cuffs placed at specific points down the braid length.
Styling advantage: This style works for virtually every face shape because the center part and symmetrical braids create balanced proportions.
6. Outer Braid Ponytail with Textured Center
This style reverses the traditional approach by braiding the outer sections of the head while leaving the center section textured or loose, then gathering everything into a ponytail. The contrast between the structured braids and the looser texture in the center creates visual depth and interest.
Creating the Contrasting Sections
Divide your hair so that the outer perimeter—from your temples around to the back—is braided, while the central section from your crown to your nape is left relatively loose or receives a different texture treatment. You might create cornrows or Dutch braids around the outer edges, while the center is either twisted, loosely braided, or simply smoothed back. This variation creates a multi-dimensional effect that’s more visually complex than a uniform all-braids approach.
Gathering and Finishing
Once your braids are complete, gather the entire head of hair into a ponytail positioned at your chosen spot. The outer braids should seamlessly integrate with the textured center section, creating one cohesive ponytail. The contrast between the two textures becomes a design feature rather than an accident—it adds sophistication and prevents the style from feeling one-note or overdone.
Design tip: This style is particularly flattering when you want to highlight your face without overwhelming it with heavy braiding patterns around your hairline.
7. Sleek High Ponytail with Braided Wrap

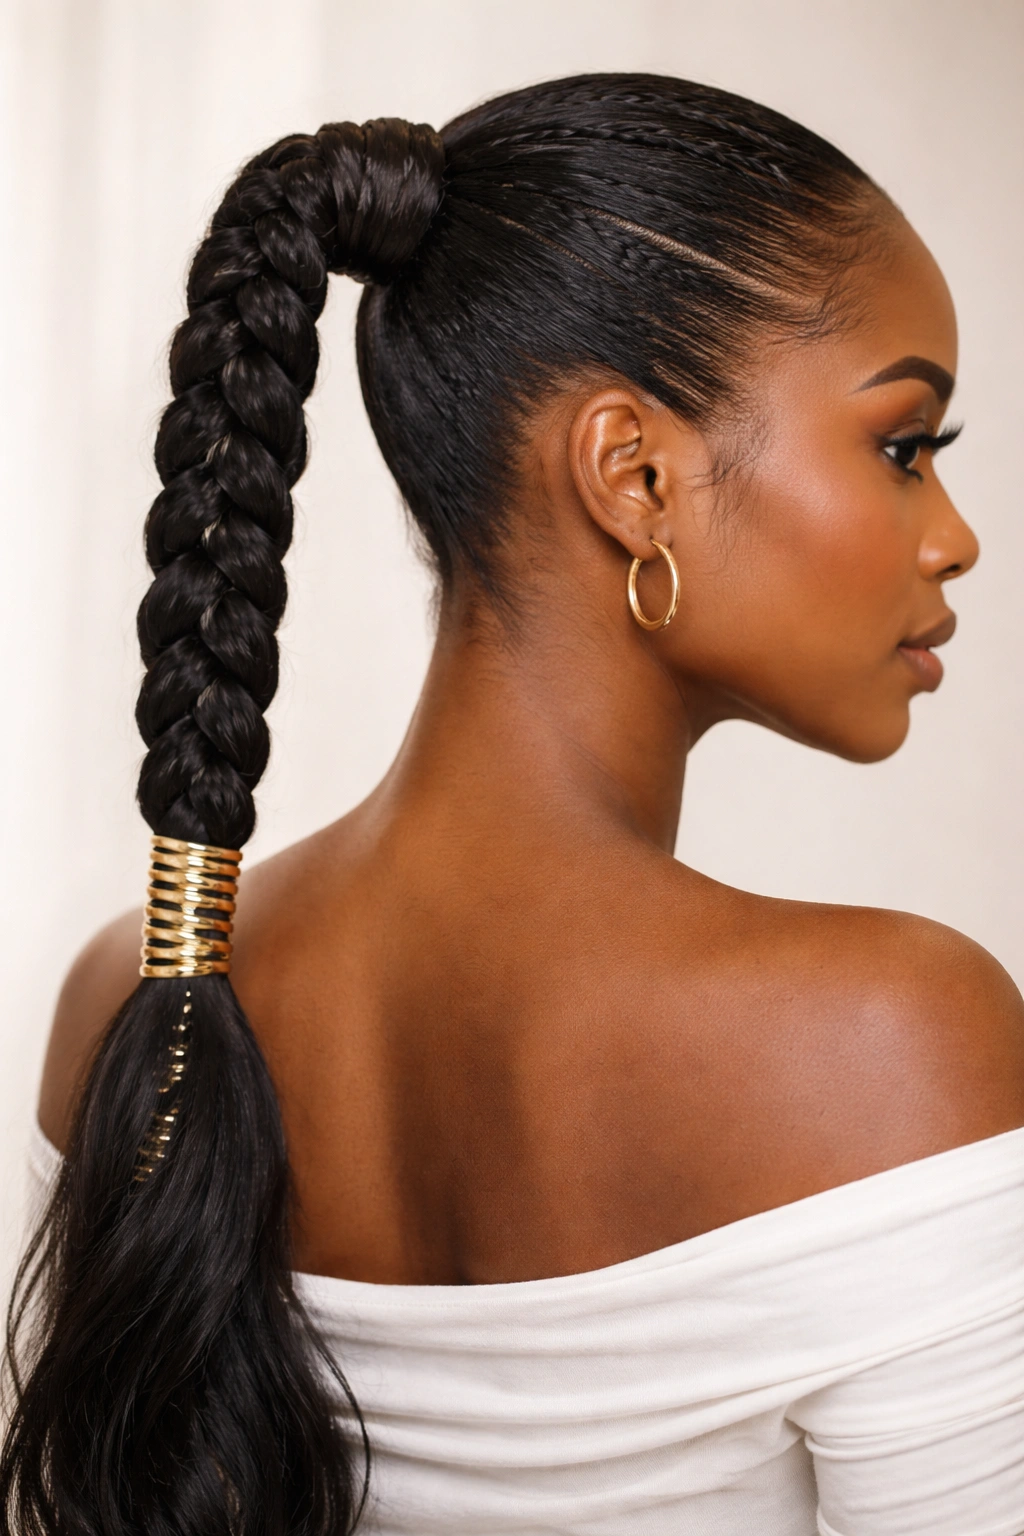
This style prioritizes the sleekness of the ponytail itself rather than intricate braiding throughout. Your hair is smoothed straight back into a high, tight ponytail, and then a single braid wraps around the base, adding just enough braiding detail to elevate the style without competing with the clean lines of the ponytail.
Achieving Extreme Sleekness
This style requires serious edge work and product. Apply a smoothing cream or gel to your entire head, using a fine-tooth comb to smooth every strand straight back. Create the highest ponytail possible if that suits your aesthetic, or position it lower and tighter based on your preference. The goal is a ponytail that looks almost gravity-defying in its sleekness—there should be zero flyaways and a glass-like smoothness to the finish.
The Braided Base Detail
Once your ponytail is secured with a strong elastic, take a thin section of the ponytail and create a braid using either your own hair from the ponytail or hair extensions. Wrap this braid around the elastic at the base multiple times, creating a braided collar effect. Secure it with bobby pins hidden underneath. This single braided element transforms the style from basic to intentional without adding complexity to the overall look.
Maintenance Considerations
Tight, sleek ponytails require edge care to prevent breakage and tension alopecia. Wear them for a maximum of 3-4 days before taking them down and giving your hairline a break. Apply edge conditioner and scalp oil regularly to keep the area nourished, and consider alternating between high and low ponytail positions to distribute tension evenly.
Safety reminder: While this style is gorgeous, it shouldn’t cause pain or tugging at your hairline—if you feel consistent tension or discomfort, the ponytail is too tight and needs to be loosened.
8. Zigzag Cornrow Ponytail with Volume
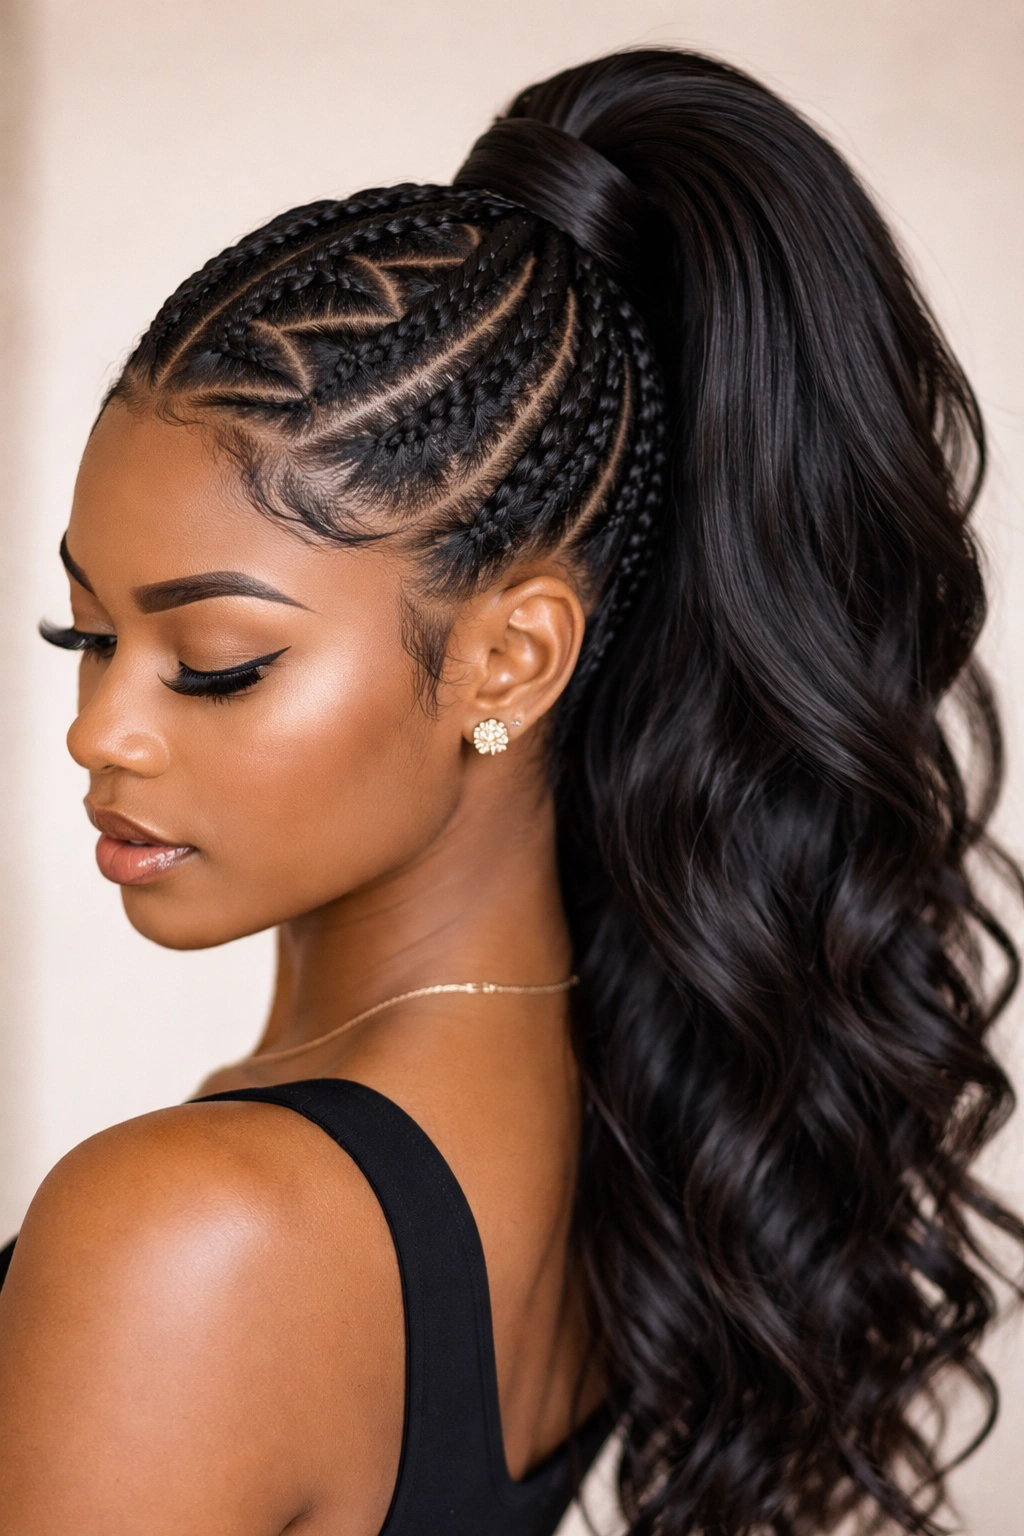
Rather than running braids straight back, this style creates a zigzag pattern with your cornrows—angling left, then right, then left again as they travel from your hairline toward the back. The zigzag pattern creates visual interest and movement while still maintaining the sleekness of cornrows.
Mapping Your Zigzag Pattern
Before you begin braiding, use your rattail comb to plan your zigzag lines. A typical pattern might involve creating one braid that angles from your left temple toward the center, another that angles from center toward your right, another from right toward center, and so on. The angles should be intentional and consistent—not haphazard. Mark these lines with a comb or by mentally visualizing them before you start braiding.
Executing the Technique
Create your cornrows following your planned zigzag pattern, maintaining consistent tension throughout. Each braid should complete its angled journey before transitioning to the next directional change. When all your braids reach the back of your head, gather them into a voluminous ponytail. The zigzag pattern remains visible at the scalp while the ponytail provides fullness and movement.
Styling the Ponytail Section
Because the braids are doing interesting work at the scalp, keep the ponytail itself relatively simple—either one thick braid, multiple thinner braids, or loose hair depending on your preference and hair length. A wrap around the base in a coordinating color adds just enough additional detail without overwhelming the style.
Creative variation: Experiment with different zigzag widths—wider angles create bolder visual movement, while tighter angles create a more subtle effect.
9. Half-Up Braided Ponytail with Half-Down
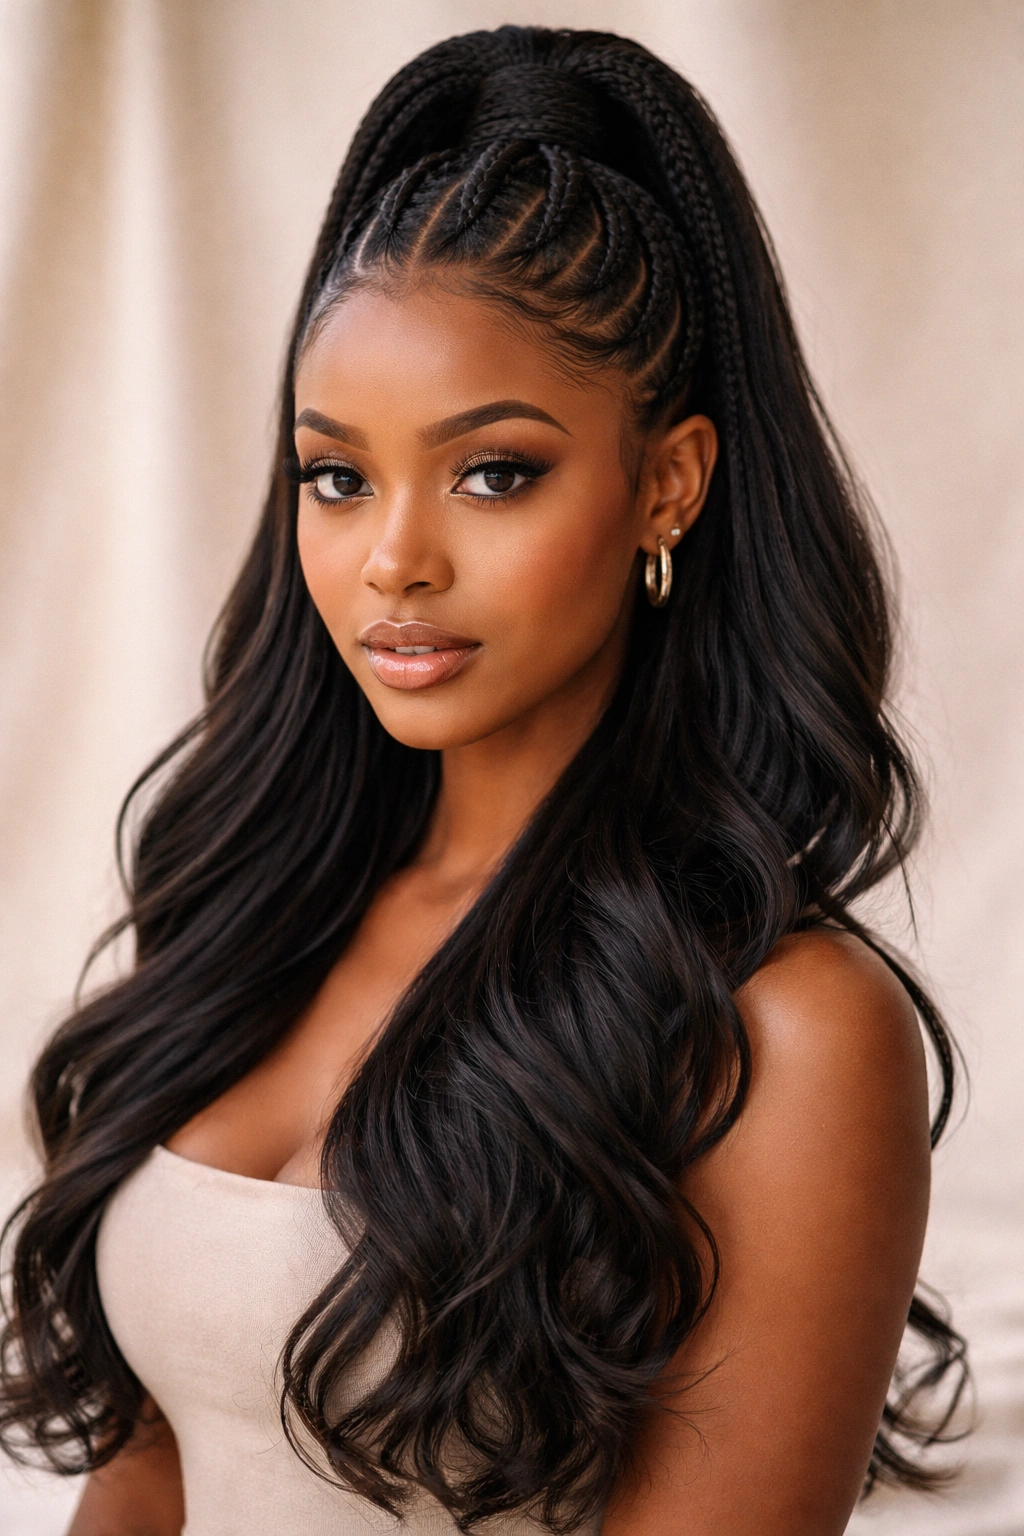
This style takes a hybrid approach, where the top half of your hair is braided and gathered into a ponytail at the crown, while the bottom half remains loose and flows down your back. The result is romantic and textured, combining the polish of braids with the softness of loose hair.
Creating Two Distinct Sections
Imagine a horizontal line running from ear to ear across the crown of your head. Everything above this line will be braided and gathered; everything below will remain loose. Create your braids in the upper section—whether that’s cornrows, feed-in braids, Dutch braids, or a combination—and gather them into a ponytail at your crown using a secure elastic. Smooth the loose section below the ponytail, optionally adding waves or curls to the ends if desired.
The Visual Effect
This style is particularly flattering because it removes hair from your face without the severity of a full ponytail. The braids create definition and polish at the top while the loose section provides movement and softness. It’s an excellent style for someone who wants the benefits of a braided updo but prefers the feel and aesthetic of having some hair down.
Variation and Personalization
You can adjust where your gathering line sits—higher creates more drama and polish, lower creates a softer, more romantic effect. You can also vary the type of braids in the upper section, add accessories to the crown ponytail, or style the loose section with heat tools or braids for additional texture.
Occasion suggestion: This style is particularly well-suited for events where you want an elegant updo feel but prefer the comfort and flexibility of having your hair partially down.
10. Intricate Feed-In Braid Crown with Low Ponytail
This advanced style features multiple feed-in braids that create a crown-like pattern around your head, meeting at a low ponytail at the nape. The braids frame your entire face and head, creating a dramatic, fashion-forward look.
Planning Your Crown Pattern
Rather than running braids straight back, plan for your braids to travel in a path that circles your head. You might start at one temple, braid diagonally across the crown, angle down toward the opposite temple, and then travel around the back of your head toward the nape where everything gathers. The specific path depends on your preference and face shape, but the goal is creating a continuous, circular braiding pattern.
Executing the Advanced Technique
This style requires patience and precision. Create your feed-in braids following your planned crown path, adding hair gradually as you go. Each braid should flow smoothly into the next, creating the illusion of one continuous pattern around your head rather than separate, disconnected braids. This requires practice and skill—if you’re new to this style, consider having a professional stylist execute it initially so you can see the proper technique in person.
The Gathered Finish
Where all your braids meet—typically at the low nape—gather them into a ponytail. This can be a simple gathered ponytail, or you can braid the ponytail section further for added complexity. Some people love adding length or color to this low ponytail section using extensions for dramatic impact.
Styling and Maintenance
This style makes a serious statement and requires excellent upkeep. Edge work is crucial to maintain the definition of your crown pattern. Because of the intricate braiding throughout, you’ll want to protect your edges and scalp with consistent moisture and scalp oil application. This style can comfortably last 5-7 days with proper care, making it ideal for someone who enjoys wearing a look for an extended period.
Expert detail: The crown-like effect is most visually striking when you ensure your braids are fed in consistently and the overall pattern maintains symmetry and balance around your head.
Final Thoughts
The versatility of sleek braided ponytails means there’s genuinely a style that works for every lifestyle, hair type, texture, and occasion. Whether you’re drawn to the simplicity of the classic cornrow ponytail or the complexity of an intricate crown braid, each style offers both protective benefits and undeniable visual impact. The key to making any of these styles look truly sleek isn’t just about the braiding technique—it’s about edge work, the quality of your tools, understanding your hair’s specific needs, and taking the time to perfect the details.
Start by experimenting with styles that feel manageable based on your current skill level and patience threshold. A classic cornrow ponytail or sleek high ponytail with a braided wrap are excellent starting points if you’re new to braiding. As you become more confident, you can graduate to more complex styles like the zigzag pattern or the intricate feed-in crown. Remember that style success is just as much about how the style makes you feel as it is about how it looks—choose styles that align with your personality and lifestyle.
Consistency in your styling routine will make the difference between a good braided ponytail and a genuinely sleek, enviable one. Invest in quality products like smoothing creams, edge control, and a fine-tooth comb. Develop a scalp care routine that keeps your hair healthy and your edges strong, especially if you’re wearing protective styles regularly. And don’t hesitate to revisit these styles multiple times—each execution teaches you something new and helps you refine your technique further. Your braided ponytail game will only get better from here.