Braided ponytails strike that perfect balance between polished and effortless—they elevate your everyday look without requiring a trip to the salon, and they’re practical enough to keep your hair secure and out of your face whether you’re heading to the gym, the office, or a dinner out. If you have long hair, you’ve got the perfect canvas for braiding creativity. Long strands give you the length and volume to create intricate, visually stunning braids that would look limp or rushed on shorter hair.
The thing is, not all braided ponytails work the same way. Some styles pull hair sleekly from the crown down into a tail, while others wrap braids around existing ponytails or weave them throughout for maximum texture and dimension. Some take five minutes and others deserve more time—but all of them can transform how you feel about your hair. Whether you’re looking for something romantic, sporty, intricate, or casually chic, there’s a braided ponytail waiting for you.
Long hair deserves to be worn in a way that makes you feel confident. These ten braided ponytail styles showcase what’s possible when you combine length, texture, and technique. Each one works beautifully with different hair types and occasions, and many can be adapted to match your skill level or the time you have available that morning.
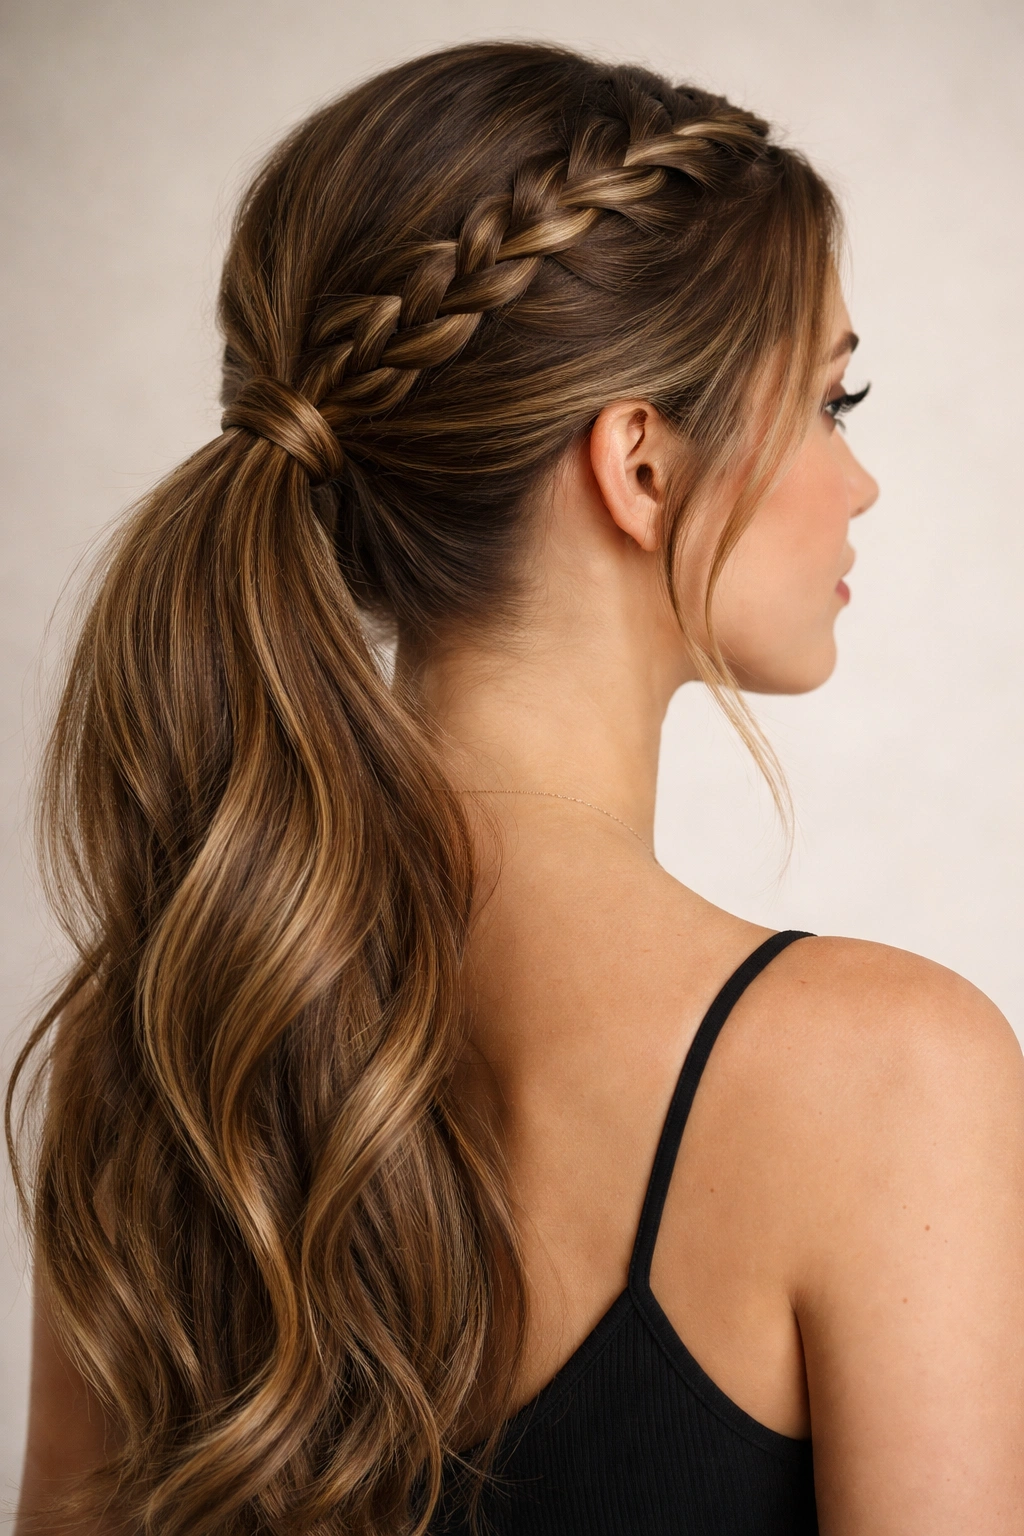
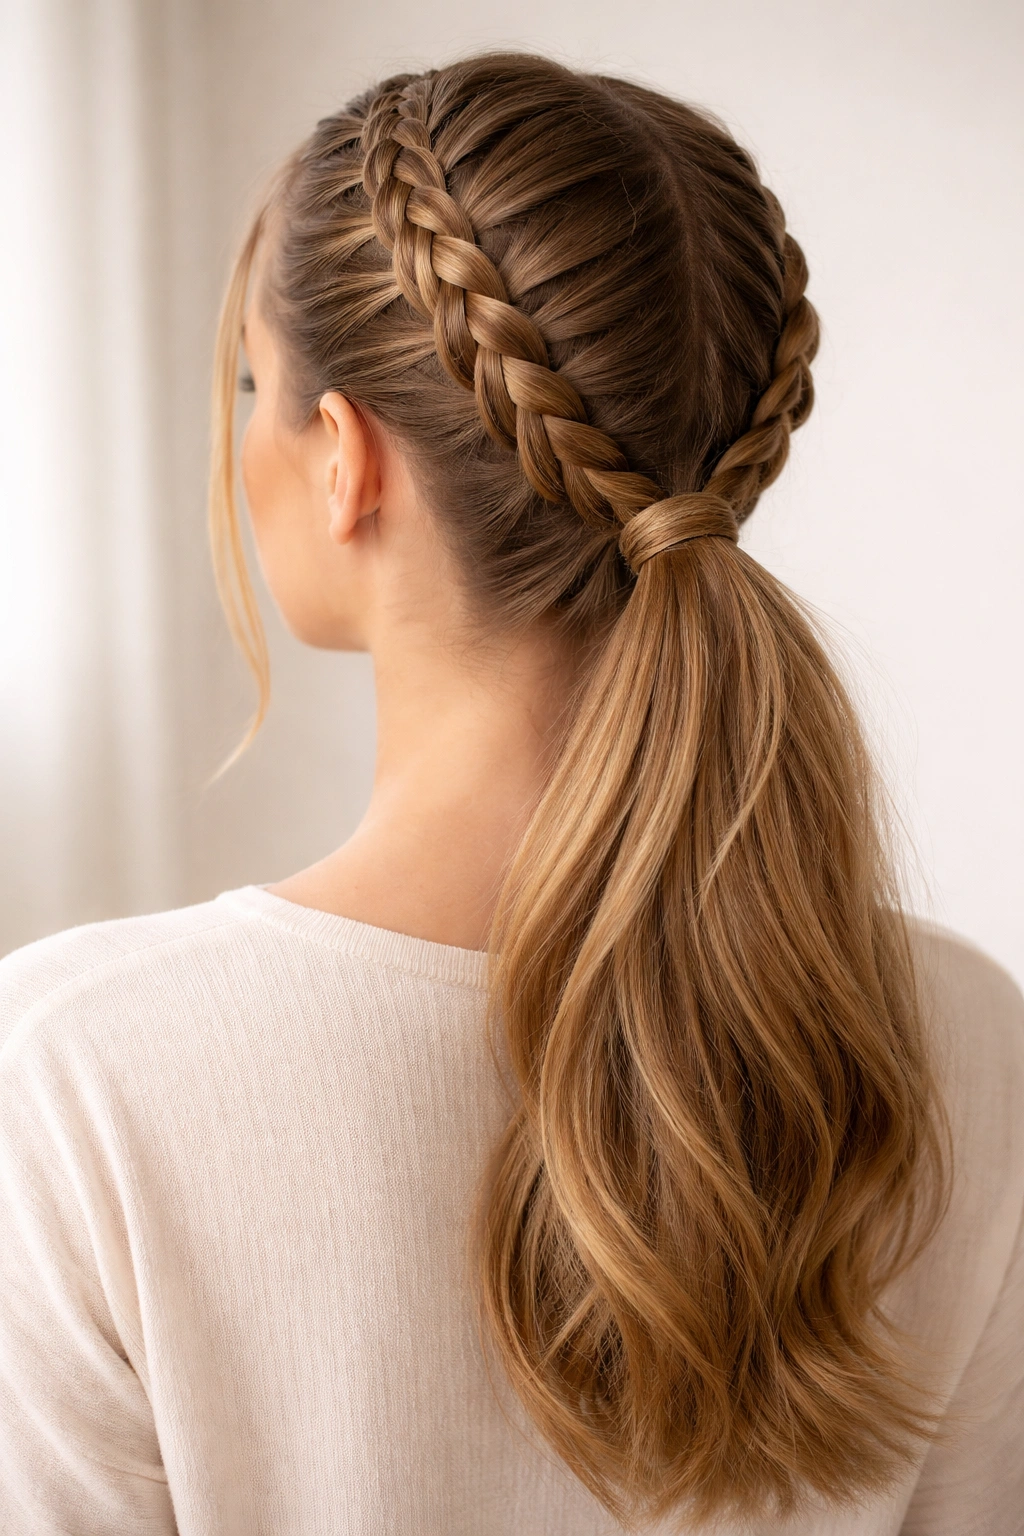
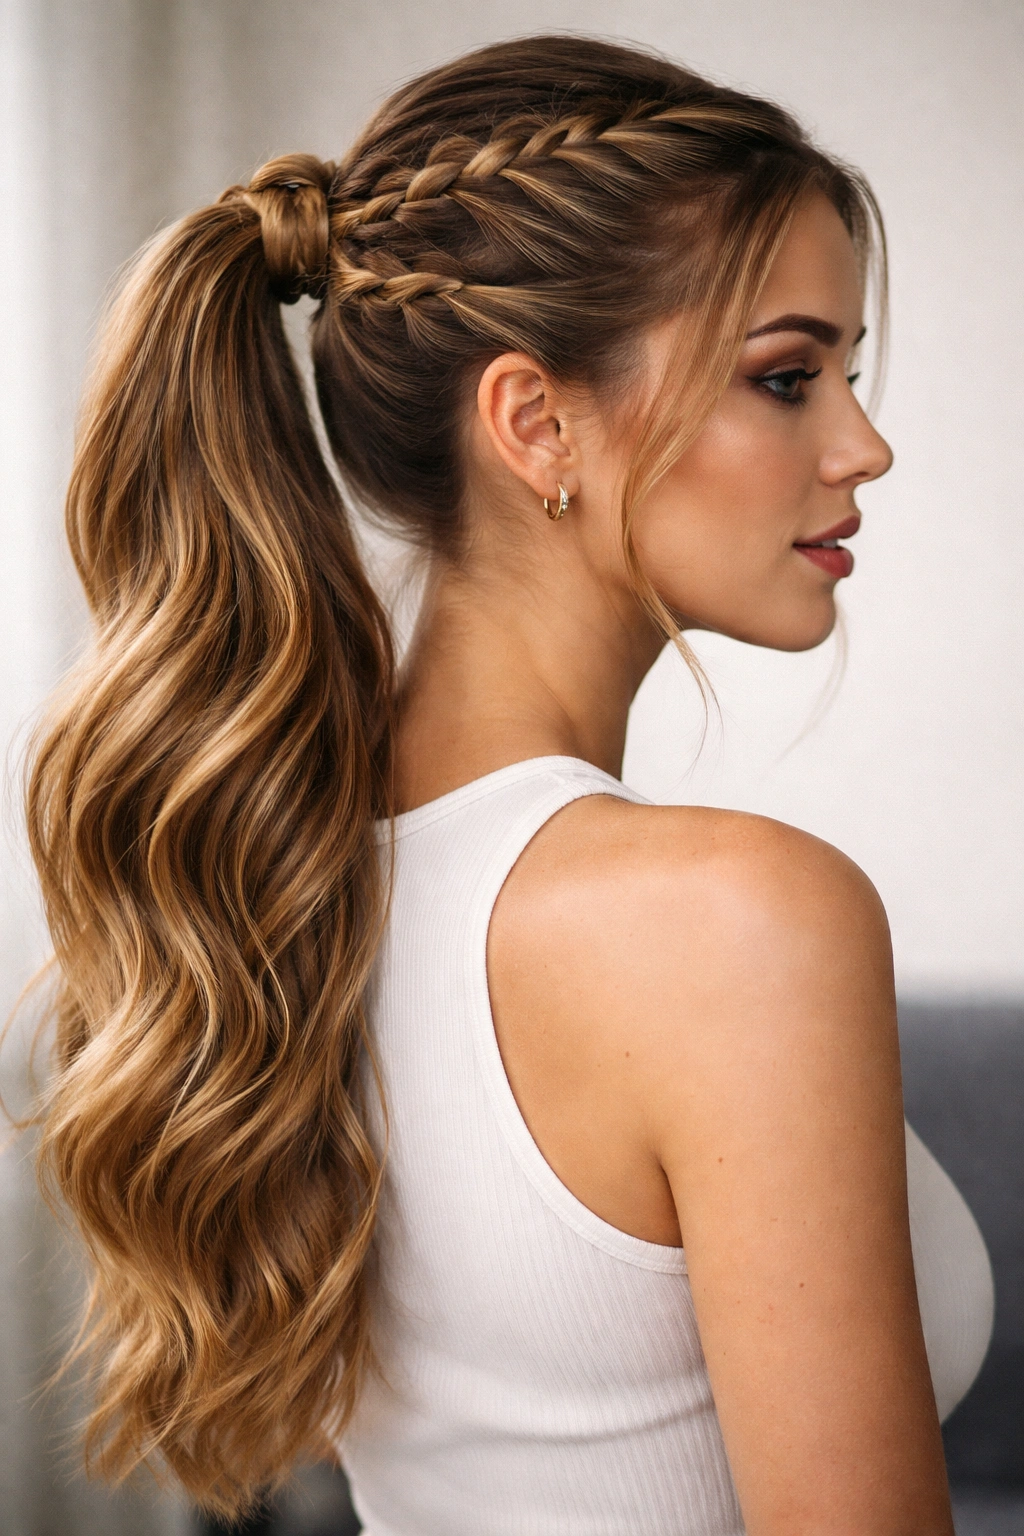
1. Classic Dutch Braid Ponytail
A Dutch braid is the inverse of a French braid—instead of weaving sections over the center strand, you weave them under, creating a raised, bold braid that sits on top of your hair rather than into it. This creates one of the most striking looks possible, especially with long hair where the braid has plenty of length to show off its dimension.
Why This Style Works for Long Hair
The Dutch braid naturally stands out from your scalp because of its under-weaving technique, which means it photographs beautifully and looks intentional even if you’re running late. With long hair, you can Dutch braid from your crown all the way down to the base of your ponytail, creating a seamless, sculptural effect that flows directly into the tail. The raised texture catches light differently than your regular hair, adding visual interest and volume that makes your ponytail look fuller and more voluminous than it actually is.
How to Create It
- Start at the very crown of your head with three small sections of hair, about the width of your index finger each
- Begin the Dutch braid by crossing the right section under the center section (not over—this is what makes it a Dutch braid), then cross the left section under the new center
- Continue this under-weaving pattern down the back of your head, adding small sections of loose hair into each strand as you work downward
- When you reach the nape of your neck, gather all your hair into a low or mid-height ponytail and secure with a hair elastic
- Gently tug at the braid sections to loosen and widen them—this creates texture and makes the braid appear thicker
- Finish with a light hairspray to keep everything in place without the stiffness that makes braids look helmet-like
Pro tip: Dutch braids show every imperfection, so save this style for when you’ve washed your hair in the last day or two and have some natural texture to work with.
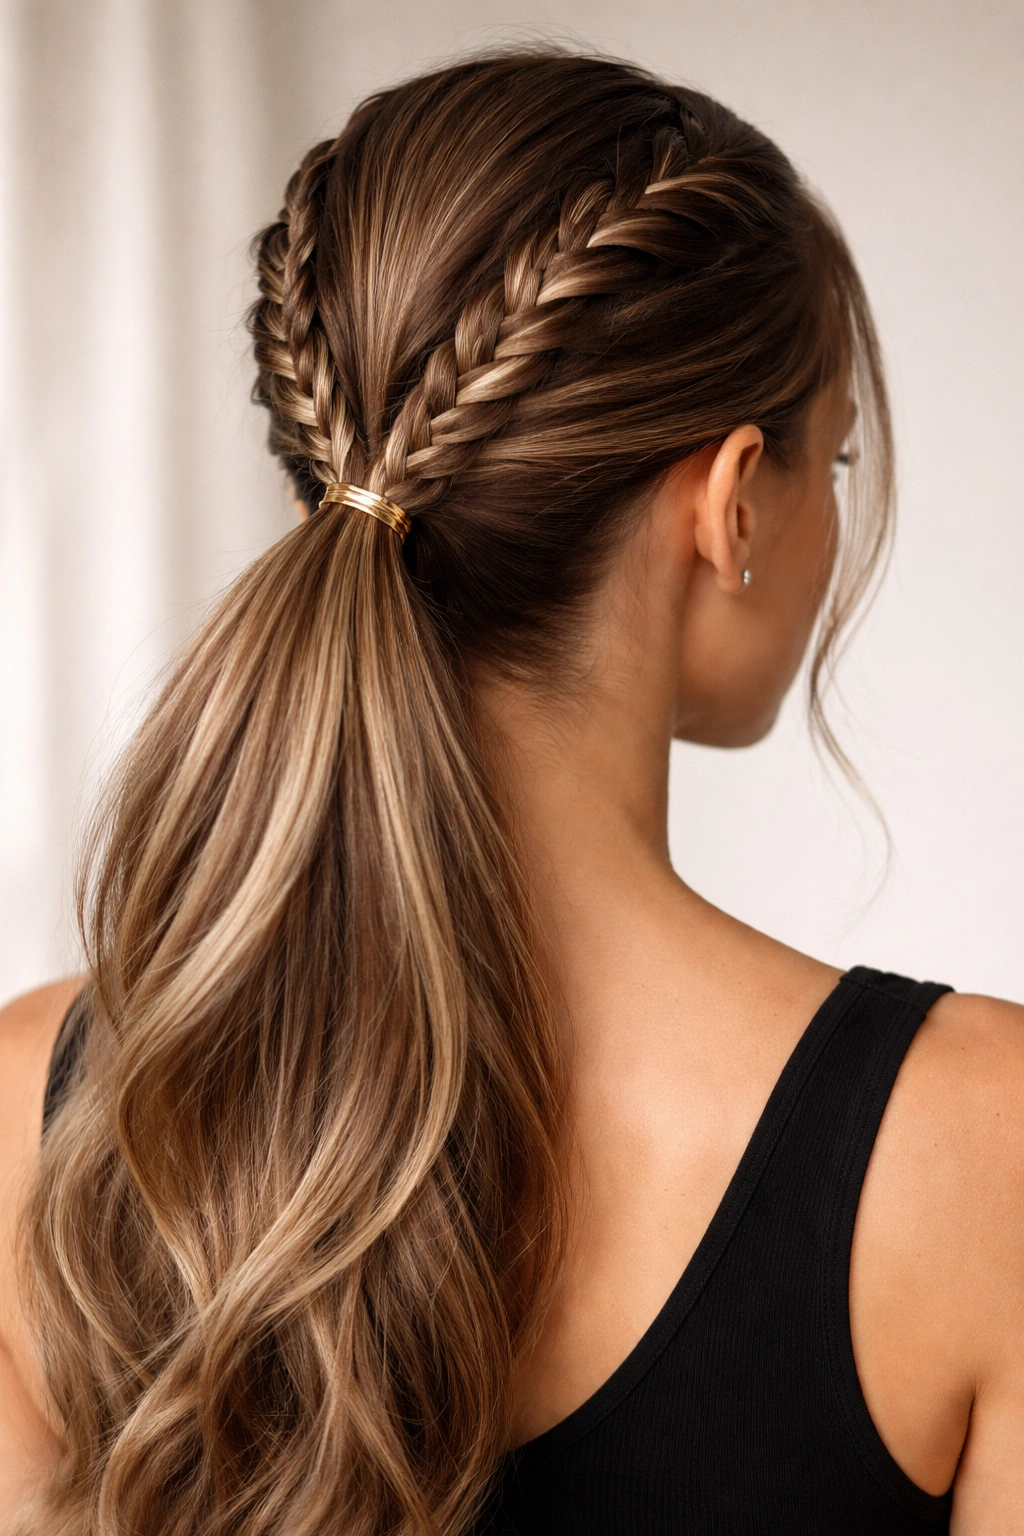
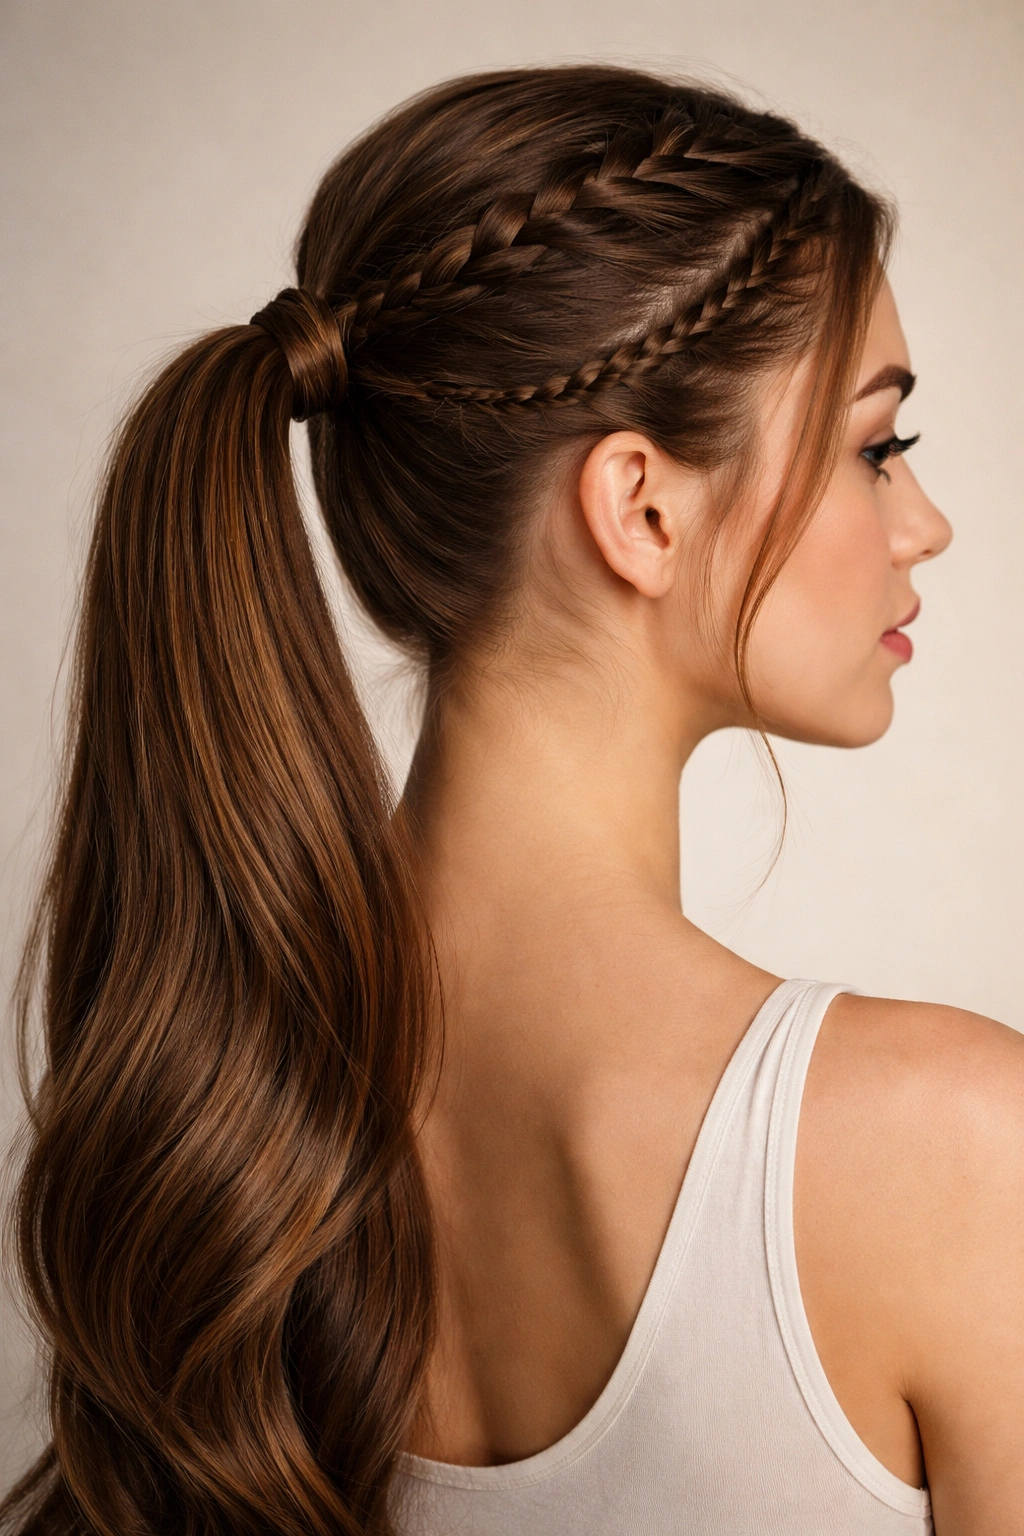
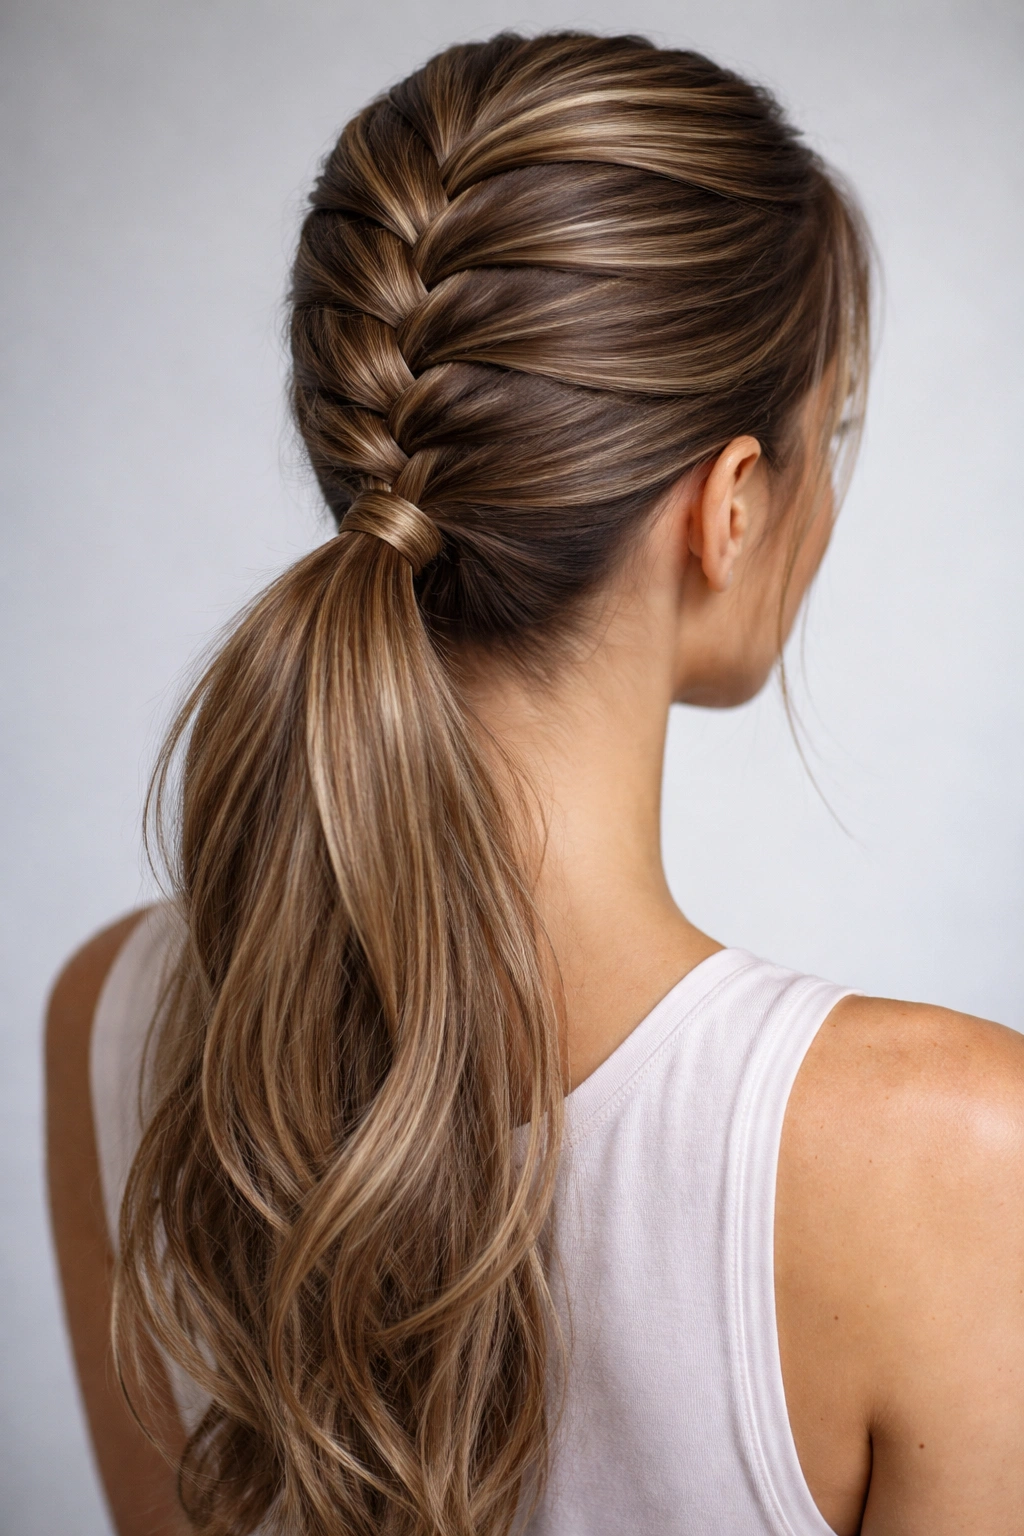
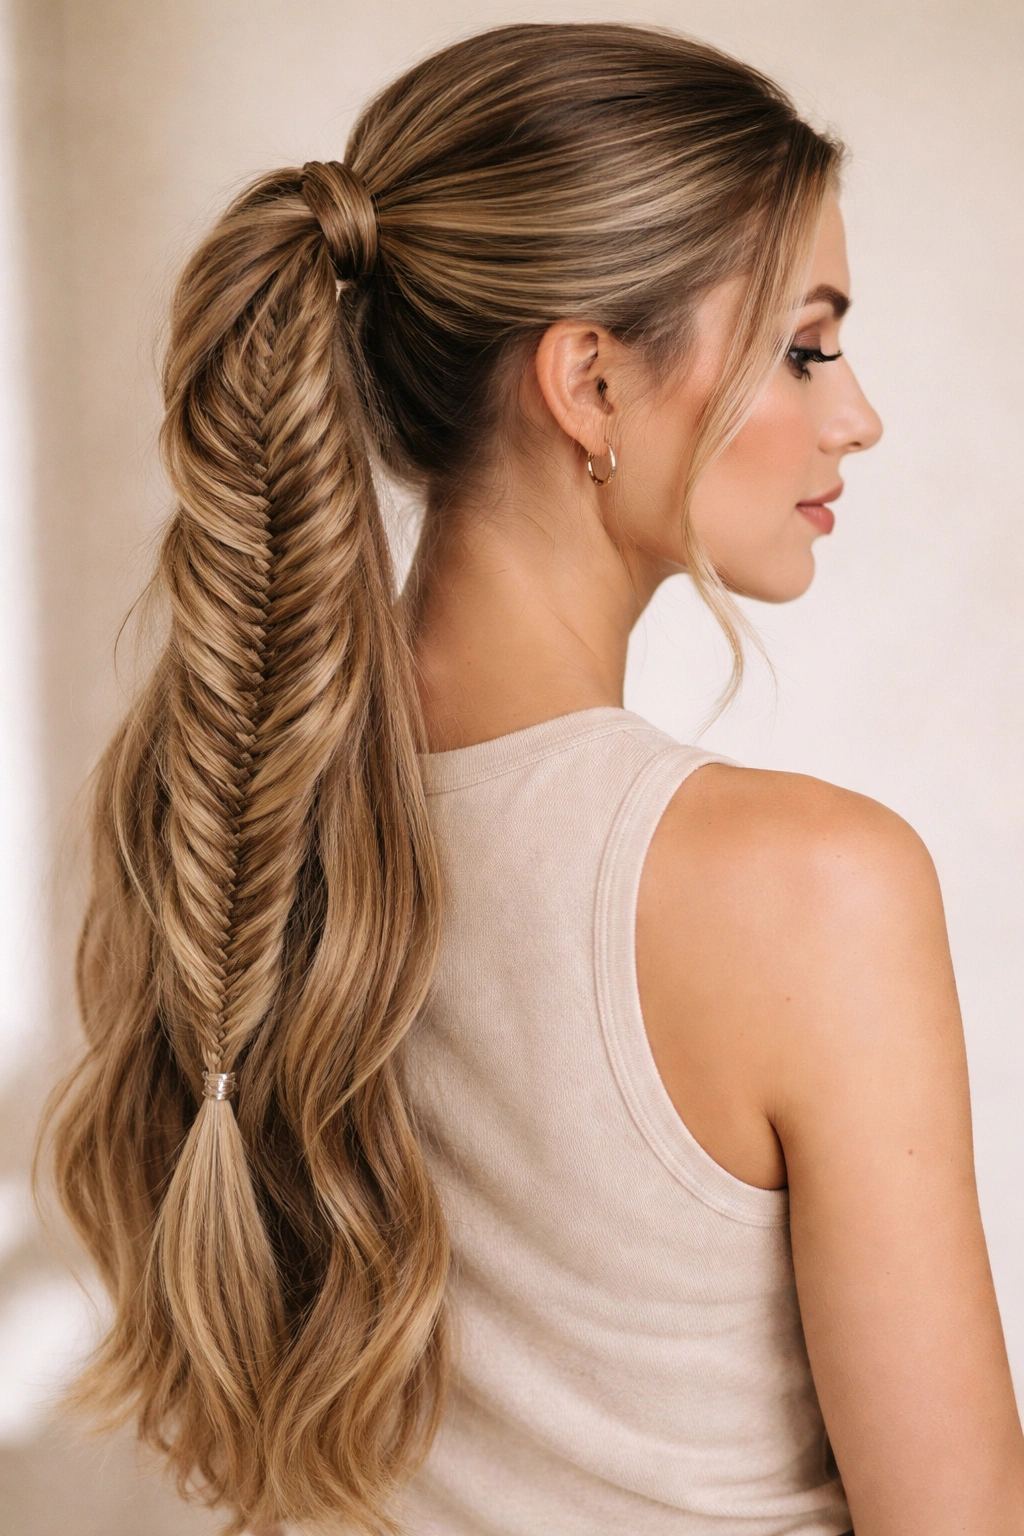
2. Fishtail Braid Ponytail
A fishtail braid uses a completely different technique than traditional three-strand braiding—instead of working with three thick sections, you work with two thicker sections and weave tiny pieces from the outside of one section into the center. The result is an intricate, feathered pattern that looks impossibly complicated but is actually quite forgiving and fast once you understand the movement.
What Makes Fishtail Special
Fishtail braids have this delicate, whimsical quality that feels more romantic and fashion-forward than standard braids. The thin interlocking strands create a lacier visual texture that’s perfect for long hair because you get maximum length to show off the pattern. Fishtail braids also photograph beautifully and work equally well styled sleekly or loosely textured depending on your mood and the occasion.
Step-by-Step Method
- Divide your hair into two equal sections, as if you’re about to create a half-up style
- Take a small piece from the outside edge of your right section and cross it over to the left section
- Take a small piece from the outside edge of your left section and cross it over to the right section
- Continue alternating, always taking from the outermost edge and crossing to the opposite side
- Work this pattern down to the nape of your neck, then gather everything into a ponytail
- For a polished look, keep the sections tight and uniform; for a softer look, gently pull at the braid to create texture
- You can fishtail braid your entire head before gathering into the ponytail, or just fishtail one section on each side and then pull back
Worth knowing: Fishtail braids work beautifully on second-day hair or slightly textured hair, so you don’t need freshly washed waves—in fact, a little grit in your hair makes the fishtail hold better.
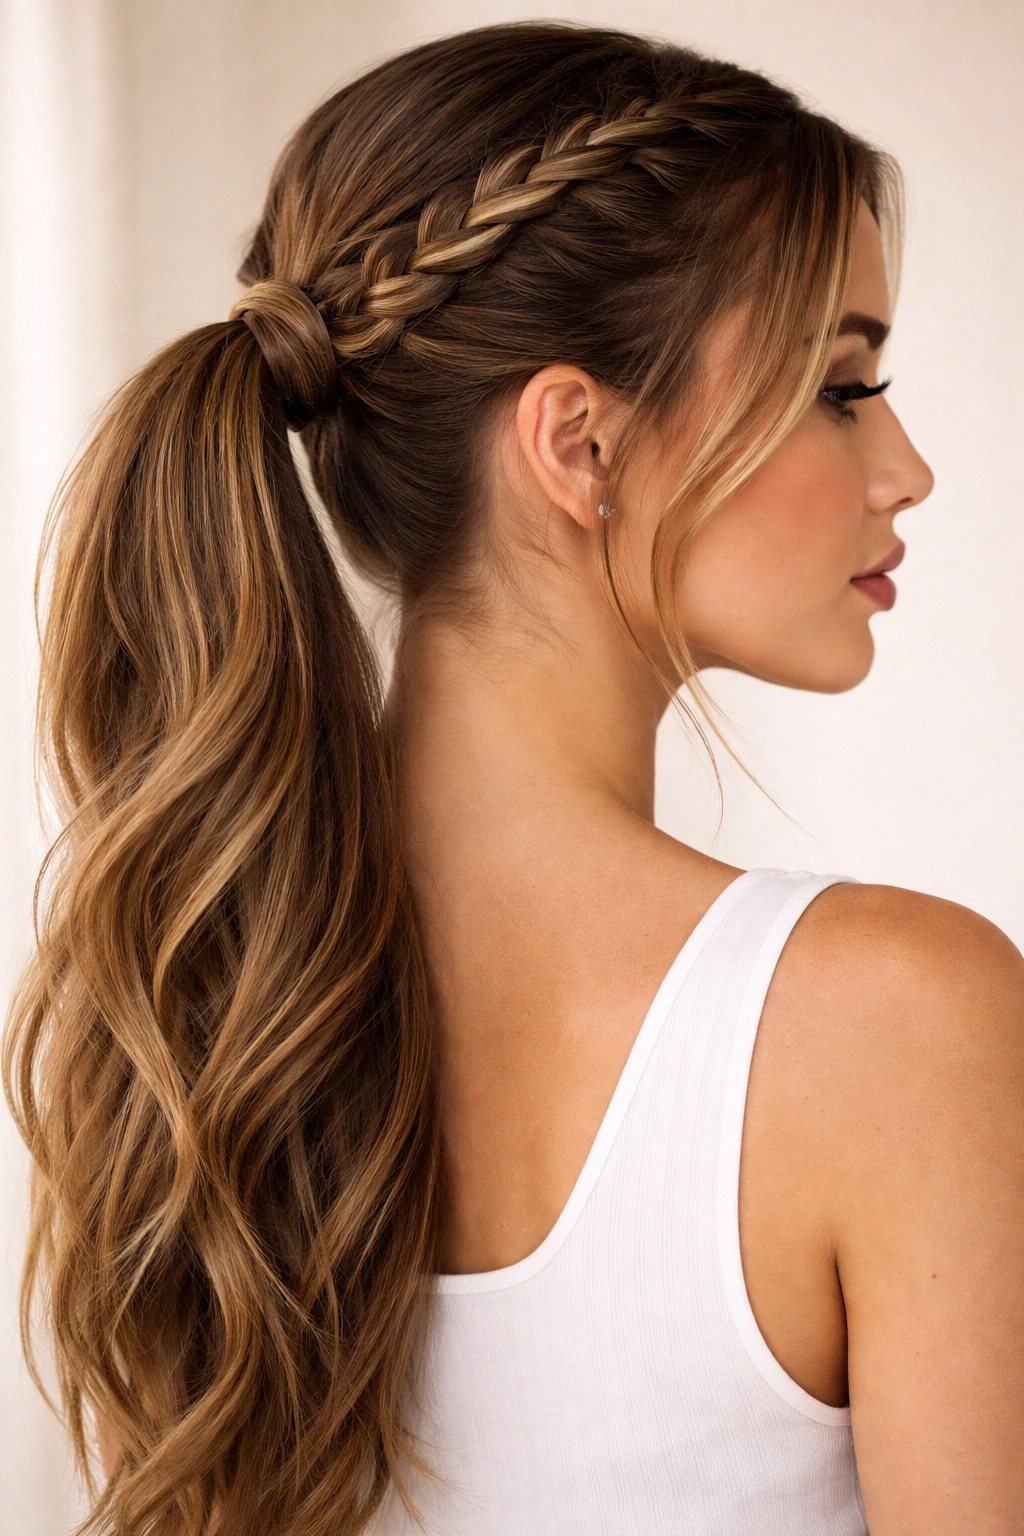
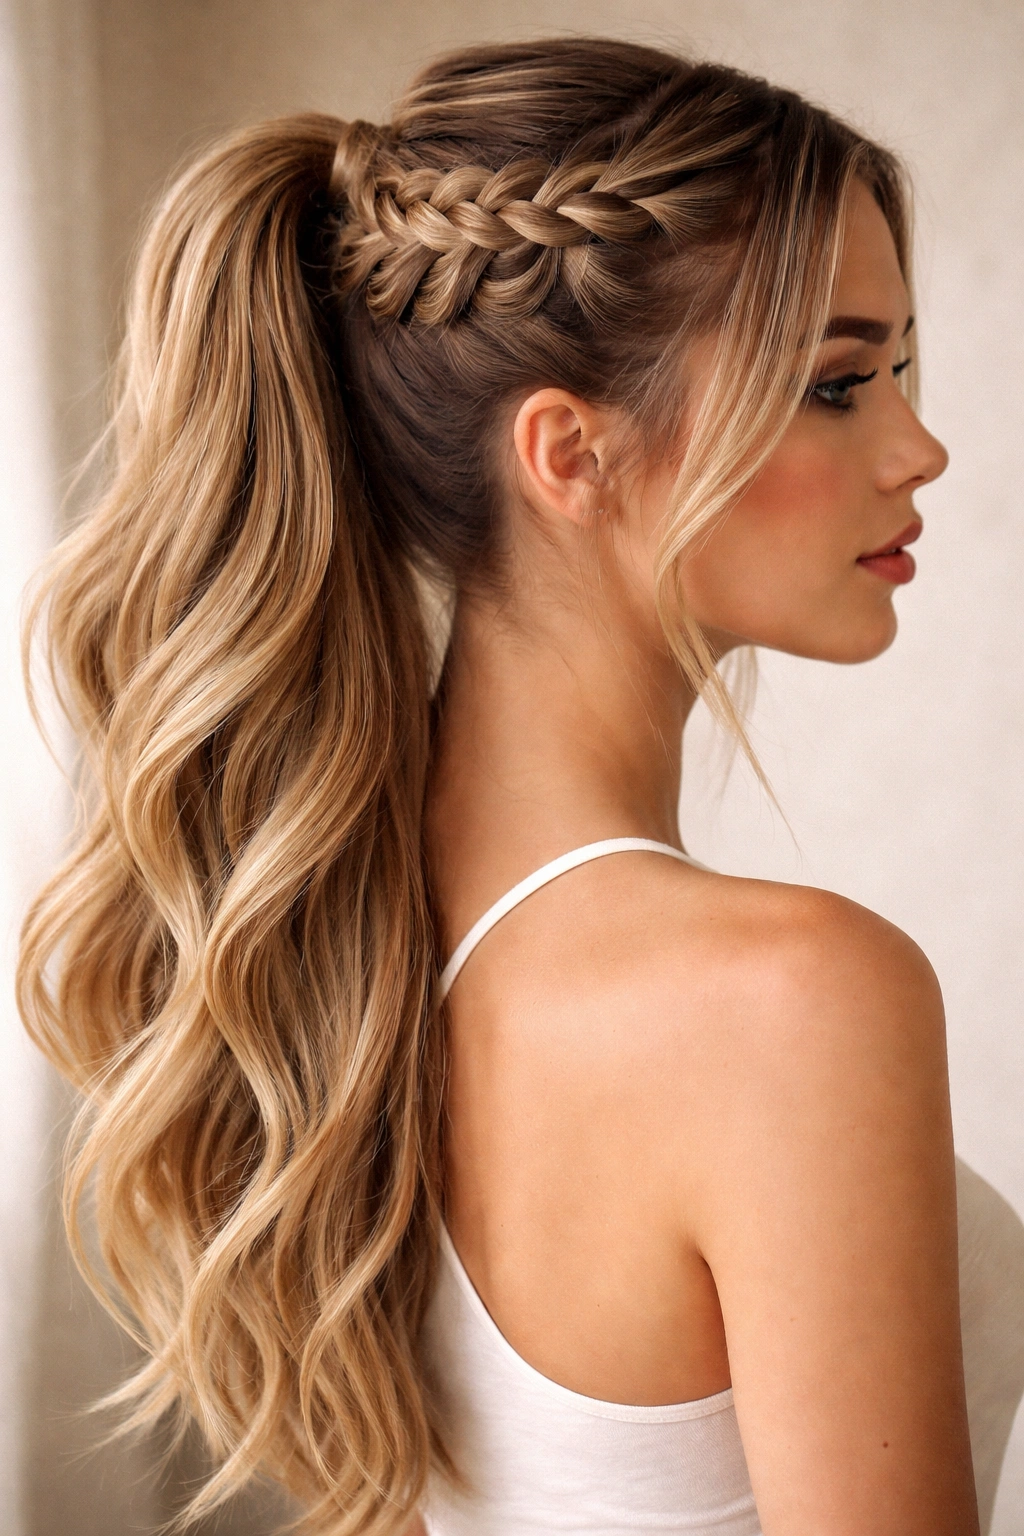
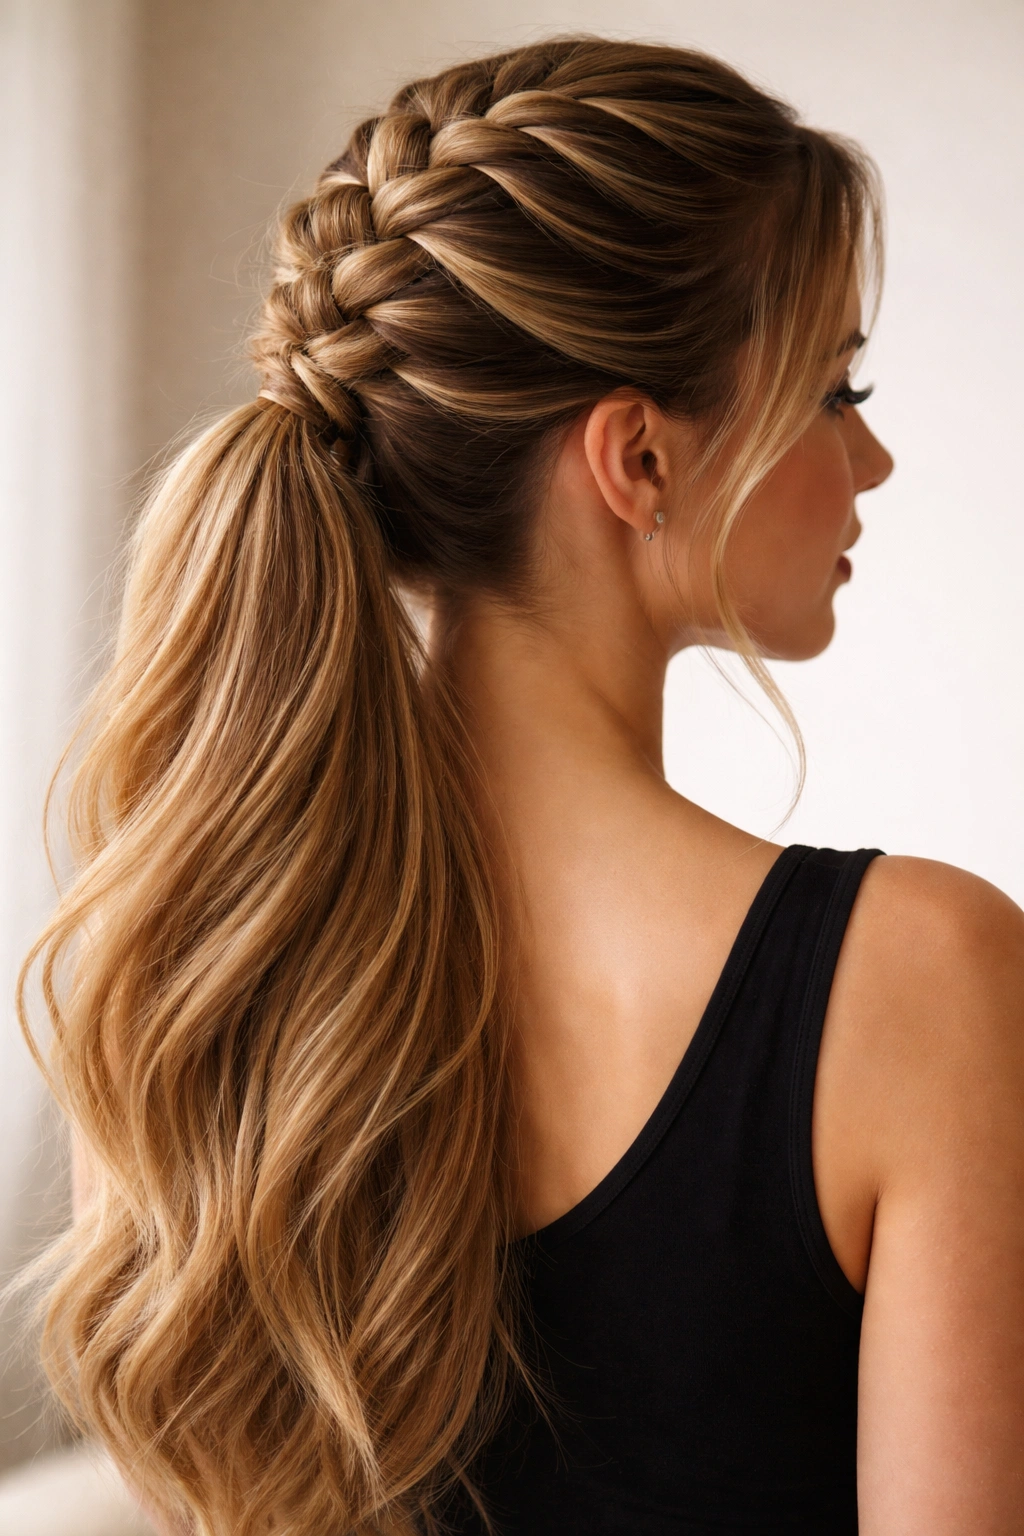
3. Crown Braid With Wrapped Ponytail
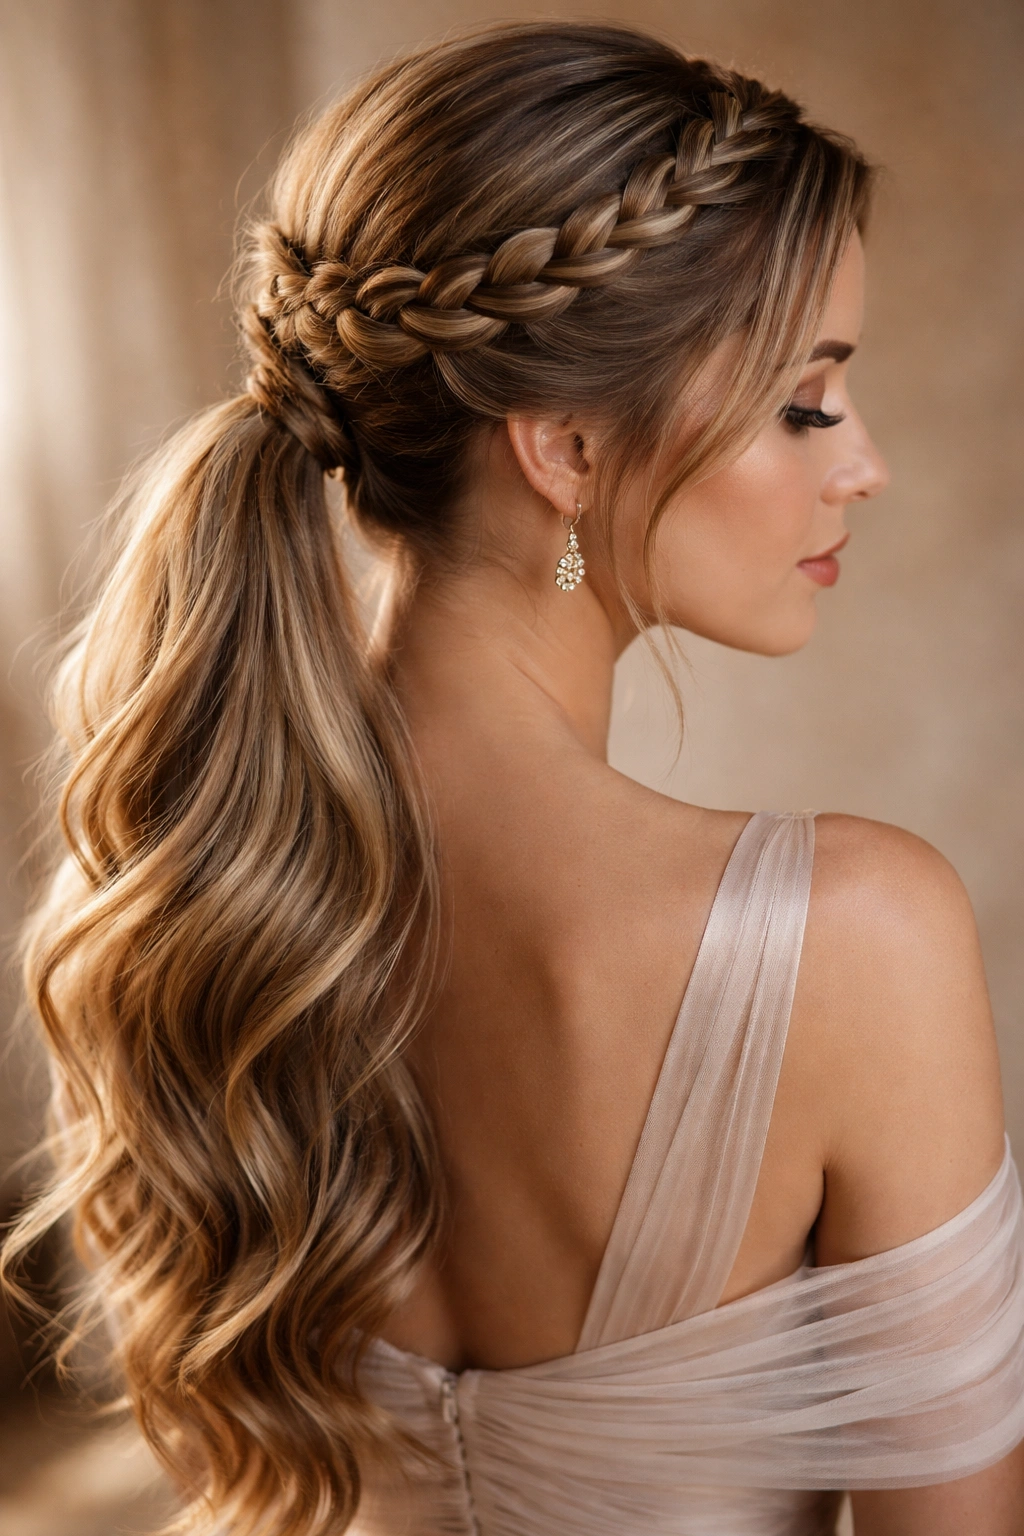
This style is all about creating a frame for your face and upper head before pulling your length back into a ponytail. A crown braid wraps around your head like a halo, creating a romantic, special-occasion vibe while still keeping your hair functional and off your neck.
Why It Looks So Elegant
The crown braid draws attention upward and creates an instant sense of occasion and intention. Your long hair gets to flow down the back and sides in the ponytail, so you’re not sacrificing length or movement—you’re just decorating the top portion of your head. This style flatters nearly every face shape because the braid frames and softens your features without pulling everything back tightly.
How to Create a Crown Braid
- Start with a section of hair at one temple (above your ear, behind the hairline)
- Create a Dutch or French braid that travels horizontally across the back of your head toward the opposite ear
- Keep the braid loose and textured as you work—you want it to feel soft, not tight
- Anchor the end of the braid behind your opposite ear using bobby pins
- Gather all your remaining hair (including the end of the braid) into a low ponytail at the nape of your neck
- Pull gently at the crown braid sections to make them wider and more visible
- Wrap a small section of hair from your ponytail around the elastic to hide it and create a finished look
Insider note: For maximum impact, leave a few face-framing pieces loose around your temples and cheekbones before you start the braid—they’ll soften the whole style.
4. Double Braid Ponytail
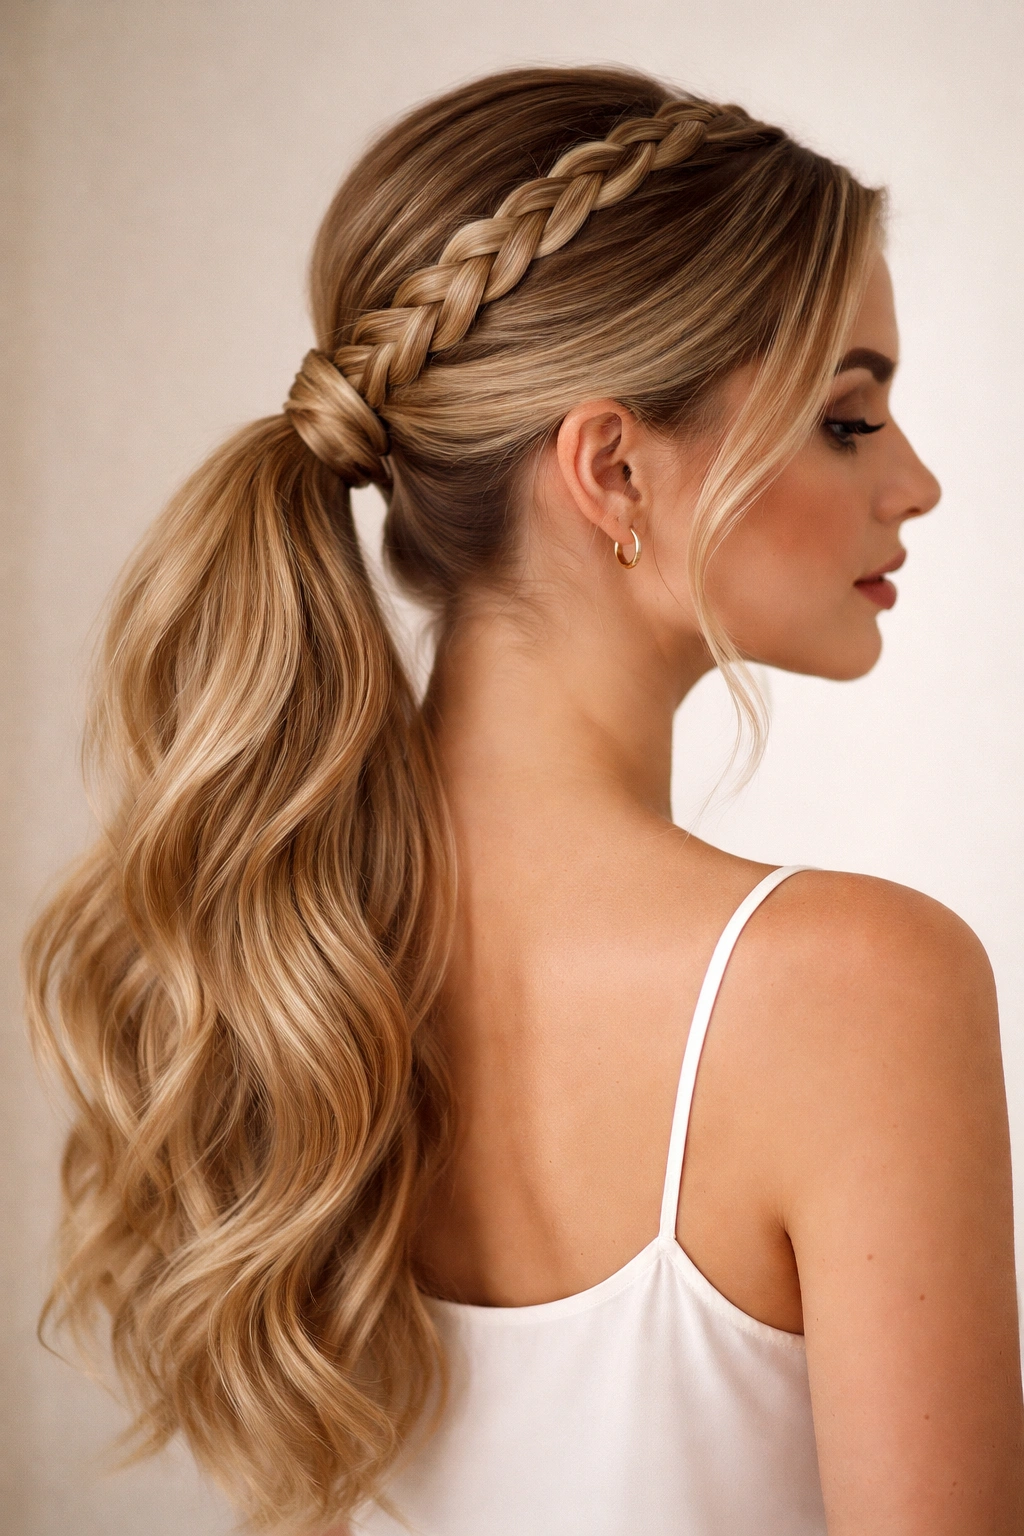

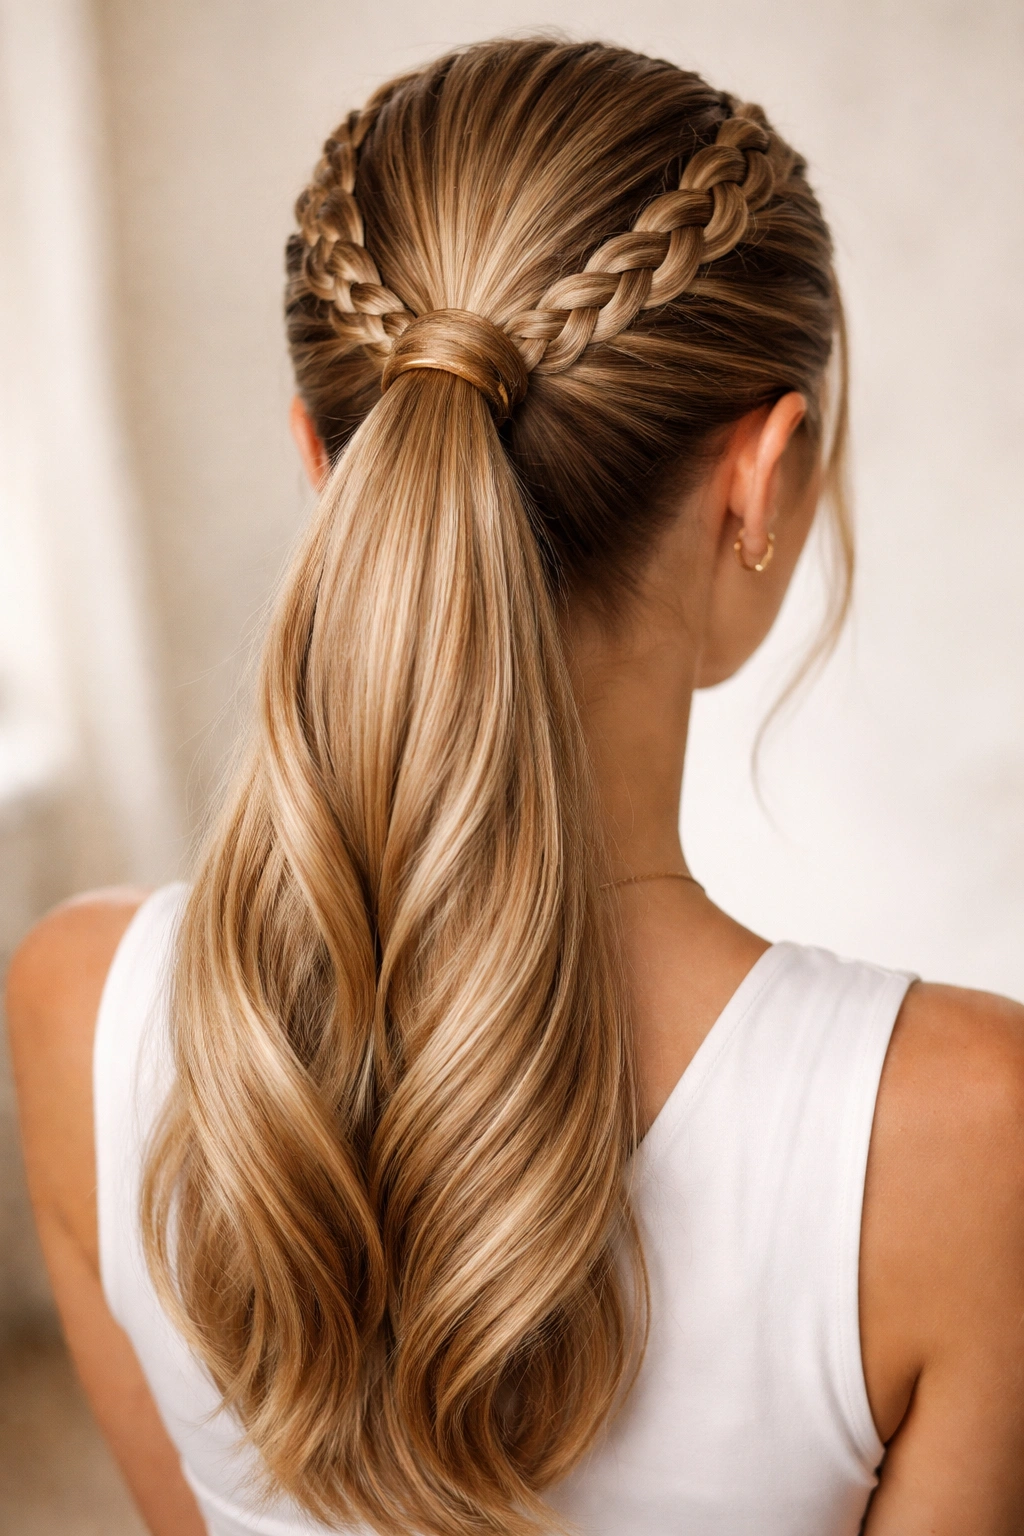

Double braid ponytails mean you’re creating two separate braids (usually positioned on either side of your head) and gathering them both into a single ponytail at the base. This creates visual interest, symmetry, and the impression of much more volume and hair than a single braid would achieve.
What Makes Double Braids Work
Two braids are exponentially more visually striking than one, and they create a natural frame on either side of your face. With long hair, you can make each braid substantial and detailed, which means the overall style reads as more intentional and polished. Double braids also feel more balanced on long hair—a single side braid on very long hair can look lopsided, but two braids feel purposeful and architectural.
How to Style Double Braids Into a Ponytail
- Create a deep side part to one side of your head
- Take a section of hair from the fuller side of your part and create a three-strand or fishtail braid, working down toward the back of your head
- On the other side, create a second braid of the same style, working at a similar angle toward the back
- Bring both braids together at the nape of your neck and secure into a ponytail with a single elastic
- For visual balance, position the ponytail at the center back of your head rather than favoring one side
- Gently pull at both braids to add texture and width
- You can wrap a strand of hair around the elastic to hide it, or leave it visible for a more casual look
Quick fact: Double braids work beautifully with different braid styles on each side (one French, one Dutch, for example) if you’re feeling creative—just make sure they’re similar in scale and thickness so they look intentional rather than mismatched.
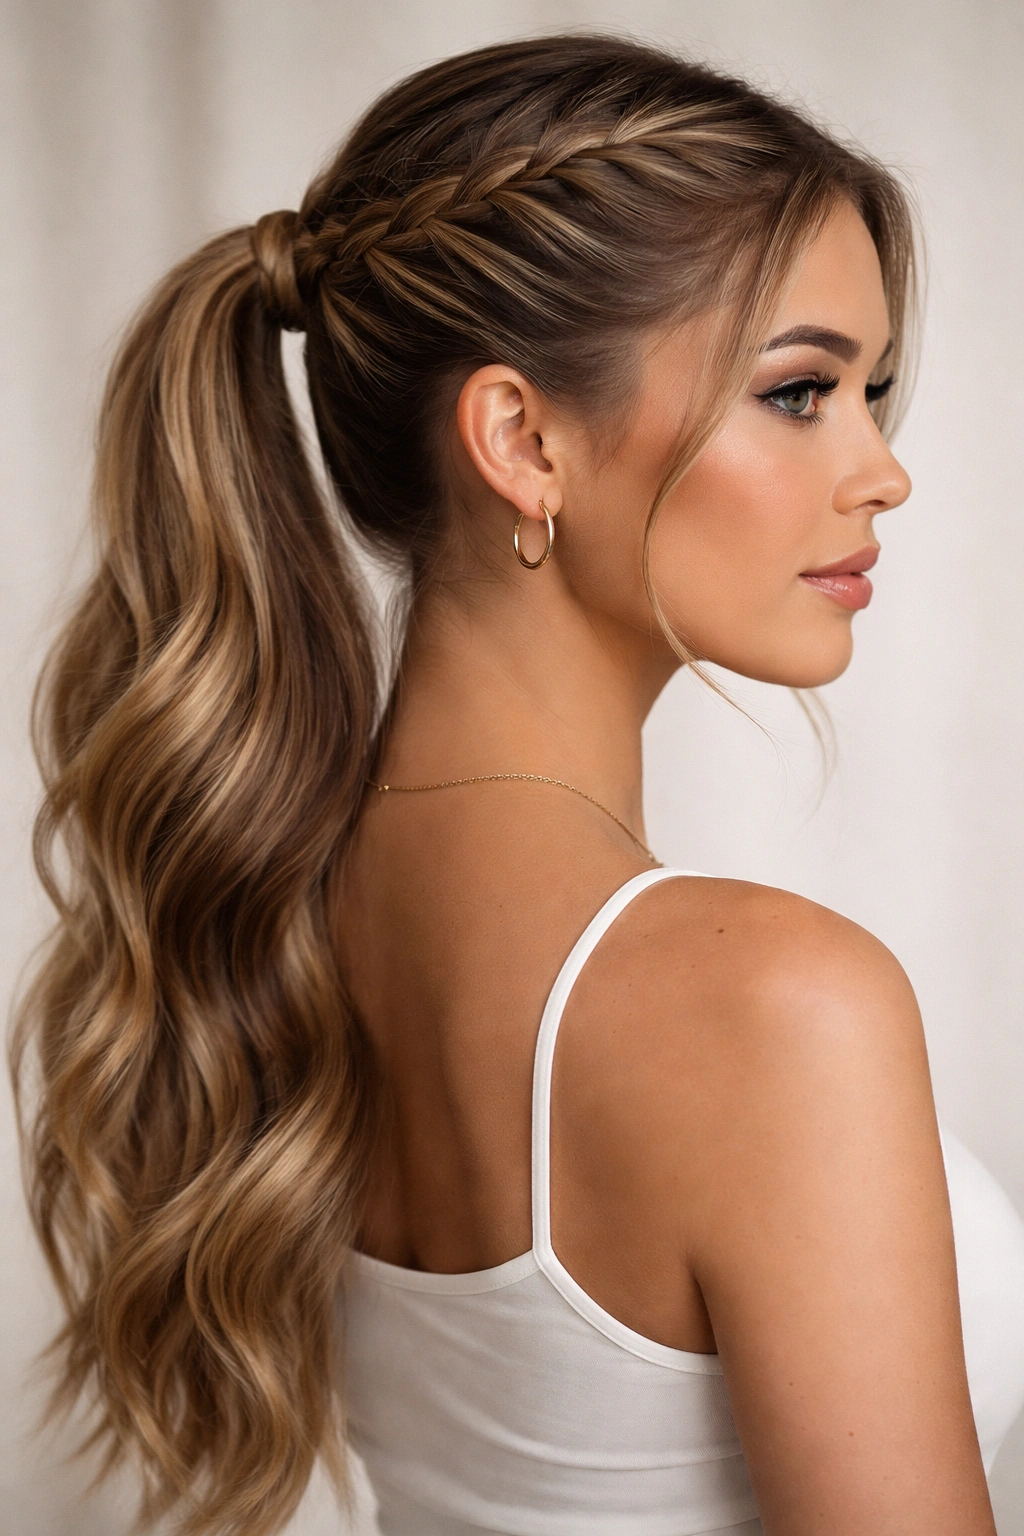
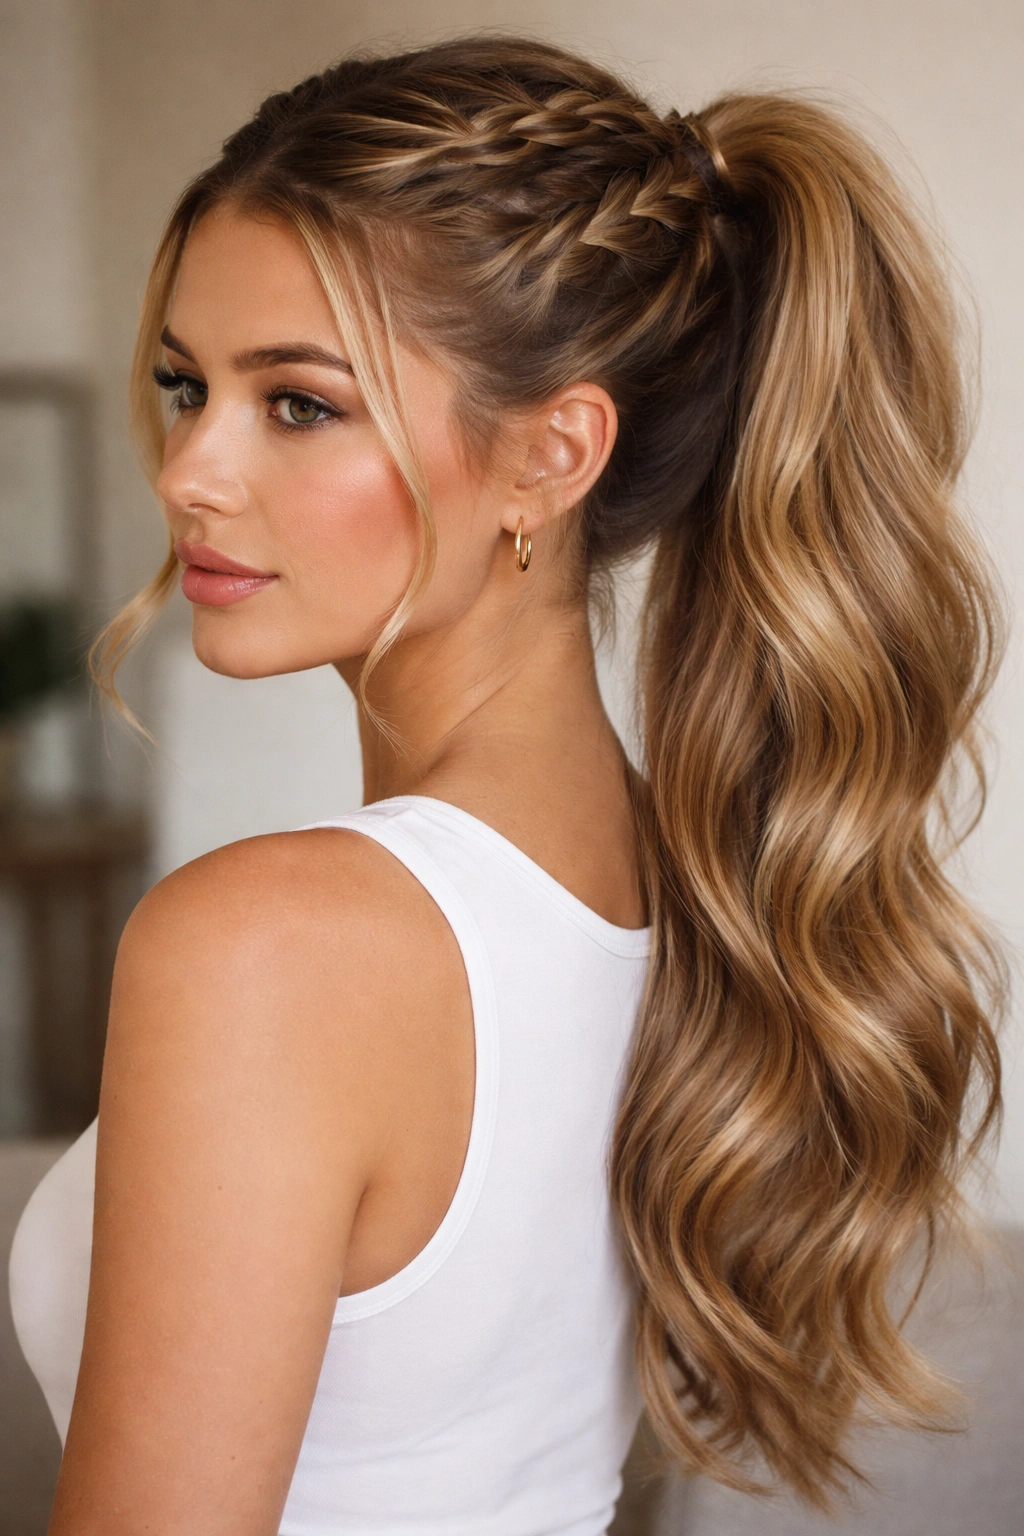
5. French Braid Into Ponytail
The French braid is the most recognizable braid style for good reason—it sits snugly against your scalp and flows seamlessly into a ponytail, creating a polished, put-together appearance that works equally well for casual or formal occasions. It’s the braid that beginners can master and experts can refine endlessly.
Why French Braids Flatter Long Hair
A French braid that runs from your crown down to a ponytail uses the length of your hair beautifully. The braid itself adds structure and visual interest to the crown and sides, while your ponytail gives you movement and volume below. The combination feels balanced and intentional. French braids also create the illusion of more volume and thickness because the braid sections are woven together tightly enough to create density without being so tight they look severe or uncomfortable.
Perfect French Braid Technique
- Start at the very top of your head with a small triangle of hair divided into three strands
- Cross the right strand over the center, then cross the left strand over the new center
- Now here’s the key: pick up a small section of loose hair from the right side and add it to your right strand before crossing it over the center
- Pick up a small section from the left side and add it to the left strand before crossing over the center
- Continue this pattern all the way down your head, always adding new hair from the sides as you weave
- When you reach the nape of your neck where there’s no more loose hair to pick up, continue the three-strand braid for a few more inches before securing
- Gather everything (including the end of the braid) into a ponytail and secure with an elastic
- Gently tug at the braid to loosen and widen the sections—this creates softness and dimension
Pro tip: French braids look better on hair that has a little texture or grease to it—try doing this style the day after you wash your hair for best results.
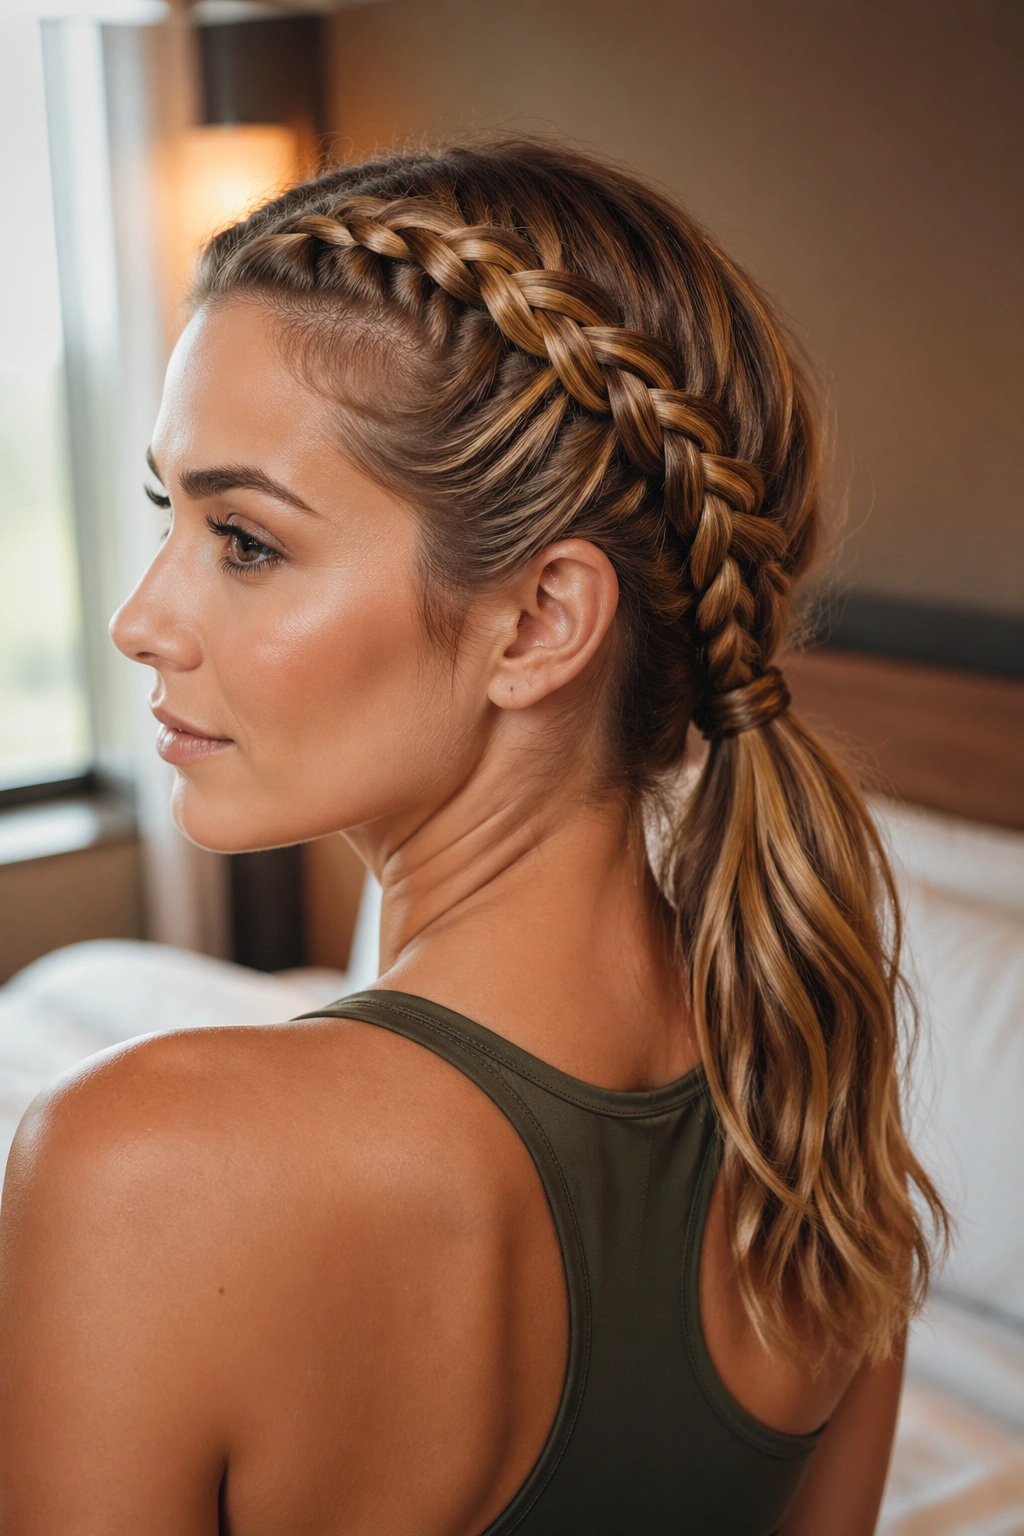
6. Rope Braid Ponytail
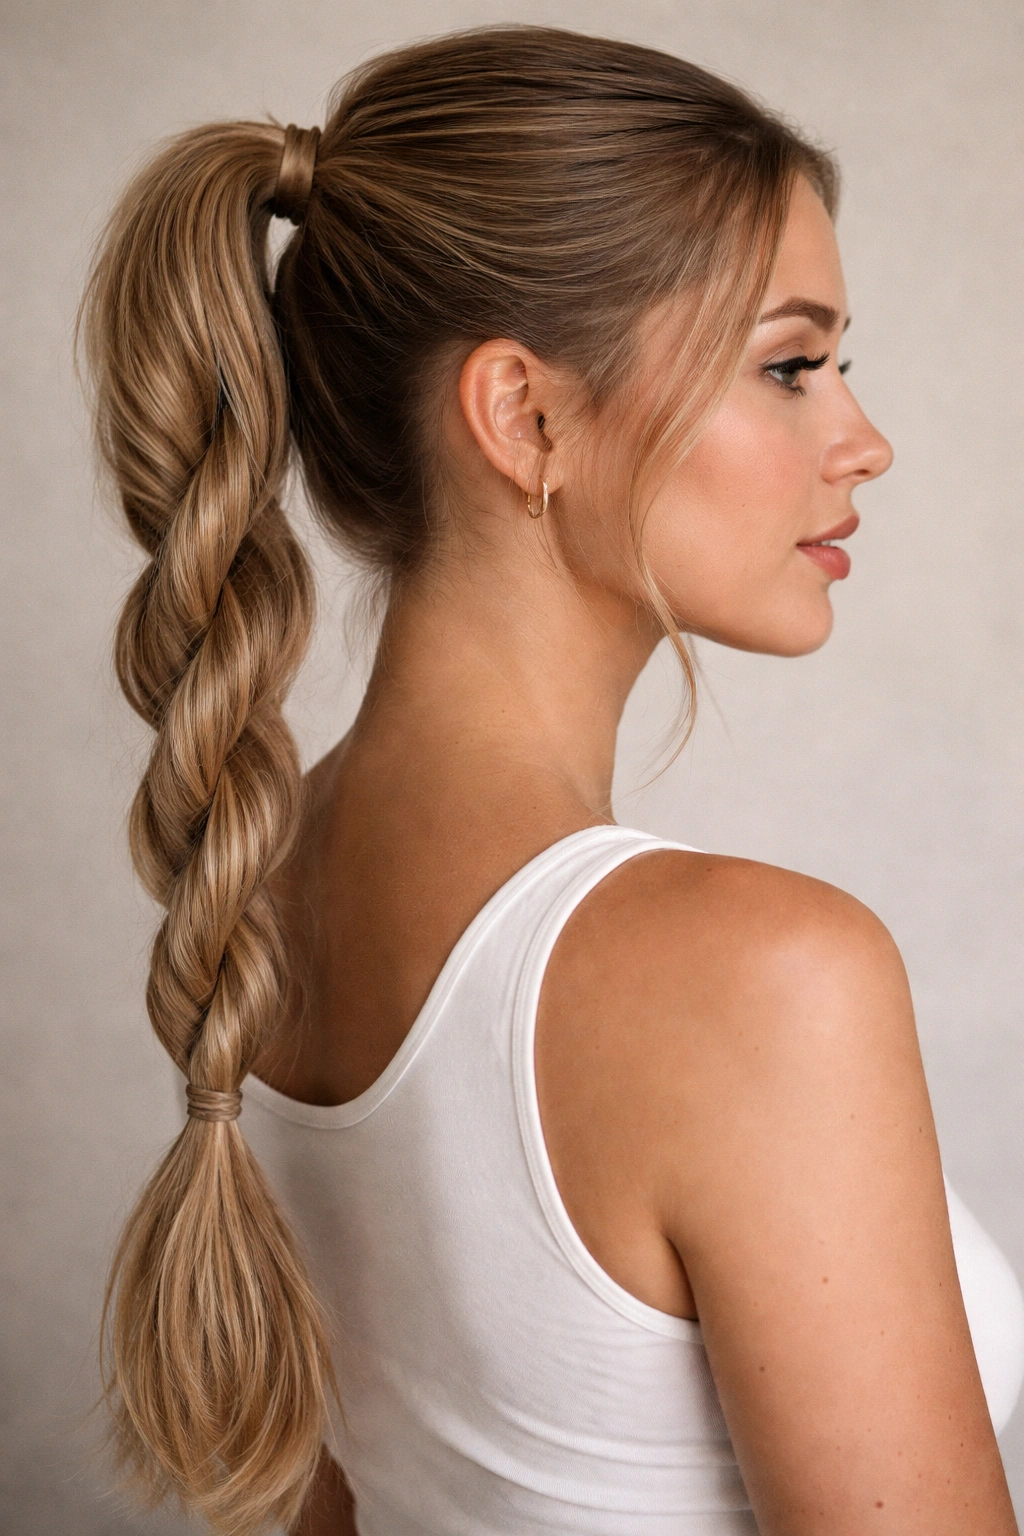
A rope braid is deceptively simple—you’re only working with two strands of hair instead of three, which means it’s faster than a traditional braid but still creates interesting texture. A rope braid creates a twisted, cord-like effect that’s different from traditional braids and offers a more casual, undone vibe.
How Rope Braids Look Different
Rope braids have a twisted, almost twisted-rope appearance because you’re spiraling two sections around each other rather than weaving three strands. They look less formal and structured than three-strand braids, which makes them perfect if you want a braided ponytail that feels more relaxed or sporty. Rope braids are also surprisingly quick—if you’re low on time but want something more interesting than a regular ponytail, rope braid is your answer.
Creating a Rope Braid Ponytail
- Start at the crown and divide hair into two equal sections
- Twist the right section clockwise, then twist the left section clockwise
- Cross the right section over the left section (they should naturally want to wrap around each other as you twisted them)
- Twist the right section again, cross it over the left
- Continue this twist-and-cross pattern down the back of your head, keeping gentle tension
- As you work, pick up small sections of loose hair and incorporate them into whichever section you’re working with next
- When you reach the base of your neck, secure the rope braid into a ponytail
- For a softer look, gently pull at the twisted sections to create looseness and texture
Worth knowing: Rope braids hold best on slightly damp hair or hair with some texture, since very slippery, freshly blow-dried hair can feel hard to control.
7. Twisted Braid Ponytail
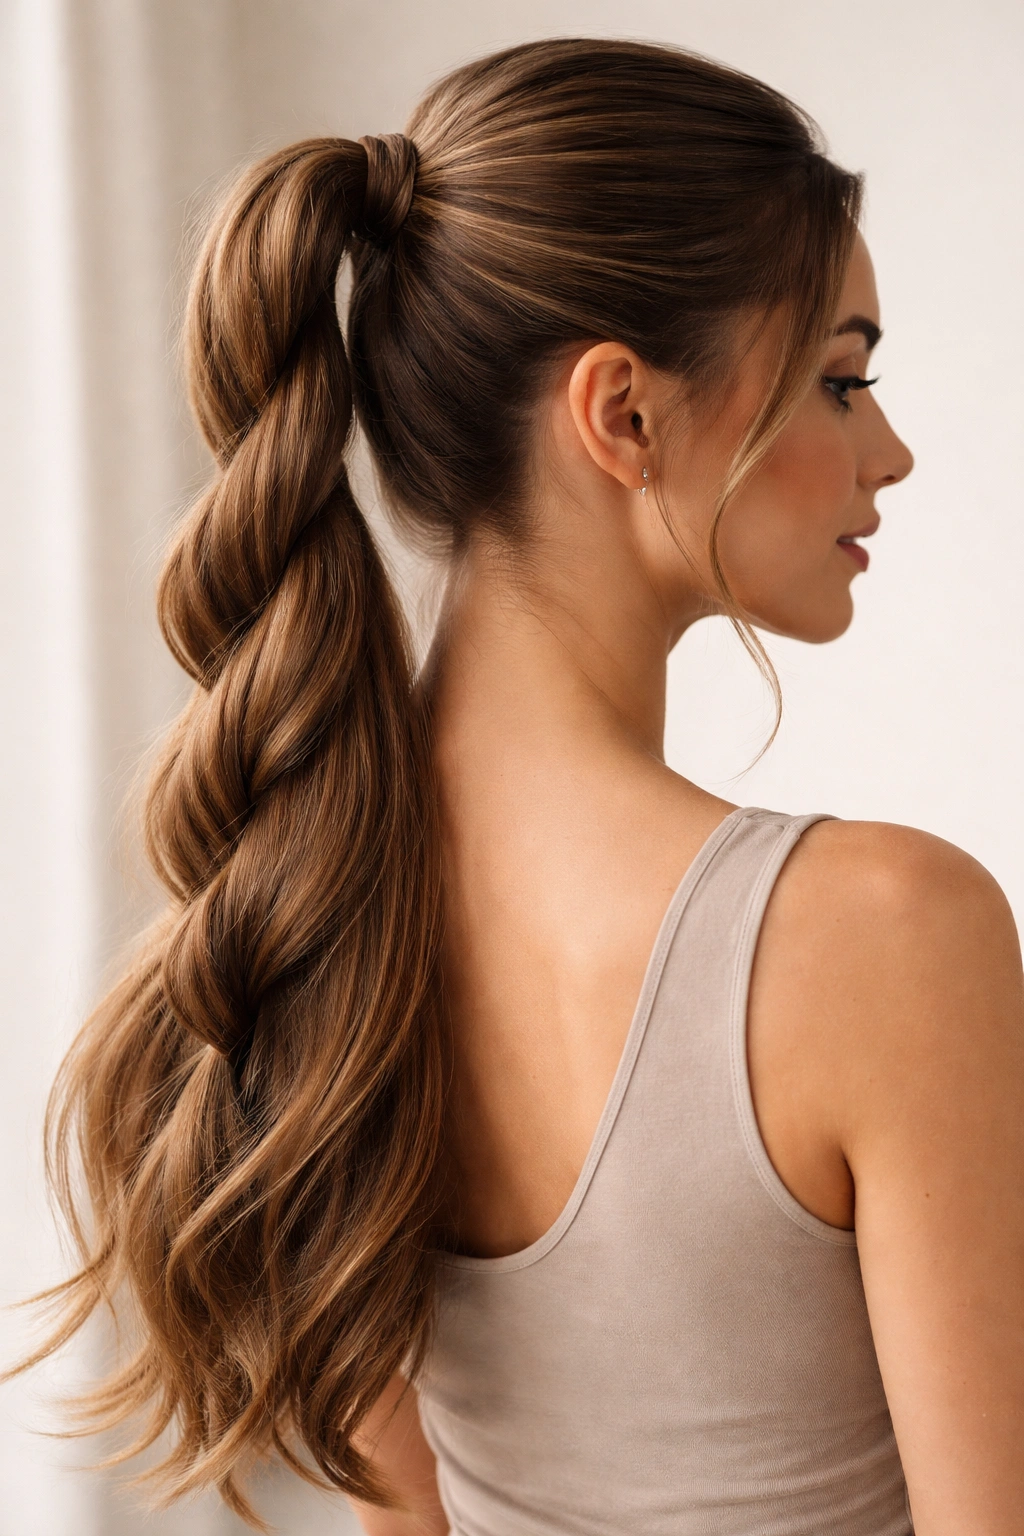
A twisted braid ponytail combines the rope braiding technique with incorporated hair sections, creating a style that’s part twist, part braid. It’s less structured than a full three-strand braid but more intentional than a simple twist, hitting a sweet spot between casual and polished.
What Makes Twisted Braids Special
Twisted braids create lovely dimension because the twists catch light differently than regular braids. They also feel more relaxed and modern—less princess-like and more editorial or fashion-forward. If you want something that reads as “braided ponytail” but feels less formal, a twisted braid is your answer. The technique is also forgiving, making it ideal if you’re still building your braiding confidence.
Building Your Twisted Braid
- Start at the crown with two sections of hair
- Twist both sections clockwise independently (you’re twisting each section on its own, not together)
- Cross the right section over the left section so they wrap together slightly
- Add a small section of loose hair into the right section, twist it clockwise once, then cross it over the left
- Add a small section into the left section, twist it clockwise once, then cross it over the right
- Continue this pattern down the back of your head: twist, cross, add hair, repeat
- Gather everything into a ponytail and secure
- Loosen the twists gently to create a softer, more textured appearance
Insider note: Twisted braids photograph beautifully because the twists create visual movement and texture that reads well in images.
8. Waterfall Braid Ponytail
A waterfall braid is one of the most visually interesting braid styles because it incorporates dropping strands that cascade down your back like water. Each section of hair you weave into the braid is then released, falling down your back while new hair replaces it. The effect is stunning and feels complex, though the technique becomes intuitive once you practice it a few times.
Why Waterfall Braids Turn Heads
Waterfall braids create an intricate, textured look that seems to require serious skill, even though they’re manageable with practice. With long hair, the waterfall strands that drop down create length and movement while the active braid remains clean and structured. This is a style that works beautifully for special occasions or when you want to feel extra put-together. It’s also incredibly flattering because the frame of cascading hair around your face softens your features while keeping everything out of your way.
Executing a Waterfall Braid
- Start with a three-strand braid at your temple or crown
- Weave a few passes of your regular three-strand braid (right over center, left over center)
- Now comes the waterfall: let the bottom strand of your braid drop loose and fall down your back
- Immediately pick up a new section of hair from where the dropped strand was and use that as your new bottom strand
- Continue your three-strand braid pattern with this new strand, but then drop it and pick up new hair again
- Keep moving along the side or back of your head, continuously dropping strands and picking up new ones
- When you’ve traveled far enough around your head, gather your remaining active braid strands and all your hair into a ponytail
- The dropped strands will cascade down, creating that waterfall effect
- Gently tease and loosen the active braid for maximum texture
Pro tip: Waterfall braids look best when you keep the active braid (the one you’re currently working with) relatively tight while loosening the dropped strands—this creates contrast and definition.
9. Bubble Braid Ponytail
A bubble braid is a series of sections separated by elastics, pulled and puffed upward to create bubble-like, rounded sections that stack vertically down your head. When you transition a bubble braid into a ponytail, you’re creating a ponytail that’s structured at the top and flows freely below—a modern, youthful style with serious visual impact.
What Makes Bubble Braids Modern
Bubble braids feel contemporary and fashion-forward compared to traditional braids. They’re also incredibly fun and playful—perfect if you want a style that feels whimsical rather than formal. With long hair, you can create larger, more impressive bubbles because you have plenty of hair to work with. A bubble braid ponytail catches light beautifully and creates interesting shadows and dimension because of all the puffed sections.
Creating a Bubble Braid Ponytail
- Create a high ponytail and secure it with an elastic
- Divide this high ponytail into three sections, each about 3-4 inches down from the elastic
- Secure each section with a separate elastic
- Take the top section and gently pull and puff the hair upward between the top elastic and the elastic securing that section (the hair will bubble upward when you pull)
- Repeat with the middle section, pulling the hair upward between its top elastic and bottom elastic
- Repeat with the final section, pulling the hair upward
- You can continue further down, creating more bubbles if you have enough hair and want a longer structured section
- Once you’ve created all your bubbles, let the remaining length flow as a standard ponytail below the final bubble
- The result is a ponytail that’s playfully structured on top and flowy below
Quick fact: You can make bubbles bigger or smaller by adjusting how far apart your elastics are—wider spacing means larger, more dramatic bubbles; tighter spacing means smaller, more delicate ones.
10. Halo Braid Ponytail

A halo braid is similar to a crown braid but wraps further around your head, creating a complete circle or near-circle of braid. When you transition a halo braid into a ponytail, you’re creating a romantic, ethereal style that feels special without being over-the-top formal.
Why Halo Braids Feel So Romantic
Halo braids frame your entire face and head, creating an almost angelic appearance that’s impossibly flattering. The braid wraps around like a crown of hair, and then your long ponytail flows freely below—you get the best of both worlds: a styled, intentional top and movement and length below. This style works beautifully for weddings, date nights, or whenever you want to feel special without spending hours on your hair.
How to Create a Halo Braid
- Start at one temple, low and behind your ear
- Create a loose three-strand or Dutch braid that travels horizontally around the back of your head toward the opposite ear
- Keep the braid loose and textured as you work—tightness diminishes the romantic effect
- When you reach the opposite temple, anchor the end of the braid with bobby pins behind the ear
- Gather all your remaining hair (including the braid end) into a low ponytail at the nape of your neck
- If you prefer, you can wrap a strand of hair around the elastic to hide it
- Gently pull at the halo braid to make it wider and softer
- Leave a few face-framing pieces of hair loose around your temples and cheeks before you start the braid for maximum softness
Worth knowing: A true halo is one continuous braid that wraps nearly all the way around your head—but you can also create a half-halo by braiding only one side and gathering the ponytail, which takes less time and still looks beautiful.
Final Thoughts
Braided ponytails offer something that regular ponytails can’t quite deliver: intention, texture, and the feeling that you’ve put real effort into your appearance even when you’re working on a tight timeline. Long hair is genuinely the best canvas for experimenting with braids because you have length to work with, volume to create dimension, and enough material to try different variations without the style falling flat.
The beauty of these ten styles is that they exist on a spectrum from super simple (rope braid, twisted braid) to more involved (waterfall braid, halo braid), so you can choose based on how much time you have and what kind of vibe you’re going for. None of them require salon skills—just practice, patience, and willingness to try again if your first attempt isn’t perfect. Your braiding improves exponentially after the fifth or sixth time you try a style, so don’t judge yourself too harshly on attempt number one.
The most important thing is that your braided ponytail should feel good to wear and make you feel confident. If a style takes too long, feels too tight, or just doesn’t work with your hair texture, skip it and try another one. Braided ponytails should enhance your day, not complicate it, so choose the styles and occasions that genuinely serve you and your lifestyle.