Gel ponytails have become a go-to protective style and everyday look for Black women who want hair that’s secure, polished, and effortlessly put-together. Whether you’re heading to the office, hitting the gym, or just need a low-maintenance day, a well-executed gel ponytail can transform your entire look in minutes. The beauty of this style lies in its versatility — gel ponytails can be sleek and refined, textured and playful, or adorned with accessories that take them from casual to completely glamorous.
The real secret to nailing gel ponytails is understanding how the product works with your natural texture and knowing which techniques create the specific effect you’re after. Not all gel ponytails are created equal. Some are meant to showcase your edges with razor-sharp precision, while others celebrate curl definition and texture. The style you choose depends on your hair’s natural pattern, the occasion, and how much time you’re willing to invest in styling and maintenance.
What makes gel so transformative is its ability to smooth, hold, and shape hair without the heat damage that comes from flat irons and blow dryers. When applied correctly, gel becomes invisible to the eye while keeping every strand exactly where you want it. The right gel ponytail doesn’t just look good — it actually protects your ends and reduces breakage, making it one of the smartest styling choices you can make for long-term hair health.
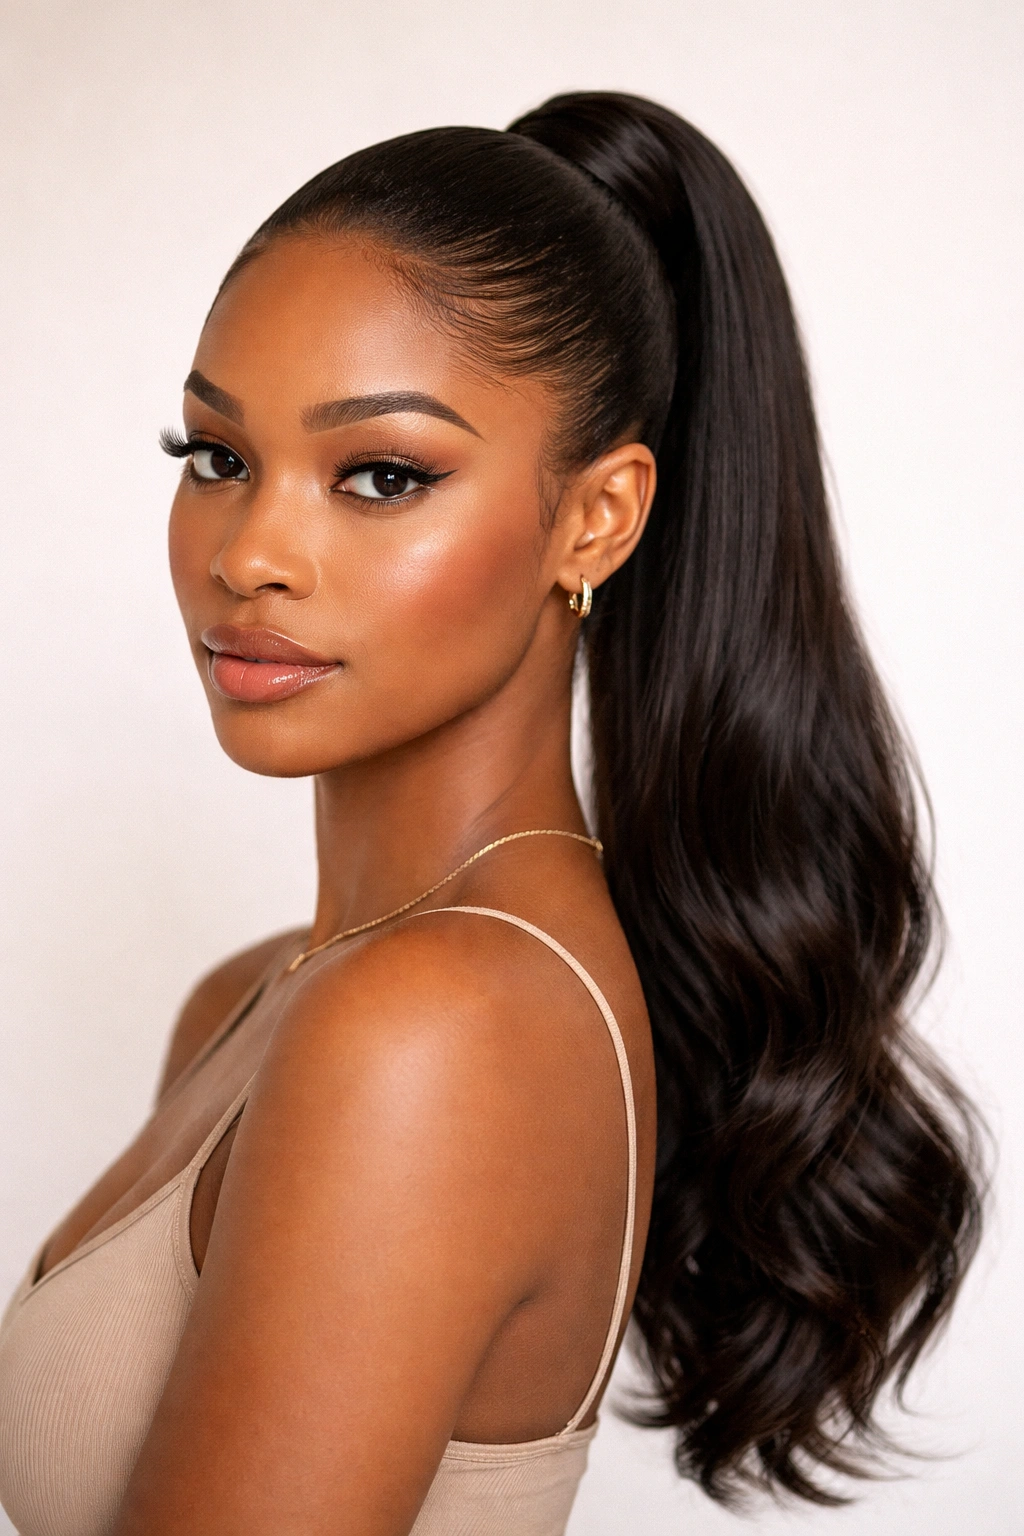
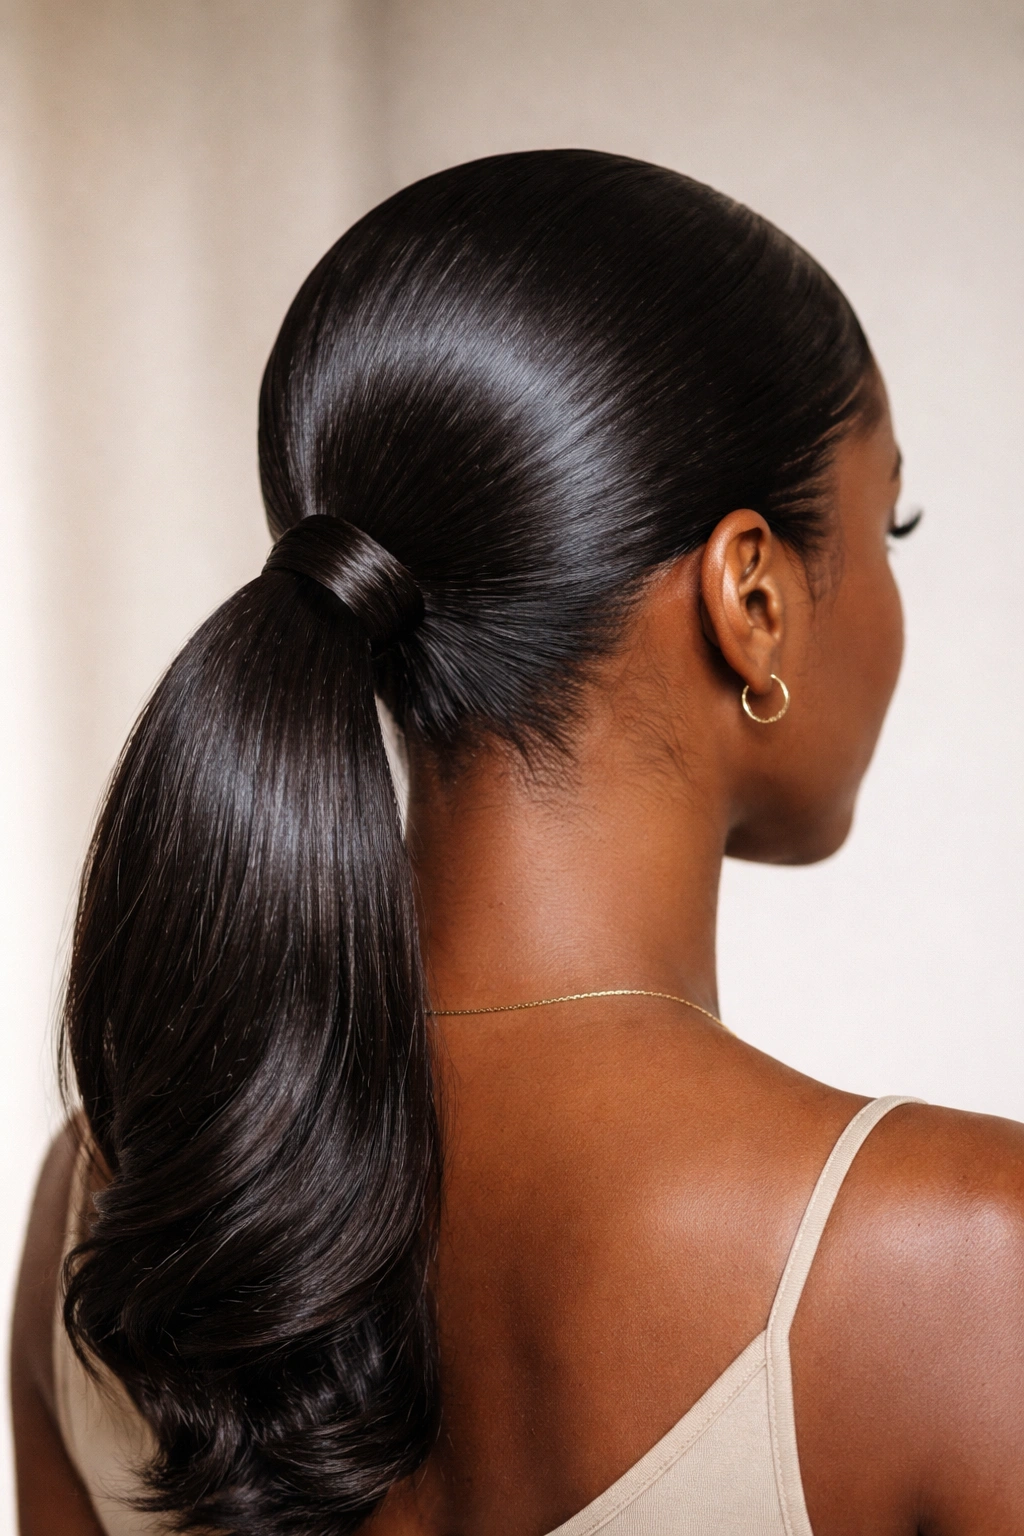
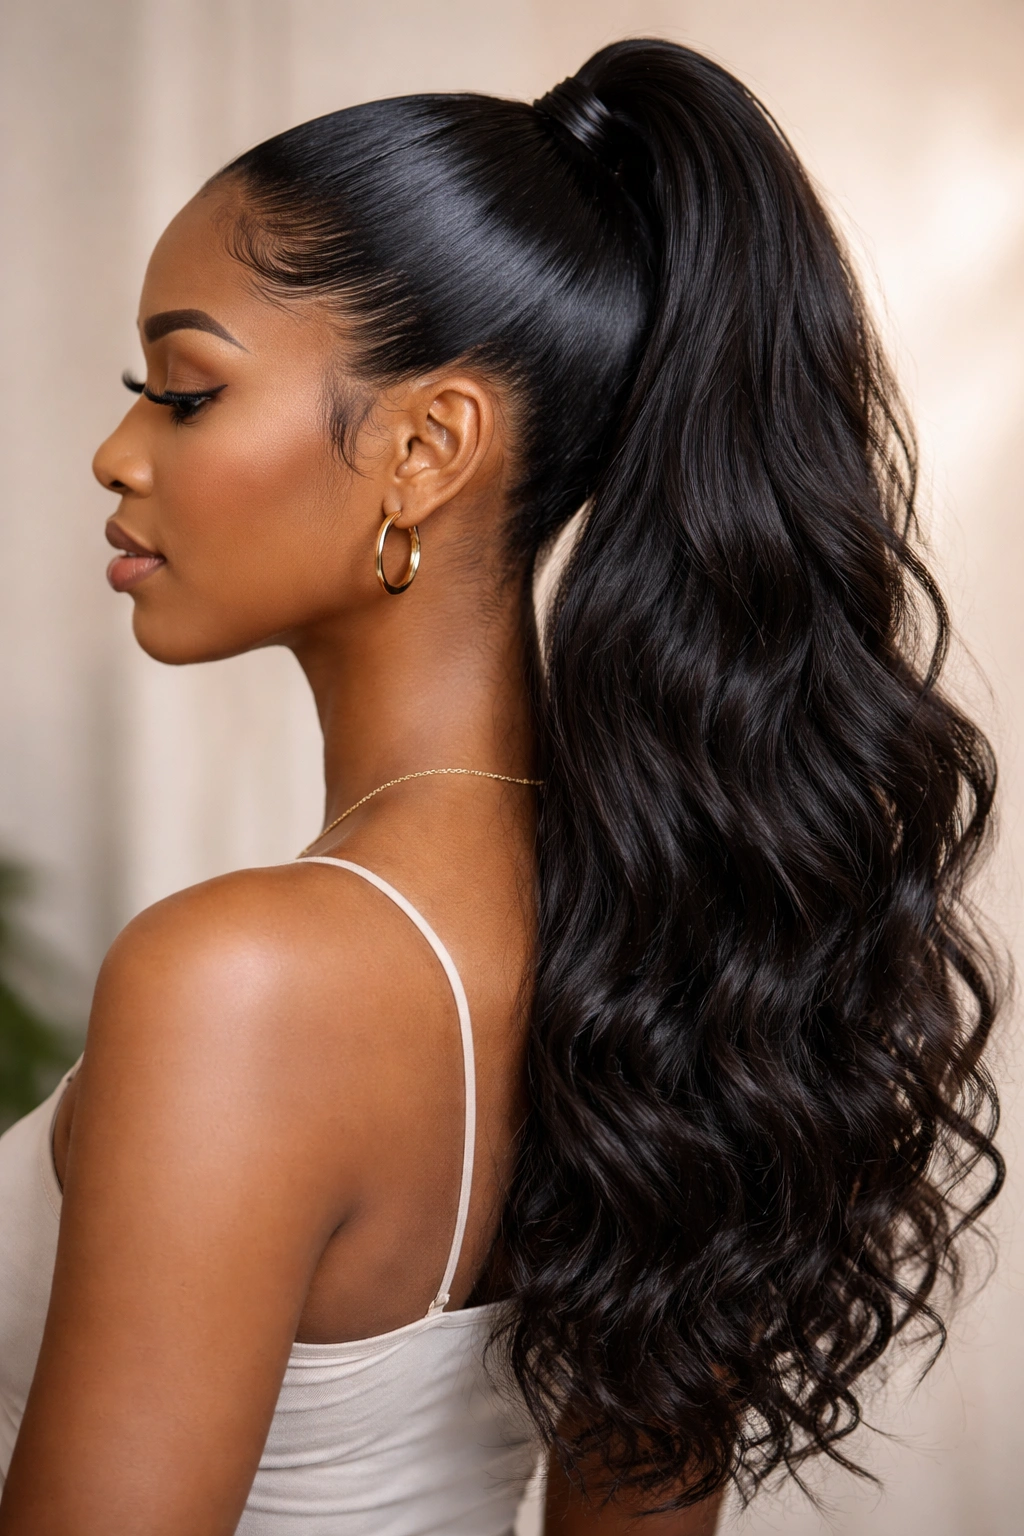
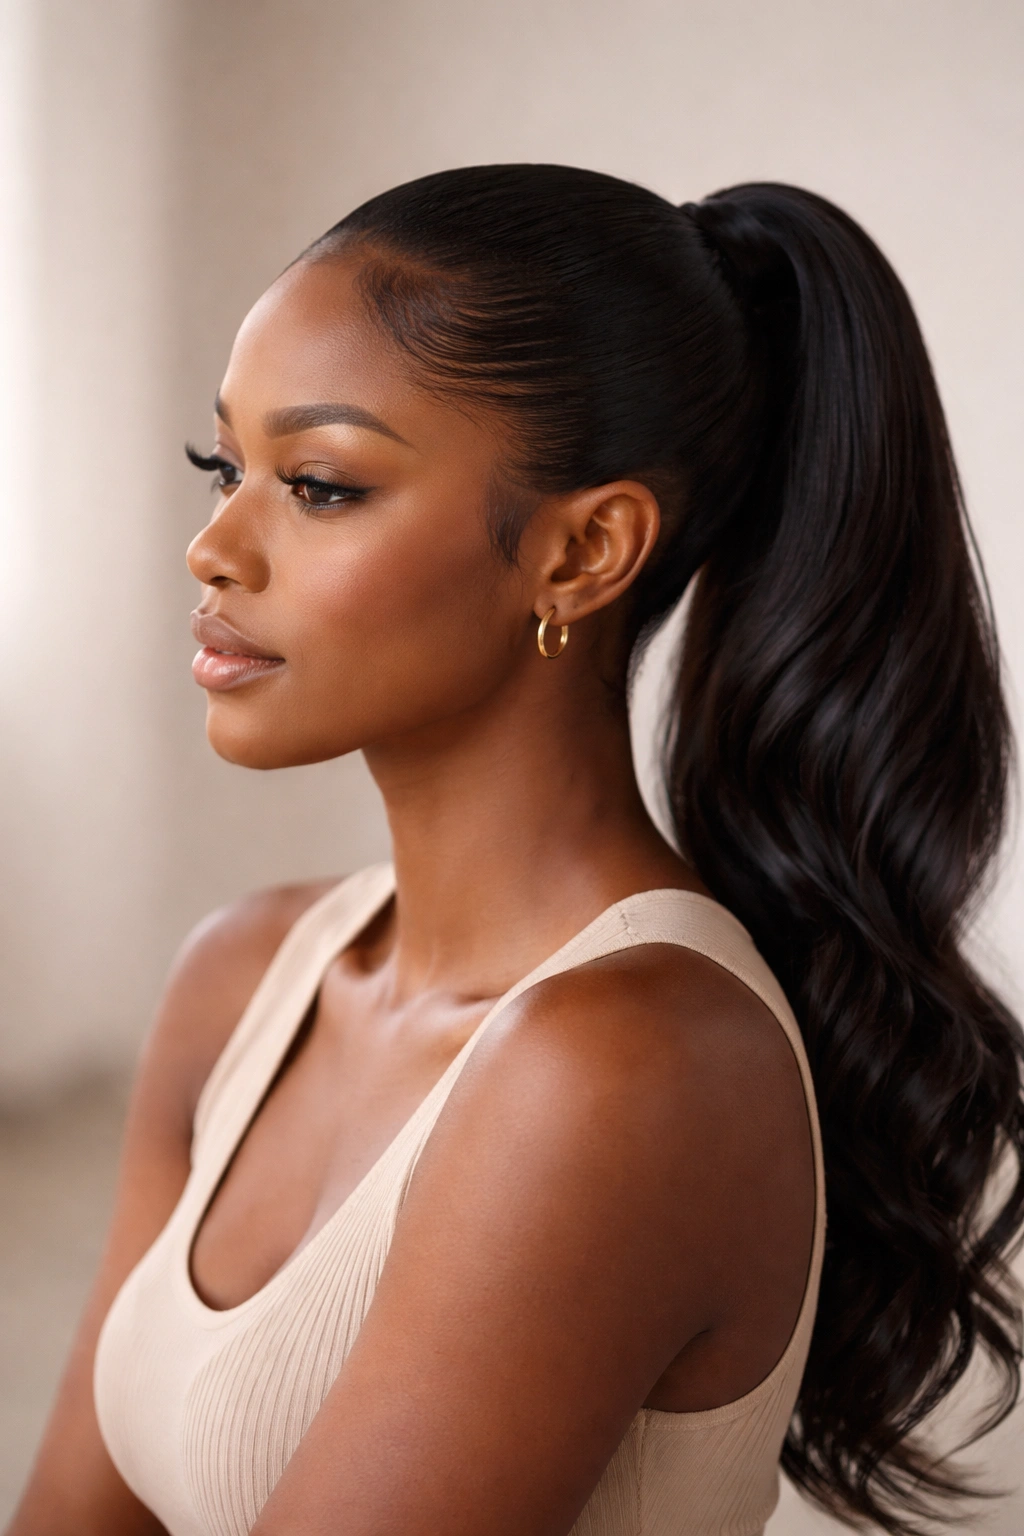
1. Sleek High Gel Ponytail
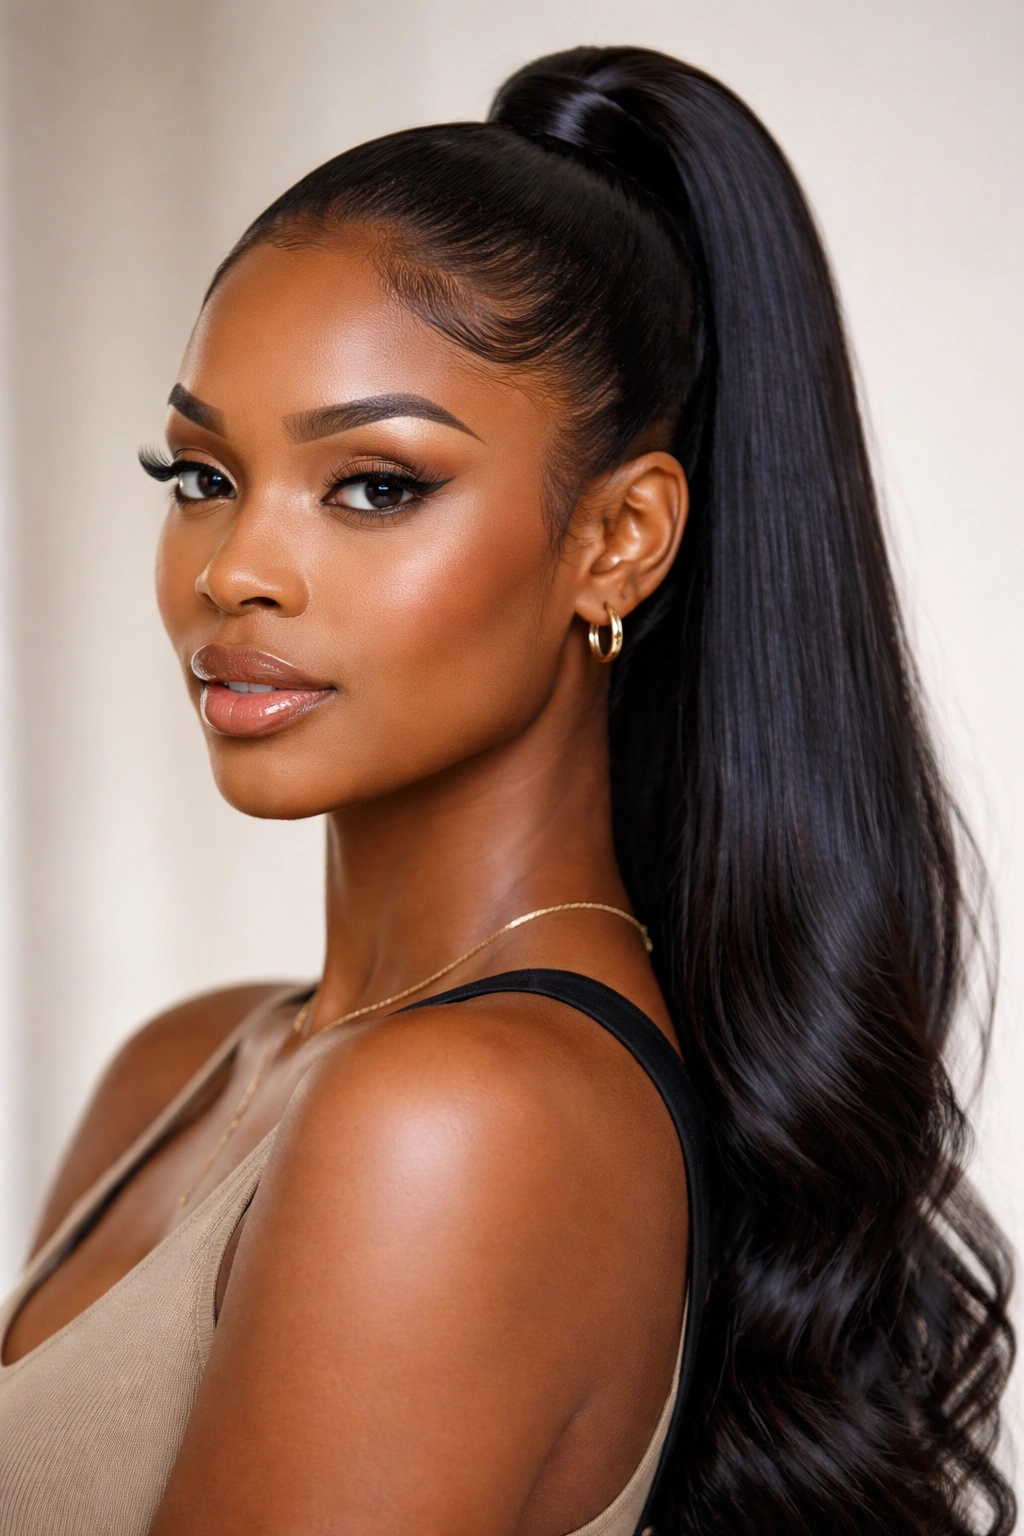
The sleek high gel ponytail is the ultimate power move — polished, professional, and undeniably chic. This style pulls your hair straight up from the crown and secures it at the top of your head, creating clean lines that frame your face beautifully. What makes this ponytail work is the gel application; you’re using it to smooth every single strand so there are literally zero flyaways or texture breaks from root to tip.
Start by applying gel to damp hair, working from your hairline back toward where your ponytail will sit. Use a fine-tooth comb or brush to smooth the hair as you apply, creating tension that locks the gel into place. The key is patience — rushing this step results in bumps and uneven sections. Once your gel has fully dried, you’ll have a sleek canvas ready for gathering into a high ponytail.
Creating the Perfect Sleekness
- Use a gel with strong hold but not so much shine that it looks wet or sticky once dried
- Apply gel in the direction your ponytail will sit, not against it
- Let the gel set for at least 10-15 minutes before gathering your hair
- A silk or satin scarf smoothed over the ponytail while drying helps seal everything down
- Bobby pins hidden within the ponytail base create extra security without showing
Pro tip: If you have baby hairs or a textured hairline, smooth those down with gel first and let them fully dry before applying gel to the rest of your hair. This prevents the hairline from drying with creases or bumps.
2. Textured Gel Ponytail with Laid Edges
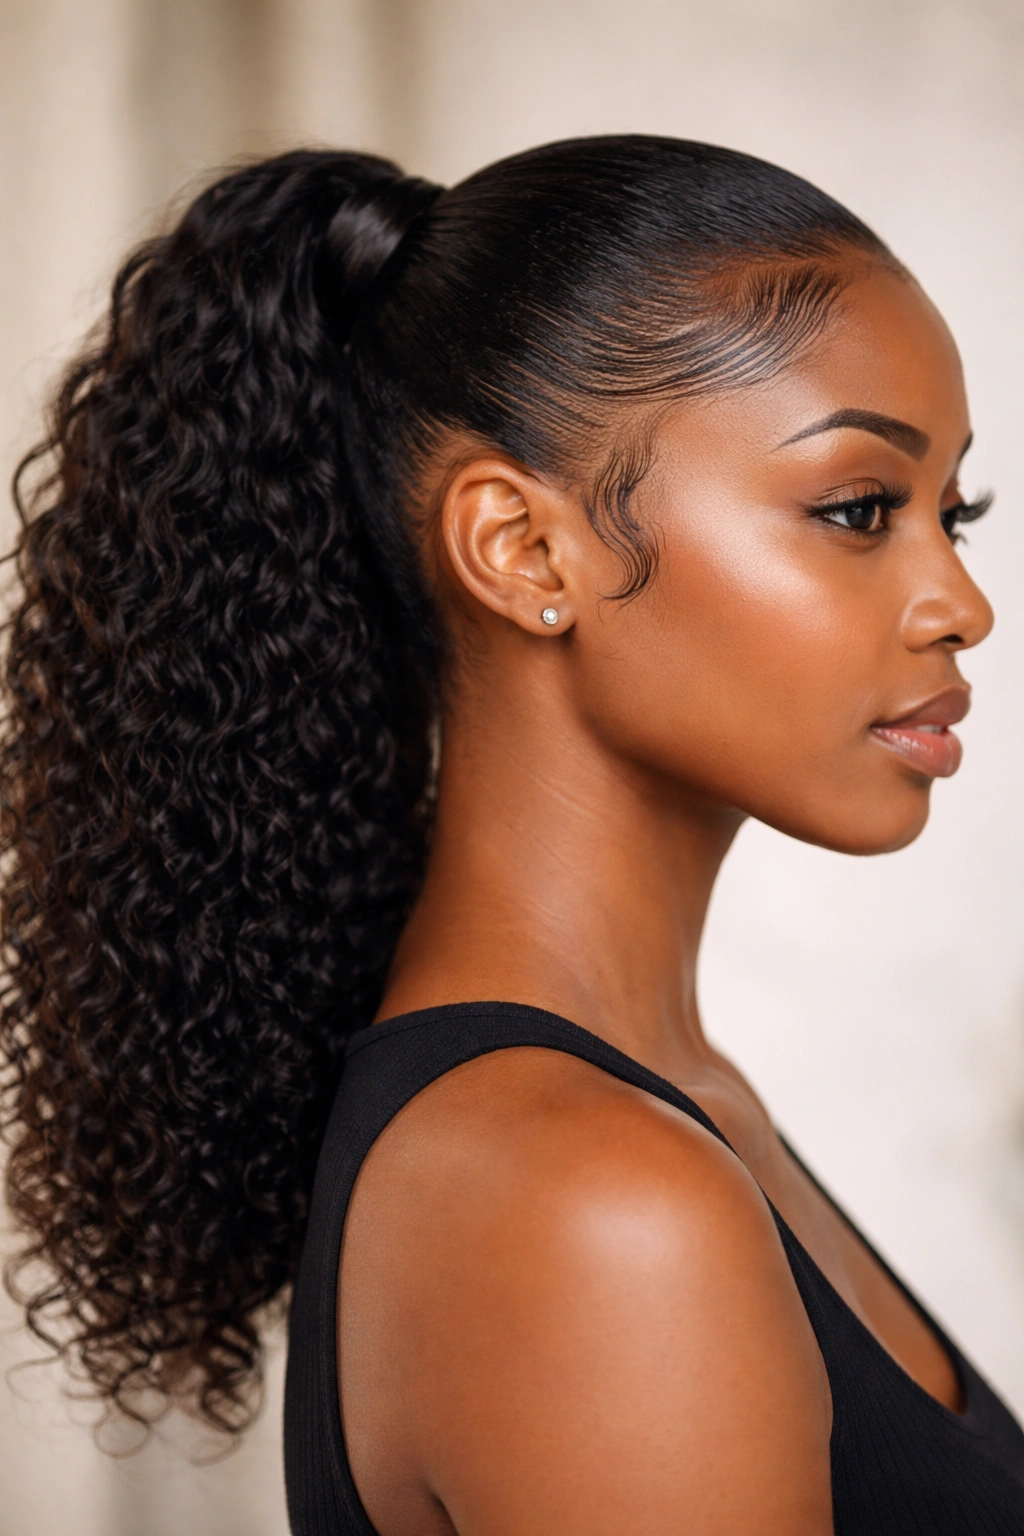
Not every gel ponytail is meant to be sleek. The textured gel ponytail celebrates your natural curl pattern while keeping the foundation neat and controlled with strategic gel placement. This style lays down your edges and smooths the crown, but then lets your natural texture take center stage in the ponytail itself.
The magic here is selective gel application — you’re only gelling the parts that need structure, leaving the bulk of your hair free to express its texture. Apply gel to your edges, your hairline, and maybe the first inch or two of the ponytail base. Everything below that gets gathered and secured without product, so your natural curls and waves remain visible and dimensional.
How to Balance Texture and Control
- Map out which sections need gel before you start — usually edges, hairline, and the ponytail base
- Use a smaller brush or your fingertips to apply gel only where you need hold
- Gather your ponytail while the gel is still slightly damp so it locks everything into place
- Don’t brush through the ponytail portion; use your fingers to gently separate curls if needed
- A light finishing spray keeps your texture defined without adding crispness
This approach works beautifully on tighter curl patterns because it shows off your natural coil without the product-heavy appearance that comes from gelling everything.
3. Braided Gel Ponytail
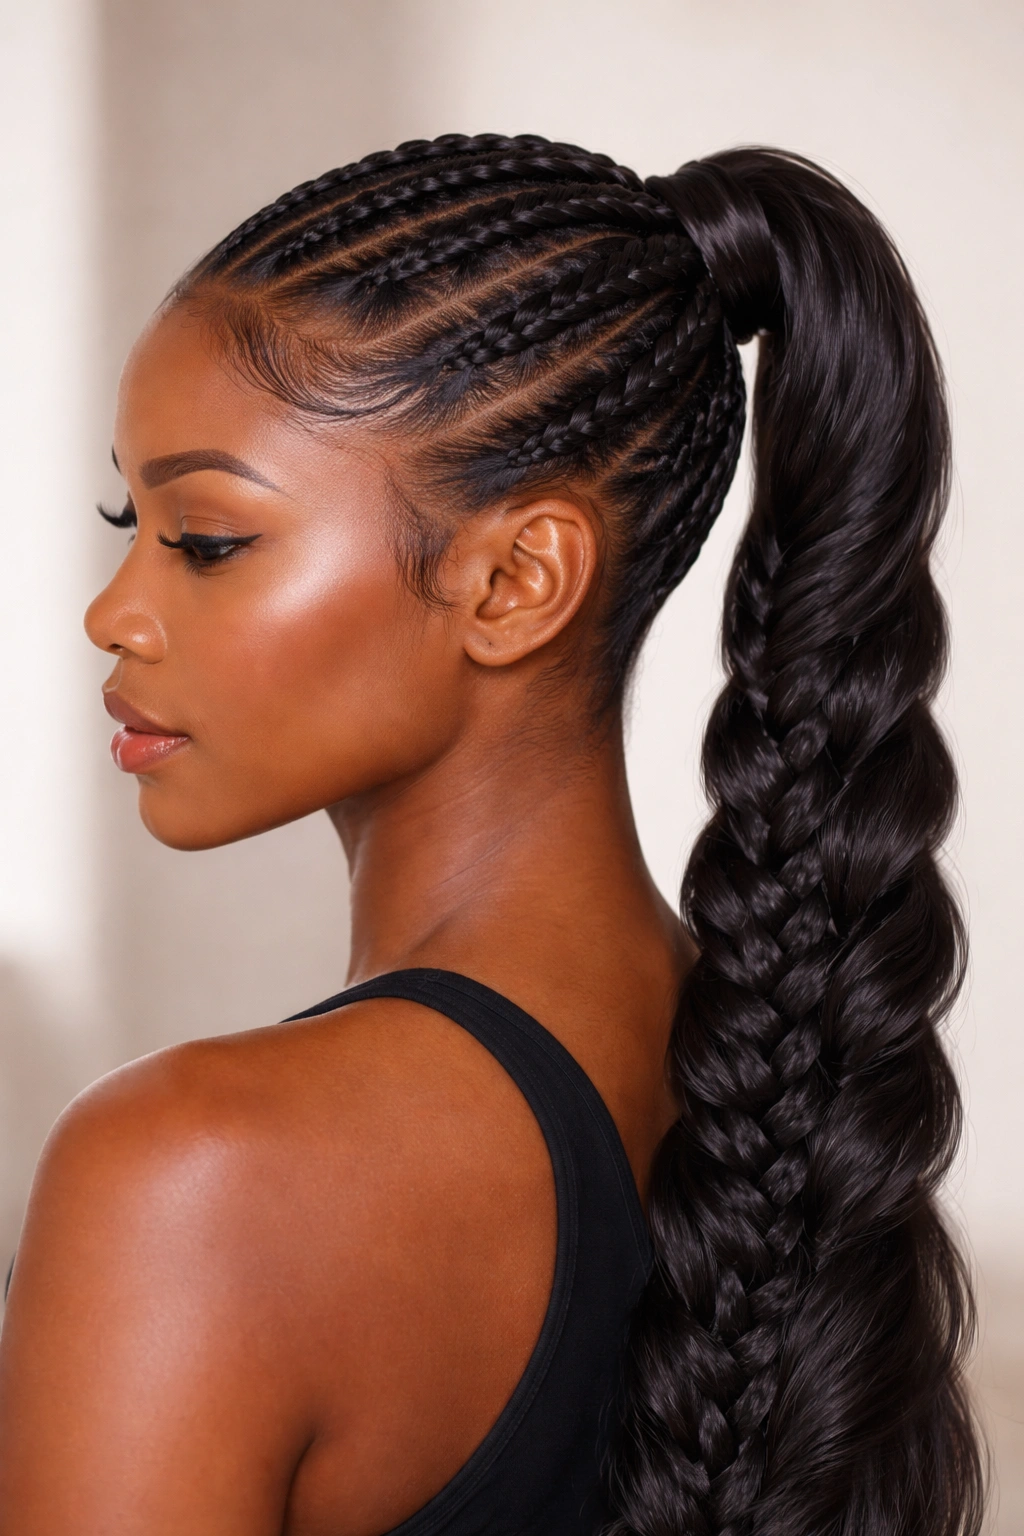
When you braid your hair before forming the ponytail, you’re creating dimension, texture, and a style that lasts significantly longer than a simple gathered ponytail. Start by parting your hair into sections, then braid each section loosely before gathering them all into a single ponytail at the base.
Apply gel to smooth your edges and the parting lines, then braid while your hair is still slightly damp. The moisture helps the braids lay smoothly against your scalp while the gel locks the edges down. Once all your braids are in place, gather the ends into a ponytail and secure with an elastic. This creates a multi-dimensional crown that’s interesting from every angle.
Building a Braided Ponytail That Stays Put
- Use gel on your edges and parting lines first, letting it dry before braiding
- Braid sections of manageable thickness — too thin looks stringy, too thick looks bulky
- Pull each braid from root to tip as you apply gel, ensuring the gel coats every strand
- Secure the base ponytail with a sturdy elastic that won’t slip on your braids
- Refresh braids overnight by misting lightly with water and re-geling the edges
Worth knowing: This style looks fresh for 5-7 days if you sleep in a bonnet and don’t manipulate the braids excessively. The longer you wear it, the more dimension develops as the braids slightly compress.
4. Gel Ponytail with Wrap
Adding a wrap around your ponytail base transforms the entire aesthetic while serving a practical purpose — it hides the elastic and protects the hair underneath from breakage. A wrap can be a thin strand of your own hair, a decorative thread, a silk scarf, or even coordinating fabric.
Apply your gel, create your sleek ponytail, then take a small section of hair from the bottom of the ponytail and wrap it around the base 2-3 times. Secure the wrap with a bobby pin tucked underneath so it’s completely hidden. Alternatively, wrap a decorative thread or thin scarf around the base, creating a pop of color or texture that becomes a statement detail.
Wrapping Techniques That Look Polished
- If using hair from your ponytail, take a thin 1-inch section so the wrap looks delicate, not chunky
- Wrap tightly enough to smooth the elastic from view but not so tight that you’re putting tension on your hairline
- Tuck the end of the wrap inside the coil so nothing hangs loose
- For decorative wraps, coordinate colors to your outfit or go bold with a contrasting shade
- A wrapped ponytail looks intentional and put-together, elevating even a basic style
Insider note: If your wrap tends to slip, apply a tiny dab of gel underneath before wrapping. It acts like an adhesive without being visible once the wrap covers it.
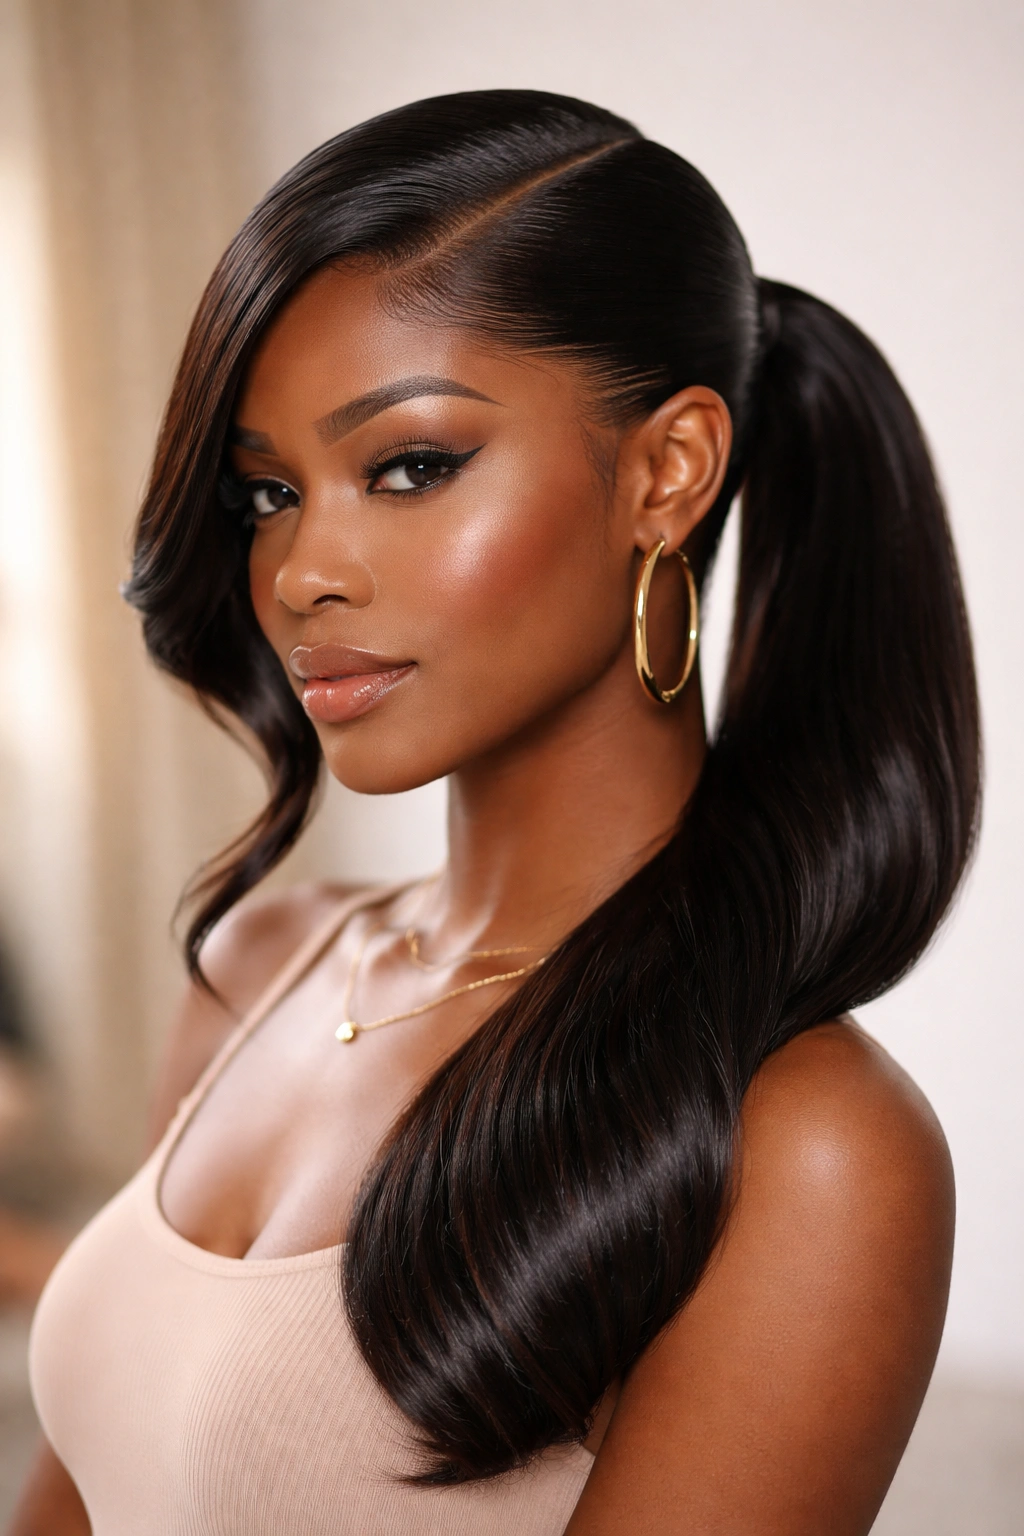
5. Slicked Back Low Gel Ponytail
The low ponytail is a sophisticated alternative to the high version, sitting at the nape of your neck with the same sleek, gelled finish. This style is especially flattering if you have a strong jawline or prefer styles that elongate your face rather than draw focus upward. The low placement also means less tension on your hairline, making it a gentler option for frequent styling.
Apply gel to your entire hairline and work it back toward where your low ponytail will sit. Smooth as you go, creating that signature sheen that says your style was intentional and deliberate. Gather your hair at the nape of your neck when the gel is nearly dry but still pliable, securing it with an elastic that matches your hair color.
Perfecting the Low Ponytail
- Start geling from your hairline at least 20 minutes before you plan to gather the ponytail
- Use a brush to smooth the gel backward and slightly downward, creating gentle lines toward the nape
- A low ponytail should sit about 2 inches above your neck — higher can look awkward, lower can feel sloppy
- Smooth any wisps or strays with a toothbrush dipped lightly in gel
- Let the ponytail dry completely before adding any accessories or adjustments
The low ponytail pairs beautifully with earrings and necklaces since it opens up your neck and collarbone area. It’s also perfect if you’re wearing a style that would compete with a high ponytail, like a structured updo or a hat.
6. Gel Ponytail with Curled Ends
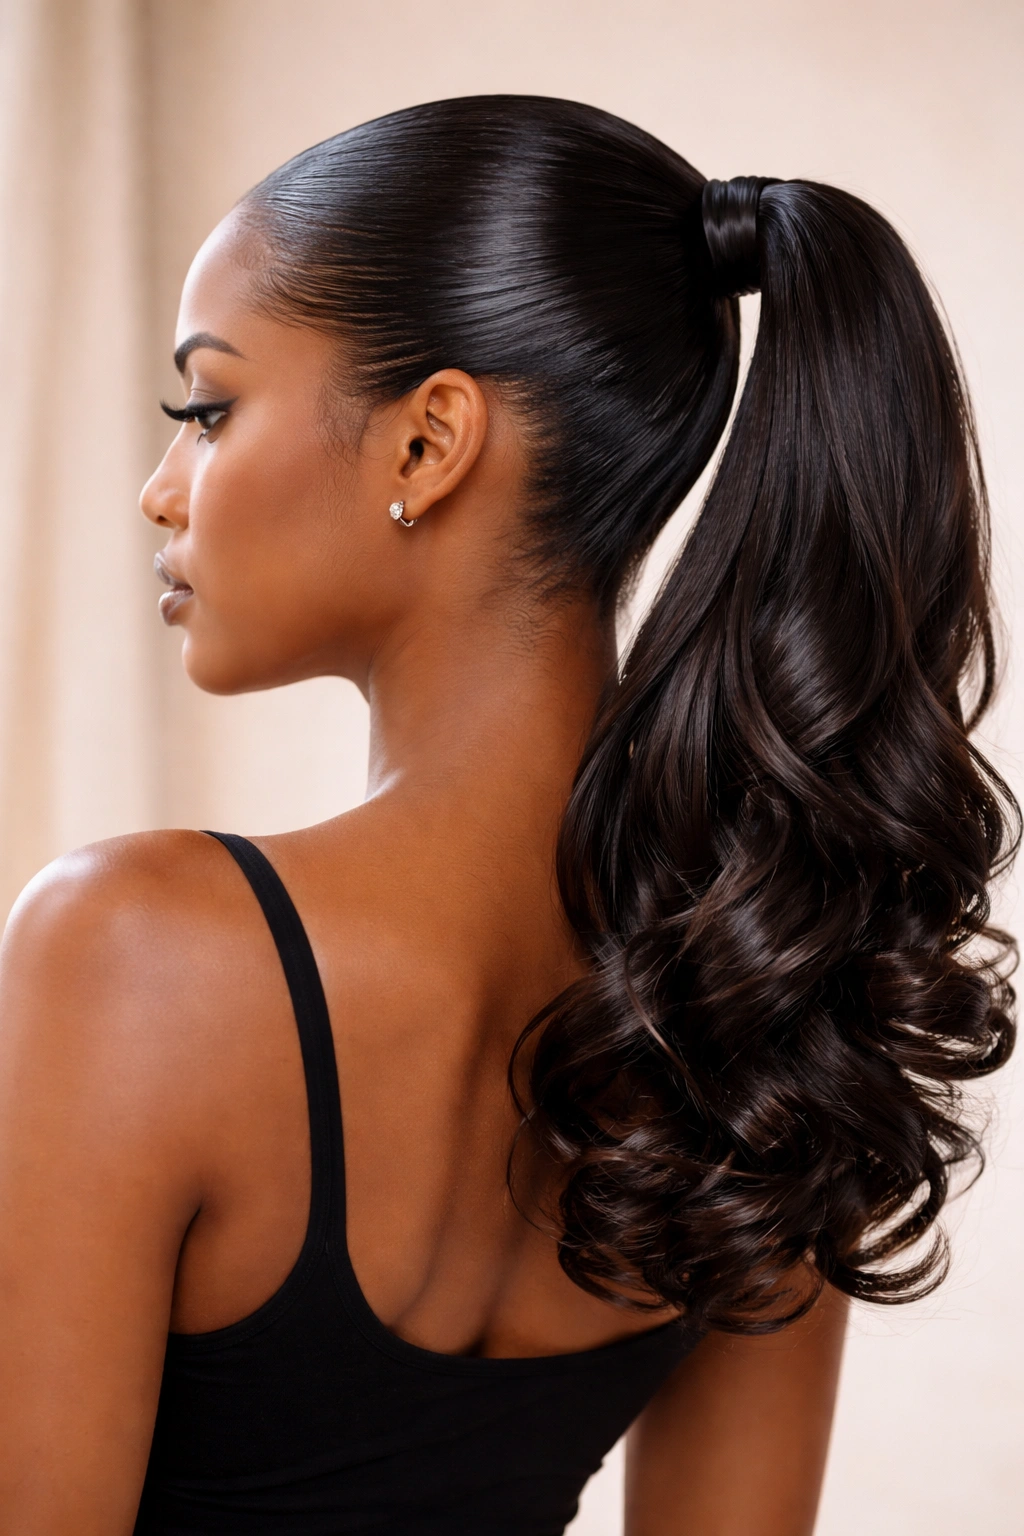
Creating curl at the ends of your ponytail adds movement and polish while keeping everything else controlled and neat. This hybrid style gives you the security and sophistication of a gel ponytail with the visual interest of curled ends that frame your face when you move.
Secure your gel ponytail using all your usual techniques, then separate the tail into sections. Use a curling iron, flexi rods, or even roller-set your ponytail and let it air dry for a heat-free approach. The curls create a soft finish that contrasts beautifully with the sleek, structured crown.
Creating Curls That Complement Your Style
- Apply a light leave-in conditioner or curl cream to your ponytail before curling to ensure shine and definition
- Sections of about 1-1.5 inches curl most evenly — too small creates a tight spiral, too large won’t hold
- Hold the curl in the iron for 5-8 seconds depending on your hair’s texture, then release
- Let each curl cool completely before touching it — this sets the shape
- Finger-comb through the curls gently once they’ve fully cooled for a softer, more natural wave
Pro tip: If you’re setting your ponytail overnight, use medium or jumbo flexi rods rather than heat tools. Your ends will be protected, you’ll avoid heat damage, and the results are just as beautiful.
7. Bubble Gel Ponytail
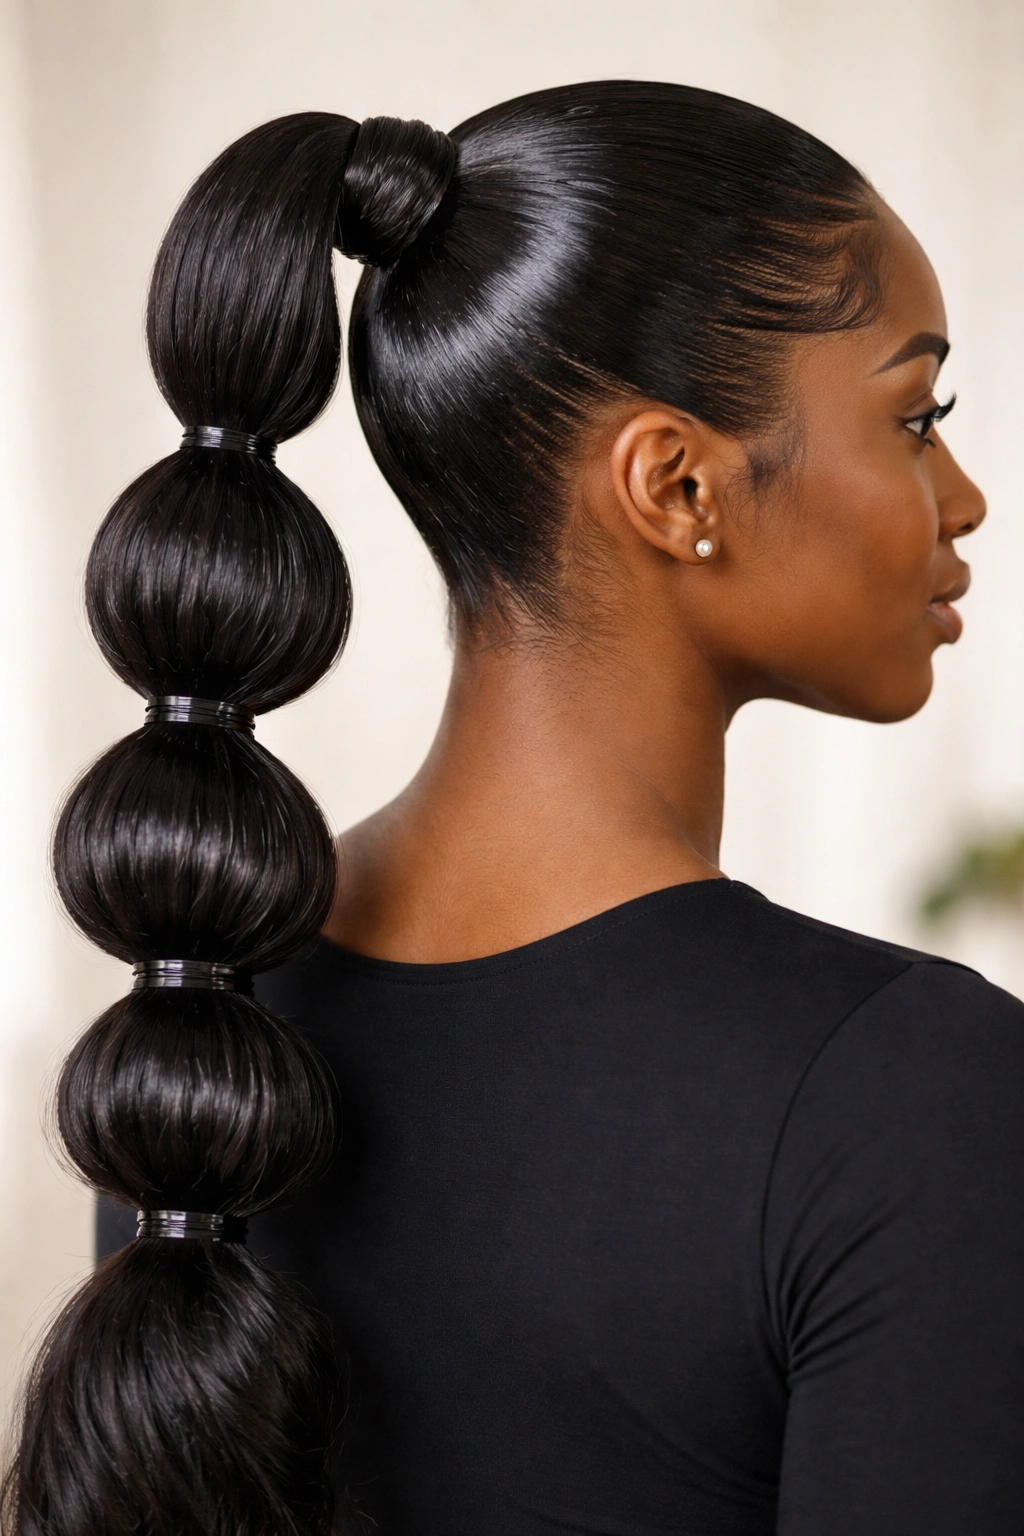
The bubble ponytail is playful, modern, and surprisingly easy to create once you understand the technique. You’re essentially creating multiple smaller ponytails stacked vertically, each one puffing out slightly to create a bubble effect. Gel is crucial here because it keeps the smaller sections neat and defined instead of looking chaotic.
Apply gel to your edges and hairline, then gather a section of hair at your crown into a ponytail and secure with an elastic. Below that, gather another section of loose hair and secure it with a second elastic, leaving about an inch of space between the elastics. Repeat this process down the length of your hair. Then, gently pull and fluff each section to create the bubble effect — the gel keeps everything looking intentional and sculpted.
Mastering the Bubble Effect
- Use elastics in colors that match your hair so they blend into the design
- Leave slightly more space between elastics (1.5 inches) for dramatic bubbles, less space (0.75 inches) for subtle texture
- Pull each bubble upward and outward gently — you want fullness without looking ragged
- Apply gel around each elastic to keep the bubble perimeter clean and smooth
- This style lasts 2-3 days before the bubbles naturally relax and flatten slightly
The bubble ponytail photographs beautifully and looks equally good in person. It’s fun enough for casual days but structured enough for planned events.
8. Gel Ponytail with Accessories
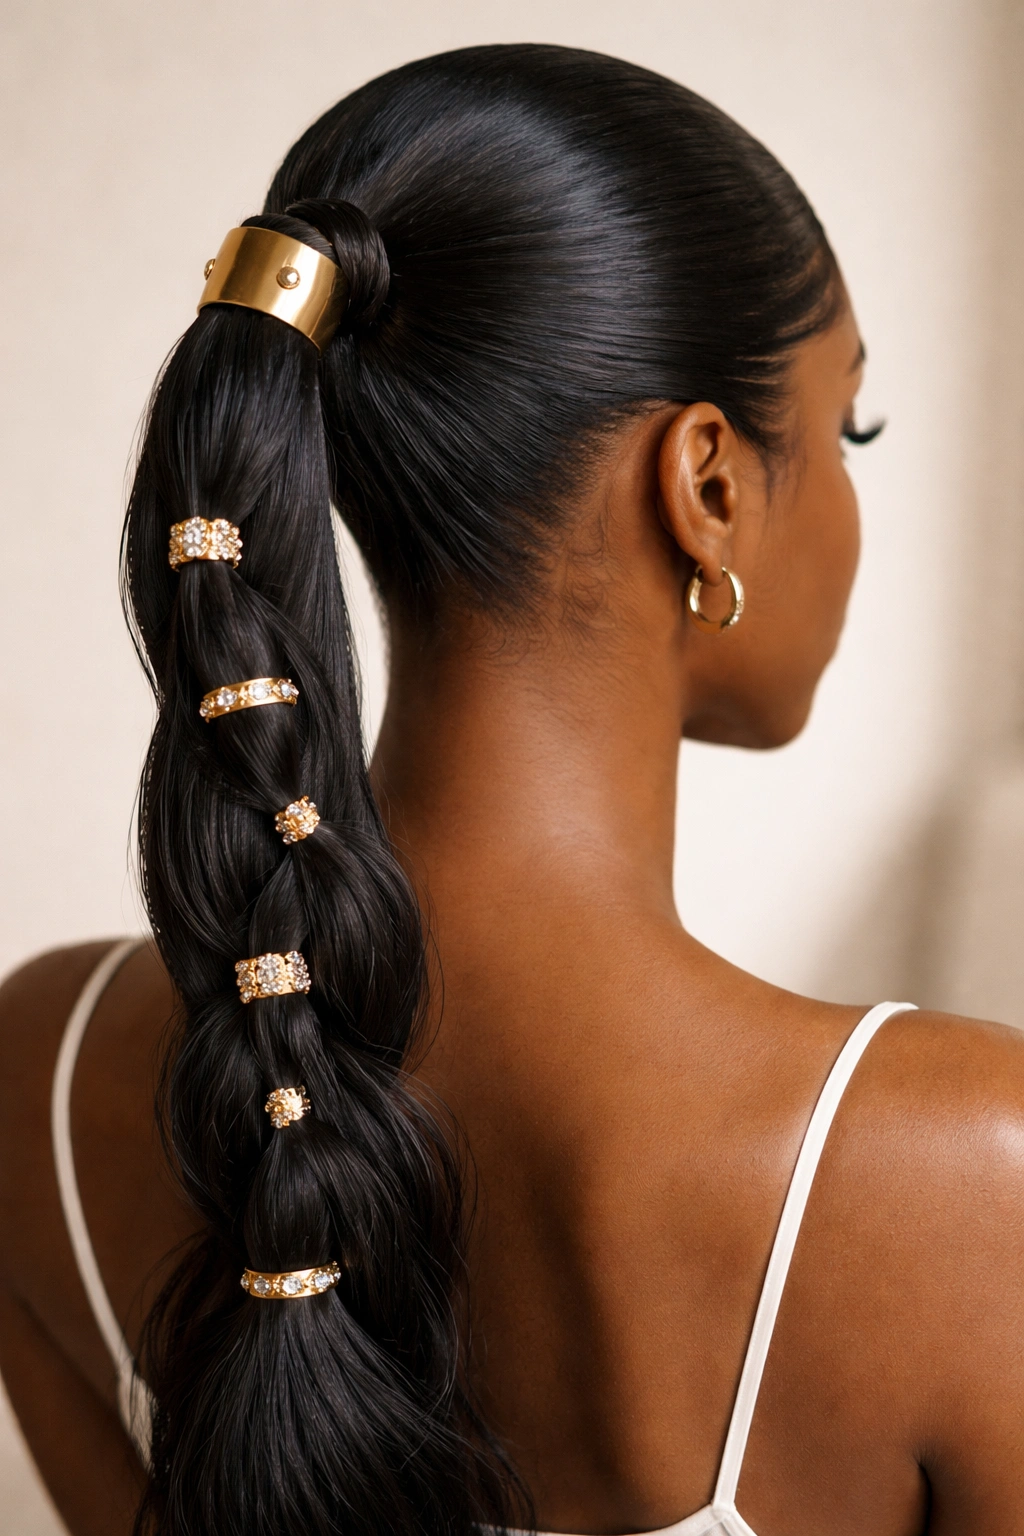
Accessories transform a simple gel ponytail into a statement piece. Cuffs, rings, clips, and decorative bands add personality and visual interest without requiring you to restyle or use additional products. Choose accessories that complement your complexion, outfit, or the occasion.
Start with your basic gel ponytail using all your usual techniques, then add accessories once everything is secure. Cuffs and rings slide over the ponytail itself, while clips and bands can attach directly to the base or the tail. Gold, silver, pearl, and beaded accessories all work beautifully with gel ponytails because the sleek foundation doesn’t compete with the ornaments.
Choosing and Placing Accessories Strategically
- Metallic cuffs and rings add elegance and work for both casual and professional settings
- Beaded or stone-covered clips create visual interest and catch the light beautifully
- Multiple smaller accessories scattered down the ponytail length look more modern than one large statement piece
- Place heavier accessories closer to the base where the elastic is strongest
- Space accessories evenly — too clustered looks crowded, too spread out looks sparse
Worth knowing: Removable hair cuffs won’t damage your ponytail when you take them off, making them ideal if you like to change your look throughout the day or week.
9. Half-Up Gel Ponytail
The half-up ponytail strikes the perfect balance between down and up styles — you get the polished appearance of a ponytail with loose hair that adds movement and dimension. Gel smooths the top portion that’s gathered while the bottom stays loose and textured, creating an interesting visual dynamic.
Apply gel to your hairline and the top half of your head, smoothing it back toward where your half-up ponytail will sit. Gather roughly the top third to half of your hair into a ponytail at the crown or slightly back, leaving the lower portion down and unstructured. The gelled section provides control while the loose portion adds softness and interest.
Building a Half-Up Ponytail With Impact
- Apply gel only as far back as your half-up point so the loose portion stays separated and textured
- Gather your half-up section while the gel is slightly tacky but not fully dry
- Use an elastic that complements both the sleek top and loose bottom
- Add a wrap around the base to elevate the style and hide the elastic
- The loose portion can be straight, curled, or allowed to dry in its natural texture
This style works beautifully if you want to show off length without committing to a full ponytail, and it’s particularly flattering if you have layers that look good falling loose.
10. Gel Ponytail with Twists
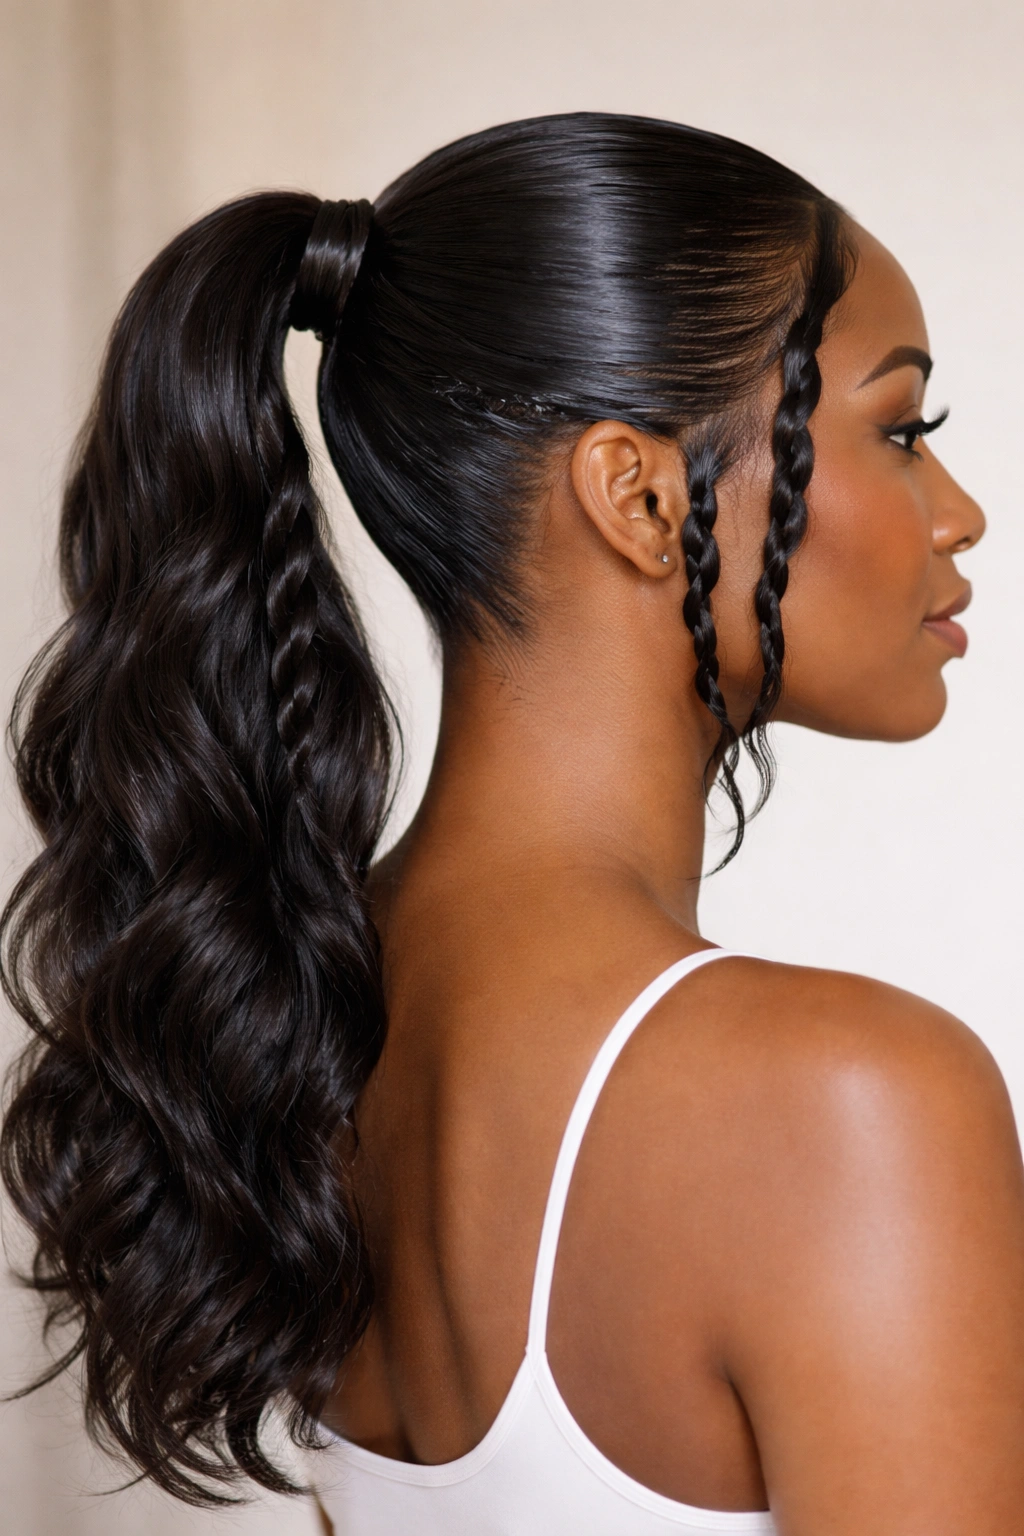
Twists incorporated into your ponytail base add texture and visual interest while maintaining the polished aesthetic that gel provides. You’re essentially combining two techniques — twists through the top portion of your hair, then gathering everything into a ponytail.
Apply gel to your hairline and edges, then take two sections of hair and gently twist them together, applying gel as you twist to keep the sections controlled. Once you’ve twisted several sections from different areas of your head, gather all your hair — both twisted and untwisted sections — into a ponytail. The twists create a halo effect that frames your face while keeping everything secured and sleek.
Creating Twists That Enhance Your Ponytail
- Twist sections loosely rather than tightly — loose twists look more sophisticated and less juvenile
- Twist from your hairline back toward your crown, creating multiple twists rather than just one or two
- Apply gel to each twist, smoothing it down so the twists lay flat against your head
- Let the twists dry completely before gathering into your ponytail
- You can tuck the twists into the base of the ponytail for a more unified look or leave them visible for dimension
Pro tip: If your twists are tight, gently separate the strands slightly once they’re dry to create a softer, more textured appearance.
11. Gel Ponytail with Defined Curls
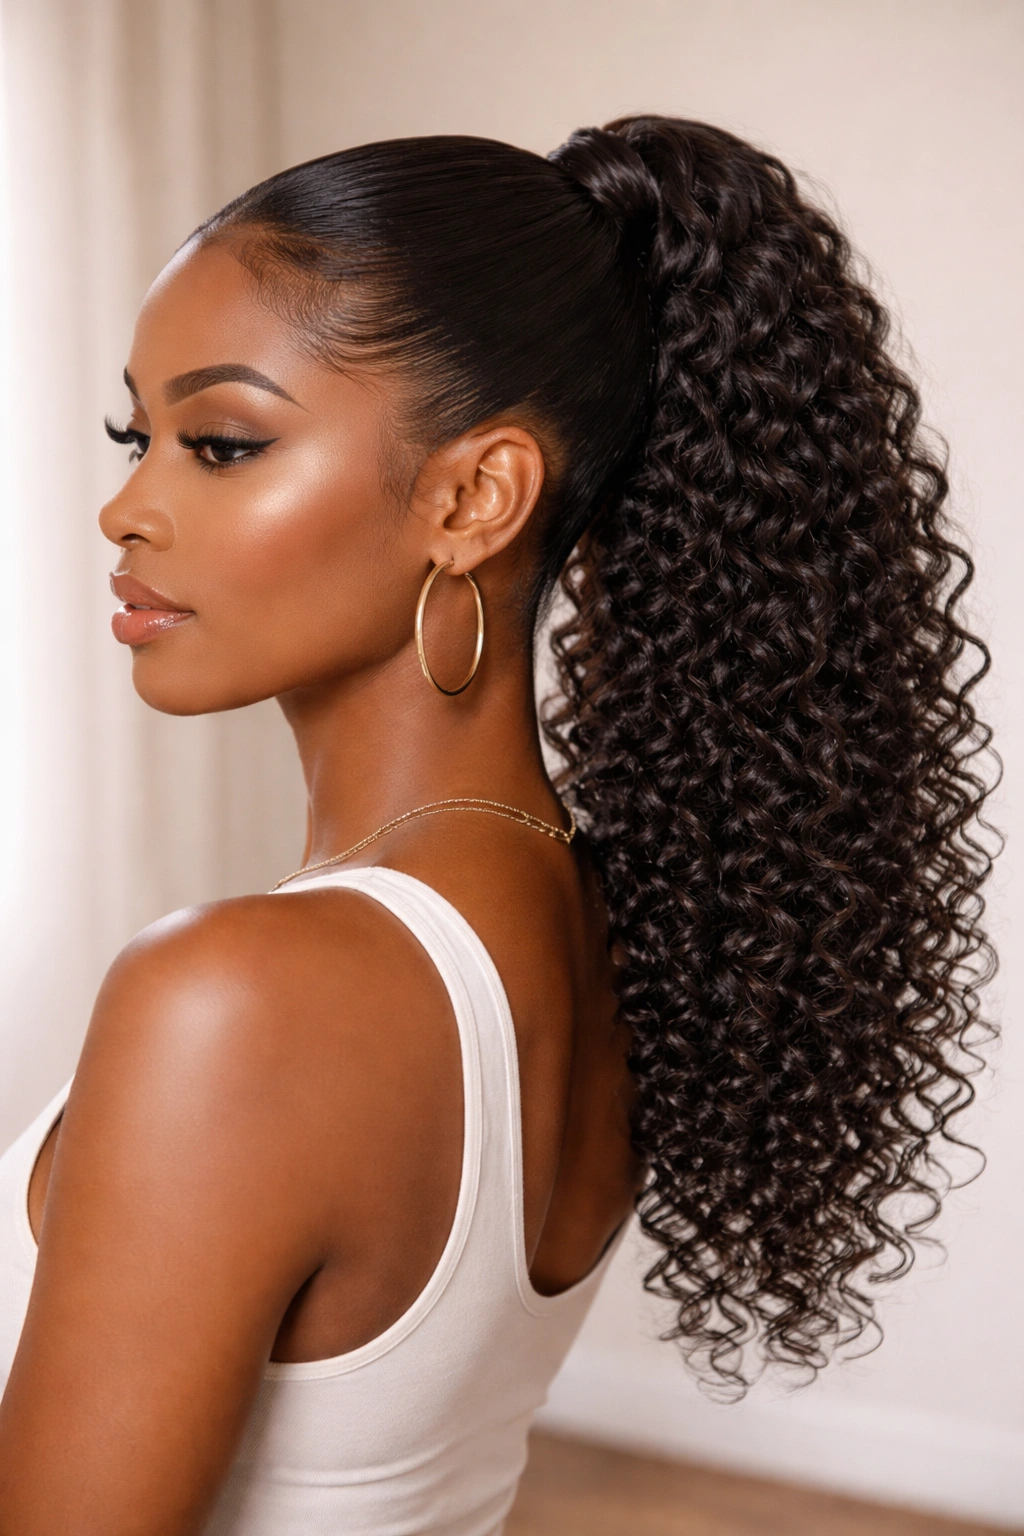
Rather than curling just the ends of your ponytail, this style celebrates defined curls throughout the entire length. You’re using gel strategically — smoothing the crown and edges while applying curl cream or gel to the ponytail portion to enhance and define your natural curl pattern.
Apply your standard edge-laying gel to your hairline and the ponytail base, creating that sleek foundation. Then, to the gathered ponytail itself, apply a curl-defining gel or cream that works with your specific curl pattern, whether that’s coils, waves, or loose curls. The contrast between the smooth, gelled crown and the defined, textured ponytail creates a style that’s both controlled and celebratory of your natural texture.
Defining Curls Without Losing the Sleek Crown
- Choose a curl-defining product specifically — not the same gel you used for edges, which would be too heavy on curls
- Apply the curl product to damp ponytail hair, not fully soaked but not dry
- Use a praying hands method, smoothing the product down the length of each curl
- Allow curls to air dry or diffuse with low heat to maintain definition
- Refresh curl definition between washes by misting with water and reapplying product
This style is ideal if you want the sophisticated appearance of a gel ponytail while expressing your natural texture authentically. It celebrates your hair rather than covering it up.
12. Sleek Side-Swept Gel Ponytail
The side-swept ponytail is dramatic, asymmetrical, and undeniably eye-catching. You’re applying gel to create a deep side part, sweeping everything over to one side before securing it into a ponytail. This style emphasizes one side of your face while the gelled crown creates movement and flow.
Apply gel starting at a deep part on one side of your head, sweeping the gel backward and across toward the opposite side. The deeper your part, the more dramatic the side-swept effect. Once the gel has dried, gather your hair into a ponytail positioned low and toward the side of the deeper part. This creates an asymmetrical silhouette that’s immediately sophisticated.
Perfecting the Side-Swept Aesthetic
- Create your part while hair is damp and gel is still pliable — this ensures it sets correctly
- Use a fine-tooth comb to smooth the gel along your part line, creating a clean, visible division
- Let the gel dry completely before gathering your ponytail — if you move it while wet, the part won’t be as defined
- Secure your side ponytail low on that same side, creating a cohesive diagonal line
- A small wrap around the base adds polish to this already-striking style
Worth knowing: The side-swept ponytail looks beautiful on every face shape because the asymmetry creates visual interest and draws the eye in flattering directions.
Final Thoughts
Gel ponytails aren’t one-size-fits-all — they’re a versatile styling category with options for every occasion, texture, and personal preference. Whether you’re drawn to maximum sleekness, textured celebration, playful bubbles, or sophisticated wraps, the foundation is the same: applying gel strategically to create control and polish where you want it, while allowing your hair’s natural character to shine through in other areas.
The longevity of a gel ponytail depends on a few key factors: the quality of your gel, how you sleep on it, and whether you’re protecting it during the day. Invest in a gel that’s actually designed for hold and shine rather than something formulated for everyday smoothing. Sleep in a bonnet or wrap to protect your style and reduce friction. And refresh your ponytail every few days with light reapplication of gel around your edges and edges of your base to keep it looking intentional.
Most importantly, remember that gel is a tool, not a punishment. If a style doesn’t work for your hair, your lifestyle, or your preferences, that’s valuable information. Your hair’s health, texture, and uniqueness are what matter most. Choose styles and techniques that feel sustainable for you, that don’t create constant tension, and that actually make you feel more confident when you look in the mirror. A gel ponytail should enhance your day, not complicate it.