Goddess braids are having a major moment, and for good reason—they’re elegant, they photograph beautifully, and they transform an ordinary ponytail into something that looks like you’ve just stepped out of a Greek mythology film or a high-end salon. The magic of goddess braids lies in their structural complexity combined with romantic, flowing movement. Unlike tight, severe braids, goddess braids use looser strands, incorporated textures, and deliberate undone details to create an effortlessly luxurious finish that works just as well at a wedding as it does at the beach.
Long hair is absolutely the canvas these styles deserve. When you’re working with length, you get the full visual impact of the braid patterns, you have enough hair to play with fullness and dimension, and you can create multiple braiding layers that short hair simply can’t accommodate. The weight and movement of long hair also means goddess braids hold their shape longer and look more intentional without needing as much product or manipulation.
The key to nailing any goddess braid style—whether you’re doing it yourself or heading to a stylist—is understanding that these aren’t meant to be perfect. They’re meant to feel lived-in, slightly undone, and romantic. You’re going for “I woke up like this” elegance, not parade-perfect precision. This guide walks you through ten distinct goddess braid ponytail styles, each with different techniques, difficulty levels, and the specific look they achieve.
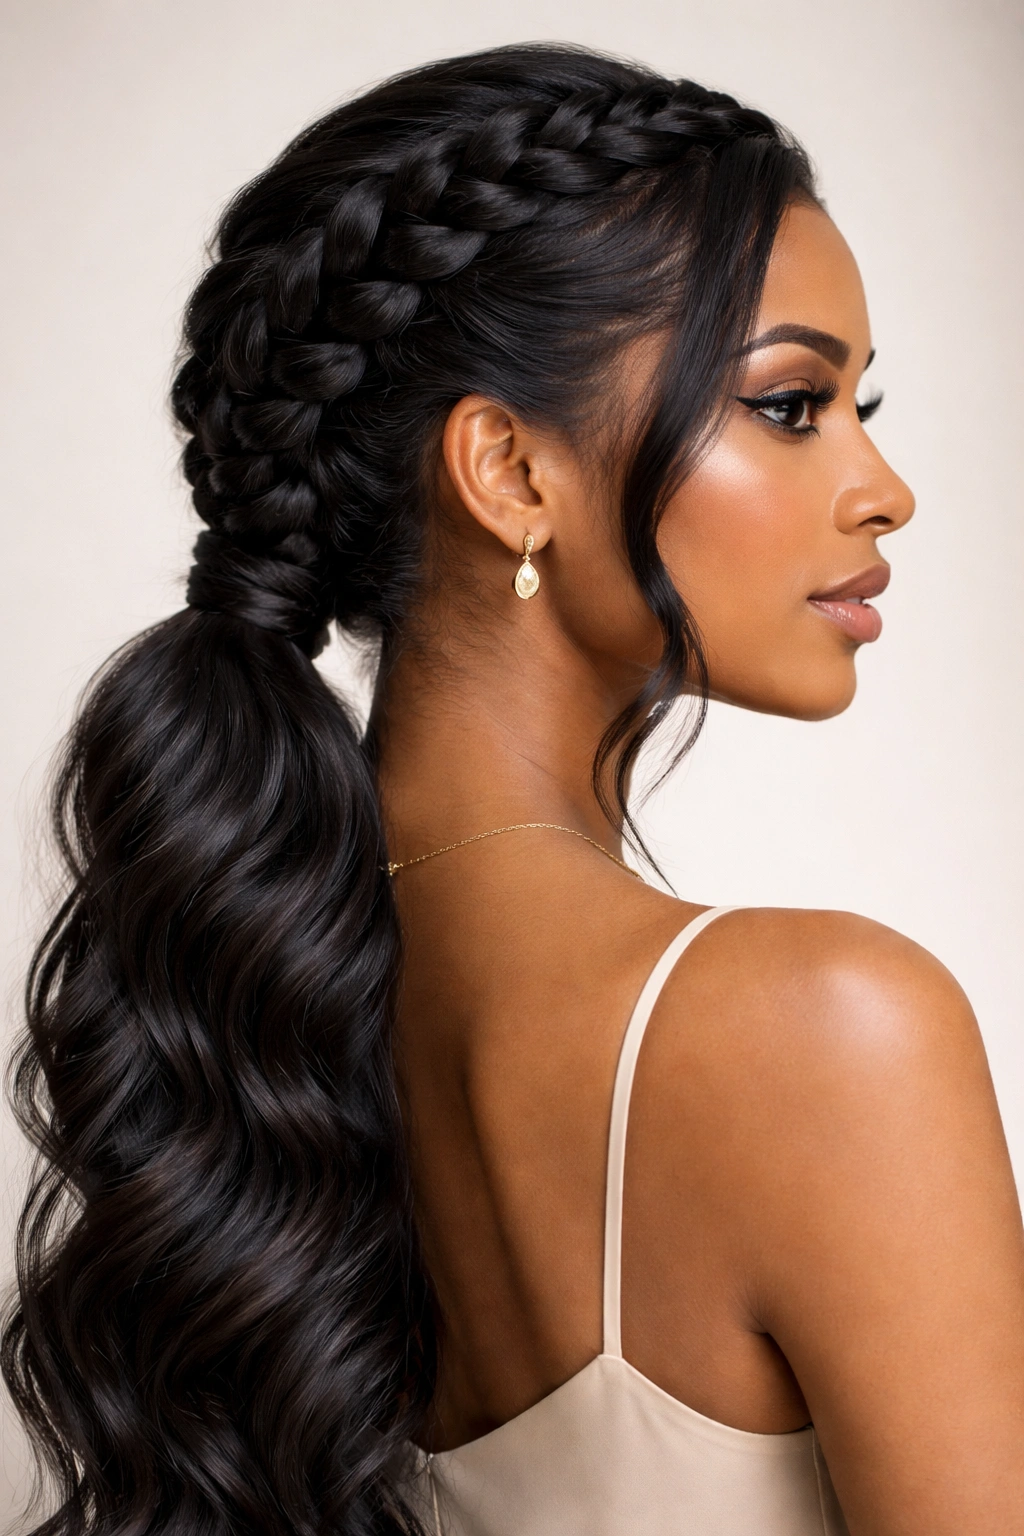
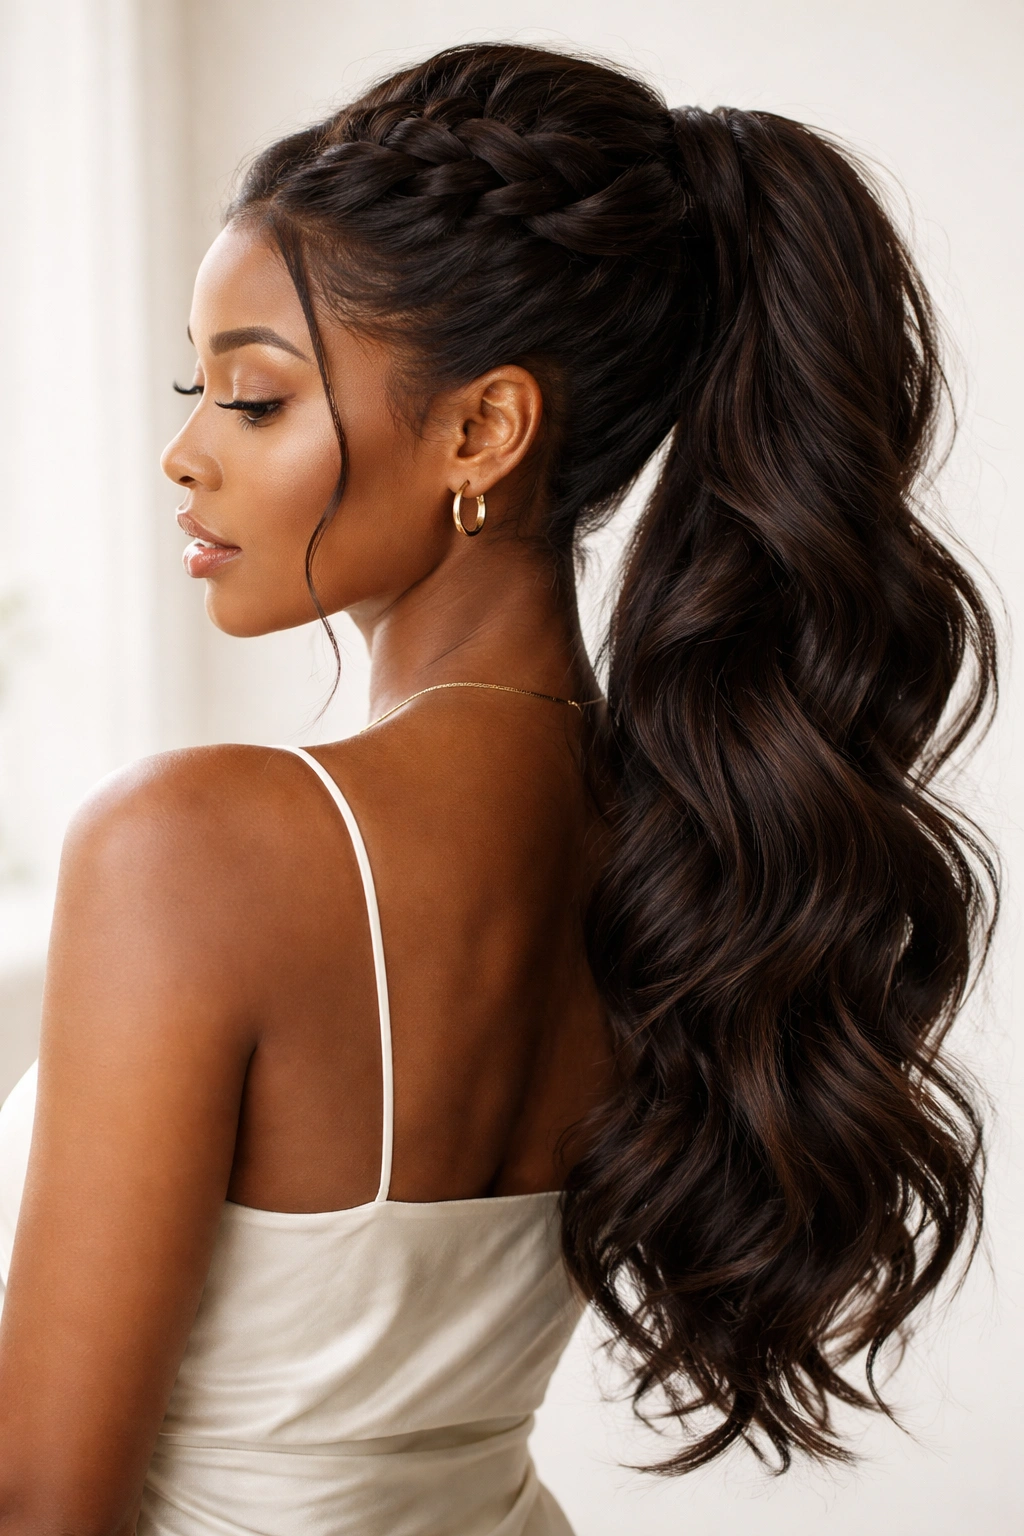
1. Crown Goddess Braid with High Ponytail
This is the statement-maker of goddess braid styles—a full crown of braided hair that wraps around your entire head and ends in a high, voluminous ponytail. The crown braid travels from one ear, across the back of the head, and finishes at the crown where it connects to a gathered high pony. It’s intricate enough to feel special for events, but the undone texture means you can pull it off casually too.
Why This Style Commands Attention
The crown goddess braid works because it frames your entire face and scalp in a protective, sculptural way while keeping all the length completely free at the back in a full ponytail. You’re getting the braided detail where it matters most (visible from every angle) while maintaining maximum volume and movement in the ponytail itself. This balance is what makes it feel both polished and effortlessly romantic at the same time.
How to Create This Look
- Start at one ear with a loose, three-strand braid—don’t make it tight
- As you braid, gently pull and widen each loop to create visible texture and a slightly undone appearance
- Continue the braid diagonally across the back of your head toward the opposite ear, gradually incorporating more hair as you go
- Incorporate texture by leaving some strands slightly loose rather than pulling everything taut
- When you reach the crown area, secure the braid loosely and gather all remaining hair (including the braid tail) into a high ponytail
- Wrap a small section of hair around the elastic to hide it, then pin that wrapped section
- Use a texturizing spray or apply light pressure with your fingers to loosen the braid strands further
Pro tip: Blow-dry your hair upside down before braiding to create natural texture and volume. This makes the finished braid look fuller and more dimensional without any additional effort.
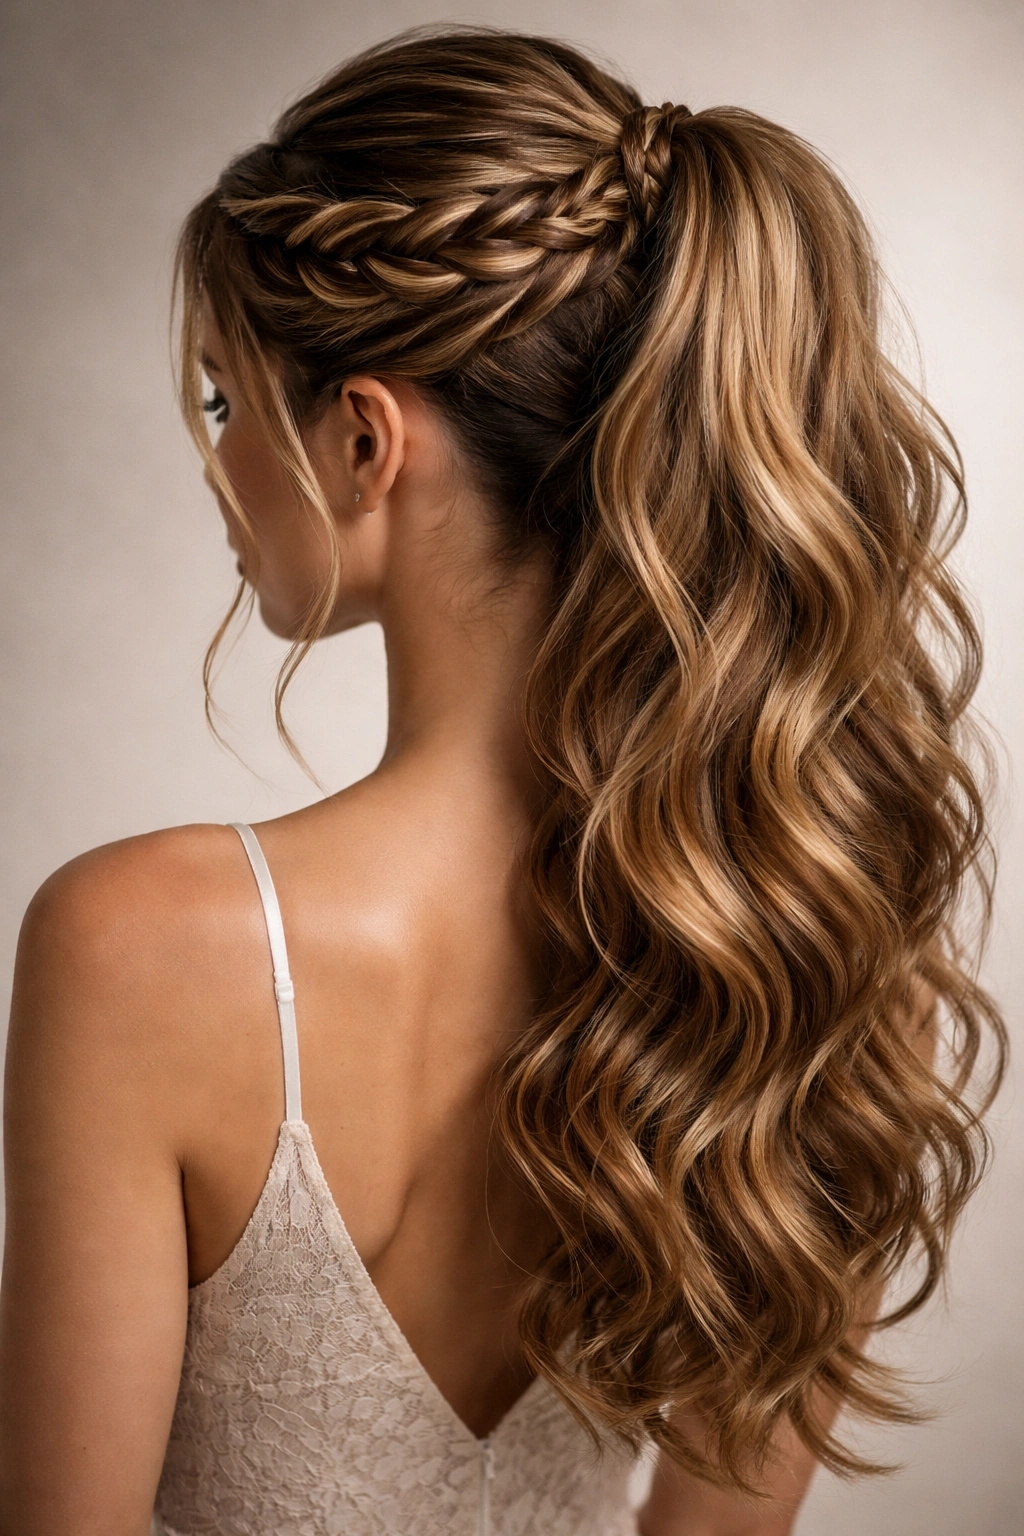
2. Side-Swept Goddess Braid Ponytail
This style sweeps everything dramatically to one side, creating an asymmetrical silhouette that’s inherently flattering and sophisticated. One thick goddess braid starts at the base of the opposite ear, travels diagonally across the back of the head, and descends into a low, side-positioned ponytail. It’s the perfect compromise between “fully styled” and “looking like you didn’t try.”
What Makes the Side Sweep So Flattering
A side-swept braid creates visual balance for round faces because it adds height and diagonal movement, and it’s equally flattering for longer face shapes because it softens angles with its side placement. The asymmetry also feels more modern and playful than a centered style, and it photographs gorgeously from the back. When the ponytail sits low and to the side, you get an elongating line that’s incredibly elegant.
Steps to Execute the Side-Swept Style
- Create texture in your hair beforehand using waves or loose curls (use a curling iron or braid your hair overnight)
- Start the braid at the base of your ear on the opposite side from where you want the ponytail
- Braid loosely, gradually incorporating more hair as you move across the back
- Let the braid naturally guide hair toward the opposite side where you want the final ponytail
- Secure that braid loosely and gather all hair (braid included) into a low side ponytail
- Hide the elastic with a small wrapped section and pin it in place
- Gently tease and loosen the braided section so it looks soft and undone
Worth knowing: The more textured your starting hair, the easier this braid is to create, because the texture helps the braid stay in place without requiring tight tension.
3. Double Goddess Braids Wrapped Ponytail
This style uses two separate braids that frame your face or head, then both braids wrap around the base of a center high or mid-level ponytail. It’s more complex than single-braid styles but creates incredible visual impact—two braids automatically read as intentional and elegant, and the double structure means more dimension and detail to admire.
Why Two Braids Are Better Than One
Double braids simply read as more luxe and labor-intensive, even though the difficulty level isn’t exponentially higher than single braids. They create twice the textural interest, frame your face in a flattering way, and give you two finishing points rather than one, which means more opportunities to create undone, romantic detail. The eye naturally spends more time exploring a style with multiple braiding lines.
Creating Your Double Braid Wrapped Ponytail
- Part your hair down the center or slightly off-center, depending on your face shape
- Starting at one temple, create a loose goddess braid that goes diagonally across the back of your head
- Repeat on the other side, mirroring the angle and tension
- Gather all hair (both braids included) into a center high ponytail at the crown
- Take one braid and wrap it around the base of the ponytail, pinning it in place
- Wrap the second braid around the base in the opposite direction, overlapping or layering for texture
- Use bobby pins that match your hair color to secure both wraps
- Gently pull and loosen the braid strands to create a fuller, softer finish
Pro tip: Prep with a light texturizing spray before you start—it gives the braids something to grip and makes them look fuller and more intentional throughout.
4. Twisted Goddess Braid Low Ponytail
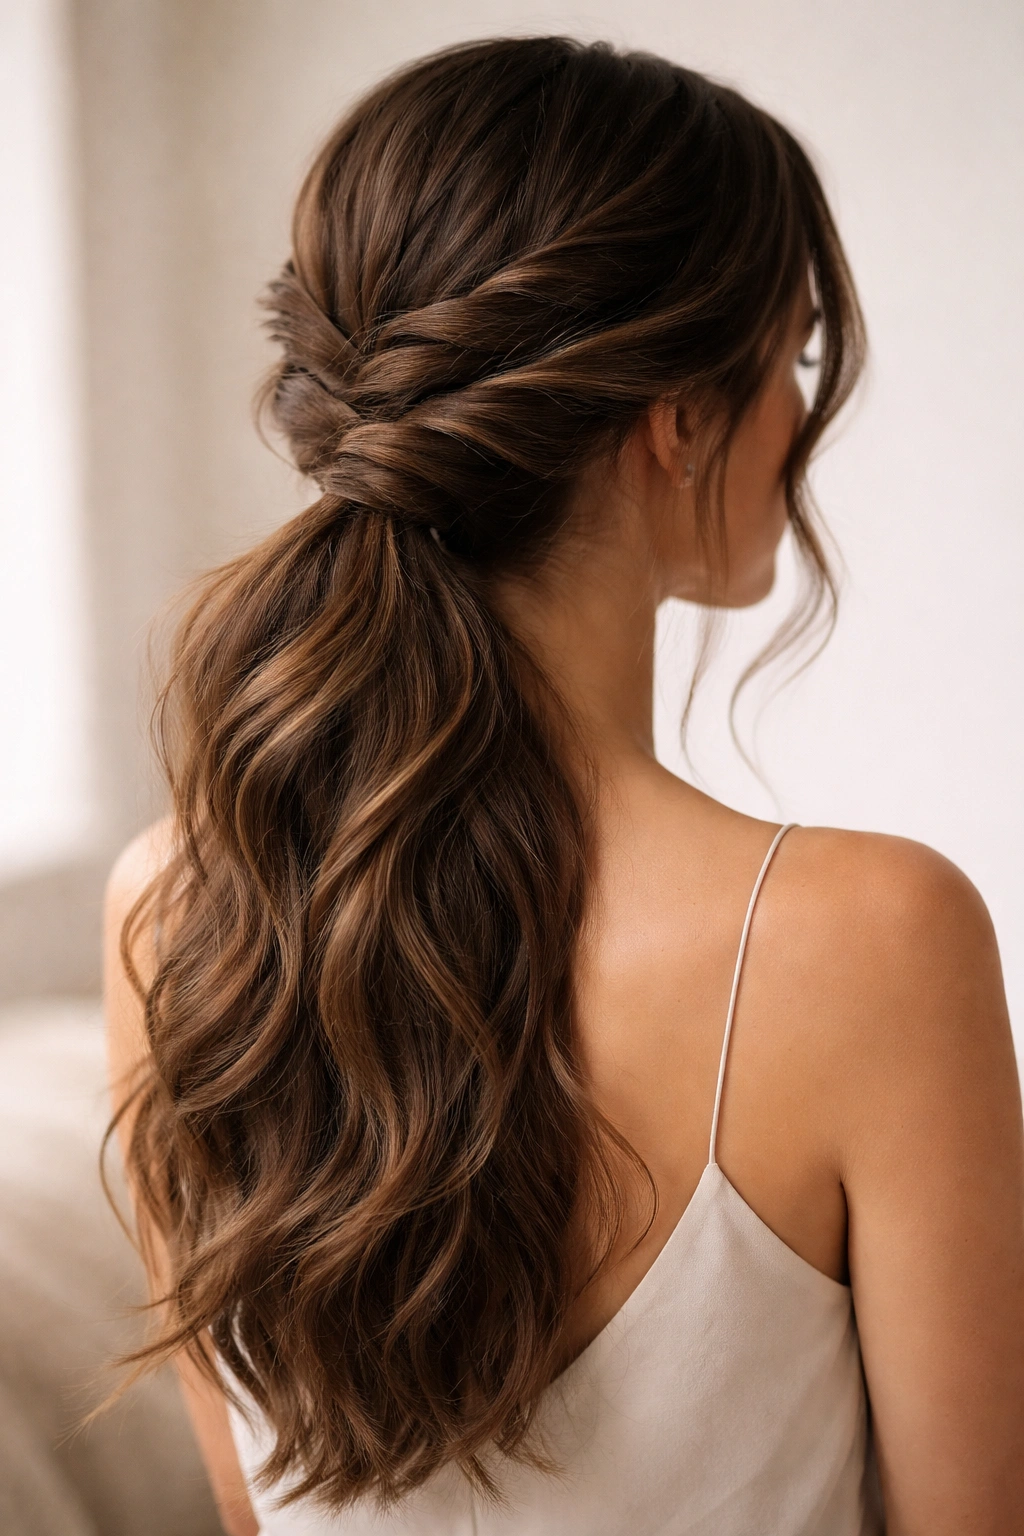
Instead of traditional three-strand braiding, this style uses loose twists to create the goddess texture and movement, then channels everything into a low ponytail. Twists are technically easier than braids, but they create a similarly romantic, detailed aesthetic. This is the right choice if you want goddess-braid texture without the braiding complexity.
How Twists Deliver the Same Effect as Braids
A twisted section actually photographs similarly to a braid and creates comparable texture and dimension, but it requires fewer steps and less hand dexterity. Twists also work beautifully with finer or slippery hair types that sometimes struggle to stay braided. The movement and flow of a twist is often softer and more romantic than a braid—they feel less structured and more organic.
Building Your Twist-Based Style
- Start with textured or wavy hair for best results
- Section off hair from one side, beginning at the ear
- Divide that section into two strands and twist them around each other loosely
- Add hair to the twist as you go, continuing toward the back and side
- Let the twist lead you toward where you want the final ponytail to sit
- Secure the twisted section and gather all hair into your chosen ponytail position (low, mid, or high)
- Wrap and hide the elastic with a small section of hair
- Use your fingers or a fine-tooth comb to gently stretch and widen the twists so they look fuller and undone
Worth knowing: Twists naturally create a softer, slightly wider texture than braids because you’re only combining two strands instead of three, so they look more substantial and romantic on thinner hair types.
5. Waterfall Goddess Braid Ponytail
A waterfall braid is a three-strand braid that lets sections of hair fall freely throughout, creating a cascading, flowing effect that’s inherently romantic and complex-looking. In this style, the waterfall braid either circles the head or travels to one side and then flows into a ponytail, so you get both the intricate braided detail and the flowing movement of released hair.
Why Waterfall Braids Feel Ethereal
Waterfall braids work because they’re visually complex—there’s both structure (the braid itself) and movement (the cascading strands), which makes them feel elegant without being severe. They’re also incredibly forgiving; the falling strands help hide imperfections in the braid and add natural-looking texture. This is the style you choose when you want everyone to think you just spent three hours getting your hair done.
Creating Your Waterfall Goddess Braid
- Start the braid at one ear or temple, using a loose three-strand technique
- As you braid, drop one strand after every one or two braiding cycles, letting it fall freely
- Replace the dropped strand by picking up a new piece of hair from the section you’re braiding
- Continue this drop-and-replace pattern all the way to your ponytail position
- The falling strands will create a cascading waterfall effect on the surface of your head
- Gather all remaining hair (including the braid) into your chosen ponytail position
- Secure and hide the elastic
- Gently pull apart the braid strands and tease the falling sections for a fuller, more textured appearance
Pro tip: This style looks most striking on hair with at least light waves or curls, because straight hair sometimes looks too thin and neat in waterfall patterns. If your hair is naturally straight, curl or wave it before starting.
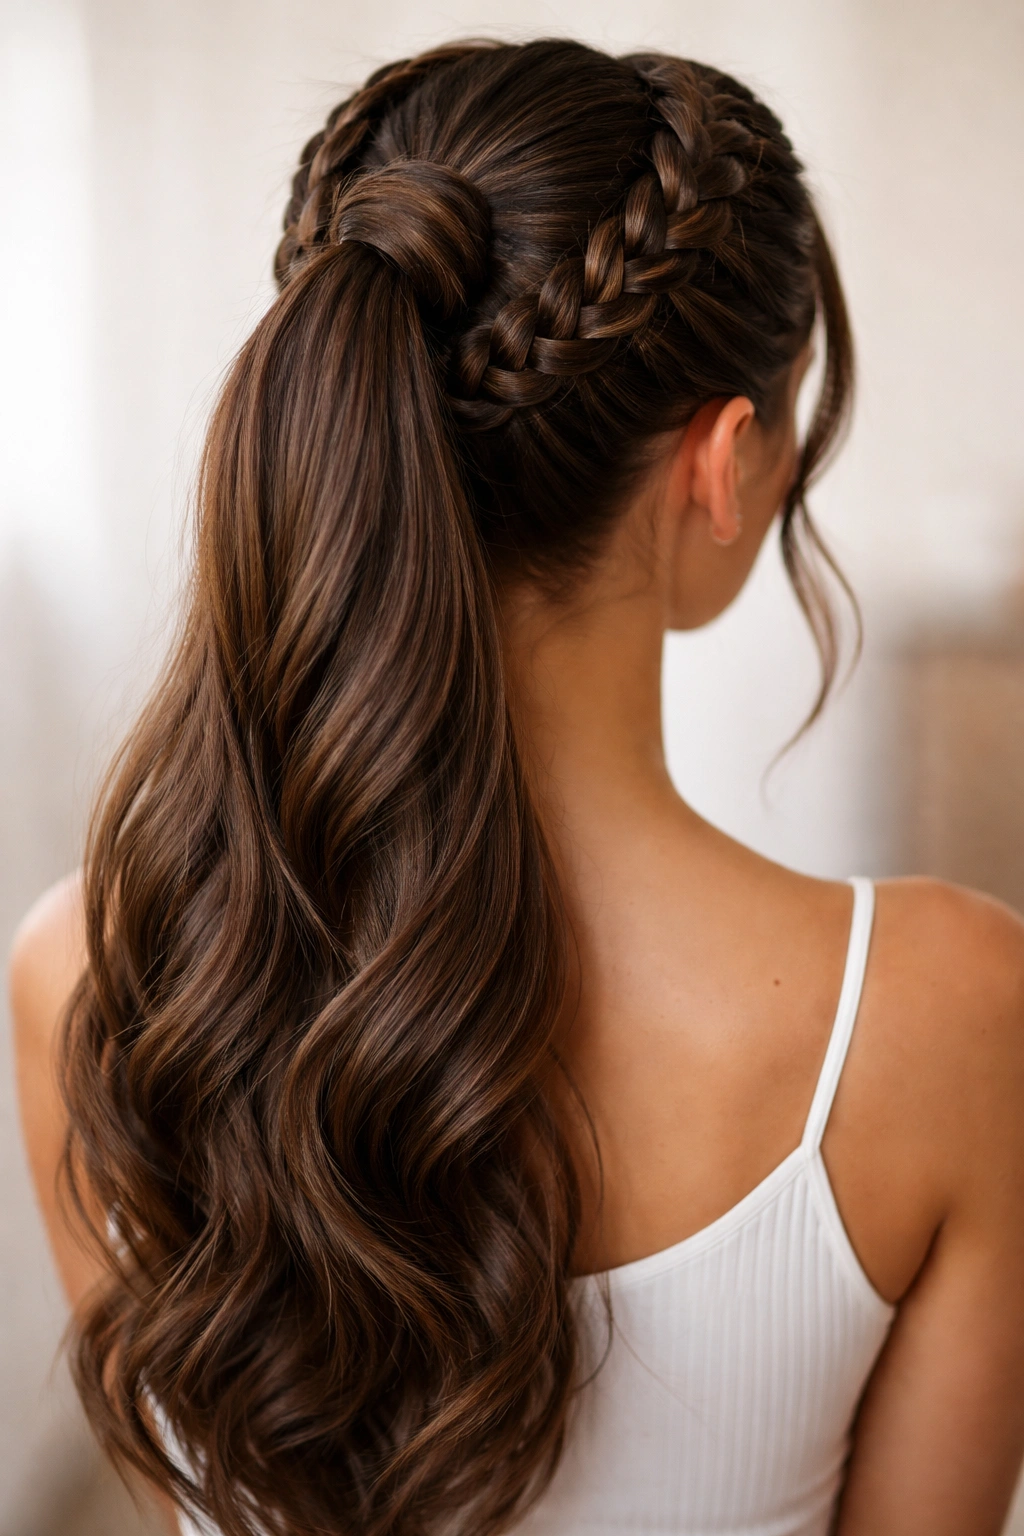
6. Goddess Braid Half-Up Ponytail
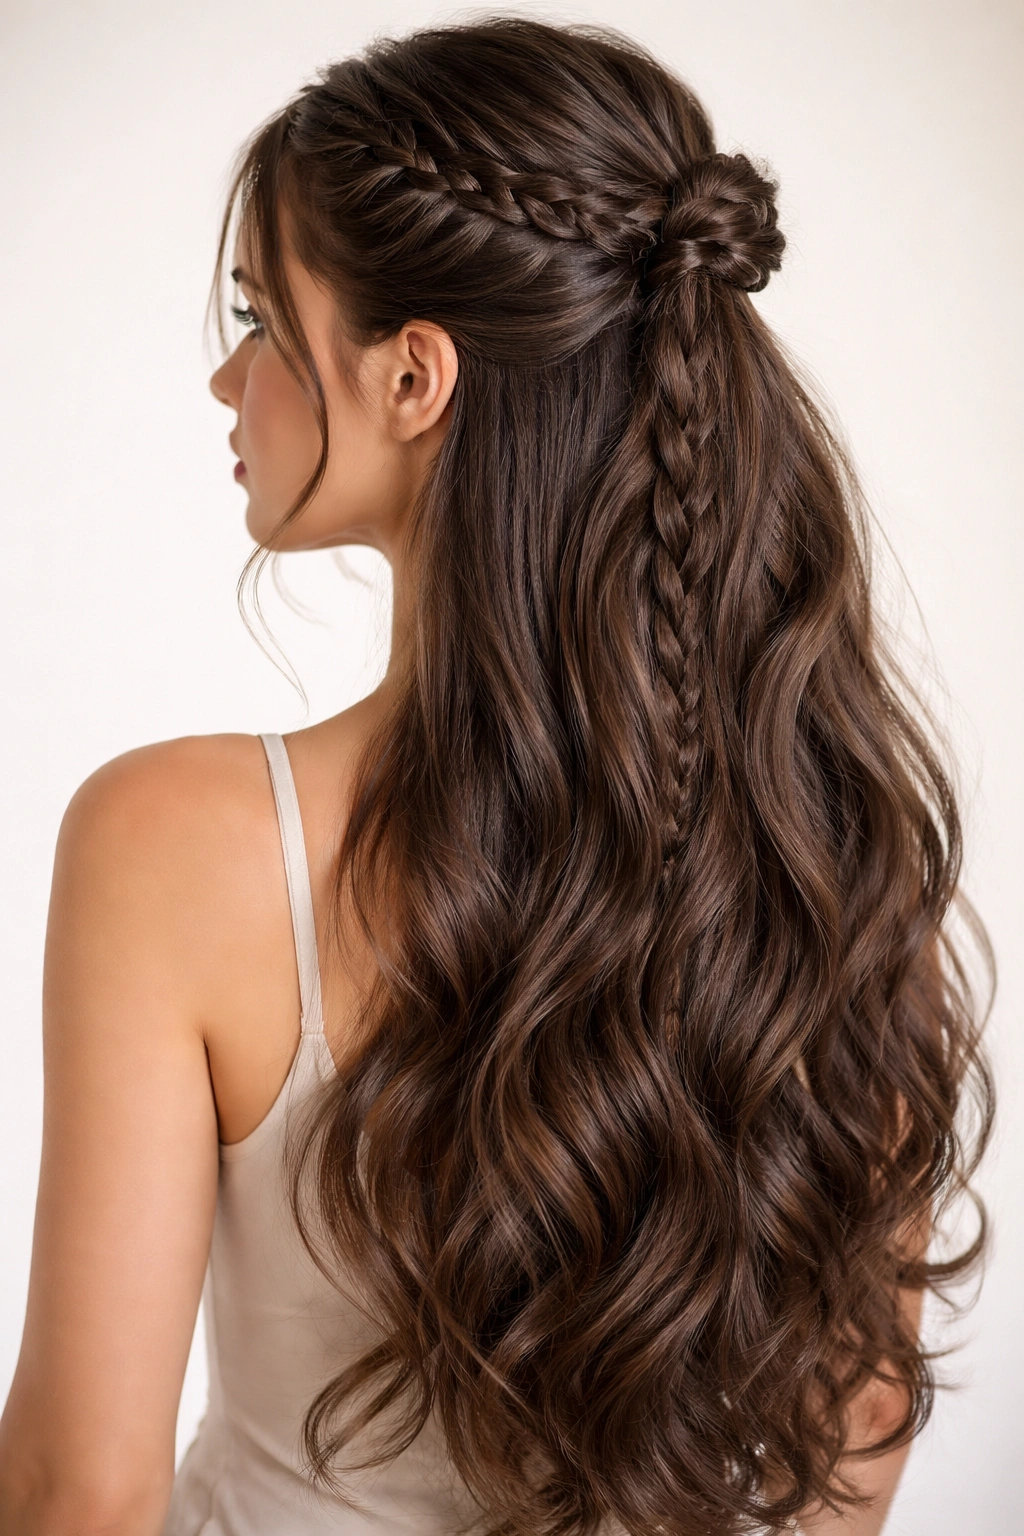
For when you want all the goddess braid detail without committing to a full ponytail, the half-up version pins braided hair to the crown while leaving bottom sections completely loose and flowing. You get the sculptural, romantic framing around your face and crown while maintaining the relaxed, undone feeling of your hair down.
The Appeal of the Half-Up Approach
Half-up styles are the perfect middle ground for any occasion—dressy enough for events but casual enough for everyday wear. With a goddess braid, you’re getting interesting detail that catches light and attention, plus the romantic movement of long hair down, all in one look. This works beautifully on extremely long hair because you get the full visual impact of the length with the added sophistication of the braided sections.
Constructing the Half-Up Goddess Style
- Decide whether you want the braid to start at one side or both sides (symmetric vs. asymmetric)
- If both sides: start braids at each temple and bring them toward the crown, meeting in the middle
- If one side: start at one temple and braid across the back toward the opposite side
- Braid loosely, incorporating hair as you go, aiming to meet your desired half-up point
- Gather the braided sections and any additional hair at that point into a low-crown clip or bobby pins
- Leave all hair below that point completely down and loose
- Gently loosen and stretch the braided sections so they look soft and undone
- You can add loose waves to the down section with a curling iron for extra texture
Worth knowing: The half-up version is actually easier on the arms than full ponytails because you’re only braiding one section instead of working all the way around the head—perfect if you have shoulder or arm mobility concerns.
7. Fishtail Goddess Braid Ponytail

A fishtail braid uses two strands instead of three, creating a tighter, more intricate woven pattern that feels incredibly detailed and luxe. In this style, you create a loose fishtail braid that flows into a high or mid-level ponytail. The fishtail pattern automatically looks more complex than a traditional braid, so this is the choice when you want maximum visual impact.
What Makes Fishtails Special
Fishtail braids create a distinctly different texture than three-strand braids—they look more woven and intricate, almost like fish scales or a finely worked textile. This visual complexity translates into “this person definitely tried,” which is perfect when you want that polished, special-occasion energy. Fishtails also work beautifully on thicker hair because the two-strand structure creates distinct definition.
How to Build a Fishtail Goddess Braid
- Section off hair from one side of your head or along your part line
- Divide that section into two even strands
- From the outer edge of one strand, take a small piece of hair and cross it over into the other strand
- From the outer edge of that second strand, take a small piece and cross it back into the first
- Continue this cross-over pattern, keeping tension loose and gentle
- As you progress, incorporate additional hair into each strand so the braid grows and travels where you want it
- Direct the fishtail toward your chosen ponytail position
- Gather all hair including the braid into that ponytail and secure
- Gently pull the fishtail strands to widen and loosen the pattern
Pro tip: Fishtail braids are actually easier on slippery hair than three-strand braids because the two-strand structure has more grip—if you’ve struggled with traditional braids sliding apart, try this version.
8. Halo Goddess Braid Ponytail
A halo braid circles completely around the head like a crown, and in this style, it connects to a center high ponytail at the crown. The effect is ethereal and princess-like—you’ve got braided detail all the way around your head, and then the long ponytail cascades from the center. This is the most complex goddess braid style in terms of technical execution, but the result is absolutely show-stopping.
Why Halo Braids Feel Transformative
A halo braid genuinely transforms your appearance because it frames your entire face and head in a protective, elegant way. The full-circle coverage means there’s braided detail visible from literally every angle, and when it connects to a center ponytail, the whole effect reads as either bridal, formal, or editorial—depending on how you style the ponytail itself. This is the style that makes people stop and ask where you got your hair done.
Creating the Full Halo
- Start with textured or wavy hair for best results
- Begin the braid at one ear, using a loose three-strand technique
- Travel the braid around the back of your head toward the opposite ear, gradually incorporating hair as you go
- The goal is to continue the braid all the way around until it meets where you started (or nearly meets)
- Secure the braid loosely and gather all hair (including the braid) into a high center ponytail
- You can weave the braid tail back into the ponytail or wrap it around the elastic
- Hide the elastic with a small wrapped section and pin
- Gently pull and loosen every section of the halo braid so it looks soft, full, and romantic
Worth knowing: This style is genuinely easier with a friend or professional the first few times because you can’t see the back of your head while you’re creating it. Once you know how it should feel and look, self-execution becomes much easier.
9. Boho Goddess Braid Messy Ponytail
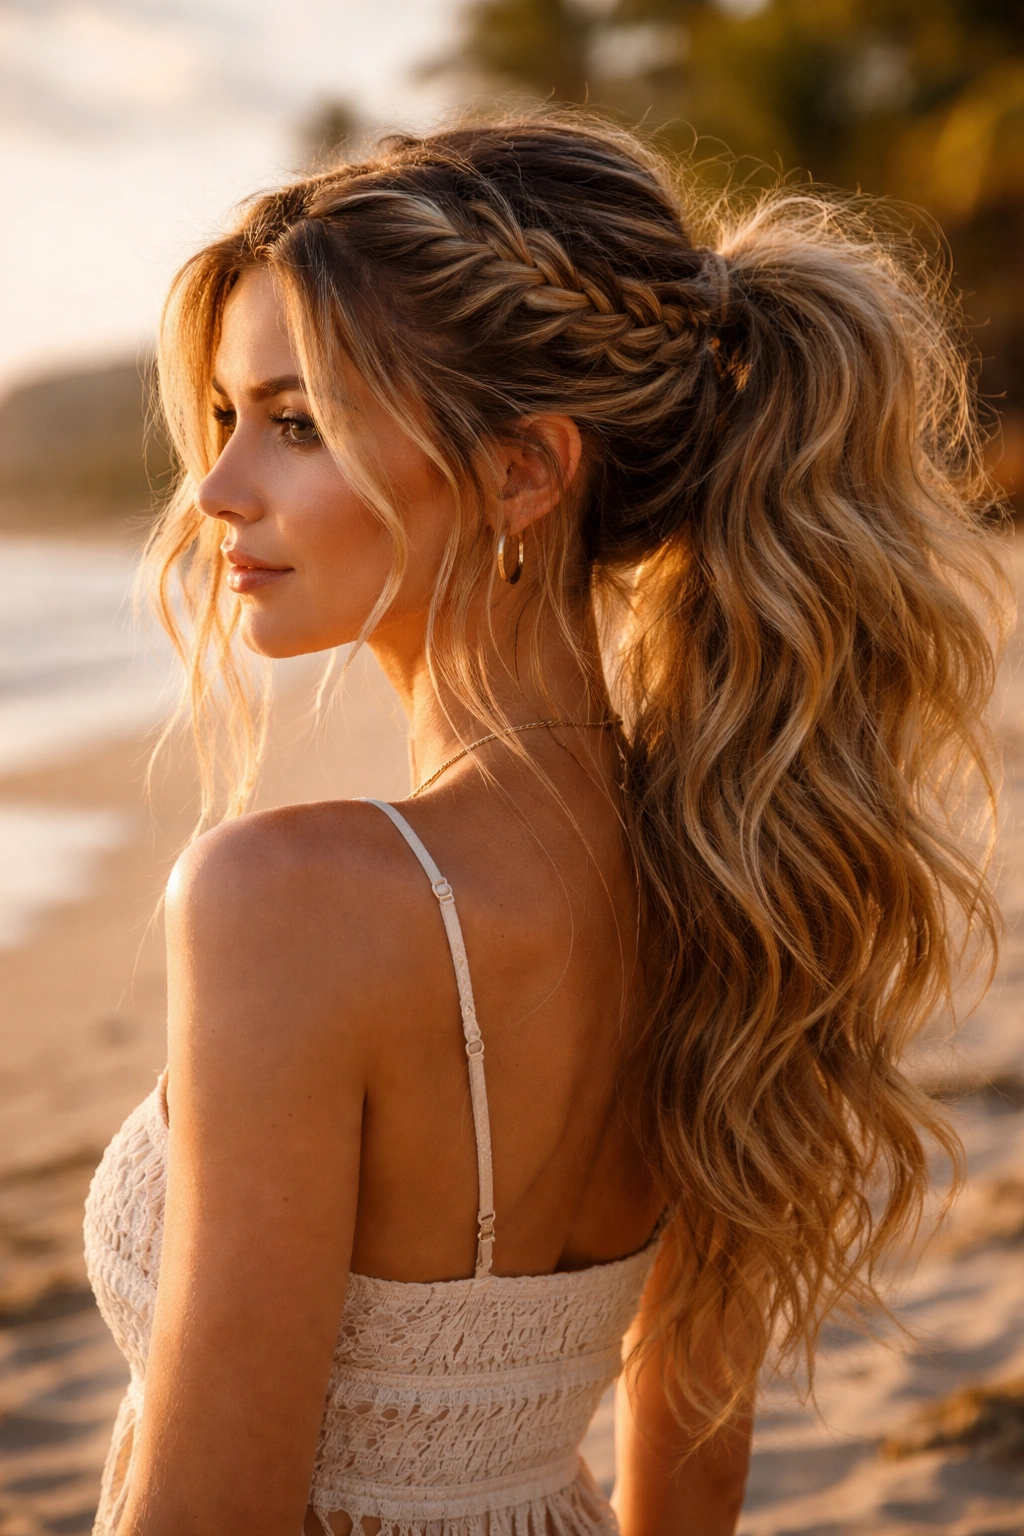
This is the goddess braid for the intentionally undone, vacation-ready aesthetic—loose braids with deliberately escaped strands, combined with a messy, tousled ponytail that looks like you’re on a beach in Santorini. The braids are woven loosely, bits of hair are left out throughout, and the ponytail itself is chunky and relaxed, with pieces pulled free.
The Beauty of Strategic Imperfection
Boho goddess braids work because “messy” is actually incredibly intentional here—you’re controlling exactly which pieces are loose and exactly how undone everything looks. This creates a version of the style that feels effortless and romantic rather than overthought and formal. It’s perfect for warm-weather events, engagement parties, or anytime you want to look like you got ready in five minutes (even though it’s more like thirty).
Assembling Your Boho Goddess Look
- Start with pre-textured hair (waves, curls, or overnight braids)
- Create loose braids from either side of your head or one side, depending on your preference
- Deliberately leave small pieces of hair out of the braid as you work, creating a face-framing effect
- Let the braid(s) lead naturally toward where you want the ponytail to sit (usually low and slightly off-center for boho)
- Gather all hair into that ponytail loosely—you’re not going for smooth here, you want visible bumps and movement
- Use a texture-focused elastic or wrap the elastic with a thin scarf or piece of fabric
- Pull a few larger pieces free from the ponytail, framing your face and softening the whole look
- Spritz everything with a salt spray or texturizing spray to enhance the undone texture
Pro tip: This style actually looks better on hair that’s been down for a few hours already—second-day hair or hair with some natural texture is ideal. Fresh, pristine hair can read as too neat for the boho aesthetic.
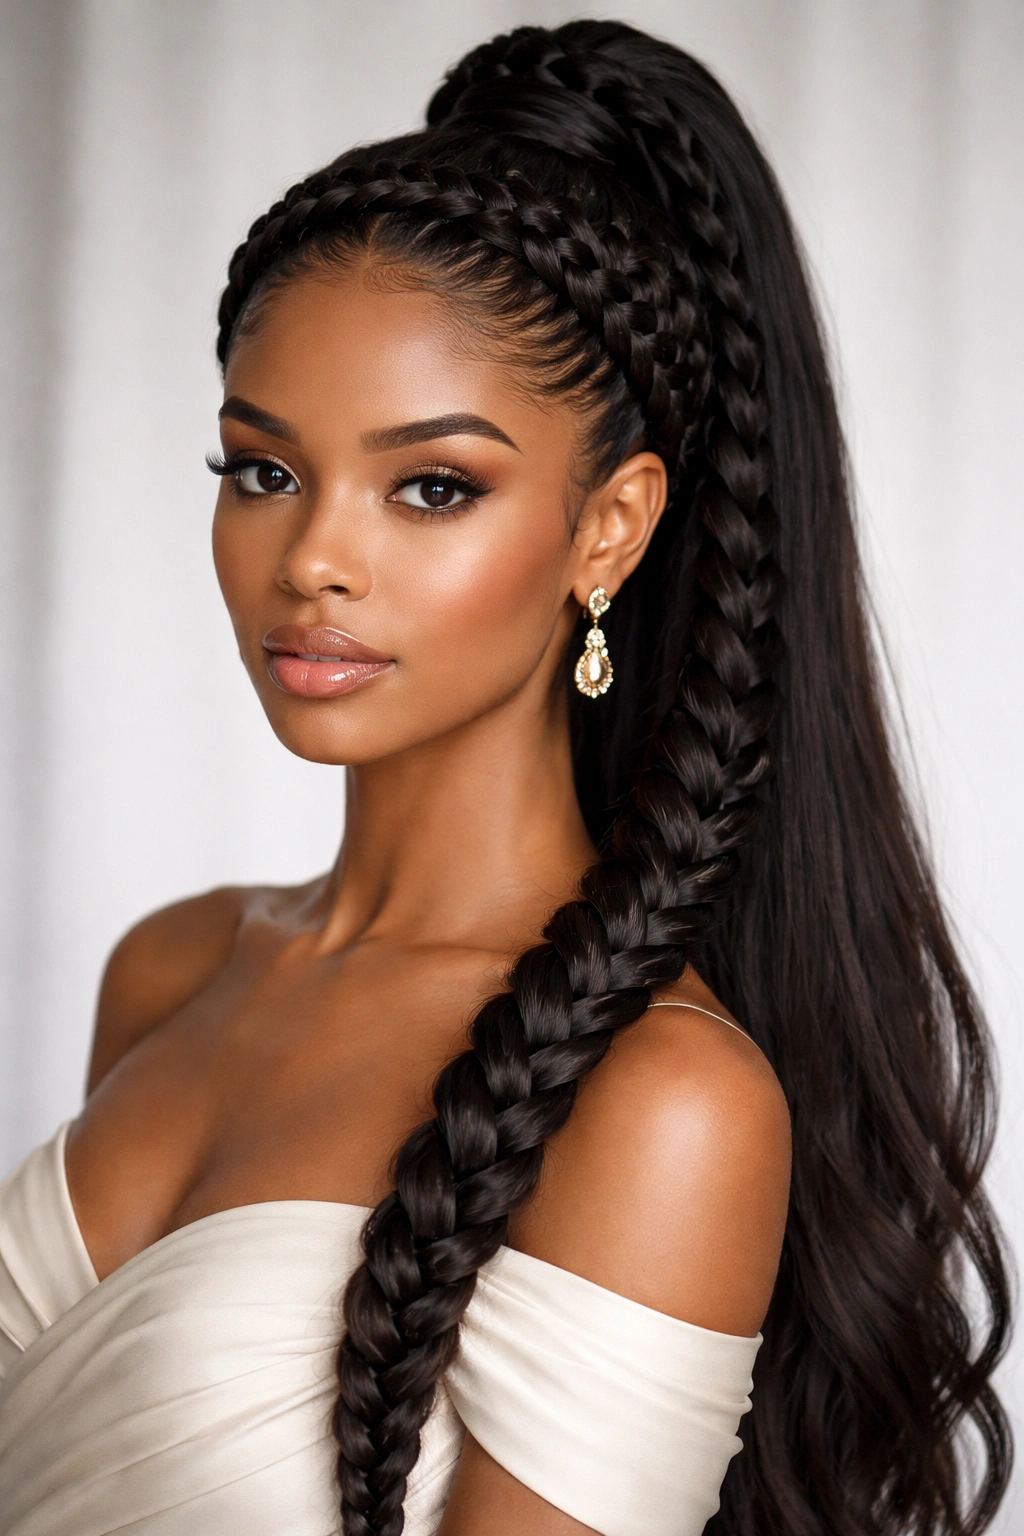
10. Three-Strand Thick Goddess Braid Ponytail
Sometimes the most elegant choice is the simplest one: a single, substantial three-strand braid that’s braided loosely and incorporates a major section of hair, then flows directly into a voluminous ponytail. There’s no unnecessary complexity here—just a thick, beautiful braid that showcases your hair’s length and volume.
Why Simplicity Is Sophistication
The three-strand thick braid works because it’s directness and the sheer volume of hair involved create inherent elegance. You’re not relying on complexity to impress; you’re relying on the beautiful movement and dimension of a thick braid combined with luxurious length. This style suits any occasion from casual to formal, and it works beautifully on hair types ranging from fine to thick.
Building Your Statement Braid
- Blow-dry your hair with volume at the roots for maximum fullness
- Section off a generous chunk of hair from one side—you want this braid to be visibly thick
- Begin braiding with a loose, three-strand technique, making sure each strand is substantial
- Rather than incorporating hair gradually, keep the same three sections throughout—this keeps the braid uniform and thick
- Travel the braid to your chosen ponytail position
- Gather all hair (braid included) into that ponytail and secure
- Wrap the elastic with a small section of hair and pin
- Use your fingers or the back of a comb to gently pull the braid strands sideways, widening the braid and creating a fuller appearance
- The goal is a braid that looks substantial and textured, not neat and tight
Worth knowing: This style genuinely looks best when the braid is noticeably wide and undone—resist the urge to make it too neat or tight, because the whole appeal is in the softness and volume.
Final Thoughts

Goddess braids work on long hair because they give you enough length and volume to play with genuine texture and movement. Whether you’re going for a full crown moment, a side-swept romance, or an intentionally undone boho vibe, the key is the same: loose is always better than tight, and undone is always more elegant than perfect.
The techniques themselves aren’t drastically different from everyday braids—you’re just being more intentional about loosening them afterward and layering them with undone details. Once you understand how to braid loosely and incorporate enough hair to create substantial texture, every single one of these styles becomes accessible. The first time you create any of these might take thirty to forty-five minutes, but by your third or fourth attempt, you’ll be executing them in fifteen.
The biggest takeaway is that goddess braids aren’t about technical perfection—they’re about creating the feeling of movement, texture, and romance that long hair absolutely deserves. Give yourself permission to make them slightly imperfect, and you’ll get the exact aesthetic these styles are designed to deliver.