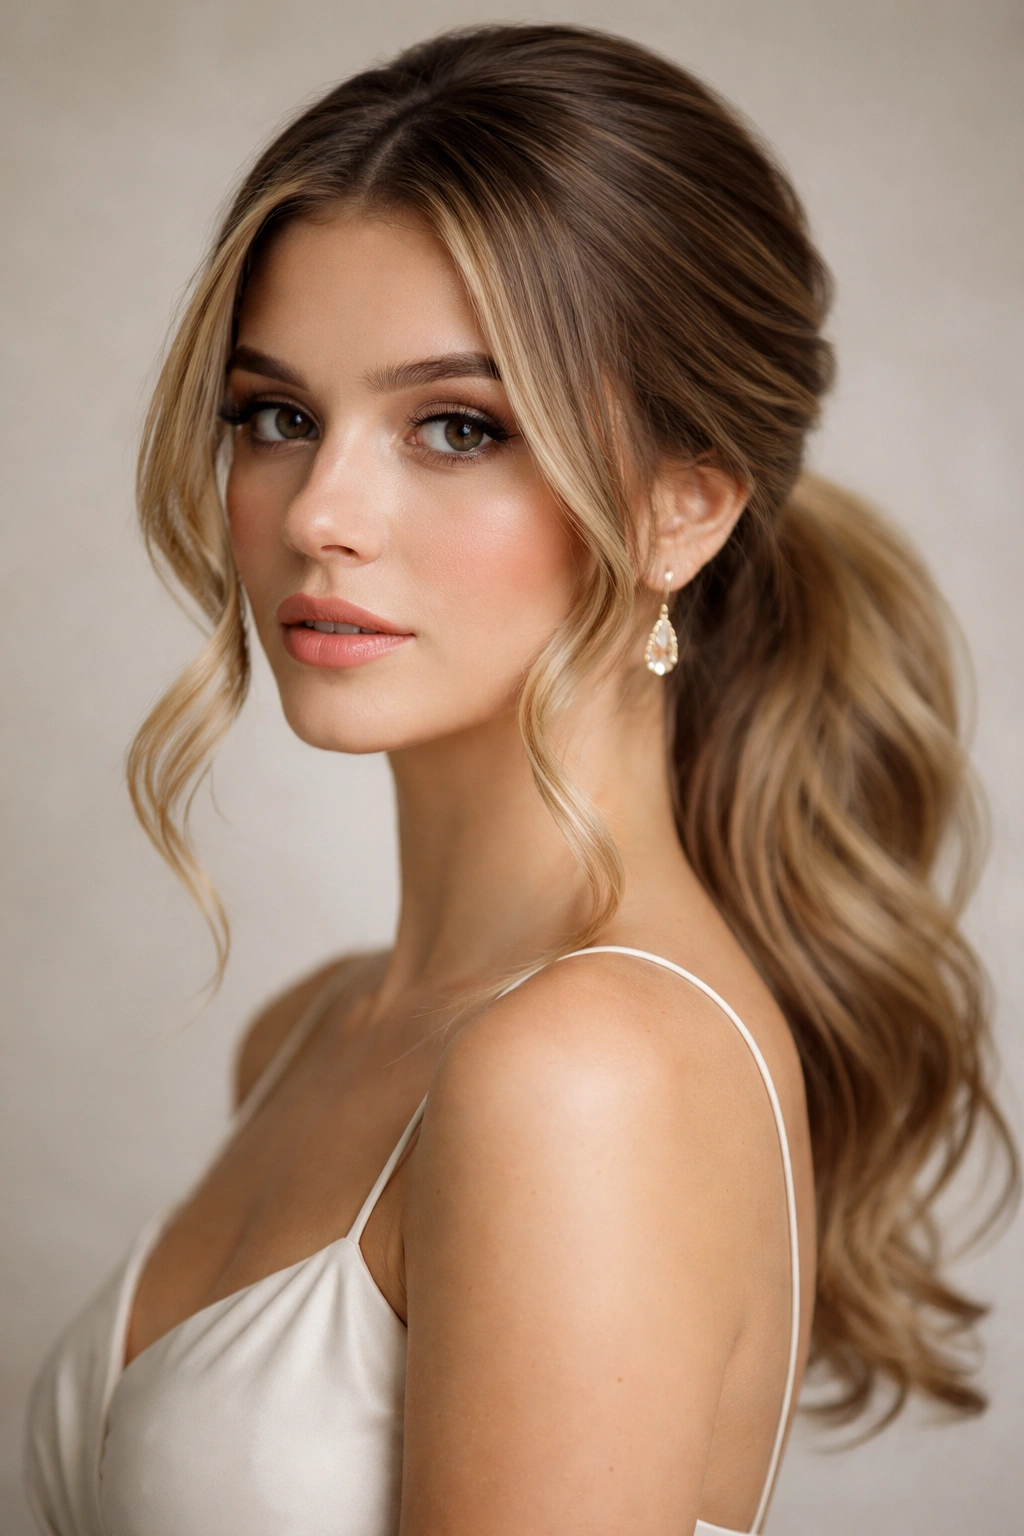
There’s something undeniably sophisticated about a well-executed low ponytail—it strikes that perfect balance between polished elegance and effortless grace that makes it the go-to choice for everyone from red carpet attendees to wedding guests to anyone who wants to look refined without appearing overdone. Unlike the casual, practical ponytails you might wear to the gym or a grocery run, an elegant low ponytail for a special event is a deliberate styling choice that requires attention to detail, texture, and how the hair frames the face and neckline.
The real beauty of the low ponytail for formal occasions is its versatility. Whether you’re attending a black-tie gala, a daytime wedding, a sophisticated dinner party, or a milestone celebration, a low ponytail can be adapted to match virtually any dress code, venue formality, and personal aesthetic. You can keep it sleek and minimalist for a modern, architectural vibe, or layer in braids, twists, waves, and accessories for something more romantic and ornate. The style flatters most face shapes, elongates the neck, keeps hair off the face and shoulders, and photographs beautifully—all practical considerations that matter when you’re spending time and money to look your absolute best.
What separates an ordinary low ponytail from an elegant low ponytail worthy of a special event is the execution. It’s the smoothness of the base, the texture and movement within the ponytail itself, the thoughtful placement of face-framing pieces, and the finishing details that elevate the entire look. In this guide, you’ll discover twelve distinct approaches to the low ponytail, each bringing its own personality and level of sophistication to your special-occasion styling.
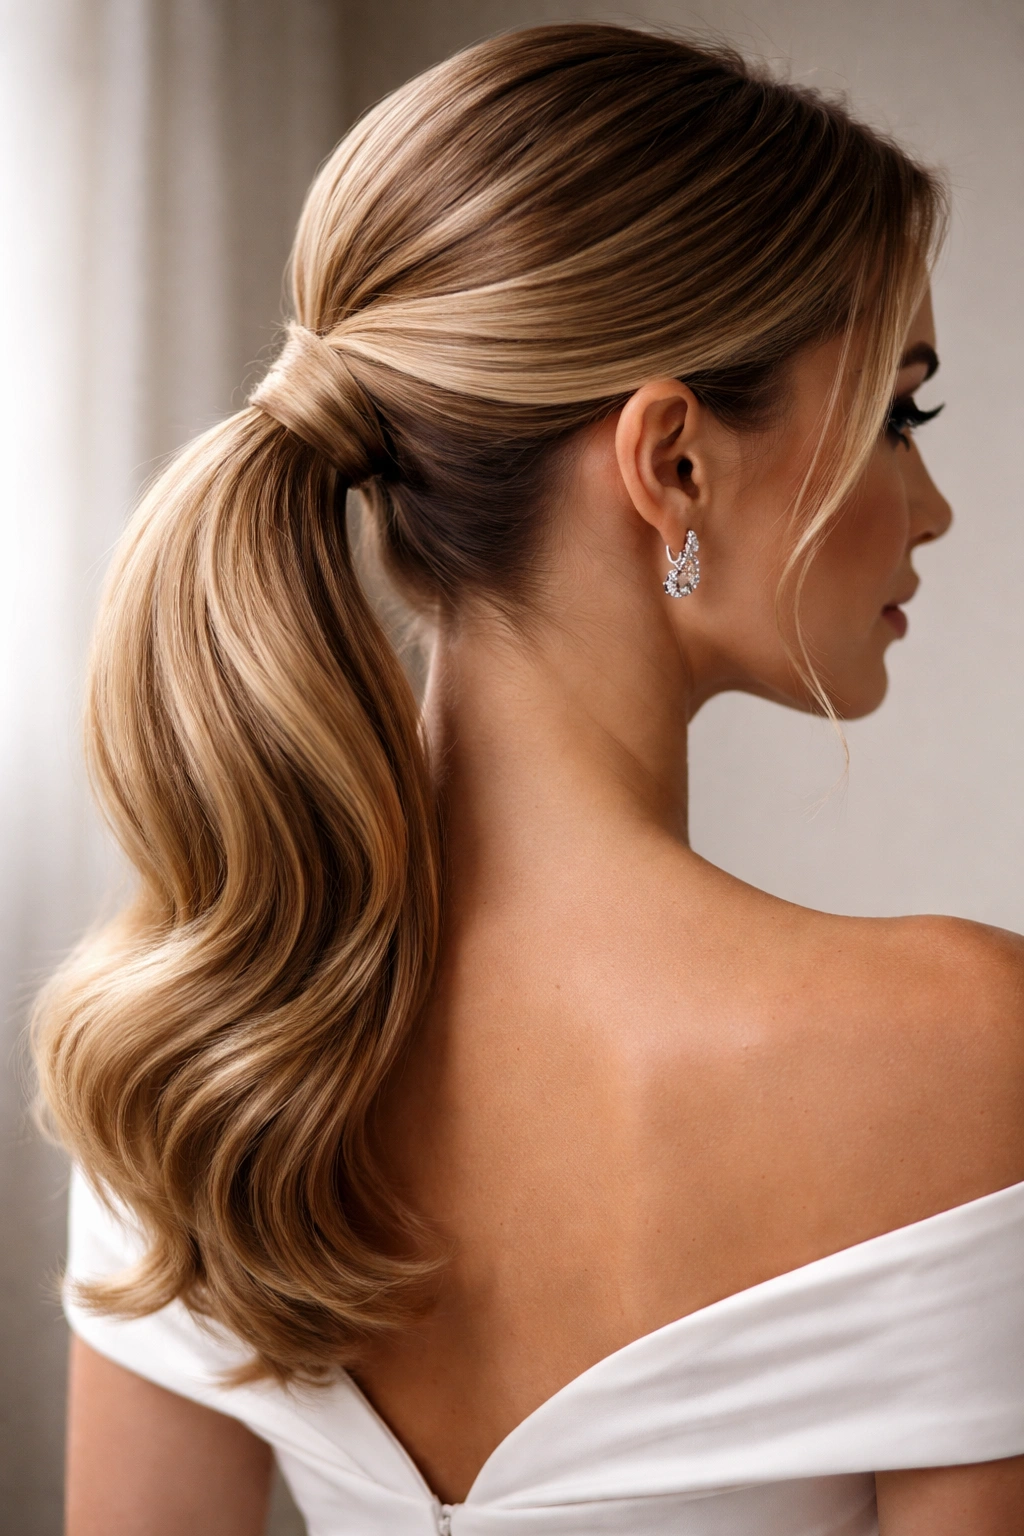
1. The Sleek Elegant Low Ponytail
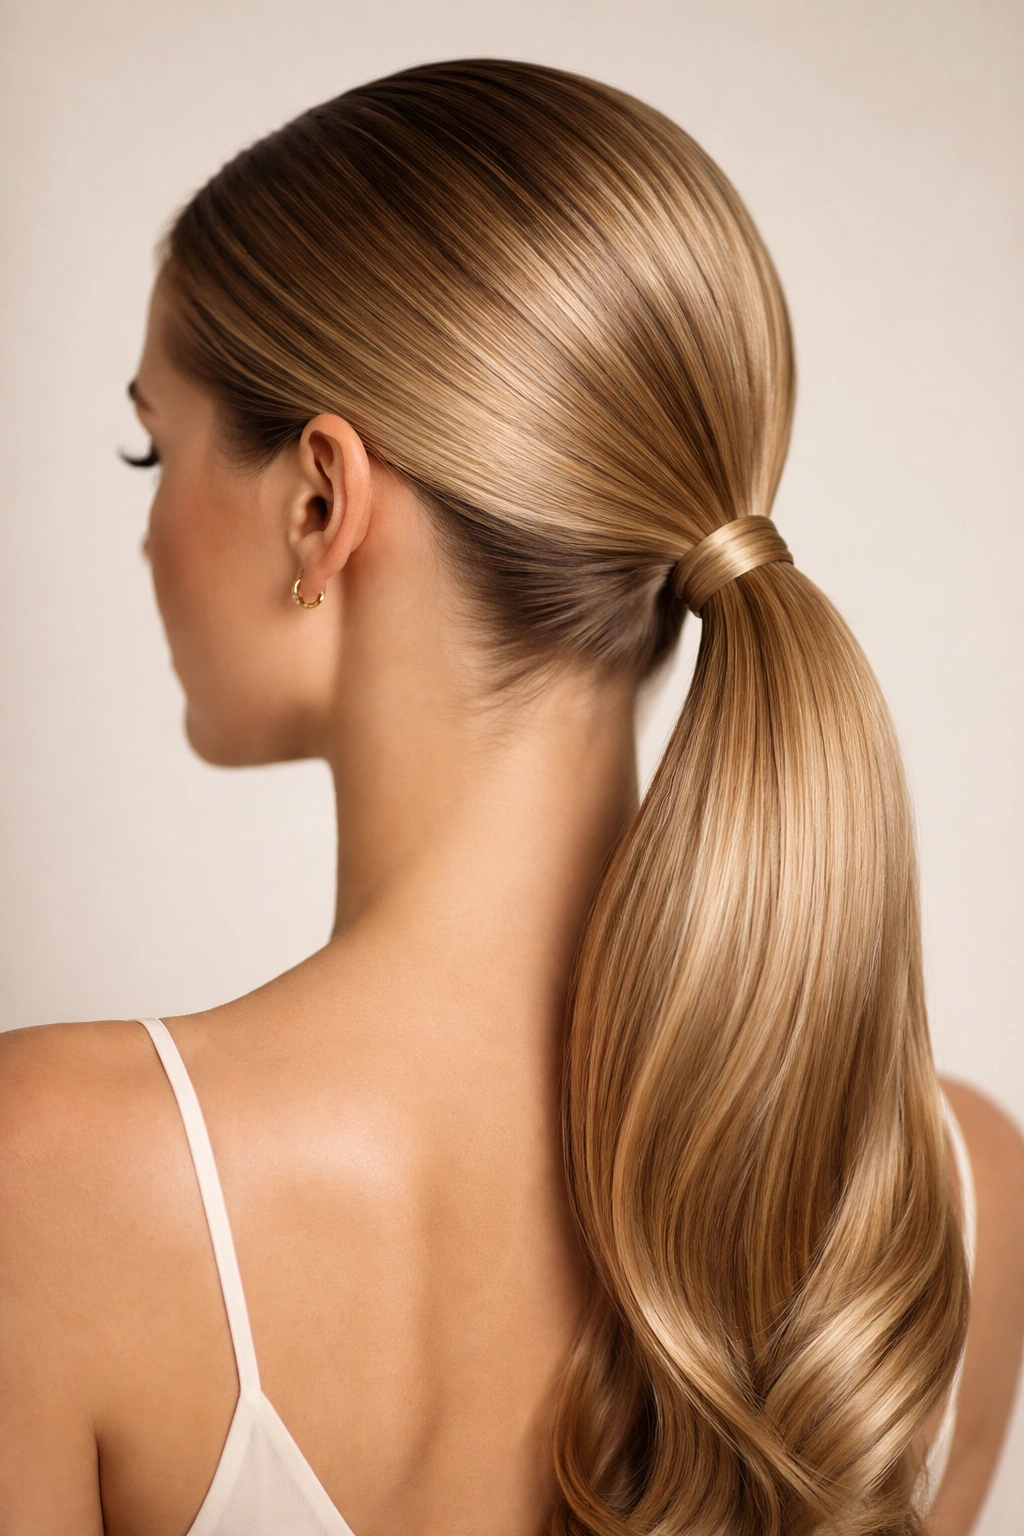
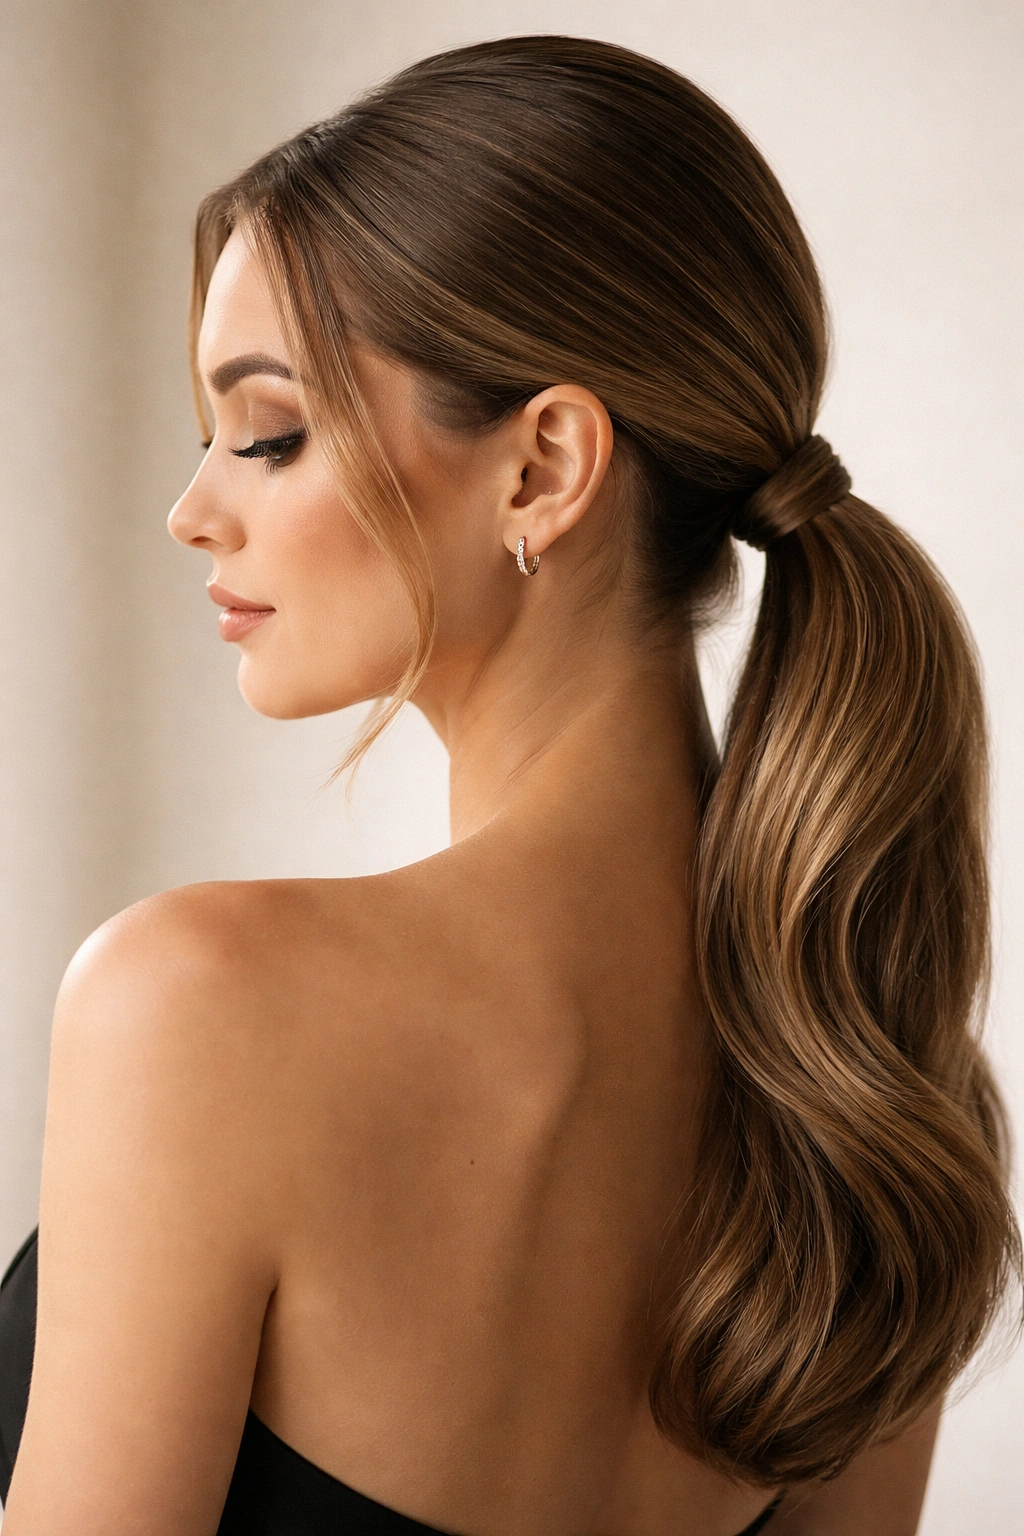
The sleek low ponytail is the timeless foundation upon which all other elegant versions build—it’s the little black dress of hairstyles, suitable for virtually every formal occasion and timelessly chic. This version prioritizes absolute smoothness, clean lines, and a polished finish that demands precision in execution but rewards you with an undeniably sophisticated result that photographs beautifully.
The magic happens in the prep work. Before you even touch your hair into a ponytail, you need a truly smooth base, which starts with either blow-drying your hair straight or, if you have naturally wavy or curly hair, using a smoothing cream and a paddle brush while blow-drying to create a sleek surface. The key is patience—rushing this step shows immediately in the final result, so take your time and work section by section, smoothing as you go.
Creating the Perfect Sleek Base
Start by applying a smoothing serum or anti-frizz cream to damp hair, focusing on the mid-lengths and ends. As you blow-dry, use a paddle brush held taut against your scalp, directing the hair downward and backward. For extra control and longevity, consider blow-drying against your natural hair growth direction first (reverse direction), then finishing by blow-drying in the direction you want the hair to lay. This technique is called “power drying” and creates dramatically smoother results than a single pass.
Once your hair is completely dry and smooth, gather it into a low ponytail positioned at the nape of your neck—aim for the center back, roughly one to two inches above where your neck meets your shoulders. The exact height depends on your face shape and dress neckline, but “low” typically means the base of the ponytail sits between your ears and shoulders. Use a fine elastic that matches your hair color, and secure it tightly enough that the ponytail won’t slip during the event, but not so tightly that you feel uncomfortable pressure on your scalp.
The Finishing Touches That Matter
The step that separates a casual sleek ponytail from an elegant one is the wrap. After securing your base ponytail, take a small section of hair from the underside of the ponytail (about an inch-thick strand), and wrap it around the elastic to conceal it entirely. Secure the wrapped section with a bobby pin hidden beneath the wrap, and smooth the wrap down with a fine-tooth comb or your fingers. This simple technique creates a polished, intentional appearance that immediately elevates the whole look.
For absolute longevity and frizz control, finish with a light hairspray—not so much that your hair looks sticky or stiff, but enough that flyaways are tamed and the style maintains its smoothness throughout the event. A sleek low ponytail works beautifully with a sleek gown or dress, and the simplicity allows bold jewelry, statement earrings, or an elegant updo-adjacent aesthetic to take center stage.
Pro tip: The sleek ponytail is the best choice if your special event involves outdoor photos or a venue with humidity, as the smooth style is less susceptible to frizz and environmental disruption than textured alternatives.
2. The Textured Low Ponytail with Volume
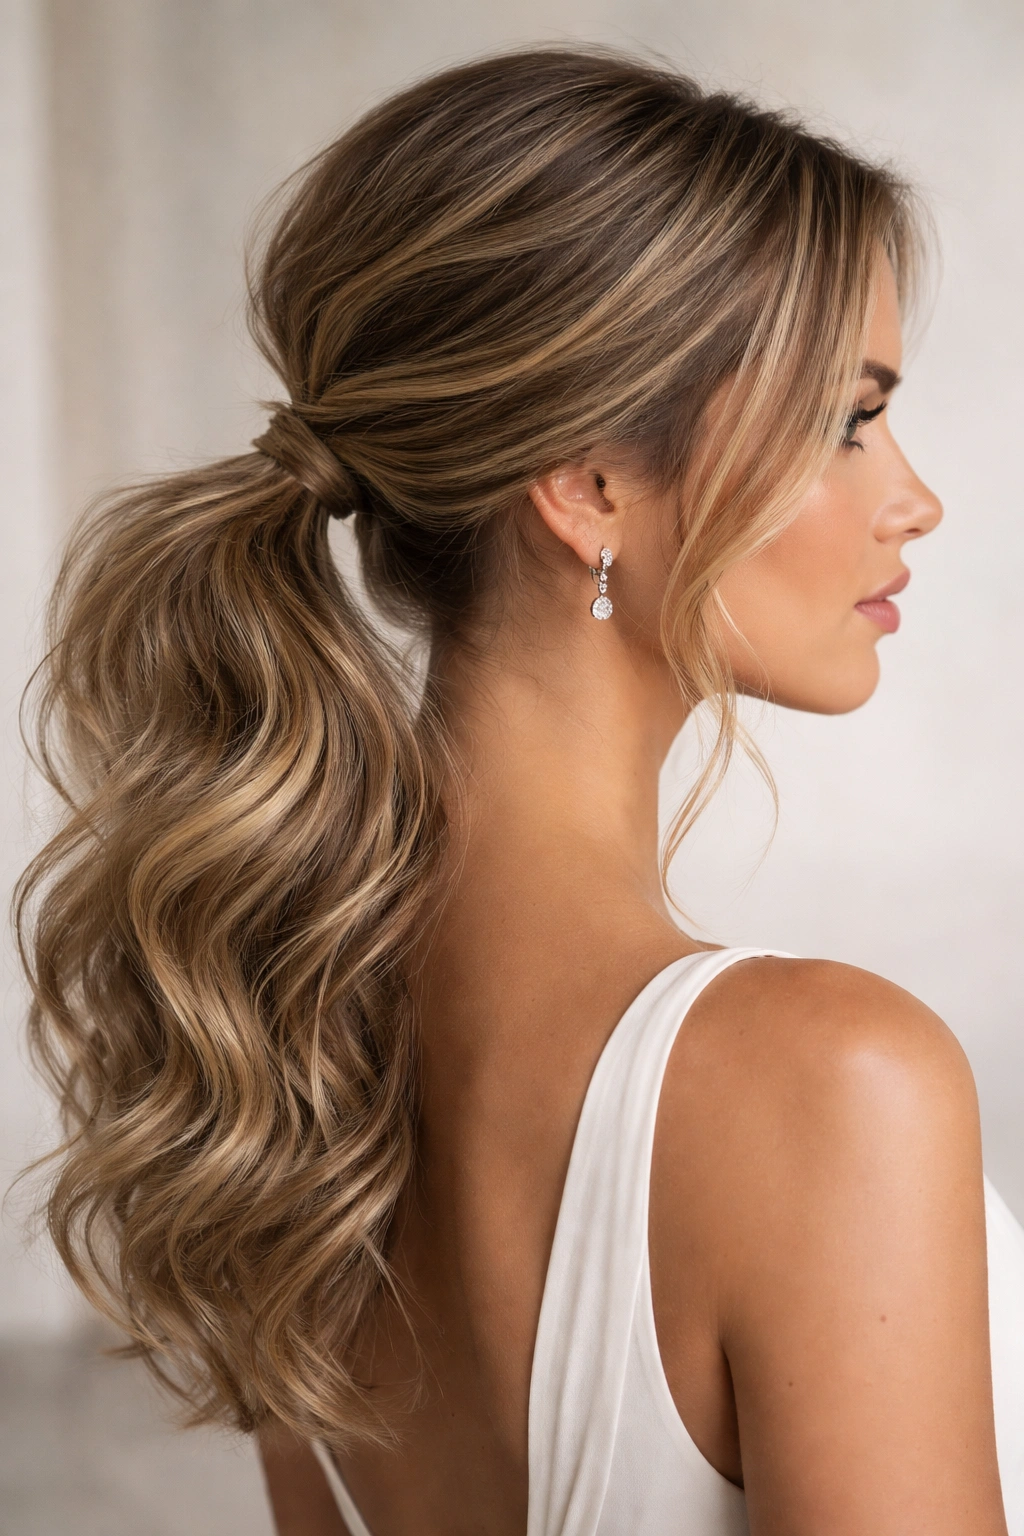
If a sleek ponytail feels too severe or doesn’t align with your personal aesthetic, the textured low ponytail brings softness, movement, and dimensionality while maintaining the elegance and sophistication of the low-ponytail silhouette. This version works especially well if you have naturally wavy or curly hair that resists straightening, or if you prefer a slightly more relaxed, romantic vibe than ultra-sleek styling allows.
The textured approach begins with your hair’s natural texture as the foundation rather than working against it. If you have naturally wavy hair, you can enhance those waves; if your hair is curly, embrace the curl and create defined, bouncy texture throughout. If your hair is naturally straight and you want texture for this style, you’ll need to create it through curling or waving techniques before gathering the ponytail.
Building Texture and Dimension
Start with damp or slightly dried hair. Apply a texturizing product—this might be a sea salt spray, a texturizing mousse, a curl-defining cream, or a lightweight styling cream depending on your hair type and the texture you want to create. These products grip the hair and help define waves and curls rather than smoothing them down.
If you want to add waves to straight hair, blow-dry with a round brush for some volume and curve, then use a curling iron or wand to create loose waves throughout. Aim for S-shaped waves rather than tight ringlets—think effortless and flowing rather than formal and controlled. For naturally wavy hair, enhance the waves by scrunching the texturizing product through damp hair as you blow-dry, using a diffuser attachment if you have one. For curly hair, apply the curl-defining product, scrunch upward as it dries, and allow your natural curl pattern to form.
Once your hair has texture and movement throughout, gather it gently into a low ponytail. The difference here is that you’re not pulling it back tightly—instead, you’re creating a slightly relaxed, softer silhouette that allows some texture to peek out around the face and shows the movement within the ponytail itself. The base might be slightly softer than a sleek version, which actually adds to the romantic, elegant aesthetic.
Enhancing the Ponytail Itself
After securing the base with an elastic, gently tease or backcomb the ponytail section itself to create even more texture and a slightly fuller appearance. You don’t want this to look matted or messy—instead, create a soft, piecey texture that shows movement. Smooth the outer layer lightly with a fine-tooth comb so it looks intentional rather than chaotic.
Leave a few soft face-framing pieces around your face and temples to soften the overall look and add to the romantic aesthetic. These pieces should be slightly wavy or curled to match the texture throughout the rest of your hair. Pin them gently behind your ears with bobby pins if needed to keep them in place throughout the event.
Finish with a light to medium-hold hairspray that adds texture rather than smoothness—avoid the ultra-glossy finishes that can make textured hair look plastic or over-styled. The textured low ponytail pairs beautifully with softer makeup, delicate jewelry, and romantic or ethereal fabrics like chiffon, lace, or silk.
Worth knowing: Textured low ponytails photograph exceptionally well because the movement and dimension show up clearly in images, creating visual interest and softness that sleek styles sometimes miss.
3. The Low Ponytail with Braided Crown
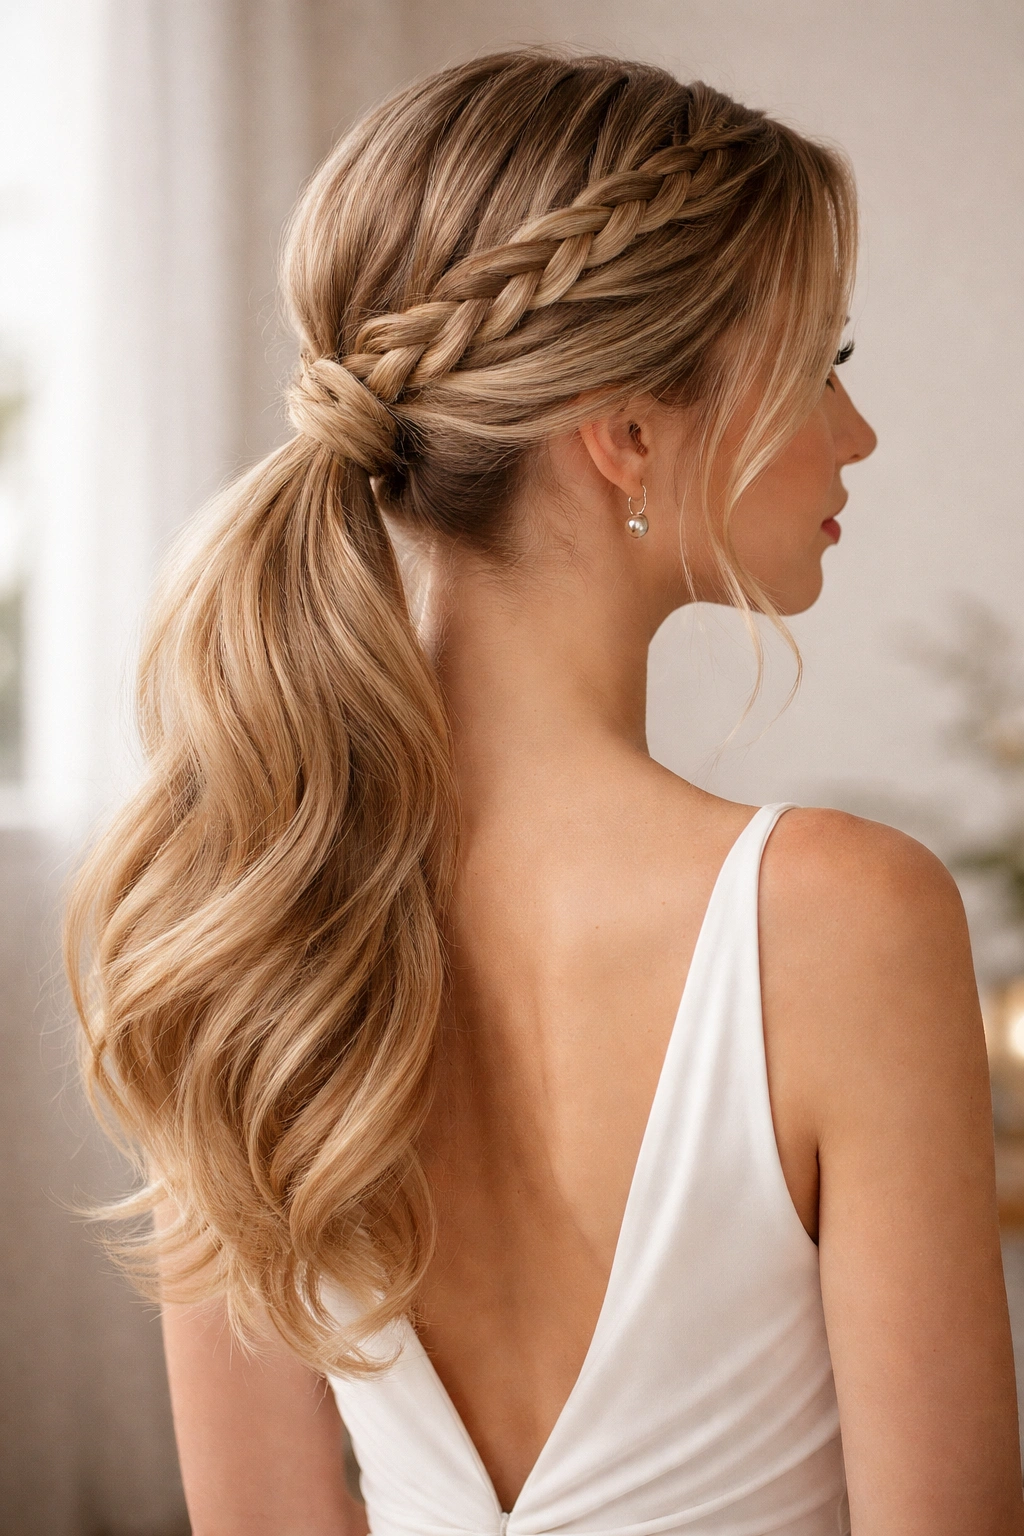
A braided crown woven across the top of the head before the ponytail gather adds an immediate element of craft, intentionality, and romantic elegance that feels both intricate and effortlessly chic. This style works beautifully for weddings, garden parties, black-tie galas, or any event where you want to convey that you’ve taken genuine time and thought with your appearance without looking overly formal or severe.
The braided crown transforms a simple low ponytail into something distinctly more ornate and special-occasion-worthy. The braid catches light, adds texture and dimension to the top of the head, and creates beautiful visual interest from every angle. The key is choosing a braid style that flatters your face shape and works with your hair texture and thickness.
Choosing Your Braid Style
The most universally flattering option is a soft, slightly loose braid that runs across the crown from one side of your head to the other, roughly at ear level. A traditional three-strand braid works, but even more elegant are Dutch braids (braided forward rather than over), French braids (starting at the front and moving backward), or fishtail braids, which create an airy, lace-like texture that’s distinctly romantic.
If you have fine or thin hair, a loose, slightly imperfect braid with some pieces pulled out to create texture will be more flattering than a tight, compact braid, which can emphasize sparseness. If you have thick or curly hair, you have flexibility to create either a tight, structured braid or a very loose, bohemian one depending on the overall aesthetic you’re going for.
Start by sectioning off the hair at one temple and begin braiding toward the back of your head. If you’re doing a Dutch braid, braid under rather than over for a raised, prominent effect. Continue braiding until you reach the opposite side of the head, roughly at ear level on that side. Secure the end of the braid with a small elastic that matches your hair color. If you want the braid to be less visible (more like a delicate crown), tuck the end under and secure with bobby pins. If you want it to be a prominent design element, leave the end visible.
Gathering the Ponytail
After your braid is secure, gather all your hair—including the braid—into a low ponytail at the nape of your neck. The braid becomes part of the gathered hair rather than a separate element. This creates a unified, polished look where the braid is a decorative element within the larger style rather than something that stands alone.
Wrap the elastic with a section of hair to conceal it, and secure with bobby pins. The braid remains visible from the back and sides, adding that special-occasion detail without overwhelming the overall silhouette. This style works beautifully with vintage-inspired dresses, romantic gowns, garden-party attire, or bohemian-leaning formal wear.
Pro tip: If you’re nervous about your braiding skills, practice this style 2-3 times before your event. It’s not difficult, but muscle memory helps you execute it quickly and confidently when you’re already getting ready and managing other styling elements.
4. The Side-Swept Low Ponytail
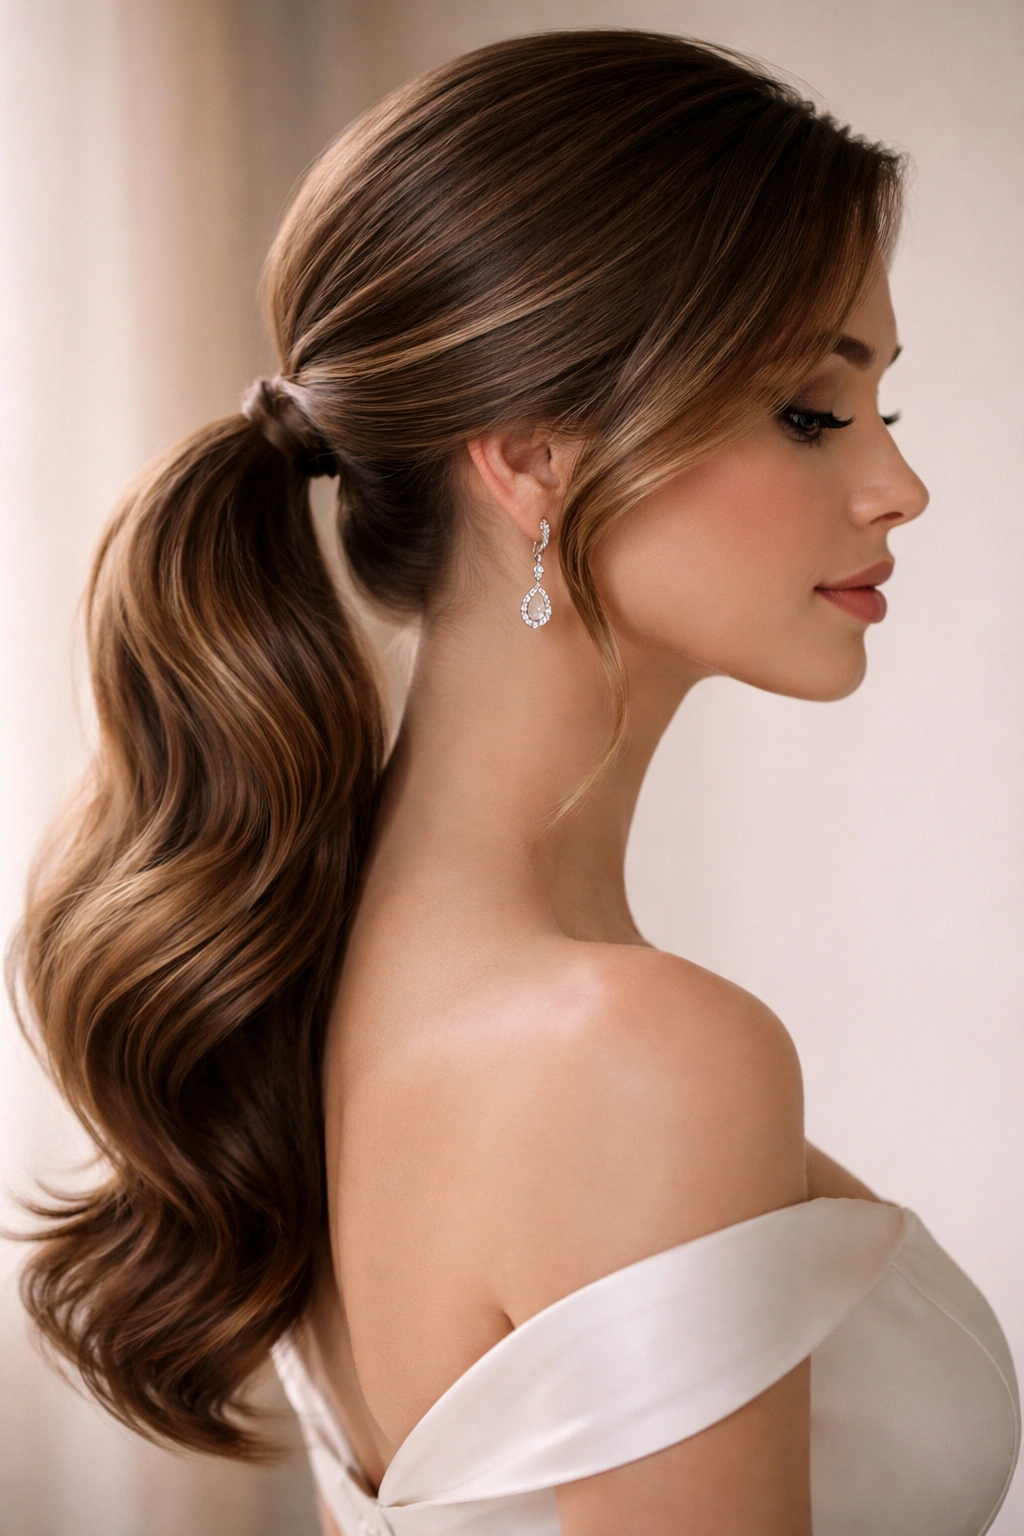
A side-swept low ponytail gathers to one side rather than the center back, creating an asymmetrical, fashion-forward silhouette that’s unexpectedly elegant and modern while still maintaining the sophistication of the low ponytail. This style is especially flattering if you have a strong side part or if you want to show off jewelry, a dramatic neckline, or unique shoulder details on your special-event dress.
The side-swept approach works beautifully with both sleek and textured hair, and it photographs exceptionally well because it creates an elegant diagonal line through your silhouette and showcases your profile. The asymmetry also adds visual interest and prevents the style from feeling too formal or severe, which is why it’s become increasingly popular for upscale events.
Creating the Asymmetrical Gather
Start by creating a strong side part—not directly at the center of your hairline, but shifted distinctly to one side. The deeper and more pronounced the side part, the more dramatic the side-swept effect will be. Blow-dry or style your hair to encourage it to fall in the direction of your chosen side part, with more volume on the side that’s being swept back.
Gather your hair to one side of your head, positioning the ponytail base lower and more toward the back than you would for a standard centered low ponytail. For a dramatic side-sweep, the ponytail might sit slightly off-center toward the back of one shoulder. This creates an asymmetrical, elegant line that immediately reads as intentional and sophisticated.
The hair that falls naturally on the larger side of your side part (the side that’s not being swept back) should frame your face softly, with perhaps a piece or two gently pinned or tucked behind your ear. This framing piece adds to the asymmetrical, romantic aesthetic and softens the overall look.
Styling the Asymmetrical Result
Whether you choose a sleek or textured finish for your side-swept ponytail, the asymmetry itself becomes the defining visual element. If you go sleek, the smooth lines emphasize the diagonal sweep created by the side part and ponytail placement. If you go textured, the movement within the hair adds to the sense of motion and grace created by the side-swept positioning.
A wrapped elastic is essential for this style because it helps define the gathered section and creates a polished, intentional appearance. The wrap should be tight and neat, as any looseness or imprecision reads more noticeably in an asymmetrical style than it might in a centered one.
This style pairs beautifully with statement earrings (since one side of your face and neck is more visible), off-the-shoulder or one-shoulder dresses, or any gown where you want to draw attention to one side of your body. The side-swept ponytail also works wonderfully for events where you’ll be photographed from one side—it’s extremely flattering in profile.
Worth knowing: If you have very thick or heavy hair, a side-swept ponytail might feel unbalanced or pull uncomfortably on the side it’s gathered to. In this case, consider using a stronger elastic or double-securing with bobby pins to ensure the style stays in place throughout your event without putting uncomfortable tension on your scalp.
5. The Low Ponytail with Face-Framing Pieces
A low ponytail with intentional face-framing pieces creates softness, femininity, and a romantic aesthetic that keeps the style from feeling too formal or severe—this version is perfect if you want the elegance of an upswept style without completely off-the-face severity. Face-framing pieces also provide strategic softening around the face, which is flattering for nearly every face shape and adds dimension to your overall appearance.
The difference between this style and simply not smoothing your hair back tightly is intentionality. Rather than pieces falling out naturally or looking unkempt, you’re deliberately leaving or creating soft, shaped pieces that frame your face with purpose. These pieces should be curled, waved, or styled to match the texture of the rest of your hair, and they should be positioned to flatter your face shape.
Identifying Your Face-Framing Pieces
Before you gather your ponytail, identify which pieces will frame your face. Typically, these are hair strands from your temple area—roughly from the corner of your eye backward to your ear. You might leave pieces on both sides of your face, or if you’ve got a side-swept or side-part ponytail, you might focus framing pieces on the side that’s more visible.
The length of these pieces matters. For maximum effect, they should be long enough to fall past your jawline or collarbone, which gives you enough length to style them and have them make a visual impact. Very short framing pieces can look accidental rather than intentional, while longer pieces create the soft, romantic effect you’re after.
Style these pieces to match your overall hair texture. If you’ve created waves or curls throughout your hair, curl or wave the framing pieces too. If you’ve kept your hair sleek and smooth, you might gently wave the framing pieces just slightly to add a touch of softness while maintaining the overall sleek aesthetic.
Positioning for Maximum Effect
As you gather your ponytail, be deliberate about which pieces you leave out and where you position them. You want them to fall naturally beside your face without looking artificially placed or requiring constant adjustment. If they’re too short or too slippery, secure them gently with a bobby pin behind your ear or at your temple, hidden beneath your hair so the pin isn’t visible.
The framing pieces should create a soft frame around your face—they should balance your face shape (wider frames for narrower faces, delicate pieces for rounder faces) and should be positioned so that they’re visible in photos and from the front without looking chaotic or unkempt.
This style works beautifully for any special event where you want to convey elegance with approachability—garden parties, cocktail events, semi-formal dinners, or weddings where you want to be polished but not overly formal. The face-framing approach is especially flattering for romantic, ethereal, or vintage-inspired dress styles.
Quick style note: If you’re prone to flyaways or if your hair tends to move around, secure your face-framing pieces with bobby pins that match your hair color and position them early in your getting-ready process so they have time to settle into place naturally.
6. The Twisted Low Ponytail
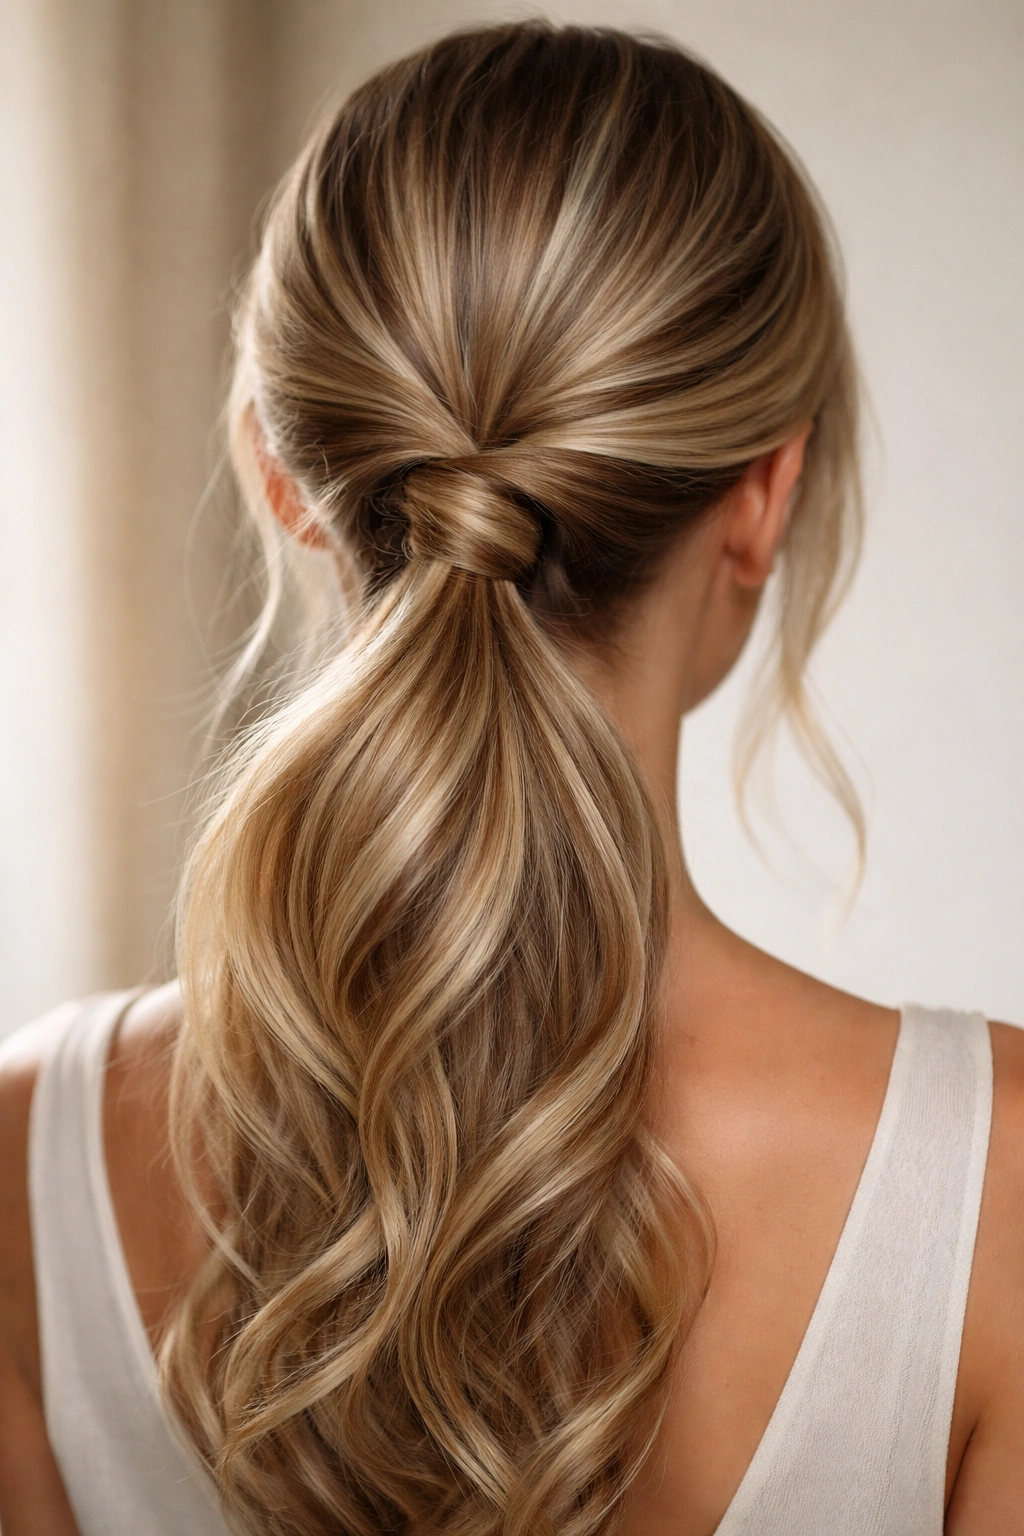
A twisted low ponytail incorporates subtle spirals and twists into the gathered section itself, creating visual texture, movement, and an appearance of complexity that’s actually quite simple to execute. This style offers an elegant middle ground between the simplicity of a basic low ponytail and the intensity of a fully braided style, making it ideal if you want something special but don’t have the time or hair-braiding confidence for more intricate designs.
The twists can be created before gathering the ponytail, built into the ponytail base itself, or woven throughout the length of the gathered hair. Each approach creates a slightly different visual effect, so you can choose based on how much texture and visual interest you want to incorporate.
Creating Twists Before the Gather
For this approach, section your hair into 2-4 sections (depending on how many twists you want to incorporate). Taking one section at a time, use a curling iron or your fingers to create a gentle twist, spiraling the section around itself. You can create tight, defined spirals or loose, relaxed twists depending on your preferred aesthetic. Once all sections are twisted, gather them together into a low ponytail.
This approach creates visible twists throughout the ponytail section, with the twists visible from the back and sides. The twists catch light beautifully and create dimension and movement that photographs well. This method works best if you have thicker hair and want the twists to be a prominent design element.
Building Twists Into the Ponytail Base
Alternatively, gather your hair loosely into a low ponytail base, and then take the gathered section and twist it around itself, creating a single large spiral. As you twist, the ponytail thickens and creates a ropelike texture with visible spiral detail. Secure the end of the twisted ponytail with an elastic, and wrap the base with a concealing section of hair. This creates an elegant, unified twisted column that looks intricate but requires only basic hair skills.
You can add subtle definition to your twists by gently pulling on alternate sections as you create them—this creates a looser, airier texture that’s more romantic than a tight, compact twist. For a more formal aesthetic, keep your twists tighter and more defined for a structured, architectural appearance.
Finishing Touches for Twist Details
The beauty of twisted low ponytails is that they work equally well with sleek, smooth hair or with textured, wavy hair. Sleek twists create a modern, polished aesthetic. Textured twists create a softer, more romantic effect because the texture adds visual interest and movement within the twist itself.
After twisting and securing, use a fine-tooth comb or small brush to smooth any flyaways along the twist, and finish with a light hairspray that maintains hold without making the hair look stiff or sticky. The twisted ponytail pairs beautifully with modern, architectural gowns or with more romantic, flowing fabrics—the twist adds visual interest regardless of your dress style.
Pro tip: Practice creating a twisted ponytail 2-3 times before your special event so you’re confident in the technique and can execute it quickly. The twisting motion becomes intuitive with practice, and you’ll be able to create consistent, attractive twists even if you’re working quickly on event day.
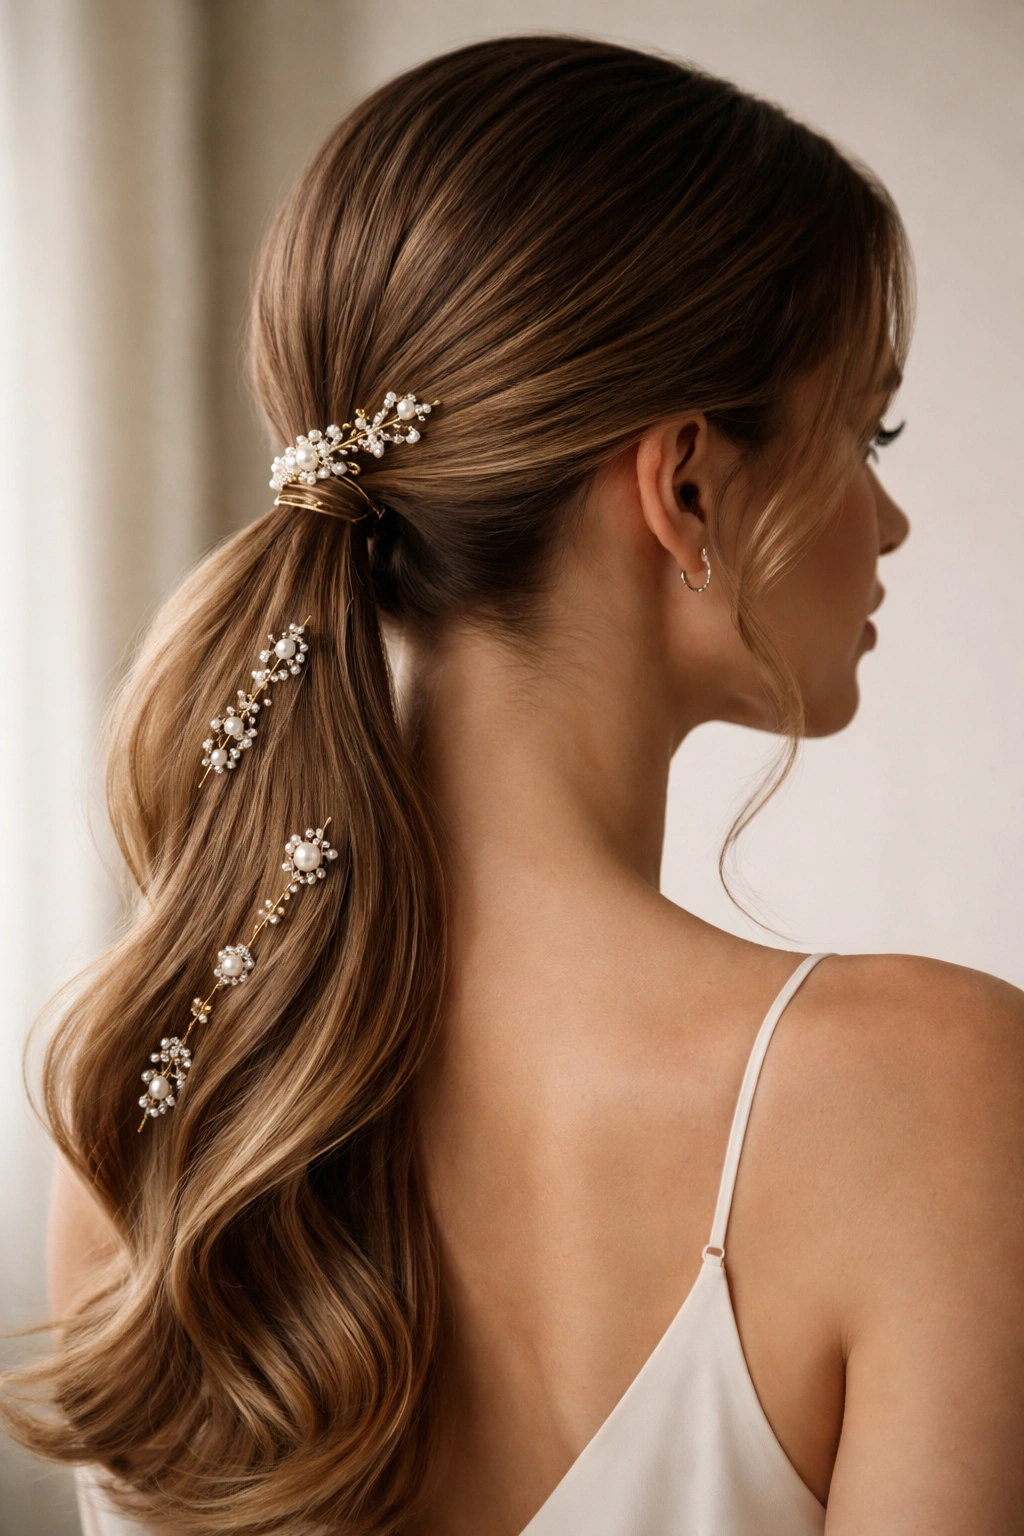
7. The Low Ponytail with Pearl or Jeweled Comb
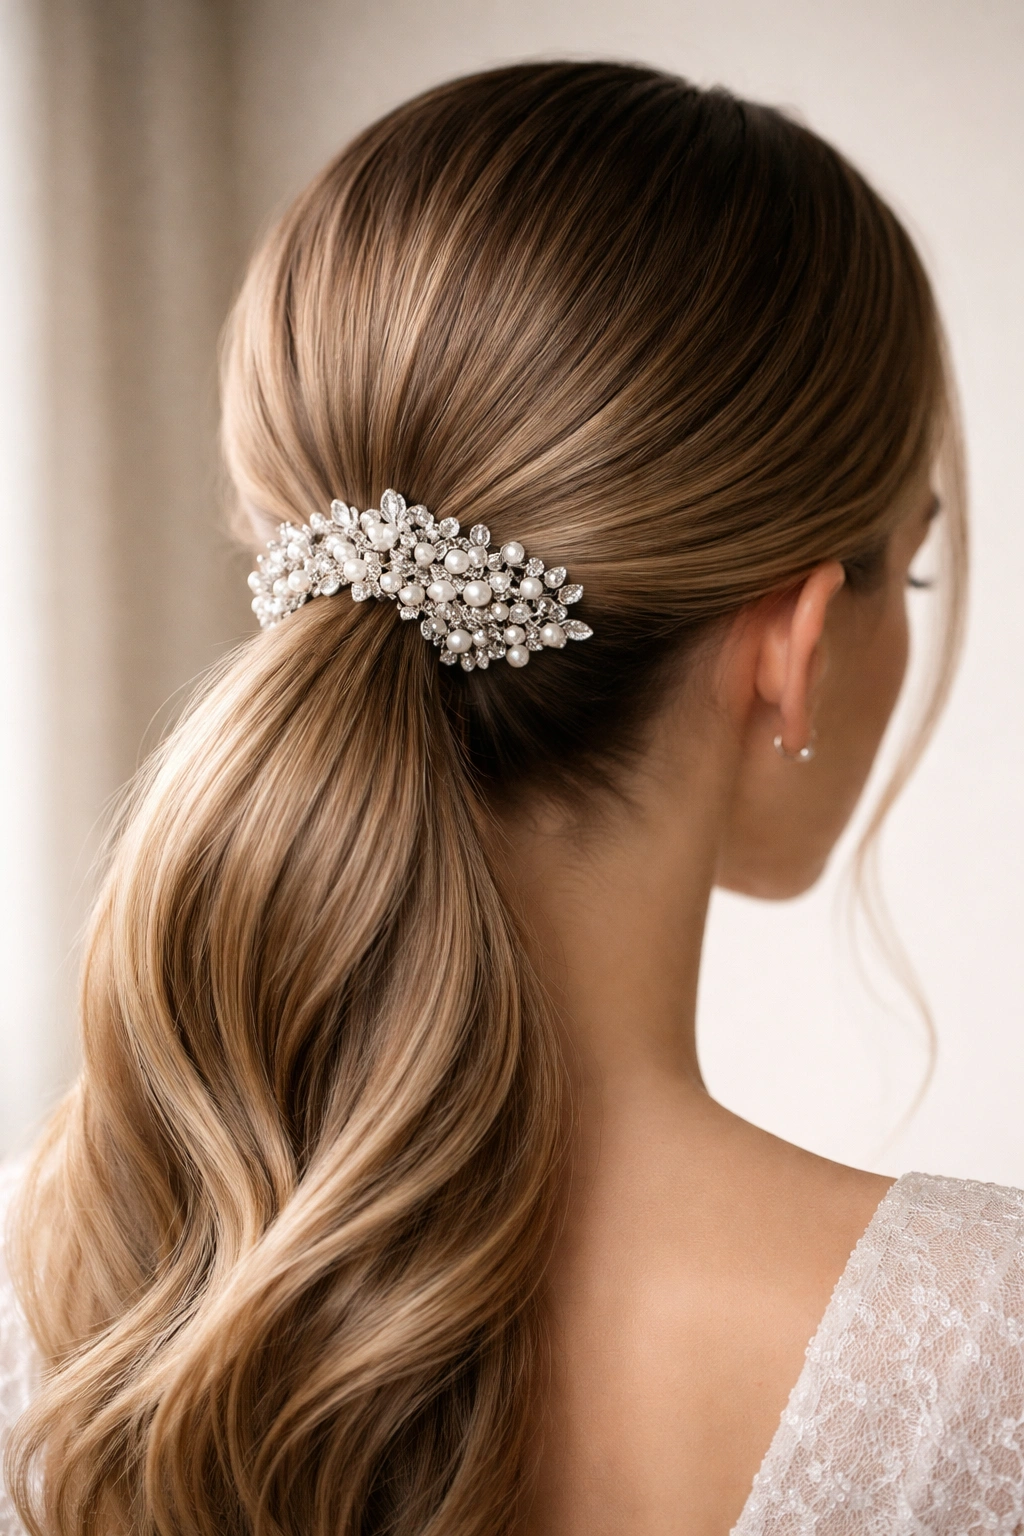
Elevating a simple low ponytail with a statement hair comb—whether adorned with pearls, crystals, rhinestones, or other embellishments—transforms the style from understated to unmistakably special-occasion without requiring any change to the ponytail itself. A beautiful hair comb serves as both a functional styling tool and a jewelry-like accessory that catches light and adds glamour.
This approach is particularly elegant because it allows maximum flexibility in style while providing a significant visual update. Your ponytail itself can remain simple and sleek, textured and romantic, or anything in between—the comb becomes the statement-making element.
Choosing the Right Hair Comb
Look for a comb that complements your dress, your jewelry, and your overall aesthetic. If your event is formal black-tie, an ornate comb with crystals or rhinestones in silver, gold, or pearl tones works beautifully. For a more subtle, elegant look, a delicate pearl-adorned comb or a simple jeweled design in your preferred metal tone is ideal.
Consider the weight of the comb—heavier, larger combs work best in thick hair and can sometimes feel unstable in finer hair. A comb that’s too large for your hair volume might slip or require constant adjustment. Try combs on before purchasing if possible, or carefully read reviews and sizing information to ensure you’re getting a comb that will stay securely in place throughout your event.
The color of the comb should either match your hair color, match your metal jewelry (gold comb with gold earrings and necklace, for example), or intentionally contrast with your hair for a bold statement. Tortoiseshell or crystal finishes work across multiple metal tones, so they’re versatile if you’re wearing mixed metals.
Positioning the Comb for Maximum Impact
Insert the comb into your low ponytail base, right where the elastic secures the ponytail, allowing the teeth of the comb to grip the hair and the decorative top to be prominently visible. Position it at a slight angle—either slightly diagonal or tilted to one side—rather than perfectly centered, which creates a more dynamic, intentional appearance.
If you’ve wrapped your elastic with a section of hair, you can position the comb either slightly above or below that wrapped section depending on how much of the comb you want to showcase. A fully visible, prominent comb makes a bold statement. A comb that sits partially behind the wrapped elastic section is more subtle and understated.
Make sure the comb is secure before you finish your styling. Gently tug on it to ensure the teeth are gripping firmly, and adjust if needed. A comb that slips or slides throughout your event is distracting and will need constant adjustment.
Styling to Complement the Comb
Whether your ponytail is sleek, textured, twisted, or braided, a beautiful comb becomes the focal point, so ensure the rest of your hair styling complements rather than competes with it. If your comb is ornate and heavily embellished, keep your ponytail relatively simple so the comb is the clear statement piece. If your comb is more delicate and understated, you can incorporate more texture, braids, or twists throughout your ponytail.
This style works beautifully for weddings (especially as a guest style if you want to look elegant without drawing attention away from the bride), formal dinners, galas, or any event where you want to add a touch of glamour. The hair comb also works wonderfully if you want to incorporate a sentimental piece—an heirloom comb, for example, becomes a meaningful accessory that tells a story.
Worth knowing: If you’re wearing a dramatic updo or off-the-shoulder gown that shows your neck and shoulders, a beautiful hair comb is the perfect accent because it’s visible from multiple angles and doesn’t compete with bold necklines or jewelry.
8. The Low Ponytail with Velvet Ribbon Wrap
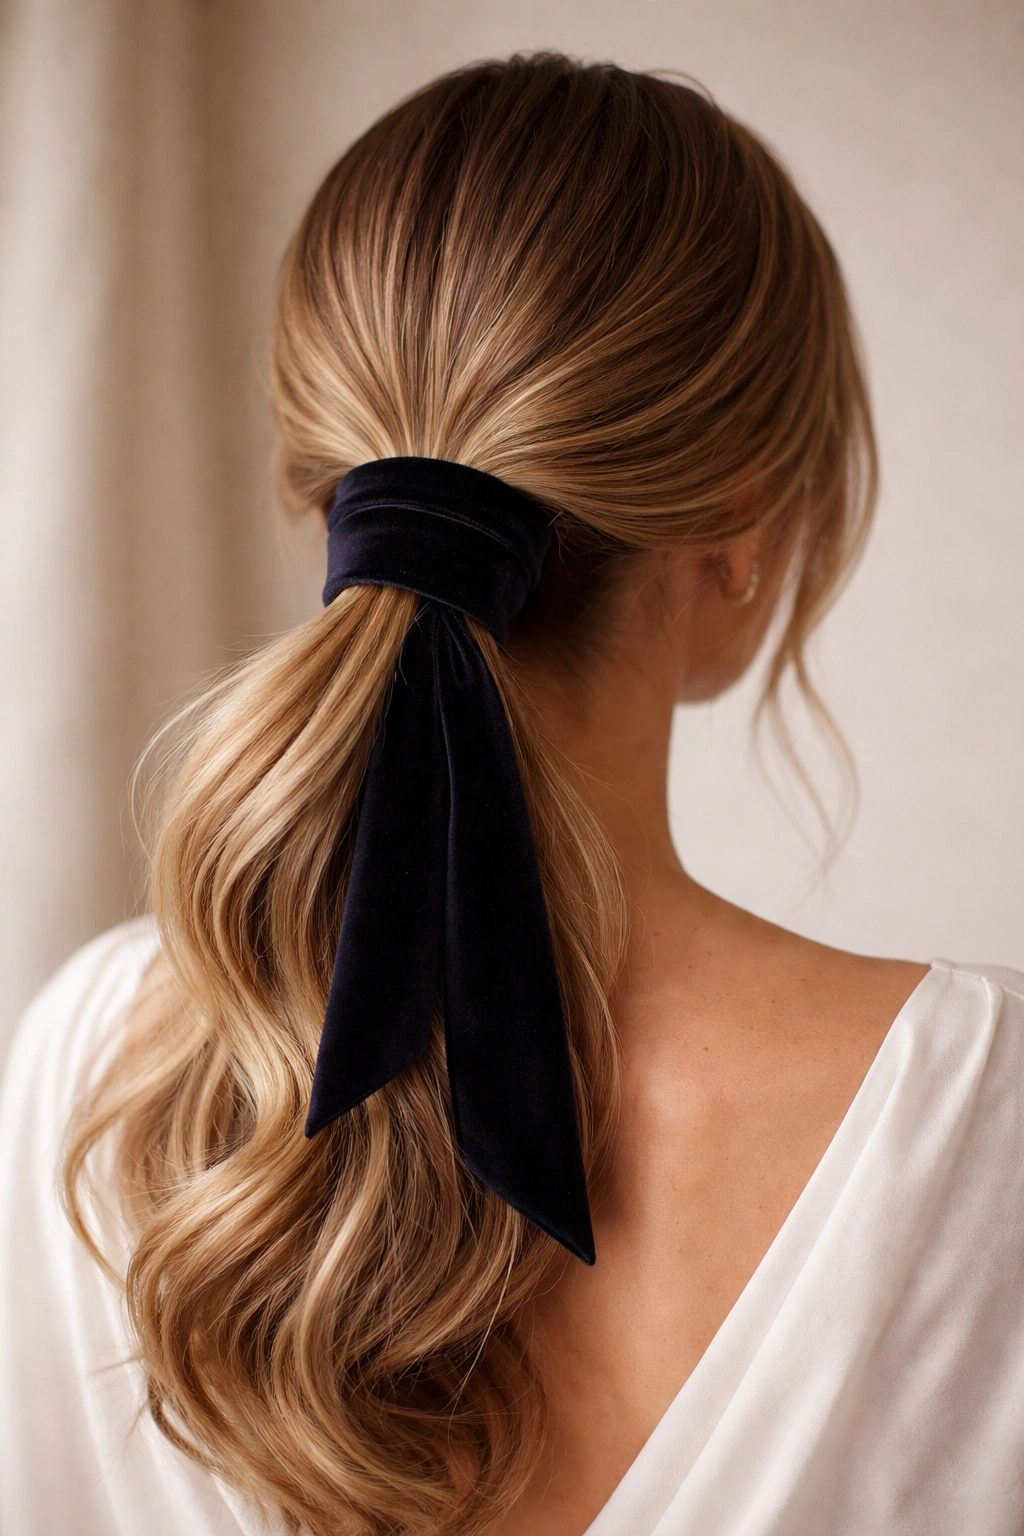
Wrapping your low ponytail’s base with a lengths of luxe velvet ribbon creates texture, softness, and an immediately elegant, vintage-inspired aesthetic that feels special and intentional. Velvet adds a tactile, luxurious quality that ribbon in other fabrics simply doesn’t achieve, making this an excellent choice for any special event where you want to convey elegance and thoughtfulness.
The velvet ribbon wrap serves both functional and aesthetic purposes—it conceals the elastic while adding a beautiful design element that photographs gorgeously and catches light with the soft, subtle sheen that velvet provides.
Selecting and Preparing Your Velvet Ribbon
Choose a ribbon width between 1 and 2 inches for optimal coverage and visual impact. Wider ribbons completely conceal the elastic and create a bolder statement, while narrower ribbons are more delicate and subtle. The color should either match your hair color, coordinate with your dress, or intentionally contrast for a bold statement.
Velvet ribbons come in jewel tones (sapphire, emerald, burgundy, amethyst) that are luxurious and elegant, as well as softer tones like blush, dusty rose, champagne, or ivory. Consider your dress color and overall event aesthetic when choosing—a jewel-tone ribbon paired with a neutral-colored dress creates a striking focal point, while a ribbon that matches your dress creates a coordinated, unified aesthetic.
Before wrapping, measure your ribbon to ensure you have enough length. You’ll typically need 8-12 inches of ribbon depending on how thickly you want to wrap it around the ponytail base. If you want a very full, thick wrap, you might need up to 18 inches.
Wrapping Technique for a Polished Finish
Gather your hair into your chosen low ponytail style and secure with an elastic. Take your velvet ribbon and position one end at the base of the ponytail, just above the elastic. Holding the end of the ribbon secure with one hand, use your other hand to wrap the ribbon tightly around the ponytail base, covering the elastic completely. Wrap in a spiral motion, layering each wrap tightly against the previous one so there are no gaps showing the elastic underneath.
Once you’ve wrapped completely around the ponytail base, secure the ribbon end with a small stitch using needle and thread (if you’re wrapping before the event and have time), or use a small clear elastic or bobby pin to secure it in place. If using a bobby pin, tuck the pin beneath the wrapped ribbon so it’s completely hidden.
For a more decorative effect, you can create a small bow with the ribbon end, tying it so the bow sits at the base of the ponytail. This adds a feminine, romantic touch and makes the ribbon detail even more intentional and visible.
Styling Combinations That Work
A velvet ribbon wrap works beautifully with nearly any ponytail style—sleek, textured, twisted, braided, or adorned with other accessories. The velvet adds sophistication without overwhelming any other styling elements. If you’re combining the velvet wrap with other details like face-framing pieces or a braided crown, the ribbon wrap becomes the finishing touch that ties everything together.
Velvet wraps are especially elegant for formal evening events, black-tie occasions, holiday parties, or any special event with a romantic or vintage-inspired aesthetic. The soft texture of velvet complements flowing, luxurious fabrics like silk, satin, chiffon, and taffeta beautifully.
Quick tip: Practice wrapping your ribbon before your event so you understand how much ribbon you need and how tightly to wrap for the most polished appearance. A few practice runs ensure you can execute this detail confidently when you’re already in styling mode.
9. The Low Ponytail with Accessory Pins
Clustering multiple delicate pins throughout your low ponytail—whether they’re pearl pins, crystal pins, decorative bobby pins, or specialty hair pins—creates a visually interesting, glamorous detail that feels modern and intentional. This approach is highly customizable: you can use as many or as few pins as appeals to you, and you can choose pins that match your dress, your jewelry, or your personal aesthetic.
The scattered pin approach works beautifully across all ponytail styles and hair textures, and the pins catch light beautifully in photographs, creating sparkle and dimension. This is an excellent choice if you want to incorporate multiple small design elements rather than one large statement piece.
Choosing and Positioning Your Pins
Look for pins that measure roughly 2-3 inches long—shorter than standard bobby pins so they’re not overly visible but long enough to provide functional grip while securing decorative elements. Specialty hair pins designed specifically for events come in finishes including pearl, crystal, gold, silver, and other metallic tones, or with small decorative elements like flowers, filigree, or geometric designs.
Plan your pin placement before you start inserting them. For a balanced look, cluster pins in 2-3 spots along the length of your ponytail rather than scattering them randomly. You might place a small cluster just at the ponytail base (creating a visual accent), another cluster mid-way down the ponytail, and perhaps one near the ends. Alternatively, distribute pins more sparsely for a subtle, delicate appearance.
Insert each pin horizontally into the ponytail, weaving it through the gathered hair so that both the pin head and the decorative element are visible. Secure each pin firmly—you want no movement or slipping as you go about your event.
Coordination and Balance
The number of pins you use should feel proportional to your overall look. Three to five pins create a subtle, elegant accent. Seven to ten pins create a more dramatic, glamorous effect. More than ten pins can start to feel busy or chaotic unless you’re going for a distinctly bold, statement-making aesthetic.
Your pins should either coordinate with your jewelry (matching metal tones, for example) or intentionally contrast with it for visual interest. If you’re wearing gold earrings and a gold necklace, gold pins create a unified, coordinated aesthetic. If you’re mixing metals, choose pins in one of your primary metals to anchor the look.
The scattered pin approach works beautifully for modern, fashion-forward events, and it’s also perfect for bohemian-leaning special occasions. The pins add visual interest without the formality of a single large statement comb or the complexity of braids and twists.
Pro tip: Bring an extra bobby pin or two in your clutch in case one of your decorative pins loosens during the event. Quickly reinserting a pin is easier and less disruptive than trying to fix it mid-event with your fingers.
10. The Romantic Soft Wave Low Ponytail
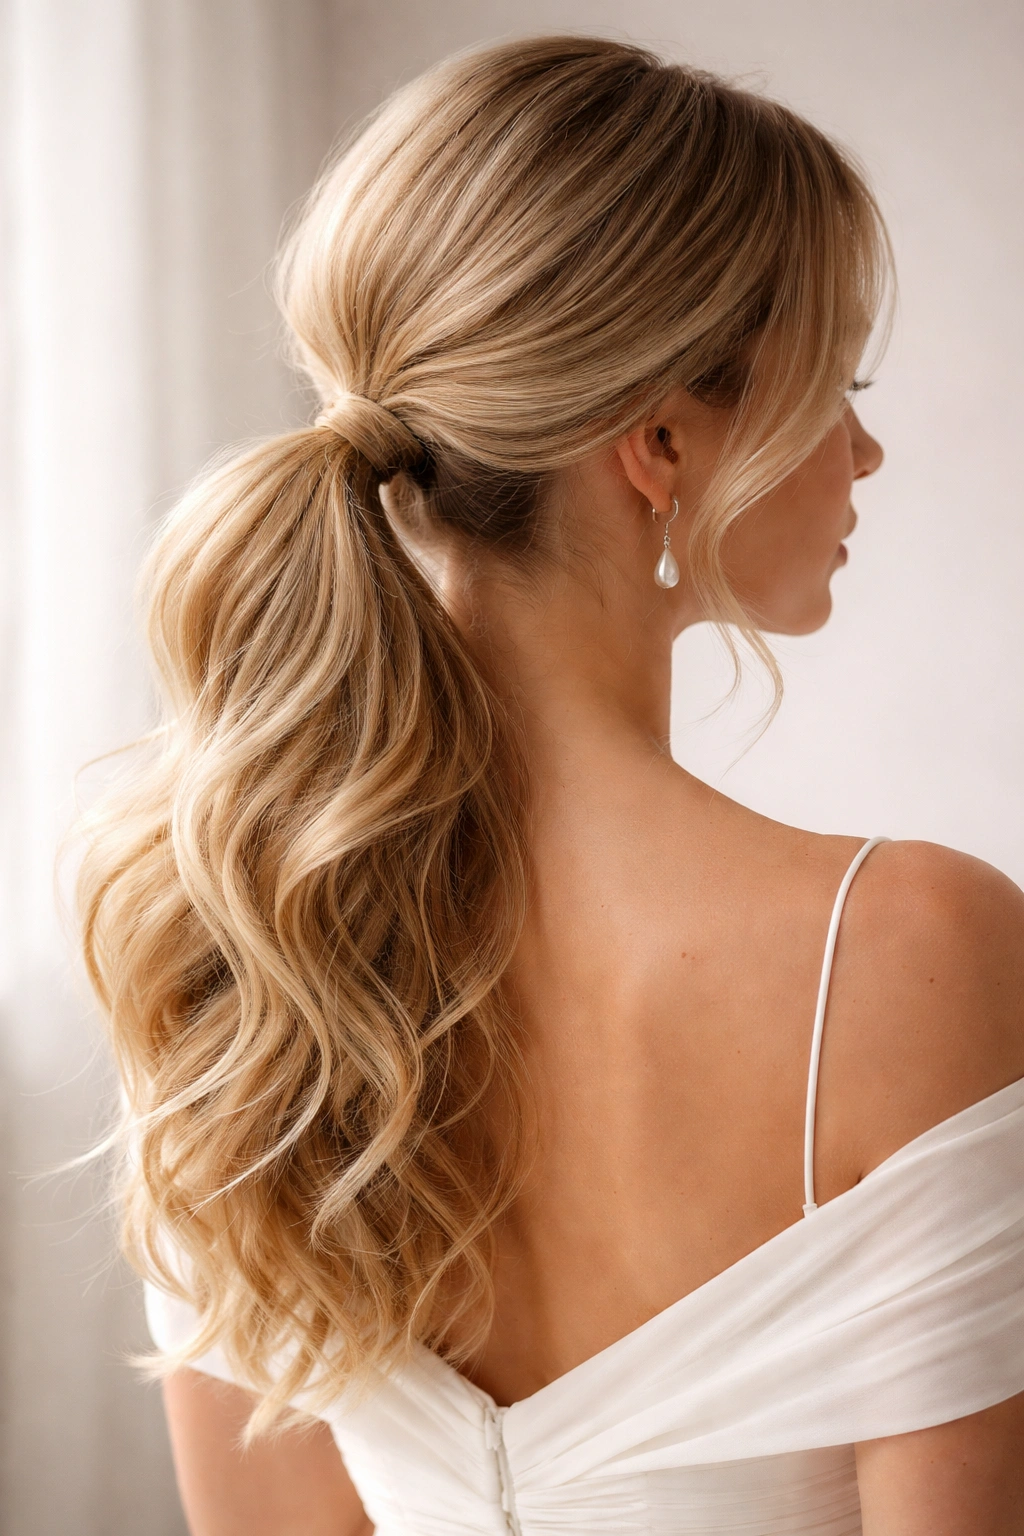
A romantic low ponytail featuring soft, loose waves throughout the ponytail section itself creates an ethereal, feminine aesthetic that’s perfect for weddings, garden parties, romantic evening events, or any occasion where you want to convey elegance with a touch of whimsy and softness. This style is all about creating movement, flow, and a sense of effortless grace.
The romantic wave approach relies on texture and dimension within the ponytail itself rather than on accessory details or braiding, making it an excellent choice if you want a sophisticated style that doesn’t require complex braiding or extensive accessory coordination.
Building Waves Throughout Your Hair
Start by creating soft, loose waves throughout your entire head of hair, not just the ponytail section. Using a curling iron or wand with a barrel size of 1.5 to 2 inches, curl sections of hair away from your face, holding the curl for 10-15 seconds before releasing. The goal is loose waves that move and flow rather than tight, compact curls.
For the most romantic effect, vary the direction of your waves slightly—some curled away from your face, some curled toward your face, creating a natural, undone appearance rather than uniform curls. This variation creates the impression that your waves formed naturally rather than being artificially curled.
Once you’ve created waves throughout your hair, allow them to cool completely (waves hold better and create more dimension as they cool), then gently finger-comb or brush through the waves to break them up into softer, more relaxed movement rather than defined ringlets.
Creating the Ponytail with Softness
Gather your wavy hair into a low ponytail at the nape of your neck, but don’t pull it back tightly. Instead, create a slightly softer, more relaxed gathering that allows the waves to remain visible and maintains the movement you’ve created. The ponytail base should be secure enough to stay in place throughout your event, but loose enough that the waves retain their flow and dimension.
Once secured with an elastic, gently tease or backcomb the ponytail section itself to create even more texture and movement. This creates a slightly fuller, more romantic appearance and allows the waves within the ponytail to be even more visible and dimensional. Smooth the outer layer lightly to avoid a chaotic or unkempt appearance.
Leave face-framing pieces to enhance the soft, romantic aesthetic, and style these pieces to match the waves throughout your hair. The combination of soft waves, gentle face-framing, and a slightly relaxed ponytail gather creates an overall effect that’s undeniably romantic and elegant without feeling overly formal or severe.
Finishing for Longevity
Use a light to medium-hold hairspray that adds texture rather than shine—textured finishes complement romantic waves beautifully and prevent the hair from looking sticky or overly styled. Avoid heavy, shine-promoting products that can make waves look flattened or plastic.
The romantic wave low ponytail pairs beautifully with romantic dress styles—flowing fabrics, soft colors, vintage-inspired designs, or ethereal silhouettes. This style photographs beautifully because the waves and movement show clearly in images, creating visual interest and softness that photographs far better than static styles.
Worth knowing: Soft wave low ponytails are ideal if you have naturally wavy or curly hair, as you’re working with rather than against your hair’s natural texture. However, if you have naturally straight hair and want this romantic effect, the time investment in creating waves throughout your entire head is worthwhile—the result is absolutely worth the effort.
11. The Low Ponytail with Undercut Detail
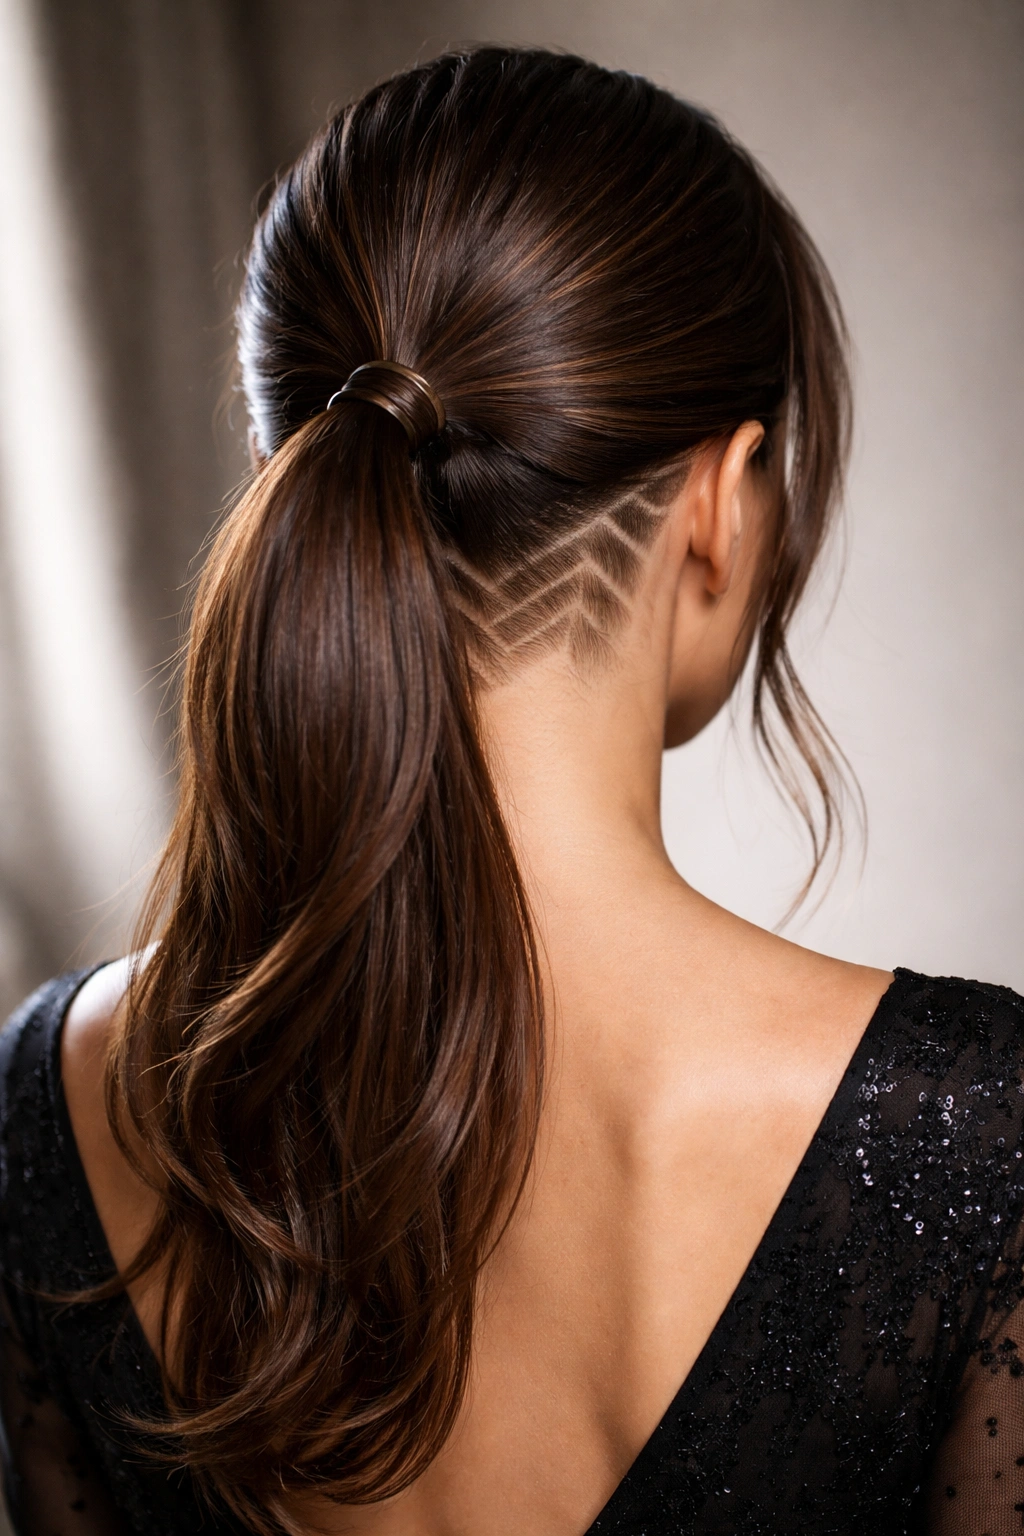
An undercut—a shaved, trimmed, or buzzed section of hair typically hidden beneath longer layers—becomes visible and dramatic when incorporated into a low ponytail, creating a modern, edgy-elegant hybrid that’s perfect if you want your special-event style to reflect a bold, fashion-forward aesthetic. This approach works whether you already have an undercut or are considering having one created specifically to add visual interest and personality to your event styling.
The undercut detail is a statement-making choice that conveys confidence and a modern sensibility, making it ideal for upscale events where individual style and personality are celebrated.
Working With an Existing Undercut
If you already have an undercut, styling it visibly in your low ponytail simply means gathering your hair in a way that highlights rather than conceals the undercut section. You might use an elastic positioned lower than you would for a standard low ponytail, allowing the undercut area to be more visible from the back and sides. Alternatively, you can position your ponytail slightly off-center or to one side, creating angles and sight lines that showcase the undercut design.
The undercut serves as negative space that creates visual interest and dimension—it shows the contrast between the length of your hair and the closely trimmed or shaved section, which is what makes the effect dramatic and modern.
Creating Visual Drama With the Undercut
Consider getting your undercut trimmed or shaped cleanly 3-5 days before your special event (not the day of, in case your stylist trims it shorter than you prefer). The cleanly defined lines of a recently trimmed undercut are more visually striking than a slightly grown-in undercut.
Some people choose to have their undercut colored differently from their main hair color—a contrasting shade, a metallic finish, or a fashion color—which makes the undercut even more visually dramatic. Temporary dyes, metallic sprays, or jewel-tone products designed specifically for undercut coloring can be used for events and then washed out, if you want to experiment with color without permanent commitment.
Position lighting to your advantage if possible—undercut details are most visible and dramatic in good lighting, where the shaved or trimmed area shows clearly as negative space. Professional photography with proper lighting captures undercut details beautifully.
Styling the Rest of Your Hair
Your ponytail itself can be sleek, textured, twisted, or braided depending on your preference—the undercut is the statement-making element, so your ponytail styling should complement rather than compete with it. Sleek styling allows maximum focus on the undercut. Textured or braided styling adds additional visual interest if you want a more complex overall look.
The low ponytail with undercut detail works beautifully for modern events, black-tie galas, fashion-forward celebrations, or any special occasion where you want to convey individual style and confidence. This is an excellent choice if you want your hairstyle to feel like an intentional extension of your personal aesthetic rather than a purely traditional formal style.
Quick style note: If you’re new to undercuts or uncertain about how dramatic you want yours to be, discuss design options with your stylist well before your event. Some undercuts are subtle and can be hidden; others are bold and dramatic by design. Know what you’re getting into so you can style accordingly on event day.
12. The Low Ponytail with Curved Hair Wrap
A curved hair wrap—a semi-circular, sculptural wrap that follows the natural curve of the back of your head—creates an architectural, modern-elegant detail that’s unexpected and visually striking. Rather than wrapping the elastic at the ponytail base (as you would with a ribbon wrap), the curved wrap encompasses a larger area and creates three-dimensional visual interest from every angle.
This advanced styling technique requires some practice and precision, but the result is absolutely worth the effort—it’s a show-stopping detail that elevates your low ponytail into true special-occasion territory.
Creating the Curved Wrap Foundation
After gathering your hair into a low ponytail, take a 1-2 inch section of hair from the underside of the ponytail. Starting at one side of the ponytail base, curve this section around the back of the ponytail base, creating a semi-circular shape that follows the natural curve of the back of your head. Secure the end of this curved section with bobby pins hidden beneath it.
The curved wrap should be smooth and precisely positioned—it’s sculpting the hair into a specific shape, so precision matters. Use bobby pins positioned horizontally (rather than vertically) to secure the curved section, as horizontal pins create a smoother line and are less visible once covered by the wrap section.
Adding Definition and Glamour
Once your curved foundation is secure, take a decorative element—a velvet ribbon, a delicate chain, metallic thread, or even thin fabric strips in a complementary color—and wrap it around the curved wrap section, creating additional definition and visual interest. The decorative element should follow the same curved line as the hair wrap, creating a unified, sculptural effect.
Alternatively, you can create the curved wrap using braided hair sections, twisted hair sections, or even secured extension hair for additional fullness and drama. The curved wrap becomes a design element that shows from the back and sides of your head, creating a three-dimensional, almost architectural aesthetic.
Styling Considerations for the Curved Wrap
The curved wrap works best with sleek or textured hair that shows the sculptural detail clearly. Highly textured, curly, or very voluminous hair can obscure the curved wrap detail, so if you have very textured hair, consider creating a smoother base that allows the wrap to be clearly visible.
The curved wrap is particularly elegant for black-tie events, galas, upscale evening events, or any occasion where you want to convey sophistication and an appreciation for architectural, intentional styling. It’s an excellent choice if you’re wearing a dress with interesting back detail or a dramatic back neckline, as the curved wrap creates a beautiful visual harmony between your hairstyle and your dress.
This style requires practice and precision, so consider having it done professionally at a salon if you’re uncertain about creating it yourself. A professional stylist can execute the curved wrap flawlessly and ensure it’s secure enough to last throughout your entire event.
Pro tip: If you’re having this style created professionally, book your appointment 2-3 weeks before your event and ask for a trial run if possible. The curved wrap is a specific, detailed technique, and a trial allows your stylist to practice and create the exact effect you’re envisioning.
Final Thoughts
An elegant low ponytail for your special event is far more than just pulling your hair back—it’s a thoughtful styling choice that reflects your personal aesthetic, flatters your features, and communicates care and intention. Whether you choose a sleek, minimalist approach or incorporate braids, twists, decorative accessories, and sculptural details, the low ponytail remains the foundation of a sophisticated, timeless style that works across virtually every formal occasion and dress code.
The key to executing any of these twelve approaches confidently is preparation and practice. If you’re trying a new technique—braiding, twisting, wave-creating, or wrapping—don’t wait until the night of your event to attempt it for the first time. Spend 20-30 minutes a few times in the weeks before your event practicing your chosen style so that your hands understand the motions, you know exactly how much product and how much time you need, and you feel confident executing it quickly even when you’re managing other aspects of getting ready.
Your special event deserves a hairstyle that makes you feel confident, beautiful, and like the very best version of yourself. A low ponytail, executed with care and personalized with details that reflect your individual style, does exactly that—allowing you to show up to your event feeling polished, elegant, and ready to enjoy the celebration.