Side ponytails are a game-changer for kids’ hairstyles. They’re playful, practical, and endlessly customizable — whether you’re heading to school, a birthday party, or just a casual day out. Unlike traditional center ponytails, side versions add instant personality and work beautifully with different hair textures, lengths, and styles. The best part? Most side ponytail styles take just five to ten minutes to create, making them perfect for busy mornings when you need something that looks polished without the fuss.
What makes side ponytails so appealing for kids is their versatility. You can dress them up with ribbons, braids, and clips, or keep them simple and sleek for everyday wear. They work equally well on straight, curly, wavy, or textured hair — you just adjust the technique slightly. Side ponytails also tend to stay put better than some other styles, keeping hair off faces during active play while still looking intentional and cute. Whether your child prefers a sleek, sophisticated look or something fun and whimsical, there’s a side ponytail variation for every personality and occasion.
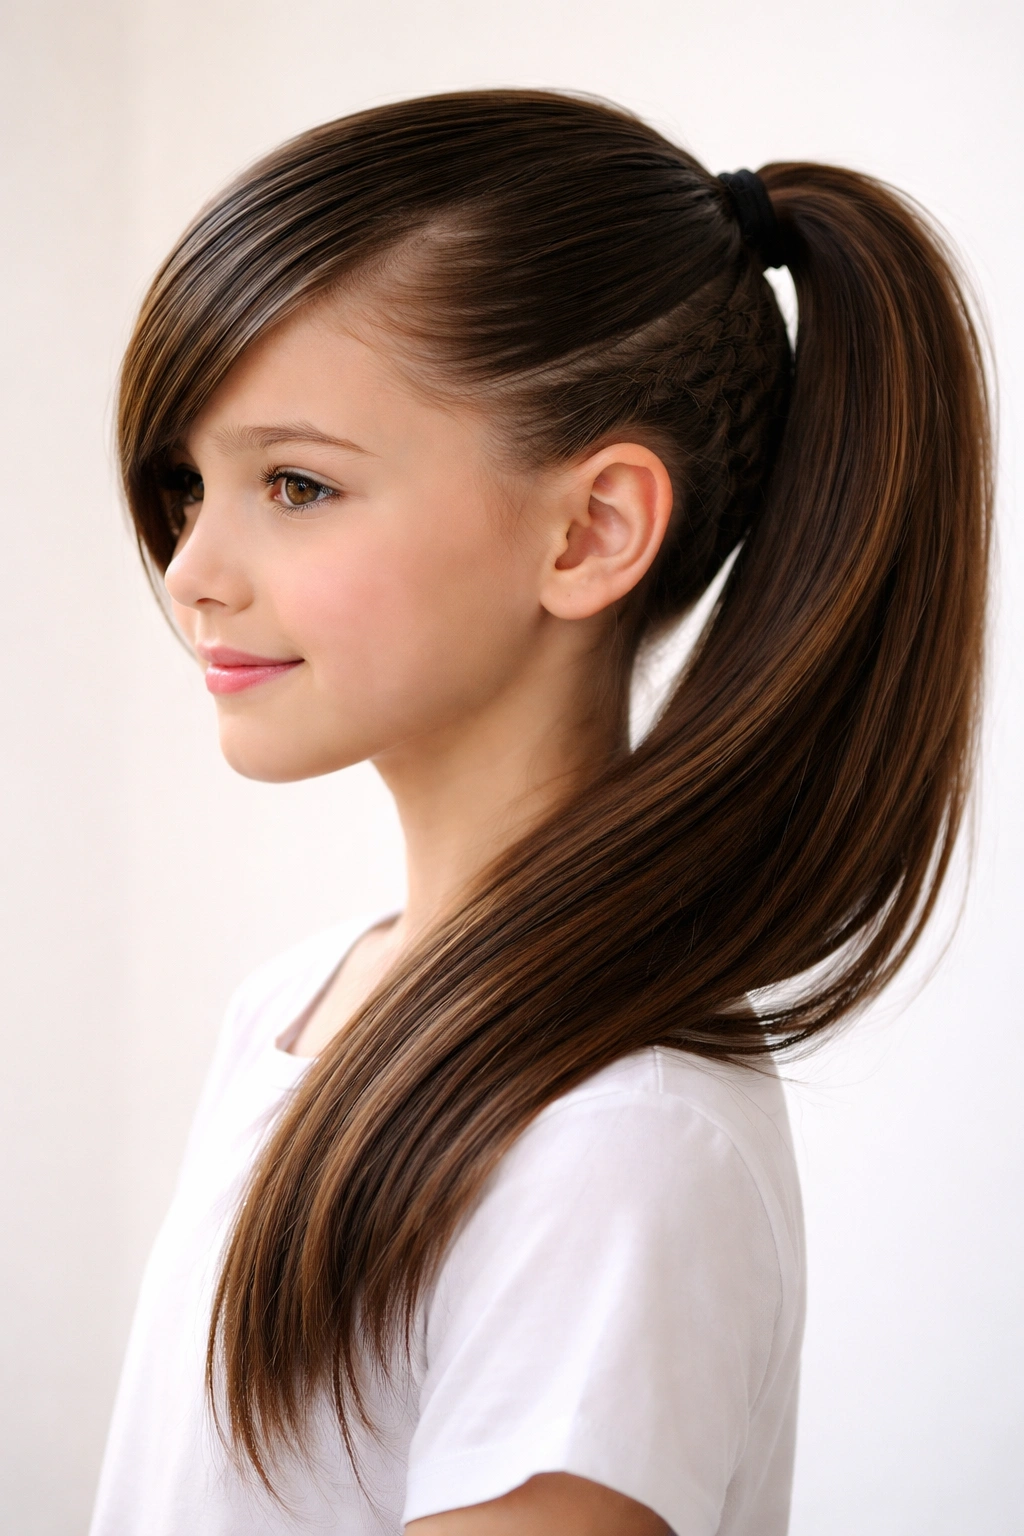
1. Classic Sleek Side Ponytail
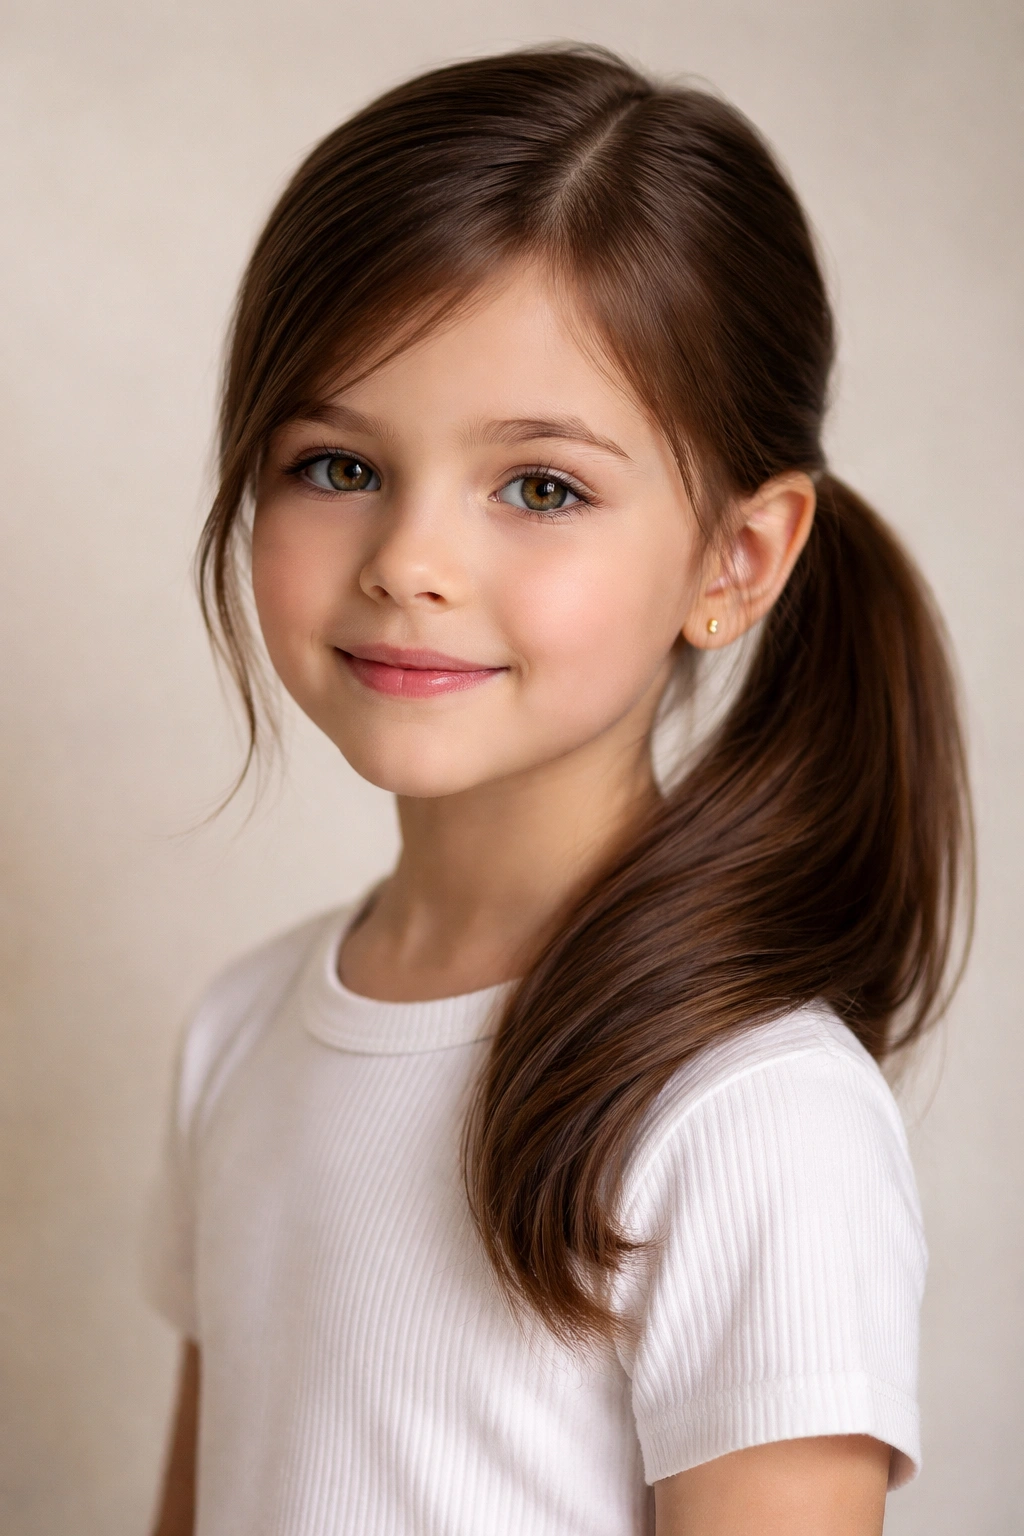
The classic sleek side ponytail is the foundation style — clean, timeless, and works for virtually any setting. This version sits lower than a traditional high ponytail, typically at ear level or just below, and uses a smooth, tight gather that looks polished without being fussy. It’s an excellent choice for school pictures, performances, or any time you want a put-together appearance that actually takes minimal effort.
Why Kids Love It
This style flatters every face shape and works with any hair length from shoulder-length upward. The lower placement feels less severe than a tight center ponytail while still keeping hair completely off the face. Best of all, you can leave a few face-framing pieces loose for a softer, less-styled appearance if your child prefers it.
How to Create This Look
- Start with brushed, dry or slightly damp hair
- Apply a light smoothing cream or serum to tame flyaways and add shine
- Brush all hair to one side — typically the right side, though left works just as well
- Gather the hair at the side, roughly where your child’s ear meets their neck
- Secure with a smooth elastic that matches your child’s hair color
- For extra polish, wrap a small section of hair around the elastic to hide it, then pin the wrapped section with a bobby pin
Pro tip: If flyaways are a struggle, a light mist of hairspray after smoothing helps keep everything in place all day, and it washes out easily at bedtime.
2. Braided Side Ponytail
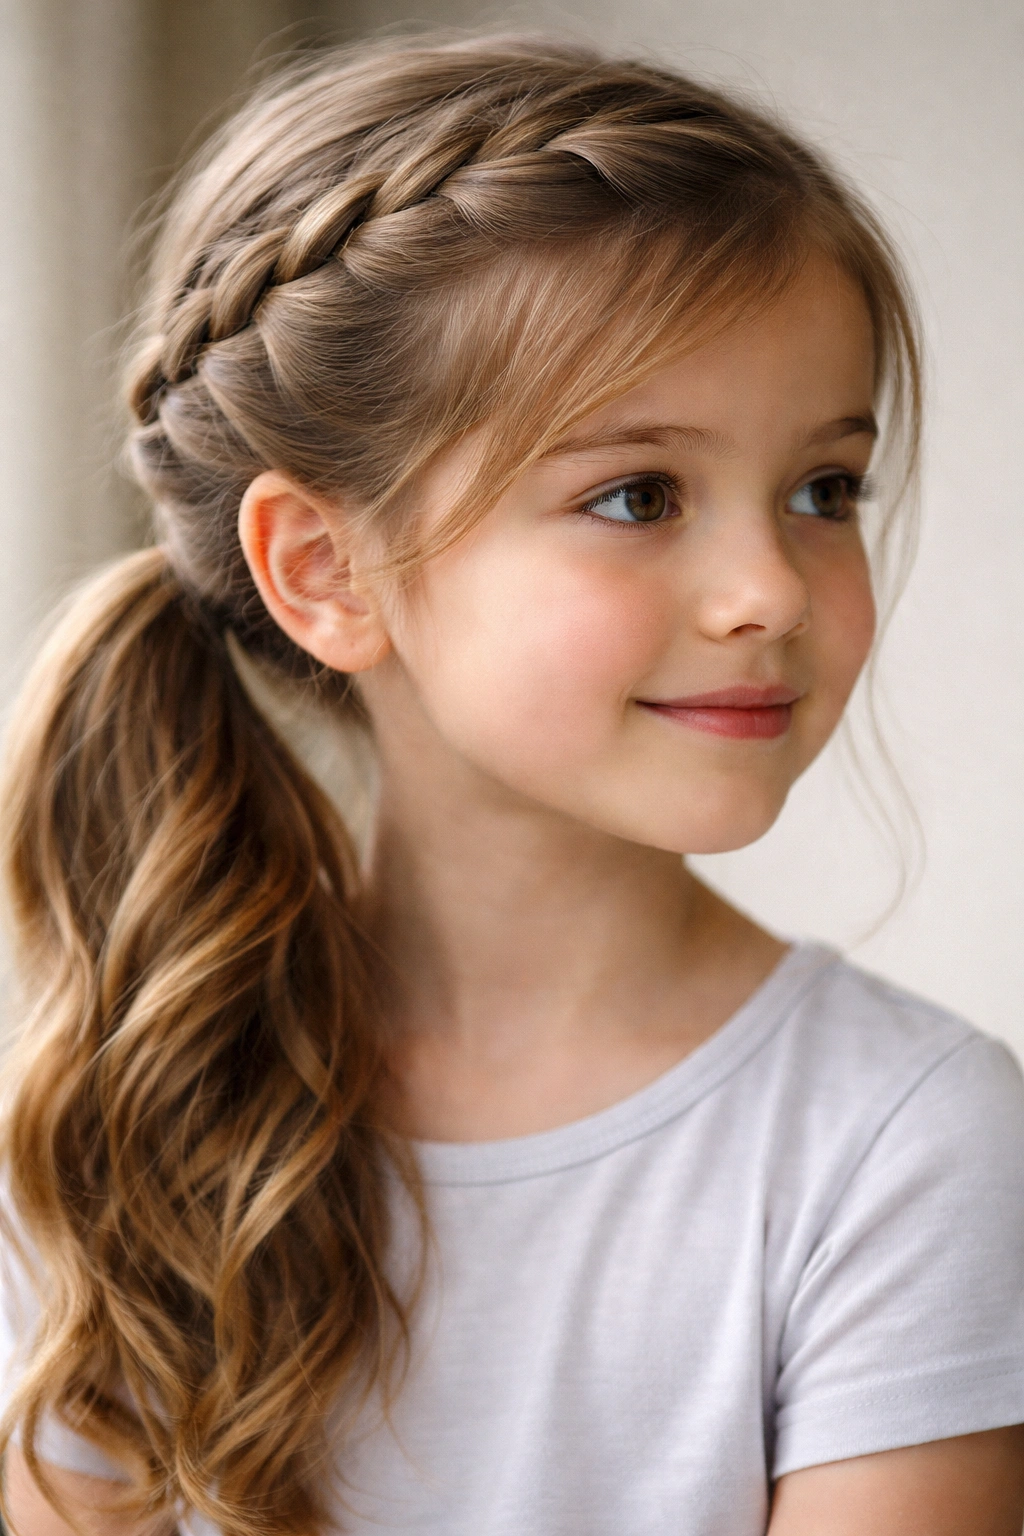
A braided side ponytail elevates the look instantly while actually making the style easier to wear because the braid locks everything in place. This version uses a Dutch or French braid that starts at the crown and leads into the gathered ponytail, creating a seamless, sophisticated look that feels special without looking overdone.
What Makes It Stand Out
The braid adds texture and visual interest while also serving a practical function — it helps keep the ponytail secure even during active play. Kids who are hard on their hairstyles (think gymnastics, playground running, sports) benefit hugely from this version because the braid anchors everything. It’s also genuinely easier to maintain throughout the day compared to a simple gathered ponytail.
Step-by-Step Creation
- Brush hair smooth and part it down the center or create a side part, depending on your preference
- Start a Dutch braid (braid pulling inward instead of outward, which gives a more textured look) at the crown on the side where you want the ponytail
- Braid down toward the back and side as you gather hair, ending roughly at ear level
- Gather the braid and all remaining loose hair into the ponytail position and secure with an elastic
- Gently pull sections of the braid slightly outward to create a fuller, more textured appearance — this is called “pancaking”
- Optional: weave a ribbon through the braid before securing the ponytail for added color and interest
Worth knowing: This style holds beautifully overnight, so you could even braid it before bedtime and have a ready-to-wear style the next morning.
3. Twisted Side Ponytail
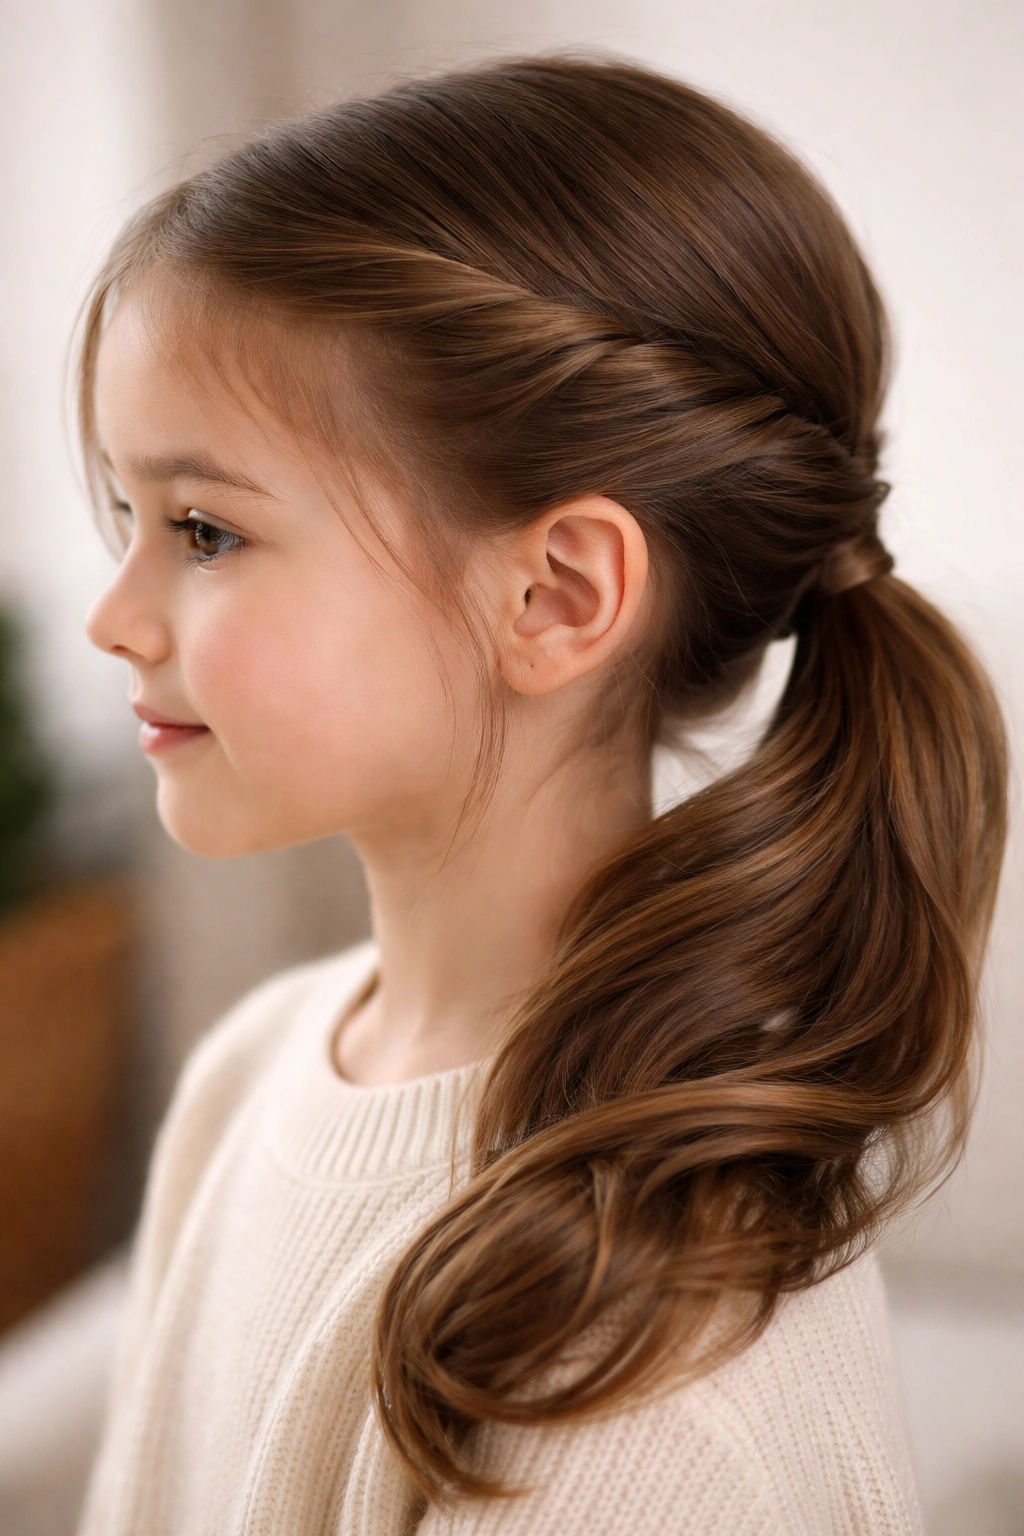
The twisted side ponytail creates the look of a braid with less actual braiding — it’s faster, easier to master, and kids often find it more comfortable because there’s no tension on the scalp. This version twists sections of hair together as they travel toward the side ponytail point, creating elegant definition without the precision a braid requires.
Why It’s Easier Than Braiding
Twisting is genuinely simpler than braiding, especially for people new to styling. There’s no three-strand coordination to worry about — you’re just twisting two sections of hair around each other. Kids with sensitive scalps often prefer twists because they can be looser and still look intentional. The finished look is sophisticated enough for special occasions but casual enough for everyday wear.
How to Execute It
- Brush hair smooth and decide which side you prefer
- Take a small section of hair from the crown on your chosen side
- Twist it gently as you move toward the back of the head, gradually incorporating more hair as you go (similar to a French braid structure, but twisting instead)
- Continue twisting until you reach the side ponytail position — roughly ear level or slightly lower
- Gather the twist and all remaining hair into a ponytail and secure
- Gently separate the twisted section slightly for more texture and visual appeal
- Add a decorative clip or ribbon at the base if desired
Pro tip: This style works beautifully on second-day hair or hair that’s slightly textured, because the texture actually makes the twist more defined and interesting-looking.
4. Half-Up Side Ponytail
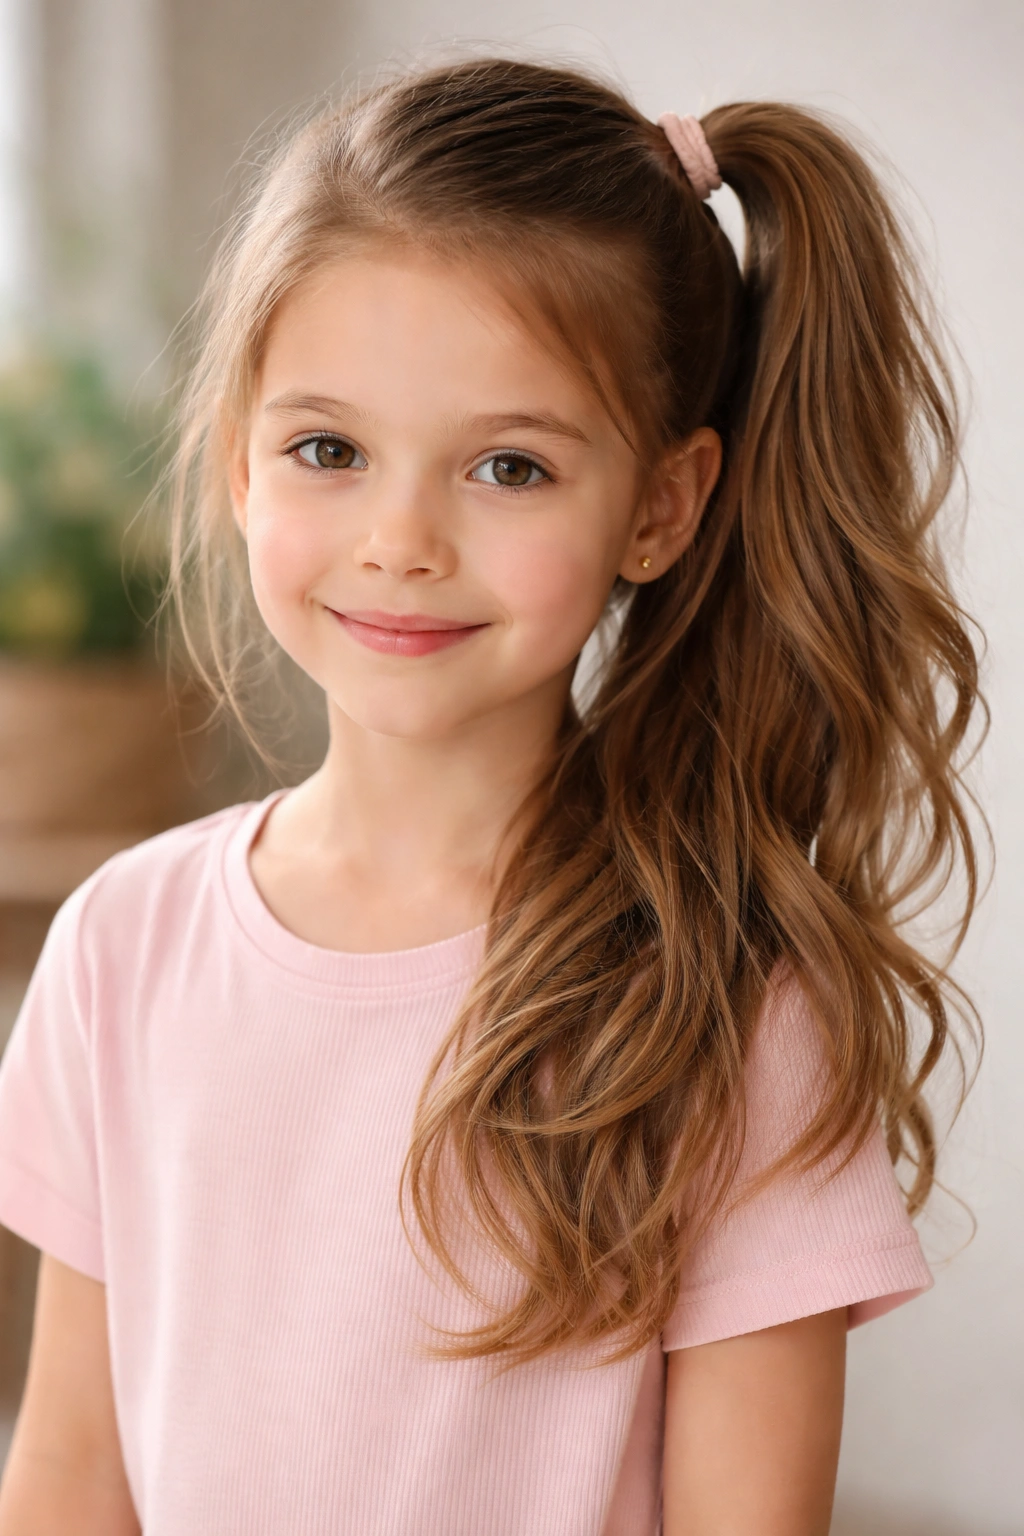
The half-up side ponytail keeps most of the hair down while gathering just the top section into a ponytail on the side. This style is perfect for kids who aren’t ready for a full ponytail but still want something off their face and neck. It’s wonderfully versatile — you can wear it casual with the bottom section straight, or add waves or curls to the loose portion for a dressier version.
Who It’s Perfect For
This style shines on kids with long, thick hair who find full ponytails uncomfortable, or kids who simply prefer having hair down. It’s also ideal for transition hairstyles — keeping hair mostly down while still being practical for active play or school days. The style feels less formal than a full ponytail, making it great for everyday wear while still looking intentional.
Creating the Look
- Brush the top section of hair smooth
- Gather just the crown and upper-back section toward your chosen side — leave roughly the bottom two-thirds of the hair loose
- Secure the gathered section with an elastic at the side
- Leave the bottom hair down and smooth, or add waves with a curling iron or braid waves in for texture
- Add a bow, clip, or decorative elastic to make the gathered section stand out
- Optional: braid or twist the gathered section before securing for added detail
Worth knowing: If your child’s bottom layer of hair tangles easily, consider using a leave-in detangler spray on that section before securing the ponytail.
5. Low Side Ponytail with Volume
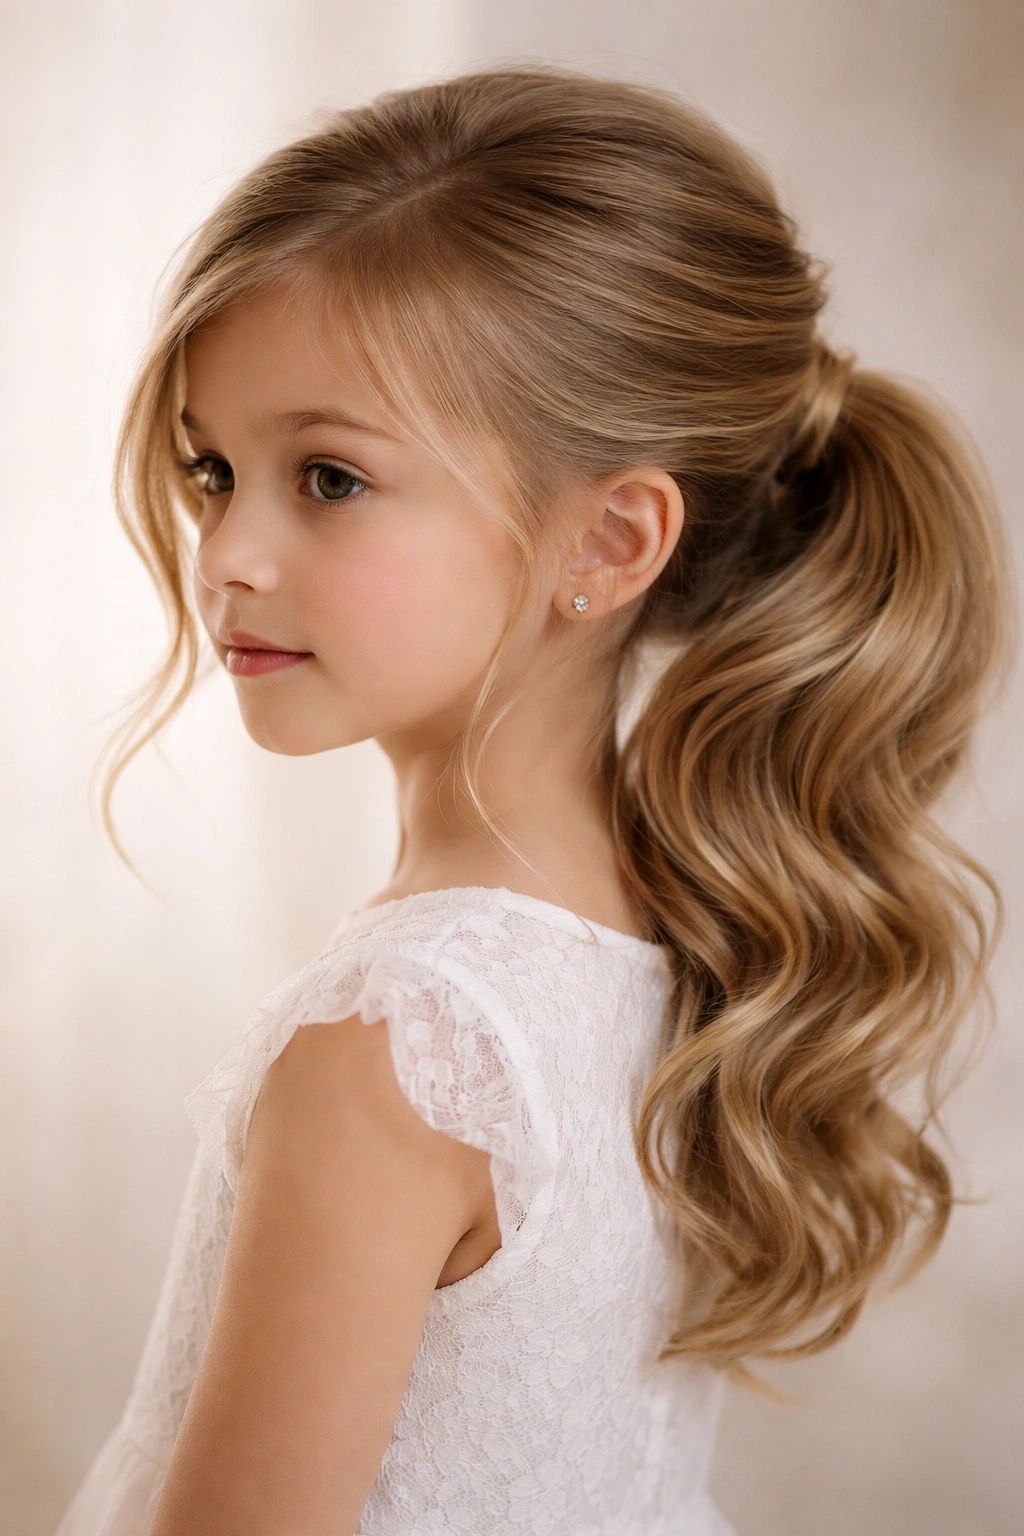
A low side ponytail positioned at the base of the neck creates a longer, more sophisticated silhouette than a higher side ponytail. This version incorporates techniques that add volume to the gathered section, making even fine or thin hair look fuller and more luxurious. It’s an excellent choice for special events or anytime you want to add a touch of elegance.
How to Add Volume
Volume comes from a few key techniques: teasing gently at the roots of the gathered section, backcombing specific areas, using a texturizing spray, or working with slightly wavy rather than perfectly straight hair. Curling the loose hair subtly before gathering adds volume too. The combination of these methods creates fullness without looking overstuffed or uncomfortable.
Building This Style
- Create texture by lightly curling or waving the hair using a curling iron or by braiding damp hair overnight
- Take the top and back section toward your chosen side
- Gently backc omb or tease at the roots of this section to add height and volume
- Smooth the outer layer gently so the teased section isn’t visible — you want to see fullness, not the teasing itself
- Gather everything into a low side ponytail and secure
- Wrap a small section of hair around the elastic to conceal it
- Fluff the gathered section gently with your fingers to emphasize the volume
- Consider adding a decorative clip or bow at the base
Insider note: If teasing feels too aggressive or damages your child’s hair, using a texturizing or volumizing spray before gathering achieves similar fullness with less manipulation.
6. Bubble Side Ponytail
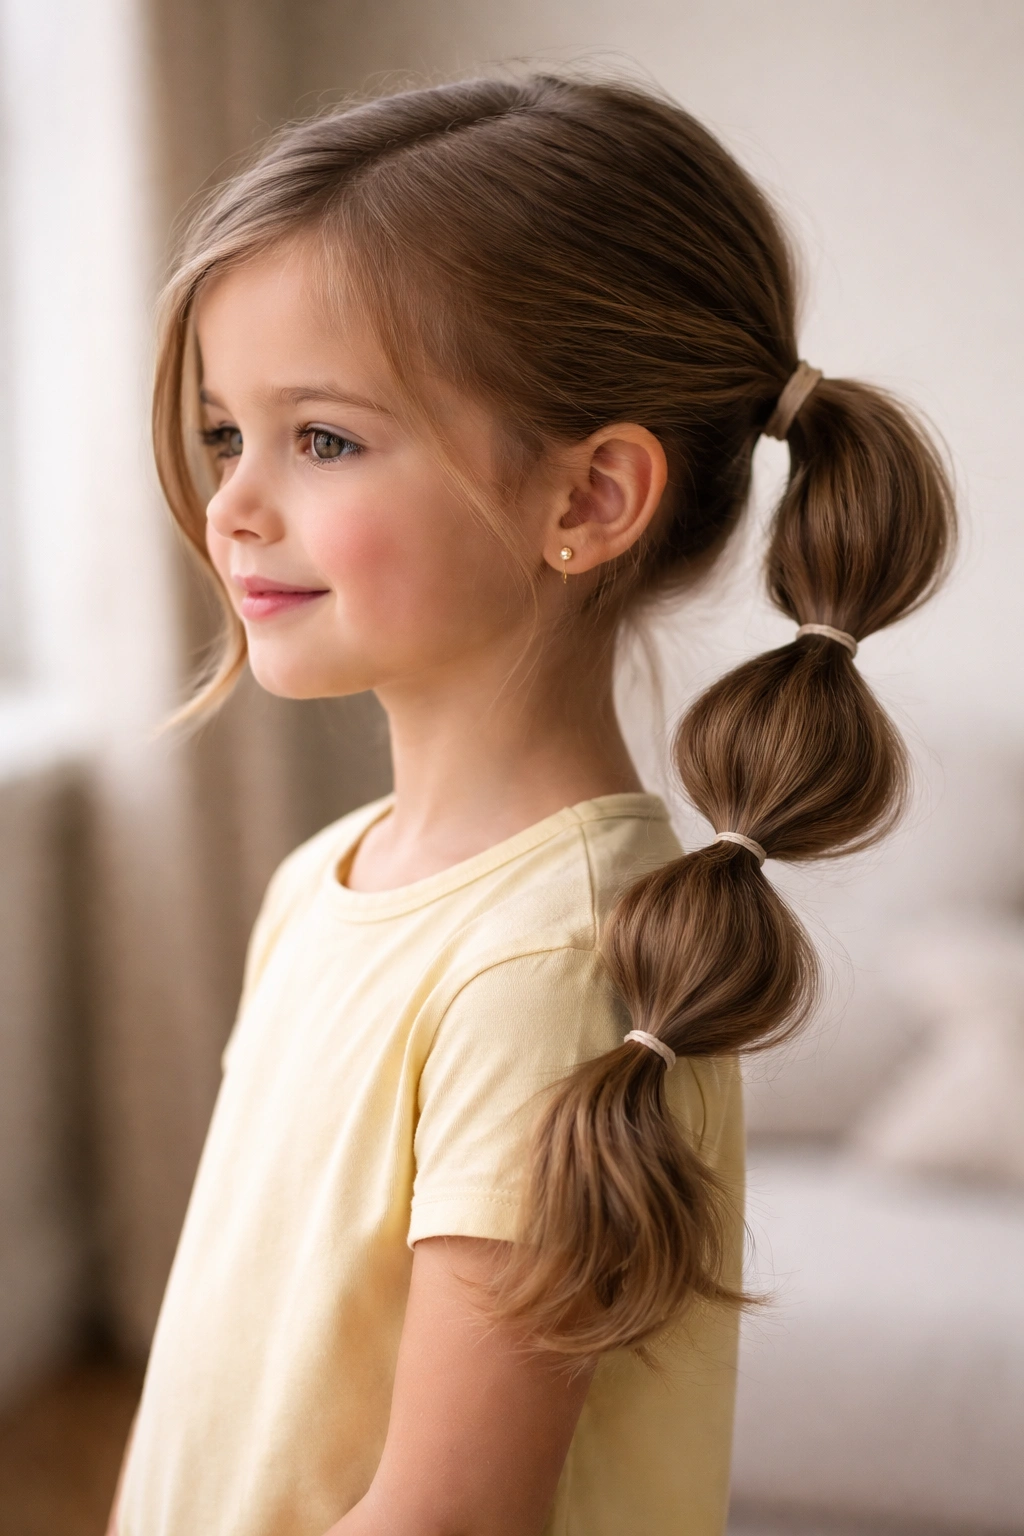
The bubble side ponytail is playful, fun, and absolutely beloved by kids — it’s like wearing an accessory and a hairstyle at once. This style uses multiple elastic bands placed down the length of the ponytail to create distinct “bubbles” of hair between each band. It looks intricate but takes only minutes once you have the basic gathered ponytail in place.
Why Kids Think It’s Cool
Bubble ponytails feel special and look way more complicated than they actually are. They work beautifully as a way to add visual interest to a simple ponytail without needing additional accessories, and kids can actually help create the bubbles themselves, which they find empowering. The style also holds extremely well during active play because the multiple elastics distribute the weight and tension.
Creating Bubble Sections
- Create a side ponytail and secure with your first elastic
- Decide how many bubbles you want — typically 3 to 5 depending on ponytail length
- Place your second elastic about 1 to 2 inches down from the first, gathering all the hair between the two elastics
- Continue adding elastics down the length of the ponytail, spacing them evenly
- Gently pull each bubble section outward slightly to create fullness and texture — they should look like little puffs
- Optional: add tiny clips, ribbons, or small bows around the elastics for color and personality
Pro tip: Use elastics in matching or coordinating colors — metallics, pastels, or colors that match the outfit make this style look even more intentional and polished.
7. Side Ponytail with Ribbon or Bow
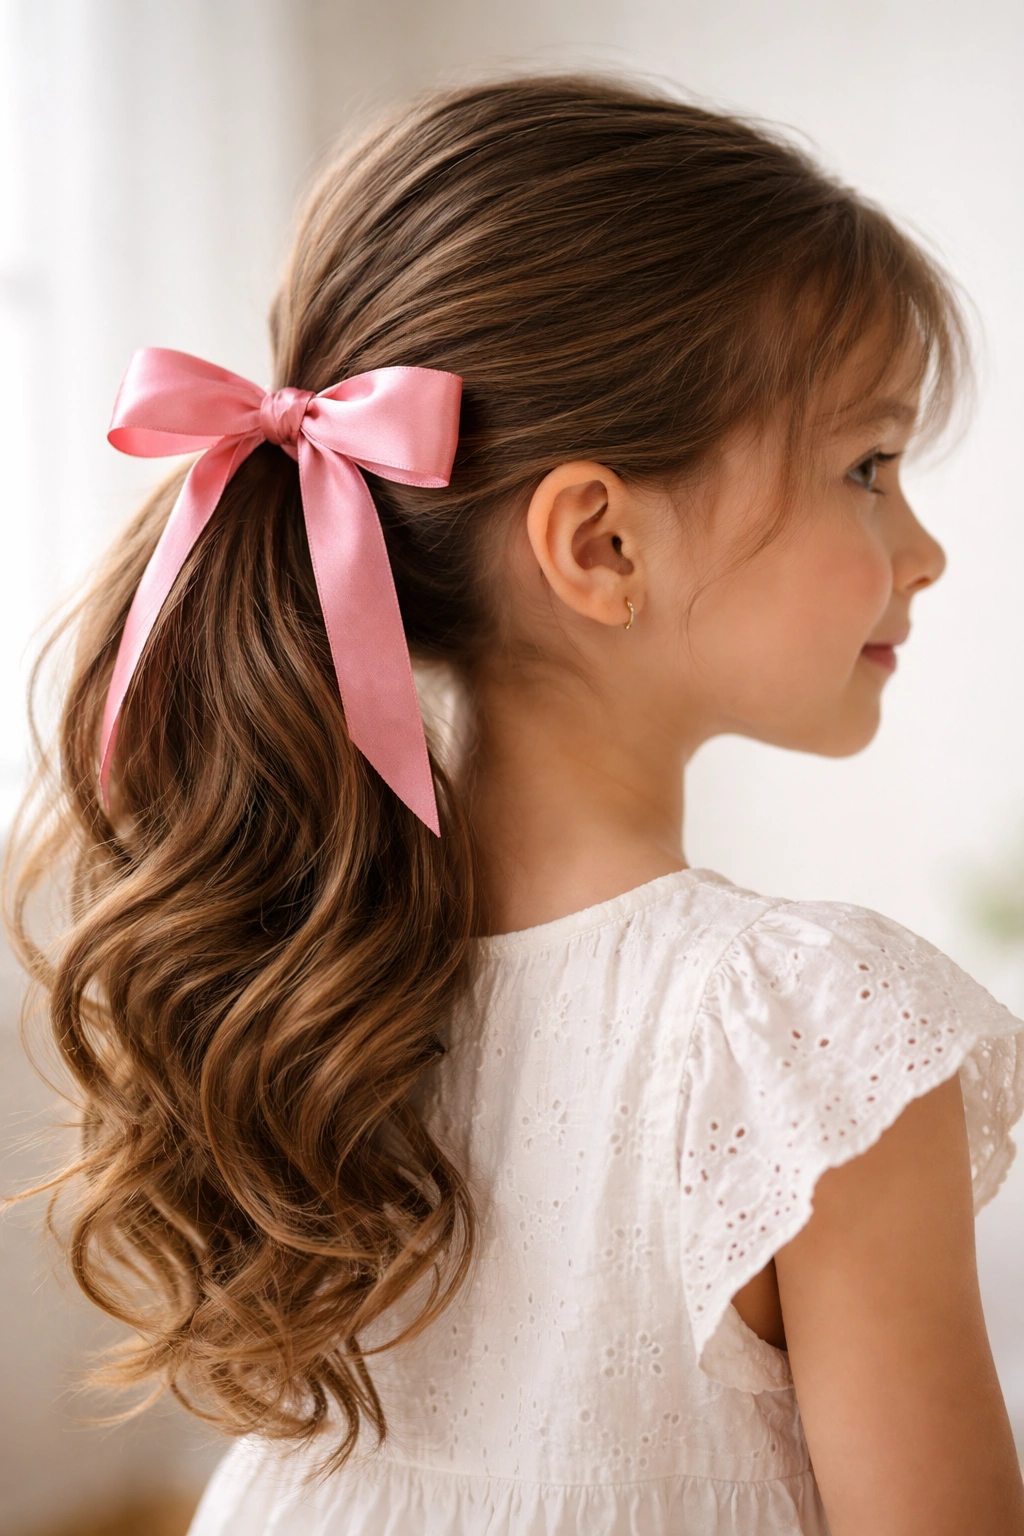
Adding a ribbon or bow to a side ponytail instantly elevates the style and works beautifully for dress-up occasions, photos, or anytime you want to add a pop of color. A well-chosen ribbon or bow transforms a simple ponytail into something special without requiring any additional styling technique. This is an easy way to customize the look and let your child’s personality shine through.
Choosing the Right Ribbon or Bow
Wider ribbons (1 to 2 inches) look more polished and graphic, while thinner ribbons feel more delicate and romantic. Bows add a more formal or vintage-inspired feel. Metallics, pastels, and prints all work — choose based on the occasion and your child’s preferences. You can also wrap a ribbon around the elastic itself for a wrapped-base effect, or tie a bow at the ponytail base for a traditional look.
How to Incorporate Ribbon
- Create your base side ponytail as usual and secure with an elastic
- Wrap a length of ribbon around the elastic base to conceal it, then tie a bow at the back or side
- Alternatively, thread ribbon through the elastic using a bobby pin before securing the ponytail
- For a woven effect, gently weave ribbon through the ponytail sections
- Secure the ribbon end with a small elastic or bobby pin so it doesn’t slip
- Trim the ribbon ends at an angle for a finished look
Worth knowing: Satin or grosgrain ribbons slip less and look more polished than cotton varieties. Avoid very long ribbon tails on active kids — they can get caught or stepped on.
8. Side Ponytail with Face-Framing Pieces
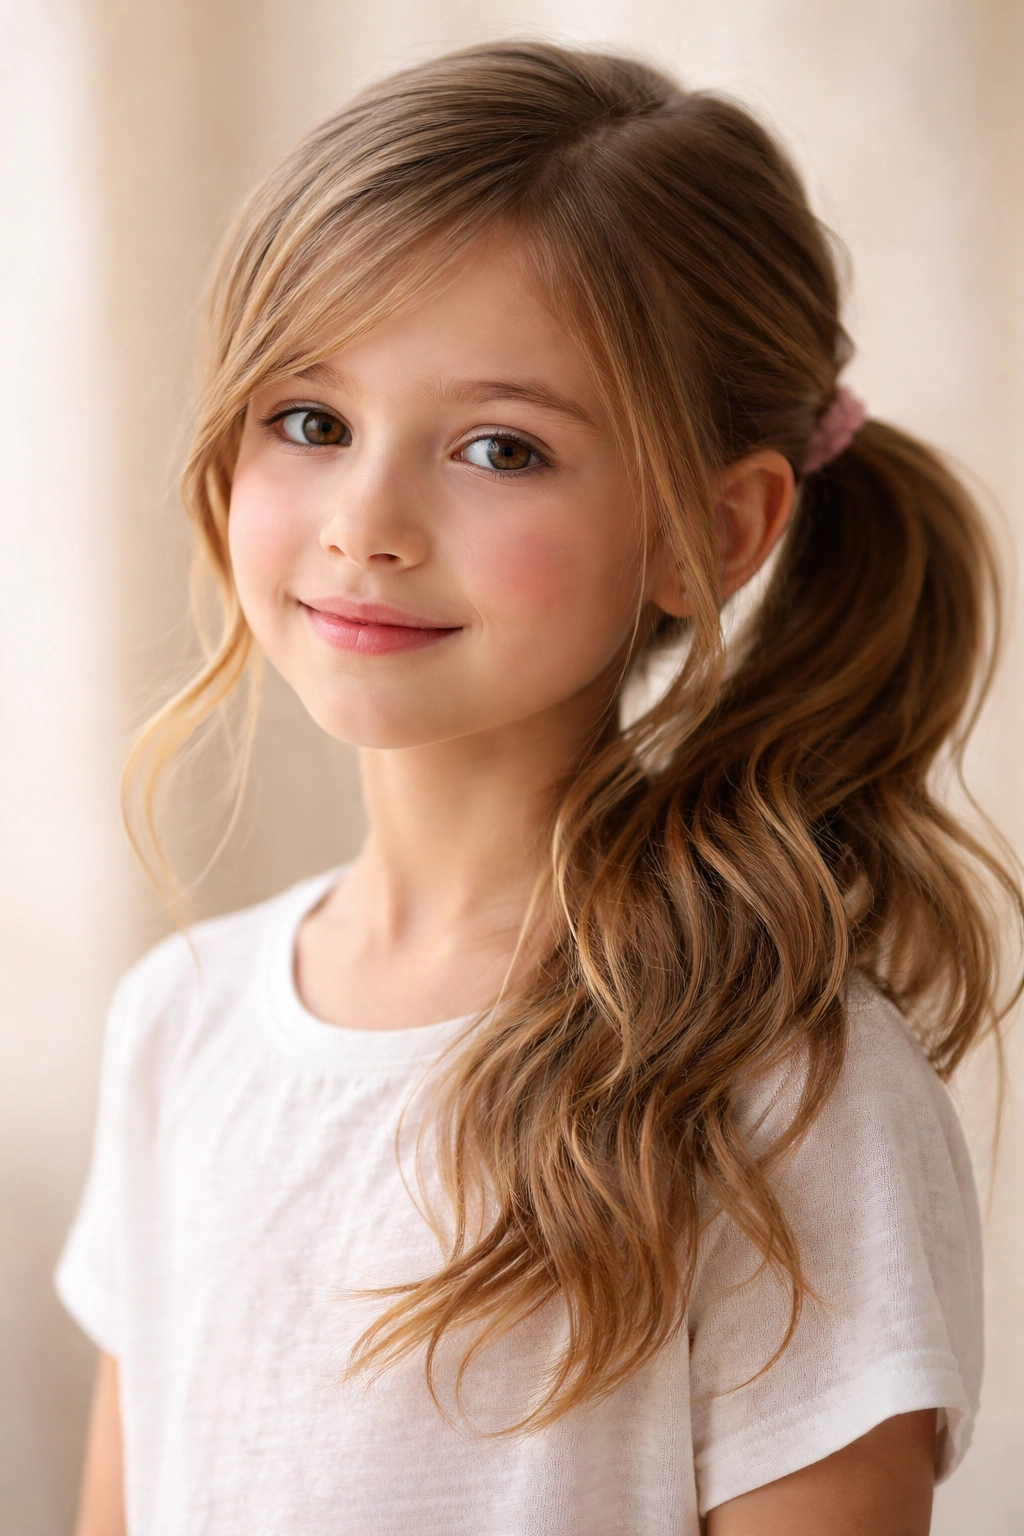
A side ponytail with intentionally loose face-framing pieces softens the look and flatters every face shape. Instead of securing all hair into the ponytail, you leave delicate sections around the face loose, creating a romantic, effortless vibe. This style works beautifully for kids who find tight ponytails uncomfortable or who simply prefer a softer aesthetic.
Why This Style is Flattering
Face-framing pieces draw attention to the eyes and create visual softness around the face. They work especially well for kids with longer, finer hair or those whose hair doesn’t sit smoothly when pulled back tightly. The style also allows some freedom — if your child wants the hair partially back rather than entirely secured, this delivers on both fronts. It feels intentional rather than like a half-finished hairstyle.
Creating Soft Framing
- Decide which pieces you want loose — typically 1 to 2 sections on each side of the face
- Brush these sections smooth and set them aside
- Gather the remaining hair into your side ponytail, being careful not to catch the face-framing pieces
- Secure the ponytail with an elastic
- Curl or wave the loose face-framing pieces gently with a curling iron for a softer look, or leave them straight for a sleeker version
- Use a light hairspray to encourage the loose pieces to stay in place
Pro tip: If the loose pieces feel messy or keep falling forward, try twisting them slightly before curling — the texture helps them hold shape better and stay put throughout the day.
9. Sleek Side Ponytail with Undercut Detail
This more modern take on the side ponytail adds an unexpected detail: a clean undercut or underside section that’s been gently teased or textured while the outer layer stays sleek. This creates visual contrast and a more contemporary vibe. It’s perfect for kids who love fashion-forward styles and appreciate interesting details.
The Undercut Effect
An undercut doesn’t mean actually cutting the hair — it’s a styling technique where you tease or crimp the underneath layers while leaving the top layer smooth. This creates texture and visual depth that reads as more sophisticated than a completely smooth ponytail. The technique works especially well on thicker hair or hair with natural texture.
How to Build This Style
- Create a side ponytail and secure loosely with an elastic
- Flip the ponytail forward and gently backcomb the underneath layers to create texture
- Flip back and smooth the outer layer so you see fullness without visible teasing
- Adjust the elastic tighter now that you’ve added volume underneath
- The result should be a sleek-looking ponytail with hidden texture that catches light beautifully
- Optional: add a decorative claw clip or metal barrette to emphasize the sleek crown
Insider note: This technique is especially useful for kids with fine hair who want the ponytail to look thicker and fuller without it actually being gathered too tightly.
10. Side Fishtail Braid Ponytail
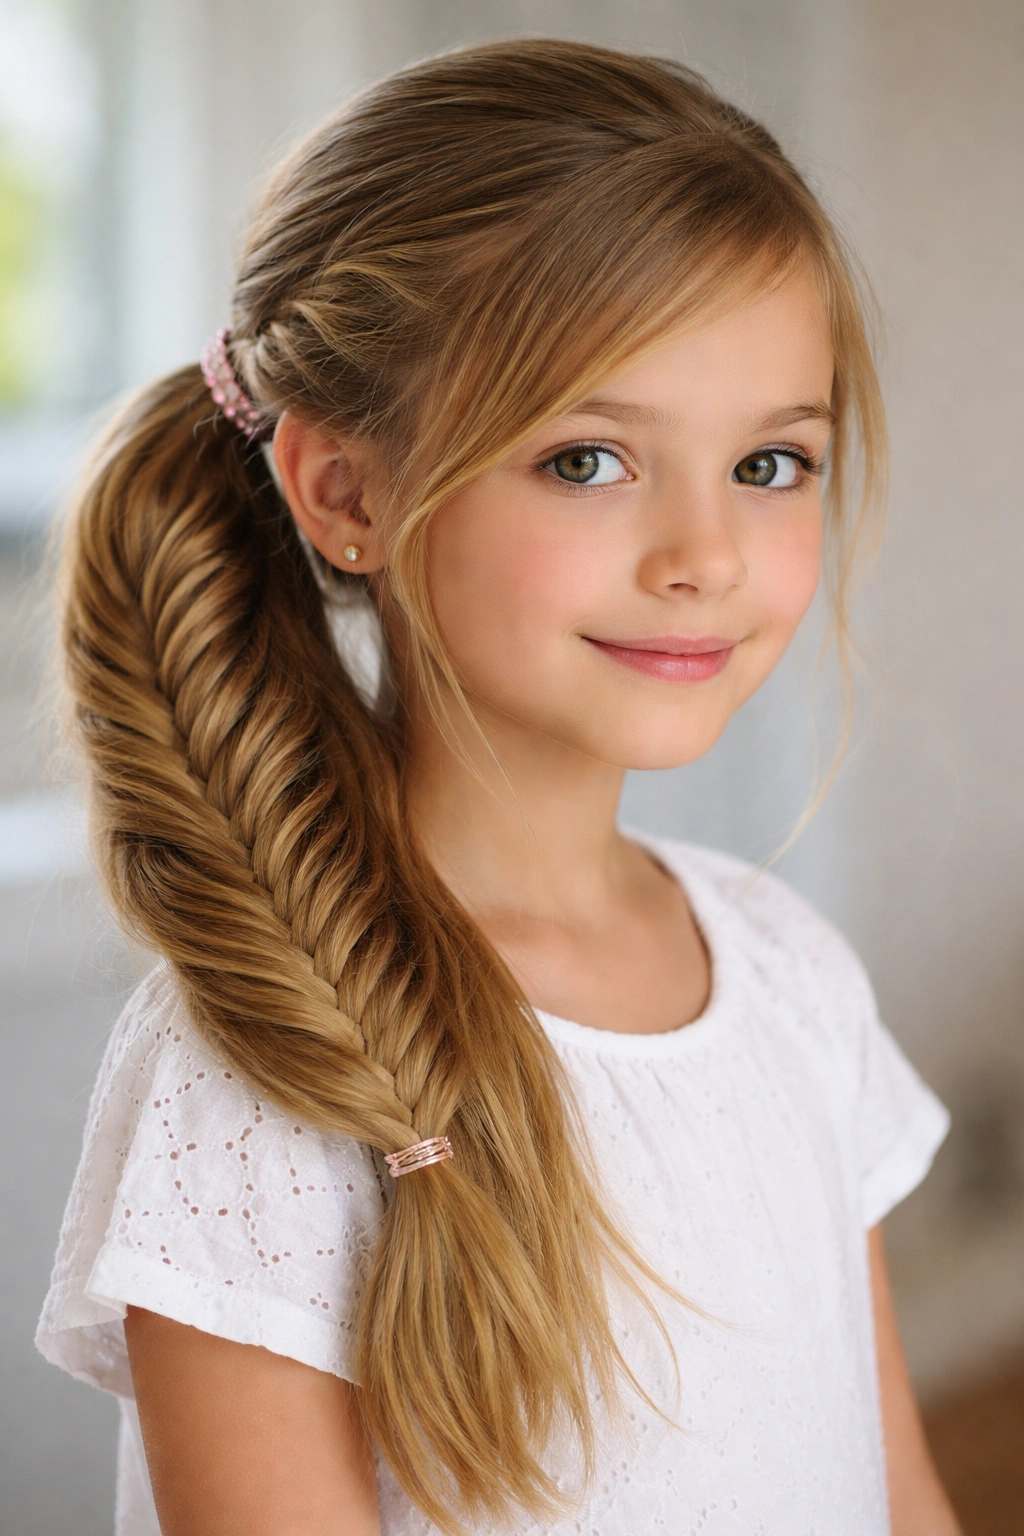
A fishtail braid is a different braiding technique from the traditional three-strand braid — it uses two sections of hair that weave across each other, creating a delicate, intricate-looking pattern. When gathered into a side ponytail, it’s absolutely stunning. This style looks incredibly complex but is actually manageable once you understand the technique.
Why Fishtail Looks So Special
The fishtail pattern creates an intricate, detailed look that feels fancier than a standard braid. It works beautifully on all hair types but especially shines on longer hair where the pattern is clearly visible. Kids who love details and appreciate that their hairstyle looks as unique as they are connect with this style immediately.
Fishtail Technique Explained
- Section off the hair you want to braid into two thick sections on one side
- Take a thin piece from the outer edge of the right section and cross it over to the left section
- Take a thin piece from the outer edge of the left section and cross it over to the right section
- Continue alternating — thin piece from right to left, then thin piece from left to right
- As you braid down, gradually incorporate more loose hair (like a French braid) until you’ve gathered everything into one side
- Secure the fishtail braid with an elastic at the ponytail position
- Gently pancake the braid to add texture and fullness
Pro tip: Practice the fishtail pattern on doll hair or a willing adult first — once your hands understand the rhythm, it becomes surprisingly easy.
11. Side Ponytail with Curls
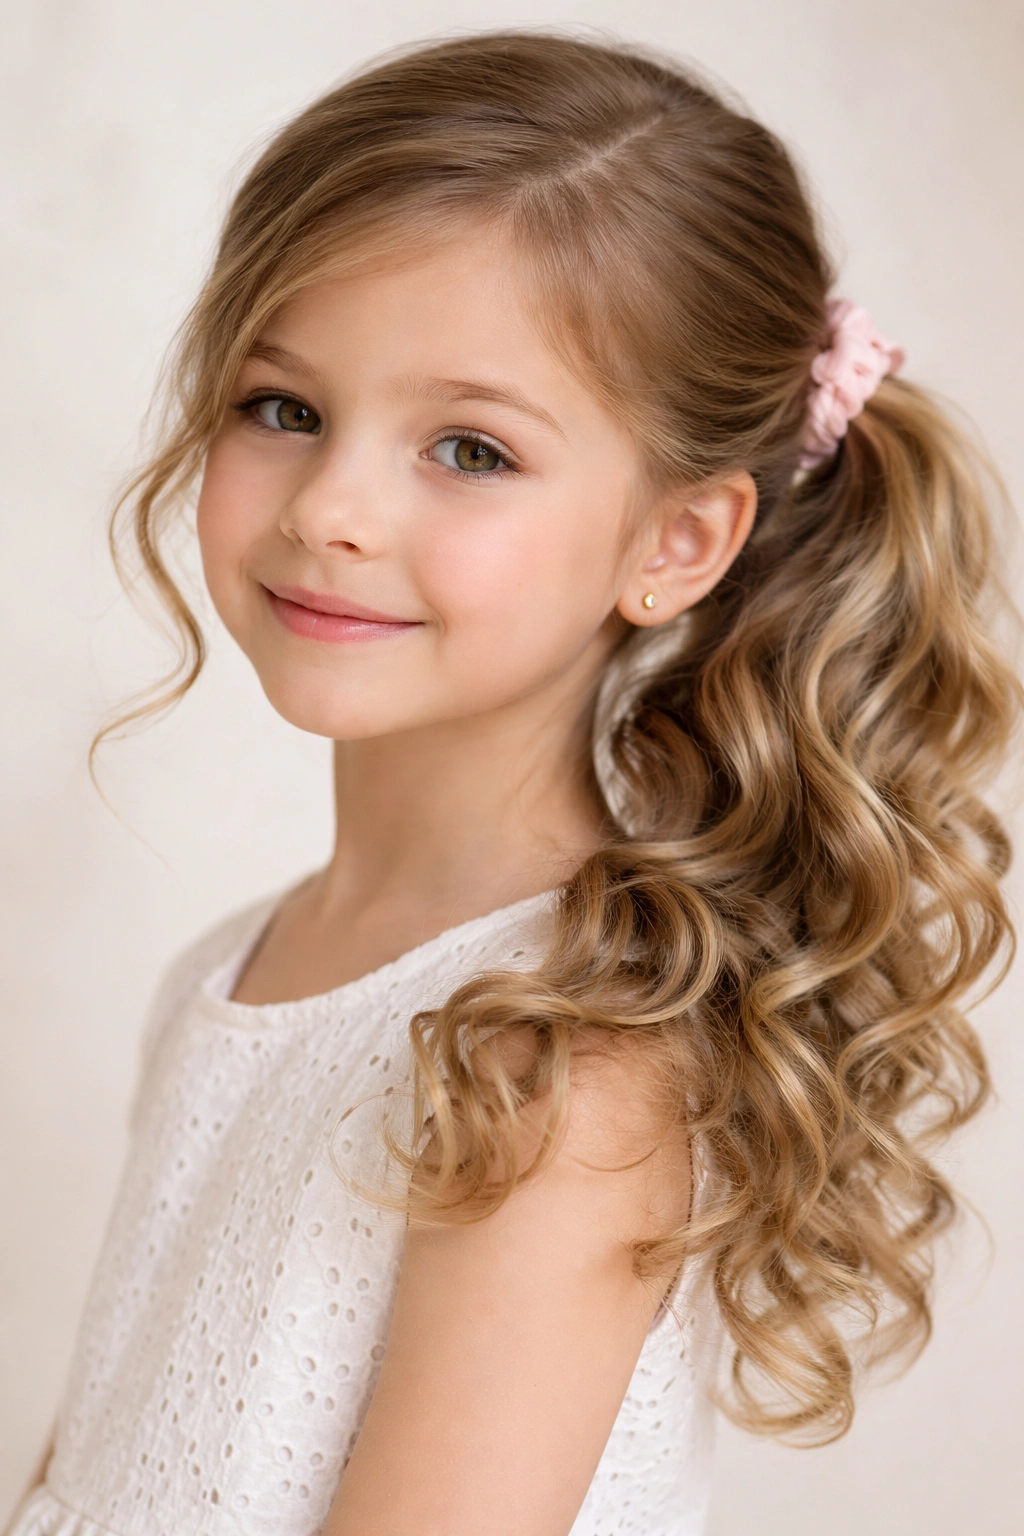
A side ponytail combined with loose waves or ringlet curls throughout the ponytail and loose hair is romantic, polished, and photograph-ready. This style works for special occasions, performances, or anytime you want to create that “tried but effortless” aesthetic. The curls add movement and elegance while the side ponytail keeps the style structured and intentional.
Curling for Longevity
For curls that actually last through the day, start with clean, dry hair and use a curling iron or wand to create the curls before gathering the ponytail. Curls last longer on second-day hair or hair that’s been texturized with dry shampoo or texturizing spray. Using a heat protectant product before curling prevents damage and helps curls hold better. Finishing with light hairspray sets everything without making curls feel stiff or crunchy.
Building the Curled Ponytail
- Apply heat protectant spray to clean, dry hair
- Section the hair and curl with a curling iron, waving away from the face for a flattering direction
- Allow curls to cool completely before gathering
- Once cool, gently gather the side ponytail, trying not to disrupt the curl pattern too much
- Secure with an elastic — work gently to avoid flattening the curls
- Use your fingers to separate and fluff the curls and any loose sections
- Optional: add a ribbon, bow, or delicate clip to coordinate with an outfit
Worth knowing: Curls hold longest on hair that’s slightly textured or wavy to begin with. If your child has very straight hair, consider adding texture with waves the night before by braiding damp hair or using a texturizing spray.
12. Double Side Ponytail
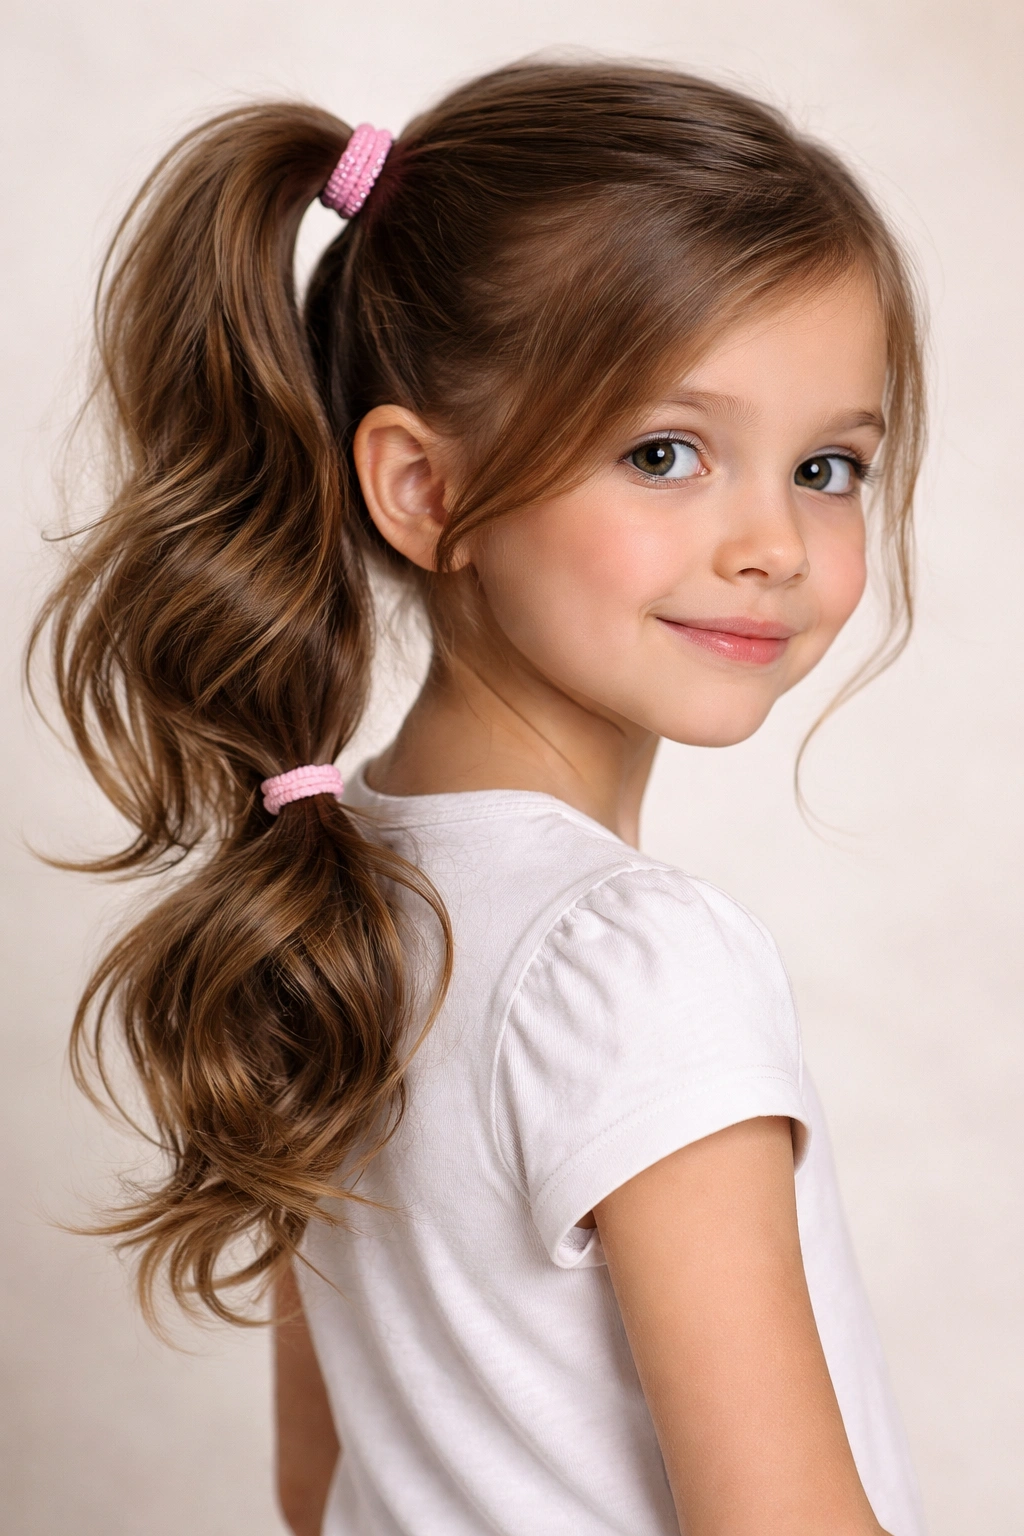
The double side ponytail is playful, youthful, and absolutely perfect for younger kids or anyone who loves a fun, statement-making style. This version gathers two distinct ponytails on the same side of the head — one higher at the crown and one lower at the nape — creating a stacked, eye-catching effect. It’s easier than it sounds and works beautifully on all hair types and lengths.
Why Double Works
Double side ponytails distribute the weight more evenly than a single ponytail, so they’re comfortable for kids who usually find ponytails restrictive. They also add volume and visual interest — the style looks fun and playful without requiring braiding or complex techniques. The double effect also works beautifully on kids with wavy or textured hair because the individual sections read as fuller.
Creating Two Distinct Ponytails
- Brush hair smooth and decide which side you prefer
- Take the top section of hair (roughly the crown and upper back) and gather it into a ponytail on your chosen side
- Secure with an elastic
- Take the remaining loose hair and gather it into a second ponytail directly below the first, positioning it at roughly ear level or slightly lower
- Secure with another elastic — match your elastics or use coordinating colors for visual interest
- Optional: add ribbons, bows, or clips to each ponytail separately for a coordinated look
- Gently fluff both sections to add volume and texture
Pro tip: Use slightly different sized elastics — a standard size for the top and a slightly smaller one for the bottom — to create visual distinction and make the style feel more intentional and designed.
Final Thoughts
Side ponytails offer endless possibilities for styling kids’ hair in ways that are practical, comfortable, and genuinely cute. Whether your child prefers sleek minimalism, playful bubbles, romantic curls, or braided detail, there’s a side ponytail variation that matches their personality and your skill level. Most of these styles take fewer than ten minutes once you’ve practiced them once or twice, making them perfect for busy school mornings, special events, or just because.
The beauty of side ponytails is that they work on every hair type, length, and texture — you just adapt the technique slightly based on what you’re working with. Fine hair benefits from teasing and layering for volume, while thicker hair might need less elastic security because it naturally holds together better. Curly or textured hair actually shines with many of these styles because the natural texture adds visual interest automatically.
Keep a collection of elastics, clips, ribbons, and bows on hand so your child can help choose and create their own styles. Kids who feel involved in their hairstyling decisions develop confidence and creativity around their appearance. Most importantly, remember that the “perfect” side ponytail is whichever one makes your child feel comfortable, confident, and ready to take on their day.