The butterfly braid has quietly become one of the most elegant and versatile braiding techniques in hairstyling. Unlike traditional braids that create texture through multiple intersecting strands, the butterfly braid uses a clever lace-braiding method that produces a delicate, openwork appearance—almost like butterfly wings. When combined with a polished ponytail, this braid transforms an everyday hairstyle into something sophisticated enough for professional settings, special events, or simply a more intentional version of your day-to-day look. The beauty of this technique lies in its ability to feel both intricate and streamlined at the same time, which is precisely why it’s become such a favorite among people who want their hair to look put-together without appearing overdone.
What makes the butterfly braid ponytail especially appealing is its incredible range of adaptability. Whether you have thick, textured hair or fine, straight strands, there’s a version of this style that will work beautifully for your hair type and personal aesthetic. You can wear it sleek and sculpted for a modern, minimalist vibe, or you can encourage some softness and texture into the braid for something a bit more romantic and relaxed. The ponytail placement—whether it sits high, low, or somewhere in between—completely changes the overall mood and suitability of the style. High placements feel energetic and polished, while lower placements lean into a more sophisticated, mature elegance.
The 12 variations below showcase the range of what’s possible when you combine butterfly braiding with ponytail styling. Each one offers a distinct look while maintaining that signature polished quality that makes this technique worth mastering. Whether you’re preparing for a job interview, a first date, a family gathering, or simply a day when you want to feel more assembled, one of these styles will deliver exactly the effect you’re after.
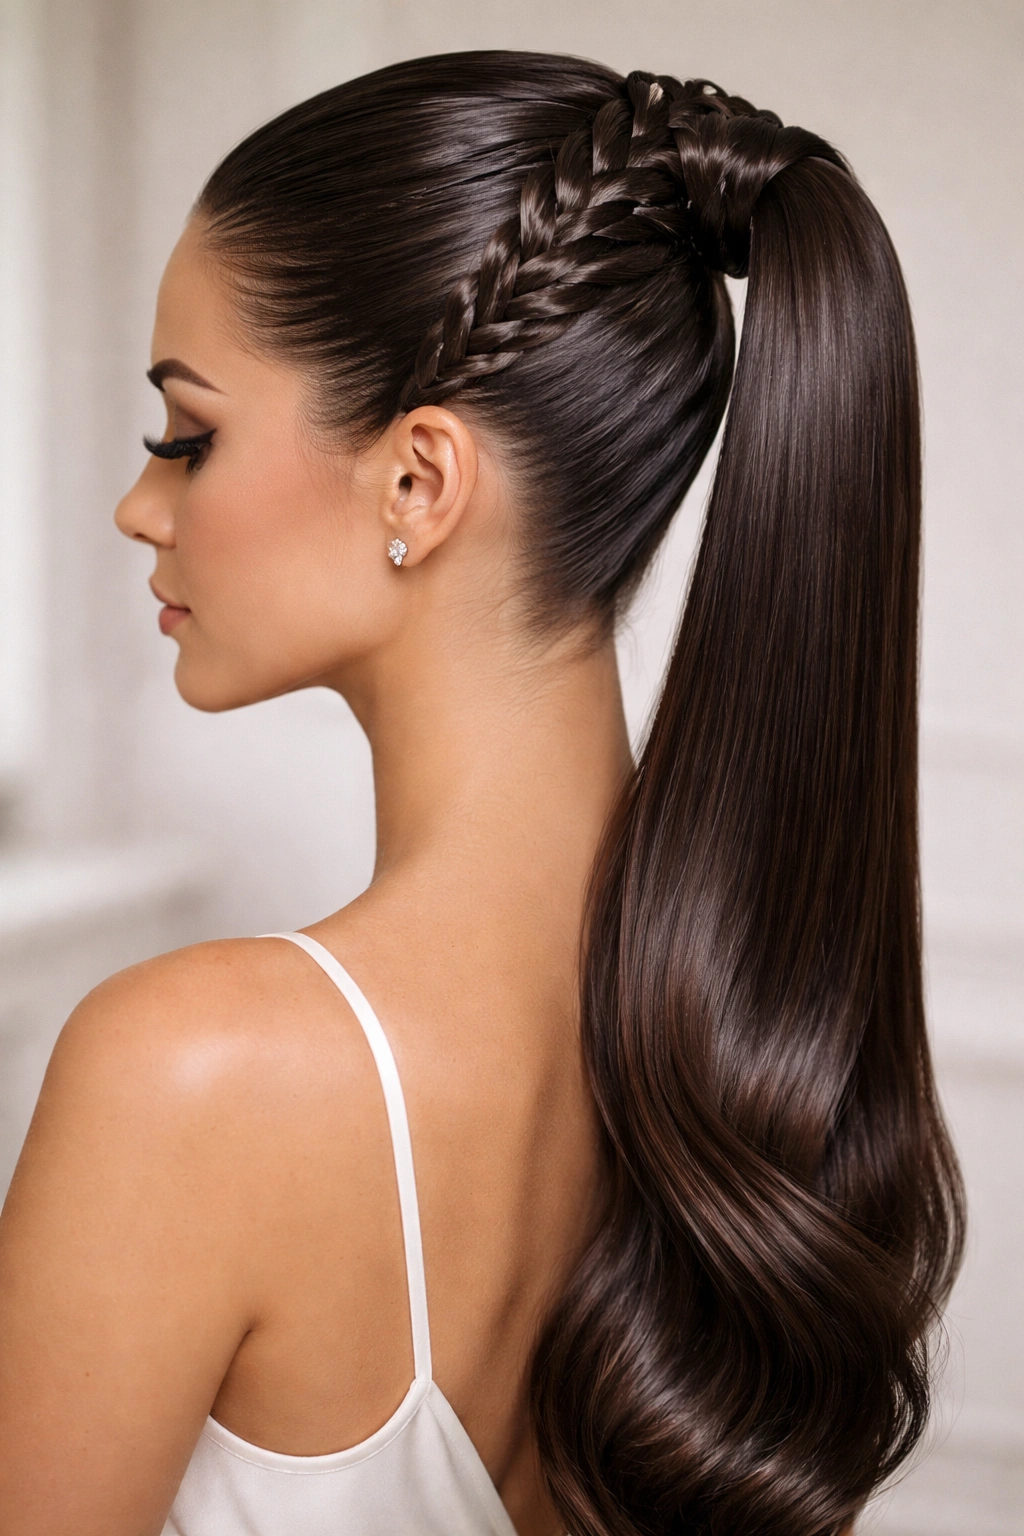
1. Classic High Butterfly Braid Ponytail
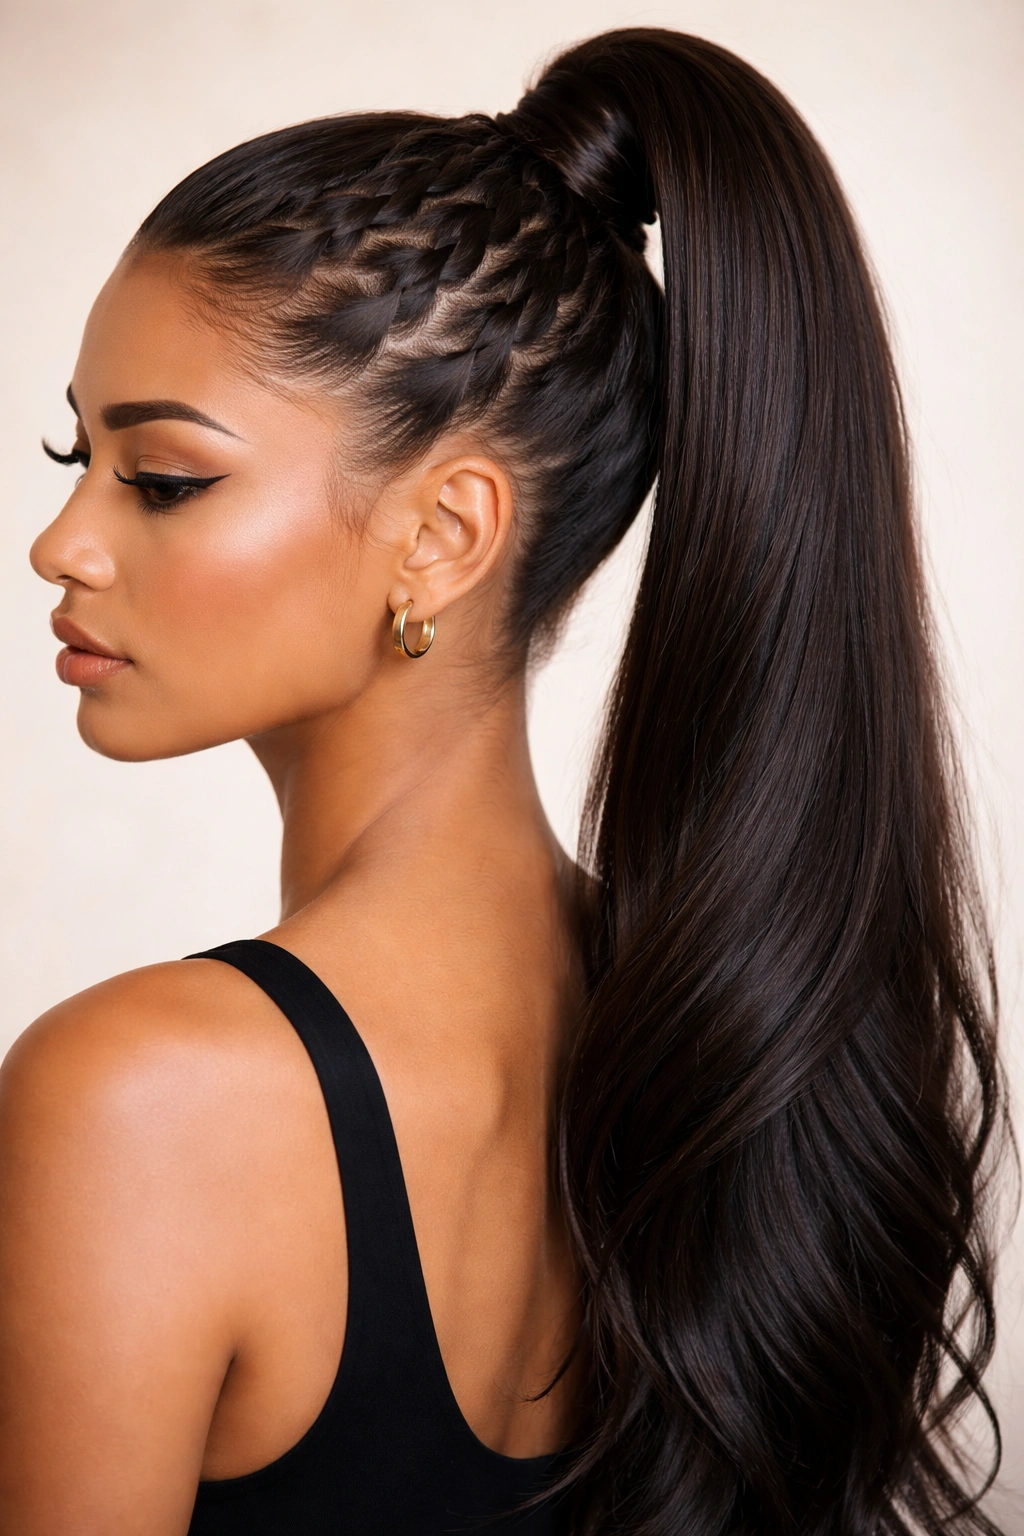
The classic high butterfly braid ponytail is the foundation style that most people picture when they think of this hairstyle combination. This version features a butterfly braid that starts at the crown of the head and flows directly into a high, sleek ponytail at the back. The braid occupies roughly the upper third or half of the head, creating a beautiful visual frame for the face while the lower portion forms a clean, smooth ponytail.
Why It Works for Almost Everyone
This placement and style combination is genuinely flattering across most face shapes and hair types. The braid draws attention upward, which naturally enhances facial features and bone structure. The high placement also works with a wide range of outfits—it’s polished enough for professional environments like offices, courtrooms, or formal dinners, yet youthful and energetic enough for casual, active days. The open pattern of the butterfly braid shows more of your scalp than a traditional braid would, which actually makes this style work better for people with finer hair who might worry about thick braids looking disproportionate.
How to Achieve This Look
Start with hair that’s slightly damp or has some texture to it—freshly washed and dried hair tends to be too slippery for clean butterfly braiding. Section off a starting point at your crown (roughly where you’d start a standard three-strand braid) and begin lace-braiding by taking small sections from the outer edges and weaving them into the center strand pattern, creating that characteristic butterfly wing effect. Once you’ve braided about 3–4 inches or until you reach where you’d naturally place your ponytail, gather all your hair into that high ponytail at the back. Use a clean, dark elastic that matches your hair color, then smooth the ponytail section with a fine-tooth comb or edge brush to eliminate any flyaways for that polished finish.
Pro tip: Apply a light smoothing serum or anti-frizz cream to the butterfly braid section before you start braiding—it helps the braid lay flatter and catch light beautifully, while also making the detail work more visible.
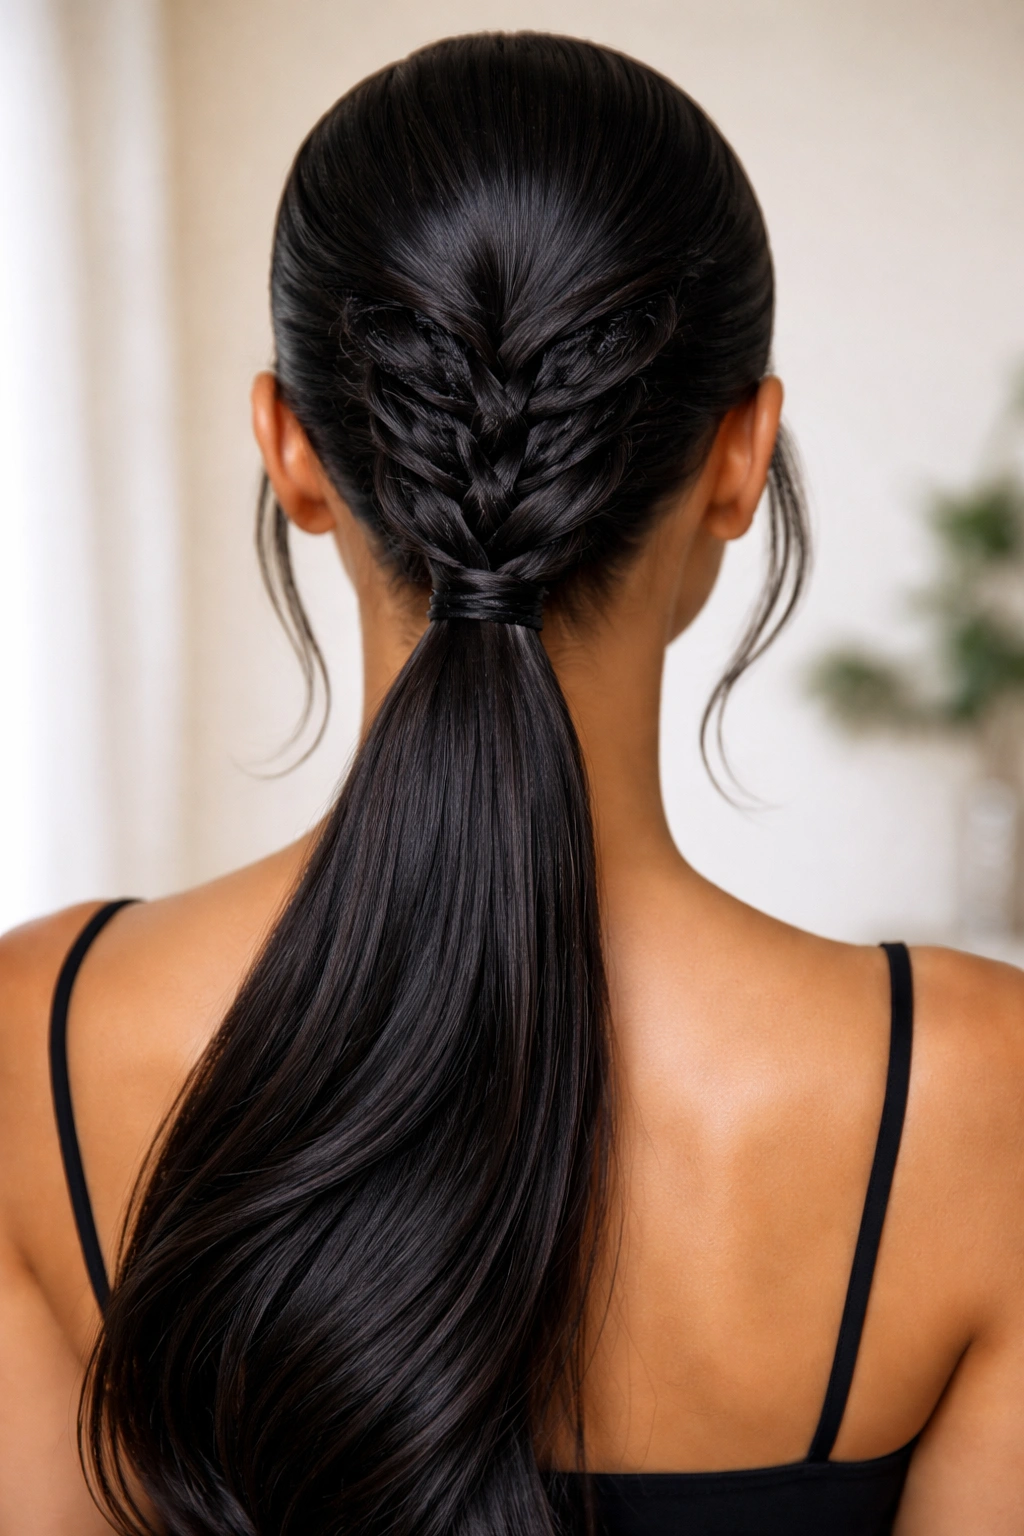
2. Low Butterfly Braid Ponytail with Wrap
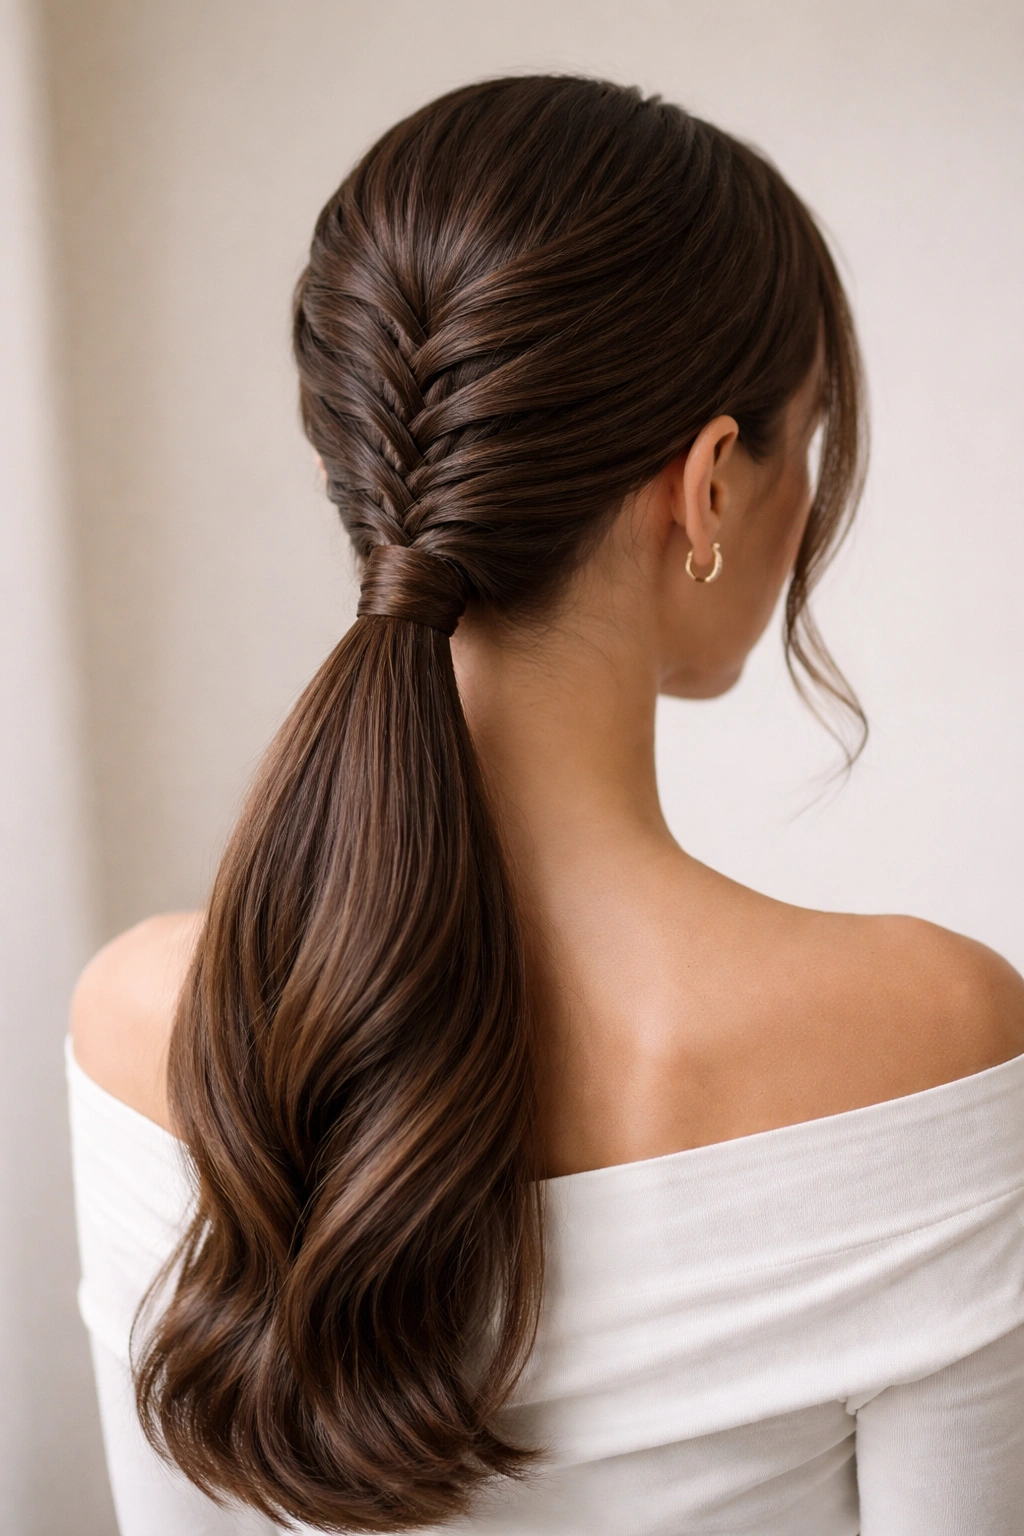
The low butterfly braid ponytail shifts the entire energy of the style downward, creating a more sophisticated, understated appearance. In this version, the butterfly braid starts further back on the head—often at the nape of the neck or just above it—and feeds directly into a low ponytail. This placement feels inherently more mature and works beautifully for professional settings where you want to look polished but not overly styled. The low positioning also reveals more of your neck and shoulders, which can be especially flattering in certain necklines or when you’re wearing jewelry.
The Wrap Element That Changes Everything
What elevates the low butterfly braid ponytail into truly polished territory is the wrap detail. After securing your low ponytail, take a thin section of hair from the base of the ponytail and wrap it around the elastic, pinning the wrapped section underneath with a bobby pin that matches your hair color. This wrap completely conceals the elastic and creates a finished, intentional look that immediately reads as more elevated and professional. It’s a small detail, but it’s the difference between “I quickly pulled my hair back” and “I carefully styled my hair.”
Best Scenarios for Wearing It
This variation shines in environments where understated elegance matters—think interviews, client meetings, formal dinners, or professional events. It’s also an excellent choice if you’re wearing your hair down most of the time but want something that feels fresh and intentional. The low placement is particularly flattering if you have a longer neck or enjoy wearing off-shoulder tops, strapless dresses, or statement necklaces.
Worth knowing: If your hair is very thick or dense, you might want to braid only a portion of your hair at the back rather than attempting a full-head butterfly braid that leads into a low ponytail. Braiding just one side or creating a thinner braid section can work just as beautifully and is often easier to manage.
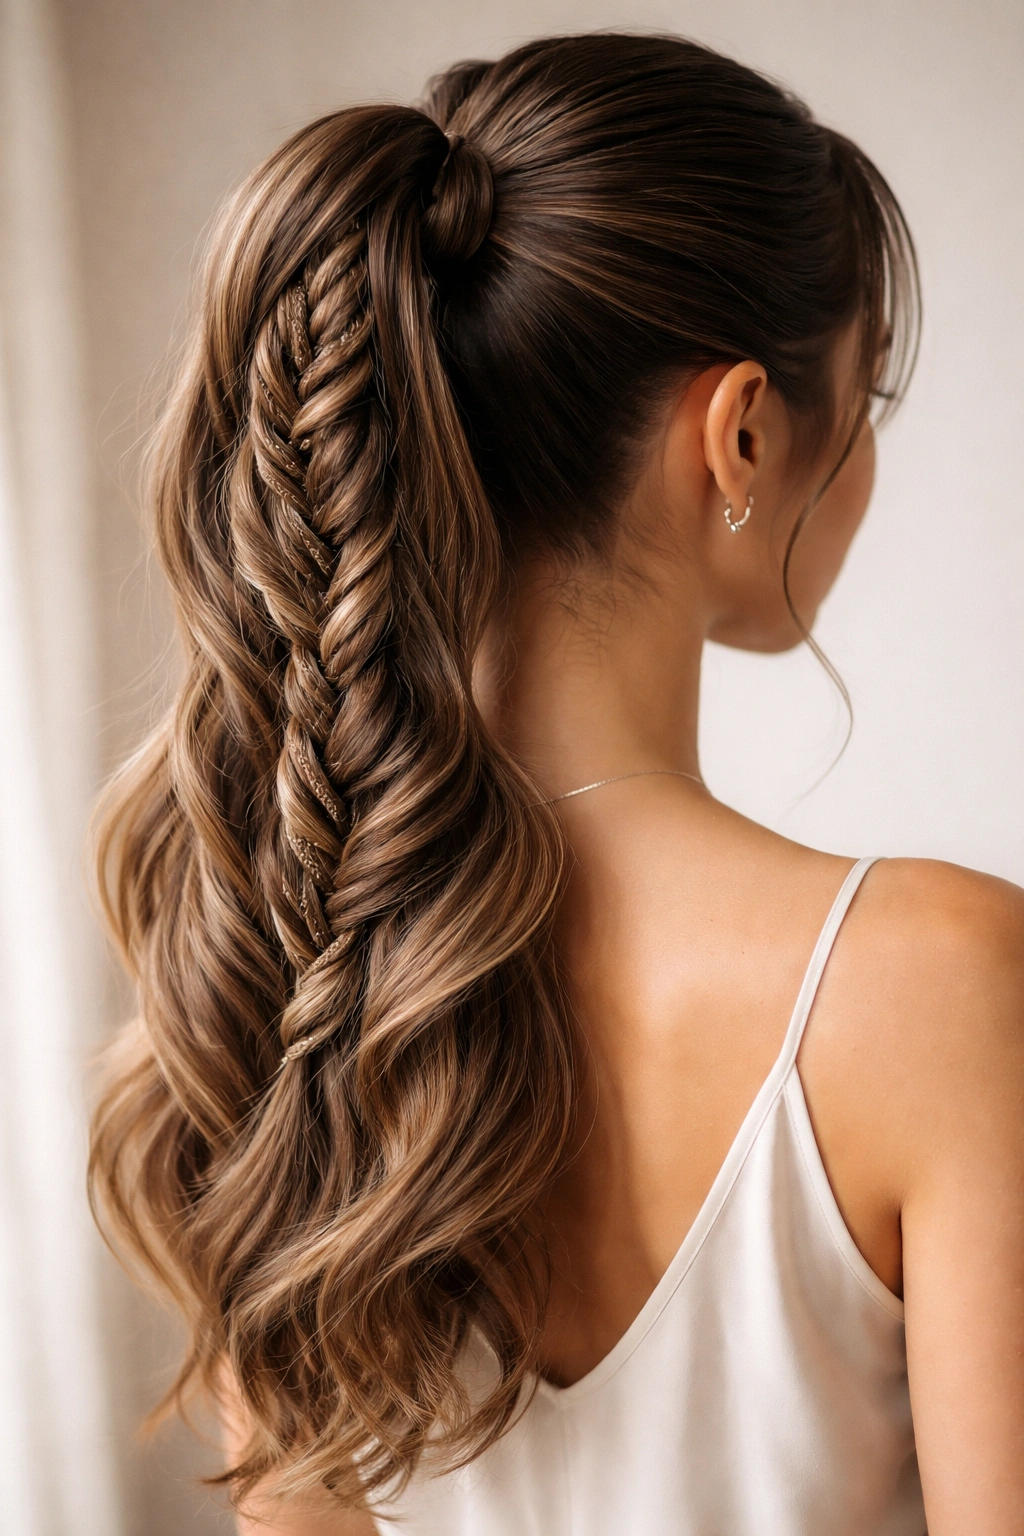
3. Half-Up Butterfly Braid Ponytail

The half-up butterfly braid ponytail is the perfect compromise for days when you want some hair off your face but don’t want the full commitment of a complete ponytail. This style features a butterfly braid that starts at the crown and ends in a half-up section at the back of the head—roughly where you’d naturally place a half-up ponytail clip. The rest of your hair remains down and loose, creating a style that feels both pulled-together and effortlessly romantic.
Why This Version Feels Modern and Fresh
Half-up styles have a particular quality that reads as intentional without being formal, and when you add the delicate detail of a butterfly braid, you get something that feels current and fashion-forward. This style works beautifully with both straight hair and textured hair—in fact, waves or curls in the down portion create a particularly pretty contrast with the structured braid. The half-up placement also doesn’t require the same level of scalp tension that a full ponytail does, making it more comfortable for longer wear.
Styling Options and Variations
You can secure this half-up section with a simple elastic, or you can choose to use a decorative clip, claw clip, or hair stick for a more intentional, styled look. Some people prefer to create a small ponytail at the end of the braid, while others simply secure the braid itself and let the loose hair flow from there. The down portion of your hair can be completely straight, can have waves or curls added with a styling tool, or can simply be left in its natural texture. Experiment with what feels right for your hair type and the occasion.
Pro tip: If you’re worried about your half-up section loosening throughout the day, pin the braid section directly to the back of your head with a small bobby pin before securing the elastic. This adds stability without being visible.
4. Double Butterfly Braids into Ponytail
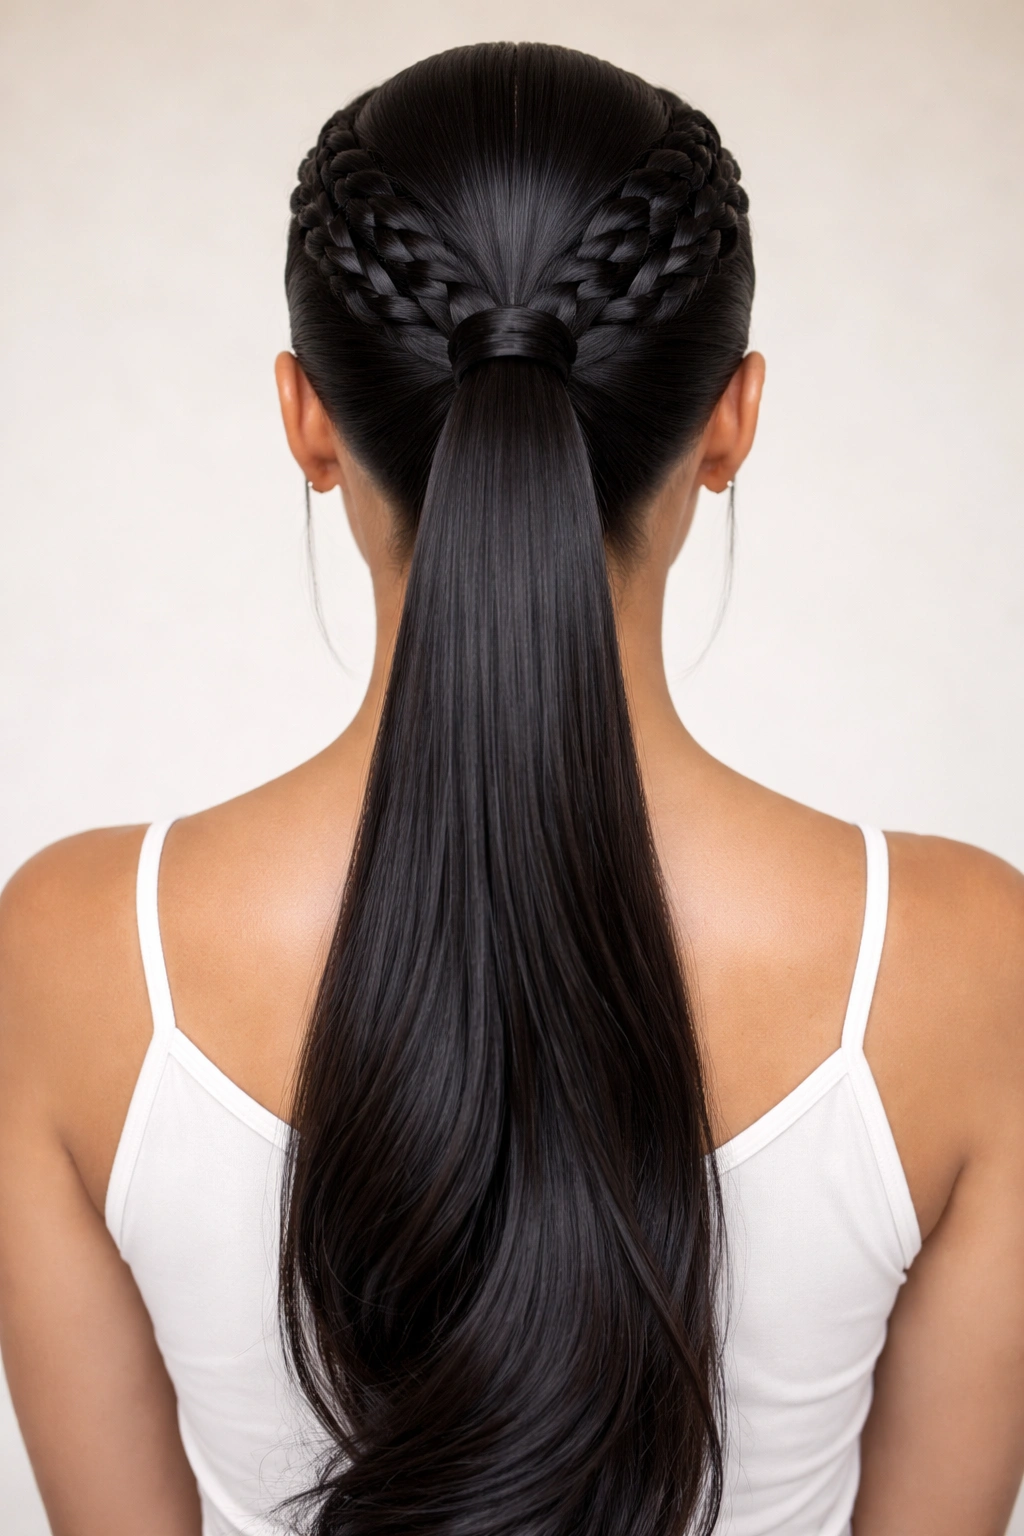
For a bolder, more visually striking look, the double butterfly braid ponytail takes the concept and duplicates it—creating two matching braids that flow into a single ponytail at the back. This version works particularly well if you have thick, voluminous hair or if you want your styling to make more of a statement. The symmetry of two matching braids creates a sense of intentional elegance, while still maintaining that signature sleek quality.
Technical Execution and Placement
Start by creating a center part from your forehead all the way down the back of your head. Then, on each side, begin a butterfly braid roughly at your temple, working that braid toward the back of the head at a slight angle. The two braids should meet at approximately the same point at the back of the head, where you’ll gather them together into one ponytail. This requires a bit of coordination, but once you’ve done it a few times, the muscle memory becomes automatic.
When Double Braids Feel Right
This style is excellent for special occasions, events where you want to look especially polished, or simply days when you want to create visual interest and show off your braiding skill. The double-braid version photographs beautifully, which makes it a favorite for weddings, formal dinners, or any time you know you’ll be captured on camera. It’s also a way to make the butterfly braid technique more visible and prominent—instead of one delicate braid, you have two, creating more impact.
Worth knowing: If your hair is fine or thin, you might find that working with two braids distributes your hair more thinly than working with one, which could make each braid look less full. In that case, consider using a texturizing spray or dry shampoo to add grip and volume before you start braiding.
5. Sleek Butterfly Braid with Hidden Elastics
This sophisticated variation focuses on creating the smoothest, most streamlined appearance possible by hiding all the elastic bands that typically hold a ponytail together. The butterfly braid is impeccably sleek, and instead of securing everything with a visible elastic at the base of the ponytail, you use small, hidden elastics spaced throughout to create a subtle segmented effect.
The Hidden Elastic Technique
Begin your butterfly braid as you normally would, but as you complete it, you’ll secure it with a tiny elastic right where the braid ends. Then, gather all your remaining hair into a ponytail and secure that with another small elastic. The magic happens when you take a thin section of hair from within the ponytail and wrap it around the base elastic, pinning it underneath with a bobby pin. This wrap conceals the elastic entirely, creating a seamless appearance where the braid literally flows into the ponytail with no visible break or band.
Who This Look Suits Best
This is the most polished, refined version of the butterfly braid ponytail—it’s the version you’d wear to an important professional meeting, a formal event, or any situation where understated elegance is the goal. The sleekness of the execution and the invisible hardware create an effect of effortless sophistication. This version also works beautifully for people with very straight, shiny hair, since the smooth texture of their hair enhances the streamlined appearance of the style.
Pro tip: Use clear elastics instead of dark ones if you’re going to wrap a section around them. The clear elastics are even less visible if the wrap accidentally shifts, and they photograph as completely invisible.
6. Butterfly Braid Ponytail with Face-Framing Pieces

Sometimes the most polished look involves just a touch of softness and movement around the face. This version maintains all the elegance of a classic butterfly braid ponytail while releasing two small sections of hair in front to frame the face. These pieces can be left completely straight and sleek for a modern look, or they can be gently curled or waved for something slightly softer.
Why This Detail Matters
Face-framing pieces serve multiple purposes beyond aesthetics. They soften the overall appearance and make the style feel less severe, they’re flattering across more face shapes since they can be positioned to enhance your unique features, and they provide a place for fine flyaways or baby hairs to exist intentionally rather than looking accidental. If you have a very round face, you can allow the pieces to be slightly longer and wavy to create an elongating effect. If you have a long face, shorter, straighter pieces can help balance your proportions.
Easy Customization
Start by sectioning off a small piece of hair at each temple before you begin braiding—these are your face-framers. Continue with your butterfly braid and ponytail as normal, then arrange those loose front pieces however feels right. You can smooth them sleekly back along the sides of your face, you can curl them into soft waves, or you can even tuck them behind your ear on one side for an asymmetrical effect. The wonderful thing is that these pieces are totally customizable, so you can change how you style them depending on your mood or the occasion.
Pro tip: Use a tiny bit of lightweight styling cream on the face-framing pieces to keep them looking intentional rather than wispy or accidental. This adds polish and keeps them in place throughout the day.
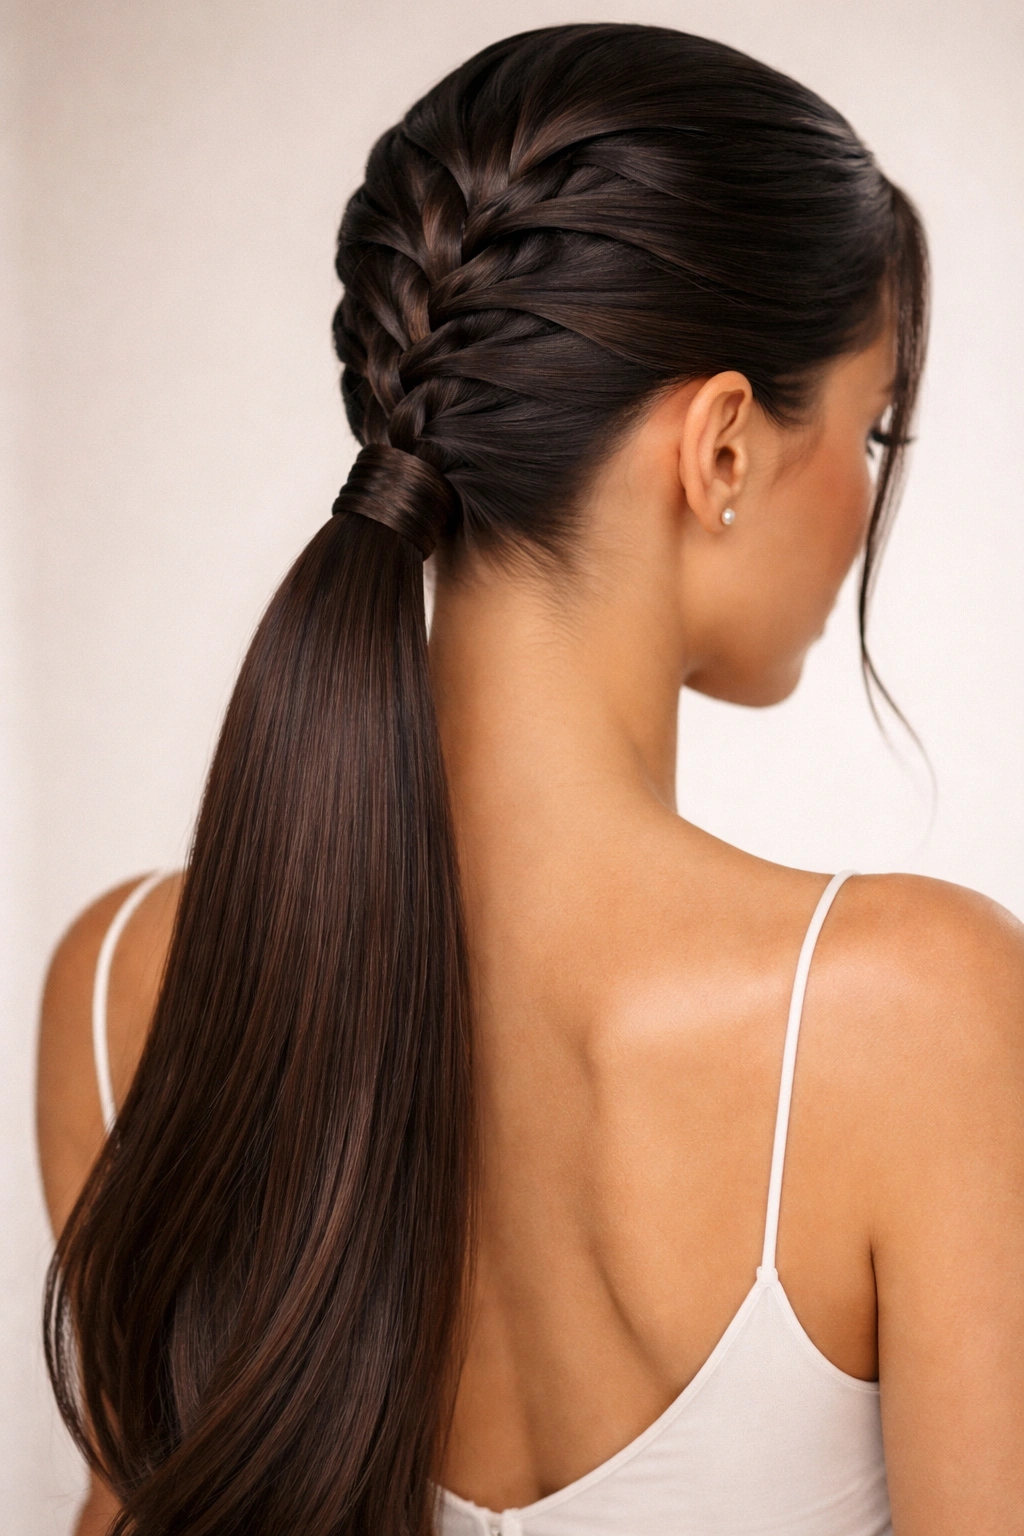
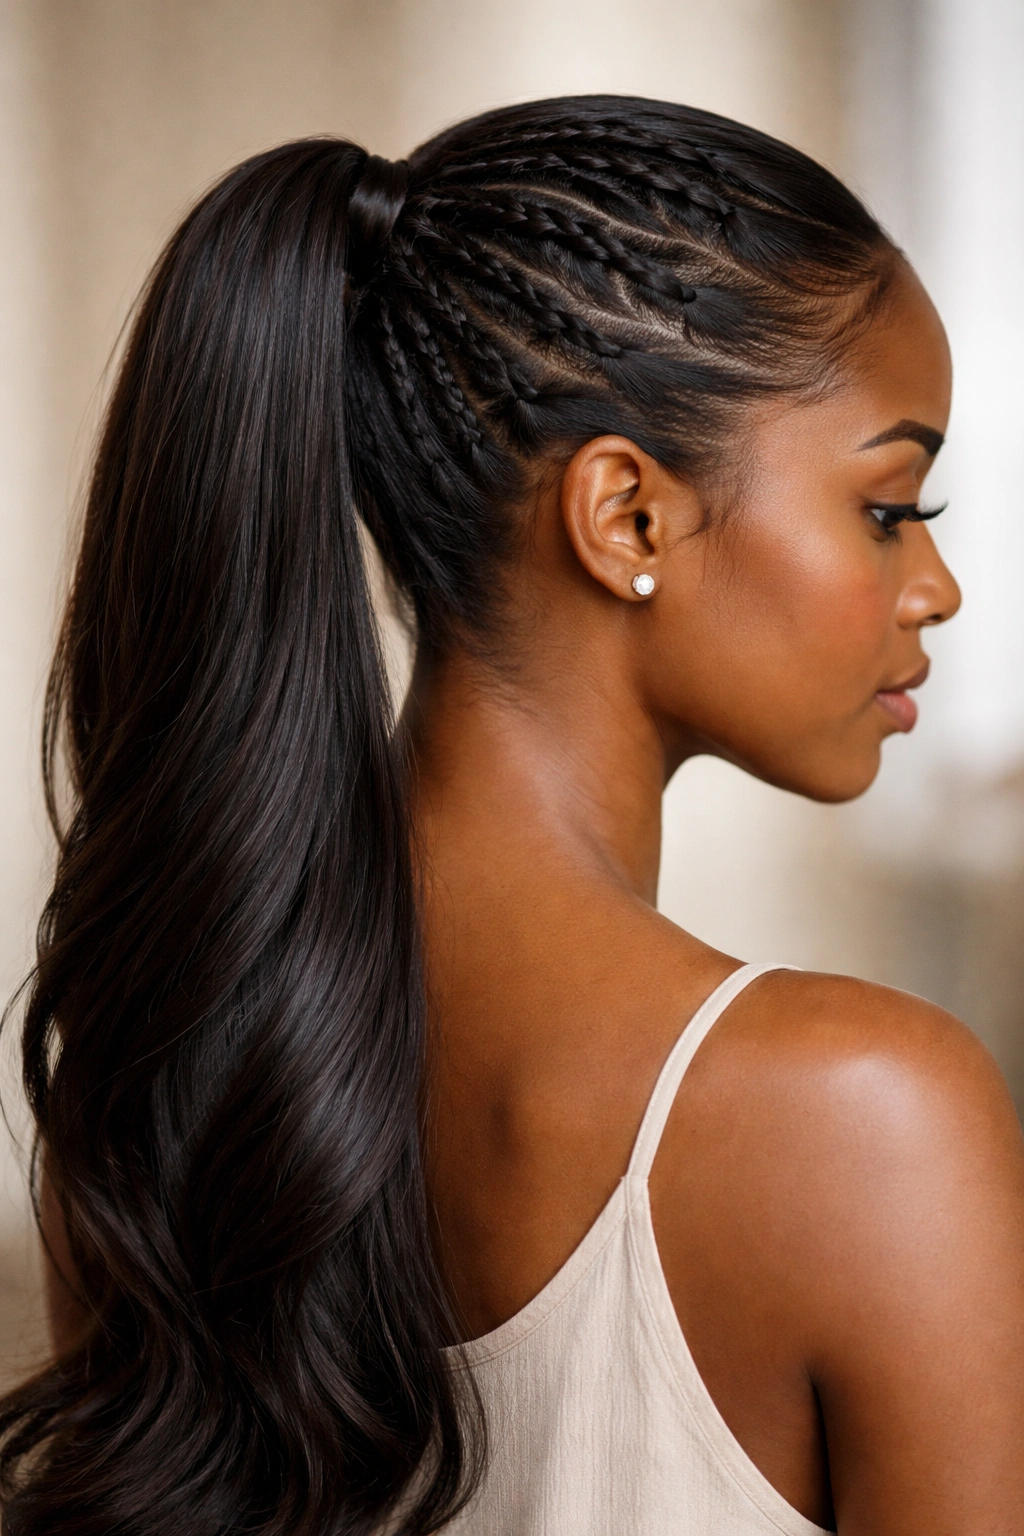
7. Twisted Butterfly Braid Ponytail
For something slightly different from the classic butterfly braid appearance, the twisted butterfly braid ponytail incorporates rope twists alongside the braiding pattern, creating a textured, dimensional look. Instead of a purely braided pattern, you might alternate between small sections of butterfly braiding and thin rope twists, creating visual variety and interest within the updo.
The Technique That Creates Dimension
Start with your butterfly braid as you normally would, but every inch or so, pause the braiding and create a small rope twist (two strands twisted around each other) for an inch or two before returning to the butterfly braid pattern. This back-and-forth creates a rhythm and adds textural variation that catches light beautifully. Alternatively, you might do one complete butterfly braid down the center and frame it with thin rope twists on either side.
Best for Textured and Curly Hair
While butterfly braids work on all hair types, the twisted butterfly braid version especially shines on textured, curly, or wavy hair. The texture of your natural hair creates additional visual interest that enhances the braiding pattern, and the combination of braided and twisted sections looks particularly beautiful against a curly background. If you have straight hair, you can add texture by curling your hair before you begin styling, which will enhance the dimensional effect of the braid and twist combination.
Worth knowing: Twisted sections can sometimes feel looser or less secure than braided sections, so make sure your twists are tight enough to hold their shape throughout the day. If you’re concerned about loosening, you can spray the twisted sections very lightly with a flexible hold hairspray as you work.
8. Textured Butterfly Braid with Smoothed Crown
This style takes an interesting approach by creating maximum texture and volume in the butterfly braid portion while keeping the crown and scalp area smooth and sleek. It’s a style that works beautifully for people with naturally curly or textured hair who want to showcase their texture while maintaining the polished quality of a structured braid.
Creating the Contrast
Begin by smoothing your crown area down toward your face with a fine-tooth comb and a smoothing cream or serum—this creates a neat, controlled base. Then, starting your butterfly braid slightly lower on the head, work the braid while allowing the hair within the braid pattern to puff out and show its natural texture. The contrast between the smooth, sculpted crown and the textured, dimensional braid creates a really interesting visual effect. Complete the style with a sleek ponytail at the back.
Who Gravitates Toward This Look
People with naturally curly, coily, or wavy hair often find this version the most wearable, since it honors their natural texture while still maintaining a polished appearance. It also works beautifully for people who want their styling to feel more modern and less “done”—this version avoids the sometimes overly-controlled appearance of fully smoothed braiding. The texture within the braid also makes the braiding pattern more visible and interesting to look at.
Pro tip: Apply your smoothing cream or serum to the crown area the night before if possible, and gently brush it smooth in the morning—this gives the smoothed section extra staying power and helps it maintain its neat appearance throughout the day.
9. Butterfly Braid Bubble Ponytail
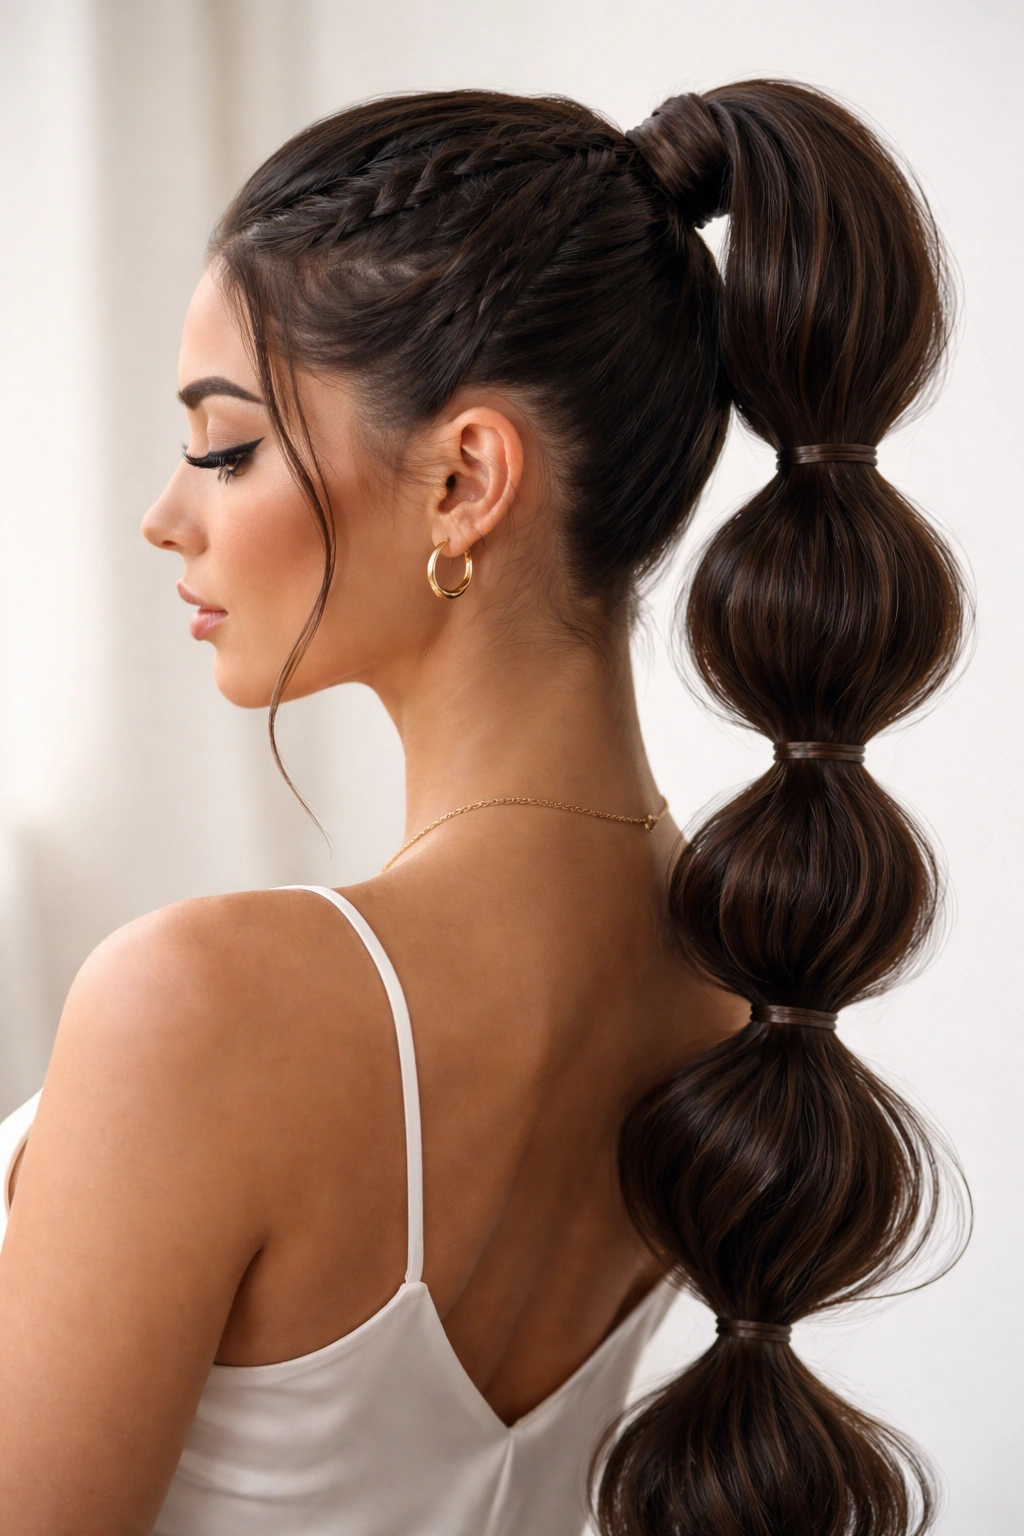
The butterfly braid bubble ponytail combines delicate braiding with a playful, dimensional ponytail style. The butterfly braid leads into a high or mid-height ponytail, which is then segmented into “bubbles” using small elastics spaced evenly down the length. The segments puff outward slightly, creating a fun, youthful aesthetic while maintaining the polished quality of the butterfly braid above.
Creating Picture-Perfect Bubbles
After securing your ponytail with an elastic at your desired height, place a second elastic about 2 inches below the first one. Gently pull the hair between the two elastics upward and outward to create a slight puff. Continue this pattern down the length of your ponytail—elastic, puff, elastic, puff—until you reach the ends. The number of bubbles you create depends on how long your ponytail is; aim for bubbles that are proportionate and evenly spaced.
When This Style Feels Just Right
The bubble ponytail version is excellent for younger styling, for events where you want something playful and fun, or for days when you want to feel a bit more youthful and energetic. It works particularly well for people with thick hair who want the bubbles to be really pronounced and dimensional. The combination of the elegant butterfly braid with the playful bubbles creates an interesting contrast—it’s sophisticated and fun at the same time.
Worth knowing: Bubble ponytails work best on hair that’s at least shoulder-length, since you need enough length to create multiple visible bubbles. If your hair is shorter, you might create just one or two bubbles for a subtle textured effect rather than a full series.
10. Sleek Butterfly Braid Side Ponytail
The side ponytail version shifts the entire composition of the style to one side, creating an asymmetrical, fashion-forward look. The butterfly braid starts at your crown and travels at an angle across the back of your head toward the opposite shoulder, where all your hair is gathered into a side ponytail. This placement feels more editorial and modern compared to the classic centered version.
The Asymmetry That Works
Side ponytails have an inherently chic quality—they feel less formal than a centered ponytail, yet still very polished and intentional. When you add the butterfly braid element, you’re creating visual interest on one side of your head while leaving the other side completely smooth, which is both elegant and modern. This version works beautifully for people who like to draw attention to one side of their face, or for anyone who simply prefers the asymmetrical aesthetic.
Positioning for Maximum Impact
The key to making the side ponytail look intentional and flattering is positioning it correctly. Ideally, the ponytail sits at roughly ear level on the side where it’s positioned, and the butterfly braid should start at your crown and travel diagonally back to meet that ponytail point. The smooth side of your head is left completely exposed, which means this style works best if you have a face shape you’re comfortable showing. If you’re self-conscious about one side of your face, you could position the asymmetry on the opposite side instead.
Pro tip: Smooth the side of your head that’s fully exposed with extra care—any bumps or flyaways will be very visible. Use a fine-tooth comb and a smoothing serum to create a really polished appearance on that bare side.
11. Butterfly Braid Ponytail with Ribbon or Accessory
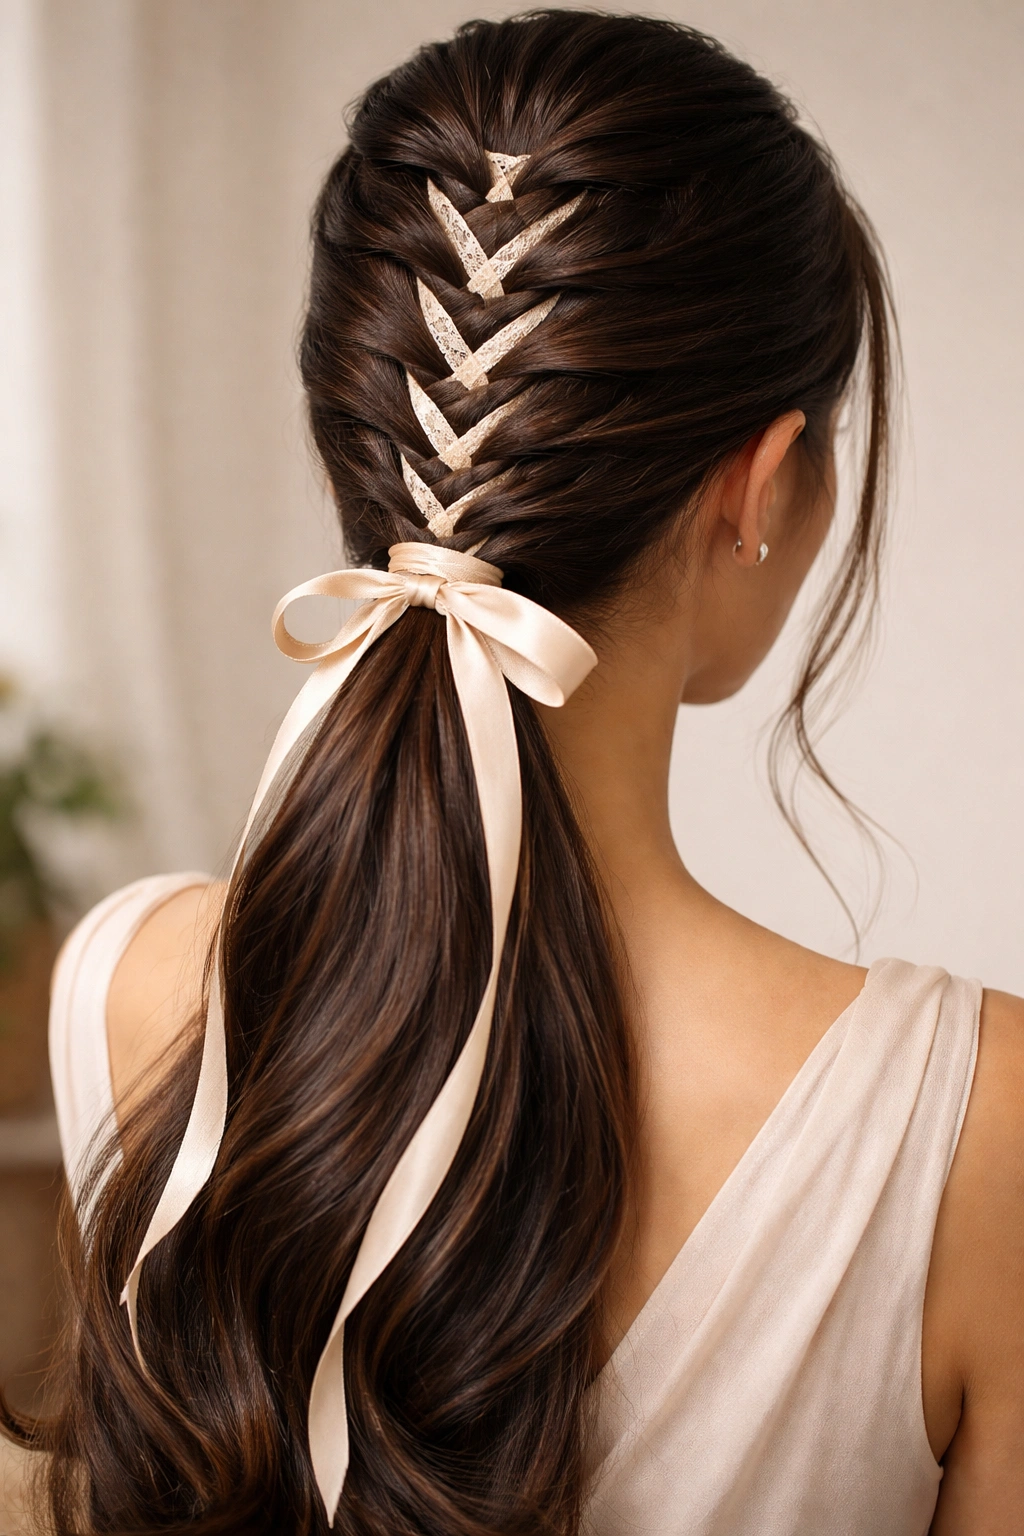
Adding a ribbon, silk thread, or other decorative element to your butterfly braid ponytail is an easy way to elevate the style and add a personalized, polished touch. The ribbon can be woven directly into the braid pattern, wrapped around the base of the ponytail, or even braided directly alongside your hair throughout the braid and ponytail section.
Choosing the Right Embellishment
The ribbon or thread you choose should coordinate with your outfit and the overall vibe of your styling. Silk ribbons create a soft, romantic appearance and are gentle on your hair. Metallic threads add glamour and shine. Velvet ribbons feel luxe and special. Subtle, muted colors often feel more polished than bright, highly saturated colors, though the right vibrant ribbon can work beautifully for the right occasion. The width of your ribbon matters too—thinner ribbons look more delicate and refined, while thicker ribbons make more of a statement.
Different Ways to Incorporate It
You can weave the ribbon directly into your butterfly braid by holding it alongside one of your braiding strands, creating a braid that incorporates both hair and ribbon. Alternatively, you can secure your ponytail as normal and then wrap the ribbon around the base of the ponytail, tying it in a bow or allowing the ends to flow down the side of the ponytail. You could also simply tie the ribbon around the completed ponytail and let the ends drape down the back. Each method creates a slightly different effect.
Worth knowing: If you’re weaving ribbon directly into your braid, test the technique with a lightweight ribbon first—heavier ribbons can pull on your hair and create tension. Silk ribbons tend to work best for this application because they’re lightweight and gentle.
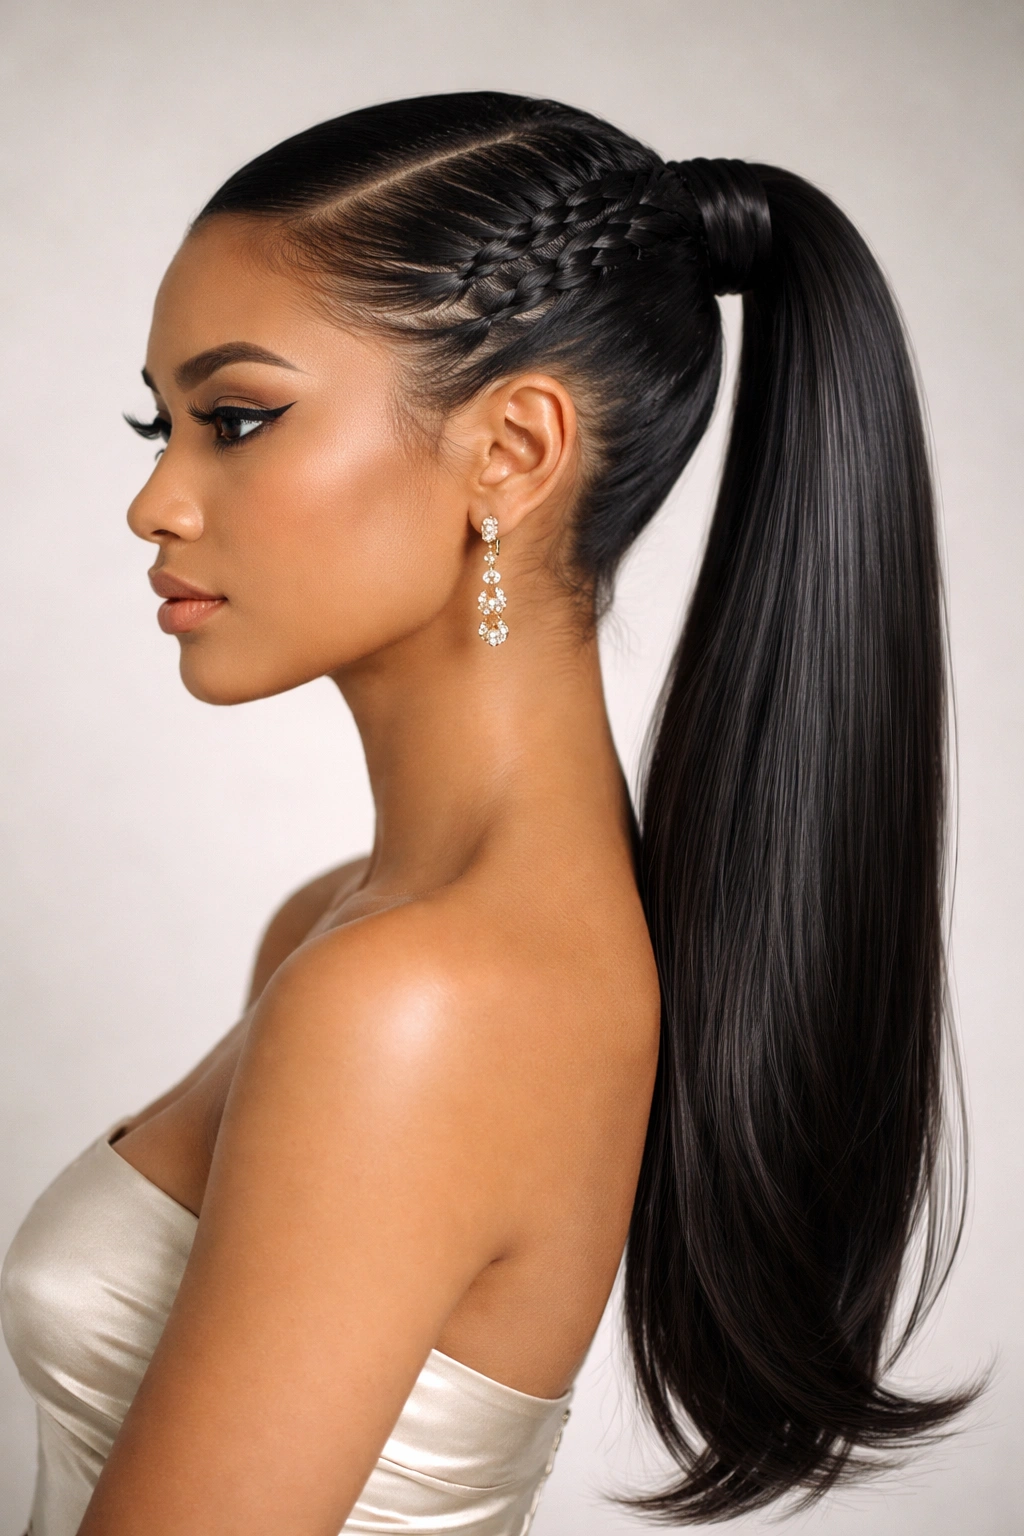
12. Slicked-Back Butterfly Braid Ponytail
For the ultimate in polished elegance, the slicked-back butterfly braid ponytail takes every element and makes it as smooth, controlled, and refined as possible. Every hair is smoothed back against the head, the butterfly braid is pristine and perfectly defined, and the ponytail is absolutely sleek with not a single flyaway in sight.
The Preparation That Makes It Possible
This version requires more prep work than a casual butterfly braid ponytail. Start with damp hair or hair that’s been lightly spritzed with water. Apply a smoothing serum or styling cream throughout, focusing on the crown and the areas where you’ll be braiding. Use a fine-tooth comb to smooth everything straight back, then blow-dry while continuing to comb and smooth. Once fully dry, apply a lightweight finishing serum or shine spray to enhance the sleek appearance.
Occasions Where This Level of Polish Shines
The slicked-back version is your go-to for formal events, professional environments where you want to look exceptionally put-together, or any time you want your styling to communicate careful attention to detail. This version photographs beautifully and reads as especially elegant and intentional. It’s also excellent if you have very shiny hair—the sleekness enhances shine and creates a sophisticated, almost liquid appearance.
Keeping It Sleek All Day
Slicked-back styles can be vulnerable to flyaways and loosening throughout the day, especially if you’re in a humid environment or if you’ll be moving around a lot. Use a flexible-hold hairspray after you’ve finished styling, and consider keeping a small edge brush or fine-tooth comb in your bag for touch-ups if needed. A lightweight serum can also help tame flyaways throughout the day without making your hair look greasy.
Pro tip: If you’re concerned about the sleekness fading, you can pin small sections of your slicked-back hair to the base of the braid with tiny bobby pins that match your hair color—these pins will be invisible but will keep everything locked in place.
Final Thoughts
The butterfly braid ponytail in any of its variations offers a wonderful way to transform your everyday hairstyle into something that feels intentional, polished, and special. What makes this technique so valuable is its genuine versatility—it works on virtually every hair type, it can be dressed up or down depending on the occasion, and it offers a legitimate challenge for anyone who wants to develop their braiding skills. The investment in mastering this braid is absolutely worth it, because once you’ve learned the technique, you’ll have a styling tool that serves you for years.
The real magic of the butterfly braid happens when you choose the version that aligns with what you want to communicate—whether that’s professional polish, creative flair, romantic softness, or youthful energy. Each of the 12 variations above responds to different moods, occasions, and personal aesthetics, which means you can return to this hairstyle again and again and experience it in completely new ways. You might wear the classic high butterfly braid ponytail to the office, the textured version on the weekend, and the double-braid version to a special event. The technique remains the same, but the styling possibilities are genuinely endless.
The most important thing is to practice this braid enough that it becomes comfortable and natural—your first few attempts might feel awkward or imperfect, but that’s completely normal. Braiding is a skill that improves dramatically with repetition, and by your fifth or sixth attempt, you’ll likely feel significantly more confident. Give yourself permission to have learning attempts, and don’t expect perfection right away. The butterfly braid is worth the small effort it takes to master.