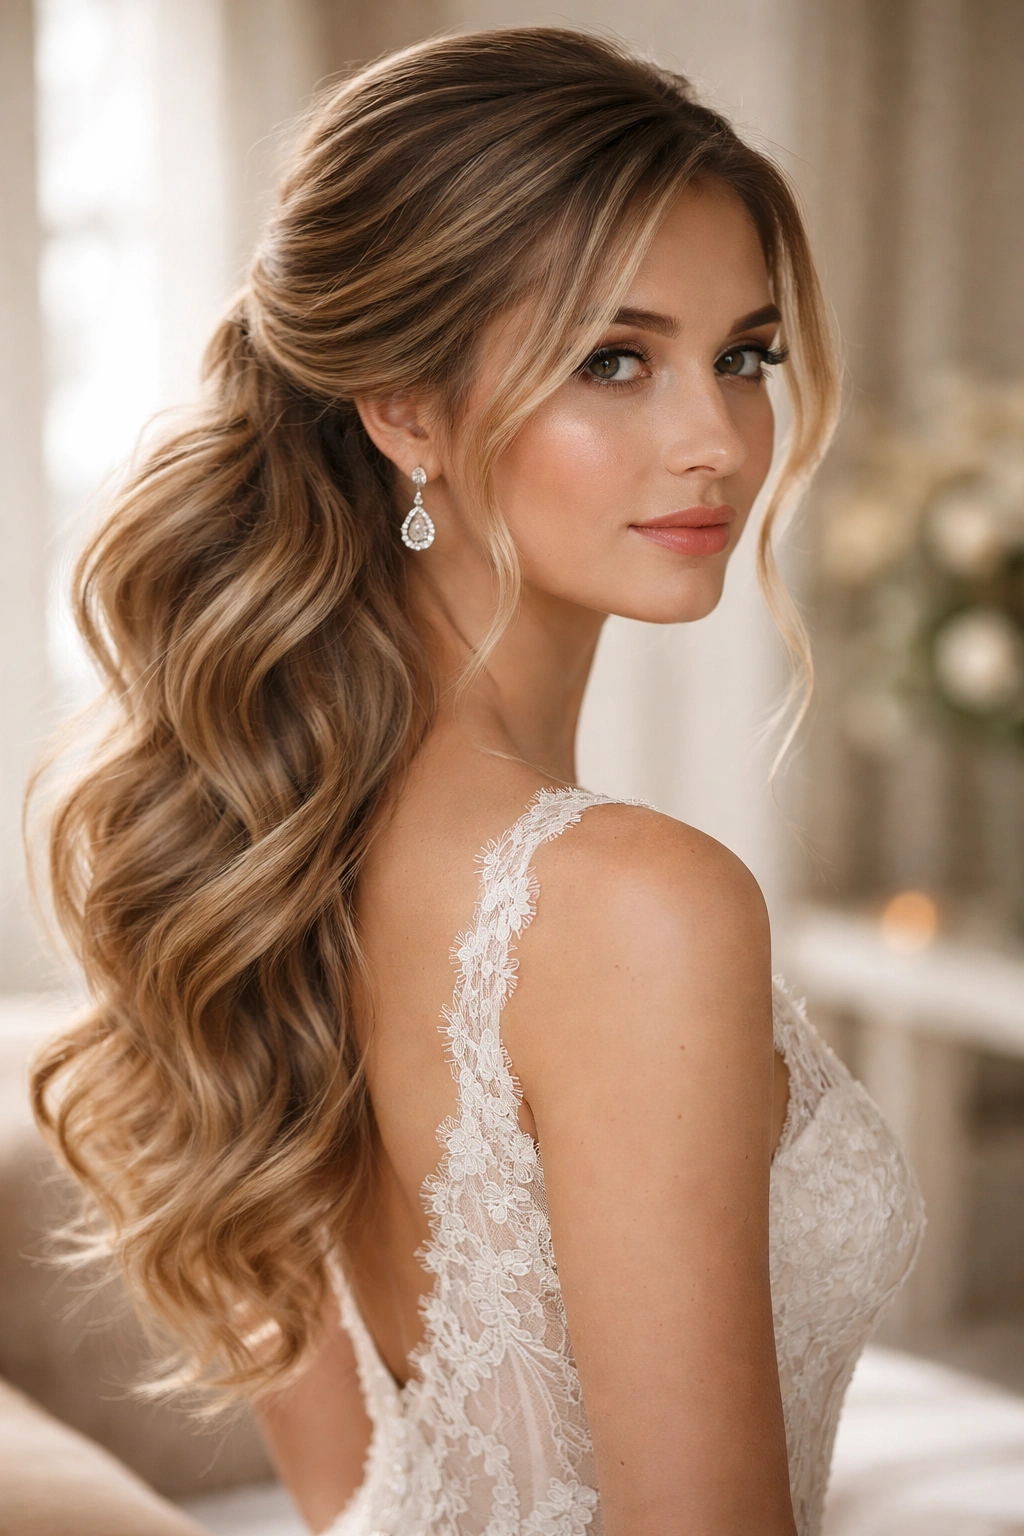
A side ponytail might seem like a casual everyday style, but in the right hands—or with the right techniques—it transforms into pure elegance. There’s something undeniably romantic about a sleek ponytail swept to one side, with strands catching the light as you turn your head. For weddings, this versatile style offers the best of both worlds: it’s polished and formal enough for a ceremonial moment, yet soft and romantic enough to feel utterly feminine. Whether you’re a bride choosing your own look, a bridesmaid coordinating with the wedding party, or a guest wanting to look effortlessly put-together, a side ponytail is an excellent choice that works across hair types, lengths, and face shapes.
What makes side ponytails particularly brilliant for weddings is their incredible adaptability. You can dress them up with intricate braids, romantic waves, and delicate accessories, or keep them streamlined and modern for a minimalist aesthetic. They photograph beautifully from nearly every angle—those candid side-profile shots during the ceremony absolutely shine when you’re wearing a styled side ponytail. Plus, they stay secure throughout hours of celebration, dancing, and emotion without requiring constant touch-ups. The movement of a side ponytail catches light in ways that an updo sometimes can’t, creating dimension and visual interest in photos and in person.
The key to a wedding-worthy side ponytail is in the execution: the placement matters, the finishing details matter, and how you prep your hair before styling matters tremendously. A simple gathered ponytail with no texture looks thin and unfinished for such a special event. But take that same ponytail, add some strategic waves, braided sections, or wrapped details, and suddenly you have a hairstyle that feels intentional and celebratory. Below, you’ll find twelve distinct takes on the side ponytail, each one offering something different—from romantic to modern, from heavily embellished to minimally chic.
1. Romantic Wave Side Ponytail with Soft Tendrils
This is the classic choice for brides who want to feel ethereal and soft on their wedding day. The beauty of this style lies in the soft waves that flow through the ponytail itself, combined with strategically left-out face-framing tendrils that create an intentionally romantic, slightly undone vibe. You’re not going for geometric perfection here; you’re creating the impression of natural, effortless beauty—the kind that suggests you didn’t try too hard, even though you absolutely did.
How to Create the Wave and Placement
Start by curling your entire head with a large-barrel curling iron or wand, creating loose waves that fall naturally. Once your waves are set and cooled slightly, gather your hair to one side—typically 2-3 inches from center back—creating your ponytail placement. Leave two small sections of hair at your face, about 1-inch-thick on each side, to frame your features. These tendrils should hit somewhere around your collarbone or jawline. Secure your main ponytail with a clear elastic or a silk-covered one that matches your hair color for invisibility.
Finishing Touches for Wedding Impact
Once your ponytail is secured, take a curling iron to the ponytail itself to refresh and deepen the waves—this adds body and visual interest to the gathered section. Smooth the crown and the sides gently with a light smoothing serum or oil, creating a polished base that shows off your waves without frizz. The face-framing tendrils should also be gently curled for coherence. Finish with flexible-hold hairspray that keeps everything in place without creating that crunchy, stiff feeling. If you’re wearing a veil, this style sits perfectly underneath one—the tendrils create softness around your face even with added layers.
Pro tip: Curl your hair the night before or that morning and let it cool completely before gathering your ponytail—cooler waves hold their shape far longer throughout your event.
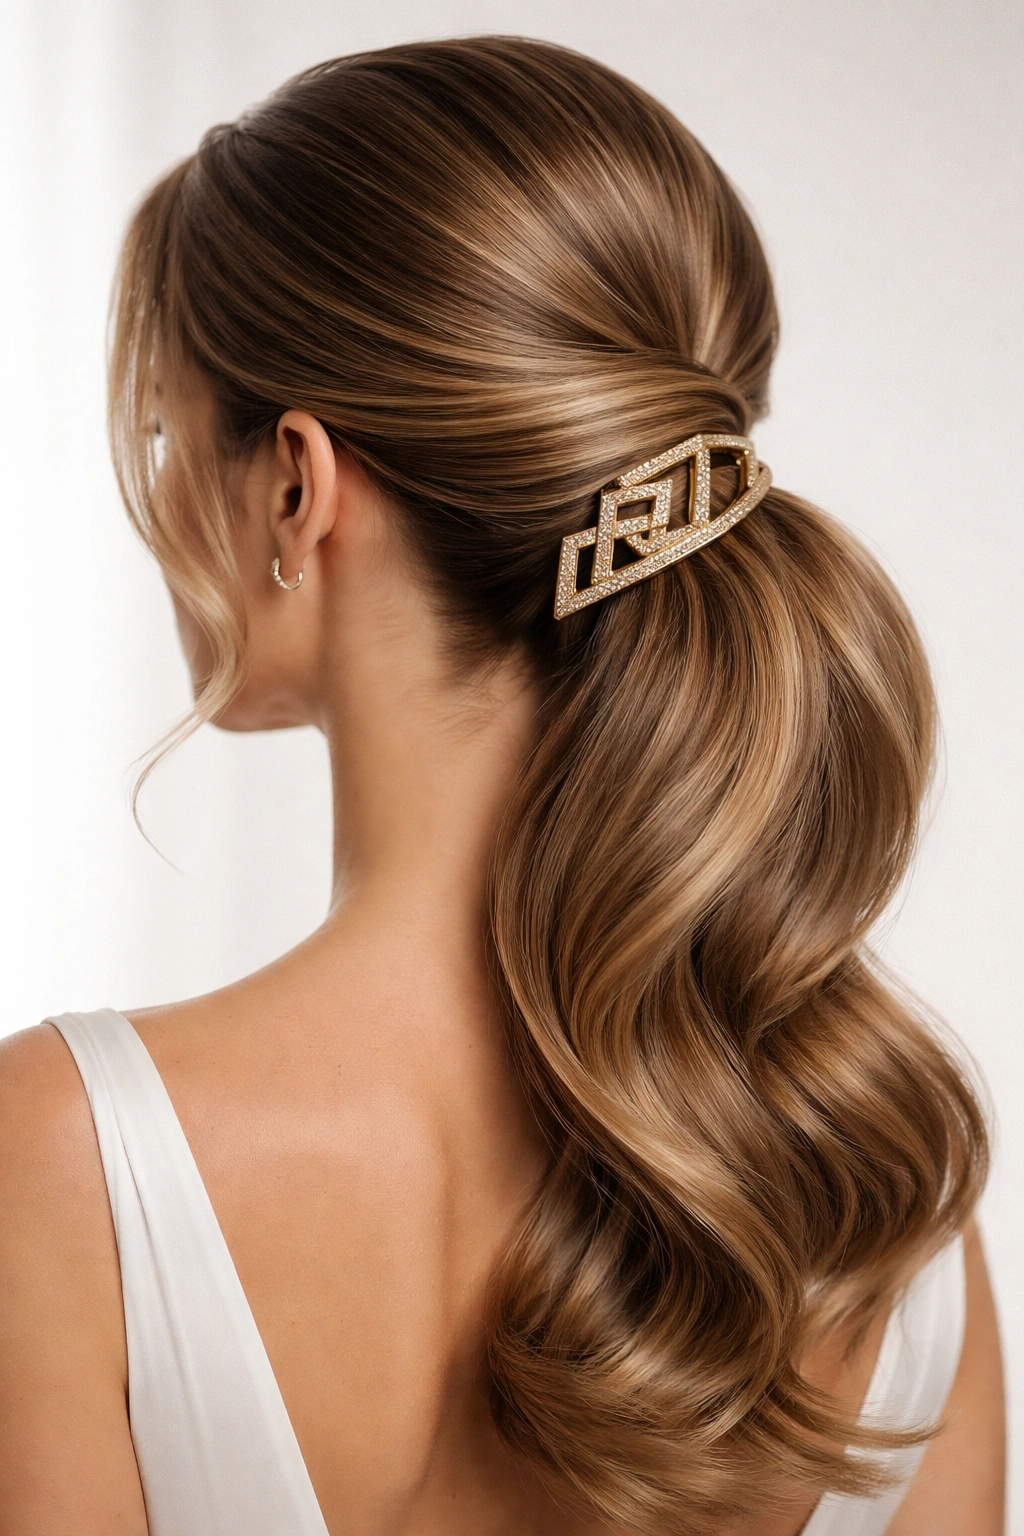
2. Sleek and Glossy Side Ponytail with Statement Hair Clip
If your wedding aesthetic is modern and minimalist, or if you’re drawn to clean lines and sculptural beauty, this ultra-sleek side ponytail delivers serious sophistication. Shine is your secret weapon here—glossy, polished hair reads as intentional and expensive, even if your styling routine is straightforward. The magic is in the sleekness and the placement of a statement clip or hair accessory that becomes a focal point.
Achieving That Glossy, Sculpted Look
Begin with smooth, shiny hair—this style requires a smoothing treatment or serum to work at its best. Use a fine-tooth comb to gather your hair to the side, pulling it back firmly toward the nape of your neck, creating a placement slightly lower than centered. Secure with a clear or matching elastic, then immediately cover that elastic with either a silk-wrapped band or a substantial hair clip—this is where your style gets its personality. The clip could be tortoiseshell, gold, pearl-encrusted, or a jeweled piece that coordinates with your wedding jewelry.
The Accessory as Design Element
Your clip isn’t just functional; it’s a design statement. A vintage-inspired claw clip, a sculptural metal barrette, or a pearl-studded clip immediately elevates this simple style into something editorial. Smooth any flyaways around the crown and temples with a light-hold gel, creating that polished, almost wet-looking finish that photographs beautifully. The ponytail itself should hang long and straight, or with just the slightest bend if your hair naturally wants to wave. This style works exceptionally well for second-day or reception looks when you want something simpler than your ceremony style.
Worth knowing: A heavier, more substantial clip requires thicker hair or a reinforced elastic underneath to prevent it from slipping—test this the day before to ensure your clip stays secure throughout dancing and movement.
3. Low Side Ponytail with Braided Wrap
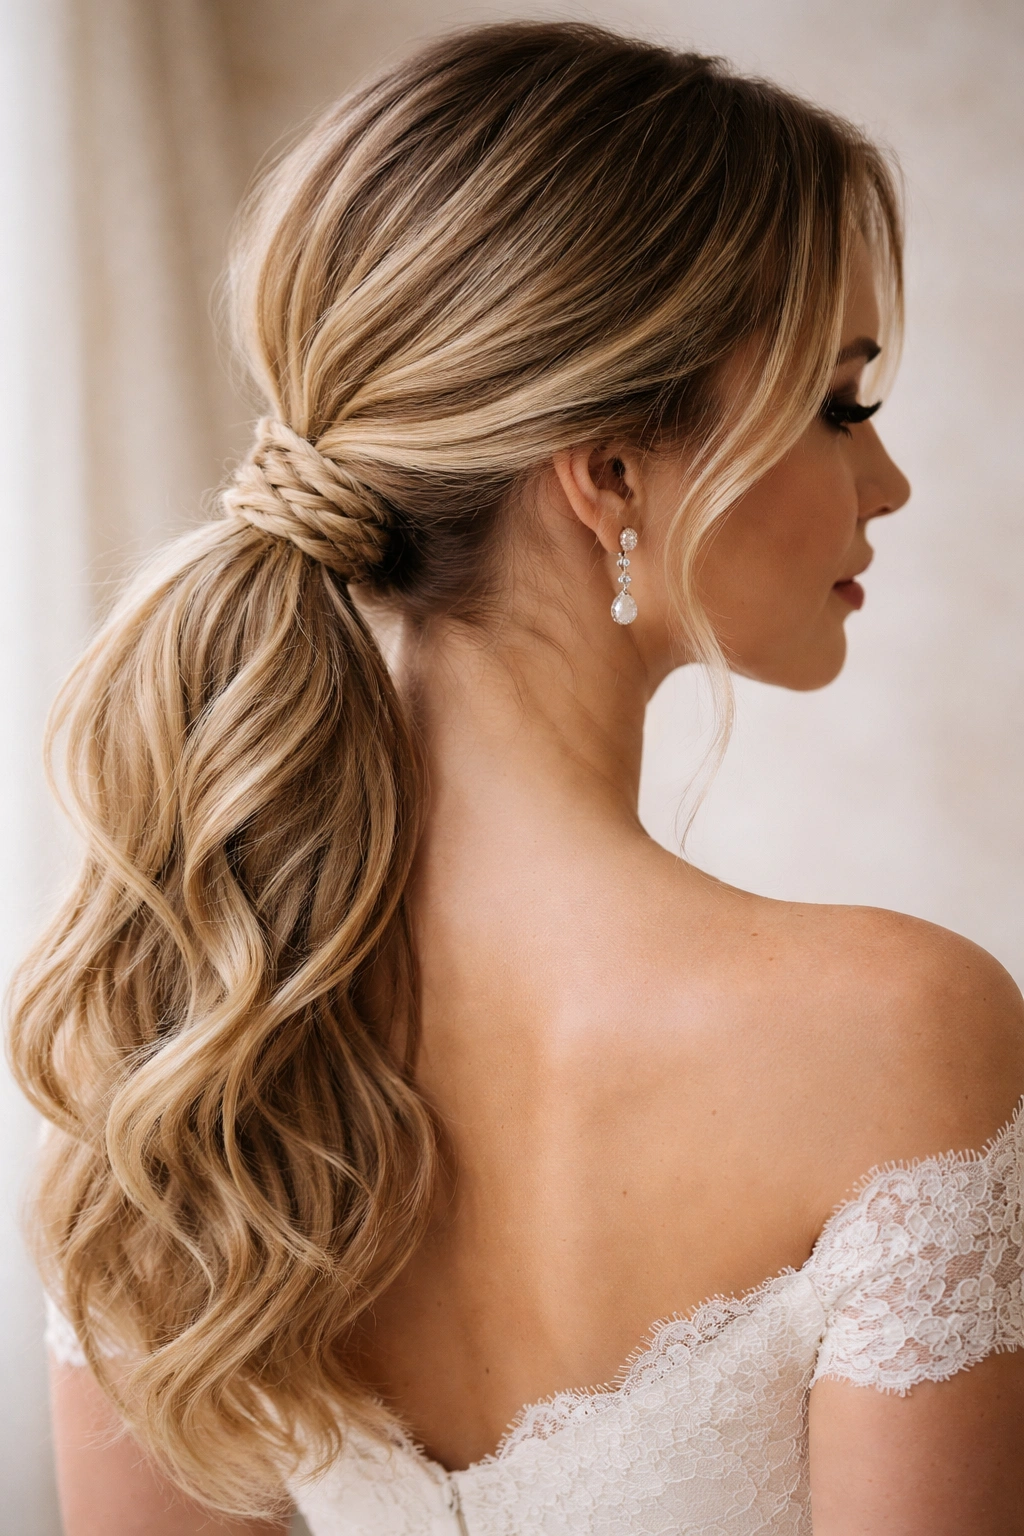
This style bridges casual and formal beautifully, making it an excellent choice for bridesmaid looks or for brides who want something less severe than a full updo but more dressed-up than a simple ponytail. The braided wrap detail transforms a basic style into something intricate and intentional, while the lower placement creates an elongating, elegant line.
Building the Braid and Wrap
Gather your hair to the side at approximately the level of your ear, securing it loosely with a clear elastic. Rather than hiding the elastic immediately, create a small three-strand braid using a section of hair from within the ponytail itself—this braid should be about 3-4 inches long. Wrap this braid around the base of the ponytail, covering the elastic completely, and secure the braid’s end with a bobby pin that matches your hair color, tucking it underneath where it won’t show. This braid detail adds texture and movement where a simple elastic would look flat.
Adding Texture to the Ponytail Body
Wave or curl the ponytail section itself for added dimension and volume. If your hair is fine or thin, backcombing the crown gently before securing your ponytail creates subtle lift that prevents the style from looking droopy, which is especially important with a lower placement. You want the back of your head to have some shape and volume, not a stark, pulled appearance. Smooth the outer layer of your ponytail with a fine-tooth comb so the texture reads as intentional waves rather than frizz.
Insider note: If you’re not comfortable braiding, you can wrap a small curled section of hair around the base instead—it creates the same elegant effect with less precision required.
4. Half-Up Side Ponytail with Pearl Pins
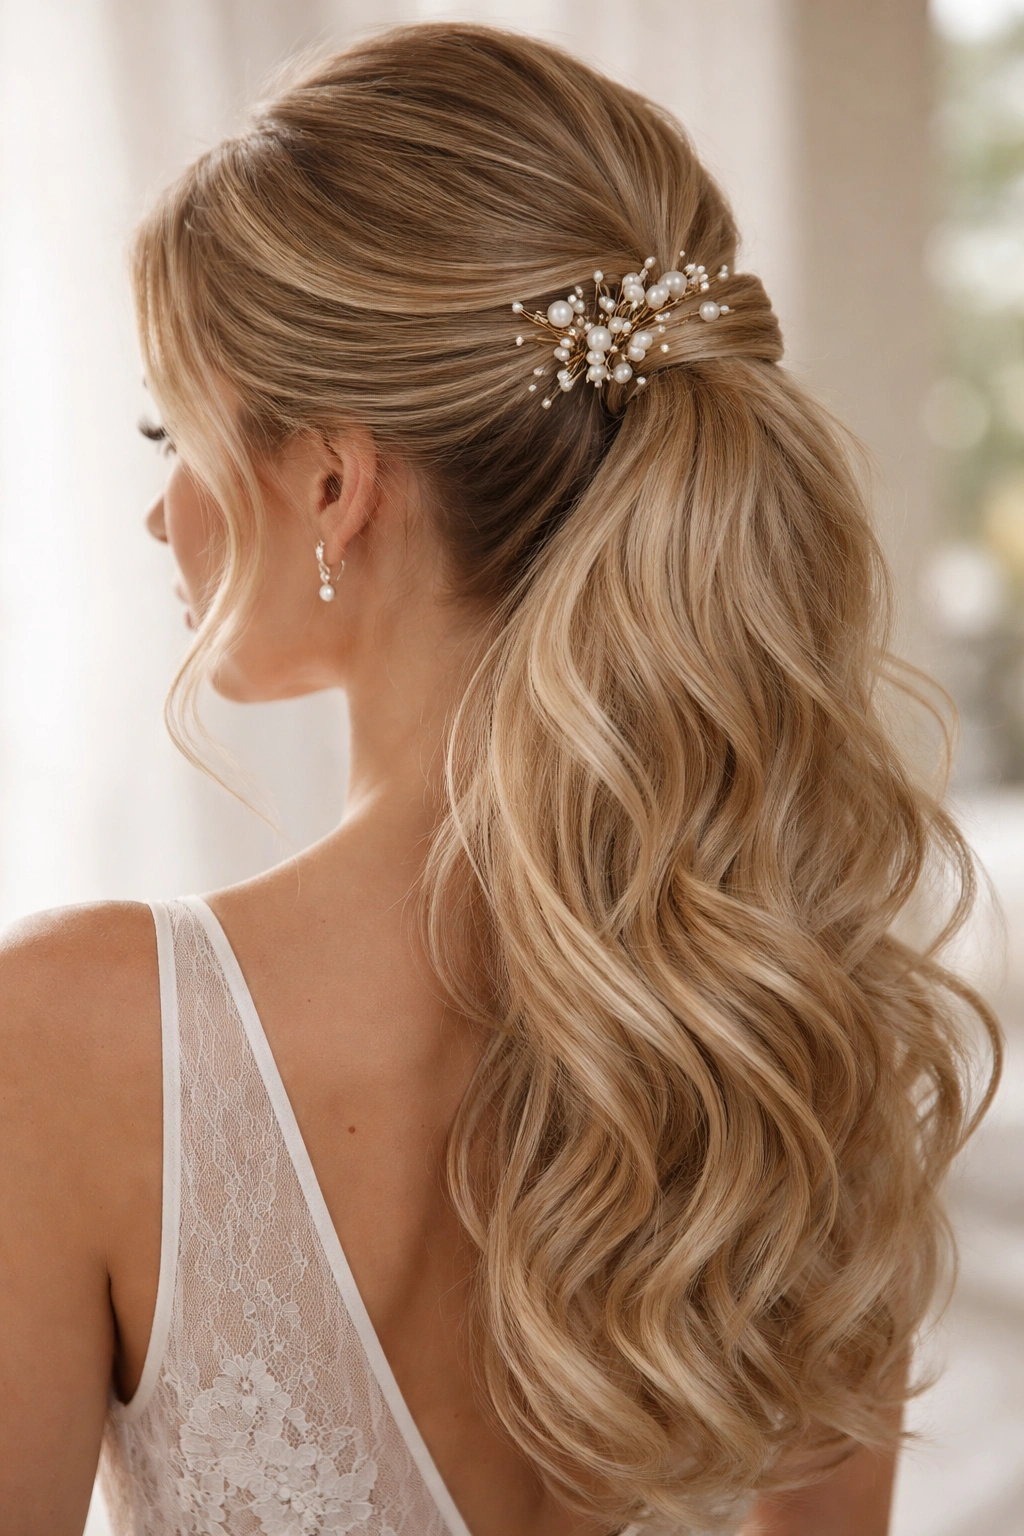
This style is a grown-up evolution of the classic half-up-half-down look you might have worn in high school, but with a sophisticated twist. Instead of gathering your hair straight back, you’re pulling it to the side, and instead of a simple elastic, you’re using decorative pins that catch light and add sparkle. It’s the perfect choice if you love the idea of a side ponytail but want to keep some hair down to frame your face and shoulders.
Creating the Half-Up Placement
Start by identifying where your half-up section will begin—typically at approximately ear level on both sides. Take small sections from each side of your head and gather them at the back, creating a low half-up placement. Rather than using an elastic here, gather the section and secure it with two or three decorative pearl hair pins or jeweled clips, inserting them at slight angles to create a secure hold. The pins become visible design elements, which is exactly the point—they should complement your wedding jewelry or veil.
Coordinating Texture and Waves
Wave or curl the bottom half of your hair to coordinate with the texture of the gathered upper section. The half-up section itself benefits from some gentle backcombing at the crown to create subtle lift and volume. This prevents the style from looking thin or flat where the gathered section begins. The lower waves should flow naturally from the gathered section, creating cohesion between the two parts of your style. If your hair is very thick, you might create looser, larger waves in the bottom section; if it’s fine, tighter, more deliberate curls will photograph better.
Pro tip: This style photographs beautifully from the back and sides, making it ideal if you’re having a first-look photo session or lots of candid movement shots during your ceremony.
5. Textured Side Ponytail with Twisted Crown Detail

Texture is everything in modern bridal hair, and this style delivers it in abundance. Rather than a smooth crown, you’re creating twisted sections that add visual interest and dimension at the top of your head, which then flow into a ponytail gathered to the side. It’s romantic and has movement, but it’s also undeniably current and styled.
Building the Crown Twists
Begin with wavy or curled hair for texture foundation. Take a one-inch section of hair from one side of your crown and twist it toward the back of your head—not tightly, but with enough intention that the twist holds its shape. Pin this twist in place temporarily with a bobby pin. Repeat on the other side with a section of similar size, twisting in the same direction and pinning. You’ll now have two twisted sections meeting at the back of your crown. At this meeting point, gather all your hair—including the twisted sections—into a side ponytail, securing it with an elastic that matches your hair.
Perfecting the Texture Throughout
The twisted sections should look soft and relaxed, not geometric or precise. If your twists look too tight, gently pull at them to loosen and separate the strands slightly, creating that effortlessly textured look that reads as intentional but not overdone. The ponytail itself should have waves or curls that coordinate with the texture of the crown. Finish with a flexible-hold hairspray that allows the twists and waves to move naturally—this is crucial for a wedding day when you’re moving, hugging, and celebrating.
Worth knowing: This style holds beautifully even when you’re moving and dancing, because the twisted sections are anchored by the ponytail itself, creating stability.
6. Sleek Side Ponytail with Silk Scarf Wrap
This variation is modern and sophisticated, drawing inspiration from fashion styling while remaining utterly appropriate for a wedding. A silk scarf wrapped around the base of your ponytail—in a coordinating or contrasting color—adds polish and visual interest while serving the practical purpose of protecting your hair from damage. It’s an excellent choice for someone who loves fashion details and wants their hair to reflect that personality.
Securing the Scarf Properly
Create a sleek, polished side ponytail using smoothing products to eliminate any flyaways or texture. Secure with a clear elastic, then take a silk scarf—approximately 3-4 inches wide when folded lengthwise—and wrap it around the base of the ponytail. Secure the scarf by tying the ends together or by tucking the ends underneath if your scarf is designed that way. The scarf should sit snugly around the elastic, covering it completely. Choose a silk scarf in a color that coordinates with your wedding palette—rose gold, blush, sage, or ivory all work beautifully with most wedding color schemes.
Styling with the Scarf as an Accessory
The ponytail itself can be completely straight for a modern minimalist look, or you can add subtle waves for dimension. The scarf becomes part of your overall aesthetic, so consider it as carefully as you would jewelry. If your wedding dress is heavily embellished, a solid or tonal-patterned scarf keeps visual balance. If your dress is simple, a scarf with pattern or subtle texture adds interest. The scarf also serves the practical purpose of protecting the hair and keeping the elastic from creating a crease or dent.
Pro tip: Practice wrapping and tying your scarf before your wedding day to ensure you know exactly how you want it positioned and how tightly to secure it for all-day comfort.
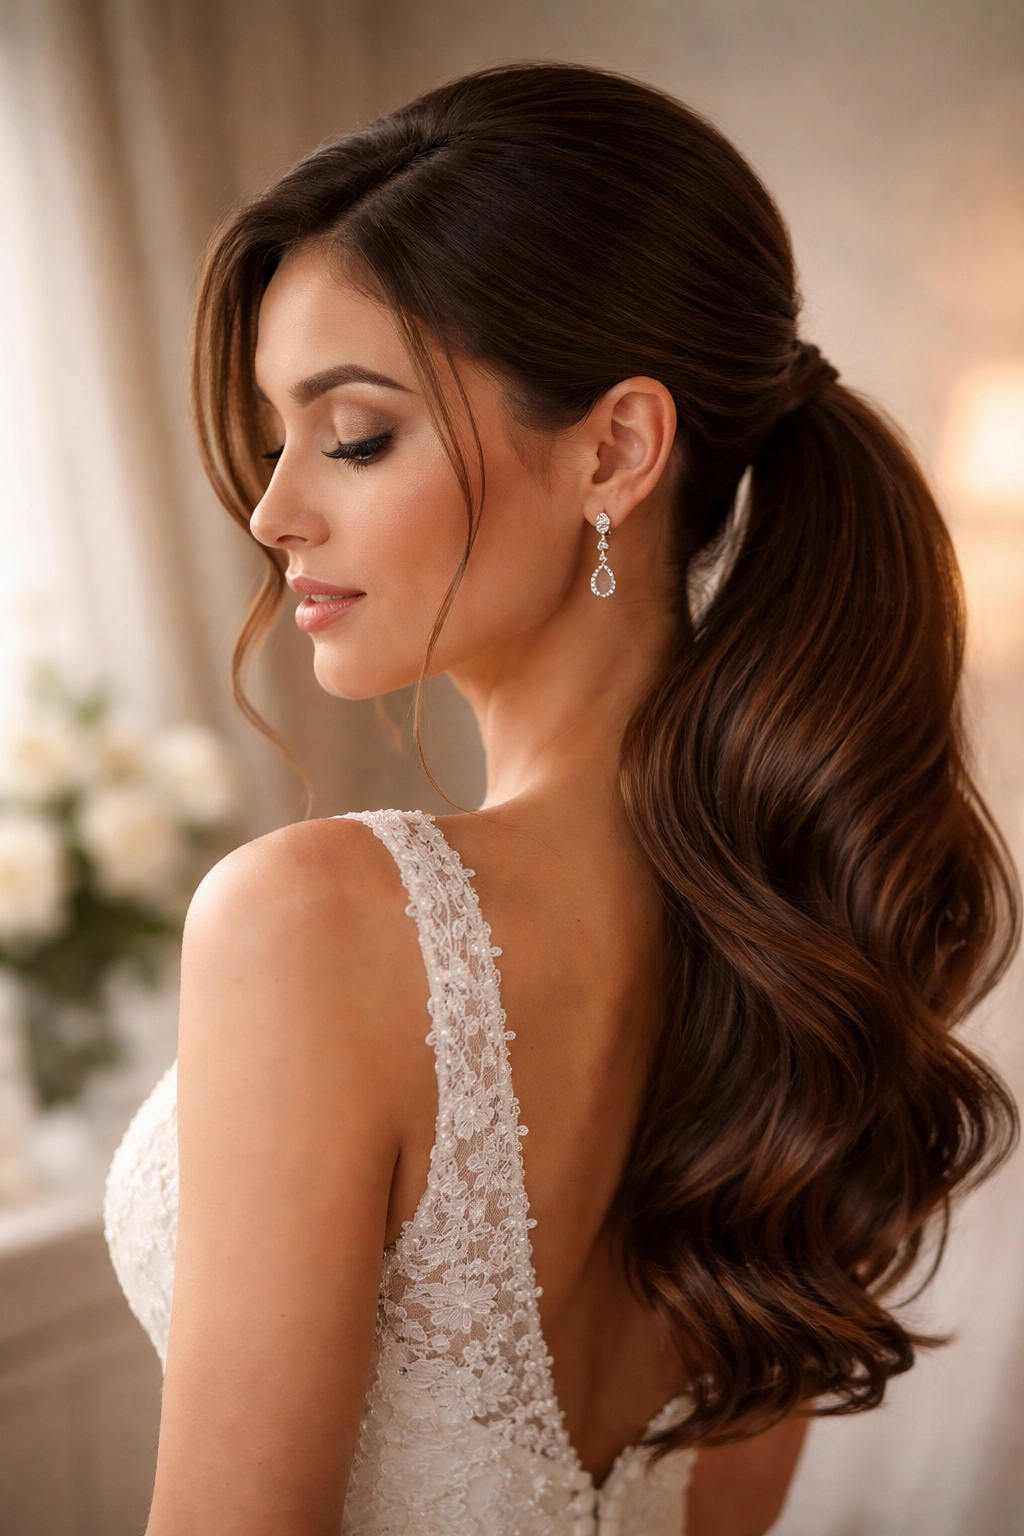
7. Side Ponytail with Wrapped Braid and Face-Frame Curls
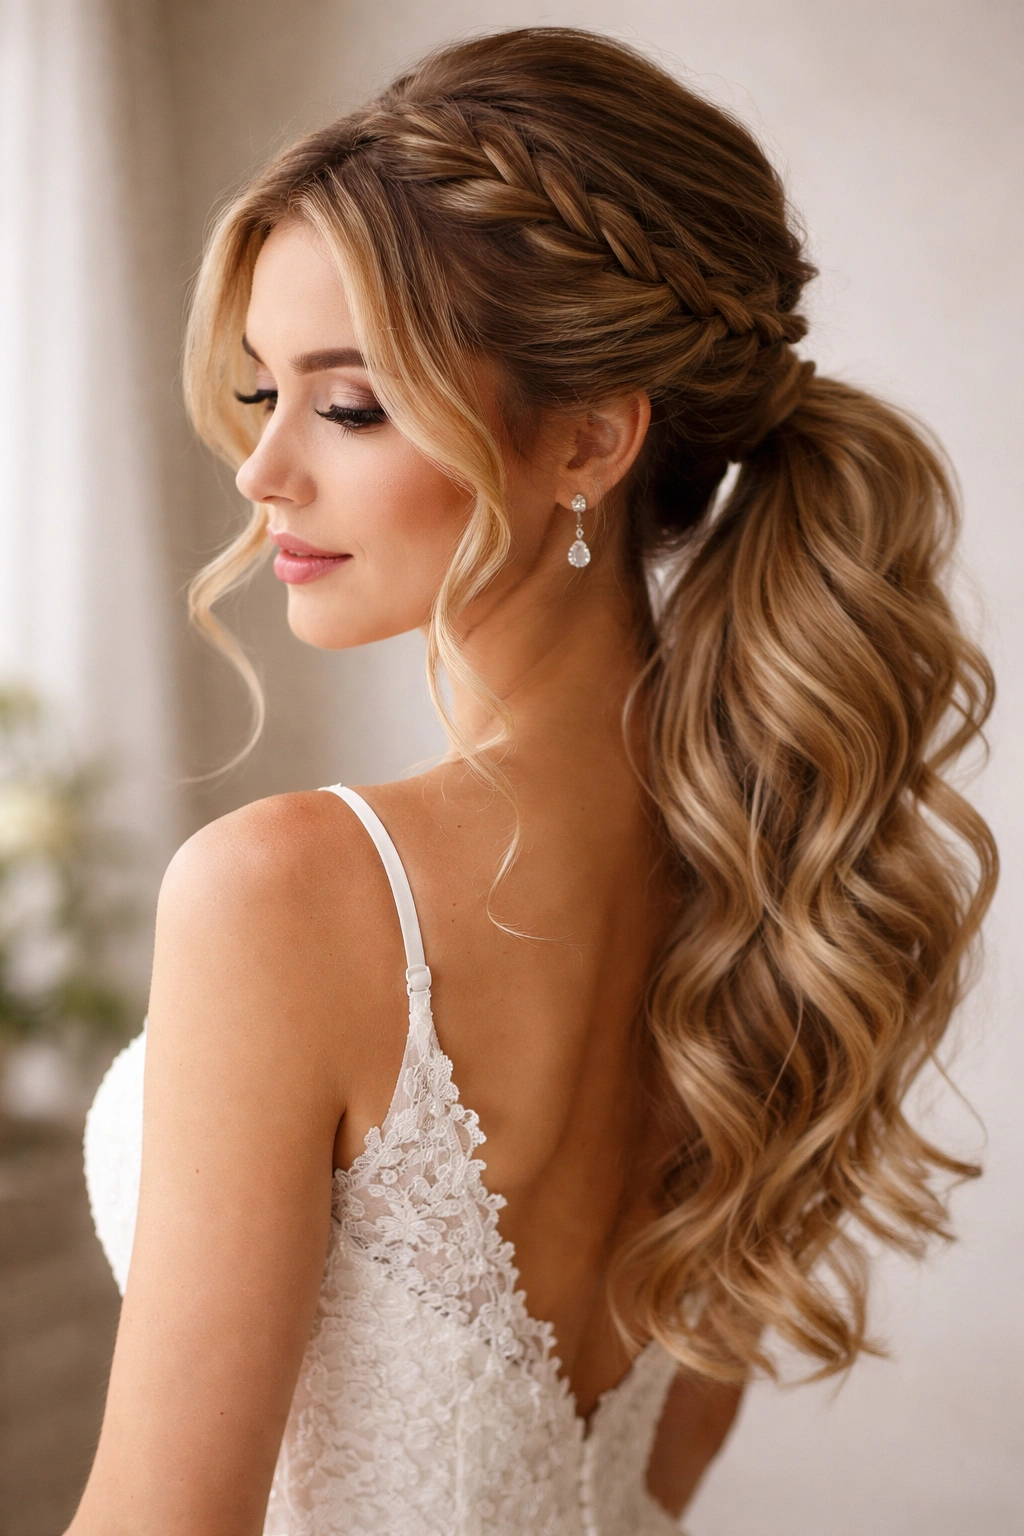
This style combines multiple elements—a secure braided base, face-framing curls, and a side placement—to create something that reads as both intricate and approachable. It’s stunning without being severe, making it an excellent choice for bridesmaids or for brides who want something special but not completely formal.
Creating the Braided Base Structure
Gather your hair to the side with a slight tilt toward one shoulder. Rather than securing immediately with an elastic, take a small section of hair from the front left side (near your temple) and begin a French braid that incorporates hair as it travels back toward your side ponytail gathering point. This braid doesn’t need to be perfect or tight—loose, textured braids photograph beautifully and feel more romantic. Incorporate all the hair you want in your ponytail into this braid as you move back, then secure the entire gathering with a clear elastic. The braid becomes a design detail that adds visual interest at the side of your head.
Adding Face-Framing Softness
Leave two small sections of hair out at your face—one on each side—before beginning your braid. These sections should curl naturally or be gently waved to frame your face softly. The contrast between the braided structure of your side ponytail and the flowing curls around your face creates visual balance and softness. The ponytail itself can hang straight, loosely waved, or with gentle curls for added dimension.
Insider note: This style is particularly flattering for oval or heart-shaped faces because the side placement and face-framing elements create width and softness where needed.
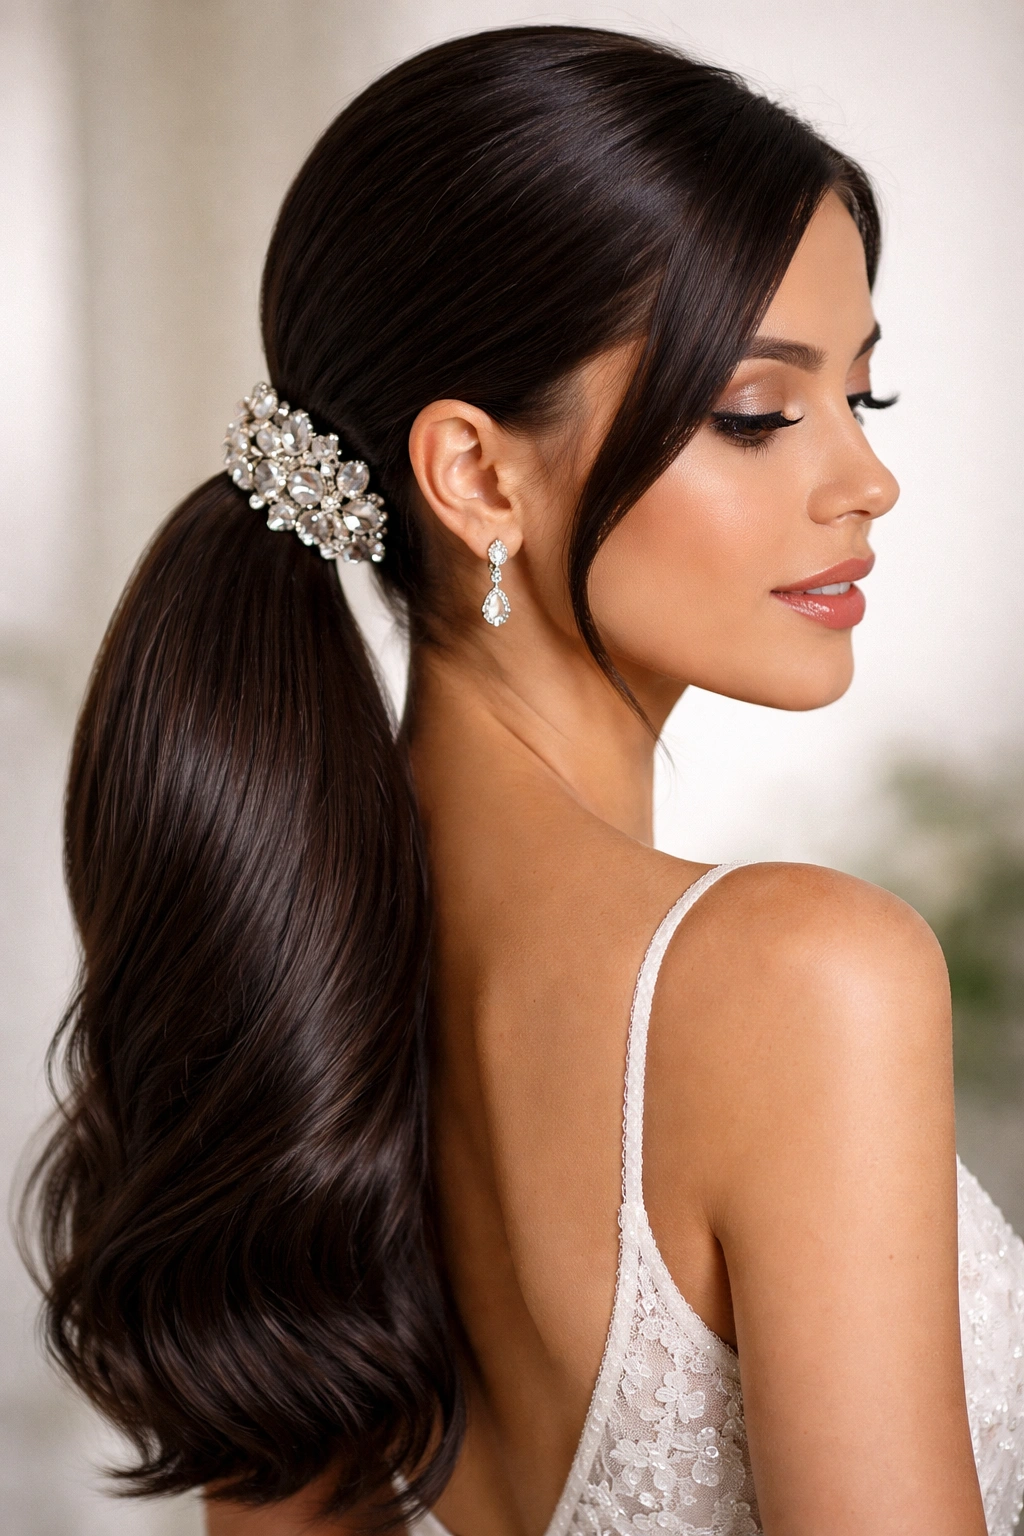
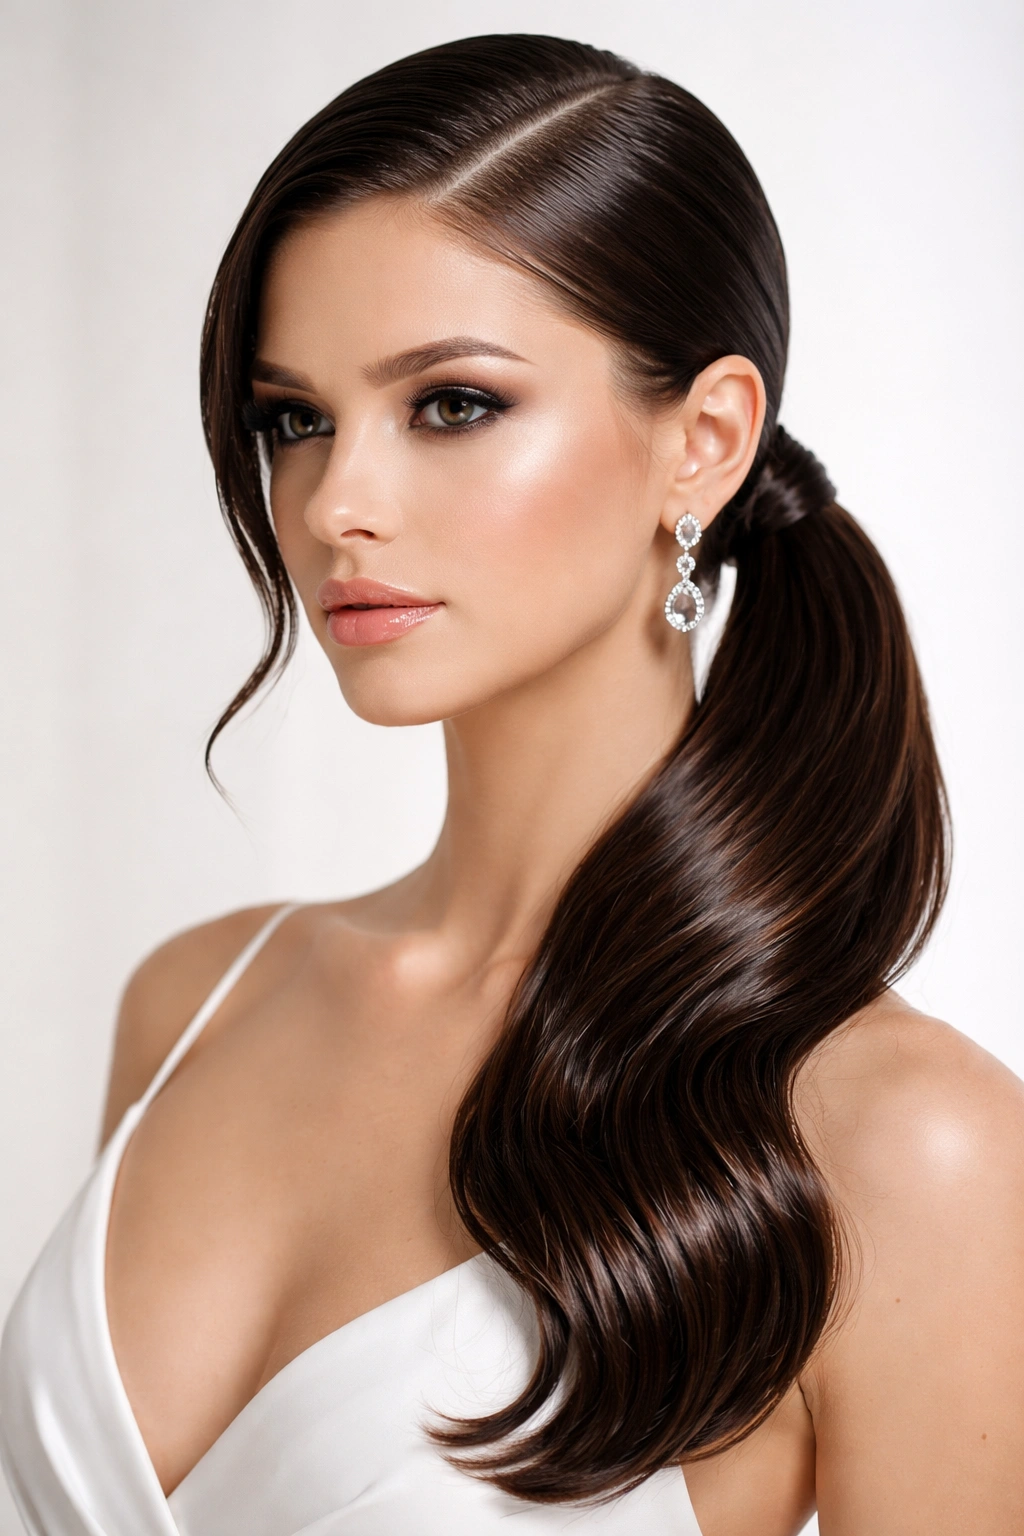
8. Polished High Side Ponytail with Jeweled Bobby Pins
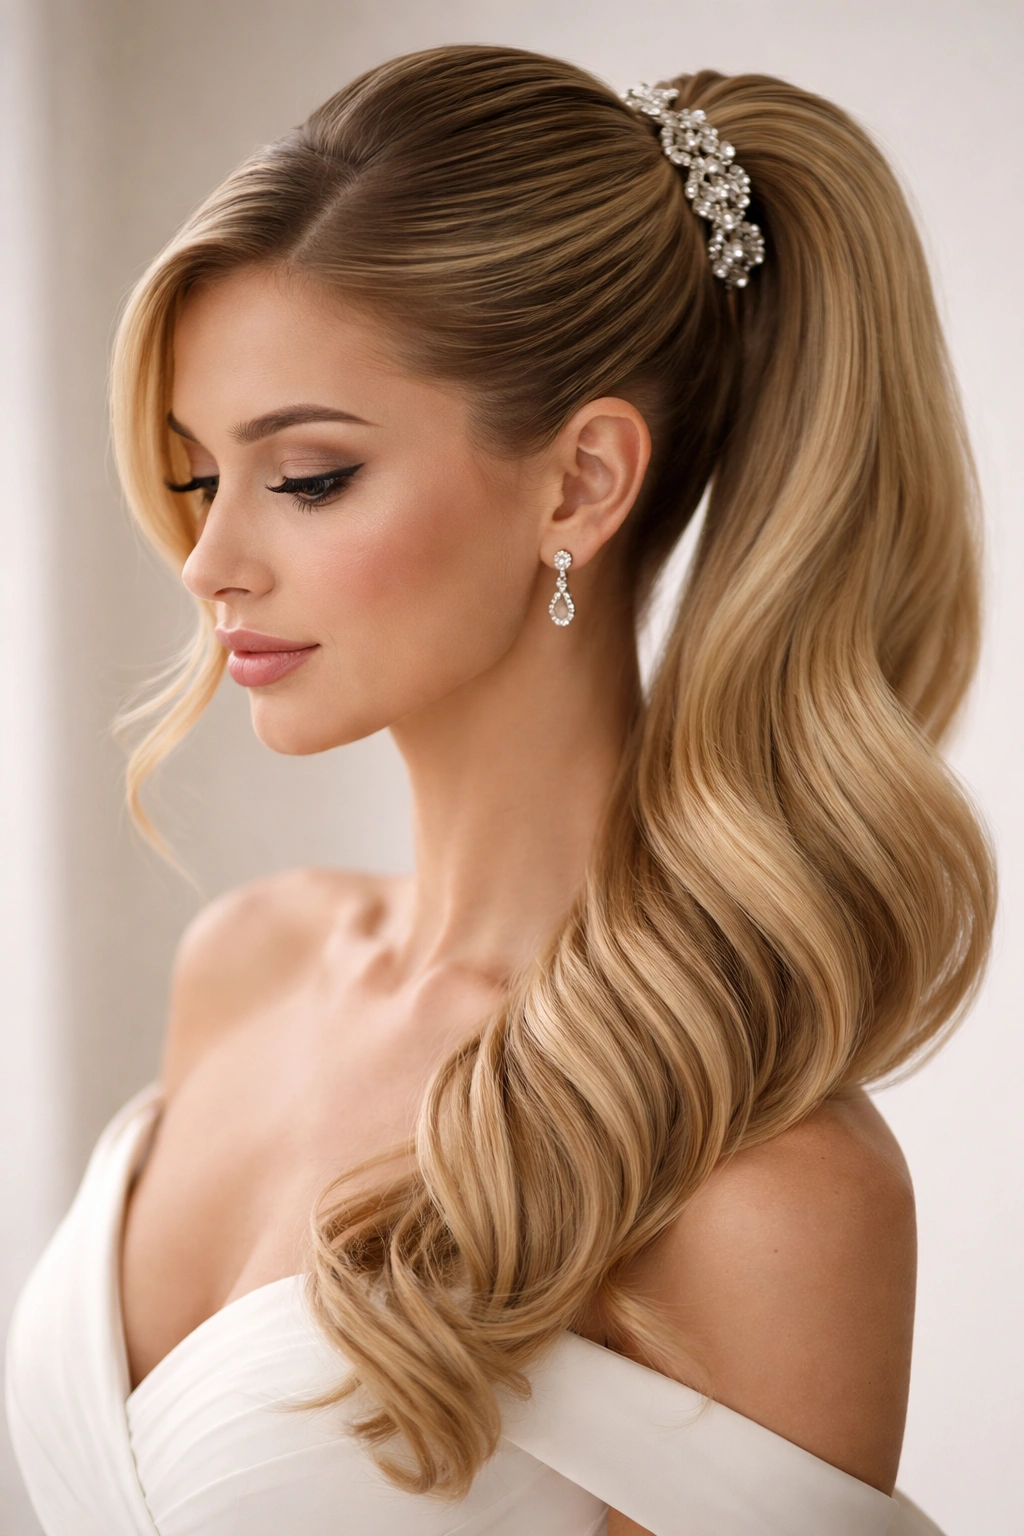
Elevation comes from placement and finishing details, and this style proves that point. A higher side ponytail placement has a different energy than a low or mid-level one—it feels more contemporary and creates an elongated line. The addition of decorative jeweled bobby pins transforms it from simple to special.
Achieving the Right Height and Placement
Gather your hair to the side at approximately the level of your crown or slightly below—this higher placement requires smoothness and polish to avoid looking overly casual. Use a fine-tooth comb to gather your hair smoothly, securing it with a clear elastic. The placement should sit closer to one ear than directly at the side of your head, creating an asymmetrical line that photographs beautifully. Before securing permanently, make sure the ponytail feels secure and won’t slip with movement—if it does, add a second clear elastic just below the first one, then cover both with a decorative comb or clip.
The Jeweled Pin Finish
Take two or three jeweled bobby pins—pearl, crystal, or gold-toned—and insert them at angles around the base of your ponytail, covering the elastic completely. These pins should be visible and should sparkle, becoming a focal point rather than hidden infrastructure. The pins add a touch of glamour without feeling costume-y, especially if they coordinate with your wedding jewelry or bouquet details. The ponytail itself should be sleek and smooth, allowing the pins to be the star of the show.
Worth knowing: A higher side ponytail requires more secure bobby pins and elastics than a lower placement because of the angle and tension—test the security of your placement before your wedding day to ensure nothing slips during the ceremony.
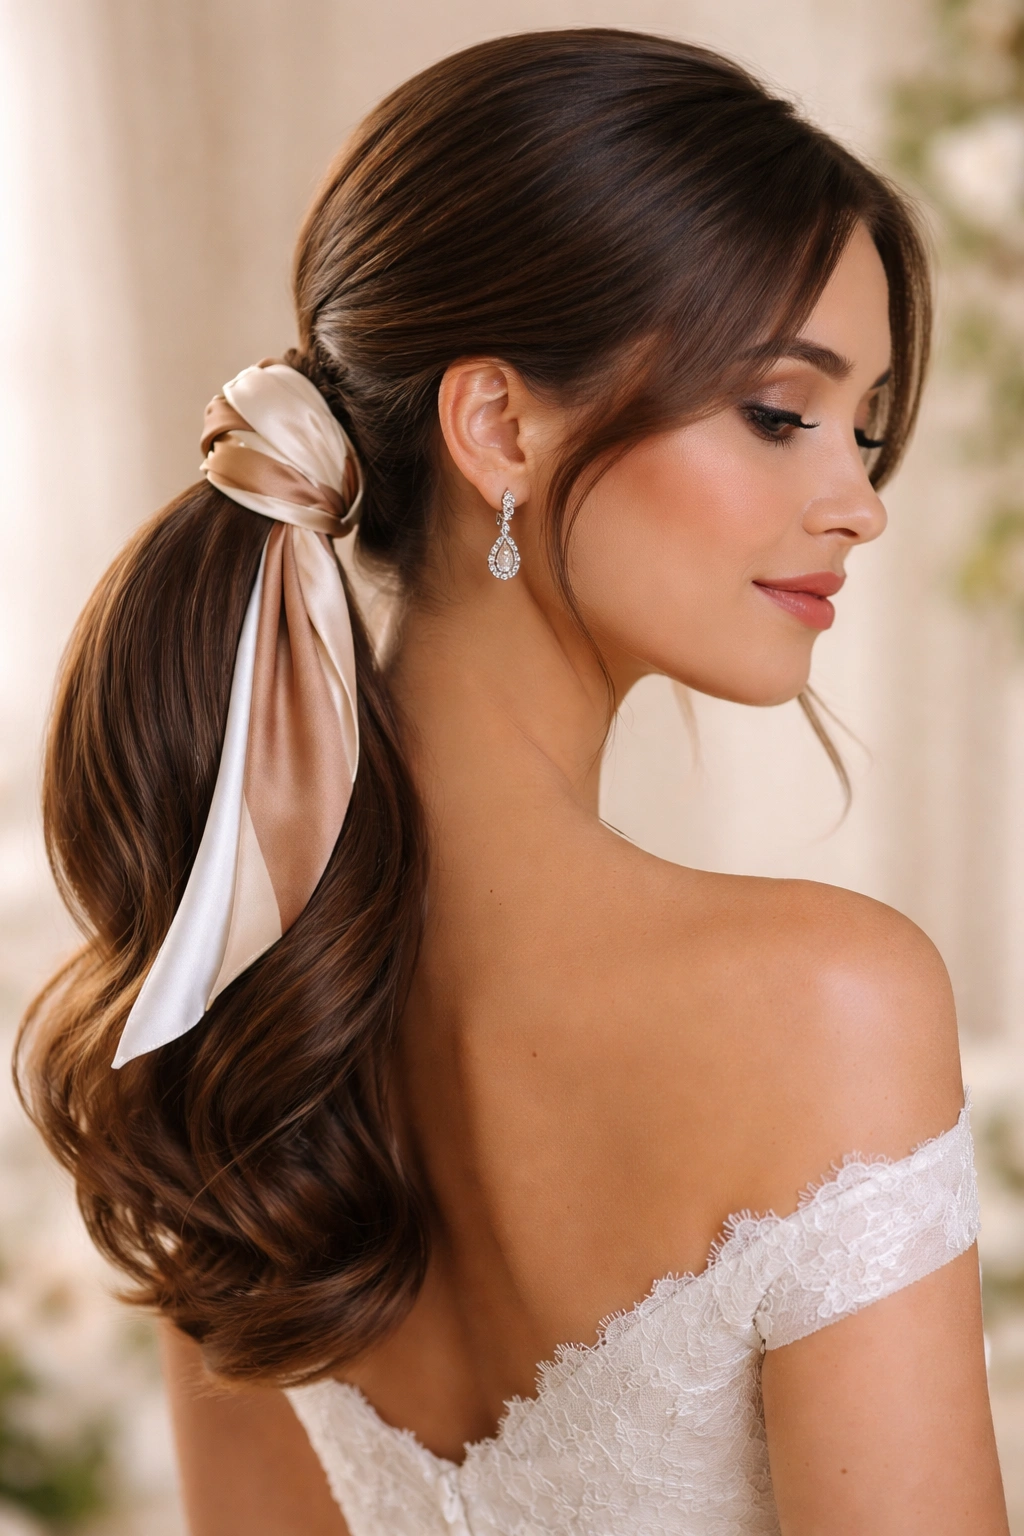
9. Boho Side Ponytail with Ribbon Weave
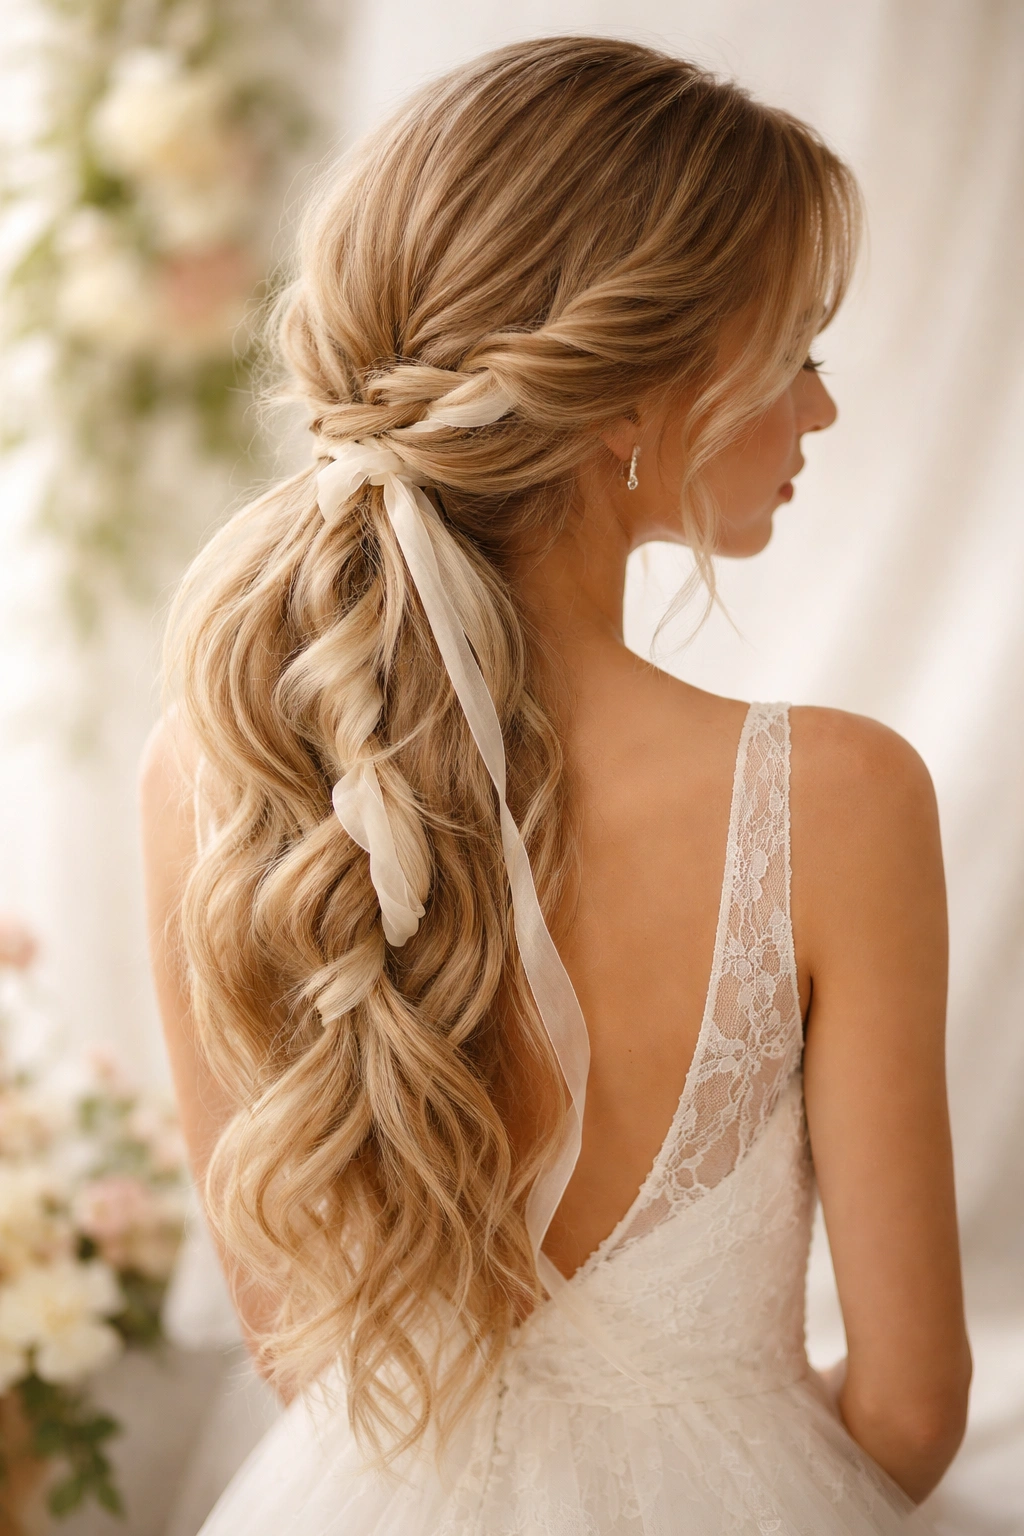
Boho-inspired weddings call for a side ponytail that feels soft, romantic, and slightly undone—and weaving a delicate ribbon through your hair achieves exactly that. This style is flowing, feminine, and works beautifully with loose waves and a relaxed overall aesthetic.
Preparing Hair with Texture and Wave
Begin with your hair curled or waved to create the soft foundation this style requires. The waves should be loose and romantic, not tight or uniform. Once your waves are set, gather your hair to the side at a mid-level placement—not too high, not too low, creating balance. Before securing your ponytail, thread a delicate ribbon (silk or satin in a soft color like blush, champagne, or ivory) through the gathered section, weaving it in and out as it travels down. Secure your ponytail with a clear elastic, then wrap the ribbon around the base, tying it in a bow or a simple knot.
Creating Intentional Softness
This style is all about softness and flow. Make sure your waves have movement and aren’t pulled too tightly at the crown—you want a slightly undone, romantic quality. The ribbon should coordinate with your wedding palette and dress, becoming an extension of your overall aesthetic rather than a contrasting element. If you’re wearing a floral crown or flower comb, the ribbon can echo the colors and romantic nature of those accessories.
Pro tip: Practice weaving ribbon through your hair before your wedding day to figure out the best technique and to ensure the ribbon doesn’t tangle or slip as you move throughout the day.
10. Sculpted Side Ponytail with Geometric Hair Comb
For a distinctly modern or editorial wedding aesthetic, this style takes sleekness to the next level. A geometric, architectural hair comb becomes the focal point, creating visual interest through shape and form rather than through braids or texture. This is the choice for someone who loves contemporary design and fashion-forward styling.
Building the Sleek Foundation
Create a perfectly smooth, sleek side ponytail using smoothing serums and a fine-tooth comb. Every hair should be in place with no flyaways or texture softening the line. Secure with a clear elastic, then insert a substantial geometric hair comb—angular, sculptural, and likely made from metal, tortoiseshell, or resin—at the base of your ponytail. The comb should be visible and should be the styling statement, not hidden or underplayed. The ponytail itself can hang perfectly straight or with a subtle bend, but it should maintain that sleek, polished quality throughout.
Coordinating with Your Overall Look
This style works best when your overall wedding aesthetic is clean, modern, and minimal. If you’re wearing a simple dress, minimal jewelry, and a structured bouquet, this sculpted side ponytail completes the picture. The comb you choose should coordinate with your metal tones (gold, rose gold, silver) but doesn’t need to match other jewelry exactly—creating intentional coordination rather than matching is more sophisticated. Your makeup can be bold or soft, but the hair should remain the anchor of sculptural simplicity.
Worth knowing: A geometric comb requires strong, healthy hair at the base to hold securely—if your hair is fine or thin, consider a smaller comb or use bobby pins in addition to the comb for security.
11. Romantic Ponytail with Woven Flower Comb and Loose Waves
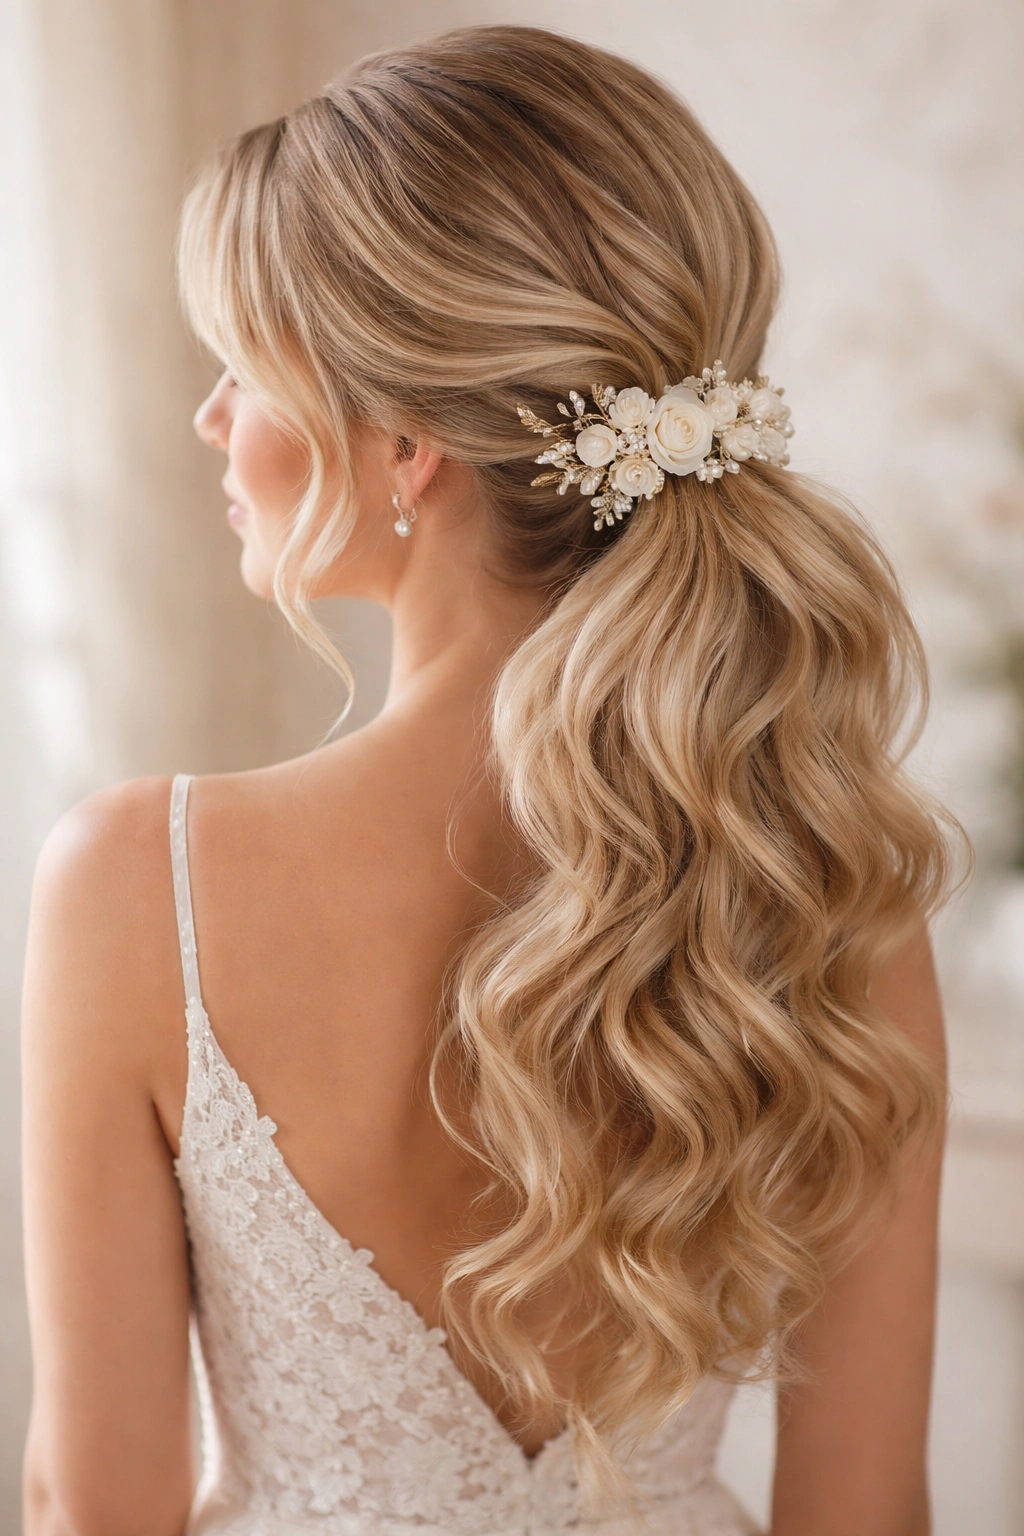
This style is unmistakably bridal and romantic, combining a side ponytail with a flower comb and the softness of loose waves throughout. It works beautifully whether you’re a bride, a bridesmaid, or a guest wanting to feel celebration-ready. The flower comb can be fresh flowers, silk flowers, or pearl-and-florals if fresh flowers don’t suit your timeline or budget.
Creating the Wave Foundation and Placement
Curl or wave your entire head with a large-barrel tool, creating romantic waves that will flow through both the gathered and the loose sections of your hair. Gather your hair to the side at a mid-level placement, leaving subtle face-framing pieces loose if desired. Secure your ponytail with a clear elastic, then insert your flower comb at the base or slightly to the side of the ponytail base. If you’re using fresh flowers, have your florist create a small comb suitable for hair (typically 2-3 inches wide) that coordinates with your bridal bouquet or bridesmaid flowers.
Balancing Romance with Wearability
The waves throughout your ponytail should feel organic and romantic, not uniform or overdone. The flower comb adds romance without requiring elaborate braiding or intricate techniques. This is an excellent choice if you want your hair to feel special and bridal without spending hours in the styling chair. The flowers can be white, blush, sage, or any color in your wedding palette, creating cohesion with your overall look. Finish with a flexible-hold hairspray that allows movement while maintaining the wave structure.
Insider note: If using fresh flowers, have your stylist or florist secure them with both the comb and additional bobby pins for security—you don’t want flowers slipping during your celebration.
12. Sleek Wet-Look Side Ponytail with Stark Elegance
This ultra-modern style is for someone who wants to make a bold statement and isn’t afraid of a sleek, wet-look aesthetic. It reads as distinctly current and fashion-forward while remaining entirely appropriate for a wedding. The shine and sculpted quality create a striking visual that photographs beautifully.
Achieving the Wet-Look Finish
Create a side ponytail using a strong-hold gel or smoothing cream that creates shine and definition. Use more product than you normally would, smoothing it through your hair to create that intentionally glossy, sculpted appearance. Gather your hair to the side with absolute precision, creating a clean line with no flyaways. Secure with a matching elastic and cover the elastic with either a sleek clip or a wrapped section of hair. The entire style should have a high-shine finish that reads as intentional and polished rather than as though you didn’t style your hair.
Styling for Impact
This style works best with simple, minimal additional accessories. Your flower comb, decorative clip, or wrapped detail should be understated so that the sleek, shiny texture remains the focal point. The ponytail can hang perfectly straight, emphasizing the sculpted quality of the style. This is an excellent choice if your wedding aesthetic is modern, minimalist, or architectural—think clean dresses, sleek jewelry, and contemporary details throughout.
Pro tip: The wet-look finish requires touchups throughout the day if you’re moving, dancing, or in humidity—carry your styling product and a fine-tooth comb to refresh the style during your celebration.
Final Thoughts
A side ponytail is deceptively simple—the placement and a few essential techniques transform it from everyday to extraordinary. The versatility of this style means you can adapt it to nearly any wedding aesthetic, whether you’re going romantic and soft, modern and minimal, or bold and editorial. What matters most is the foundation: healthy, well-prepped hair; secure placement; and thoughtful finishing details that reflect the specific moment you’re celebrating.
The beauty of these twelve variations is that they prove you don’t need an elaborate updo or complex braiding to feel bridal and special. Sometimes a side ponytail, styled with intention and executed with precision, speaks louder and photographs better than a complicated style ever could. Your wedding day is the moment to choose the side ponytail version that makes you feel most like yourself—the one where you catch your reflection and think, “Yes, this is exactly right.” Whether that’s the romantic waves and tendrils or the sculpted sleekness is entirely up to you, and either choice is absolutely correct.