A bob will tell on you faster than long hair.
When the line is crisp, the ends are dense, and the shine is healthy, old money bob cuts give off the polished look people keep trying to fake with clothes, handbags, and jewelry. When the cut is hacked up, over-thinned, or fried at the ends, the spell breaks right away. A bob puts every choice on display—length, parting, density, even how well you treat your hair between salon visits.
The phrase old money gets tossed around for almost anything tidy and expensive-looking, yet the hair version is less about wealth than restraint. These cuts do not beg for attention. They sit close to the head in a controlled way, hold their shape, and make your hair look like it has been cared for on purpose. That means fewer ragged layers, less obvious texture spray, and a lot more respect for clean lines.
I keep coming back to the same point because it matters: the perimeter is everything. A half-inch too much weight removed around the jaw can turn a strong bob into a limp one. A razor can make soft ends on the right head of hair, sure, but on fine or fragile hair it often leaves that frayed, airy finish that reads cheap instead of polished. And if your nape has a cowlick, the back of the cut needs special attention or it will kick out by lunchtime.
That’s where the right version comes in, because there isn’t one old money bob. There are at least a dozen solid ways to wear one well.
What Makes Old Money Bob Cuts Look Expensive
Restraint does most of the work. The polished look people associate with old money hair usually comes from shape, shine, and discipline—not from dramatic layers or fussy styling tricks. The best bob in this lane looks intentional from every angle, even when you catch it in bad bathroom lighting.
A few details show up again and again in these cuts:
- A firm perimeter that looks full at the ends rather than wispy
- Controlled volume at the crown or roots, never a helmet shape
- Soft bends or a tucked finish instead of loose, salty texture
- Healthy shine that reflects light across the surface of the hair
- Minimal layering on the outside so the silhouette stays clean
- A part that suits your face and stays put after styling
- Movement with weight, which is the hard part
Hair condition matters more here than people want to admit. The American Academy of Dermatology has long pointed out that repeated heat, chemical processing, and rough handling can lead to breakage and dullness. On long layers, you can hide some of that. On a bob, you cannot. Dry ends look louder on short hair because there is less length to distract from them.
Product choice should stay tight and practical. A light heat protectant, a smoothing cream the size of a pea, and a flexible hairspray often do more than a cabinet full of sticky stylers. If you need a flat iron, keep the temperature matched to your hair type—around 250°F to 300°F for fine hair, 300°F to 350°F for medium hair, and up to 375°F for coarse hair—so you polish the cuticle without cooking it.
Skip the crunchy texture unless the cut asks for it. Most old money bob cuts look best when the hair feels smooth between your fingers and the ends land with weight.
How to Ask for Old Money Bob Cuts at the Salon

Walk into the salon saying “I want an old money bob” and a good stylist will probably ask you ten follow-up questions. Fair enough. That phrase gives a mood, not a blueprint. You need shape words.
Salon terms that help
Ask about perimeter, weight line, bevel, graduation, and internal layers. Those words tell your stylist how you want the haircut to behave, not only how you want it to look in a photo. A perimeter is the outer line of the cut. Graduation means the hair gets slightly shorter as it stacks upward, often at the back. Internal layers remove bulk from inside the shape while leaving the surface cleaner.
Length matters in tiny increments with a bob. Bring reference photos from the front, side, and back, then say exactly where you want the longest pieces to hit: lip, chin, jaw, neck, or collarbone. “A little shorter” is not enough. On a bob, “a little” can mean the difference between flattering and annoying.
What your stylist needs to know before the first snip
Tell them how much styling time you’ll give the cut on a normal weekday. Five minutes? Fifteen? That answer changes the plan. A glassy center-part bob needs more finish work than a softly beveled chin bob. Mention cowlicks around the hairline and nape, your natural wave pattern, whether you tuck one side behind the ear, and if you wear glasses. Glasses, by the way, change how a bob sits around the temple and cheek.
Say what you do not want too. If you hate a triangular shape, say so. If you do not want stacked “mom bob” energy at the back, say that out loud. If your hair is fine, ask the stylist to avoid aggressive texturizing shears around the ends. They can hollow out the line faster than you’d think.
Photos help. Honest habits help more.
1. Chin-Length Blunt Bob With Softly Beveled Ends
Picture the bob that keeps showing up in old portraits, fashion editorials, and family photos where everyone looks polished without seeming overworked. That’s this one. A chin-length blunt bob with softly beveled ends lands right at the jaw, gives the face a clean frame, and carries enough weight at the hemline to look expensive.
The trick sits in the word beveled. You still want a blunt outer line, yet the final quarter-inch of the ends gets curved under so the cut hugs the jaw instead of sticking out. That tiny bend changes the mood. The hair looks cared for, not severe.
Why it reads polished
A firm chin-length shape makes your bone structure do part of the styling. Cheekbones look sharper. Necklines look cleaner. If your hair is straight or only slightly wavy, this cut can look tidy with little more than a blow-dry and a pass of a round brush at the ends. On medium-density hair, it often holds shape for two or three days with a silk pillowcase and a quick morning brush-through.
A few practical notes help:
- Best for: straight to softly wavy hair, fine to medium density
- Strong point: makes thin ends look fuller
- Watch for: a heavy cowlick at the front hairline can split the shape
- Ask for: a blunt perimeter with only minimal point-cutting at the ends
Pro tip: ask your stylist to soften only the final 2 to 3 millimeters of the line. More than that and the bob starts losing the compact, polished finish that makes this shape work.
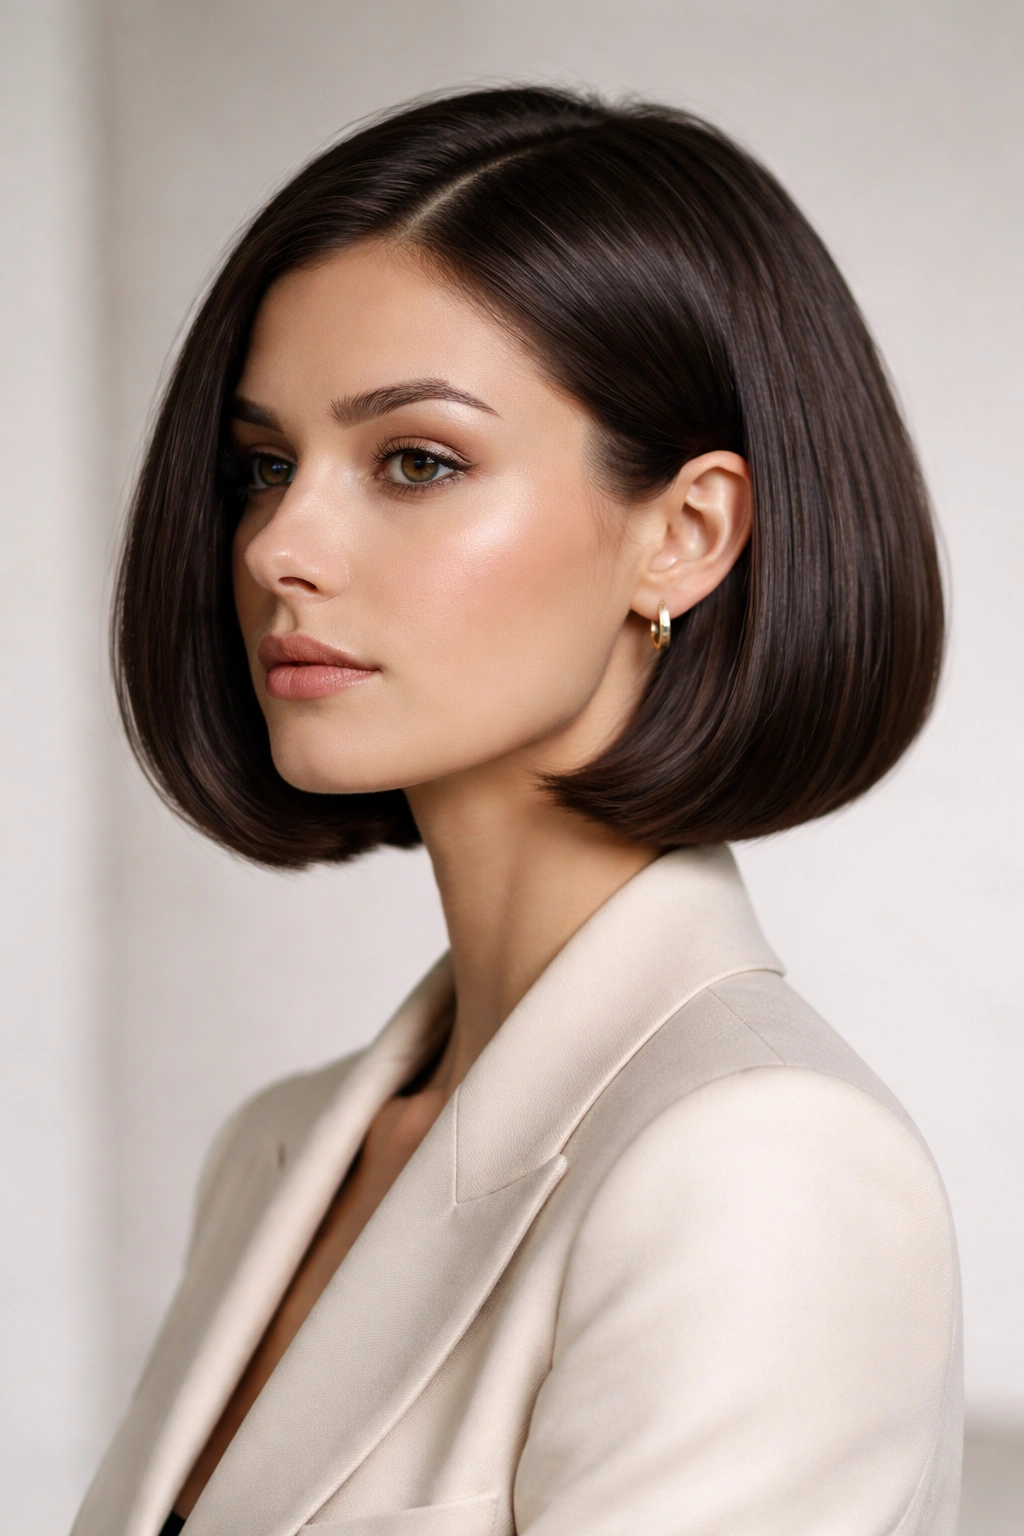
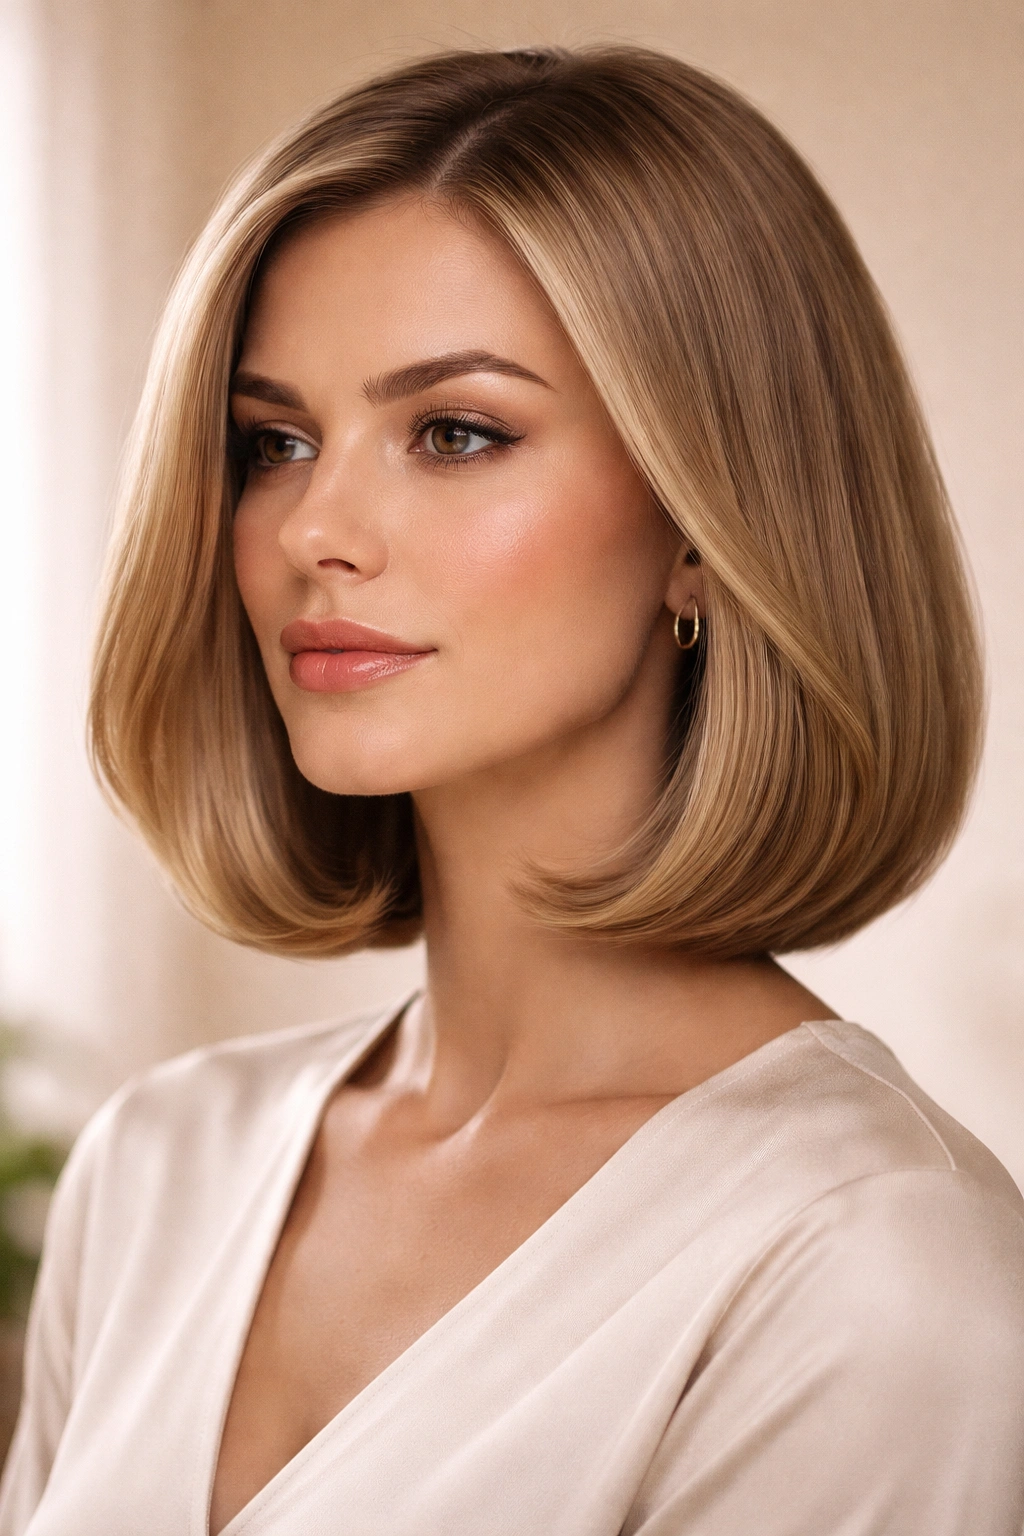
2. Deep Side-Part Jawline Bob
A deep side part can make a bob look richer. I know that sounds like a strange sentence, yet it’s true. When the part drops close to the arch of one brow, the hair gains lift at the roots and a sweep across the forehead that feels poised rather than trendy.
This cut usually hits at the jaw or a hair below it. One side tucks neatly behind the ear, the other side sweeps forward with a controlled curve. It gives the face a little drama, though not the loud kind. Think old boarding-school photos, tailored coats, clean gold hoops, hair that stays put in a crosswind.
Fine hair often loves this shape because the side part creates natural fullness where a center part can flatten things out. A walnut-sized amount of mousse at the roots helps, then your stylist or your round brush pushes the front section up and back before guiding it across. That overdirection is what builds the lift.
There is one catch. If the part goes too deep, the bob can start looking costume-ish and flimsy on the lighter side. Keep it about 1 to 1½ inches off center rather than dragging it all the way over the crown. You want movement and shape, not a comb-over.
3. Collarbone Italian Bob With Tucked Ends
Want more movement than a jaw-length bob gives you, while keeping the same polished spirit? The collarbone Italian bob is where a lot of people land after they realize they want softness without giving up structure.
This cut skims the collarbone and keeps more fullness through the bottom than a typical lob. The Italian influence shows up in the body: a richer blowout, a little bend, a little swing, and hair that looks plush rather than razor-thin. It is one of the easiest old money bob cuts to wear if you like your hair to move when you turn your head.
The tucked finish matters here. Ends that flip all over the place make the cut look casual. Ends tucked under with a large round brush or a 1¼-inch iron keep it polished.
How to style it
Start with a smoothing cream on damp hair, then rough-dry until the hair is around 80 percent dry. Work in sections with a 1¾- to 2-inch round brush, lifting at the roots and rolling the ends under for one clean bend. If you want more body, set the front two sections in large Velcro rollers for 10 minutes while you do your makeup or answer email.
This shape works well on thicker hair that feels bulky in shorter bobs. The extra length lets the hair drop instead of puff out. If your shoulders are broad or you wear collared jackets often, that collarbone-grazing length also looks balanced in a way shorter bobs do not always manage.
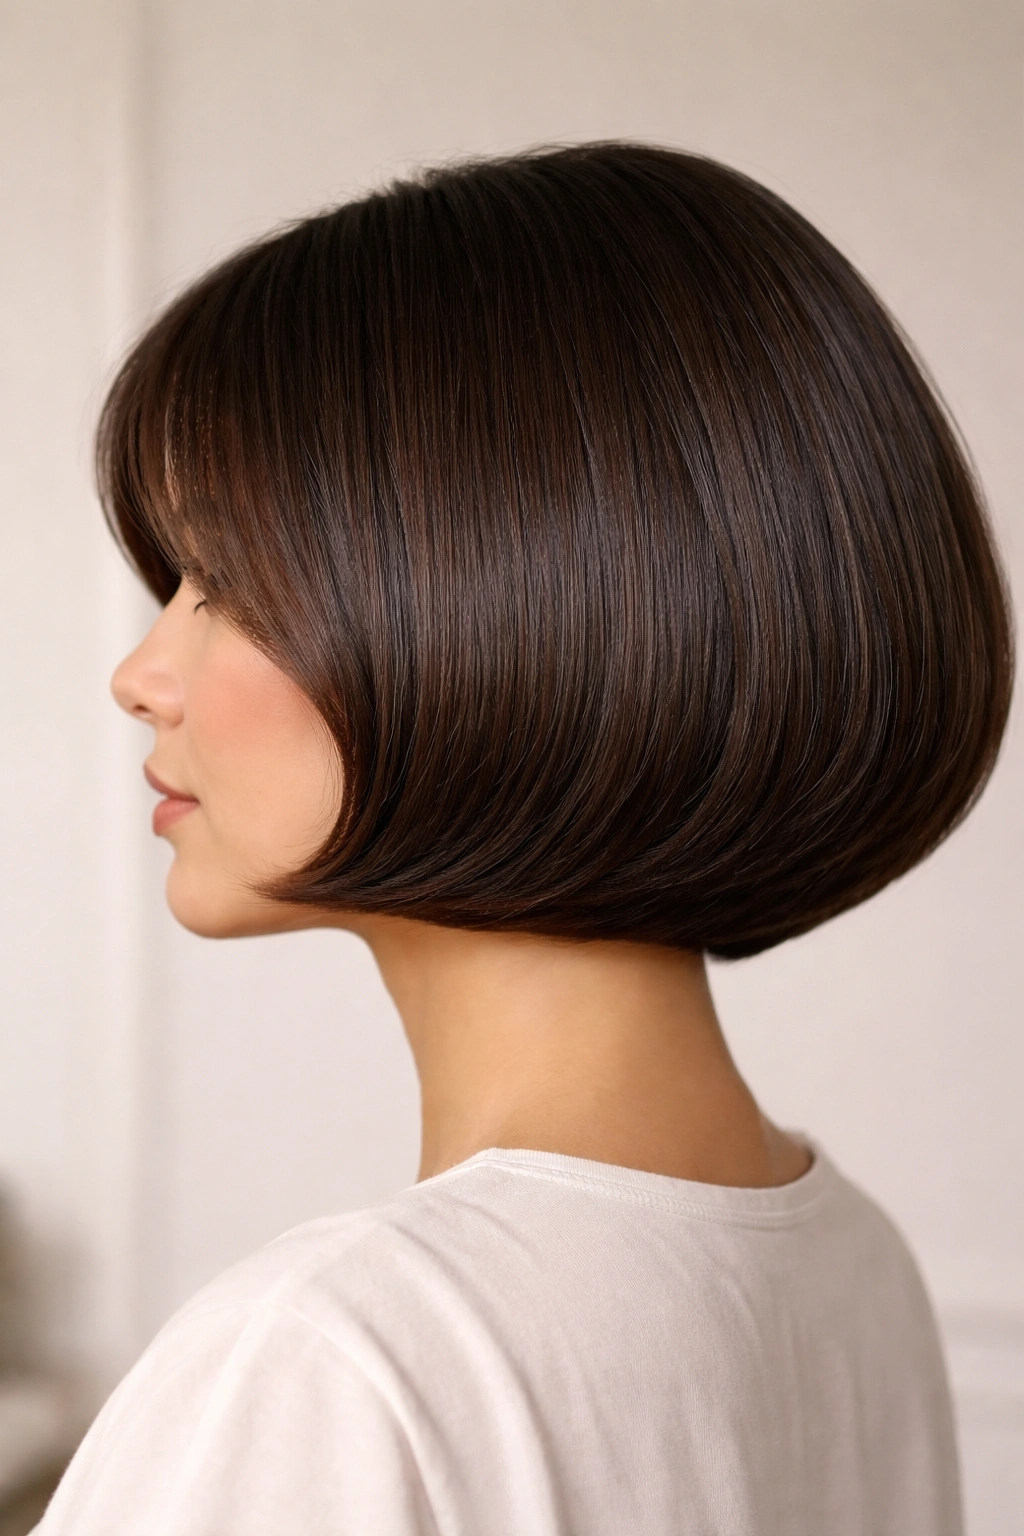
4. Graduated Bob With a Hidden Stack at the Nape
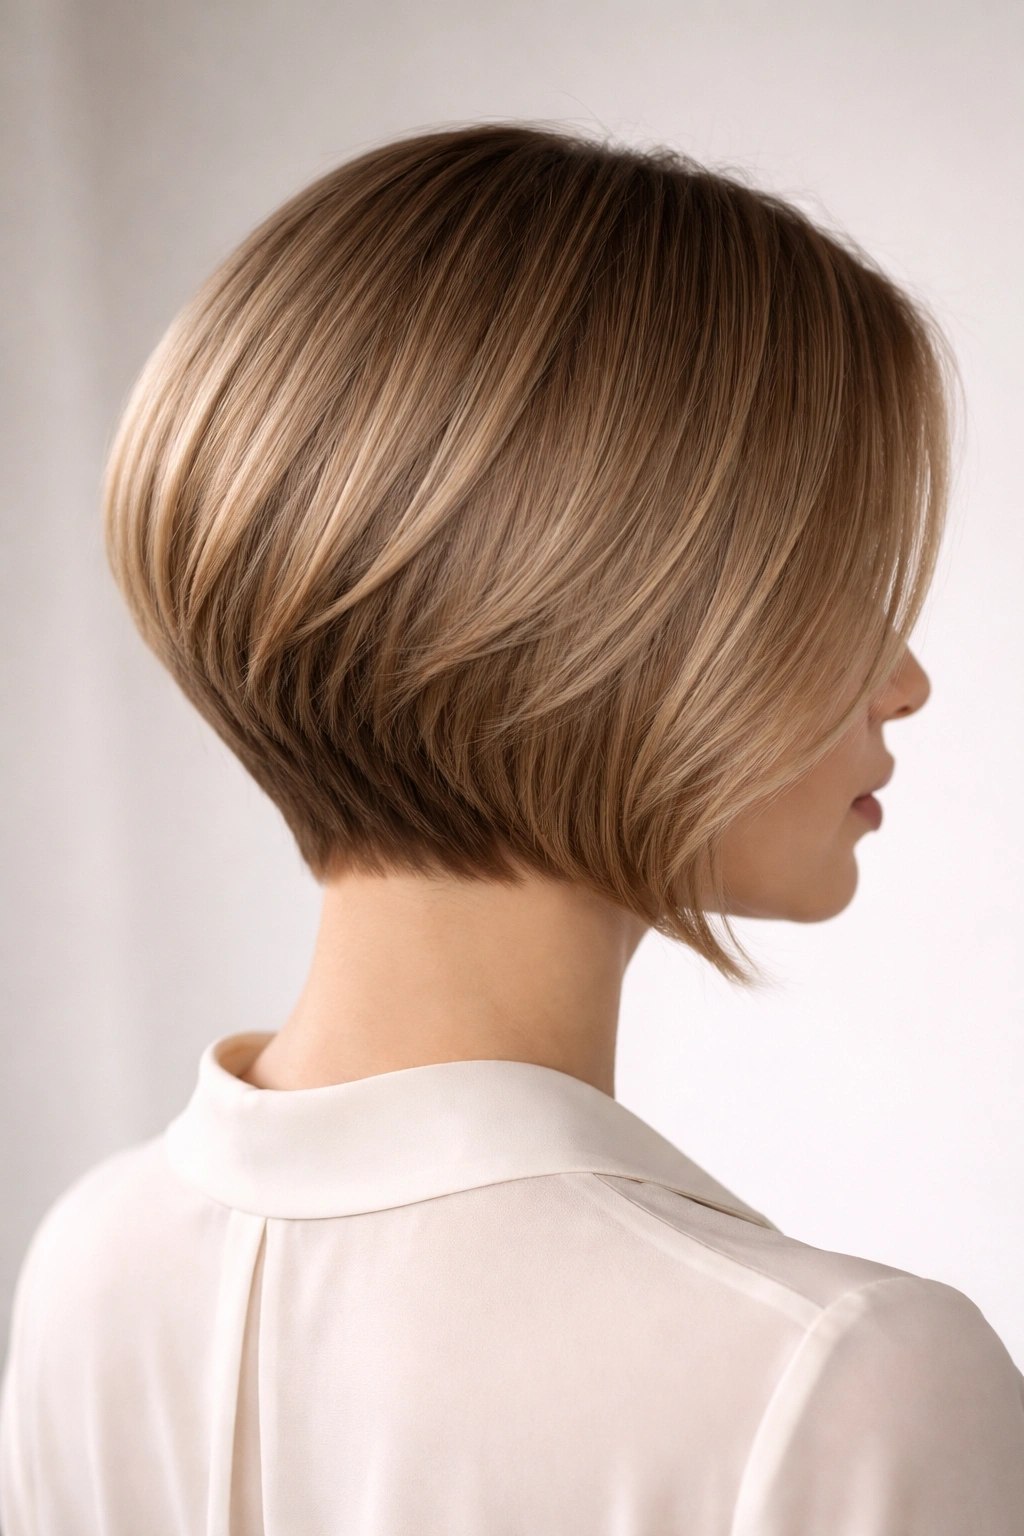
From the back, this cut looks neat enough to make people assume you spend more time on your hair than you do. From the front, it still reads classic. That mix is why a graduated bob with a hidden stack at the nape earns its place here.
The phrase hidden stack sounds more dramatic than it is. You are not asking for a sharp, obvious wedge. You want a soft graduation—often 10 to 15 degrees of elevation at the back—so the nape sits snug and the front keeps a longer, elegant line. Done well, nobody notices the technical part. They only see that the bob falls into place.
This is a smart pick if your hair grows thick at the neck or if humidity makes the back puff out before the front loses shape. The graduation removes bulk where you need it most.
Key details worth mentioning to your stylist:
- Keep the stack inside the cut, not carved into a visible ledge
- Leave the front ½ to 1 inch longer than the back for a polished angle
- Check the nape dry before finishing, especially if you have a cowlick
- Avoid heavy texturizing around the outer line, which can make the back fuzzy
A bad graduated bob can look dated in a hurry. A restrained one looks tailored.
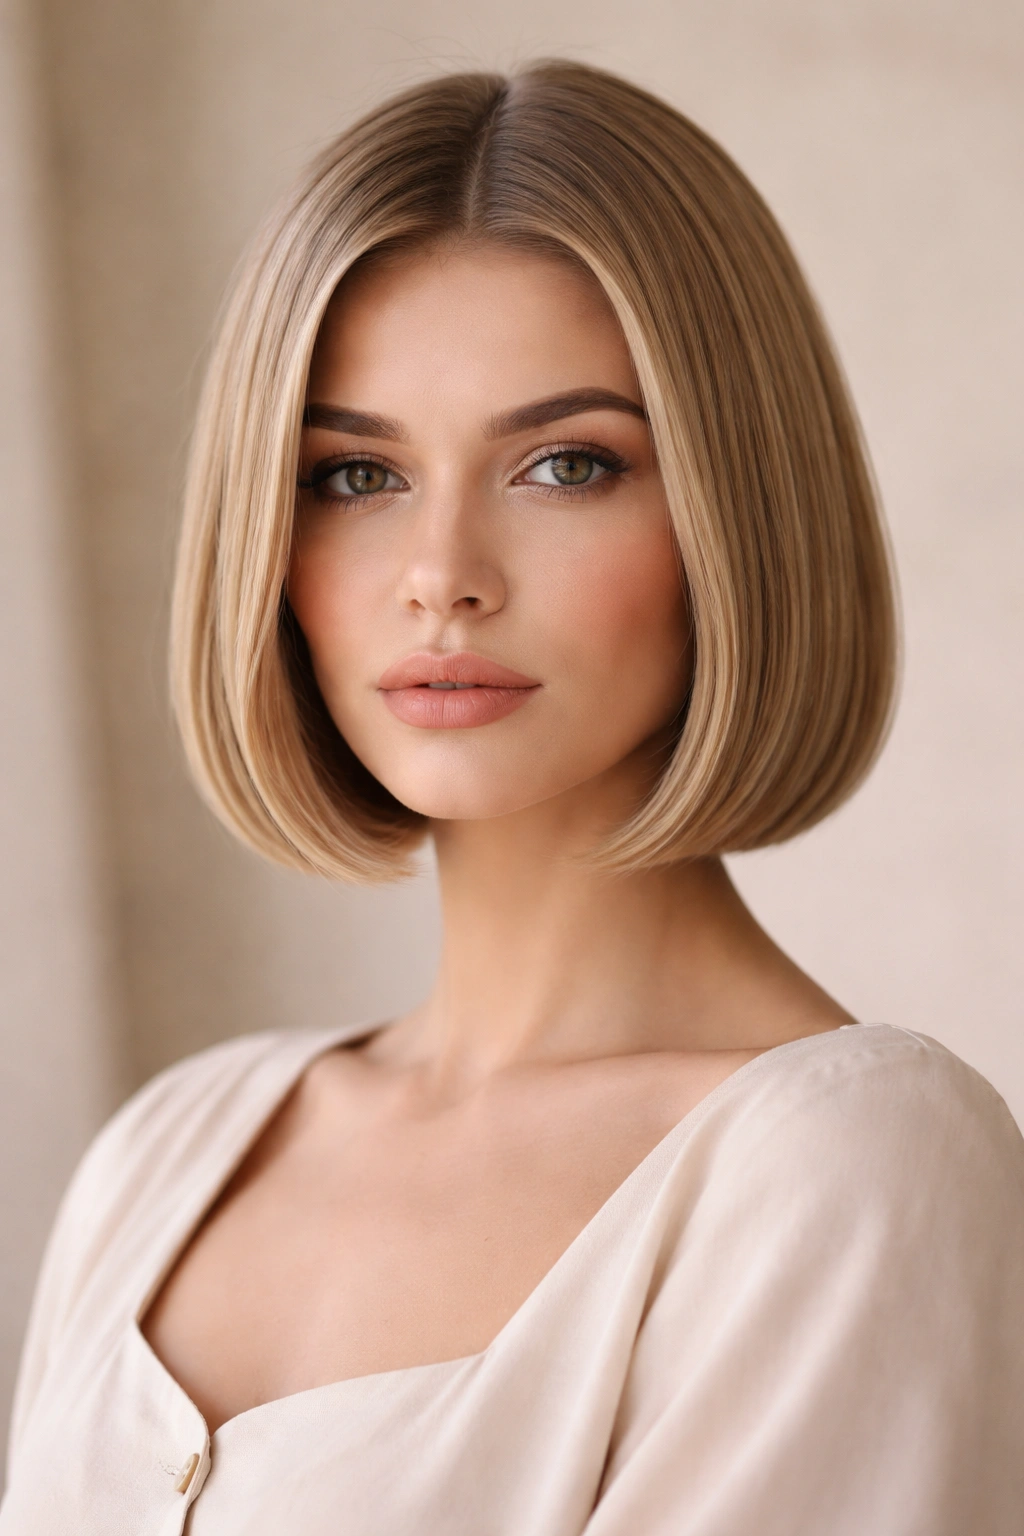
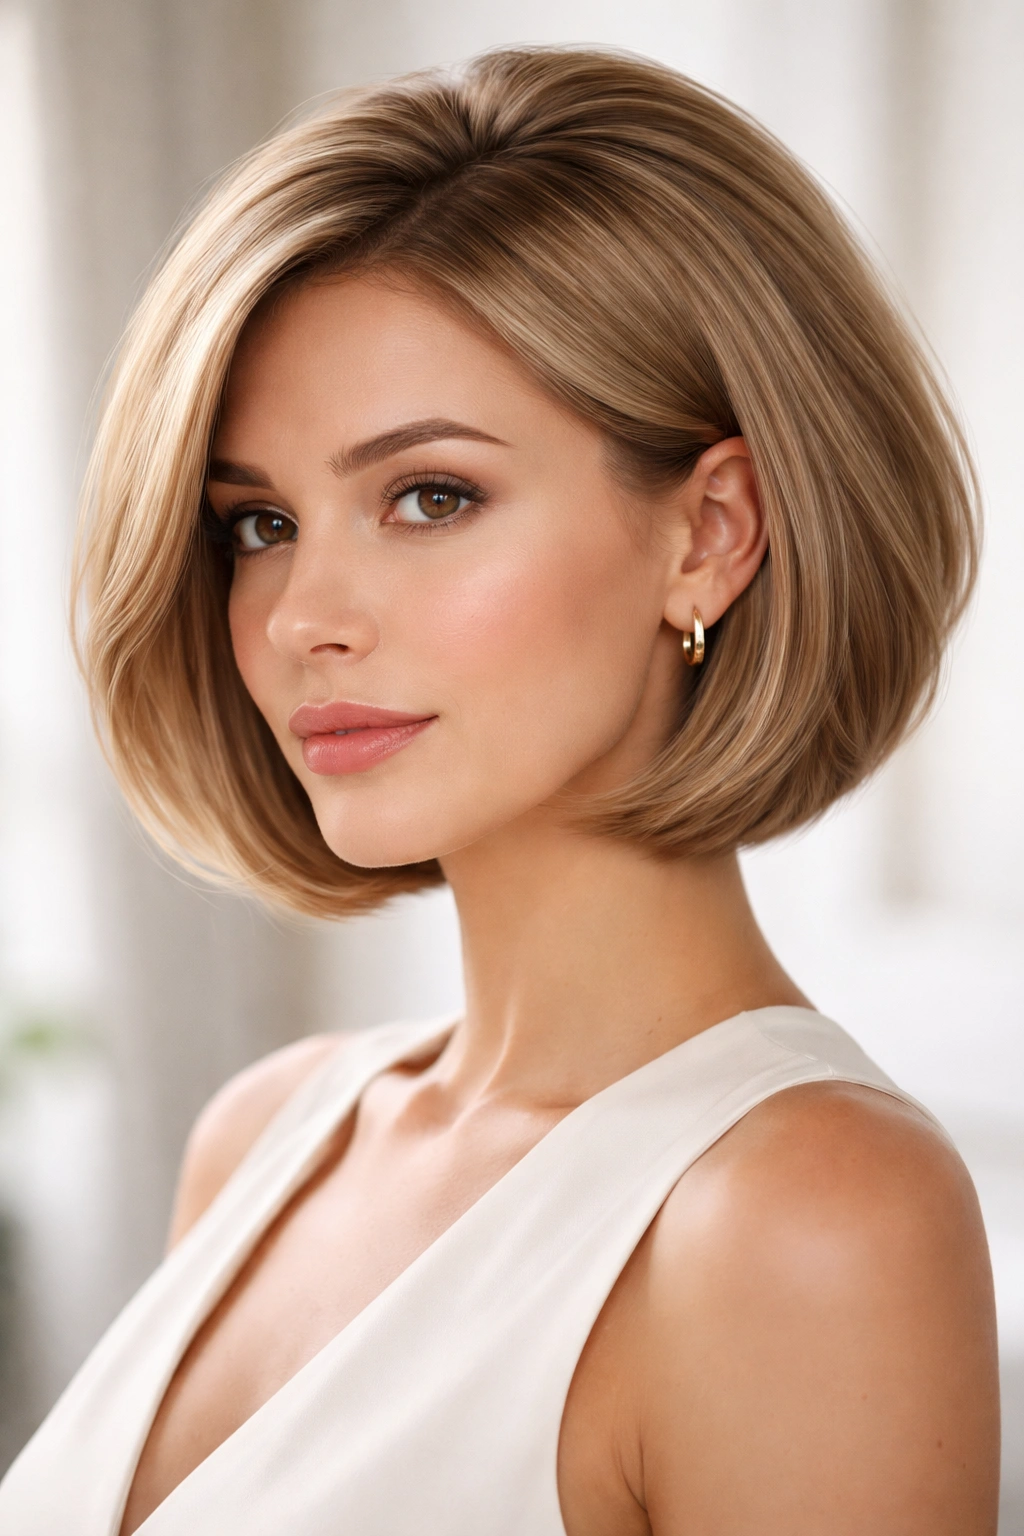
5. Center-Part Glass Bob
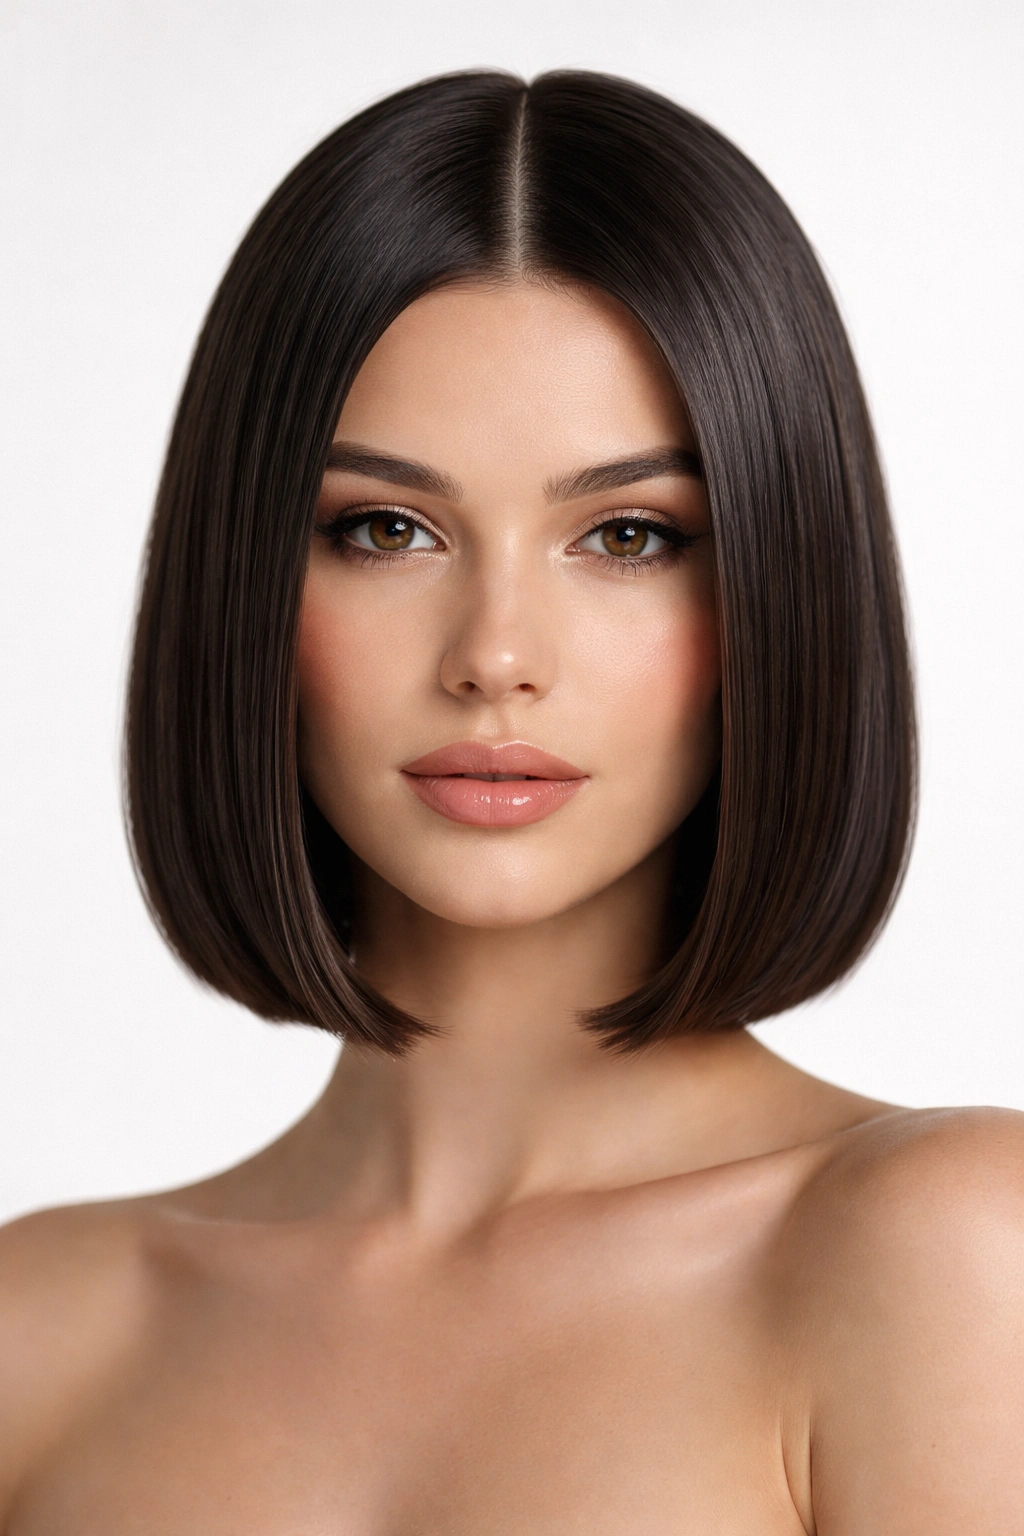
This is the sharpest, glossiest bob on the list, and it does not hide anything. A center-part glass bob puts smoothness, symmetry, and shine right out front. If your ends are healthy and your color is even, the result can look almost liquid.
There are usually no visible layers on the surface. The line stays one length or close to it, and the finish is sleek enough that each side hangs like a pane of fabric. On straight hair, the cut can air-dry into a clean shape with a little help. On wavy hair, you will need heat styling or a smoothing blowout to get the same effect.
The reason this style reads old money rather than fashion-week costume is restraint. No aggressive A-line. No jagged face pieces. No chunked-out ends. The polish comes from the surface being calm and the perimeter staying full.
It also has zero mercy.
If your hair splits at the ends, if your bleach line is uneven, if the temple area breaks off from heat, this cut will show all of it by day three. You need regular dusting at the ends, a silk or satin pillowcase, and a light serum or anti-humidity spray that smooths without making the hair separate into greasy strings.
Use a flat iron after a blow-dry only where you need it, and move with purpose. One slow pass per section is better than five rushed ones. The hair should feel cool and smooth after you finish, not hot and stiff.
6. Long Bob With Face-Framing Front Corners
Unlike a shaggy lob that leans casual and beachy, a long bob with face-framing front corners keeps the back line clean and lets the front do a little sculpting. It is one of the easiest entries into the old money bob family because you still have length to pull into a clip, tuck into a coat collar, or bend with a large brush.
The front corners usually run 1 to 1½ inches longer than the back, often landing between the collarbone and the top of the chest. That extra length narrows the face and adds that graceful, stretched-out line people often want from longer hair, only with a neater shape.
This cut works well if you are growing out a shorter bob and do not want an awkward in-between stage. It also suits anyone who likes the idea of a bob but panics at the thought of exposing the whole neck. Fair. Not everyone wants that much structure right away.
Ask for minimal layering and a blunt outer line with soft detailing around the two front corners only. If the stylist starts carving too many face pieces into it, the cut slips out of old money territory and into generic layered territory fast. The strength here is in the contrast: clean through the back, gentle around the front.
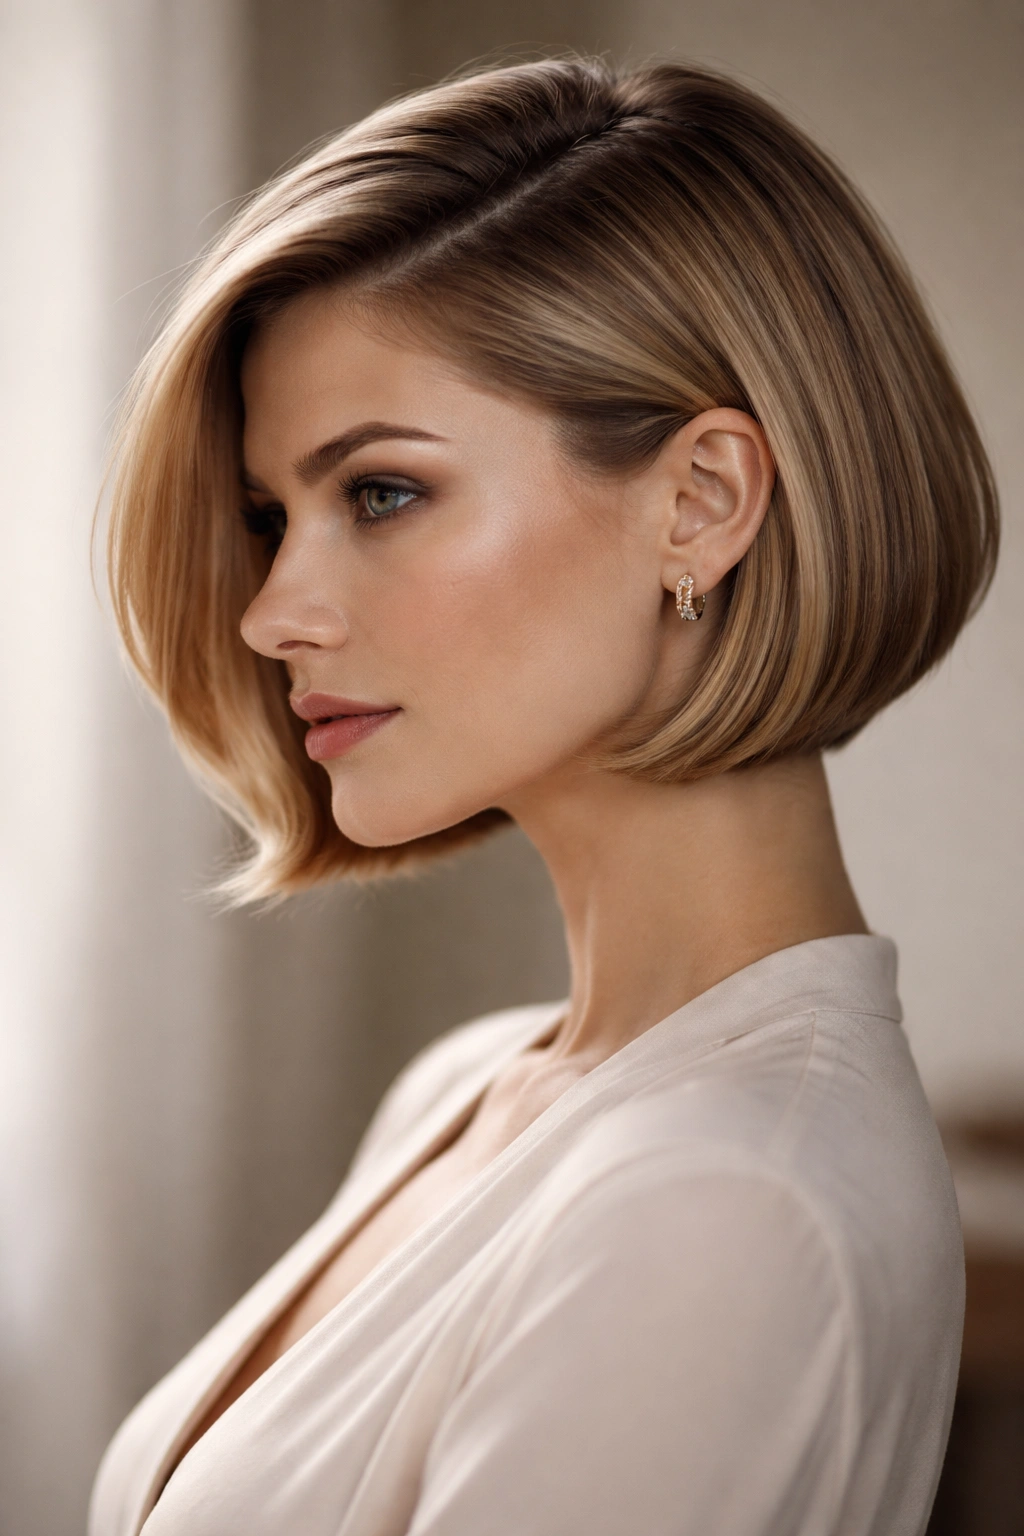
7. Side-Swept Bob With a Polished Ear Tuck
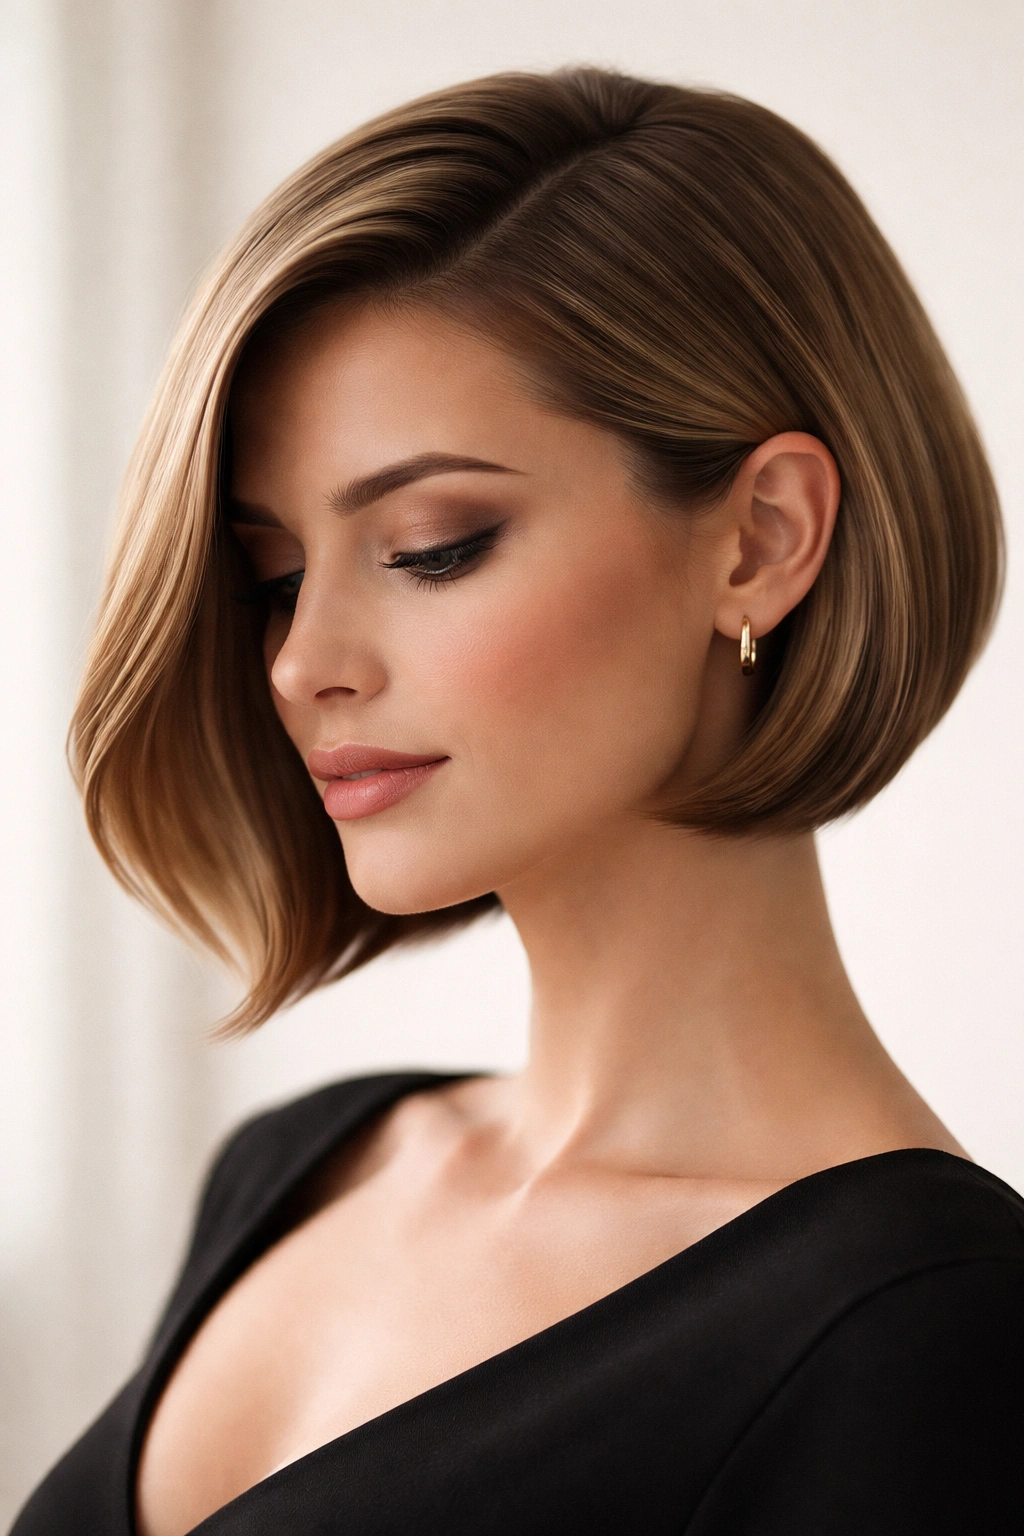
There’s something crisp about a bob that looks made for an ear tuck. One side stays close to the head, the other sweeps across with a controlled bend, and the whole cut seems to settle into place on its own. A side-swept bob with a polished ear tuck has that clean, social-club, tailored-blazer energy people keep chasing.
This one usually sits between cheekbone and jaw length. The part stays slightly off center rather than deep, and the hair around the temple is cut with enough precision that the tucked side does not bulge or spring loose two minutes after you arrange it.
What makes it different
The ear tuck is not an afterthought here. The haircut has to support it. That means the tucked side often carries a little less bulk at the temple and a line that follows the cheek rather than puffing out away from it. The other side gets the sweep.
A few people suit this shape especially well:
- Anyone with fine to medium hair that needs shape more than layers
- People who wear glasses, since the tuck clears the arm of the frame
- Anyone growing out a side fringe and wanting it to blend into the bob
- Faces with strong cheekbones or a defined jawline
You can dry this cut with a paddle brush for a flatter finish or a small round brush for a softer curve. A touch of wax on the tucked side helps it stay close, though keep it off the roots unless you enjoy the look of second-day hair on first-day hair.
8. Cheekbone Bob With Long Curtain Fringe
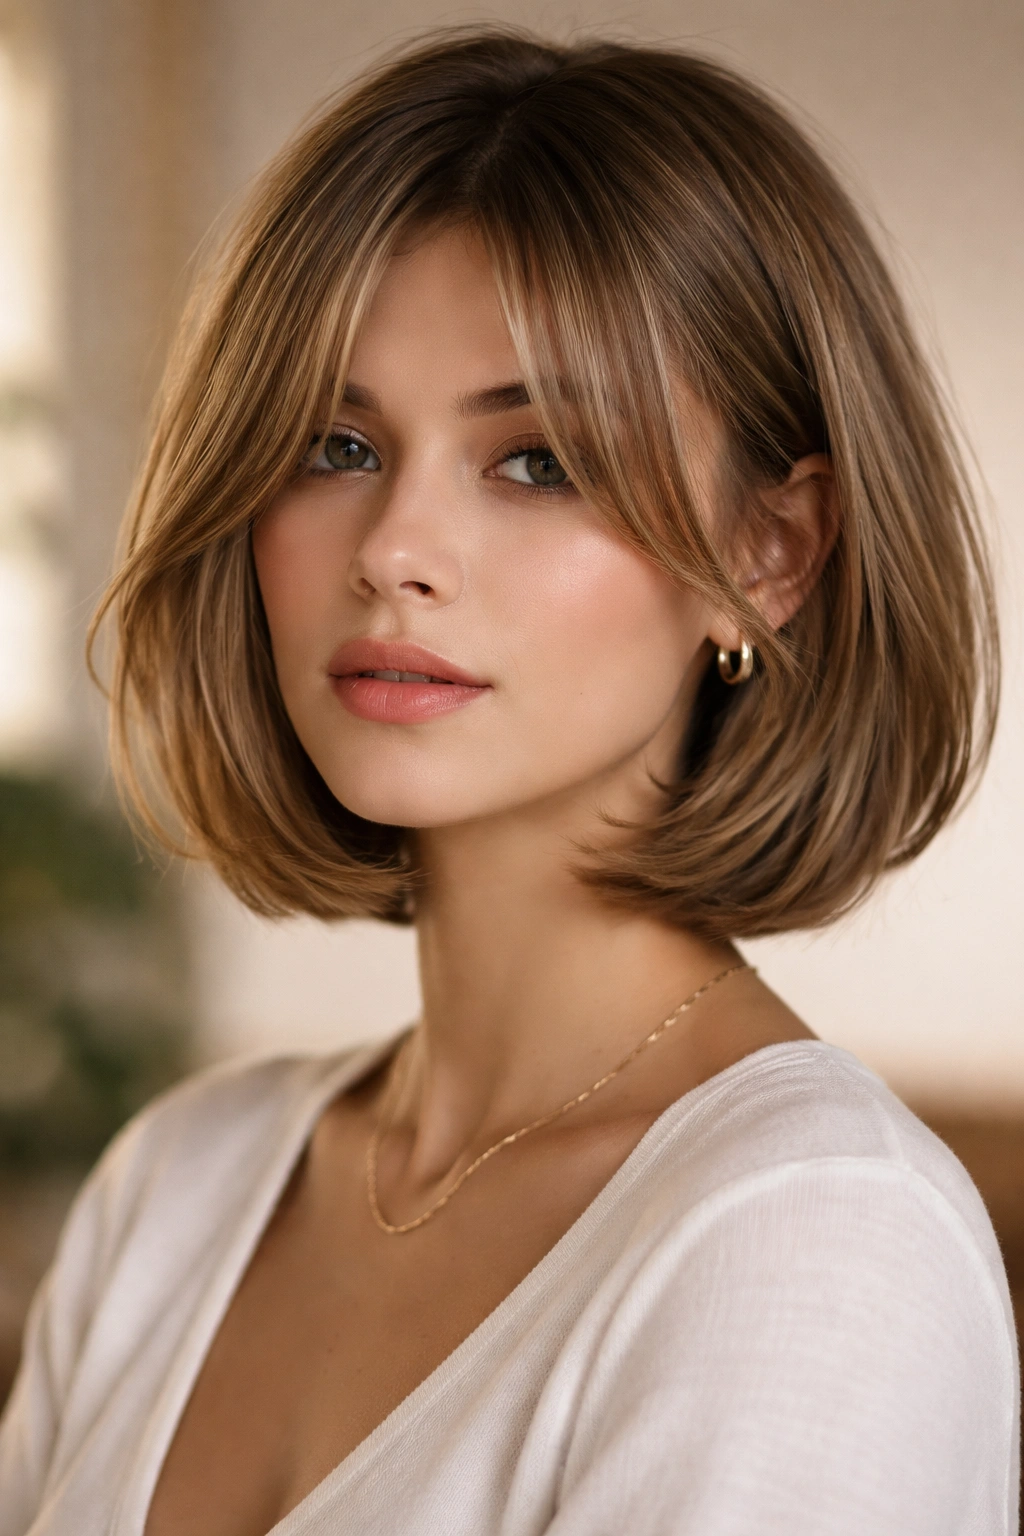
Bangs can look polished. They can also go wrong faster than almost any haircut choice on earth. The version that works best in this old money lane is the cheekbone bob with a long curtain fringe—nothing blunt, nothing baby-short, nothing shredded into pieces.
The fringe parts softly and opens around the eyes, often landing between the brow and the top of the cheekbone when dry. The bob itself sits around the chin or jaw. That pairing frames the face without crowding it, and it softens a higher forehead in a clean, grown-up way.
This shape suits hair with a slight bend because the fringe can drape instead of forcing itself stick-straight. You blow-dry the curtain section forward first, then split it and roll each side back with a 1-inch round brush. Clip the bend while it cools if your fringe falls flat within ten minutes.
Cowlicks matter more here than in most bobs. A strong front hairline can split the fringe down the middle or throw one side high. That does not mean you cannot wear it, though it does mean the cut needs to be mapped around the way your hair grows. A smart stylist will trim this fringe dry or at least check it dry before calling it done.
The payoff is worth it. You get the softness people want from bangs without the schoolgirl feel that a shorter fringe can bring.
9. Curved-Under Bob for Thick Hair
Does thick hair keep turning your bob into a triangle? Then the answer usually is not “more layers.” It is better weight placement. A curved-under bob for thick hair keeps the outer line clean while removing bulk from the inside so the shape folds inward instead of pushing out.
This is one of the most flattering old money bob cuts on dense hair because it respects the fact that thick hair already has body. You do not need extra texture. You need control. Internal layering and careful sectioning at the occipital bone—the area at the back of the head where the skull curves out—help the haircut sit closer to the neck and jaw.
The undercurve can come from the cut, the blow-dry, or both. Usually it is both. A boar-mix or ceramic brush adds tension through the mid-lengths, and the last inch gets rolled under so the ends land with a rounded finish rather than a fan shape.
What to watch for
The surface should stay smooth. If the stylist removes too much weight from the outside, the bob starts looking fluffy and unfinished. Ask for debulking inside the shape and keep the perimeter dense.
Humidity can still test this cut—thick hair loves to claim more space than you gave it—so a smoothing cream with some hold goes a long way. The hair should feel soft when you touch it, not sticky, and the ends should curve under with a little spring instead of stiffly clamping to the neck.
10. Fine-Hair Bob With Invisible Layers
Fine hair needs a different kind of discipline. Too blunt, and the bob can lie flat against the head. Too layered, and the ends go stringy in a week. The sweet spot is the fine-hair bob with invisible layers, which sounds technical because it is.
Invisible layers sit inside the haircut, not across the outside. They lift the crown and help the hair move without eating away at the outer line. From the front, people still see a full bob. Underneath, there is enough structure to stop it from collapsing by noon.
I like this cut best when it falls between the bottom lip and the jaw or a touch longer. Fine hair often looks fuller at those lengths than it does at the collarbone, where it can start clinging to the neck.
A few details matter more than the name of any product:
- Ask your stylist to skip heavy texturizing shears at the ends
- Use a volumizing spray at the roots only, not all over
- Dry the crown with small metal root clips for 5 to 10 minutes
- Choose a 1¼-inch round brush rather than a giant one, which can flatten the bend
- Finish with a light mist of hairspray under the front sections for lift
This is one of those cuts where less product gives a better result. Fine hair turns greasy-looking fast, and a polished bob needs air in it.
11. Wavy Bob With a Structured Perimeter
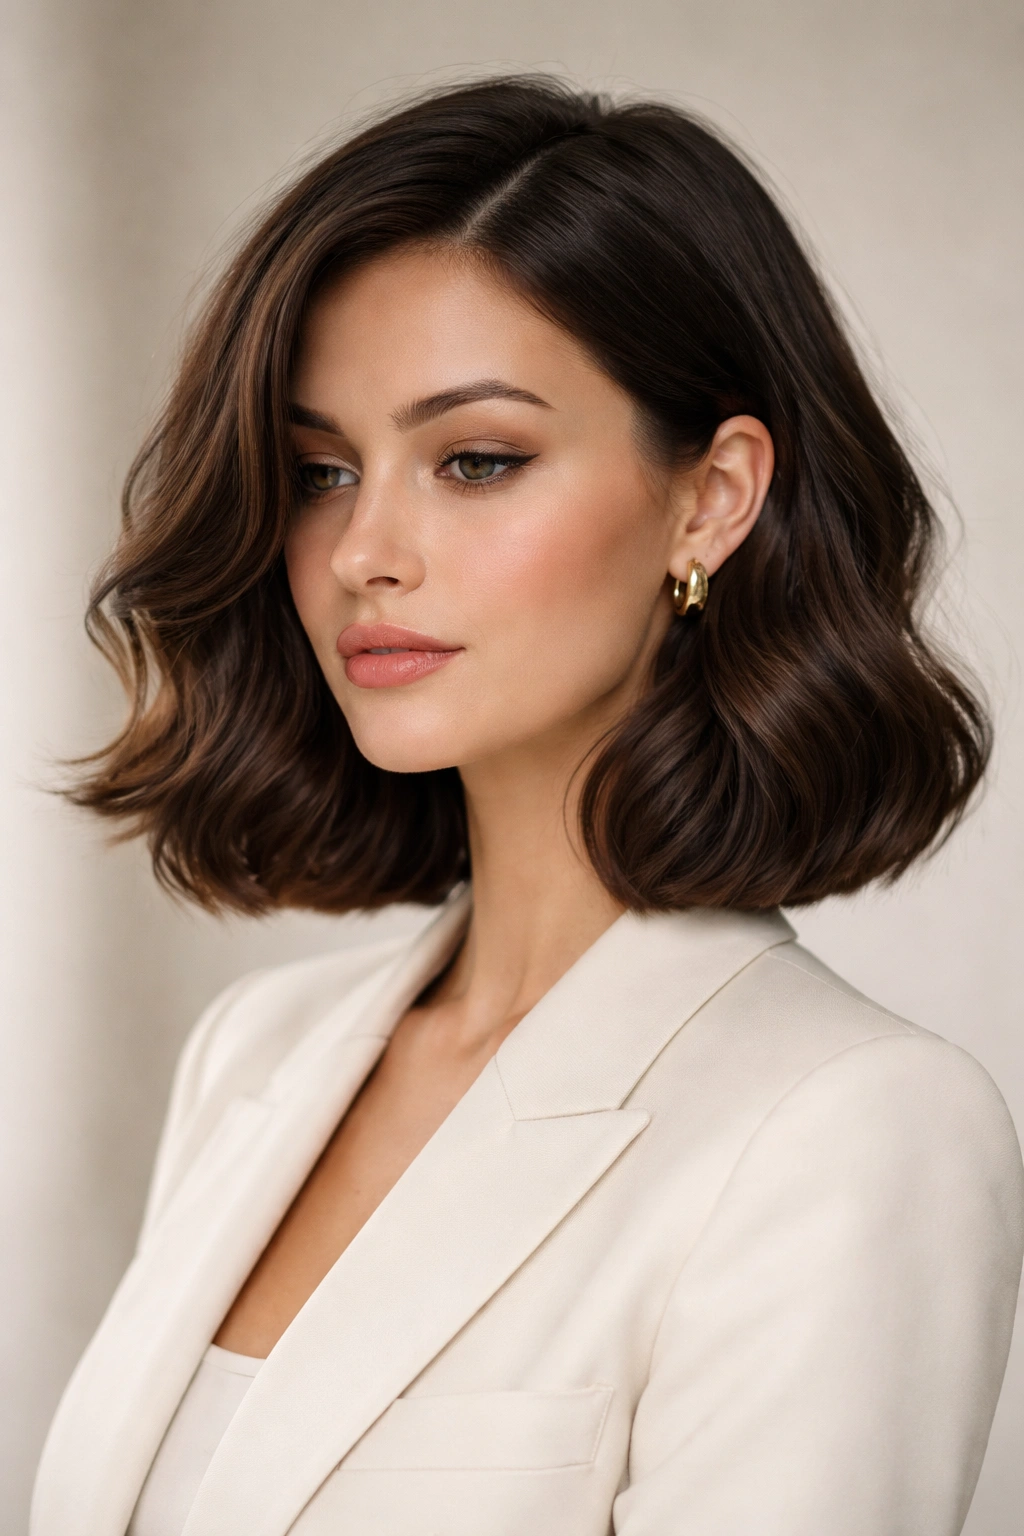
A wavy bob can look old money, though not if it is drowning in salt spray and chopped into a hundred pieces. The polished version keeps a structured perimeter and lets the wave show up through the body of the hair rather than exploding from every layer.
That usually means the outer line stays blunt or close to blunt, while the inside gets only enough shaping to prevent bulk. Type 2A to 2C waves often do well with this plan because the natural bend gives life to the cut without turning it into a shag. The ends still look firm. That part separates a refined wavy bob from a casual one.
Styling should feel controlled, not stiff. Work a curl cream or smoothing wave cream through damp hair, diffuse to around 80 percent dry, and then decide what the front needs. Some people can leave it there. Others need a quick touch with a 1-inch iron on the front two sections so the waves frame the face in the same direction.
Brushing is where many people lose the shape. Brush too much and the bob goes wide. Never brush it and it can look fuzzy at the ends. The middle ground works best: smooth the perimeter lightly with a boar-bristle brush or your hands, then let the wave live through the mids.
A little irregularity keeps this one human. Too much and it stops looking polished.
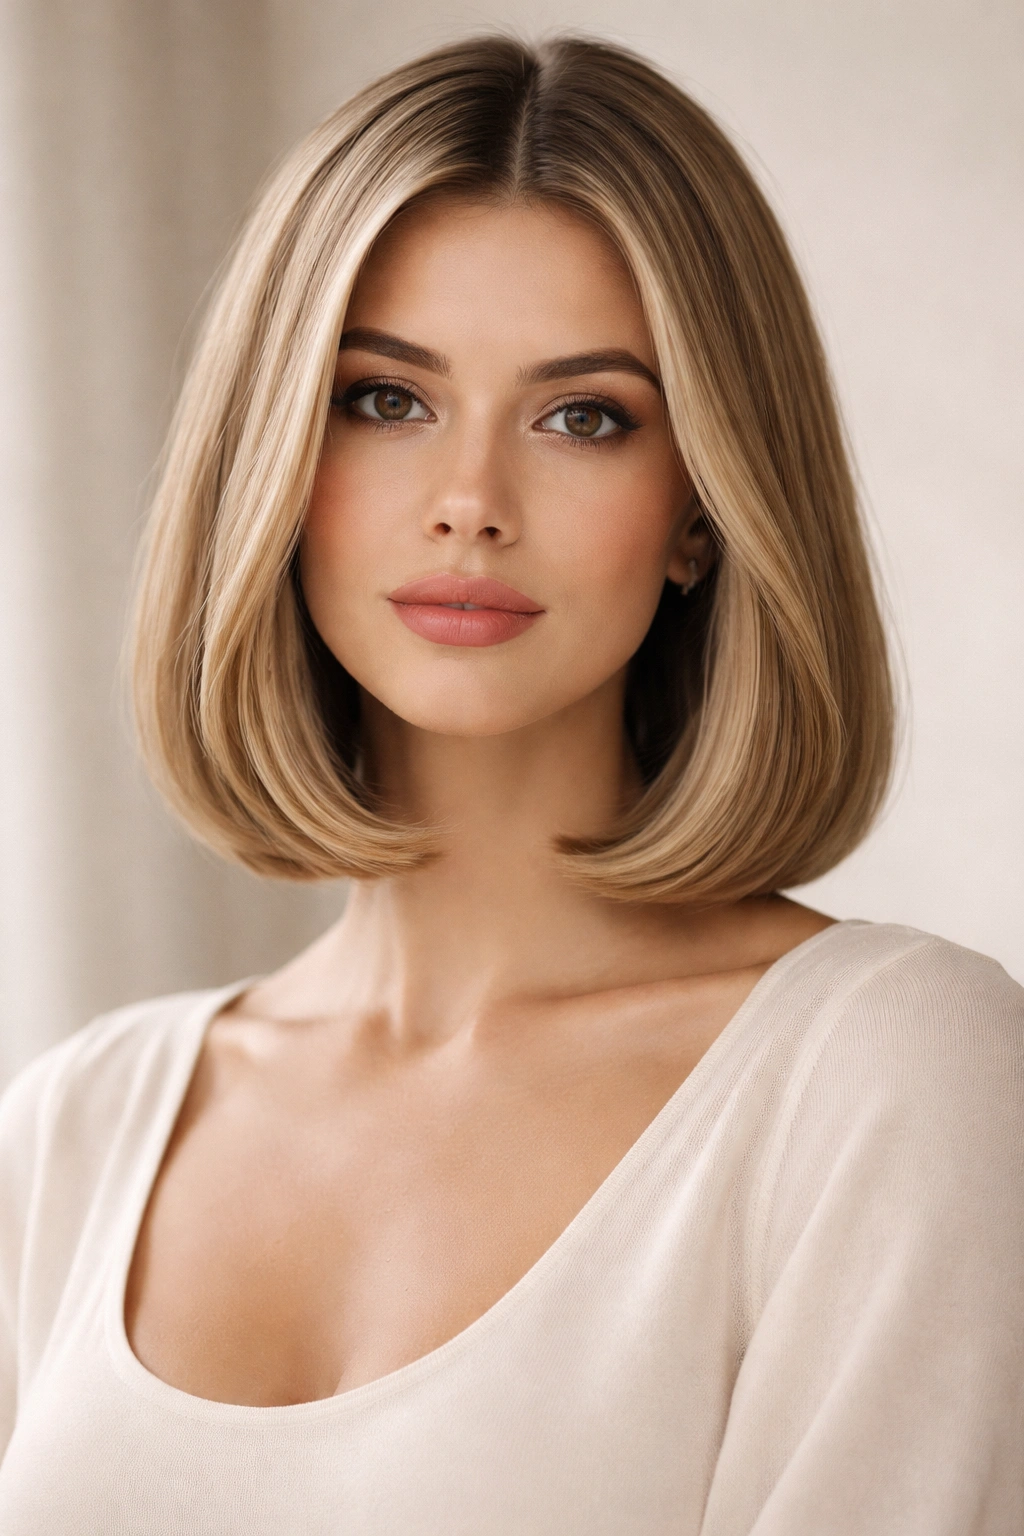
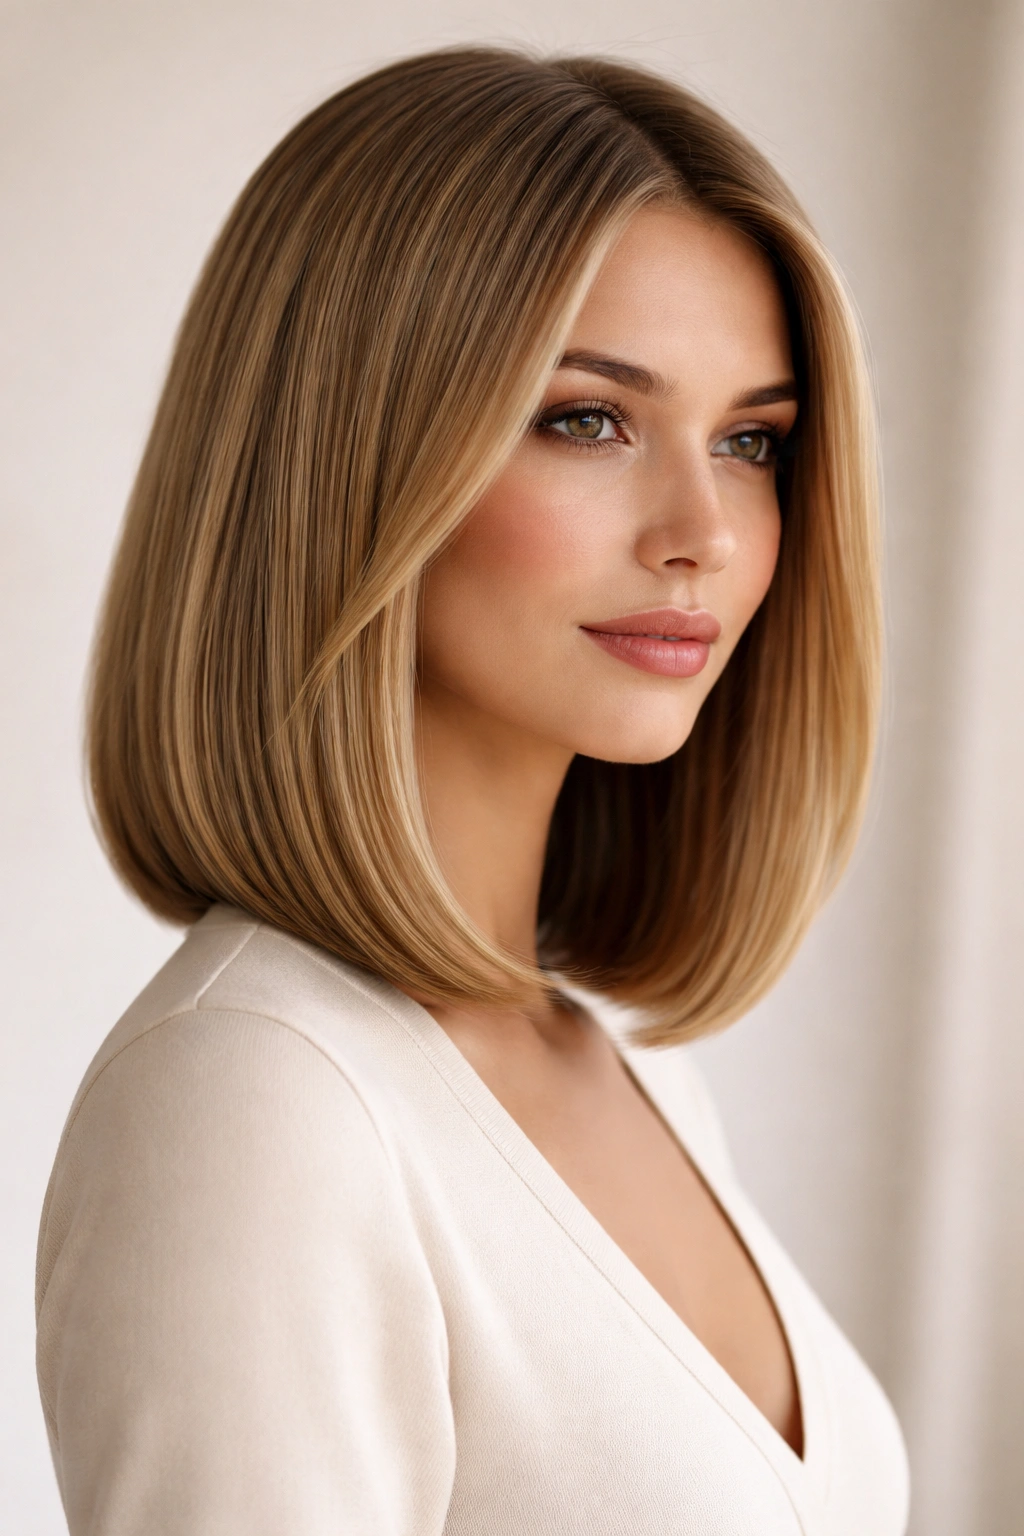
12. One-Length Bob With a Luxe Round-Brush Blowout
Unlike the glass bob, which leans sleek and hard-edged, a one-length bob with a luxe round-brush blowout feels softer and richer. Same clean perimeter. Different finish. Instead of mirror-straight hair, you get body at the roots, a tucked-under edge, and that full salon swing people try to stretch into day three.
The haircut itself is simple on paper: one length, often between chin and collarbone, with only the smallest amount of softening at the ends. The styling is what turns it into an old money staple. A good blowout makes the hair look thick, smooth, and settled into shape without looking shellacked.
Getting the finish right at home
Rough-dry first until the hair is about 70 percent dry. Then work in sections with a 1½- to 2-inch ceramic round brush, pulling up at the root and turning the brush under only at the last inch. The bend belongs at the ends, not halfway up the shaft. Finish each section with the cool shot so the shape sets before it falls.
A few home-styling rules help:
- Use a lightweight setting spray before blow-drying if your hair drops fast
- Keep serum to a pea-sized amount, rubbed through palms first
- Brush the hair into place after styling and leave it alone
- Sleep with the hair wrapped loosely or use a silk pillowcase to stretch the blowout
This cut suits medium-density hair better than almost anything else on the list. It does not need pin-straight texture or dense thickness. It needs hair that can hold a bend, a cut with a strong line, and a little patience with the brush.
Final Thoughts
The best old money bob is not always the shortest, glossiest, or most dramatic one. It is the one that matches your hair’s density, your growth pattern, and the amount of time you will give it on a normal morning. Pick a cut that fights your natural texture and you will spend more time correcting it than enjoying it.
A firm perimeter, healthy ends, and measured styling beat trend-chasing every time. That is why these bob cuts keep coming back. The shapes are disciplined, the finish looks polished, and the haircut still makes sense after the novelty wears off.
If I had to be blunt about it, I’d say this: do not choose the bob you admire most on someone else before you choose the bob your own hair can support. Get that part right, and the polished look stops feeling borrowed. It starts looking like you.