A braid at the front can save a bad curl day.
Front braid styles for curly hair work because they control the part that frizzes first, falls in your face first, and somehow looks twice as busy by lunchtime. The trick is not forcing curls to behave like straight hair. It’s giving them a shape that makes sense on their own terms.
Curly hair has a little drama built in. Good drama, usually. But the same spring that makes curls look full also means the front pieces can puff up, split apart, or shrink into odd little corners if you braid too tightly or too cleanly. I like braids that respect that texture instead of trying to flatten it out.
So the styles below lean into curls rather than fighting them. Some are neat and polished. Some look a little messy on purpose. All of them work best when you leave enough softness around the braid for the curl pattern to do its thing.
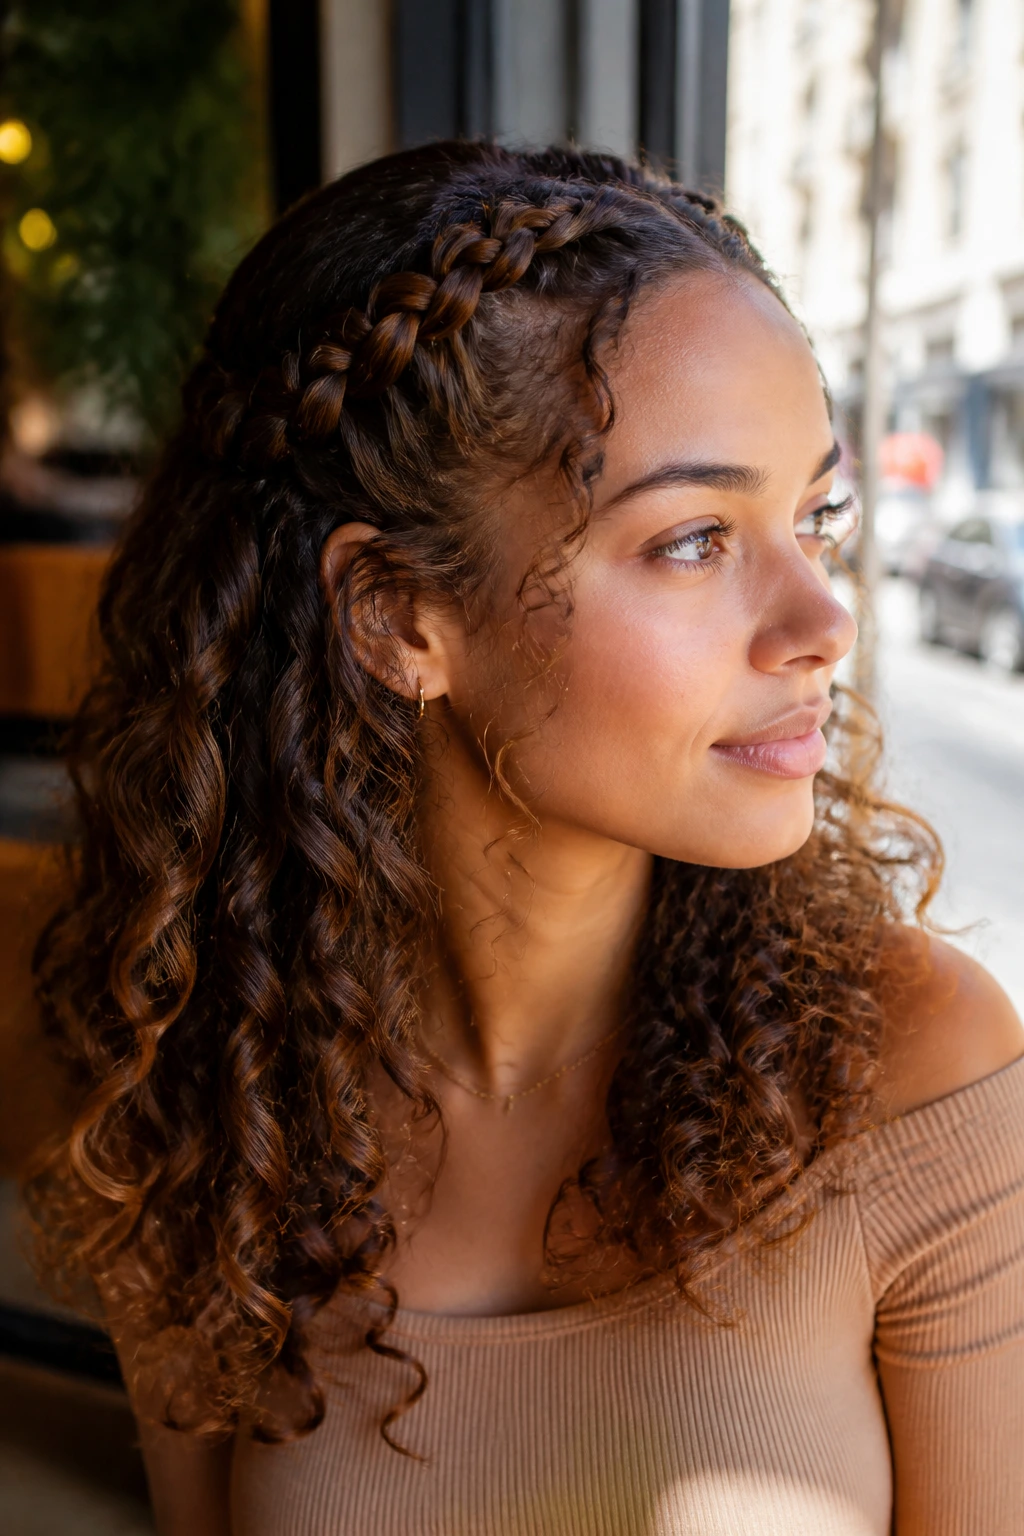
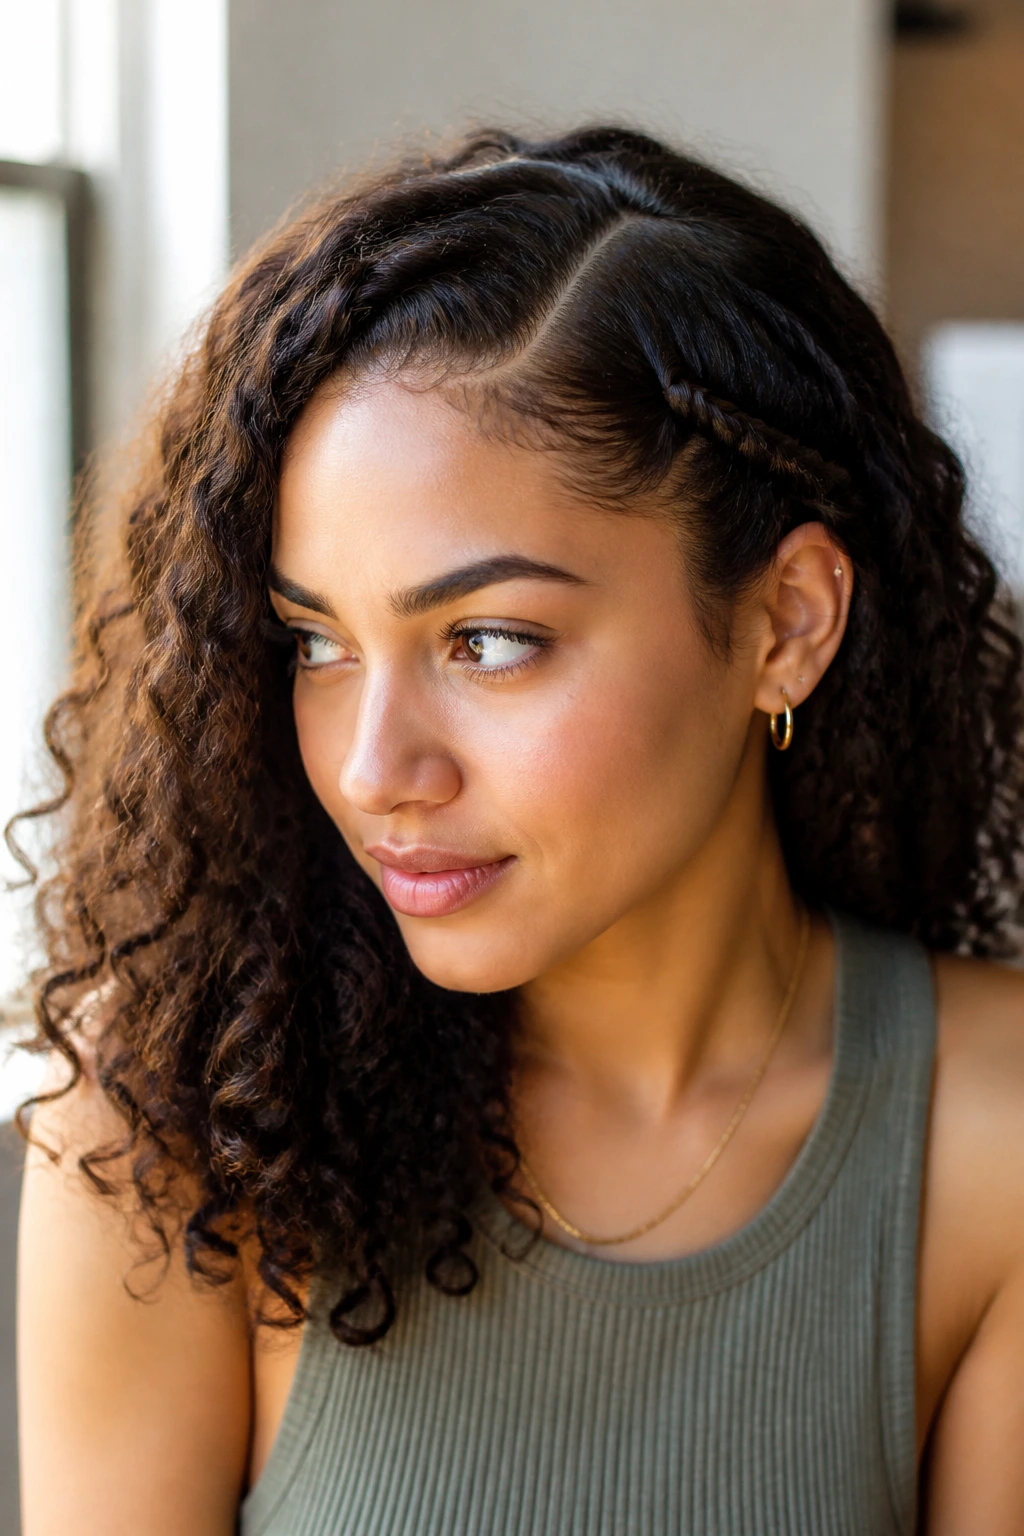
1. Deep Side-Part Front Braid Into Loose Curls
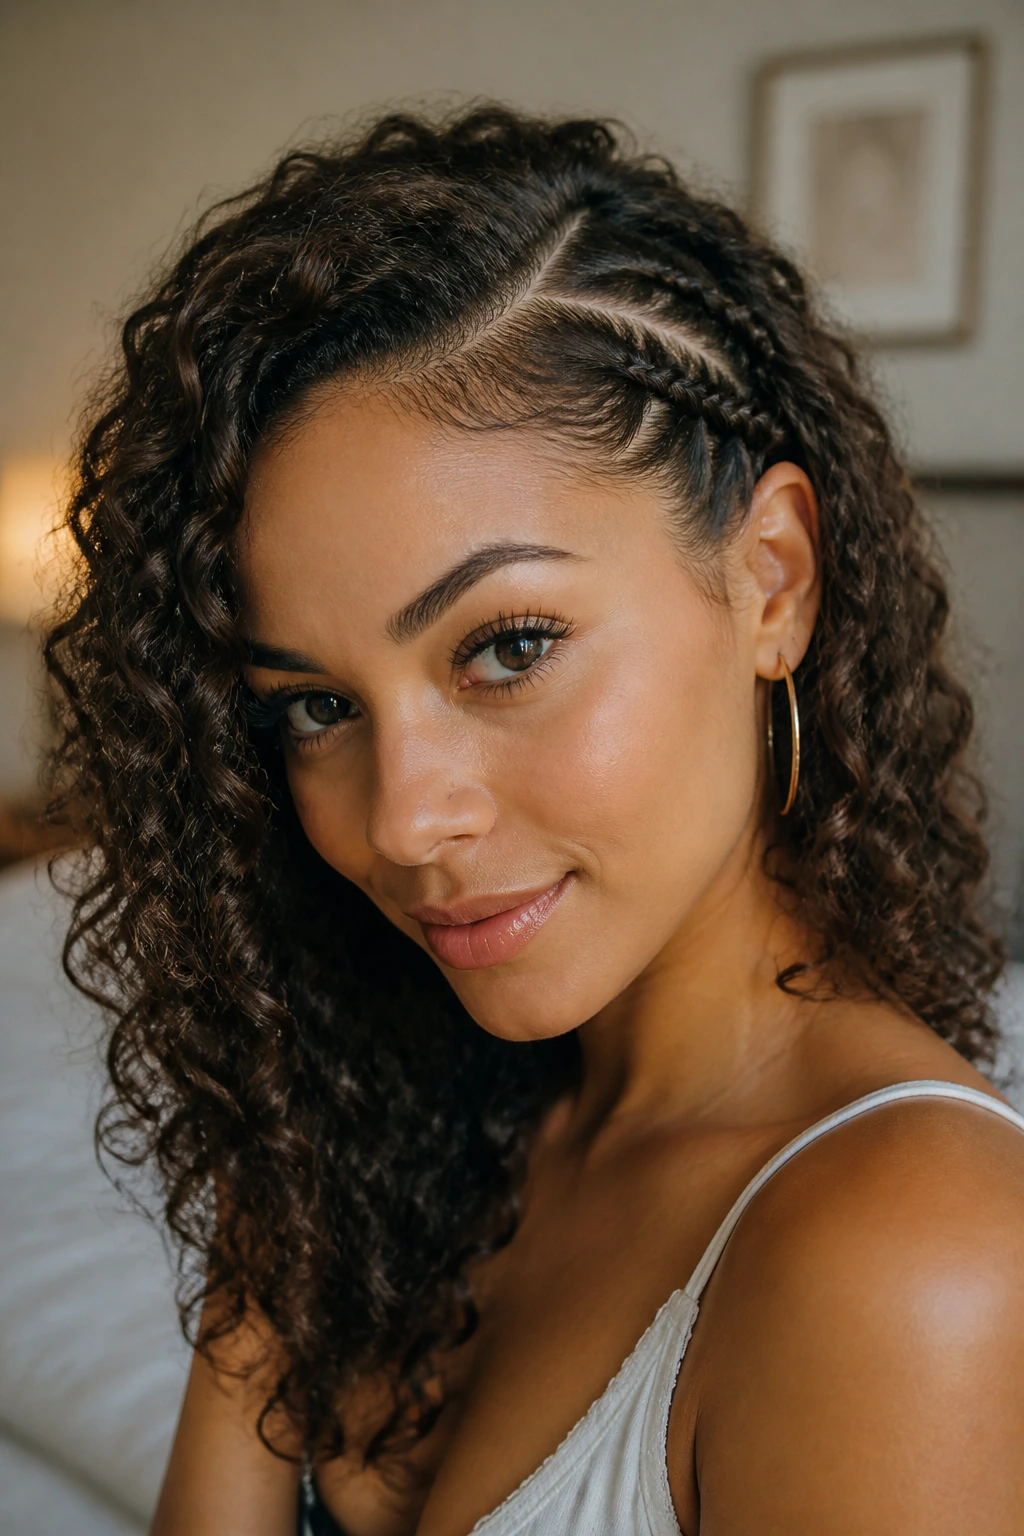
Start with a deep side part and pull a small front section from the heavier side of your hairline. That one change gives the braid more visual weight, which matters because curly hair already has volume and you do not want the front to look cramped. A braid that starts near the temple and travels down toward the ear feels intentional without looking stiff.
Why This One Flattens Less Than You’d Expect
The braid only needs to grip the first 2 to 3 inches near the hairline. After that, let it travel back and disappear into the curls. On thick curls, that tiny front braid acts like a frame. On finer curls, it adds a clean line that keeps the style from looking puffy around the forehead.
Use a little styling cream or lightweight gel only on the section you plan to braid. Too much product at the roots can make the braid look greasy and drag the curl pattern down. Too little, and the front pieces will spit out tiny flyaways by the second hour.
Quick Placement Notes
- Start the braid above the brow bone, not at the very edge of the hairline.
- Keep the braid loose enough that the front still bends.
- Secure the end behind the ear with a small clear elastic or a pin tucked under a curl.
- If your curls are tight, stretch the front section for 10 to 15 minutes first with a diffuser or a loose twist.
A small braid should shape the face, not slice through it.
One more thing: this style looks best when the rest of the curls stay full. Resist the urge to over-smooth everything else. That contrast is the whole point.
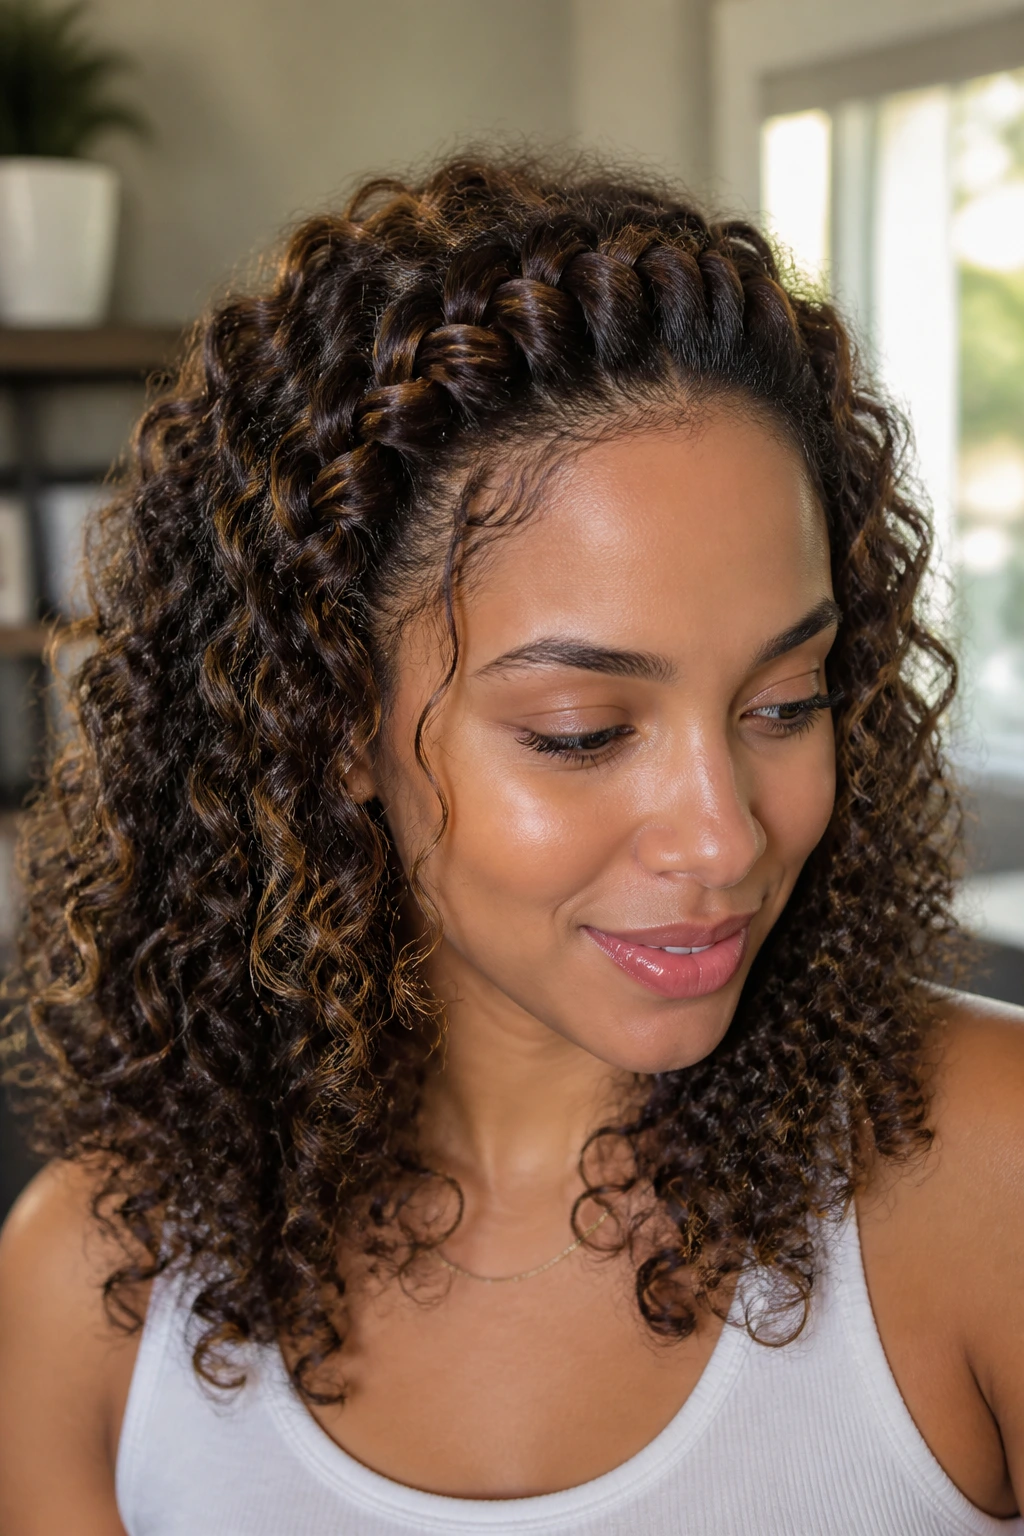
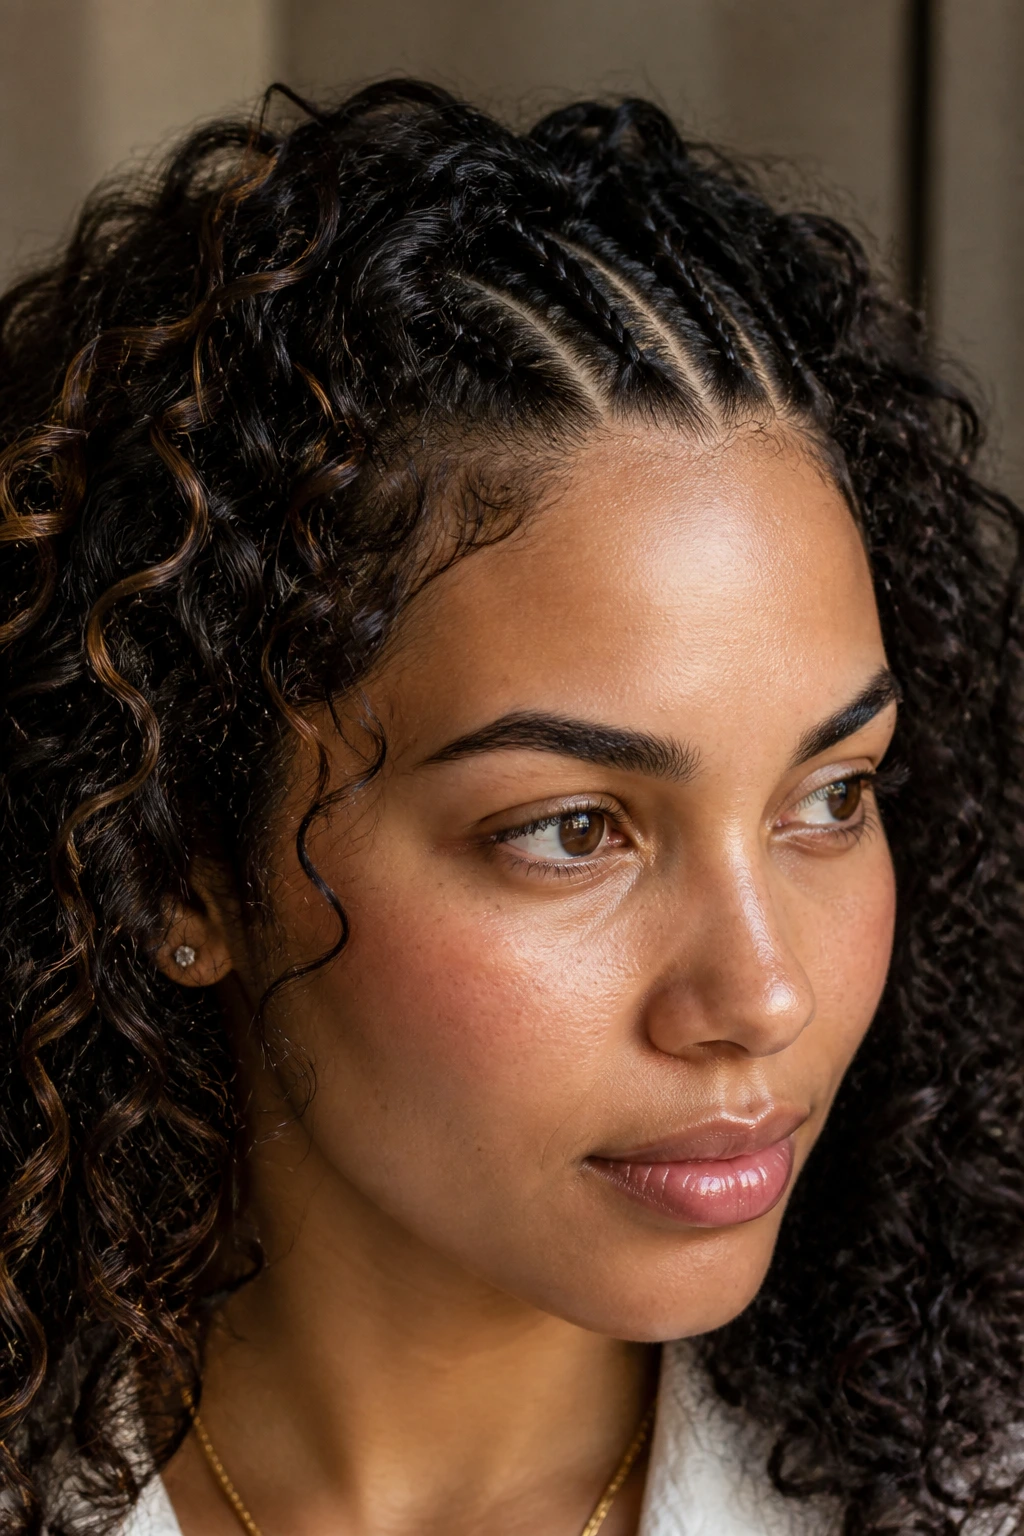
2. Tiny Center Front Cornrow That Stops at the Crown
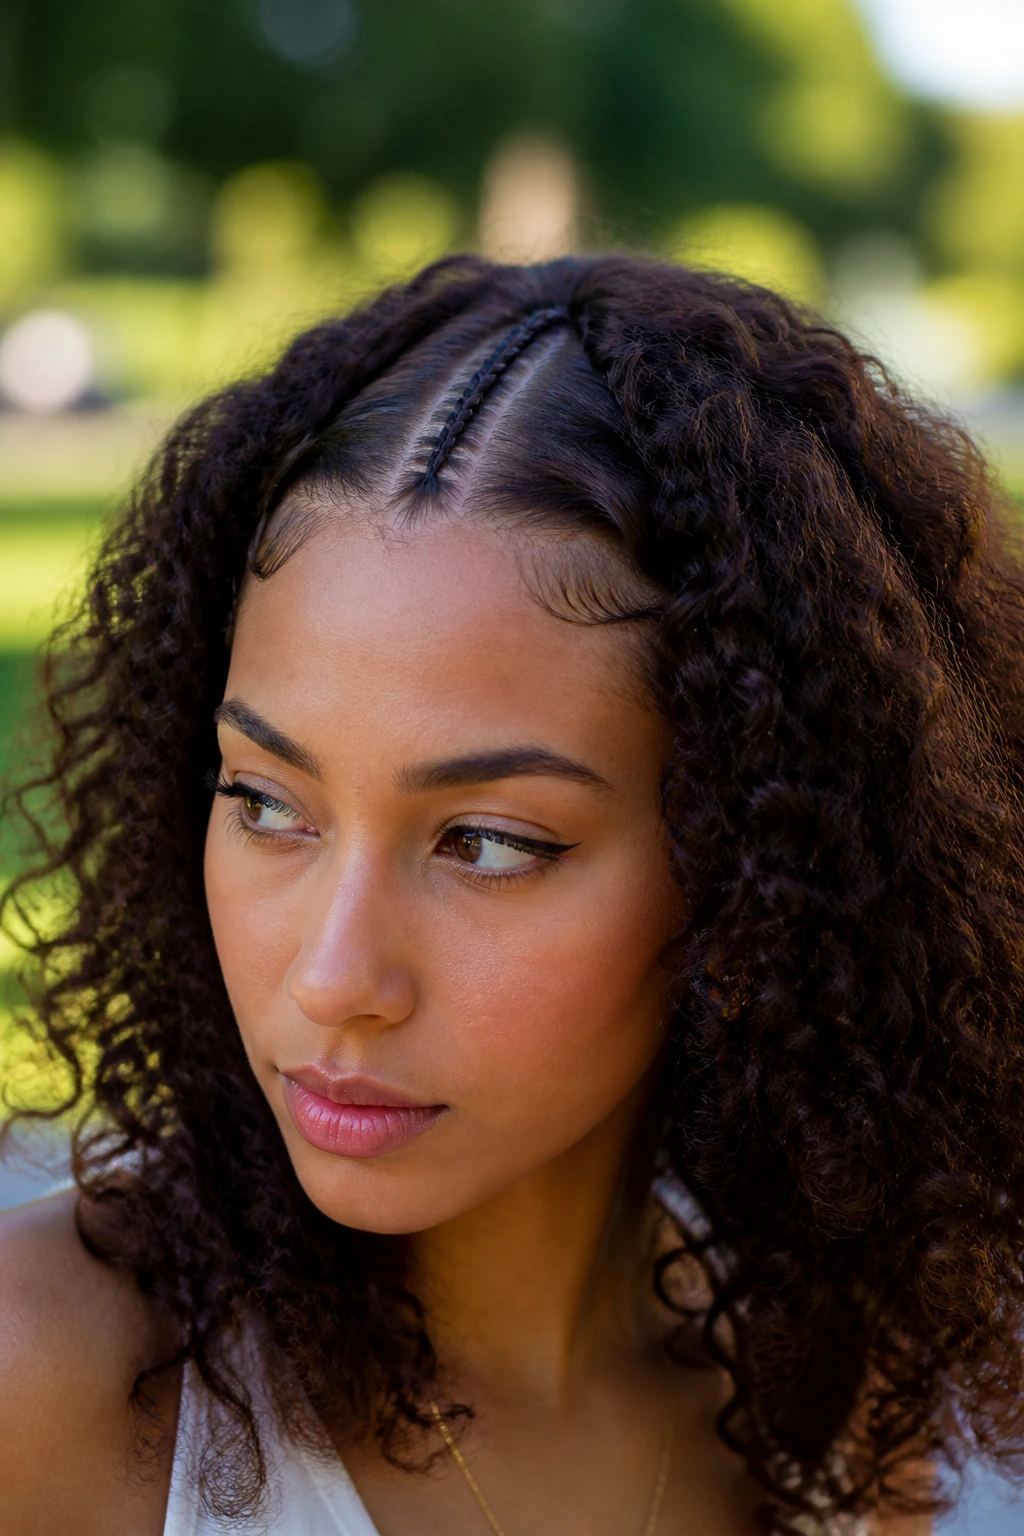
Need a braid that keeps the forehead open without stealing all the attention? This is the one. A slim center braid gives curly hair a neat line right where the part wants to split, and it works especially well on day-two or day-three curls that have a little puff at the roots.
The braid should be narrow, almost pencil-width at the start, then stay close to the scalp for just long enough to calm the front section. Stop it at the crown and let the rest of the hair fall free. That short run keeps the look crisp. If you braid too far back, the style starts to feel heavier than it needs to.
Curly hair does better here when the roots are lightly damp or misted with water. Add a touch of gel or styling custard, then smooth with your fingertips before you start. You want the braid to lay flat, but not tight. Tight is where the headaches begin.
If your hairline is delicate, use your fingertips instead of a comb for the first bit of sectioning. It takes an extra minute. Worth it. A braid that sits too snug against the scalp can show tension fast, especially on curls that bounce back hard.
The nice part is how little maintenance this needs. Once it’s pinned, the rest can be big, fluffy, and a little wild. That contrast looks good with hoops, glasses, or a strong lip. Tiny braid, big payoff.
3. Twin Face-Framing Front Dutch Braids
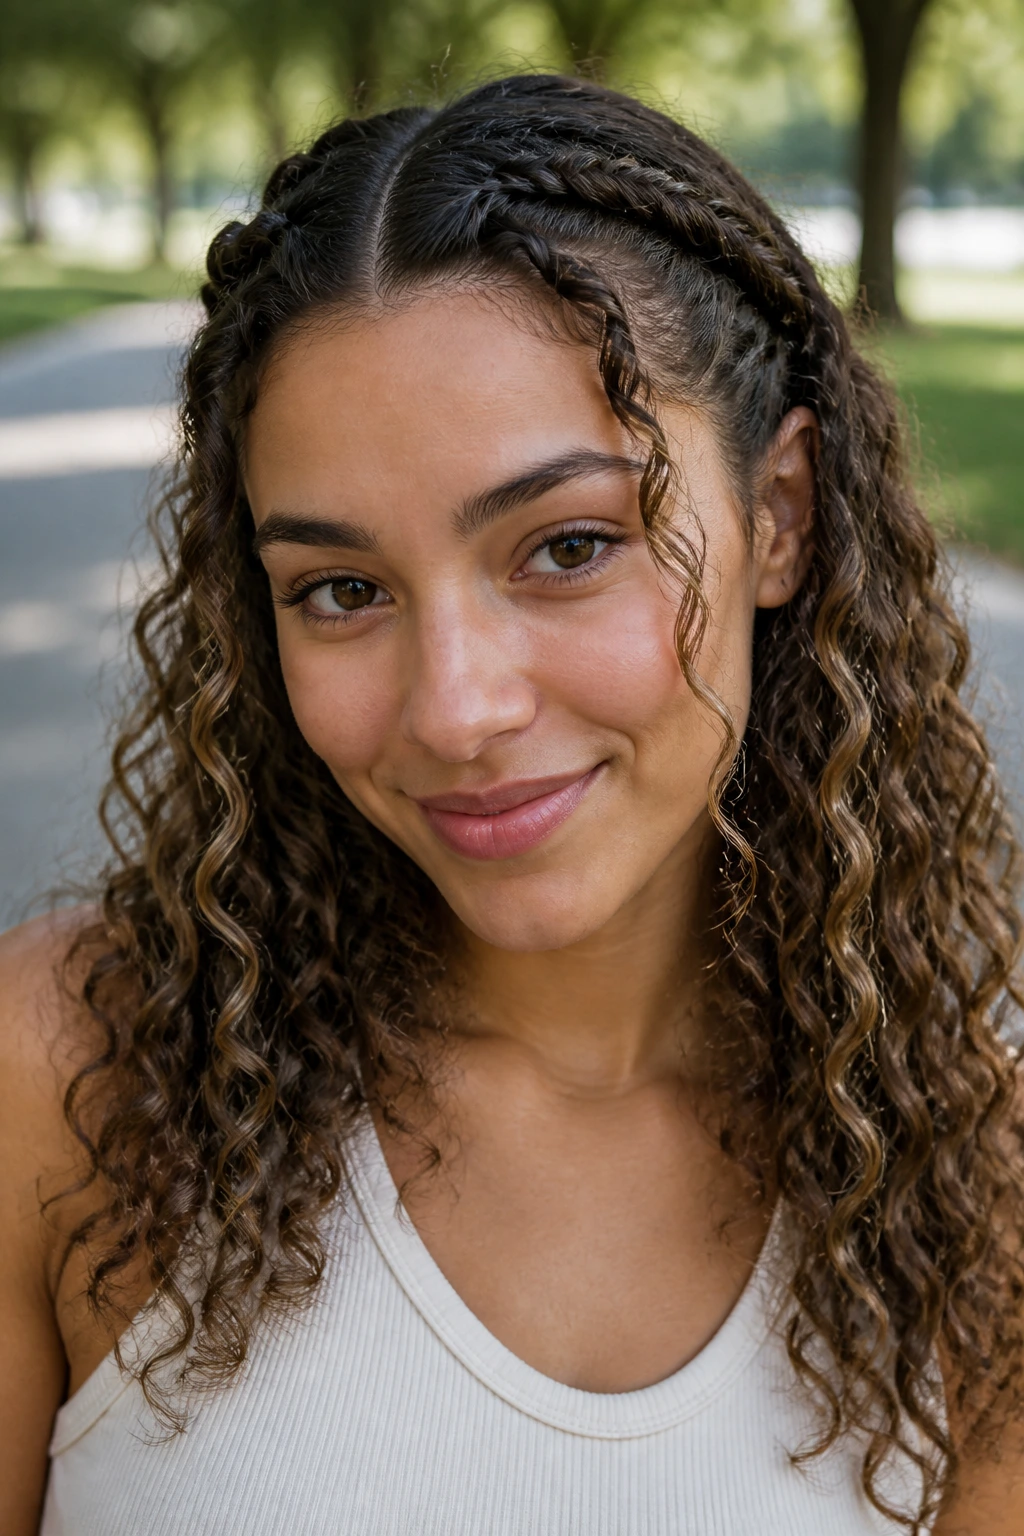
This style is a lifesaver when your curls are doing that thing where they look gorgeous from the side and chaotic right around the temples. Two Dutch braids, one on each side of the front hairline, pull the face together without flattening the rest. The raised braid ridge gives the style shape, which straight hair often has to fake with extra teasing.
You can start each braid from the temple and angle it slightly back so the braids sit like slim rails on either side of the part. Dutch braiding works here because the braid rises above the scalp instead of sinking into it. On curly hair, that little lift makes the style visible even when the pattern is dense.
What Makes Them Stay Put
- Section each side into a triangle that starts at the forehead and widens toward the crown.
- Add small bits of hair as you cross under, keeping each pass close to the scalp.
- Stop the braid above the ears if you want the curls to take over sooner.
- Hide the ends under a layer of hair or tuck them into a low bun for a cleaner finish.
This one is especially good for thick, springy curls that need a firm shape at the front. If your curls are looser, braid on slightly stretched hair so the pattern does not puff the braids apart too fast. I also like this style with a middle part because it gives the braids symmetry, but a side part can make it feel softer.
4. Braided Bang Across the Forehead
This is the fastest way to fake bangs without cutting them. A braided bang sits across the forehead like a soft frame, and on curly hair it can be surprisingly flattering because the texture keeps the braid from looking too neat. You get shape, movement, and a little attitude. Nice combination.
The braid can sit just above the brows if you want a stronger statement, or higher near the hairline if you want the face to stay open. I prefer a little distance from the brow line, because too-low braids can make the front feel cramped when the curls expand later. Curly hair almost always expands later.
Keep the braid slightly loose and leave a few wisps at the temples. Those tiny soft pieces stop the style from looking like a helmet. If your hair is shorter in front, pin the braid in a shallow arc instead of forcing it straight across. A straight line can fight the natural fall of the curls.
One tiny detail people miss: the front braid should not be the only polished part of the look. Let the rest of the hair stay bouncy and textured. That contrast is what makes the braid look like a choice instead of a rescue mission. And if your curls are coily, a braided bang can be gorgeous with a puff or a bun underneath.
5. Half Halo Front Braid With Loose Curls
Unlike a full crown braid, this one keeps the back open. That matters. A half halo braid gives you the clean, wrapped feeling around the front and sides, but the rest of your curls stay visible and full, which is usually where the hairstyle gets its charm.
Start the braid behind one ear or at the temple, then follow the front curve of the head toward the other side. The braid should hug the hairline without sitting so far forward that it crowds the face. If you’ve ever worn a braid that kept slipping over your eyes, you know how annoying that gets. This style avoids that.
Where the Braid Should Sit
The sweet spot is about half an inch above the hairline on most faces. High enough to show the braid. Low enough to keep the shape grounded. On tighter curl patterns, a half halo also helps keep shrinkage from making the front look boxy, because the braid creates a visible line before the curls start doing their own thing.
How to Finish It Cleanly
- Pin the back end under a layer of curls instead of leaving an elastic out in the open.
- Tug the braid edges a little after it’s secured so it looks fuller.
- Smooth only the front section with a dab of cream, not the whole head.
- Let the ends of your curls sit loose and touchable.
This is the kind of style I reach for when earrings matter. The braid frames the face, the curls do the rest, and the whole thing feels balanced without trying too hard.
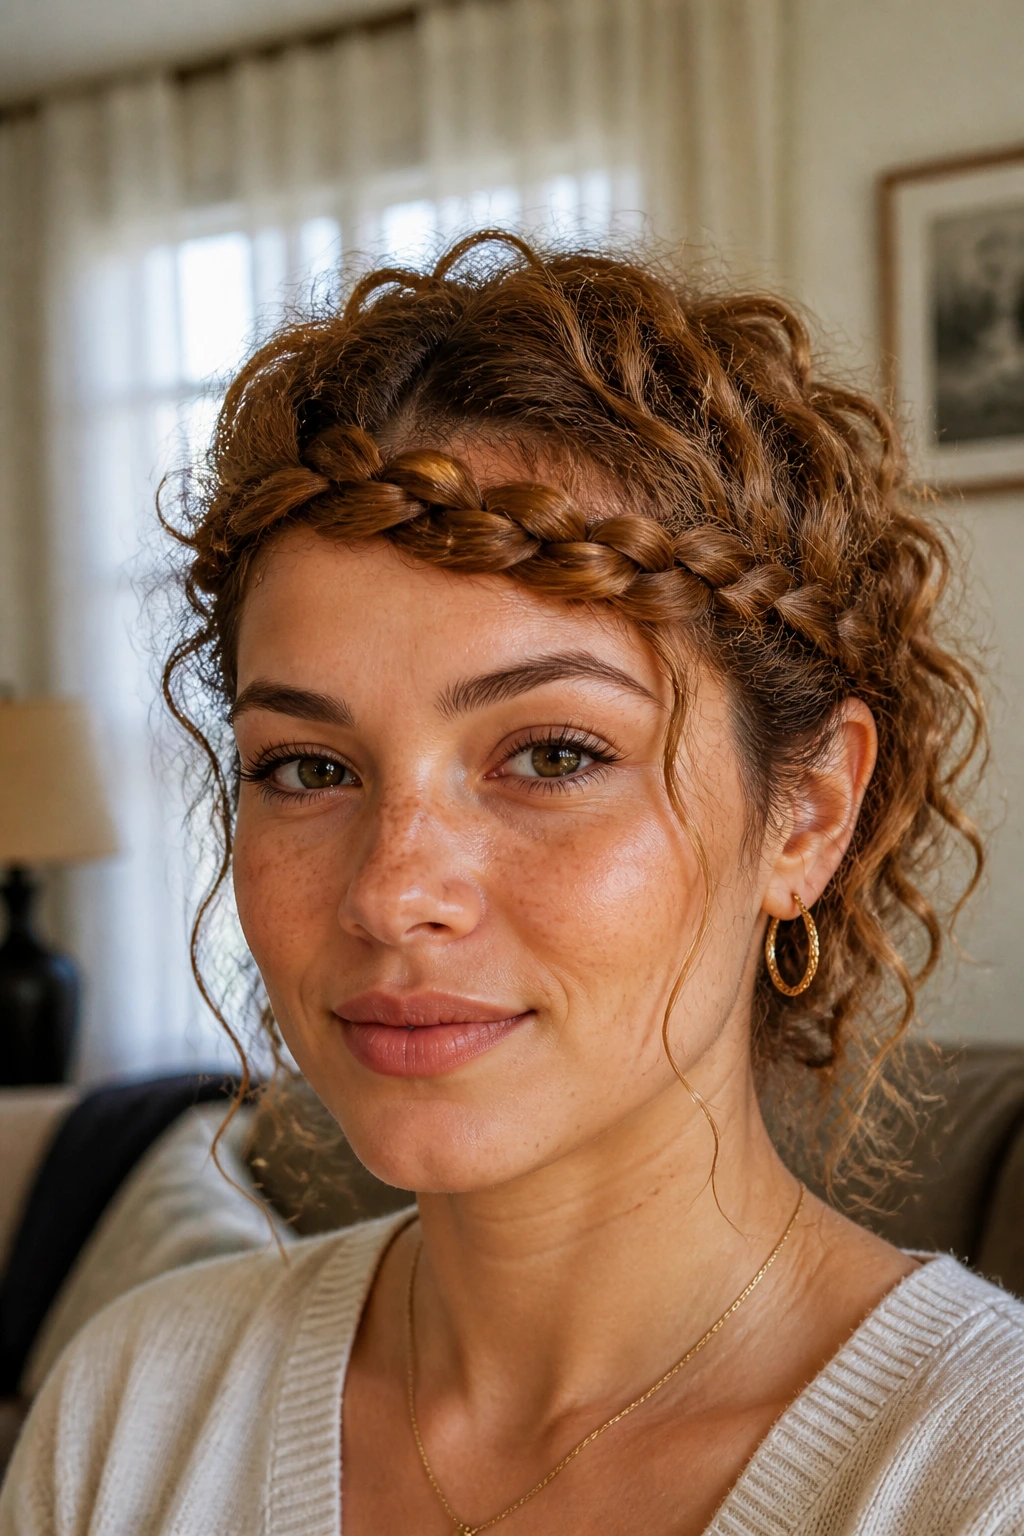
6. Ear-to-Ear Front Crown Braid
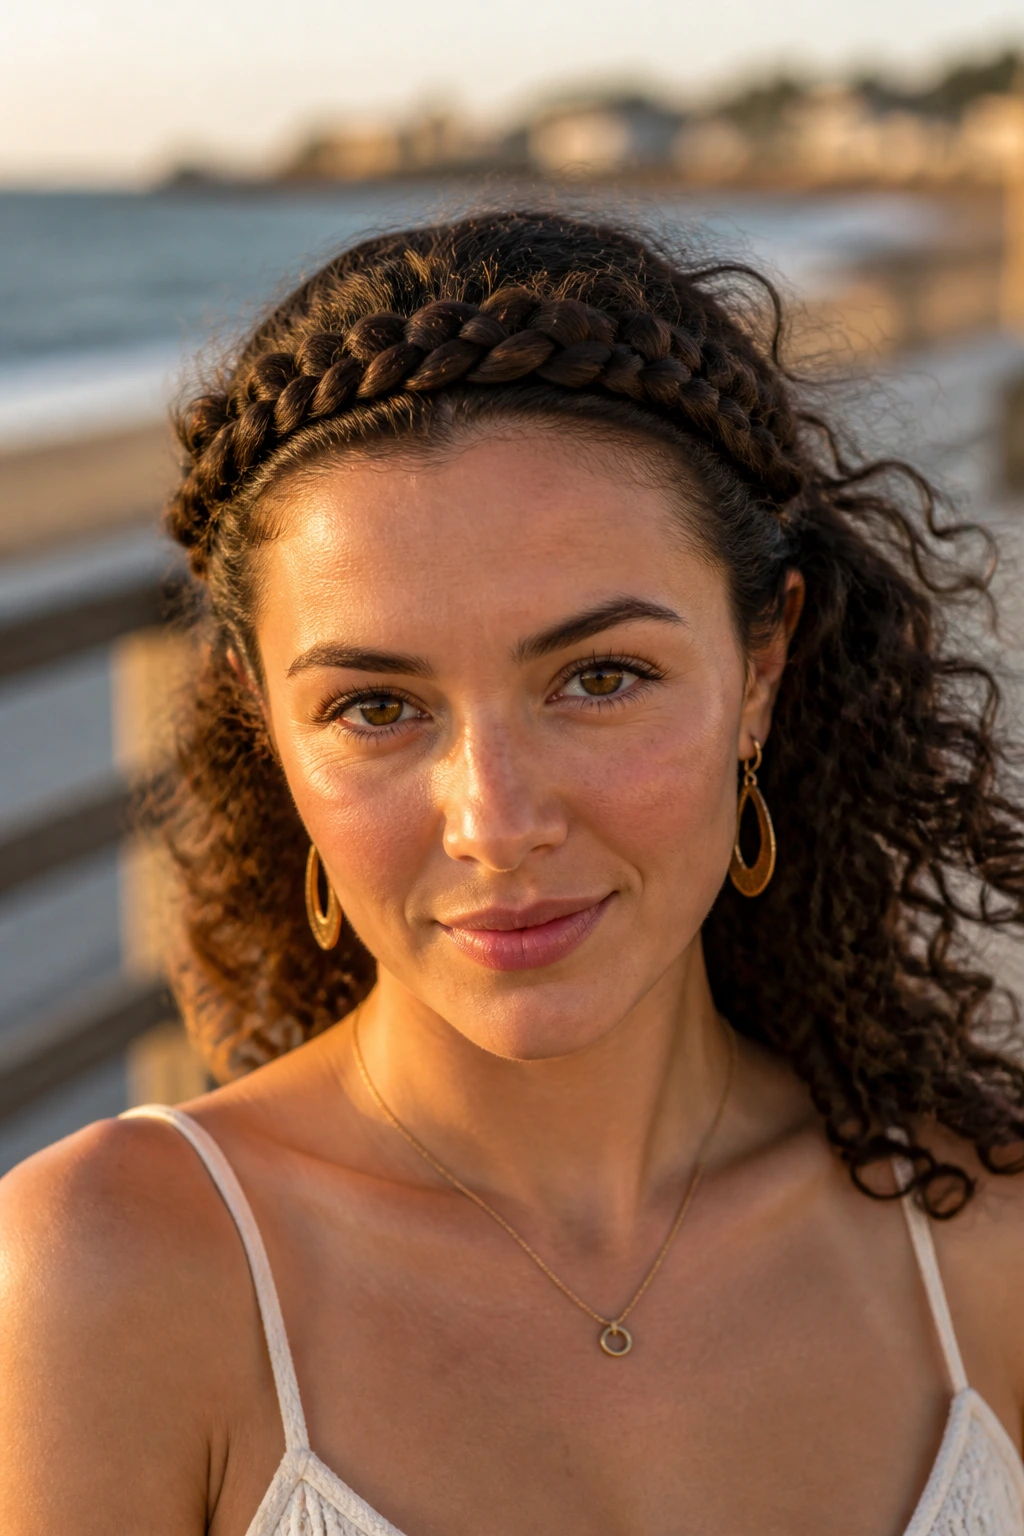
The ear-to-ear crown braid has a firm, almost architectural feel, and curly hair wears that shape well. You’re not building a tiny detail here. You’re drawing a curved line across the front of the head that makes the curls behind it look even fuller by contrast.
Start at one temple and braid across the front of the head toward the other side, staying close to the hairline. The trick is pressure. Keep your hands close to the scalp so the braid stays anchored, but do not yank the strands tight. Curly hair remembers tension. Sometimes for hours.
A crown braid like this is handy when humidity is messing with the front section and you want a style that can survive a long stretch of wear. It also works when the top of the hair has a little frizz but the ends still look good. That happens more than people admit.
- Use a rat-tail comb to make one clean front section.
- Mist the roots lightly so the braid grips.
- Pin every 2 to 3 inches if your hair is heavy.
- Finish with a flexible-hold spray, not a hard shell.
One thing I’ve learned the hard way: do not over-fluff the braid once it’s in place. A little widening is fine. Too much and it starts to unravel into a fuzzy ridge. You want texture, not collapse.
7. Pull-Through Front Braid for Extra Volume
Want a braid that looks thick even when the front section is a little fine? Pull-through braids are the trick. They are not the same as a classic three-strand braid, and that’s the point. On curly hair, the pulled sections create a bubble-like shape that looks fuller than it really is.
You build this one with small ponytail sections along the front, then split and pull them through each other with clear elastics. It sounds fussy, but once you get the spacing right, it’s easier than trying to coax a slippery front layer into a neat braid. Curls that like to puff out actually help here.
Why It Works on Curls
The braid line stays visible even when the texture gets soft. Each little section expands on its own, so the style reads as full and deliberate instead of thin or stringy. That’s useful if your hair is finer at the hairline or if your curls loosen up during the day.
How to Fake More Fullness
- Space the elastics about 1 to 1.5 inches apart.
- Pull the loops gently after each tie so the shape opens up.
- Keep the base sections small and even.
- Hide the final elastic under a curl or pin it behind the ear.
This is one of those styles that looks more complicated than it is. Good. I like that. If you want a front braid that can survive a busy day and still look airy, this one earns its place.
8. Waterfall Front Braid Into Loose Ringlets
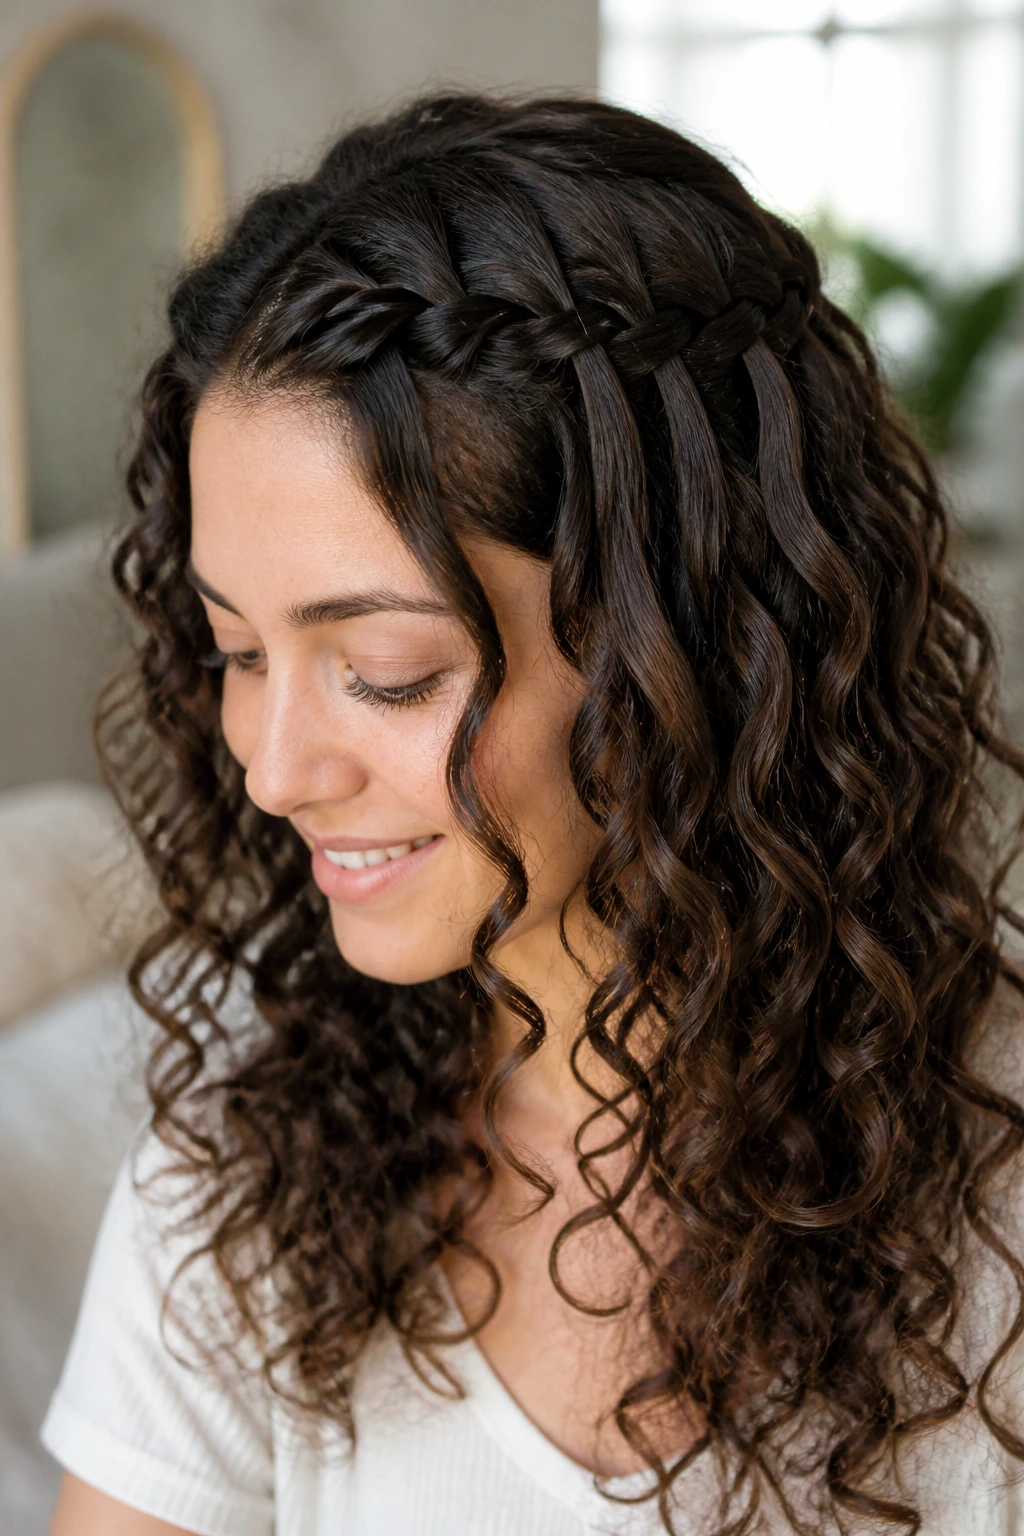
A waterfall braid looks fancy, but the real trick is leaving enough curl free so it doesn’t feel stiff. On curly hair, that matters a lot. The released strands blend into the rest of the pattern, which gives the braid a softer edge than it has on straight hair.
Start a small braid near the front hairline and drop one strand each time you cross. Replace it with a fresh section from above, then let the dropped curl fall into the open length. The result is a braid that seems to float through the front of the hair instead of trapping it. That floating look is why this style works on curls.
If your curls are very tight, stretch the front a bit first so the waterfall pattern shows up. On looser curls, you can braid on naturally dry hair and still get a readable shape. A little cream helps the dropped strands stay defined, but don’t pile on gel. Sticky curls break the softness of the braid.
What to Watch For
- Too-small sections vanish inside dense curls.
- Too much product makes the braid cling in clumps.
- A slightly stretched front gives cleaner lines.
- The braid should end before the hair gets too heavy.
This one suits romantic updos, half-up looks, and wedding hair that still needs movement. It’s fussy enough to feel special, but not so perfect that it loses the curl.
9. Side Rope Front Braid With a Deep Part
Unlike a three-strand braid, a rope braid only twists two sections around each other. Curly hair often takes to that texture faster than you’d expect, because the natural bend in the strands helps the twist hold. If your hair slips out of classic braids, this is worth trying.
Make a deep side part, gather a front section near the temple, and split it into two pieces. Twist each piece in the same direction, then wrap them around each other in the opposite direction. That reverse movement is what gives the rope braid its tight spiral look. Small and shiny. Very clean.
This style is especially good when the front section has a lot of shrinkage. The twist catches the curl pattern without needing a long braid to show up. It also works well if your hair is short to medium in the front, because rope braids need less length than a full three-strand plait.
Best when your front layers slide out of everything else.
Use a light cream first, then a tiny bit of oil on your fingertips if the strands feel dry. Heavy oil can make the braid spin apart. And if the ends are too fuzzy, tuck them into a side pin or curl them around a bobby pin instead of trying to hide them completely.
I like this one with a low ponytail or a loose bun. It keeps the front polished while the rest stays soft.
10. Triple Micro-Braids at the Front Hairline
Some days call for detail, not volume. Three tiny braids along the front hairline can tame curls without changing the shape of the whole style, and that’s a useful thing when your hair already has enough body. Think of them as small lines drawn where the hair tends to puff first.
Place the braids about a quarter-inch to half-inch apart, starting near the part or temple and running them back only 2 to 3 inches. If you go much longer, they start taking over the look. Keep the sections narrow and even. Tiny braids look cleanest when they’re not fighting for space.
Why Tiny Braids Do So Much
Because they sit right at the edge of the face, they catch the eye first. That means they can make the rest of the hair feel more controlled even if the curls behind them are loose and full. They’re also handy for pulling attention away from a root area that’s doing its own thing.
- Use a light hold gel just at the roots.
- Separate the sections with your fingers if the hair is fragile.
- Secure the ends with the smallest clear elastics you can manage.
- Add one cuff or bead only if the rest of the style is simple.
One caution: do not crowd the front if your hairline is sensitive. Tiny braids should look delicate, not tense. I’d rather see two clean micro-braids than six that pull the scalp around.
11. Front Braid Into a High Puff or Pineapple
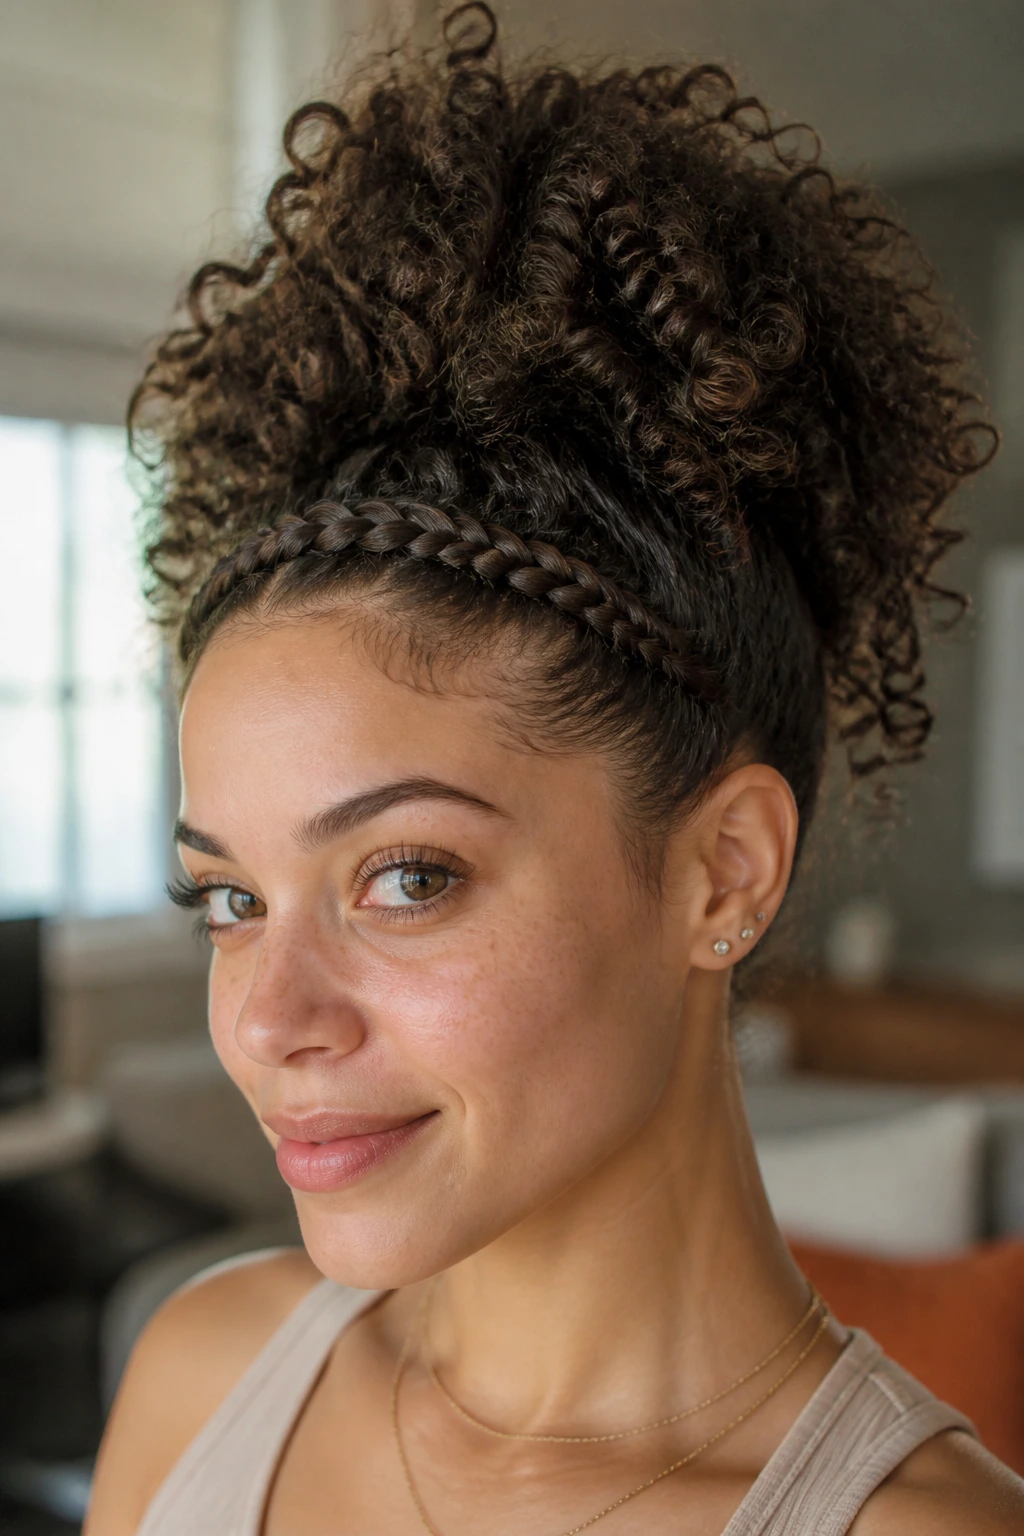
This is the style I reach for when I want the front to behave and the rest to stay huge. A front braid feeding into a high puff or pineapple gives you control where you need it and lift where you want it. It’s especially good for coily and very curly hair that looks better with height than with flattening.
Start with a braid from the front hairline, then braid it back toward the crown and secure the rest of the hair high on the head with a satin scrunchie. The braid and puff work like a pair: the braid keeps the face open, and the puff lets the texture breathe. Clean front, full top. Easy to love.
How to Balance the Height
If the puff sits too low, the braid can look stretched. Too high, and the front starts to feel disconnected. Aim for the crown area, then let the curls fan out above it. That usually gives the most natural shape.
What to Do With Shorter Front Layers
Short layers can slip out. Pin them under the braid with crossed bobby pins, then smooth the surface with a little cream on your fingertips. Don’t try to force every curl into the plait. Some of them should stay loose. That’s what keeps the style from looking boxed in.
A front braid into a puff is also one of the few looks that can go from errands to evening without much change. The shape does the work. You just keep the elastic hidden.
12. Scattered Front Accent Braids at the Temples
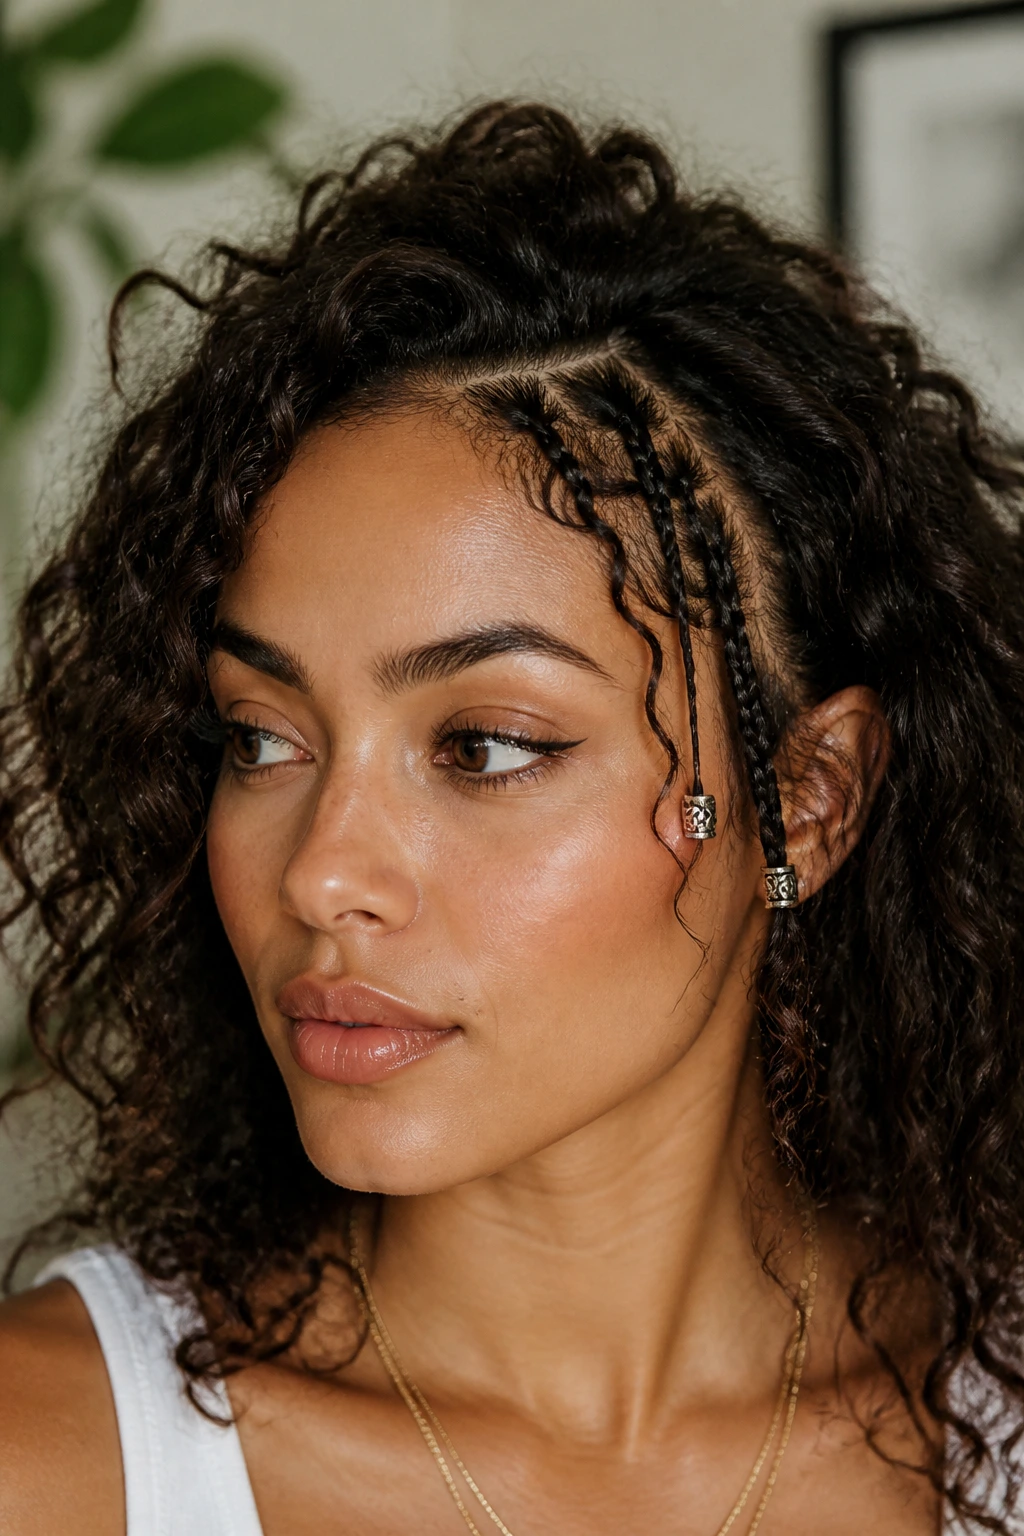
If one braid feels too tidy, scatter a few small accent braids where the hair needs help most. Two at the temples, one near the part, maybe a shorter one tucked closer to the hairline. This approach is more relaxed than a single formal braid, and curly hair wears that kind of unevenness well.
The nice part is freedom. You can choose the spots that usually frizz first or the places where your curls split apart when you wear them loose. Accent braids don’t need to match perfectly. In fact, I think they look better when they don’t. A little asymmetry makes the style feel lived in instead of engineered.
A few small braids can also make second- or third-day curls look purposeful. That’s the real win. The style says you meant to wear your hair this way, even if the truth is that the front needed a little help. No shame in that.
Use tiny elastics, keep the sections narrow, and leave the ends curly if they’re long enough to show. If the braids are short, pin them flat and let the rest of the front curl around them. The braid should look like part of the curl pattern, not a separate object stuck on top.
This is the style I’d hand to someone who likes curly hairstyles with a little edge. Not too polished. Not too precious. Just enough structure to make the front behave, and enough softness to keep the curls looking like curls.