Long curly hair looks generous until you need to leave the house in ten minutes.
A style that seems simple on straight hair can turn into a small battle on curls because the weight is different, the texture is different, and the hairline usually has its own opinion. That is why easy hairstyles for long curly hair need to work with volume and shrinkage instead of trying to flatten everything into obedience.
The good ones do three things at once: they keep the curl pattern visible, they control the outline around your face, and they do not demand a drawer full of tools. I keep coming back to styles that can be done with one elastic, a claw clip, or a couple of bobby pins, because those are the styles you’ll actually wear on a normal Tuesday.
A few habits make almost every style easier. Detangle while the hair is damp, reach for a satin scrunchie or a smooth elastic, and leave a little room at the roots so the style does not pull the curls tight. After that, the fun part starts.
1. Half-Up Twist
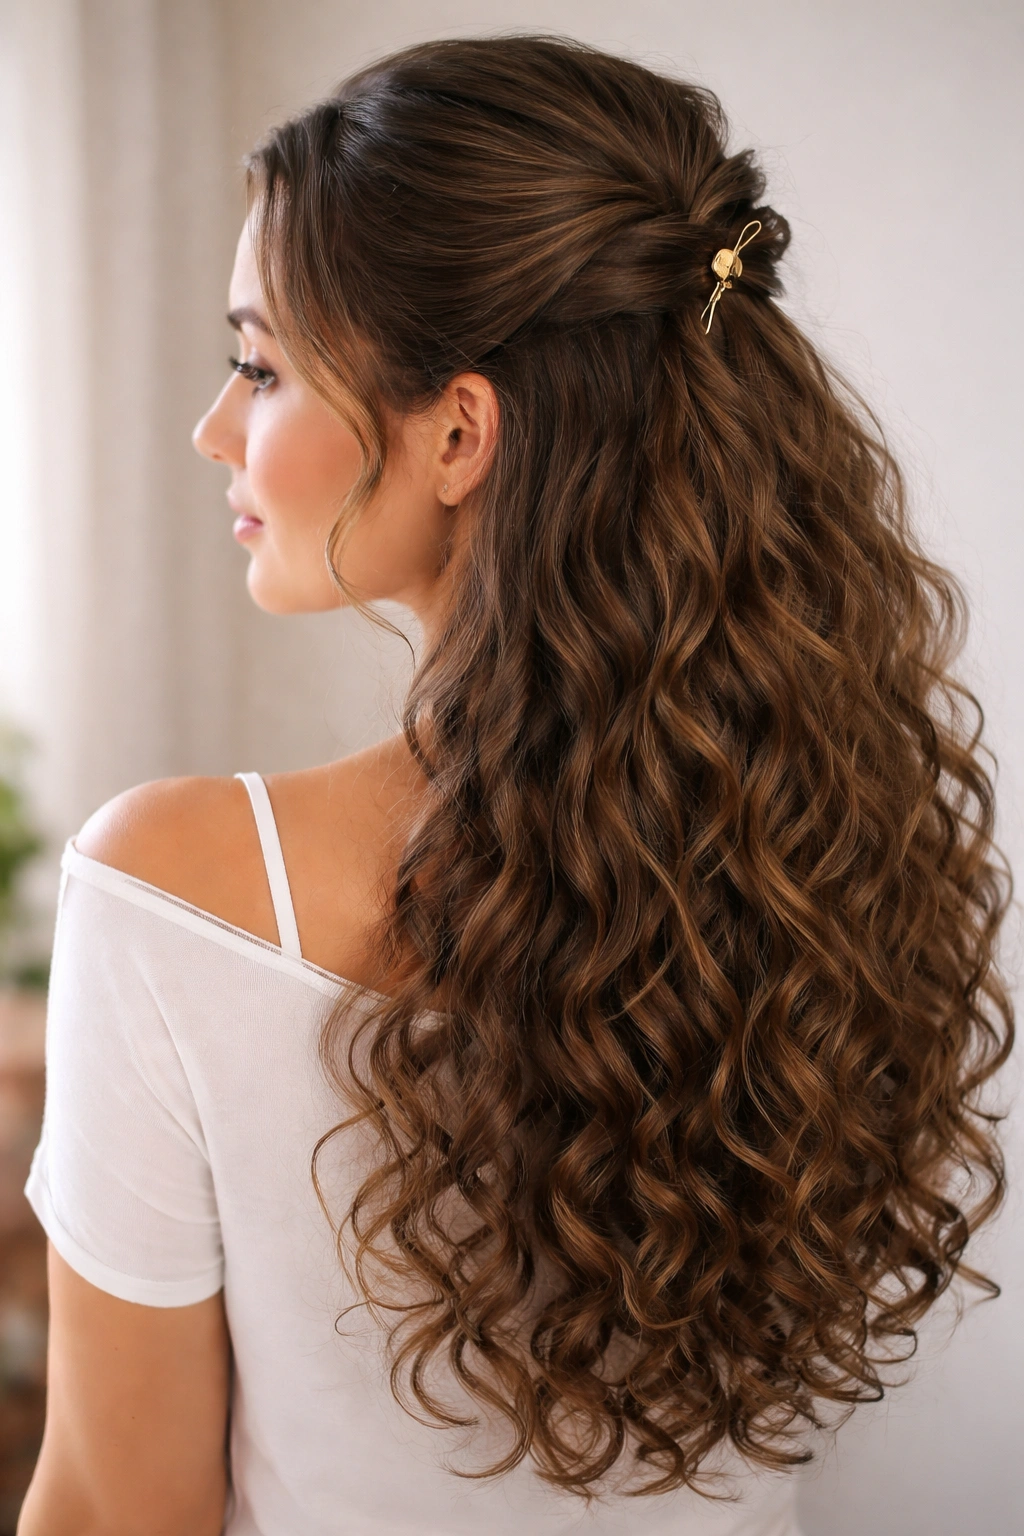
A half-up twist is one of those styles that looks like you tried, even when you did not. It keeps the front sections off your face, shows off the length, and leaves the curls at the bottom doing what they do best.
Take a section from each temple, twist both pieces back, and join them at the crown with a small claw clip or two crossed bobby pins. If your hair is thick, start the twist just behind the ears so you are not fighting too much bulk at once. Don’t cinch the twist tight. A looser twist sits flatter at the scalp and gives the curls room to move.
What makes it worth using
The half-up twist works because it controls the front without stealing the drama from the rest of the hair. It also hides a little frizz at the crown, which is often the first place curls start to puff.
A medium claw clip with curved teeth holds better than a tiny decorative one. If your curls are soft and springy, a pinch of gel on the temple section helps the twist stay together. If your hair is very long, let the lower lengths spill freely; the contrast is what makes the style look finished.
2. Pineapple Ponytail
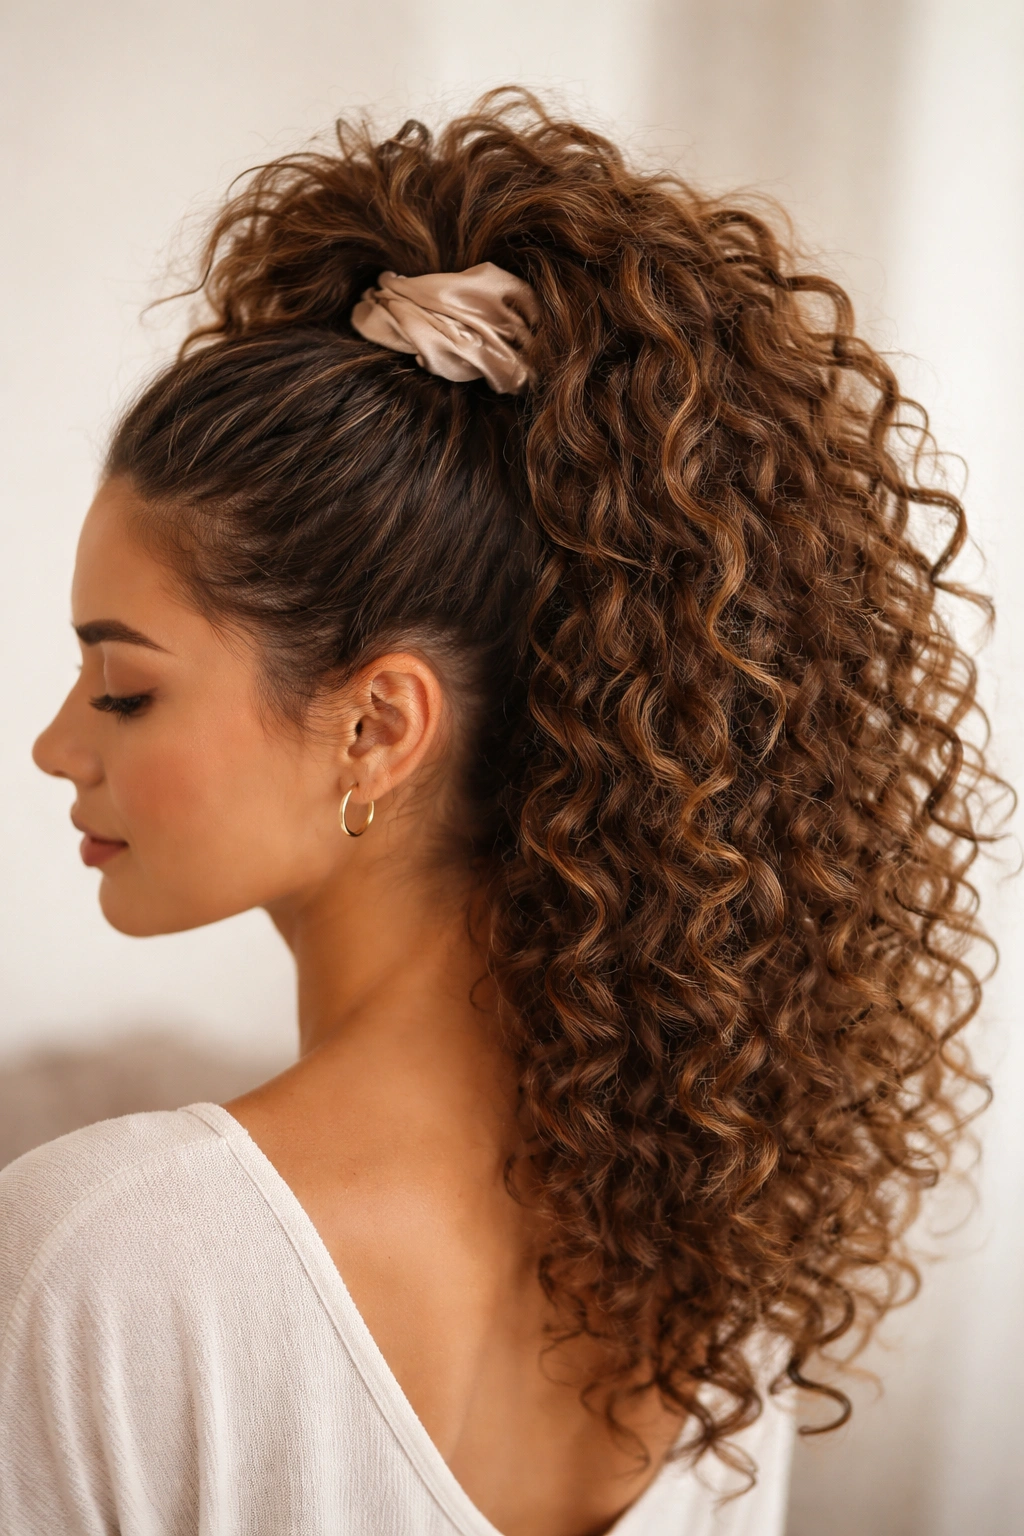
Why does the pineapple work so well on long curls? Because it keeps the curl clumps together instead of crushing them into a flat, sad top knot.
Gather the hair loosely at the very top of your head and secure it with a satin scrunchie or soft elastic. Let the tail sit forward or slightly to one side so the curls keep their shape. If your hair is extra long, do not force every strand through the tie on the first pass; one loose wrap is usually enough.
How to keep it from slipping
The trick is to place the ponytail high enough that the curls fall away from your neck, but not so high that the base feels stretched. You want lift, not tension.
This is one of the few styles that can work both as a daytime look and as a sleep-saving shape overnight. If the crown starts to sag, push the elastic up a half inch rather than tightening it. That small move keeps the root from going flat.
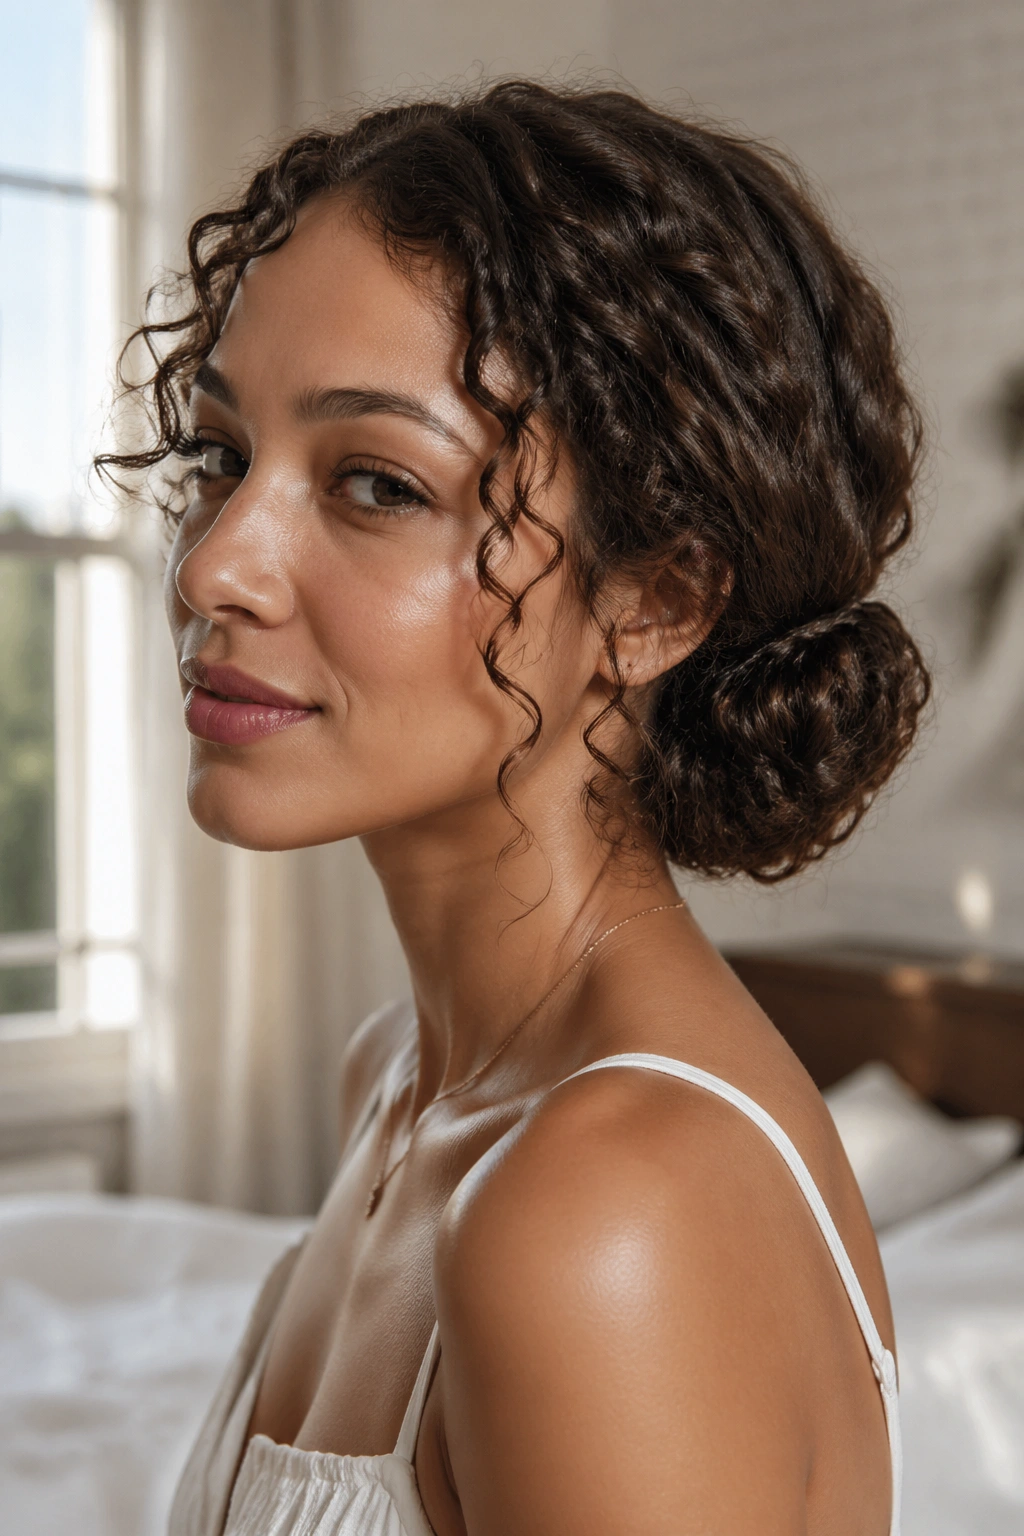
3. Low Loose Bun with Face-Framing Tendrils
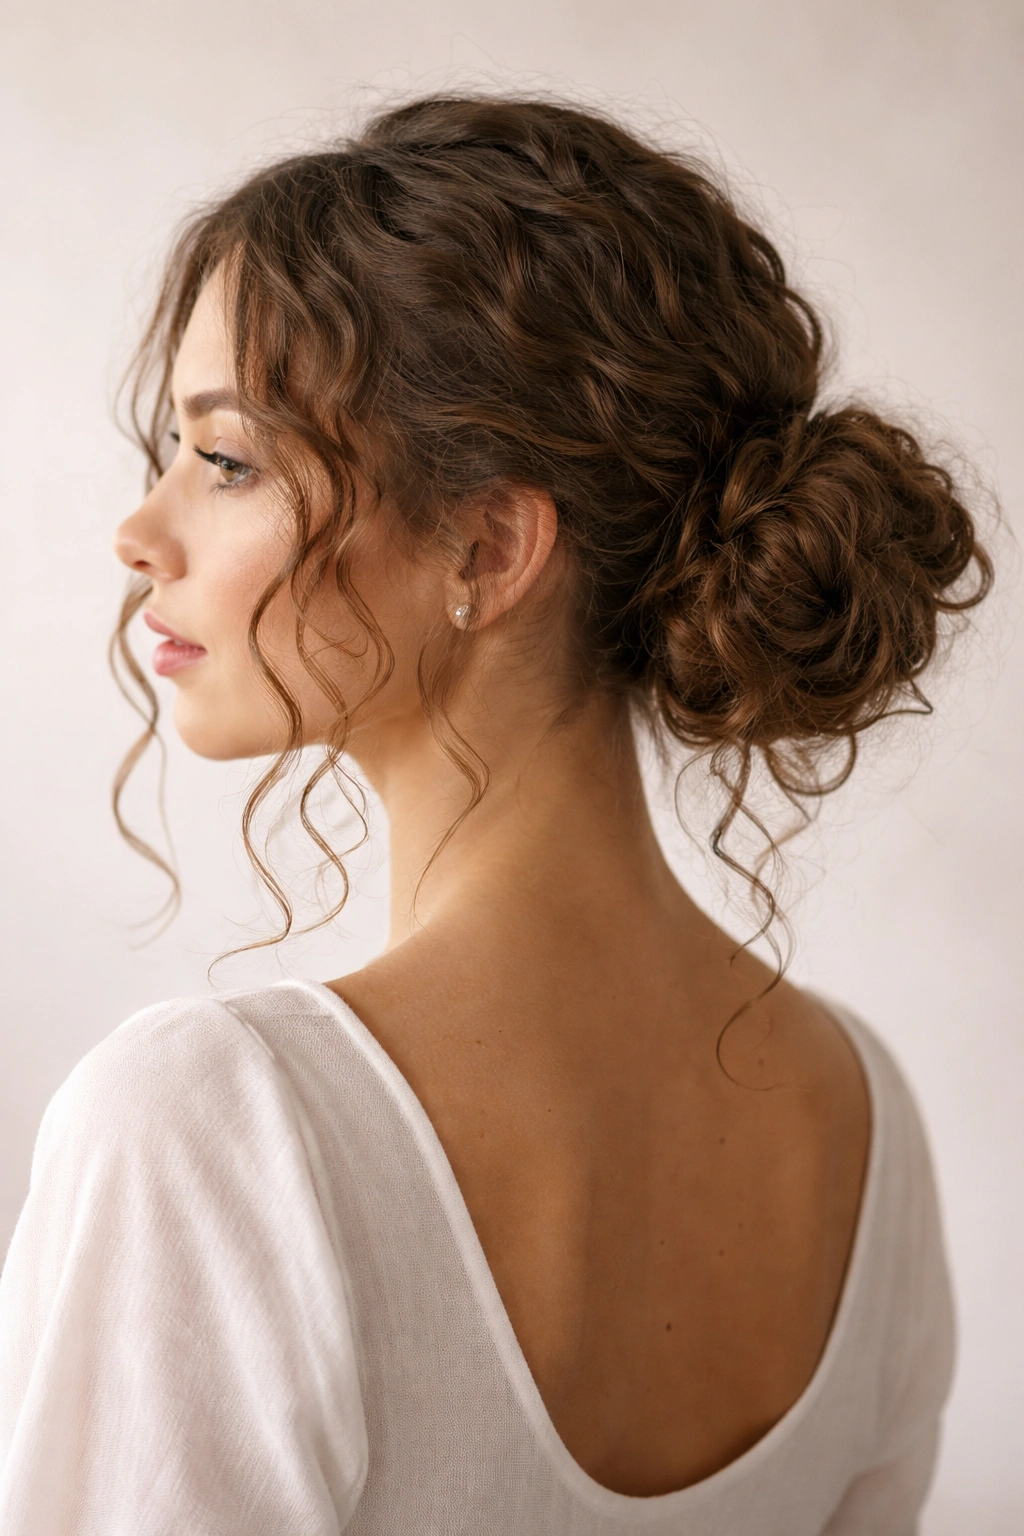
The nape should feel calm, not squeezed. That is the test I use for a low curly bun, and it saves a lot of regret later.
Pull the hair into a low ponytail, twist it once or twice, and coil it into a bun just above the elastic. Pin it with two or three long bobby pins, then leave a few curls around the face and at the temples. A handful of loose tendrils makes the bun look softer and takes the pressure off your hairline.
A low bun works especially well when your curls are stretched a little from day-two wear. The shape holds better, and the bun sits closer to the head instead of flaring outward. If the ends are slippery, mist them lightly with water before you coil them; that tiny bit of grip helps.
A little looseness is the point.
4. Side Braid
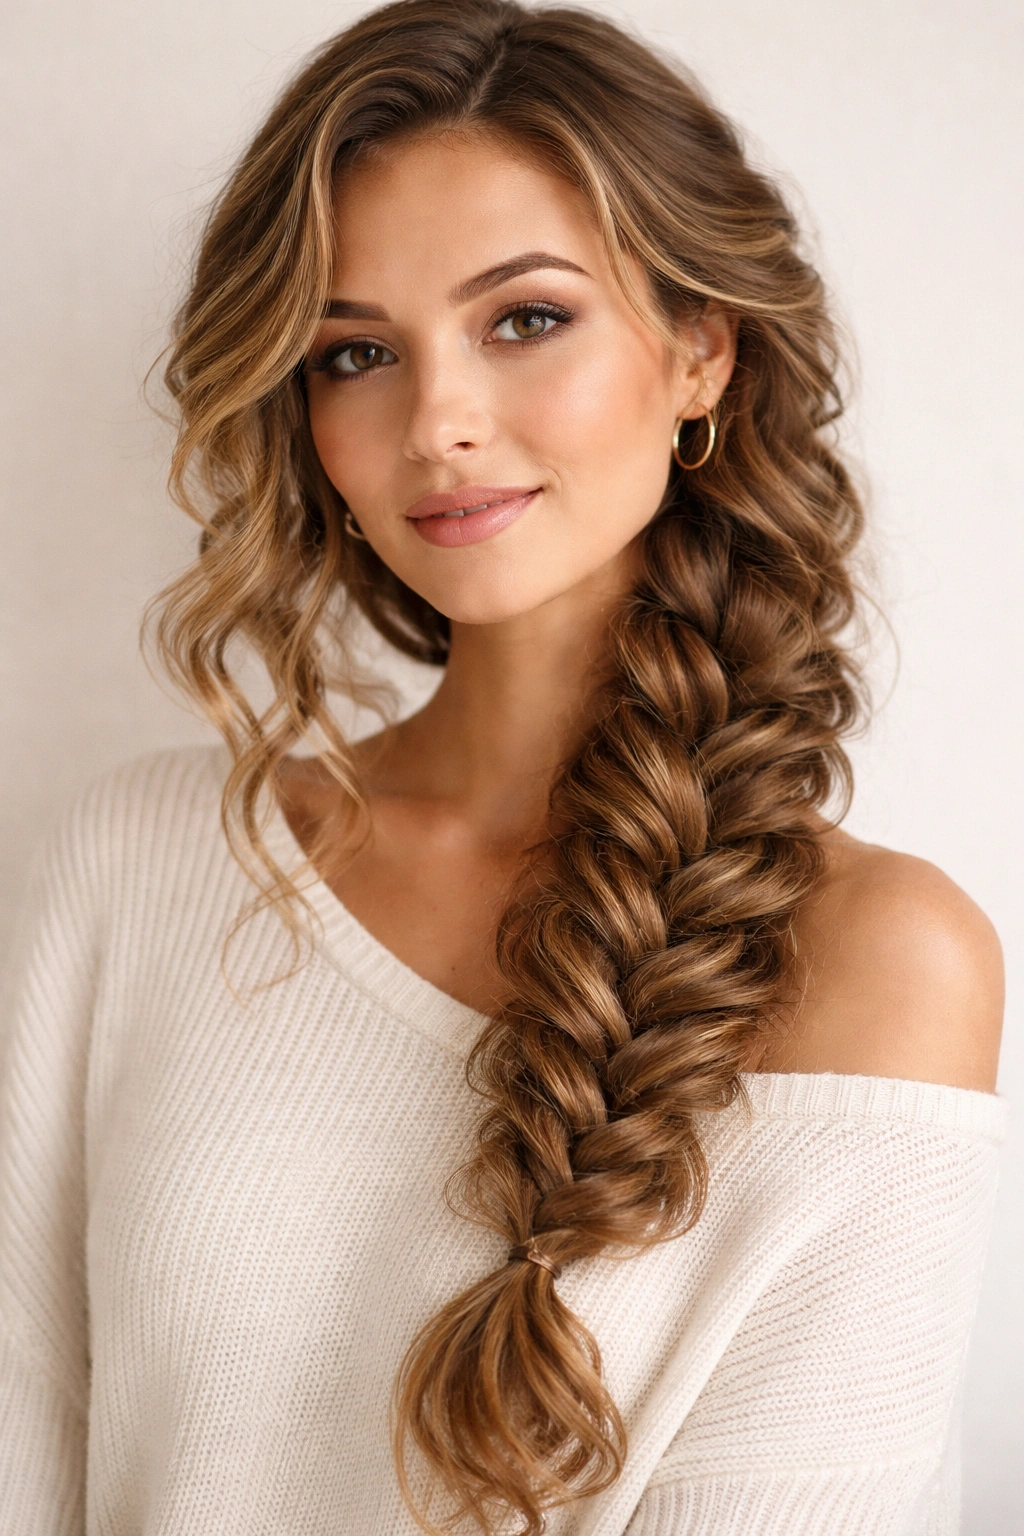
Windy day, damp coat, hair everywhere? A side braid solves that fast.
Sweep the curls over one shoulder and create a loose three-strand braid from about ear level down to the ends. Keep the braid relaxed so the curls still show through between the sections. If you want a softer look, gently tug the outer edges of the braid after it is secured; stylists call that pancaking, and it gives the braid more width without making it neat in a stiff way.
Quick details that help
- Use a clear elastic or a small fabric tie at the end so the braid does not snag.
- Start the braid lower if your roots puff easily.
- Leave the first inch around the face a little free if you want movement.
The side braid is good when you need the hair contained but do not want a sleek ponytail. It also sits well under a scarf or coat hood, which is a small mercy when the weather turns rude.
5. Bubble Ponytail
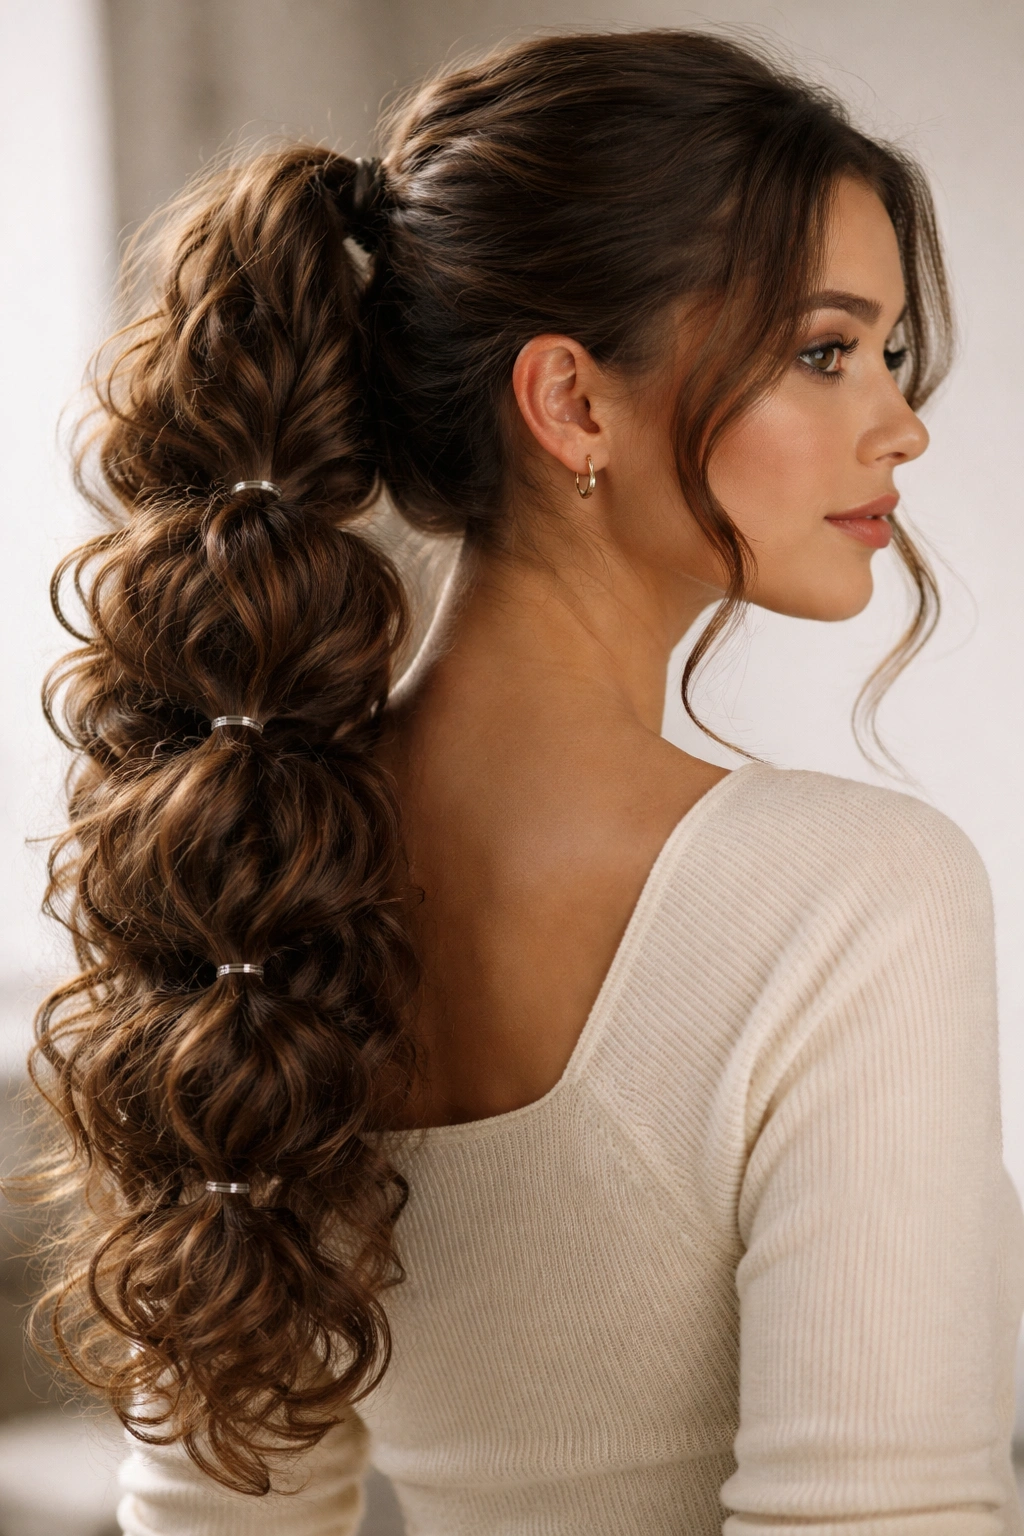
A bubble ponytail is the fastest way to make long curls look styled without asking the ends to behave. It has shape, height, and a little playfulness, which is hard to beat when your hair is already doing the heavy lifting.
Start with a low or mid ponytail and secure it with a satin scrunchie. Add small clear elastics every 2 to 4 inches down the length, then gently pull each section outward until it looks rounded. That pulling part matters. If you skip it, the style reads flat.
How to get the bubbles even
Use the length of your own hand as a guide between elastics. For very long curls, four or five bubbles usually look balanced; for thicker hair, you may need more. Try to keep the spacing fairly consistent, but do not obsess over perfection. The charm is in the shape, not in making it look machine-made.
This style works especially well when the curls are a little stretched and you want some visual structure. It is also one of the better choices for long hair that gets heavy fast, because the elastics spread the weight out instead of dumping it all at the crown.
6. High Puff Ponytail
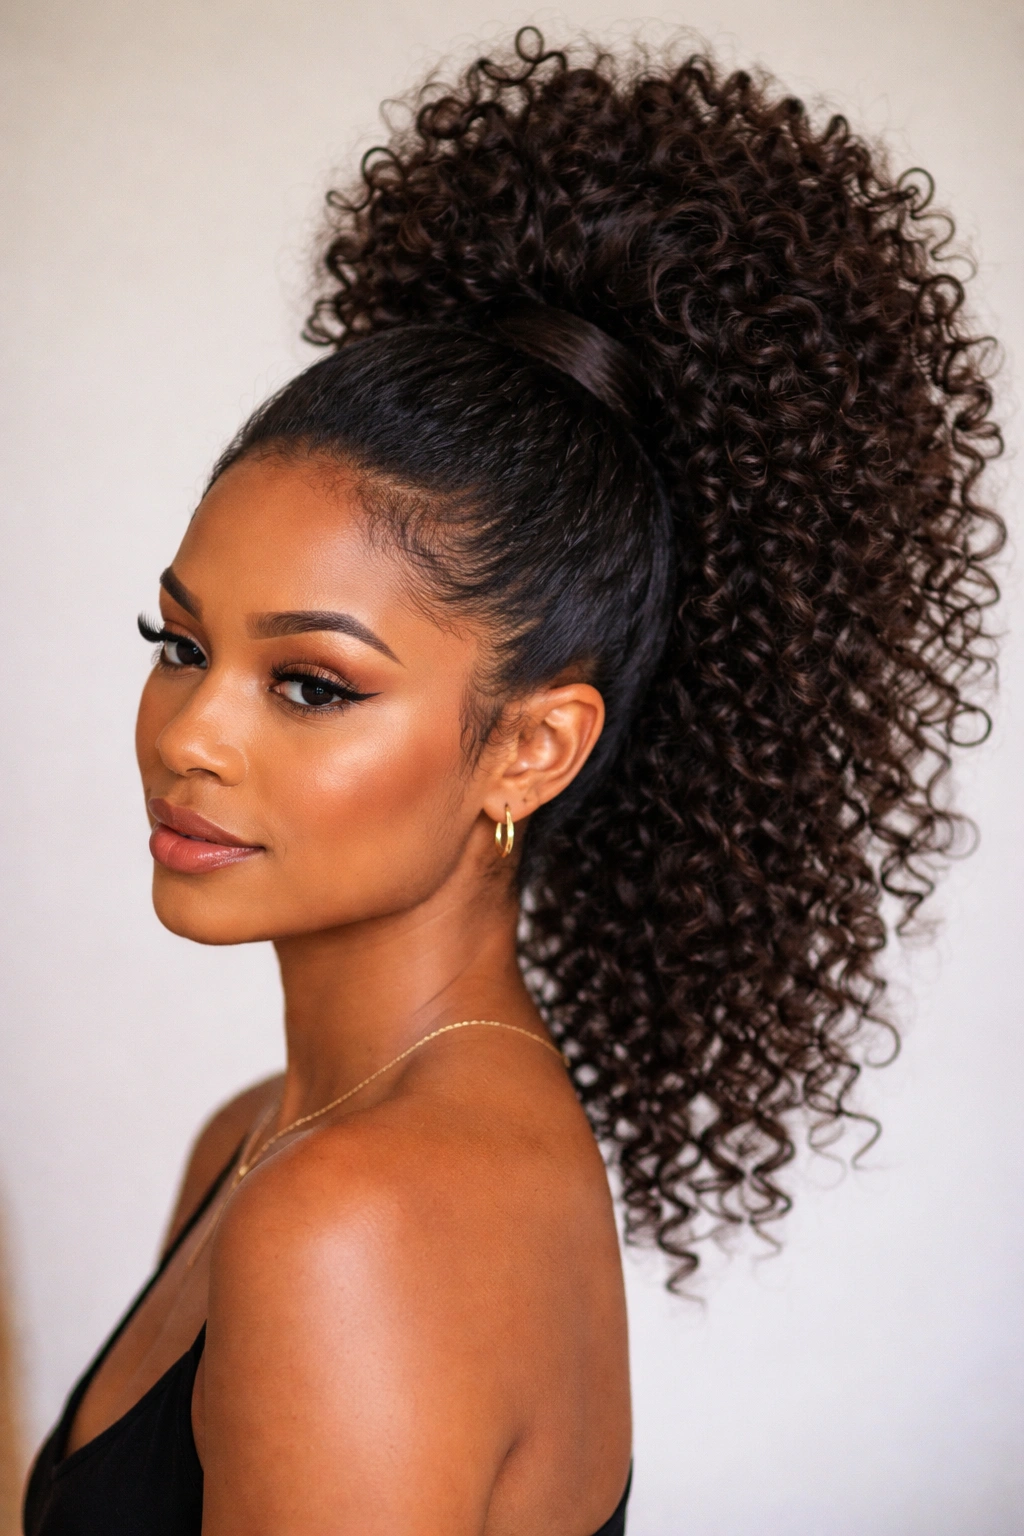
You do not need a sleek crown to make a high ponytail look polished.
That’s the part people miss.
A high puff ponytail keeps the lift at the roots and lets the curls make the statement. Gather the hair high, secure it with a strong elastic, and stop before the roots feel yanked. If the hair is dense, wrap a small section around the base and pin it underneath so the elastic disappears.
This style is especially good on curls with plenty of volume because it turns shrinkage into shape rather than fighting it. A light spritz of water at the crown helps the hair settle where you want it, but avoid soaking the whole head. Damp roots are easier to smooth; wet hair is harder to control and takes forever to dry.
If the front needs a little discipline, smooth only the top inch with your hands. Leave the rest alone. That contrast keeps the ponytail from looking overworked.
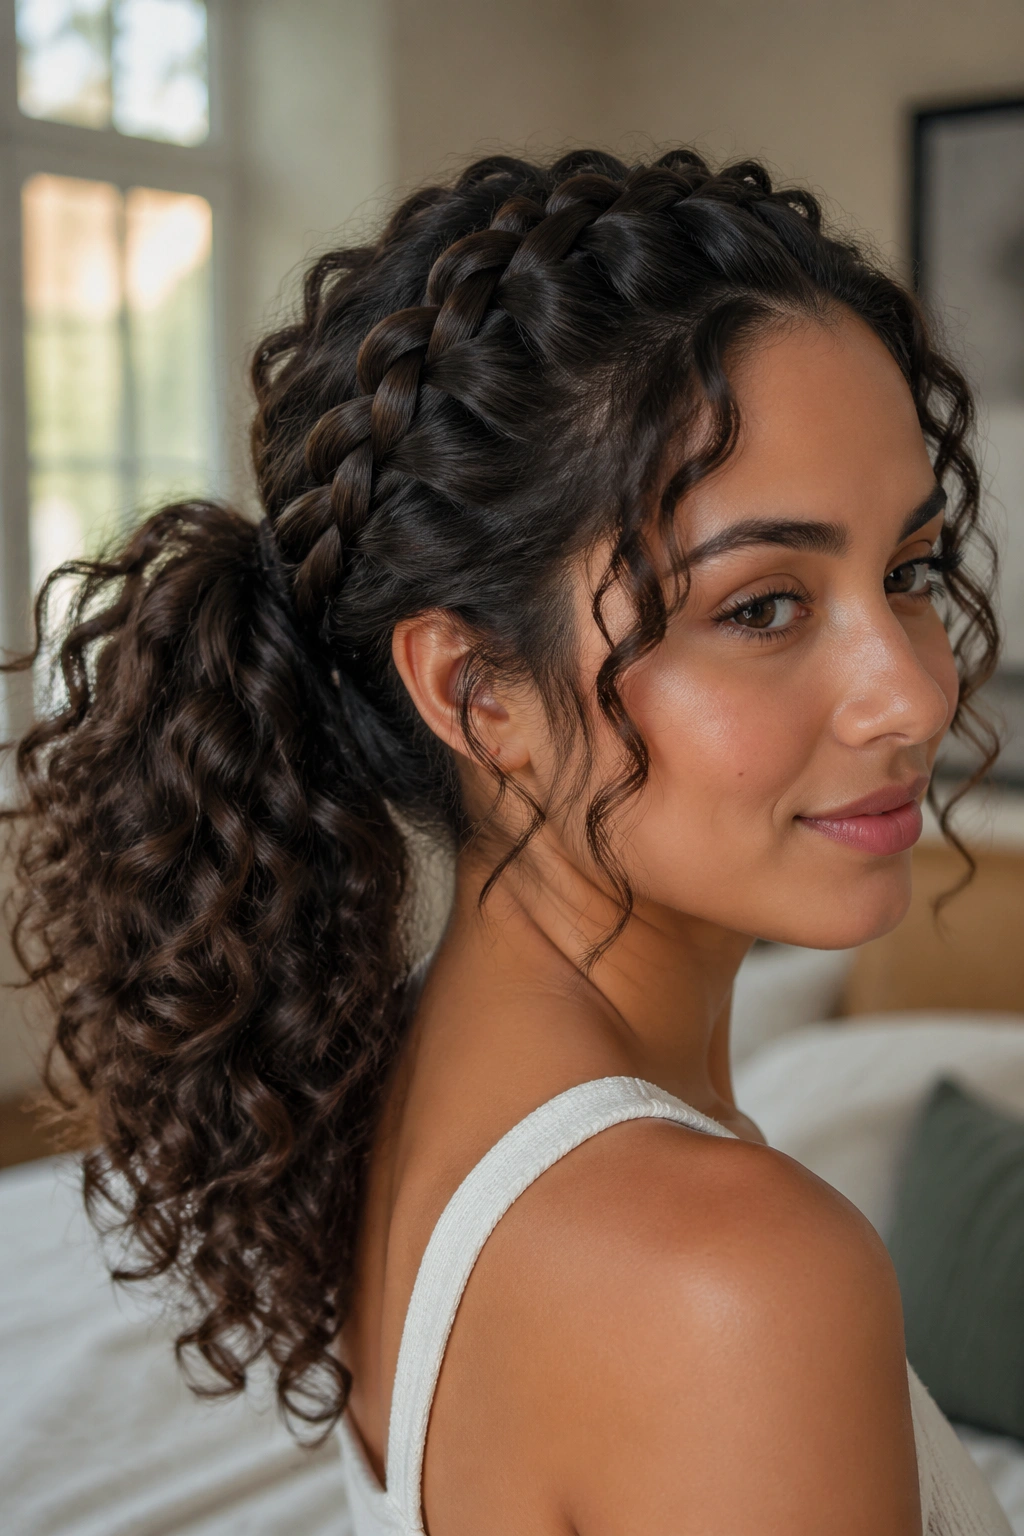
7. Crown Braid Halo
Need your hair off your face but still want the length to feel dressed up? A crown braid is the answer I reach for when a regular braid feels too plain.
Take a section from one temple and braid along the hairline toward the opposite side, or braid both sides and pin them together at the back. Long curly hair makes this style look fuller than it does on finer textures, which is half the appeal. The braid sits like a frame, and the loose lengths below add softness.
Pinning the ends without a mess
- Use bobby pins that match your hair color.
- Slide each pin in at an angle so it grips the braid’s base.
- Cross two pins into an X if the braid feels loose.
- Hide the braid ends under a curl cluster instead of forcing them flat.
A crown braid can look fussy if you pull it too tight. Leave a little bend in the braid so it follows the curve of your head instead of cutting across it. That small bit of slack keeps the whole thing from feeling stiff.
8. Double Dutch Braids
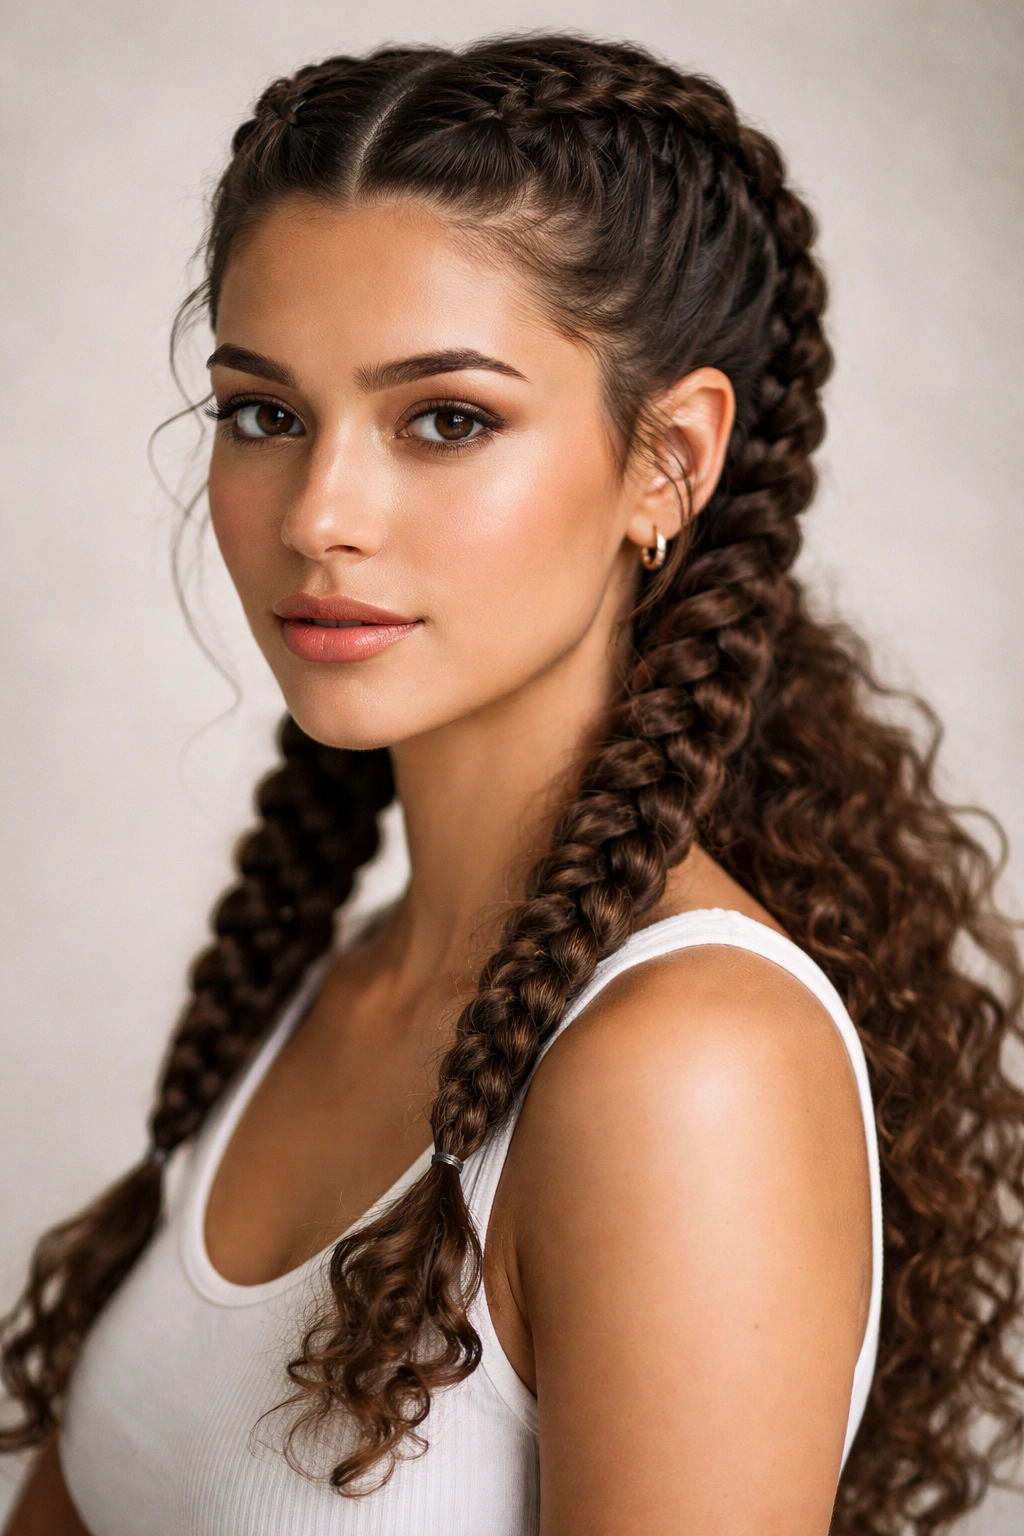
Need your curls completely out of the way? Double Dutch braids are the practical answer, and they are much gentler than people think when you braid with a soft hand.
Start at the front hairline and braid under, not over, so the braids sit raised along the scalp. Work down to the nape, then either secure the ends as small loose braids or let them finish as low ponytails. If your hair is thick, part it with a tail comb first; a clean part makes the style easier to control.
What to watch for
- Don’t braid wet hair tightly around the edges.
- Keep the tension even so one side does not tug harder than the other.
- A small amount of leave-in conditioner helps the sections separate cleanly.
- Stop if the scalp starts to feel sore. That is a sign the braid is too tight.
This style is excellent for workouts, travel, or days when humidity is determined to win. It also lasts longer than most quick styles because the braids hold the curl pattern in place instead of letting it frizz out at the top.
9. Scarf-Wrapped Low Ponytail
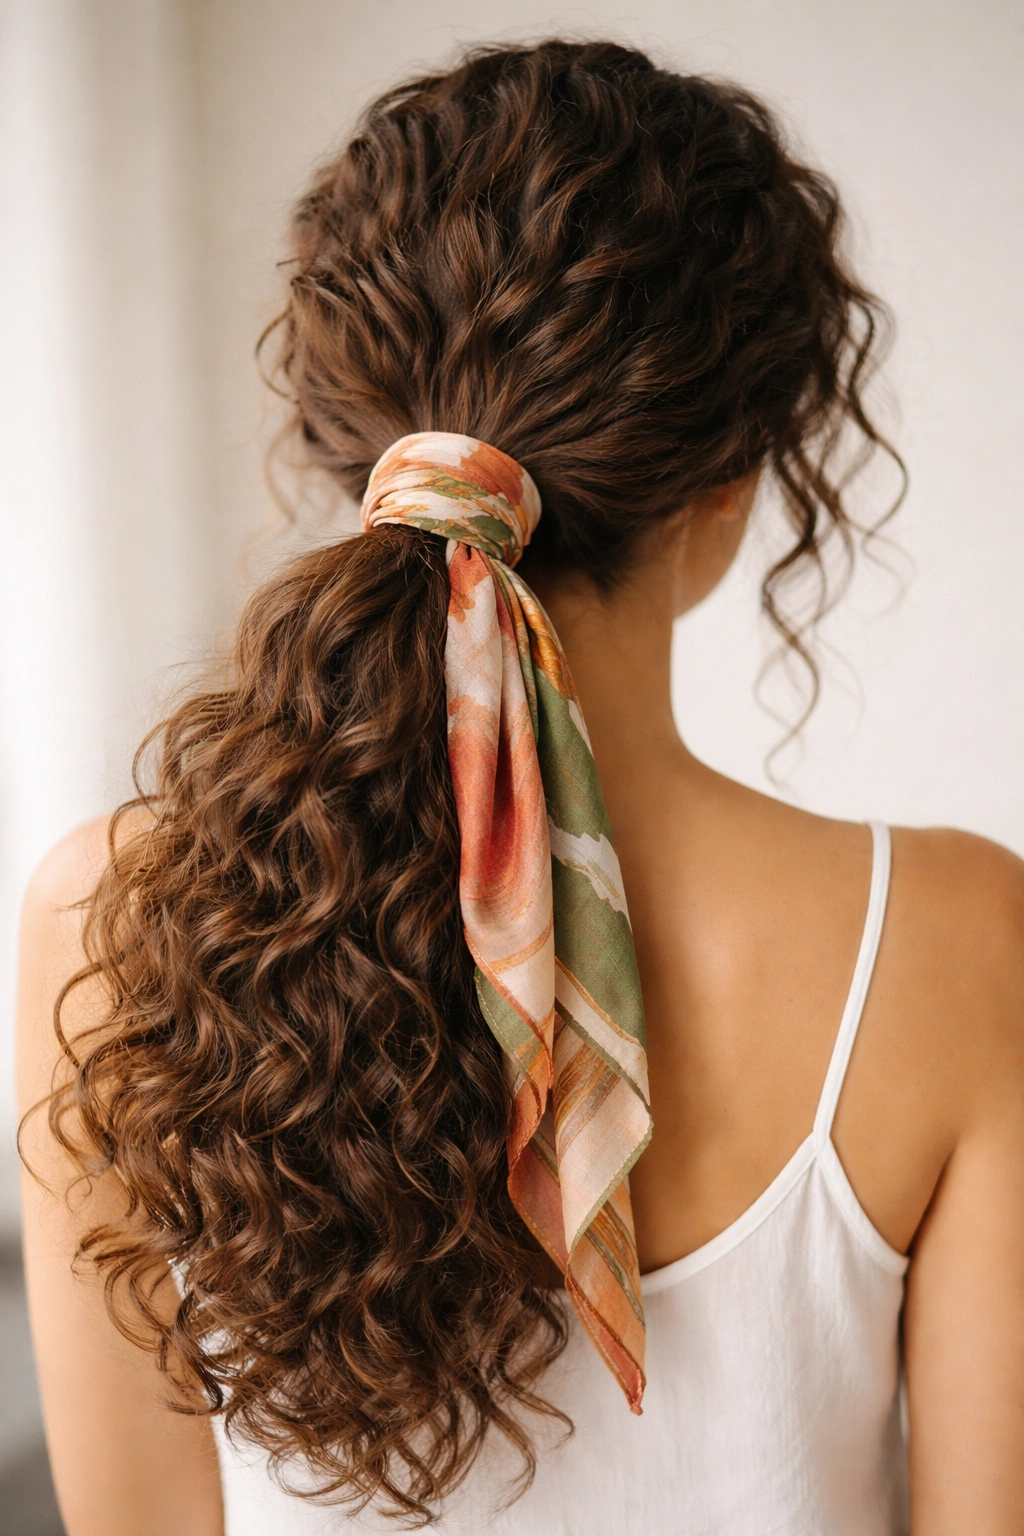
A scarf does a lot of work for very little effort. It hides a plain elastic, adds color, and softens the outline of a low ponytail in a way that feels intentional rather than thrown together.
Pull the curls into a low ponytail and secure them with a soft elastic. Fold a square scarf into a strip about 2 inches wide, wrap it around the base, and tie it into a knot or bow just off center. Let the ends trail a little; stiff, tiny scarf tails tend to look awkward on long hair.
The best part is how forgiving this style is. If the ponytail is not perfectly smooth, the scarf distracts the eye. If a few curls at the nape escape, they blend in instead of looking messy. That is a rare and useful thing.
Choose a silk or satin scarf if your hair tangles easily. The fabric slides against the curls instead of snagging them, which matters more than most people realize.
10. Messy Space Buns
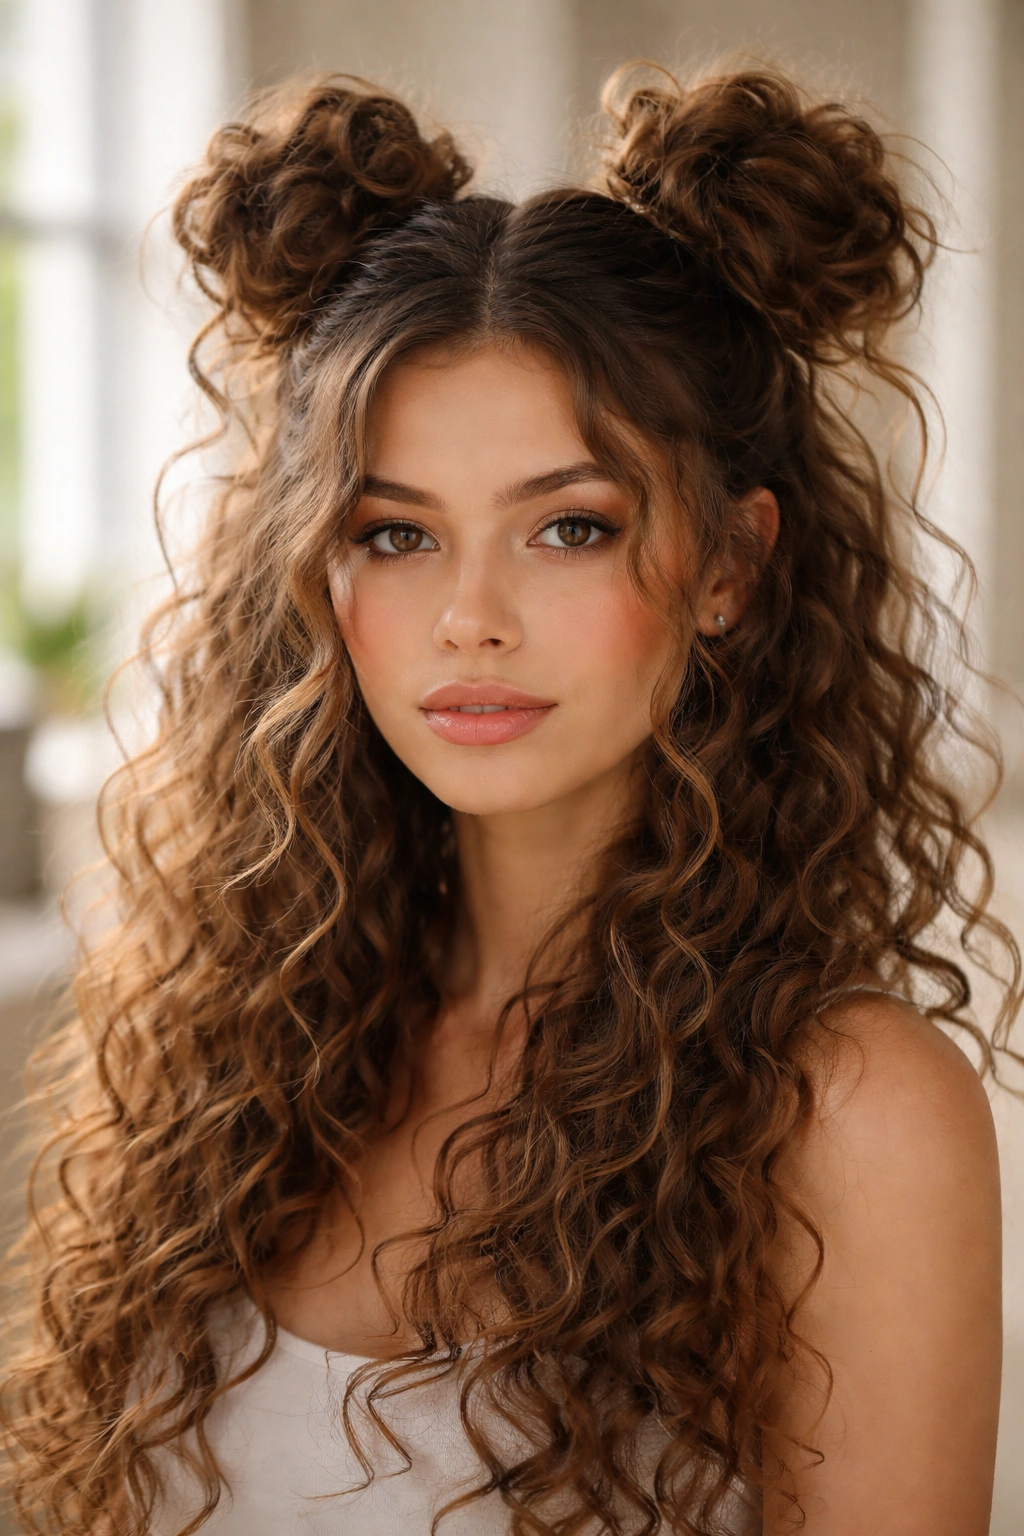
Space buns are less childish than people think, especially on long curls. Done loosely, they read playful and a little editorial without asking much from you.
Split the hair into two high sections and twist each one into a small bun. Leave the buns a little uneven and let some curls escape around the face and neck. That softness matters. If every strand is tucked in, the style starts to look too exact, and curls rarely look their best when they are overcontrolled.
A few placement ideas
- Place the buns slightly back from the hairline for a softer shape.
- Keep them lower if your hair is very thick.
- Use spiral pins or two bobby pins per bun if they feel heavy.
- Pull a few curls out near the temples to break up the outline.
This is one of my favorite quick styles for long curly hair because it turns volume into the point of the look. It is fun, but not flimsy. There’s a difference.
11. Side-Swept Clip Back
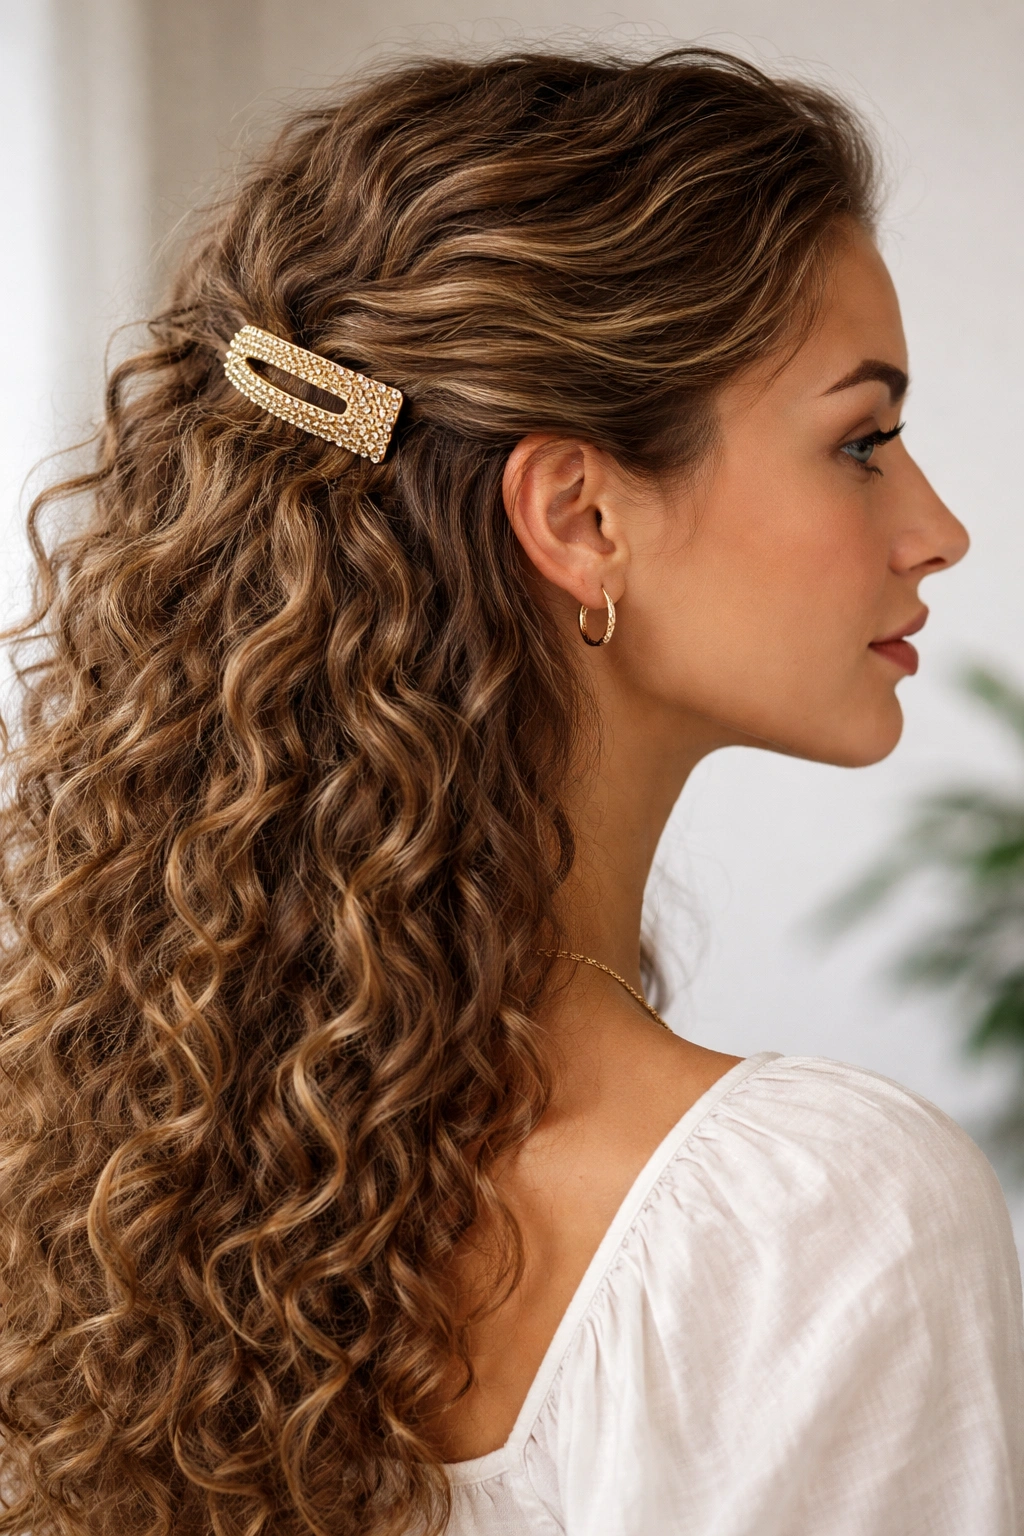
Some days you only need one side out of the way. That is where the side-swept clip back earns its keep.
Sweep one section of hair behind the ear and secure it with a large barrette, decorative clip, or two crossed pins. Leave the other side down so the curls still show their length. The asymmetry is the whole trick here. It feels relaxed, but not careless.
This style works especially well when the curls are freshly defined and you want to show off the pattern instead of hiding it. If the clip keeps sliding, choose one with a flat base and a strong clasp. Tiny clips are a waste of time on dense curls.
It is also a good answer for growing-out bangs or layers that keep falling into your eyes. One clip. Done.
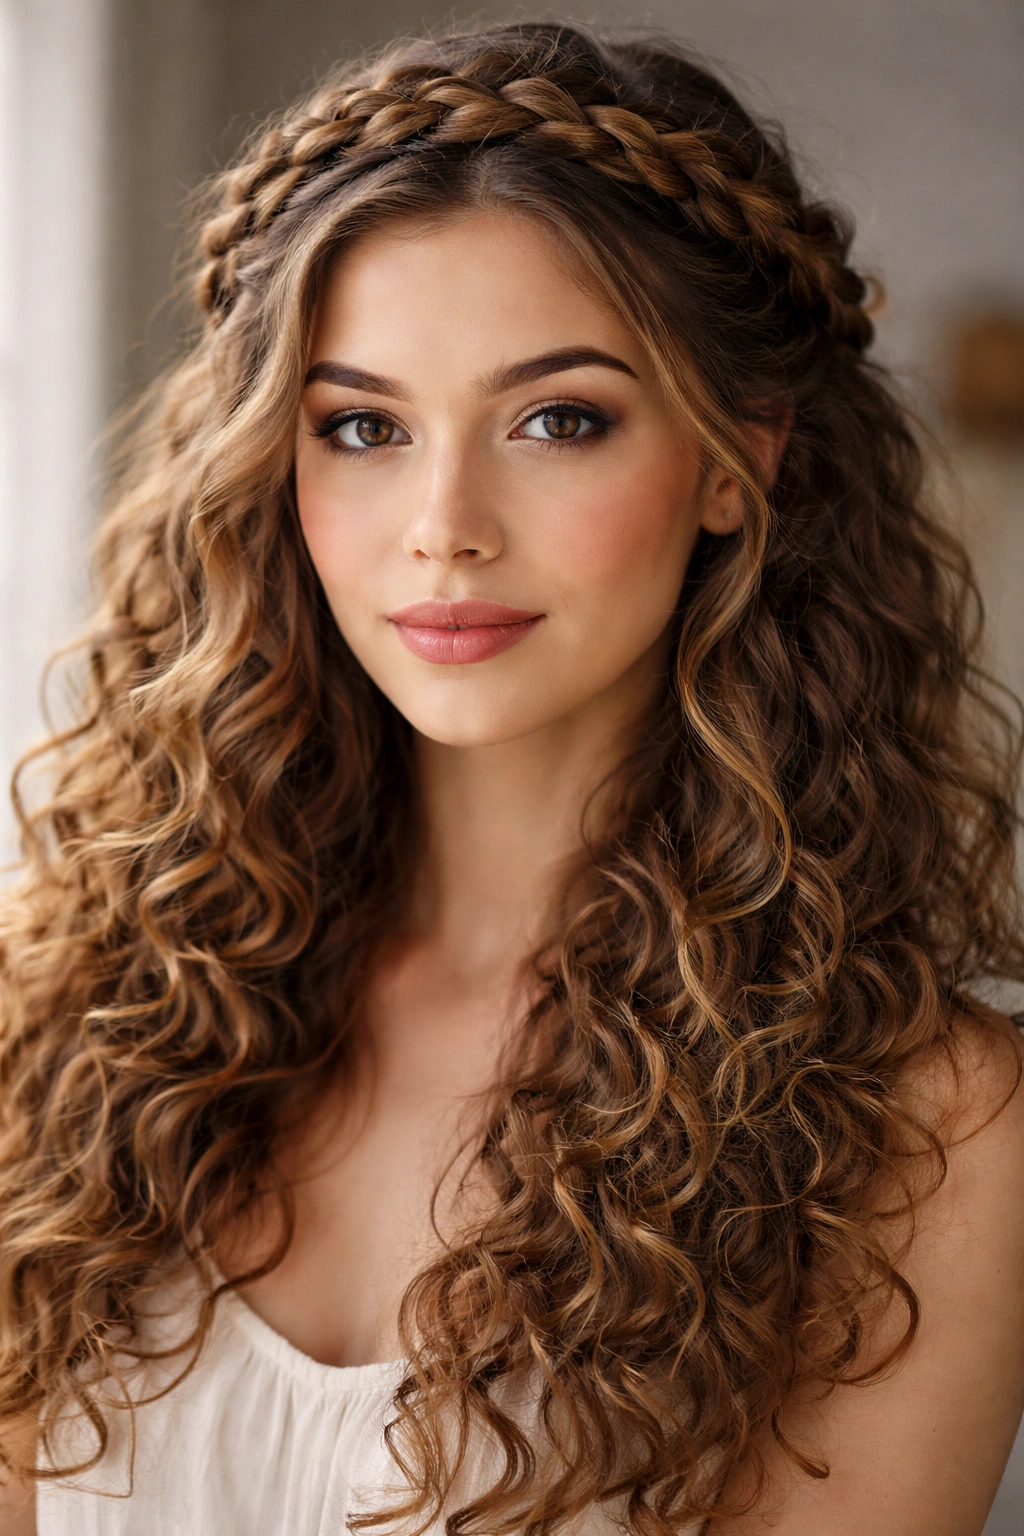
12. Half-Up Braided Crown
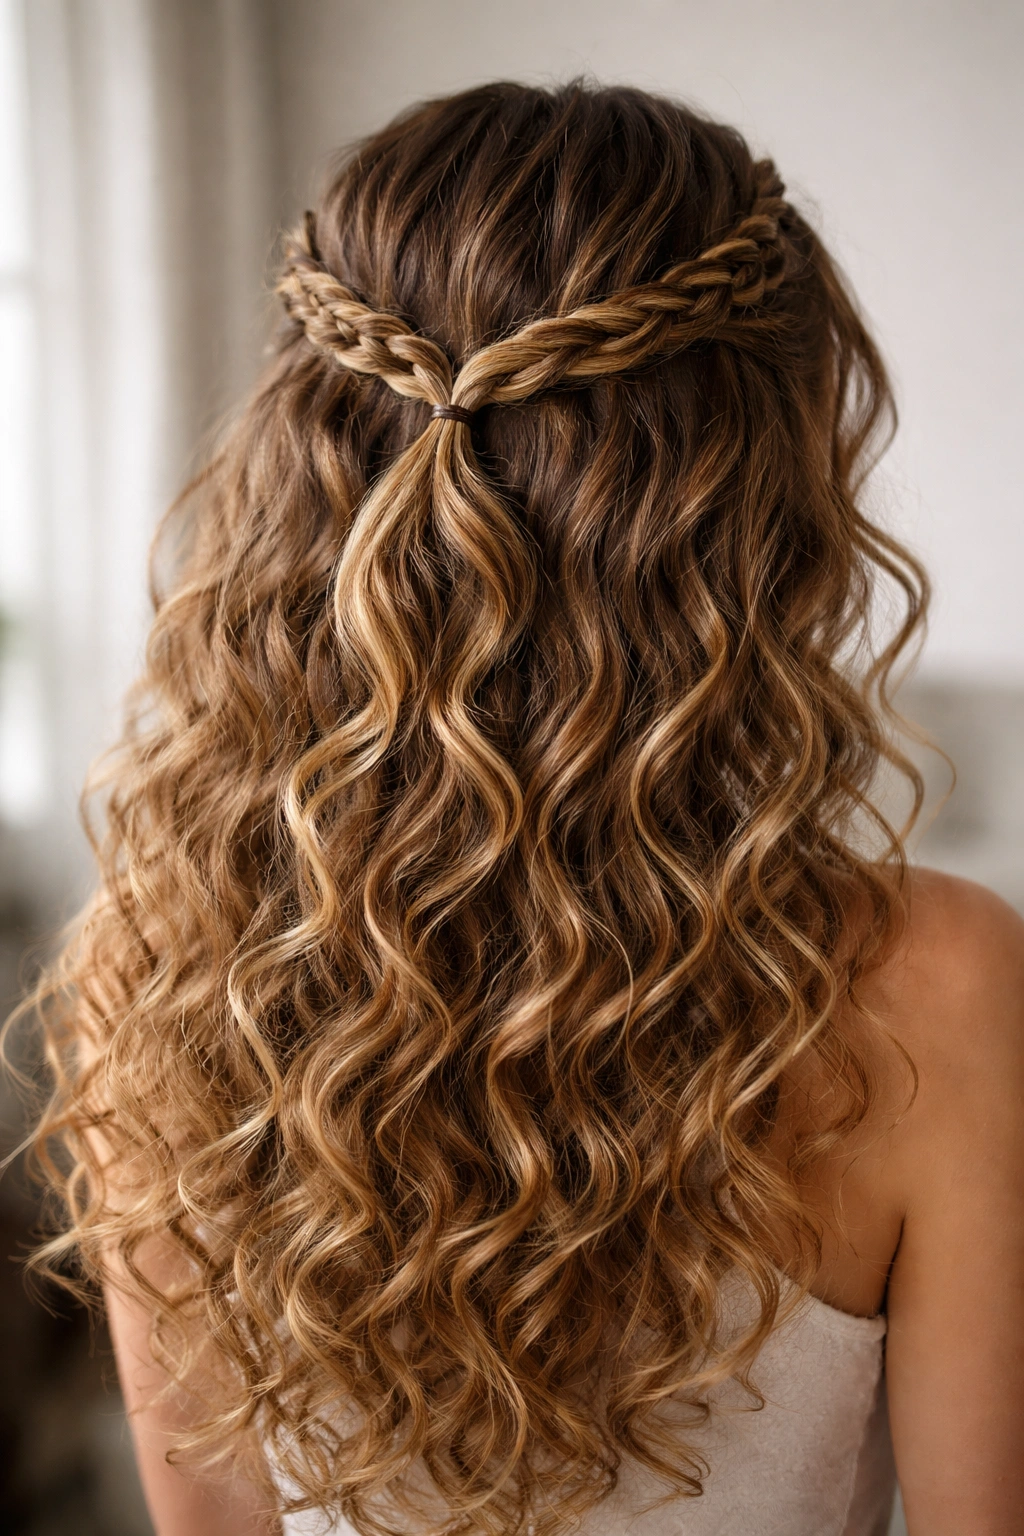
A half-up braided crown gives you the clean outline of a braid and the fullness of loose curls underneath. It is a nice middle ground when you want something a touch more polished than a twist but less formal than a full crown braid.
Take two small sections from the temples, braid each one, and join them at the back of the head. You can also braid one side across the front and pin it behind the opposite ear. Either way, the face stays open and the rest of the hair keeps its volume.
Small changes that soften it
- Pull a few curls free at the front if the braid looks too neat.
- Loosen the braid edges with your fingers after pinning.
- Let the ends disappear under the hair rather than hanging stiffly.
- Use only enough pins to hold the braid flat. More is not better.
This style is useful on long curls because it controls the top half without flattening the bottom. That balance is what makes it feel easy to wear, even when the braid itself takes a few extra minutes.
13. Low Rolled Tuck
A low rolled tuck looks formal, but it is one of the easiest things you can do with curly hair.
Start with a low ponytail, split the hair just above the elastic, and flip the tail up and through the gap. Then tuck the lengths inward and pin them close to the nape. If your curls are long enough, the ends can fold under themselves and create a soft roll. If they are extremely long, let a few ringlets fall out on purpose. It looks better that way.
This style works best when the hair has a little texture already. Freshly washed, silky curls can be too slippery, while day-two curls usually hold the tuck with less fuss. A few pins placed horizontally across the base make the shape secure without showing.
Don’t try to make the roll perfect. The charm comes from the bend and the softness, not from a ballroom finish.
14. Curly Faux Hawk

If you like volume, this one delivers.
Pin both sides of the hair back while leaving a wide center strip free from the forehead to the nape. The curls in the middle rise up like a soft ridge, and the pinned sides create a clean frame. It looks bold, but the actual work is simple: a few sections, a few pins, and some patience.
Where to pin first
- Start just above the temples.
- Cross two bobby pins in the same spot for extra grip.
- Add pins lower near the ears if the sides puff out.
- Leave the crown loose so the center has height.
The faux hawk is a smart choice when your curls are extra fluffy and you do not want to fight that volume. It also photographs well in real life because the shape reads clearly from the front and the side. The only mistake is making the sides too slick. A bit of texture makes the style feel more natural.
15. Rope Twist Ponytail
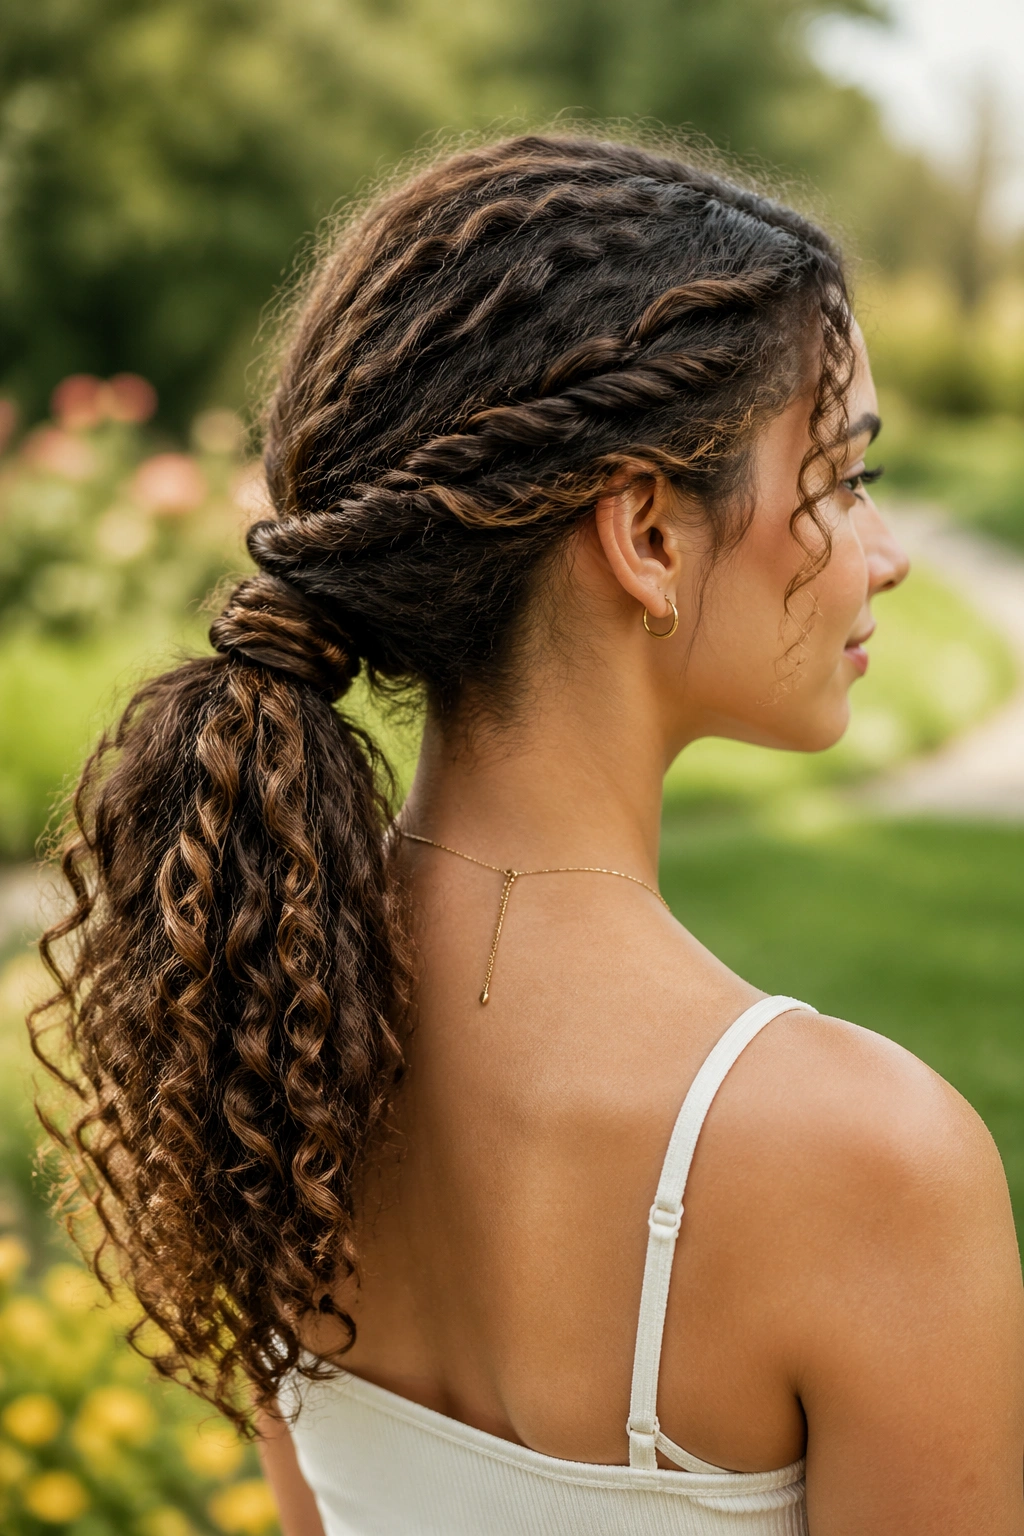
Why braid when a rope twist does the same job faster? That is the appeal here.
Split the hair into two sections, twist each section in the same direction, then wrap them around each other in the opposite direction. Secure the end with a small elastic and stop there, or turn the whole thing into a low ponytail first and twist the ponytail itself. Either way, the result has a neat, rope-like look without the time commitment of a braid.
This style works well on long curls because the twist shows off the natural clumping at the ends. It also puts less tension on the hair than a tight braid can, which matters if your scalp gets sore easily. If the twist starts to loosen, hold the base with one hand while you smooth the sections with the other.
The rope twist is one of those styles that looks more complicated than it is. I like that.
16. Oversized Claw Clip Twist
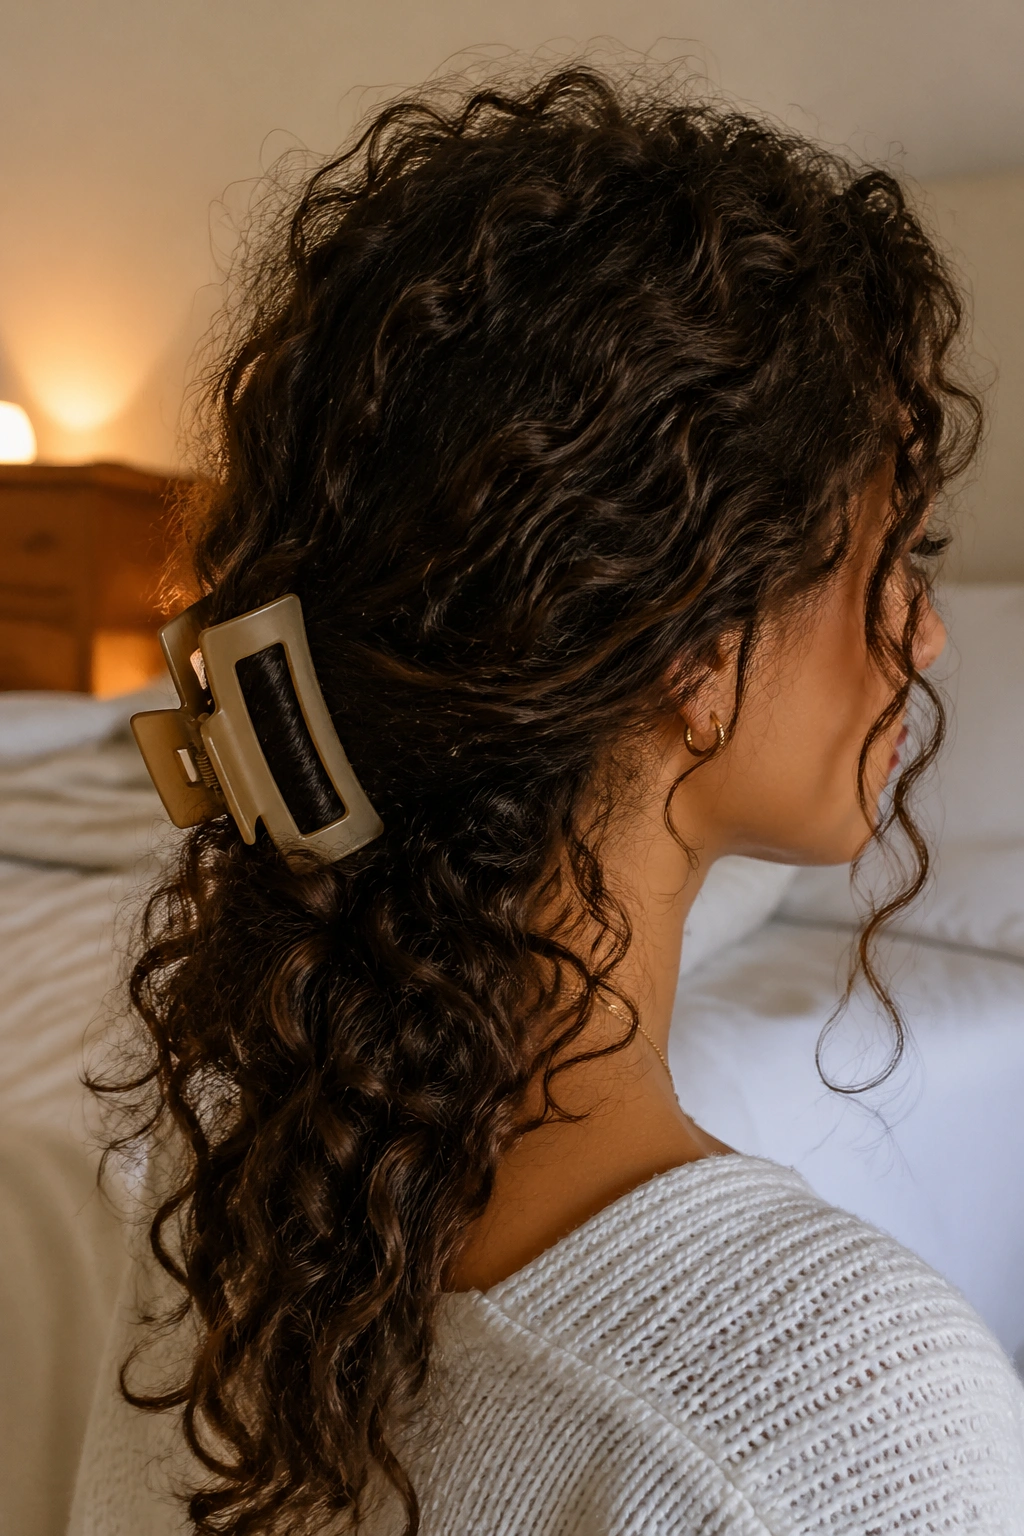
A big claw clip is still one of the most useful tools on a shelf full of styling gadgets.
Gather the hair as if you were making a low twist, fold the lengths upward, and clamp the clip over the middle. Let the curls fan out above and below the clip. If the clip is strong enough, the style takes less than a minute. If it is weak, it will slide out by lunch. That part matters.
What to look for in the clip
You want long teeth, a spring that actually closes firmly, and a shape wide enough to catch all that curl bulk. Small clips look cute in theory and fail in practice. A larger clip with curved arms usually does better on long hair because it spreads the grip across more of the twist.
This is the style I would choose on a busy morning, on a warm day, or on any day when my patience is low. It is not fancy. It works.
17. Curly Ponytail with Ribbon Tie
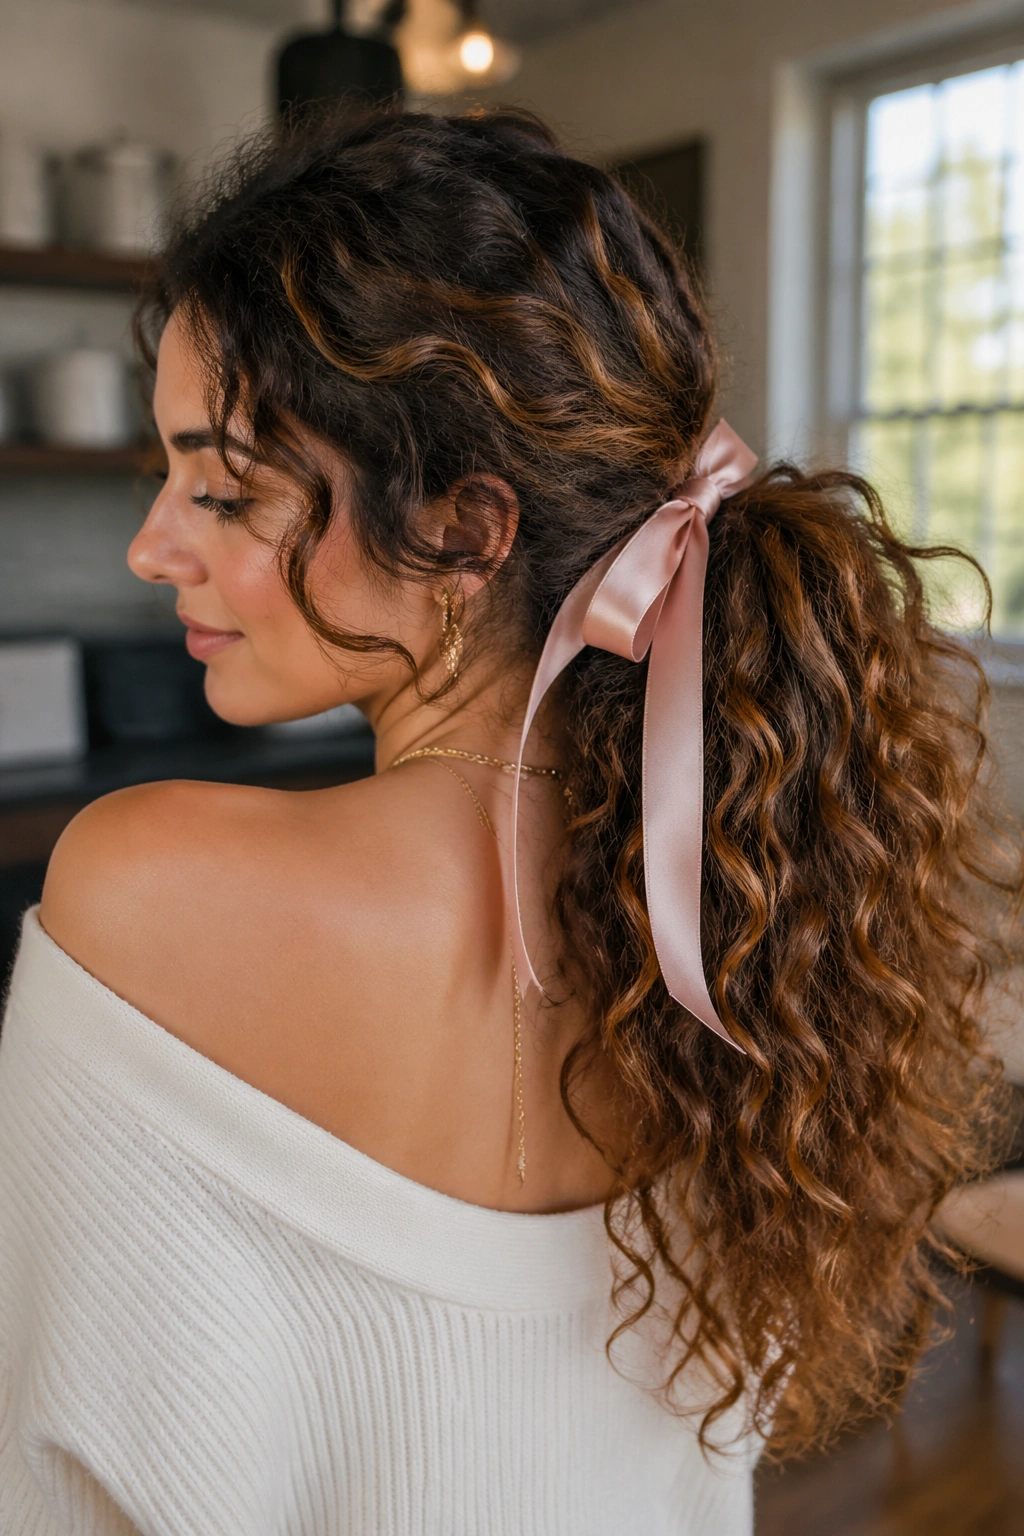
A ribbon softens a ponytail in a way that an elastic never will. It makes the style feel finished, even if the actual setup took less than three minutes.
Pull the curls into a mid or low ponytail and secure them first with a plain elastic. Then tie a ribbon around the base and let the ends hang down the back or off to the side. A satin ribbon in a 1-inch width is usually enough for thick curls; narrow ribbon can disappear into the hair and look fussy.
The nice thing about this style is that it dresses up something simple without fighting the texture. The curls stay visible, the ribbon gives you a focal point, and the whole thing feels softer than a standard tie. If the ponytail is very dense, wrap the ribbon over the elastic only once and knot it off-center.
It is a small change. That is the point.
18. Two-Minute Headband Tuck
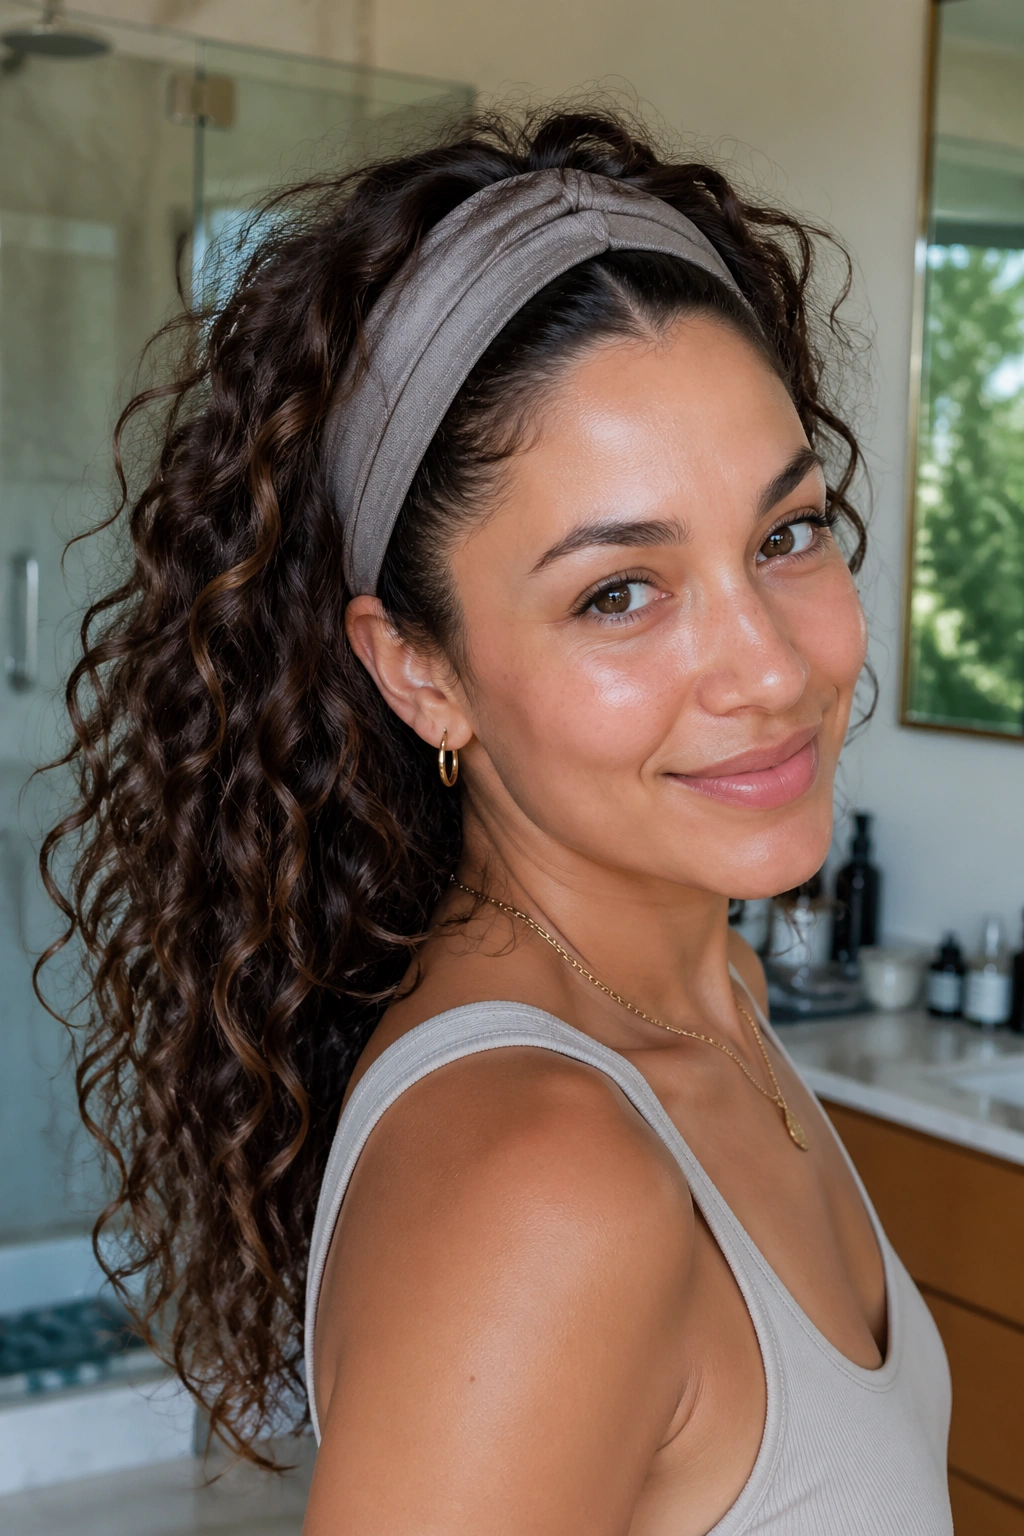
This is not a kid’s trick. It is a fast way to keep curly hair off your face while still letting the length and body show.
Slip on a wide fabric headband, then tuck the front sections of hair behind it so the curls sweep back. Leave the back loose. The band does the work of holding the front in place, and the loose lengths stop the style from feeling overdone. A tight plastic headband can pinch the scalp, so go for something soft and wide if you can.
This style is especially useful when your bangs are growing out or when the front curls keep falling into your eyes. It also gives you a bit of crown lift, because the band pushes the hair upward before it settles. If you want more shape, pull the hair at the crown forward a touch before you tuck.
Fast. Soft. Done.
19. Loose French Braid into Ponytail
A loose French braid into a ponytail is a good answer when you want control at the top and freedom at the ends.
Start braiding at the hairline, adding only small sections as you move back toward the crown. Stop the braid around the midpoint of the head and secure the rest into a ponytail. That split between the braid and the free ends gives the style movement, which keeps it from looking too strict.
Where to stop the braid
If you braid too far down, the whole style can feel stiff. If you stop too high, the ponytail may look disconnected. The sweet spot is usually just above the ears or just at the upper crown, depending on how long your hair is.
This style is good for long curly hair because it uses the braid to tame the roots, where frizz and puffiness tend to show first, while leaving the lengths to keep their shape. A little curl cream through the loose ponytail can help the ends look defined. Don’t drown it. One small amount is enough.
20. Mini Twists and Pins
When nothing else feels right, tiny twists at the temples solve the problem without pretending your curls are straight.
Take two or four small sections around the face, twist them back one at a time, and pin them where they naturally want to fall. You can do this on both sides for symmetry or just stack the twists loosely along one temple for a softer look. The rest of the hair stays down, which keeps the style feeling like your own curls instead of a costume.
This is a good style for long curly hair that needs a little structure but not a full updo. It takes pressure off the front, shows off the length, and lets the curls stay visible from every angle. If the twists are too neat, tug a few ringlets free. That small bit of looseness keeps them from looking stiff.
Long curls do not need to be tamed into one shape. Give them a border, leave some movement, and they usually look better than the polished version you were chasing.