Bantu knots for medium length hair hit a sweet spot. The length is long enough to coil neatly, but short enough that the knots stay compact instead of drooping into floppy little ropes.
That middle zone matters more than people think. A shoulder-grazing bob, a blunt lob, or a grown-out cut with layers can all take the style, but the result changes fast depending on section size, stretch, and how much product you smooth into the roots.
Medium hair can be picky. Too much cream and the knots feel heavy; too little slip and the ends fray before you finish the last row. The parting matters too — a clean grid looks polished, while uneven sections make even a careful style look rushed.
The good news is that medium length gives you options. You can go neat and symmetrical, soft and side-swept, or full-on knot-out mode if you want the style to turn into waves the next day. Start with the cleanest version first, because that makes the rest easier to judge.
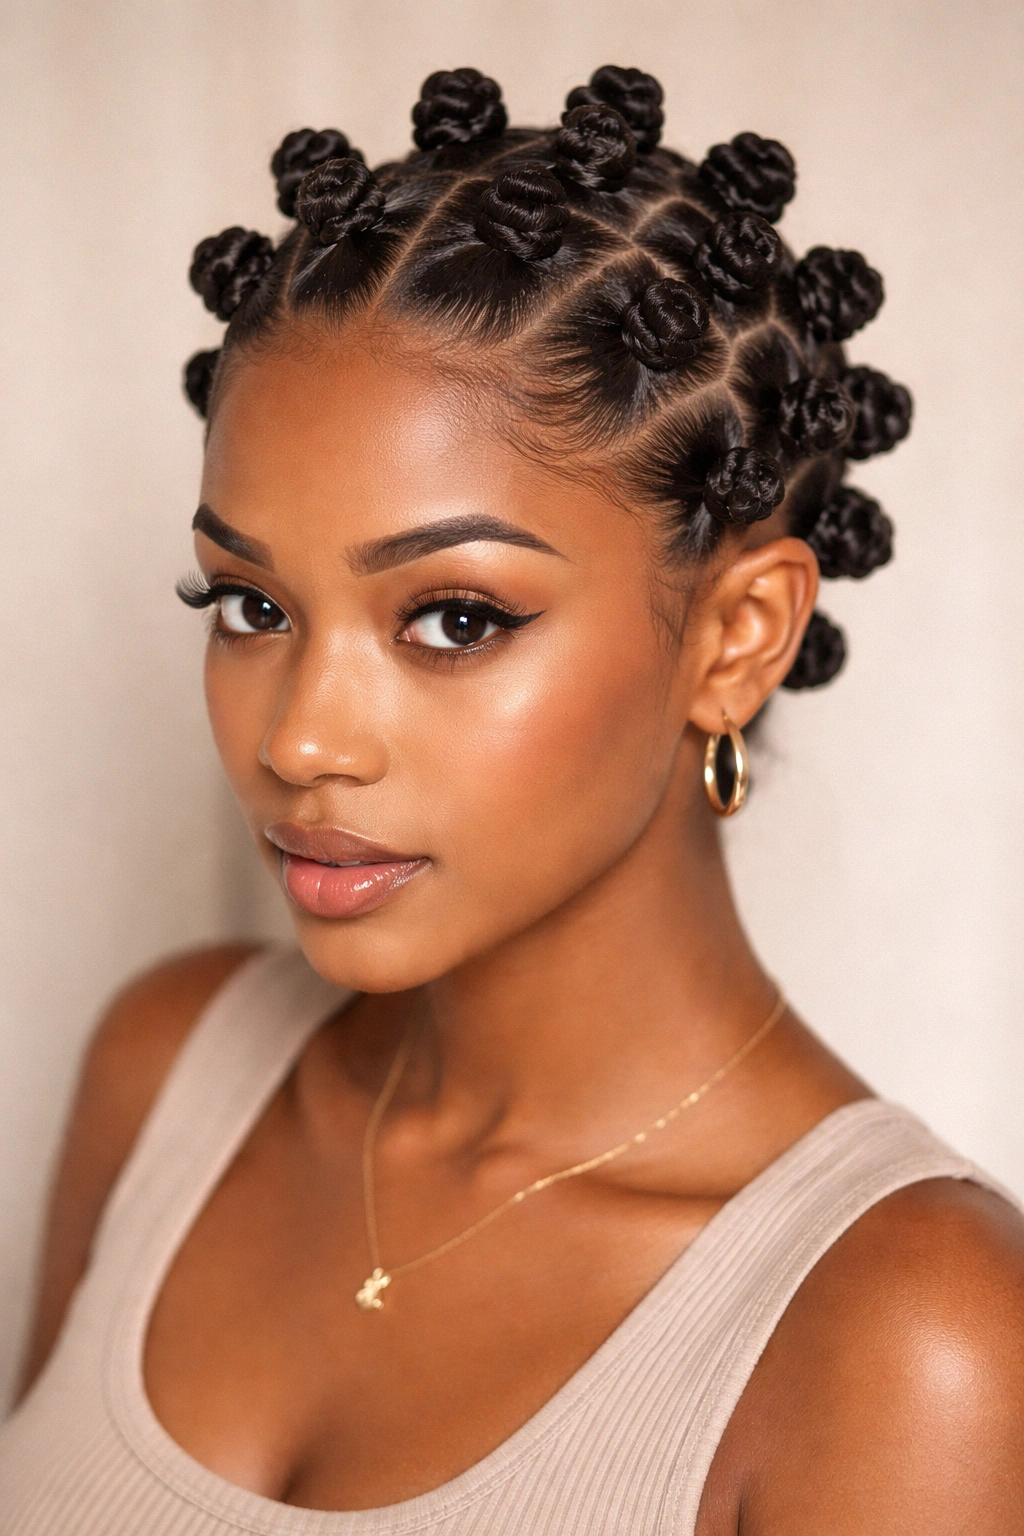
1. Clean, Even Grid Bantu Knots
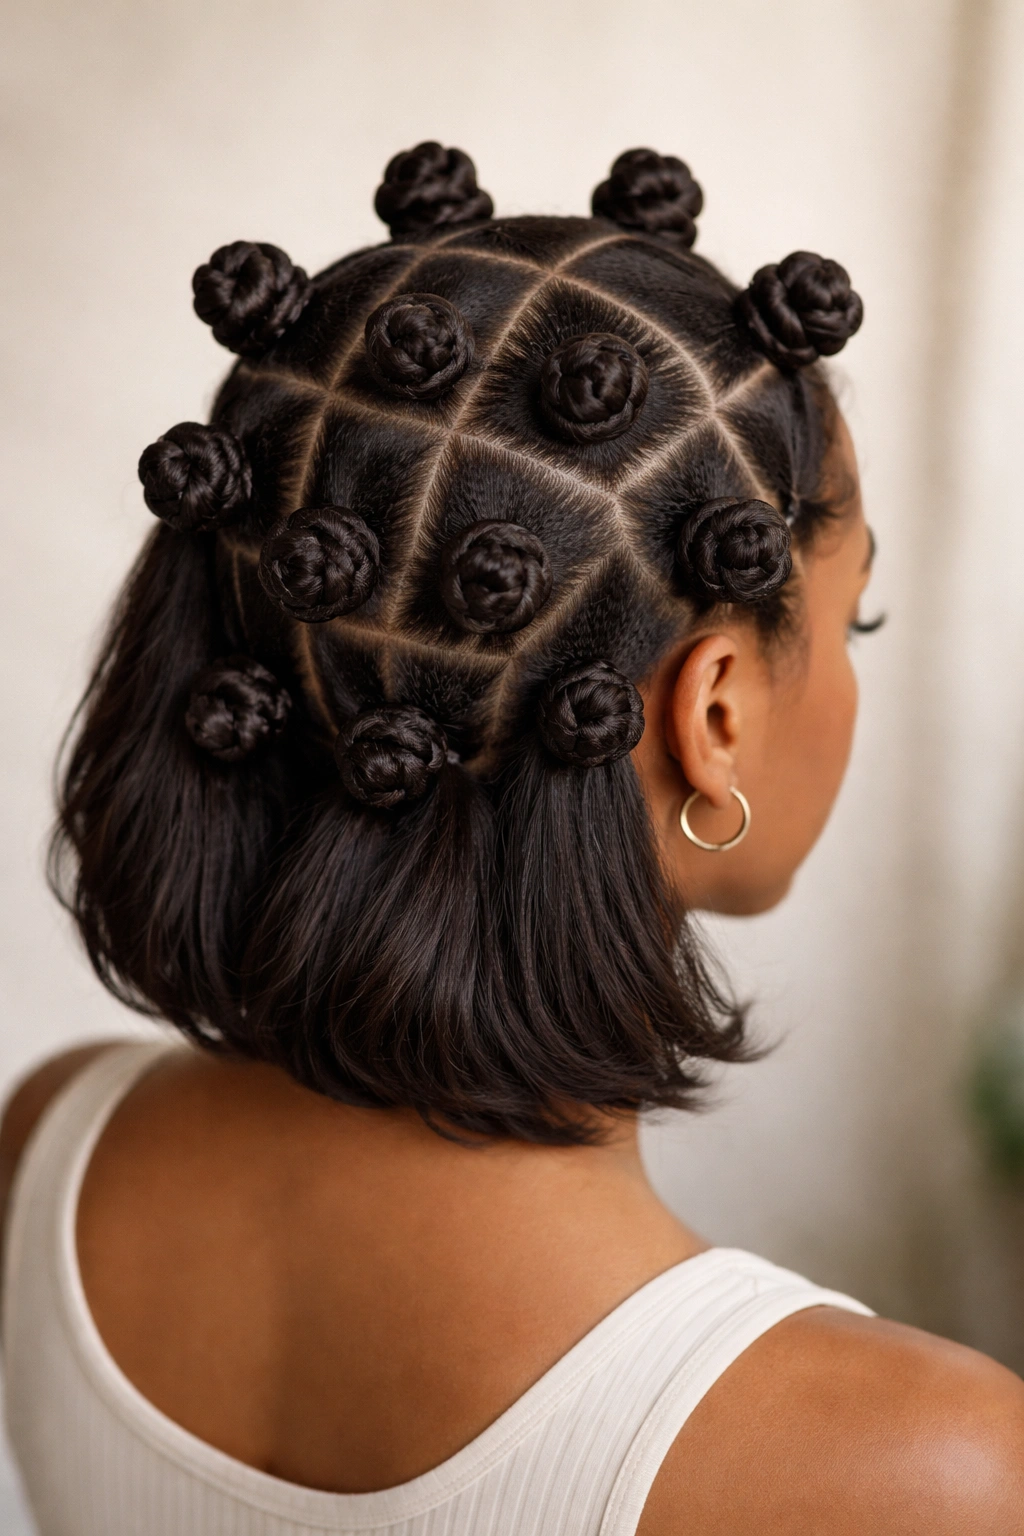
A straight, even grid is the version that makes medium-length hair look deliberate from the first part to the last coil. It’s the style I’d send a first-timer toward, because the shape is easy to control and the final result holds up well whether you wear it with a T-shirt or a dress shirt.
Why the grid works so well
Square sections keep the whole head balanced. On medium hair, that balance matters because the hair is long enough to show mistakes, but not long enough to hide them under a lot of extra coil.
Use parts that land around 1 to 1.5 inches wide. That size usually gives you a knot that sits close to the scalp without looking crowded. If the sections get much bigger, the ends tend to stick out and the knot starts to look loose.
A tail comb, a spray bottle, and a few clips save time here. Dry, fluffy hair makes the parts drift, while lightly stretched, moisturized hair stays where you put it.
- Best for a crisp, tidy finish
- Good when you want a knot-out later with even waves
- Works well on bob-length or lob-length cuts
- Easier to keep neat if you clip each finished section out of the way
Tip: smooth the roots first, then twist. If you try to coil before the roots are laid down, the knot starts off lumpy and never fully recovers.
2. Side-Parted Bantu Knots That Frame the Face
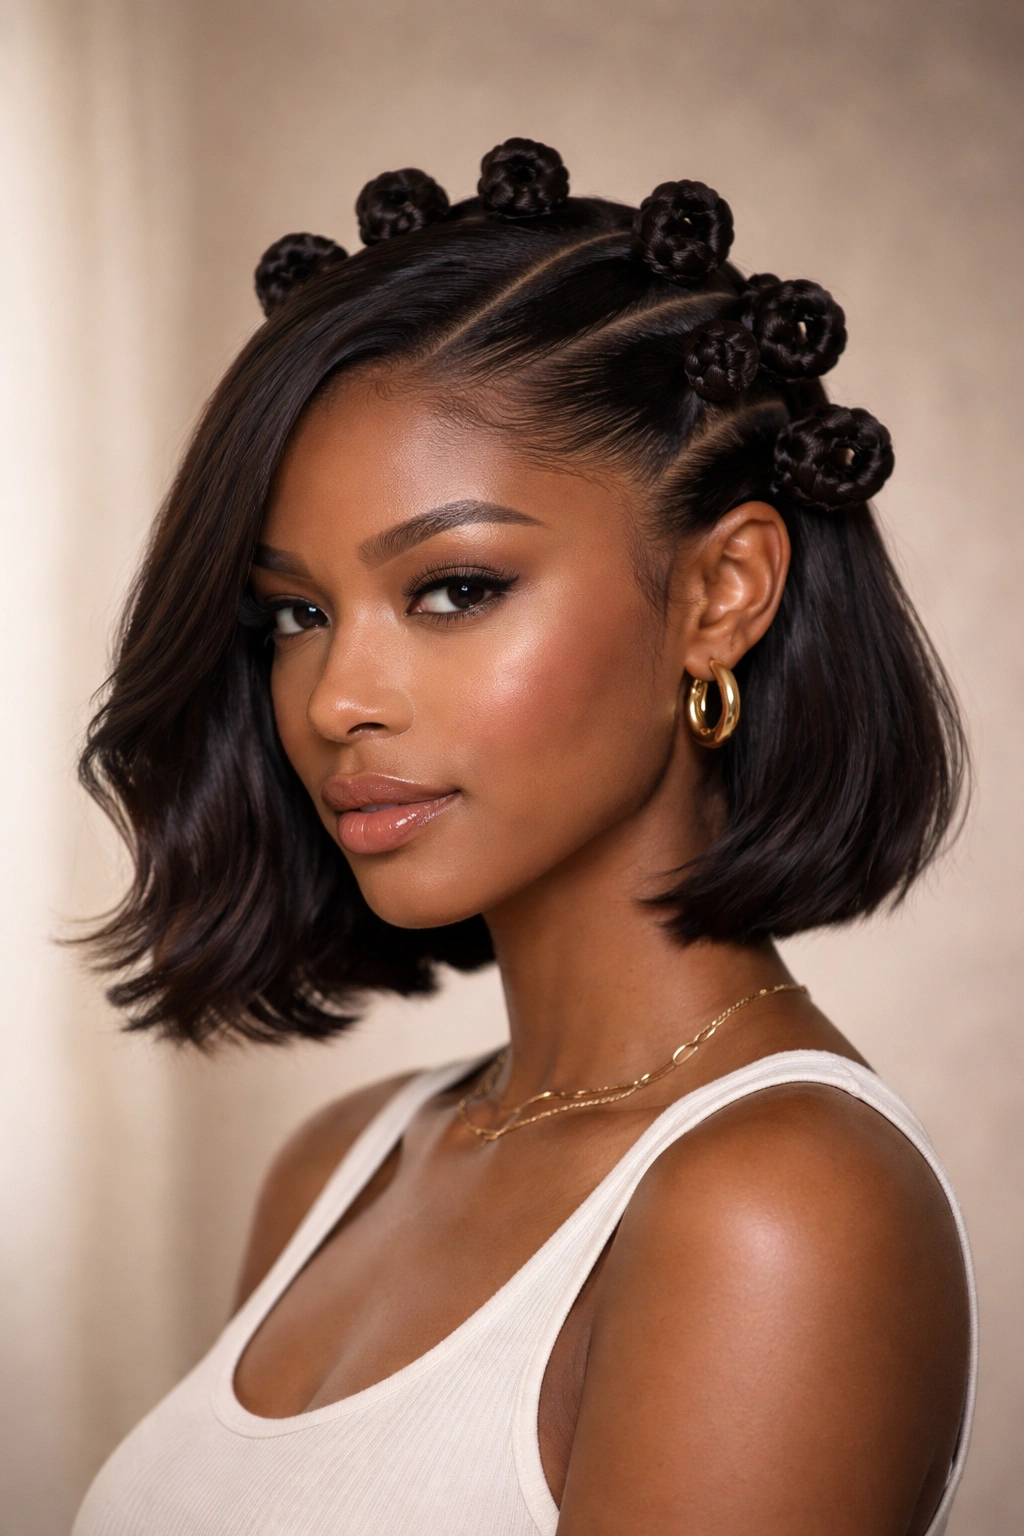
A side part changes the whole mood. Instead of the hair sitting in a strict grid that can feel a little severe, the diagonal line pulls the eye across the face and softens the outline.
The part doesn’t need to be dramatic. A deep side part about 2 to 3 inches off center is enough to shift the shape. From there, you can keep the front sections a touch smaller so they sit closer to the temple, then let the back knots get a bit fuller.
That little imbalance is the point. Medium hair can look boxy when every knot is the same size, and a side part breaks that up fast. It also helps if you wear glasses, because the front sections don’t crowd the frames as much.
One thing people miss: the first few inches around the hairline matter more than the rest of the set. If those front parts are clean, the whole style reads clean.
A side-parted set works especially well on a blunt bob or a lob with long layers. The part gives the cut movement, and the knots stop the style from feeling too rigid. It’s tidy, but not stiff. That’s a nice place to be.
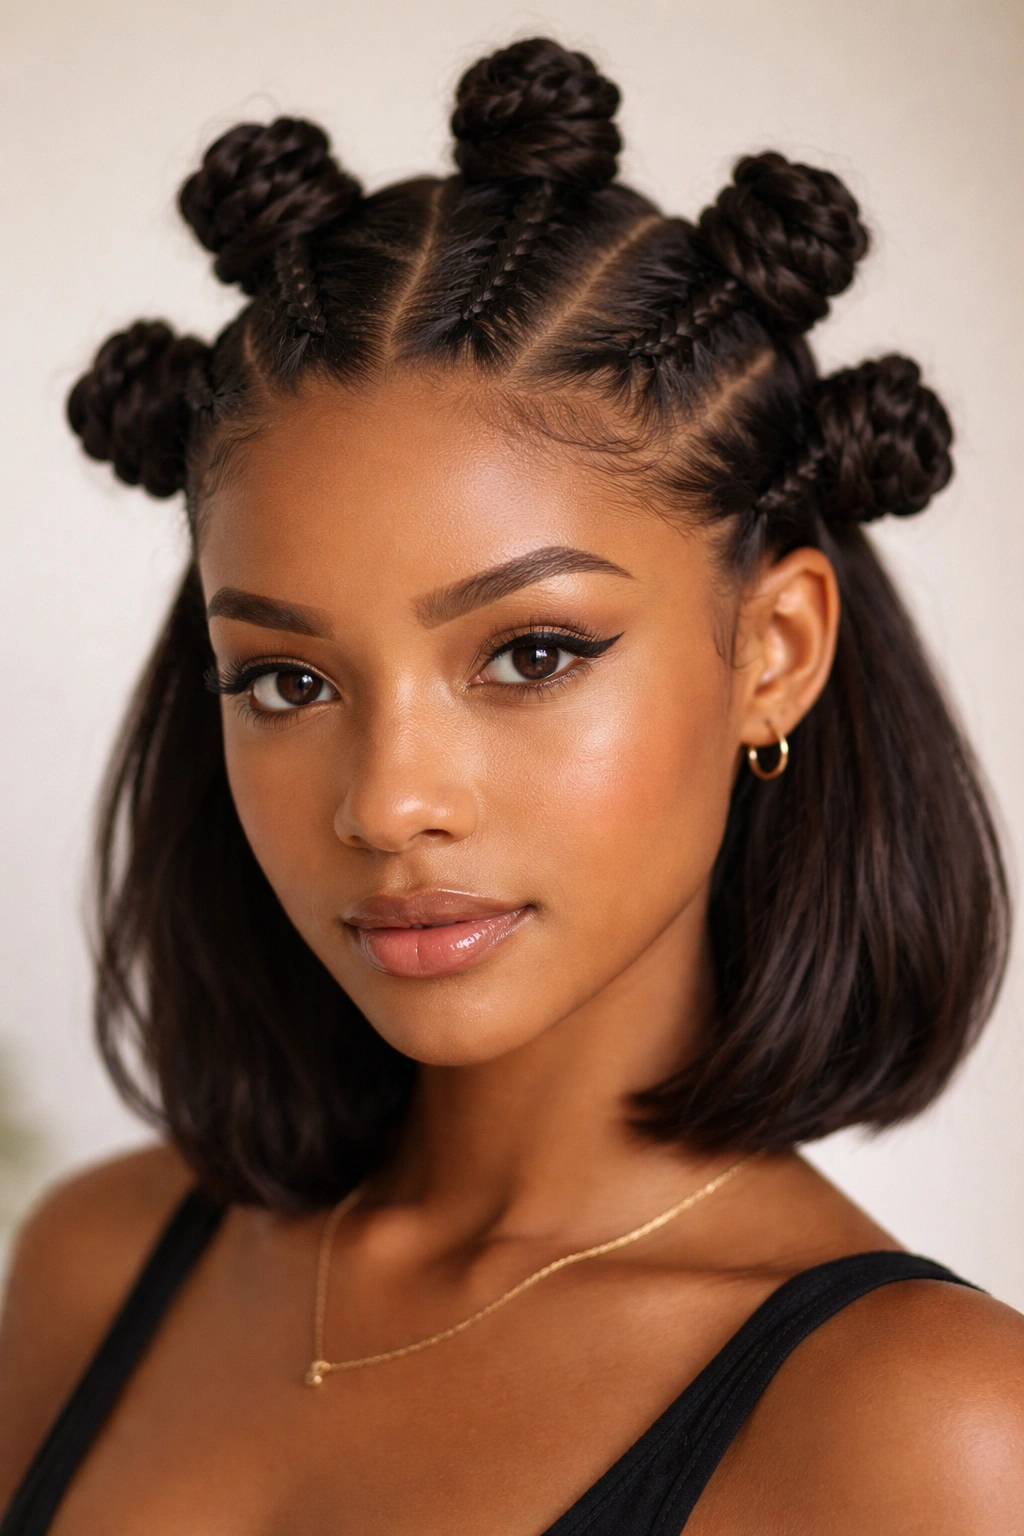
3. Half-Up, Half-Down Knots With Loose Back Length
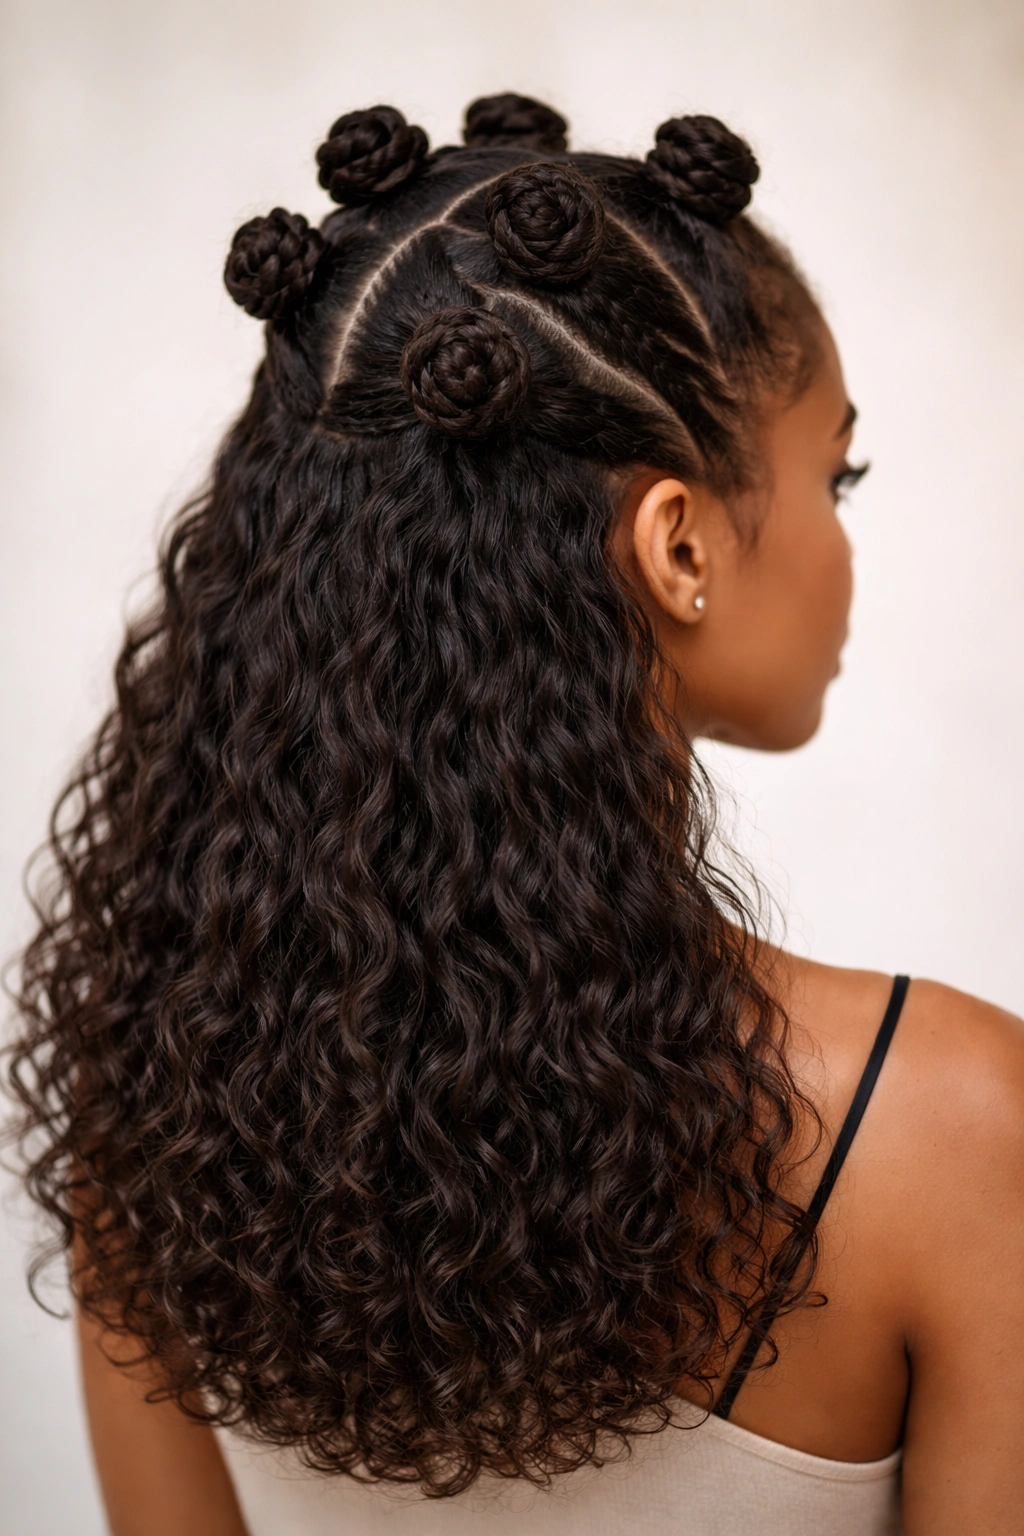
Some medium-length cuts are long enough to knot up top and still leave something interesting hanging in the back. That’s where the half-up, half-down version comes in, and it has a lot more range than people give it credit for.
Top half first
Take the hair from ear to ear and section off the crown. That top half usually gives you 4 to 6 knots, depending on how wide you make the parts. Keep them close enough together to feel connected, but not so close that the scalp starts looking crowded.
The loose back section can stay curly, stretched, blown out, or twisted overnight into a softer finish. I like this style when the back length is still showing off the cut and the top needs a little structure.
What to leave out
Leave the bottom section untouched if you want contrast. Leave it lightly twisted if you want less frizz. Leave it stretched if you want the knots to feel like the star of the show.
That flexibility is why this set works so well on medium hair. You get the shape of Bantu knots without sacrificing the length you actually want to see. It also buys you some breathing room if your hair is layered and the ends don’t all reach the same place.
The catch is simple. If the top knots are too tight, the back section starts feeling unrelated, like two styles sharing the same head. Keep the line between the two parts clean and the whole thing makes sense.
4. Jumbo Bantu Knots for a Faster Set
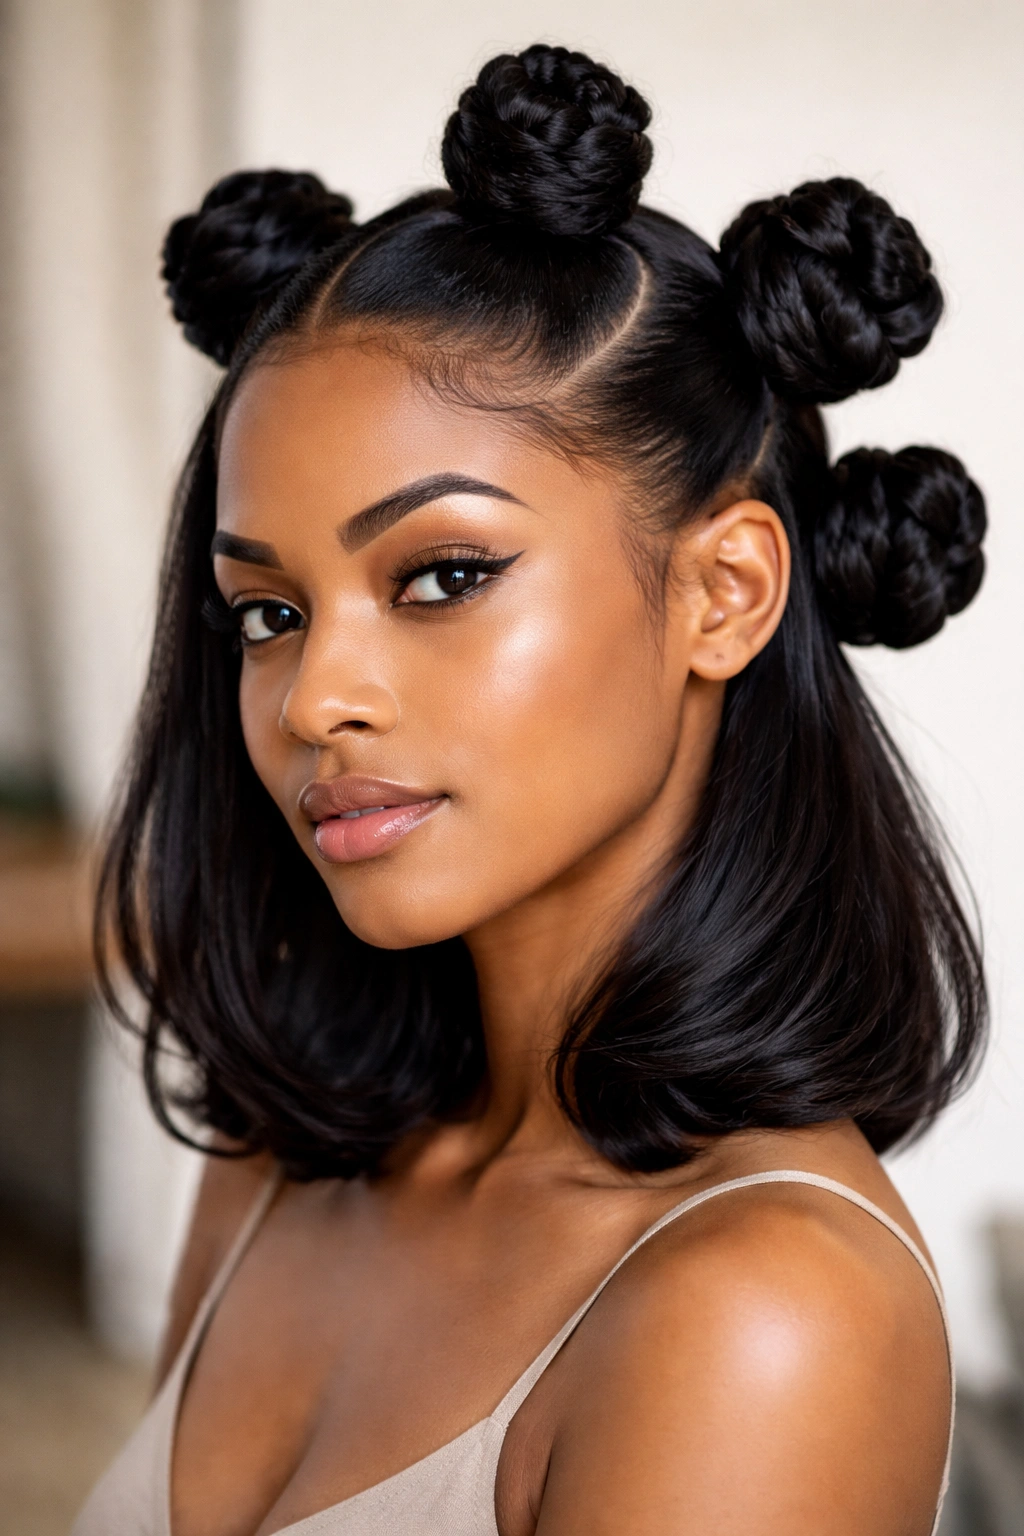
Bigger knots are not the lazy option. They’re the practical one when you want the shape, the drama, and the speed all at once.
Jumbo knots on medium-length hair usually mean 4 to 6 large sections instead of a full head of tiny coils. That makes the styling faster, and it also gives the final knot-out a looser wave pattern if you plan to take the knots down later.
A lot of people worry that larger sections will look unfinished. Sometimes they do. But that happens when the roots aren’t smoothed enough or when the section is too thick for the length. If the hair is medium and the sections are controlled, jumbo knots can look bold rather than messy.
What to watch for:
- Smooth the roots more than you think you need to
- Use a little more hold at the base, not the whole strand
- Keep the sections equal, even if there are fewer of them
- Tuck the ends fully so they do not poke out
The look is especially good when you want your face to stay open and the style to read from across the room. It’s also a decent choice if you’re working with a cut that has blunt ends and not much layering. Big knots let the shape breathe.
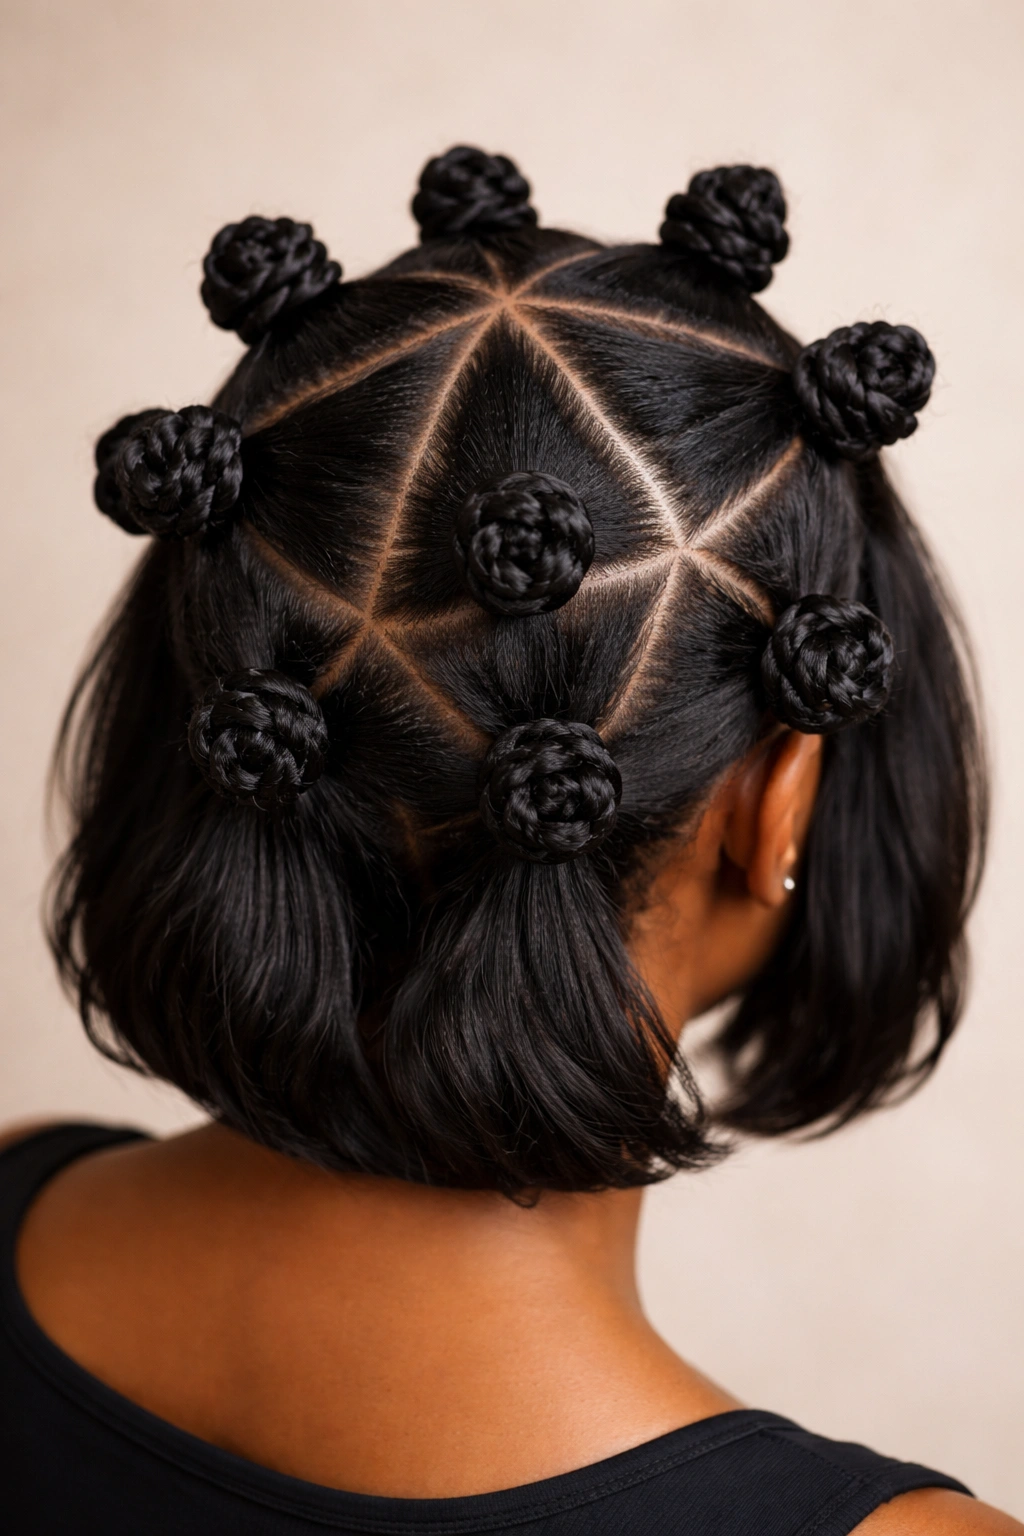
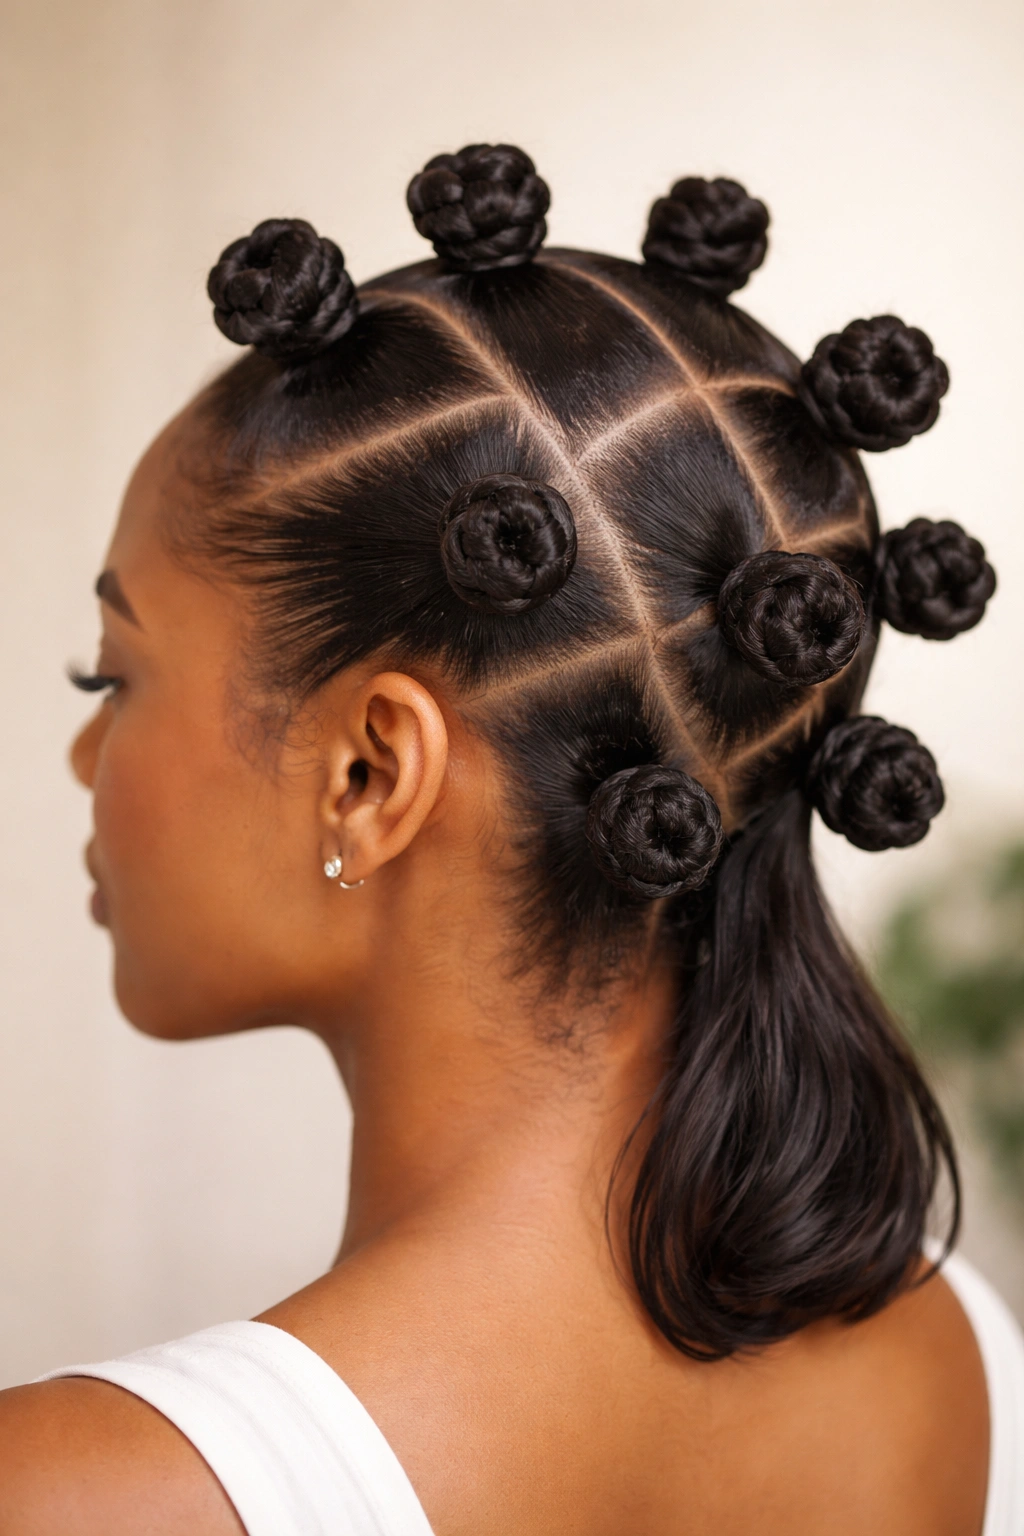
5. Mini Bantu Knots With a Dense, Sculpted Finish
Tiny knots feel tidy in the hand and a little obsessive in the mirror. That’s part of the charm.
Mini Bantu knots use more sections — often 10 to 16 on medium-length hair, depending on density — and the payoff is a tighter, more sculpted finish. The head looks fuller, the parting looks sharper, and the knot-out, if you take it down later, tends to give you more definition than a larger set.
Why the small size changes everything
Smaller sections sit closer to the scalp and hold their shape longer. That’s useful if your hair is thick or naturally puffy, because the knots stay readable instead of expanding into rounded lumps.
There is a downside. More knots mean more time, more parting, and more tension if you pull too hard. Do not make the parts so small that your scalp feels sore after ten minutes. That is the point where a style stops being cute and starts being annoying.
Mini knots suit medium-length hair that has enough body to hold a clean coil without fighting the section. If your ends are layered heavily, you may need a little gel or a small pin at the base to keep the shortest pieces tucked in. Once the hair is secure, the look is worth it. It has a crisp, polished shape that photographs well from the side and holds up nicely through the day.
6. Braided-Base Bantu Knots for Slippery Hair
Slippery hair changes the whole job. If your strands slide loose before you finish the row, the usual twist-and-wrap method can start to feel pointless.
A braided base fixes that. Start each section with a short flat braid of about 1 inch at the root, then coil the rest of the strand into the knot. That extra anchor gives the style something to hold onto, especially if your hair is fine, relaxed, freshly washed, or just plain stubborn.
Where the braid goes
Keep the braid close to the scalp so it disappears into the knot. You’re not trying to make a separate braided style here. You’re building a base that grips.
How much hold is enough
Use a light gel or styling cream at the root, then a smaller amount on the braid itself. Too much product makes the section feel wet and soft, which sounds useful until the knot starts slipping apart before lunch.
This version also helps if your cut is layered. The braid holds the shorter ends in place, and the wrapped section finishes the shape. On medium-length hair, that matters because layers can otherwise stick out like little flags. If you want a knot set that stays neat without a lot of touching up, this is the one I reach for first.
7. Triangle-Part Bantu Knots With Sharp Geometry
Triangles change the whole mood.
Square parts look orderly. Triangle parts look intentional in a more graphic way, and medium-length hair is long enough to show the difference. The shape is especially nice around the crown and hairline, where the scalp curves and square sections can look a bit too stiff.
The trick is to keep the triangles consistent. Each point should land cleanly, and each base should be wide enough to hold the hair without crowding it. If one triangle is narrow and the next one is wide, the pattern starts to wobble.
A few things that help
- Start each triangle with the point at the scalp, not off to the side
- Keep the angle of each part matched with the section beside it
- Use the tail of a rat-tail comb for the cleanest lines
- Clip finished sections immediately so the pattern stays visible
Triangle parts work well if you like your style to read a little sharper and less uniform. They also help disguise a long face or a narrow forehead because the pattern spreads movement across the head instead of locking everything into straight rows.
This is one of those styles that looks more complicated than it is. It just takes patience with the parting. The knot itself can be simple; the geometry does the heavy lifting.
8. Mohawk Bantu Knots Down the Center
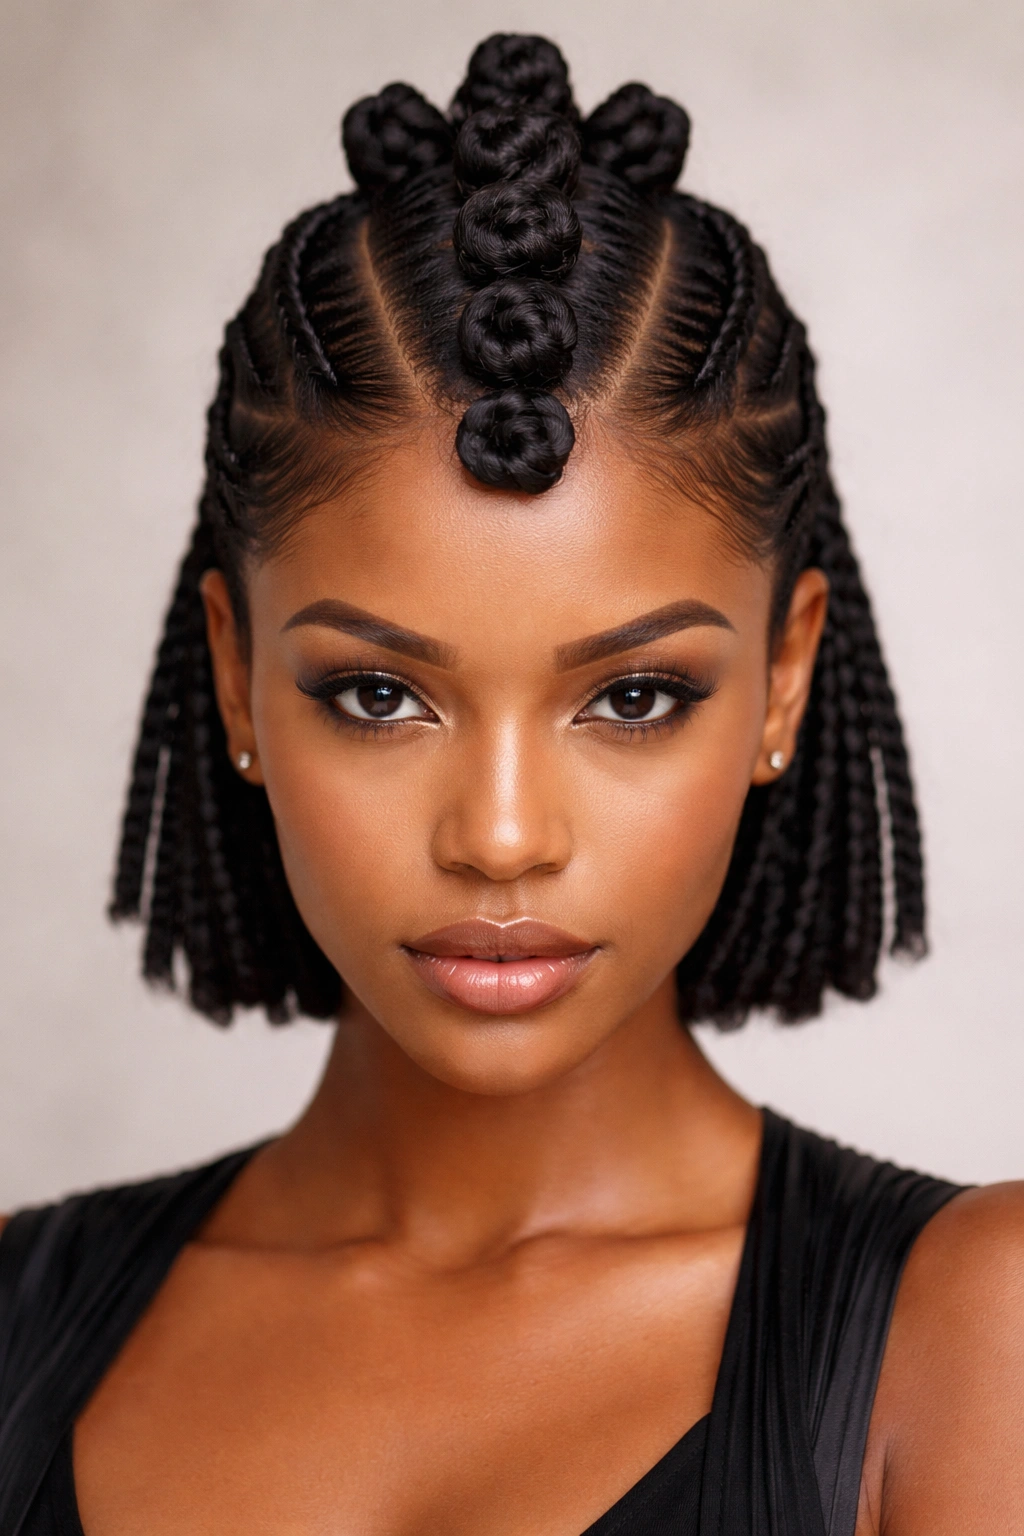
A center strip can carry the whole style. Really.
Instead of covering the full head, this version runs a line of knots from the front hairline to the nape and leaves the sides slicked, braided, or flat-twisted back. It’s a strong look on medium-length hair because the shape stays compact while the center line gives you height.
The middle row usually needs 5 to 7 knots, depending on how wide you make the strip. Keep the strip about 3 to 4 inches wide if you want the mohawk shape to read clearly. Any narrower and the style starts to look accidental; any wider and the center loses its edge.
The sides matter just as much as the knots. Smooth them with mousse, a light gel, or a little styling cream, then pin them flat or tuck them into a low base. You want the center to look like the main event. The sides are the frame.
This is a strong choice when medium-length hair feels too short for a full-head knot set but too long to leave loose. It also works nicely with a shaved side, a tapered cut, or a grown-out bob that needs a harder shape. Not every Bantu knot style has to be soft. Some of them should have attitude.
9. Accessorized Bantu Knots With Cuffs, Thread, or Beads
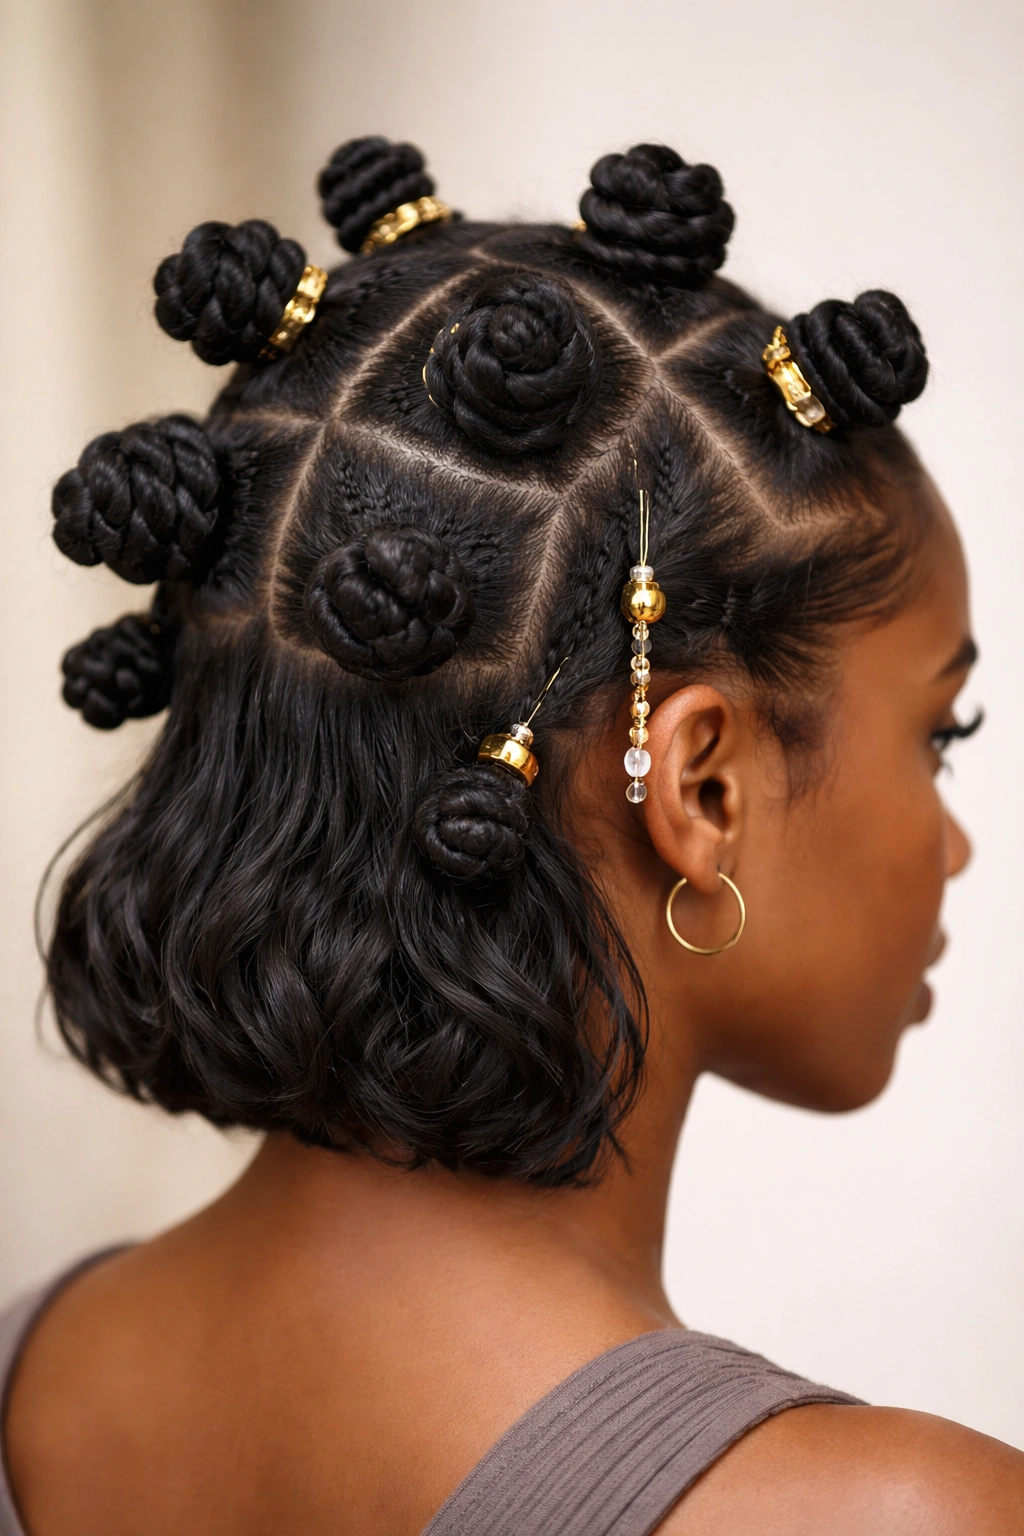
Beads, thread, cuffs, or all three? It depends on how much weight your hair will tolerate.
Accessories change Bantu knots fast. A plain set can look clean and modern, but a few metal cuffs or wrapped thread turns the same pattern into something more dressed up. Medium-length hair usually has enough length to support small decorations without the knots collapsing, which makes this a fun one.
What to add, and where
Use lightweight cuffs on the front row if you want the style to catch the eye right away. Thread wraps work well when you want color without weight. Beads can work too, but they’re better kept to a few sections, not the whole head.
Less usually wins. Heavy beads on every knot can tug at the roots and make the style feel fussy by noon. A few pieces on the front or one side are enough.
If your hair is fine or your edges are a little delicate, keep the decorations off the hairline. Place them slightly back from the scalp so they sit on the knot rather than pulling at the root. That small shift matters more than people expect.
This version is easy to dress up for a dinner, a photoshoot, or any situation where plain knots feel too plain. The style itself stays the same; the extras do the talking.
10. Stretched-Root Bantu Knots for Cleaner Definition
A lob that shrinks hard needs a little help before the knots go in. That’s where stretched roots make a real difference.
When the root area is stretched first, the knots sit smoother and dry with less puff around the base. The overall shape looks cleaner, and if you plan to take the style down later, the knot-out usually separates with less snagging. Medium-length hair benefits a lot from that because shrinkage can hide the shape you worked for.
Best prep choices
- Banding: place 3 to 5 soft bands down each section and let the hair stretch overnight
- Low-heat blow-drying: use a nozzle on low or cool settings and keep the airflow moving
- Tension drying: hold each section taut while it air-dries, then knot once the roots are no longer damp
The goal is not bone-dry hair before styling. You still want a little moisture and slip, but not so much that the knot takes forever to set. A damp-to-stretched base is the sweet spot.
What to watch for
If the roots are too fluffy, the knot puffs up. If the hair is too wet, the inside of the knot stays soggy and the style can smell off after a day. Both problems are annoying. Both are avoidable.
This is the version I’d pick for thick hair that shrinks fast or for any set you want to wear into the next day without the base turning fuzzy.
11. Front-Row Bantu Knots With a Puff at the Back

Not every good knot set has to cover the whole head.
Front-row Bantu knots paired with a puff at the back make sense when medium-length hair is long enough to knot the front but still happiest when the back stays gathered. That combination gives you structure near the face and softness where the hair is a little shorter or a little more layered.
The front usually holds 3 to 5 knots, placed from temple to temple. Keep them small enough to sit flat and neat, because the eye goes straight there. The back can be shaped into a puff, a low pouch, or a gathered pony, depending on how much length you have and how much shrinkage your hair likes to do.
A soft brush, a satin scarf, and a gentle elastic are enough to make this look work. Smooth the front with a light hand. Pull too hard and the edges start looking stressed, which kills the whole effect.
This style is especially nice on a grown-out bob or a cut that sits right at the shoulders. It gives the hair room to breathe without abandoning the knot look. There’s a casual side to it, but it still feels styled.
12. Soft Knot-Out Bantu Knots for the Next Day
The cleanest Bantu knots are often the ones you do twice.
Set the knots first, wear them as they are, then take them down for a soft knot-out later. Medium-length hair is a good length for this because the initial knots stay compact, while the release gives you movement without pushing the hair all the way into a full blown-out shape.
The setup matters. Let the knots dry fully — not mostly, fully — before you unravel them. If you rush this step, the inside stays damp and the pattern disappears into frizz. A satin scarf overnight helps, especially if you sleep rough and tend to flatten one side.
How to take them down without puffing the roots
Start with a small amount of lightweight oil on your fingertips. Unwind each knot in the reverse direction it was wrapped, then separate the coil into 2 or 3 pieces only. Stop there if you want definition. Keep pulling if you want bigger volume, but know that the texture gets looser fast.
A pick can lift the roots if you want more height, though I’d keep it away from the ends. The ends are where the style starts to fray first. That is the part to protect.
This version gives you two looks from one install: the knots first, the waves after. On medium hair, that extra day of wear feels worth the effort, especially if you want a style that still looks neat even after it has changed shape.