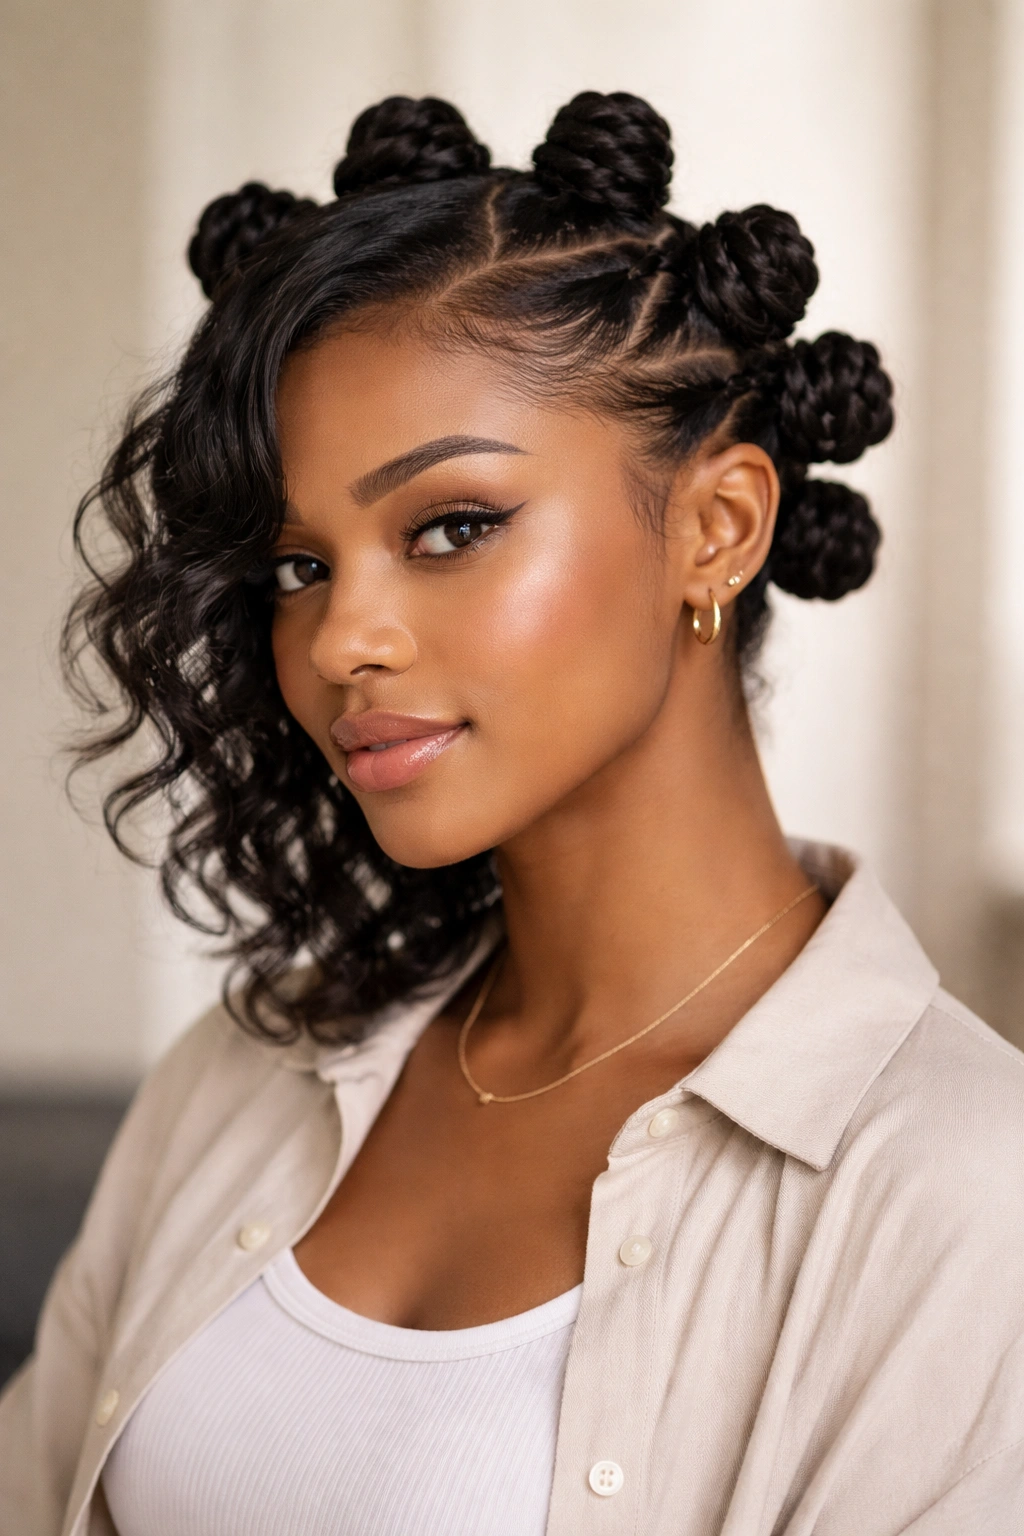
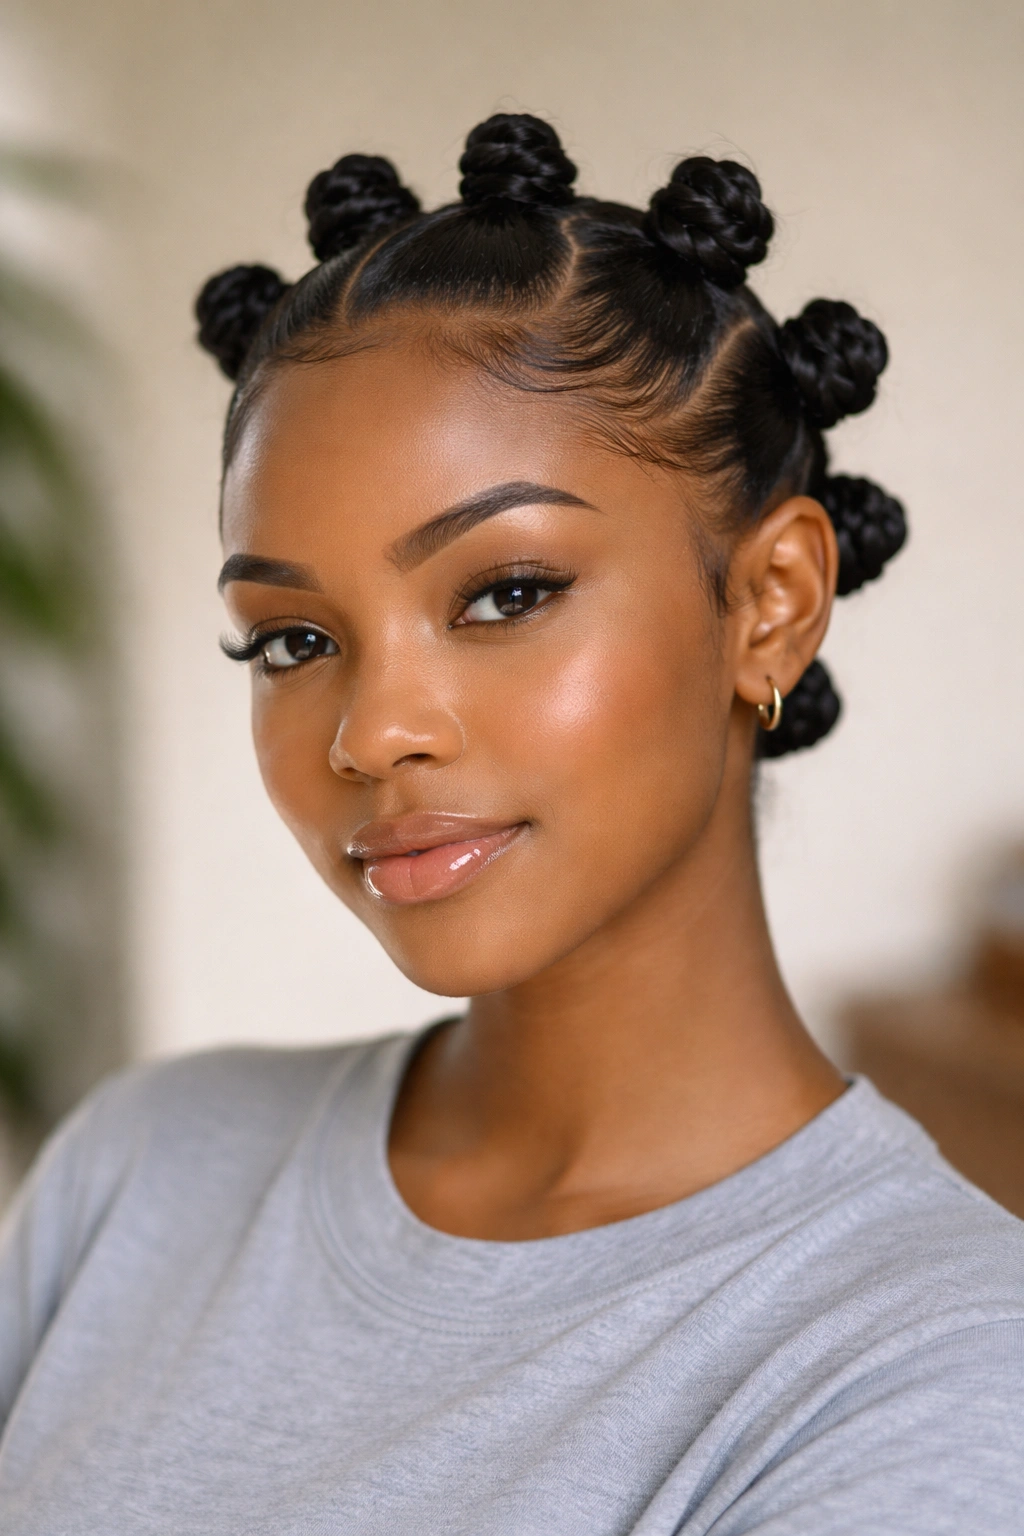
A rushed morning can make hair feel like one more thing standing between you and the door, and that’s exactly where Bantu knots for school earn their keep. They’re neat, protective, and — when you pick the right size and section pattern — fast enough to fit into a real weekday routine.
The mistake most people make is assuming quick Bantu knots have to look plain or sloppy. Nope. A clean part, a little moisture, and the right number of knots can make the style look polished without eating half your morning. Six medium knots often look better than twelve tiny ones done in a panic.
I also like this style because it works with the rhythm of school life. It stays put through backpacks, bus seats, gym class, and the general head-turning that happens in hallways all day long. If you’ve got natural hair, coily hair, or stretched curls, the trick is picking a version that matches your length and your patience.
Start with the simplest option if you’re unsure. The first style below is the one I’d hand to anyone who needs a clean look fast.
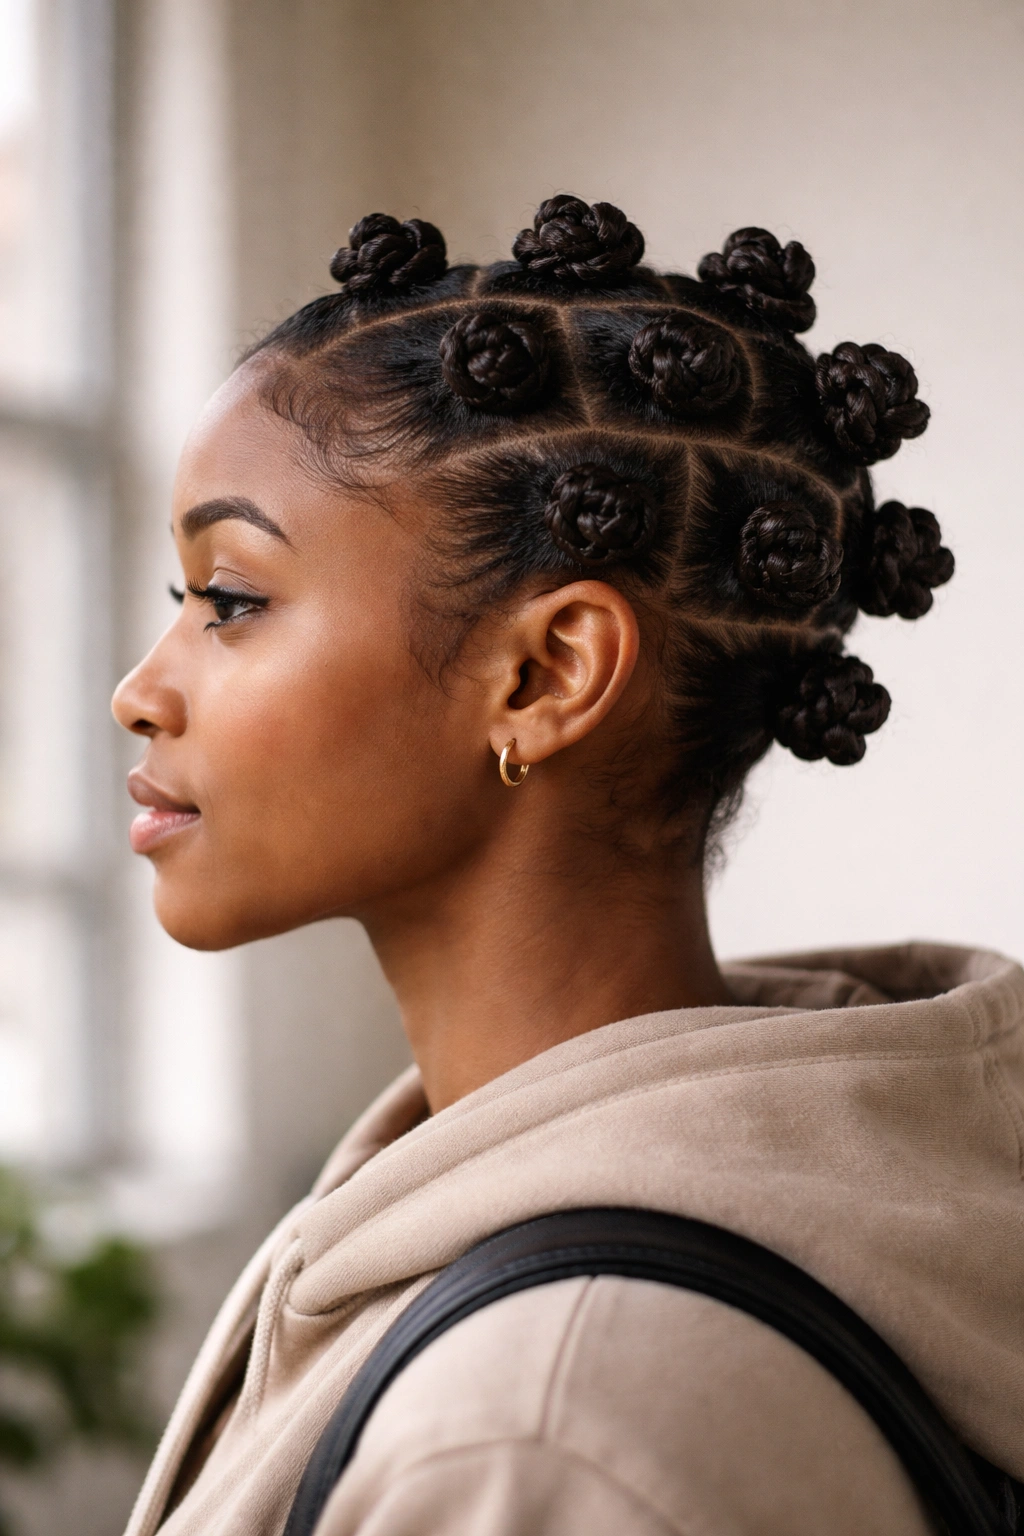
1. Classic Six-Knot Center Part

A center part does a lot of work for you before the first knot even goes in. It makes the style look balanced, and that balance hides a lot of the little imperfections that show up when you’re moving fast.
This is the version I reach for when the morning is already loud. Part the hair straight down the middle, then split each side into three sections from front to back. On shoulder-length hair, six knots usually hit the sweet spot: enough detail to look styled, not so many that you spend forever smoothing each one. On longer hair, you can stretch that to eight if needed, but six is the cleaner school-day choice.
Why the center part saves time
- You only map one line first, and everything else follows it.
- Each side mirrors the other, so you spend less time second-guessing the shape.
- Medium sections dry faster than tiny ones, which matters if the hair is damp.
- The style looks orderly even when one knot is slightly bigger than the others.
That last part matters more than people admit. A perfectly even set of knots is nice, but school hair usually has to survive motion, weather, and whatever your hands are doing between classes.
Keep each section about the size of your palm at the base if you want the knots to stay tidy without taking too long. A rat-tail comb, a little leave-in, and a pea-sized bit of styling cream per section are usually enough. If the hair feels too slippery, wait a minute before coiling. That tiny pause helps more than adding another pile of product.
2. Side-Swept Bantu Knots for a Softer Frame
Why does a side part make Bantu knots feel less rigid? Because it breaks the symmetry just enough to soften the whole look. That’s useful if you wear glasses, if your forehead shape changes the way center parts sit, or if you simply want something that looks a little less textbook.
A side-swept version usually works best with five to seven knots. Start the part above one eyebrow, then let the larger side carry one extra section. The uneven balance is the point. It gives the style movement, and movement makes even a fast hairstyle look more considered.
The real win here is that the side part often follows the way your hair wants to fall anyway. If you spend less time forcing the front into a straight line, you get to the knots faster. I’d especially choose this if your roots puff up easily or if the front of your hair gets frizzy the second you touch it.
It looks deliberate. That’s the whole appeal.
Keep the knot nearest the face a little smaller than the others so the front doesn’t feel heavy. If one side has finer hair, smooth it first with a damp brush and a touch of gel. The goal is not a shellacked finish. The goal is a clean frame that still feels like hair, not plastic.
3. Half-Up Bantu Knots with Loose Back Length
If your hair keeps catching on backpack straps, half-up is the smartest school move. You get the neatness where people actually see it — around the face and crown — while the back stays loose, soft, and easier to manage through the day.
This version is fast because you’re working with only the top section. Four knots across the front and crown are usually enough. If your hair is dense, you might use six, but I wouldn’t push it beyond that unless you want the look to feel more dressy than quick. The back can stay in a simple stretched state, loose curls, or two flat twists if you want more control.
How to keep the back neat
- Mist the back lightly with water or leave-in spray.
- Smooth the ends with your fingers before you touch the top section.
- If the back puffs too much, twist it in two large sections instead of leaving it loose.
- Use one clip to separate the top from the bottom while you work.
A style like this is good on days when you know you’ll be moving around but still want hair off your face. It’s also kinder if you’re in a rush because you’re not trying to make the entire head look identical. That removes a lot of pressure, which honestly helps the style look better.
The only thing I’d watch is the transition line between the knot section and the loose section. Keep it clean. If that line is messy, the style stops looking intentional. A quick pass with a brush and a little gel at the part usually fixes it.
4. Mini Bantu Knots for Short Hair
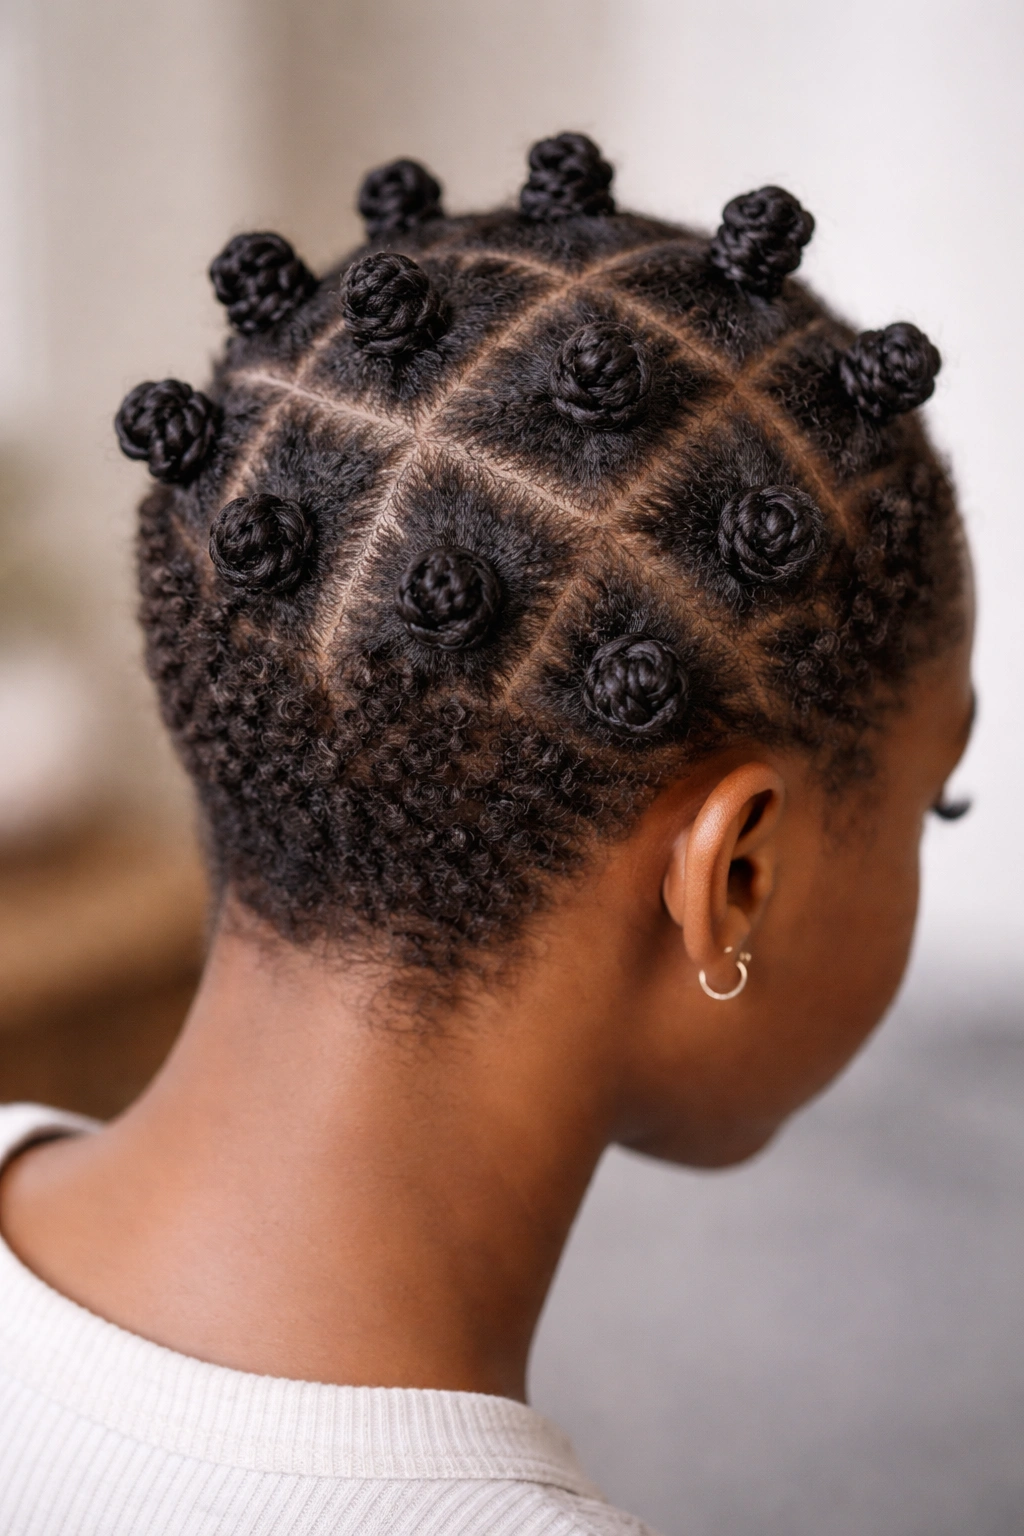
Small knots are not slow if your parts are clean. That sounds backwards, but it’s true. On short hair, mini Bantu knots often give you the neatest finish because each little section lies flat and holds its shape without fighting you.
This is the version for shorter coils, tapered cuts, or anyone who likes a tighter pattern close to the scalp. You’ll usually need eight to twelve knots, depending on how much hair you’re working with. The sections can be about half an inch to three-quarters of an inch wide. That sounds tiny, and it is, but the tradeoff is control. Smaller parts stay put better, especially if your hair has a mind of its own in humid air.
When mini knots beat bigger ones
- Your hair is short enough that large knots won’t anchor well.
- You want the style to last through a full school day.
- You prefer a more detailed pattern around the head.
- Your hair shrinks a lot after washing and needs tighter placement.
The only part that slows this style down is the parting. Once that grid is in place, the knots themselves go fast because there isn’t much hair in each section. I like to mist the hair lightly first, then apply a small amount of cream or gel at the root. Too much product makes short hair feel gummy, and gummy hair is harder to coil cleanly.
If your sections start frizzing before you finish, that usually means the hair is drying too fast. Stop and re-mist just that section. Don’t restart the whole head. That’s how a quick style turns into a long one.
5. Jumbo Bantu Knots for Fast Mornings
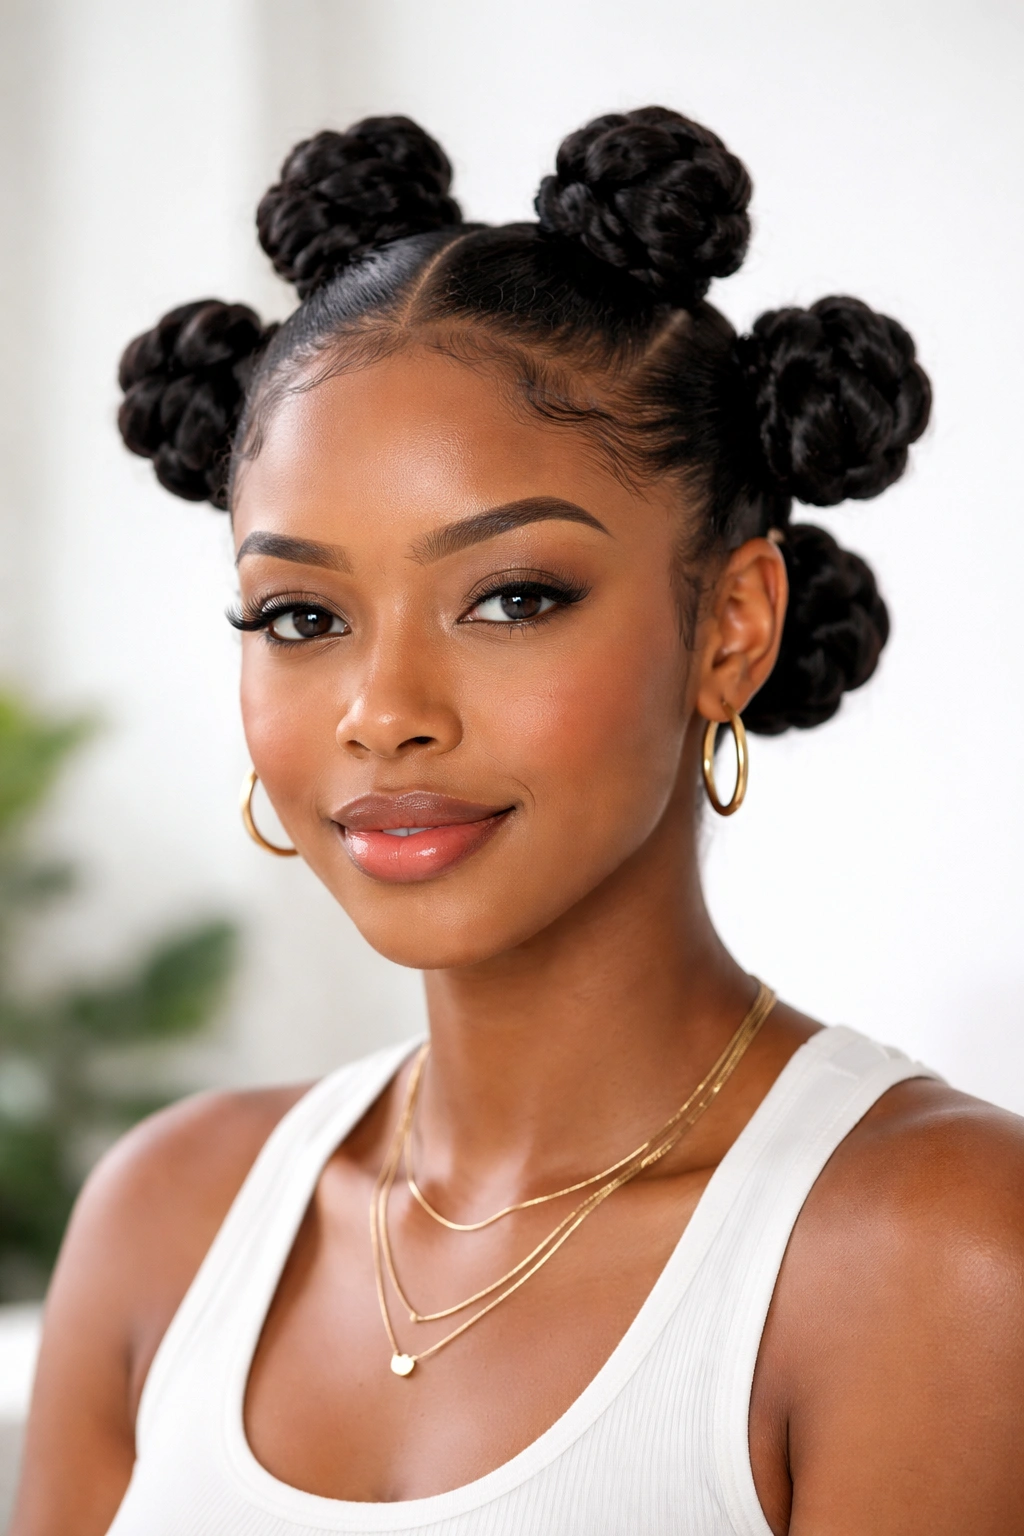
Unlike mini knots, jumbo Bantu knots are built for speed. Fewer sections mean fewer parts, fewer coils, and fewer chances to get stuck perfecting details that no one else will notice by second period.
This version works especially well on thick natural hair or hair that has been stretched the night before. Four to six large knots are enough for a school day, and they often look more balanced than people expect. If your hair is long, the knots sit high and make the style look full. If your hair is shorter, the knots stay lower and look compact in a good way.
I prefer this option when the morning is tight because it has the fewest moving parts. Part the hair into large, clean sections, smooth each one with your fingers, then coil the length around itself until the ends tuck under the base. A bobby pin hidden under the knot can help if the hair is slippery or layered. That little pin is not cheating. It’s smart.
One thing: don’t overstuff the sections. Large knots should still be neat, not bulky and uneven. If you can feel the knot wobbling as you move, you used too much hair in that section. Split it again and make the shape cleaner.
This is the one I’d choose for a day when you need hair done, not fussed over.
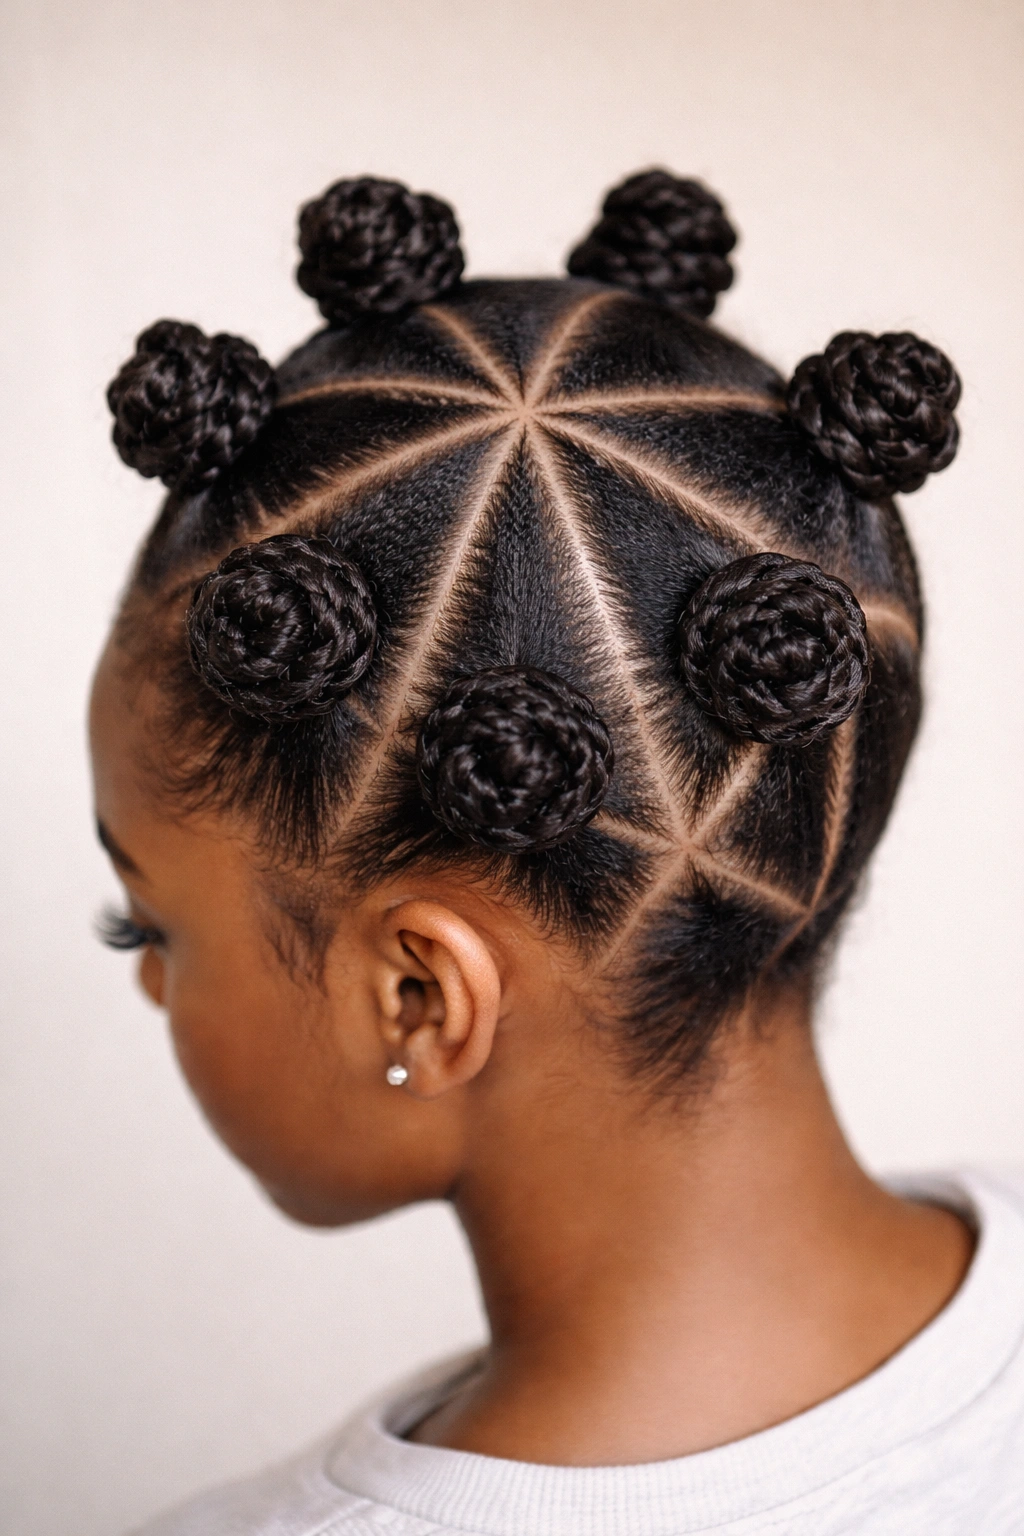
6. Two-Row Bantu Knots for a Neat Profile
From the side, this style sits low and tidy. That’s why it works so well for school. It doesn’t get in the way of coats, hoodies, or the general leaning, bending, and turning that happens all day.
Two-row Bantu knots are exactly what they sound like: a row across the front or crown, then a second row behind it. On medium-length hair, that layout keeps the style organized without making the head feel crowded. You can use six to ten knots total, depending on how much spacing you want. The front row gives you shape where people see it first, and the back row fills out the silhouette.
What I like about this version is the clean profile. It doesn’t puff out too far, which makes it easier to wear with backpacks or jackets that rub the shoulders. If your hair tends to expand by lunchtime, this layout holds better than a tall crown of knots. The rows also make the style easier to section because you’re working in bands instead of trying to divide the whole head at once.
Keep the lower row a touch looser at the base if your scalp gets sensitive. A style that feels tight at the nape usually gets annoying by the end of the day, and school styles should not punish you for sitting still. If you need more hold, smooth the roots with a bit of gel, then let the knot itself stay soft.
It’s a simple layout, but it looks crisp. That counts.
7. Sleek Front Bantu Knots with Smooth Edges
The front of the style does most of the talking. If the hairline is smooth, the rest can be a little softer and still look put together. That’s why I like sleek-front Bantu knots for days when you want the face frame to stay controlled.
This version is less about the knot shape itself and more about the finish at the front. Use a soft brush to smooth the hairline, then add a small amount of edge control or gel where the parts meet the forehead. Not a lot. A pea-sized amount at each temple is usually enough, and too much product tends to flake once the hair dries. That’s one of those annoying little things nobody warns you about until you’re brushing white bits off your collar at lunch.
What to smooth, what to leave alone
- Smooth the hairline and crown.
- Leave the knots themselves a little softer.
- Keep the part line straight and clean.
- Skip heavy product on the ends unless the hair is frizzy.
This version is strong for picture day, assemblies, or any school day when you want your face frame to look sharp. It also works well if your hair naturally frizzes at the front, because the sleek section creates contrast. The knots behind it don’t need to be perfect; they just need to be shaped and secure.
A scarf tied down for five to ten minutes can make a big difference here. That short wait flattens the front and helps the product settle. If you skip that part, the style can still work, but you’ll spend the first hour touching the front and wondering why it keeps lifting.
8. Triangle-Part Bantu Knots for a Sharper Pattern
Triangle parts look like extra work. They aren’t. Once the first few sections are mapped, triangle parts move fast because you can repeat the same shape across the head without overthinking it.
This style is a good pick if you want your Bantu knots to look a little more interesting without adding actual styling time. The triangles create a sharper pattern at the root, and that pattern is what people notice first. The knots themselves can stay medium-sized, so you’re not adding complexity where it doesn’t help. On a school morning, that matters. Nobody has time for a parting grid that eats the whole half-hour before the bus comes.
I’d use the pointed end of a rat-tail comb and keep the lines clean but not obsessive. Perfect triangles are nice in theory and annoying in practice. If a point is slightly rounded, move on. A finished head full of evenly placed knots will still look deliberate, and deliberate beats perfect when the clock is moving.
The triangle layout works best when the hair has some stretch to it. Freshly washed hair can be a little too slippery, which makes the points collapse. If that happens, let the hair dry for fifteen to twenty minutes before you start. That small pause saves time later because the parts hold better.
Sharp pattern, same effort. That’s why I like this one.
9. Bantu Knots with Small Beads or Cuffs

Accessories can do the heavy lifting when the clock is mean. A small bead, a single gold cuff, or a tiny clear elastic at the base can make quick Bantu knots look more finished without adding real styling time.
The trick is to stay restrained. One cuff per knot is enough. Two if you’re going for a more decorative look, but beyond that the style can start to feel busy, especially for school. A neat set of knots with one simple accent each usually looks cleaner than a pile of extras. And yes, it helps the style stand out, but in a contained way.
If your school is strict about jewelry or loose pieces, keep the accessories tiny and secure. Beads should not clack against desks, and cuffs should sit snugly so they don’t slide off in the middle of the day. Clear elastics are also useful if you want the hair to stay locked without changing the look too much.
How to keep it school-safe
- Choose small accessories that sit close to the knot.
- Avoid heavy metal pieces that tug at the hair.
- Keep beads on the lower half of the knot, not the end of a loose strand.
- Skip dangling charms if your school has a conservative dress code.
I like this option when the knots themselves are plain but the outfit needs one little point of interest. A hair bow can do the same thing, but cuffs feel sturdier and less childish on older students. That said, plain knots can be better if you know you’ll be active all day. Accessories are lovely until they start getting in your way.
Small is better here.
10. Night-Before Bantu Knots That Need a Five-Minute Refresh
This is the one I’d pick when the alarm feels rude. You do the real work the night before, sleep on it, and spend the morning checking the shape instead of building it from scratch.
The method is simple. Start on hair that is slightly damp, not wet, then section and knot the hair in your chosen pattern. Medium or jumbo knots work best here because they’re less likely to flatten overnight. Cover everything with a satin scarf or bonnet, and make sure the roots are smooth before bed. If you toss and turn a lot, keep the knots a little tighter at the base so they survive the pillow.
In the morning, you only need a few minutes. Mist any flat spots, smooth the front with your fingers or a soft brush, and re-tuck any ends that loosened. If one knot shifted, fix that one knot only. Do not unravel the entire head because one side looks softer than the other. That’s how a five-minute refresh turns into a forty-minute problem.
A little oil on the fingertips can help seal frizzy roots, but keep it light. Too much oil makes the hair look dull and can weigh the knots down before lunch. If you want a little lift at the crown, fluff the base gently with the handle of a rat-tail comb instead of digging into the knot itself.
Mornings get easier when the parts are already waiting. This style is the cleanest answer for days when you want your hair done before you’ve even finished thinking about breakfast. It’s fast, it lasts, and it keeps the whole routine from spiraling into a hair emergency.