Afro bun styles do something a lot of people underestimate: they let textured hair look polished without sanding off the texture that makes it interesting in the first place. A bun can be sharp and smooth, soft and fluffy, braided and sculptural, or a little undone on purpose, and the right one depends less on rules than on your hair’s length, density, and how much stretching you’re willing to do first.
The mistake I see most often is chasing one sleek formula for every head of hair. Coils, kinks, curls, and stretched strands all sit differently, and a bun that looks easy on a loose wave can turn into a tight, sore little knot on denser hair if you copy it word for word. The better move is to match the bun to the texture you actually have that day.
Loose is not sloppy. A softly pinned bun can look more finished than a stiff one that fights your hair at every turn.
Start with the bun that fits your hair’s mood, not the photo in your head, and the rest gets easier fast.
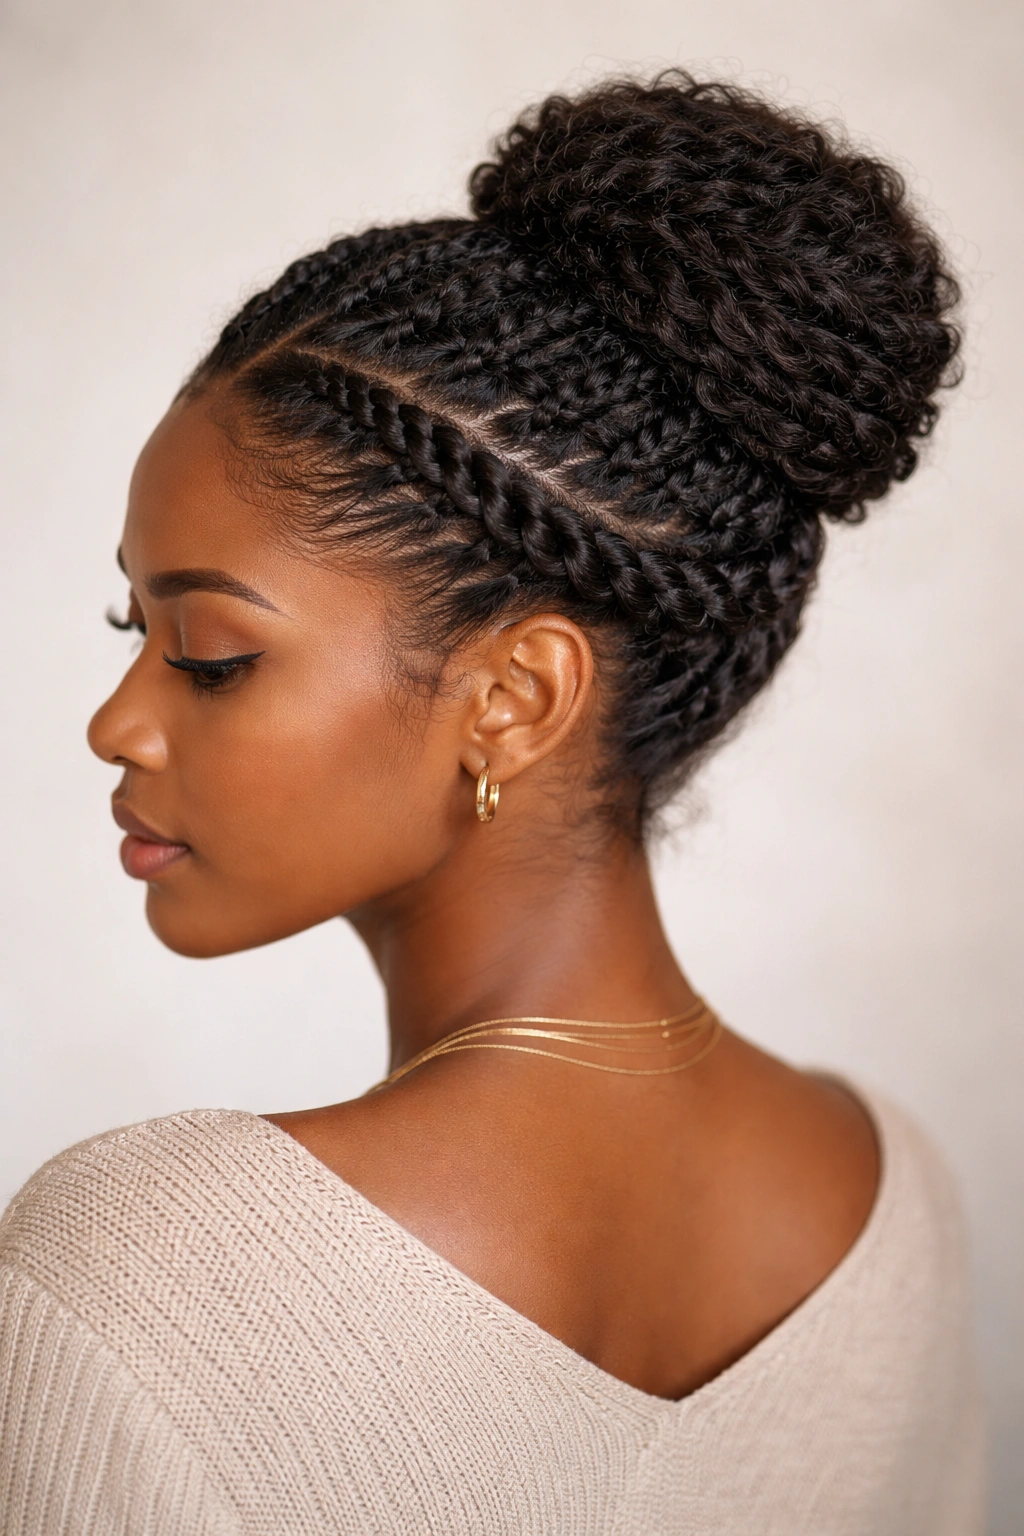
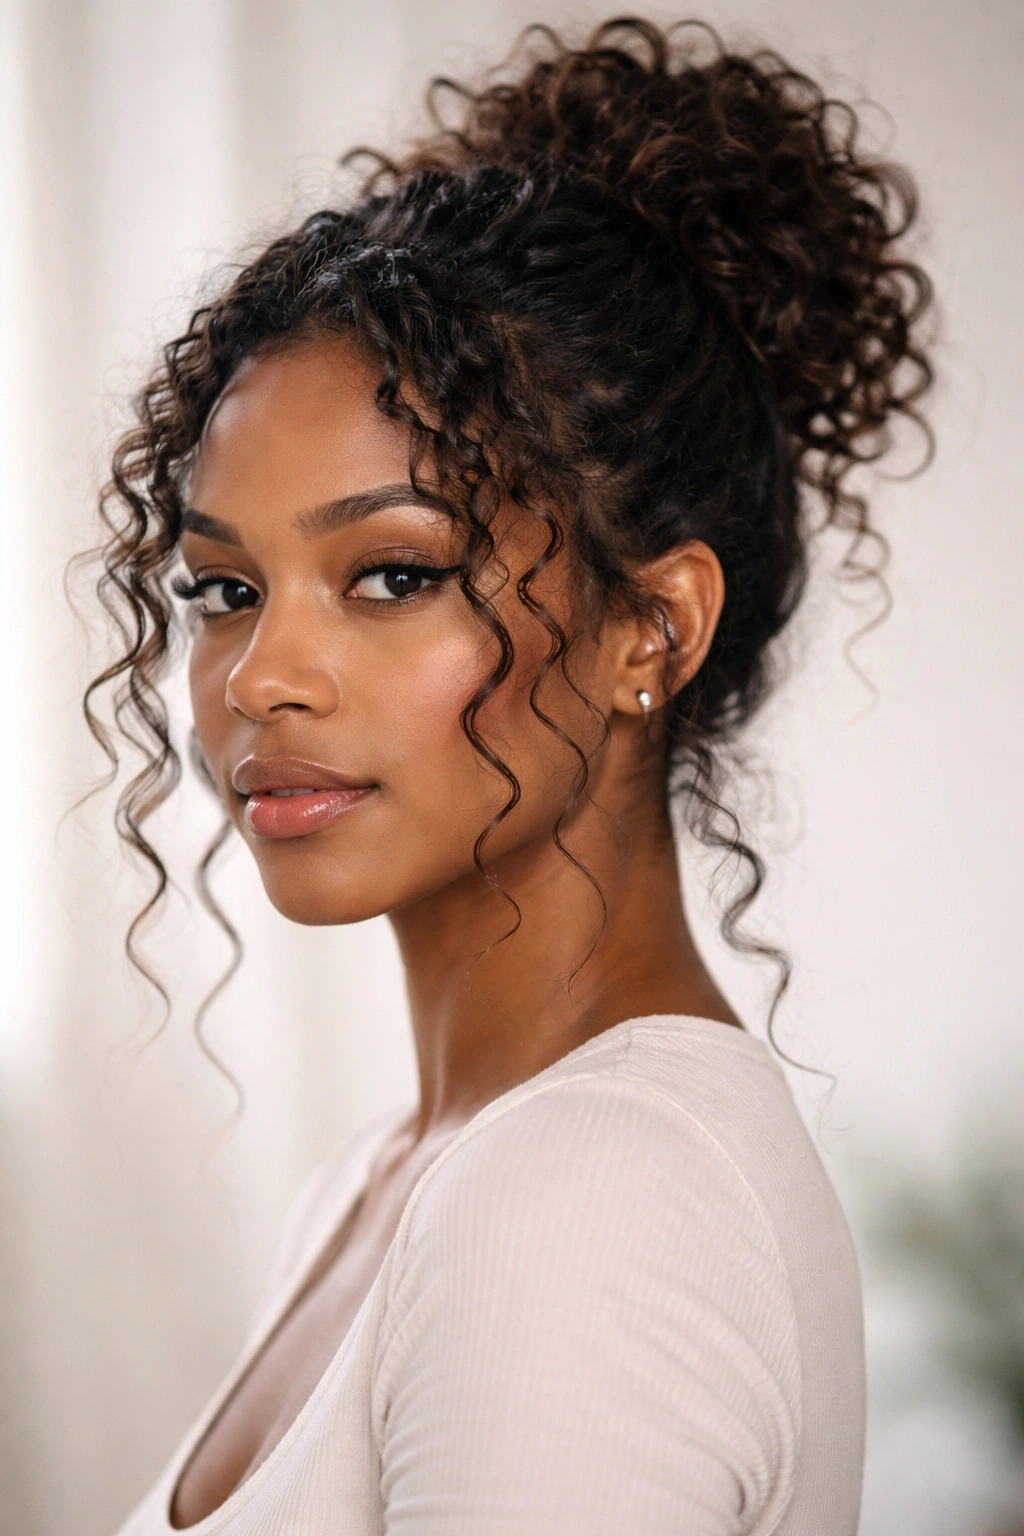
1. High Puff Afro Bun
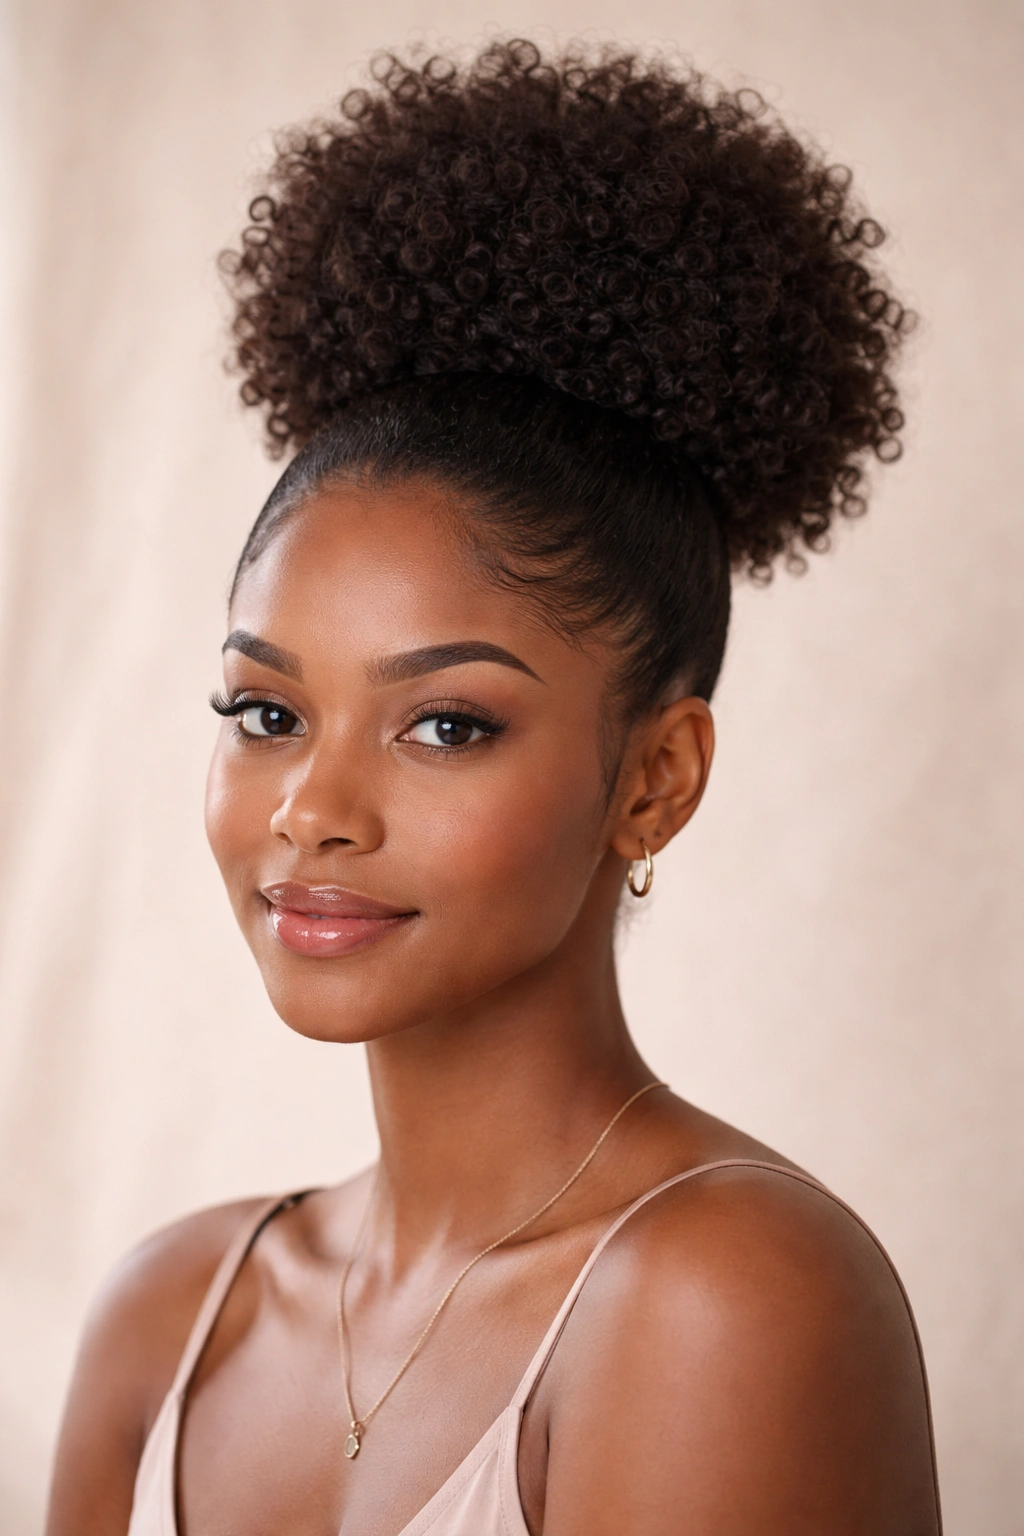
A high puff bun is the one I reach for when I want lift without a lot of fuss. It sits at the crown, lets your texture do some of the talking, and gives the face a nice open frame. On coily hair, that height can look strong and soft at the same time, which is a combination I never get tired of.
Why This Shape Flatters Textured Hair
The magic is in the balance. A high puff bun keeps the sides neat while leaving the top with enough volume to look full instead of flattened. If your hair has shrinkage, this style works with it instead of trying to bully it into submission.
It also plays well with second- or third-day hair. A little natural hold at the roots helps the puff stay up, and you do not need every strand to be perfectly stretched. A satin scrunchie, a soft brush, and a little cream around the base usually do more than a heavy hand with gel.
- Best on medium to long natural hair
- Works well after twist-outs, braid-outs, or banding
- Easier on the edges than a tight top knot
- Looks polished with earrings, lipstick, or a sharp collar
Pro tip: place the puff at the highest point of your head, not too far forward. That small shift keeps the shape from looking heavy.
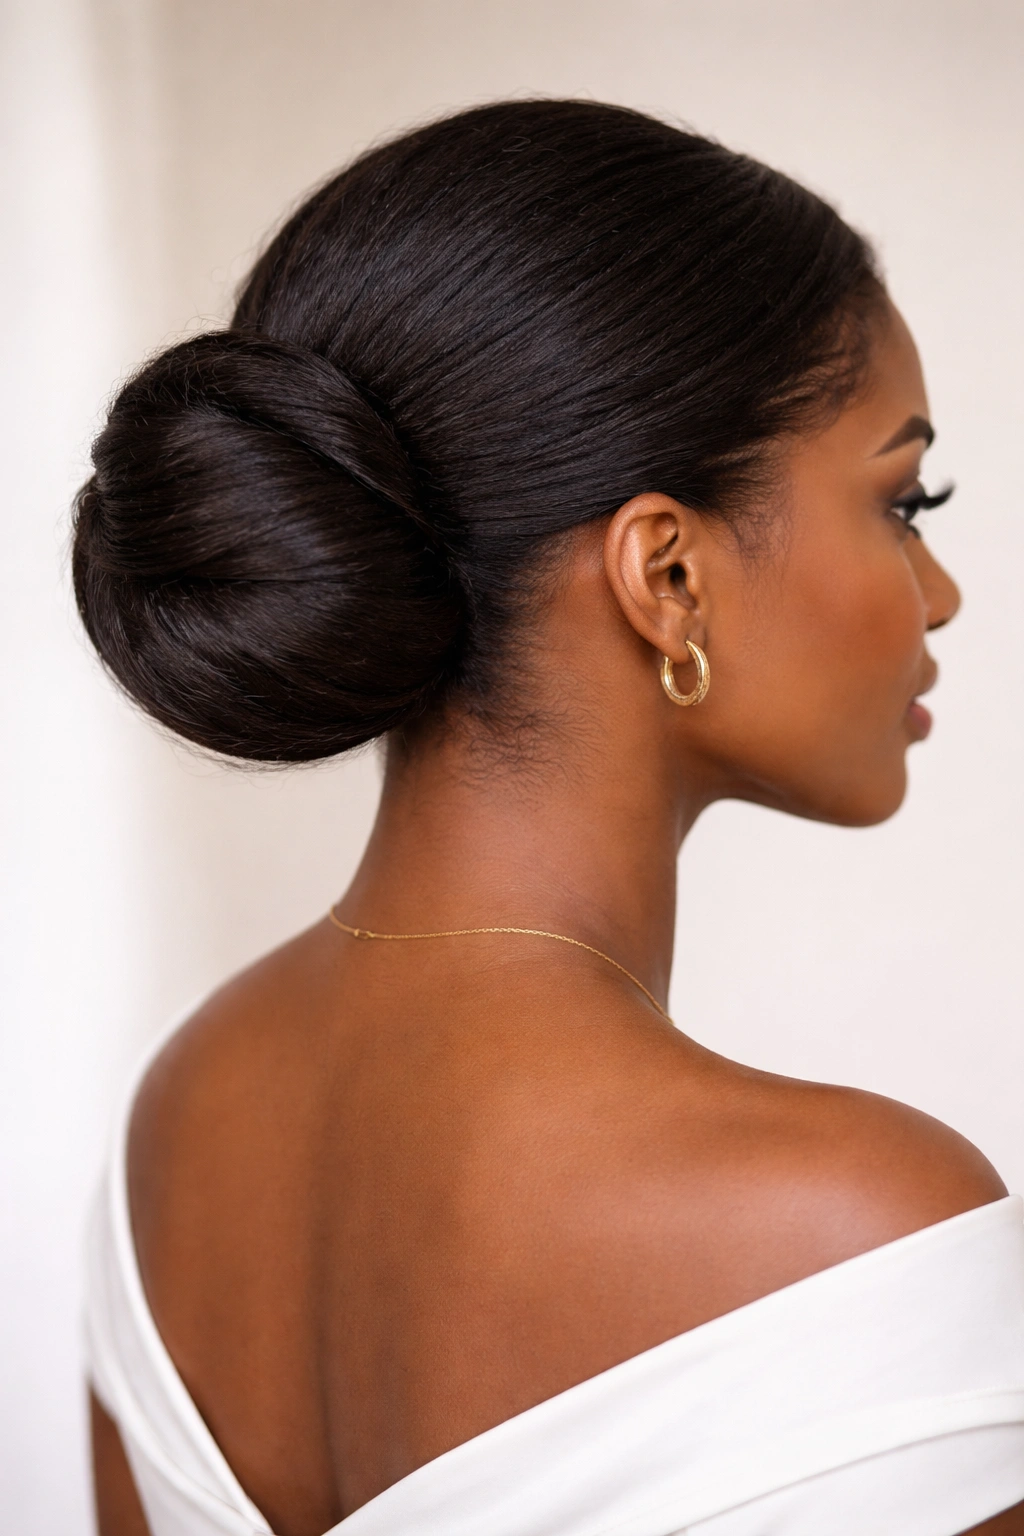
2. Sleek Stretched Afro Bun
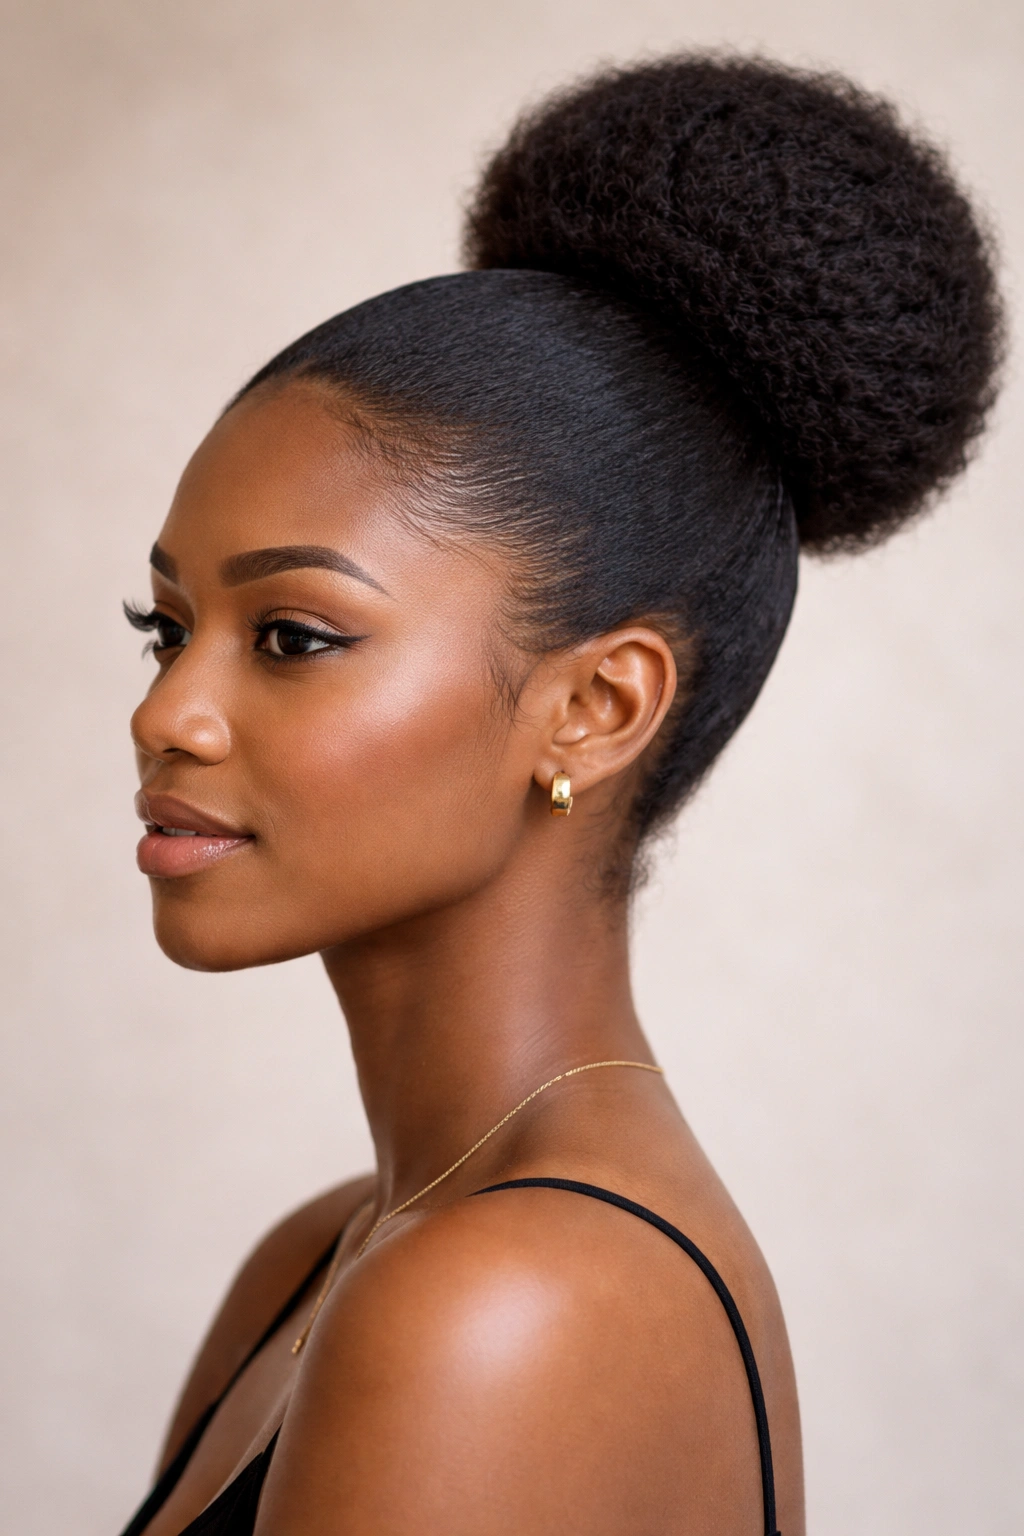
This is the bun that makes people assume you spent longer than you did. It looks crisp, but it still reads like natural hair, which is the part I like most. When the strands are lightly stretched first, the bun sits flatter, the base looks cleaner, and the whole style feels more controlled.
A little stretching goes a long way here. Banding overnight, a chunky twist-out, or a low-heat blow-dry on already conditioned hair can make the bun easier to gather without stacking too much bulk at the nape. You do not need bone-straight hair. You need enough stretch so the ponytail lies in one direction instead of fighting you.
The front matters, too. Smooth the perimeter with a light gel or styling cream, then go back with a soft brush and a tiny bit more product only where the frizz actually needs help. Too much gel can leave flakes and make the bun feel hard instead of clean. I’d rather see a little texture than a helmet.
This bun is a strong choice for work meetings, dinners, or any event where you want a neat line through the front and a fuller shape in the back. It looks especially good with a middle part, but a deep side part can soften it if you want a less severe finish.
3. Low Nape Afro Bun with Side Part
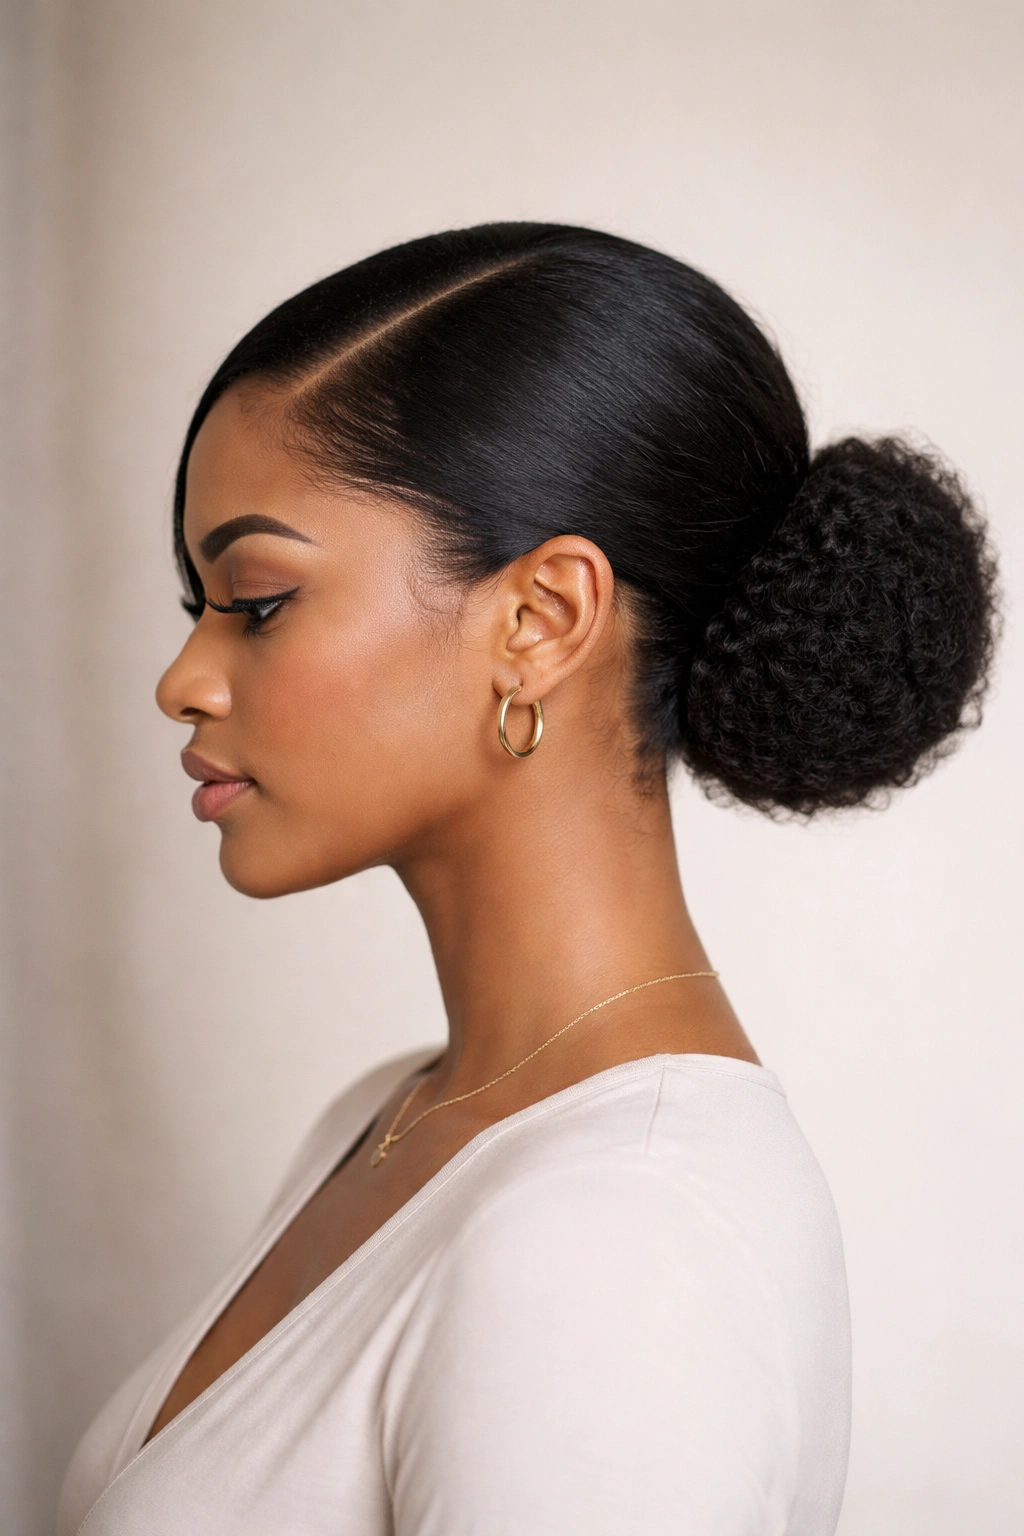
Why do low buns look so expensive on textured hair? Because they let the hairline stay calm while the rest of the style does the heavy lifting. A low nape bun with a side part has that quiet, tailored feel that works with a blazer, a dress, or even a plain T-shirt when you want the hair to carry the outfit.
The side part helps break up the shape so the bun does not feel too strict. It also gives you room to keep the front smooth without flattening every bit of volume. If your hair is dense, twist or loosely braid the gathered section before wrapping it into the bun; that keeps the base from turning into one thick lump.
Keeping the Part Clean and the Nape Soft
The part looks best when it is defined but not scraped bare. Use a rat-tail comb, trace the part once, then smooth the roots with a small amount of gel or edge control. After that, stop touching it. Overworking the front is how you end up with white residue and a puffy line by lunchtime.
At the nape, keep the tension low. The bun should sit close to the neck without yanking the scalp backward. That detail matters more than people think. A low bun that feels soft at the roots tends to last longer, and it’s easier to wear for a full day without that tired, pulled sensation.
4. Braided Crown Bun
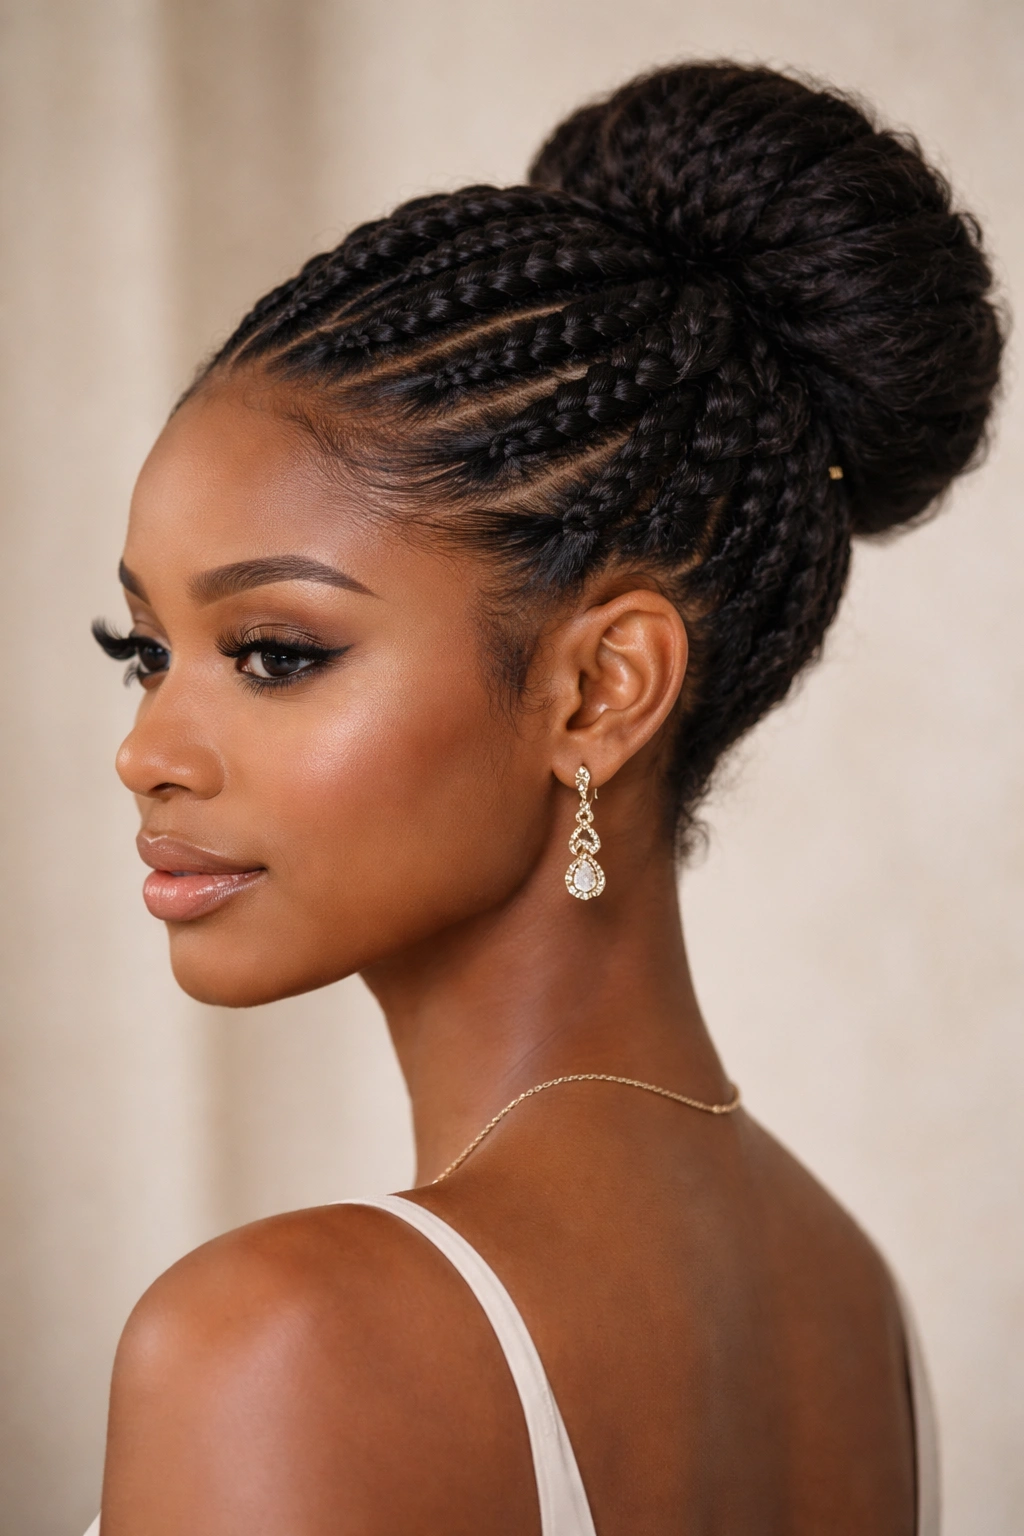
Picture a bun that can survive a crowded commute, a long dinner, and a quick dance floor detour without losing its shape. That is the charm of a braided crown bun. The braids create a built-in frame, and the bun gives the style a solid finish at the back.
What I like here is the structure. Instead of relying on gel alone, the braid pattern helps anchor the hair and keeps the style from puffing out too fast. You can braid the front sections back toward the crown, gather the ends, and coil them into a bun, or feed several braids into one central knot if your hair is longer.
A braided crown bun is also good when you want your hair to look detailed from every angle. It does not matter if someone sees you from the front, the side, or behind the ear — there’s always something to look at.
- Good for weddings, gallery nights, and dressy dinners
- Holds shape well on thick hair
- Can be done with your own hair or added braid hair
- Needs a few pins tucked into the braid base, not only the bun
Small warning: don’t make the braids so tight that the crown feels sore after an hour. A pretty style should not feel punishing.
5. Twisted Halo Bun
You do not need everything smoothed flat for the bun to look polished. A twisted halo bun proves that texture can stay visible and still feel intentional. The halo part comes from two-strand twists or rope twists that wrap around the head before they feed into the bun, so you get shape near the hairline and volume where it counts.
This style works well on dense curls because the twists help corral the hair without hiding it. If your hair has a mix of curl sizes, the pattern can be forgiving. A neat twist at the front and a fuller bun at the back feels balanced in a way that a plain gathered bun sometimes does not.
I like this style for days when I want the hair to look styled, not frozen. The twists can be a touch softer than braids, and that softness keeps the whole look from feeling too severe. Use a cream first, then a light gel only at the roots if you need extra grip.
One thing people get wrong: they twist the hair too tightly and lose the ease that makes the style work. Leave a little give. The halo should sit like a frame, not like wire.
That little bit of friction matters.
6. Pineapple Afro Bun
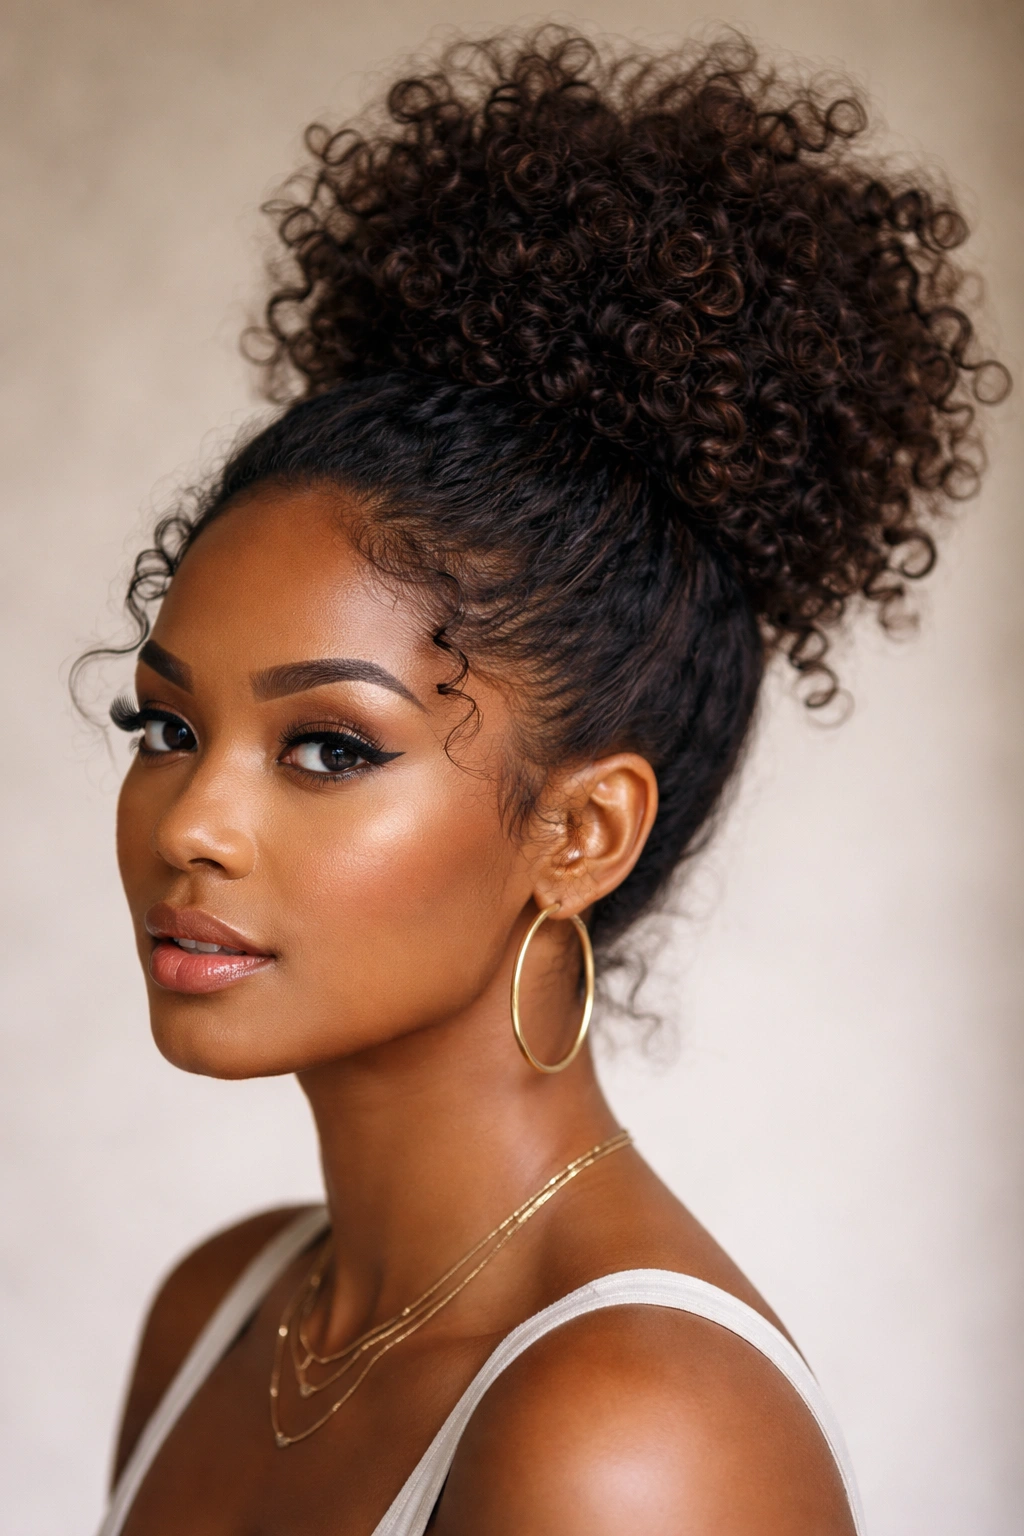
Unlike a sleek bun, the pineapple bun keeps the curls exposed and leans into shape instead of hiding it. It sits high, almost like a gathered crown, and the ends stay loose enough to keep their curl pattern visible. If your hair is already full, this style can look better than any slicked-back option because it keeps the movement.
It’s a strong choice for second-day hair, stretched curls, or hair that you want to refresh without a full restyle. A satin scrunchie or a soft tie is better than a tight elastic here, because the whole point is lift without crushing the texture. If the front is frizzy, smooth only the edges and leave the rest alone. That restraint helps.
The pineapple bun is the one I suggest when a client or friend says, “I want something casual, but not sloppy.” That is exactly its lane. It can look relaxed with a sweatshirt, then hold up fine with earrings and a dress if you place it neatly and keep the base clean.
If you sleep in a loose pineapple under a satin bonnet, it can also become a quick morning style. Add a few pins, shake the roots, and go. No drama.
7. Double Space Buns
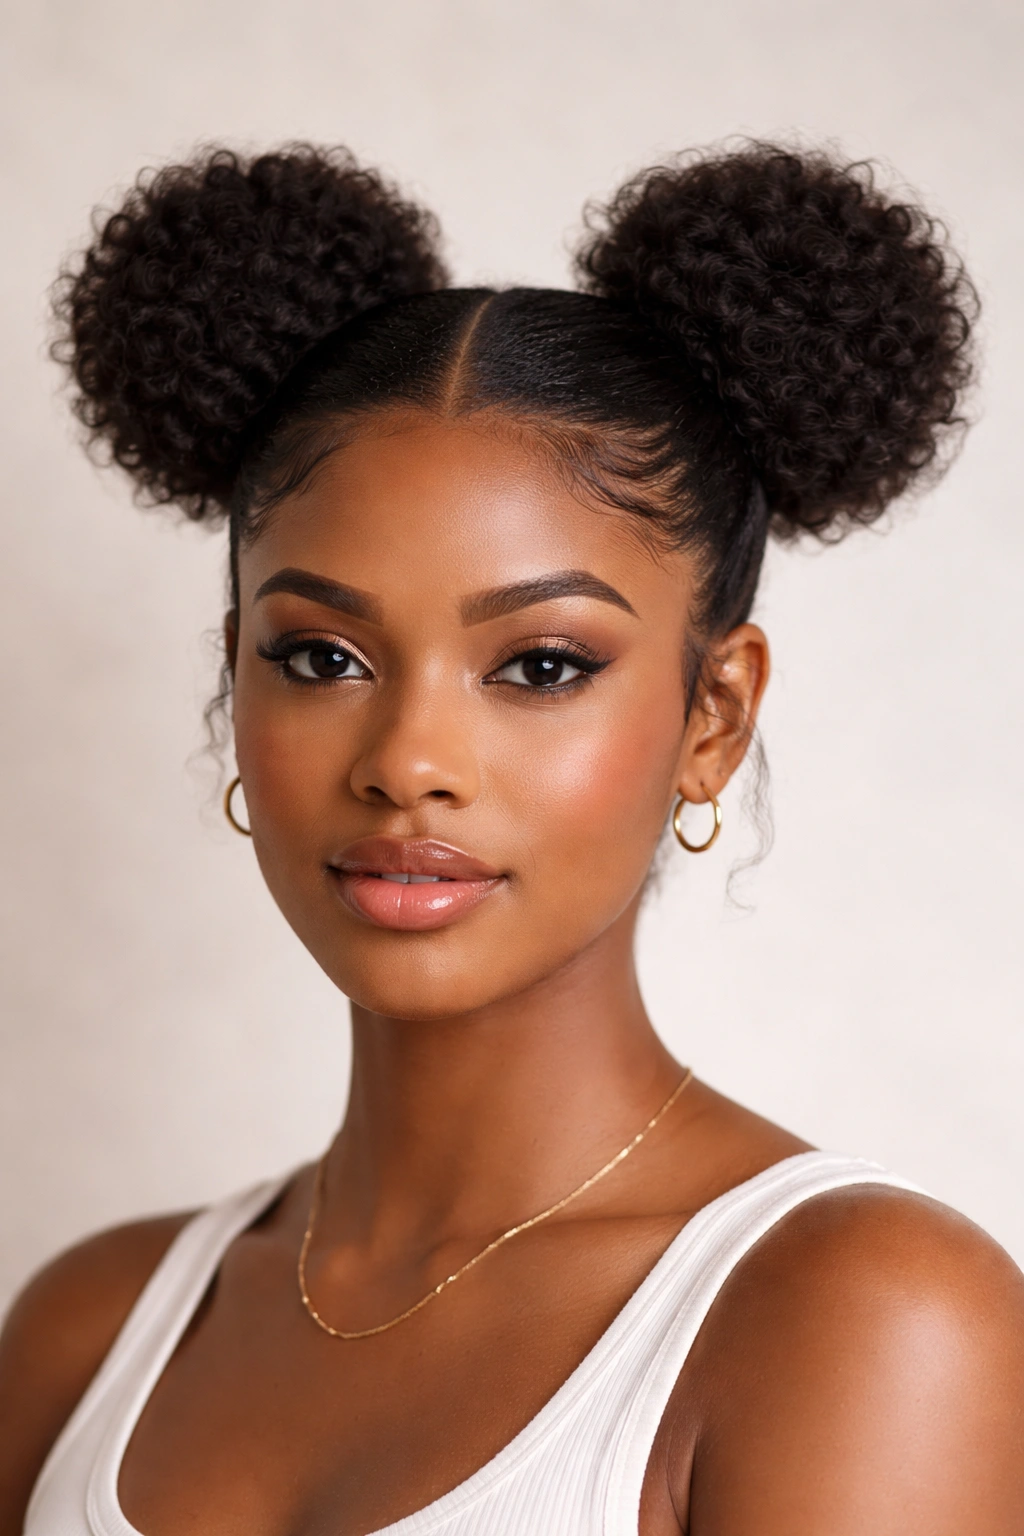
Two buns can read playful or sharp, depending on where you place them. If the parts are clean and the buns sit evenly, space buns on Afro-textured hair can look crisp without losing the softness that makes natural hair interesting. They are a good option when you want something more fun than a single bun but still want control.
Making the Parts Match
Symmetry matters more than perfection. Start with a center part, then split the hair into two equal sections from forehead to nape. Use a comb tail and check the mirror from the front, not just the top, because the eye tends to forgive the crown and notice the face line.
After that, build each bun with the same amount of stretch and the same size base. One bun cannot be twice as large as the other unless that is the whole point. A small difference is fine; a lopsided result is not.
- Place the buns slightly above the ears for lift
- Keep the base loose enough to avoid tension headaches
- Use a bit of cream on the ends before wrapping
- Pin from underneath so the hardware stays hidden
My rule: if the style starts pulling at your temples, loosen it immediately. Cute is not worth a sore scalp.
8. Braided Base Bun
A braided base fixes the complaint I hear most about buns: they collapse halfway through the day. The braid gives the bun something solid to sit on, so the shape holds better and the finished style looks more deliberate. It’s especially useful if your hair is thick, layered, or prone to slipping out of smooth ponytails.
Here’s the part people skip: the braid does not have to be tiny or fancy. One strong braid from the gathered ponytail is enough. After that, wrap the braid around itself and pin it at the base, keeping the pins tucked into the braid rather than sitting on top of the hair. That tiny difference is what keeps the bun from wobbling.
This style is one of my favorites for long wear because it handles movement well. If you’re running around all day, the braid holds the weight in place better than a loose coil. It also gives a nice, slightly sculpted look that still feels grounded on natural hair instead of overly slick.
A braided base bun is a strong answer when you want a clean finish without relying on a mountain of product. Less product, fewer flakes, better hold. That’s a trade I’ll take every time.
9. Bantu Knot Bun Hybrid

What happens when you want a bun and still want texture on display? You get the Bantu knot bun hybrid, which is one of the more creative looks on the list. It gives you shape, pattern, and a little edge all at once, and it does not require the hair to lie flat the whole way.
The hybrid version usually starts with a few Bantu knots along the perimeter or at the crown, then the remaining hair is gathered into a bun or tucked around the knots. On shorter natural hair, that can mean three or four knots leading into a compact bun. On longer hair, you can build a larger knot pattern and still keep the back neat.
How to Wear It Well
Keep the knot sections even. If one side is packed tight and the other is loose, the whole style feels off. A small amount of styling cream helps the parts stay defined, while a firmer gel at the roots keeps the sections from frizzing up too fast.
This style suits creative dress codes, night events, concerts, or any day when plain and tidy is not the assignment. It has personality. A lot of personality, actually.
If you want the knots to pop, twist each section in the same direction before wrapping. That gives the style a cleaner line and keeps the finish from looking fuzzy.
10. Messy Coily Bun with Face-Framing Pieces
Some of the best bun styles look a little undone on purpose. A messy coily bun with face-framing pieces works because it gives you shape without trying to erase the curl pattern at the front. The loose pieces soften the face, and the fuller bun keeps the style from reading too casual.
This is the one I’d pick for brunch, a relaxed date, or a day when you want your hair to look styled without acting like it had to be forced there. The bun itself can be low or mid-height. What matters is the texture around it — the front pieces should be intentional, not random.
To keep it from looking unfinished, define just the pieces you leave out. A small amount of curl cream or water-based leave-in on those strands goes a long way. Don’t over-brush them. That turns soft coils into frizzy ribbons, and nobody wins.
- Leave two to four front pieces out
- Pin the bun loosely so it keeps volume
- Smooth the sides, but not the entire head
- Refresh the face-framing curls with a little water and cream
Good messy is controlled. If the bun gets too loose at the base, it stops looking stylish and starts looking tired.
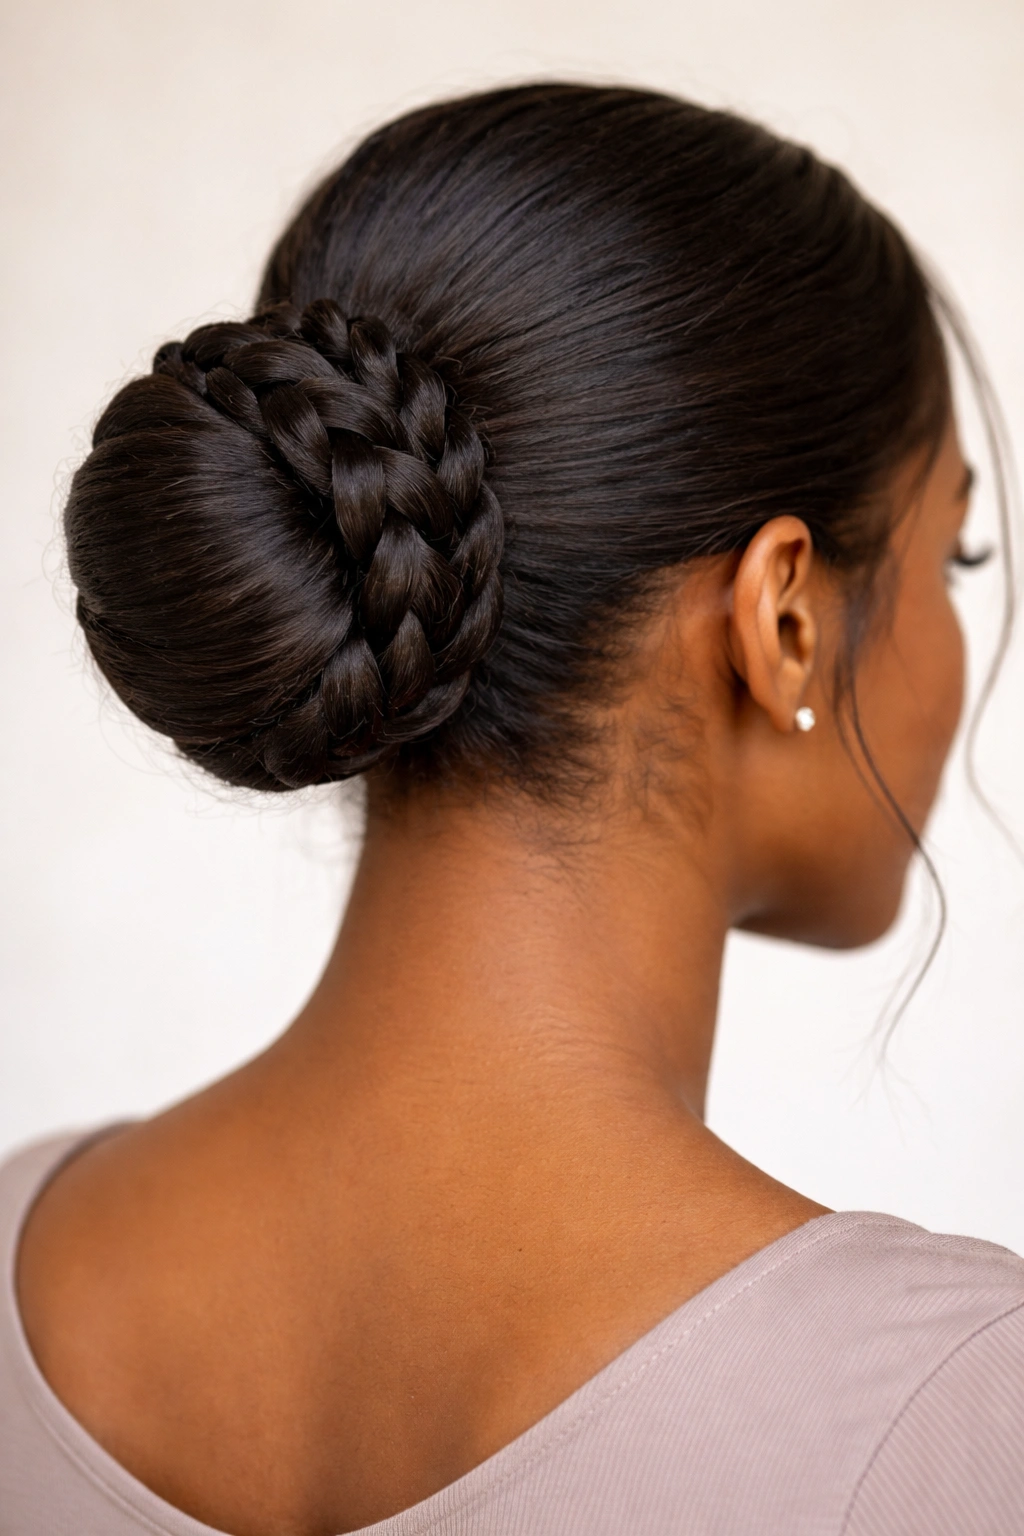
11. Rolled Tuck Bun
A rolled tuck bun has the neat, old-school feel that can look sharp with a blazer or simple earrings. It works by rolling the lengths inward and tucking the ends under, which gives the style a smooth edge without needing a large amount of hair to wrap around itself. On stretched natural hair, the result is tidy and compact.
This bun is especially nice for medium-length hair. You don’t need a huge ponytail to get the shape right, but you do need the ends to be flexible enough to tuck. If your hair is layered, use pins more generously than you think you need. Hidden support is what keeps the roll from unfolding as the day goes on.
The finish can be very clean, almost tailored, and that makes it useful for formal settings or work days where you want your hair to stay quiet and neat. It’s also one of the better options if you don’t want a lot of bulk at the crown.
Pins are doing the quiet work here.
I’d avoid this style on hair that’s freshly washed and too soft, because the tuck can slip. A little stretch gives you better grip, and better grip means fewer resets in the bathroom mirror.
12. Accessorized Statement Bun
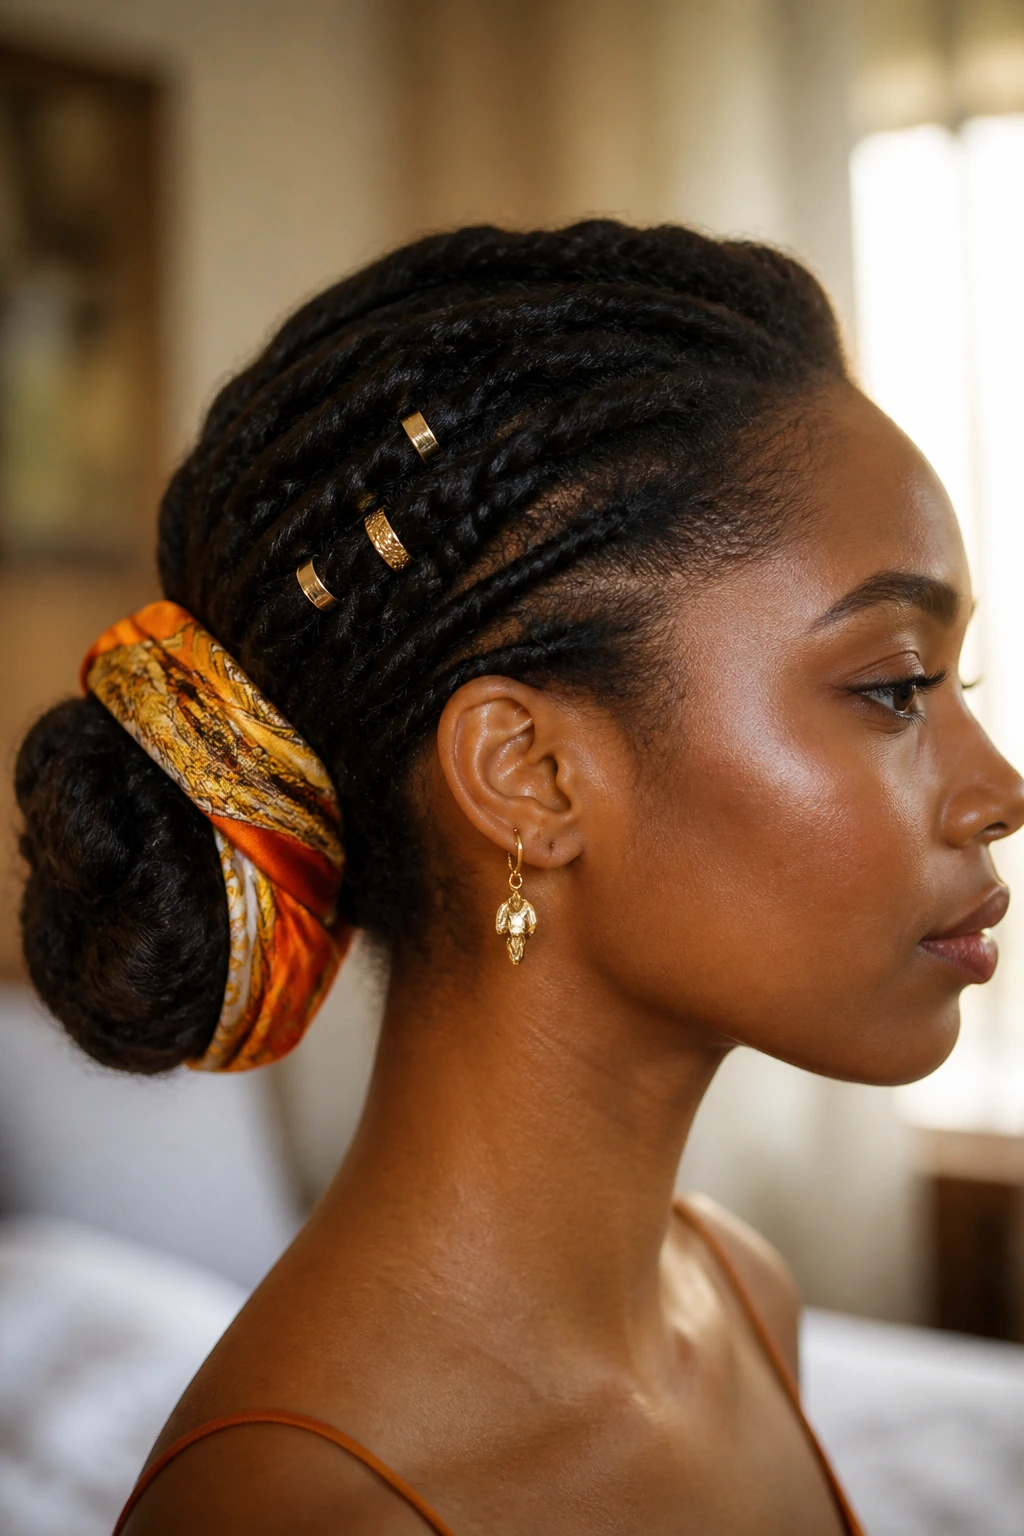
Unlike a plain bun, this one depends on accessories to do part of the talking. That can mean a silk scarf wrapped at the base, a few gold cuffs tucked into the twists, pearl pins on one side, or a wooden hair stick that lifts the bun into something a little more dressed up. The bun itself can stay simple. The extras carry the mood.
I like this approach because it lets one base style do a lot of work. A low bun with a bright scarf feels relaxed and artistic. A high bun with metal cuffs leans sharper. Add a single side pin, and the whole thing shifts again. The hair does not need to be rebuilt every time you change the event.
The main trick is restraint. Pick one accent family and stay there. If you use a patterned scarf, keep the pins simple. If you go heavy on metallic clips, skip the loud print. Too many competing details make the style look cluttered, which is the exact opposite of what you want.
This is the bun I’d choose for celebrations, photos, or any day when you want the hairstyle to read as part of the outfit rather than an afterthought. Build a small accessory stash — a scarf, four good pins, a few cuffs — and you can turn one bun into five different looks without touching the rest of the hair.