Straight hair can feel one-note if you’re not careful, but add a braid accent and suddenly you’ve got a look that feels intentional, polished, and effortlessly chic. The beauty of braiding straight hair is that the plaits stand out with crisp definition — no texture competition, just clean lines that frame your face or add visual interest to an otherwise sleek style. Whether you’re after something subtle for everyday wear or a statement-making style for a special occasion, combining straight strands with strategic braid placement gives you endless possibilities.
The magic happens because straight hair shows off braid texture in a way that wavy or curly hair sometimes can’t. Your braids won’t disappear into waves or get lost in curl definition — they’re front and center, creating contrast and dimension. You can make a single delicate braid whisper down the side of your head, weave multiple braids throughout, or use braids as an anchor point for updos and half-up styles. The straight hair provides the perfect canvas, and the braids become the art.
What makes these styles so practical is that they work across hair lengths, face shapes, and occasions. You can wear them on freshly washed, slightly greasy second-day hair (which actually holds braids better), or with a bit of texture spray for extra grip. Most of these styles take less than five minutes once you’ve gotten the technique down, making them totally doable for weekday mornings or last-minute event preparation. Let’s explore ten distinct ways to combine straight hair with braid accents that’ll have you reaching for your hair ties.
1. Side-Swept Dutch Braid With Straight Layers
A Dutch braid that runs from one temple down to behind the opposite ear creates an instant face frame while keeping most of your straight hair down. This style works because the braid catches light differently than the straight sections, creating a dimensional look even when your entire head is one color. The Dutch braid (braided under rather than over) sits slightly closer to the scalp than a regular three-strand braid, which gives it a more modern, intentional appearance.
Why This Works for Straight Hair
Dutch braids show incredible definition on straight strands because there’s no wave pattern to soften or obscure the plaits. Each strand interlocks with crystal clarity, making the braid feel architectural and design-forward. The contrast between smooth straight hair and textured braid is exactly what makes this style pop. You’re not fighting with your hair’s natural texture — you’re using straightness as part of the composition.
How to Execute It Perfectly
- Start the braid at your temple on one side, taking a small three-strand section
- Braid under (not over) each subsequent strand as you move around the side of your head toward the back
- Gather the braid at the nape of your neck or behind your opposite ear
- Secure with a thin elastic or bobby pins that match your hair color
- Leave the rest of your hair down and straight for maximum contrast
- Optional: pull the braid slightly loose by gently tugging each section outward — this softens the look and makes it feel intentional rather than too tight
Pro tip: This braid stays put best if your hair has a little natural oils or you apply a light texturizing spray beforehand. Freshly washed, slippery hair can make Dutch braids slide throughout the day.
2. Two-Braid Crown With Center Part
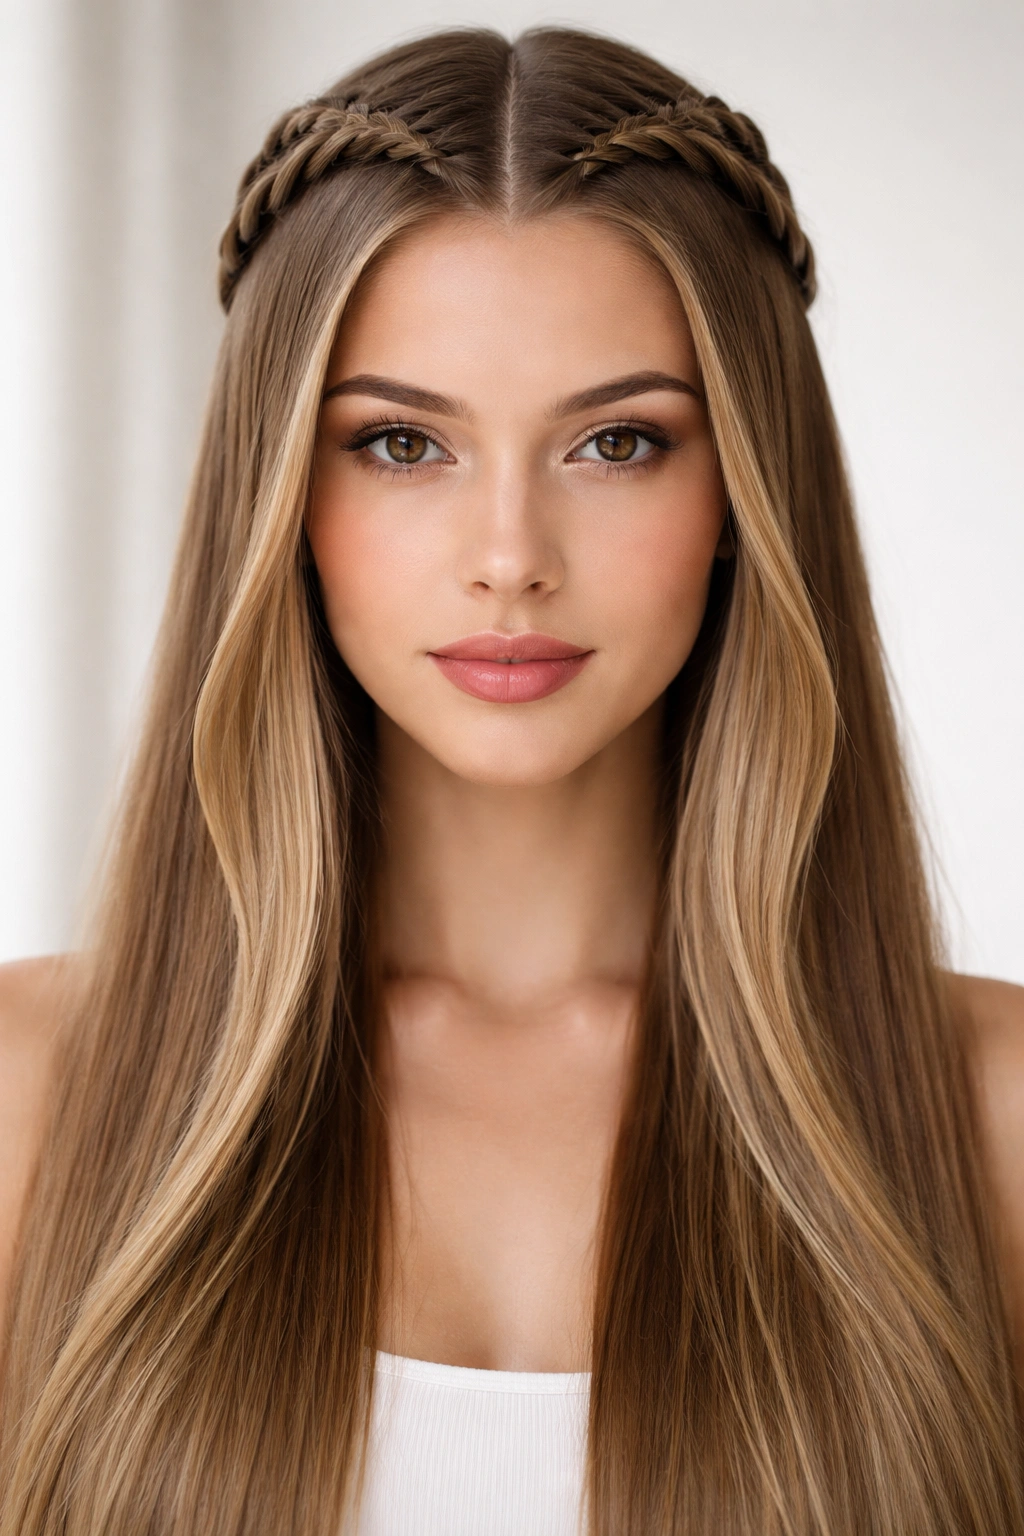
Position two French braids along the crown of your head, starting from behind each ear and braiding toward the back center, then crossing them to create a crown or halo effect. Your straight hair hangs down freely below the braids, creating a half-up, half-down silhouette with all the romantic detail concentrated at the top. This style works whether your hair is waist-length or shoulder-length — the braids provide the visual anchor while the straight length below grounds the whole look.
What Makes This Style Special
Crown braids signal intention without being overly formal. They’re elegant enough for date nights, brunch, or professional settings, but casual enough for everyday wear. Because your straight hair acts as a neutral canvas, the braids become the focal point — you can braid tightly for a polished, controlled look or loose and romantic for something softer. The style keeps hair away from your face while celebrating your length and the detail of the braids simultaneously.
Key Steps for Success
- Part your hair down the middle and secure one side with a clip
- Start a French braid behind your ear on the unclipped side, braiding upward toward the crown
- As you braid, incorporate small sections of hair from the crown area, continuing until you reach the back center
- Repeat on the other side, braiding toward the same central point
- Secure both braids together with bobby pins or a decorative elastic
- Gently pull each braid section outward to loosen and romanticize the look
- Leave your remaining straight hair to fall naturally — the contrast between textured braids and smooth strands is the whole point
This style holds beautifully on day-two hair when straight strands have slightly more grip.
3. Sleek Low Ponytail With Braid Wrap
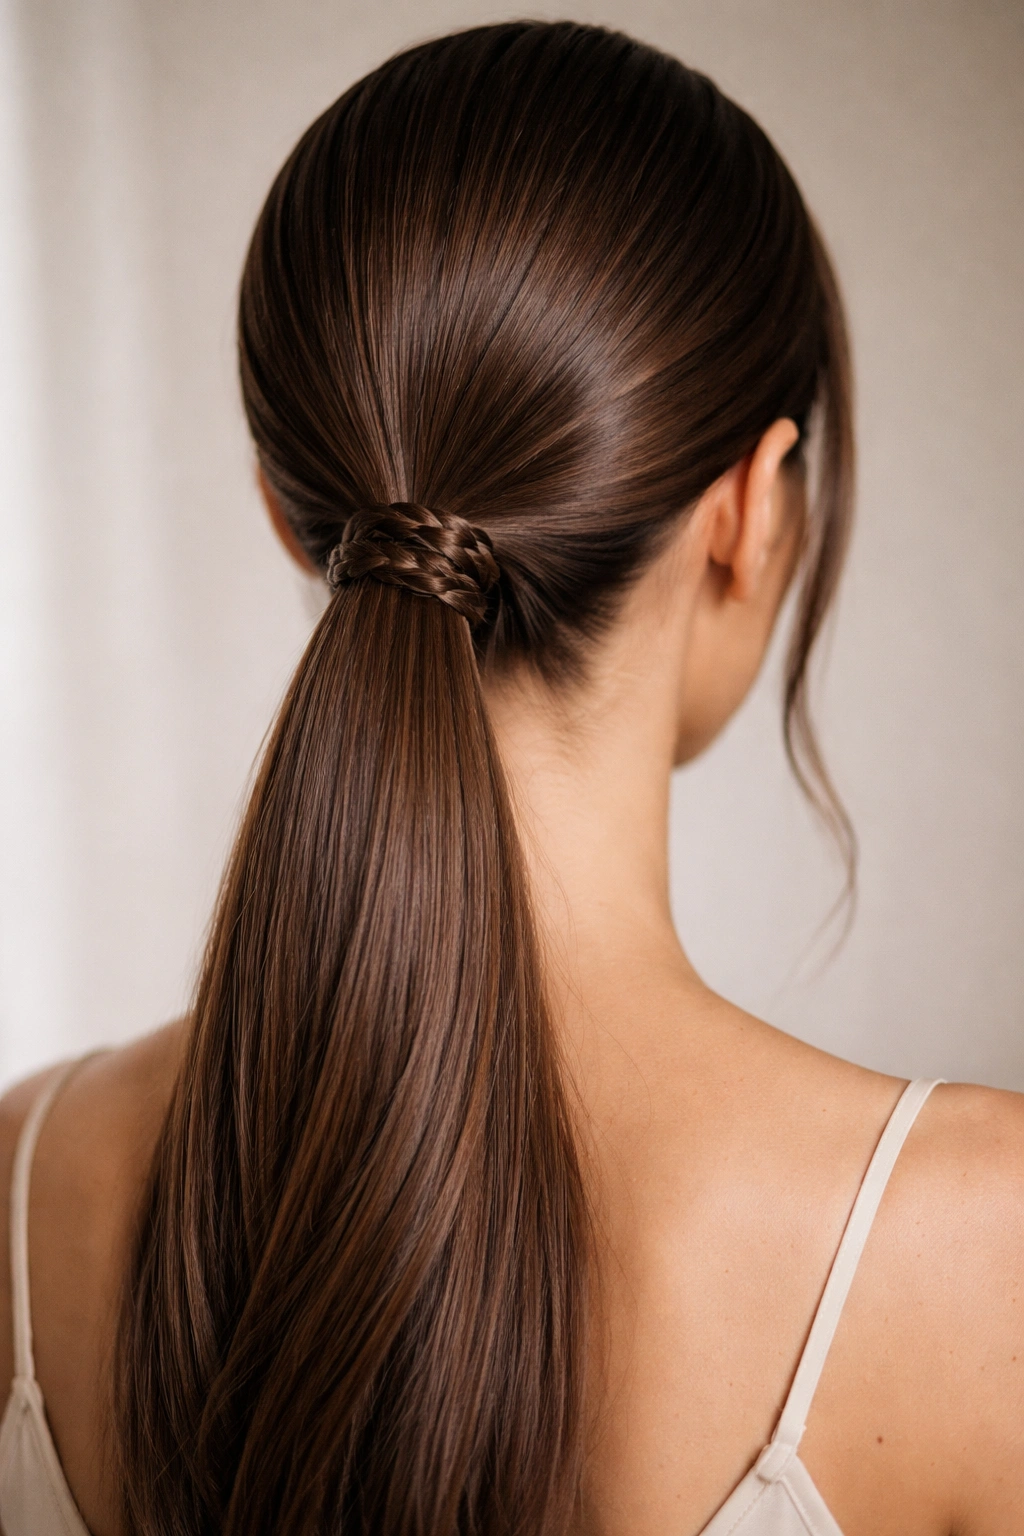
Gather all your straight hair into a sleek, low ponytail at the nape of your neck, then take a small section from the ponytail itself, braid it, and wrap it around the base of the ponytail to conceal the elastic. The braid acts as both functional (hiding the hair tie) and decorative (adding a detail that transforms a basic ponytail into something considered). This style is incredibly practical because it works on any hair length longer than shoulder-length and takes roughly two minutes to create.
Why the Braid Wrap Changes Everything
A braid wrap elevates a basic ponytail from functional to intentional in seconds. Instead of a visible elastic, you’ve got a textured, decorative band that draws the eye. The contrast between the sleek straight hair and the small braided detail is precisely why this works — you’re adding visual interest without cluttering the overall clean aesthetic. It’s the difference between “I threw my hair up” and “I styled this deliberately.”
Step-by-Step Execution
- Use a fine-tooth comb or brush to smooth your straight hair back into a low ponytail positioned at the nape of your neck
- Secure with a thin elastic in a matching color
- Take a small section of hair (about one inch thick) from within the ponytail
- Divide that section into three strands and braid it
- Wrap the braid around the base of the ponytail, covering the elastic
- Secure the end of the braid underneath or with bobby pins
- A light smoothing serum or balm on the wrapped-around braid helps it stay put
The beauty here is that the wrapped braid camouflages any loose elastics or visible hair ties, giving the entire style a seamless, polished finish.
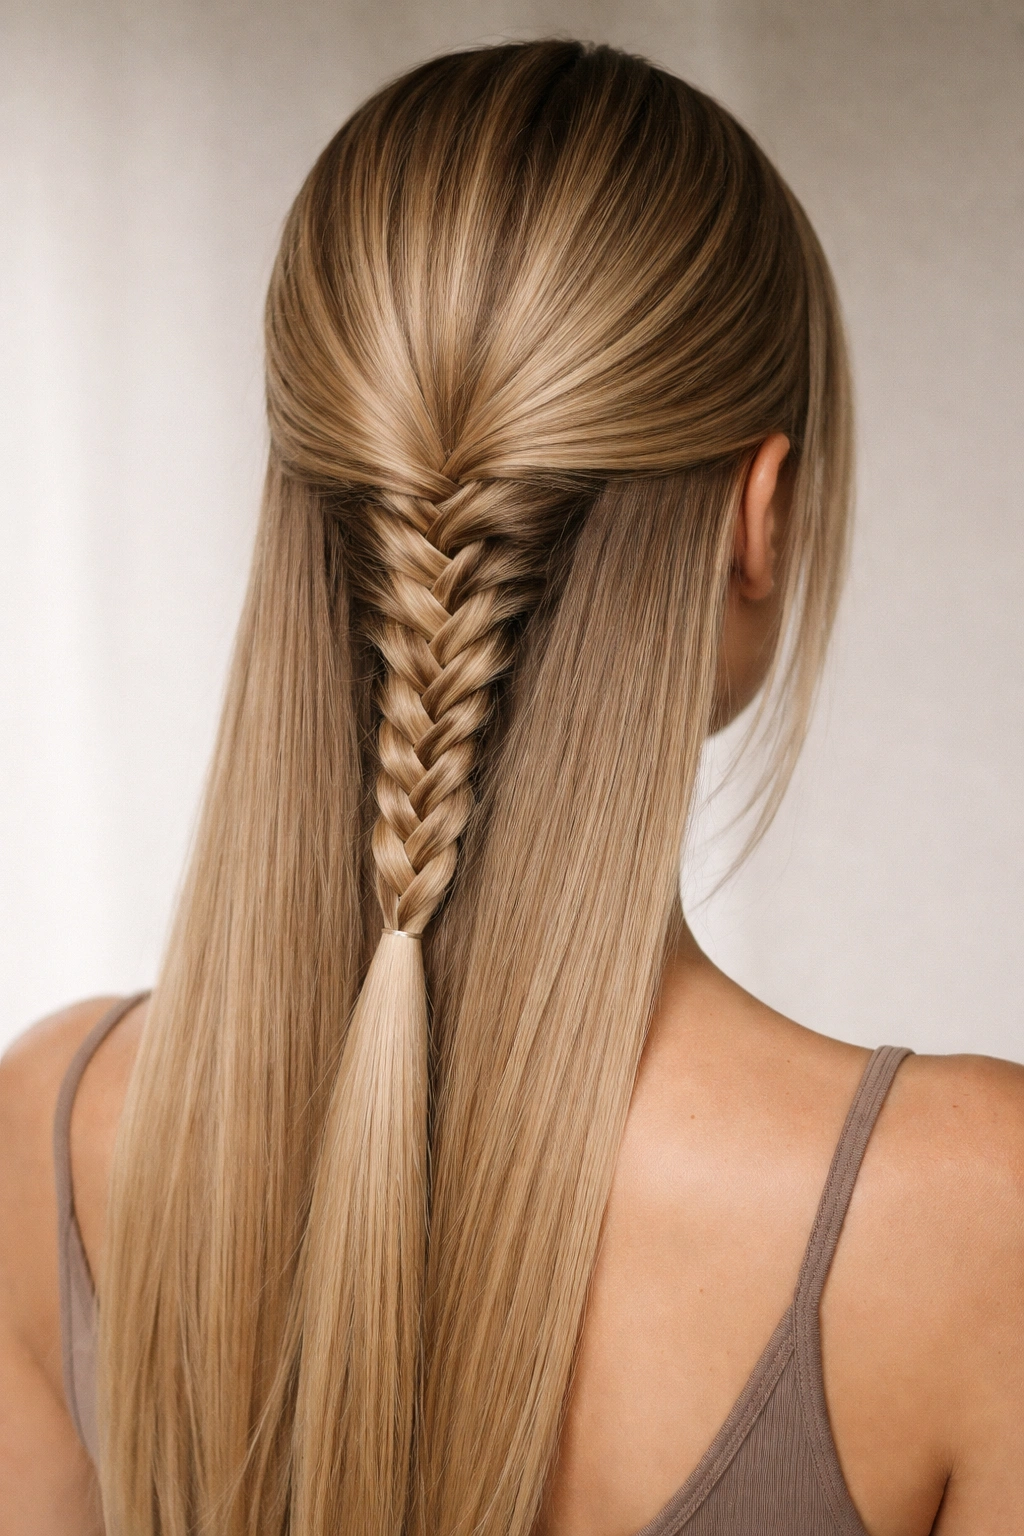
4. Braid-Threaded Half-Up Style
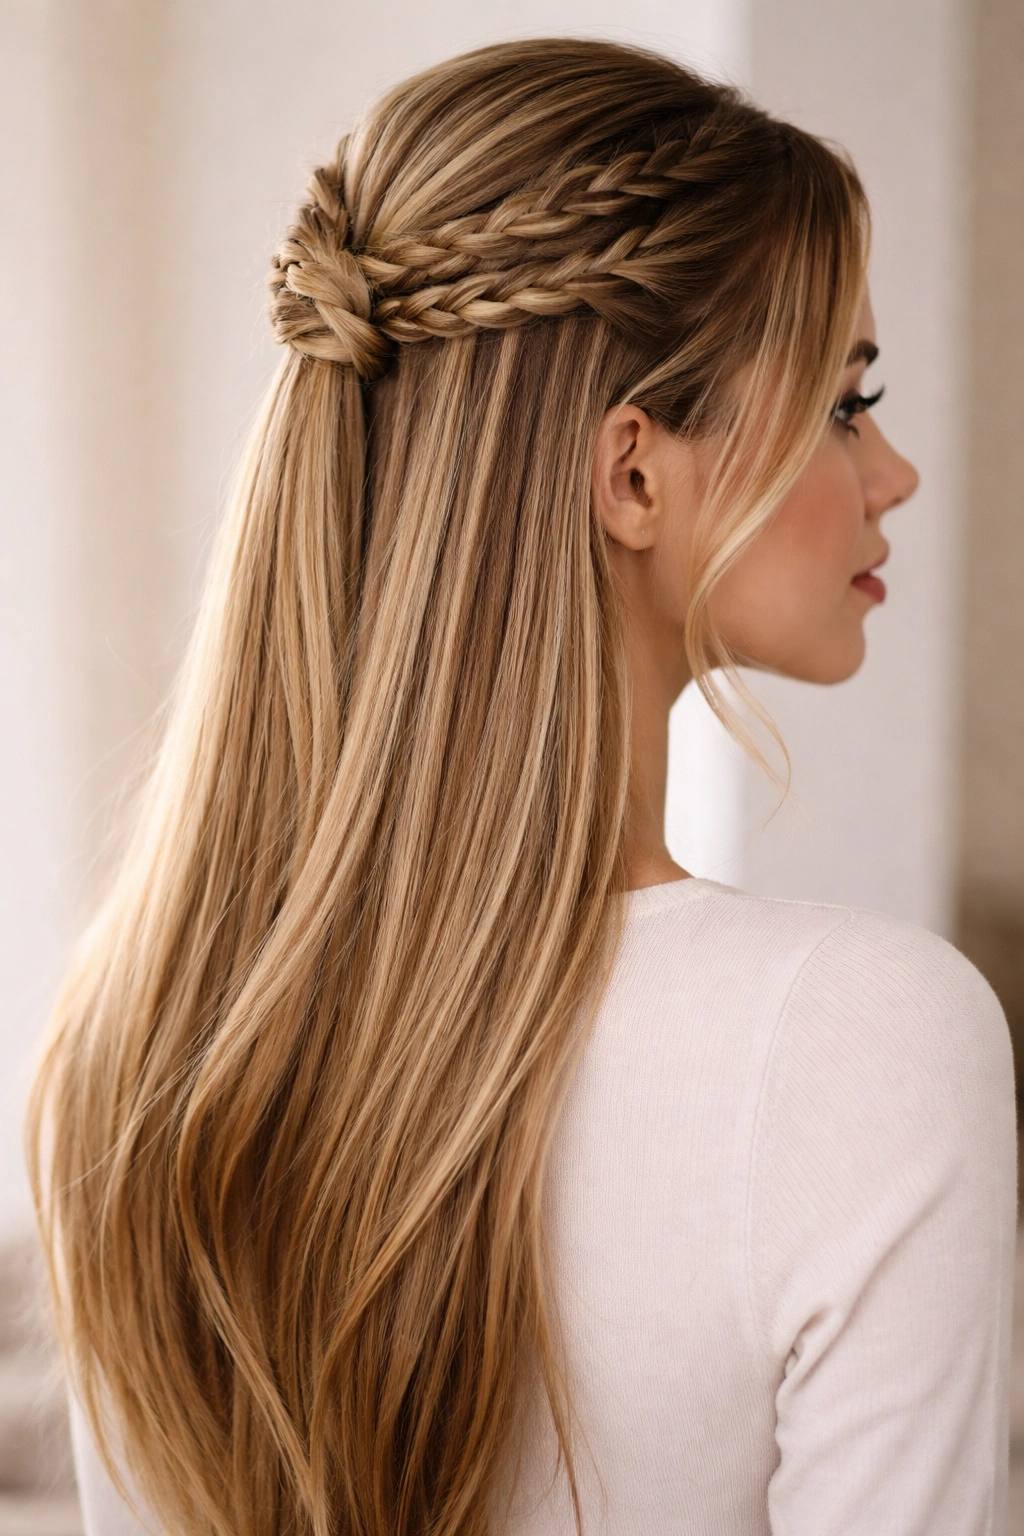
Pull the top half of your straight hair up into a half-up shape, then instead of securing it with an elastic immediately, take sections from the pulled-up hair and braid them before twisting everything together into a knot or securing it. The braids become woven throughout the half-up section, creating texture and visual depth while the bottom half of your hair remains completely straight. This is the style for days when you want maximum visual interest without committing to full-head braiding.
The Appeal of Braid Threading
Threading braids into a half-up style gives you a complex-looking result that’s actually simpler than it appears. You’re not braiding from the roots down — you’re creating braids from existing pulled-up sections, which is much faster. The contrast between the textured braid area and the completely straight lower section is striking, especially from the back view. It’s a style that photographs beautifully because it has clear visual layers and dimension.
How to Build This Look
- Starting at the temples, pull the top section of your hair up toward the back of your crown
- Divide this pulled-up section into three parts
- Braid one section, then braid the second, leaving the third unbraided or lightly twisted
- Secure all three elements together with a bobby pin or small elastic at the back of your crown
- Make sure the braids are visible and intentional — don’t hide them under more hair
- Let the bottom half flow straight and sleek
- Optional: gently loosen the braids by tugging outward for a softer, more romantic interpretation
This works especially well if you have longer hair, because the contrast between textured top and smooth bottom is more dramatic.
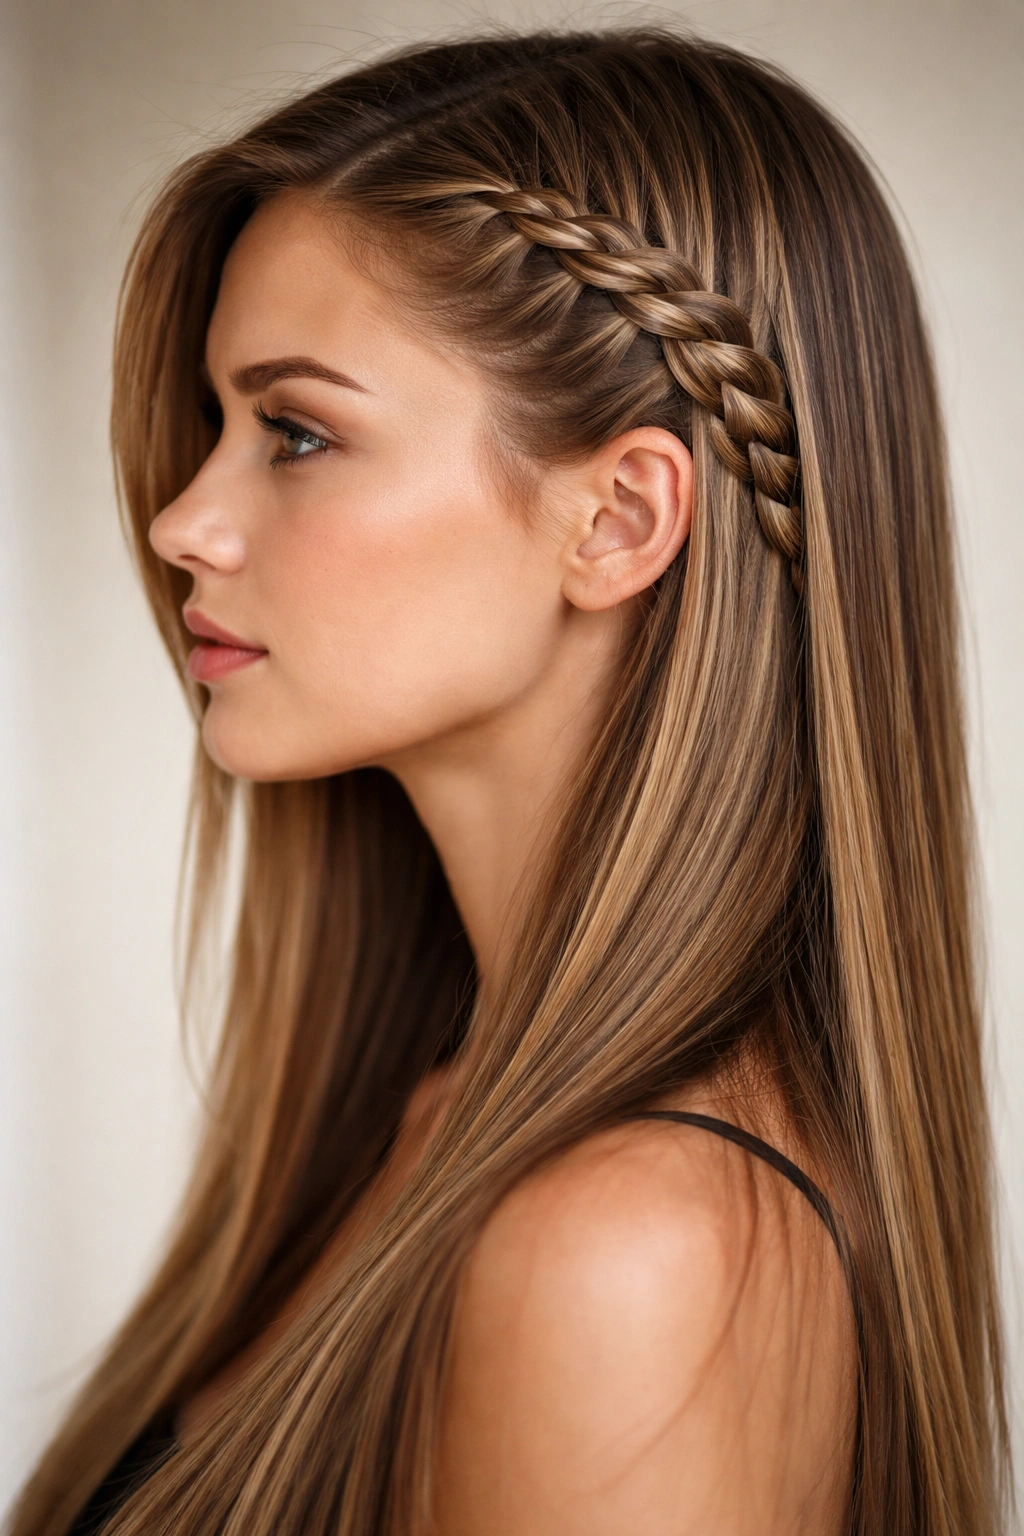
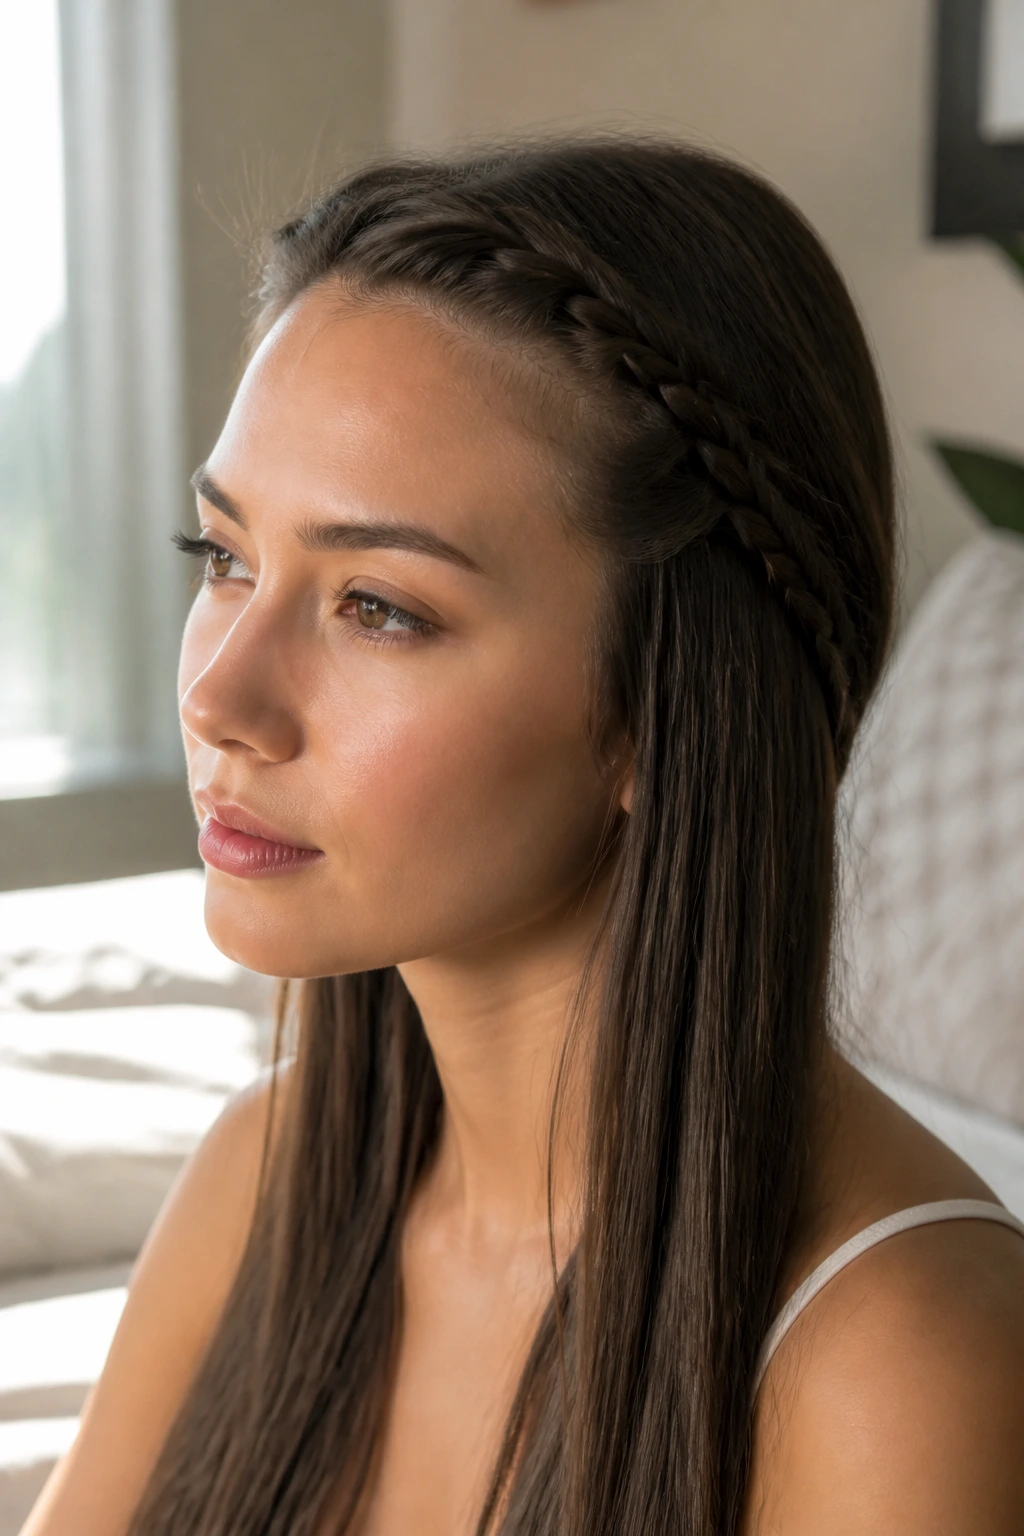
5. Single Thin Side Braid Against Straight Hair
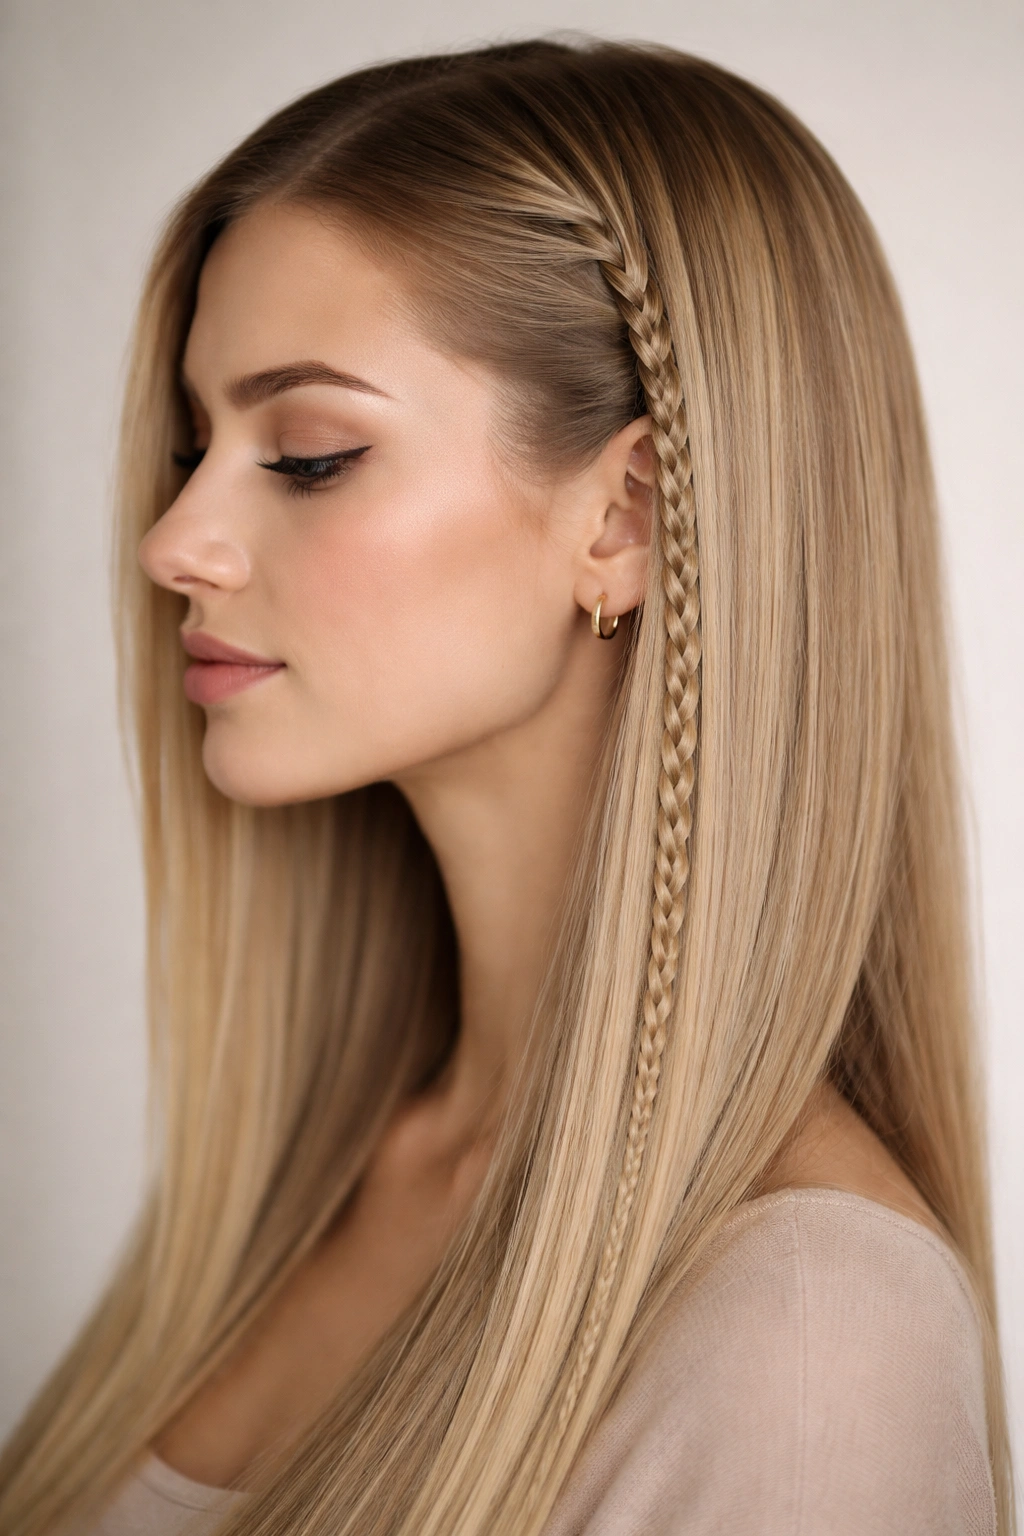
Create one delicate three-strand braid that starts at your temple and winds down the side of your head toward your shoulder, while the rest of your straight hair remains completely down. This is the minimalist approach to braid accents — you’re adding just enough texture to register as intentional without transforming your overall hairstyle. The thinness of the braid means it becomes an accent rather than a structural element, resting against your straight strands like jewelry for your hair.
Why Minimalism Works Here
A single thin braid is the perfect solution if you like the look of braids but don’t want to commit to major styling. It takes sixty seconds, holds all day, and transforms your look from “just straight hair” to “straight hair with a detail.” The thin braid catches light and draws the eye without demanding attention. It’s casual enough for the gym or grocery store, yet put-together enough for a coffee date or casual work environment. Thin braids also work beautifully on thinner or finer hair textures, where bold statement braids might feel overwhelming.
How to Create a Wispy Side Braid
- Starting at your temple, take a small three-strand section about half an inch thick
- Braid straight down the side of your head at a slight angle toward your shoulder
- Keep the braiding loose and relaxed — tightness defeats the purpose of this delicate style
- Secure the end of the braid with a tiny elastic or bobby pin behind your ear
- Gently pull the braid slightly loose by tugging at the sides for a softer, undone look
- The braid should feel almost accidental, like it naturally happened to be there
- This pairs especially well with loose waves, but since we’re keeping the rest straight, the contrast feels very intentional
Worth knowing: This style works beautifully for days when you’ve partially straightened your hair but it still has some natural texture — the braid sits right on top and feels like part of your style, not a competing element.
6. Braid-Pinned Sleek Updo
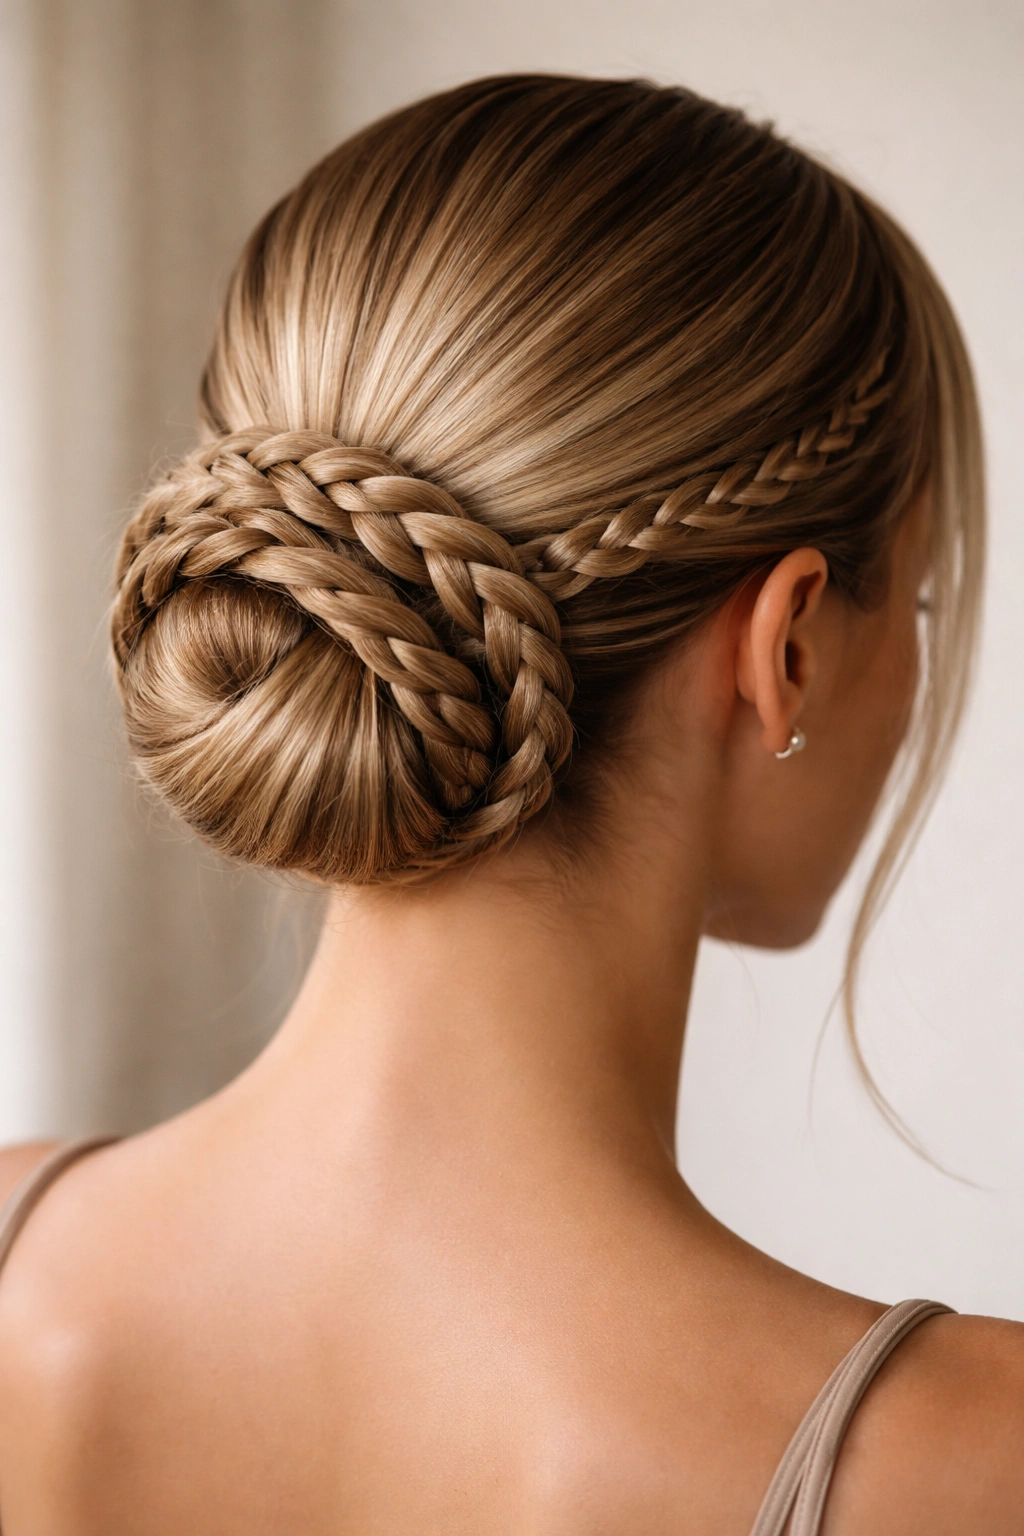
Create multiple small braids from sections of your straight hair, then gather everything into a high or low bun and secure it with bobby pins, arranging the braids so they coil around and define the bun shape. Instead of a simple, plain bun, the braids become the structure — they’re not hidden inside; they’re visible and intentional, wrapping around the bun’s perimeter or clustered at the back. This style reads as elevated and special, perfect for events, professional settings, or days when you want to feel polished.
The Elegance of Braided Updos
A bun created entirely from braids feels more sophisticated than a regular gathered bun because you’re adding texture and effort. The braids catch light, create dimension, and signal that you’ve put thought into your appearance. Because straight hair creates clean, defined braids, each plait is visible and readable — the viewer can actually see the work you’ve put in. This style works on any hair length longer than shoulder-length and scales beautifully from casual to formal depending on how tightly you braid and how polished you make everything look.
Building a Braided Bun
- Divide your straight hair into three or four sections depending on thickness and desired effect
- Create a French or Dutch braid from each section, braiding toward the nape of your neck
- Gather all the braids at the back and twist them together into a bun shape
- Secure the bun with bobby pins, allowing some braids to wrap around the perimeter and others to coil inward
- For a neater, more formal look, keep the braids very close to your head; for softer, more romantic, gently loosen each braid by tugging the edges outward
- Finish with a light hairspray to set everything and catch any flyaways
This works beautifully for everyone from fine-haired individuals (multiple thin braids create the illusion of volume) to thick-haired folks (braiding distributes weight and makes an updo feel less heavy).
7. Reverse Braid With Straight Tail
Start a single braid at the nape of your neck and braid upward toward the crown, creating a reverse or inverted braid that sits low and textured against your head. Leave the top portion of your hair unbraided and straight, falling down your back like a tail. The braid becomes an unexpected anchor at the base of all your straight length, creating visual interest from the back while keeping the front completely smooth and uncomplicated.
The Unique Visual Impact
A reverse braid changes the direction of visual flow — instead of guiding the eye downward, it draws attention upward toward the crown. The braid texture at the base against the smooth straight hair above creates a striking two-part visual composition. This style is perfect if you want to add detail without framing your face or changing how you look head-on. It’s all about the back view, the angle someone sees when you’re walking away — a little secret detail that you’ll notice in photos and mirror reflections.
How to Reverse Braid Successfully
- Start at the nape of your neck with a small three-strand section
- Instead of braiding toward your crown, imagine you’re braiding in reverse — take the back strand and cross it over the middle, then the front strand over the middle, moving upward as you go
- Continue until you reach the crown or as high as you want the braid to extend
- Secure the end of the braid with a bobby pin at the crown, hiding the pin underneath the straight hair above
- Leave all the hair above the braid point completely straight and down
- The contrast between textured base and straight top is the whole point, so don’t try to unify them
Pro tip: This braid actually looks better when it’s slightly loose, so gently tug at the sides after securing to create dimension.
8. Multiple Thin Braids Scattered Throughout
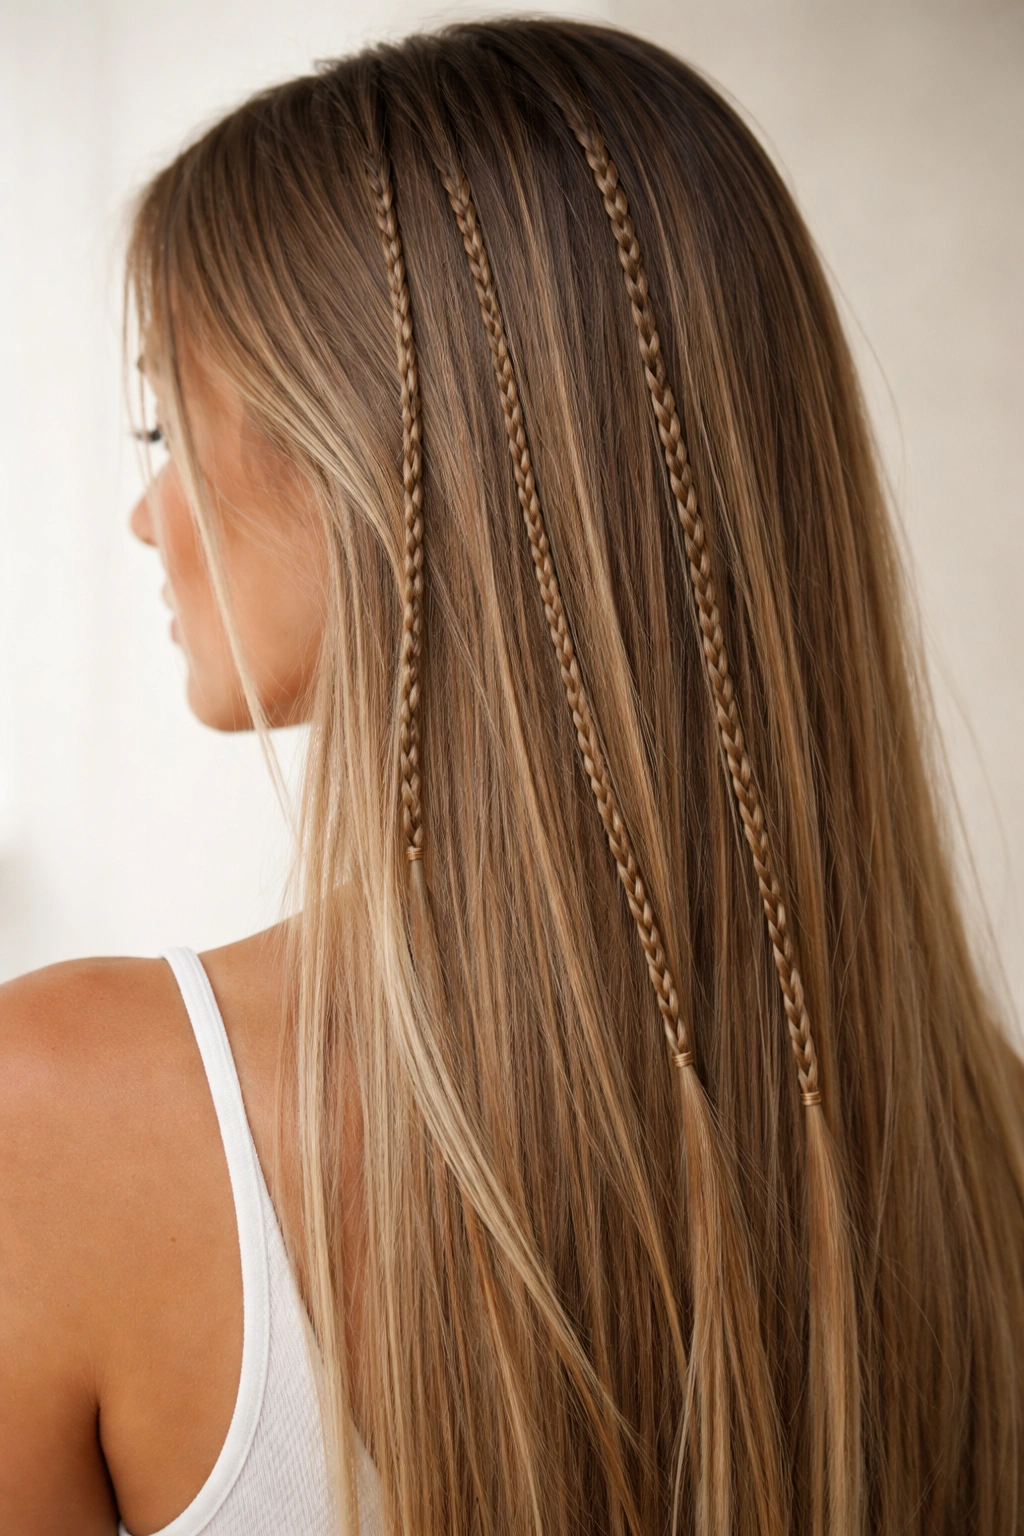
Instead of following a pattern, place three to five very thin braids throughout your straight hair at different positions and angles — one starting at the temple, one behind the ear, one along the side, maybe one at the back. Each braid remains thin and delicate, and they’re positioned somewhat randomly rather than in a coordinated pattern. The effect is like you’ve accessorized your straight hair with textured details scattered throughout, creating interest from every angle without overwhelming the overall sleek aesthetic.
Why Scattered Braids Feel Modern
Scattered braids are the opposite of symmetrical styling — they feel intentional but not matchy-matchy, styled but not overly coordinated. This approach works beautifully on people who like the idea of braids but worry they’ll look too formal or overdone. By scattering them throughout instead of creating a unified style, you get a modern, fashion-forward look that reads as creative and curated. Each thin braid is optional; they complement your straight hair rather than dominating it.
Placement Ideas and Execution
- Create one thin braid starting at your temple, braiding toward the back
- Create another starting behind your opposite ear
- Add a third along the side of your head if you want
- Keep all braids the same thinness for visual cohesion
- Secure each braid with a tiny elastic or bobby pin
- Arrange them so they’re visible but feel like natural accents rather than the main event
- The braids should feel like they’re happening within your straight hair, not on top of it
The beauty of this approach is that it’s customizable — add more braids if you love them, remove one if it doesn’t feel right. There’s no rule that says every braid has to match or coordinate.
9. Bubble Braids for Playful Texture
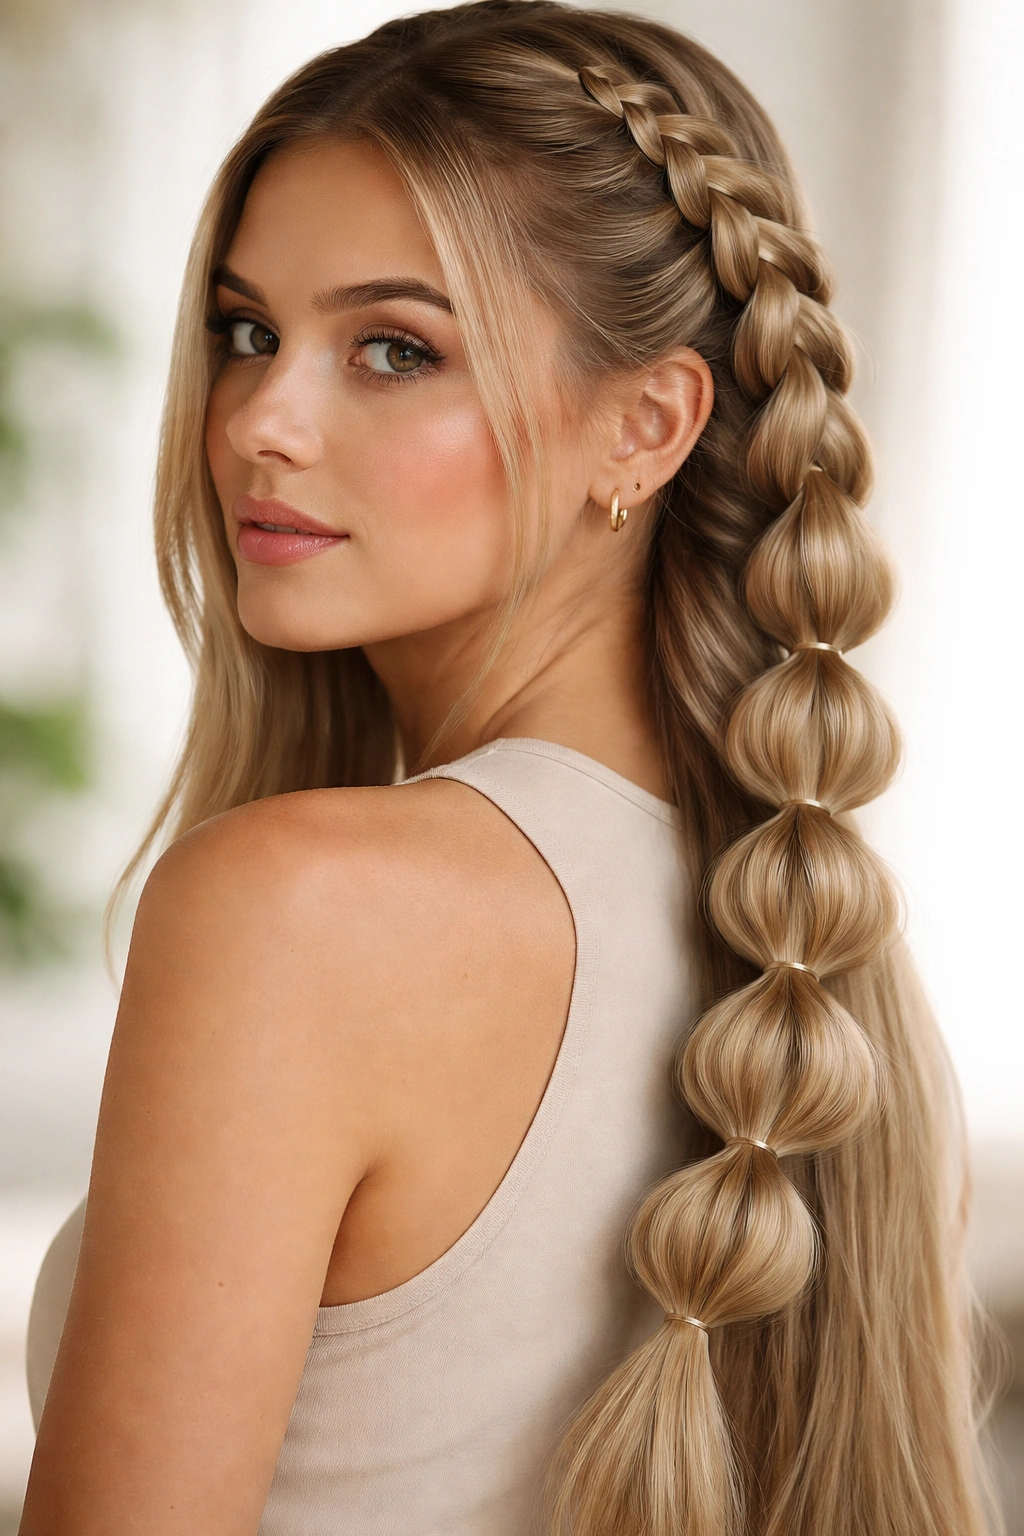
Create a single or double braid down the back or side of your head, then pinch and pull out each section of the braid to create a puffy, bubble-like effect. The straight hair combined with bubbled braids creates a dimensional, almost sculptural hairstyle that reads as playful and intentional. Bubble braids work especially well on straight hair because the cleanness of the original braid becomes more pronounced when you puff out the sections — the contrast between sleek braiding and voluminous bubbles is visually striking.
The Playfulness Factor
Bubble braids instantly make a style feel less formal, younger, and more creative. They’re perfect for casual outings, creative environments, or anytime you want your hairstyle to signal that you’re not taking yourself too seriously while still looking polished. Because your straight hair is the base, the bubbled texture reads as a deliberate styling choice rather than accidental messiness. This style is also incredibly forgiving — if a section doesn’t puff out perfectly, it just looks more intentional and organic.
Creating Picture-Perfect Bubbles
- Create a braid (Dutch or French) starting from the top or side of your head, braiding downward
- Secure the end of the braid with an elastic
- Starting at the top of the completed braid, gently pinch and pull the outer edge of each section outward, creating a bubble or puff
- Work your way down the entire braid, puffing each section consistently
- Pull gently enough to create volume without completely unraveling the braid
- The bubbles should look deliberately placed but still clearly braided
- You can leave some sections puffed and others tight for an intentional mixed effect
This style actually looks better a few hours after creation when the bubbles have softened and settled slightly.
10. Hidden Braids in Straight Ponytail
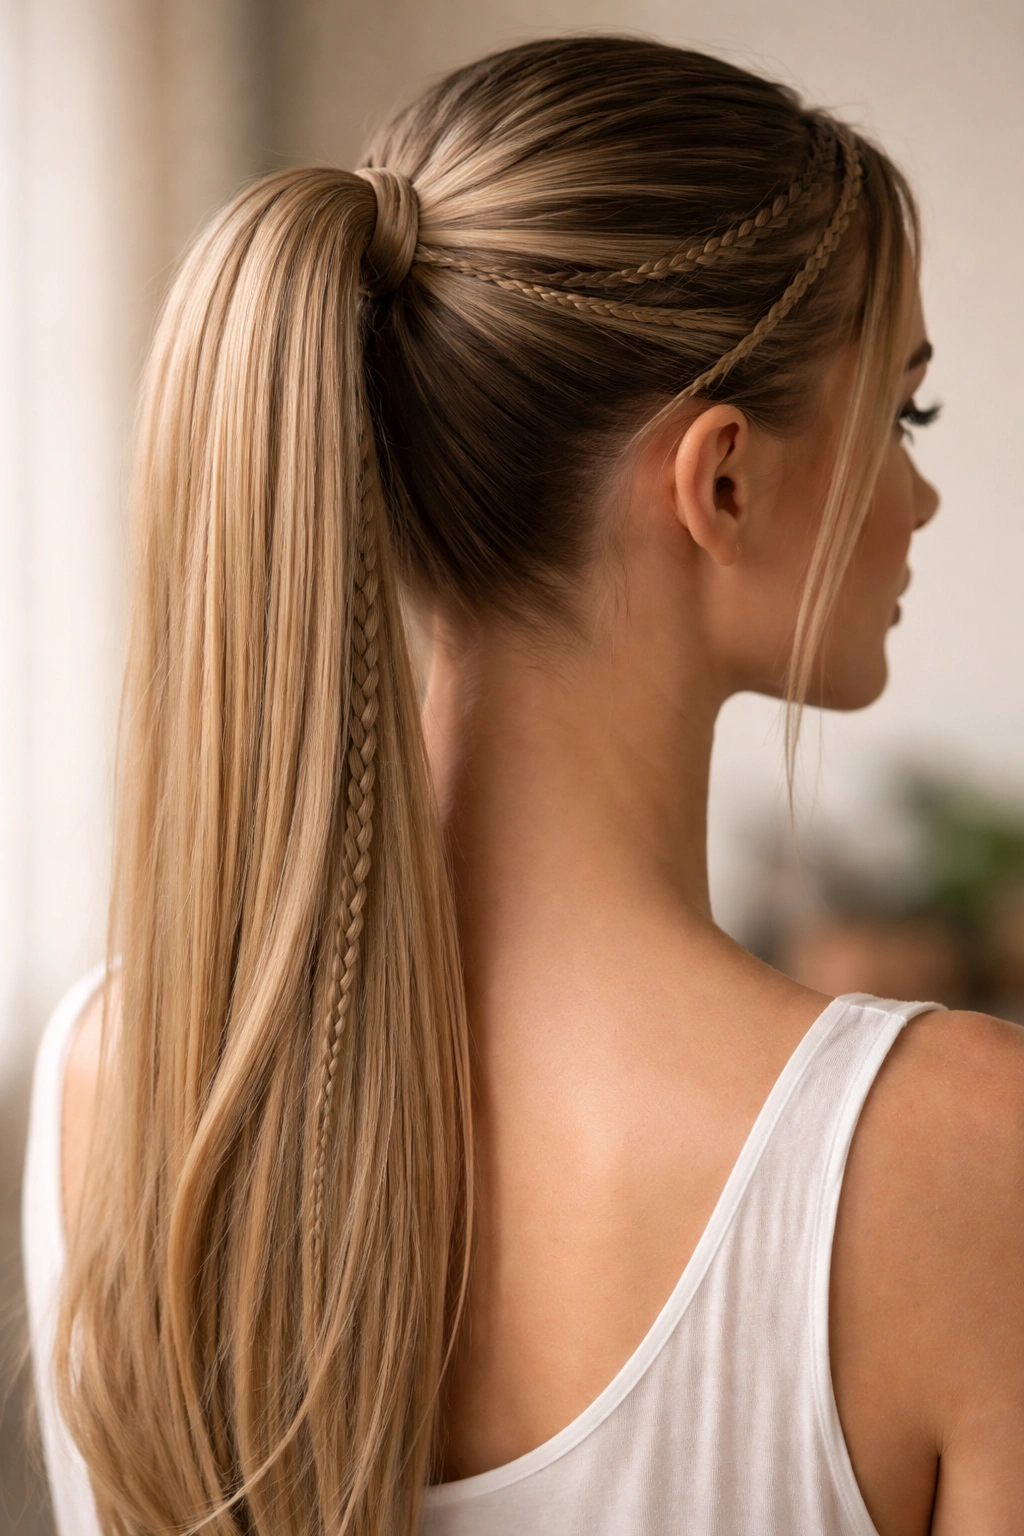
Create two or three braids from front sections of your straight hair, then gather everything together — braids and non-braided hair alike — into a single ponytail, arranging the braids so they wrap around and define the ponytail’s surface. From the front, this looks like a simple, sleek straight ponytail, but from the side and back, the braided texture becomes visible and dimensional. This style is perfect if you like the idea of braids but want the front-facing impression to be clean and minimal.
Strategic Texture Placement
Hidden braids maximize visual interest without committing to an obvious braid look. You’re creating surprise detail for anyone who sees you from behind or from the side, while maintaining a sleek, straightforward appearance from the front. This approach works brilliantly for professional environments where you want to look put-together but not overly styled. It’s also an excellent solution for days when you want braids but aren’t feeling confident wearing them prominently.
Building Your Textured Ponytail
- Create two or three thin French braids starting from the front/temple areas, braiding toward the back
- Gather all of your hair — both braided and non-braided sections — into a low or high ponytail depending on your preference
- Arrange the braids around the outside of the ponytail, using bobby pins to position them so they frame and define the ponytail’s shape
- This arrangement means the braids are visible from behind but completely hidden when you’re facing someone head-on
- Secure everything with a sturdy elastic that matches your hair color
- The braids should feel like they’re an integral part of the ponytail, not an afterthought
Worth knowing: This style photographs beautifully from behind because the braided texture pops against the straight ponytail length.
Final Thoughts
Combining straight hair with braid accents gives you the best of both worlds — the sleek, polished ease of straight strands plus the texture, detail, and visual interest that braids provide. Whether you choose a bold crown braid, a delicate side accent, or scattered details throughout, you’re leveraging the natural clarity and definition that straight hair brings to braiding. These styles range from sixty-second minimalist additions to more involved updos, meaning you’ve got options whether you’re rushing out the door or wanting to create something special.
The magic of these combinations is that they work on every hair length, every hair thickness, and every face shape. Straight hair is the perfect canvas for braids because there’s no texture competition or wave pattern softening the plaits. Your braids show up crisp, defined, and intentional. Start with whichever style resonates most with your lifestyle, and remember that the best braid is the one you’ll actually take the time to create. Once you master one or two approaches, adding braids to your styling routine becomes as automatic as straightening your hair in the first place.