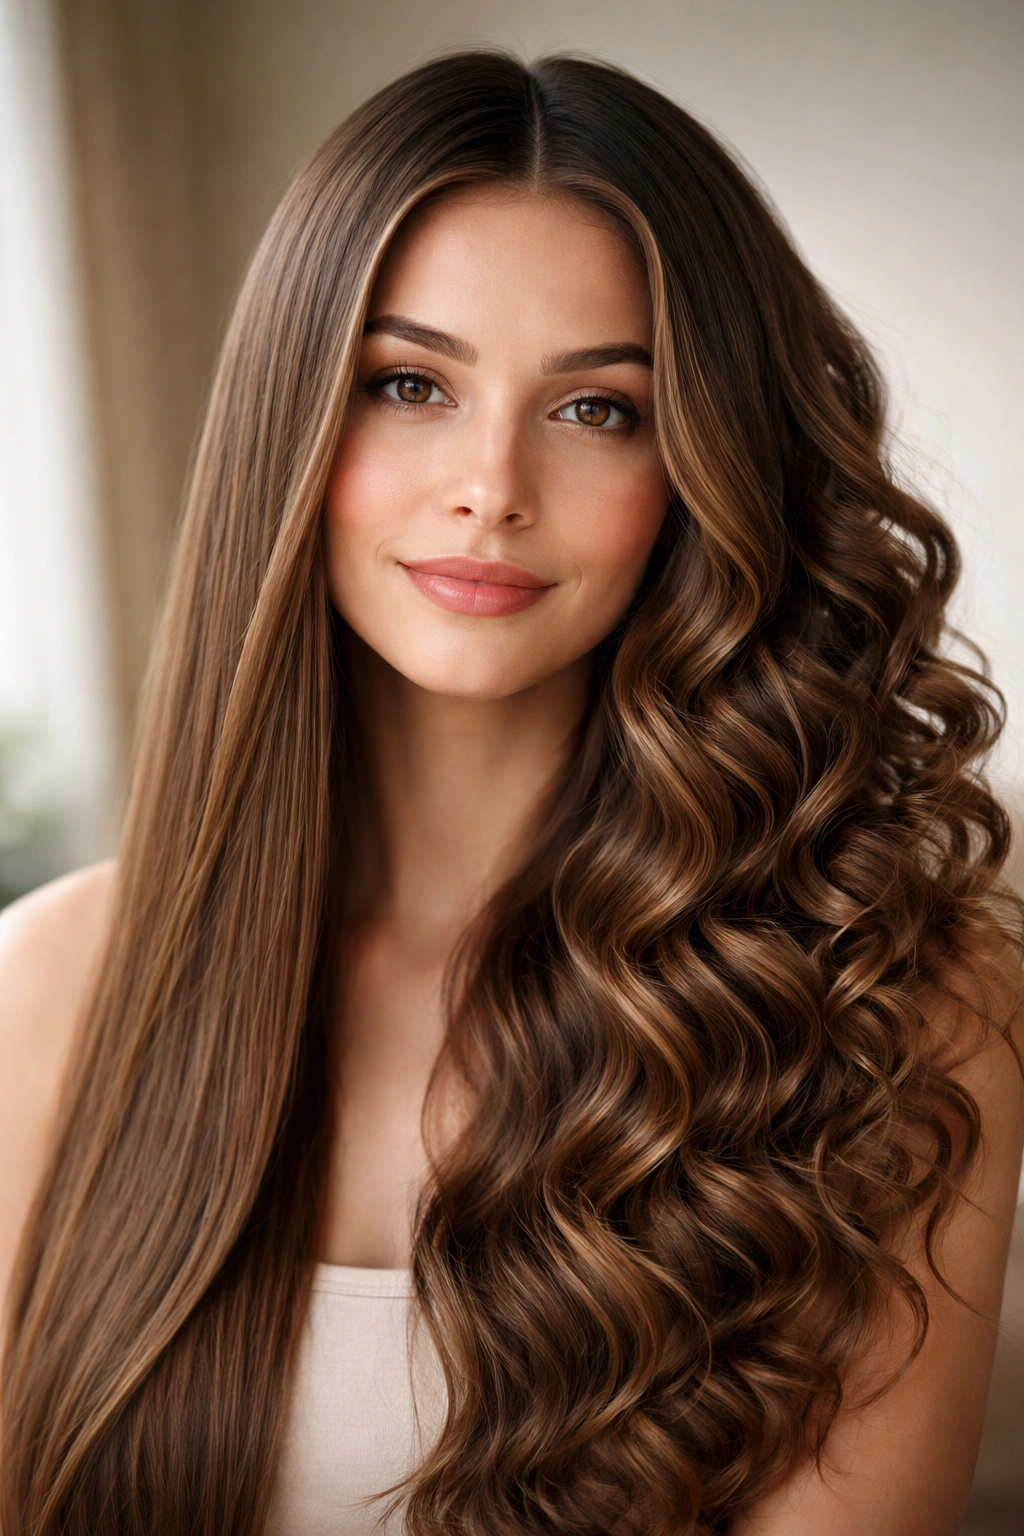
Getting bouncy, defined curls from naturally straight hair used to feel like an either-or choice: damage it with harsh chemicals or settle for limp, disappointing results. Flexi rods changed that equation entirely. These flexible foam rollers work with your hair’s texture rather than fighting it, creating lasting curls through a gentler tension method that actually improves hair health over time. The best part? The technique isn’t one-size-fits-all. How you wrap, where you place your rods, and what method you choose completely transforms the outcome—from tight spirals to loose waves, from volume at the roots to definition throughout. If you’ve got straight hair that’s never held a curl before, the right flexi rod method can finally make that happen, and you’ve probably got more options than you realize.
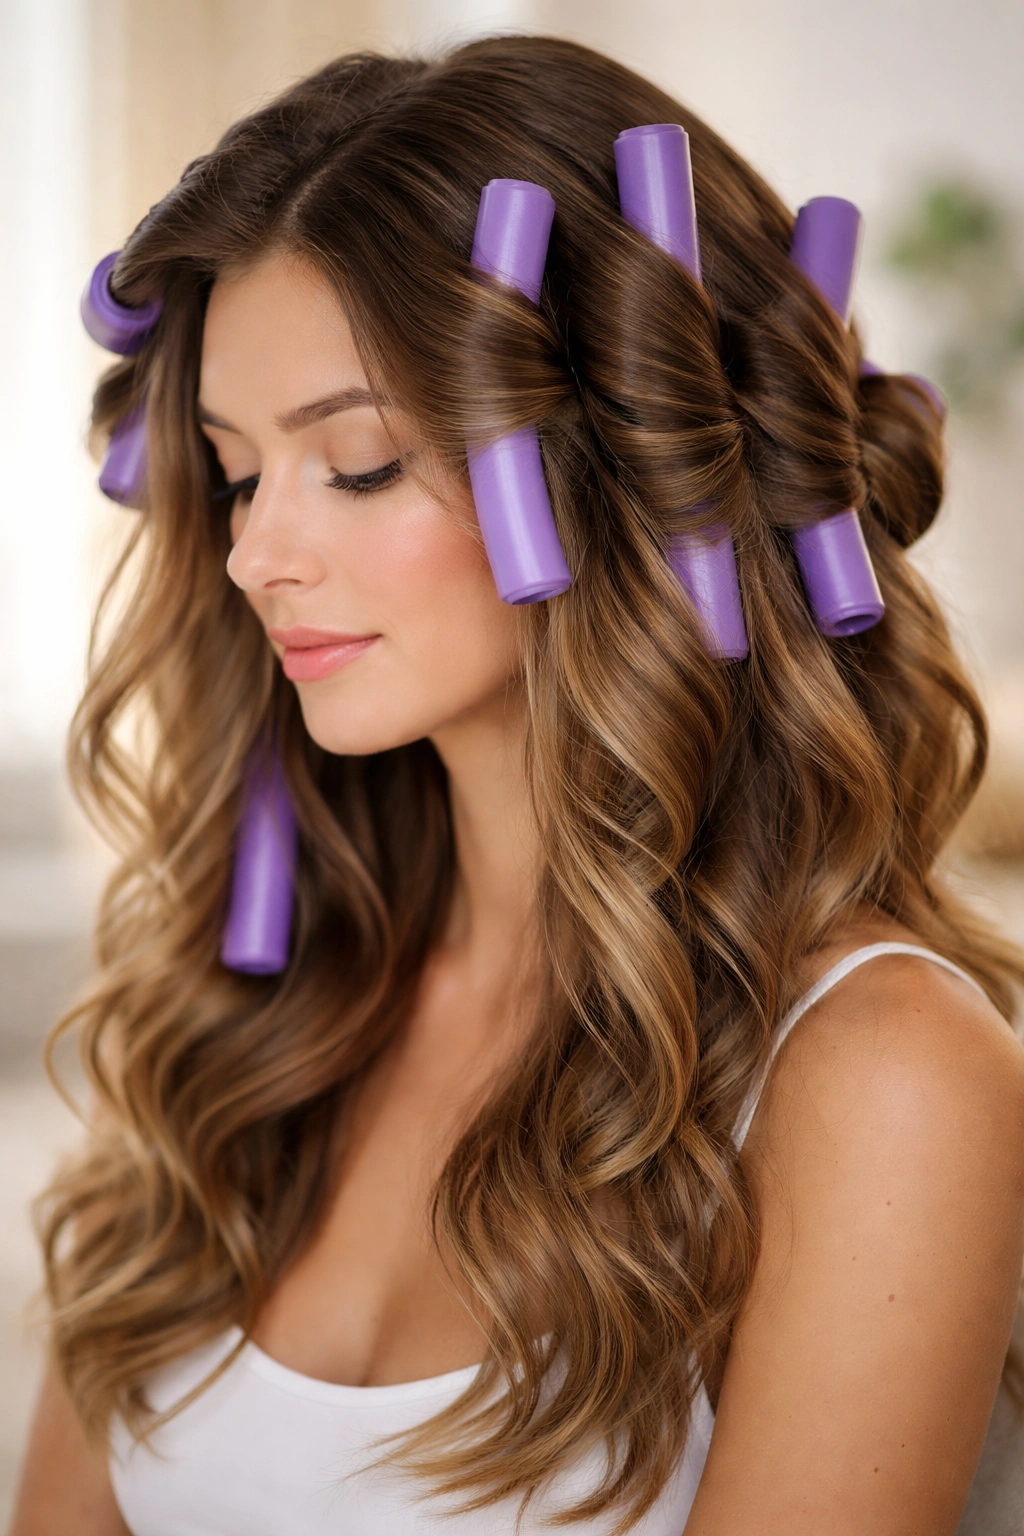
1. Classic Overnight Curls on Damp Hair
The foundation of flexi rod success lies in timing and moisture. Starting with damp—not soaking wet—hair creates the perfect canvas for curl formation. Soaking wet hair takes forever to dry and creates frizz; completely dry hair won’t take a curl at all. Damp hair (roughly 60-70% dry) allows your curls to set through the entire drying process without the hair becoming brittle.
How Moisture Creates Lasting Curl Memory
Hair is most receptive to shape when it’s in this moist state because the hydrogen bonds that determine your hair’s texture are temporarily flexible. As your hair dries around the rod, those bonds reset into the new curled shape—that’s when you get genuine curl memory instead of just a temporary bend. Straight hair needs this deliberate moisture window because your hair’s natural pattern is already programmed to be straight. You’re essentially reprogramming those bonds by holding them in a curved position while they reset.
Step-by-Step Application for Overnight Sets
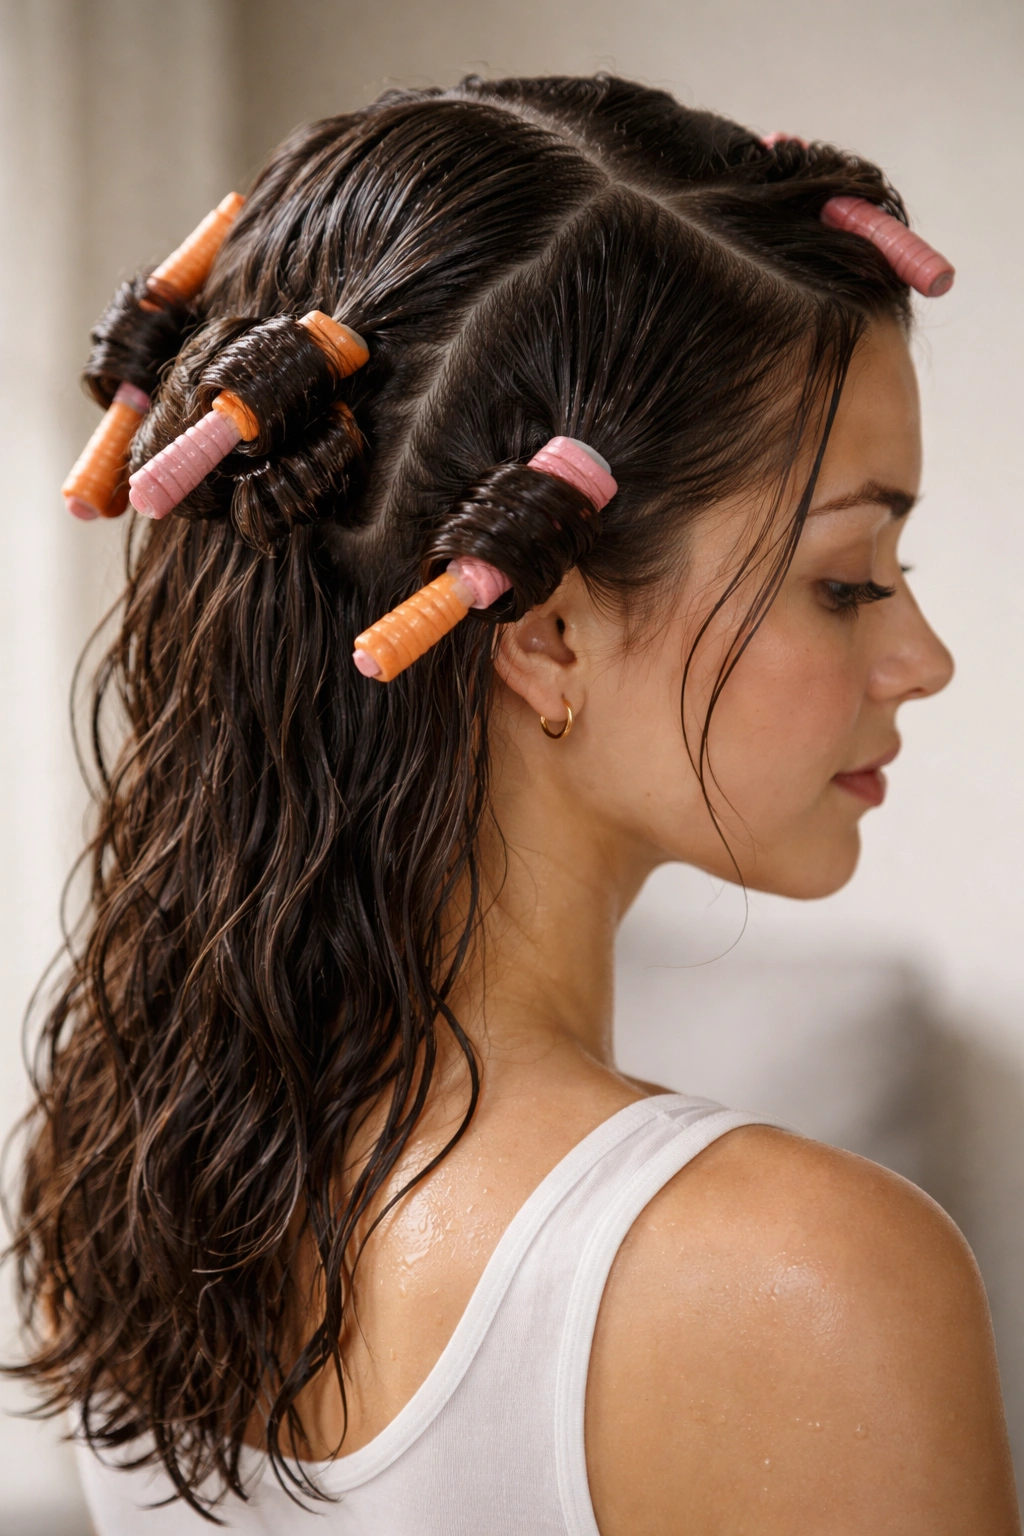
Work through your hair in sections—typically four quadrants for medium-length hair. Apply a curl-setting mousse or lightweight styling cream to each section, then comb through with a wide-tooth comb to distribute evenly. Take a subsection about the width of your rod, place the rod at your hair ends, and roll upward toward the roots with gentle tension. The key is consistency: every roll should be equally tight, with no loose sections that won’t curl properly. Secure the rod by bending the flexible ends together. Sleep on a silk or satin pillowcase to reduce friction, and leave the rods in for at least 6-8 hours—overnight is ideal because gravity naturally helps set the curl as your head rests against the pillow.
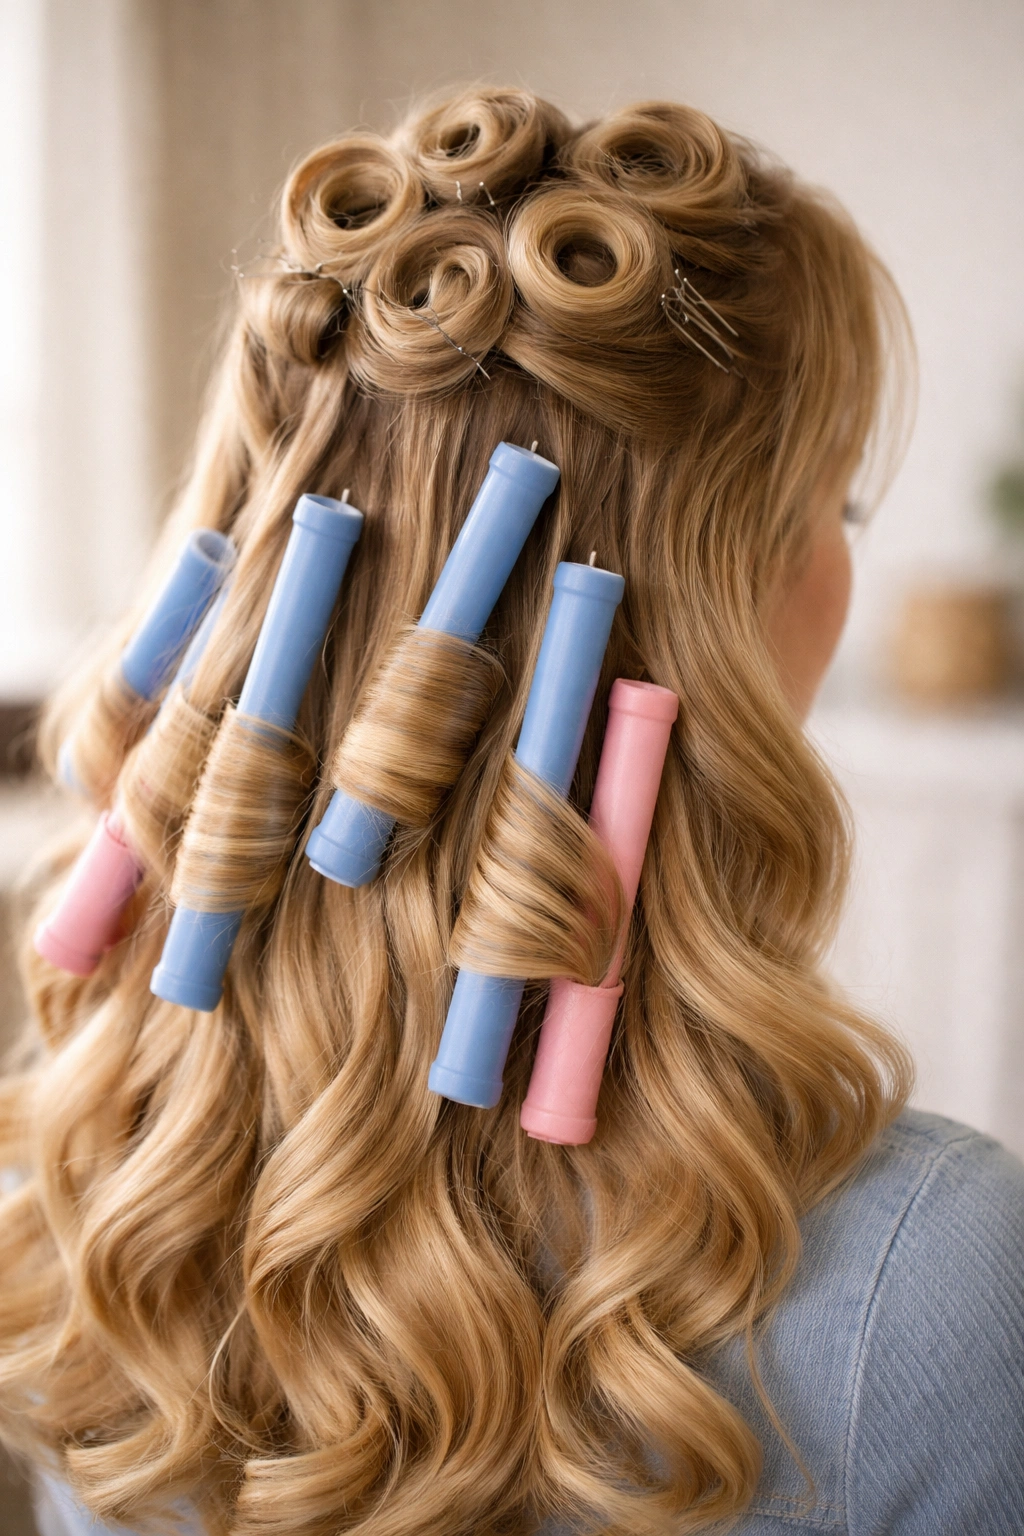
2. Spiral Wrapping Method for Defined Ringlets
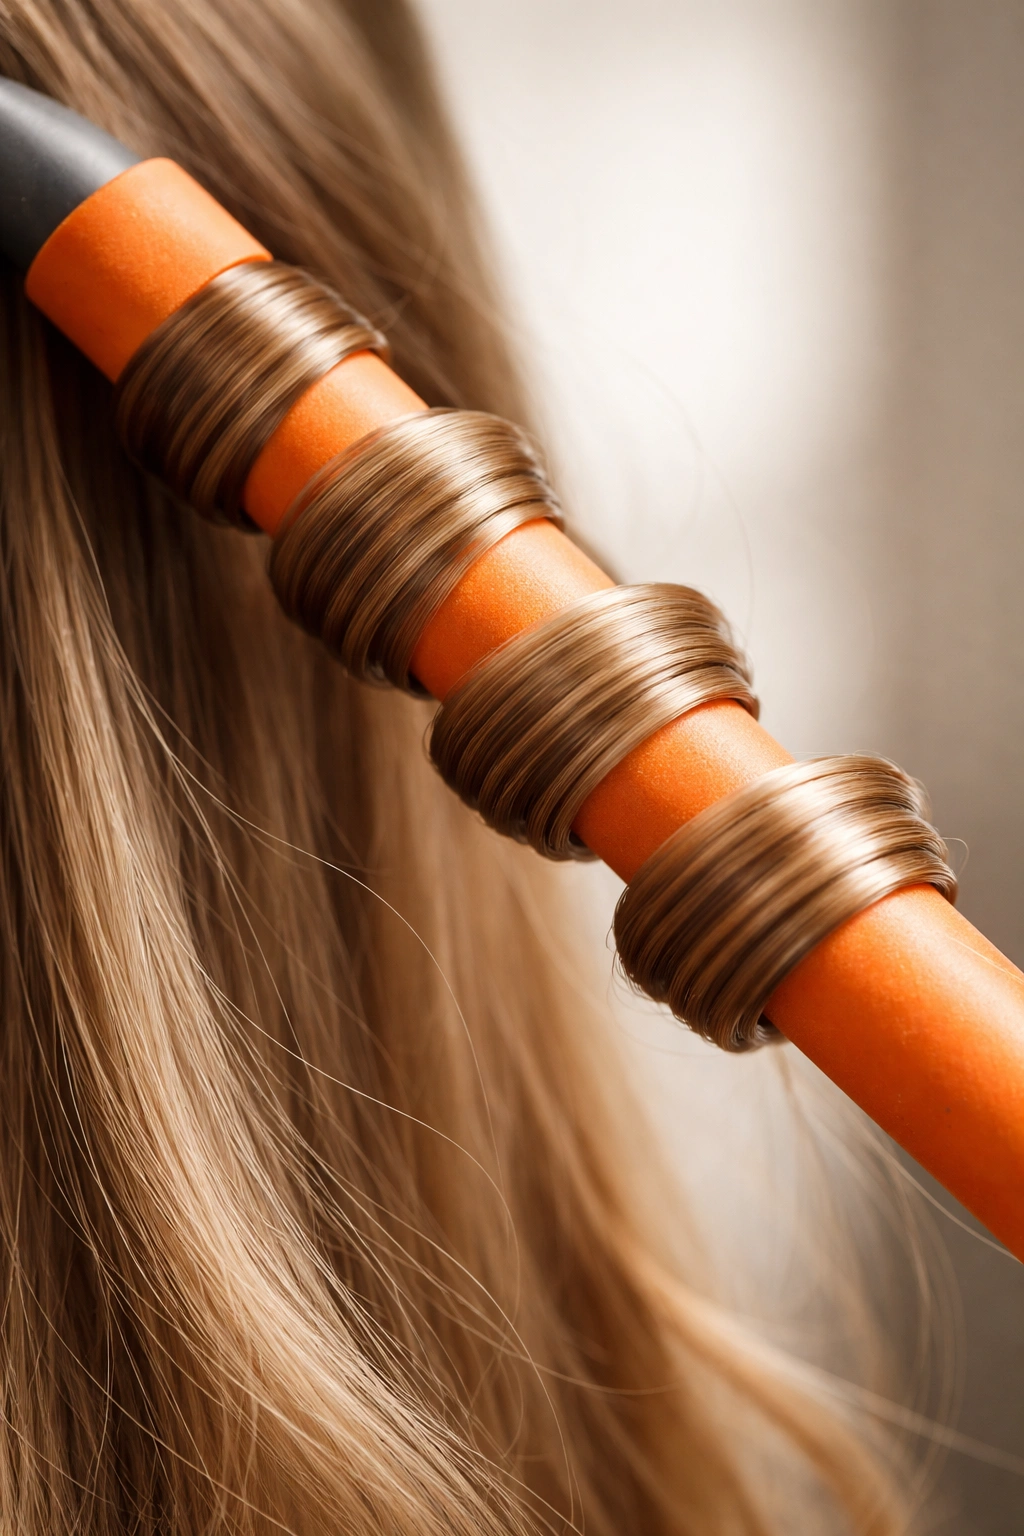
Spiral wrapping creates those tight, bouncy ringlets that catch light and move independently. The difference from classic rolling is how you thread the hair onto the rod—instead of rolling perpendicular to your scalp, you spiral the hair around the rod in a helical pattern, almost like a corkscrew.
Why Spirals Create Tighter, Longer-Lasting Curls
When you spiral-wrap, you’re creating more surface contact between your hair and the rod, which means more even tension distribution and a tighter curl formation. The spiral pattern also naturally aligns your hair cuticles in one direction, which reduces frizz and increases shine. Straight hair benefits enormously from this method because the extended contact time allows the curl to really set into the hair structure rather than just sitting on the surface.
How to Execute Perfect Spirals Without Tangling
Start at the very tip of your hair section and begin wrapping around the rod at a slight diagonal angle—not a 90-degree angle. As you roll upward, maintain that same diagonal so the hair naturally wants to stay in the spiral pattern without sliding. This requires a bit more finesse than basic rolling, but it’s worth mastering because the results are dramatically different. Work slowly through this first time, and don’t rush—a rushed spiral becomes a tangled mess. Once you do it a few times, your hands naturally find the motion. Use a fine-tooth comb to smooth each layer as you go, which prevents tangling and ensures even tension.
3. Root-Lifting Technique for Maximum Volume
If your straight hair has always fallen flat against your scalp, root-lifting rods solve that problem by placing the roller directionally against your scalp’s natural curve rather than straight up from the root. This technique specifically targets how your roots form.
The Biomechanics of Root Lift
Roots determine overall volume—flat roots mean flat hair, no matter how curly the lengths are. When you place a flexi rod parallel to your scalp (tilted back slightly toward the nape of your neck) instead of perpendicular to it, the curl that forms at the root stands away from your scalp rather than collapsing against it. Straight hair doesn’t naturally have this lift, so you’re actively fighting gravity and your hair’s own weight. The root-lifting position counteracts both.
Placement Strategy for Lasting Lift
Divide your hair into sections, then place your rod at the root area with slight upward tension—tip the rod backward about 15 degrees from vertical. Roll only the root section onto the rod (roughly the first 2-3 inches from your scalp), leaving the mid-lengths and ends unrolled or rolled on a separate, larger rod. This two-rod system takes longer but creates that coveted “curly on top, waves below” look. Smaller rods at the roots, larger rods down the hair shaft. Leave the root rods in longer—at least 8 hours minimum—so the curl sets properly in that crucial foundation area.
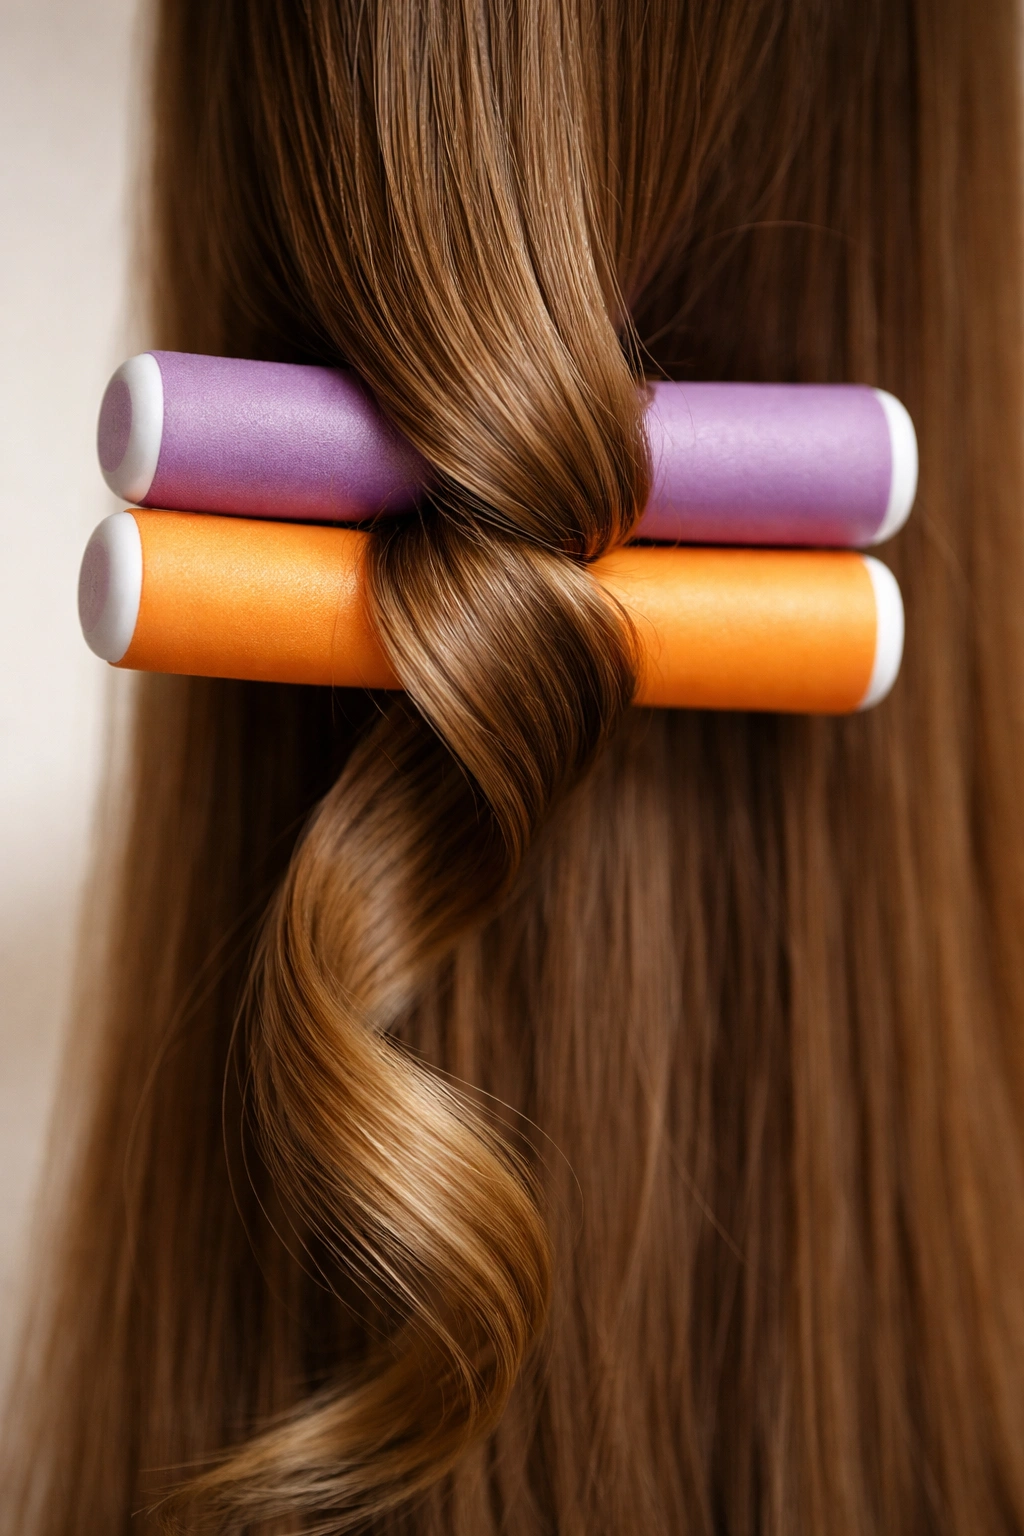
4. Double Rod Stacking for Enhanced Texture
Double stacking uses two rods per section, one placed above the other, to create deeper texture and more complex curl patterns. This isn’t the easiest technique, but it’s wildly effective for straight hair that needs convincing to hold any texture at all.
Why Stacking Creates Richer, More Dimensional Curls
One rod creates a simple curve; two rods create multiple curves within the same hair section. This layered approach means your curl has several “anchor points” instead of just one, making it far more resistant to gravity and humidity. The upper rod typically creates a tighter curl, and the lower rod creates a looser wave, which together produce that salon-style dimension that’s hard to achieve any other way. For straight hair, this multiplication of curl points is genuinely transformative.
How to Stack Without Causing Breakage
Place your first rod at the roots and roll upward about halfway through your section—roughly to ear level or shoulder level depending on length. Secure it. Then place a second rod just below the first one and roll the remaining hair length onto that rod. Make sure both rods are equally tight—no loose first rod with a tight second rod, or vice versa. This requires practice to get the tension consistent, but it’s essential for a polished look. The time investment is higher (you’re using twice as many rods), but the results justify it, especially for important occasions or when you want your curls to truly last all week.
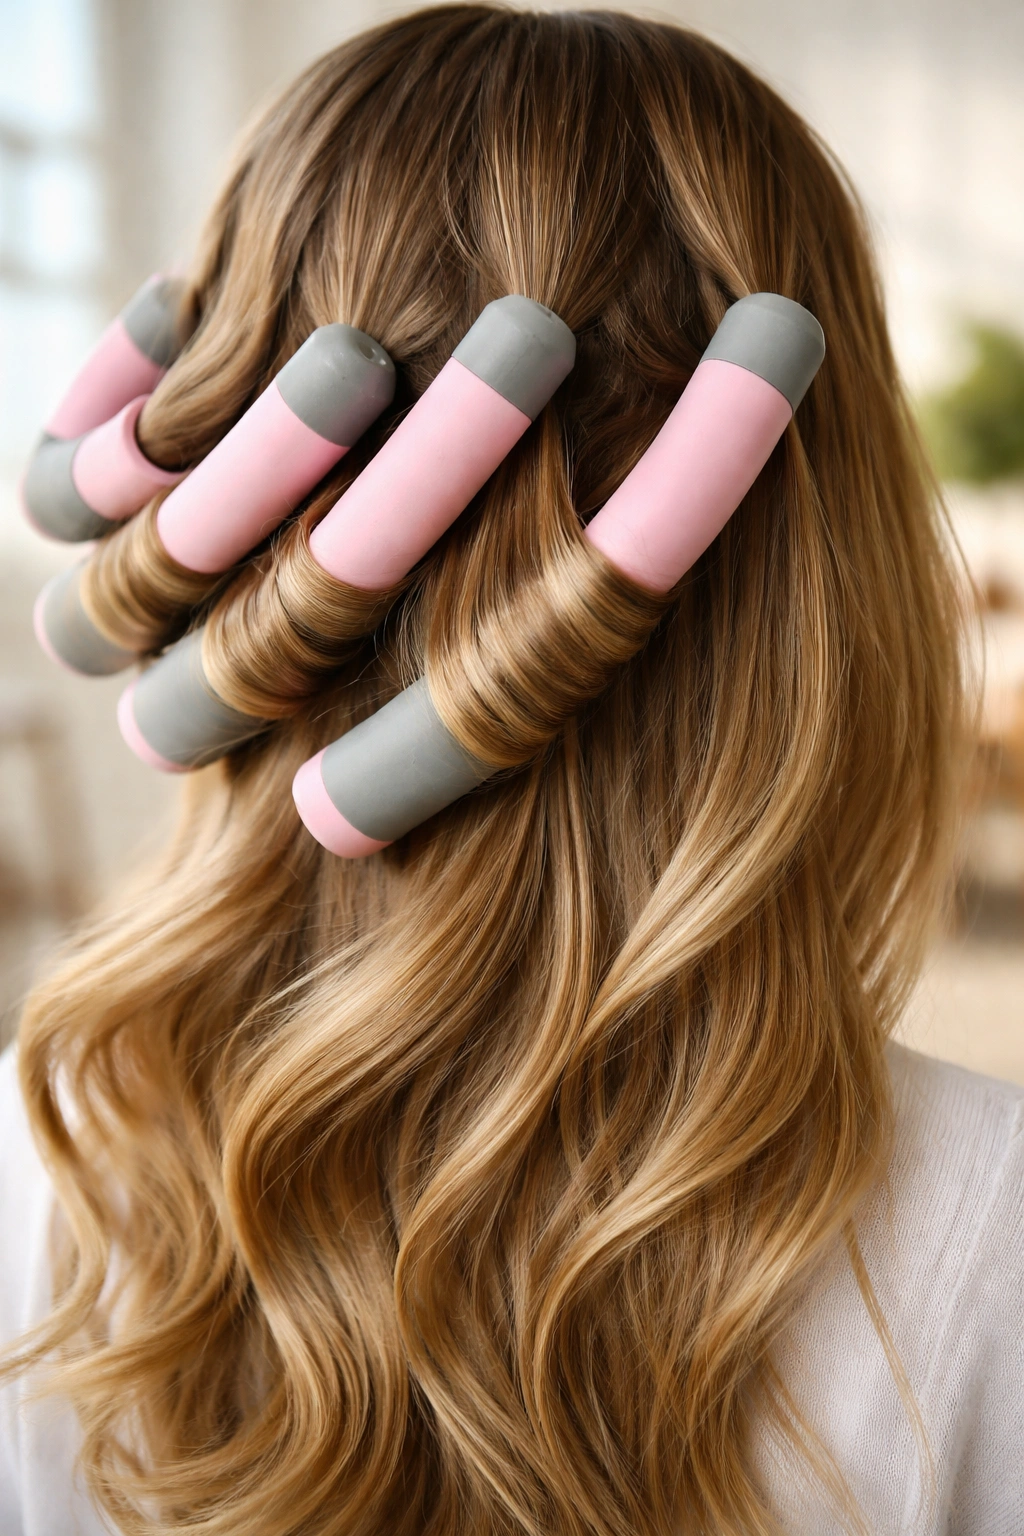
5. Barrel Curls for Soft, Romantic Waves
Barrel curls use medium to large rods placed vertically down your head in a simple, repeating pattern. This is the most straightforward technique and the one most people think of when they picture flexi rods, but it’s deceptively powerful for creating soft waves rather than tight curls.
How Barrel Size Dictates Curl Tightness
The rod’s diameter directly determines your curl’s diameter—small rods (¼-inch) create tight ringlets, medium rods (½-inch) create defined curls, and large rods (¾-inch or bigger) create loose waves. Straight hair responds beautifully to large barrel curls because the technique feels less harsh—you’re not fighting your hair’s natural pattern as dramatically. A large barrel rod has the added benefit of giving you volume and movement without the commitment of tight curls. If you run your fingers through large barrel curls while they’re still setting, they relax into waves rather than falling flat. This flexibility (pun intended) makes the barrel method forgiving for beginners.
The Simple Section-and-Roll Pattern
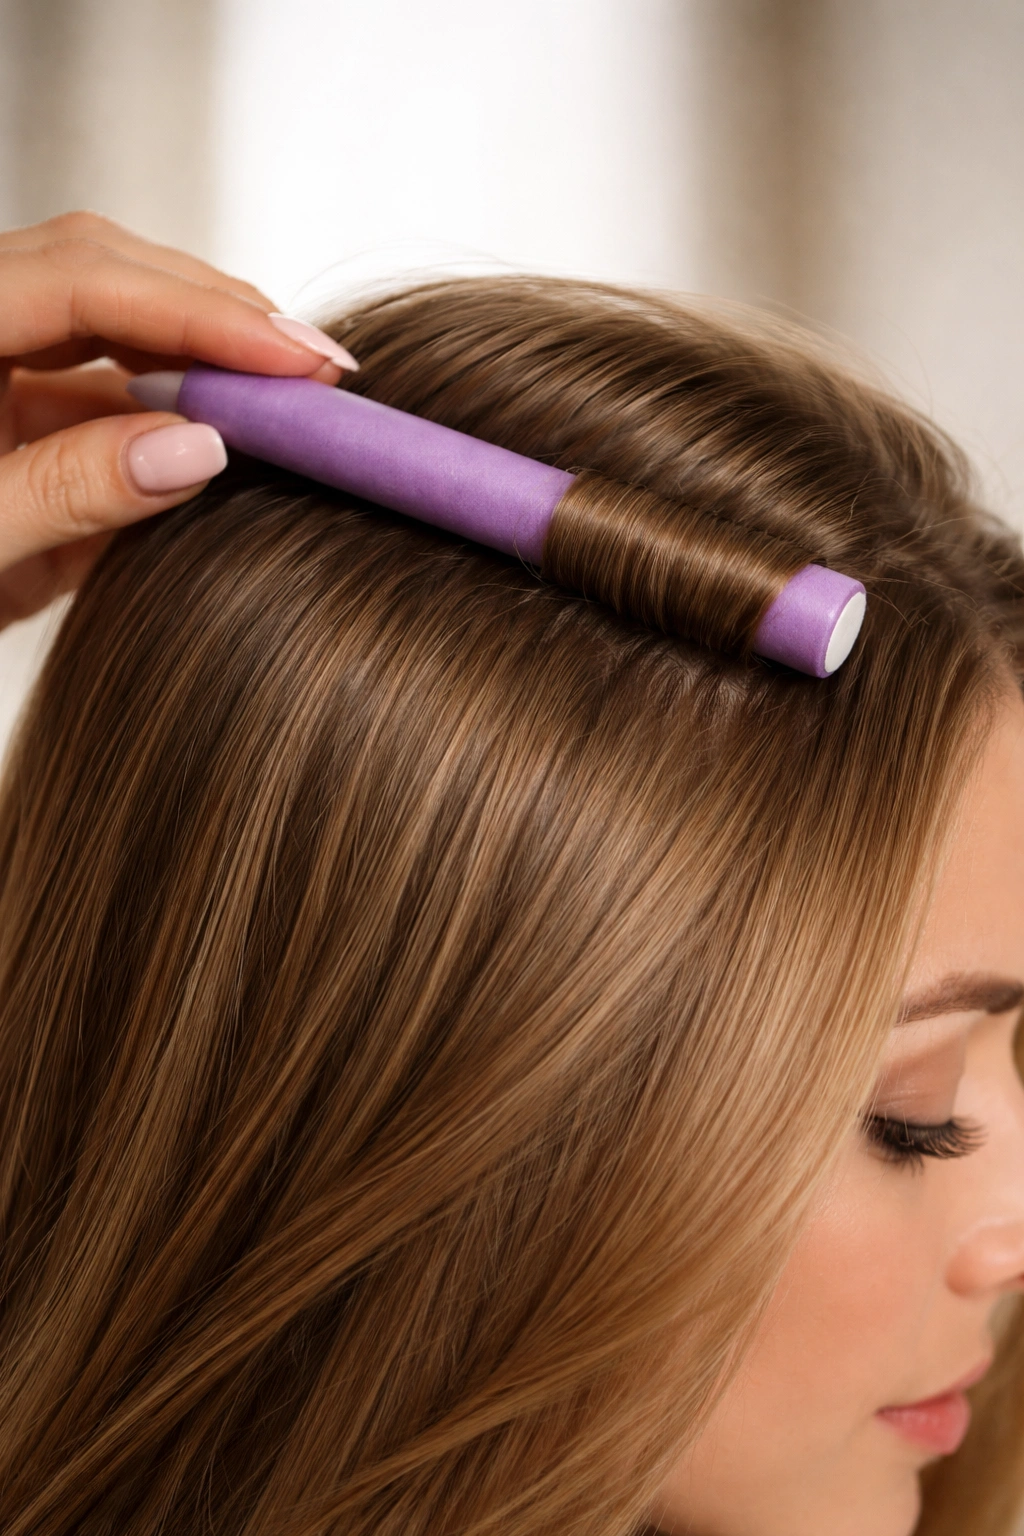
Divide your hair into roughly 1-inch vertical sections from front to back. Roll each section straight up from root to tip, maintaining even tension throughout. The key is consistency: if section one is loosely rolled and section two is tightly rolled, you’ll get a patchy, uneven result. Work methodically through your entire head in the same rolling direction—always rolling the same direction (say, away from your face) creates cohesive waves rather than confused texture. This pattern is the most time-efficient because you’re not doing complex spirals or double-stacking, just straightforward vertical rolling.
6. Pin Curl Hybrid Method for Vintage Texture
Combining flexi rods with pin curls—small twists pinned against your scalp—creates ultra-defined texture that mimics classic vintage sets. Pin curls at the roots hold the foundation while flexi rods through the lengths create body and definition.
Why Vintage Stylists Loved This Combination
Pin curls grip your scalp directly, creating lift and shape right where it matters most. Flexi rods create defined shape through the hair lengths. Together, they create a complete curl from root to tip with multiple anchor points. Straight hair absolutely benefits from this layered approach because you’re not relying on any single technique—you’re stacking two methods specifically designed to fight gravity and the hair’s desire to fall flat. Vintage waves that last all week become genuinely possible.
Execution: Pin Curls Then Rods
Start at the crown and create three to five small pin curls (basically twist small sections of hair, then pin them flat against your scalp with bobby pins). These curls face different directions—one clockwise, the next counterclockwise—which creates that dimensional wave pattern. Then, on the remaining hair (sides and back), roll medium to large flexi rods vertically. The pin curls set while you sleep; remove them gently in the morning to reveal soft waves, and the rod-set curls add fullness and movement below. This technique takes longer to set up but produces results that genuinely look like you visited a professional salon.
7. Alternating Direction Pattern for Seamless Waves

Rolling every other section in opposite directions—forward, back, forward, back—creates waves that flow seamlessly into each other rather than forming distinct spiral rings. This is the secret to that natural, cascading wave look.
How Direction Creates Flow Instead of Ringlets
When every section rolls the same direction, you get concentric circles of curl that can look mechanical or overly styled. When you alternate directions, each section’s curl complements the section next to it, creating the optical illusion of continuous waves flowing down your hair rather than independent curled sections. Straight hair especially benefits from this because your hair has no natural texture to begin with—you’re essentially creating a coherent texture pattern rather than fighting your hair’s existing texture pattern.
The Alternating Pattern for Front and Back
Starting at one side of your face, roll your first vertical section away from your face. Roll the next section toward your face. Continue alternating as you move back. Do the same on the other side of your face, so both sides mirror each other. This symmetry looks intentional and polished. At the crown, continue the alternating pattern straight back toward the nape. When you remove the rods and run your fingers through, the curls blend into waves that flow together rather than standing separately. This technique takes the same time as regular barrel curls but produces dramatically different visual results.
8. The Crown Cluster for Defined Volume
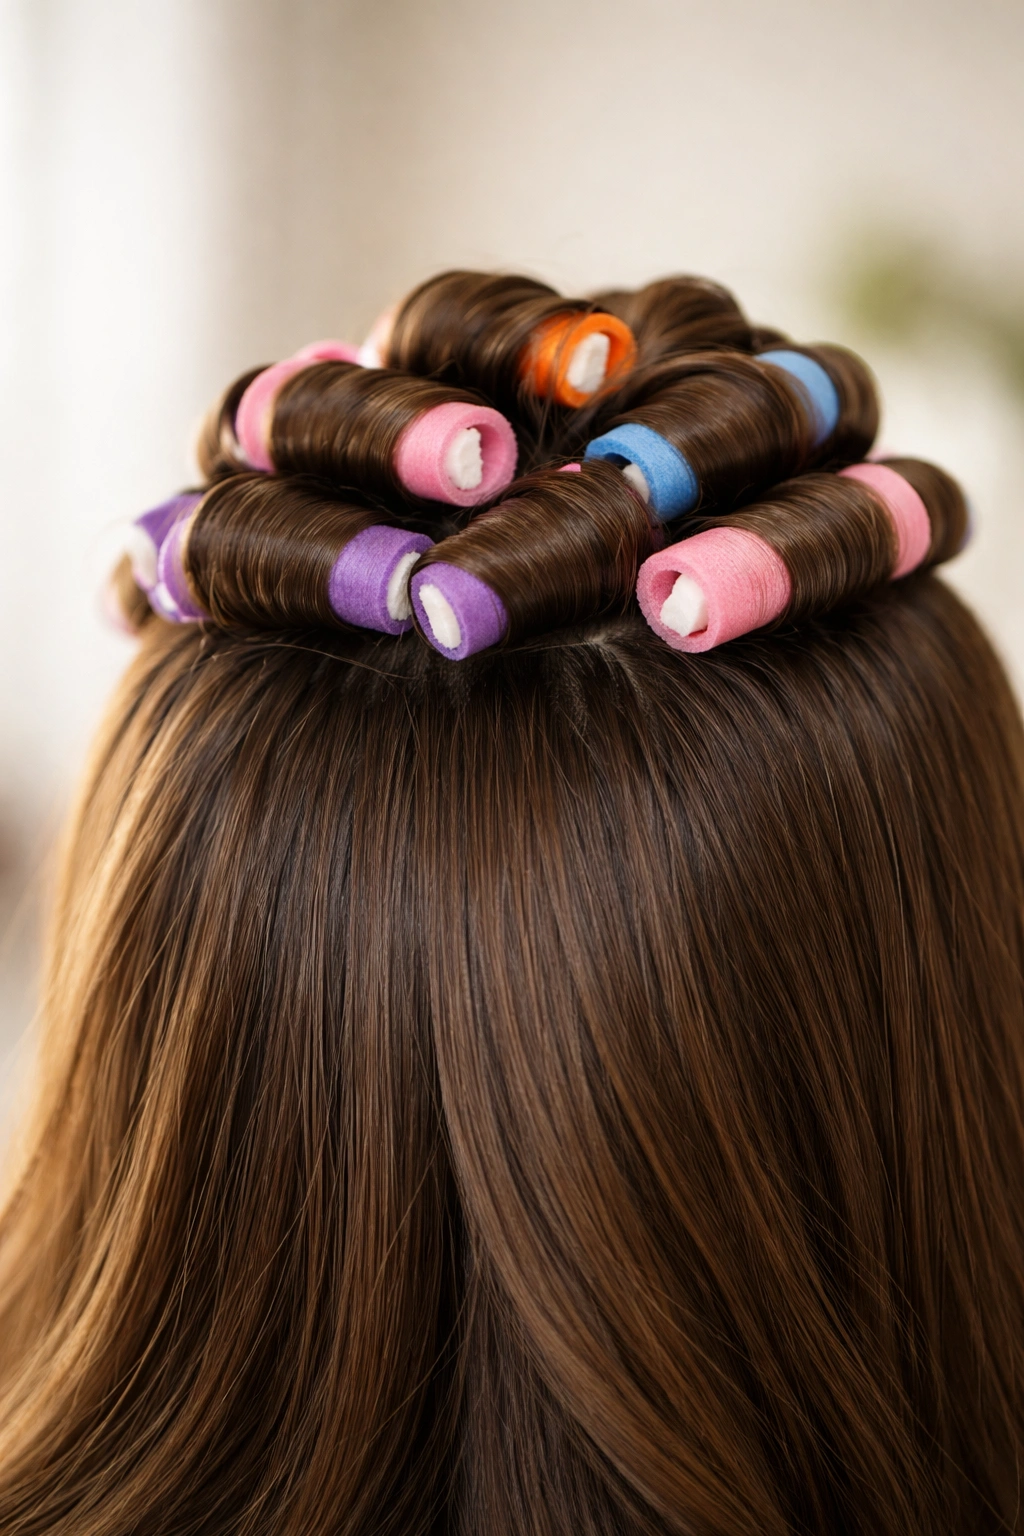
Concentrating multiple rods at your crown—your hair’s highest point—creates maximum volume and shape right where it’s most visible. This targeted approach works beautifully for straight hair because you’re not trying to curl your entire head uniformly; you’re strategically placing volume.
Why Crown Placement Matters Most
Your crown is the first thing people see when they look at you. It’s the area that determines whether you look flat or voluminous. The sides and back can have minimal curl, but if your crown has shape, your entire head reads as textured and styled. For straight hair, which naturally lacks any height, crown clustering solves the problem directly. Instead of rolling your whole head (which requires more rods and more time), you use 6-8 rods densely packed at your crown and maybe lighter rolling on sides and back.
Strategic Rod Placement for Maximum Impact
Mentally divide your crown into a rectangular zone from your front hairline back to the middle of your head, and about 2 inches on each side of center. This is your high-impact zone. Place medium rods here with slightly tighter rolling tension than you’d use elsewhere. Roll them vertically so they create height and lift. On the sides and back, use larger rods or even skip the rods entirely and just use a texture spray to encourage waves. Your crown will have defined curls while your hair tapers to softer waves, which creates a sophisticated, intentional look rather than trying to uniformly curl hair that doesn’t naturally do that.
9. Wave-Setting Technique for Subtle Movement
If you want movement and texture without actual curls—just wavy softness—the wave-setting technique uses larger rods with less tension and shorter setting time. This is perfect for straight hair that wants to look effortlessly tousled rather than styled.
The Difference Between Curls and Waves
Curls return to their spiral shape when you release them; waves have just enough bend to create movement and catch light, but they hang relatively straight. Straight hair can achieve this more easily than tight curls because you’re working with the grain rather than against it. Waves are forgiving—they don’t have to be perfect because imperfection looks intentional. You’re essentially creating slight bends in your hair that last for days rather than structured spirals.
Achieving Waves Without Over-Setting
Use the largest rods you can find (ideally 1-inch or larger), and roll with light to medium tension only—don’t crank down hard. Set them for 4-6 hours rather than overnight (overnight would set them too heavily into defined curls). Use a light-hold styling product rather than heavy mousse, which prevents the waves from getting too rigid. When you remove the rods, gently shake your hair out and finger-comb rather than brush, which preserves the wave pattern without exaggerating it. A texture spray mist afterward adds grip without weight. This technique is ideal for straight hair because you’re adding just enough texture to look intentional without the commitment of actual curls.
10. Quick Heat-Set Method for Faster Results
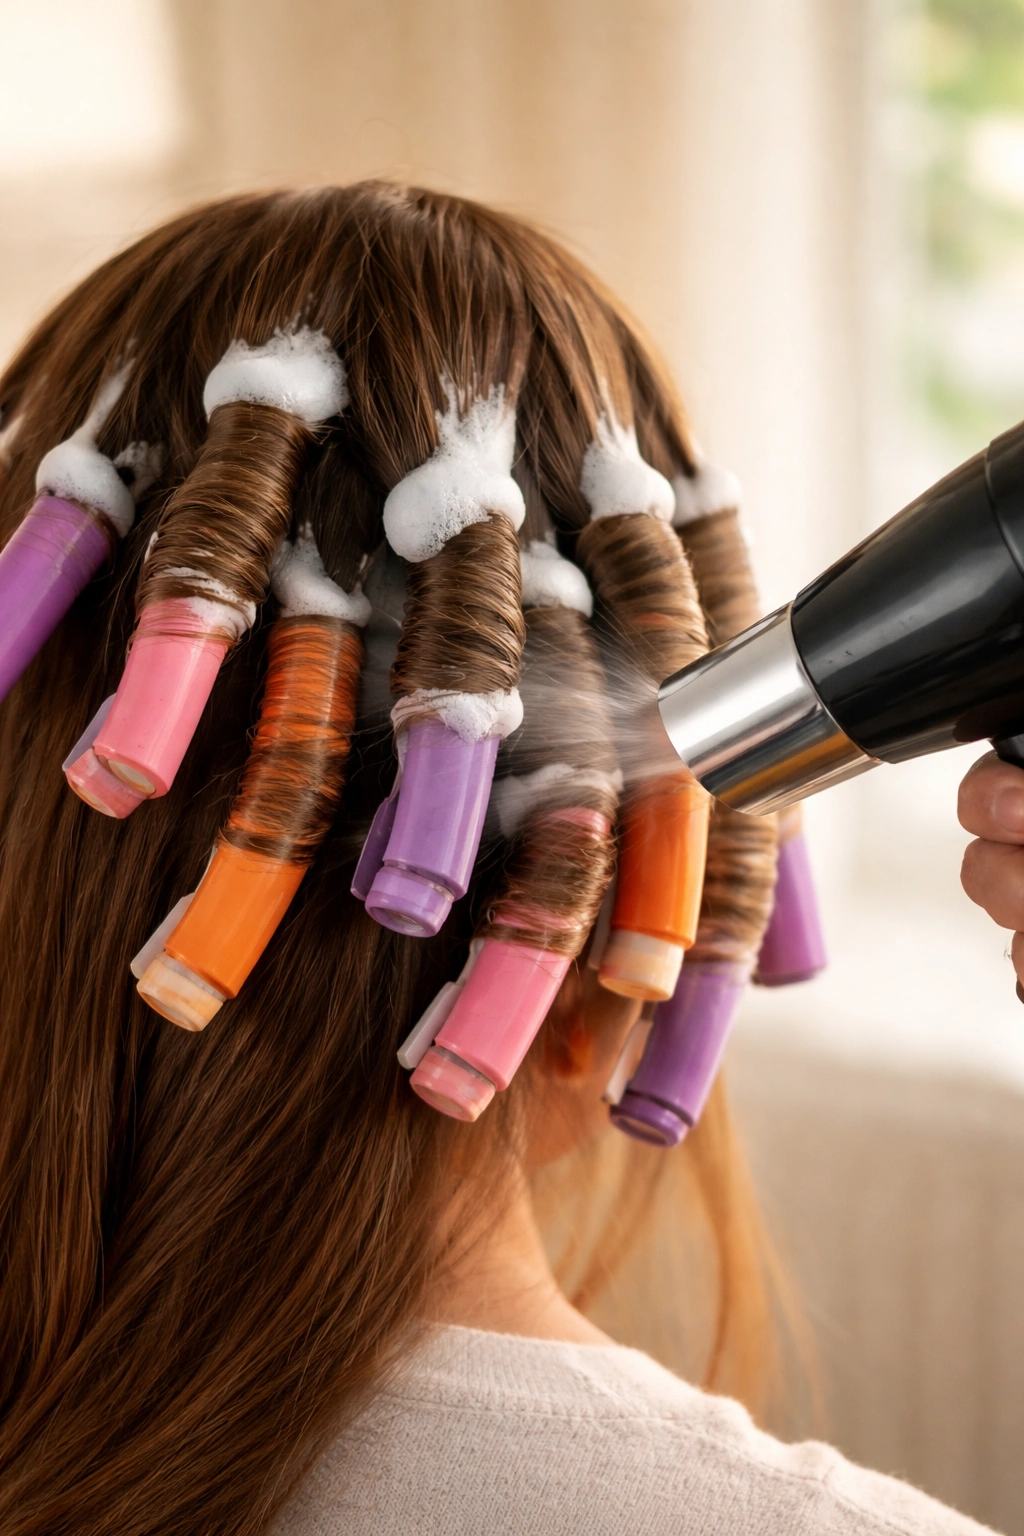
If you don’t have overnight to set rods, a quick heat-set method using a blow dryer cuts the time dramatically—from 8 hours down to 1-2 hours. This technique works because heat speeds the process that normally happens during natural drying.
How Heat Accelerates Curl Setting
Hair sets when the hydrogen bonds reset into a new shape as moisture leaves the hair. Natural air-drying takes hours; heat-drying takes minutes. The catch with straight hair is that heat can make your hair frizzy if you’re not careful—you need to control the moisture and heat level precisely. Using a blow dryer on rods requires technique to avoid over-drying and creating a brittle, frizzy result.
Safe Heat-Setting Without Damage
Apply your styling product (mousse works best for this method), place your rods, then use a hand-held blow dryer on medium heat and medium speed. Don’t use high heat, which can make straight hair frizz and look uncontrolled. Work section by section, drying each rod thoroughly but not scorching your hair. Aim to spend 10-15 minutes per rod if you have multiple rods. Once fully dry, let the rods cool for at least 15-20 minutes before removing them—cooling allows the curl to fully set. Remove rods gently and shape with your fingers. The results won’t be quite as bouncy as an overnight set, but for straight hair that’s never held a curl, even heat-set rods produce genuine, wearable texture that lasts 2-3 days.
Final Thoughts
Flexi rods transformed straight hair from a permanent limitation into a styling choice. What makes each of these techniques valuable isn’t that one is objectively “best”—it’s that they solve different problems for different situations. Overnight barrel curls work when you have time; heat-setting works when you don’t. Crown clustering works when you only need volume in one area; alternating directions work when you want seamless waves throughout.
The real skill isn’t memorizing techniques—it’s matching the right technique to what your straight hair actually needs. Start with the classic overnight method to learn the basics, then experiment. Your hands will develop the muscle memory faster than you’d expect, and soon you’ll instinctively know which method creates the look you want. Straight hair can do everything textured hair can do; it just requires deliberate choice and technique. That’s actually an advantage: you get to decide your texture daily rather than living with what you were born with.