Homecoming night carries that special kind of pressure—you want your look to feel polished, memorable, and authentically you. And here’s what many people don’t realize: straight hair is genuinely one of the most versatile hair types for creating sophisticated updo styles, sleek pulled-back looks, and elegant statement hairstyles. While others struggle with frizz and texture, your straight strands hold crisp lines, catch light beautifully, and take to styling products with remarkable precision. The challenge isn’t limitation—it’s knowing which styles will make your straight hair shine without looking flat or one-dimensional.
The right homecoming hairstyle does more than just look good in photos. It makes you feel confident all night, stays in place through dancing and hugging friends, and complements whatever dress or suit you’ve chosen. Whether you’re drawn to classic elegance, modern edge, romantic softness, or bold drama, there’s absolutely a hairstyle designed to showcase your straight hair’s natural strengths. Some of these styles are surprisingly simple to execute at home with the right technique, while others benefit from professional help—we’ll break down what makes sense for your comfort level and timeline.
What follows isn’t a basic list of generic names. Each style comes with the specific techniques that make it work on straight hair, the tools you’ll actually need, the products that prevent slipping and add grip, and honest notes about which styles suit different face shapes and dress styles. You’ll know exactly what to ask for if you’re seeing a stylist, or precisely how to recreate the look yourself.
1. The Sleek Low Ponytail with a Twisted Wrap
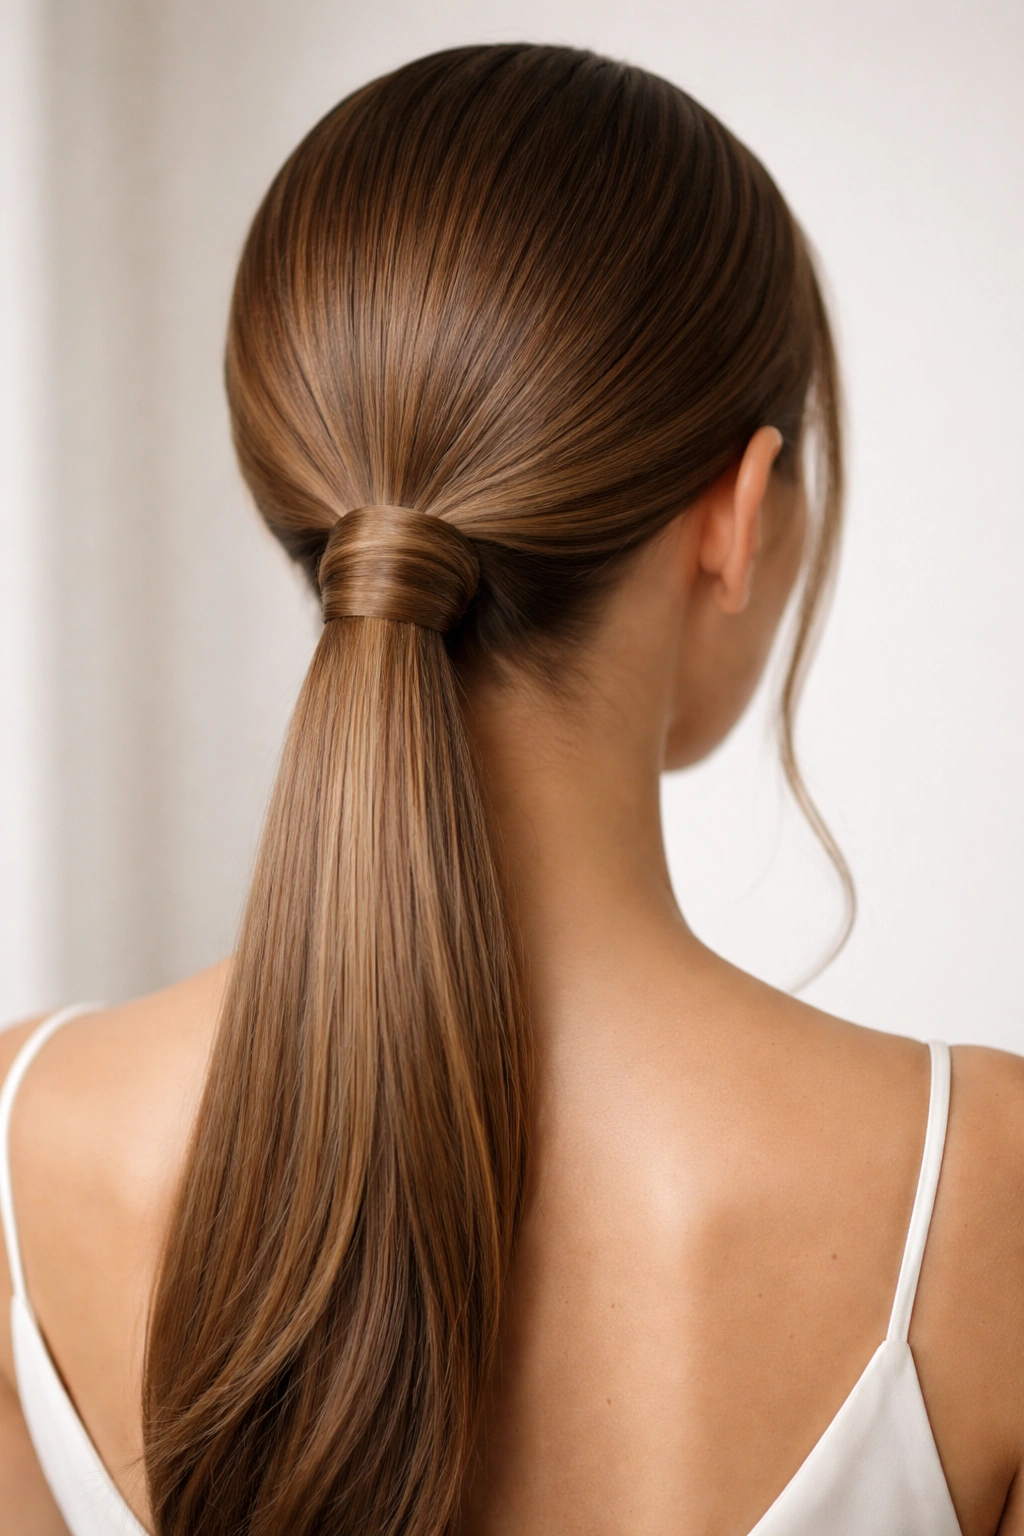
A low ponytail sounds deceptively simple, but when executed with precision on straight hair, it becomes an unexpectedly sophisticated statement. The magic happens in the detail—the ponytail sits low and centered at the nape of your neck, your hair is pulled taut enough to look intentional and polished, and a twisted or braided section of hair is wrapped around the base, hiding the elastic entirely. This transforms what could feel casual into something formally elegant.
Why This Works on Straight Hair
Straight hair’s natural smoothness is the entire point here. Because your hair lies flat and doesn’t have texture to grip, every strand stays in place exactly where you position it. The sleekness reads as intentional sophistication rather than accidental smoothness. You get clean lines, zero flyaways (with the right product), and a finished look that photographs beautifully from every angle. This style complements virtually every face shape because the low placement elongates your neck and doesn’t pull the face too tightly.
How to Create It
Start with clean, dry hair and apply a smoothing serum or lightweight anti-frizz cream to damp strands before blow-drying. Blow-dry your hair completely straight—this is crucial, as any wave or curl will disrupt the clean lines. Using a fine-tooth comb or a brush with densely packed bristles, gather your hair at the nape of your neck, right where it naturally falls. Secure with a clear elastic, pulling the ponytail taut but not painfully tight. Take a small section (about the thickness of a pencil) from inside the ponytail and twist it around the base, wrapping it multiple times until the elastic is completely concealed. Secure the twisted section with bobby pins that match your hair color, tucking the end underneath so it’s invisible. Finish with a flexible-hold hairspray to lock everything in place without creating a stiff, shellacked look.
Pro tip: If your hair tends to slip, lightly backcomb the hair at the nape before gathering it into the ponytail. This creates friction and grip without being visible.
2. The Deep Side Part with Volume at the Crown
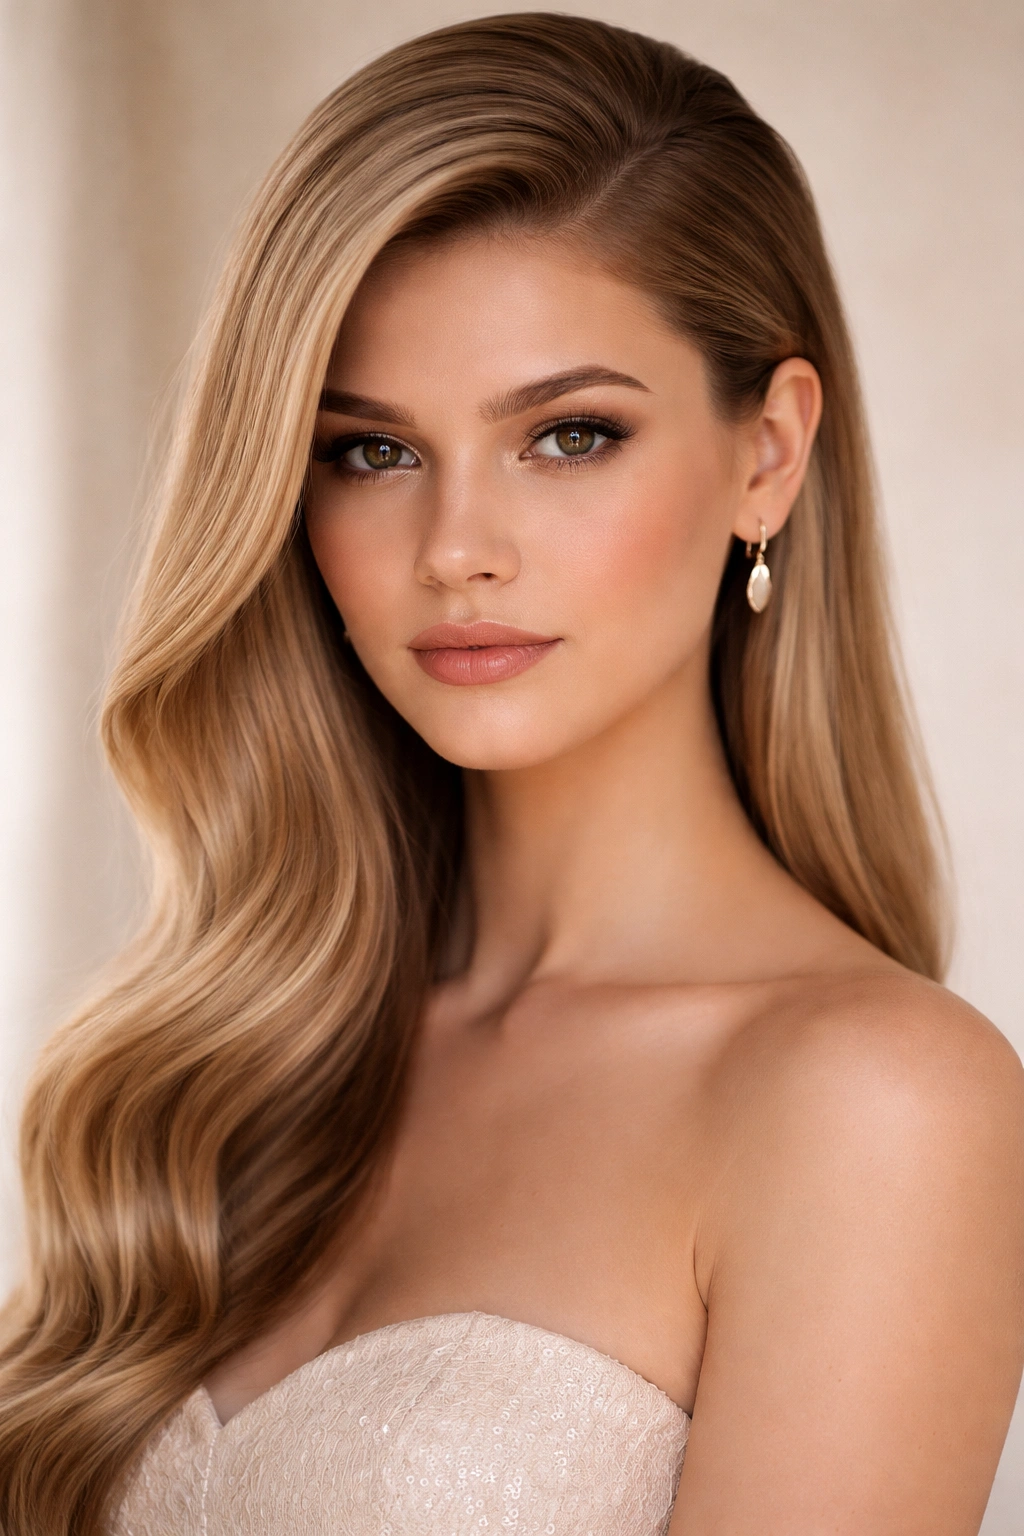
This is the hairstyle that makes you feel like you’ve stepped out of a 1940s photograph, except modern. The hair is parted dramatically on one side—think three-quarters of the way across your head—and then styled with soft waves that begin at the crown and cascade down one side. The other side of your head is smoothly tucked behind your ear, creating beautiful asymmetry. It’s romantic without being fussy, and works whether you’re wearing a strapless dress or a structured suit.
Why Straight Hair Excels Here
Creating waves on naturally straight hair means your waves will hold their shape crisply and beautifully without the frizz that wavy or curly hair sometimes battles. The foundation of straight hair also means you can create truly precise lines with your part, which is essential for making the asymmetry intentional rather than accidental. The smoothness on one side of your face creates a polished contrast to the textured waves on the other side, which is more visually interesting than if you had waves throughout.
How to Create It
Begin with completely dry hair. Using a comb, create a deep side part by drawing a line from the outer edge of one eyebrow back to the crown, then continuing the line to the back of your head. Blow-dry the smaller side (behind the part) completely smooth and sleek—this will stay tucked behind your ear, so it needs to look intentionally polished. For the larger side, use a 1.25-inch curling iron to create soft waves. Start at the crown and curl sections away from your face, holding each curl for three to five seconds before releasing. Allow the curls to cool completely before touching them, which sets the wave shape. Once all waves are cooled, gently brush through them with a paddle brush to soften the curl into a wave. Tuck the smooth side behind your ear and secure with bobby pins. Mist the entire style with flexible-hold hairspray.
Worth knowing: The deeper your part, the more dramatic the asymmetry. If you want something subtler, move the part closer to center.
3. The Bubble Braid Half-Up Style
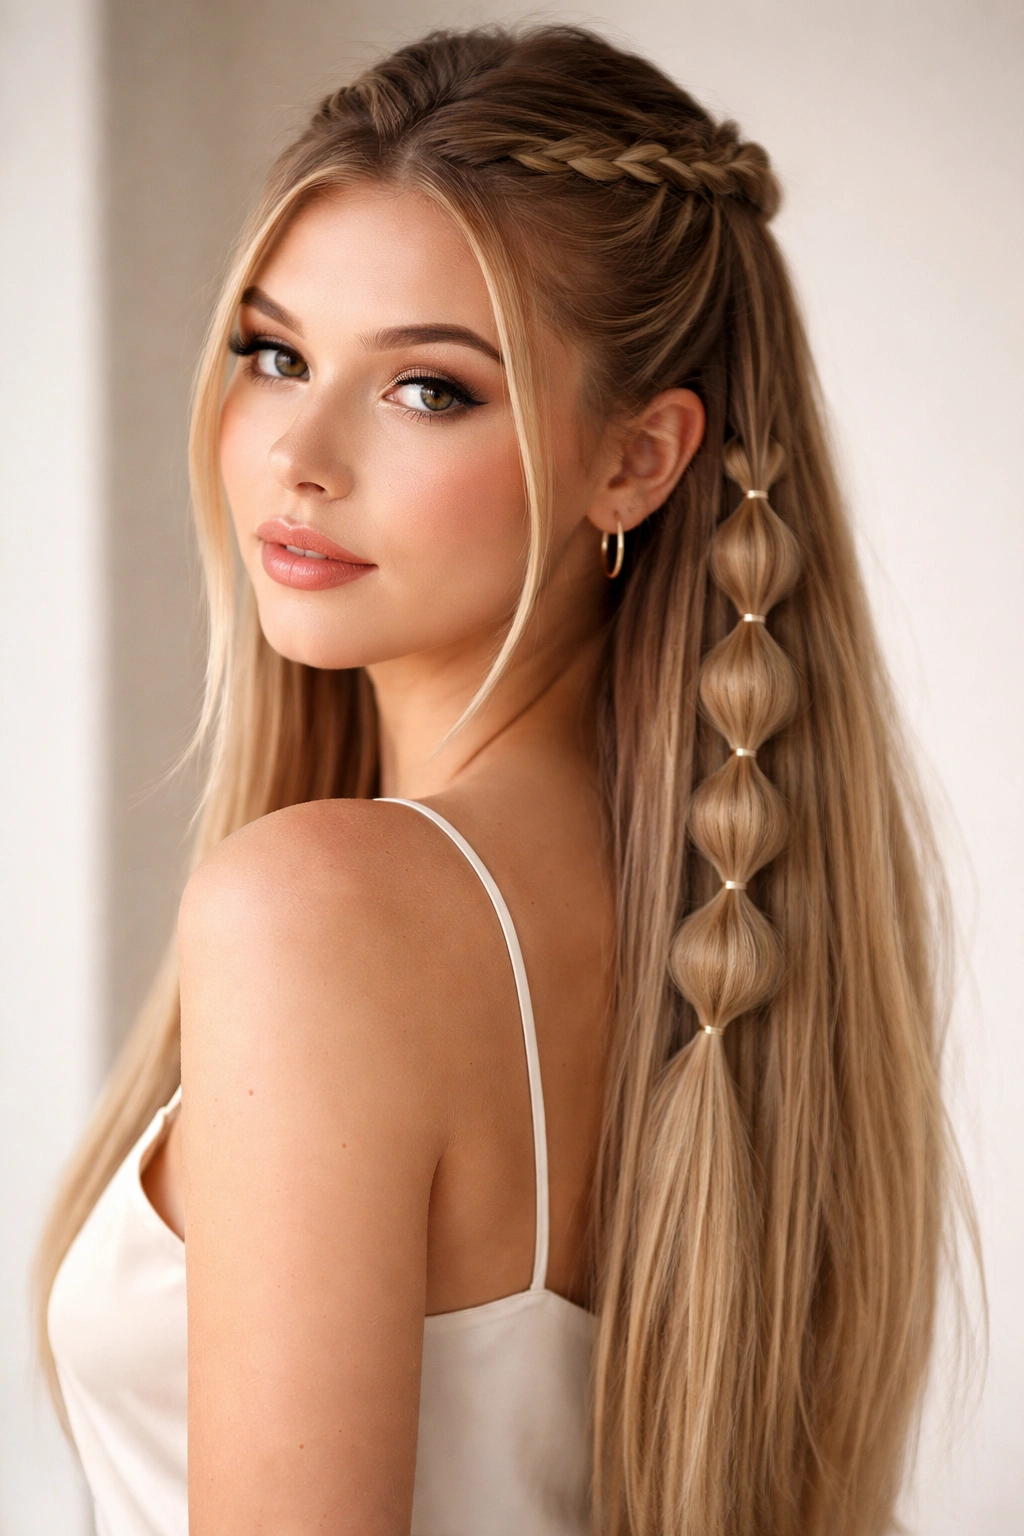
This modern, playful style takes a braided half-up ponytail and transforms it by creating distinct “bubbles” along the length of the braid. Each bubble is created by gathering a section of the braid and securing it with a tiny elastic, puffing out the section slightly to create dimension and texture. It looks intricate and takes time, but the effect is undeniably fun and photo-worthy. This works beautifully on straight hair because each bubble maintains clean definition.
The Appeal and Execution
What makes this style special is the contrast between the precision of a structured braid and the loose, playful dimension of the bubbles. On straight hair, this contrast is crisp and intentional. The style feels youthful without being childish, especially when paired with metallic or jeweled bobby pins that catch the light. It’s the kind of style that reads as thoughtfully executed rather than accidentally messy.
Step-by-Step Instructions
Start at one side of your head at about ear level and create a standard three-strand braid that goes across the back of your head to the other side, stopping at ear level. Secure the braid with a small elastic. Now comes the bubble-making: starting at the top of the braid near your scalp, place a small elastic around the braid about an inch down from where you secured it. Gently pull the braid section above this elastic slightly outward to create a puffed bubble. Continue down the braid, placing elastics at regular intervals (about one inch apart) and puffing out the section above each elastic. You should end up with four to six bubbles depending on the length of your braid. The loose hair below the final bubble can be curled slightly for added texture, or left straight and smooth for contrast. Secure everything with hairspray.
Insider note: Using tiny pearl-head bobby pins or small metallic elastics turns this from playful to genuinely elegant for a formal event.
4. The Sleek High Bun with Face-Framing Pieces
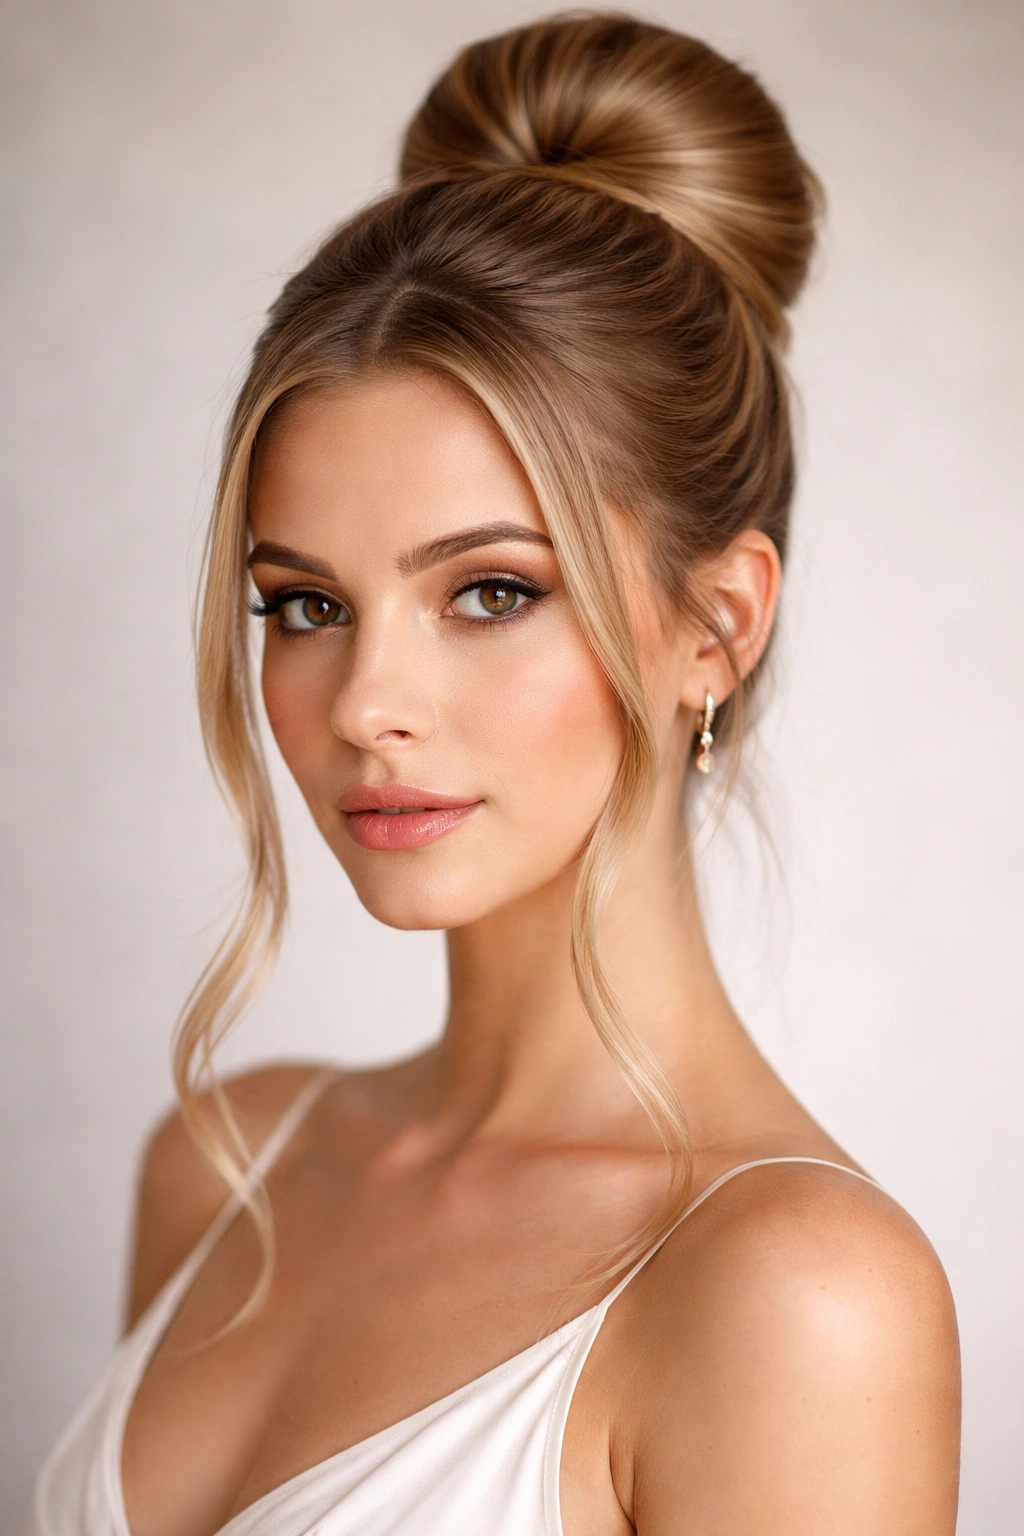
This is the sophisticated alternative to a basic bun. Your hair is pulled up into a high, tight bun at the crown, but two delicate face-framing pieces are left loose. These pieces are slightly curled or waved for softness, creating a striking contrast between the controlled precision of the bun and the romantic movement of the framing pieces. It’s elegant and modern simultaneously, and it works on virtually every face shape because the framing pieces can be positioned specifically to complement your features.
Why This Works
A basic high bun on straight hair can sometimes feel stark or unfinished. The face-framing pieces solve this by adding dimension and softness while maintaining the sophisticated updo structure. Because your hair is naturally straight, the bun will be sleek and polished, and the framing pieces will hold their wave without looking frizzy. This style is also practical—it keeps most of your hair off your neck (perfect if you’re wearing an elaborate necklace or a backless dress) while still showing off your face.
Creating the Look
Brush your hair straight back and gather it into a high ponytail at the crown, pulling it as taut as possible. Divide the ponytail into two sections. Twist one section tightly and wrap it around the base of the ponytail to form the bun, securing with bobby pins. Repeat with the second section, layering it around the first to create fullness and dimension in the bun. Before securing, pull out two thin pieces from the front sections of your hair—these will be your face-framing pieces. Use a 1-inch curling iron to curl these pieces away from your face, then gently brush them out into soft waves. Secure everything with strong-hold hairspray and tuck any flyaways with a fine-tooth comb and hairspray.
Pro tip: Smooth your high ponytail with a wet brush before twisting sections, which prevents the bun from looking separated or lumpy.
5. The Slicked-Back Topknot with Graphic Edges
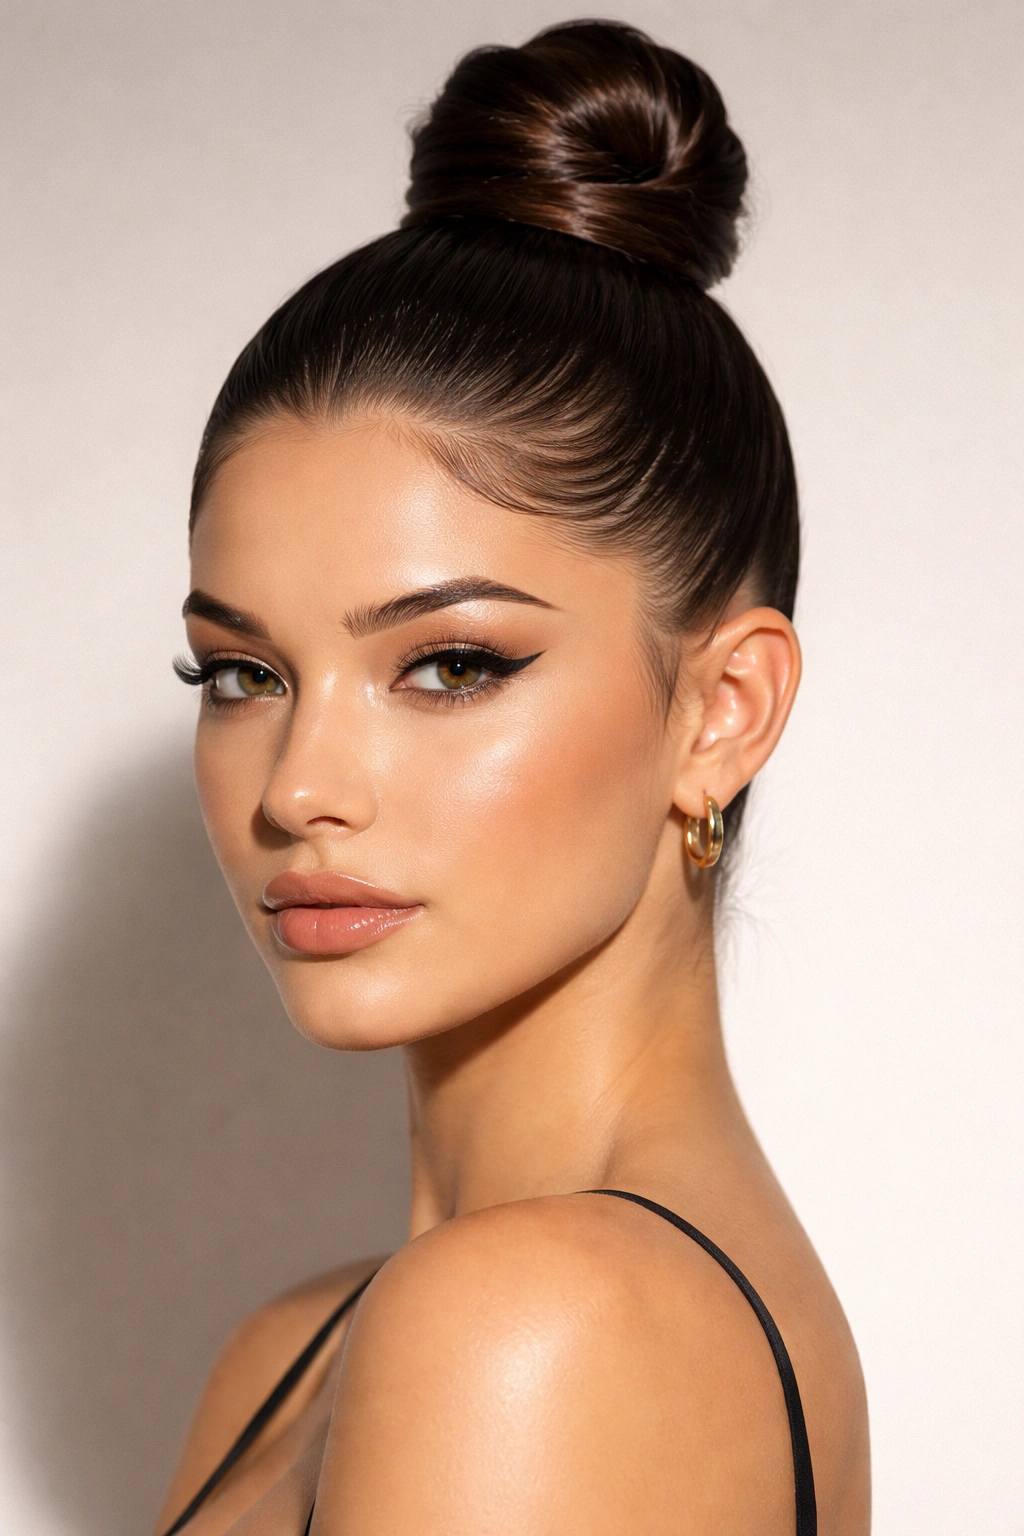
This ultra-modern style takes the casual topknot and makes it architectural. Your hair is slicked straight back with smoothing gel or mousse, pulled up into a knot at the very crown of your head, and the edges around your hairline are defined with crisp lines. Some people add an additional detail like baby hairs sculpted into a specific pattern, creating an almost graphic quality. It’s bold, it’s fashion-forward, and on straight hair, it’s absolutely stunning because the slickness emphasizes clean lines.
The Modern Edge
This isn’t your everyday messy bun. This is intentional, precise, and modern. It suits people who want to make a statement with their hair, who aren’t afraid of their face being fully visible, and who appreciate an architectural approach to styling. The graphic edges can be as subtle or as bold as you want—just tiny swoops along your hairline, or more elaborate wave patterns. On straight hair, because there’s no natural texture to obscure lines, these edges read as intentional artistry.
How to Execute It
Apply a strong-hold smoothing gel or pomade to damp hair and blow-dry completely smooth. Using a fine-tooth comb, comb every single strand straight back from your face, pulling it taut. Gather the hair into a high ponytail at the crown and secure with a strong elastic. Twist the ponytail around itself into a tight knot and secure heavily with bobby pins, making sure the knot feels sturdy and doesn’t move. Using the pomade and a fine brush or an old toothbrush, define the hairline edges by creating precise lines along your forehead and temples. You can create simple curved swoops, or more intricate patterns depending on your comfort level. Set everything with extra-strong-hold hairspray and allow it to dry completely.
Worth knowing: This look works best on people with a strong face shape and symmetrical features, since nothing is hidden. Pair it with bold makeup to balance the graphic hair.
6. The Half-Up Crown Braid with Loose Waves Below
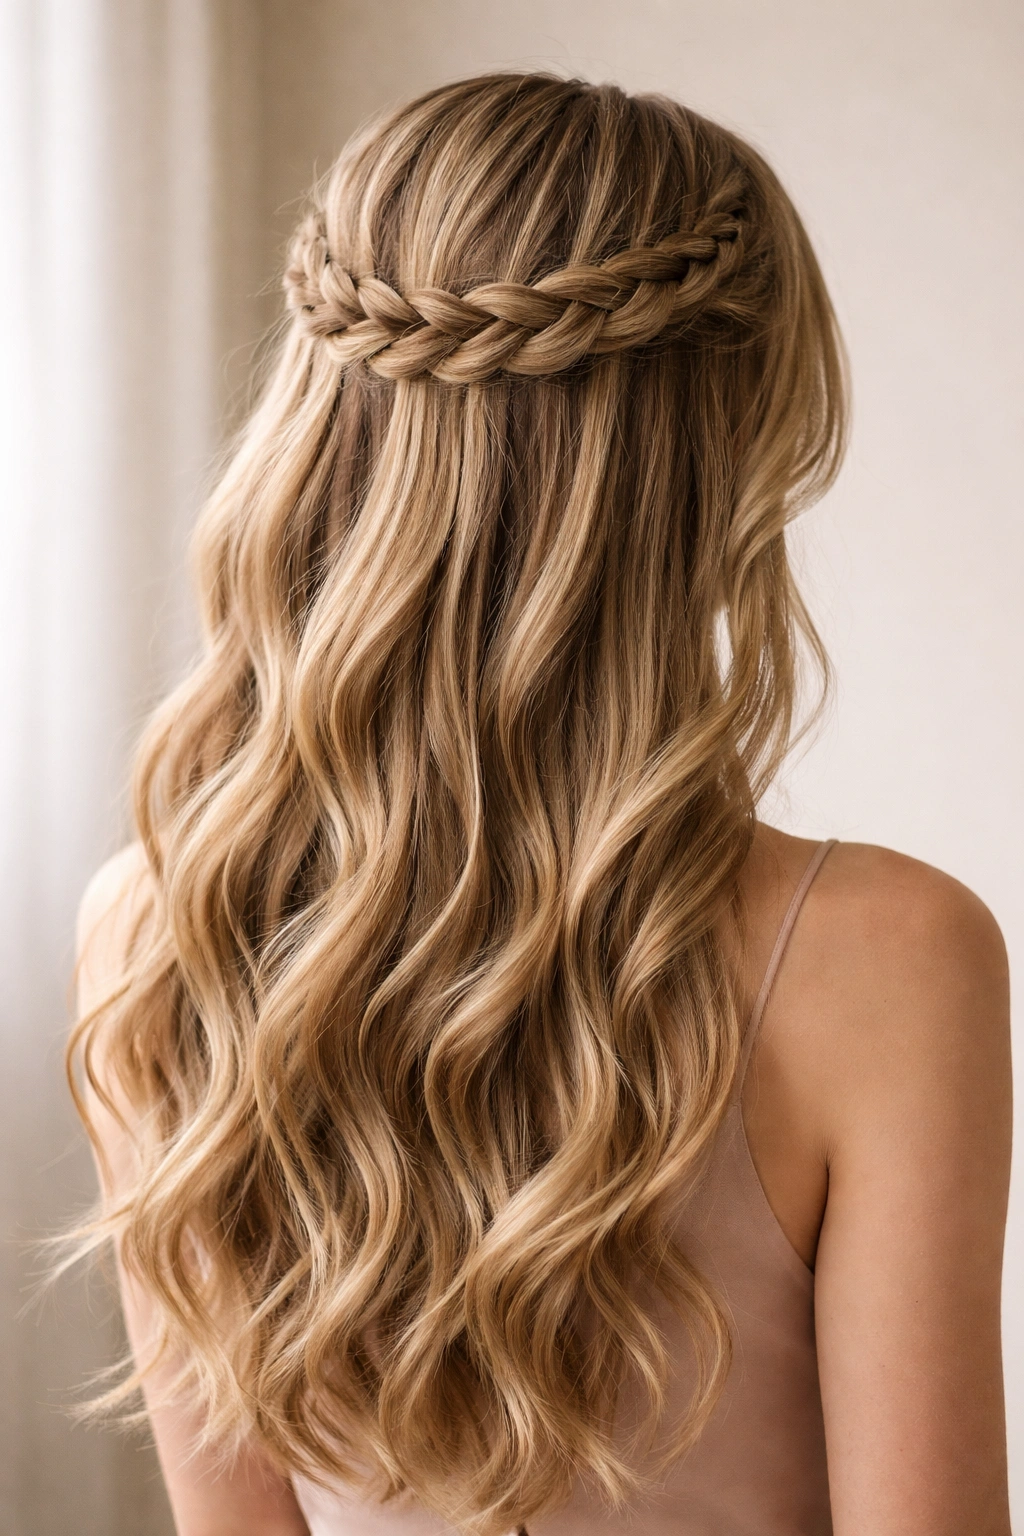
This romantic style combines the best of both worlds: the polished elegance of a partially up hairstyle, with the soft femininity of waves flowing down. The crown of your head features a braid that runs horizontally across the back, creating a crown effect, while the hair below remains in soft waves. It’s the perfect balance of styled sophistication and effortless romance, and it works beautifully for both traditional and modern dress styles.
Why This Style Shines on Straight Hair
The crown braid benefits from having structured, non-frizzy hair to work with. Because your straight strands hold their shape clearly, the braid definition is crisp and visible—you can actually see the braid detail, which wouldn’t be as clear on textured hair. Meanwhile, the waves below benefit from being applied to straight-hair foundation, which means they’ll hold their shape all night without gradually falling flat or becoming frizzy. It’s an easy-to-manage style that looks way more elaborate than it actually is.
Step-by-Step Creation
Begin with straight hair. Starting at one temple, create a Dutch braid (braiding forward instead of backward) that runs horizontally across the back of your head, ending at the opposite temple. Secure the braid end with a small elastic and hide it by tucking it underneath the remaining loose hair. Using a 1.25-inch curling iron, create soft waves through the bottom half of your hair, curling away from your face. Allow the curls to cool before brushing them out into waves. You want the waves to look soft and lived-in, not tightly spiraled. If desired, tease gently at the crown for added volume. Secure everything with flexible-hold hairspray so the waves can still move naturally while staying in place.
Quick styling facts:
- Dutch braids create more dimension than regular braids and look more modern
- Cooling the curls completely before brushing ensures waves hold until morning
- Flexible-hold products preserve movement better than hard-hold for this style
- Adding a decorative barrette or comb to the braid end adds instant glamour
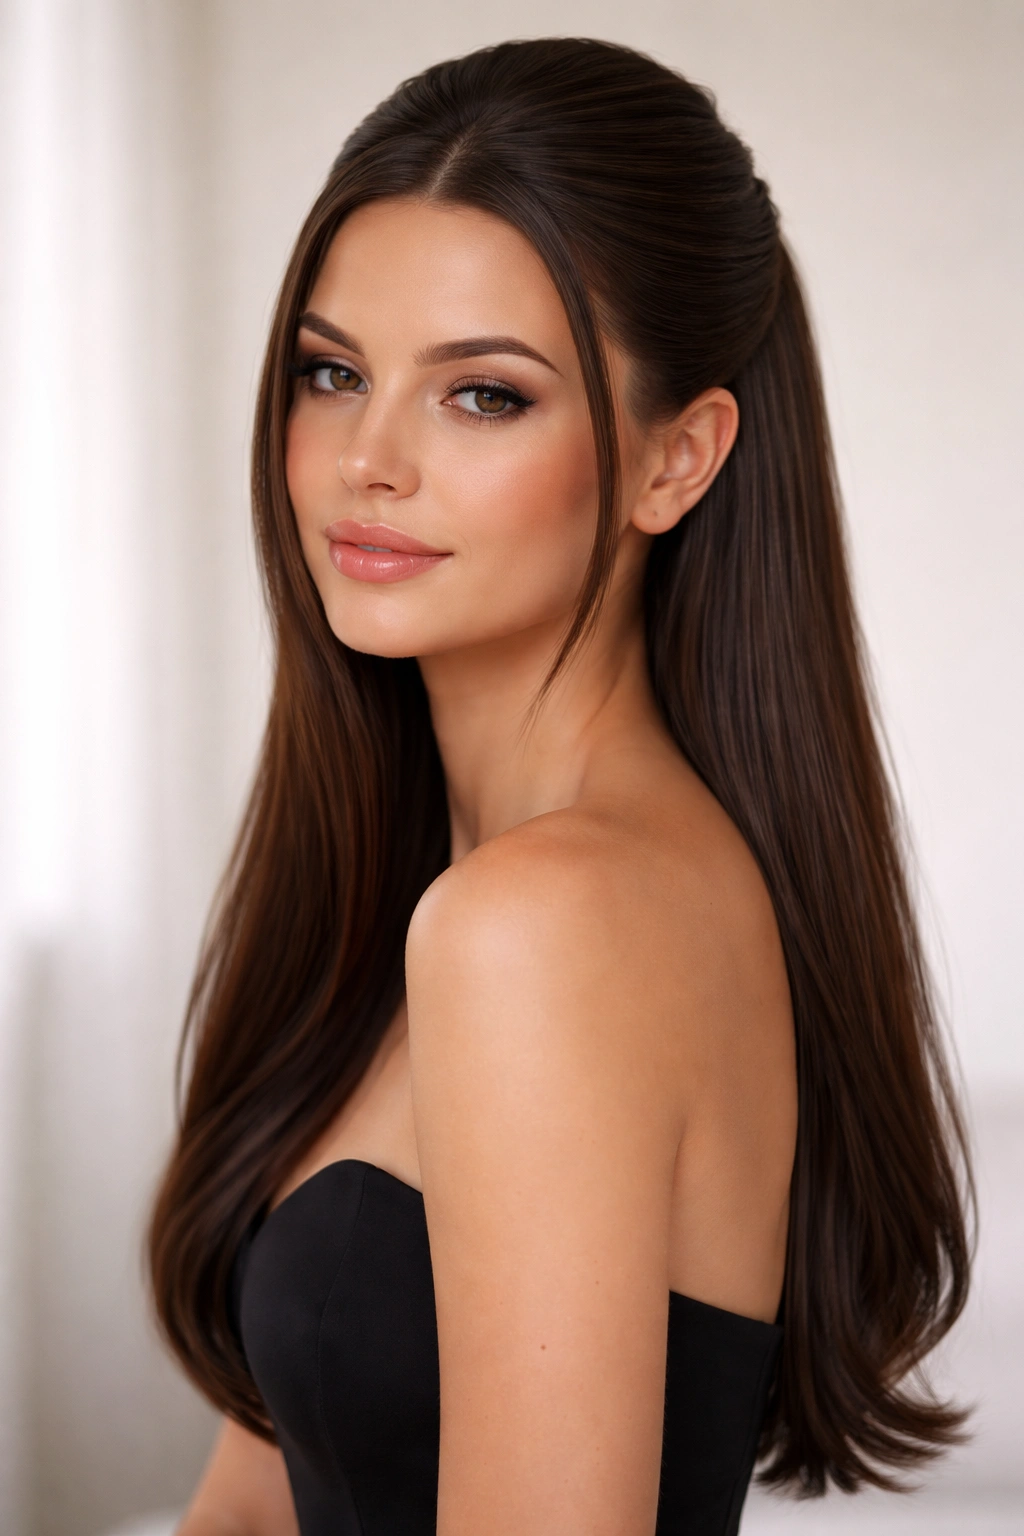
7. The Perfectly Straight Sleek Blowout with Statement Accessories
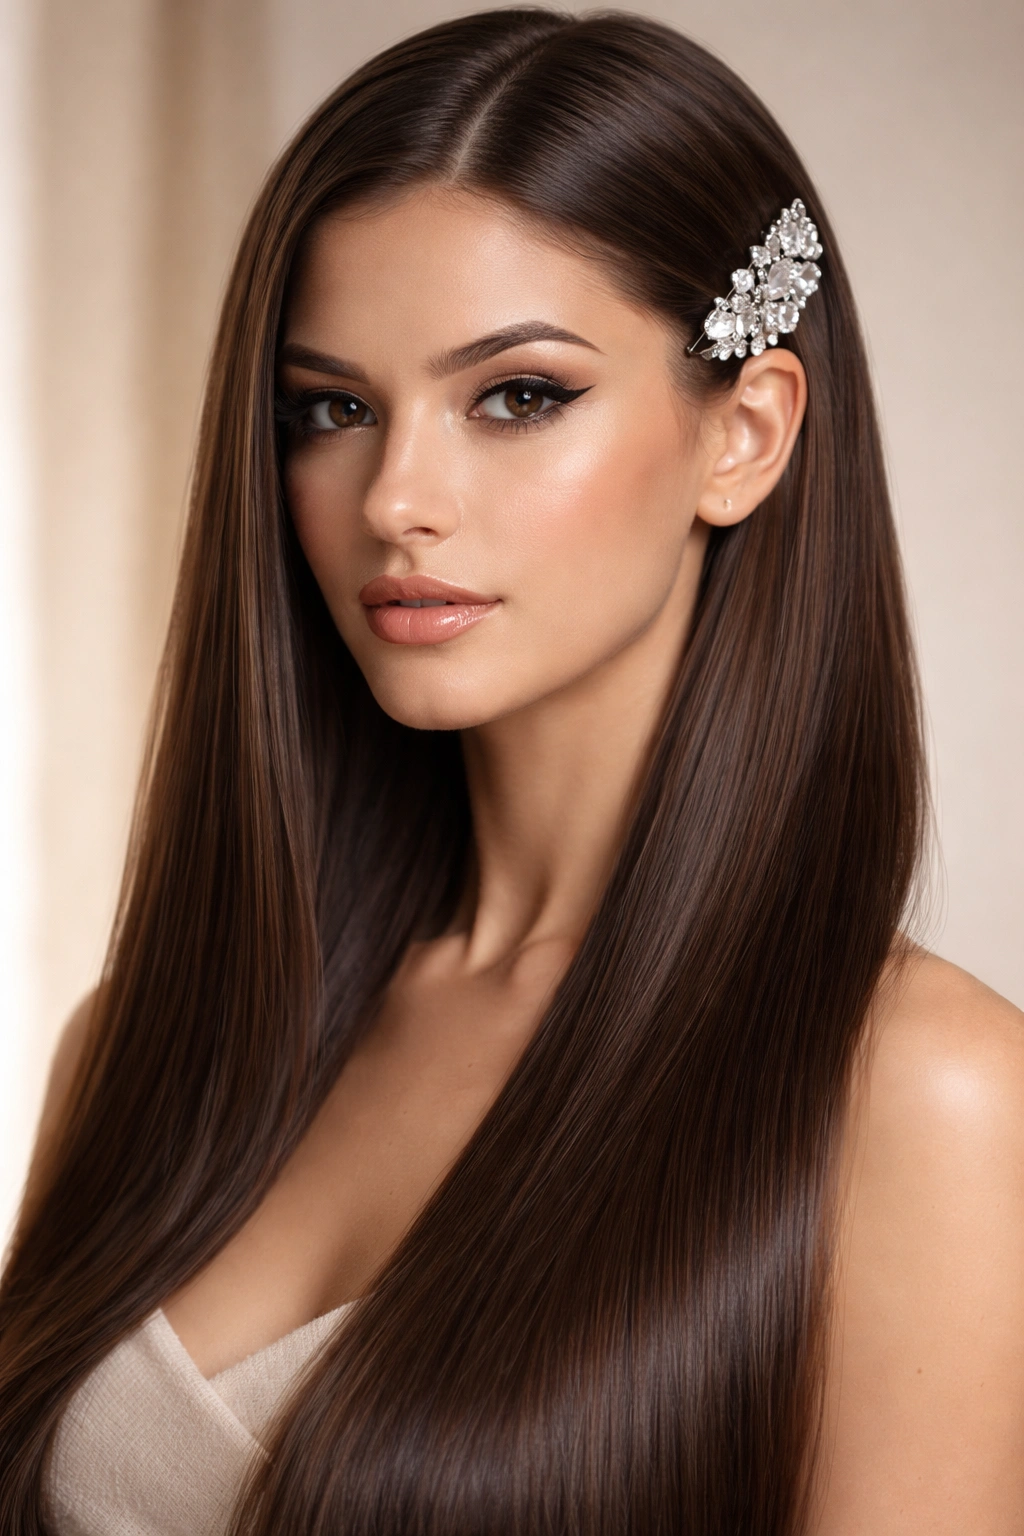
Sometimes the most striking homecoming look is the simplest one. This style is about embracing the natural perfection of your straight hair and amplifying it through flawless technique. Your hair is blown out to an impossibly smooth, shiny finish with absolutely no frizz, no texture, no waviness—just pure, glossy straightness. The statement comes from bold hair accessories like jeweled clips, metallic barrettes, or an ornate comb that catches light and adds visual interest to the sleekness.
The Power of Simplicity
There’s something undeniably powerful about showing up with hair that’s so perfectly executed it looks effortless. The straight blowout requires technique, but the result looks impossibly easy. Paired with a statement clip or comb, it reads as intentional and fashion-forward. This style suits people who want their dress and accessories to be the focus, who have naturally fast-drying straight hair, or who simply love the feeling of freshly blown-out hair.
How to Achieve It
Shampoo and condition with smoothing products designed for straight hair. While hair is damp, apply a heat-protectant serum and a lightweight smoothing cream. Using a paddle brush and a high-heat blow-dryer, work through one section at a time, pulling the brush through each section with steady tension. The brush and dryer should work together, with the dryer following close behind the brush. Aim for completely dry hair with zero dampness remaining. Once dry, use a flat iron on medium-high heat for a final pass through each section to seal the cuticle and increase shine. Apply a finishing serum or shine spray to the ends and mid-lengths. Place your statement hair accessory strategically—clipped to one side, centered at the back, or securing a subtle half-up section. Finish with a light hairspray that won’t weigh down your freshly blown-out hair.
Pro tip: Run your straightening iron once more through your hair right before leaving the house—this refreshes the style and increases shine one final time.
8. The Twisted Low Side Bun
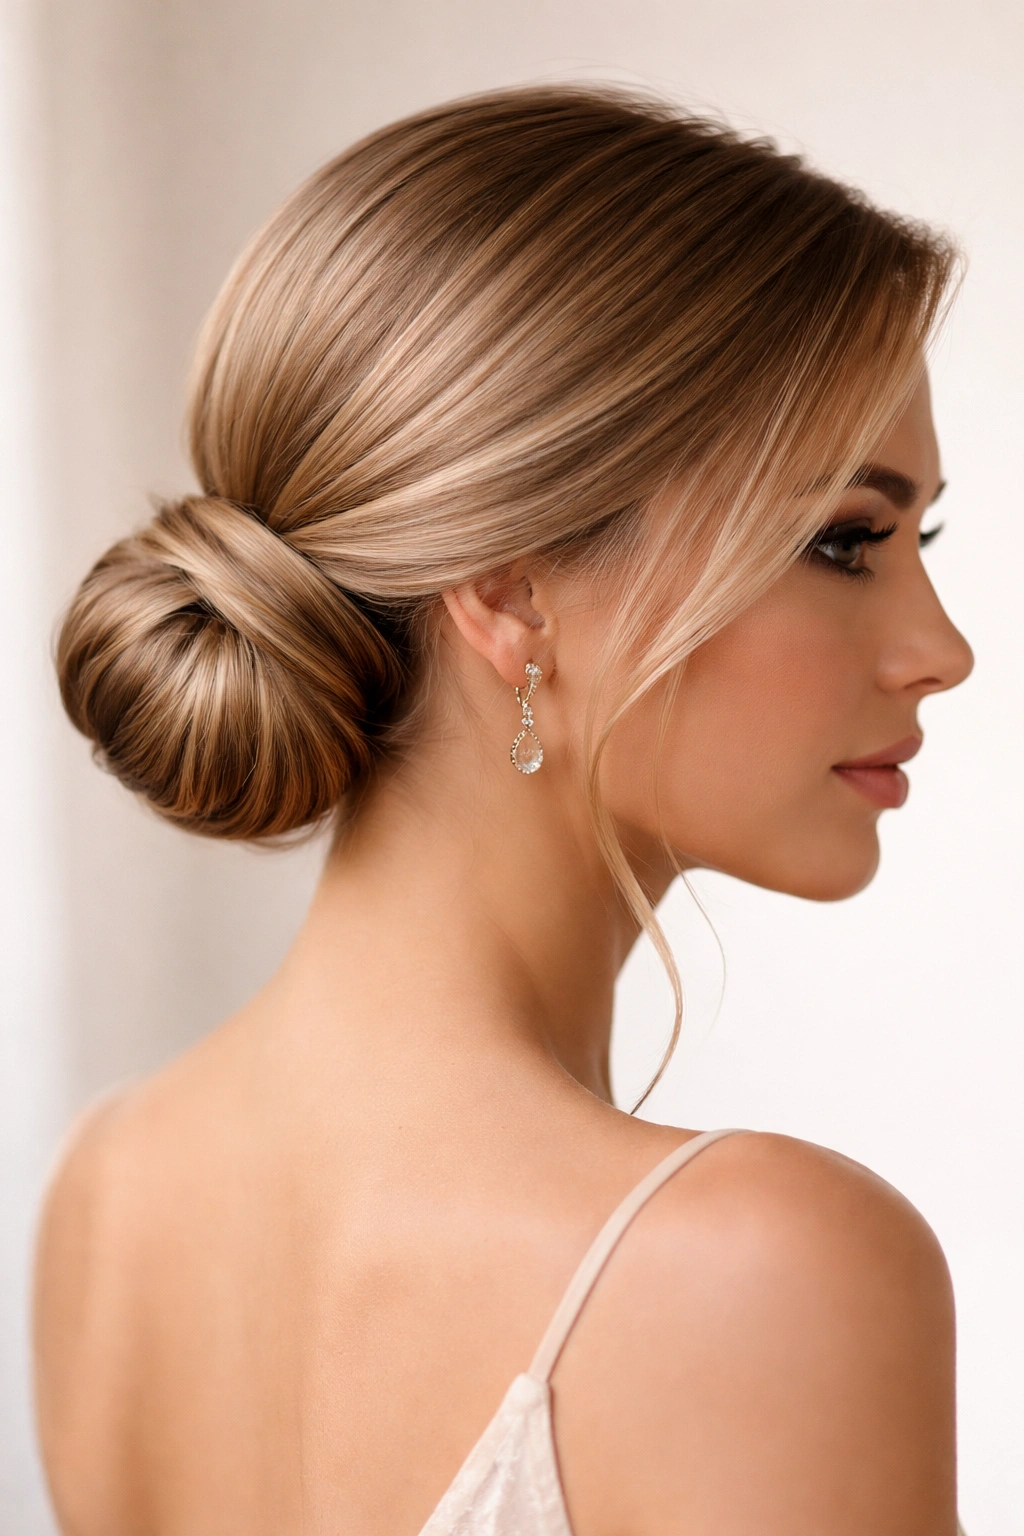
This hairstyle is pure elegance with an unexpected twist (literally). Your hair is parted to one side and then twisted—not braided—in a spiral pattern that wraps around into a low bun on the opposite side of your head. The twists create texture and visual interest while the overall placement remains sophisticated and formal. It’s refined enough for a traditional homecoming dance, but interesting enough to feel modern and thoughtfully executed.
The Elegance Factor
While a bun can sometimes feel overdone or safe, a twisted version feels more contemporary and intentional. The spiral of the twist draws the eye and creates dimension that a regular bun doesn’t have. On straight hair, this twist holds its shape beautifully—you can see the clear spiral definition, which is far more striking than on curly or wavy hair where the texture can obscure the detail.
Detailed Creation Steps
Begin with completely straight, dry hair. Create a deep side part, with the larger section on one side. Take a one-inch section of hair from the top of the part and begin twisting it away from your face in a clockwise direction (if your part is on the left) or counterclockwise (if your part is on the right). As you twist, gradually incorporate more hair from underneath—similar to creating a Dutch braid but with only two strands twisting instead of three. Continue this process, working the twisted section down and around toward the opposite side of your head. Once you’ve reached the nape of your neck, continue twisting the remaining length of hair into a rope-like strand. Wrap this twisted rope into a low bun on the side opposite your part and secure with bobby pins. Pull slightly on the outer edge of the twisted sections to create softness and dimension in the twist. Secure with flexible-hold hairspray.
Styling facts:
- Twists hold better on freshly blow-dried hair than on second-day hair
- Twisting away from your face is universally more flattering than twisting toward it
- Releasing your grip slightly as you wrap the bun into place creates a fuller, more romantic bun
- This style works on all face shapes but especially suits longer face shapes
9. The Structured Ponytail with Geometric Hair Clips
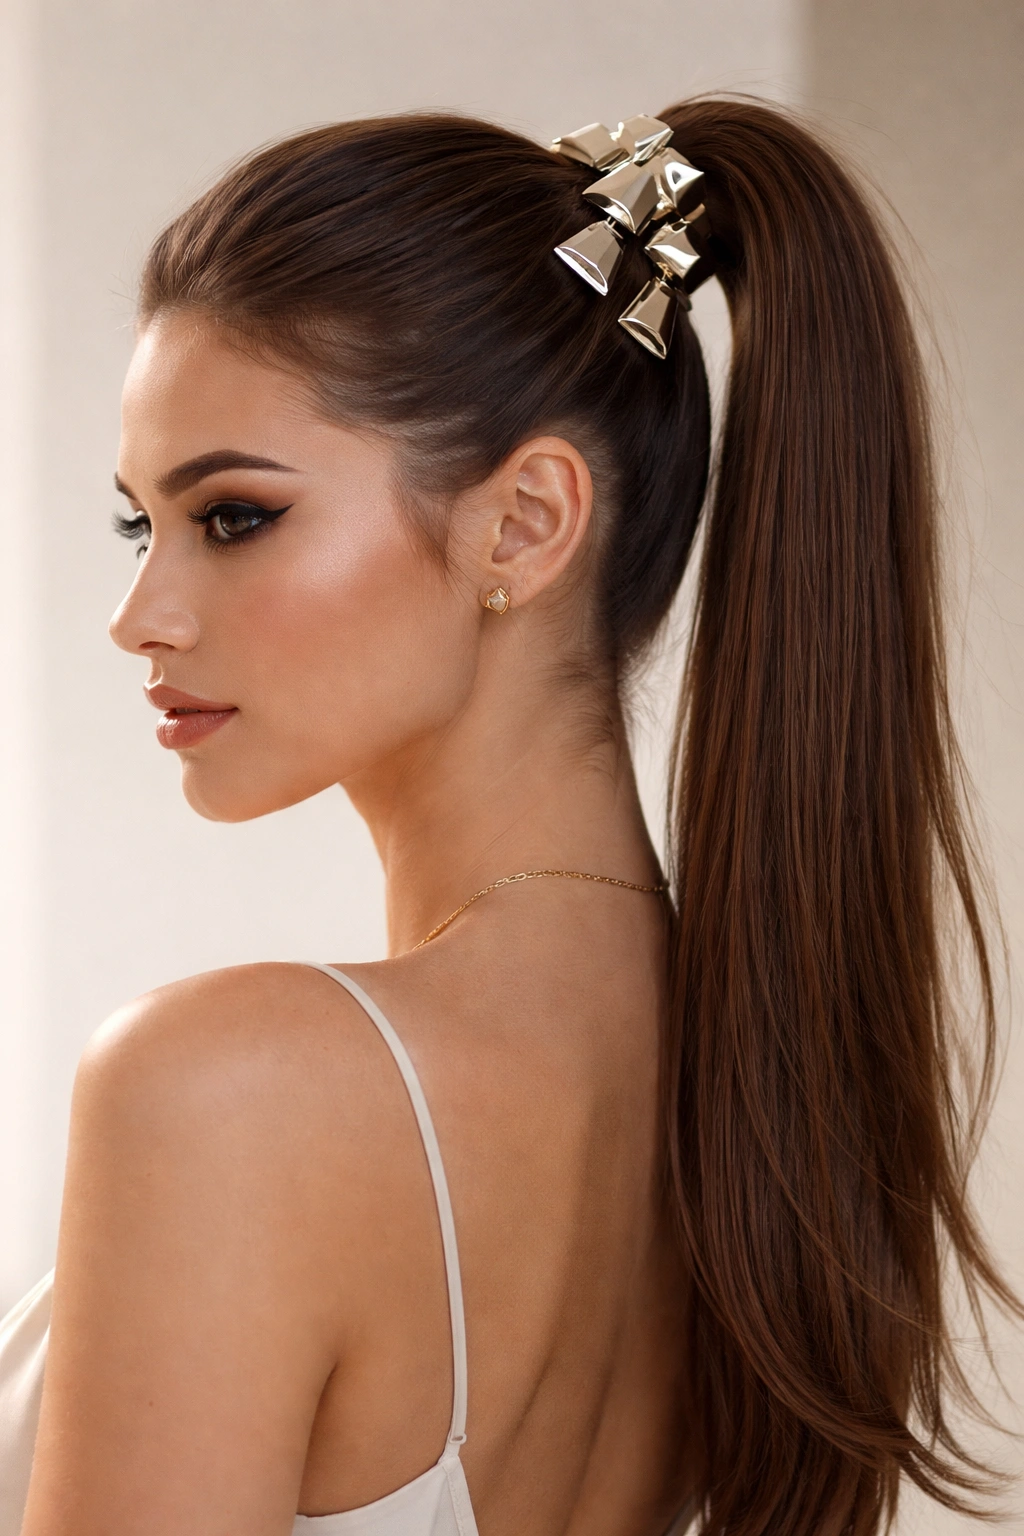
This modern, edgy style pulls your hair into a high or mid-level ponytail and secures it with multiple geometric clips arranged in a pattern. Instead of hiding the elastic with wrapped hair (like in the traditional sleek ponytail), the clips become the decorative element, creating a deliberately architectural look. It’s the kind of hairstyle that works for people who appreciate modern design and want their hair to feel intentionally styled rather than naturally easy.
Contemporary Appeal
This style emerged from high fashion and runway looks, and it reads as fashion-forward and thoughtful. Geometric clips can be silver, gold, tortoiseshell, or matte black depending on your dress and aesthetic. The arrangement of multiple clips creates visual interest that wouldn’t exist in a simple ponytail, transforming what could be a casual style into something deliberate and design-focused. This works beautifully on straight hair because the clean lines of geometric shapes echo the clean lines of your straightness.
Execution Details
Blow-dry your hair completely straight and smooth. Gather your hair into a ponytail at your desired height—high for drama, mid-level for balance, low for classic elegance. Secure with a clear elastic. Now, instead of wrapping hair around the base, position your geometric clips vertically against the elastic and the base of the ponytail. You might use two to four clips depending on their size and your preference. Position them symmetrically or in an offset pattern—both work. Secure each clip by sliding it into place; it should grip the ponytail and elastic firmly. Smooth any flyaways with a fine-tooth comb and hairspray. You can leave the ponytail completely straight, or add soft waves to the ends for softness that contrasts with the geometric precision of the clips.
Worth knowing: This look pairs especially well with minimalist dress styles and structured, modern outfits. It might feel too edgy for vintage-inspired or heavily embellished dresses.
10. The Wrapped Half-Up Style with Texture at the Ends
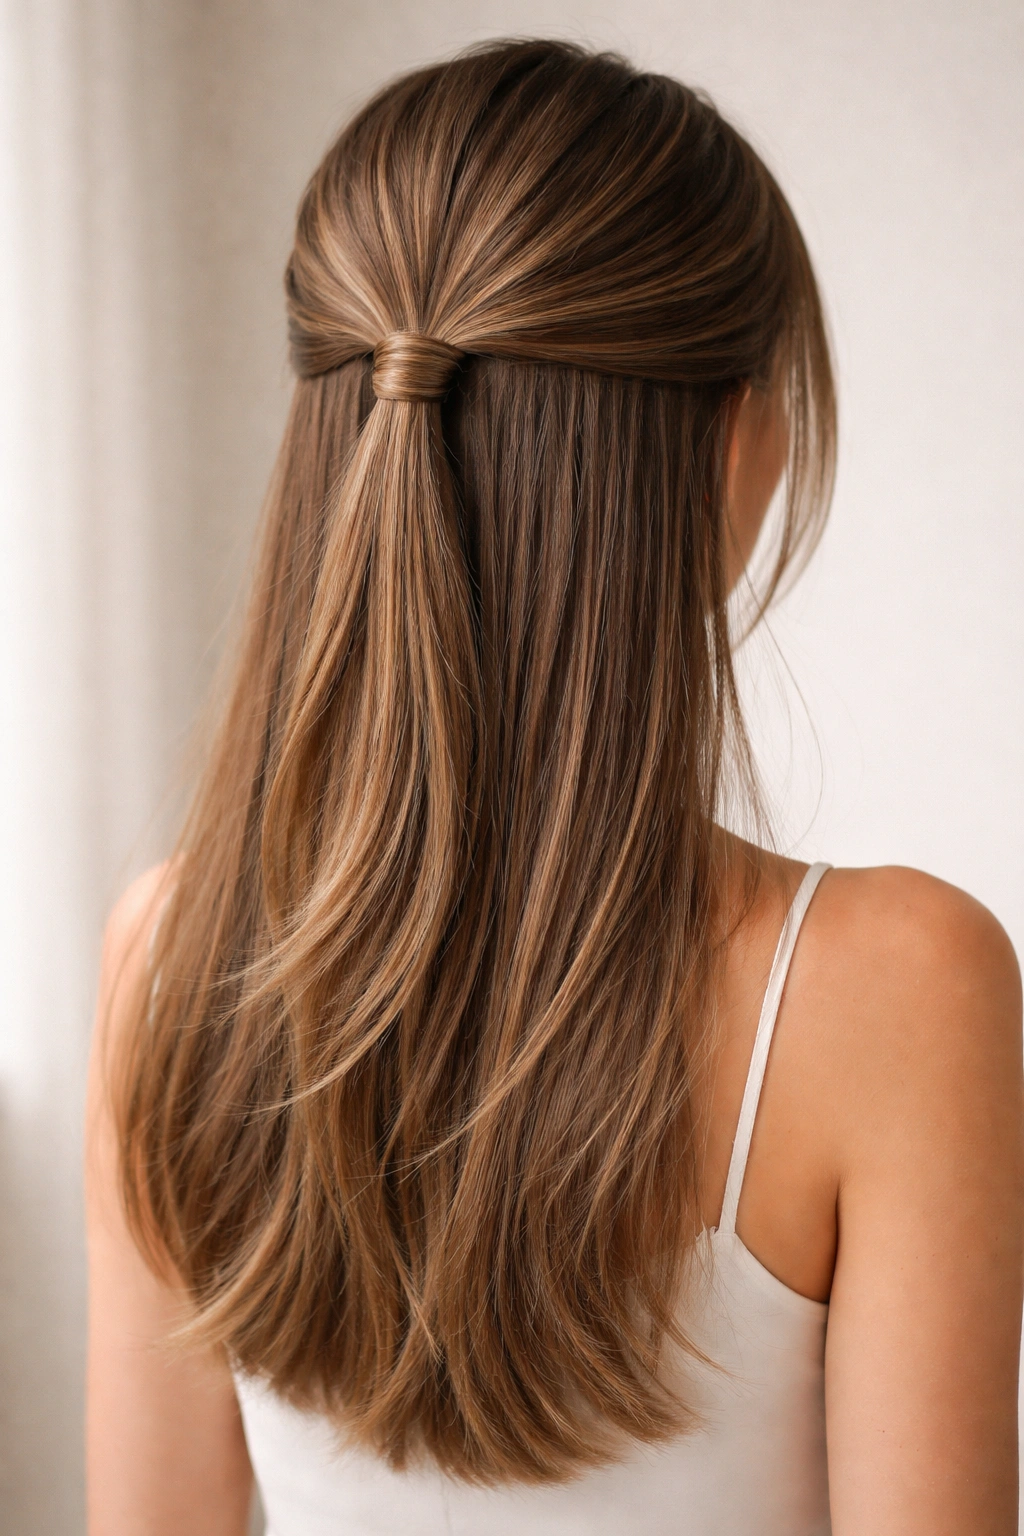
This final style offers the best of comfort and elegance combined. The top half of your hair is pulled back into a half-up ponytail at the crown, and the elastic is wrapped with a thin section of hair as the detail. The bottom half of your hair is left down, and the ends are given subtle texture—either soft waves or a slight curl. It’s polished without being overly formal, it’s feminine without being fussy, and it works on virtually everyone. The half-up placement is flattering because it shows your full face while still pulling hair back from your shoulders and neck.
Why This Works for Homecoming
This style hits a sweet spot: it’s styled enough to feel intentional and elegant, but it doesn’t require the commitment of a full updo. You can dance and move comfortably, your hair won’t stick to your back or neck throughout the night, and you have the comfort of having hair down. It’s also incredibly versatile—you can adjust the tension and placement based on your comfort level and dress style. The texture at the ends adds dimension and prevents the style from looking too structured or severe.
How to Create It
Start with completely dry, straight hair. Create a half-up section by gathering hair from the temples back toward the crown, securing it with a small elastic. Take a thin strand of hair from the back of this ponytail and wrap it around the elastic multiple times, tucking the end underneath and securing with a bobby pin. Now focus on the bottom half of your hair. Using a 1.25-inch curling iron, curl the bottom half in alternating directions—curl one section away from your face, the next section toward your face, and so on. This creates a softer, less uniform wave pattern. Once all sections are curled, allow them to cool completely, then gently brush through them to soften the curls into waves. You can also use a texturizing spray for added grip and dimension. Finish everything with flexible-hold hairspray.
Quick facts:
- The half-up placement visually balances a round face shape by adding lift
- Curling alternating directions creates more natural-looking waves than curling all one way
- This style works beautifully with or without bangs
- You can prep this look ahead of time—the waves will last through the entire evening
Final Thoughts
The right homecoming hairstyle becomes part of your entire look, adding confidence and polish to the entire night. Straight hair gives you a genuine advantage when it comes to creating clean, intentional styles that photograph beautifully and last through dancing, laughing, and celebrating with friends. Whether you choose something romantic, modern, classic, or bold, the key is picking a style that makes you feel like the best version of yourself—because that confidence shows in every photo and every moment.
If you’re planning to have a stylist create your look, bring photos of at least two of these styles to your appointment so your stylist understands the vibe you’re going for. If you’re styling at home, do a test run at least once before the actual event—this takes the pressure off and lets you practice the technique with fresh perspective. Either way, plan to do your hair earlier in the day if possible, which gives your style time to set and lets you make minor adjustments before you need to head out. Your straight hair is genuinely an asset here, and any of these styles will have you walking in looking intentionally styled and authentically yourself.