Being a bridesmaid is an honor, but nailing the perfect hairstyle for the big day? That’s a different challenge entirely. Straight hair offers a gorgeous canvas for bridesmaid looks — sleek, polished, and undeniably elegant — but you want something that complements the bride’s vision while making you feel confident in your own skin. The trick is finding a style that photographs beautifully, holds up through hours of celebration, and suits the formality level of the wedding itself.
The right bridesmaid hairstyle bridges the gap between standing out and fitting seamlessly into the bridal party aesthetic. Unlike curly or textured hair, straight strands shine in styles that emphasize clean lines, dramatic parts, and architectural shapes. You can pull off looks that would fall flat on other hair types, and you can also add subtle drama through texture, shine, and strategic pinning that creates visual interest.
What makes straight hair particularly forgiving is its natural ability to hold styles crisply without constant touch-ups. A half-up twist maintains its shape from ceremony through reception. A polished bun stays exactly where you pinned it. Waves, when added to straight hair, read as deliberately elegant rather than naturally loose. This article breaks down ten bridesmaid hairstyles that complement straight hair perfectly — each one tested to survive dancing, hugging, and a full day of photographs.
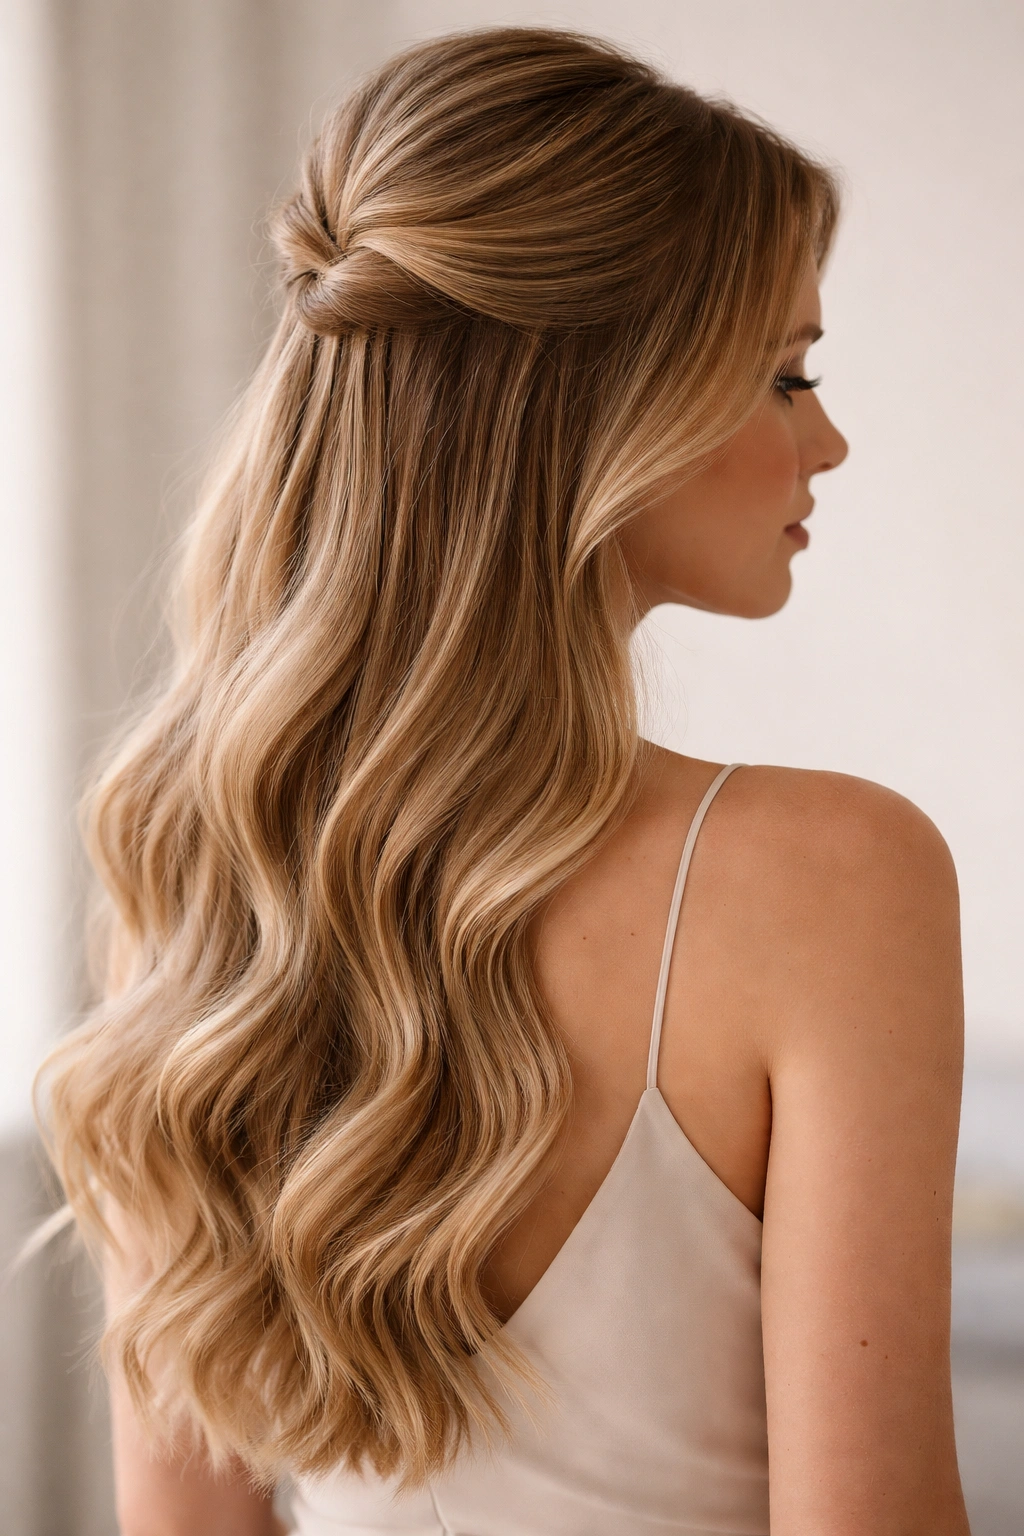
1. Classic Half-Up Style with Waves
This is the goldstandard bridesmaid hairstyle for a reason. You’re leaving the length down while securing the top half elegantly away from the face, creating movement and dimension without looking overdone. For straight hair, this style works because the waves you add become a deliberate design choice rather than relying on natural texture for volume.
Why This Works for Straight Hair
Straight hair’s sleek nature means when you deliberately add waves to just the bottom section, they read as polished and intentional. The contrast between the secured, smooth top and the wavy bottom half creates visual interest that feels bridal without stealing the bride’s thunder. This style is also incredibly adaptable — you can dress it up with delicate pins or keep it simple with just a clear elastic.
How to Create the Look
Start by blow-drying your hair straight, then use a large-barrel curling iron to create loose waves from the mid-shaft down to the ends. Take the top section (from your temples back to the crown) and gently twist it, securing with bobby pins that match your hair color. Pin the twist slightly off-center for a romantic asymmetrical feel. The key is making the twist look intentional without making it appear tight or overdone — you want it to feel like you casually gathered your hair, not that you’re pulling your face back.
Pro tip: Spray the waves with light-hold hairspray before you twist the top section. This keeps the waves defined even if you’re dancing or hugging throughout the evening. A strategically placed pearl pin or delicate hair comb adds bridal elegance without extra effort.
2. Sleek Low Bun with Face-Framing Strands
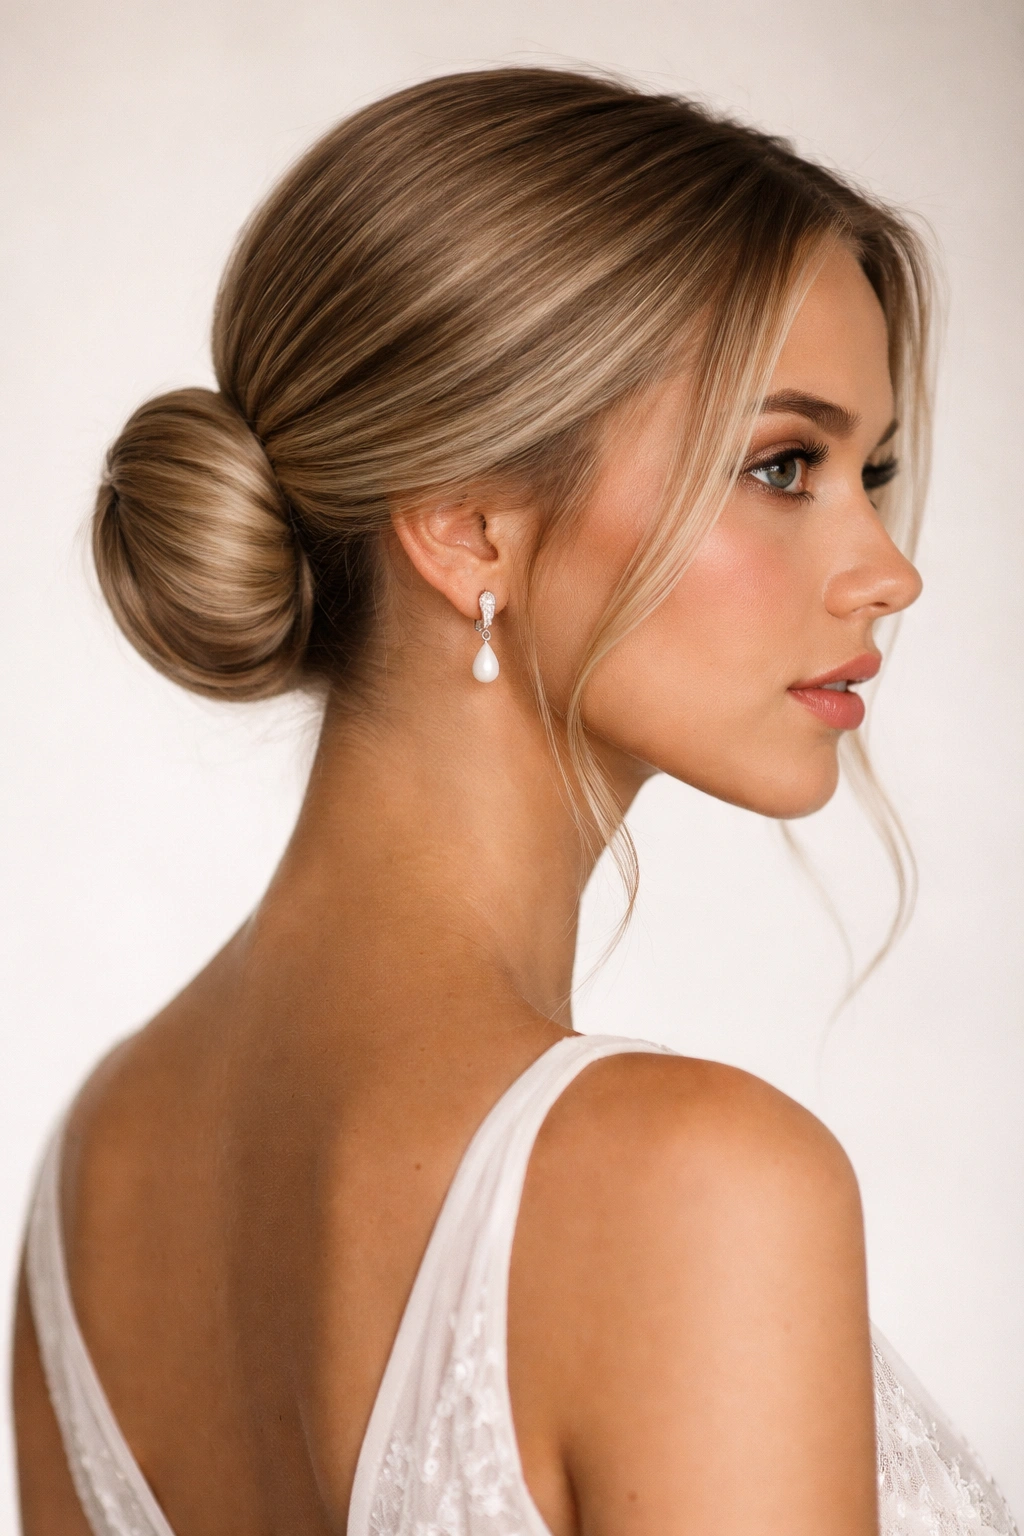
The low bun is a timeless choice for formal occasions, and straight hair creates the sleekest, most polished version possible. By leaving just a few strands loosely framing the face, you soften the look enough that it feels modern rather than severe, while maintaining that sophisticated, pulled-together aesthetic that photographs beautifully.
What Makes This Style Stand Out
A low bun on straight hair sits perfectly flat against the back of your head with zero bumps or flyaways. The sleekness is inherent to the hair type — you’re not fighting texture, you’re celebrating it. Face-framing strands prevent the look from feeling too severe or architectural, which is especially important if the wedding has a relaxed or garden setting rather than formal ballroom vibes.
Step-by-Step Creation
Apply smoothing serum to damp hair before blow-drying completely straight. Use a fine-tooth comb to gather hair into a low ponytail at the nape of your neck, positioned slightly off-center. Twist the ponytail loosely and wrap it around the base to form a bun, securing with bobby pins and a clear elastic hidden underneath. Leave two small sections of hair (one on each side of your face) loose before you start the bun, and gently curl them away from your face with a small-barrel curling iron for just a hint of movement.
Worth knowing: This bun style works particularly well if your wedding day involves outdoor photos. The neat, contained nature of the bun means wind won’t turn your hair into an unmanageable mess, unlike looser styles that can look bedraggled after being tousled by a breeze.
3. Half-Up Twisted Crown

This style creates the visual impression of an ornate updo while leaving your full length down — it’s sophisticated enough for black-tie events but works just as well for casual outdoor weddings. The twisted crown frames the entire face and feels special without requiring an elaborate hairpiece or extensive pinning.
Why Straight Hair Excels Here
The twisted crown’s success depends entirely on clean, visible twists that hold their shape. Straight hair maintains crisp twist definition from the moment you pin it until the last dance. There’s no flyaway texture to distract from the geometric beauty of the twist, and the overall silhouette reads as intentional and elegant.
How to Build the Crown
Start with completely straight, smoothed hair. Take a section from one side of your head (near the temple) and begin twisting it back toward the center of your crown. As you twist, gradually incorporate more hair, working toward the opposite side of your head so the twist wraps around and follows a crown-like path. Secure the final twist with bobby pins hidden underneath, and release the secured twist slightly with your fingers so it has a relaxed, intentional look rather than appearing mechanical.
Pro tip: Use dry shampoo or texturizing spray at the roots before you start twisting. This gives you extra grip without making the twists look oily or weighted down, and it helps everything stay in place through hours of celebration and movement.
4. Straight and Slicked-Back Ponytail
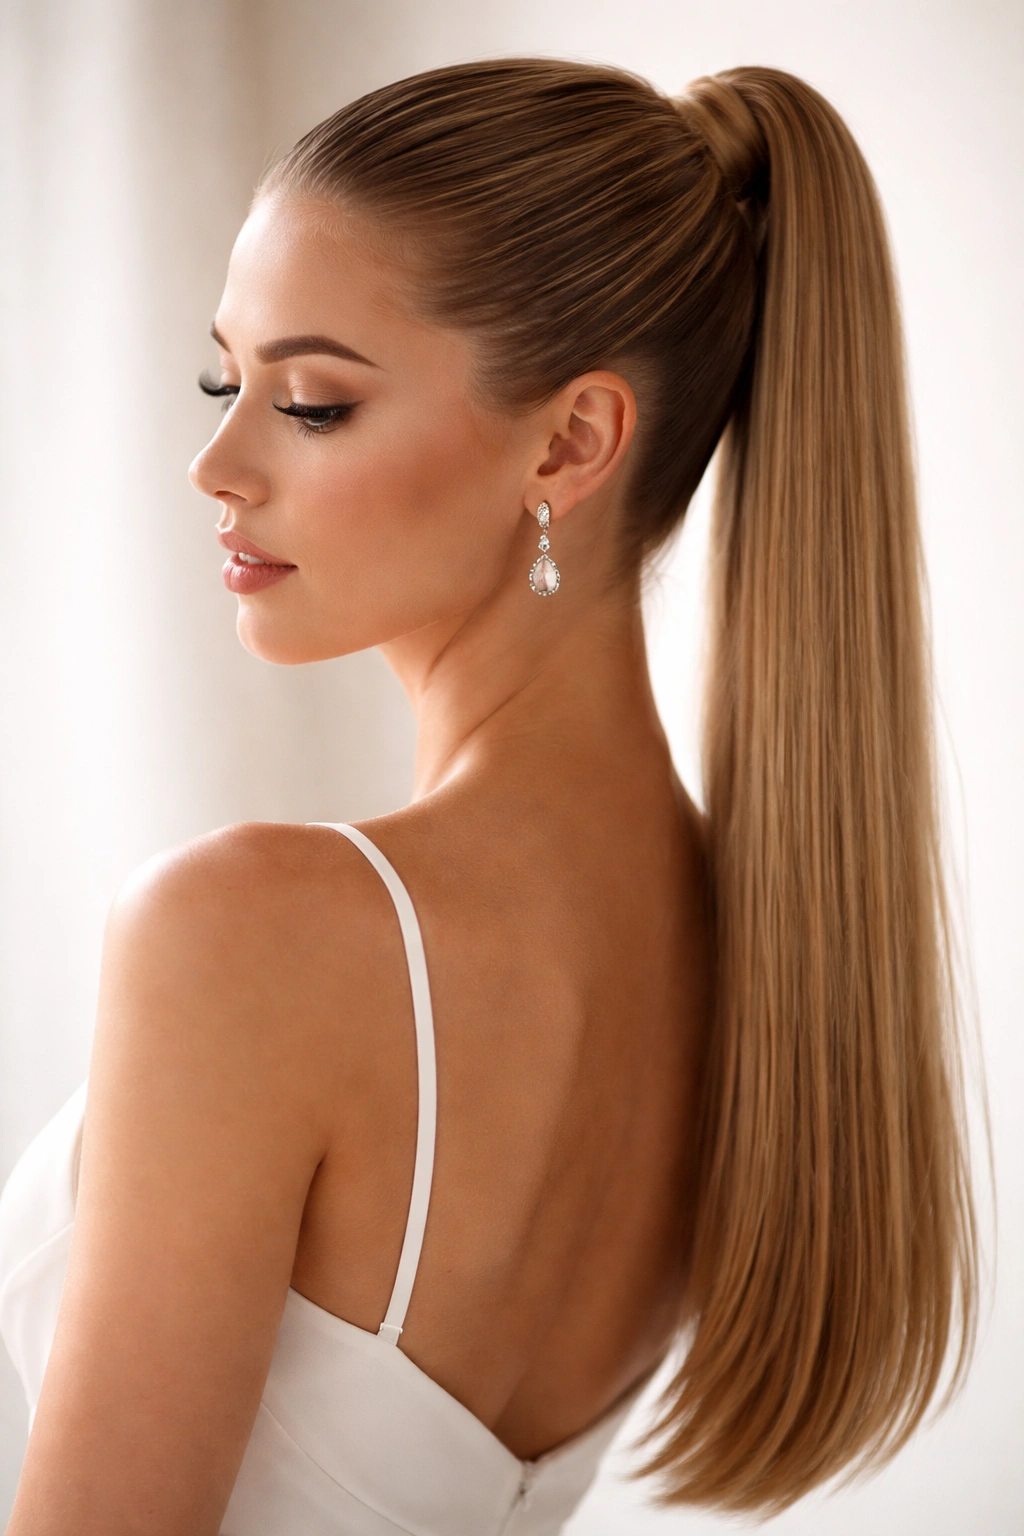
Sometimes the most powerful statement is the simplest one. A high, sleek ponytail worn straight (not curled) creates a modern, minimalist aesthetic that reads as chic rather than boring. This is the choice for weddings with contemporary or fashion-forward aesthetics, and it showcases your face and your bridesmaid dress without competing for visual attention.
What Makes It Work
Straight hair in a polished ponytail is inherently elegant — there’s nothing tentative or underdone about it. The slicked-back styling emphasizes cheekbones and the line of the jaw, and it photographs with striking clarity. This style also means zero fuss once it’s secured; you’re not constantly adjusting waves or worrying about a bun coming loose.
The Perfect Execution
Blow-dry hair completely straight using a paddle brush to maximize smoothness. Apply smoothing serum to your hairbrush and work through the hair as you smooth it back into a high ponytail. Use a boar-bristle brush to gather the ponytail smoothly — boar bristles grip the hair without creating static or frizz. Secure with a clear elastic, then take a thin section of hair from the base of the ponytail and wrap it around the elastic, pinning the wrapped section underneath to hide the elastic completely.
Insider note: A tiny amount of pomade or gel on the very top layer of your hairline (just the baby hairs and the first half-inch) keeps everything smooth and graphic-looking without appearing shiny or wet. This is a professional trick that makes the difference between a hairstyle and a polished styling moment.
5. Deep Side Part with Layers
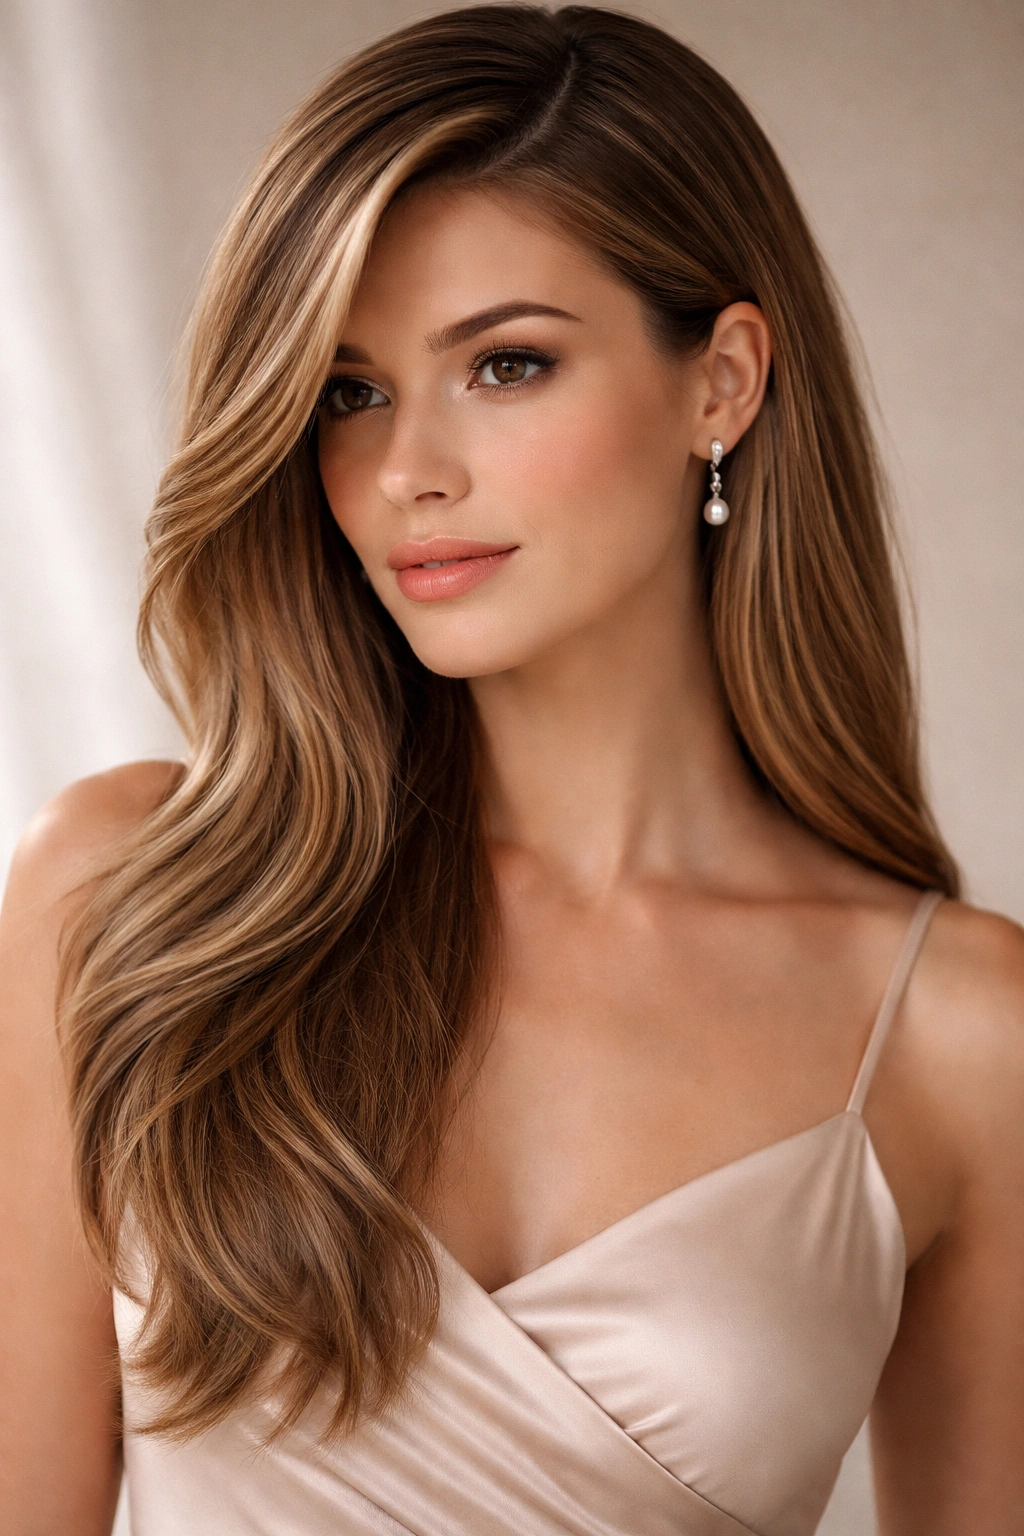
If you have texture or layers cut into your straight hair, emphasizing those with a dramatic side part creates movement and dimension without requiring curls or waves. The side part alone changes your face shape and creates visual interest, making you look intentional without high styling effort.
Why This Approach Suits Straight Hair
Straight hair with layers shows off those layers beautifully when they’re parted and positioned correctly. The diagonal line created by a deep side part is inherently flattering and modern. You’re not fighting against your hair’s natural state — you’re working with it and making the geometry of your cut do the heavy lifting.
Creating the Statement
Use a fine-tooth comb and a blow-dryer to establish a deep side part — go deeper than you might normally wear it, creating a dramatic diagonal from above one eyebrow to behind the opposite ear. Blow-dry the larger section straight and smooth, then blow-dry the smaller section back and slightly under so it creates a subtle frame around your face rather than falling flat. If your hair has layers, those will naturally fall into place and create movement without you doing anything extra.
Worth knowing: If your hair is naturally very fine or straight without movement, add barely-perceptible waves using a large-barrel curling iron on the low setting. The goal is subtle texture that adds dimension, not obvious curls that contradict the modern vibe of the side part.
6. Low Twisted Bun with Pearl Pins
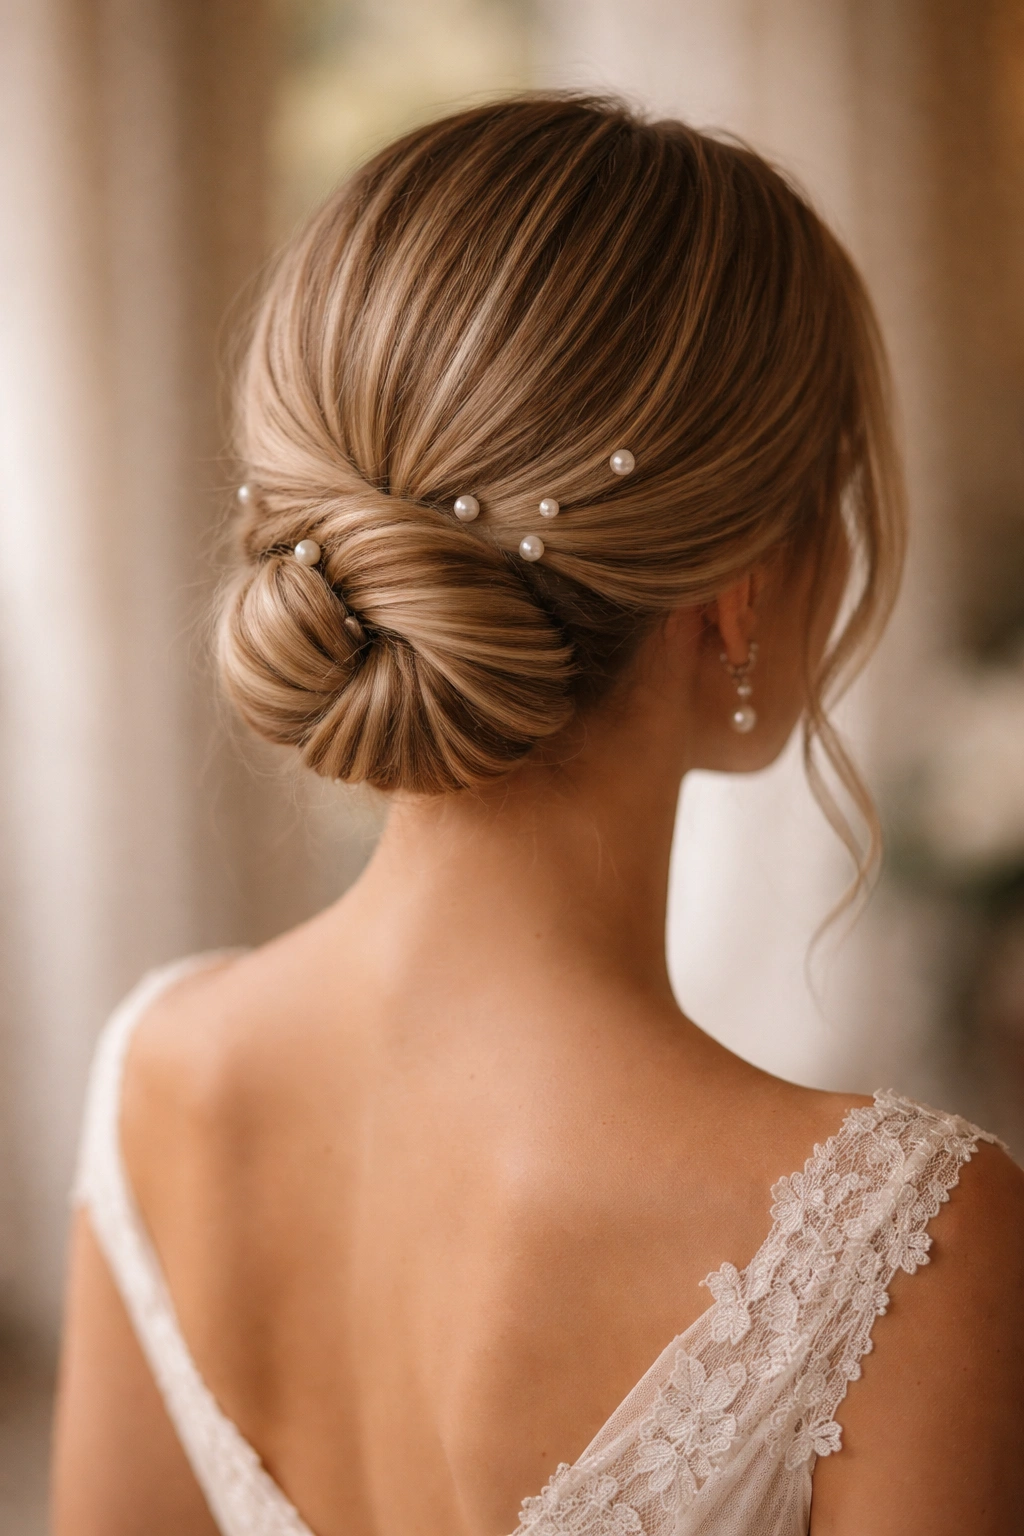
This is the romantic option for brides who want their bridesmaid party to feel cohesive and ethereal. The twisted bun is more interesting than a simple bun because the twists create visual texture, and pearl pins add just enough jewelry without being distracting. It’s sophisticated enough for formal events and sweet enough for garden weddings.
How This Style Works on Straight Hair
The twists in this bun style create depth and visual interest that compensates for the sleekness of straight hair. Pearl pins catch the light subtly and create small focal points without adding bulk or weight. The overall effect is polished and elegant without feeling heavy or overly styled.
Step-by-Step Assembly
Blow-dry your hair completely straight and smooth. Gather hair into a low ponytail at the nape of your neck, positioning it slightly off-center. Divide the ponytail into two sections and twist each section gently, then wrap both twisted sections around the base of the ponytail, securing with bobby pins. The two twisted sections should spiral around each other slightly, creating an intricate-looking bun that’s actually simple to execute. Insert 3-4 pearl pins at different angles around the bun for a scattered, elegant look.
Pro tip: Lightly tease the bun sections before twisting them. This creates subtle texture on the surface of the bun, making it look more deliberately styled and less like a simple wrapped ponytail. Use a fine-tooth comb to gently smooth the teased sections so they look intentional rather than messy.
7. Straight Hair with Decorative Hairpiece
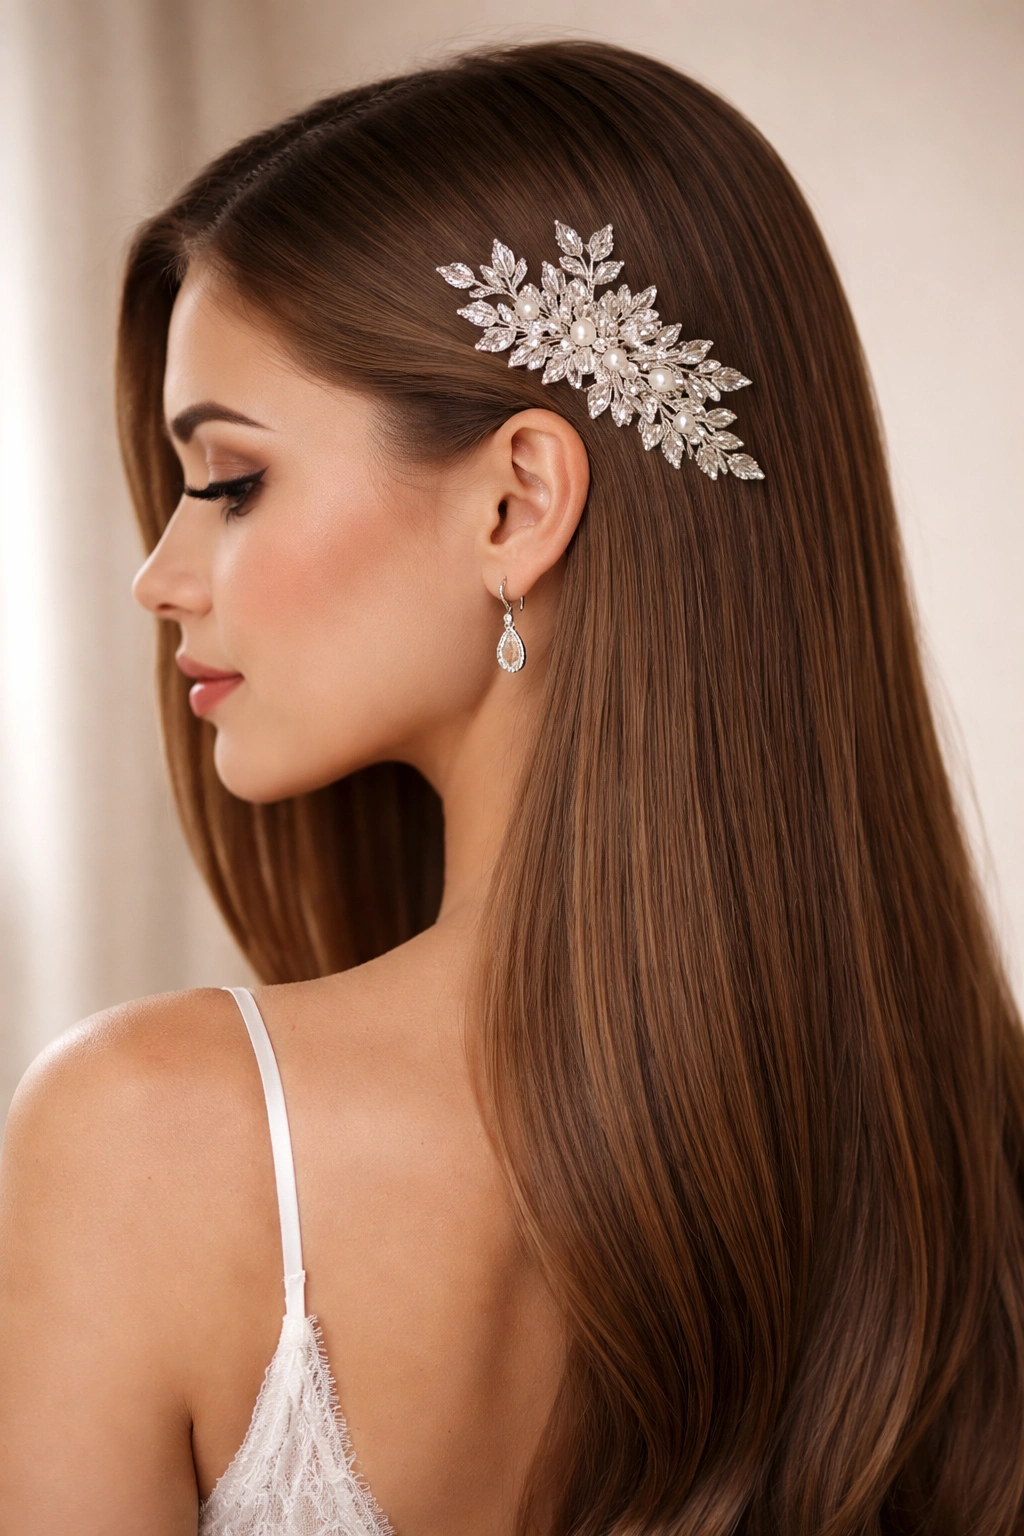
If the bride has chosen a color scheme or requested specific aesthetic elements, a decorative hairpiece (a jeweled comb, a floral clip, or a delicate chain piece) transforms even the simplest straight hairstyle into something special. Straight hair provides the perfect backdrop for a statement hairpiece because there’s visual contrast between the clean hair and the intricate accessory.
Why Accessories Shine on Straight Hair
A decorative piece on textured hair can get lost or appear busy. On straight hair, the same piece reads as intentional, elegant, and part of the overall design. The piece becomes a focal point rather than competing with texture for visual attention. This approach is also incredibly practical if the bride has a vision but wants flexibility in the actual hairdo.
Styling Options with a Piece
The beauty of this approach is flexibility. You could wear your hair down and straight with the piece positioned at the side, creating a modern look. You could wear half-up with the piece securing the half-up section. You could wear a low ponytail and position the piece at the base for a romantic effect. The straight hair remains the canvas, and the piece is the art. Make sure whatever piece you choose complements your face shape — a side clip works well for most face shapes, while a center piece requires more angular features to avoid appearing childish.
Worth knowing: If the piece doesn’t have a secure mechanism, use hair clips or bobby pins to attach it firmly. Test it before the wedding day to make sure it stays put through movement, dancing, and outdoor activities.
8. Sleek High Ponytail with Shine
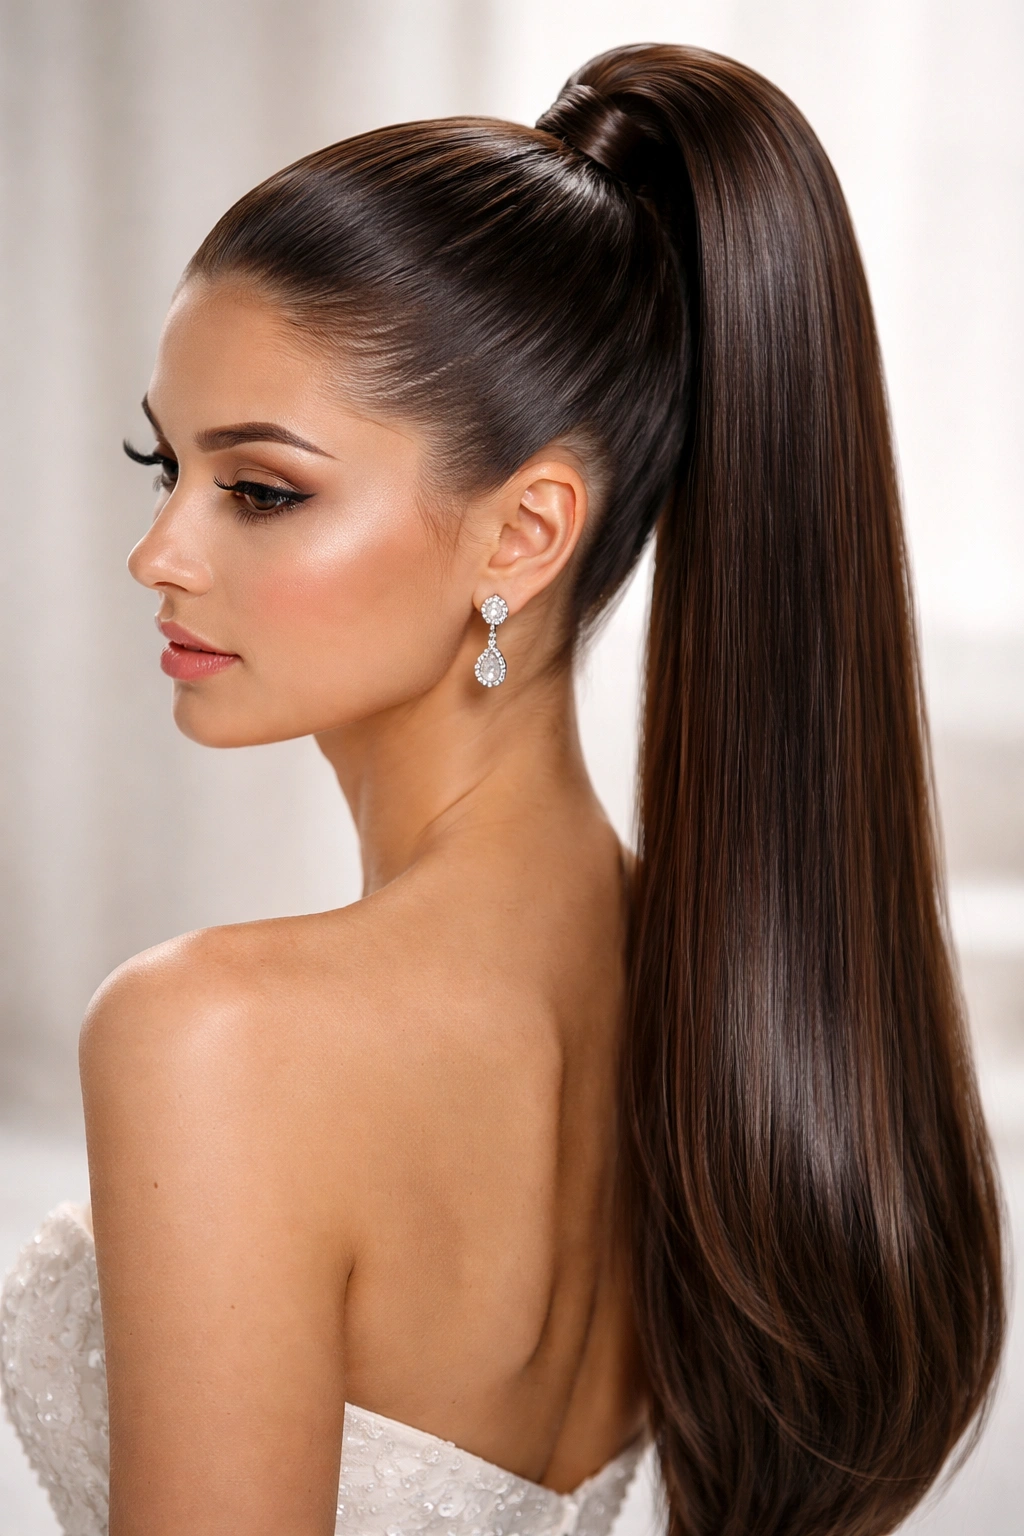
A high ponytail is the go-to choice when you want polish, practicality, and a modern edge. On straight hair, you can maximize shine using smoothing products and specific blow-dry techniques, making your hair catch the light beautifully in photographs. This style works for any wedding formality level and any venue.
What Makes This Universally Flattering
The high ponytail works because it’s geometrically flattering regardless of face shape, and on straight hair, the polish is undeniable. The height creates the illusion of a lifted face, and the smoothness creates a clean silhouette that photographs sharply. Unlike styles that rely on texture for volume, this style celebrates the sleekness of straight hair as an asset.
Achieving Maximum Shine
Start with a clarifying shampoo to remove product buildup, then apply a silicone-based smoothing serum to damp hair before blow-drying. Use a paddle brush with the blow-dryer to maximize smoothness — the paddle brush’s broad, flat surface creates sleek results on straight hair better than round brushes do. Blow-dry in one direction, pulling the brush smoothly from roots to ends. When creating the ponytail, use a boar-bristle brush to gather the hair, as these bristles polish the hair cuticle and enhance shine.
Pro tip: A light mist of shine spray after you’ve secured the ponytail adds luminosity without making your hair look wet or greasy. Spray from about 12 inches away and focus on the ponytail itself, avoiding the roots where shine spray can weigh things down.
9. Straight Hair with Subtle Braided Details
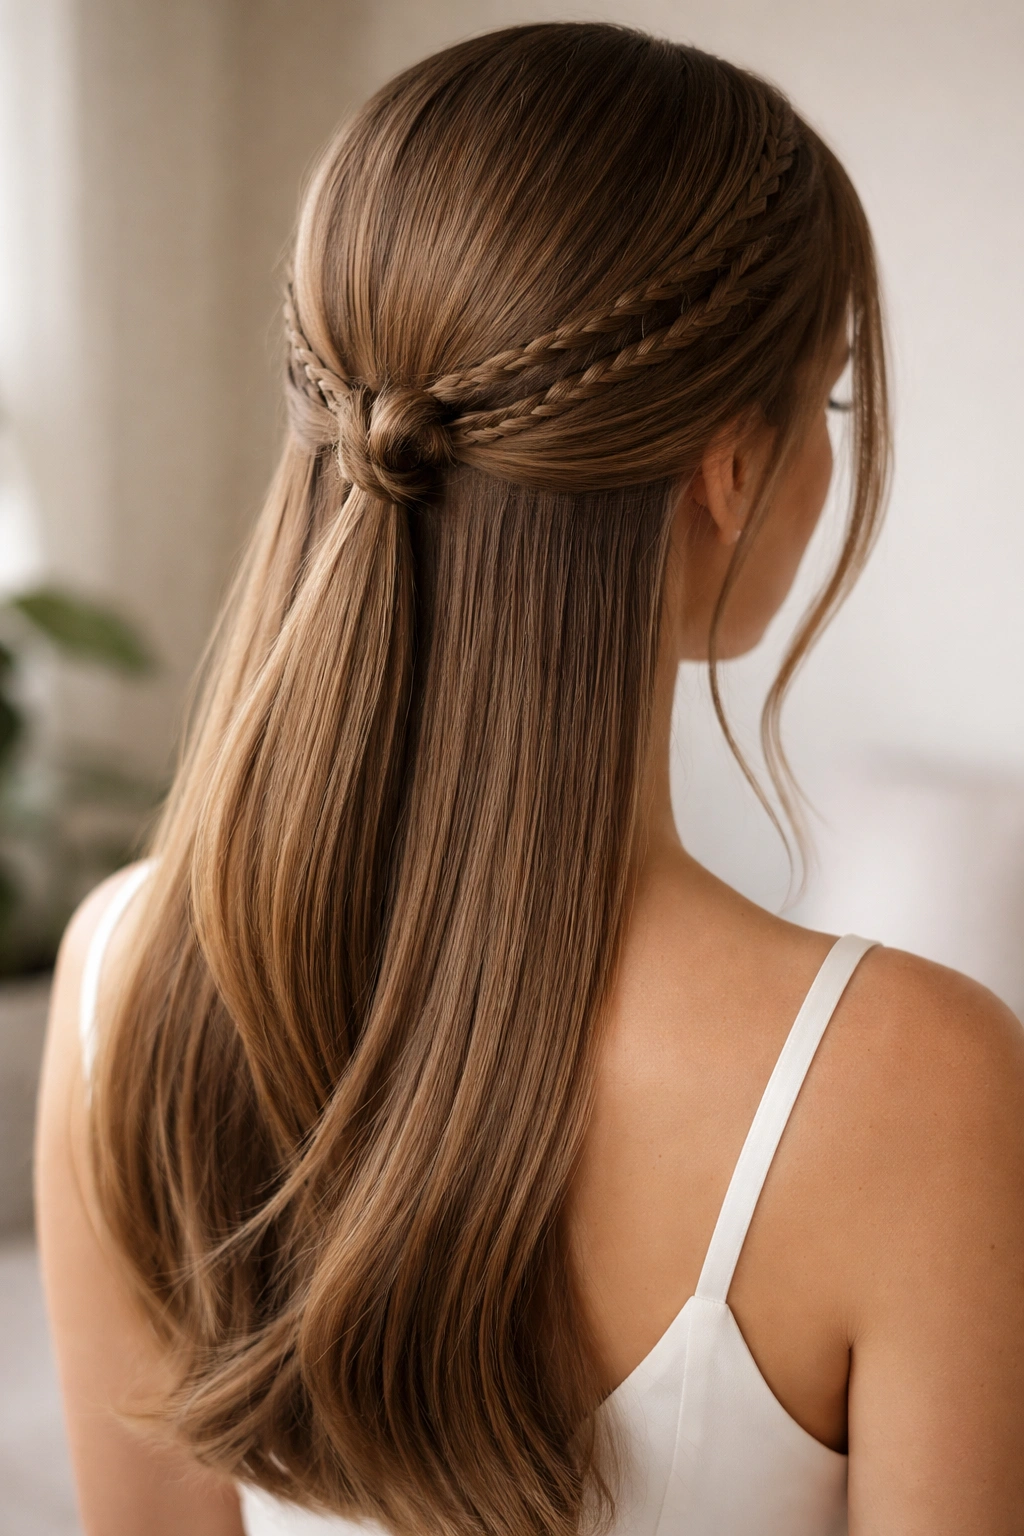
Braids on straight hair read as intentional and architectural rather than loose and bohemian. Adding one or two subtle braids (perhaps pulled from the side and incorporated into an updo, or woven into the back of a half-up style) creates detail and visual interest without requiring your hair to have inherent texture.
Why Braids Work Differently on Straight Hair
A braid on straight hair has clean, defined lines that create geometric beauty. On textured hair, a braid can look casual or undone; on straight hair, the same braid looks deliberately styled and sophisticated. The contrast between the braid’s structure and the sleekness of the surrounding hair creates visual depth.
Incorporating Braids Intentionally
You could create a thin three-strand braid that pulls from one temple toward the back, incorporating the braid into a low bun or securing it with a bobby pin hidden underneath. You could create two thin braids (one from each side) and meet them in the center back, then leave the rest of your hair down. You could create a single Dutch braid (braiding away from the scalp instead of toward it, which creates more dimension) and wrap it around the back of your head. Each variation offers a different vibe — choose based on the wedding’s formality and your own comfort level.
Worth knowing: Practice braiding before the wedding. Braids on straight hair require slightly more tension than braids on textured hair to look intentional rather than loose. You want the braid to be secure and defined without looking uncomfortably tight or pulled.
10. Polished Center Part with Straight Length
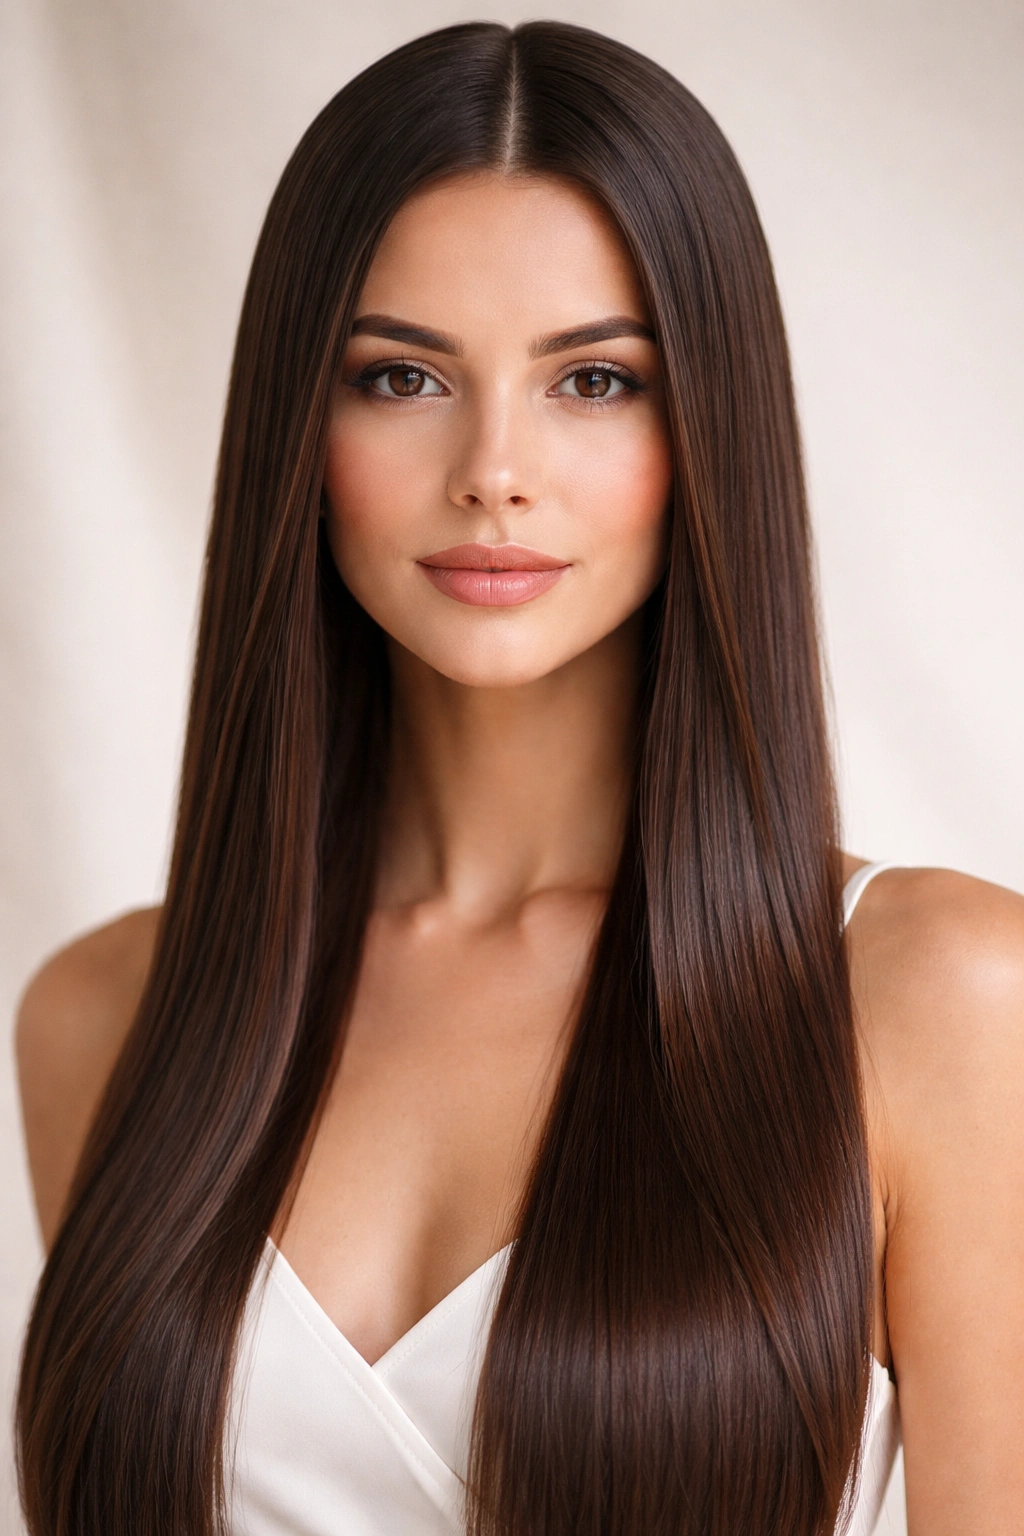
The simplest hairstyle is sometimes the most powerful. A center part worn with completely straight, glossy length is the choice if you want to showcase your hair itself rather than a specific style. This look works for any wedding and any dress, and it puts the emphasis on shine, health, and sleekness rather than elaborate styling.
Why This Minimalist Approach Works
A center part divides the face symmetrically and is inherently flattering. When paired with straight hair that’s visibly healthy and shiny, it reads as effortlessly elegant rather than like you didn’t try. This style requires your hair to be in genuinely good condition — the simplicity means there’s nowhere for damage or dullness to hide — but that investment in shine and health pays off not just for this day but for months afterward.
Execution and Maintenance
Part your hair directly down the center using a fine-tooth comb and a blow-dryer. Blow-dry the entire length straight using a paddle brush, applying smoothing serum as you go. You’re not creating texture or movement — you’re maximizing smoothness and shine. Once dry, apply a small amount of smoothing serum or lightweight oil to the ends to enhance shine and prevent frizz. That’s it. The entire appeal of this style is that it looks intentional without appearing overly styled.
Pro tip: Schedule a glossing treatment at the salon a week or two before the wedding. A semi-permanent glossing treatment deposits shine-enhancing pigment and tones down any brassiness, making your hair look noticeably more lustrous. This is the insider move that takes “straight hair” from pretty to undeniably striking.
Final Thoughts
The beauty of straight hair for a bridesmaid is that every one of these styles works because of your hair’s natural qualities, not in spite of them. You’re not fighting texture or volume — you’re leveraging sleekness, shine, and the ability to hold clean shapes. Each of these ten styles is designed to look polished in photographs, comfortable enough to wear for hours, and flattering enough that you feel confident celebrating your friend’s big day.
The best bridesmaid hairstyle is one that makes you feel like yourself while complementing the bride’s vision. Before you commit to any style, talk with the bride about her overall aesthetic and expectations. Some brides want uniformity across the bridal party; others want flexibility so each bridesmaid can choose what suits her best. Once you know the parameters, return to this list and trust that whatever you choose will look elegant and intentional.
Straight hair is a gift for formal styling, and there’s no such thing as a boring bridesmaid hairstyle when you start with a strong foundation and a clear direction. Pick your style, practice it beforehand, invest in a good blow-out or professional styling the morning of the wedding, and enjoy standing beside your friend looking absolutely polished.