Straight hair is a canvas for some of the most elegant and polished wedding hairstyles. Whether you’ve been blessed with naturally sleek strands or you’re planning to straighten your hair for your big day, the clean lines and sophisticated possibilities of straight hair make it incredibly versatile for bridal looks. The key to mastering straight-hair wedding styles lies in understanding how to add texture strategically, use accessories as design elements, and leverage the natural shine and smoothness that straight hair provides. These styles range from romantic and undone to severely elegant and editorial—and what’s particularly wonderful is that most of them can be achieved without requiring extensions, complex techniques, or hours in the styling chair. The best straight-hair bridal styles feel timeless rather than trendy, photogenic from every angle, and comfortable enough to wear throughout a long celebration.
1. Sleek Low Ponytail
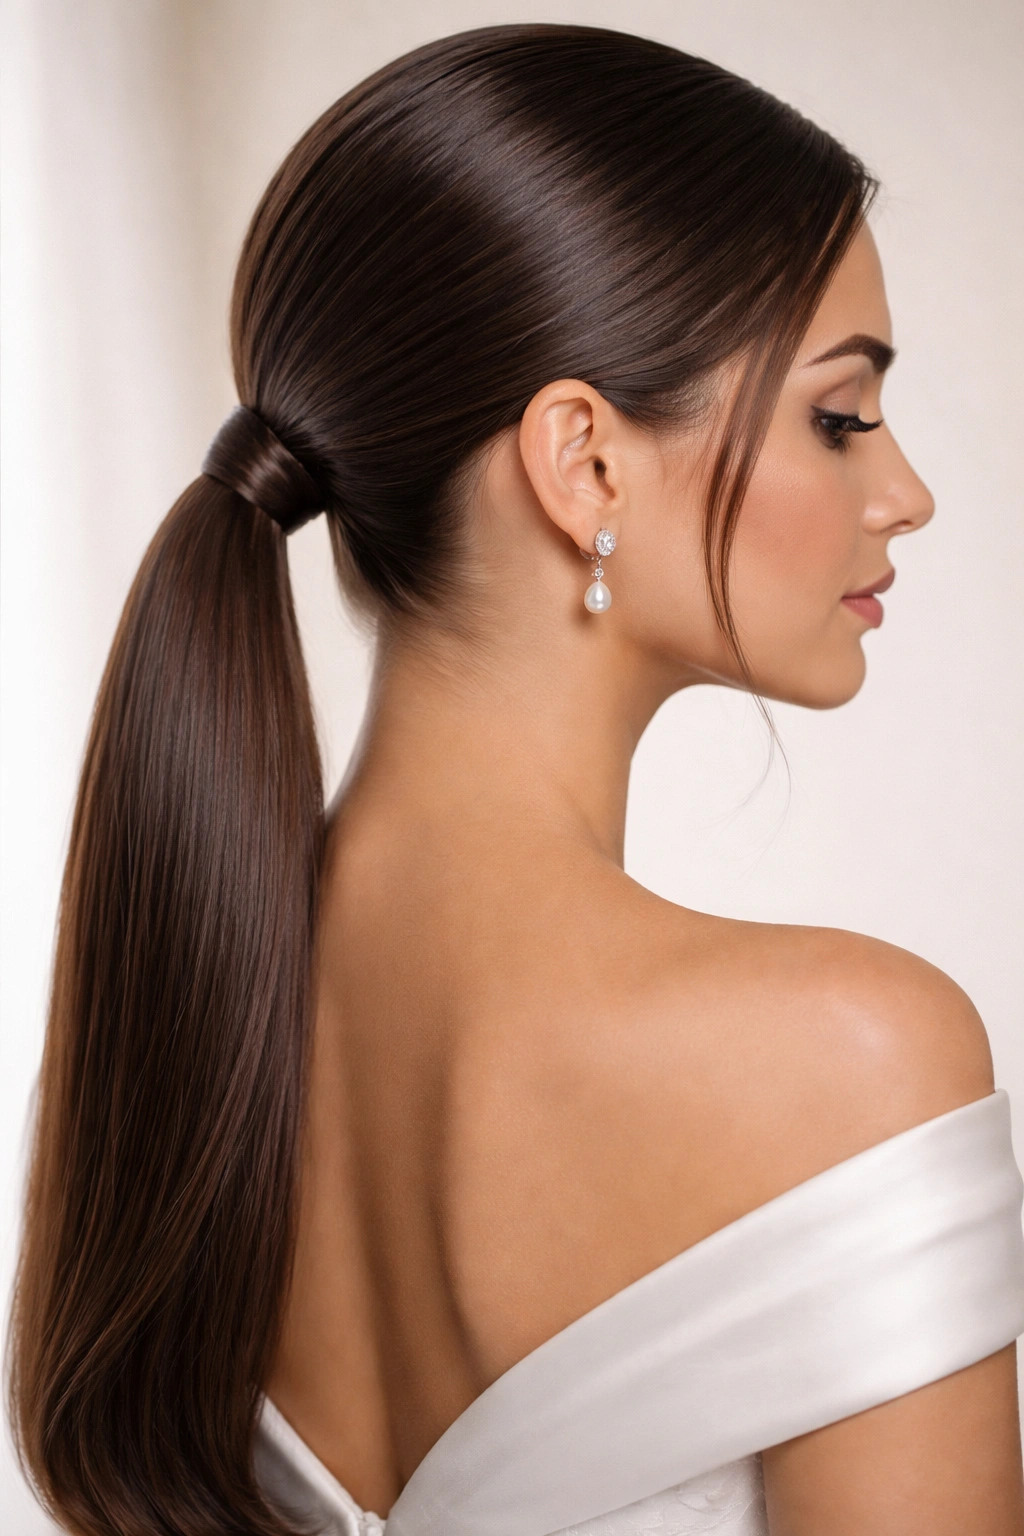
A sleek low ponytail is the definition of understated elegance for a straight-haired bride. This style works brilliantly because it removes hair from the face while maintaining that polished sophistication that photographs beautifully, and it’s surprisingly practical for a full day of celebration. The key to nailing this look is achieving a perfectly smooth, tight gather at the nape of the neck without any flyaways—this is where a quality smoothing serum and a fine-tooth comb become your best friends. You want the ponytail positioned low enough to feel romantic but high enough that it reads as intentional and styled, typically about two inches above the base of your skull.
Why It Works for Straight Hair
A sleek low ponytail is the perfect foundation for showcasing the naturally smooth texture that straight hair possesses. The tightness required for this style actually benefits from hair that’s already straight, since you won’t struggle with frizz or the stubborn bend marks that curly or wavy hair often develops after being pulled back. This style also keeps your neckline and shoulder area completely clear, which is ideal if your wedding dress has detailed beading or an interesting neckline design.
How to Achieve This Look
- Use a paddle brush to smooth every section of hair back without bumps or creases, starting from the front and working toward the back
- Apply a smoothing serum or light hairspray before gathering to create a sleek surface and prevent flyaways
- Secure with a clear elastic or a small hair tie matching your hair color, wrapped tightly and smoothly
- Consider wrapping a thin strand of hair around the base of the ponytail to conceal the elastic and add a polished finish
- Pin a small comb, jeweled barrette, or pearl clip into the ponytail as an understated accessory
Pro tip: Tease slightly at the crown before smoothing to create subtle volume at the back of the head—this prevents the look from feeling flat or severe while maintaining the sleek aesthetic.
2. Half-Up Half-Down

The half-up half-down style strikes an ideal balance between showing off the length and movement of your straight hair while keeping some strands away from your face and neck. This romantic option has a naturally effortless quality that works beautifully in both traditional and modern wedding settings. The versatility of this style is remarkable—you can make it feel polished and wedding-ready with the right technique and accessories, yet it reads as romantic and relaxed rather than overly formal. It’s also one of the most comfortable styles for a bride, since it doesn’t pull hair as tightly as a full updo, making it easier to wear comfortably for eight to ten hours.
Why It Works for Straight Hair
Straight hair displays the half-up half-down style with effortless sophistication because the bottom section falls in clean, smooth lines that frame the face beautifully. You don’t have the bulk or frizz concerns that can sometimes make this style look muddled on textured hair. The sleek lines created by straight hair actually enhance the dimensional quality that comes from having the top section styled up—the contrast between the pinned portion and the loose section below becomes a design element itself.
How to Achieve This Look
- Section off the top third of your hair, starting from one temple and moving to the other temple across the crown
- Smooth this section back and secure it with an elegant clip, barrette, or comb at the back of the head
- Leave the bottom two-thirds of hair completely straight and smooth, parted down the center or off to one side
- Tease the base of the upper section slightly for subtle volume before smoothing the top layer back
- Add a jeweled clip, pearl pins, or fresh flowers to the pinned section for bridal embellishment
Worth knowing: If you’re concerned about pieces slipping throughout the day, use bobby pins along with your barrette or comb—they’ll be completely hidden under the smoothed-back section, and the double-security will keep everything in place.
3. Deep Side Part with Waves
A deep side part with waves brings glamorous movement to straight hair while maintaining the sophisticated polish that makes straight hair so appealing for weddings. This style works whether you create loose, romantic waves or slightly more defined waves—the key is that the waves feel intentional rather than accidental. The deep side part itself is a styling choice that photographs exceptionally well, creating dimension and movement even though your hair starts as completely straight. This option bridges the gap between a fully styled updo and completely loose hair, giving you structure without feeling overly formal.
Why It Works for Straight Hair
The contrast between perfectly straight hair and deliberately added waves is visually striking and photographs beautifully—the waves read as purposeful styling rather than the hair’s natural texture. A deep side part on straight hair creates beautiful dimension and asymmetry that’s flattering on most face shapes, drawing attention to whichever side you’re parting toward. Because your hair starts straight, you have complete control over the wave intensity and placement, allowing you to customize the look to suit your hair thickness and face shape.
How to Achieve This Look
- Create a deep side part by running your comb from your temple almost to the back of your head on one side, pulling hair to that side
- Use a large barrel curling iron or wand to create loose waves throughout the entire length, allowing waves to cool before brushing them out for softness
- Brush through the waves gently with a paddle brush to soften them and create a romantic, undone texture
- Smooth the side with more hair using serum for extra polish and shine
- Pin the smaller side of hair slightly at the back crown if you want a subtle half-up element, or leave it completely loose
Insider note: If you’re worried about waves falling flat throughout your reception, lightly mist your hair with finishing spray after curling, before you brush the waves out—this helps them hold without looking stiff or overdone.
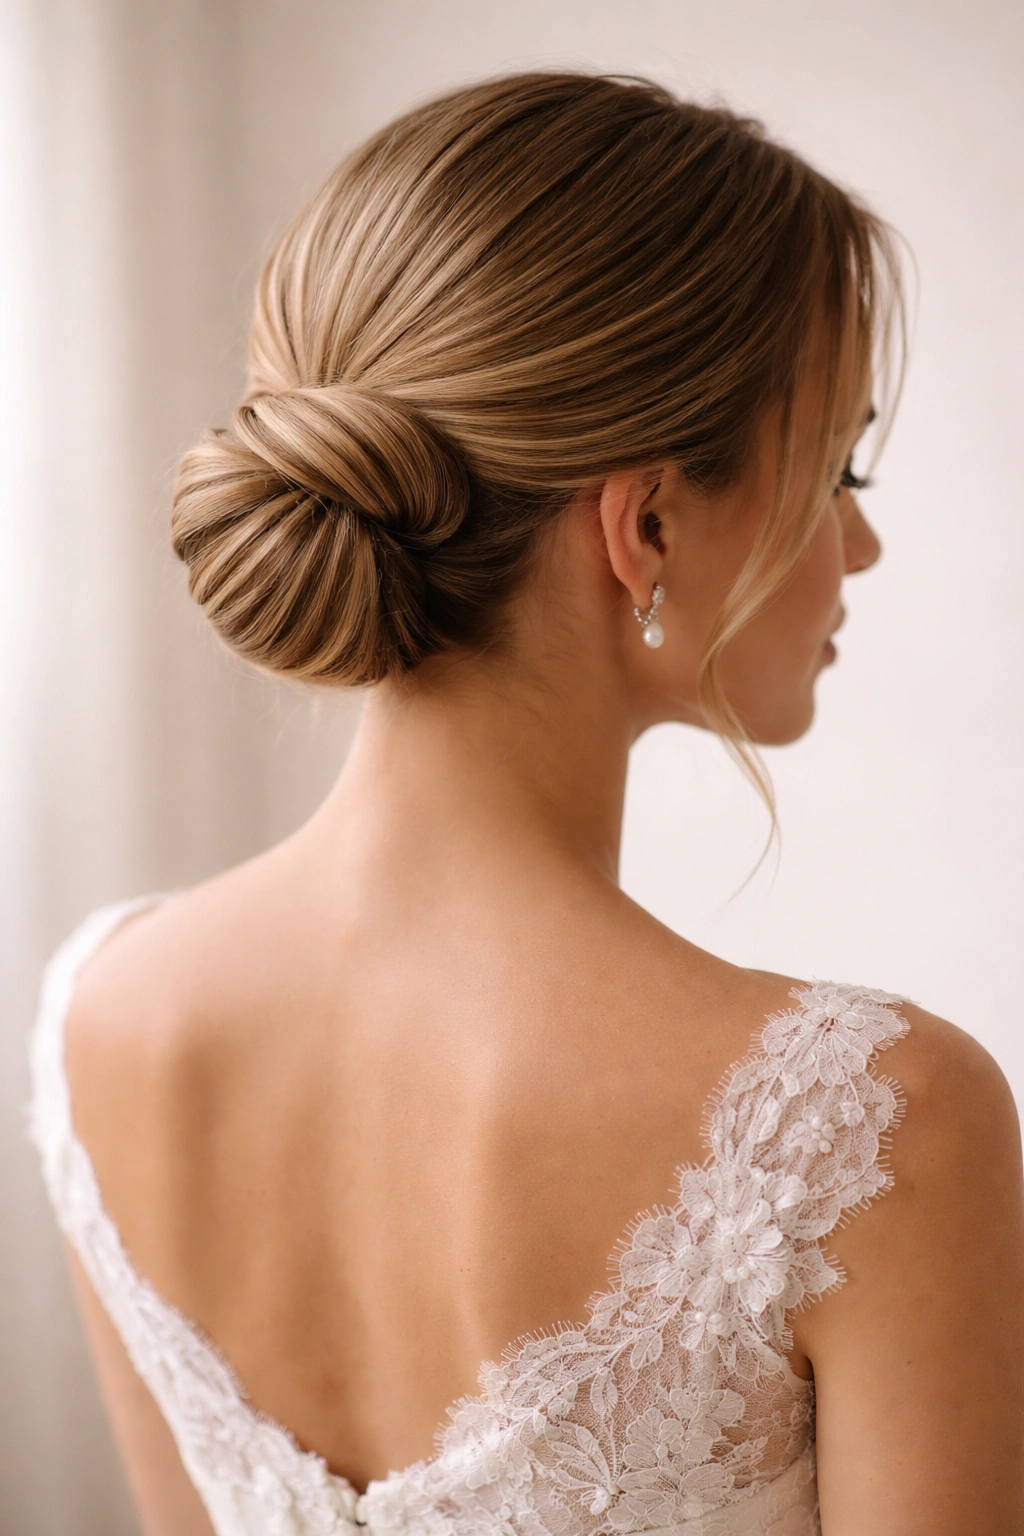
4. Sleek Bun
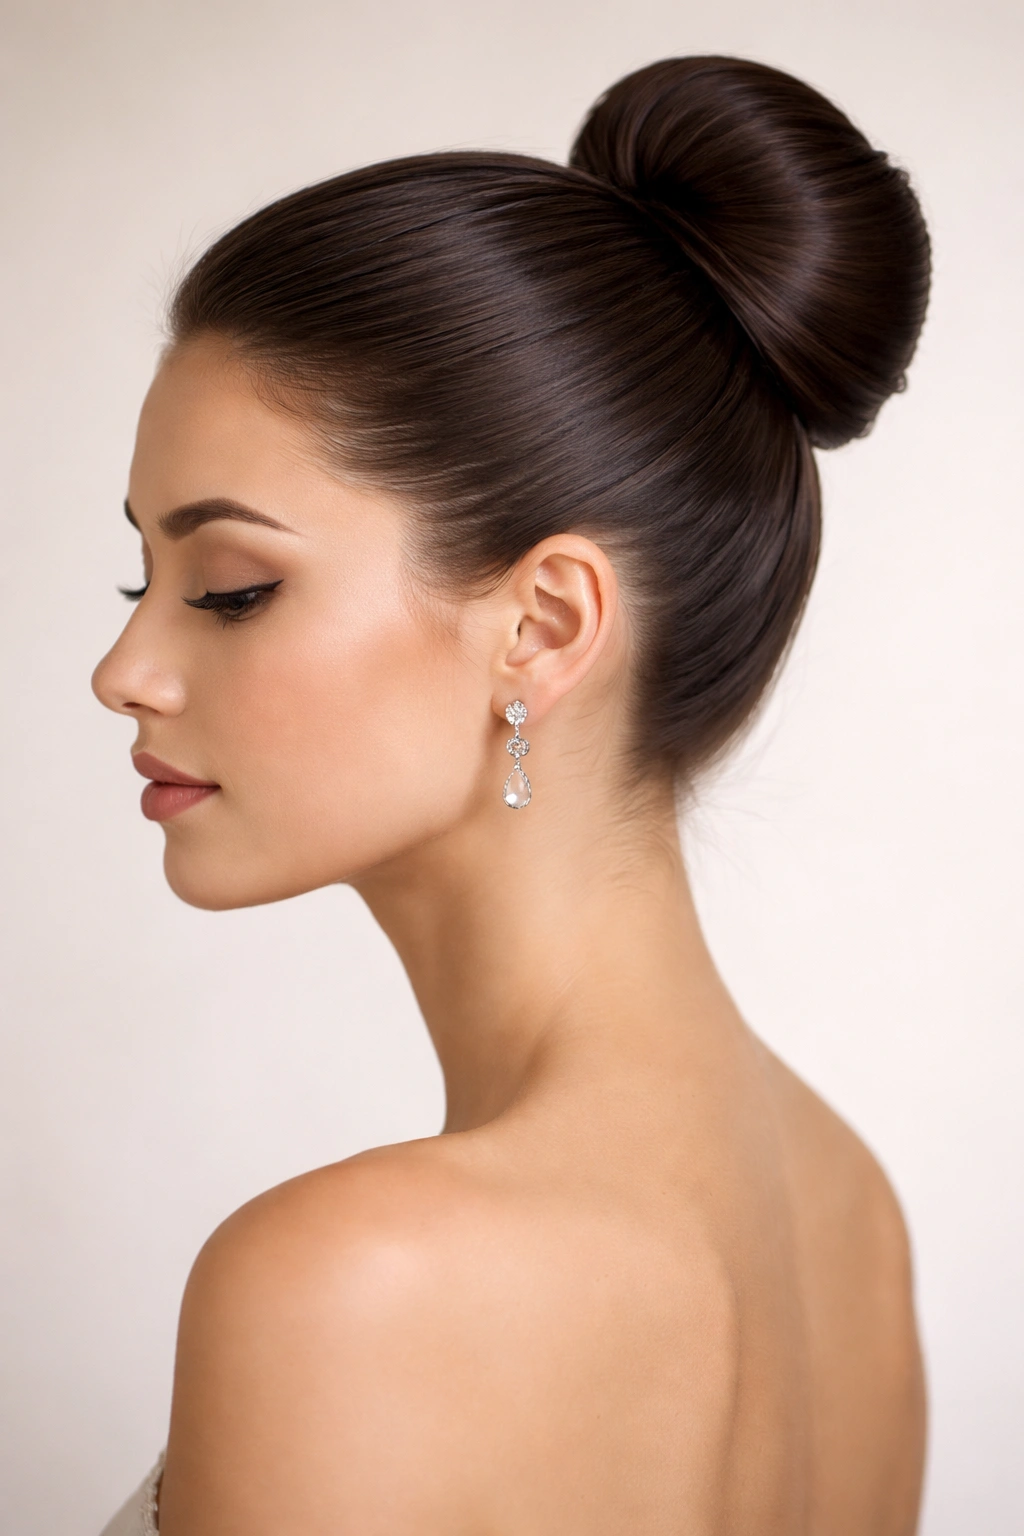
A sleek, polished bun positioned at the crown or nape offers the ultimate in refined elegance for a straight-haired bride. This is the hairstyle that says you’re serious about your beauty and your celebration—it’s formal without being overdone, and it photographs like a dream because every angle is intentional. The simplicity of a perfectly executed bun actually showcases the quality of your hair, your skin, and any jewelry or veil you’re wearing. Since this style completely removes hair from your face and neck, it’s an excellent choice if you want your bridal makeup and jewelry to be the focal point, or if your wedding dress has an especially beautiful neckline or back.
Why It Works for Straight Hair
A sleek bun benefits enormously from starting with straight hair because you don’t have texture or frizz to fight—you’re starting with a smooth, polished foundation. The tightness and shine of a bun made from straight hair reads as intentional and high-fashion rather than severe. Your straight hair creates clean lines from the crown or sides down into the bun shape, which is harder to achieve with textured hair that wants to go in multiple directions.
How to Achieve This Look
- Smooth all hair back into a high or low ponytail, depending on whether you want the bun at your crown or the nape of your neck
- Twist the ponytail gently and wrap it around the base in a spiral, securing with bobby pins as you wrap
- Smooth any flyaways with a fine comb and light finishing spray
- Add subtle volume at the crown by teasing the roots before smoothing the bun section back
- Finish with a pearl comb, jeweled pins, or hair sticks inserted through the bun for an added design element
Pro tip: For extra shine and polish, apply a smoothing serum or light oil to your hands and run them over the finished bun—this catches light beautifully in photographs and adds an expensive, finished quality.
5. Textured French Twist
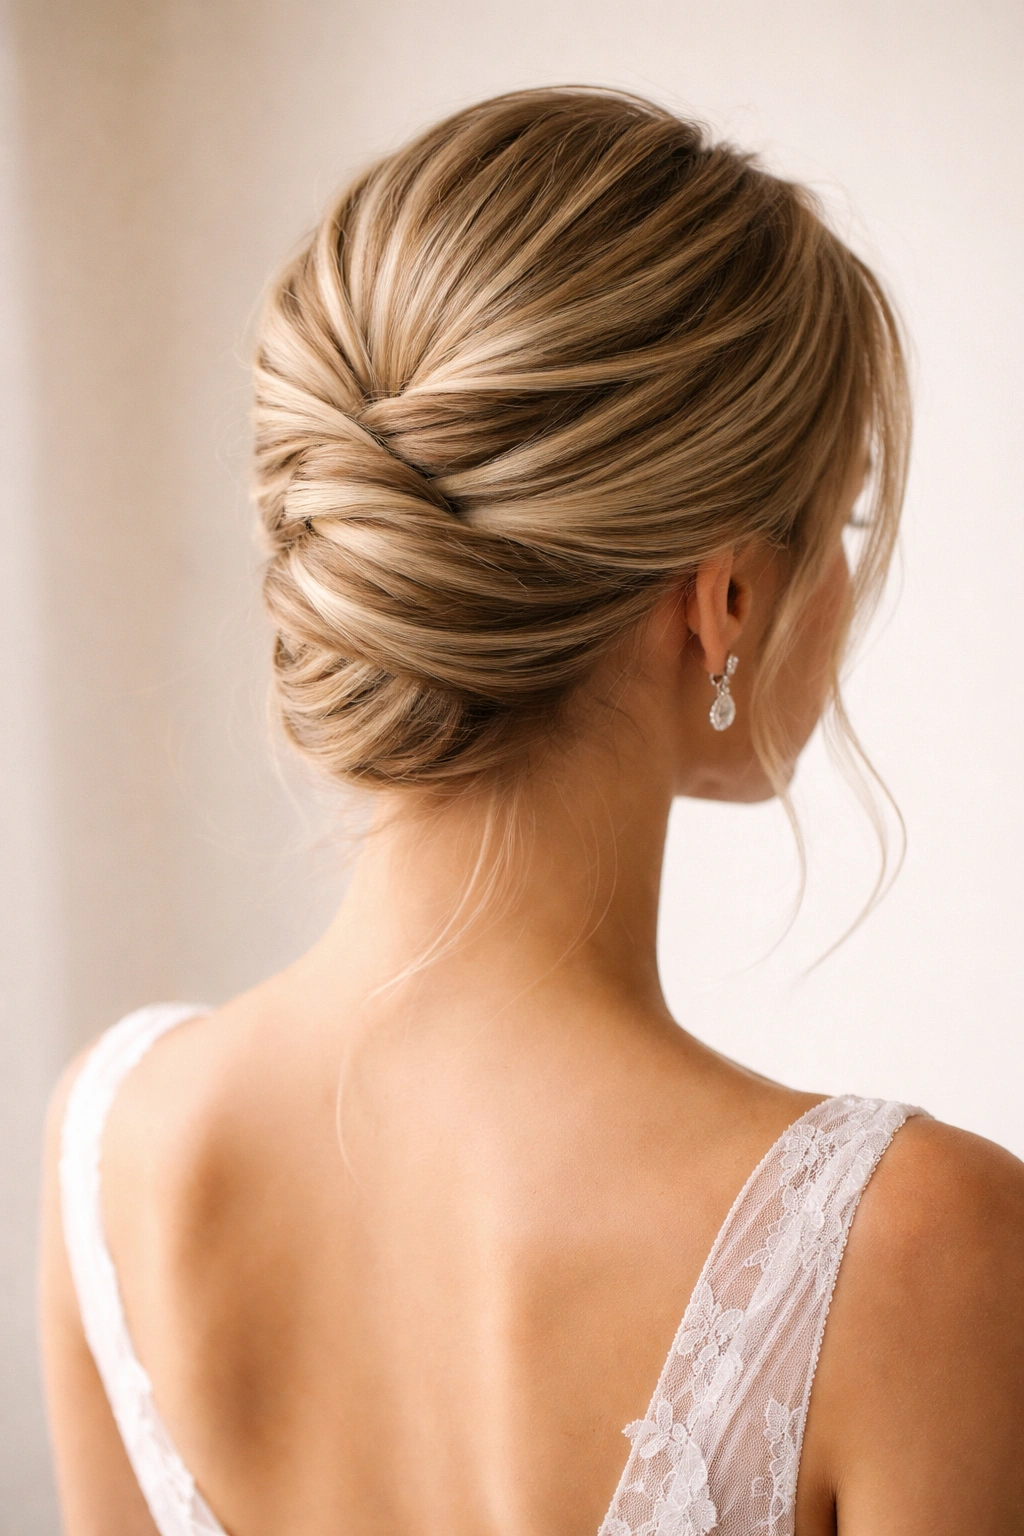
A textured French twist offers a more modern take on the classic updo, and it’s surprisingly achievable when you start with straight hair. The textured quality comes from deliberately adding waves or kinks to your straight hair before twisting it, creating visual interest that a smooth twist on straight hair might not have. This style is sophisticated without feeling stuffy, and it photographs beautifully from every angle since the intricate twisting detail is visible when guests see you from behind. The French twist is also extremely practical for a full wedding day—once it’s pinned securely, it’s not going anywhere, and you can move and dance without concern.
Why It Works for Straight Hair
Starting with straight hair gives you a clean slate to add texture exactly where you want it, creating a customized, intentional look. You can add waves using a curling iron or create texture with braids that you then unravel before twisting—straight hair accepts these texture additions beautifully and holds them throughout your event. The smooth base of your straight hair makes the textured details more visible and dimensional rather than getting lost in natural curl or wave.
How to Achieve This Look
- Create loose waves or texture throughout your hair using a curling iron, flat iron, or braiding technique
- Brush the waves through gently to soften them into a textured, not wavy, finish
- Smooth one side of your hair back and begin twisting at the side of your head, moving toward the center back
- Add the other side’s hair into the twist as you move toward the nape of your neck
- Secure the finished twist with bobby pins, working them in horizontally for the most secure hold
- Tuck in any loose strands and smooth the outer surface of the twist with a light touch of serum
Worth knowing: Texture holds better in a twist than smooth hair does, so don’t skip the step of adding waves or texture—it genuinely makes the difference between a twist that holds all day and one that starts loosening after a few hours.
6. Cascading Waves with Half-Up Twist
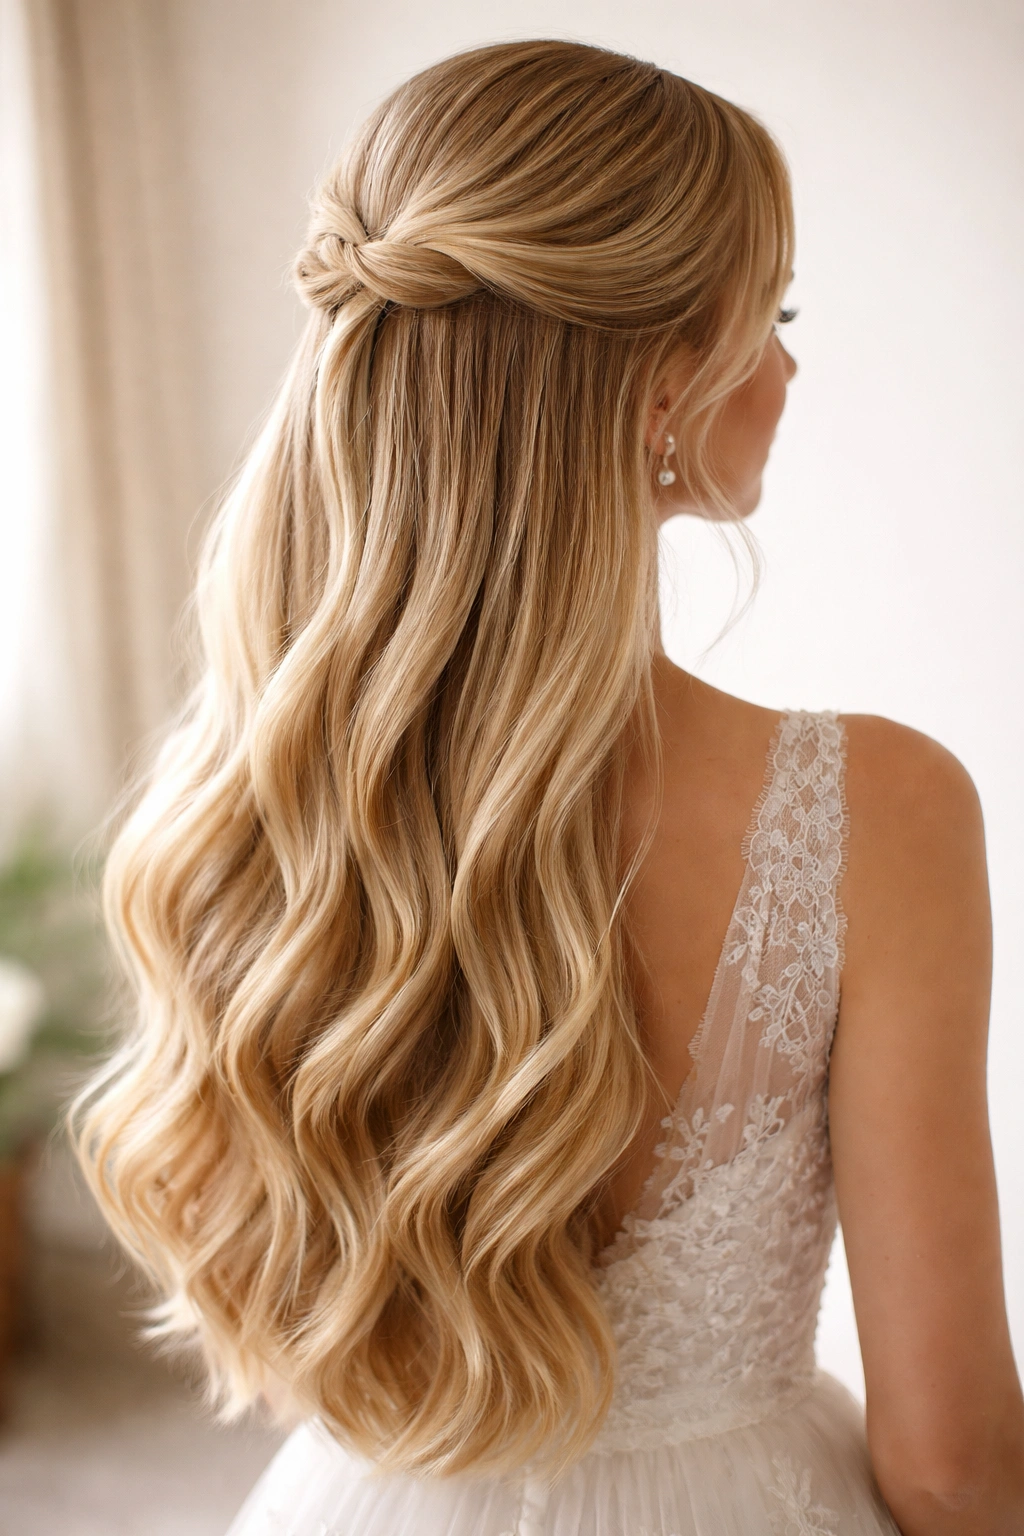
This style combines the romance of cascading waves with the intentionality of a twisted half-up section, creating a look that feels both effortless and expertly styled. The half-up twist keeps hair away from your face without the severity of a full updo, while the cascading waves below provide movement and dimension. This option works beautifully for both indoor and outdoor weddings, and it photographs wonderfully because there’s visual interest at every angle—the twisted detail in back, the dimensional waves, and the open face. The cascading element adds a sense of movement and romance that reads as deeply bridal without feeling costume-like.
Why It Works for Straight Hair
The contrast between the twisted, controlled section and the wavy, flowing section below is especially striking when you start with straight hair. Straight hair accepts wave-setting beautifully and holds waves crisply throughout your event, so the cascading element will look intentional and polished all day. The twisted section has clean, defined lines when made from straight hair, creating an elegant contrast with the softer waves below.
How to Achieve This Look
- Create loose waves throughout the length of your hair using a large barrel curling iron, gently brushing them out for softness
- Section off a piece of hair from one temple, about two inches wide
- Twist this section back toward the back of your head, where it meets the crown
- Secure the twisted section with bobby pins hidden underneath the twist
- Leave all remaining hair loose in waves, allowing it to cascade down your back and over your shoulders
Pro tip: Mist the twisted section lightly with hairspray before twisting it to help it hold its shape—this single step makes the difference between a twist that stays put all day and one that gradually loosens and flattens.
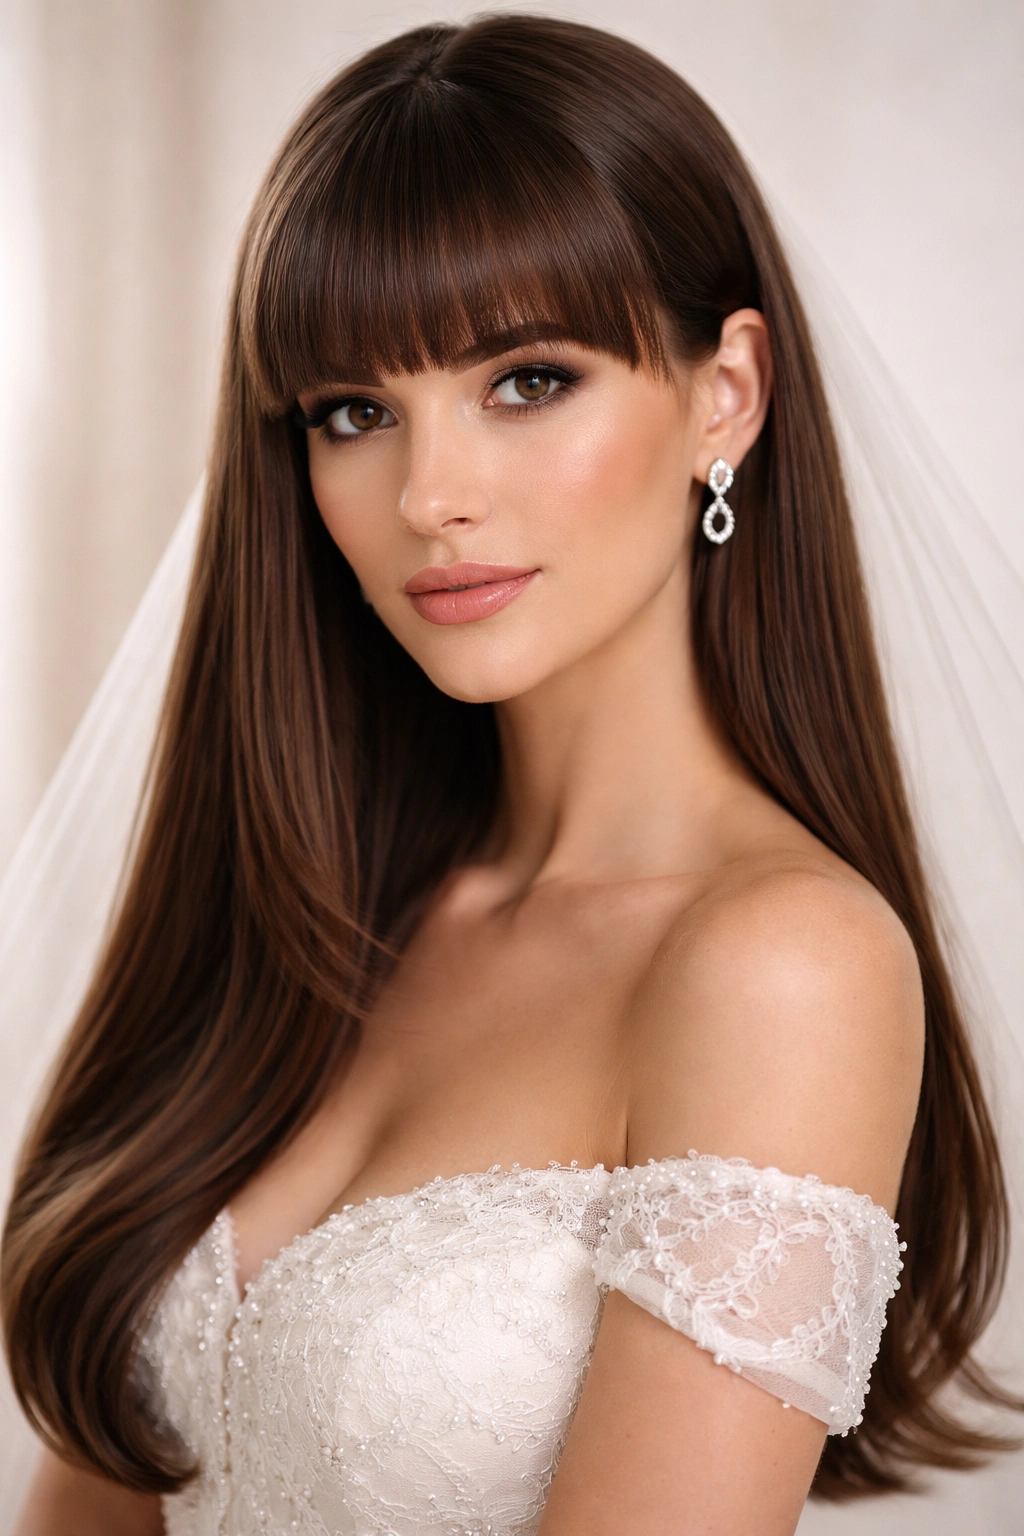
7. Blunt Bangs with Smooth Layers
Straight hair with blunt bangs and smooth layers is a modern, editorial look that’s increasingly popular with brides who want to feel current and fashion-forward rather than traditionally bridal. If you already have straight hair and bangs, this is your moment to lean into that aesthetic with intention. The blunt bang frames your face beautifully and draws attention to your eyes and makeup, while smooth layers add dimension without bulk. This style reads as incredibly polished and intentional—it’s the kind of look that makes photographers excited because it’s visually distinctive and photographs with crisp, clean lines.
Why It Works for Straight Hair
Blunt bangs require straight hair to look their best—the clean line of the bang only works when hair is genuinely straight and smooth. Layers on straight hair create clean lines and movement without the bulk or texture that layers can sometimes add to curly or wavy hair. This combination of blunt bangs and layers creates a sleek, high-fashion silhouette that’s especially striking on straight hair.
How to Achieve This Look
- Ensure your bangs are recently trimmed with a truly blunt edge—if you have any concerns, visit your stylist the week before your wedding
- Straighten all hair smoothly, including the bangs, using a flat iron and smoothing serum
- Style the rest of your hair in any of these other ways—loose and straight, in waves, in a bun, or in a half-up style
- The layers should fall naturally around your face and shoulders, creating movement without requiring additional styling
- Apply a finishing spray to keep everything smooth and in place
Insider note: Bangs require a bit more maintenance throughout your wedding day because they’re closest to your face and can catch moisture from humidity, heat, or tears of joy. Pack a small flat iron in your emergency kit and a small bottle of dry shampoo—they can refresh your bangs in minutes if needed.
8. Straight Hair with Hair Jewelry
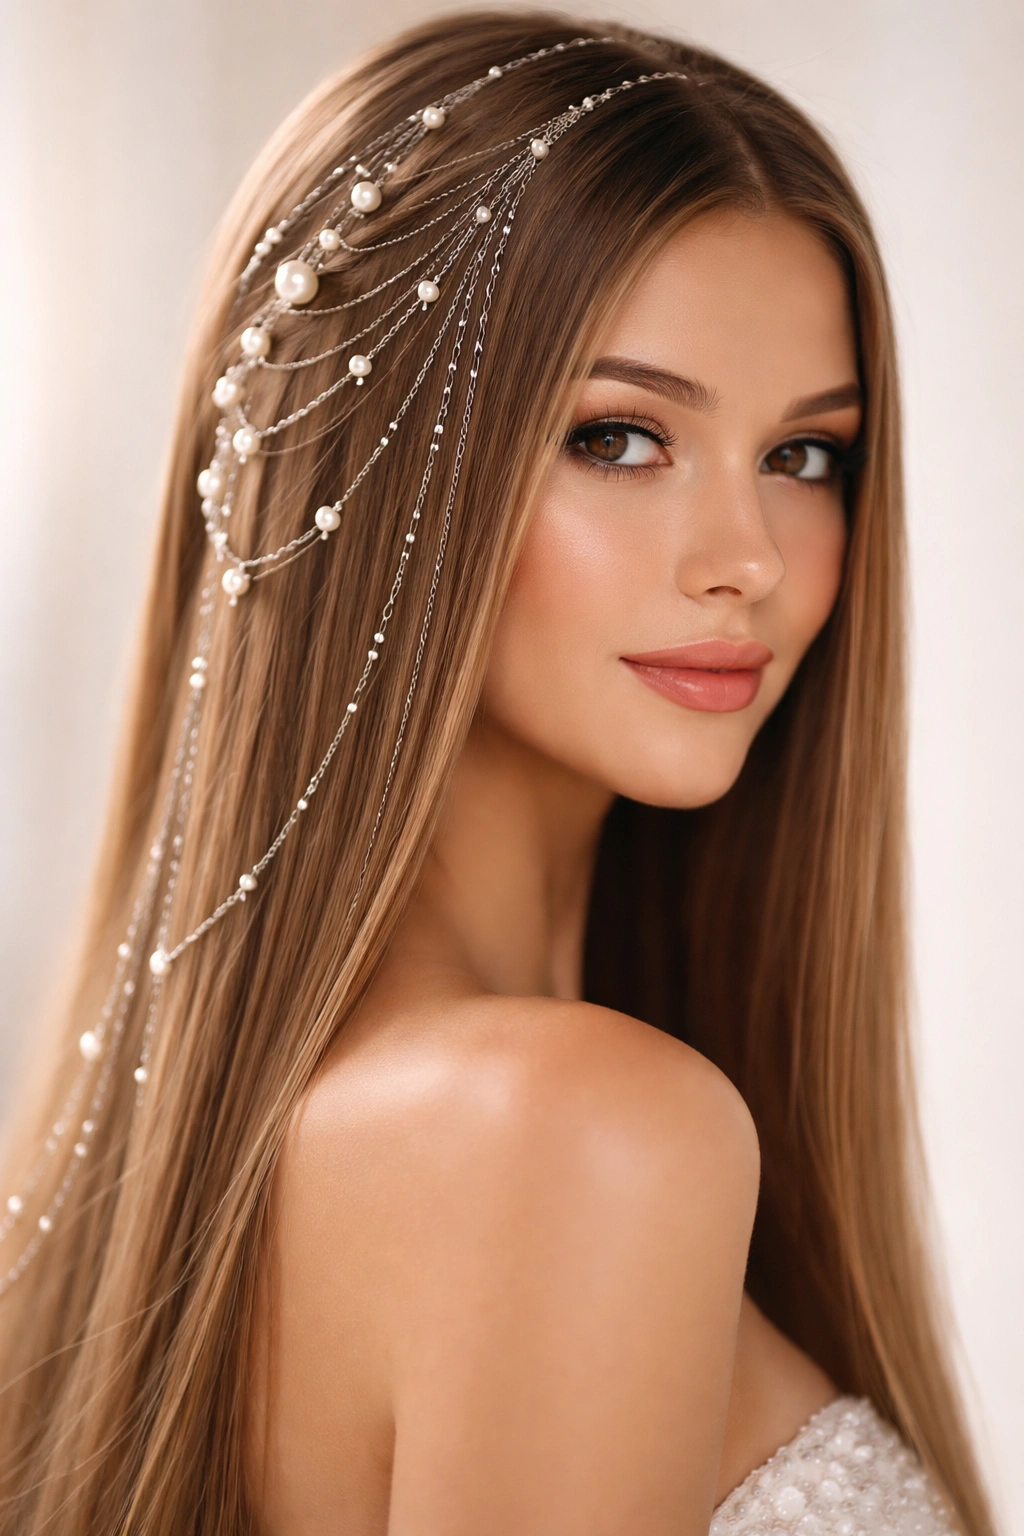
Hair jewelry—delicate chains, pearl strands, or beaded accessories woven through your hair—transforms simple straight hair into something ethereal and deeply intentional. This modern approach to wedding hair embellishment works beautifully because the smooth, clean lines of straight hair provide the perfect backdrop for showcasing these delicate pieces. Hair jewelry adds glamour without requiring complex styling, making it an excellent option if you want your hair to be mostly down but definitely styled. The jewelry catches light and moves as you move, adding subtle visual interest and a touch of luxury to your bridal look.
Why It Works for Straight Hair
Hair jewelry sits beautifully on straight hair because your hair provides a clean surface for the chains or strands to drape across. The contrast between the smoothness of your hair and the delicate sparkle of jewelry creates a striking visual effect. Straight hair also won’t snag or catch the jewelry the way textured hair sometimes does, so it stays perfectly positioned throughout your event.
How to Achieve This Look
- Wear your hair completely straight and smooth, parted down the center or off to one side
- Select hair jewelry that complements your dress and overall aesthetic—gold chains work with warm metallics in your dress, while silver or pearl strands work with cool tones
- Weave the jewelry through your hair starting at one side of your head, securing it with small bobby pins or by wrapping it around small sections
- The jewelry can drape across the side of your head, down your back, or in whatever pattern appeals to you—this is where you can get creative
- Let the length of your hair flow loose, or combine hair jewelry with a loose bun or half-up style
Worth knowing: Secure hair jewelry very carefully so it absolutely won’t slip or catch on your dress—test the security by gently tugging on it before you consider it finished. Using small bobby pins in addition to wrapping provides double security.
9. Low Bun with Face-Framing Pieces
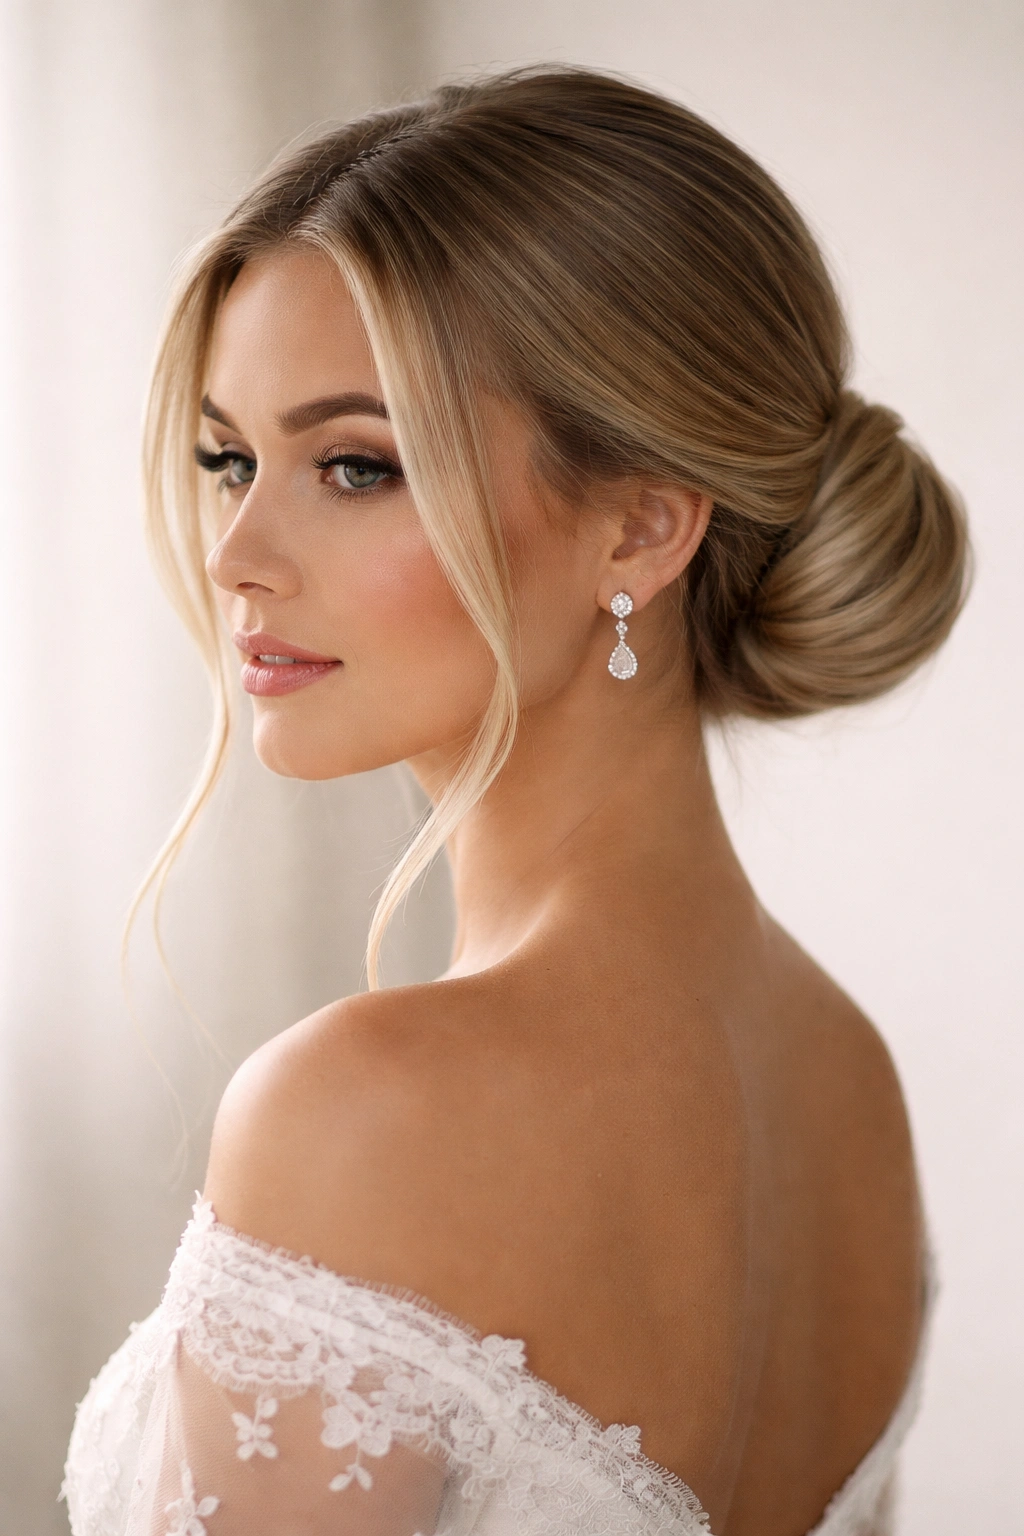
A low bun with intentional face-framing pieces softens the formality of an updo while maintaining the polished sophistication that buns provide. By releasing a few carefully chosen sections of hair from the bun to frame your face, you create dimension and softness while keeping the bulk of your hair neatly secured. This style is excellent if you want the practicality and elegance of an updo but worry that a completely pulled-back style might feel too severe for your face shape. The face-framing pieces add romance and movement without requiring complex styling—they’re simply loose strands that create visual softness.
Why It Works for Straight Hair
Straight face-framing pieces create beautiful, clean lines down the sides of your face that enhance rather than obscure your features. The smooth texture of these pieces contrasts beautifully with the structured bun, creating visual interest. Because these pieces are straight, they fall consistently and photograph beautifully from every angle.
How to Achieve This Look
- Pull your hair back into a low bun at the nape of your neck, twisting and securing it as described in the sleek bun section
- Before finalizing the bun, release two sections—one on each side of your face, starting from your temples
- These face-framing pieces should be about two to three inches wide and long enough to fall past your jawline
- Smooth these pieces with serum and leave them completely straight, or very gently wave them with a curling iron for softness
- Let them fall naturally on either side of your face, secured behind your ears with a small bobby pin if needed
Pro tip: Apply a light smoothing serum to the face-framing pieces and use a fine-tooth comb to ensure they’re perfectly smooth—any flyaways in these prominent pieces will show in photographs, so make sure they’re polished.
10. Slicked-Back High Ponytail
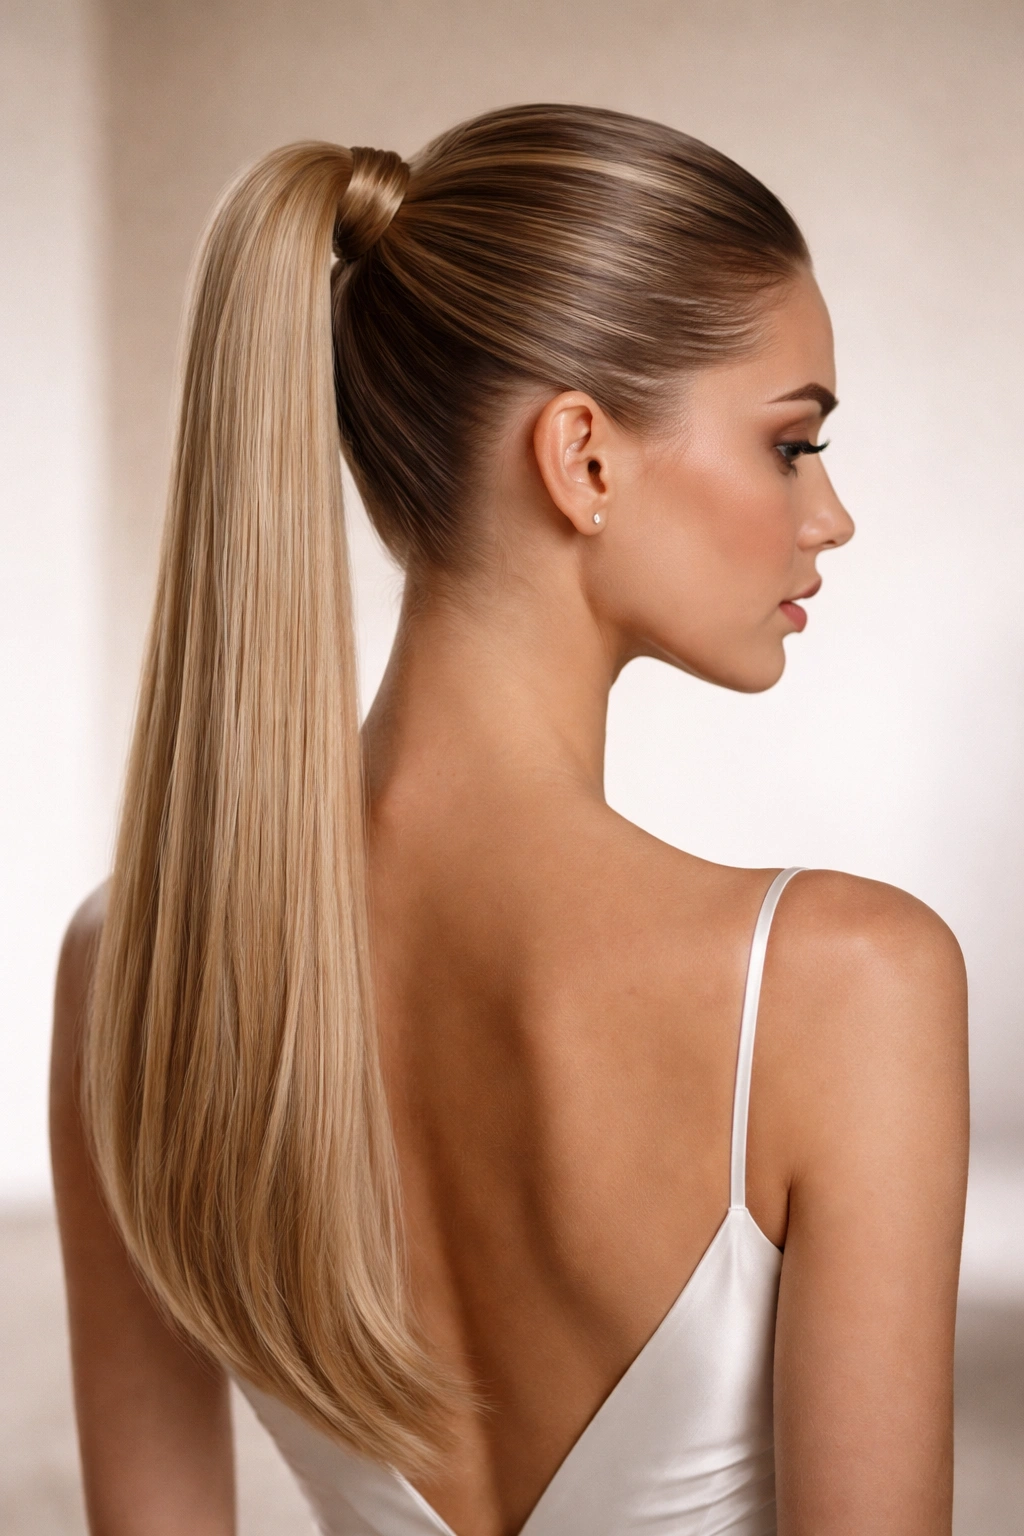
A slicked-back high ponytail positioned at the crown creates a bold, fashion-forward look that’s increasingly popular with modern brides. This style is unapologetically styled rather than natural-looking, which photographs beautifully and works especially well if you want your face, makeup, and jewelry to be the absolute focus. The high positioning creates the illusion of elongated proportions and looks especially striking in photographs. This is the ponytail for brides who want to make a statement and aren’t interested in soft, romantic aesthetics—it’s clean, strong, and undeniably elegant.
Why It Works for Straight Hair
A slicked-back high ponytail requires serious smoothness to look its best, and straight hair delivers this perfectly. The tightness and shine of a slicked-back style showcases the natural smoothness of straight hair beautifully. Because your hair is already straight, you won’t have texture or frizz fighting the sleek aesthetic—you’ll achieve that editorial, high-fashion look that slicked-back styles are meant to convey.
How to Achieve This Look
- Apply smoothing serum or light gel to your hair, working it through evenly
- Brush your hair straight back and up toward your crown, smoothing it as tightly as possible without causing discomfort
- Secure the ponytail at the crown with a small, strong elastic
- Smooth any flyaways using a fine-tooth comb and light hairspray or gel
- Wrap a small section of hair around the base of the ponytail to conceal the elastic, securing with bobby pins
- Consider adding a sleek comb, simple cuff, or minimal jewelry at the base for understated embellishment
Insider note: The higher and tighter the ponytail, the more important it is to have a blowout or smoothing treatment beforehand—any texture or frizz will be completely visible in this style. If your hair tends toward texture, consider a keratin treatment or professional smoothing before your wedding day.
11. Side-Swept Hollywood Waves
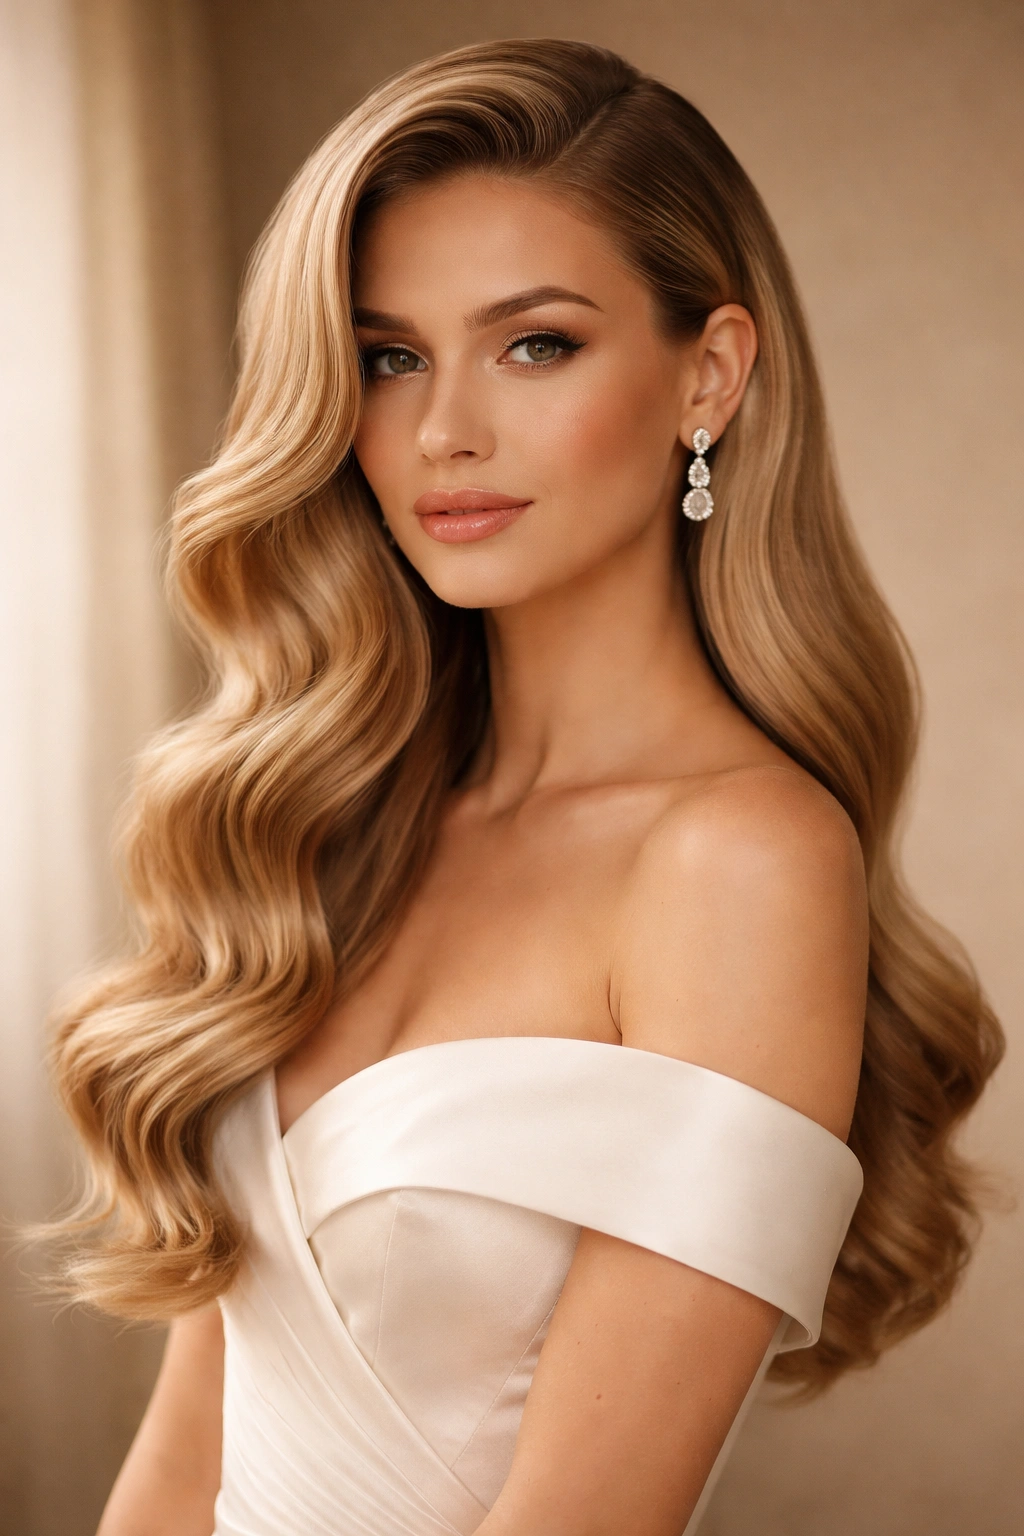
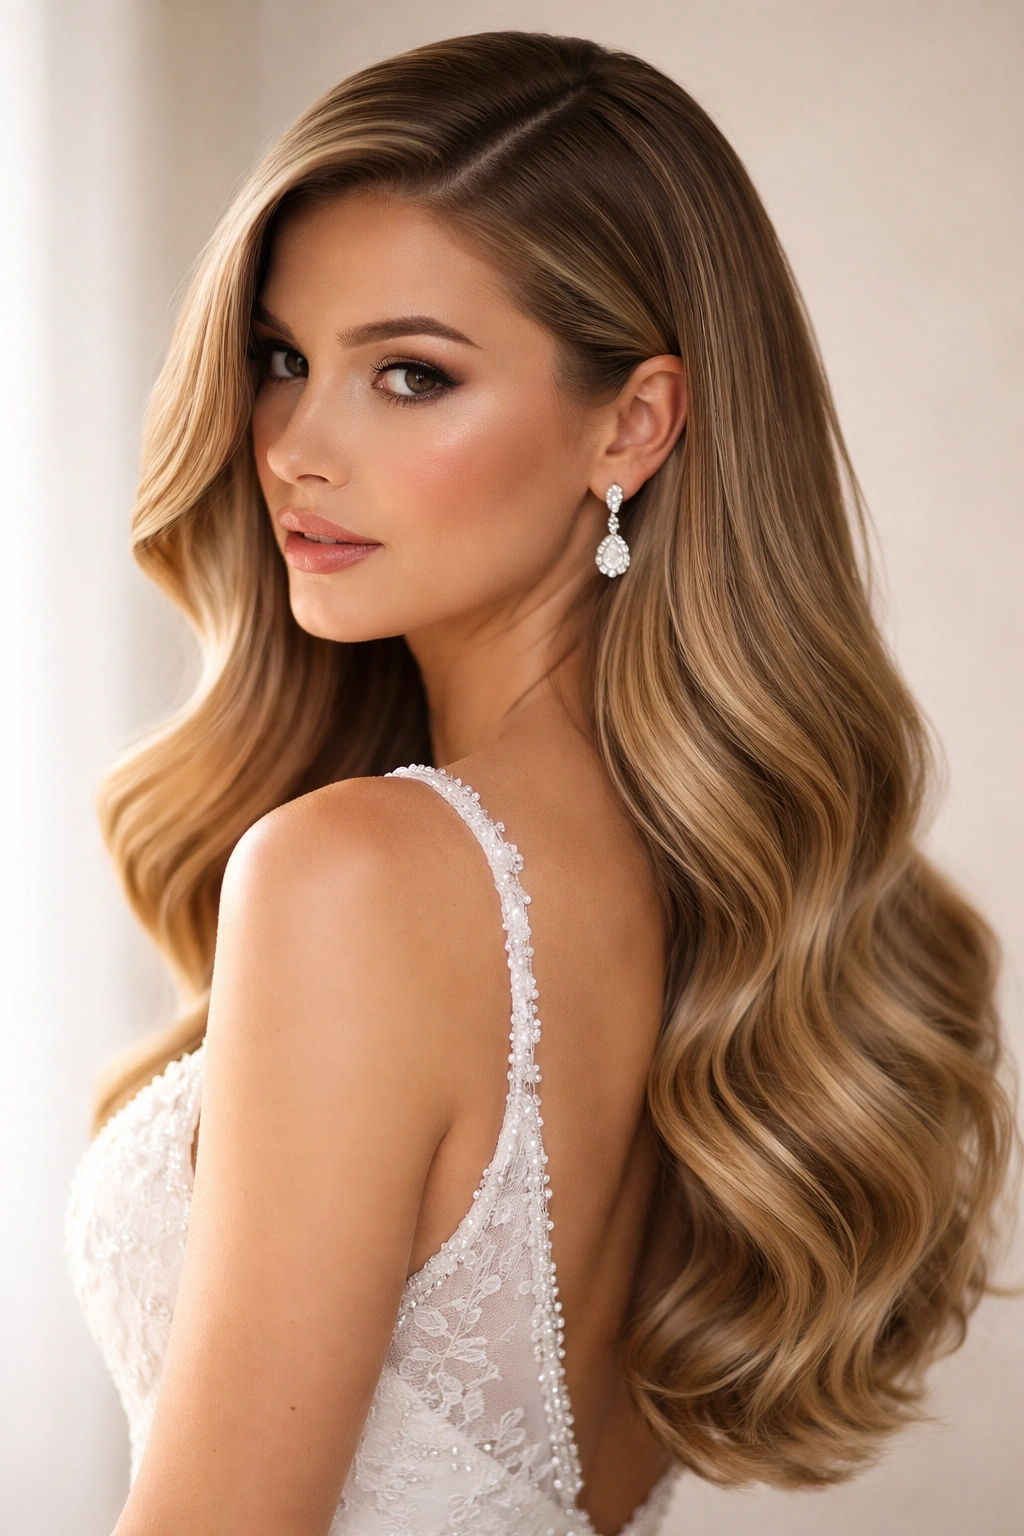
Side-swept hair with classic Hollywood waves is pure elegance and timeless bridal sophistication. This style takes your straight hair and adds luxurious, defined waves that cascade from one side, creating a glamorous, romantic effect. The side-sweep creates beautiful asymmetry and frames one side of your face while leaving the other side open—this balance is incredibly flattering and photographs beautifully. Hollywood waves read as deeply bridal and works for both formal, traditional weddings and more modern celebrations. This is the style that makes you feel like an old-school movie star on your wedding day.
Why It Works for Straight Hair
Starting with straight hair allows you to create precise, defined waves that hold beautifully throughout your event. You have complete control over wave placement and intensity, making it easy to customize the look to suit your hair thickness and face shape. The smooth base of straight hair creates waves that look intentional and polished rather than naturally textured—they read as a deliberate styling choice, which is exactly what you want for this glamorous aesthetic.
How to Achieve This Look
- Create a deep side part, sweeping the larger section of hair to one side
- Use a large barrel curling iron to create distinct, defined waves throughout the length of your hair
- Curl away from your face on the side that’s swept back for flattering wave direction
- Brush the waves through gently with a paddle brush or your fingers to create softness and dimension
- Allow waves to cool completely before moving or touching them—this helps them hold their shape
- Finish with medium-hold hairspray to keep waves in place without making them stiff
Worth knowing: The waves in a Hollywood look should be distinct enough to see clearly in photographs, so when in doubt, curl with a smaller barrel and curl away from your face—this creates the most recognizable, glamorous wave pattern.
12. Straight Hair with Pearl Pins
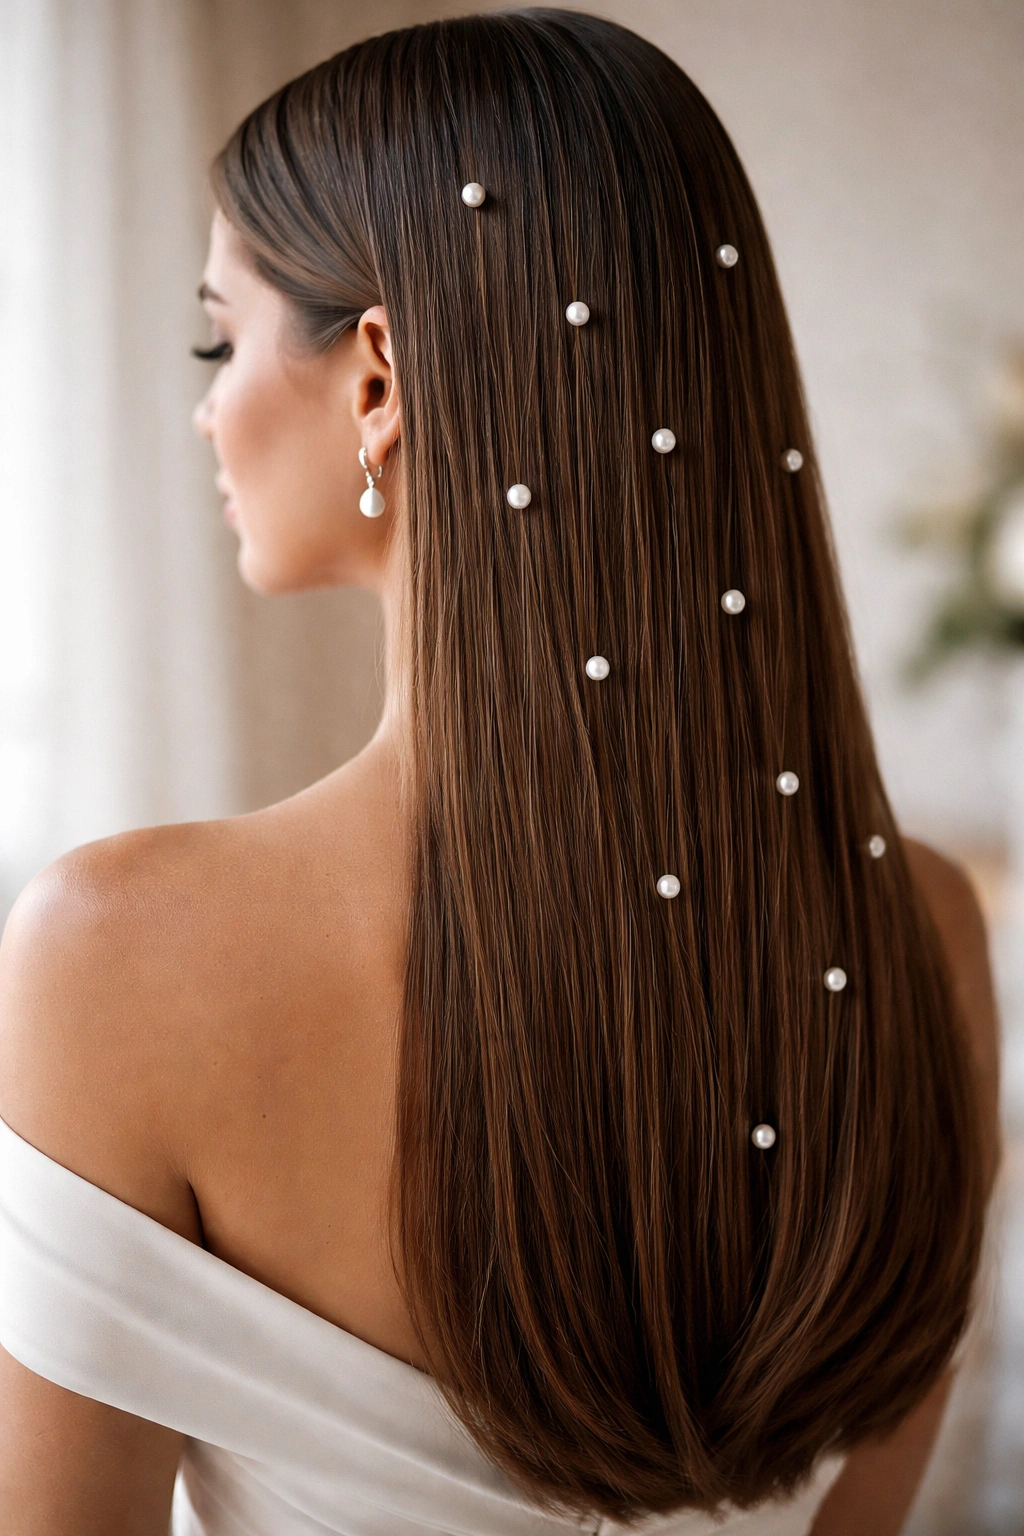
Pearl pins or pearl hair clips inserted into smooth, straight hair create understated elegance and subtle bridal detail without requiring complex styling. This minimalist approach allows your hair itself to be the focus while adding a touch of luxury through the pearl accessories. Pearl pins read as timeless and sophisticated—they work with traditional, modern, or eclectic wedding aesthetics. Multiple pearl pins scattered through your hair, or a small cluster at the back, adds visual interest and catches light beautifully without feeling overdone. This is an excellent option if you want polished, intentional styling without the time investment of waves or updos.
Why It Works for Straight Hair
Pearl pins sit beautifully on straight hair and show up clearly in photographs because there’s no texture competing with them. The smooth surface of straight hair provides an elegant backdrop for the delicate shine and color of pearls. You can position pins exactly where you want them, and they’ll stay put because they’re not fighting against texture or curl.
How to Achieve This Look
- Wear your hair completely straight and smooth, either loose or in any of the other styles mentioned here
- Select pearl pins or small pearl clips that complement your dress color and bridal aesthetic
- Position pins strategically—options include: a small cluster at the back where you might gather a half-up section, scattered throughout loose waves, or positioned along one side if you’re wearing a side part
- Secure each pin by inserting it horizontally through a small section of hair, twisting slightly for security
- Step back and check your placement in a mirror to ensure the pins are distributed symmetrically and caught by light
Pro tip: Use pins with secure mechanisms (not loose clip pins) and test their security before your wedding day—you want them absolutely solid and unable to slip out, even with movement and dancing.
13. Center Part Straight Style
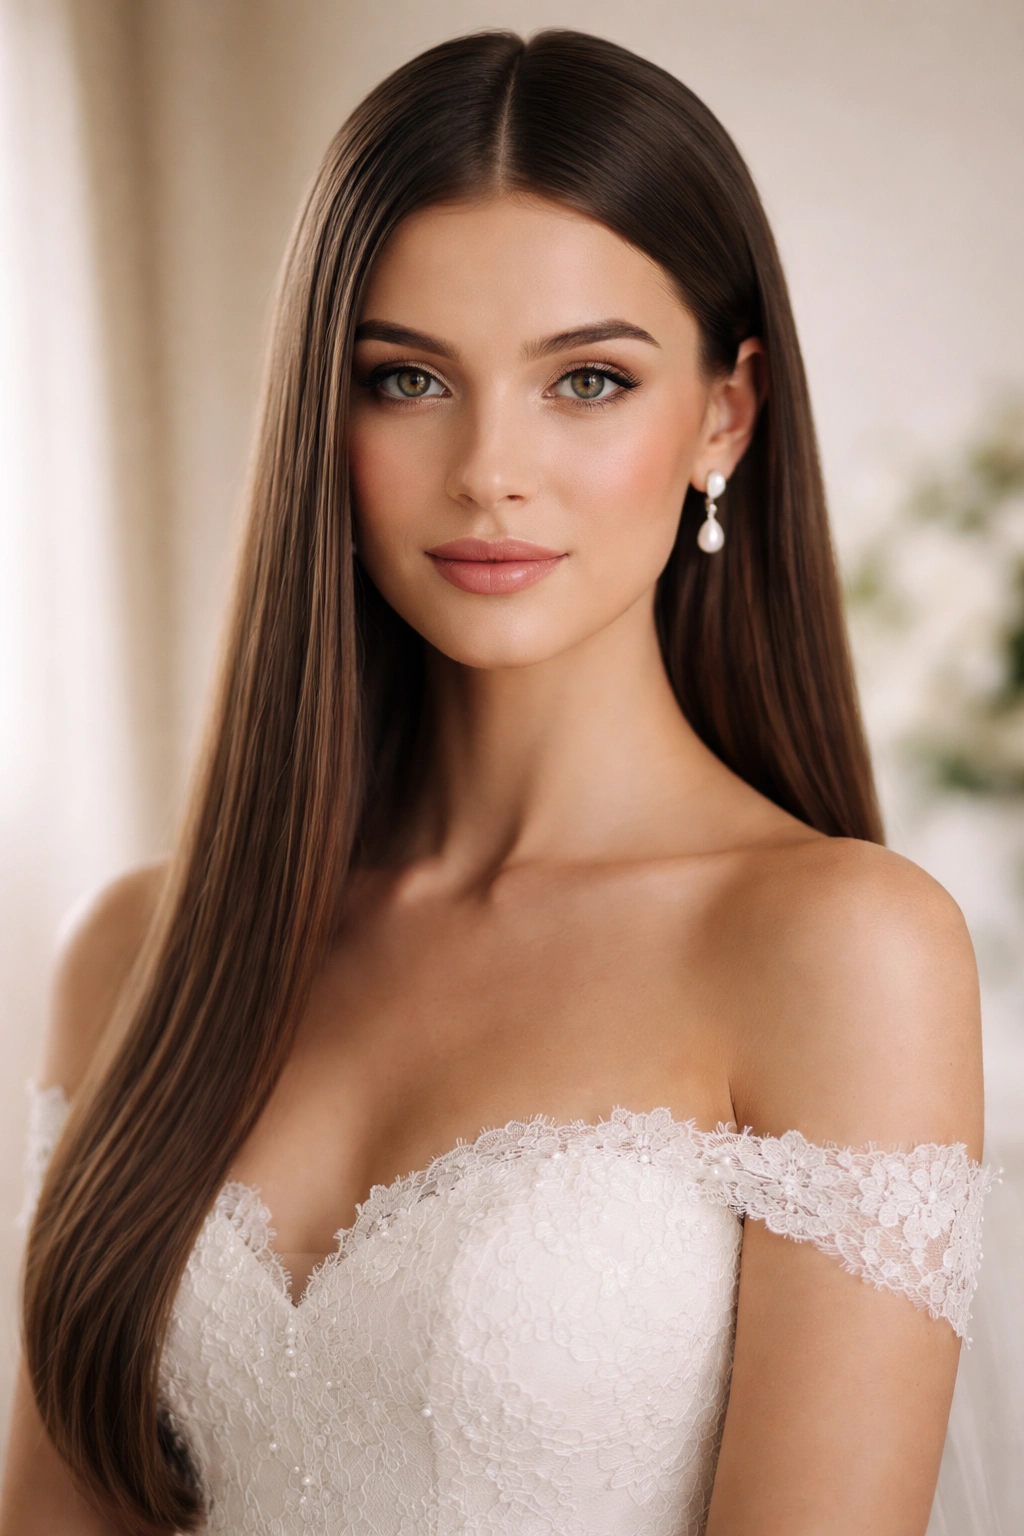
A perfectly center-parted style with completely smooth, straight hair is minimalist sophistication at its finest. This look requires zero styling beyond ensuring your hair is perfectly straight and smooth, making it an excellent option if you prefer a clean aesthetic or want to minimize hair preparation time. The center part is deeply flattering on most face shapes because it creates symmetry and balance, and it photographs beautifully because there’s no styling to distract from your face, skin, and bridal makeup. This style can be worn completely loose, with a soft loose bun, or with minimal accessories—the possibilities are endless because the foundation is so clean.
Why It Works for Straight Hair
A center-parted style is only possible with genuinely straight hair—even slightly wavy hair will make the parts fall unevenly. Straight hair allows you to achieve perfectly symmetrical lines that look intentional and polished. The simplicity of this style actually showcases the quality and health of your hair, so if you have beautiful, shiny straight hair, this is the style that lets it shine.
How to Achieve This Look
- Use a fine-tooth comb to create a perfectly straight center part, starting at your hairline and moving straight back
- Smooth all hair straight using a flat iron and light smoothing serum
- Wear your hair completely loose, allowing it to fall straight down your back and over your shoulders
- Alternatively, gather the top section into a small, sleek bun or clip at the crown while leaving the rest loose
- Apply a finishing spray for shine and smoothness without stiffness
Insider note: A center part is unforgiving if your part isn’t perfectly straight or if you have any flyaways—take extra time in your styling prep to ensure your part is truly centered and your hair is completely smooth and polished.
14. Low Twisted Bun
A low twisted bun combines the elegance of a bun with slightly more dimension and visual interest than a sleek, smooth bun provides. By twisting your hair rather than simply wrapping a ponytail, you create texture and detail that photographs beautifully while maintaining the polished sophistication of an updo. This style is more informal than a sleek bun but more structured than loose waves—it’s the perfect middle ground for brides who want sophistication without severity. The twisted element adds movement and dimension while keeping your hair completely off your face and neck.
Why It Works for Straight Hair
Straight hair creates clean, defined twist lines that are visible and beautiful in photographs. The smooth texture of your hair allows the twist to sit neatly without loose pieces or flyaways. Because your hair is straight, the twist will maintain its shape throughout your event without texture or frizz compromising the look.
How to Achieve This Look
- Pull your hair back into a low ponytail at the nape of your neck, securing it loosely
- Divide the ponytail into two sections and twist each section gently
- Wrap the two twisted sections around each other, spiraling them into a loose, braided-looking bun shape
- Secure the finished bun with bobby pins, working them in horizontally for maximum security
- Smooth the outer surface of the bun with a fine-tooth comb and light serum
- Leave a few small, intentional face-framing pieces if desired, or tuck everything back for a completely clean look
Worth knowing: A twisted bun holds better when the twists are relatively loose rather than extremely tight—tight twists can actually loosen as the day goes on, while looser twists maintain their shape better. This is counterintuitive but true.
15. Asymmetrical Pulled-Back Style

An asymmetrical pulled-back style combines loose hair with a pulled section on one side, creating visual interest and flattering dimension. This approach works beautifully because you get the romance and movement of loose hair with just enough styling to read as intentional. The asymmetry is deeply flattering and creates the appearance of movement even though most of your hair is loose. This style photographs wonderfully because there’s visual interest at every angle—the pulled section, the contrast with the loose side, and the overall dimension.
Why It Works for Straight Hair
Straight hair displays asymmetrical styles beautifully because the smooth lines of the pulled section contrast elegantly with the straight fall of the loose portion. The pulled section has clean, defined lines when made from straight hair, creating intentional visual contrast. The loose side falls smoothly without flyaways or texture complications.
How to Achieve This Look
- Part your hair off to one side, creating an asymmetrical line from your temple to the back of your ear
- Take the smaller side of hair and pull it gently back toward the center back of your head
- Secure this section with a small, decorative clip, bobby pins hidden under the smoothed section, or by twisting it and pinning the twist
- Leave the larger side completely loose, allowing it to fall straight and frame one side of your face
- Smooth all hair with serum for shine and polish
- Add a small accessory like a comb, barrette, or flowers to the pulled section
Pro tip: The key to making this look feel intentional rather than accidental is to ensure the pulled section is smooth and deliberate—any flyaways will make it look like your hair was only partially styled. Take time to smooth this section thoroughly and secure it very securely.
16. Sleek Straight with Statement Earrings
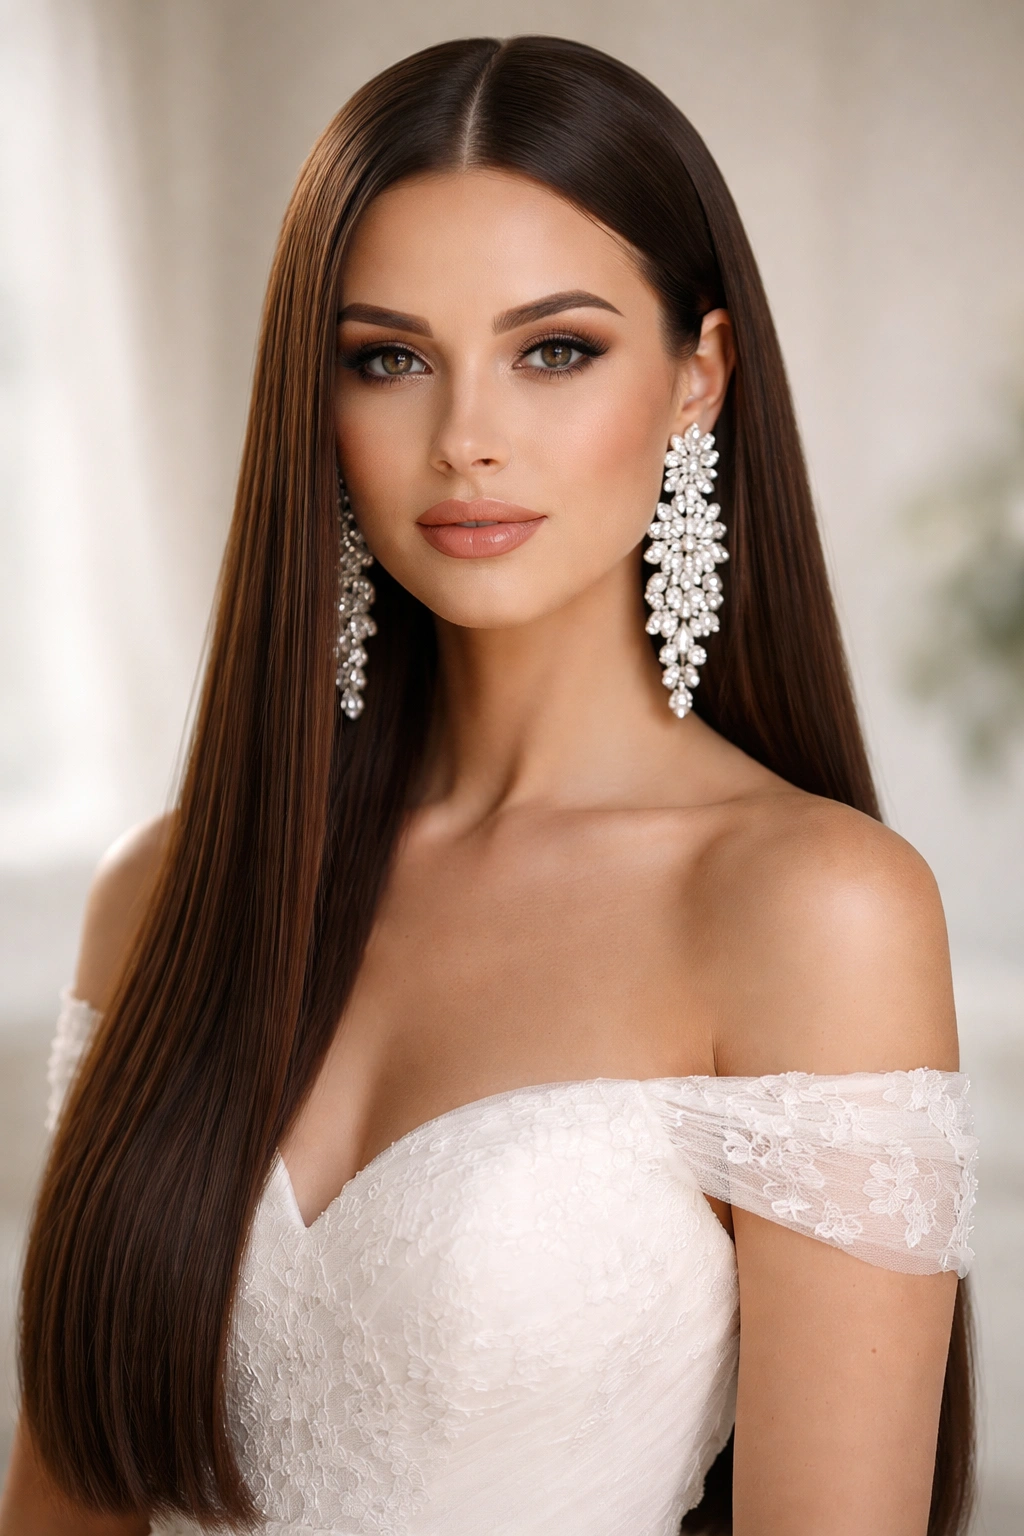
Sometimes the most impactful bridal hair choice is to keep your hair completely simple and let your statement earrings be the focal point. Perfectly straight, smooth hair worn loose (or in any simple style) creates an ideal backdrop for showcasing beautiful, dramatic earrings. This approach works beautifully for brides with strong personal style who want to make a statement beyond traditional bridal aesthetics. The simplicity of the hair allows your face, jewelry, and makeup to command attention without competing visual elements. This is especially striking if you’re wearing chandelier earrings, pearl drops, or any other statement pieces.
Why It Works for Straight Hair
Straight hair doesn’t distract from jewelry or facial features—it provides a clean, polished frame that lets your statement earrings be the star of the show. The smooth texture and shine of straight hair actually enhances the look of statement jewelry by creating a sophisticated, minimalist foundation. Your hair reads as intentionally styled rather than thrown-together because it’s so sleek and polished.
How to Achieve This Look
- Style your hair in any of the previously mentioned straight-hair styles—completely loose, a half-up, a simple bun, or any variation
- Select statement earrings that speak to your personal style and complement your dress and bridal aesthetic
- Ensure your chosen hairstyle shows off your earrings fully—avoid styles that completely cover your ears, and choose styles where your ear area is visible
- Apply extra polish to your hair with smoothing serum and finishing spray to ensure it’s perfectly sleek
- Keep makeup and other accessories relatively understated so the earrings remain the focal point
Worth knowing: If you’re wearing dramatic chandelier earrings or anything that moves and catches light, test how they interact with your hair movement—you want the earrings to be visible and beautiful, not hidden or tangled with hair.
17. Braided Half-Up with Straight Ends
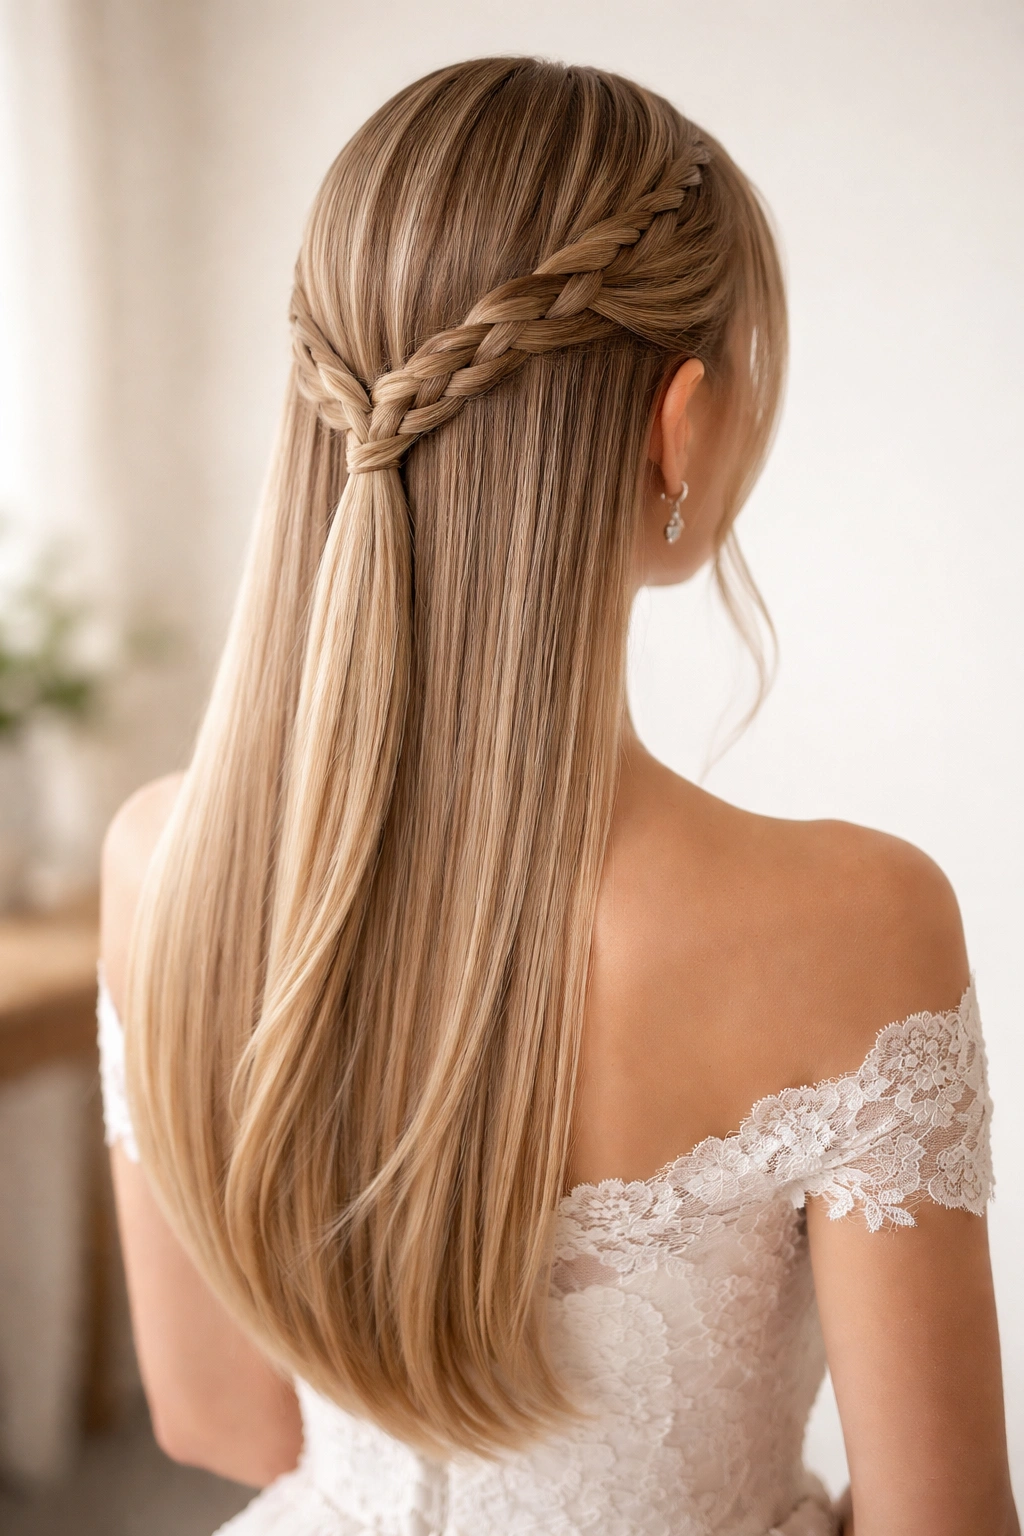
A braided half-up style with straight ends combines texture from the braid with the sleekness of straight hair, creating visual interest and dimension. The braid adds detail and sophistication without the bulk of a full updo, and it keeps some hair off your face while leaving the length loose. This style works beautifully because it’s romantic without being overly formal, and it reads as more intentionally styled than a simple half-up. The contrast between the braided section and the straight section below creates beautiful visual dimension that photographs wonderfully.
Why It Works for Straight Hair
The braided section shows up clearly against the smooth base of straight hair—the contrast makes the braid more visible and visually striking. The straight hair below provides a beautiful contrast to the texture of the braid. Because your hair is straight, you won’t have additional frizz or texture competing with the braid—your focus is exactly where you want it: on the braided detail.
How to Achieve This Look
- Section off a portion of hair from one side of your head, starting at your temple
- Create a three-strand braid with this section, incorporating additional hair as you braid back toward the center of your head
- Once the braid reaches the center-back of your head, secure it with a small elastic or bobby pin
- The other side of your hair remains completely loose and straight, creating asymmetry
- Leave the length of your hair straight and smooth, allowing it to cascade down your back
- Add a small jeweled comb, pearl pin, or flowers to the braid for embellishment
Insider note: Braids hold better and look more polished when you braid fairly tightly—loose braids can look sloppy in photographs. Practice your braid tightness before your wedding day to ensure it reads as intentional and beautiful.
18. Polished Straight with Hair Comb
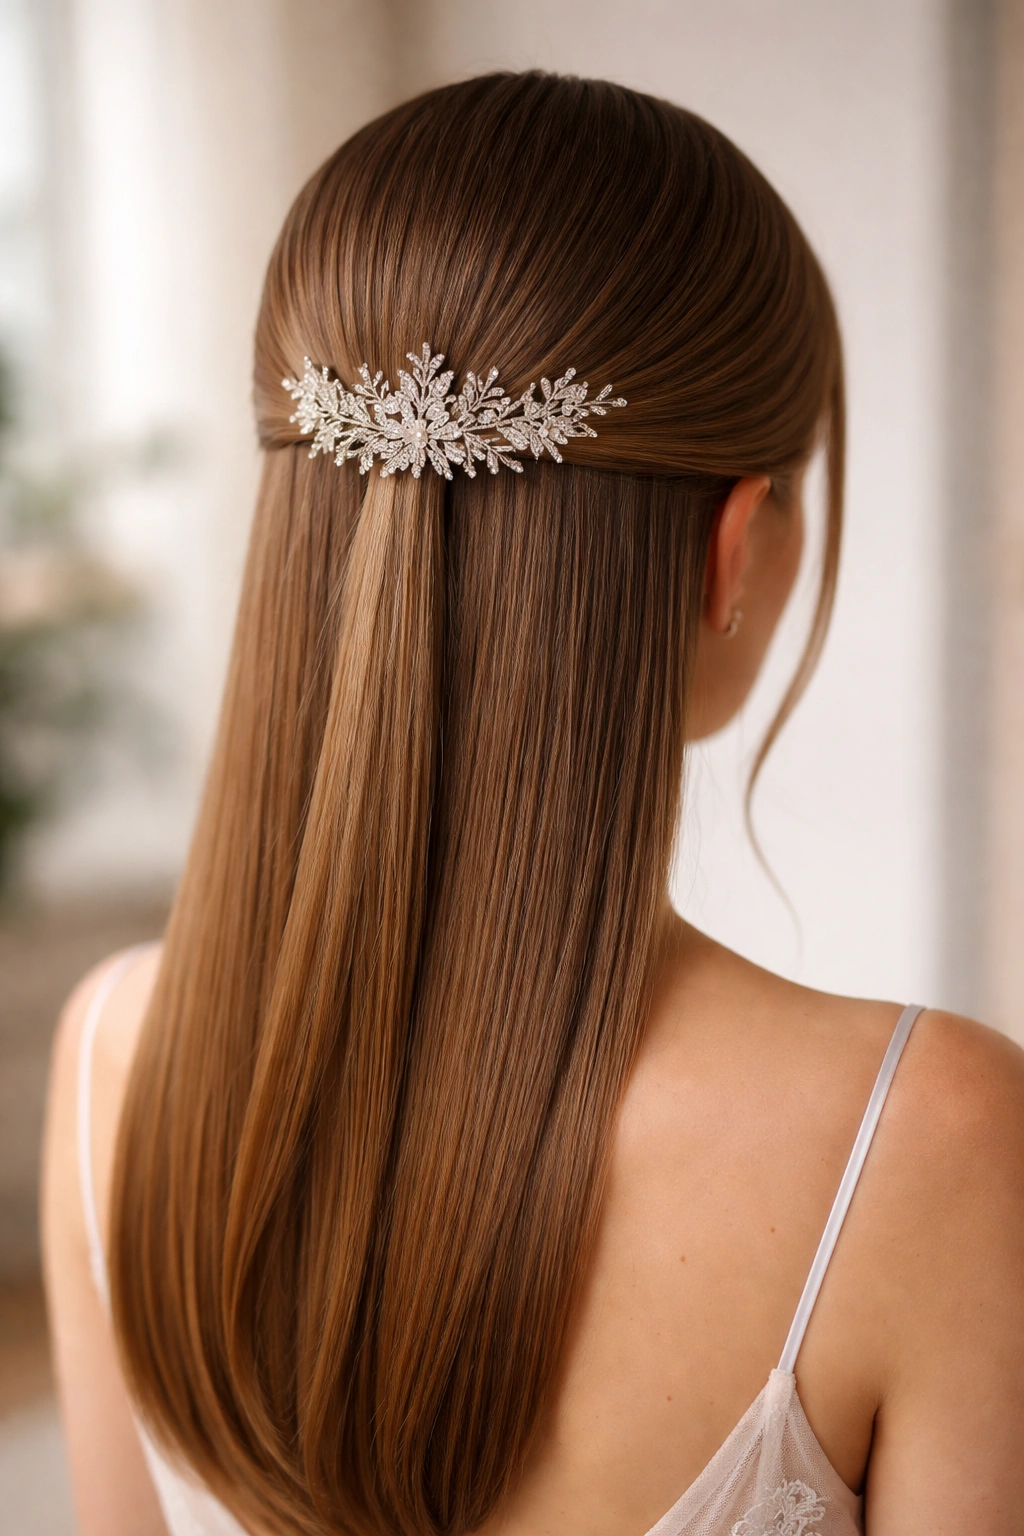
A simple, polished straight hairstyle accessorized with a beautiful hair comb creates understated elegance and intentional styling detail. The comb becomes a design element rather than hidden functionality, showcasing a piece of jewelry that’s specifically chosen to complement your bridal aesthetic. This approach works for brides who want their hair completely loose but styled enough to read as intentional. A decorative comb positioned at the back where you’ve gathered a small section, or tucked into a half-up style, adds luxury and polish without requiring complex styling techniques.
Why It Works for Straight Hair
A hair comb shows up beautifully against straight hair and is completely secure when inserted correctly into a smooth, sleek section. The contrast between the polished comb and the smooth hair creates an intentional, sophisticated look. Straight hair won’t snag or catch on the comb, ensuring it stays perfectly positioned and visible throughout your event.
How to Achieve This Look
- Style your hair in any simple straight style—completely loose, in a half-up, or gathered loosely at the back
- Select a hair comb that complements your dress, skin tone, and overall bridal aesthetic—gold metal, pearl, jeweled, or tortoiseshell options all work beautifully
- Position the comb where you’ve gathered a small section (at the back of a half-up, or holding together a small gathered section of loose hair)
- Insert the comb horizontally through the gathered section, twisting slightly to ensure security
- Adjust the hair smoothly around the comb so it’s visible and beautiful
- Step back and check that the comb is positioned symmetrically and catching light
Pro tip: Choose a comb with secure teeth that hold hair firmly—a comb that’s too small or has teeth that are too far apart won’t hold securely, and you don’t want to risk it slipping throughout your event.
19. Low Chignon

A low chignon is a French updo style that’s slightly looser and more romantic than a traditional bun, creating elegance with a softer, more undone quality. This style works beautifully for straight-haired brides who want the polish of an updo with a touch of romantic looseness. The chignon is created by gathering hair loosely at the nape and twisting or wrapping it, allowing for some gentle pieces and softness around the face. This style is sophisticated without feeling severe, making it an excellent choice for brides who want elegance and practicality combined.
Why It Works for Straight Hair
A low chignon actually benefits from straight hair because the smooth texture allows you to control exactly how much looseness or tightness you want—you’re not fighting texture or natural curl. The sleek base makes any intentional softness or loose pieces read as deliberate styling choices. Straight hair creates clean lines in the chignon shape while allowing for romantic softness.
How to Achieve This Look
- Gather your hair loosely at the nape of your neck, not pulling it too tightly
- Twist the gathered hair gently and wrap it into a loose, soft spiral, securing with bobby pins as you wrap
- Leave some texture and slight looseness rather than making the chignon perfectly sleek
- Allow a few small pieces to fall around your face and neck for softness and romance
- Smooth the outer edges of the chignon slightly so it reads as intentional rather than simply undone
- Add subtle decoration with pins, flowers, or a small comb woven through the chignon
Worth knowing: The difference between a chignon and a bun is primarily the looseness and softness—a chignon should feel romantic and slightly undone, while a bun is more formal and structured. If your updo starts to feel too tight or severe, it’s become a bun rather than a chignon, so adjust accordingly.
20. Minimalist Straight Style
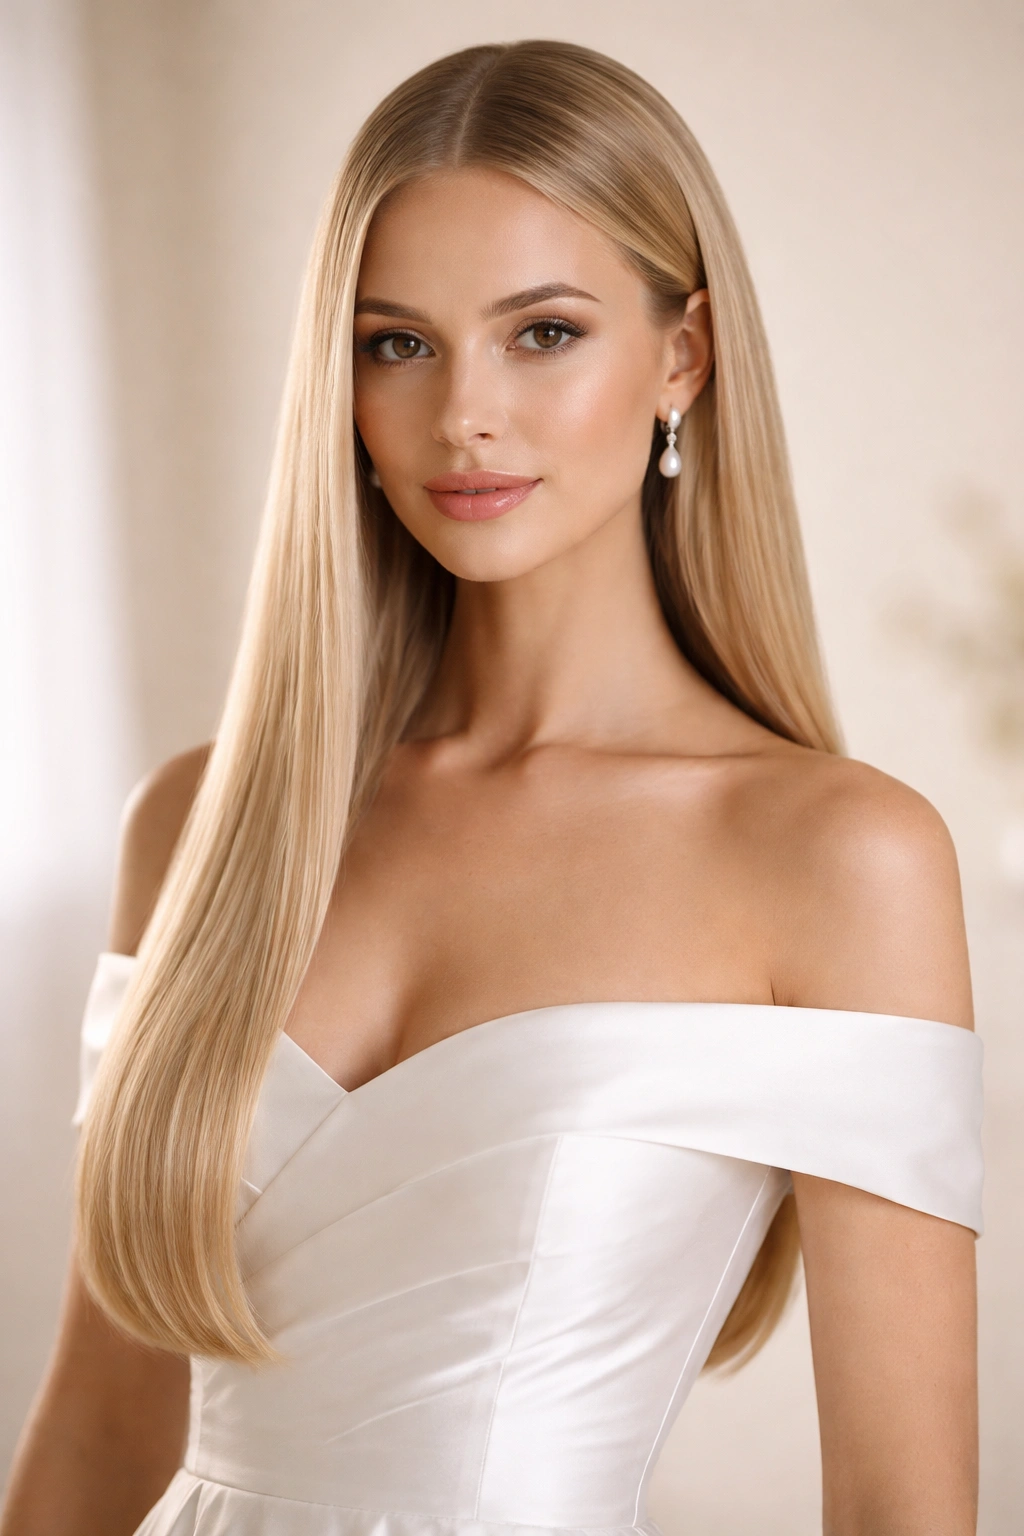
A minimalist straight style is simply beautiful, healthy straight hair worn completely smooth and straight with absolutely no styling beyond essential smoothing and finishing spray. This approach is perfect for brides who prefer understated elegance, who have confidence in the quality of their natural straight hair, or who prefer simplicity over ornamentation. This style reads as impossibly sophisticated and chic—sometimes the most impactful choice is to do absolutely nothing except ensure your hair is perfectly healthy, shiny, and smooth. This is the choice for brides with strong minimalist aesthetic who want their overall look to speak for itself.
Why It Works for Straight Hair
If you have beautiful, naturally straight hair, this is the style that showcases it. There’s nowhere to hide with no styling, so this only works if your hair is genuinely in excellent condition—healthy, shiny, thick, and beautiful. The smoothness and shine of well-maintained straight hair is actually an ornament in itself, requiring no additional adornment.
How to Achieve This Look
- Ensure your hair is in pristine condition before your wedding—consider treatments or deep conditioning sessions in the weeks leading up to your event
- Wash your hair the morning of your wedding using a smoothing or volumizing shampoo and a rich conditioner
- Blow dry your hair smooth, using a paddle brush to create even smoothness throughout
- Use a flat iron to perfect any areas that need additional straightening, using a smoothing serum for protection and shine
- Apply a finishing spray designed to add shine and hold without stiffness
- Do absolutely nothing else—no braids, no pins, no accessories, just beautiful, straight hair
Pro tip: If you’re choosing a completely minimalist style, invest in a professional blowout or smoothing treatment the day before your wedding—this ensures your hair has maximum shine, smoothness, and volume without any styling effort on your part.
Final Thoughts
Straight hair offers endless possibilities for bridal styling, from severely sleek and modern to romantic and softly undone, and everything in between. The advantage of working with straight hair is that you have complete control over texture, wave, and styling direction—you’re not working against natural curl or fighting frizz, which means you can achieve polished, intentional looks that hold beautifully throughout your entire celebration. Whether you choose a style that’s loose and romantic, pulled back and formal, or something in between, the foundation of straight hair gives you a sophisticated starting point for any bridal aesthetic. The most important element is choosing a style that makes you feel beautiful, confident, and like yourself on your wedding day—because ultimately, the best hairstyle is one that allows your joy and personality to shine through. With these twenty options, you have the flexibility to find the perfect bridal hairstyle that suits your dress, your face shape, your wedding aesthetic, and most importantly, your own personal style.