Straight hair gets a bad reputation for being “boring” or “hard to style,” but that’s actually backward. The truth is that straight strands are incredibly versatile—they take to styling tools and techniques beautifully, hold shapes cleanly, and create lines that look polished without much effort. Whether you’re rushing out the door in the morning or preparing for an event, you have dozens of options that work with your hair’s natural texture instead of against it.
The challenge isn’t that straight hair lacks potential; it’s that many styling guides assume you want volume and movement that doesn’t come naturally to straight strands. What you actually need are hairstyles specifically designed to work with straight hair—styles that respect how your hair falls, holds shape, and responds to simple techniques. The good news? Some of the most chic, modern hairstyles are actually easiest to execute on straight hair.
What makes a hairstyle “easy” varies from person to person. For some, it means minimal time at the styling station. For others, it means something that lasts all day without frizz or fallout. Some styles work better for certain face shapes or hair lengths, and a few actually improve the look of straight strands by creating intentional geometric lines that feel intentional rather than flat. The 20 styles below cover different occasions, different hair lengths, and different definitions of “easy”—so you’ll find something that fits your lifestyle and your straight hair’s specific strengths.
1. The Sleek Low Ponytail
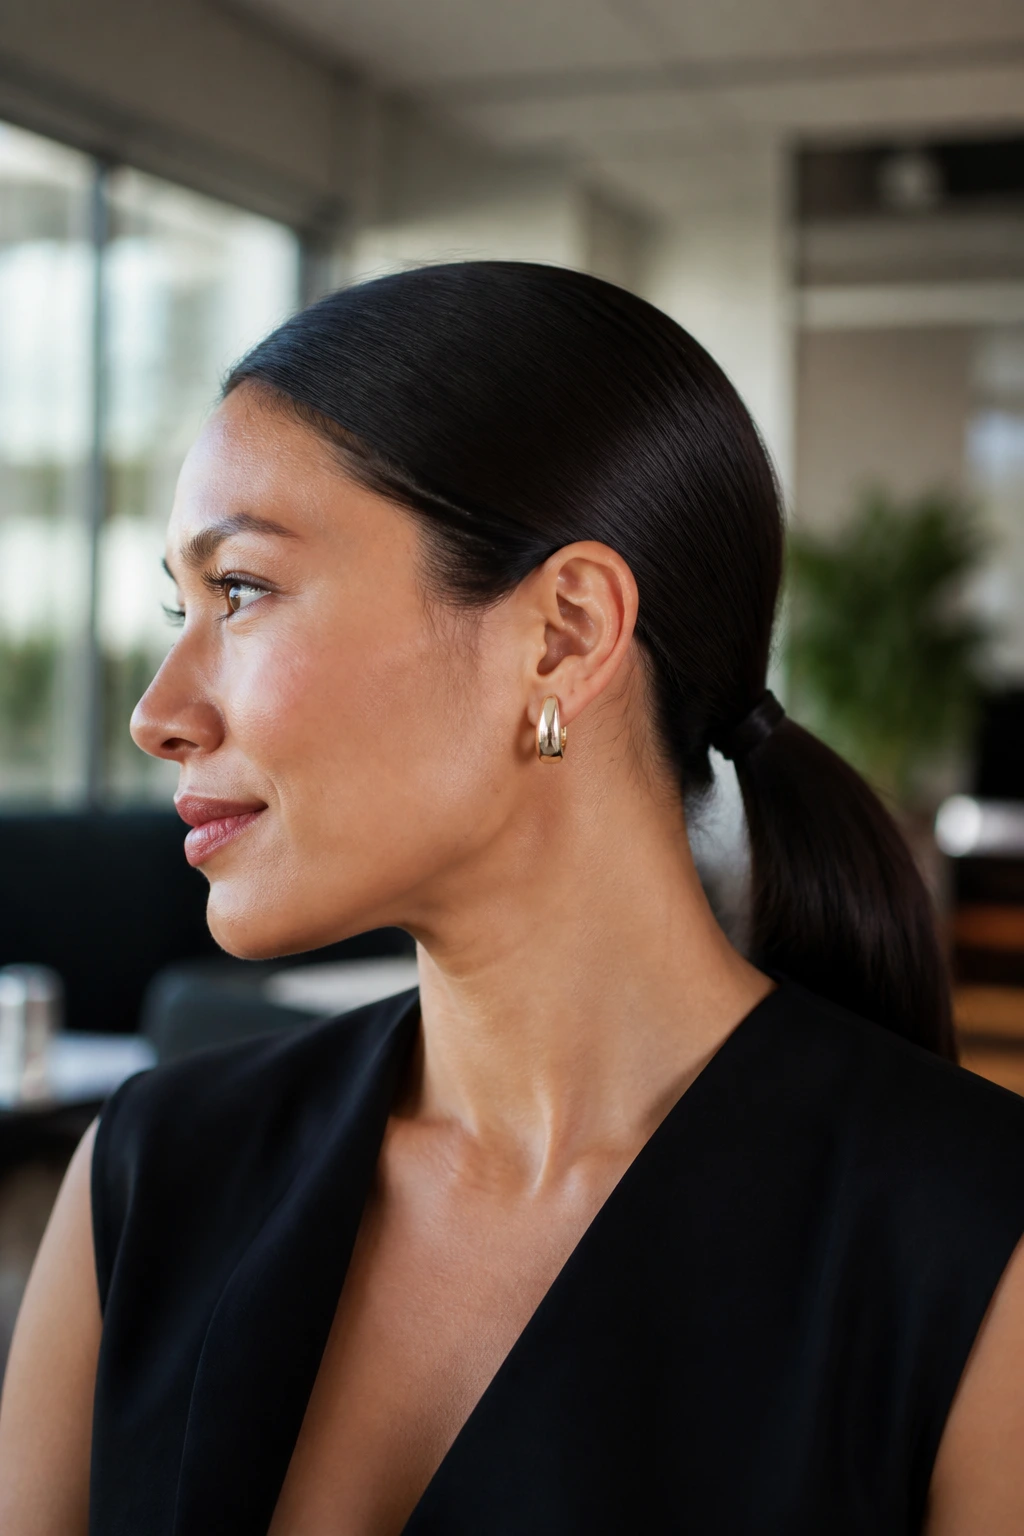
A low ponytail sits at the nape of your neck and feels effortlessly refined. On straight hair, this style looks particularly polished because the clean lines of your strands create an intentional, almost architectural effect rather than softness. This works whether you’re heading to the office, a date, or a casual weekend, and it genuinely takes three minutes to execute.
Why It’s Perfect for Straight Hair
Straight hair naturally creates a smooth, clean line in a ponytail without any frizz or flyaways pulling the shape apart. The strands lay flat against the scalp and cluster together neatly at the base, which gives the style a high-polish finish that curly or textured hair would need products or tools to achieve. You’re not fighting your hair’s texture—you’re highlighting its best feature, which is that seamless, glossy quality.
How to Get the Look and Keep It Fresh
- Brush your hair straight back with a fine-tooth comb to eliminate any texture or bumps at the crown
- Gather your hair at the nape of your neck (lower than you think—this is the secret to the “easy but elegant” vibe)
- Use a smooth elastic or a silk hair tie to avoid snagging and breakage on your straight strands
- Apply a tiny dab of smoothing serum to any flyaways and smooth them down with your fingers for an intentional, polished finish
- For extra hold that lasts all day, lightly mist the ponytail with flexible hairspray once it’s secured
Pro tip: A low ponytail instantly becomes more modern and less “gym class” when you take a thin section of hair from the ponytail itself and wrap it around the elastic to cover the tie. It looks intentional and adds instant polish.
2. The Straight Blunt Bob
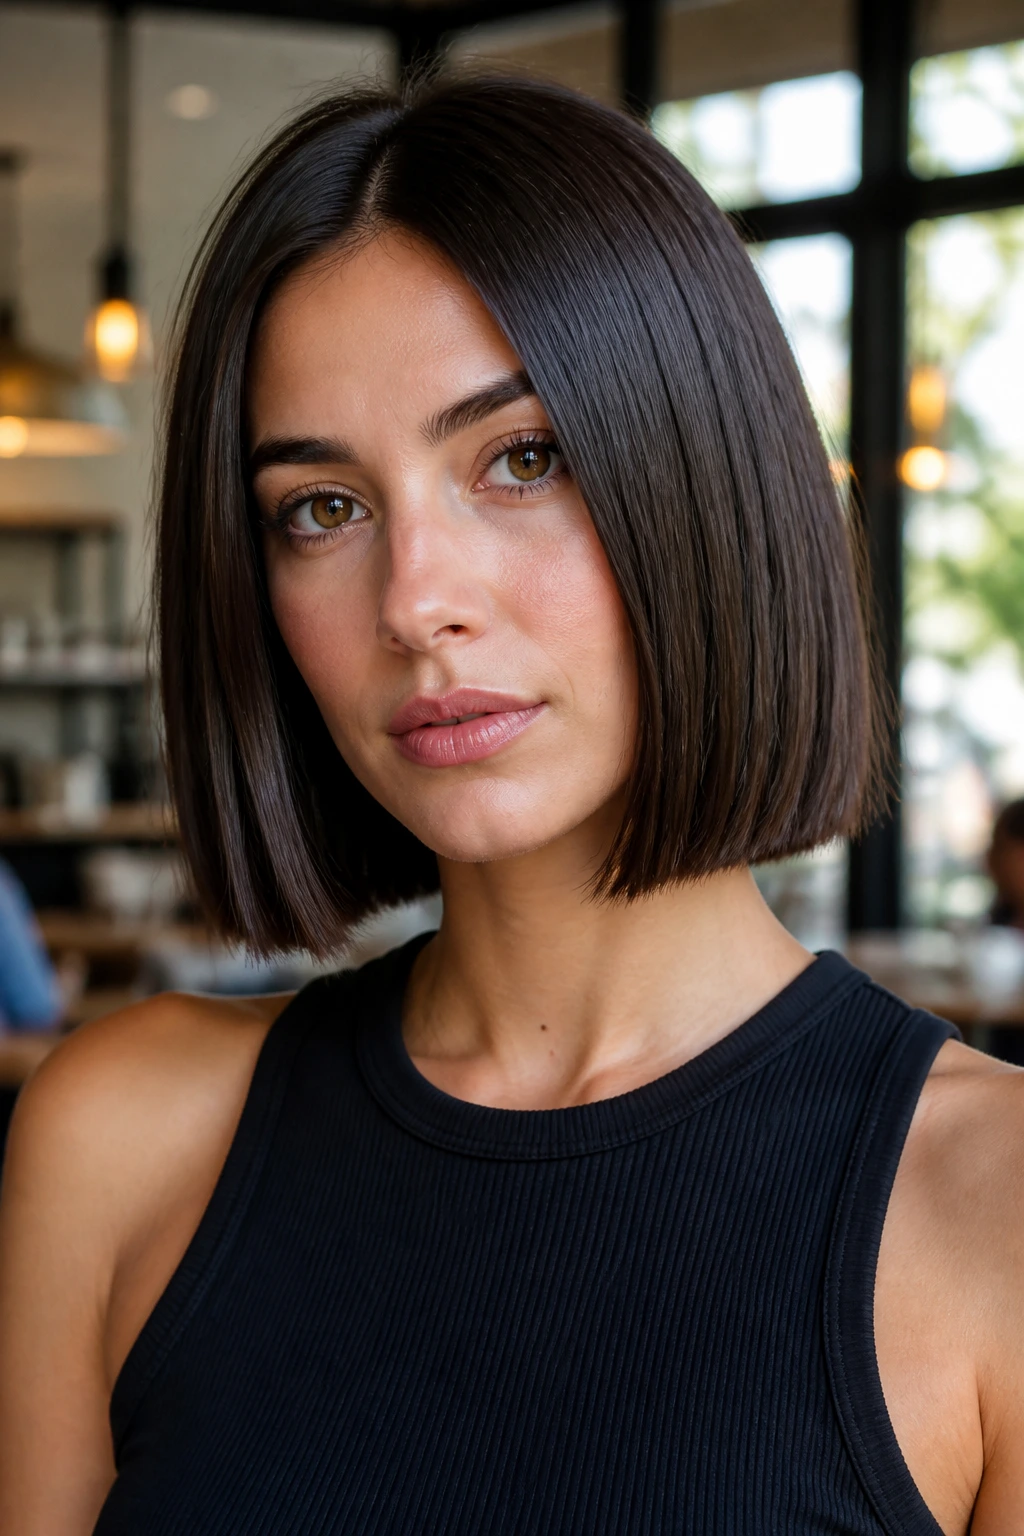
A blunt bob is cut to a precise length and sits just above or at the collarbone, creating a sharp, defined shape. On straight hair, this cut is absolutely transformative because the blunt edge emphasizes the clean lines of your strands. It reads as intentional and architectural rather than just “short hair,” and styling it is genuinely minimal—often just washing and air-drying.
What Makes This Cut Work So Well
Blunt bobs rely entirely on a clean, sharp line and even density to look polished. Straight hair gives you both automatically. Your strands fall in exactly the same direction, create an even hem, and move as a single unit rather than breaking into choppy texture. The blunt edge catches light uniformly, giving the whole style a expensive-salon vibe even when it’s undone.
Steps to Maintain and Style Your Bob
- Get trims every 6-8 weeks to maintain that sharp blunt edge (this is non-negotiable for the style to read as intentional)
- Wash with a smoothing shampoo to enhance your hair’s natural shine and straight texture
- Air-dry whenever possible, or blow-dry with a paddle brush to keep the line smooth and even
- Use a straightening iron only on the ends if they start to bend outward (a common issue with blunt bobs as they grow)
- A light texturizing spray adds movement without disrupting the line, if you want a slightly softer version
Worth knowing: The blunt bob actually shows off straight hair’s best qualities and hides its weaknesses. Flat roots? The bob’s volume sits at ear level, which creates the illusion of a fuller head of hair. Fine strands? The neat line makes thin hair look intentional and modern rather than sparse.
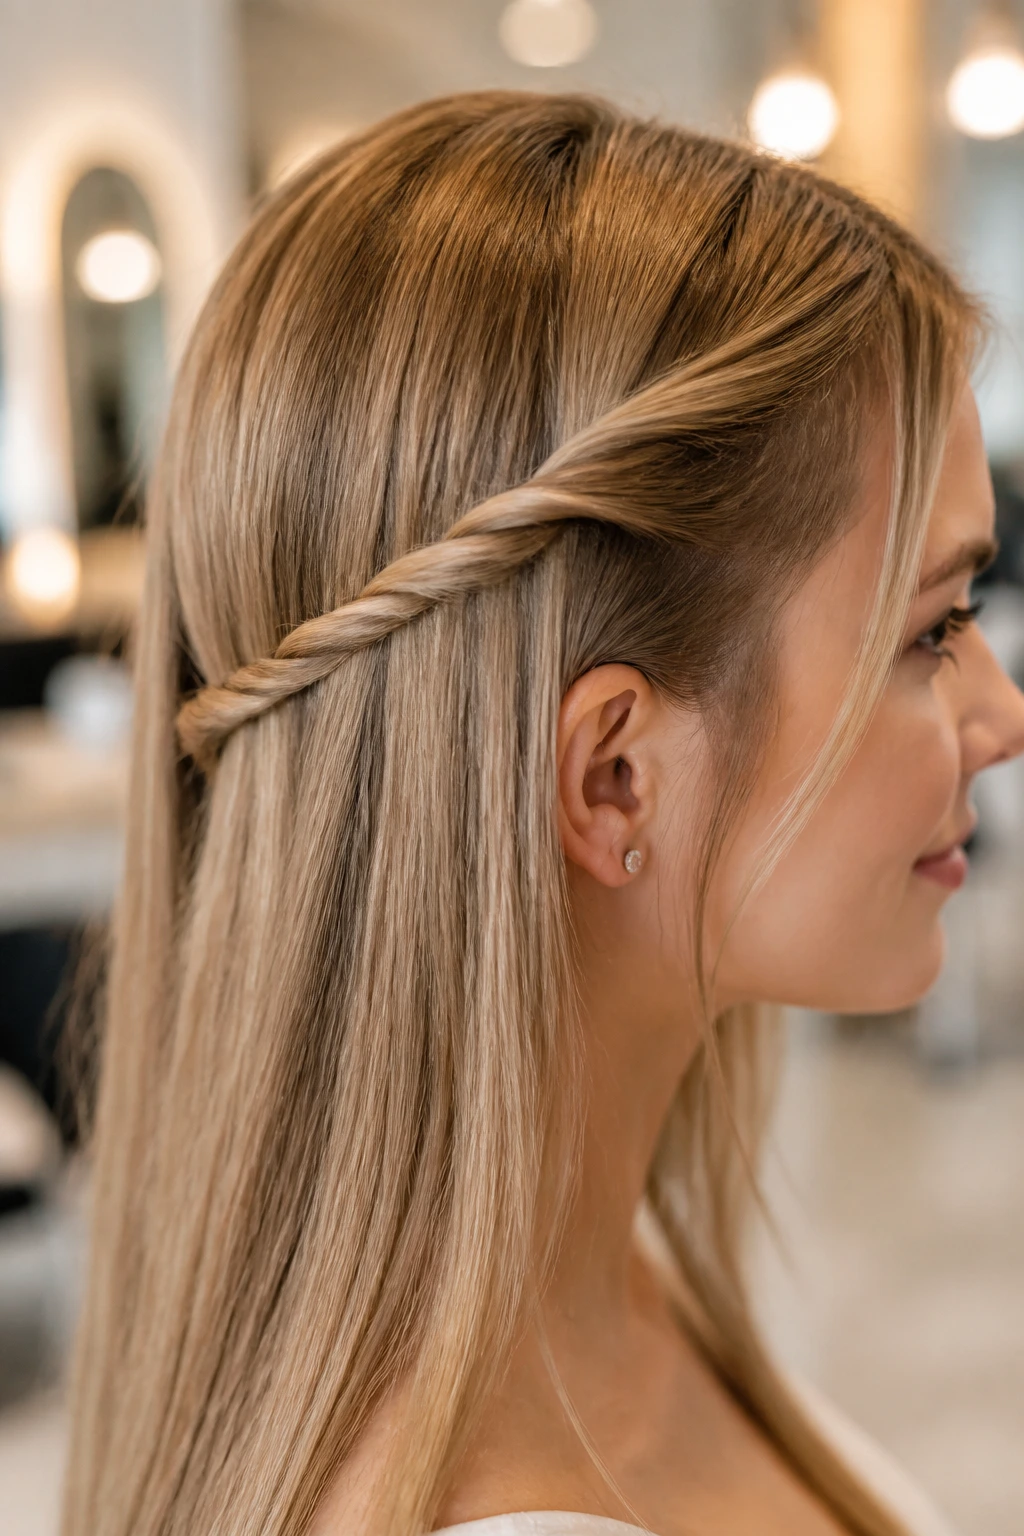
3. The Half-Up Twist
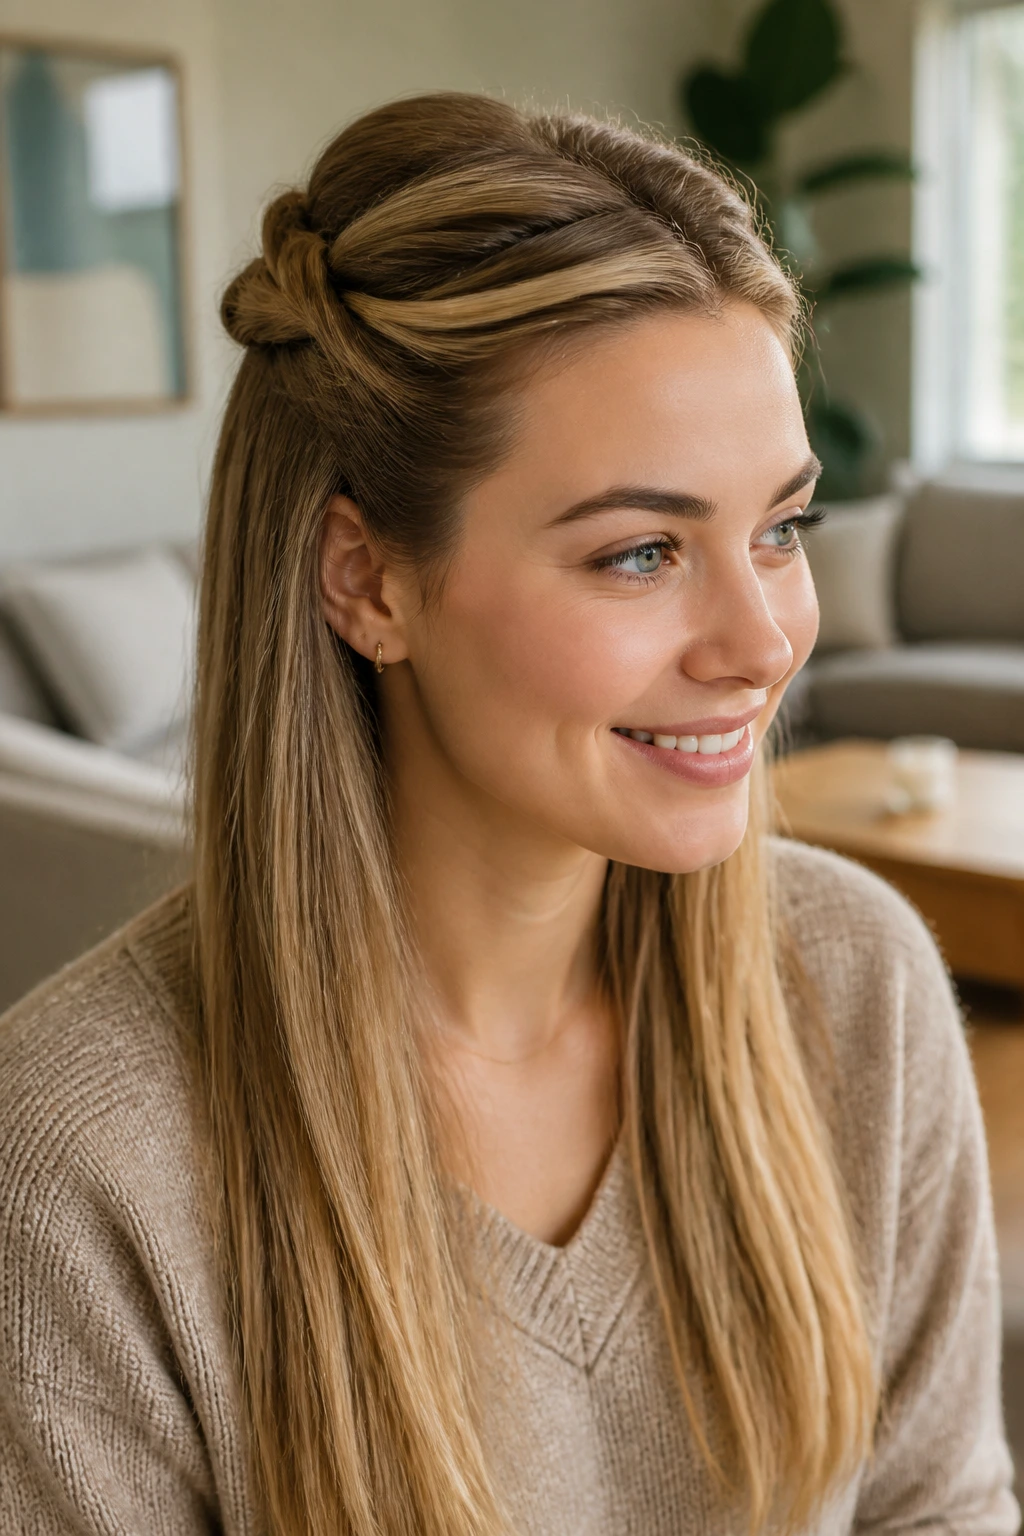
This style pulls the top half of your hair back into a soft twist that sits on top of your head, leaving the bottom half down. It’s the perfect middle ground between “hair down” and “hair fully up”—polished enough for an event or work, but still undone enough for casual settings. On straight hair, the twist itself looks intentional and architectural, not floppy or undone.
Why Twists Look Better on Straight Hair
When you twist straight hair, each strand catches and holds in the twist without slipping out or requiring you to backcomb for grip. The twist holds its shape all day without the texture working against you. You get a defined, elegant detail that naturally looks more deliberate and polished than the same twist would on textured hair, where it might read as messy rather than intentional.
How to Create a Polished Half-Up Twist
- Start with smooth, brushed hair—use a straightening iron quickly if needed to ensure maximum grip for your twist
- Take a section from each side of your hair at about ear level (or slightly higher if you prefer a smaller twist)
- Twist each section gently, keeping the twist relatively tight so it holds without needing pins
- Bring both twisted sections to the center back of your head and secure with a small elastic or bobby pins
- Smooth any flyaways with a fine-tooth comb and a tiny dab of gel or smoothing serum
- Optional: take a thin section from your ponytail/twist base and wrap it around the elastic to hide it
Quick fact: This style works at every hair length—long, medium, or shoulder-length. The key is that you’re twisting enough hair to create a substantial visual detail, not a scraggly, hard-to-see twist that disappears into your head.
4. The Straight Center Part with Tucked Sides
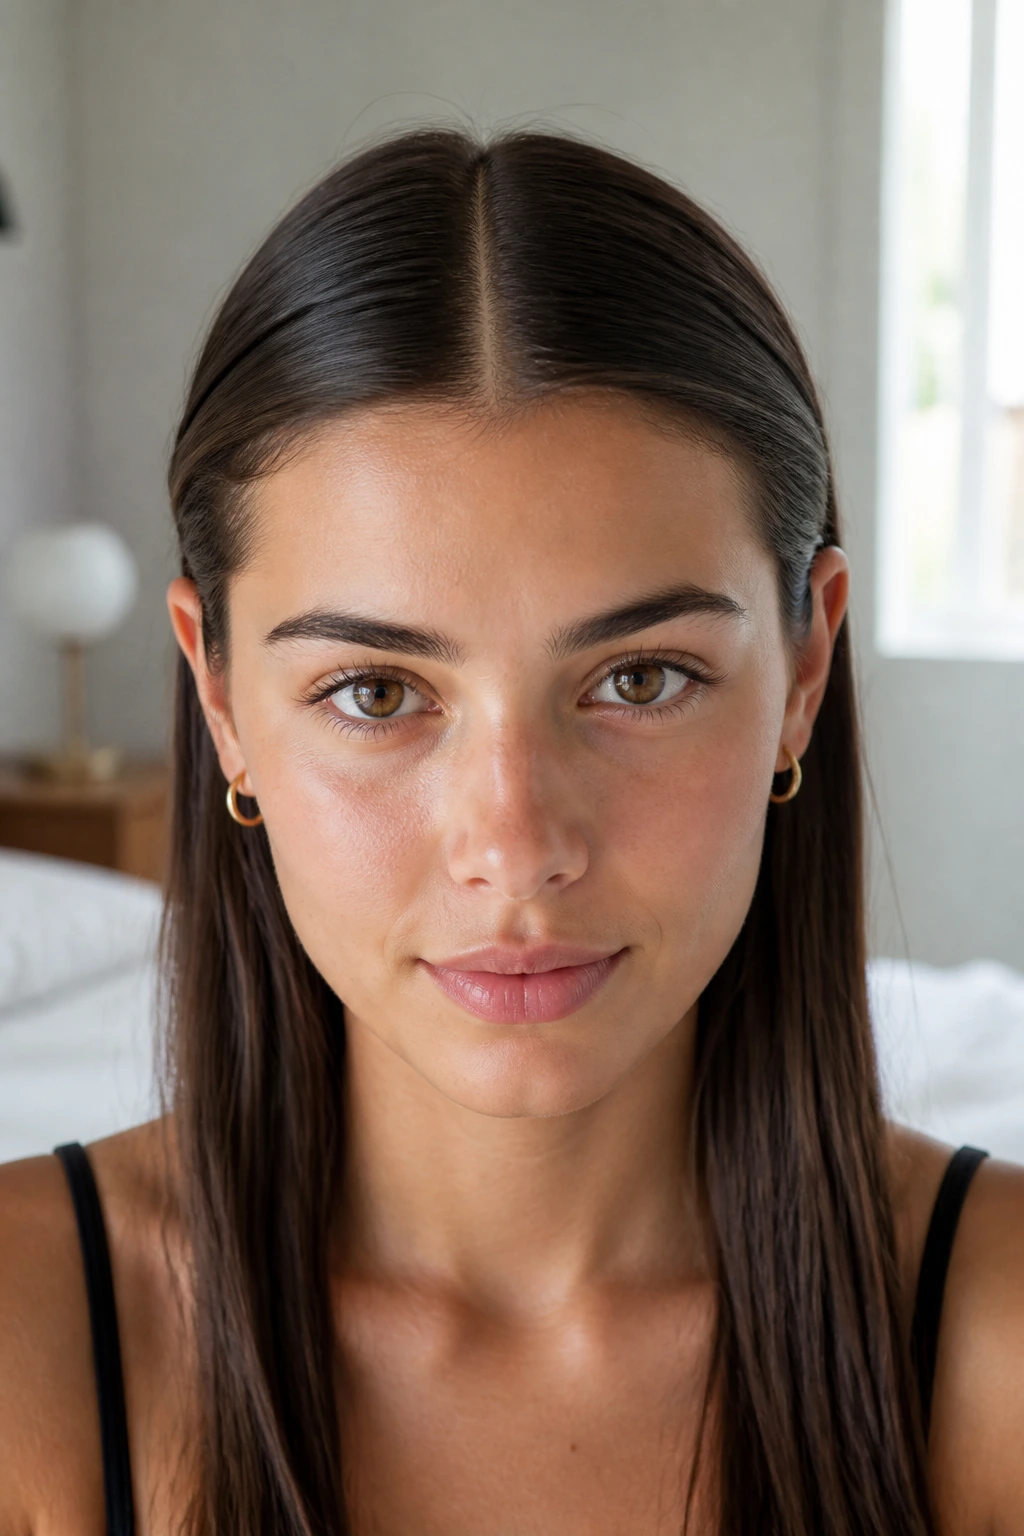
This is simplicity itself: straight center part, smooth strands falling on either side of your face, and the front sections tucked behind your ears or swept back with bobby pins. It’s the hairstyle equivalent of putting on a white t-shirt and jeans—effortless, classic, and somehow always works. On straight hair, this creates clean lines that frame your face intentionally.
What This Style Gets Right
Straight hair with a center part creates perfect geometric balance—each side mirrors the other exactly, which feels calming and polished. There’s no frizz, no texture breaking up the line, and no asymmetrical flyaways that would require styling products. Your hair’s natural sleekness becomes the entire point of the style, which means you’re not fighting your texture; you’re embracing it.
Making It Look Intentional (Not Like You Just Woke Up)
- Part your hair down the exact center of your scalp (use a fine-tooth comb to get it perfectly straight)
- Smooth each side with a paddle brush, applying light tension to create a sleek, flat surface
- If you have a rounded face, consider moving the part slightly off-center (not quite a side part, but shifted an inch or two) to create the illusion of length
- For the tucked version: use a small bobby pin or clip on each side to secure the front sections behind your ears, or let them fall naturally
- A light hairspray keeps the part sharp and flyaways controlled all day without making your hair feel stiff
Insider note: This style immediately looks more sophisticated when you use a subtle hair oil or shine spray on your strands—it emphasizes the glossy quality of your straight hair and reads as intentional rather than just “hair laying flat.”
5. The Sleek Side Part Wrap
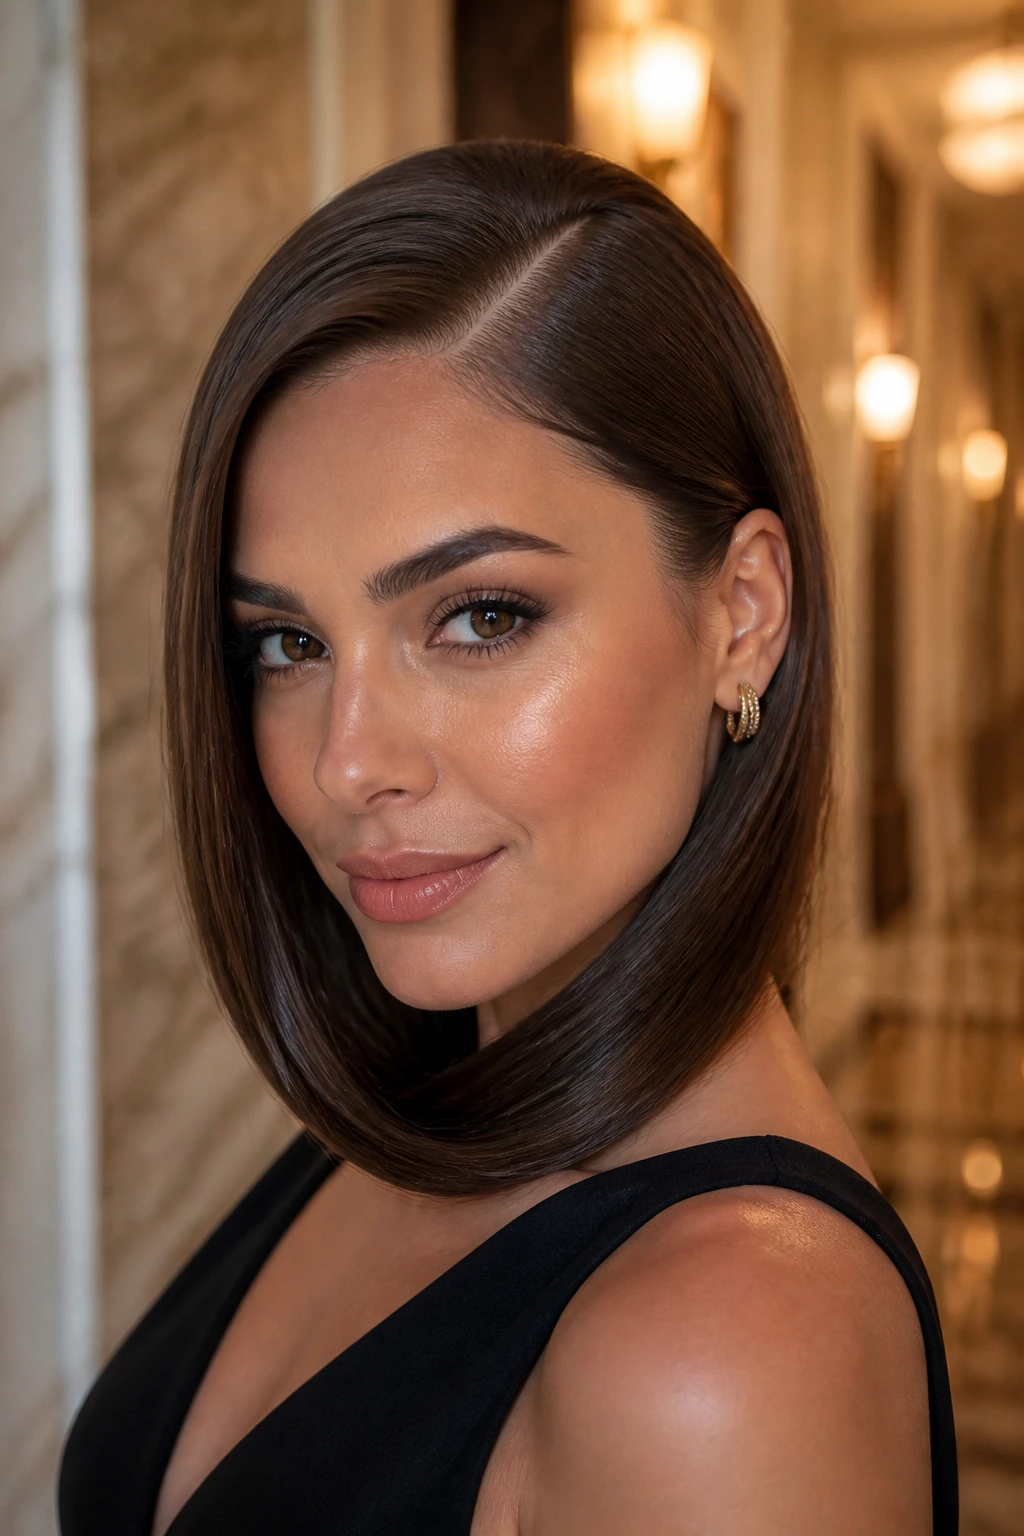
A deep side part sits way over to one side of your scalp, and the bulk of your hair falls on the opposite side, creating an asymmetrical, elongated line. Straight hair responds beautifully to this because the line is so clean and dramatic. It’s particularly flattering on oval or heart-shaped faces and creates an instantly more sophisticated vibe than a center part.
Why This Works So Well on Straight Strands
The side part creates an asymmetrical, elongated frame that plays with light and shadow in a way that flatters most face shapes. Straight hair emphasizes this effect because your strands create a clean line without texture breaking the visual. The asymmetry feels intentional and modern, not like you couldn’t be bothered to center your part. It’s genuinely one of the easiest ways to look more polished without doing anything complicated.
Steps to Style a Sleek Side Part Wrap
- Create your side part by drawing a line from the top of one eyebrow straight back to your crown—this is roughly where your part should sit
- Brush all hair toward the heavier side, using a paddle brush and light tension to create a smooth surface
- Use a straightening iron on medium heat if you want maximum sleekness, or skip this if your hair is already smooth
- Smooth down any flyaways on the lighter side with a small amount of gel or serum applied with your fingertips
- Optionally, use a bobby pin or clip to tuck the lightest strands behind your ear if they’re too wispy
Quick fact: A side part sits somewhere between “trying” and “effortless”—it’s enough styling effort to look intentional, but quick enough that you’re not spending time every morning. Perfect for people who want to look polished without high-maintenance hair.
6. The Straight, Sleek Braid
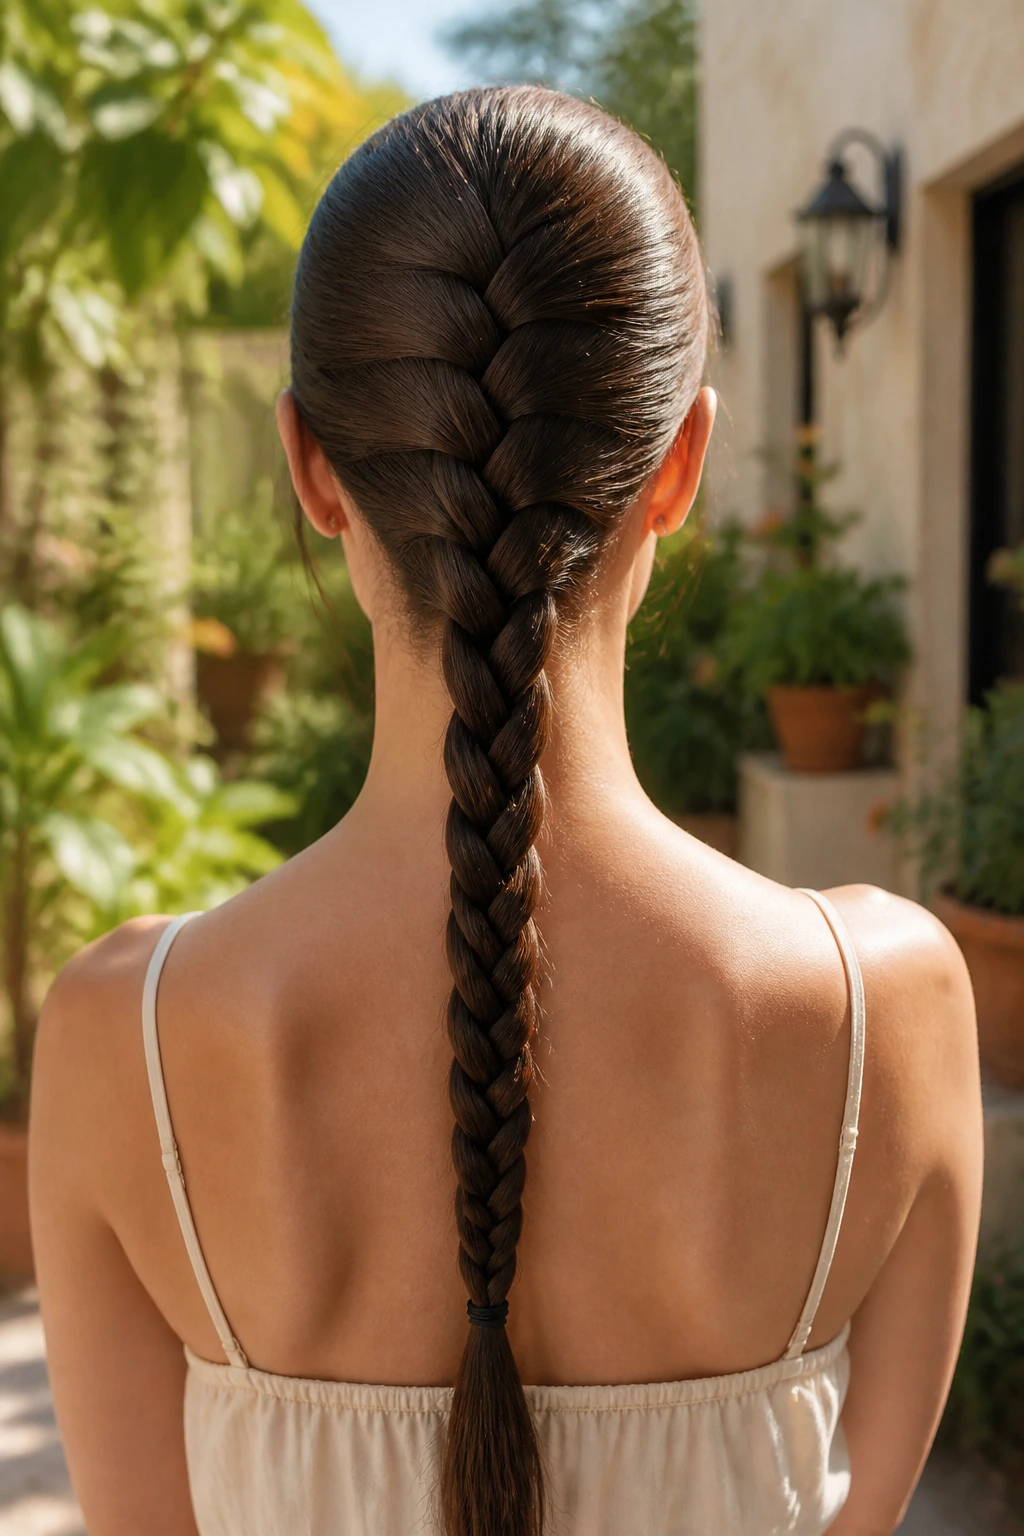
A sleek braid means your hair is brushed smooth and braided tightly from your scalp all the way down (rather than a loose, textured braid). On straight hair, this creates an almost jewel-like effect—the individual strands are visible and catch light beautifully, and the braid has a defined, almost sculptural quality. It’s understated but undeniably elegant.
What Makes a Straight Braid Different
A braided style on curly or textured hair tends to get fluffy and soft-looking, which is beautiful but requires intentional undoing for that effect. A braid on straight hair is automatically sleek and geometric. Your strands grip each other during the braid, creating a tight, defined texture that looks intentional without any extra work. The braid itself becomes a visual detail rather than just “hair that’s out of the way.”
How to Braid Your Hair Smoothly and Tightly
- Start with brushed, straight hair—smooth it with a straightening iron if needed for maximum grip during braiding
- Create a small section at the crown and begin braiding tightly from the top of your scalp (not a loose, casual braid from the side)
- Keep consistent tension as you braid down the back of your head—not so tight that you’re pulling painfully, but tight enough that the braid feels secure and defined
- Secure the braid with a small elastic at the end, or wrap a thin section of hair around the base to hide the elastic (it looks more polished)
- Smooth any flyaways with a fine-tooth comb, running it down the braid to catch stray hairs
- A very light hairspray keeps everything in place without making the braid feel stiff or crunchy
Pro tip: A sleek braid paired with a blouse or structured clothing looks surprisingly upscale. It’s the kind of hairstyle that reads as intentional and put-together in professional or formal settings, even though it takes less than five minutes to create.
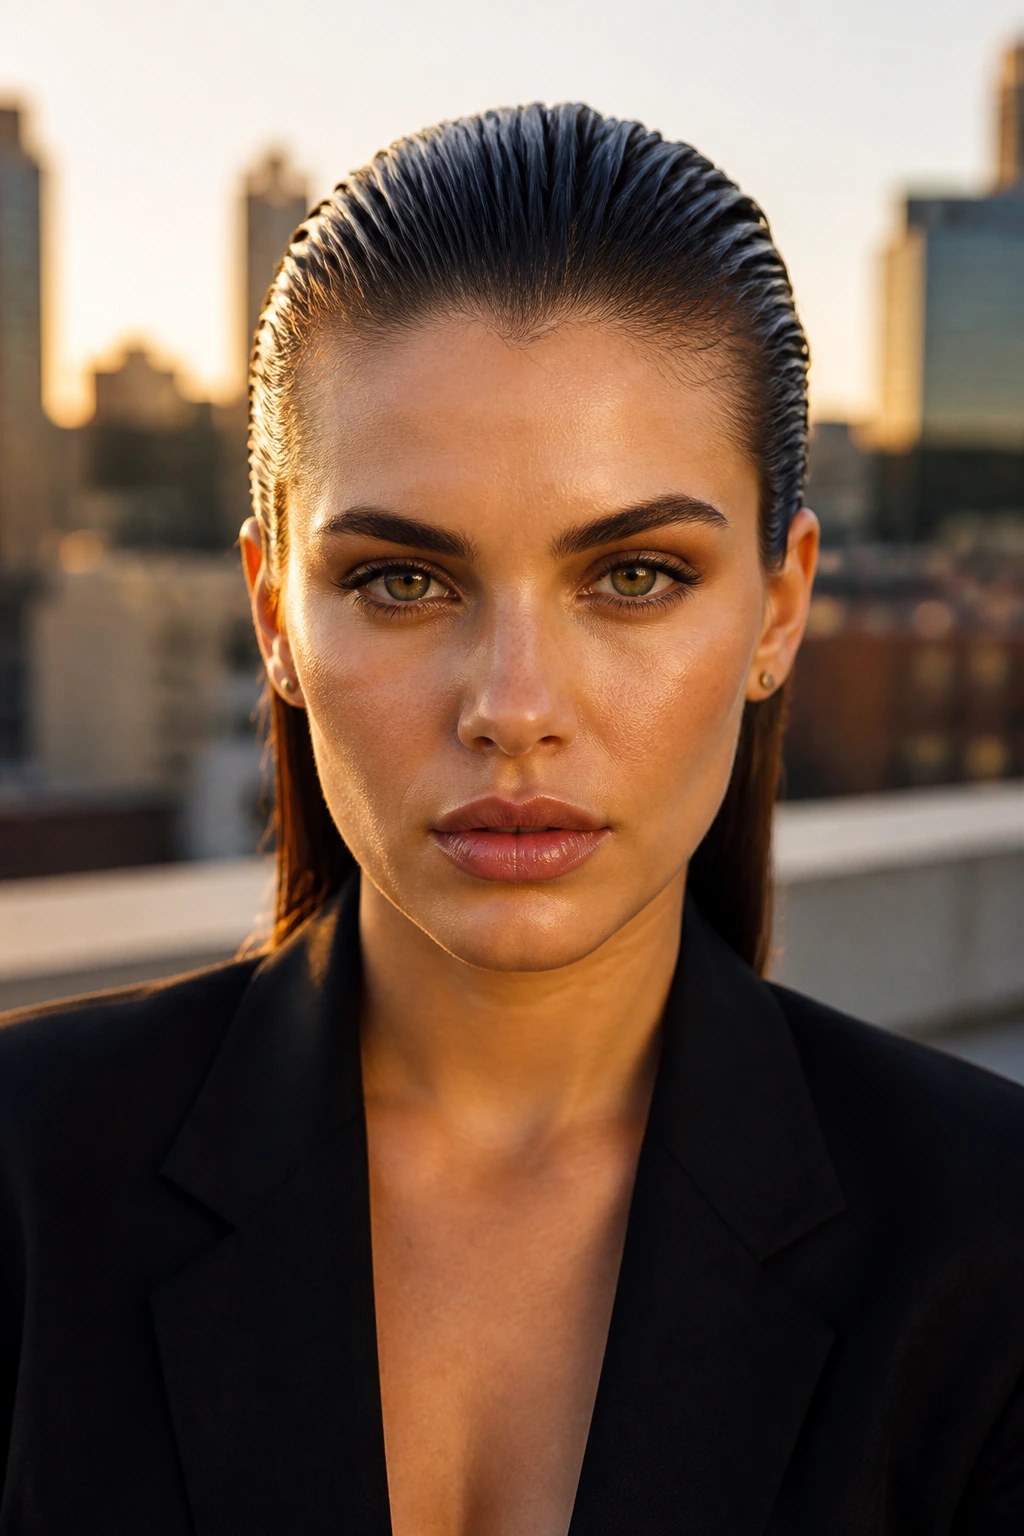
7. The Slicked-Back High Pony with Shine
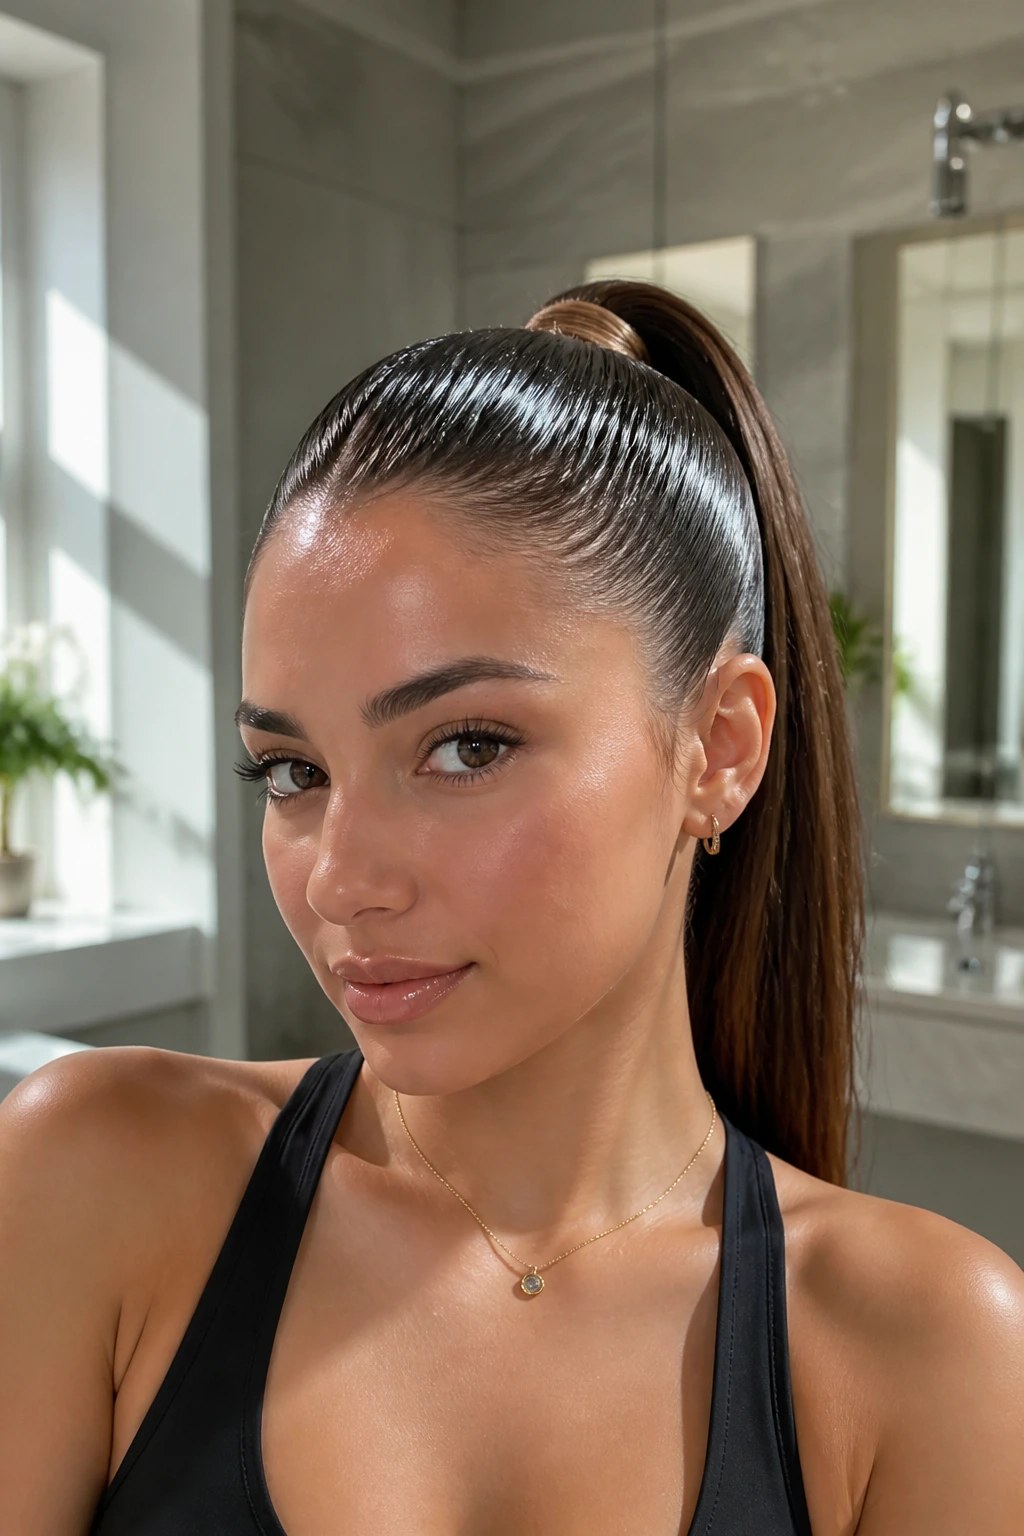
This ponytail pulls all your hair straight back and up into a high knot at the crown, and it’s styled with shine serum or oil so your strands look glossy rather than matte. It reads as athletic-but-intentional, and the shine component elevates it from “just pulled my hair back” to “this is a deliberate styling choice.” On straight hair, the shine creates an eye-catching detail because your strands already have a natural reflective quality.
Why High Ponytails Look More Polished on Straight Hair
A high ponytail tends to expose your entire scalp and face, which means your hair texture becomes very visible. On straight hair, this means your scalp looks smooth and your hair looks sleek and shiny—not showing any texture or frizz. A high pony on straight hair automatically looks cleaner and more intentional than the same style on textured hair, which is why so many athletes and professionals choose this look.
Achieving the Slicked-Back Effect
- Use a gel or lightweight pomade to slick all your hair straight back against your scalp—apply it to damp hair and smooth with a paddle brush
- Gather your hair into a high ponytail at the crown and secure with a smooth elastic that won’t snag or break your strands
- Take a very thin section from the ponytail and wrap it around the elastic to hide the base (this adds polish)
- Apply a shine serum or lightweight hair oil to your entire ponytail—run it through with your fingers and make sure it’s evenly distributed
- Smooth any flyaways at the temples and crown with a fine-tooth comb and a touch of gel
Worth knowing: The shine serum is what elevates this from “gym hair” to “intentional styling.” It catches light and draws the eye to your hair in a positive way, making even a very minimal style feel deliberate and polished.
8. The Soft Waves with a Texture Spray
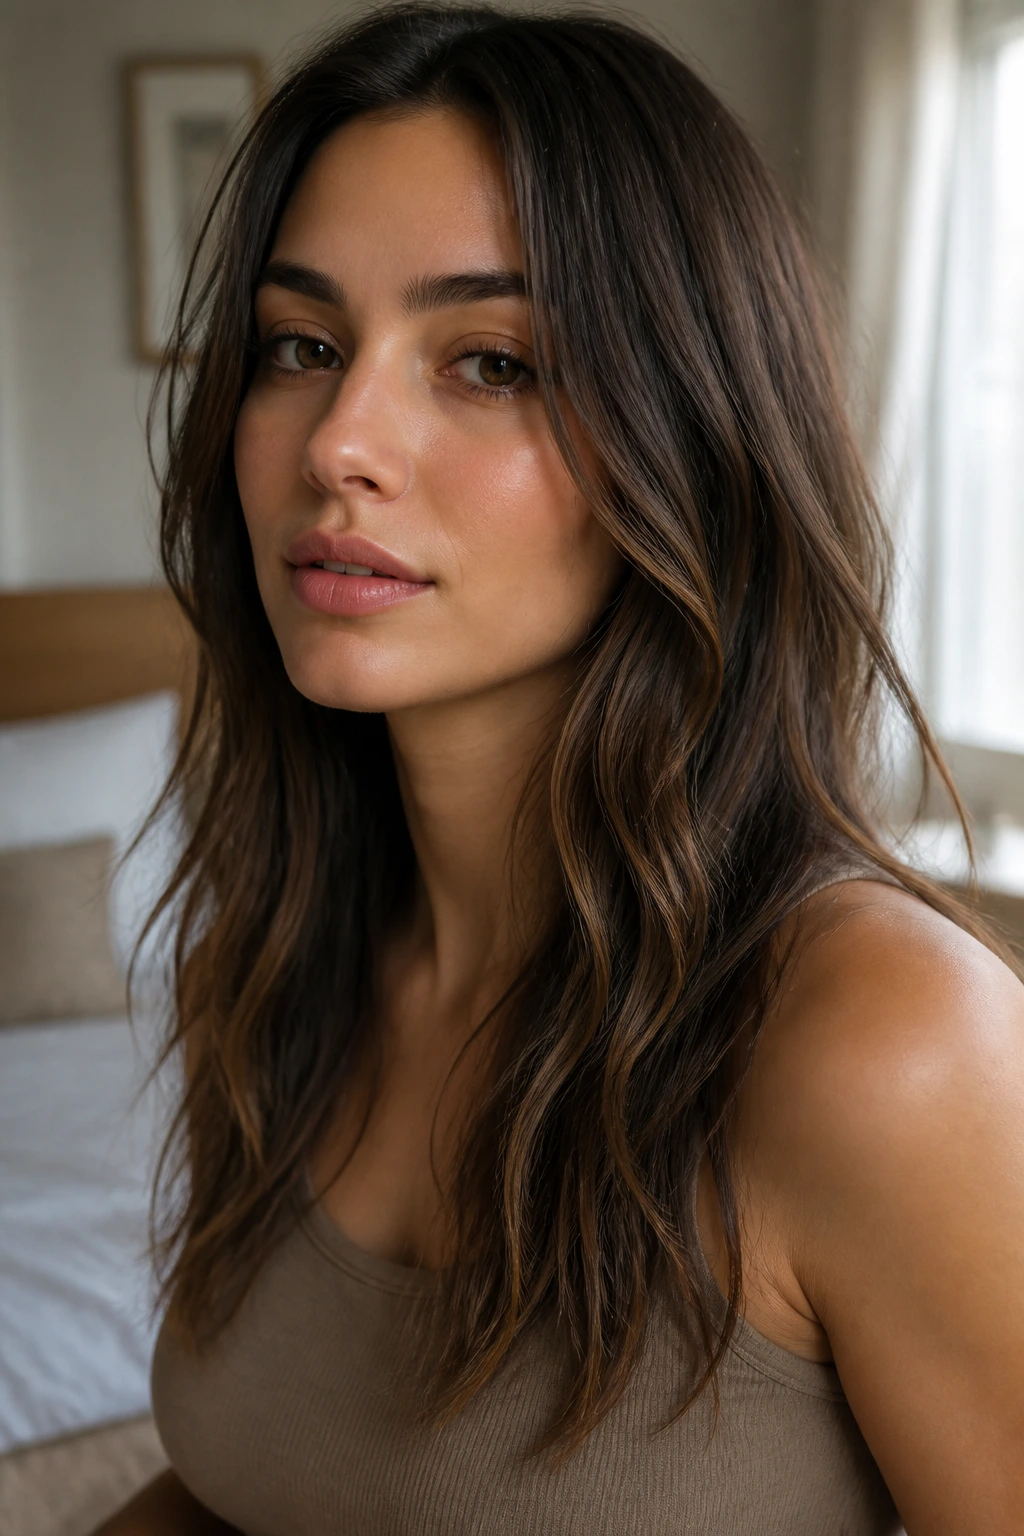
“Soft waves” might seem counterintuitive for straight hair—isn’t the point that it’s straight? But soft, undone waves on straight hair create movement without looking frizzy or uncontrolled. The key is using a texture spray (not a curling iron) to create definition and hold. Your straight strands still show through; you’re just adding subtle movement and interest.
How Texture Spray Changes Straight Hair
Texture spray (also called sea salt spray or beach spray) adds grip and definition to your strands without creating actual curls. On straight hair, this means you get subtle waves and visible texture without the frizz or heat damage that a curling iron would cause. Your hair still looks like straight hair—it’s just got more movement and visual interest. It’s the difference between “flat” and “effortlessly undone.”
Steps to Create Soft Waves Without Heat
- Start with damp hair and apply texture spray evenly throughout, scrunching gently as you spray
- Use your fingers to create loose waves by scrunching sections of hair and letting them air-dry, or blow-dry with a diffuser for faster results
- Once your hair is dry, go back through and gently separate the waves with your fingers to avoid clumping or looking overly textured
- A very light hairspray holds the waves in place without making them feel stiff or artificial
- The waves should look natural, like you just came back from the beach—not defined or intentionally curled
Pro tip: This style is perfect for days when you’re not sure if you want your hair up or down. You get movement and interest, but your hair is still mostly straightforward and can be quickly pulled back if needed.
9. The Twisted Crown Detail
This style keeps most of your hair down, but you take a thin section from one side and twist it around the back of your head like a crown, securing it on the opposite side. It’s more romantic than a full updo and more polished than hair completely down. Straight hair creates clean, defined twists that look almost sculptural rather than soft or undone.
Why Twists Work as a Detailed Accent
A twisted crown detail draws the eye upward and creates visual interest at the back and sides of your head. On straight hair, the twist itself is the styling detail—it doesn’t need texture or volume to look intentional because the twisted shape is the point. You’re creating a geometric detail that contrasts with the sleekness of your straight strands, which makes the whole look feel sophisticated without being overwrought.
Creating a Defined Twisted Crown
- Take a section of hair from one side of your head (about 2-3 inches wide)
- Twist it loosely but with consistent tension as you bring it toward the back and across to the opposite side
- Secure it on the opposite side with bobby pins that match your hair color (tuck them in so they’re not visible)
- Make sure the twist is visible—you want people to see it, so don’t hide it under other hair
- Smooth any flyaways with a fine-tooth comb and a tiny dab of smoothing serum
- Optional: for extra hold that lasts all day, mist the twisted section with flexible hairspray
Quick fact: This detail works at any length—shoulder-length, mid-back, or longer. It works with hair fully down, or you can combine it with a ponytail or updo for a more complex look if you’re feeling ambitious.
10. The Sleek Straight Shag
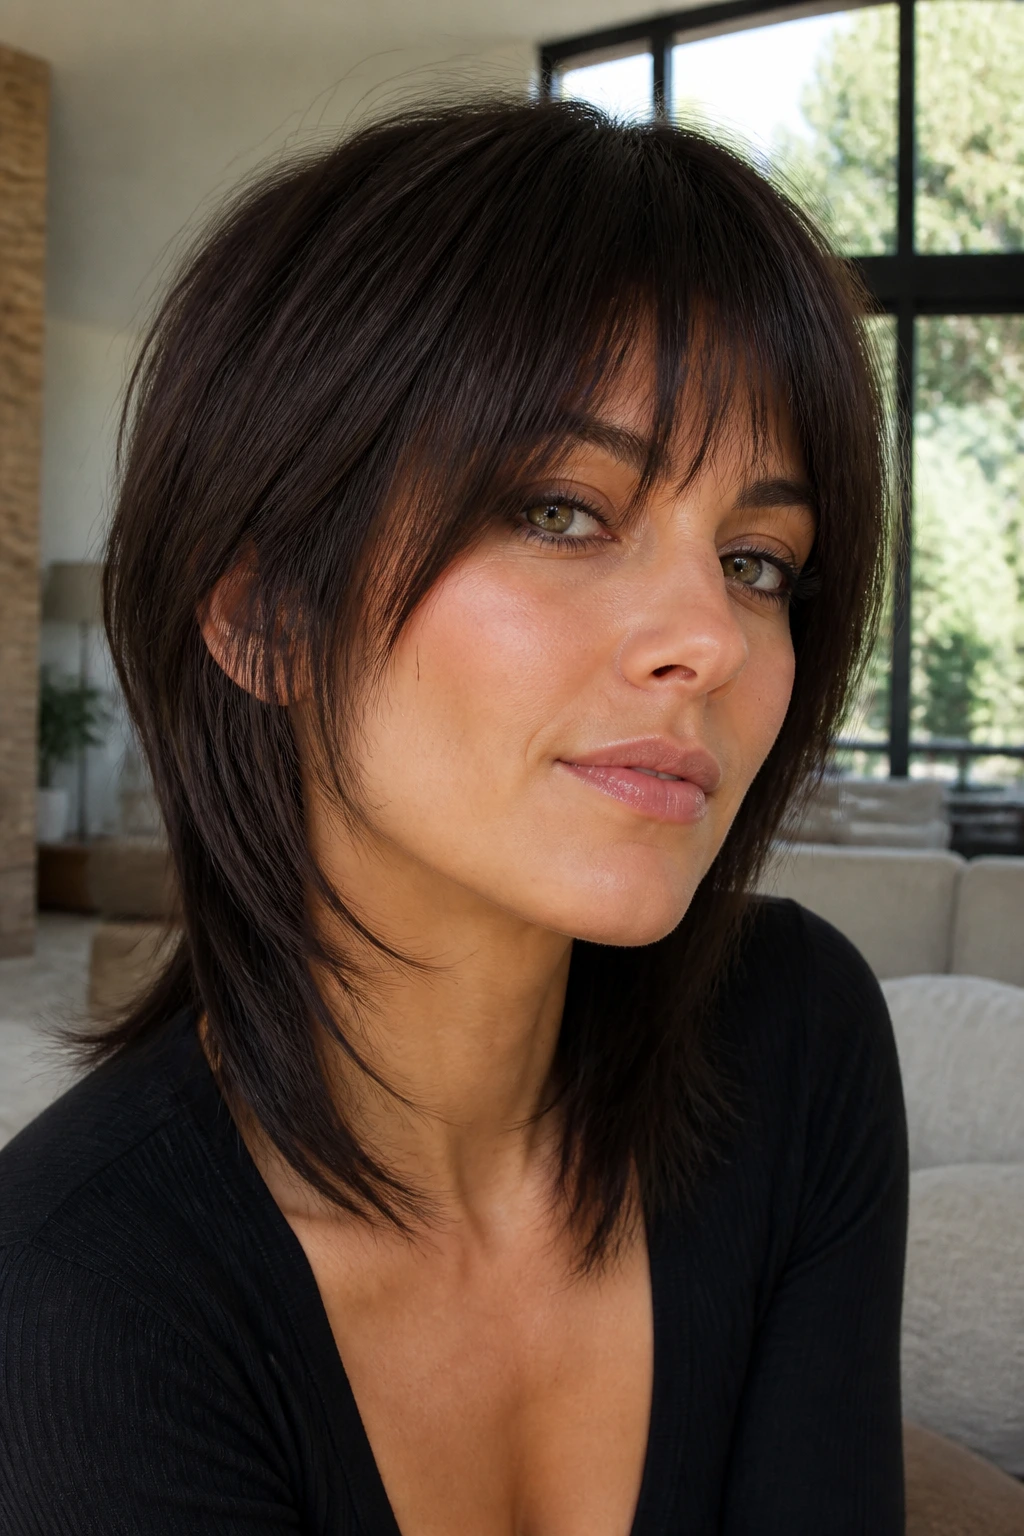
A shag is a layered cut with shorter layers on top and longer layers underneath, creating movement and texture. On straight hair, this creates something different than the traditional soft, rock-and-roll shag—it’s cleaner and more defined, with each layer visible rather than blending together. It’s becoming trendy again, and on straight hair, it’s particularly modern and chic.
What Makes a Straight-Hair Shag Unique
Straight hair shows off every layer of a shag because the strands fall cleanly without texture blending them together. The shorter layers on top create volume and movement without requiring any styling—they naturally sit away from your head. The longer layers create flow without the need for heat tools or product. You get a textured, interesting haircut that’s still effortlessly straight-friendly.
Styling Your Straight Shag for Maximum Impact
- Wash with a volumizing shampoo to give your layers movement and dimension
- Blow-dry with a blow dryer and round brush, directing layers away from your face and crown for maximum movement
- Use a straightening iron only on the ends if they start to bend outward (this maintains the clean line between layers)
- A light texturizing spray adds definition to your layers without making them look frizzy or intentionally textured
- Run your fingers through to separate the layers once everything is dry—each layer should be visible and distinct
Insider note: A shag on straight hair is one of the few layered cuts that actually looks better without being “fluffed” or styled with a ton of products. The straight texture is doing the work; you’re just letting it do its thing.
11. The Sleek Dutch Braid
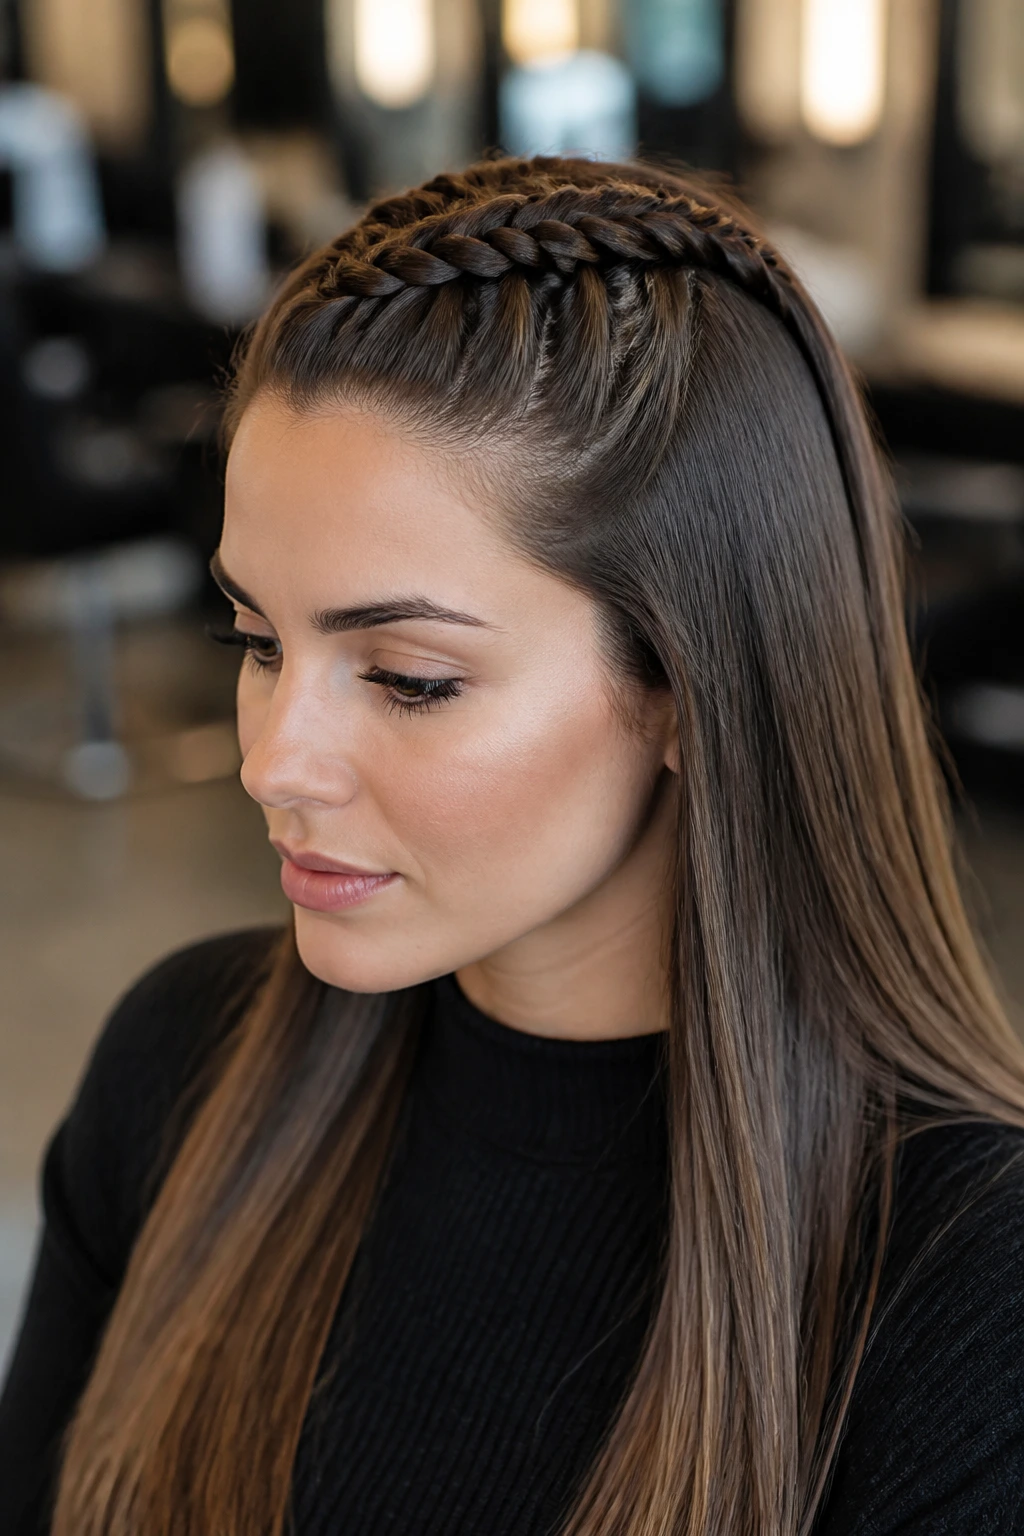
A Dutch braid is like a regular three-strand braid, but you’re crossing the side strands under the center strand instead of over it, creating a raised, textured appearance. On straight hair, the braid sits on top of your scalp in a defined, almost jeweled way that’s more visually interesting than a regular braid. It’s polished and works for casual or formal settings.
Why Dutch Braids Stand Out on Straight Hair
The Dutch braid’s visual definition comes from the texture created by crossing strands underneath instead of over. On straight hair, this texture is especially visible and intentional-looking because your strands are smooth. There’s no frizz or flyaways diffusing the braid; every detail is crystal clear. A Dutch braid on straight hair looks more intricate and deliberate than on textured hair, even though the technique is identical.
Steps to Braid a Perfect Dutch Braid
- Start with smooth, brushed hair—use a straightening iron if needed for maximum grip
- Begin at the crown with three equal sections of hair and start braiding, crossing the side sections under the center section (this is the only difference from a regular braid)
- Keep the braid tight and centered, working your way down the back of your head in a straight line
- Continue until you reach the ends of your hair, then secure with a small elastic
- Smooth flyaways with a fine-tooth comb and a light hairspray, but don’t try to “loosen” the braid—the tightness is what makes it look polished
Pro tip: A Dutch braid looks even more polished if you take a thin section from the bottom and wrap it around the elastic base, covering the tie completely. It’s a small detail that elevates the whole look.
12. The Slicked-Down Pixel or Baby Braids
These are tiny, thin braids that sit close to your scalp, often in a geometric pattern or grid-like arrangement. On straight hair, they look sculptural and architectural rather than undone or textured. They’re less common than other styles, which means they read as intentional and fashion-forward. They can be worn alone or incorporated into a larger updo.
What Makes This Style Stand Out
Tiny braids require significant hair grip and hold to stay in place—which straight hair provides naturally. On textured hair, baby braids can get fuzzy as they age. On straight hair, they stay defined and clean-looking for days. They’re also visually striking because they create geometric patterns on your scalp that are only possible with smooth, easily-controlled hair. It’s a high-impact statement style without being complicated.
Creating Defined Pixel Braids
- Start with smooth, brushed hair—smooth with a straightening iron if needed
- Plan your pattern (a grid is most common, or you can do a geometric arrangement)
- Take thin, even sections following your pattern and braid each section tightly from scalp to ends
- Secure each braid with a tiny elastic (or let them hang free if they’re short enough)
- Smooth any flyaways with gel or smoothing serum—the more defined and clean-looking, the better
- Optional: add a small clip, bead, or hair charm to the end of each braid for extra visual interest
Worth knowing: This style is genuinely easier to maintain on straight hair than any other texture because the braids stay tight and defined without frizzing. You can sleep in them and they’ll still look sharp the next morning.
13. The Straight Lob (Long Bob) with Minimal Styling
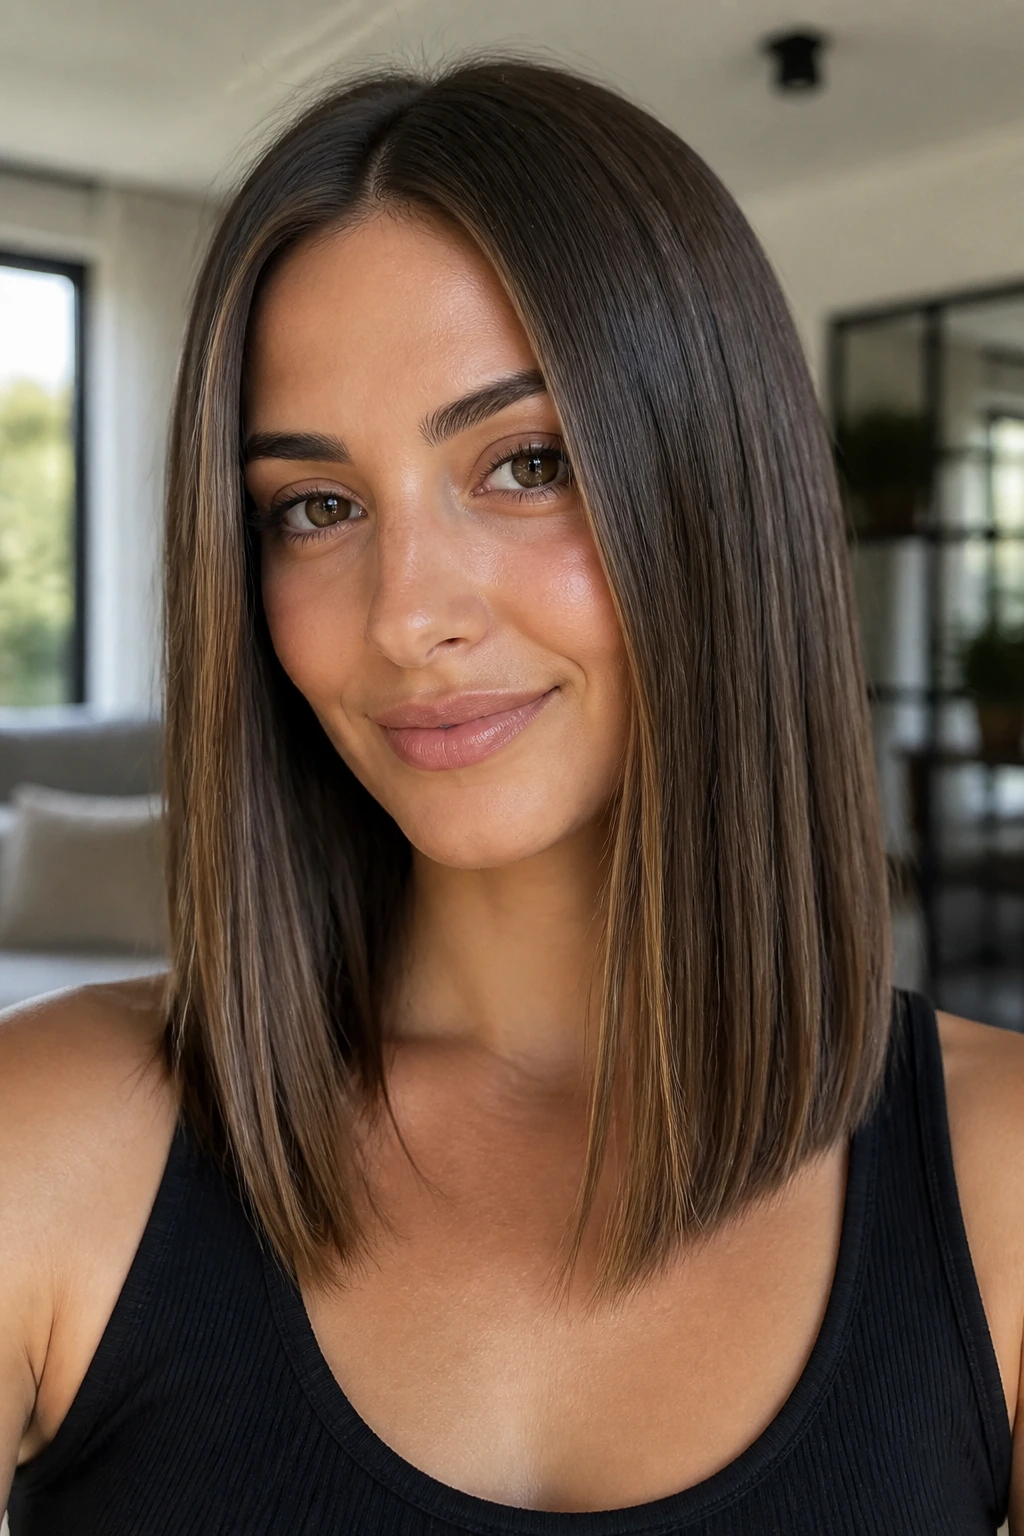
A lob is a longer version of a bob—usually falling between shoulder and mid-chest—with clean, intentional lines but not an extremely blunt edge. On straight hair, a lob looks effortlessly chic because the clean lines are emphasized by your hair’s natural sleekness. It requires minimal daily styling while still looking polished and intentional.
Why a Lob Flatters Straight Hair
The lob is the perfect length to show off straight hair’s best quality: that glossy, sleek appearance. It’s long enough to create movement and flow without needing to be curled or waved, but short enough to look intentional and shaped rather than just “long hair.” The length also means you’ve got options—it can be worn down, half-up, or in a ponytail depending on your mood and occasion.
Styling Your Lob for Maximum Impact
- Get regular trims every 8-10 weeks to maintain the shape and keep the line intentional
- Blow-dry with a round brush, directing the ends slightly away from your face for subtle movement
- Use a straightening iron on the ends if they start to bend inward (this is a common issue with lobs and creates an unintentional blunt edge)
- Apply a shine serum to emphasize your hair’s natural glossy quality
- Brush through with a paddle brush to smooth everything once you’re done styling
Pro tip: A lob is one of the few cuts that looks good even if you don’t style it much. Air-dry, run your fingers through, and you’re done. It’s the definition of “effortful-looking without effort.”
14. The Slicked Back Wet-Look Style
This is an intentionally shiny, wet-looking style where your hair is smoothed straight back and held in place with a gel or pomade that creates a glossy finish. It’s bold and modern, and on straight hair, the wet look is especially striking because your strands already have a natural reflective quality. It’s fashion-forward and works for events, shoots, or just when you want to make a statement.
What Makes a Wet Look Work on Straight Hair
A wet-look style relies on shine and sleekness for its impact. Straight hair naturally has both, which means you’re not fighting your texture to achieve the look. The gel or pomade just amplifies what’s already there. The result is a high-impact style that looks intentional and modern, not greasy or neglected—because you’ve deliberately chosen the shine as part of your styling.
Creating a Polished Wet-Look Style
- Start with damp hair and apply a strong-hold gel or pomade evenly throughout
- Use a fine-tooth comb to smooth all hair straight back, creating a sleek surface
- Make sure the product is evenly distributed so you don’t have clumpy or dull patches
- Blow-dry or air-dry depending on how much hold you need
- Go back through with the comb once dry to ensure everything is smooth and the shine is even
- A light hairspray on top locks everything in place for all-day wear
Quick fact: The key to making this look intentional rather than greasy is using the right product—a gel or pomade specifically formulated for shine, not a heavy styling cream. And using the right amount (usually less than you think) so it looks glossy rather than wet.
15. The Straight Hair with a Decorative Hair Clip
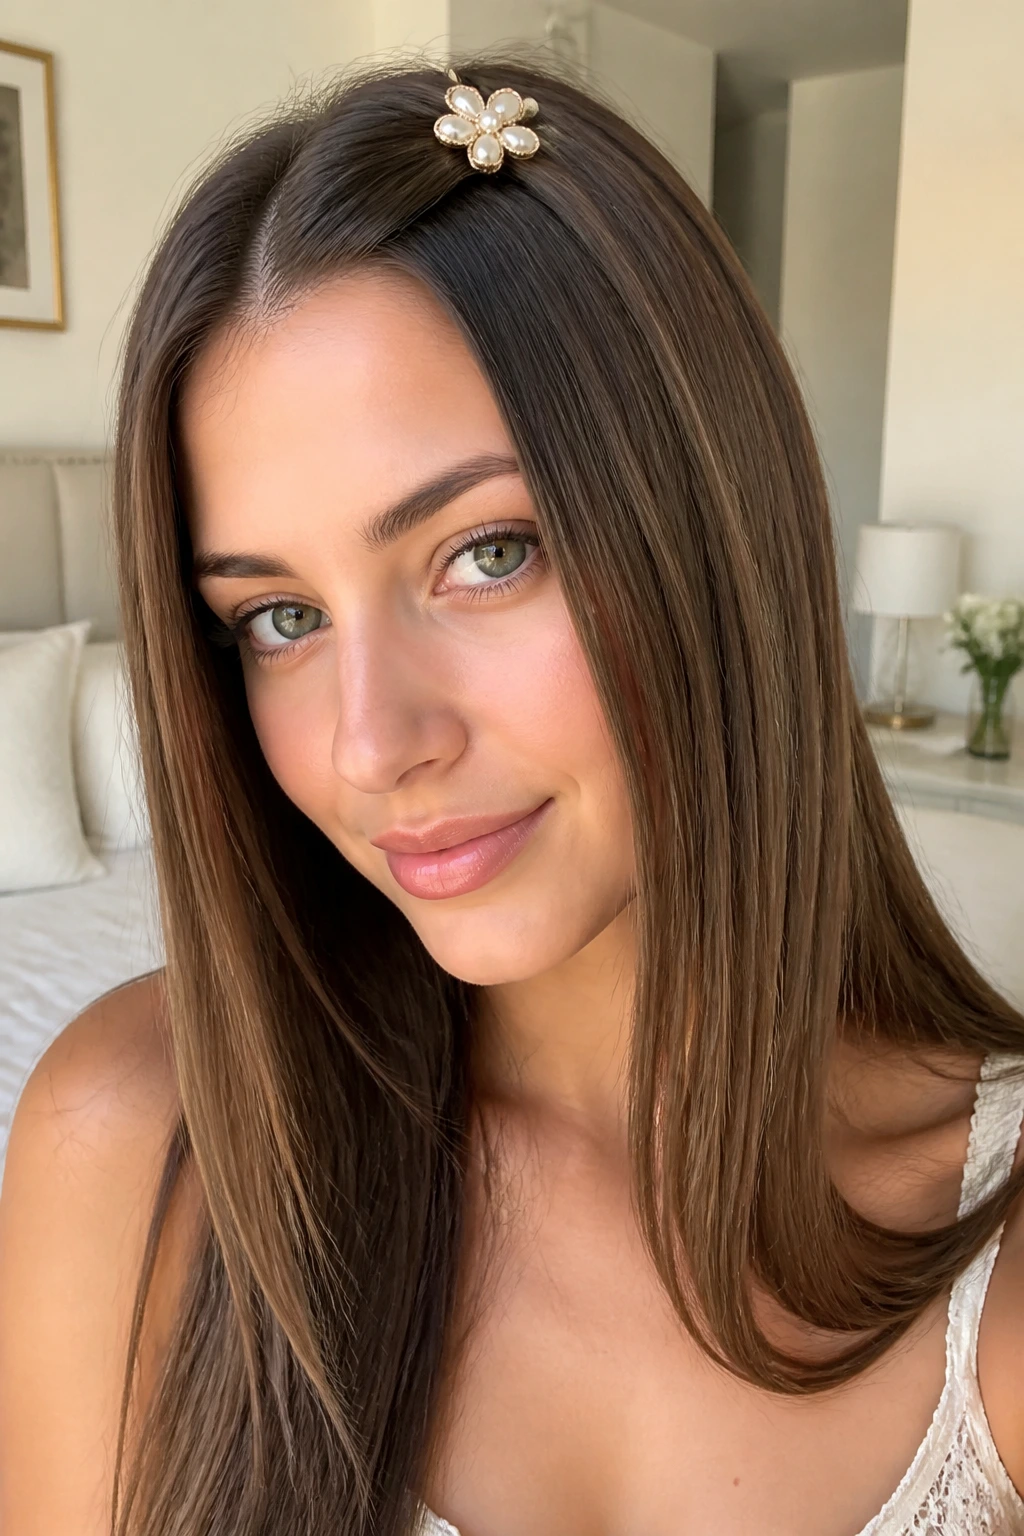
This is almost a non-style—your hair stays down and straight, and the entire effect comes from a decorative clip placed strategically. It could be a small tortoiseshell clip at the back, a larger clip at the crown, or even a hair claw in the middle of a low pony. On straight hair, minimal styling details like clips are incredibly impactful because they stand out against the smooth background of your strands.
Why Clips Look More Intentional on Straight Hair
When your hair is smooth and sleek, any accessory stands out visually. A clip on straight hair reads as an intentional styling choice rather than a practical hair-control measure. The contrast between the clip’s color, texture, or pattern and the sleekness of your hair creates visual interest without requiring any actual styling effort. It’s the ultimate hack for looking put-together without doing much work.
Choosing and Placing Your Clip
- Select a clip in a color or finish that contrasts with your hair (tortoiseshell on dark hair, gold on blonde, etc.)
- Experiment with placement: at the crown for a pulled-back vibe, at the nape for a low-pony effect, or on one side for asymmetry
- If you want the clip to hold hair in place rather than just sit as decoration, use a larger clip or one with gripping teeth
- Keep the rest of your hair perfectly smooth and straight so the clip stands out as the styling detail
- This works at any hair length, but shows up most visibly on shoulder-length or longer hair
Insider note: The clip trend is actually perfect for straight hair because you don’t need to style your hair at all to make this work. Just smooth it and add the accessory. Done.
16. The Sleek High Bun
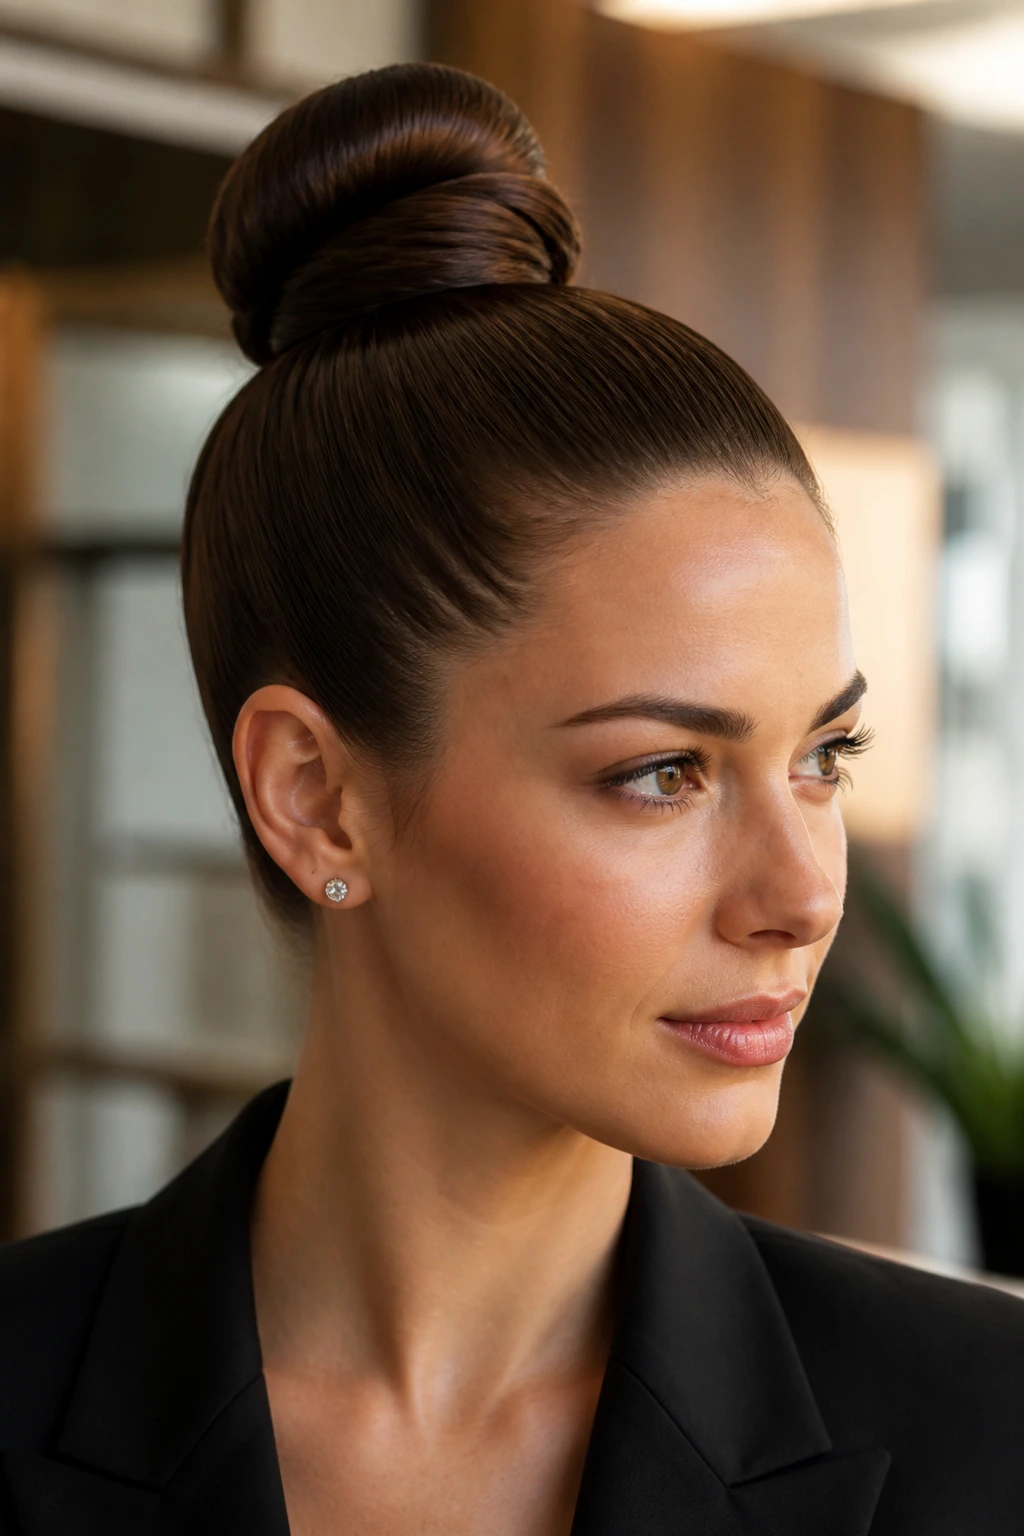
A high bun sits at the crown of your head and is wrapped tightly from a high ponytail. On straight hair, the bun itself is smooth and defined rather than fluffy or soft. It creates a polished, almost architectural look that’s perfect for work, formal events, or whenever you want your hair completely off your face. It’s surprisingly elegant for something so simple.
What Makes a Straight-Hair Bun Different
A bun on curly or textured hair tends to look soft and rounded. A bun on straight hair is more structured and geometric. Your strands wrap around themselves in defined layers without needing to be teased or backcombed for volume. The smooth, shiny finish of straight hair creates an almost polished or sculptural effect. It’s the difference between a soft, romantic bun and a sleek, intentional one.
Creating a High Bun That Lasts All Day
- Smooth all your hair straight back with a paddle brush and gather it into a high ponytail at the crown
- Twist the ponytail gently, then wrap it around the base to form a bun shape
- Secure with bobby pins, tucking the ends under the bun so they’re not visible
- Use a light hairspray to hold any flyaways and smooth them against the bun
- Optional: take a thin section from the ponytail and wrap it around the elastic base for extra polish
Pro tip: A bun looks especially polished on straight hair if you use a metal hair comb or vintage-style hair stick to secure it instead of just bobby pins. It’s a small detail that elevates the whole look and actually provides better hold.
17. The Straight Side Ponytail with a Statement Elastic
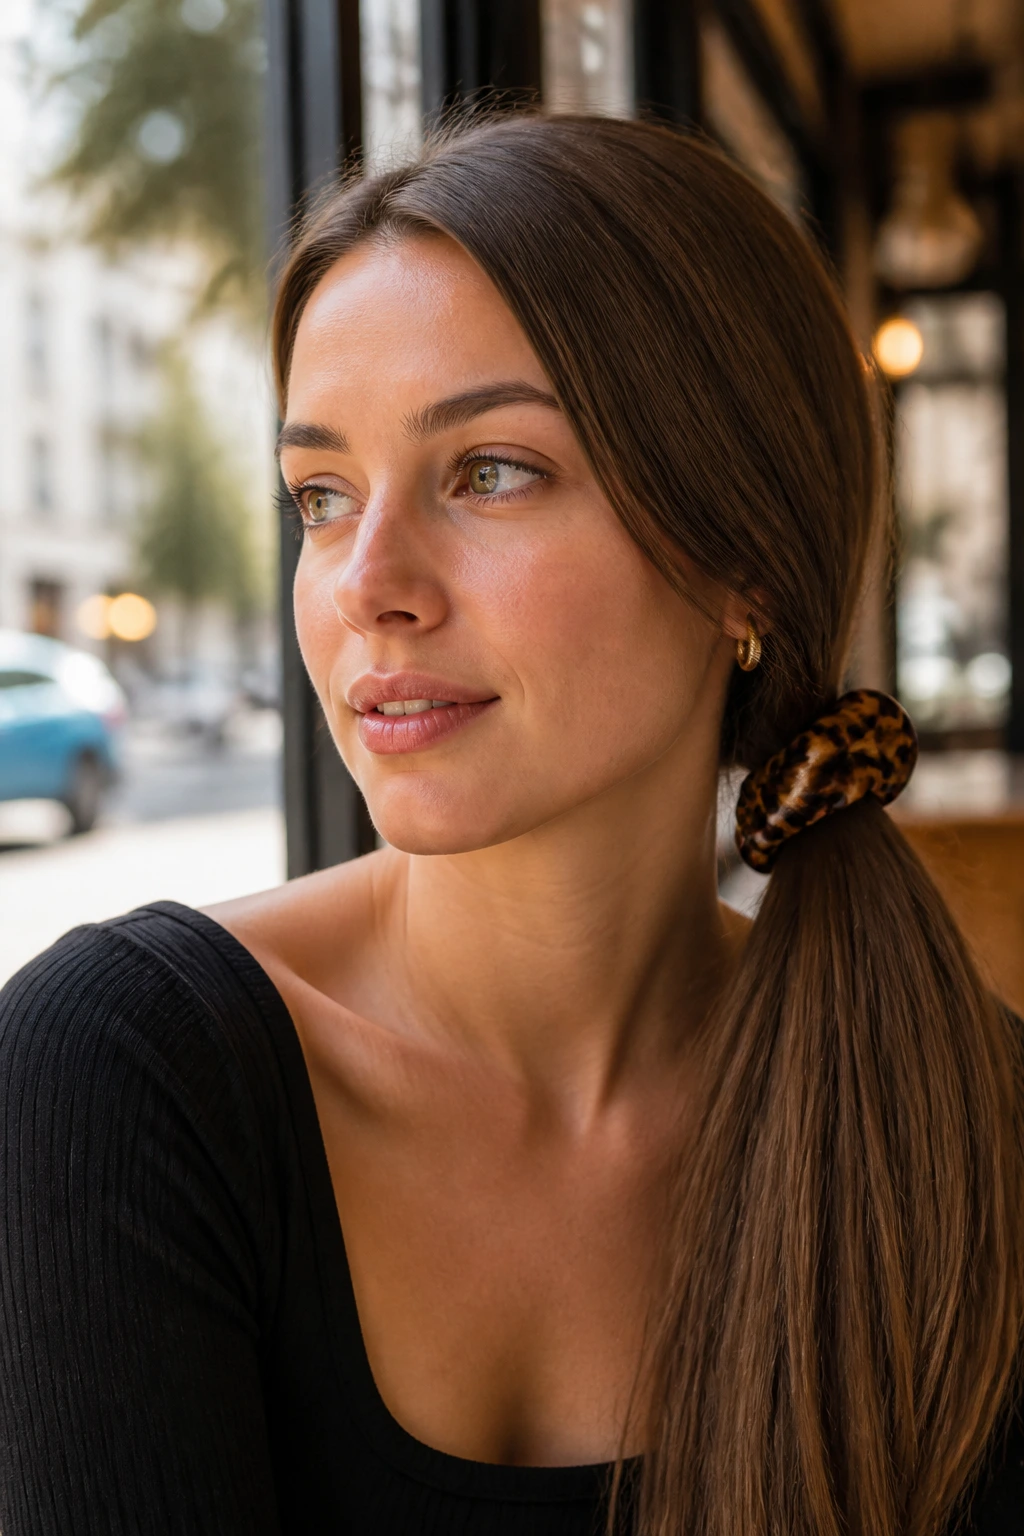
A side ponytail sits off to one side of your head rather than directly at the back. Adding a statement elastic (a colorful, patterned, or decorative elastic instead of a basic black one) makes the ponytail intentional and fashion-forward. On straight hair, the ponytail hangs sleekly and the elastic becomes a visible styling detail rather than just functional.
Why Side Ponytails Work on Straight Hair
A side ponytail has a playful, asymmetrical vibe that contrasts nicely with the sleekness of straight hair. Your hair falls in a smooth, shiny line to one side, and the elastic becomes a visible accessory rather than something hidden. The smoothness of your hair emphasizes the contrast created by the asymmetrical placement, making it feel more intentional and modern.
Styling a Side Ponytail with Impact
- Brush your hair smooth and gather it into a ponytail positioned off to one side (about where your ear is)
- Use a statement elastic in a color or pattern that coordinates with your outfit or stands out intentionally
- Smooth any flyaways with a fine-tooth comb and a light touch of gel or smoothing serum
- Optional: take a thin section from the ponytail and wrap it around the elastic to cover it and add polish
- The ponytail itself should be smooth and shiny—no texture spray or attempts to make it “effortlessly undone”
Worth knowing: The statement elastic is what makes this style different from a regular side ponytail. Choose one that feels intentional—tortoiseshell, a bold color, metallic, or a vintage-inspired option. It should feel like a deliberate accessory choice, not just “whatever elastic was in the drawer.”
18. The Straight Hair Bubble Pony
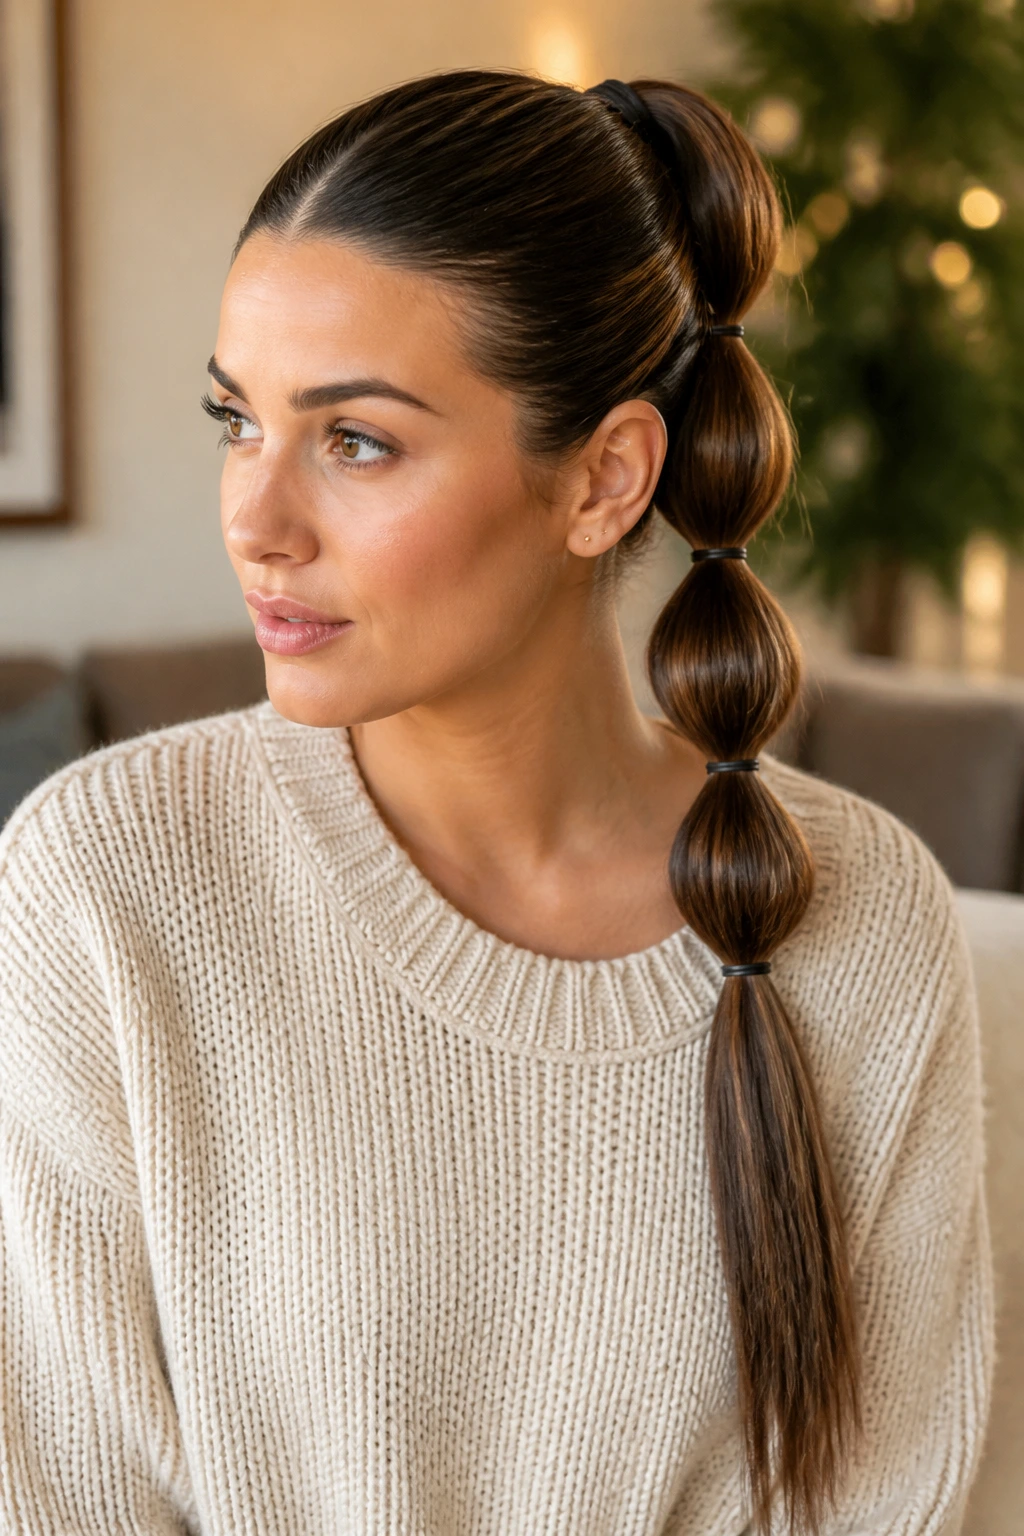
A bubble pony uses multiple elastics placed down the length of a ponytail to create a segmented, bubbled effect. It’s playful and modern, and on straight hair, each bubble is clearly defined and separate rather than blending together. It’s the kind of style that looks more complicated than it actually is, making it perfect for when you want to look creative without spending much time.
What Makes This Style Work on Straight Hair
Each “bubble” in a bubble pony is created by the elastics gathering your hair into separate sections. On straight hair, these sections are visibly distinct and clean—not blurring together or getting fuzzy. The visual is crisp and intentional. The style also relies on the smoothness of your strands to look polished rather than playful-messy, which straight hair provides automatically.
Creating a Defined Bubble Ponytail
- Create a regular high or mid-height ponytail and secure it with an elastic
- Place another elastic 2-3 inches down the ponytail to create the first bubble
- Continue placing elastics every 2-3 inches down the length of the ponytail, creating a segmented effect
- Gently tease or fluff each bubble section slightly with your fingers to make them pop visually
- Smooth the overall ponytail with a fine-tooth comb and light hairspray to keep everything in place
- Optional: add hair clips, beads, or charms between the elastics for extra visual interest
Pro tip: This style works especially well on longer hair where you can create 4-5 clear bubbles. On shorter ponytails, you might only get 2-3 bubbles, which is fine but looks more striking with more definition.
19. The Straight Slicked-Back Sleek Look with a Low Knot
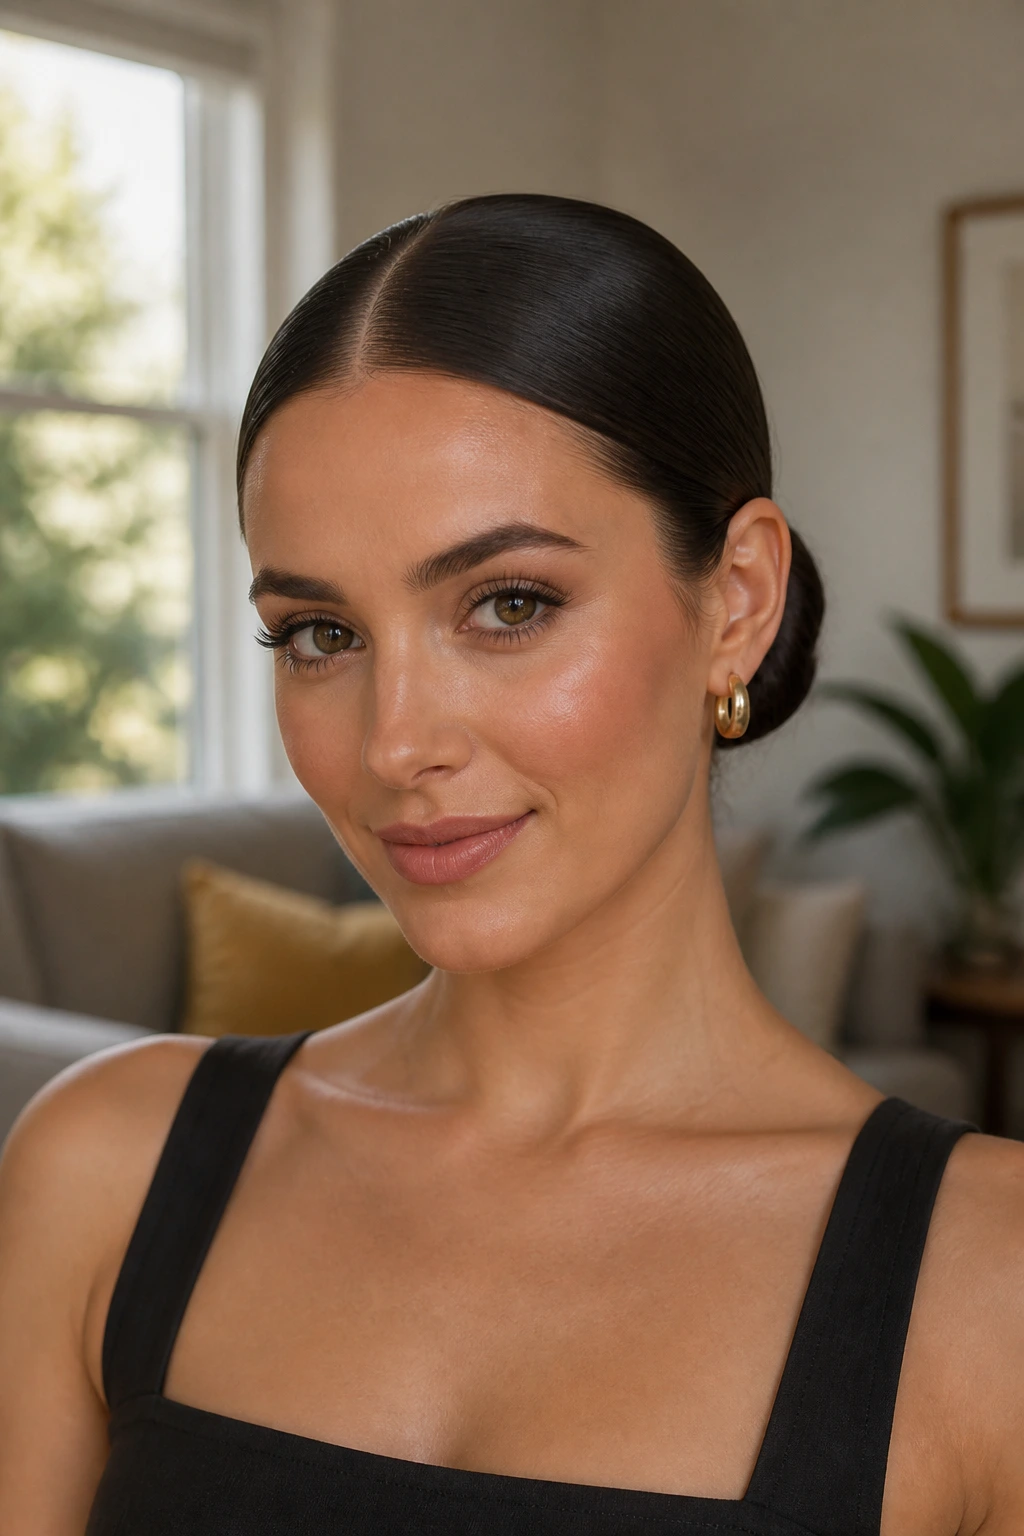
This is similar to a low bun, but instead of wrapping the hair, you gather it low and secure it into a knot shape with bobby pins. It sits at the nape of your neck and creates an elegant, effortless look that works for casual or dressier occasions. On straight hair, the knot is smooth and defined rather than frizzy or undone.
Why Low Knots Suit Straight Hair
A low knot on straight hair looks intentional and polished without requiring the extra effort of actually braiding or wrapping your hair. You’re simply gathering and securing, but because your hair is straight and sleek, the result looks deliberately styled rather than thrown together. It’s the kind of hairstyle that reads as “I have my life together” even though it takes literally two minutes.
Creating a Low Knot That Holds All Day
- Smooth all your hair back with a paddle brush and gather it low at the nape of your neck
- Gently gather the hair into a loose knot shape and secure multiple bobby pins through the knot to hold it
- Make sure all the ends are tucked under the knot so nothing sticks out
- Smooth any flyaways with a fine-tooth comb and a tiny amount of smoothing serum
- Light hairspray locks everything in place for all-day wear
- Optional: take a very thin section and wrap it around the knot base to hide the pins and add polish
Quick fact: A low knot is particularly flattering on people with longer faces or who want to elongate their neck. The low placement draws the eye downward, creating balance.
20. The Straight and Simple—No Styling Required

This final style is honesty: straight hair at its best is sometimes just straight hair, fully down, smooth, and shiny. No tools, no products, no complicated techniques—just your naturally straight strands doing what they do best. On days when you’re pressed for time or just want to let your hair be itself, this is the style. It’s the ultimate example of how straight hair is easy to manage.
The Beauty of Minimal Styling
Your straight hair has natural advantages that other textures have to work hard to achieve: shine, smoothness, and clean lines. Sometimes the best styling choice is not styling at all, just letting those qualities shine (literally). A smooth, shiny head of straight hair reads as intentional and polished without any effort. You’re not “lazy” if you wear your hair down and unstyled—you’re smart enough to work with what you’ve got.
Maximizing Your Hair’s Natural Beauty
- Invest in a good smoothing shampoo and conditioner that bring out your hair’s natural shine
- Use a paddle brush to smooth your hair gently after washing, distributing your hair’s natural oils from roots to ends
- Apply a light shine serum or smoothing cream to damp hair before air-drying, focusing on the mid-lengths and ends
- Air-dry whenever possible to avoid heat damage and preserve your hair’s natural shine
- A very light hairspray keeps flyaways controlled without making your hair feel stiff or product-heavy
Final thought: The fact that straight hair can look polished and intentional with literally zero styling is actually a superpower. Own it. Sometimes the best hairstyle is the simplest one.
Final Thoughts
Straight hair isn’t a limitation—it’s a foundation for dozens of different styles that range from barely-there-minimal to intricate and fashion-forward. Whether you’re going for sleek and polished, playful and textured, up and off your face, or down and shiny, straight hair responds beautifully to these approaches. The styles above cover different occasions, different time commitments, and different moods, so you’ll always have options.
The secret to making any of these styles work is understanding that straight hair’s best qualities are shine, smoothness, and clean lines. When you work with those qualities instead of against them, every style feels effortless and intentional. You don’t need to force texture where it doesn’t naturally exist; instead, you create visual interest through placement, accessories, structure, and intentional smoothness. That’s how straight hair becomes versatile.
Pick a few styles that match your lifestyle and your occasion, master the technique, and build from there. Some days you’ll want the dramatic impact of a sleek bun or a textured braid. Other days you’ll want the effortless vibe of a simple part or a decorative clip. The beauty of straight hair is that you’ve got real options, and you can switch between them without spending hours styling. That’s the actual definition of easy.