If you’ve been scrolling through social media and wondering how to pull off space buns on straight hair without them looking limp or falling flat, you’re definitely not alone. Space buns are playful, fun, and undeniably on-trend, but they require a different approach when you’re working with naturally straight strands. The good news? Straight hair actually offers some serious advantages when it comes to creating structured, sleek buns that hold their shape throughout the day.
The key to nailing space buns on straight hair is understanding that structure comes from tension, strategic placement, and the right styling products and techniques. Unlike wavy or curly hair that naturally grips itself, straight hair needs you to be intentional about creating volume and hold. You’ll want to think about where you position the buns, how tightly you gather the hair, and whether you need texture-building products to prevent them from looking too slicked-back or thin.
What makes straight hair genuinely fun for space buns is that you can achieve a polished, editorial look that photographs beautifully. You can go for sleek and minimalist, add intricate braided details, incorporate accessories, or build texture and dimension. The possibilities range from ultra-modern and graphic to playful and whimsical—it’s entirely up to what vibe you’re after and where you’re wearing them.
Let’s walk through ten different space bun styles that work beautifully on straight hair, each with specific techniques and product recommendations to keep them looking fresh and intentional, whether you’re wearing them to run errands, hit a festival, or turn heads at a night out.
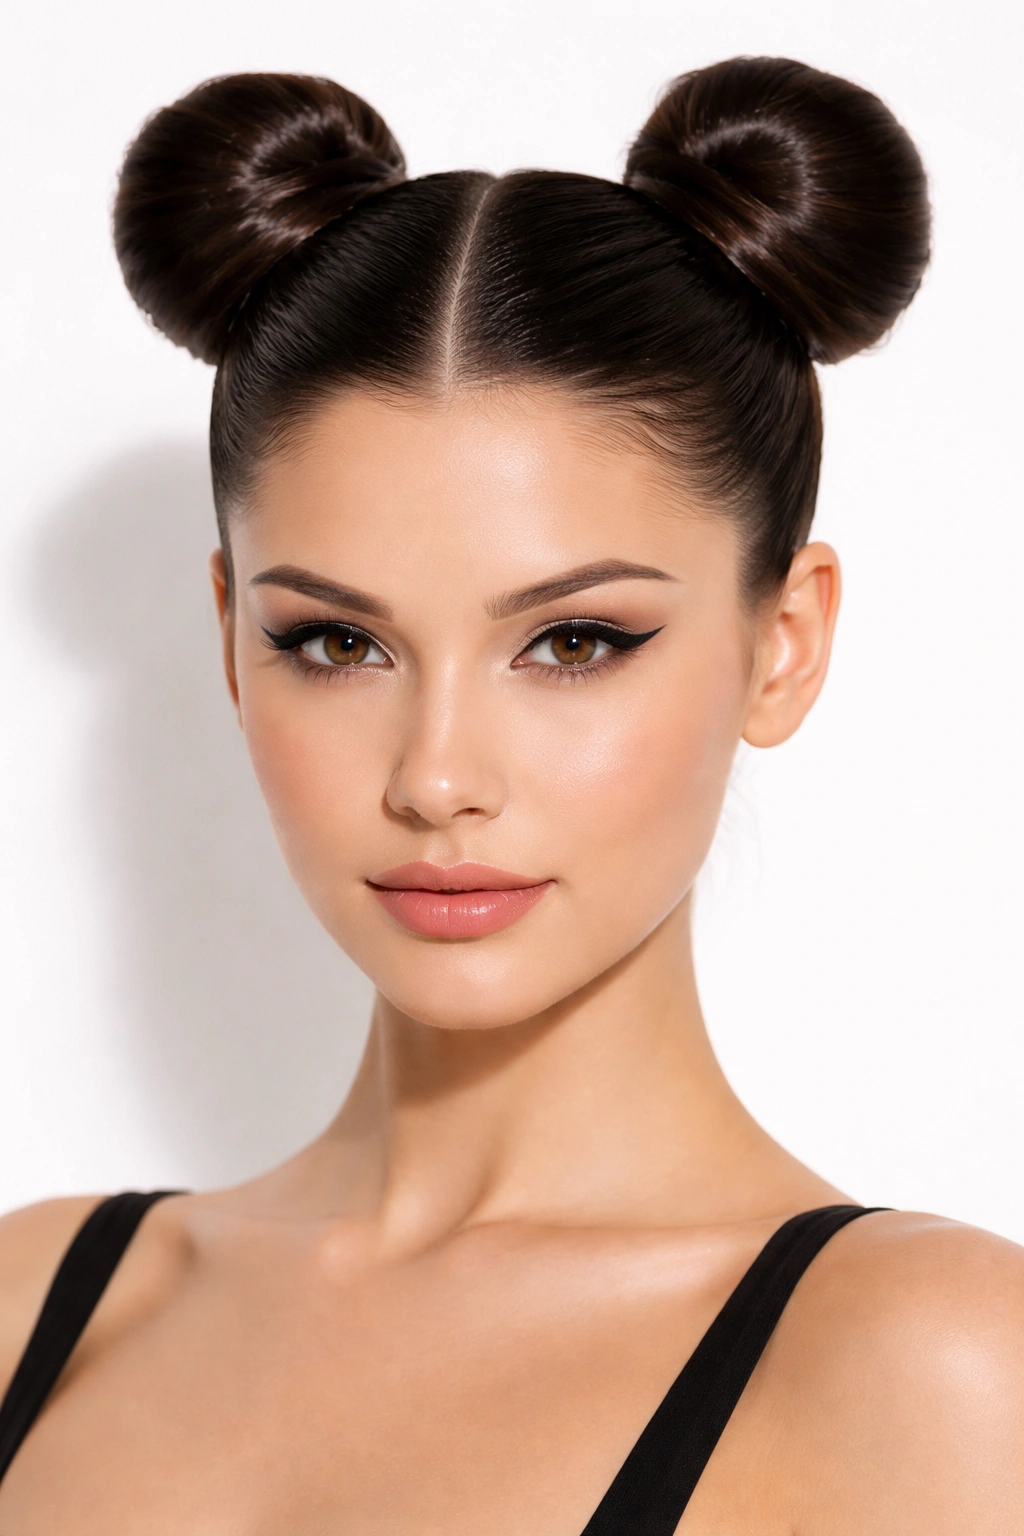
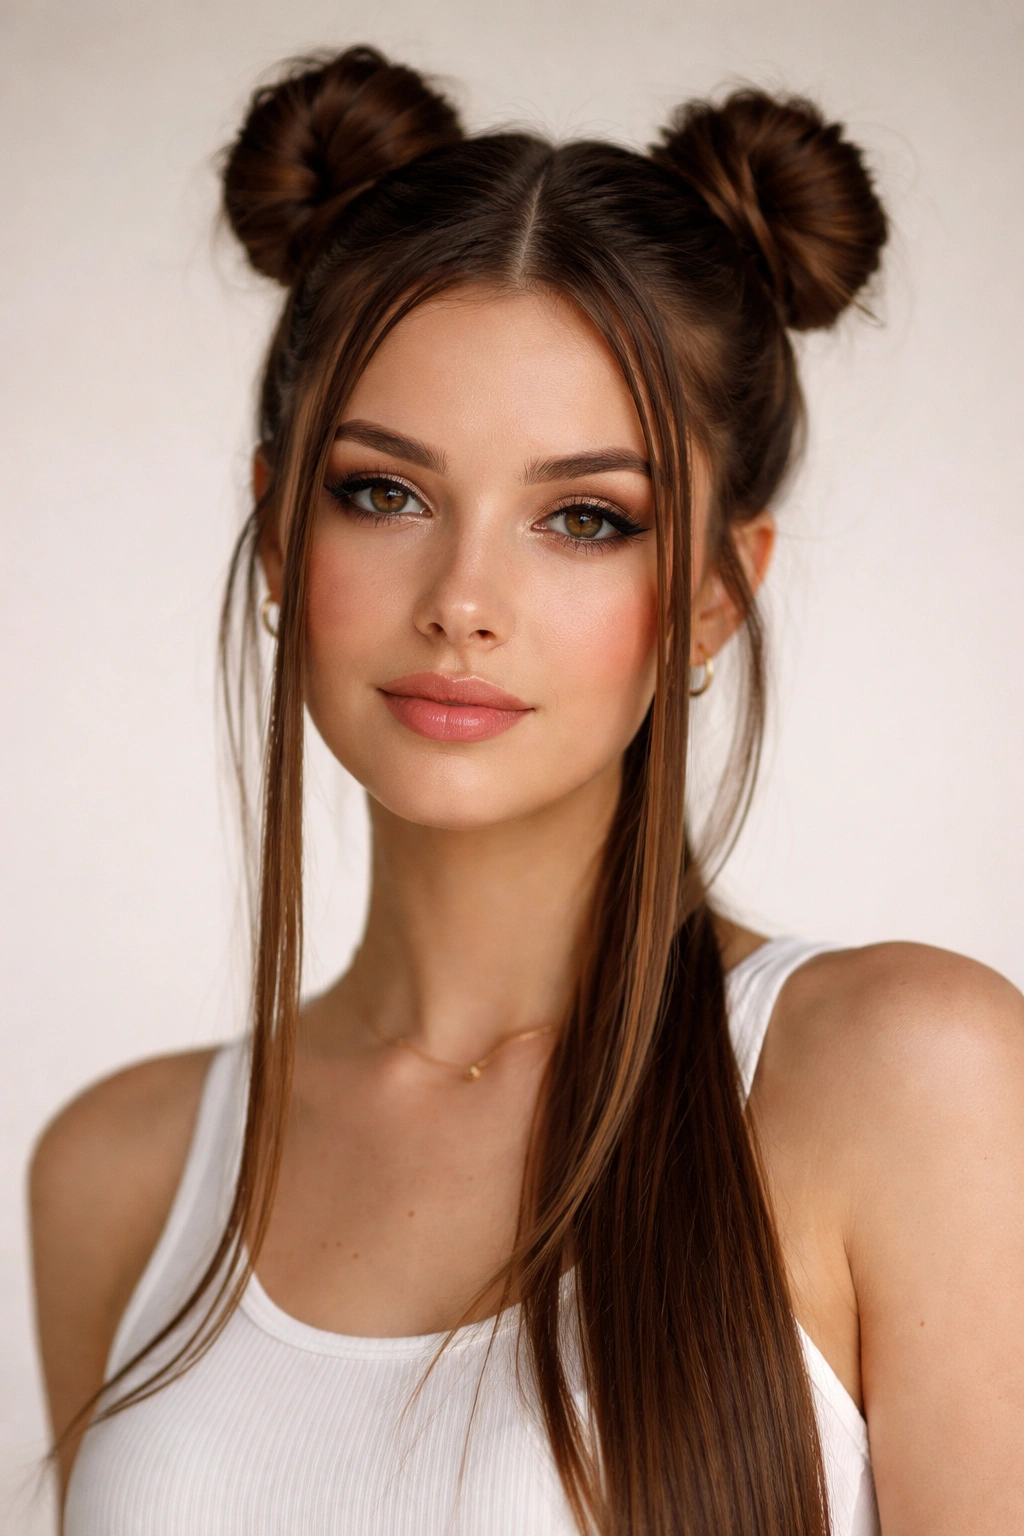
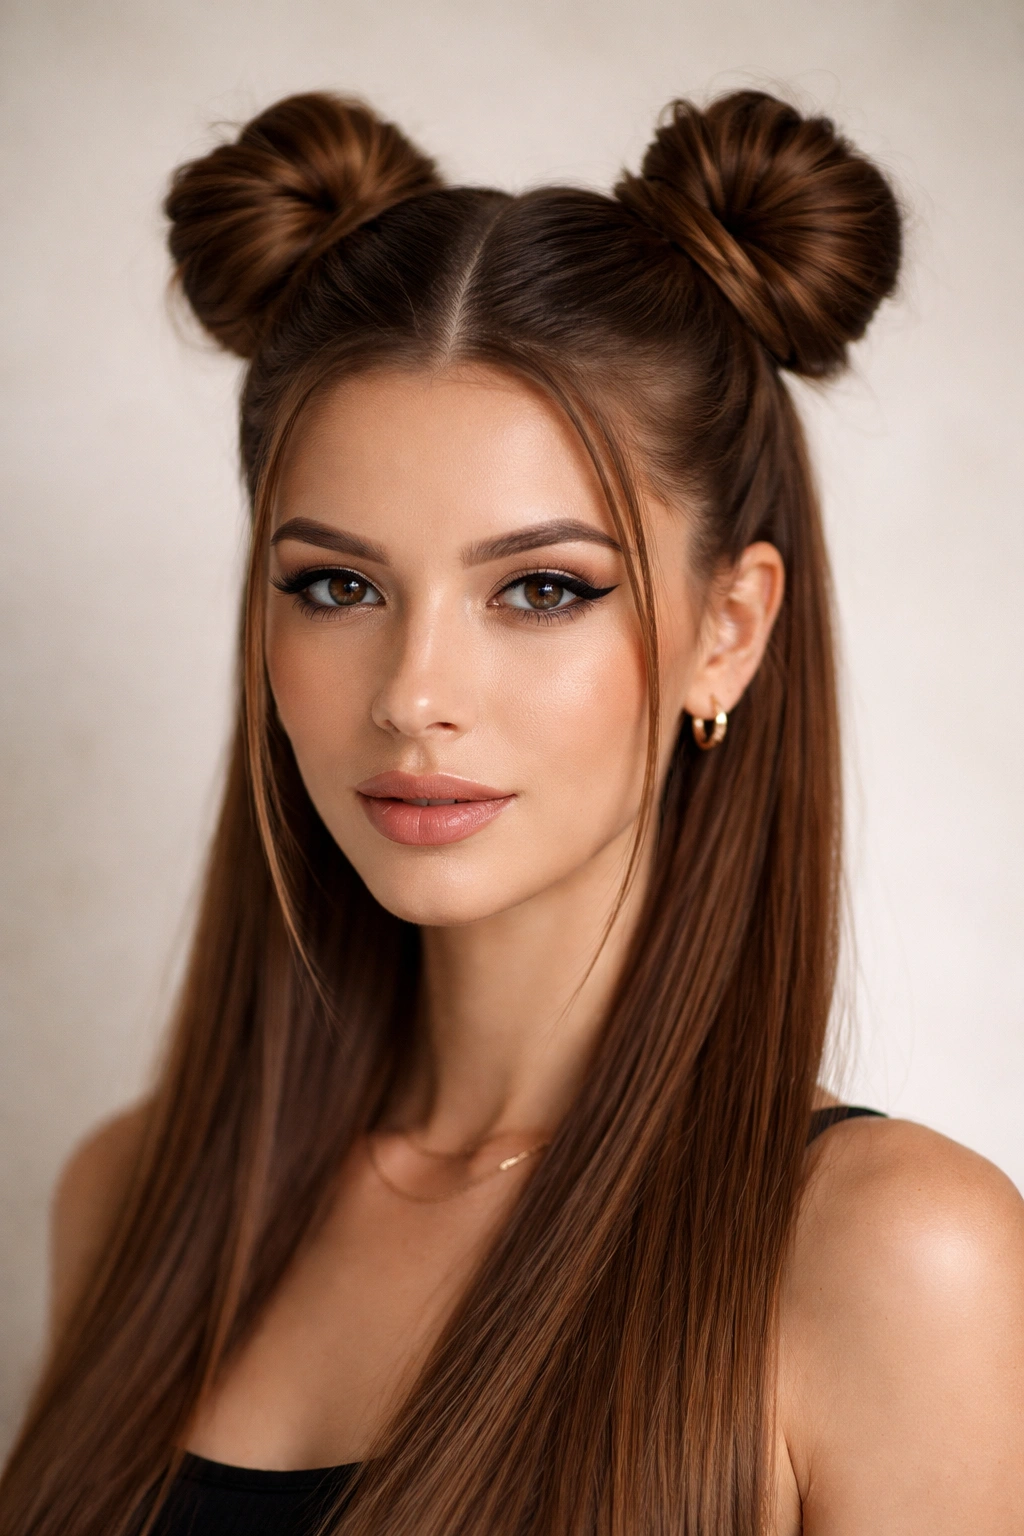
1. Classic Space Buns with a Modern Twist
The foundation of all space bun styles starts here—two perfectly placed buns positioned high on the crown and slightly toward the back. On straight hair, the classic approach works best when you start with hair that has a tiny bit of texture built in, rather than completely flat, freshly-washed strands.
Begin by flipping your head upside down and blow-drying your roots with your fingers for lift, or use a volumizing mousse at the roots before blow-drying. Once your hair is completely dry, flip back up and use a fine-tooth comb to create a clean middle part from your forehead to the nape of your neck. You’re looking for precision here—the straighter and more intentional the part, the more editorial and put-together the whole look reads.
Why This Version Stands Out
The modern twist comes from keeping everything ultra-sleek rather than teasing or fluffing out the buns. Using a smoothing serum or lightweight styling cream helps your straight hair catch the light beautifully and prevents any flyaways. The buns themselves should be wrapped tightly at the base—this gives you clean, defined shapes rather than messy or undone-looking clusters.
How to Build This Look
- Use a mouse or volumizing spray at the roots before blow-drying for invisible lift and grip
- Part your hair down the middle with sharp, clean lines using a comb
- Divide each side into two sections at the crown, gathering one section into a high ponytail on each side of your head
- Twist or braid each ponytail loosely, then wrap it into a bun shape and secure with bobby pins that match your hair color
- Smooth any flyaways with a lightweight serum or gel along the hairline and at the base of each bun
- Set with a light hairspray to keep everything in place without crunchiness
Pro tip: If your straight hair struggles with grip, try a texturizing spray or dry shampoo at the roots before creating the buns—this creates friction that helps bobby pins hold better.
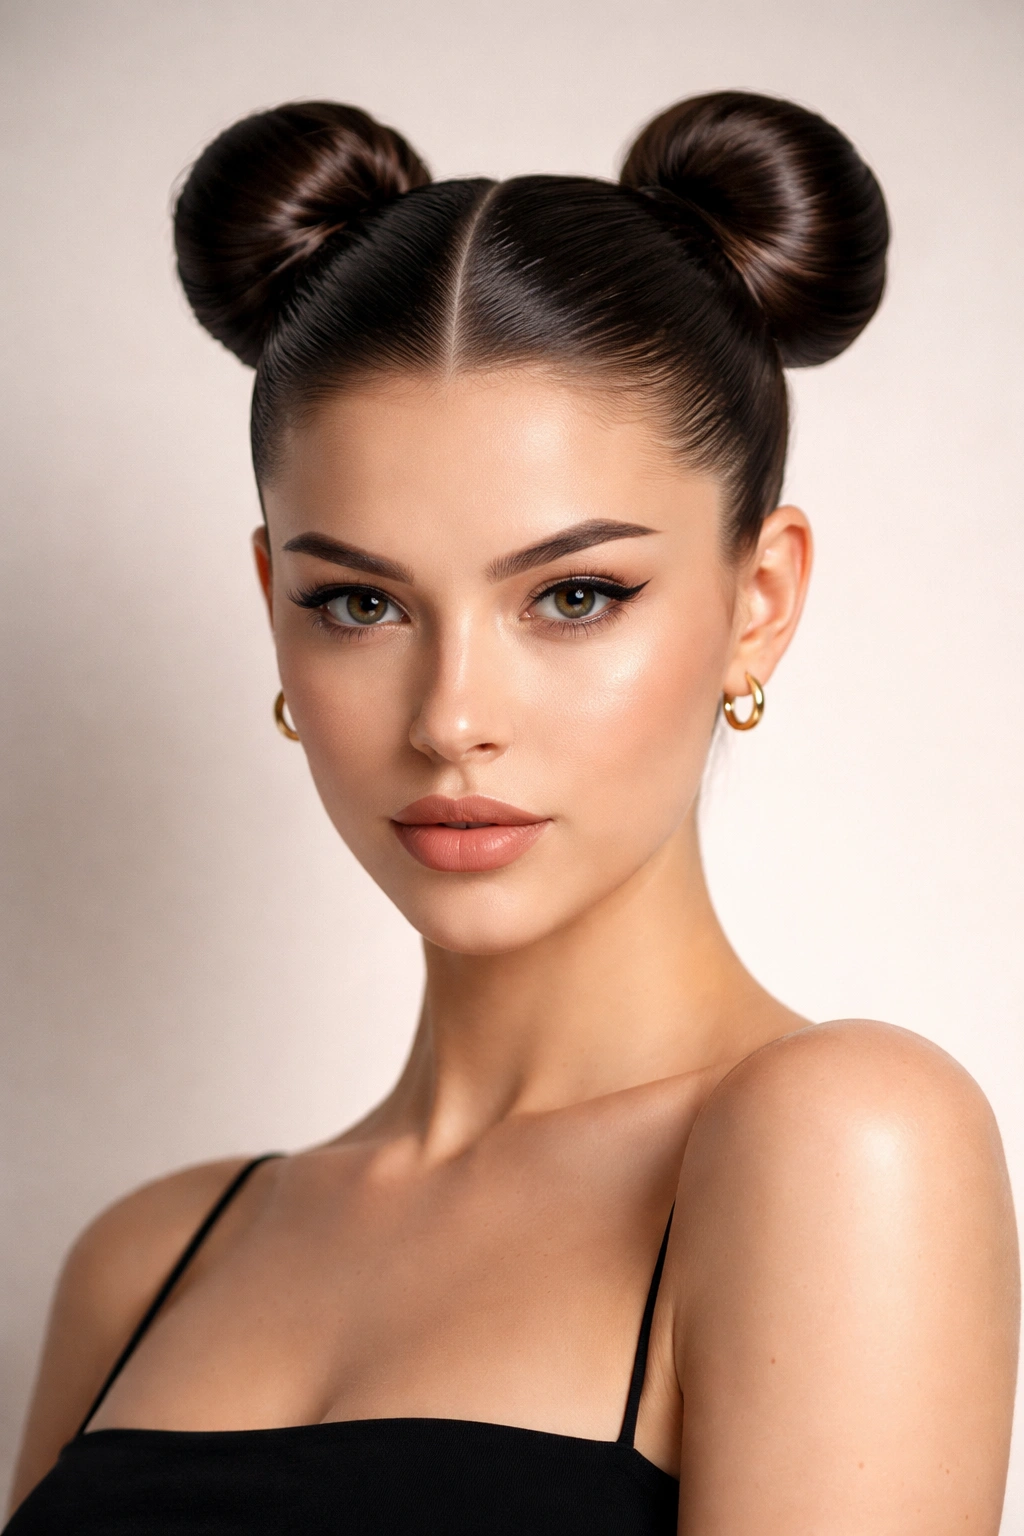
2. Sleek and Polished Space Buns
This version leans into minimalism and graphic appeal. It’s the space bun style you’d see in high-fashion editorials or on someone heading to an upscale event. The entire effect depends on absolute smoothness and precision, with zero frizz and perfectly symmetrical placement.
Straight hair is genuinely ideal for this version because you’re not fighting texture or curl patterns. The goal is for the buns themselves to be completely smooth, almost glossy-looking, with clean architectural lines. This isn’t about volume or dimension—it’s about control and polish.
What Makes This Different
The sleek version requires more intensive smoothing than the classic take. You’ll want to use a smoothing cream, serum, or gel while your hair is still slightly damp, then blow-dry everything completely straight and smooth. The buns should be wrapped so tightly that they’re almost geometric in shape—round or slightly flattened, but definitely intentional.
Step-by-Step Technique
- Apply a smoothing cream or anti-frizz serum to damp hair, working from mid-shaft to ends
- Blow-dry your hair completely smooth using a round brush or paddle brush, keeping tension as you dry
- Create a precise center part using a rattail comb—this part is structural, so take your time
- Use a fine-tooth comb to smooth hair back on each side without bumps or inconsistencies
- Gather hair into two high ponytails positioned symmetrically on either side of your crown
- Wrap each ponytail around its base into a smooth, flat bun shape and secure with bobby pins
- Apply a finishing smoothing serum or light gel to the surface of the buns to eliminate any flyaways
- Lock everything with a strong-hold hairspray
Worth knowing: This style reads best when your part is absolutely straight and your buns are positioned at the exact same height. Even a slight asymmetry will be visibly noticeable, so take a moment to check in the mirror before finalizing.
3. Space Buns with Braided Details
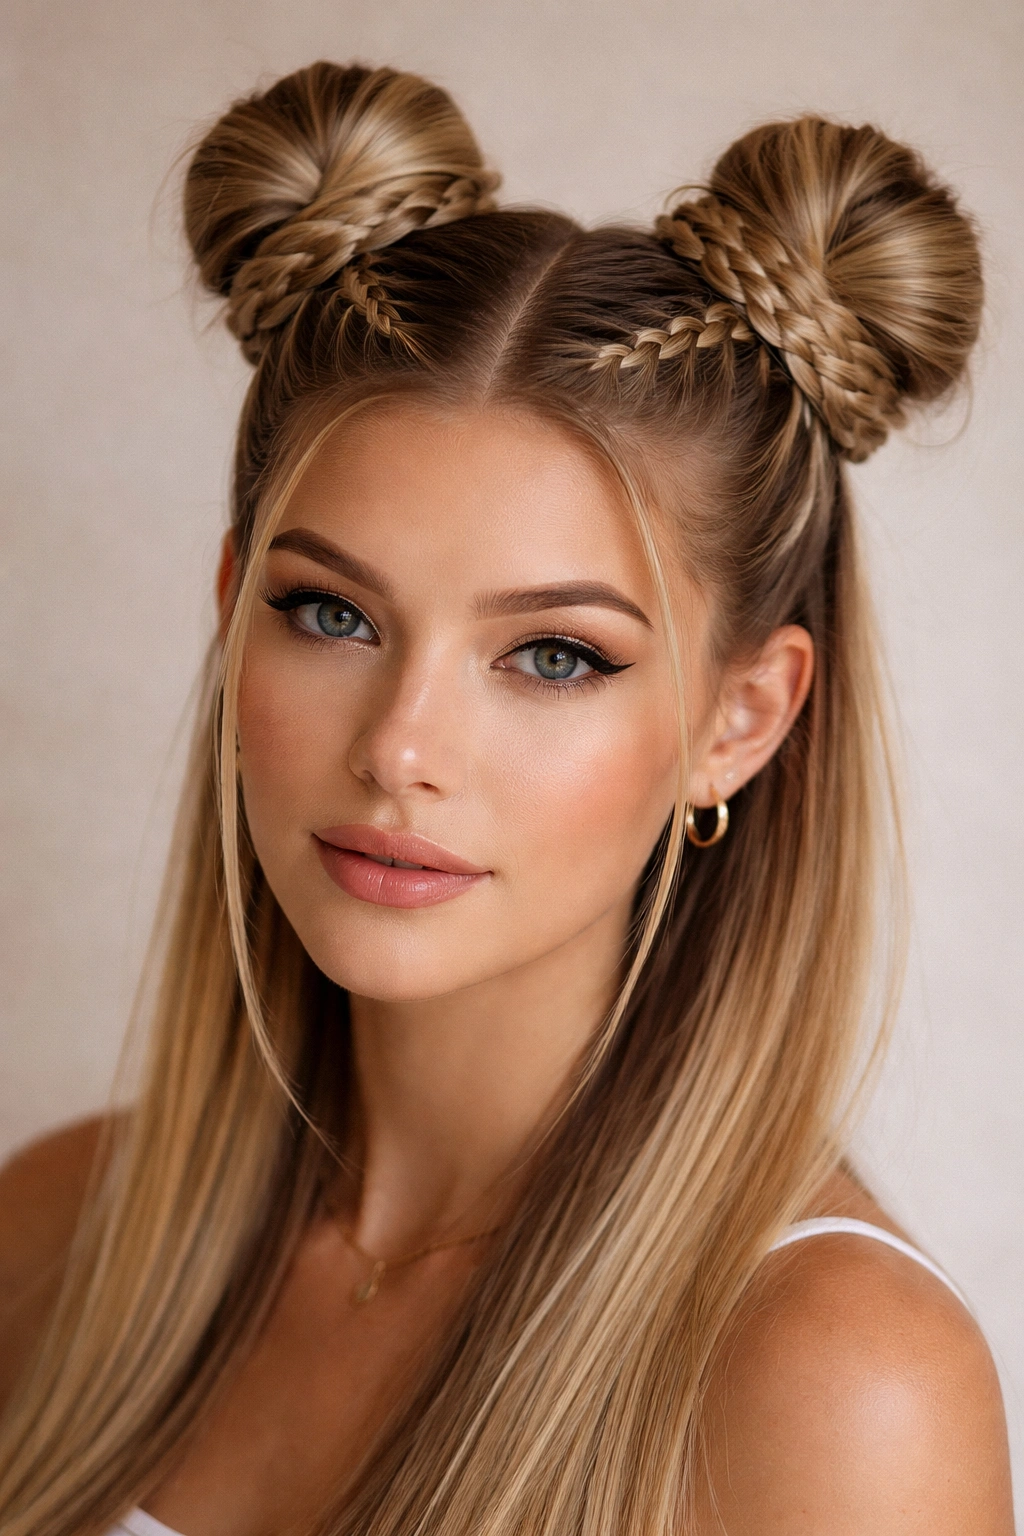
Bringing braids into your space bun design adds visual interest and architectural complexity. On straight hair, braids actually hold their crisp, defined edges without needing much texture, which means they look cleanest and most intentional in this style.
The braided version works by incorporating one or more braids into the bun structure itself—either wrapping a braid around the base of each bun, weaving braids into the top of the head before gathering into buns, or creating Dutch braids that form the buns’ framework.
How This Elevates the Look
Braids add dimensionality and texture to an otherwise sleek style, giving you visual complexity that straight hair shows off beautifully. The geometric pattern of braids photographs well and reads as more intentional and styled than simple buns alone. This version works especially well if you’re heading somewhere creative or artistic—it signals that you took time with your styling.
Building the Braided Version
- Start with smooth, blow-dried straight hair
- Create two Dutch braids or French braids starting from the crown area, positioning them where your buns will sit
- Braid loosely so the braid texture shows and has dimension
- At the end of each braid, gather the loose ends and any remaining hair into a high ponytail
- Wrap each braided ponytail into a bun at the crown, letting the braid texture be visible on the surface
- Secure with bobby pins positioned under the bun structure
- Use a light smoothing serum on the braids to prevent frizziness while keeping definition
- Finish with hairspray to hold the braids’ shape throughout the day
Pro tip: Dutch braids (where you braid under instead of over) show more texture and pattern on straight hair than French braids, so they’re worth trying if you want the braids themselves to be a focal point.
4. Half-Up Space Buns
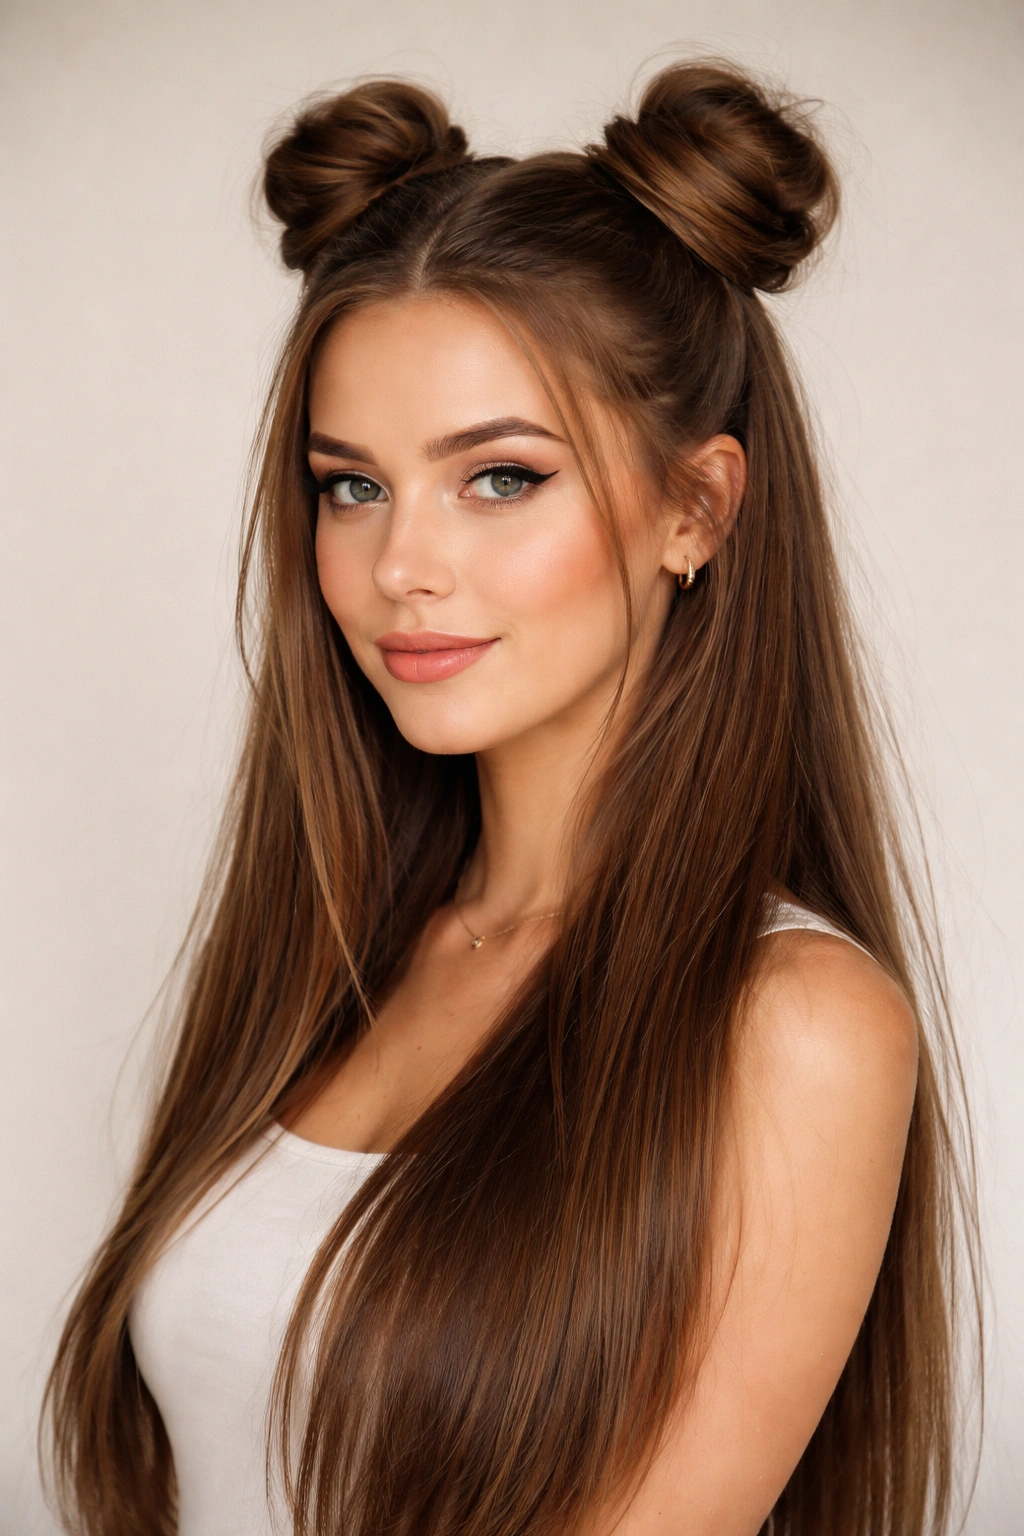
The half-up variation keeps hair down on the bottom while gathering the top half into two buns. This style works beautifully on straight hair because the contrast between the buns’ structure and the smooth, straight lengths below is visually striking and modern-looking.
Half-up space buns feel less dramatic than full buns while still being playful and intentional. They’re genuinely practical too—you get the style and personality of space buns without the commitment of putting all your hair up, which makes them great for transitional weather or days when you want something that feels easier to wear.
Why Half-Up Works So Well
This variation reads as more wearable and less costume-like than full space buns, making it a solid choice if you’re incorporating space buns into everyday styling rather than saving them only for parties or themed events. The straight hair on the bottom acts as a clean visual anchor that balances the playfulness of the buns on top.
Creating Half-Up Space Buns
- Blow-dry your hair smooth and straight
- Create a subtle part where you want the upper section to begin—roughly from ear to ear around the crown
- Gather the top section at the crown and divide it into two ponytails positioned slightly off-center (traditional space bun placement, but only using the top half of your hair)
- Wrap each ponytail into a bun and secure tightly with bobby pins
- Leave the bottom half of your hair down, brushing it smooth
- Optionally, add texture to the bottom section with a curling iron if you want contrast, or keep it completely straight for a sleek minimalist look
- Smooth the area where the buns meet the rest of your hair so the transition looks intentional
- Set with hairspray
Worth knowing: Half-up space buns read best when the buns are positioned high and the lower section is either perfectly straight or has subtle, loose waves—hard, tight curls on the bottom can visually clash with the structure of the buns.
5. Tiny Space Buns for a Playful Look
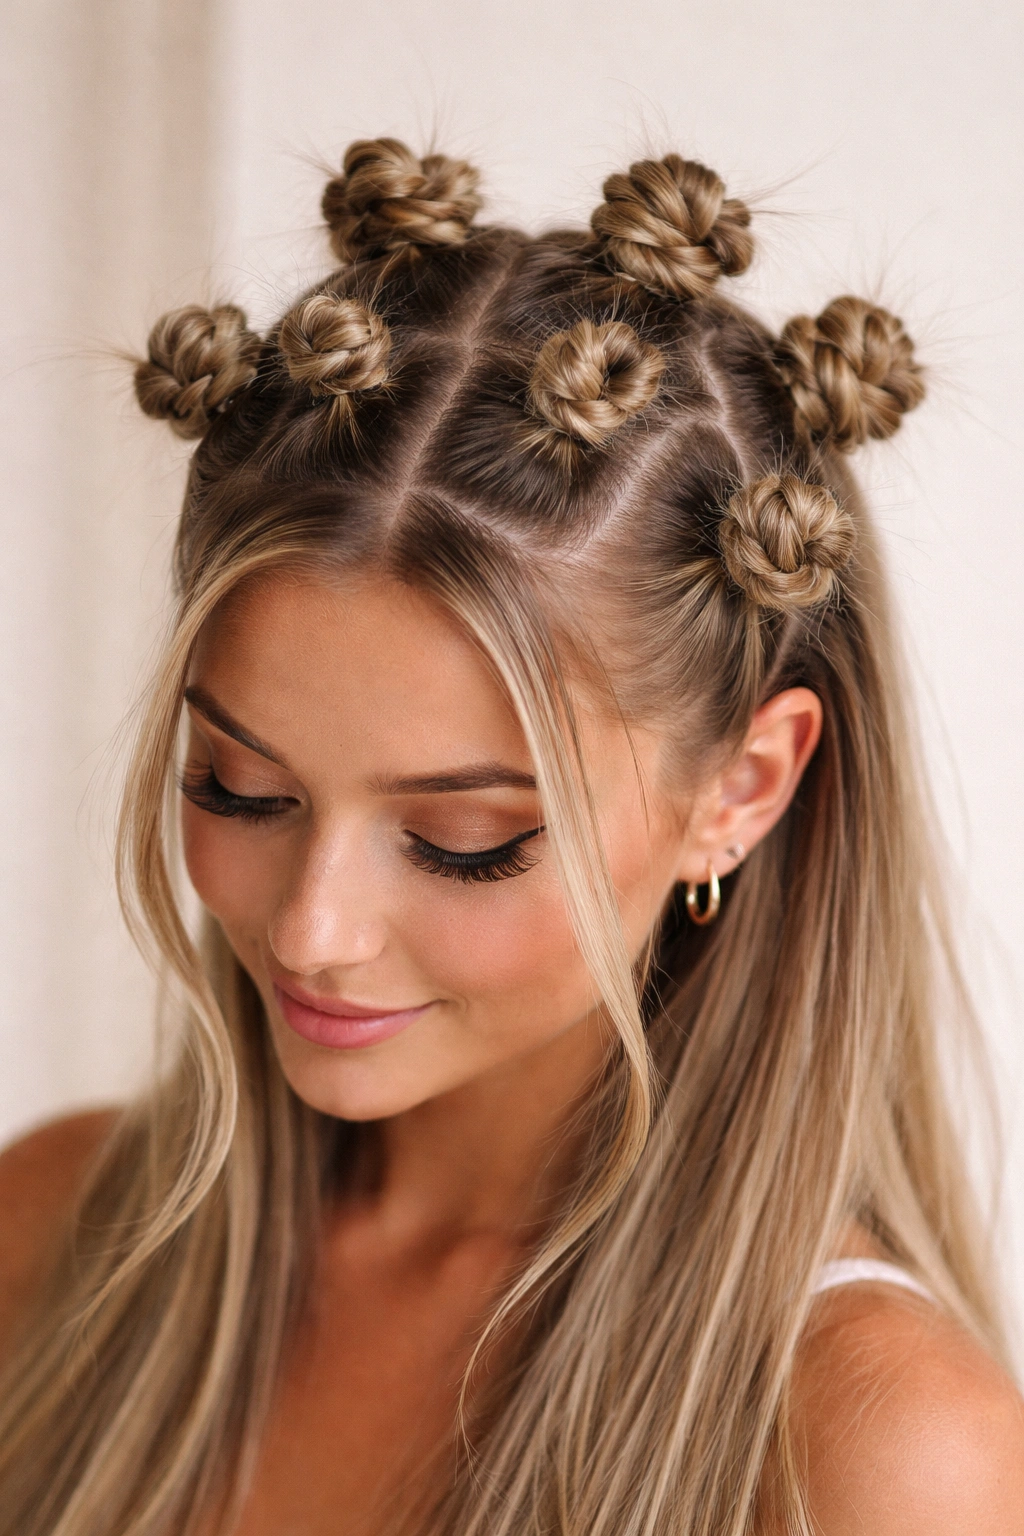
Going smaller with your space bun placement creates an entirely different energy—playful, youthful, and distinctly more whimsical. Instead of positioning two large buns at the crown, you’re creating multiple smaller buns scattered across the top and sides of your head.
This version works wonderfully on straight hair because each small bun sits distinctly separate, and the clean lines of straight hair make the multiple bun placement feel intentional rather than chaotic. You might do four tiny buns (two on top, two on the sides), six buns (arranged in a loose grid pattern), or even more depending on your hair thickness and how playful you want to be.
What Makes Tiny Buns Special
Multiple smaller buns feel less editorial and polished, and more creative and personality-driven. They’re inherently more fun-looking, which makes this version perfect for festivals, parties with friends, or any situation where you want your styling to signal that you’re not taking yourself too seriously. The individual buns are also easier to position imperfectly on purpose, which can actually be part of the aesthetic.
Technique for Multiple Small Buns
- Start with smooth, blow-dried straight hair
- Instead of one center part, create multiple small sections across the crown and upper back
- You might do a rough zig-zag part, or simply section the hair into a grid-like pattern
- Gather each section into its own tiny ponytail and secure with an elastic
- Twist or lightly braid each ponytail, then wrap it into a small, loose bun
- Secure each bun with bobby pins—you can leave them slightly loose and undone if you want that playful vibe
- Leave some flyaways and baby hairs loose around the hairline for a softer, less formal look
- Set with a medium-hold hairspray so the buns feel flexible rather than rigid
Pro tip: For tiny buns, consider using small claw clips instead of bobby pins—they’re faster, they give you more grip on straight hair, and you can color-coordinate them as an intentional accessory.
6. Space Buns with Face-Framing Strands
Pulling some hair down on either side of your face while keeping the rest in buns creates softness and dimension. On straight hair, the face-framing strands hang cleanly and create a flattering frame that balances the structure of the buns.
This version bridges the gap between fully putting your hair up and leaving most of it down. You’re getting the playful impact of space buns while keeping enough hair down that the overall look feels less extreme or costume-like. It’s a genuinely wearable version if you’re new to space buns or if you prefer styling that feels less commitment-heavy.
Why Face-Framing Matters
The loose strands on either side of your face soften the overall look and draw attention to your face rather than the buns. This is flattering for almost every face shape and gives you styling flexibility—depending on how you style the face-framing sections, you can make the whole look feel modern, romantic, playful, or polished.
How to Create Face-Framing Space Buns
- Blow-dry your hair smooth
- Create a center part that runs from your forehead to the nape of your neck
- On each side, section out a small piece of hair from your temple area (roughly 1-2 inches wide)—these are your face-framing sections
- Leave these sections completely down and smooth
- Gather the remaining hair (minus the face-framing sections) on each side into a high ponytail positioned off-center slightly
- Twist each ponytail and wrap into a bun, securing with bobby pins
- Smooth the face-framing strands and optionally add a subtle wave or curl with a small curling iron for a softer texture
- You can tuck the face-framing strands slightly behind your ears for a neater look, or leave them completely loose
- Set everything with a light hairspray
Worth knowing: The width of your face-framing sections matters—too narrow and they don’t create a visible softening effect; too wide and the buns look awkwardly small by comparison. Aim for roughly 1.5 to 2 inches of hair on each side.
7. Slicked-Down Space Buns with Geometric Precision
For a truly high-fashion, editorial take on space buns, go completely slicked-back with severe precision. Every hair gets smoothed back into the bun structure with a gel or pomade, creating an almost sculptural look that emphasizes the shape of your head and the geometric placement of the buns themselves.
This version demands perfect symmetry and zero flyaways. It reads as intentionally minimal and artistic rather than cute or playful. On straight hair, this look absolutely shines because your hair naturally cooperates with the slicked-back aesthetic without needing to fight texture or curl patterns.
What Sets This Apart
The slicked-down version is genuinely striking—it’s modern, fashion-forward, and bold. It reads as confident rather than cute, which makes it an excellent choice if you’re wearing space buns to an editorial shoot, an art event, or anywhere creative where you want your styling to signal sophistication rather than whimsy.
Achieving Perfect Slicked-Back Buns
- Begin with slightly damp hair or use a water spray to lightly dampen your hair
- Apply a strong-hold gel, pomade, or edge control product all over your hair, working from roots to ends
- Use a fine-tooth comb to comb everything back smooth and flat against your head, eliminating every bump
- Create your center part with absolute precision using a rattail comb
- Gather hair on each side into high ponytails, pulling back tightly
- The tension should be firm enough that you feel it, but not painful—you’re aiming for security without damage
- Twist or braid each ponytail, then wrap it into a smooth, compact bun
- Use bobby pins and additional pomade or gel on any flyaways
- Use a rattail comb to smooth the surface of the buns so they’re gleaming and flat
- Finish with a strong-hold, non-flaky hairspray
Pro tip: Apply gel or pomade to your hairline and the area around your face as well, slicking back any baby hairs or shorter pieces that might otherwise look wispy or unkempt.
8. Space Buns with Metallic Accents
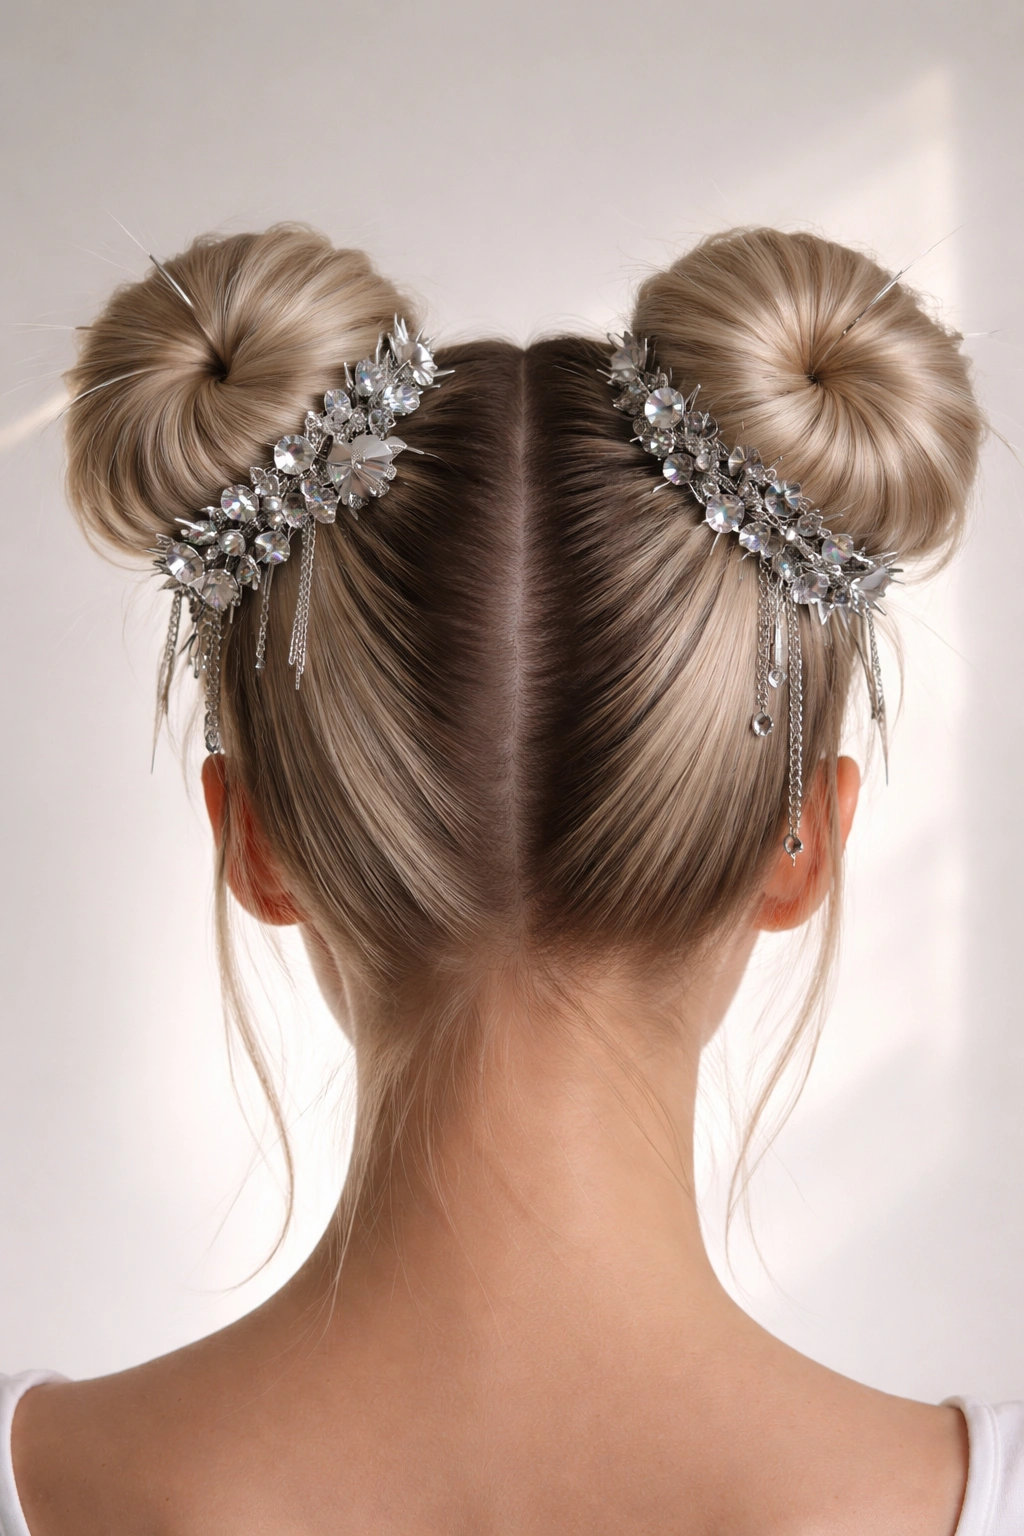
Adding metallic elements—gold or silver bobby pins, hair clips, chains, or foil-wrapped elastics—transforms space buns from playful to genuinely elevated and fashion-forward. The metallic accents catch the light and draw attention to the geometric structure of the buns, making even a simple bun style feel intentional and designed.
On straight hair, the clean lines of the buns show off metallic accessories beautifully. Light bounces off the metal and creates visual interest, which means your styling reads as more thoughtful and coordinated. This version works wonderfully if you’re already incorporating metal accessories into your outfit, or if you simply want your hair styling to feel more polished and intentional.
Why Metallics Elevate the Look
Metallic elements transform space buns from purely playful into something more editorial and artistic. You’re not just wearing buns—you’re creating a cohesive visual statement. The metallics draw the eye and make the buns themselves feel like an intentional design choice rather than a casual styling decision.
Adding Metallics Successfully
- Style your space buns using any of the techniques above—sleek, braided, half-up, or any version that appeals to you
- Instead of using regular bobby pins, use gold or silver bobby pins that coordinate with your skin tone and outfit
- Secure the buns tightly first with regular pins, then add metallic pins on top to be visible
- Consider wrapping metallic tape or foil around your hair elastics before gathering the sections
- You could also use small metallic claw clips to secure the bun shapes instead of bobby pins entirely
- Add decorative metallic hair chains that drape between or around the buns
- Arrange metallic hair sticks or bun forks through the buns for both function and aesthetic
- If you want subtler metallics, use a very small amount of gold or silver hair gel on the surface of the buns for a subtle shimmer
Worth knowing: Metallic elements read best when they’re not excessive—aim for 2-3 intentional placements rather than covering everything with metal, which can feel costume-like rather than fashionable.
9. Textured Space Buns with Volume
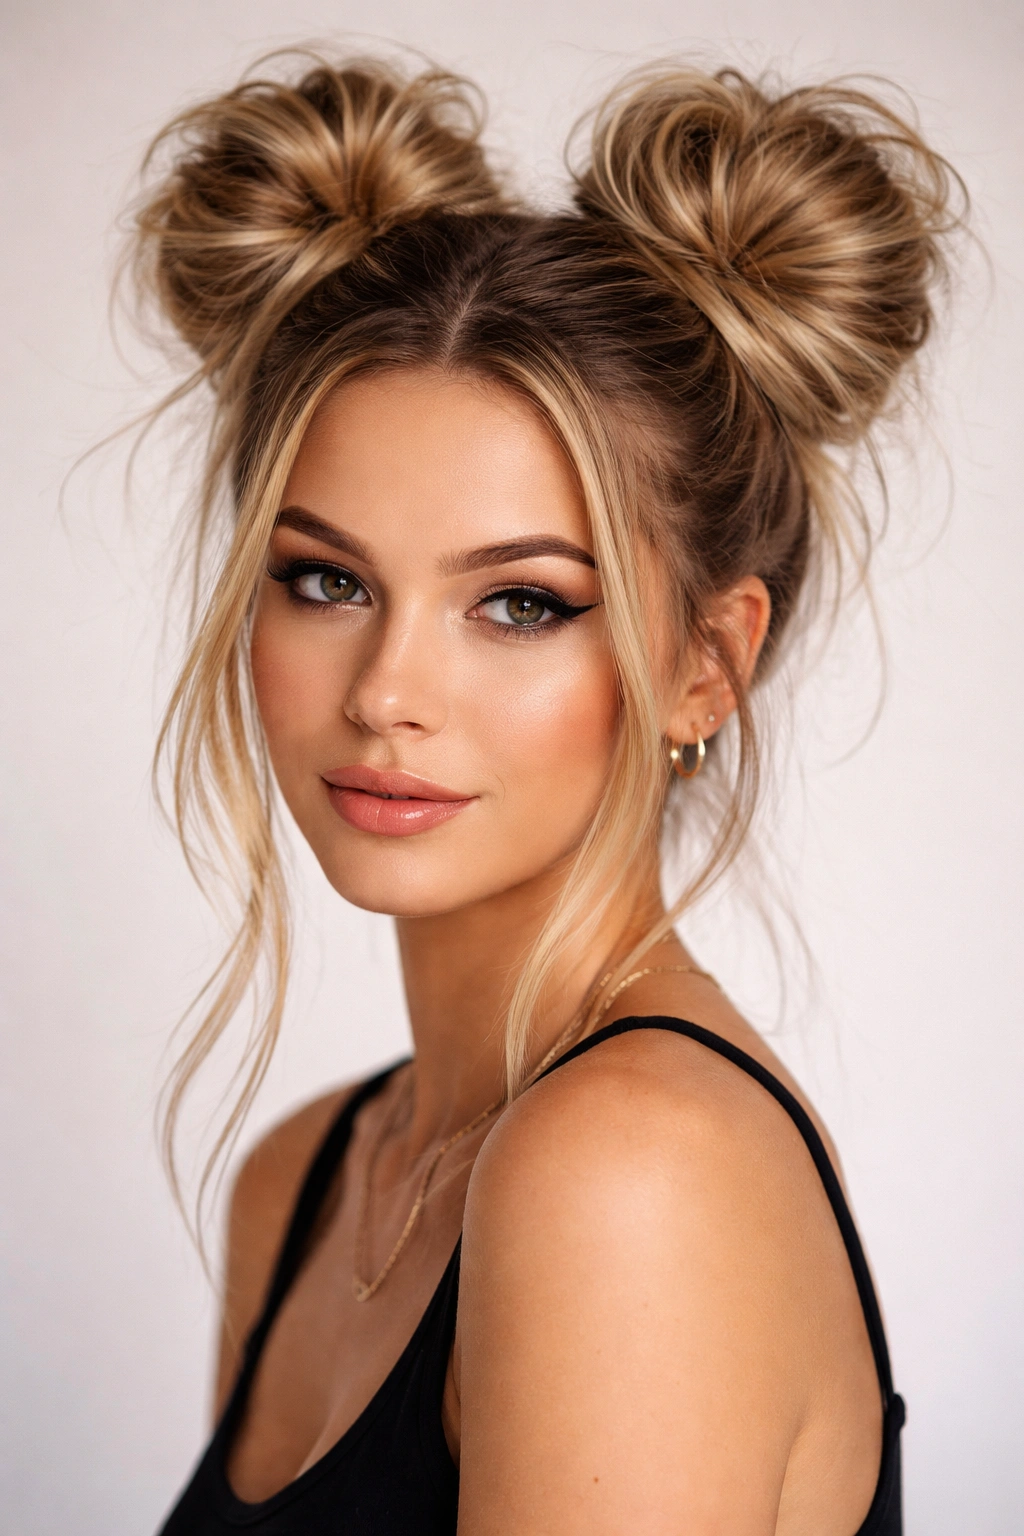
For straight hair that tends to fall flat or feel thin, building texture and volume into your space buns makes them feel fuller and more visually interesting. This version uses teasing, texture products, and strategic styling to create dimension within the buns themselves.
The textured approach works especially well if you’re styling space buns for a night out or an event where you want them to feel substantial and impressive. The added volume makes the buns look bigger and fuller, and the texture catches light in a way that completely smooth buns might not.
How Texture Changes Everything
Textured buns feel more modern and less slicked-back or overly controlled. They read as intentionally undone rather than severe, which makes them more versatile for different occasions and personal styling preferences. The texture also actually helps bobby pins grip your straight hair better, which means your buns will stay put throughout the day.
Building Textured Space Buns
- Start with completely dry hair—you’ll be teasing and texturizing, which requires dry hair to work properly
- Apply a volumizing mousse or texturizing spray to the roots
- Blow-dry your hair with your fingers to create movement rather than blowing it completely smooth
- Create your center part and side sections where your buns will go
- Before gathering each section into a ponytail, tease the hair at the crown using a fine-tooth comb or teasing brush
- Tease at the roots and mid-shaft to create texture and grip
- Smooth the outer layer of teased hair with your comb so it looks intentional rather than messy
- Gather the teased section into a high ponytail—the teasing adds grip and helps the elastic stay put
- Twist or loosely braid the ponytail rather than wrapping it smooth
- Wrap the twisted or braided ponytail into a bun and let the texture be visible on the surface
- Secure with bobby pins and add a second pass of light hairspray for hold
Pro tip: Textured buns are much more forgiving of imperfection than smooth buns, so you can spend less time perfecting symmetry and more time simply enjoying the fuller, more voluminous effect.
10. Space Buns with Ribbon or String Details
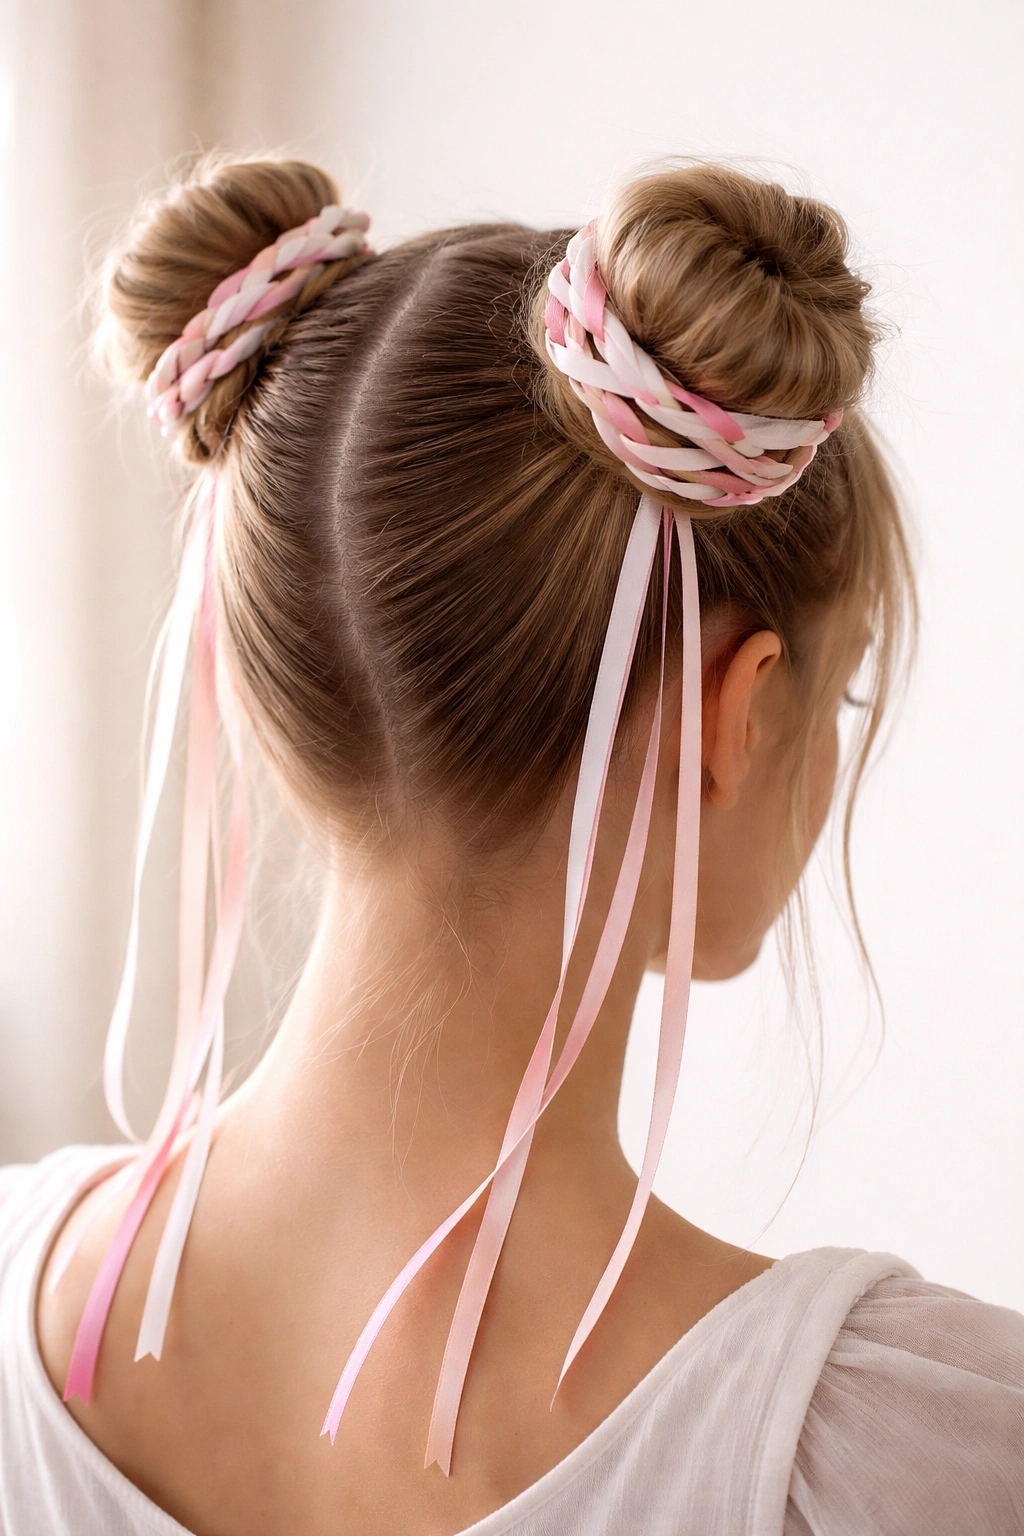
Weaving ribbon, string, or thin cord through space buns adds a playful, creative element that reads as artistic and intentional. This version works beautifully on straight hair because the ribbon or string threads cleanly through the bun structure and sits visibly against your smooth hair.
You can incorporate ribbon in countless ways—wrapping it around the base of the buns, weaving it through the ponytail before wrapping into a bun, threading it in and out of the bun structure, or using it as a hair tie instead of an elastic. The ribbon becomes both functional and decorative, which makes the whole styling feel well-designed rather than slapped-together.
Why Ribbon Transforms the Look
Ribbon adds instant personality and visual interest. It’s an easy way to coordinate your hair with your outfit, add color contrast, or signal a specific aesthetic—vintage, romantic, playful, artistic, or whatever vibe the ribbon color and style communicates. On straight hair, ribbon sits flatly and visibly, making this a styling choice that genuinely reads.
Using Ribbon with Space Buns
- Style your space buns using any base technique that feels right for you
- If you want the ribbon to be structural, wrap it around your hair ponytail instead of using (or before using) an elastic
- Tie the ribbon snugly, then proceed to twist and wrap the ponytail into a bun
- Alternatively, gather your ponytail with a regular elastic, then wrap a length of ribbon around the base of the bun as decoration
- For woven ribbon, gather your ponytail loosely and thread ribbon in and out through the hair before wrapping into a bun
- You could also pin ribbon to the surface of the finished bun, creating a design that drapes or swags intentionally
- Use multiple ribbon colors if you want a more playful, artistic feel
- Secure the ribbon with bobby pins that match the ribbon color for a seamless look
Worth knowing: Thinner ribbons and cords work better on straight hair than thick, chunky ribbons—thin ribbon threads through cleanly and shows up without overwhelming the bun structure, while thick ribbon can make the buns look bulky.
Final Thoughts
Space buns on straight hair don’t have to be one single way. You’ve got an incredible range of options, from ultra-polished and editorial to playful and creativity-driven. The beauty of styling straight hair is that your strands naturally cooperate with structure—they don’t fight back with texture or frizz, which means you can achieve clean lines, precise symmetry, and visual impact more easily than you might think.
The key is choosing a version that matches both your styling goals and your comfort level. If you’re new to space buns, start with the classic version or the half-up version and build from there. If you’re comfortable experimenting, the braided, textured, or accessory-forward versions let you get creative and develop a signature style that’s entirely your own.
The real magic of space buns is that they signal intention—you’re not just throwing your hair up mindlessly. You’re making a deliberate choice to style yourself in a way that’s playful, artistic, or fashion-forward, whatever that means to you. On straight hair, that intention reads clearly and powerfully.