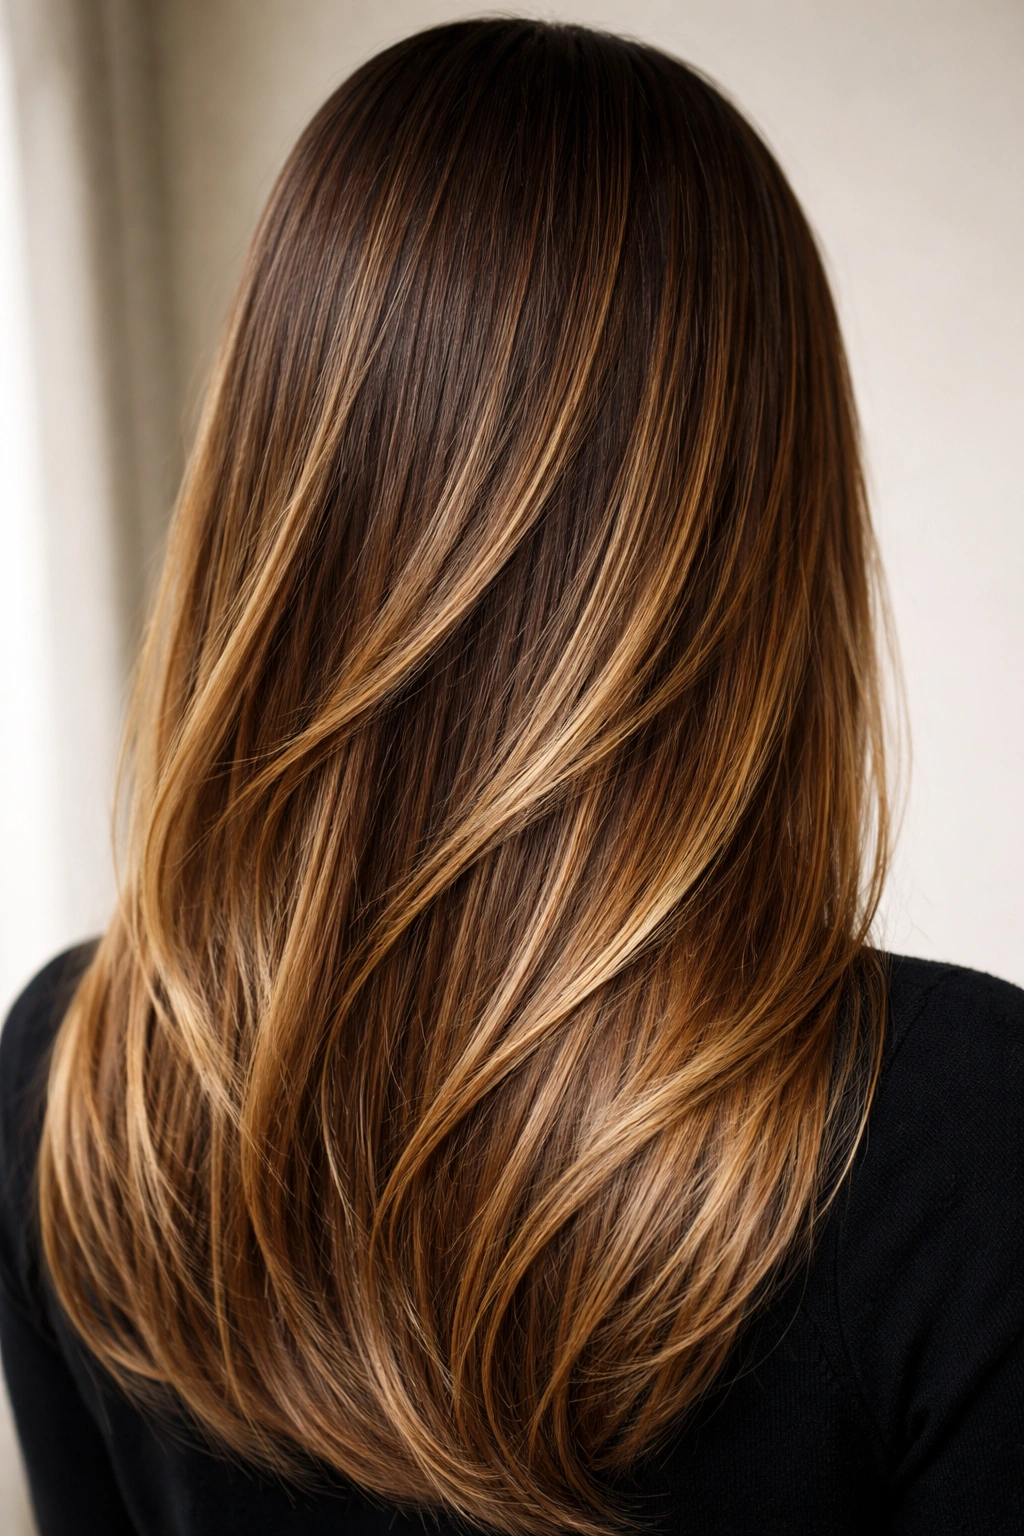
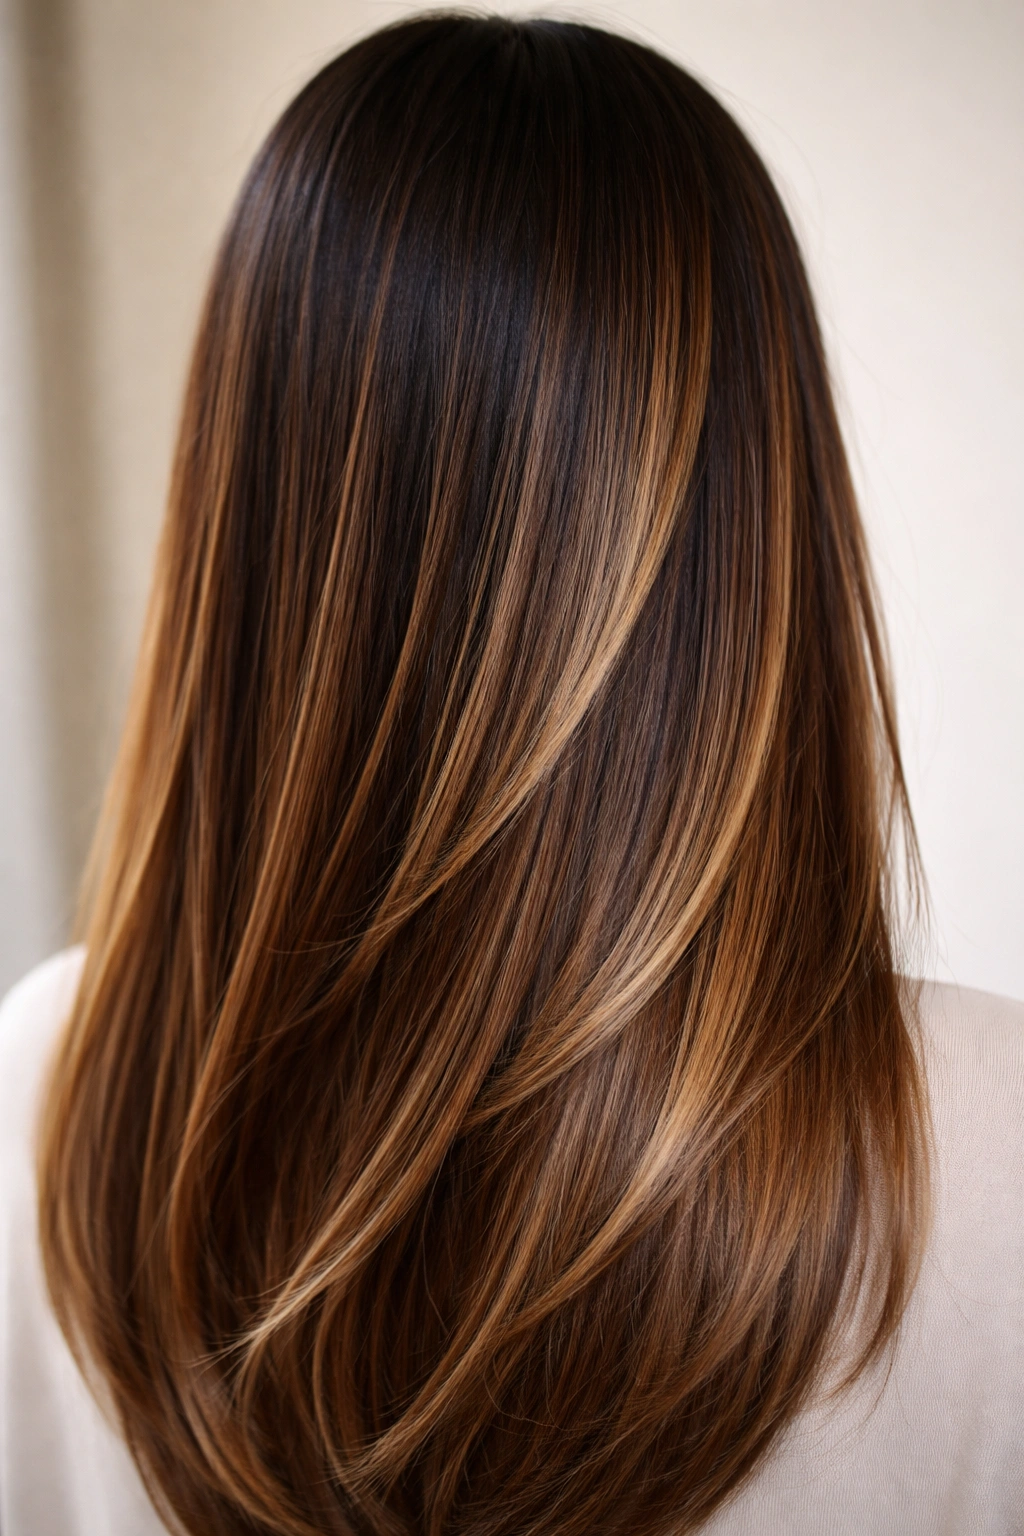
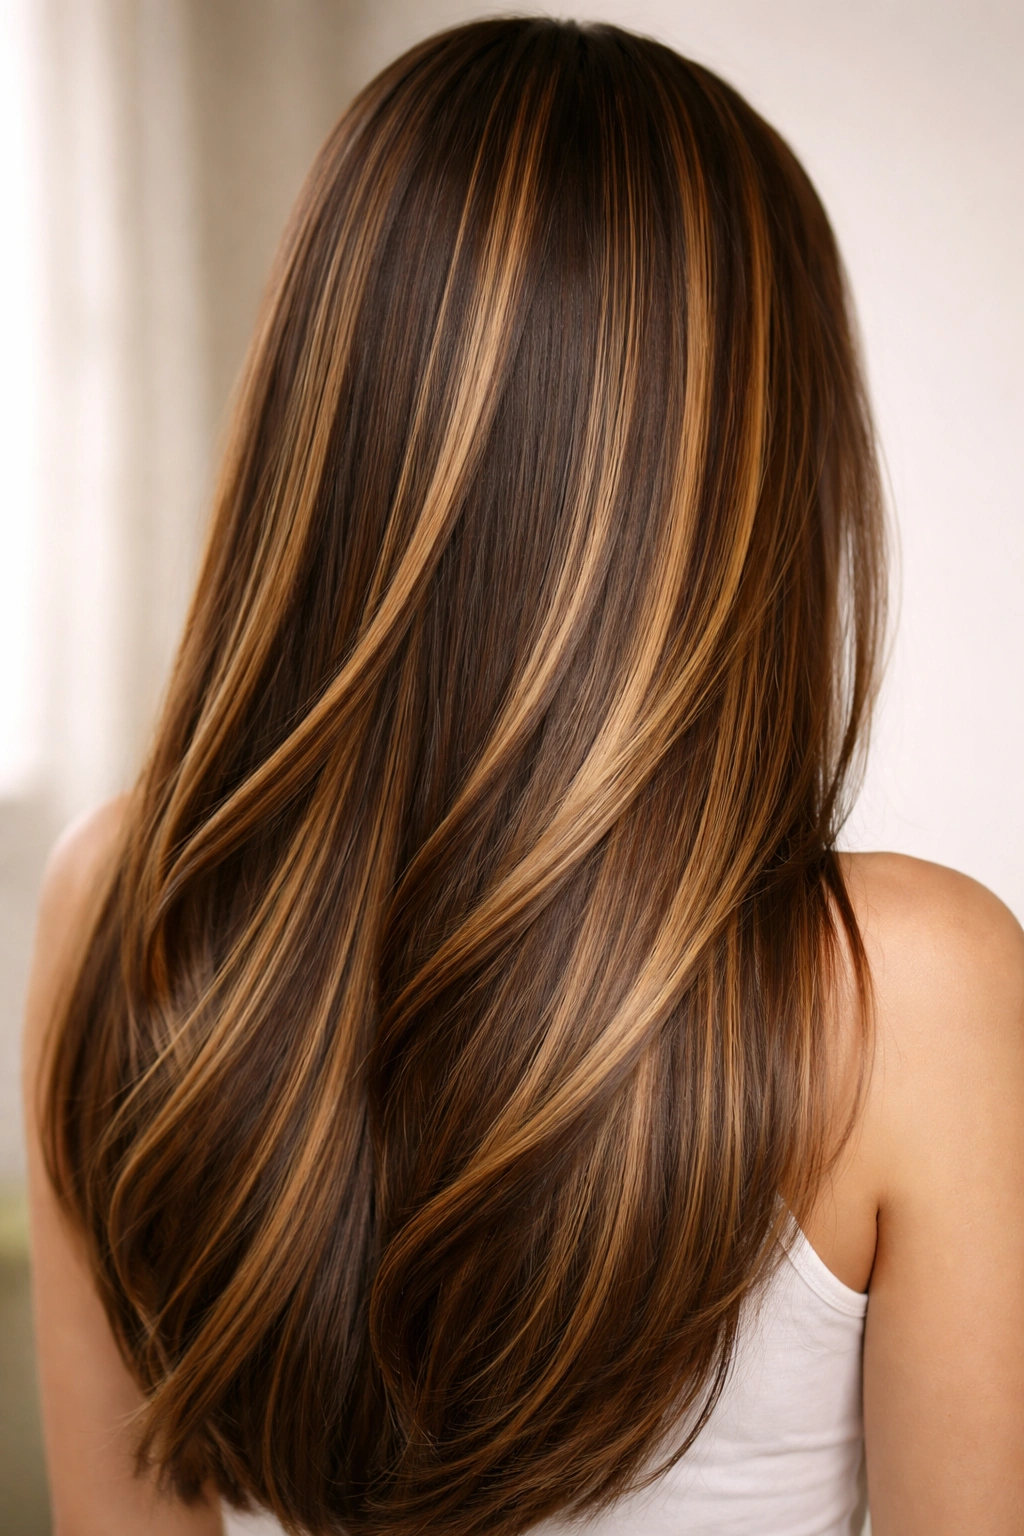
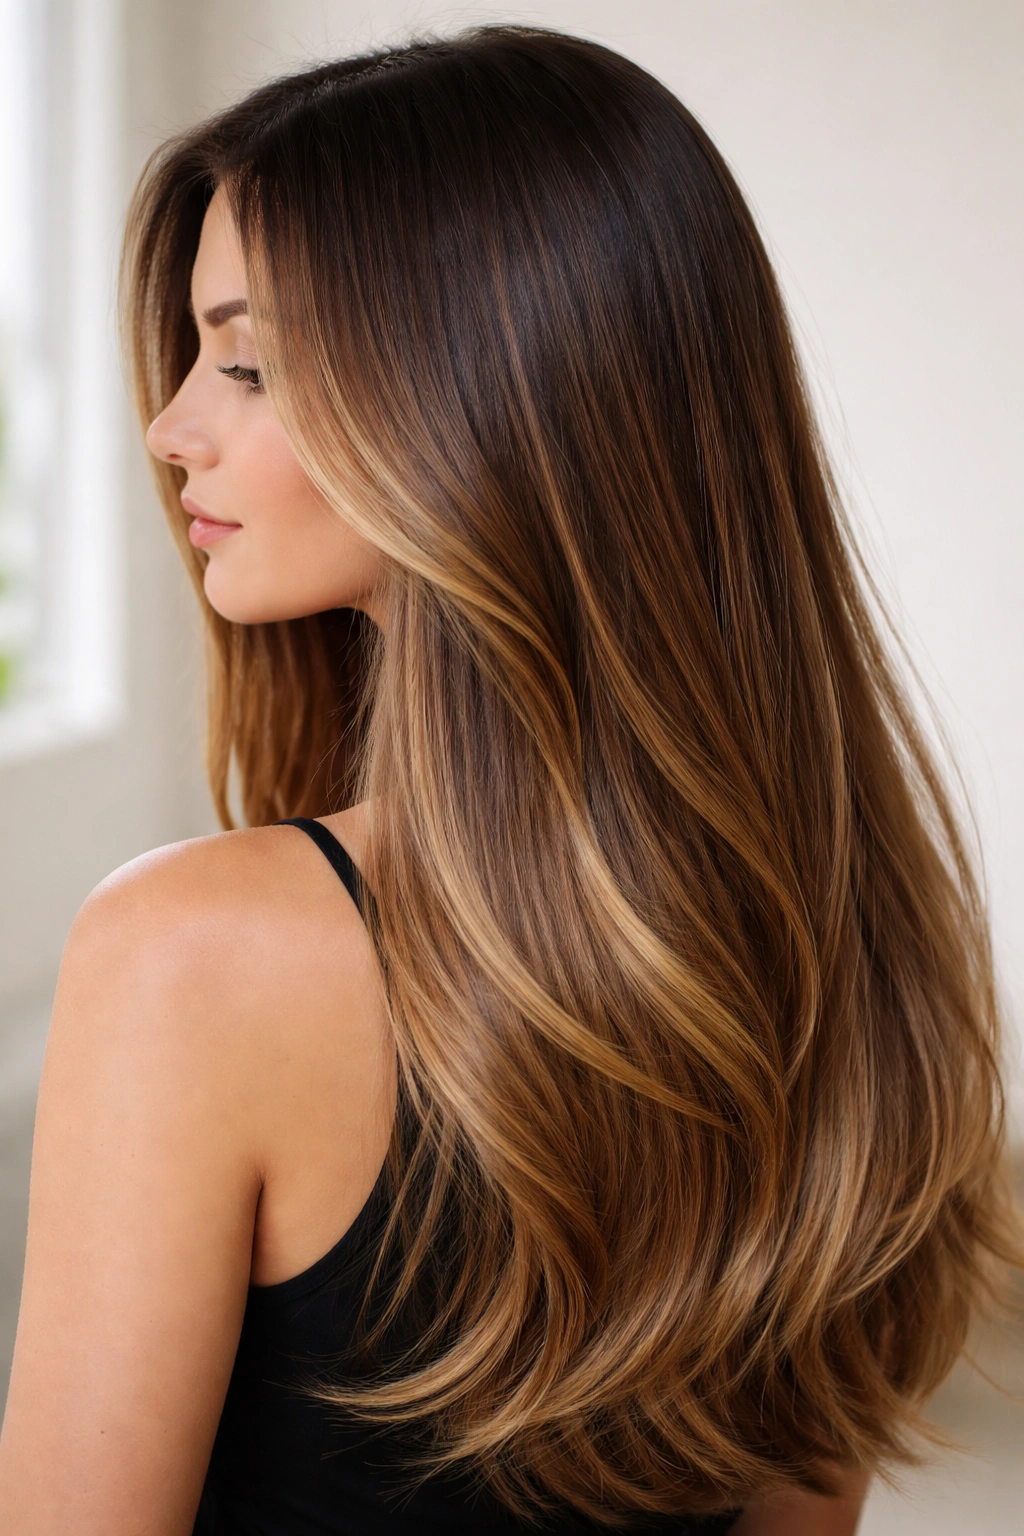
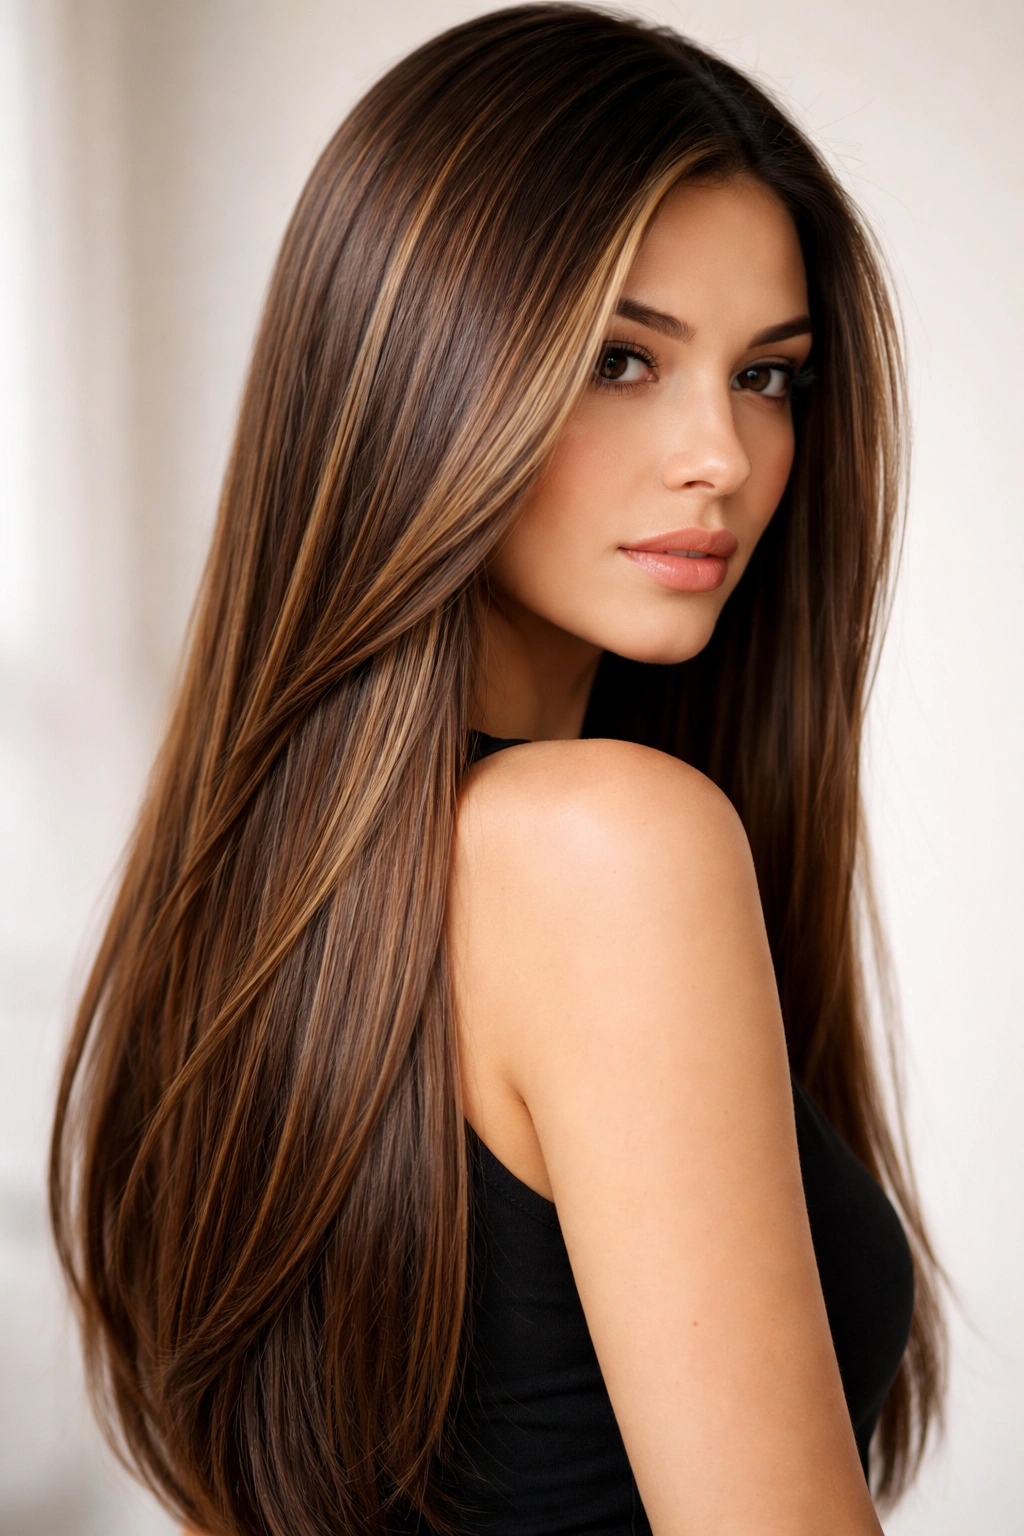
Caramel highlights bring warmth, dimension, and movement to straight hair in ways that feel both effortless and intentional. Unlike curly or textured hair where highlights can disappear into the curl pattern, straight hair showcases caramel tones with crystalline clarity—every shade catches light distinctly, creating that coveted multi-dimensional look that makes the hair feel thicker, more dynamic, and deeply dimensional. The key to choosing the right caramel highlight style isn’t just about the color itself, but about the placement technique, the base shade it’s applied over, and how the straight hair’s natural light-reflecting properties will make those tones sing.
What makes caramel such a powerful choice for straight hair is its versatility across complexions and base colors. Whether you’re starting from a rich brunette, a light brown, a golden blonde, or even a cooler ash-blonde base, caramel shades adapt beautifully. The color sits in that sweet spot between warm and neutral—it’s not aggressively brassy, but it’s warm enough to add radiance without looking dated or overly done. Straight hair’s sleek surface means these warm tones reflect light more uniformly than they would in curly texture, so the visual impact is immediate and sophisticated rather than subtle and scattered.
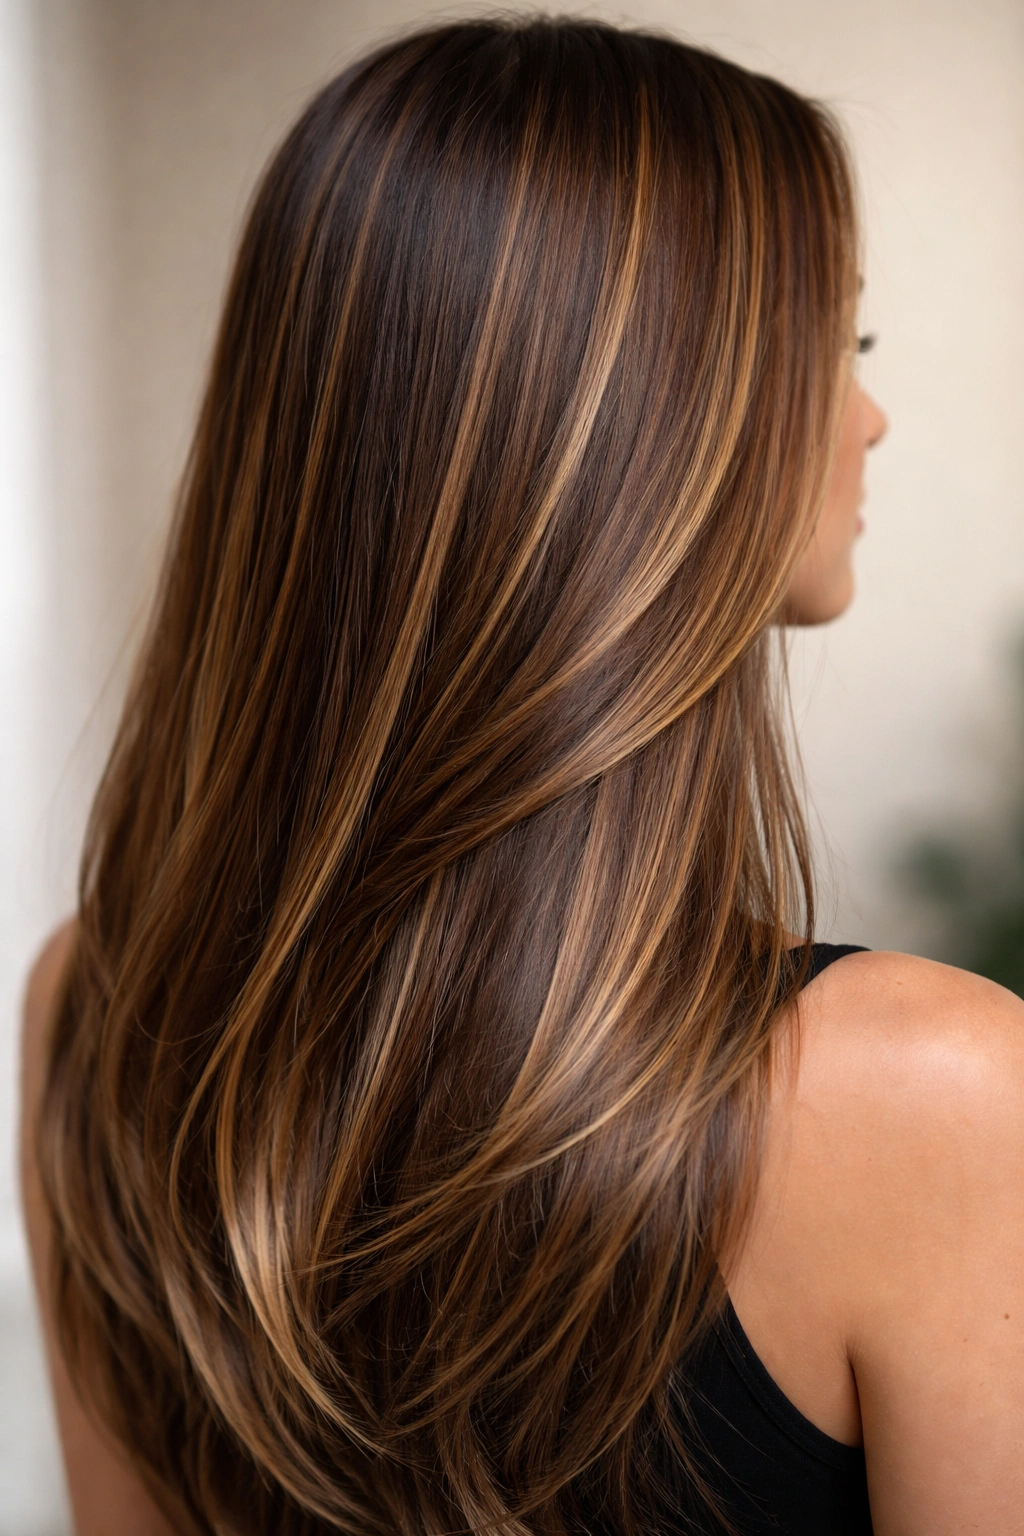
The right caramel highlight placement transforms not just the color, but the entire perceived structure of your face and hair. Some placements are specifically designed to brighten the face, others to add overall dimension throughout the length, and some to create that editorial, fashion-forward look that turns heads. Understanding the distinctions between these approaches helps you identify exactly which style serves your hair goals, lifestyle, and maintenance expectations.
1. Balayage with Caramel Highlights
Hand-painted balayage with caramel tones is the go-to choice for those who want a natural, sun-kissed finish that doesn’t look like deliberate highlighting. The colorist paints the highlights directly onto sectioned hair, focusing on mid-lengths and ends while leaving the roots uncolored—this technique creates dimension that feels like your hair naturally lightened from the sun. On straight hair, balayage placement is visible and precise, allowing the colorist to create intentional light placement that flatters your specific face shape and hair length.
Why This Technique Creates Natural-Looking Dimension
Balayage doesn’t follow a grid pattern like traditional foil highlighting, which is why it reads as effortlessly dimensional. The hand-painted application allows the colorist to skip sections, vary the depth and saturation of the caramel tone, and create graduating color rather than stark contrasts. Straight hair showcases this graduated effect beautifully—the caramel sits smoothly against the base color with no texture to disrupt the visual flow.
What to Know Before You Go
- Application takes 2 to 3 hours depending on how many sections are painted and how blended you want the finish
- Works beautifully on brunette, light brown, and golden blonde bases—darker bases show caramel most dramatically
- Requires root maintenance every 6 to 8 weeks if you want to keep the rooted effect intentional and fresh
- The placement is completely customizable—you can focus highlights only at the ends, or extend them through the entire length for more dimension
- Straight hair shows grow-out distinctly, so this style benefits from root blending between appointments
Pro tip: Ask your colorist to paint more caramel toward the face and lighter near the back—this draws light to your features and creates a naturally brightening effect.
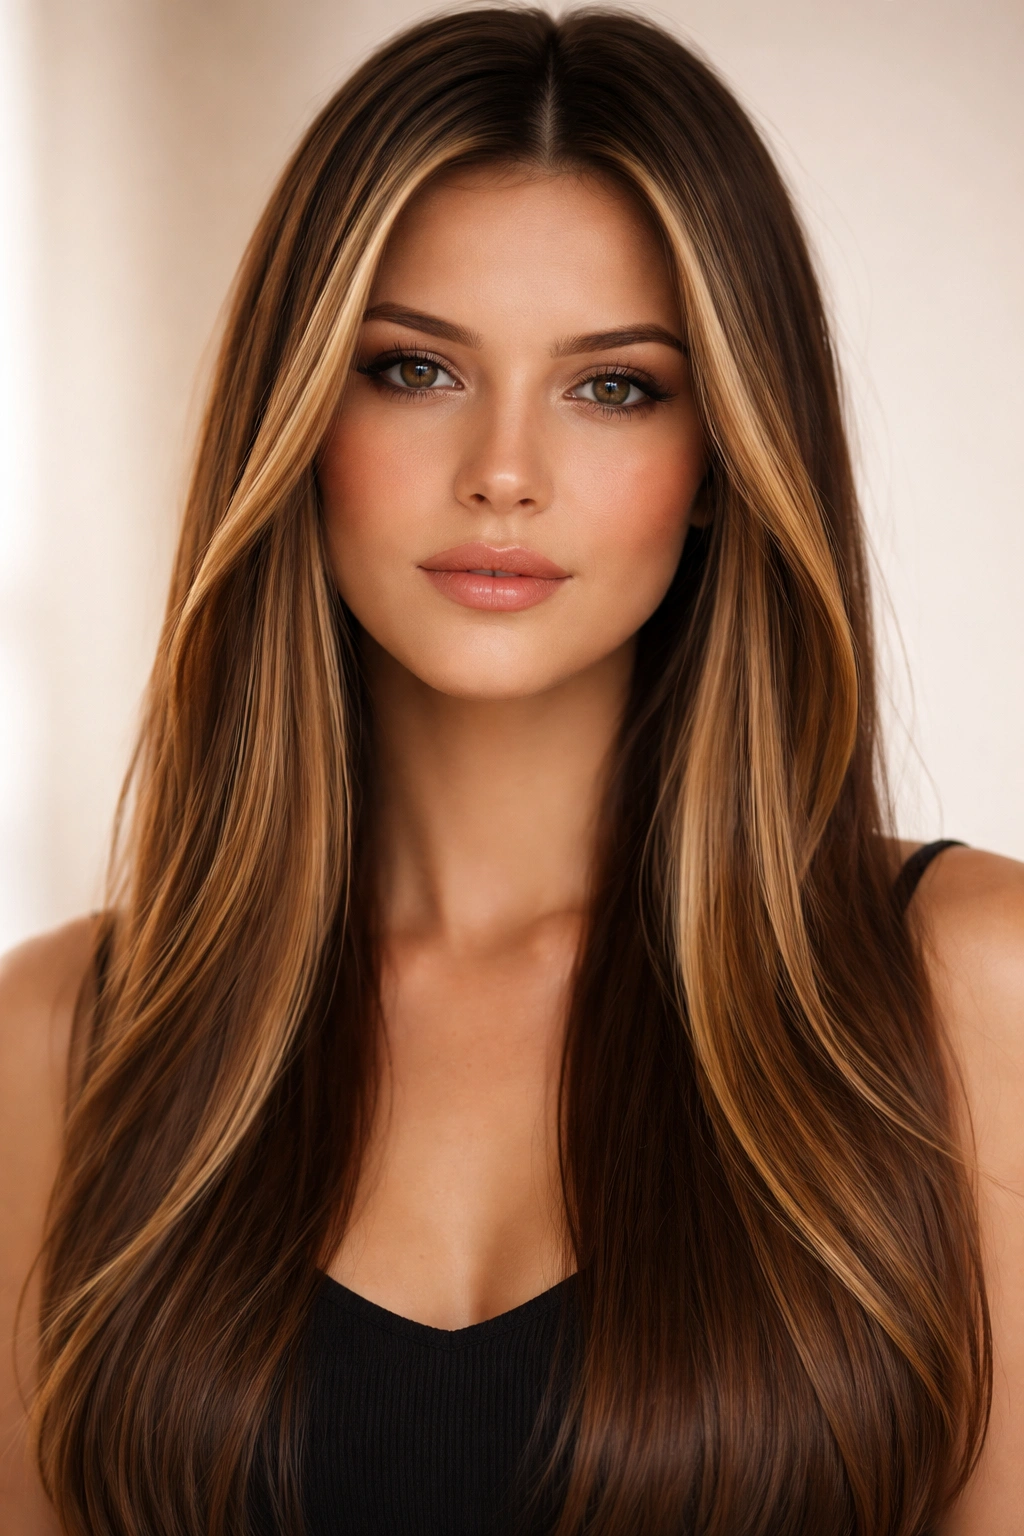
2. Face-Framing Caramel Highlights
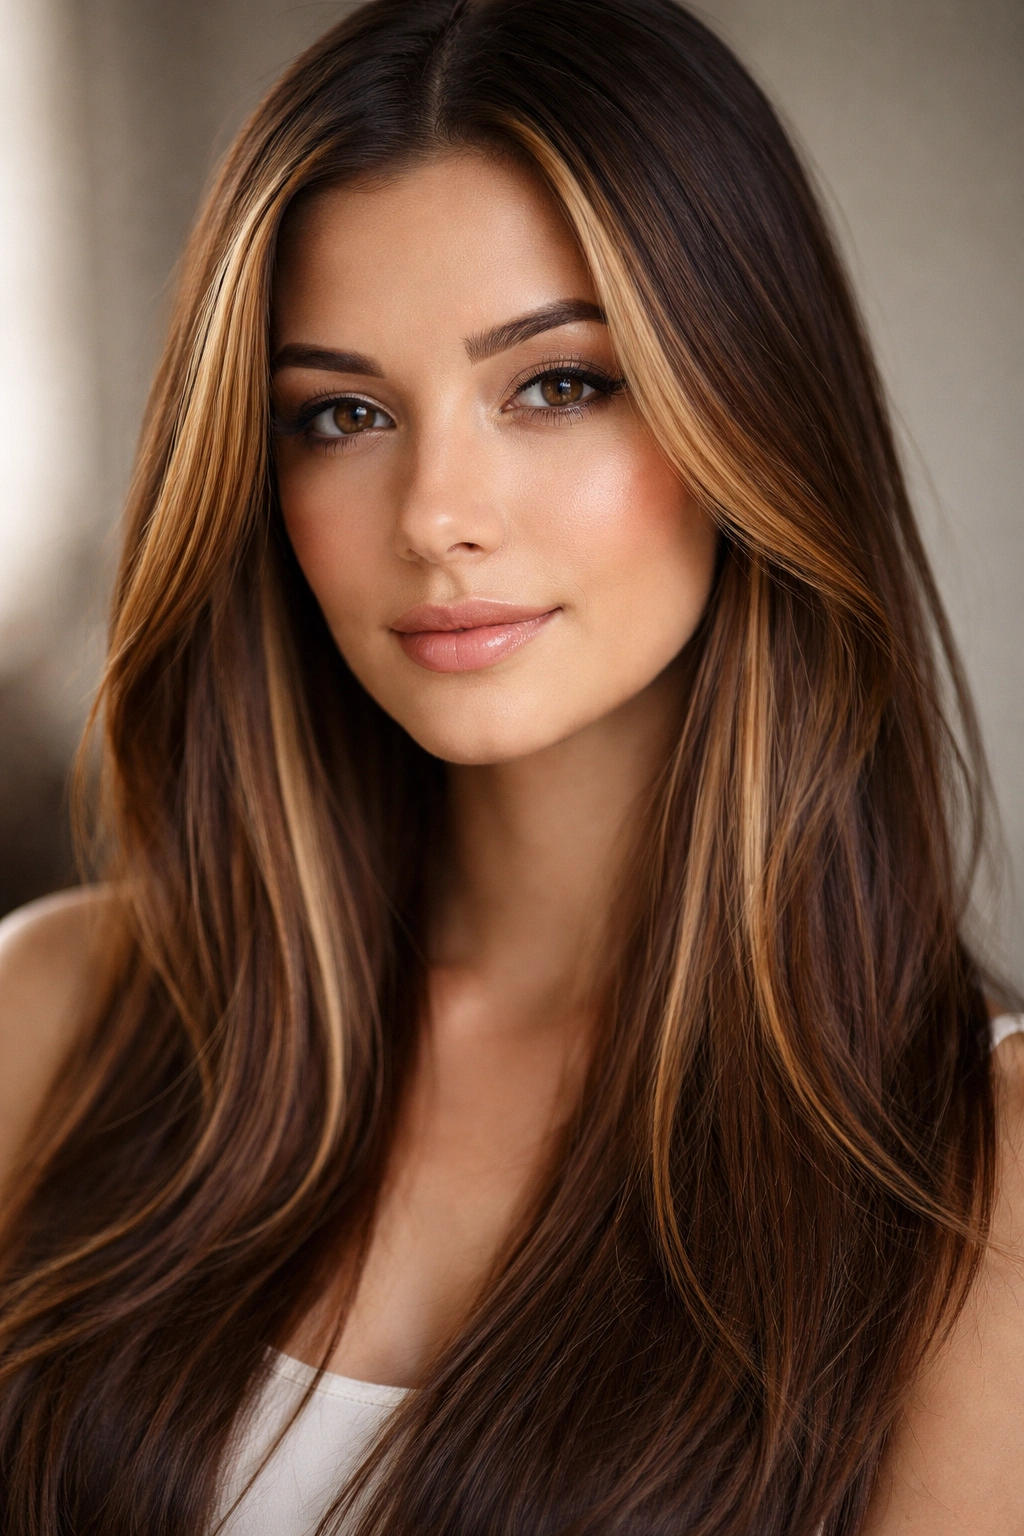
Face-framing caramel highlights are strategically placed around the perimeter of your face—typically 1 to 3 inches on each side starting near the temples and extending down the length of the hair. This placement is brilliantly practical because it brightens the face and draws attention upward without committing to full coverage highlighting. On straight hair, these frame pieces are immediately visible and impactful; they catch light directly and make the eyes appear brighter and more awake without the maintenance demands of more extensive highlighting.
How Face-Framing Placement Changes Your Entire Look
The highlights closest to your face have disproportionate visual impact—they bounce light onto your complexion and create the optical illusion of a lifted, more defined face. This placement is especially effective if you have a longer straight hair length, because the highlighted pieces create a natural frame rather than disappearing into the overall mass. The technique works on nearly any base color and is particularly striking on medium to dark brunette bases where the caramel creates unmistakable contrast.
The Strategic Advantages
- Lowest maintenance option—typically requires touch-ups only every 8 to 10 weeks since the highlights start away from the scalp
- Perfect entry point if you’ve never highlighted before, since it’s easy to expand this later if you want more dimension
- Enhances facial features without overwhelming your natural hair color or requiring ongoing root coverage
- Works exceptionally well with side-parted straight hairstyles where the highlights naturally fall forward
- Can be combined with subtle lowlights for even more refined dimension
Worth knowing: If you do this style with a side part, ask your colorist to place slightly more caramel on the side that falls forward—this creates better light reflection on your face throughout the day.
3. Shadow Root with Caramel Accents
A shadow root means keeping your natural base color (or a very close approximation) at the roots while transitioning into caramel tones through the mid-lengths and ends. This color-melting technique gives you the brightness and dimension of highlights without the harsh regrowth line. The shadow—typically 2 to 3 inches of darker color at the base—blends seamlessly into the caramel, creating an ombré-like effect that feels intentionally artistic rather than haphazard. Straight hair makes this gradient visually pure; you can actually see the color progression clearly.
Why Shadow Roots Solve the Maintenance Headache
Traditional highlights create a obvious grow-out line as your hair grows because the contrast between new dark root and light highlight is sharp and visible. A shadow root deliberately blurs this line by introducing a transition zone—darker than the highlight, lighter than your natural root color—that makes grow-out invisible. On straight hair, this shadow blends into the caramel beautifully, and even as your natural hair grows in, the shadow root means you can wait 10 to 12 weeks between color appointments instead of 4 to 6.
The Technical Details That Matter
- The shadow is typically created using a semi-permanent color or a lighter deposit color so it doesn’t look like you’re growing out undyed roots
- Caramel accents placed throughout the mid-lengths and ends create dimension that keeps the hair from looking flat in the shadow-root zone
- Works especially well if your natural hair is medium to dark brown—if you’re already blonde, a shadow root is less relevant
- The transition zone typically sits at the level of your jaw or shoulders, creating a flattering frame
- Balayage or sombre techniques are often used within the caramel portion for a natural, uneven light placement
Pro tip: Bring a photo of candlelight and ask your colorist to match the caramel tone to that warmth—it ensures your highlights reflect warm light rather than looking too brassy or orange.
4. Rooted Caramel Blonde
A rooted caramel blonde combines a darker brown or ash root (matching or close to your natural color) with a caramel-blonde base throughout the length. This is different from a shadow root because the transition is more intentional and structured—often a deliberate 2 to 4 inch darker zone that creates dimension rather than just masking grow-out. If you have straight hair and want the sophisticated look of a fully lightened blonde with built-in dimension and low maintenance, this is the approach. The darker root acts as a visual anchor that keeps the overall look from feeling washed out or aging, while the caramel blonde portion gives you that warm, expensive-blonde aesthetic.
How Rooted Color Creates Dimension Without Highlights
Instead of using multiple placement techniques within the caramel section, the rooted blonde approach lets the dimension come from the root-to-length contrast itself. This means fewer appointments with your colorist (you’re doing a root touch-up, not repainting highlights), and the depth in your hair comes from the color separation rather than the application method. Straight hair shows this structured gradient beautifully—there’s no texture to complicate the visual, just clean color separation.
What This Style Requires Practically
- Root touch-ups every 5 to 8 weeks to maintain the deliberate rooted look (if you let it grow beyond that, it starts reading as unintentional grow-out)
- The caramel blonde portion may need toning every 6 to 8 weeks if you wash your hair frequently or expose it to sun, since blonde tones fade quickly
- Works best if you’re already considering a full or near-full blonde, not just subtle highlights
- The darker root should be only 1 to 2 shades darker than your natural color for a cohesive, modern look (too dark and it reads costume-like)
- Straight hair makes it easy to maintain this style at home between appointments with a root-touch-up product if you’re color-confident
Insider note: This style photographs beautifully and tends to look expensive in person because of how the structured root creates a sculpted-looking face frame.
5. Dimensional Caramel Ribbons
Caramel ribbons are wider, strategically placed sections of caramel that run through the hair like ribbons, typically 1 to 2 inches wide and placed throughout the mid-lengths and ends. Unlike fine, delicate highlights, ribbons are deliberately chunky and visible—they create a bold, dimensional look that’s modern and editorial. On straight hair, these ribbons are unmistakably visible; the light reflects off each caramel section distinctly, creating a striped, multi-tonal effect that looks both intentional and fashionable.
The Visual Impact of Ribbon Placement
Ribbon highlights have become increasingly popular because they work beautifully on straight hair—they’re thick enough to remain visible through the length of your hair, they create clear visual dimension, and they feel current without looking trendy or temporary. The placement is typically every 1 to 2 inches around the head, creating a repeating pattern that the eye reads as intentional dimension rather than random lightening. On straight hair, this pattern is pristine and clear, making the style look polished and high-fashion rather than accidental.
Technical Aspects of Ribbon Highlights
- Typically applied using foil or sectioning and hand-painted for total control over placement and width
- Works on virtually any base color from dark brunette to honey blonde—the contrast between base and caramel creates the visual impact
- Requires the same maintenance schedule as traditional highlights—root touch-ups every 6 to 8 weeks
- The ribbon placement can be adjusted to flatter your specific face shape: narrower ribbons on the face, wider at the back if you prefer, or denser at the crown if you want extra volume
- Straight hair makes it easy for the colorist to create even, professional-looking ribbons without texture interference
Worth knowing: If you have long straight hair, ask your colorist to make the ribbons slightly wider toward the ends—this makes the caramel feel like a dimensional part of your hair rather than just color on top of it.
6. Honey Caramel Lowlights
Honey caramel lowlights blend a mix of caramel and deeper honey-toned shadows throughout your hair, creating dimension through both lightening and strategic darkening. Instead of just adding light to your base, lowlights add depth below the surface, making straight hair appear thicker and more textured than it actually is. The approach is particularly effective on medium to light brown bases, where caramel highlights alone might feel flat or one-dimensional. By layering in darker honey and caramel tones, you create visual depth that makes hair look fuller and more professionally colored.
Why Combining Highlights and Lowlights Creates Sophistication
A true dimensional color uses both light and dark to create visual complexity. When you use only highlights, you’re essentially bleaching certain sections lighter—the effect can look thin or brassy if the tones aren’t carefully selected. Lowlights add shadow and depth, which trains the eye to perceive more texture and fullness. On straight hair, this contrast between caramel highlights and honey lowlights creates an almost three-dimensional appearance—the lighter pieces pop forward, while the darker pieces recede, creating perceived movement.
Implementation and Maintenance
- Typically requires both foil highlighting and hand-painting for precise control over the honey and caramel placement
- The application process takes 2.5 to 3.5 hours depending on the density of color and how blended you want the finish
- Root maintenance every 6 to 8 weeks keeps the dimensional effect fresh, though the blended nature of this style means grow-out is less obvious than with single-process highlighting
- Works beautifully on hair that’s naturally level 5 to 8 (medium brown through light brown), where both caramel and honey tones read distinctly
- Straight hair’s sleek surface means the color placement is visible and intentional-looking throughout the length
Pro tip: Ask your colorist to use a slightly cooler honey tone near the roots (for shadow) and a warmer caramel tone in the lengths—this creates the illusion of natural sun-lightening.
7. Caramel Money Pieces
Money pieces are larger, more prominent highlight sections placed directly at the front of your hair—typically one piece on each side of your face starting at the temple and running down past your shoulder. They’re called money pieces because they’re the most visible, high-impact highlights that immediately catch the light and draw attention to your face. On straight hair, money pieces are dramatically visible; they frame your features, brighten your complexion, and create the impression that you’ve invested in professional color work. If you want maximum impact with moderate maintenance, this is the strategy.
Why Money Pieces Change Your Entire Face
The front-facing placement of money pieces means these highlights reflect light directly onto your face and complexion. They instantly brighten the eye area, make the skin appear more luminous, and create a lifted, youthful-looking frame around your features. Because straight hair falls smoothly without texture interference, these caramel pieces are continuously visible—you get the brightening benefit throughout your day and in every lighting situation. This is why money pieces feel like the most bang-for-your-buck highlighting technique.
The Details of Money Piece Application
- Typically 2 to 4 inches wide per side, but width can be adjusted based on face width and hair density preferences
- Can be combined with face-framing pieces or subtle overall dimension for a more cohesive look
- Requires touch-ups every 8 to 10 weeks since the lighter pieces start away from the scalp (less visible regrowth)
- The caramel shade should be 1 to 2 levels lighter than your base for adequate contrast and brightening effect
- Works beautifully as a starting point if you’re nervous about committing to full highlighting
Insider note: This style works especially well if you typically wear your hair in a side part—the money piece on the forward side catches light more consistently.
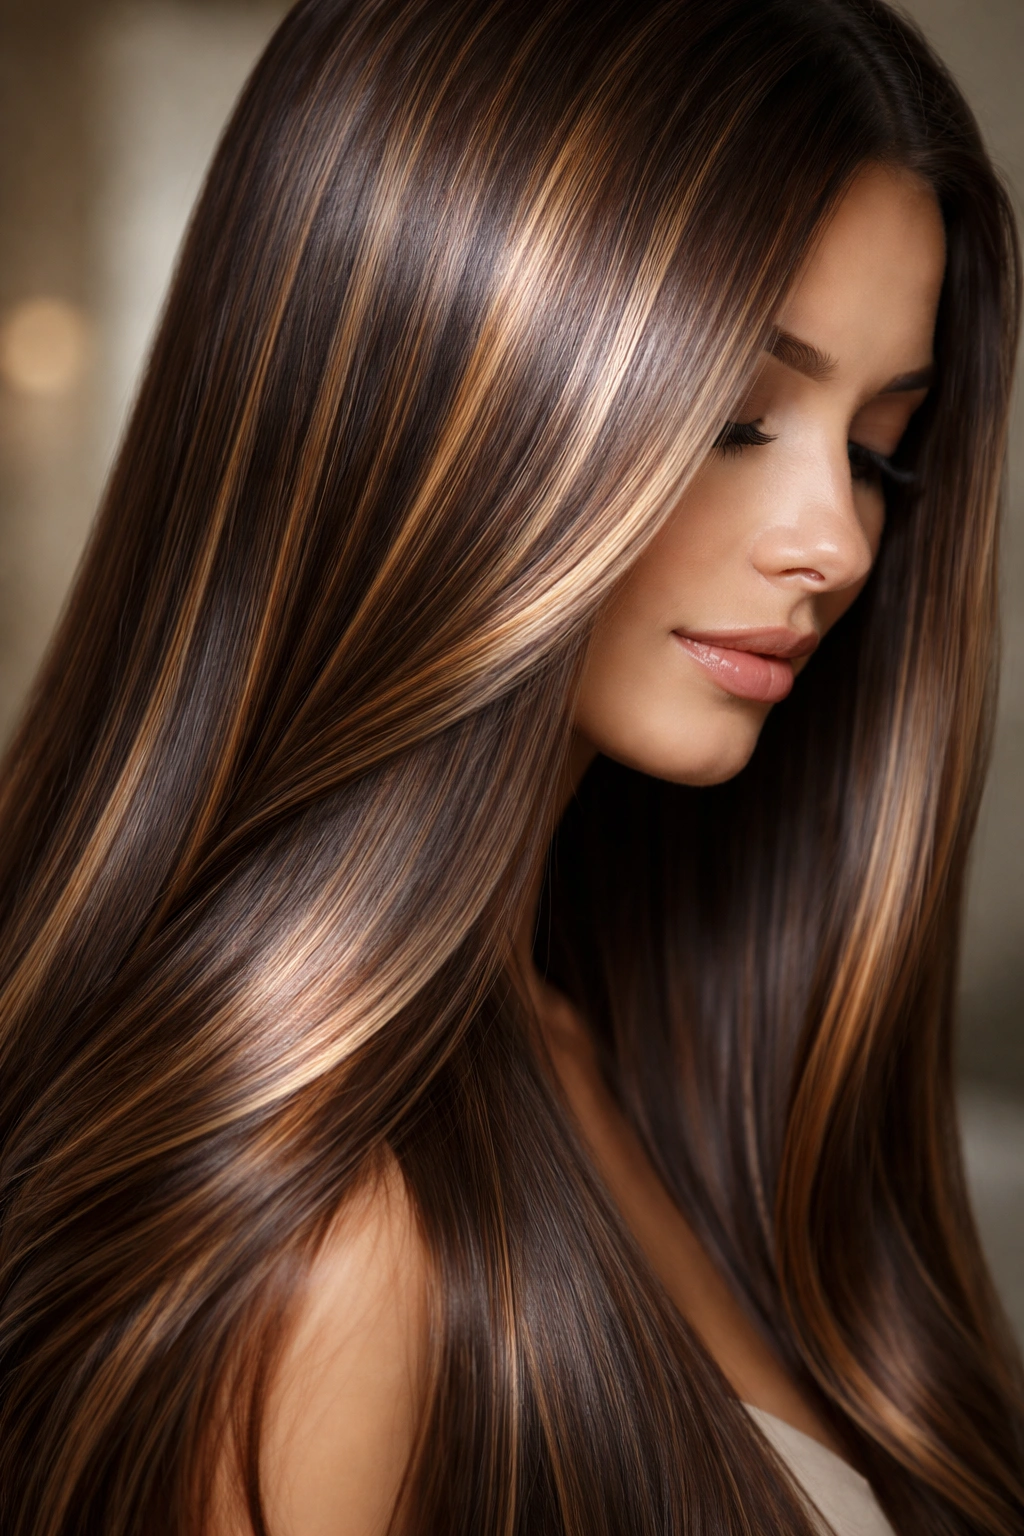
8. Blended Caramel Balayage
A blended caramel balayage takes the hand-painted balayage technique and pushes it toward a perfectly seamless, diffused effect where the transition between base and caramel is so soft and gradual that it’s almost imperceptible. Instead of keeping some separation between highlighted and non-highlighted sections, the colorist uses overlapping hand-painting, toning, and gloss work to create a unified, multi-tonal appearance. On straight hair, this extremely blended approach looks like a professional ombré—soft, dimensional, and intentional, with no harsh lines or obvious placement techniques visible.
The Art of Seamless Color Blending
Achieving a truly blended balayage requires skill and time; the colorist must paint strategically, apply color with varying saturation, and then use additional toning and gloss applications to ensure every millimeter transitions smoothly. The result is hair that looks naturally multi-tonal rather than highlighted, as if the caramel tones emerged organically from your base. Straight hair is actually ideal for this technique because the sleek surface makes blending lines visible, so the colorist has to execute the blend perfectly or imperfections show immediately.
What Blended Balayage Demands and Offers
- Typically takes 3 to 4 hours due to the additional hand-painting detail work and toning required for seamless blending
- Requires a highly skilled colorist—this isn’t an entry-level technique, and results vary dramatically based on expertise
- The investment is higher upfront, but maintenance is relatively low since the blended nature of the placement means grow-out is less noticeable
- Once achieved, this style photographs beautifully and creates an expensive, editorial appearance
- Straight hair shows the blending work clearly, so this technique is particularly impactful on sleek hair
Worth knowing: Ask your colorist if they’ll do a gloss appointment 2 weeks after the initial coloring—this ensures the blending is perfectly refined before you leave the salon.
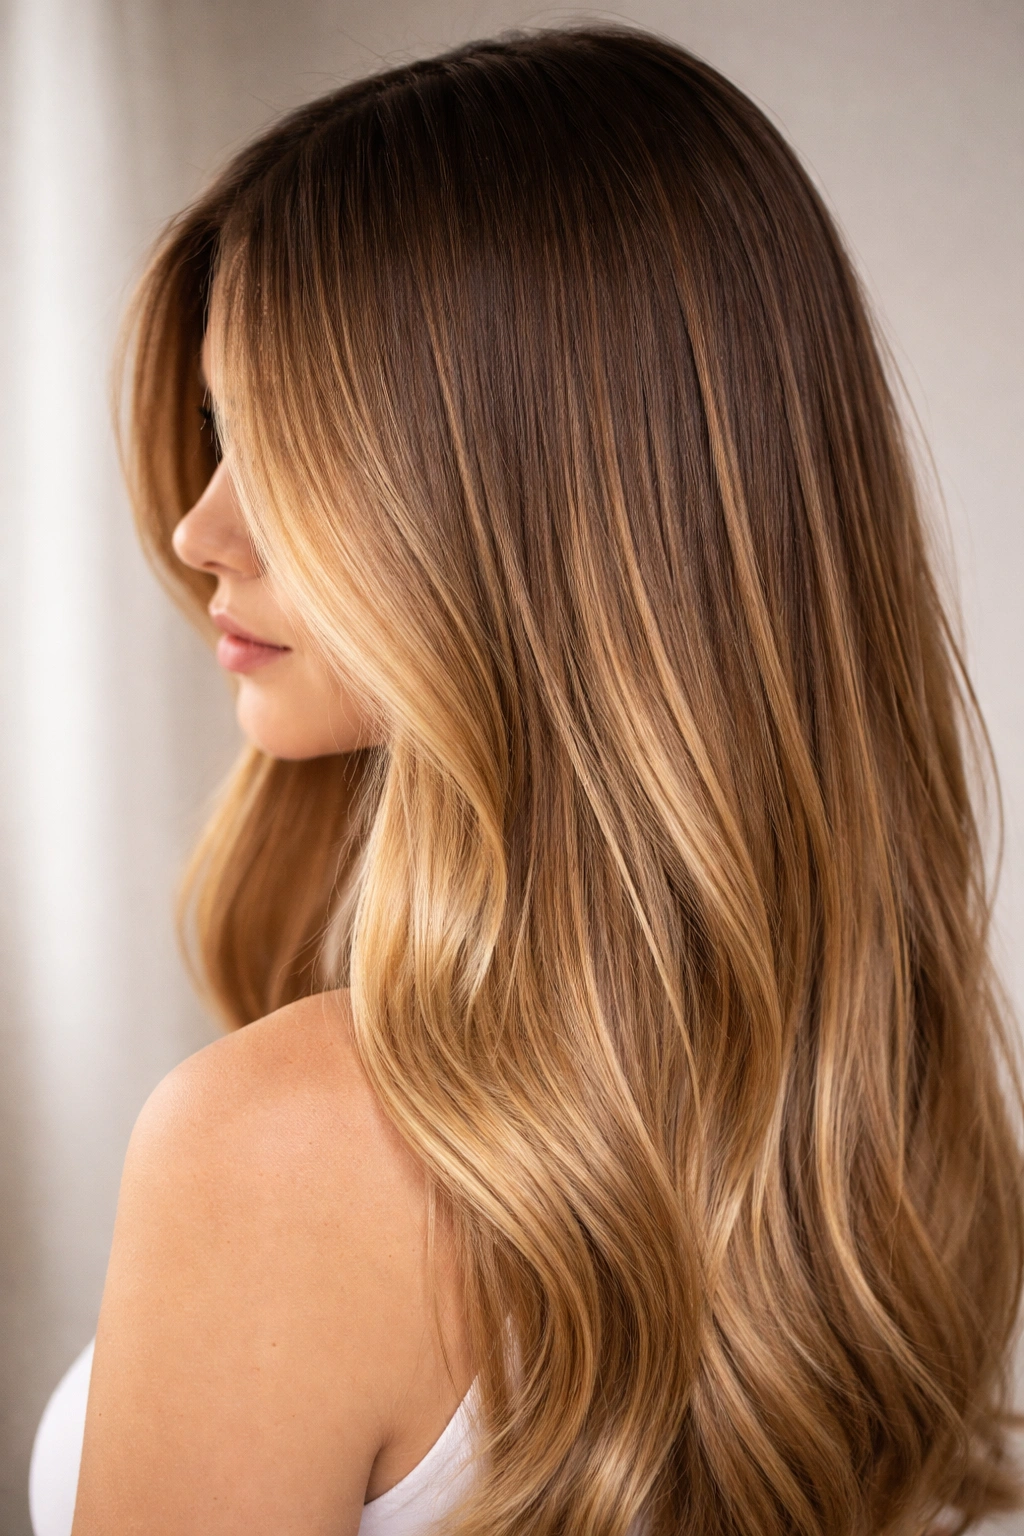
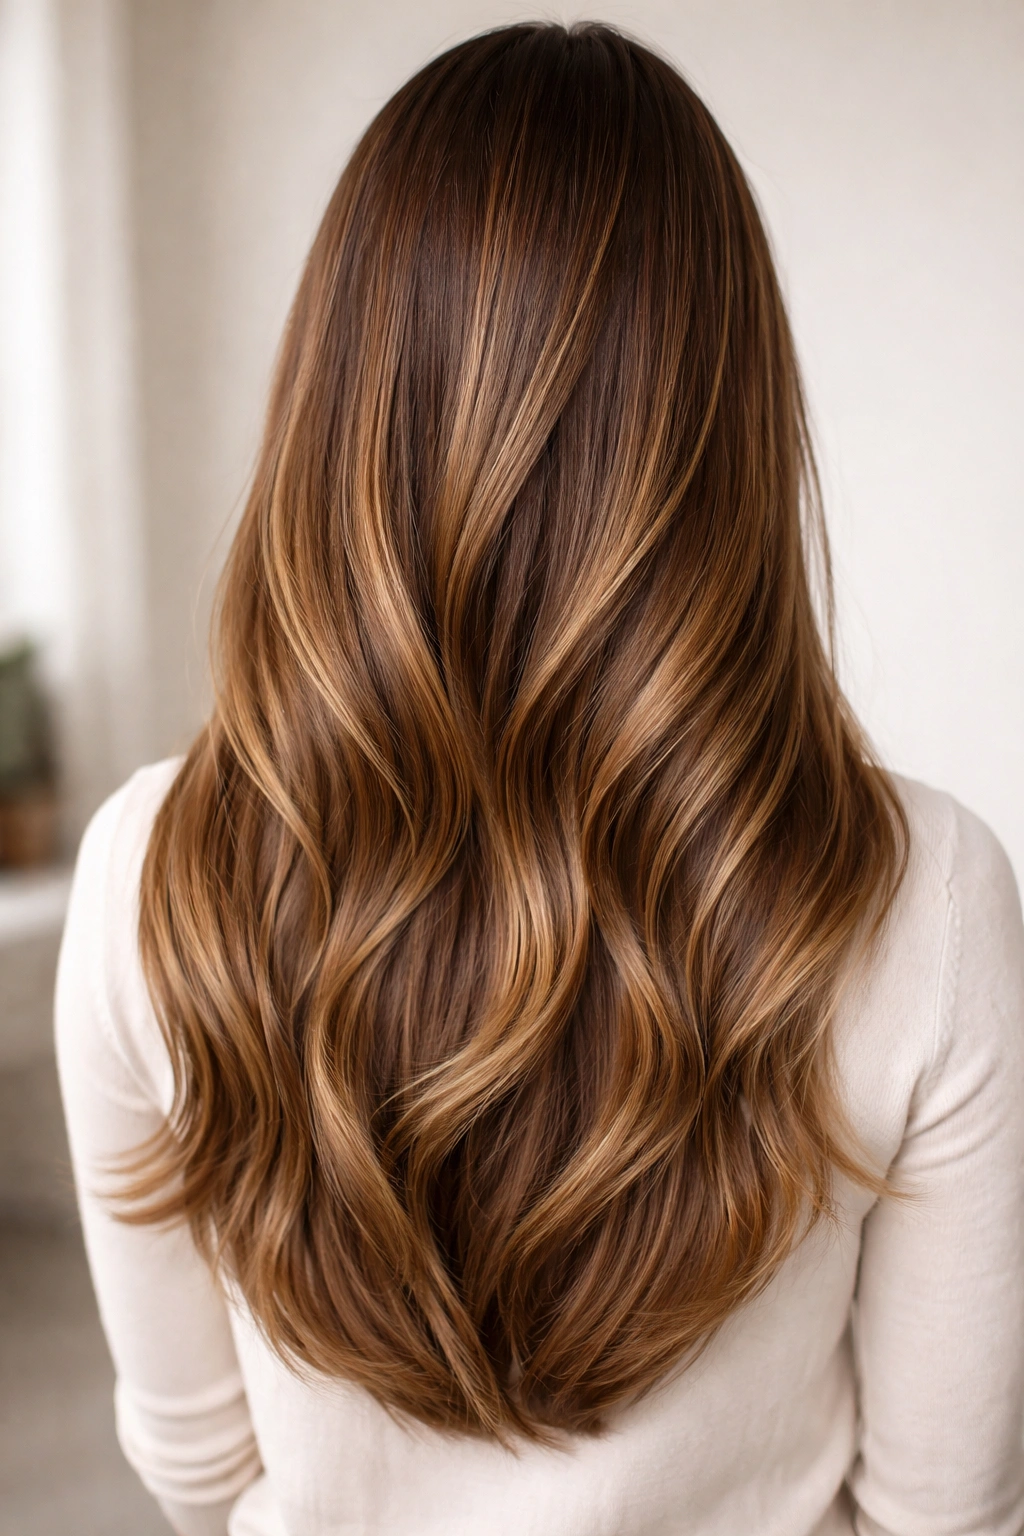
9. Sombre with Caramel Tones
Sombre (subtle ombre) uses caramel and honey tones to create a very gradual lightening effect from roots to ends, but the transition is so soft and natural-looking that it reads more as dimensional depth than obvious color technique. It’s less dramatic than a traditional ombré, more intentional than a balayage, and perfectly suited to straight hair where the smooth surface makes the gradient visible. The caramel tones sit in the mid-lengths and ends, while the roots remain your natural color or very close to it, creating a sun-kissed effect that feels earned rather than artificial.
How Sombre Creates the Illusion of Movement
The subtle gradient of a sombre makes straight hair appear to have natural dimension and movement, even if it’s completely sleek and static. The eye perceives the root-to-tip lightening as visual depth and texture, making the hair feel thicker and more dynamic than a single-process color would. On straight hair, this illusion is particularly effective because the smooth surface makes the color gradient absolutely clear—there’s no texture to distract from or complicate the transition.
The Practical Reality of Sombre Coloring
- Application typically takes 2 to 3 hours since the gradient requires careful painting and blending
- The transition zone is usually placed around the mid-length to lower-mid-length area, depending on your hair length and how dramatic you want the effect
- Maintenance is moderate—root touch-ups every 8 to 10 weeks keep the look intentional, though the blended nature means grow-out is less harsh than with stark highlighting
- Works beautifully on medium to light brown bases, and also on naturally lighter hair where caramel tones add warmth without bleaching
- Straight hair’s sleek surface means the gradient is visible and clean—no texture to hide inconsistencies in blending
Pro tip: If you want your sombre to last longer between appointments, ask your colorist to place slightly more caramel density in the ends—that way when the color fades, it still reads dimensional rather than dull.
10. Metallic Caramel Highlights
Metallic caramel highlights use specially formulated tones that contain subtle shimmer or light-reflecting particles, creating a shiny, lustrous finish that makes the caramel appear to glow. These aren’t glittery or obviously sparkly—the effect is more of an ultra-luminous, almost champagne-like quality that catches and reflects light. On straight hair, metallic caramel is exceptionally effective because the sleek surface is perfect for showing off light reflection; the highlights literally shimmer as you move, creating a high-fashion, expensive-looking result.
Why Metallic Tones Read as Premium
The slight shimmer or iridescence of metallic caramel creates a visual impression of depth and complexity that regular caramel tones don’t quite achieve. The light-reflecting properties mean your hair catches and bounces light in a way that appears intentional and expensive, even if the actual placement technique is straightforward. Straight hair is the ideal canvas for this effect—any curliness or texture would break up the light reflection and diminish the metallic quality.
The Technical Considerations
- Metallic tones typically contain mica or other light-reflecting particles that can be drying, so deep conditioning becomes essential
- These tones are often pricier than standard caramel since they’re specialty formulations
- Application is typically straightforward (face-framing, balayage, or ribbon placement), but the results have more visual impact than standard caramel
- Metallic tones photograph exceptionally well and appear more vibrant in natural outdoor light than in indoor artificial light
- Straight hair with a glossy finish maximizes the metallic effect—consider a gloss or shine treatment as part of your color maintenance routine
- The shimmer gradually fades with washing, so color-safe shampoo and minimizing hot water extend the metallic shine
Worth knowing: Metallic caramel looks most dramatic when you pair it with a glossing treatment every 4 to 6 weeks—the gloss refreshes both the color and the shine simultaneously.
Final Thoughts
The right caramel highlight approach depends on your maintenance tolerance, your face shape, the depth of your natural base color, and how dramatically you want the dimension to read. Some styles like face-framing or money pieces offer maximum impact with minimal upkeep, while others like blended balayage demand more frequent styling attention but deliver a seamlessly dimensional, expensive-looking result. Straight hair is genuinely your advantage when it comes to showcasing caramel highlights—the sleek surface makes every tone visible, every placement technique clear, and every light reflection obvious.
When you consult with your colorist, bring specific photos of caramel tones you love and be honest about how much time you’re willing to invest in maintenance. A shadow root with caramel accents might be perfect if you hate coming back to the salon frequently, while a metallic balayage might be your choice if you want that editorial, high-fashion appearance. The most beautiful caramel highlight is ultimately the one that fits into your real life—your styling routine, your color appointment frequency, and your actual daily habits. That’s when the dimensional warmth and brightness of caramel truly shines.