Bubble braids have become one of those rare hairstyles that work beautifully with straight hair while also looking intentional and modern. If you’ve been scrolling through social media or noticing this style everywhere, there’s a reason—it’s genuinely flattering, surprisingly versatile, and the elevated bubble effect actually becomes more defined on straight, smooth hair texture than on other hair types. The straight-hair advantage means you don’t need to backcomb or tease to create the signature puffy segments; instead, you get clean, sculpted bubbles that catch light and add visual dimension without the frizz.
The real appeal of bubble braids for straight hair comes down to control and polish. When your hair is naturally smooth or you’ve straightened it, you have a clean canvas to work with. This means you can create bubble braids that are either sleek and sophisticated or playfully voluminous, depending on what you’re going for. You’re not fighting texture or managing frizz while styling—you’re just working with the natural advantages that straight hair gives you. Whether you’re thinking of a braided updo for a special occasion, a casual bubble braid for everyday wear, or something with a dramatic twist, straight hair is honestly the ideal canvas for nailing this look.
The bubble braid technique itself is simpler than people often think. You’re essentially creating a basic three-strand braid and then gently pulling out sections between the braids to create those signature puffed-out segments. What elevates the look is where you place the braid, how you distribute the bubbles, and what you do with the rest of your hair. That’s where the real creativity comes in, and why there are so many different versions worth exploring. Let’s walk through ten specific bubble braid styles that absolutely sing on straight hair, complete with the techniques and styling tricks that make each one unique.
1. Classic High Bubble Braid with Grosgrain Ribbons
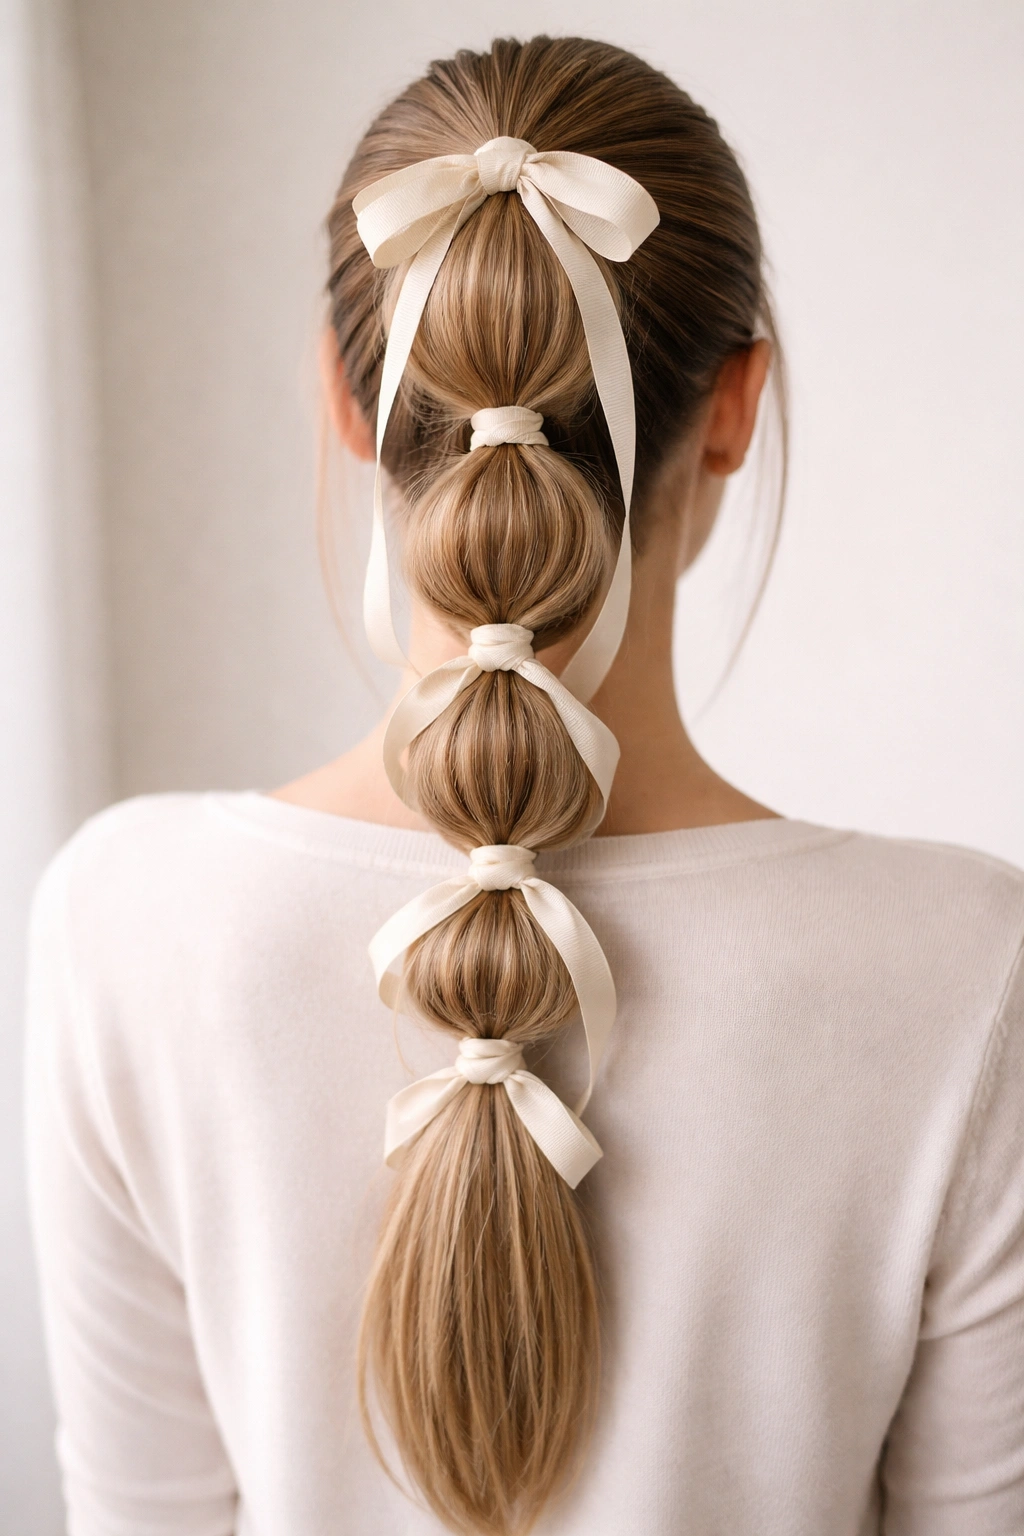
This is the version that launched a thousand TikToks—a simple, centered bubble braid that runs down the back of your head, elevated with a sleek, polished finish. Start at the crown and braid straight down, creating even segments that you’ll puff out as you go. The magic is in the rhythm: braid a section, pull gently, braid another section, pull again. The result is a column of perfectly spherical bubbles that look intentional and salon-finished without actually requiring much technique.
Why This Style Reads as Elevated
What makes this specific version special is the addition of a grosgrain ribbon threaded through the braid itself. The ribbon doesn’t just add visual interest—it actually helps define the bubble sections and gives the entire style a polish that reads as either sporty-chic or delicate, depending on the ribbon color you choose. A white or ivory ribbon gives off ballerina vibes, while a bold jewel-tone ribbon punches things up for evenings. The ribbon also serves a practical purpose: it takes tension off your scalp by distributing the weight of the braid more evenly, and it helps keep bubbles defined throughout the day.
How to Execute This Look
- Brush your hair straight and smooth—any flyaways will be visible, so make this count and use a smoothing serum for extra shine
- Create a base three-strand braid starting at the crown, keeping it relatively loose and even
- As you braid, pause after every 2-3 braids and gently pull out small sections from the sides to create bubble shapes
- Thread a grosgrain ribbon alongside the braid as you work, securing it into each braid section
- Finish with a small elastic, and do a final gentle pull of each bubble to ensure they’re evenly sized
- This works best on second-day hair with a bit of texture, so consider washing the night before if you have very slippery strands
Pro tip: Use a lightweight hairspray on each bubble segment after you’ve pulled it out—this keeps the puffs shaped throughout the day without making your hair feel stiff or crunchy.
2. Sleek Side Bubble Braid with Wispy Face-Framing Layers
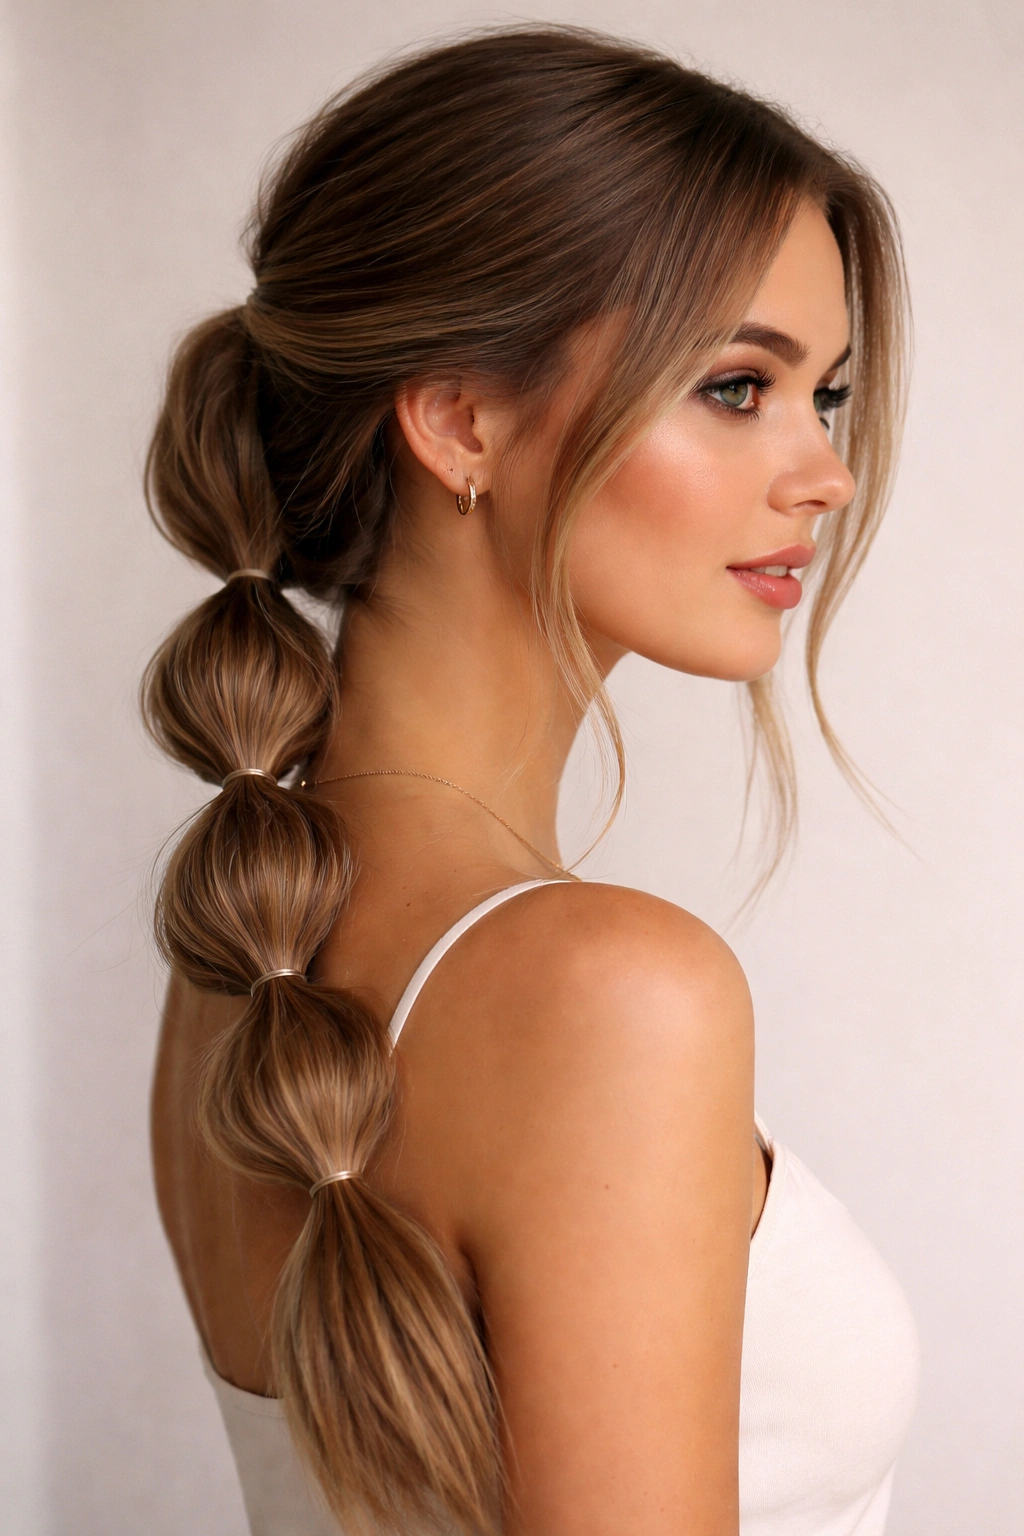
Instead of centering the bubble braid, pull it to one side and keep it low, creating an asymmetrical look that’s both romantic and modern. This version intentionally leaves pieces out at the front to frame the face, softening what could otherwise feel too formal. The braid itself sits at an angle along the back of your head, and because it’s positioned lower, the bubbles catch light differently than a crown-placed version. This style works particularly well for straight hair because the contrast between the smooth sections you’ve left out and the textured braid creates real visual interest.
What Makes This Version Feel Effortlessly Polished
The key to nailing this style is the balance between control and softness. You’re not going for chaos or undone—you’re going for intentional elegance. The face-framing pieces should be intentional: pull a section from each side, leave it out, and let those pieces rest against your cheeks. The bubble braid itself should be crisp and defined, which is where straight hair becomes your superpower. Because you’re starting with a smooth base, the bubbles look crisp rather than fluffy, giving the whole style a more grown-up, intentional vibe than you might get on other hair types.
Styling Steps to Follow
- Part your hair slightly off-center and brush everything smoothly to one side
- Leave out a small section from each temple—these will frame your face and fall naturally around it
- Begin your braid slightly higher than you want the final braid to sit, using the section you didn’t leave out
- As you braid, angle slightly toward the back and down, creating that asymmetrical line
- Create bubbles as you go, making sure they’re even and gradually increasing slightly in size as you move down
- Secure with a small elastic that matches your hair color, and pin the end near your ear or the base of your neck depending on hair length
- Wrap one of the face-framing pieces loosely around the base of the braid for extra polish
Worth knowing: This style photographs beautifully from the side, so if you’re doing this for photos, position yourself accordingly.
3. Double Bubble Braids for Symmetrical Volume
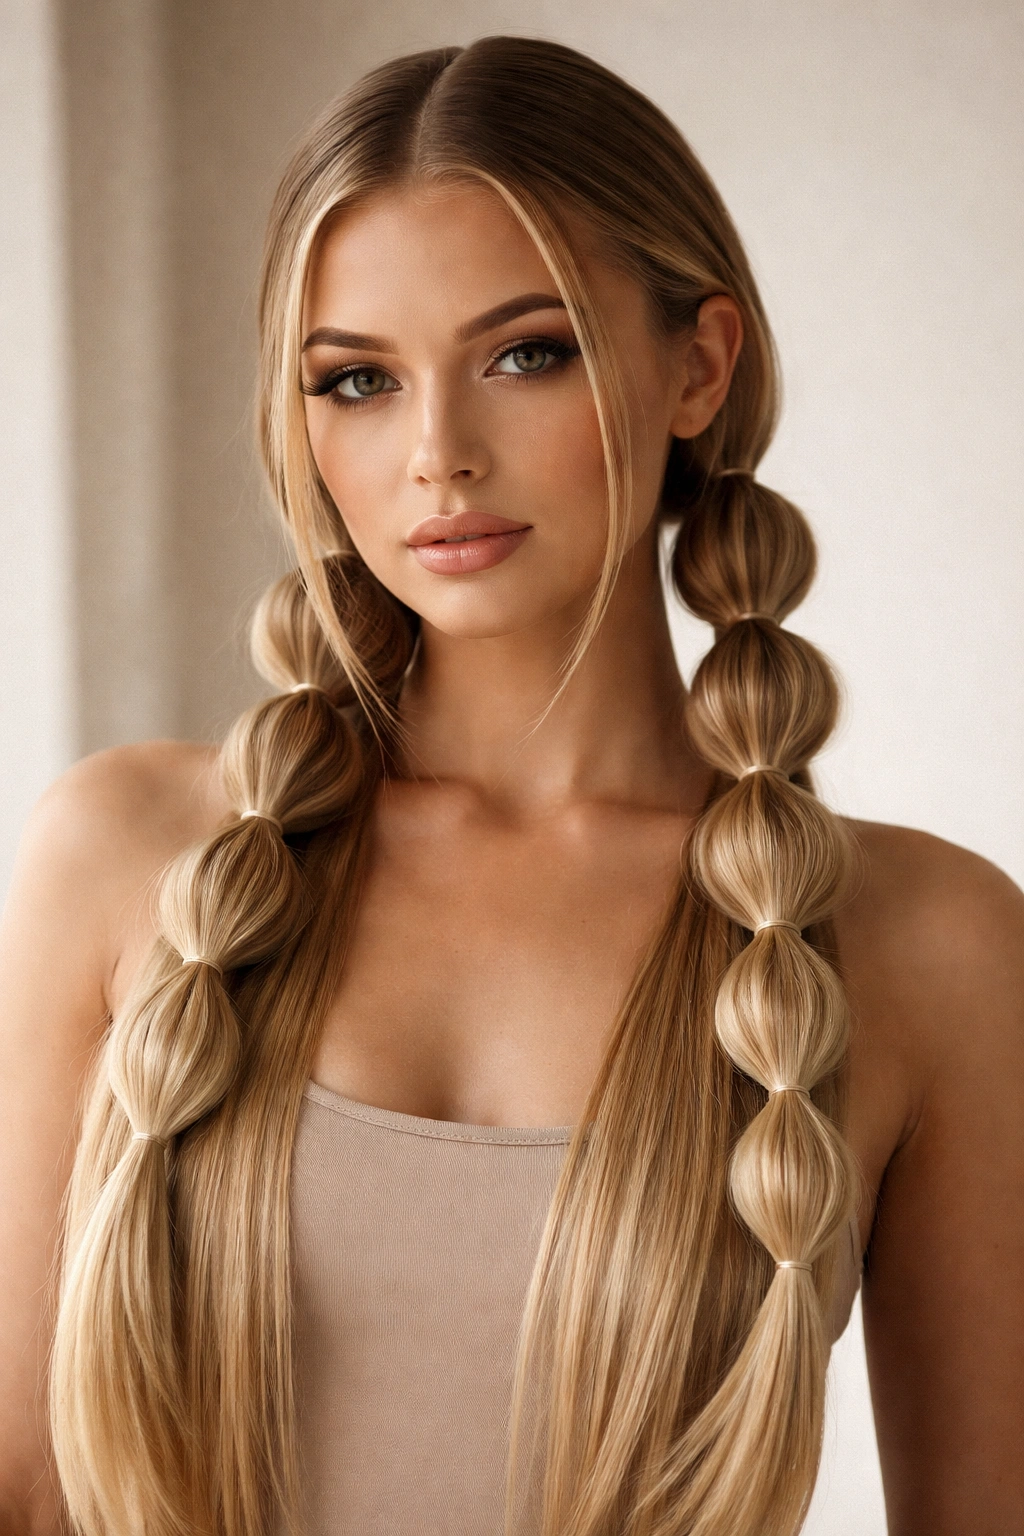
Two braids instead of one create more visual impact and also distribute the weight more evenly across your scalp. This version involves parting your hair down the middle and creating a matching bubble braid on each side. The symmetry is deeply satisfying, and because you’re creating two narrower braids instead of one thick one, the bubbles tend to look more defined and rounded. This style is perfect if you want serious volume and visual interest without things feeling chaotic. It’s popular for events, but it also works beautifully as a casual everyday style—it reads as intentional either way.
Why Double Braids Feel More Modern Than You’d Expect
Twin braids could feel juvenile if styled wrong, but bubble braids specifically elevate the look because of the deliberate puffing-out technique. When you’ve carefully sculpted each bubble, twin braids read as editorial and intentional rather than nostalgic. The trick is making sure both braids are symmetrical—same thickness, same bubble size, same tension—so they feel coordinated rather than accidental. On straight hair, this symmetry is easier to achieve because you’re starting with a sleek base with no natural texture variations to work around.
How to Create This Style
- Part your hair straight down the middle and clip one side away
- Beginning with one side, create a bubble braid starting at the crown and moving down the back half of your head
- Keep the braid relatively loose so the bubbles have room to expand outward
- Release the clipped section and repeat on the other side, matching the placement and bubble size as closely as possible
- Both braids should end around the same point on your neck or between your shoulder blades, depending on hair length
- You can leave the ends loose, secure them together into one ponytail, or wrap each end around into a bun
- Do a final check: look in a mirror from the front and back to ensure symmetry
Quick styling notes:
- Use the same size elastic for both braids so they appear intentionally matched
- If one braid isn’t as full as the other, gently redistribute some pulled-out hair to even them out
- This style works wonderfully with colored thread or ribbon woven through each braid for extra visual pop
- Best completed on straight hair or freshly straightened hair for the cleanest result
4. Bubble Braid Topknot for Updo Elegance
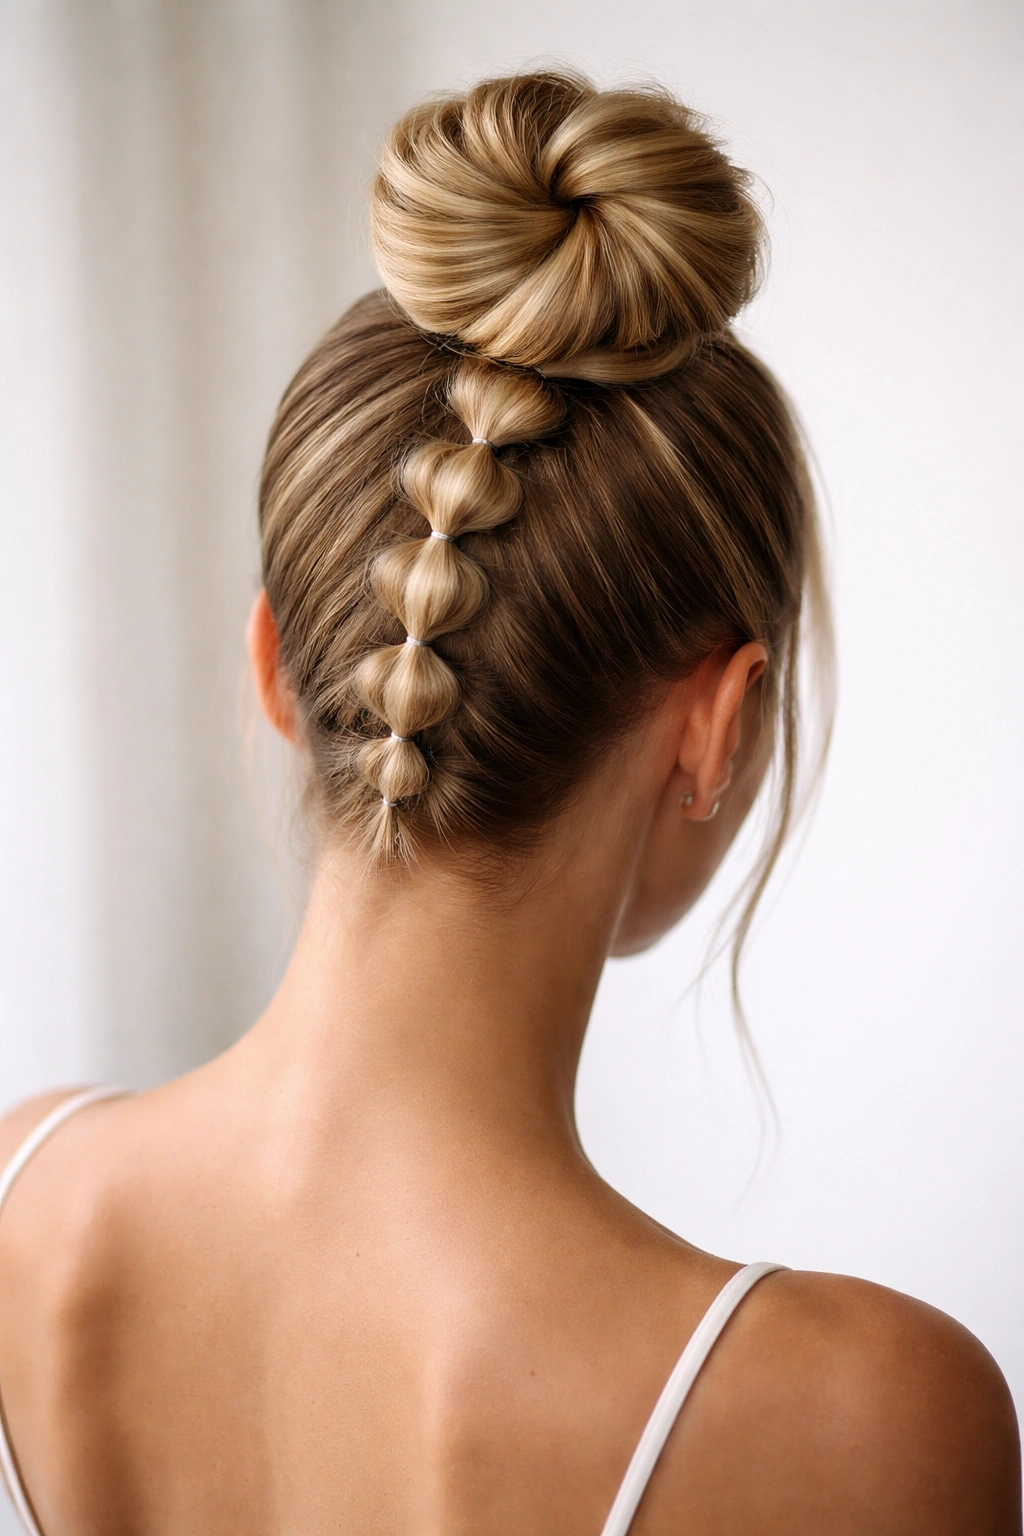
Take your bubble braid all the way up and coil it into a knot at the crown, and suddenly you’ve got an updo that’s both polished and playful. This version starts at the nape of your neck and moves upward, with bubbles formed throughout the ascent. Once you reach the top of your head, you coil the remaining braid into a knot and secure it with bobby pins. The result is an updo that works for formal events, weddings, or even just a chic casual day when you want your hair completely off your neck.
Why This Updo Works Beautifully on Straight Hair
Straight hair has a natural slickness that makes coiling and securing an updo easier and more stable than on textured hair. The braid itself maintains its definition better because there’s no frizz softening the edges, and when you coil it up, the geometric bubble shapes remain clearly visible rather than disappearing into a puffier overall shape. This means the updo reads as intricate and carefully constructed, even if you’ve only spent fifteen minutes on it. It’s the kind of style where straight hair gives you instant polish—you barely have to try.
Steps to Execute a Bubble Braid Topknot
- Flip your head upside down and brush all your hair toward the crown to gather it
- Starting at the nape of your neck, create a bubble braid moving upward toward the crown
- Keep the braid tight enough that it won’t slip as you work, but still loose enough to create defined bubbles
- As you reach the crown, you’ll have some remaining hair—gather any loose pieces and begin coiling the braid into a spiral knot shape
- Use bobby pins to secure the coil in place, pinning it from multiple angles so it’s locked down
- Gently pull out any remaining bubbles along the braid to ensure they’re all defined
- Smooth any flyaways with a smoothing serum or lightweight hairspray
Pro tip: A decorative hair comb or small hair clip inserted into the center of the coiled knot adds an instant element of elegance, plus it helps secure the updo from another angle.
5. Textured Bubble Braid with Crimp Details
If your straight hair is on the thicker or more resistant side, adding intentional texture before creating your bubble braid actually makes the bubbles more defined, not less. You can use a crimping tool on specific sections of your hair before braiding, or you can create waves using a waver tool. The texture gives the bubbles more grip and structure, so they hold their puffed shape better throughout the day. This version is particularly good for anyone whose straight hair tends to flatten or lose volume by midday—the added texture combats that while also creating a visually interesting style.
How Texture Enhances the Bubble Braid Effect
The magic of adding crimp or texture is that it creates friction between hair strands without making you look frizzed or undone. When you crimp certain sections before braiding, those sections have natural grip, which means your bubbles stay puffed and defined. The sections you’ve crimped also add subtle visual interest—light catches them differently than smooth hair, creating dimension. This approach is particularly clever if you have very fine straight hair that typically looks flat, or if you have thick straight hair that resists styling. The texture gives everything more staying power and more visual presence.
How to Add Texture Before Braiding
- Start with straightened hair for a smooth base
- Section off 2-3 random sections throughout your hair and crimp them using a crimping tool (don’t crimp everything—selective crimping looks intentional, while all-over crimp looks dated)
- Alternatively, use a waver tool on select sections for a looser, more subtle texture
- Let the crimped sections cool slightly, then brush gently through them with a wide-tooth comb to soften the crimp slightly—you want texture, not defined crimps
- Now create your bubble braid using your normal technique; you’ll notice the textured sections hold their bubble shape more aggressively
- Use a light hairspray to encourage the bubbles to maintain their texture and hold throughout the day
Quick facts:
- Crimping before braiding is specifically helpful if you’re planning to wear the braid for several hours or overnight
- This technique works best on hair that’s at least shoulder-length, since shorter hair won’t have enough length for the texture to be visible within the bubbles
- The textured version photographs slightly softer and more romantic than ultra-sleek bubble braids
6. Bubble Braid Ponytail with Tapered Ends
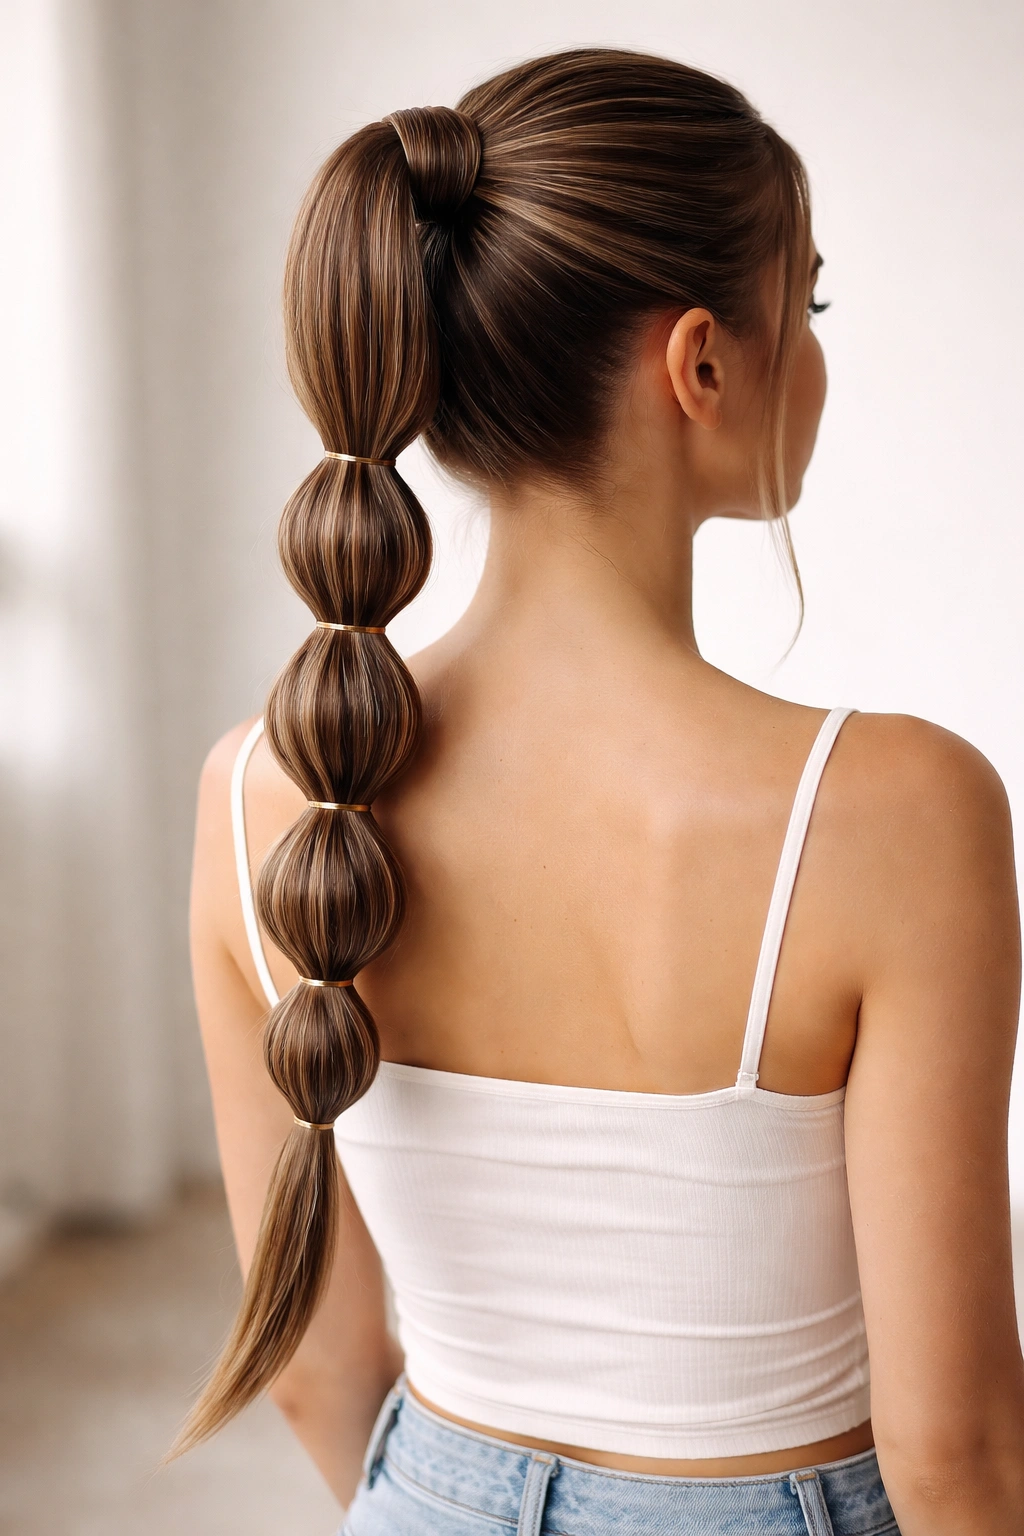
Instead of ending your bubble braid with a standard elastic, keep braiding all the way down and let the braid taper to a point, creating an almost rope-like end. This version combines the visual interest of bubbles with the elongated elegance of a long, thin braid. You can wrap the tapered braid end around your finger to create a spiral at the base of your ponytail, or you can let it hang loose as a decorative tail. This style works particularly well for straight hair because the taper creates a beautiful gradient from thick bubbles to thin, refined line.
Why the Tapered End Adds Visual Sophistication
The taper changes the entire visual story of the braid. Instead of ending abruptly with an elastic, you’ve created a transition—thick, textured bubbles gradually becoming smoother and thinner. This gradient draws the eye and creates a sense of intentional design. On straight hair, this taper is especially clean because there’s no frizz softening the transition. It reads as polished and thoughtful rather than simply “a braid with an elastic.” It’s a small detail that elevates the entire look.
How to Create a Tapered Bubble Braid Ponytail
- Gather your hair into a ponytail at whatever height you prefer (high, mid, or low)
- Secure with a small elastic
- Create your bubble braid starting at the base of the ponytail, forming bubbles as you normally would
- Continue braiding all the way to the ends, but rather than stopping and securing with another elastic, keep the braid going
- As you near the ends of your hair, gradually decrease the amount of hair you’re incorporating into the braid, allowing it to naturally taper to a thin point
- Secure the tapered end with a tiny clear elastic or a small thread
- The last 2-3 inches of the braid should look like a thin, refined rope rather than a thick braid
- You can wrap this tapered end around the base of the ponytail and secure it with a bobby pin for a continuous loop, or leave it hanging
Worth noting: If you have very thick hair, you may need to thin out sections as you taper rather than simply braiding with less hair—ask yourself what would create the cleanest gradient.
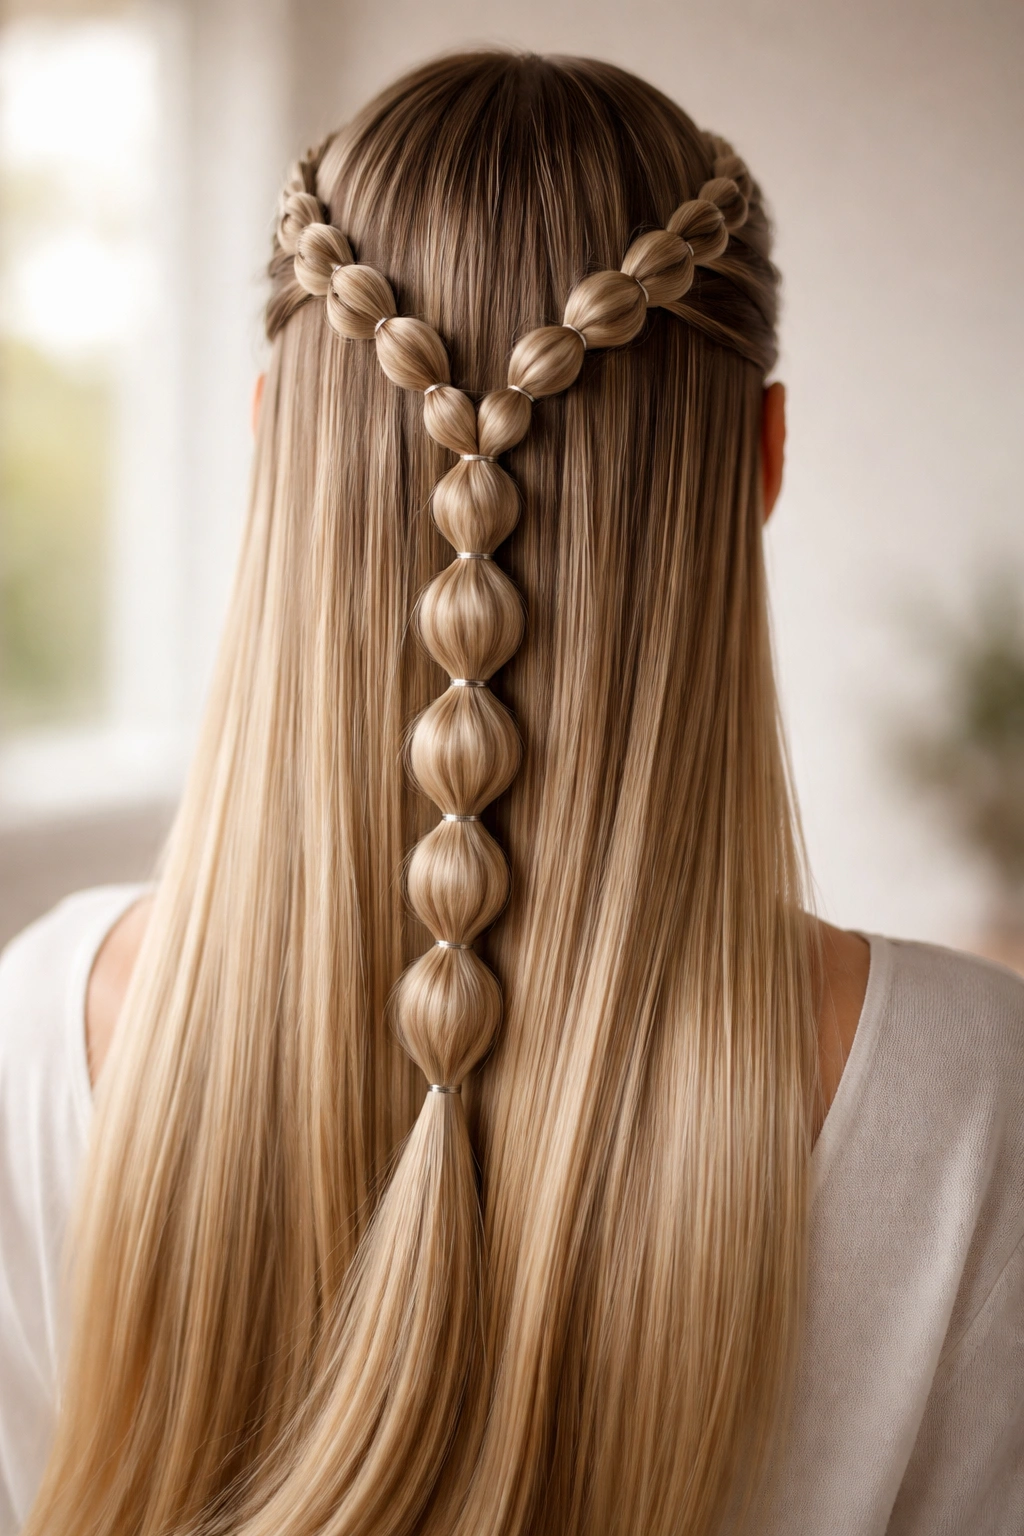
7. Bubble Braid Crown Around the Head
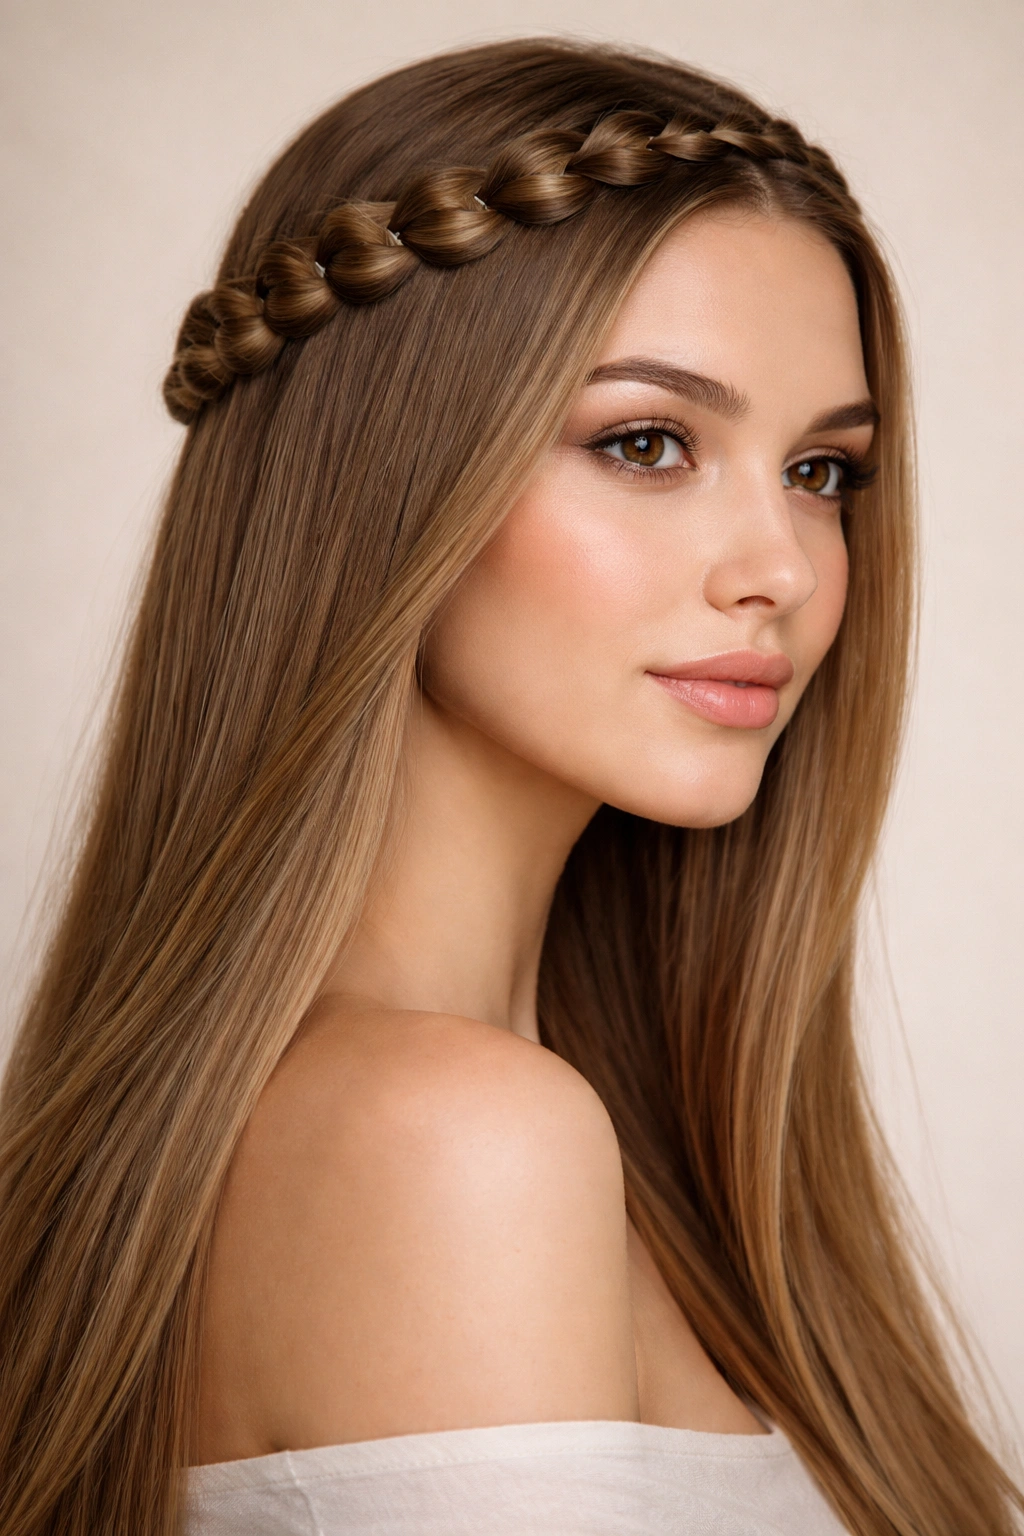
Instead of a traditional bubble braid going down the back, create one that wraps around your head like a crown or halo. This version starts at one side of your face, travels around the back of your head, and ends at the other side. The result is a romantic, crown-like style that draws attention to your face and works beautifully for events, photos, or simply when you want to feel extra polished. Because the braid travels horizontally around your head rather than vertically, the bubbles catch light from multiple angles, creating more visual impact.
What Makes a Crown Braid Read as Romantic Rather Than Costume-y
The key is creating a crown braid that feels integrated with your natural hair rather than sitting on top of it. You want it to feel like a style you’ve created from your own hair, not a separate accent. This means starting and ending the braid seamlessly—maybe the braid begins with a section of hair that would naturally be at your temple, and it ends by incorporating all the hair from the other side. The bubbles should be even and deliberate, not chaotic. On straight hair, you have the advantage of the braid appearing very defined and intentional rather than blending into overall texture.
How to Create a Crown Bubble Braid
- Brush all your hair to one side and identify where you want the braid to start (typically at temple height on one side)
- Create a small three-strand braid at that starting point, using hair from that section
- As you braid, gradually incorporate more hair as you move around the back of your head, working in a semicircle toward the opposite side
- Create bubbles as you go, ensuring they’re even and evenly distributed
- The braid should travel roughly along where a tiara or crown would sit—high enough to frame the face but not so high that it sits on the very top of your head
- Continue until you reach the opposite temple, where you’ll have incorporated most of your hair into the braid
- Secure the end with a small elastic, then pin it smoothly against your head using bobby pins that match your hair color
- Leave loose hair hanging down below the braid for a romantic finish, or secure everything into a low ponytail if you prefer an updo
Quick styling notes:
- This style is easier to execute on longer hair (at least bra-strap length or longer)
- You can embellish the crown with baby’s breath, small flowers, or hair gems for a bridal or special-occasion version
- Practice the braid once or twice before an important event—the technique is straightforward, but muscle memory helps
8. Asymmetrical Bubble Braid with Undercut Detail
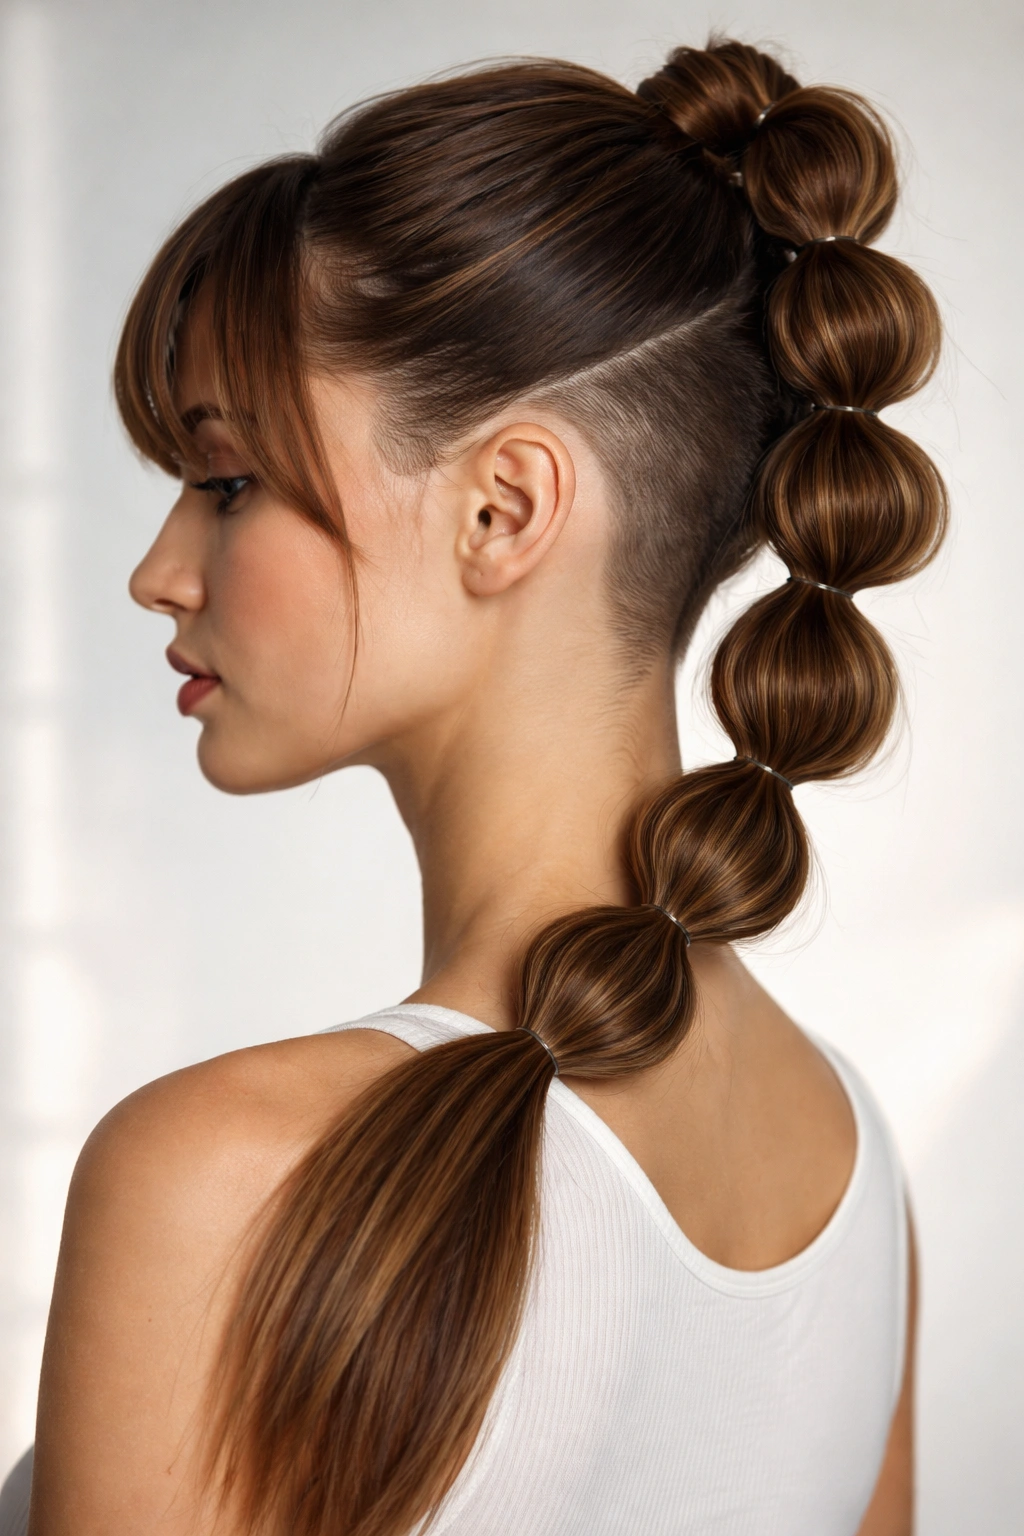
If you’re looking for something with visual edge, an asymmetrical bubble braid paired with an undercut creates a modern, fashion-forward look. This works best if you have (or are willing to temporarily create) an undercut or shaved section at the nape of your neck or behind one ear. The bubble braid sits on top, and when you tilt your head or move around, glimpses of the undercut become visible, creating an element of surprise and edginess. This version is definitely a statement, but on straight hair, the contrast between the polished, sculpted bubbles and the graphic undercut is absolutely striking.
How an Undercut Transforms Bubble Braid Aesthetics
An undercut completely changes the vibe of a bubble braid from soft and romantic to bold and intentional. The undercut reads as a deliberate style choice, and pairing it with something as feminine as bubble braids creates an interesting contrast that feels very current. The undercut also makes the braid itself more visible and prominent—you’re not competing with a lot of hair, so the bubble structure becomes the main focus. This is a look for anyone confident enough to do something unconventional.
Creating This Bold Look
- If you don’t have an undercut, you can create a temporary one using electric clippers with the shortest guard, shaving a section at your nape or behind one ear
- For a temporary version, you can buzz one section and let your hair grow back, or you can create a hidden shave that’s only visible when your hair is up (cut underneath the upper layer of hair)
- Create your bubble braid on the upper portion of your head or on one side, braiding the upper layers of hair
- Secure the braid, then smooth the braid over the undercut area so the contrast between the detailed braiding and the clean undercut is visible
- Style the loose hair hanging down to frame the braid, or pin everything up to showcase both the braid and the undercut
Important note: This is genuinely a bold choice, so make sure it aligns with your personal style and comfort level. If you’re not ready for a permanent undercut, you can try this look with extensions and a clip-in undercut piece before committing.
9. Colored Thread Bubble Braid for Dimension
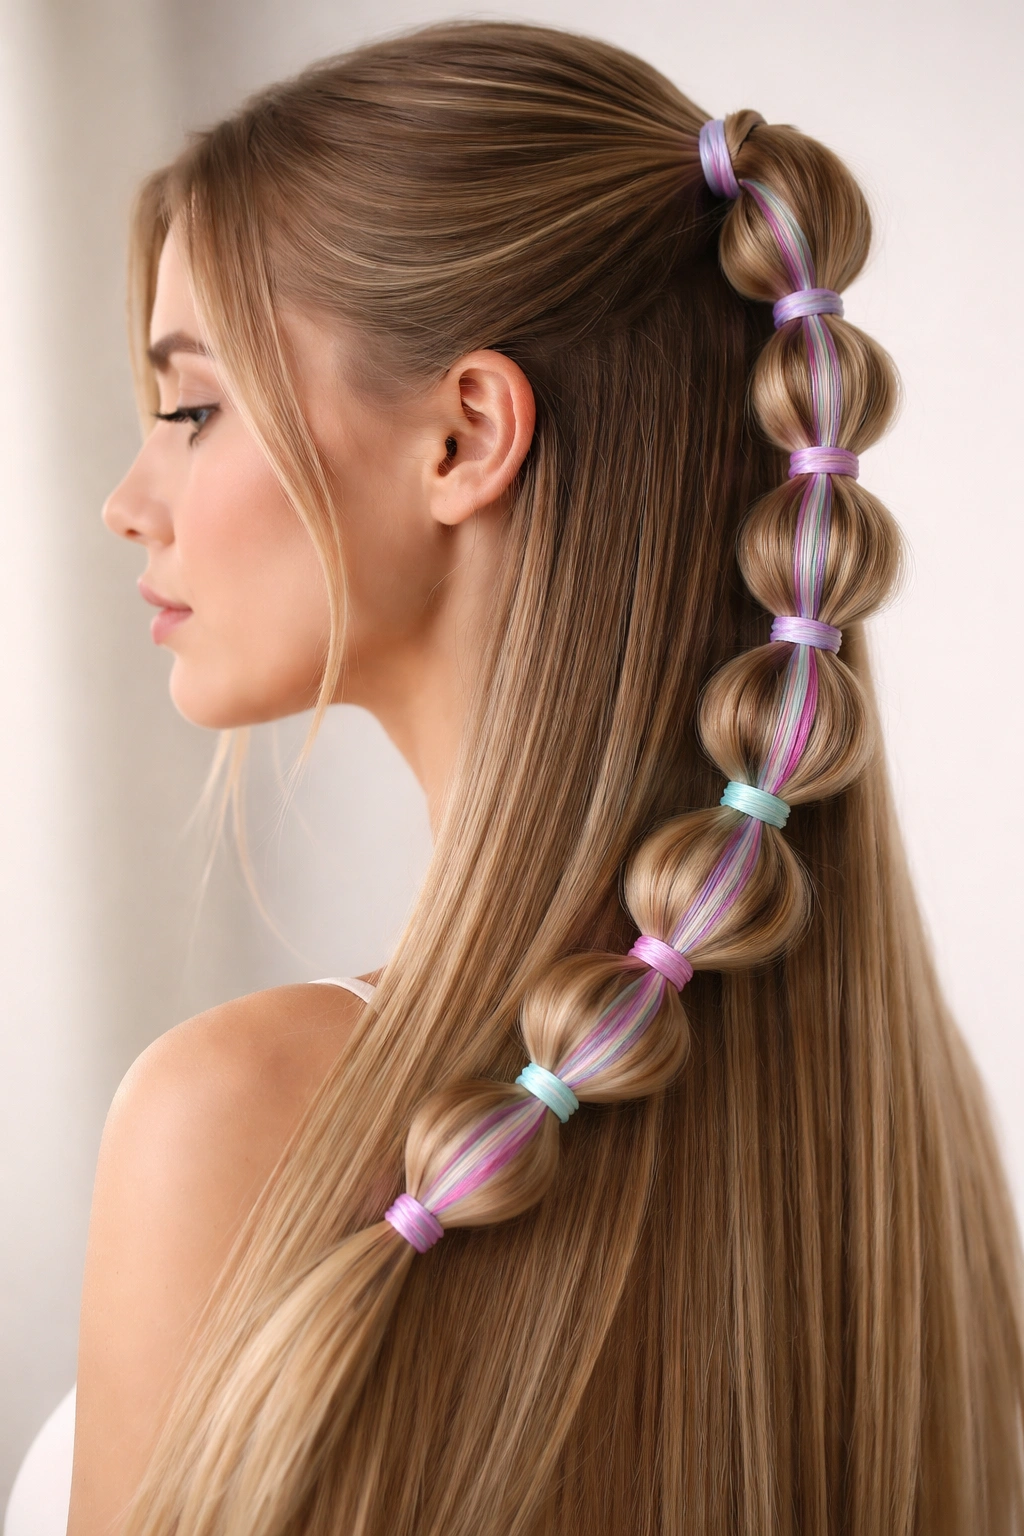
Weave colored thread, embroidery floss, or thin ribbon through your bubble braid to add color without dyeing your hair. You can choose a color that matches your hair, a complementary shade, or something bold and contrasting—the thread runs through the braid itself, so it becomes part of the visual structure rather than sitting on top of it. This version is particularly fun because you can change the color every time you style your hair, experimenting without commitment. On straight hair, the thread becomes very visible within the crisp bubble sections, creating defined lines of color.
Why Threaded Bubble Braids Create Such Visual Impact
When you thread colored material through a bubble braid, the color sits nestled within the braid structure, creating striped or gradient effects depending on how you position it. Because straight hair creates clean, defined bubbles, the color appears very vibrant and organized rather than diffused or hidden. You could use a single color that stands out dramatically, or you could use multiple colors for a more rainbow-like effect. The thread also adds a functional benefit—it helps keep bubbles defined and shapes them more uniformly.
How to Thread Color Through Your Bubble Braid
- Gather your colored thread or thin ribbon (embroidery floss works beautifully and comes in endless colors)
- Create your bubble braid, but stop before you secure the end
- Take your colored thread and weave it through the braid starting at the base, threading it under and over the braided sections
- You can weave it in a straight line down the center, or you can spiral it around the braid for a more dynamic effect
- Once you’ve woven it through the entire braid, secure both the braid and the thread with an elastic
- If desired, weave the thread back through once more in a different pattern for added color depth
- Secure any loose thread ends with a small knot or by incorporating them into your elastic
Pro tip: Use a thin embroidery needle to help you thread material through tight sections without pulling hair or creating tension on your scalp.
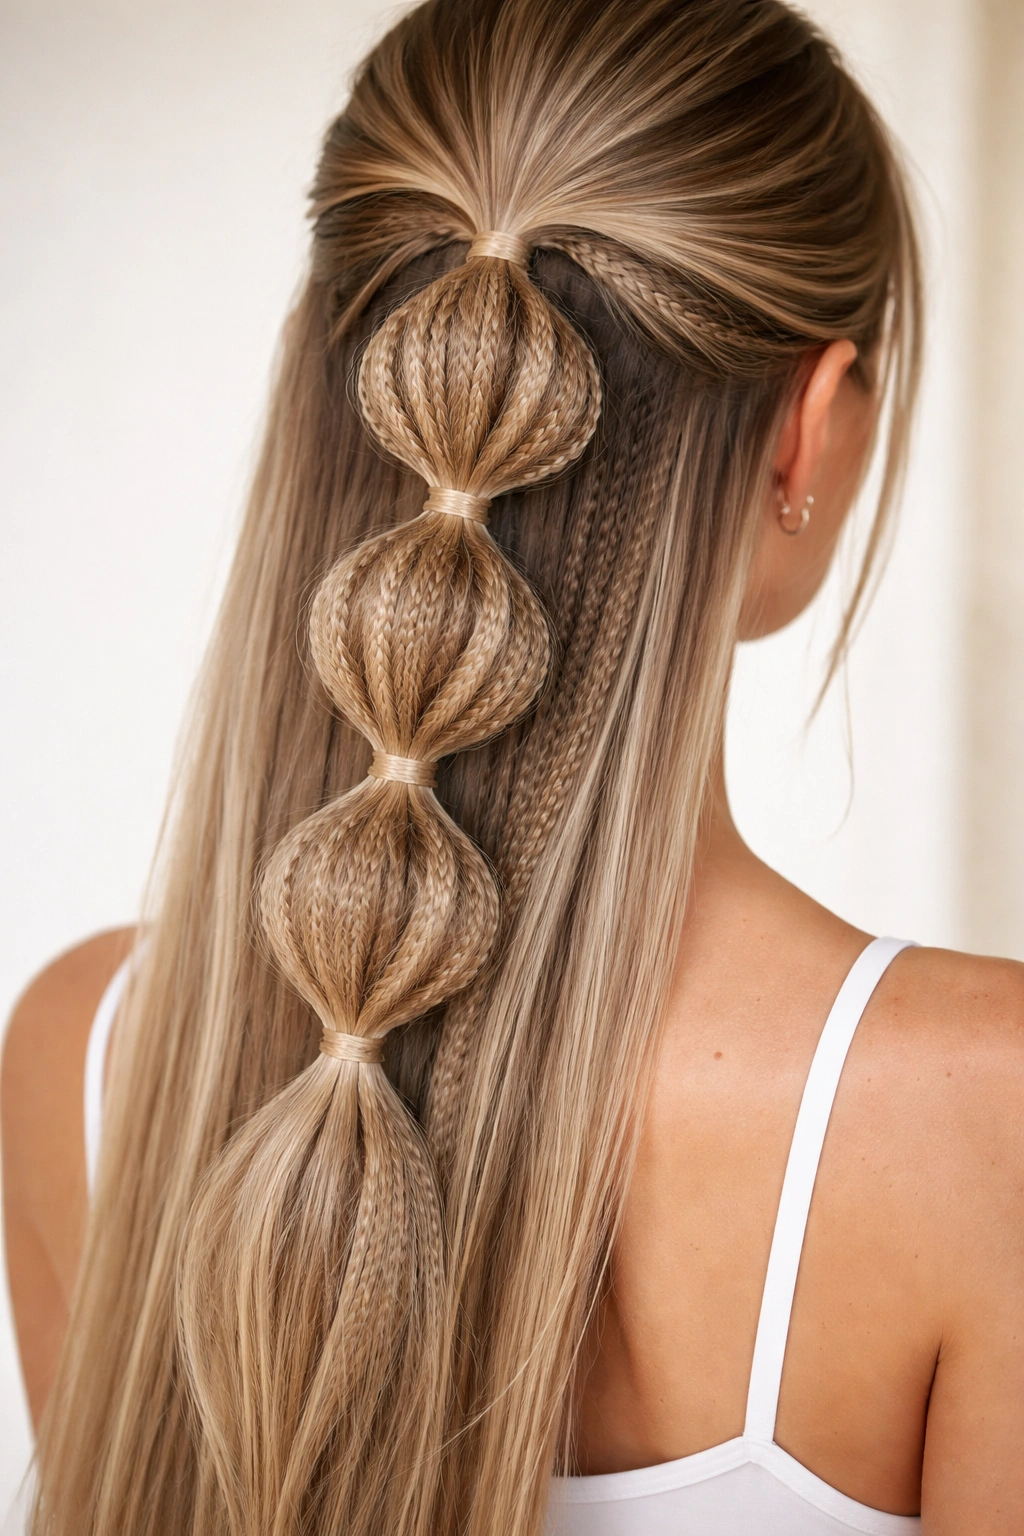
10. Bubble Braid Half-Up Style with Volume at the Crown
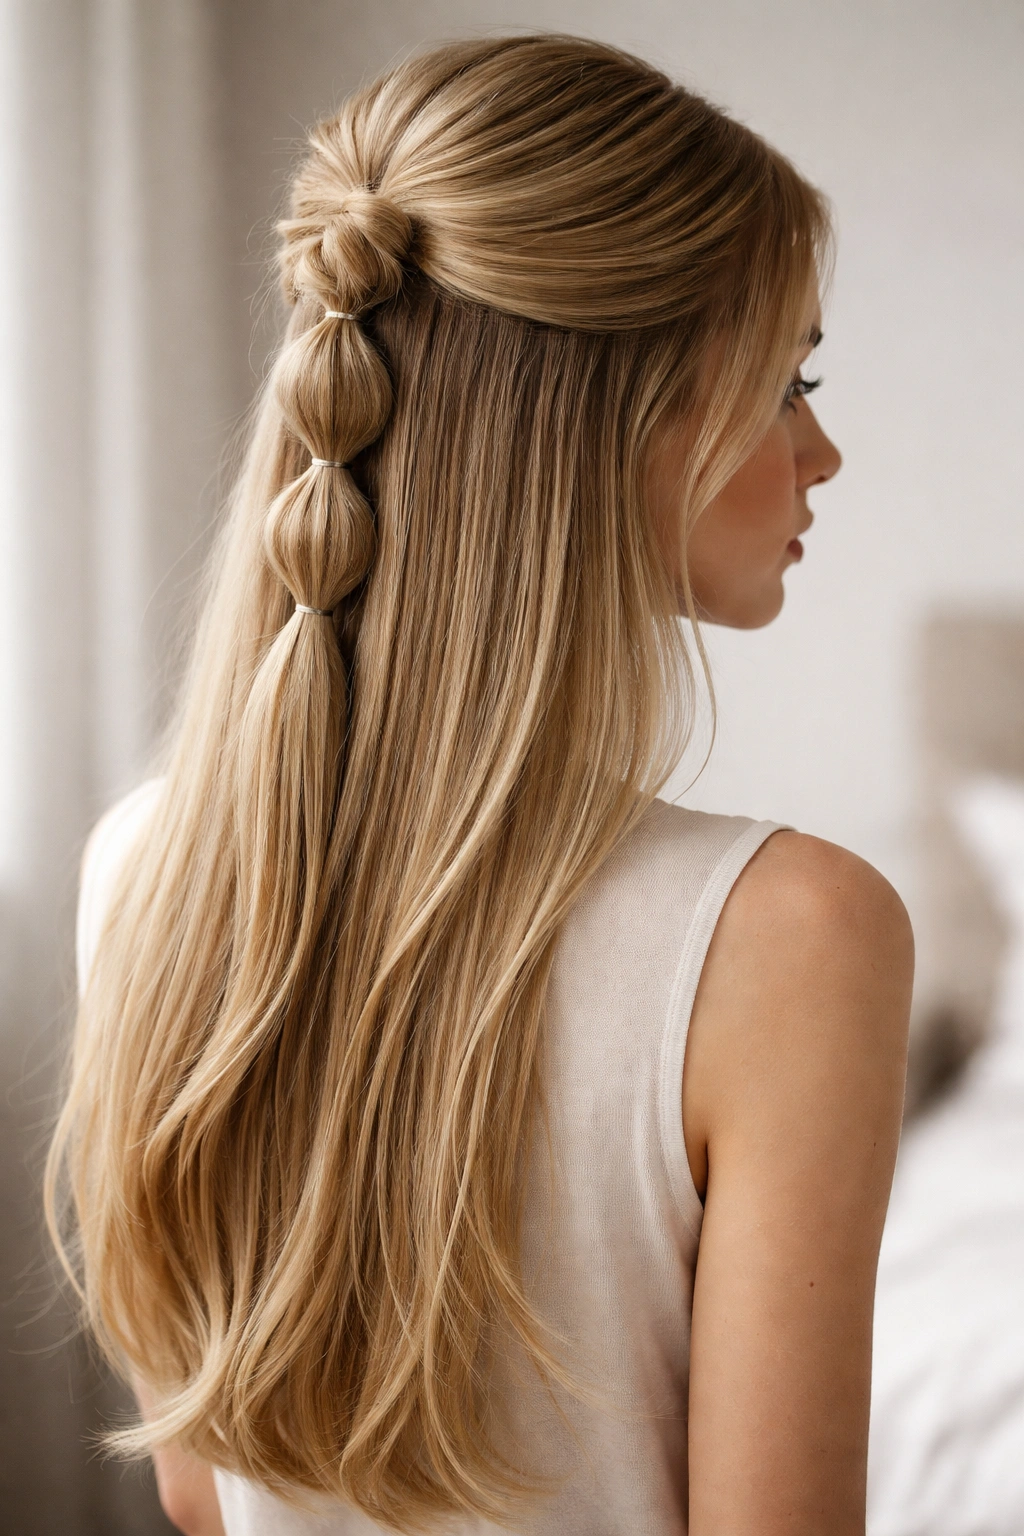
Combine the bubble braid with a half-up, half-down style to balance polished structure with soft, loose waves. You’re creating the bubble braid using only the top half of your hair, while the bottom half remains down and loose. This version is perfect if you want volume and interest without committing to a full updo. It works beautifully for casual days when you want your hair styled but not overly formal, and it’s particularly flattering because it frames your face while keeping some movement going.
Why This Half-Up Approach Feels Perfectly Balanced
The half-up, half-down format gives you the visual interest and intentionality of a styled braid without the commitment of putting all your hair up. The loose bottom half creates movement and softness, while the braided top creates structure and design. On straight hair, this contrast is especially effective—the smooth, sleek bubble braid at the top emphasizes the sleekness, while loose straight hair below emphasizes length and movement. You get the best of both worlds: polish and ease.
How to Execute a Half-Up Bubble Braid
- Leave the bottom half of your hair completely down and loose
- Take the top half and gather it at the crown, securing loosely with a clip
- Release only the crown section and begin creating a bubble braid using just this upper portion of hair
- The braid should start at roughly ear height and move upward and back toward the crown
- Create your bubbles as you normally would, ensuring they’re even and well-defined
- Once you’ve braided all the crown section, gather any remaining piece into a small ponytail and secure with an elastic
- If desired, you can wrap the tapered end of the braid around the base of the ponytail for a seamless look
- Release the clipped hair underneath—your full length of straight hair is now down, with a beautiful bubble braid crown on top
Worth knowing:
- This style looks best on hair that’s at least bra-strap length, since you want enough loose hair below the braid to create visible movement
- You can add waves to the loose bottom half using a waver or curling iron for extra texture and dimension
- This is an ideal everyday style that takes maybe ten minutes to execute once you’ve practiced it
Key Takeaways
Bubble braids on straight hair offer something genuinely special: clean lines, defined texture, and the ability to create polished looks that feel both intentional and effortless. The straight-hair advantage means you don’t need to fight frizz or work around natural texture variations—you’re simply working with a smooth canvas that makes every bubble crisp and visible. Whether you’re going for romantic crown braids, modern asymmetrical styles, or playful double braids, the foundation is the same: master the basic technique of braiding and gently pulling out sections, then adapt it to whichever style calls to you.
The real magic of these styles is that they’re not actually complicated—they just look like they took forever. Once you understand the principle of creating bubbles by pulling out braided sections, you can apply that technique to endless variations. You can position the braid anywhere on your head, incorporate threads or ribbons, add texture with crimps, or combine it with other styling elements. The versatility is genuinely impressive, which is why bubble braids have become such a staple across different age groups and style preferences.
Your straight hair is actually the perfect canvas for experimenting with these styles, so don’t hold back. Try the sleek, polished versions for work or formal events, and try the textured or embellished versions for fun and creativity. Each time you practice, your hands will develop muscle memory and your instincts will sharpen. What felt like it took forever on attempt one will feel natural and quick by attempt five. And honestly, even slightly imperfect bubble braids look intentional and beautiful on straight hair—the clean base makes everything work.