Straight hair has a reputation for being “too sleek” or “too polished” for boho styles—but that’s actually a misconception that’s holding you back from some genuinely gorgeous braiding possibilities. The truth is, straight hair takes braids beautifully because the strands have natural grip, hold their definition, and create clean, intentional lines that feel effortlessly chic. The key is understanding which braid styles work best with your hair’s texture and how to add those soft, undone touches that make boho braids feel authentic rather than overly constructed.
Boho braiding isn’t about perfectly symmetrical, tight plaits. It’s about embracing a relaxed, romantic aesthetic that looks like you didn’t try too hard—even though you absolutely did. The good news? Straight hair actually makes this easier because the styles hold their shape without needing tons of product buildup or texture manipulation. You just need to know how to soften the edges, add strategic waves, and choose braid styles that naturally complement the way your hair falls and moves.
The styles that work best on straight hair are ones that either create their own texture through the braiding technique itself, or play up the sleekness with loose, flowing variations. Whether you’re going for a delicate accent braid or a full statement style, there’s a boho option that’ll look stunning with your straight hair. Let’s walk through the most flattering styles and exactly how to execute them.
1. Dutch Braid Crown
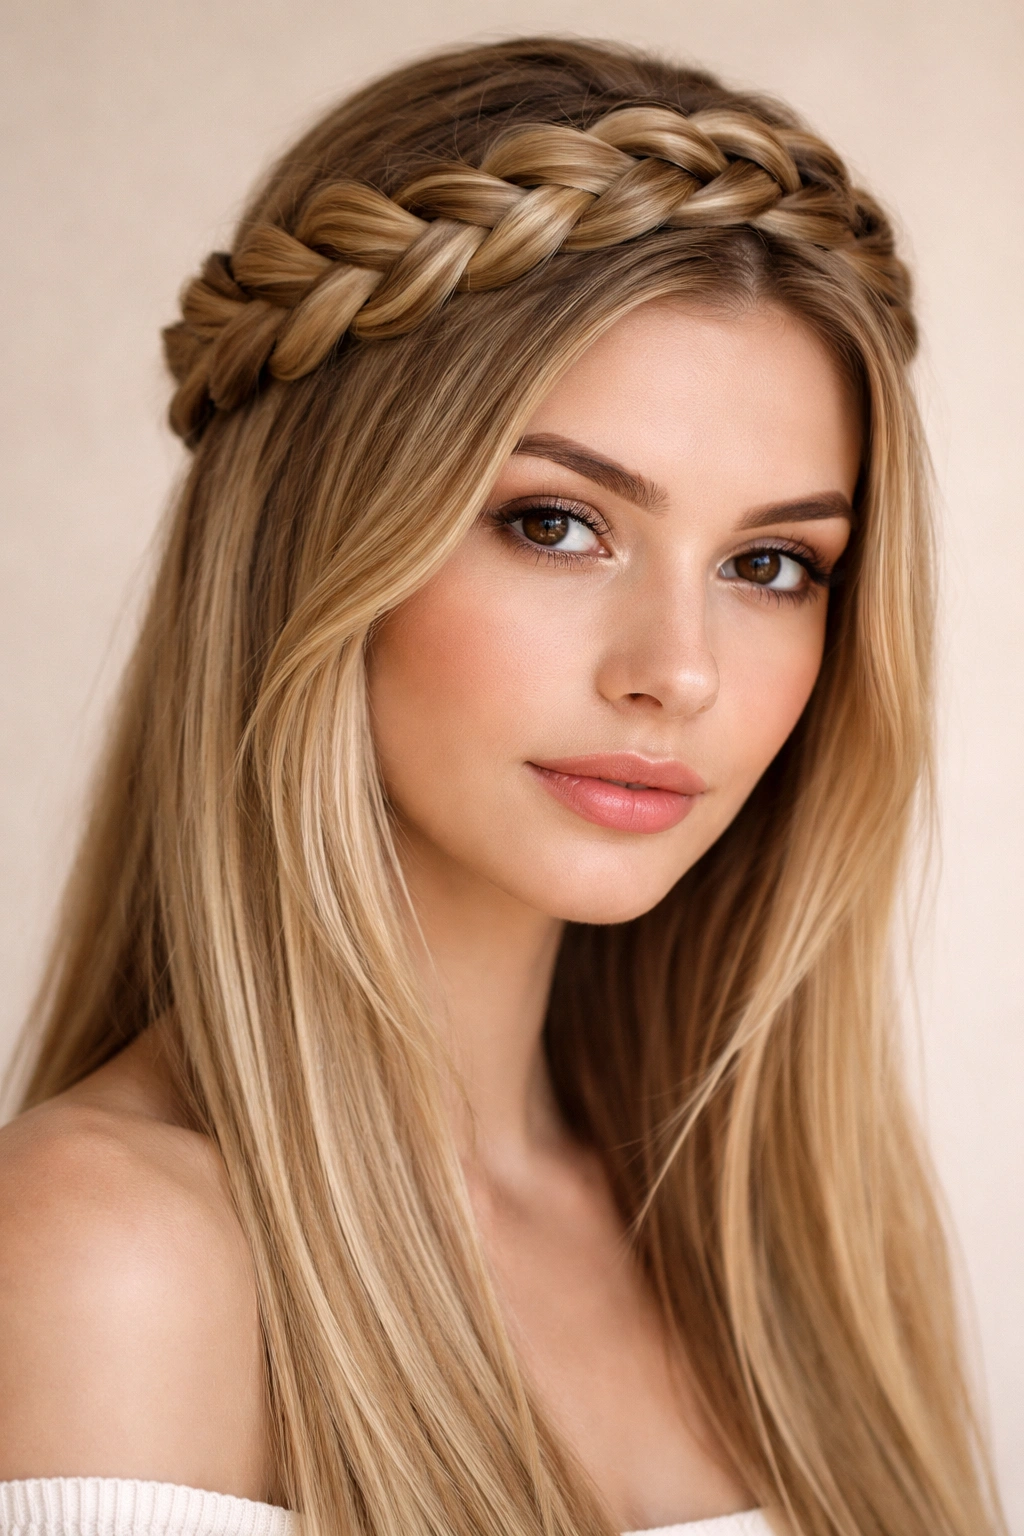
A Dutch braid crown—braids woven from one side of your head to the other in an arc—creates an instant boho vibe that feels romantic and put-together. What makes this work beautifully on straight hair is that the braid creates its own texture, giving your smooth strands some visual interest and dimension. The crown placement draws attention upward and creates a soft frame around your face, which straight hair shows off perfectly.
Why This Style Works for Straight Hair
Dutch braids actually benefit from straighter hair because the plaits sit flatter against your head and create cleaner, more intentional lines. On straight hair, you can see the precise interlocking pattern, which reads as more intentional and design-forward. The braid doesn’t get lost in texture—it becomes the focal point. This style also holds beautifully throughout the day without needing a ton of hair spray or styling products that can weigh down fine or delicate straight hair.
How to Create the Look
- Start on one side of your head at temple level, separating about a 2-inch section of hair
- Dutch braid (braid under instead of over) toward the back of your head, gradually picking up more hair as you work backward
- Bring the braid all the way across the crown to the other side of your head
- Pin the braid end behind your opposite ear using bobby pins that match your hair color
- Gently loosen the braid by pulling small sections outward—this softens the look and adds boho texture
Pro tip: If your straight hair feels slippery, mist it with texturizing spray before braiding to give the strands more grip so the braid holds tighter and lasts longer.
2. Loose Fishtail Braid
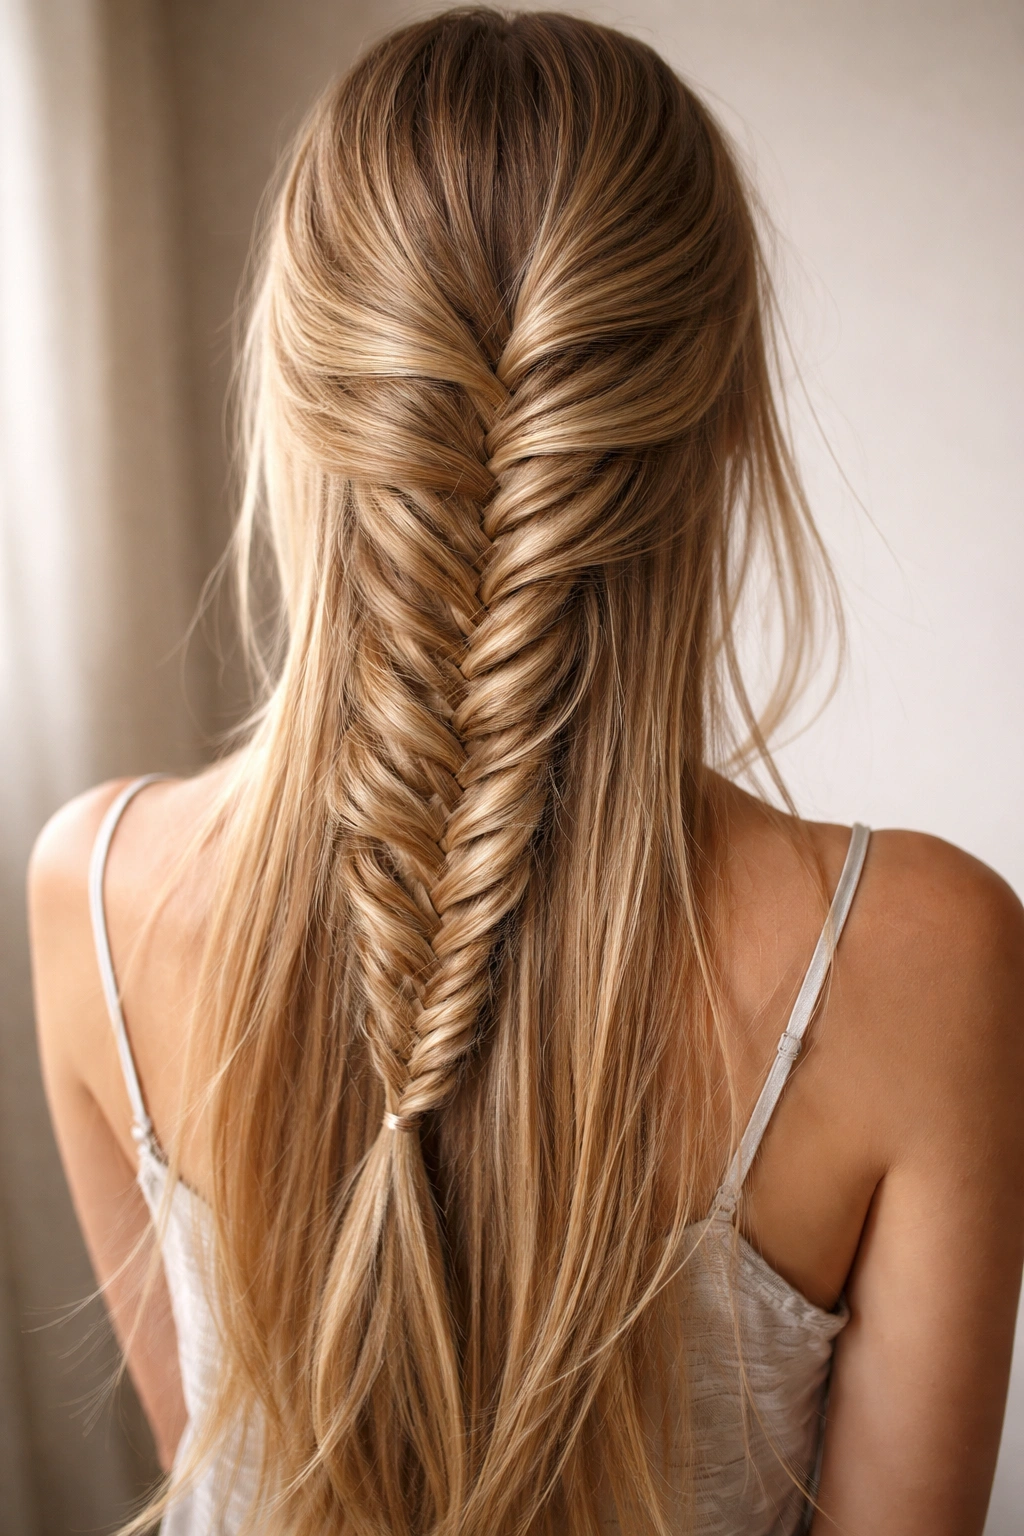
The fishtail braid is the definition of boho—it looks intricate and complicated, but it’s actually easier than a three-strand braid once you get the technique down. On straight hair, a loose fishtail has this gorgeous, almost lacy appearance because you can see all the woven sections clearly without texture creating confusion or bulk. The loose interpretation makes it feel relaxed and intentional, which is exactly what boho is about.
Why This Style Works for Straight Hair
Fishtail braids look their most elegant and defined on straight hair because each tiny section of woven hair catches the light differently. You get visual interest and movement without needing your hair to already have waves or texture. The looseness is key—a tight fishtail on straight hair can look harsh, but one that’s been gently pulled apart has this dreamy, undone quality that’s pure boho.
How to Create the Look
- Start with clean, straight hair or hair with a light wave
- Divide your hair into two thick sections at the nape of your neck
- Take a small piece from the outside of one section and cross it over to the other section
- Take a small piece from the outside of the second section and cross it back
- Continue alternating, taking small pieces and crossing them over until you reach the end
- Gently pull and loosen the braid, working from the bottom upward to release more texture
- Secure with a clear elastic or a thin hair tie
Worth knowing: Start with thicker sections than you think you need—it makes the early learning curve easier, and the finished braid still looks beautifully detailed.
3. Side Swept Braid
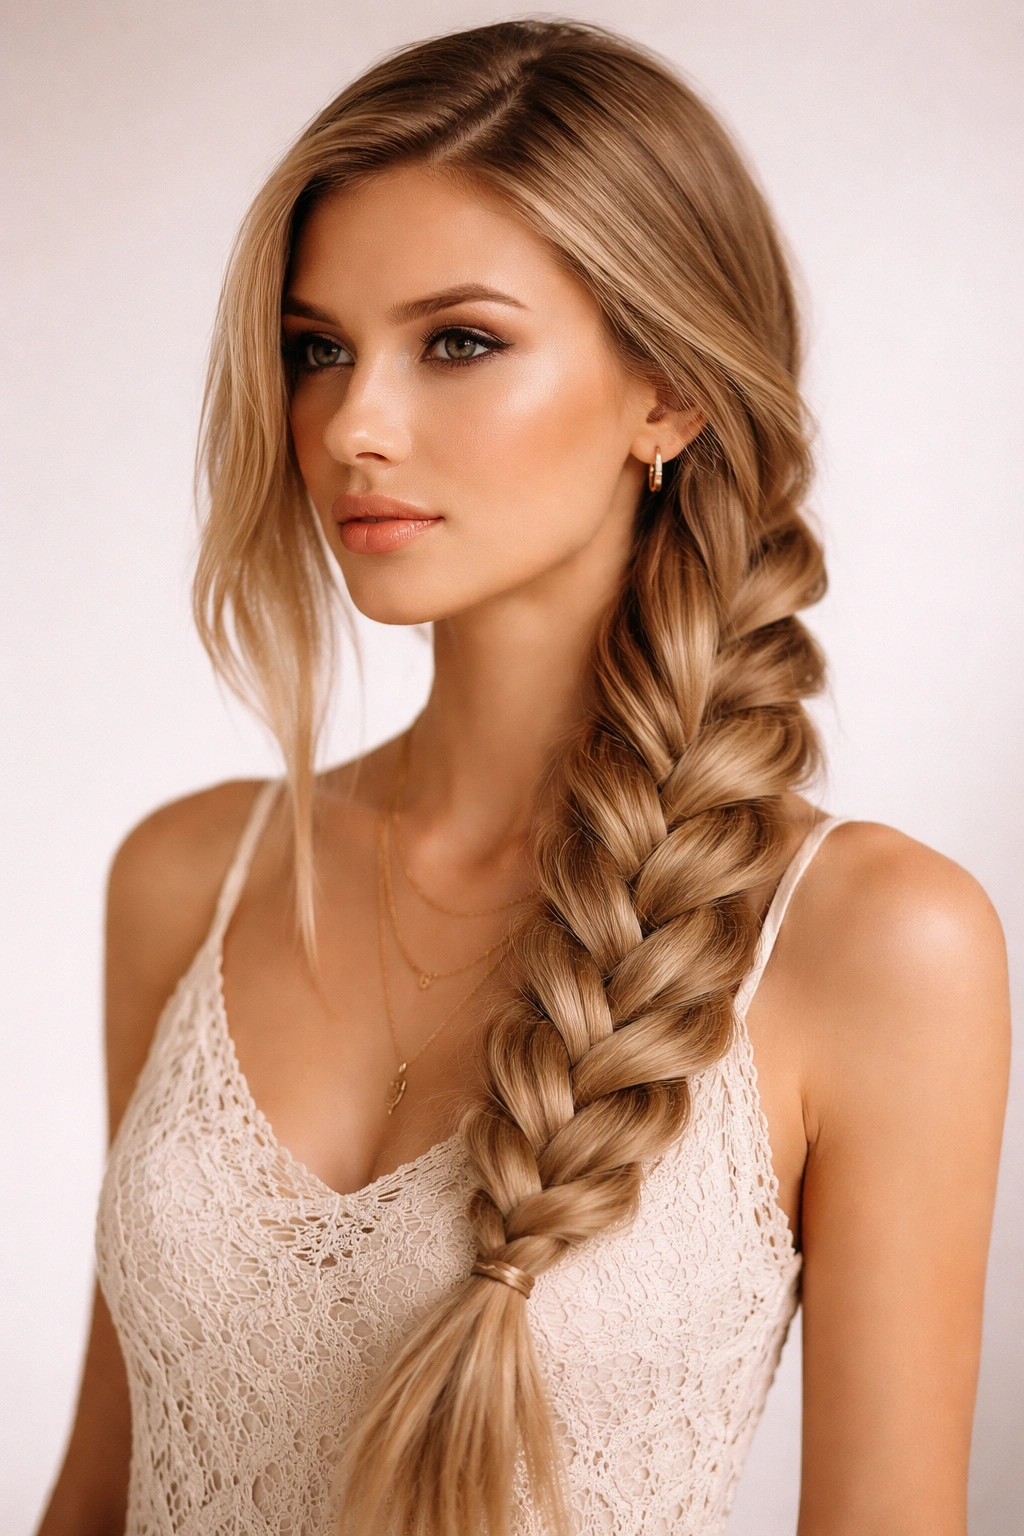
A side braid that sweeps dramatically across one shoulder is the ultimate boho statement—it’s feminine, romantic, and photographs beautifully. On straight hair, the clean lines of the braid become a design element rather than just a functional style. The side placement creates asymmetry, which is core to boho aesthetics, and straightness means the braid stays put without needing it pinned down constantly.
Why This Style Works for Straight Hair
The strength of this look is that on straight hair, the braid catches light along its entire length, creating definition and visual impact without texture. The severity of perfectly straight hair is softened by the braid itself, plus the side placement creates movement and flow. This works whether you do a tight three-strand braid or a looser fishtail variation—both read beautifully on straight hair.
How to Create the Look
- Start your braid at the crown on one side, or begin a three-strand braid high at the back of your head
- Braid down at an angle toward the opposite shoulder, picking up sections as you work downward
- Bring the braid all the way over your shoulder and down your chest for maximum drama
- Secure at the end with an elastic, and pull the braid gently to loosen it
- Consider leaving a few face-framing pieces unbraided for softness
Pro tip: Brush your hair to one side and let it sit for a few minutes before braiding—this trains the hair to fall naturally in that direction, making the braid look intentional rather than forced.
4. Boho Braided Bun
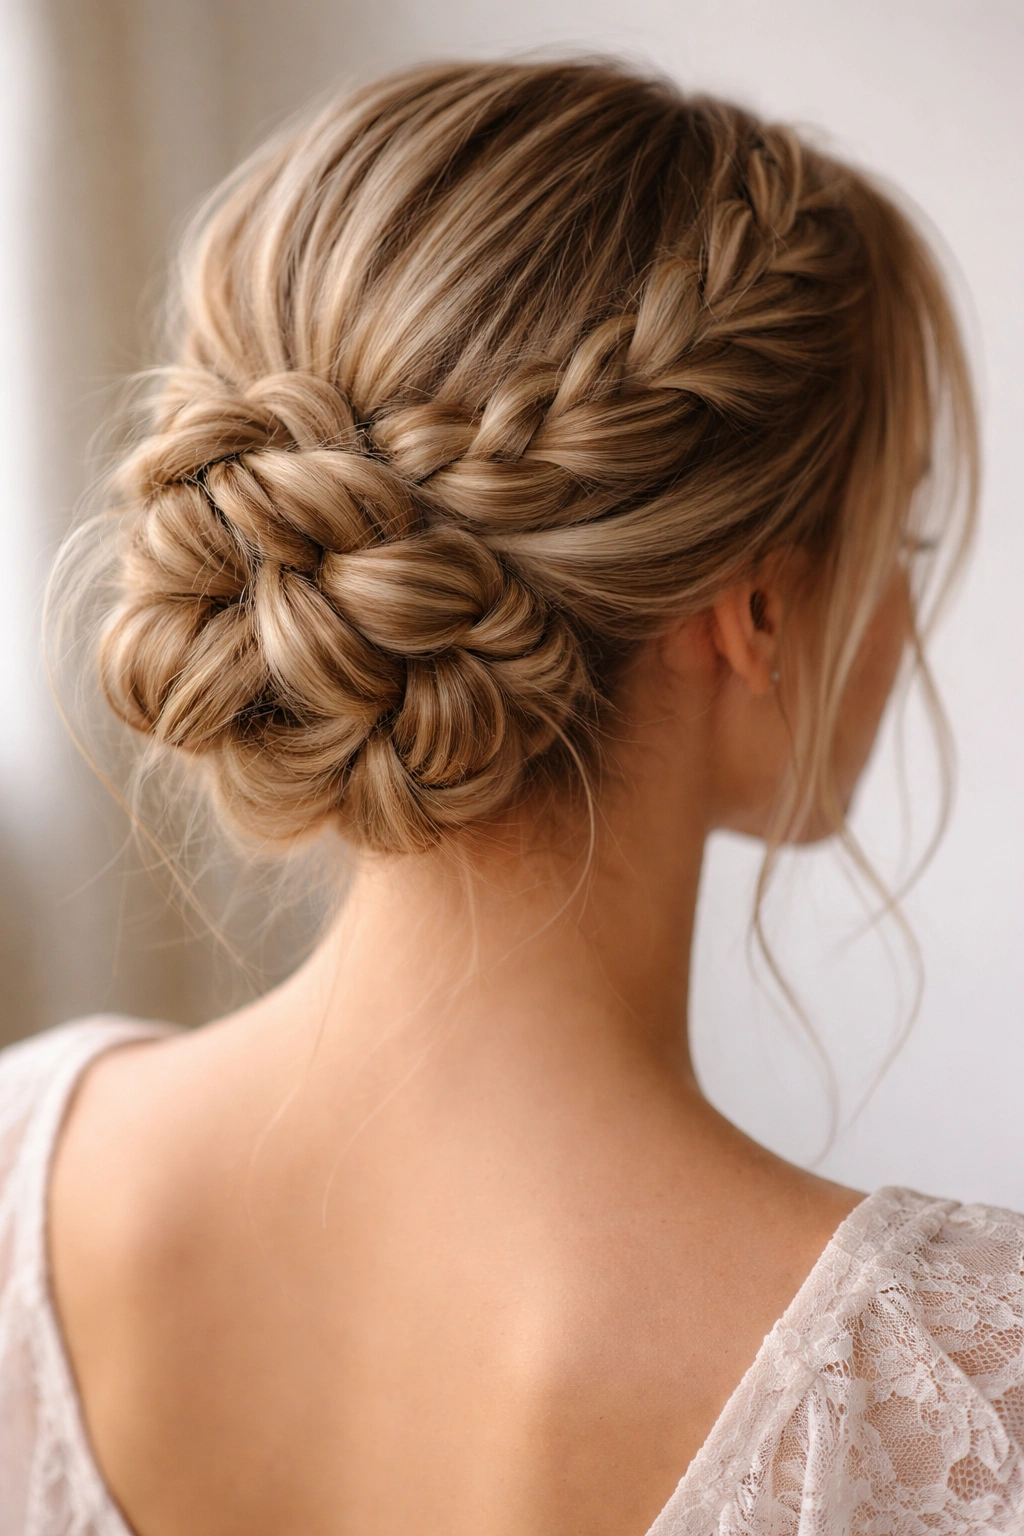
A bun made from braids is the ultimate hybrid style—it’s polished enough for work or a special occasion, but the braids keep it relaxed and bohemian. On straight hair, the braids create texture that prevents the bun from looking too sleek or severe. It’s basically the best of both worlds: the sophistication of an updo with the romantic vibe of boho braiding.
Why This Style Works for Straight Hair
Straight hair can sometimes make updos look too pulled-back and harsh, but when you use braids as the base for your bun, you’re automatically adding visual interest and softness. The braids break up what might otherwise be a very smooth, tightly pulled style. Plus, on straight hair, braids hold really well in an updo without needing tons of pins or products.
How to Create the Look
- Create two Dutch braids starting from the crown, one on each side of your head
- Bring both braids toward the back, gathering them into a low ponytail
- Twist the ponytail gently and wrap it around itself to form a bun shape
- Secure with bobby pins, tucking the ends of the braids underneath
- Gently pull sections of both braids outward to add looseness and texture
- Add a few face-framing pieces by gently pulling them out of the braids
Worth knowing: The looser you pull the braid sections, the more romantic and boho the final bun will look—tight braids equal a more polished vibe, while loose sections create pure boho texture.
5. Double Braid with Ribbons
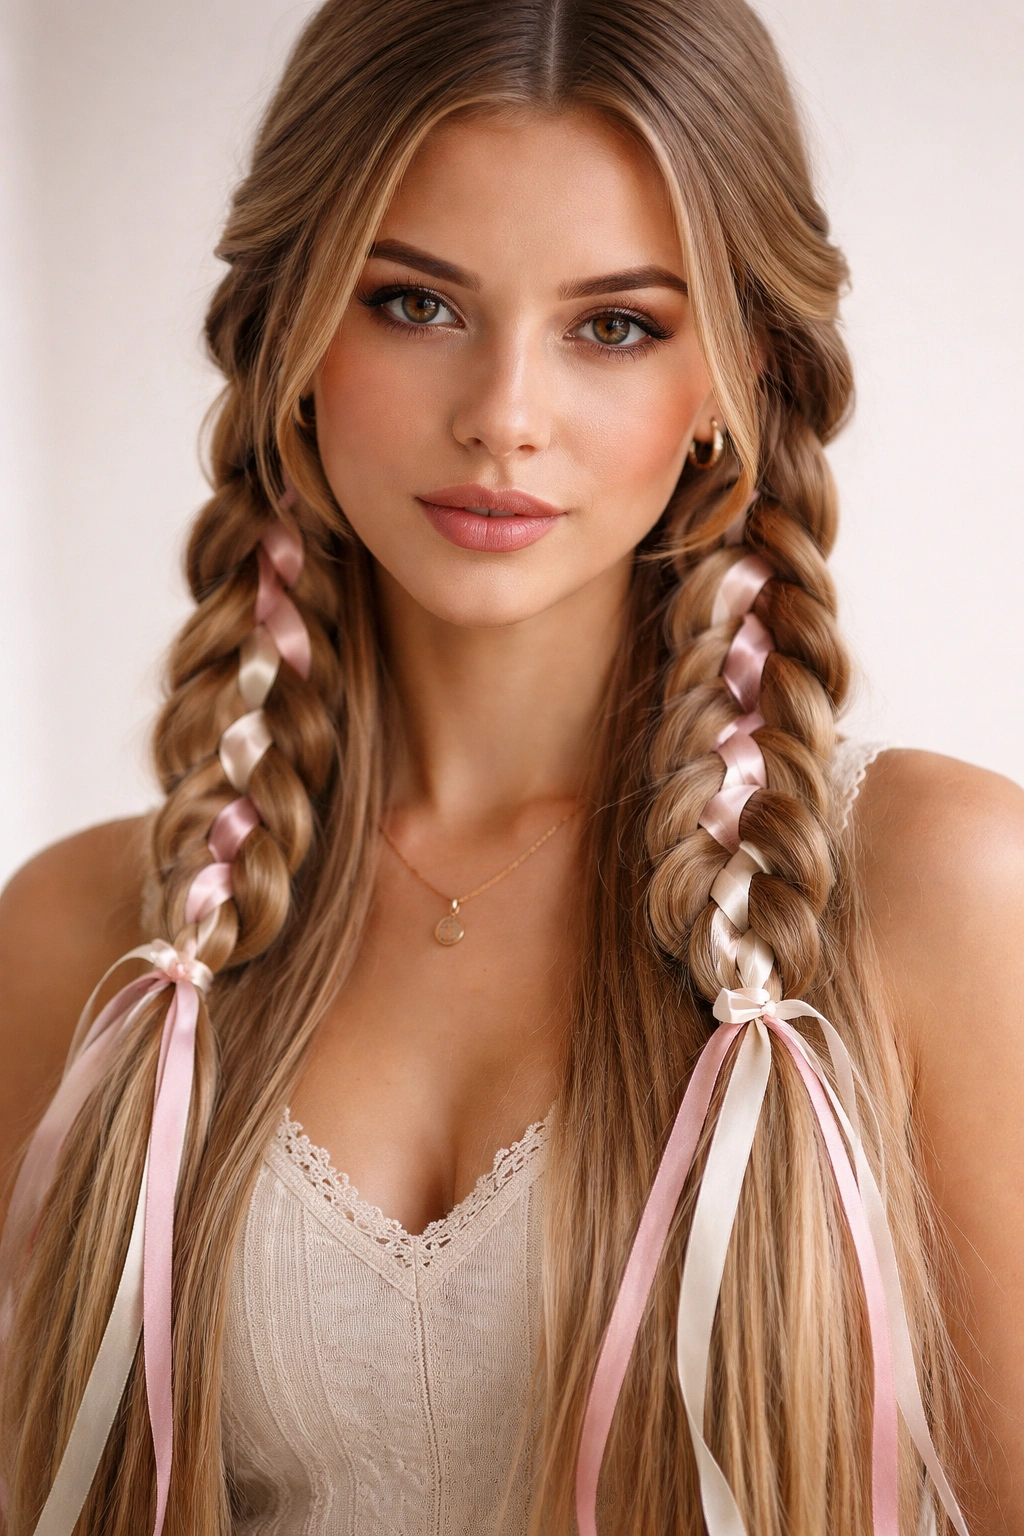
Adding ribbons to braids is a classic boho move, and on straight hair, the ribbon creates amazing contrast and visual interest. A double braid situation (one on each side, incorporated with ribbon) feels young, romantic, and intentionally styled without looking overly done. Straight hair provides the perfect clean canvas for the ribbon to shine as a design element.
Why This Style Works for Straight Hair
The ribbon adds color, texture, and intentionality to the style in a way that’s very boho. On straight hair, the ribbon sits perfectly within the braid without getting tangled in waves or texture. You see the pattern clearly—where the hair is, where the ribbon is, how they interact. It’s almost like adding jewelry to your hair, and straight hair shows off that detail beautifully.
How to Create the Look
- Choose a thin ribbon in a color that complements your hair (metallics, pastels, or jewel tones all work)
- Create a three-strand braid on one side of your head, weaving the ribbon in as the fourth element
- Once you’ve pinned that braid, create a matching braid on the other side with the same ribbon
- Leave both braids slightly loose—pull gently to release texture
- You can leave the braids down over your shoulders or gather the ends into a low ponytail
Pro tip: Use a silk ribbon rather than a satin one—silk is gentler on your hair and creates a softer, more romantic look that feels very boho.
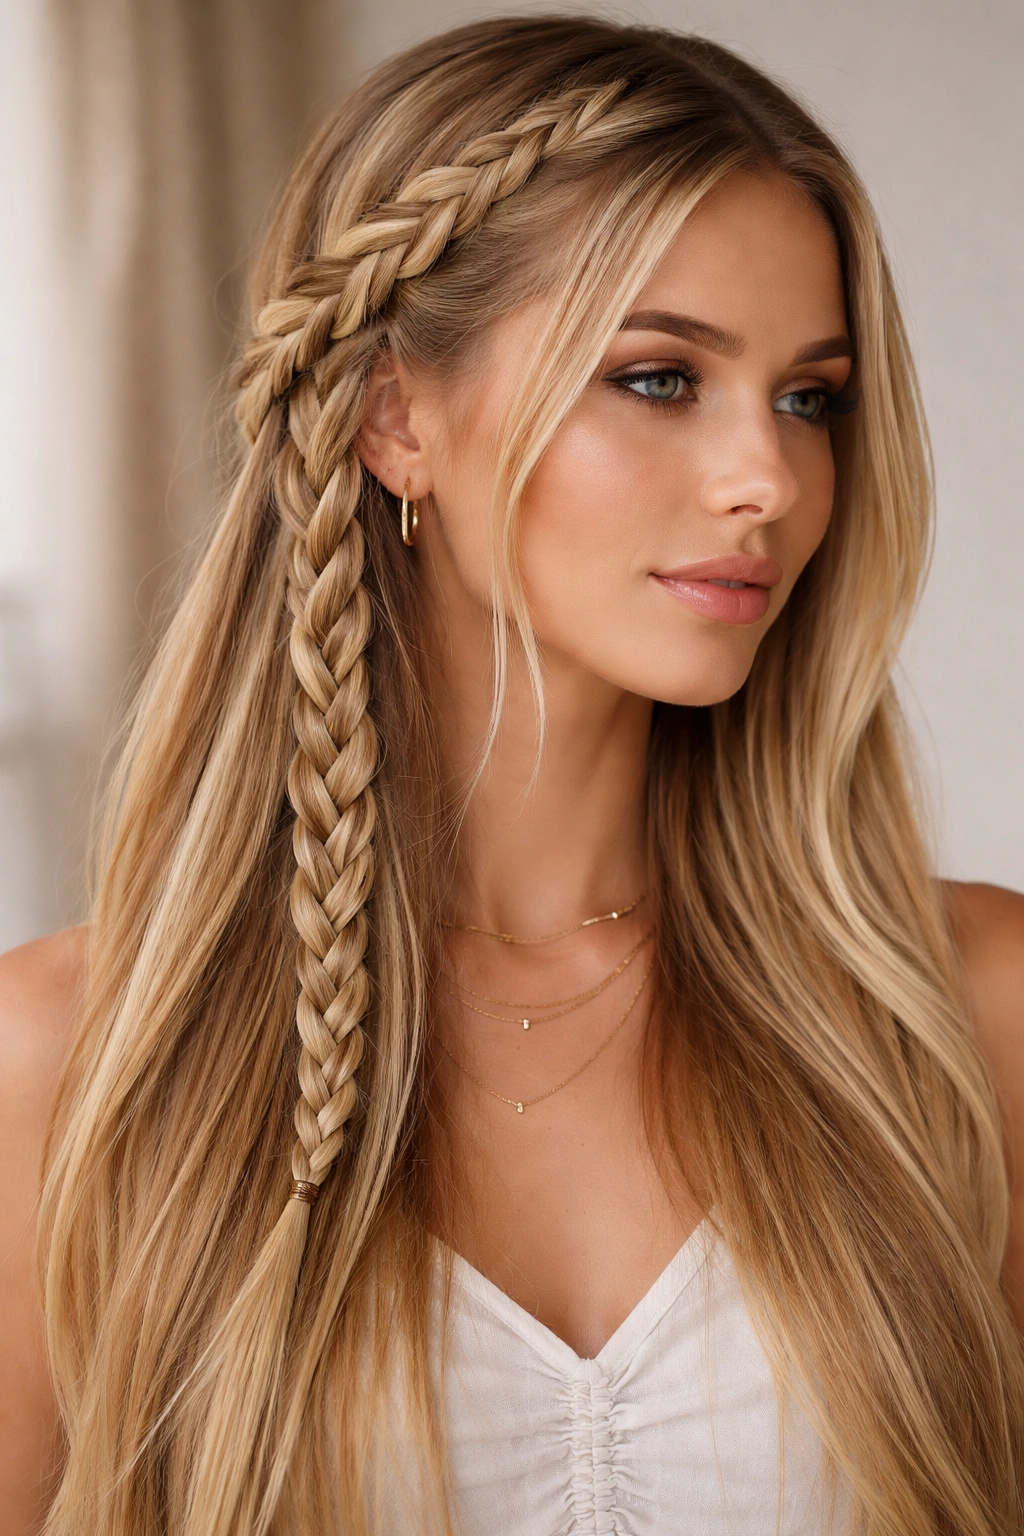
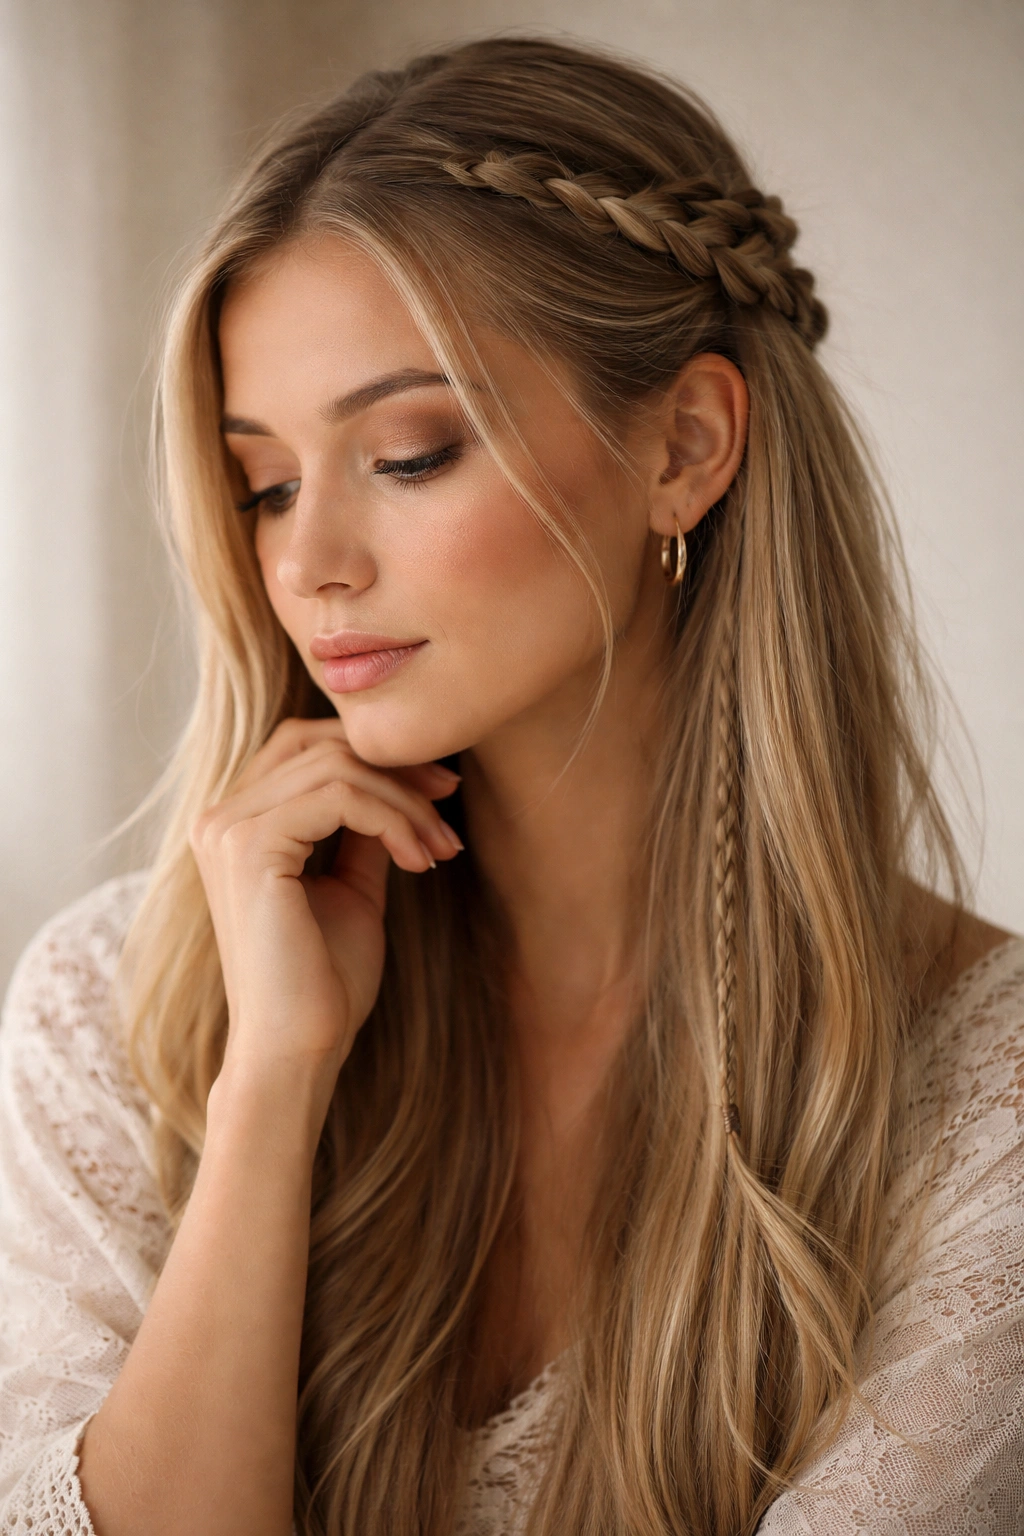
6. Half-Up Braided Look
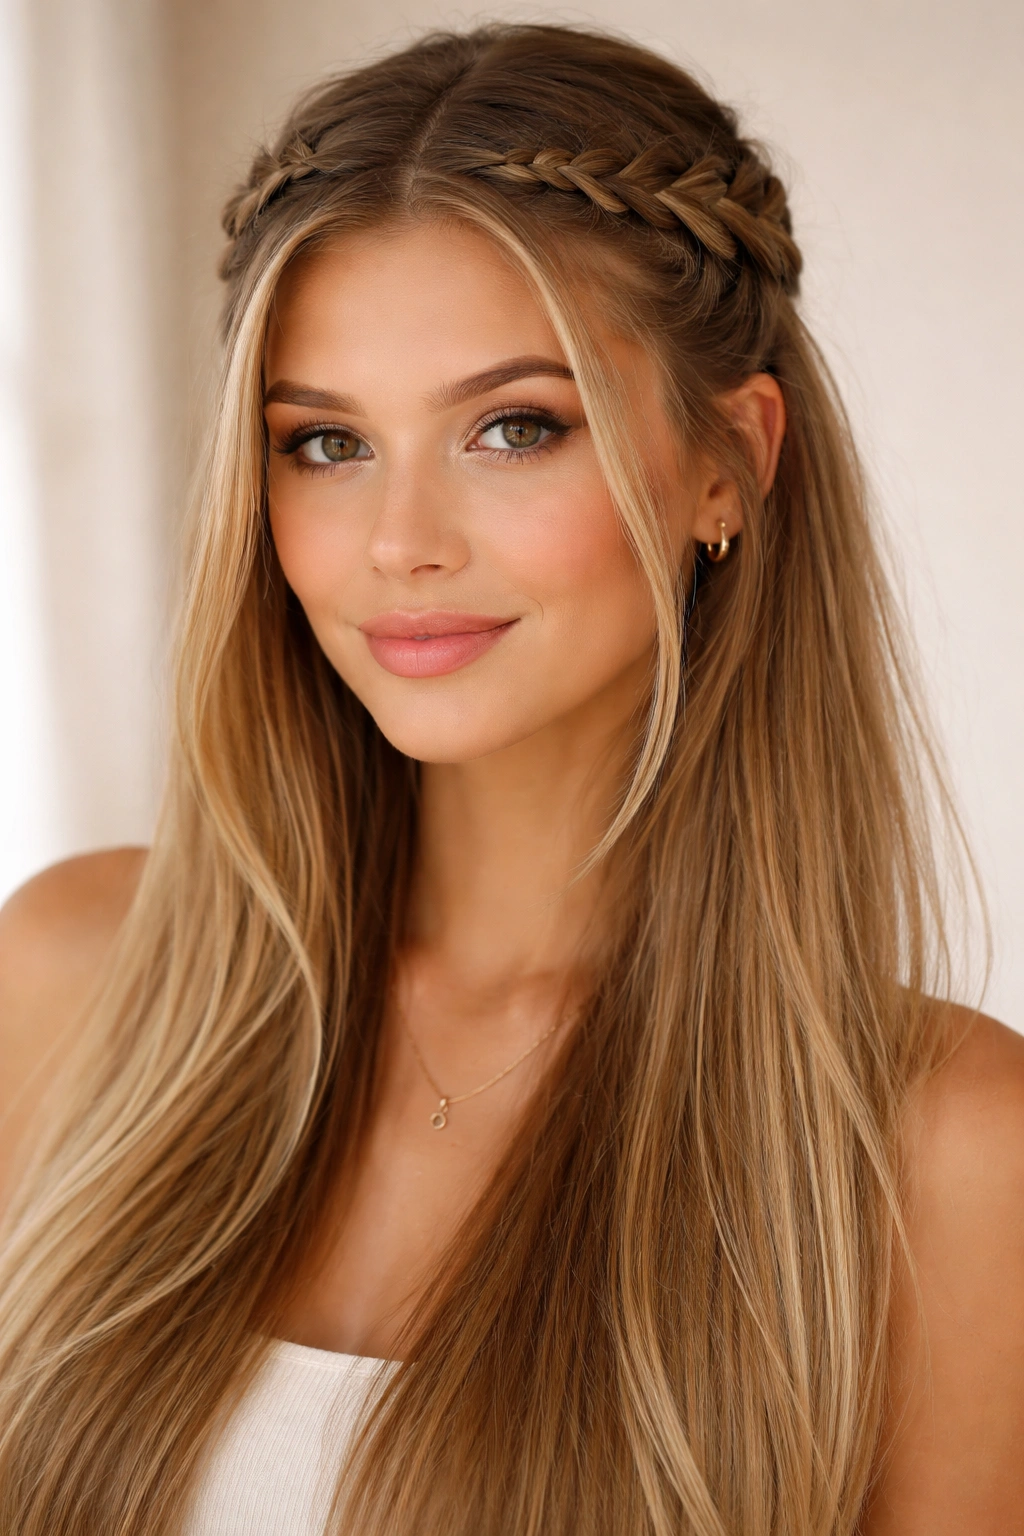
The half-up braided style keeps hair down and flowing while still incorporating a structured braid element at the crown—it’s the perfect balance of boho and practical. On straight hair, you can create a braid that looks intentional and clean while leaving the rest of your hair free to move and showcase its natural shine.
Why This Style Works for Straight Hair
This style works because the braid at the top breaks up what might otherwise be a very sleek, pulled-back look. Straight hair can sometimes read as too uniform or flat, but adding a braid element—even just half-way up—creates dimension and visual interest. Plus, you’re still showing off the length and health of your straight hair, which is beautiful.
How to Create the Look
- Take a section of hair from one temple and start a Dutch braid or fishtail braid at temple level
- Braid toward the back of your head, picking up small sections from the crown as you work backward
- Bring the braid to the center back of your head
- Secure it with a small clip or bobby pins
- Leave the rest of your hair down and brush it straight
- If desired, add waves or curls to the loose hair with a curling iron for textural contrast
Worth knowing: The contrast between the structured braid on top and the straight, sleek hair below is actually very boho—it shows intention without being overdone.
7. Milkmaid Braids
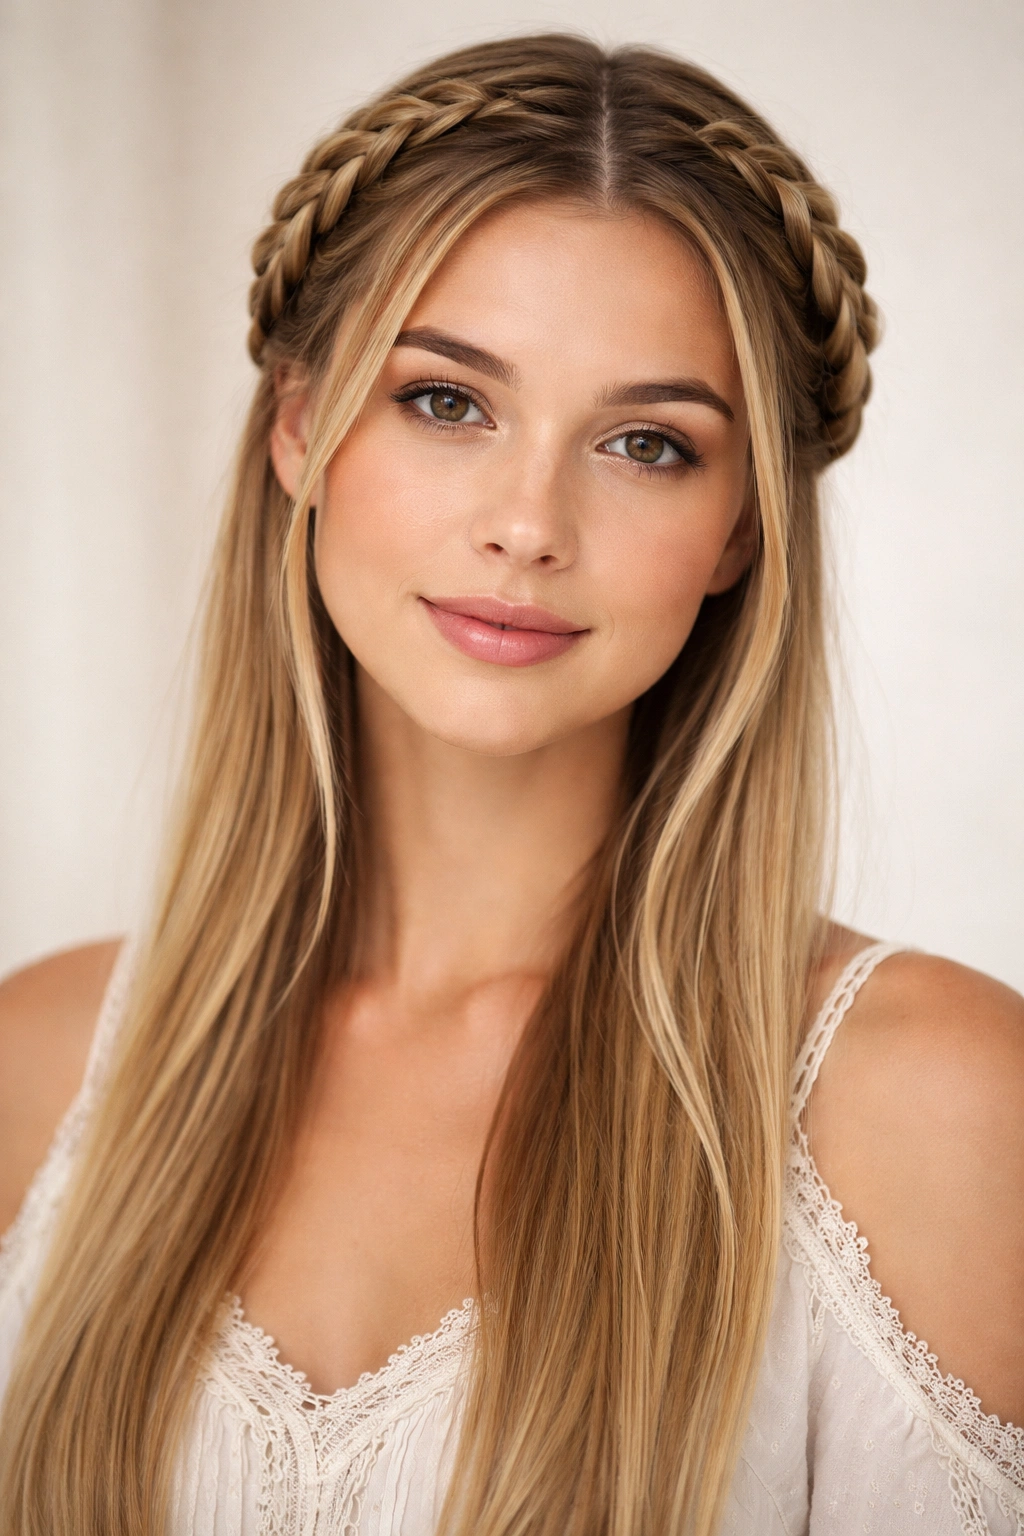
Milkmaid braids are two braids wrapped around the crown of your head like a halo, and they’re endlessly romantic and boho. This style works wonderfully on straight hair because the braids create a frame around your face and head, while the straightness means the braids stay neat and defined throughout the day.
Why This Style Works for Straight Hair
Milkmaid braids on straight hair have this fairytale quality—the braids are clean and intentional, creating a clear frame around your face. On straight hair, each braid sits exactly where you position it without shifting or getting lost in texture. The style reads as very deliberate and design-forward, which is very boho in the most intentional way.
How to Create the Look
- Create a three-strand braid on one side of your head, starting from behind your ear and braiding back toward the opposite side
- Bring the first braid across the top of your head, securing it on the opposite side with bobby pins
- Create a second braid on the other side of your head, braiding it toward the first braid
- Wrap the second braid around and over the first one, securing it with bobby pins
- Gently pull and loosen both braids to add softness and boho texture
Pro tip: This style is easier if you create thicker braids at the start—they’re easier to handle and wrap, and they still look beautifully detailed once you loosen them.
8. Braided Halo
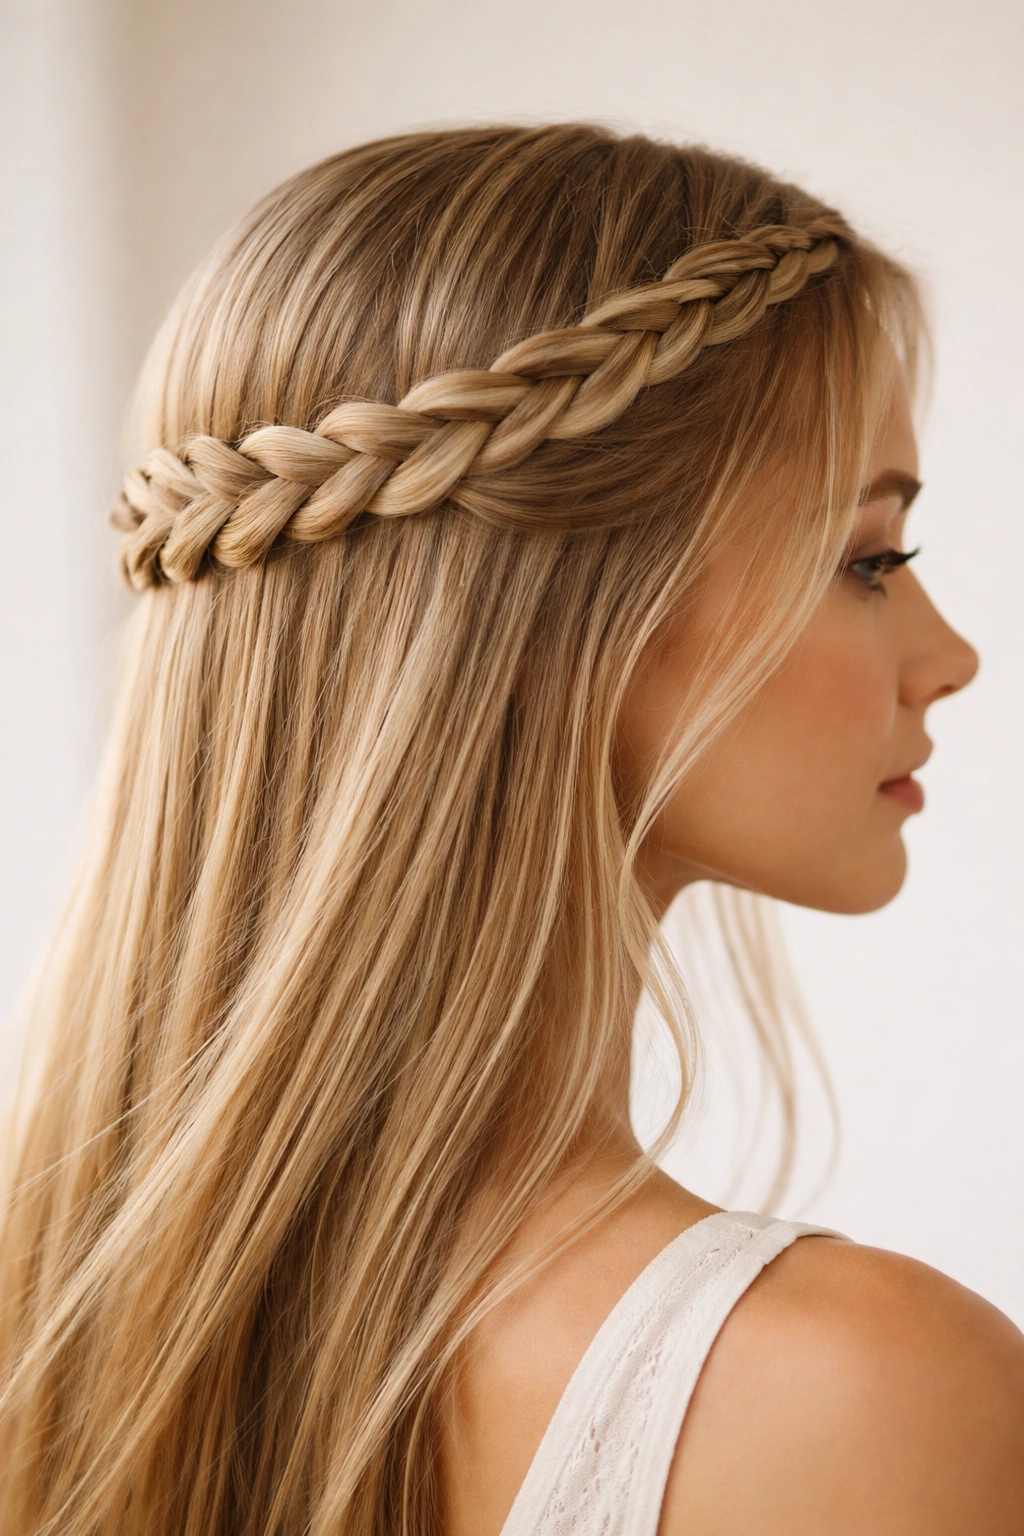
A braided halo is essentially a braid that wraps all the way around your head, sitting against the scalp like a crown. It’s romantic, stunning, and reads as very boho while being surprisingly structured. On straight hair, the braid creates a clear visual circle without getting lost in texture, making it look intentional and almost sacred.
Why This Style Works for Straight Hair
The braided halo is one of those styles that honestly looks its best on straight hair because you can see the entire pattern and structure clearly. The braid doesn’t get obscured by waves or texture—it’s a complete design element. Straight hair also makes it easier to grip and control the braid as you wrap it around, so it stays put throughout the day.
How to Create the Look
- Start with your hair pulled back in a low ponytail or bun to get it out of your way
- Create a long braid by braiding down from the top of your head, or start a braid from one temple
- Continuously work around your head, incorporating loose sections of hair into the braid as you go
- Bring the braid all the way around your head back to where you started
- Secure the end by pinning it underneath the starting point
- Remove the original ponytail and gently loosen the halo braid for texture
Worth knowing: This style requires a decent amount of hair to work well—if you have very fine or thin hair, consider doing a looser, more delicate braid rather than a thick one.
9. Twisted and Braided Combo
Mixing twists and braids in the same style creates a sophisticated boho look that feels modern and romantic at the same time. On straight hair, the contrast between twisted sections and braided sections creates visual interest and texture without your hair needing actual waves. It’s a great way to elevate a basic braid into something more intentional.
Why This Style Works for Straight Hair
This style works because the combination of techniques creates varied textures and visual interest across your head. Straight hair can sometimes feel monotonous, so mixing twists (which create a tighter spiral) with braids (which create an open weave) gives you the best of both. The interplay between the two techniques reads as intentional and design-forward, which is very boho.
How to Create the Look
- Start on one side with a twisted section—divide hair into two pieces and twist them around each other
- Bring that twist to the back and transition into a braid by dividing the twisted section into three pieces
- Continue braiding toward the back
- On the other side, do the same thing: twist first, then braid
- Bring both twisted-braided sections to the center back and secure them together
- Gently loosen both the twists and the braids for a softer appearance
Pro tip: Twisted sections loosen and soften faster than braids, so if you want them to match in terms of looseness, pull out the twists first and the braids second.
10. Waterfall Braid
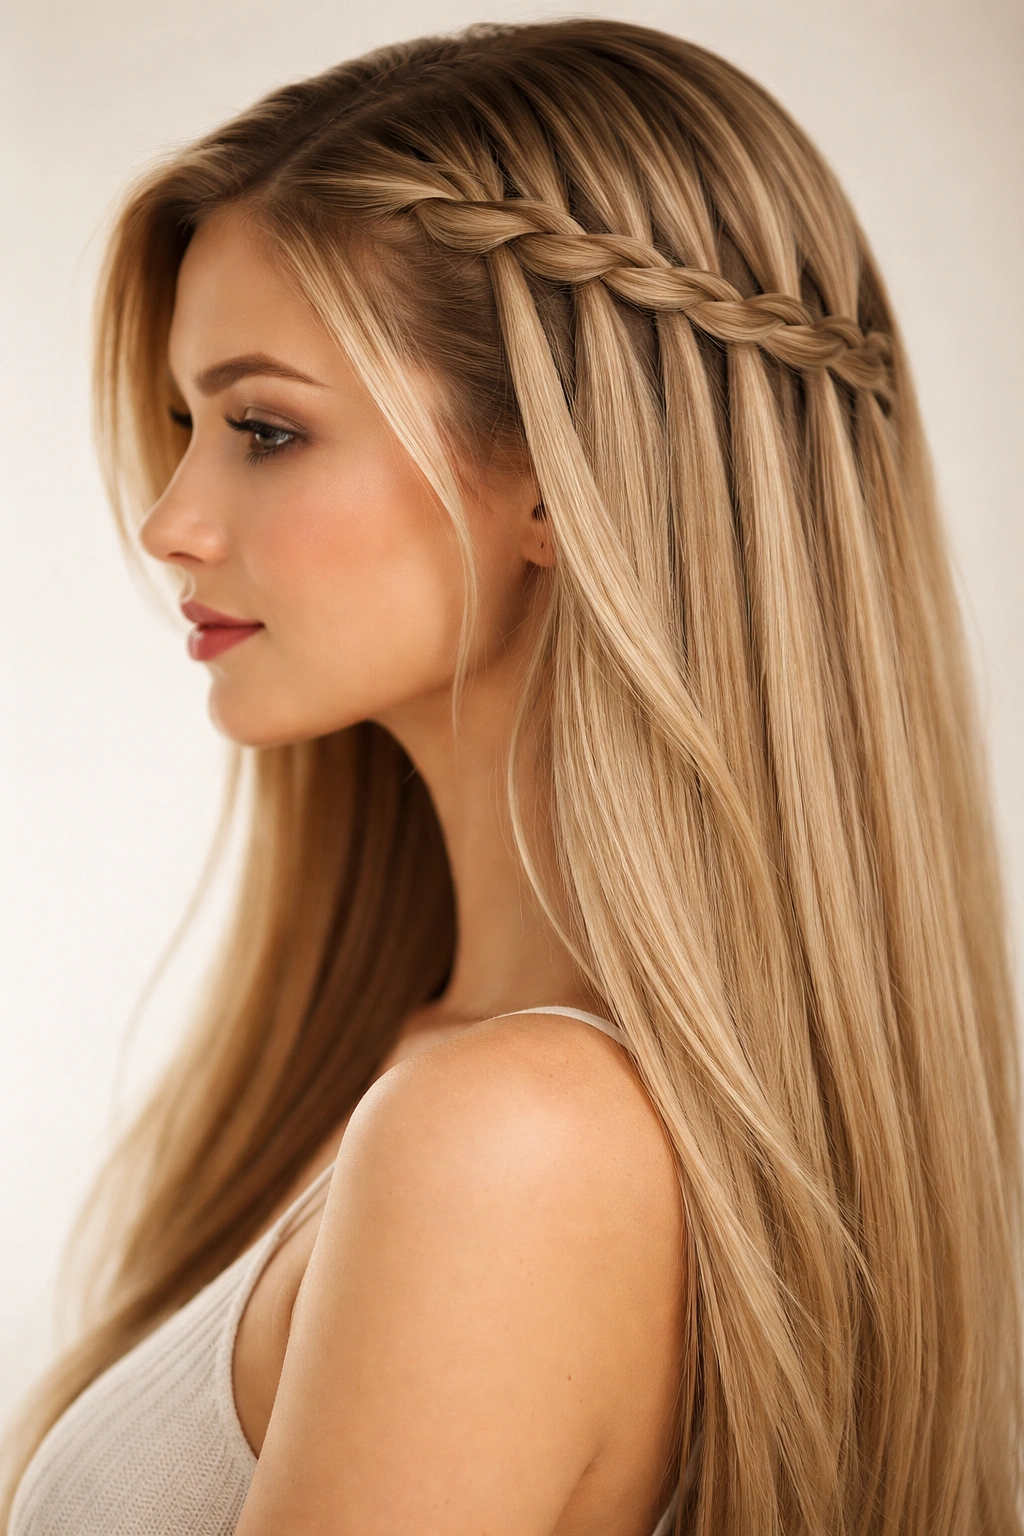
A waterfall braid is technically a three-strand braid with a twist—instead of braiding all the hair, you drop sections as you go, creating a cascading effect. On straight hair, this style is absolutely stunning because you can see exactly where the “waterfall” sections fall. It’s romantic, intentional, and deeply boho without being overly complicated.
Why This Style Works for Straight Hair
The waterfall effect is most visible and intentional on straight hair because the sections that drop cascade smoothly without getting tangled in texture. You can see the full design of where the braid is and where the loose hair falls. On straight hair, it looks less accidental and more like the intended design it actually is.
How to Create the Look
- Start a three-strand braid at your temple on one side
- After a few passes of braiding, drop one of the three strands and pick up a new section of hair from above to replace it
- Continue braiding and dropping sections as you work toward the back of your head
- The dropped sections create the waterfall effect, cascading down alongside the braid
- Bring the braid to the back of your head or to the opposite side and secure it
- Gently loosen the braid by pulling sections outward for a softer, more boho appearance
- You can leave loose hair down or curl it for additional texture
Worth knowing: This braid is easier to execute if you start at temple level and work at an angle toward the back—it gives you more space to work and makes the waterfall effect more dramatic and visible.
Final Thoughts
Boho braids on straight hair are about embracing the texture that braids themselves create, rather than trying to hide or mask the straightness of your hair. The best approach is to choose styles that either create their own visual interest through the braiding technique or play up the sleekness as an intentional design element. The loosening step—gently pulling sections of the braid to soften and expand it—is honestly what transforms a neat, structured braid into a boho masterpiece, so never skip that part.
The beauty of straight hair is that braids hold beautifully without needing tons of product or styling tricks. You get the romance and intentionality of braiding without the weight or buildup that can sometimes come with heavily textured hair. Experiment with which styles feel most natural to you, play with how loose or tight you want the braids, and don’t be afraid to mix and match—combining ribbons with braids, mixing twists and braids, or adding face-framing pieces are all ways to make any of these styles completely your own.