Straight hair gets a bad rap when it comes to styling options. Most of the advice out there fixates on adding texture and volume—curl it, wave it, tease it. But here’s what people miss: straight hair is a superpower if you know how to style it right. It’s sleek, it’s polished, it’s sophisticated, and honestly, it’s easier to work with than most people realize. The real limitation isn’t your hair type—it’s the assumption that you need heat to style it.
The truth is, some of the most chic, modern hairstyles actually look better on straight hair when they’re done without heat. These aren’t the limp, boring styles you might be picturing. They’re textured, dimensional, intentional, and they take advantage of what makes straight hair genuinely special: clean lines, shine, and the ability to hold a shape without constant heat damage. Whether you’re protecting your hair health, saving time in the morning, or just tired of the blow dryer, there are genuinely beautiful heatless options that work specifically for the way straight hair naturally behaves.
The styles that follow aren’t theoretical—they’re tested approaches that leverage straight hair’s actual strengths. Some use braiding to create texture, others maximize your hair’s natural shine, and several play with proportion and positioning to create visual impact without any styling tools. The best part? Most of them take less than five minutes once you understand the technique. Let’s dig into the ones that actually work and look really good.
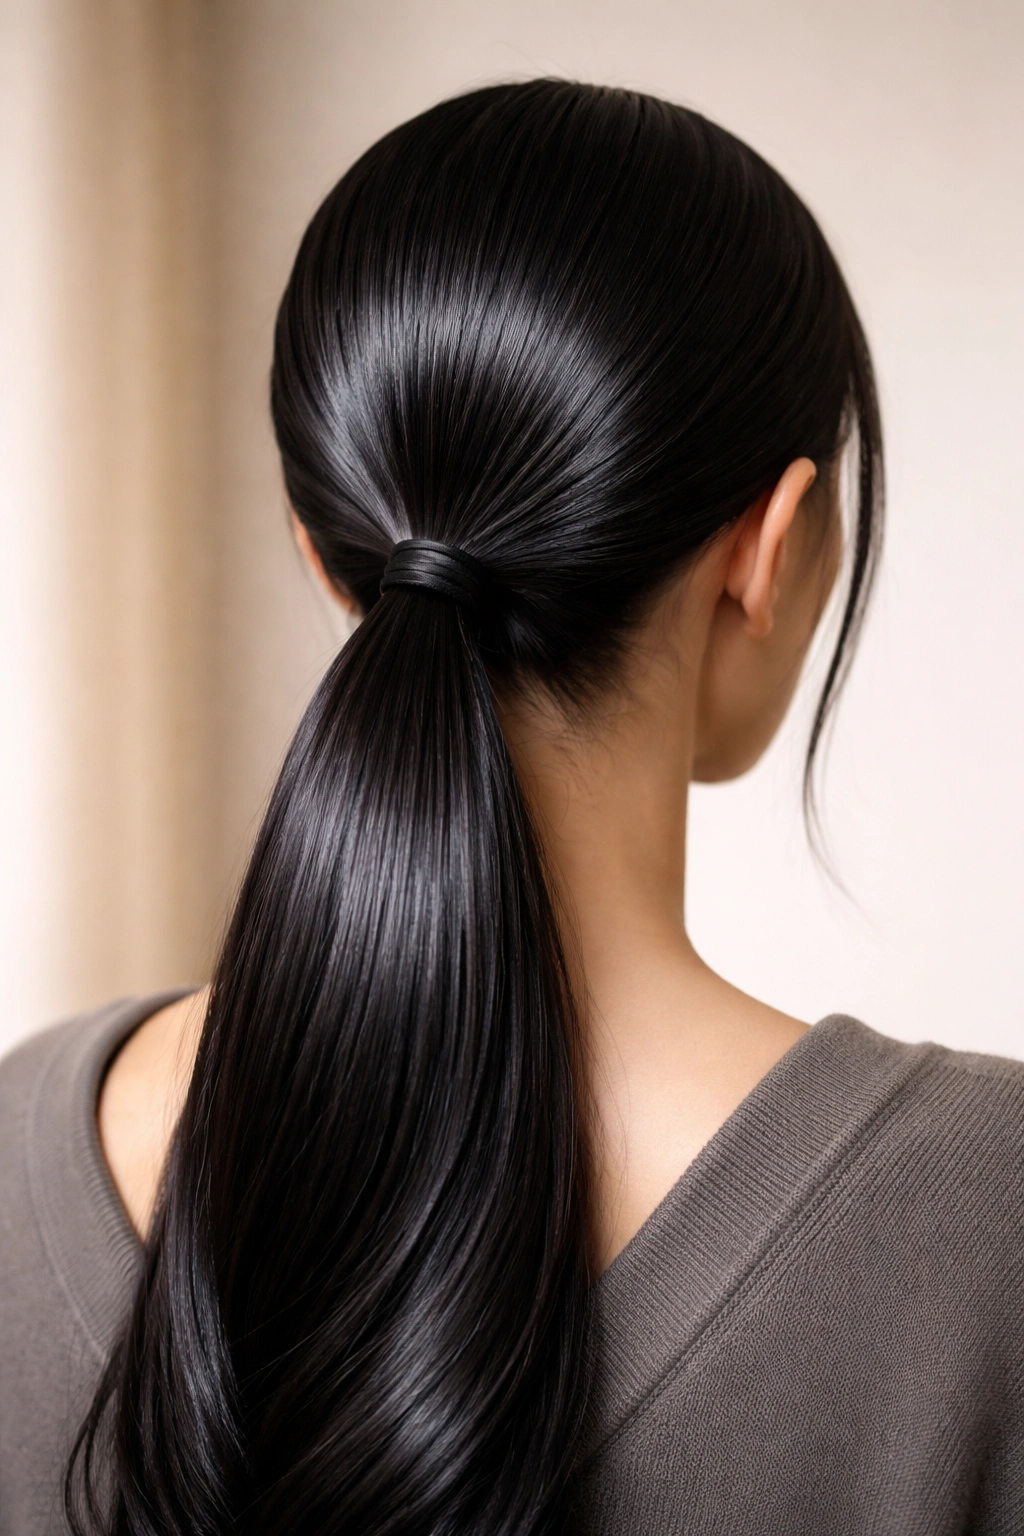
1. The Sleek Low Ponytail with Smoothing Serum
A low ponytail should be the foundation of every straight-haired person’s style arsenal. Not the messy, intentionally-undone version that’s blown through every trend cycle—the actual sleek, polished version that reads as put-together no matter what else is happening in your life. The secret to making this work on straight hair isn’t fighting your hair’s natural texture; it’s enhancing it.
Why It Works for Straight Hair
Straight hair has an inherent smoothness and shine that bounces light beautifully when it’s polished rather than disrupted. A sleek low ponytail doesn’t just look clean—it looks intentional and modern. The style works because straight hair naturally wants to lie flat, which means you’re working with your hair’s behavior instead of against it. No frizz-fighting, no texture-teasing, just straightforward polishing.
How to Achieve It
- Apply a smoothing serum or lightweight shine spray to damp hair before it fully dries—this gives you that glass-like finish without needing a flat iron
- Brush your hair back into a low position (about two inches above the nape of your neck), using a fine-tooth comb to smooth the front sections
- Secure with a clear elastic band or a silk scrunchie to protect the hair from breakage and maintain shine
- Take a small section from the ponytail and wrap it around the base to hide the elastic—pin in place with a bobby pin
- Finish with a light hairspray to hold flyaways in place without creating that heavy, product-coated appearance
- For extra polish, apply a tiny bit more serum to the wrapped section so it catches the light
Pro tip: If you have baby hairs around your hairline, smooth them down with the serum rather than trying to tame them with hairspray—serum holds them in place without the stiffness, and it actually makes your face look softer and more intentional.
2. Double Braids for Wearable Texture
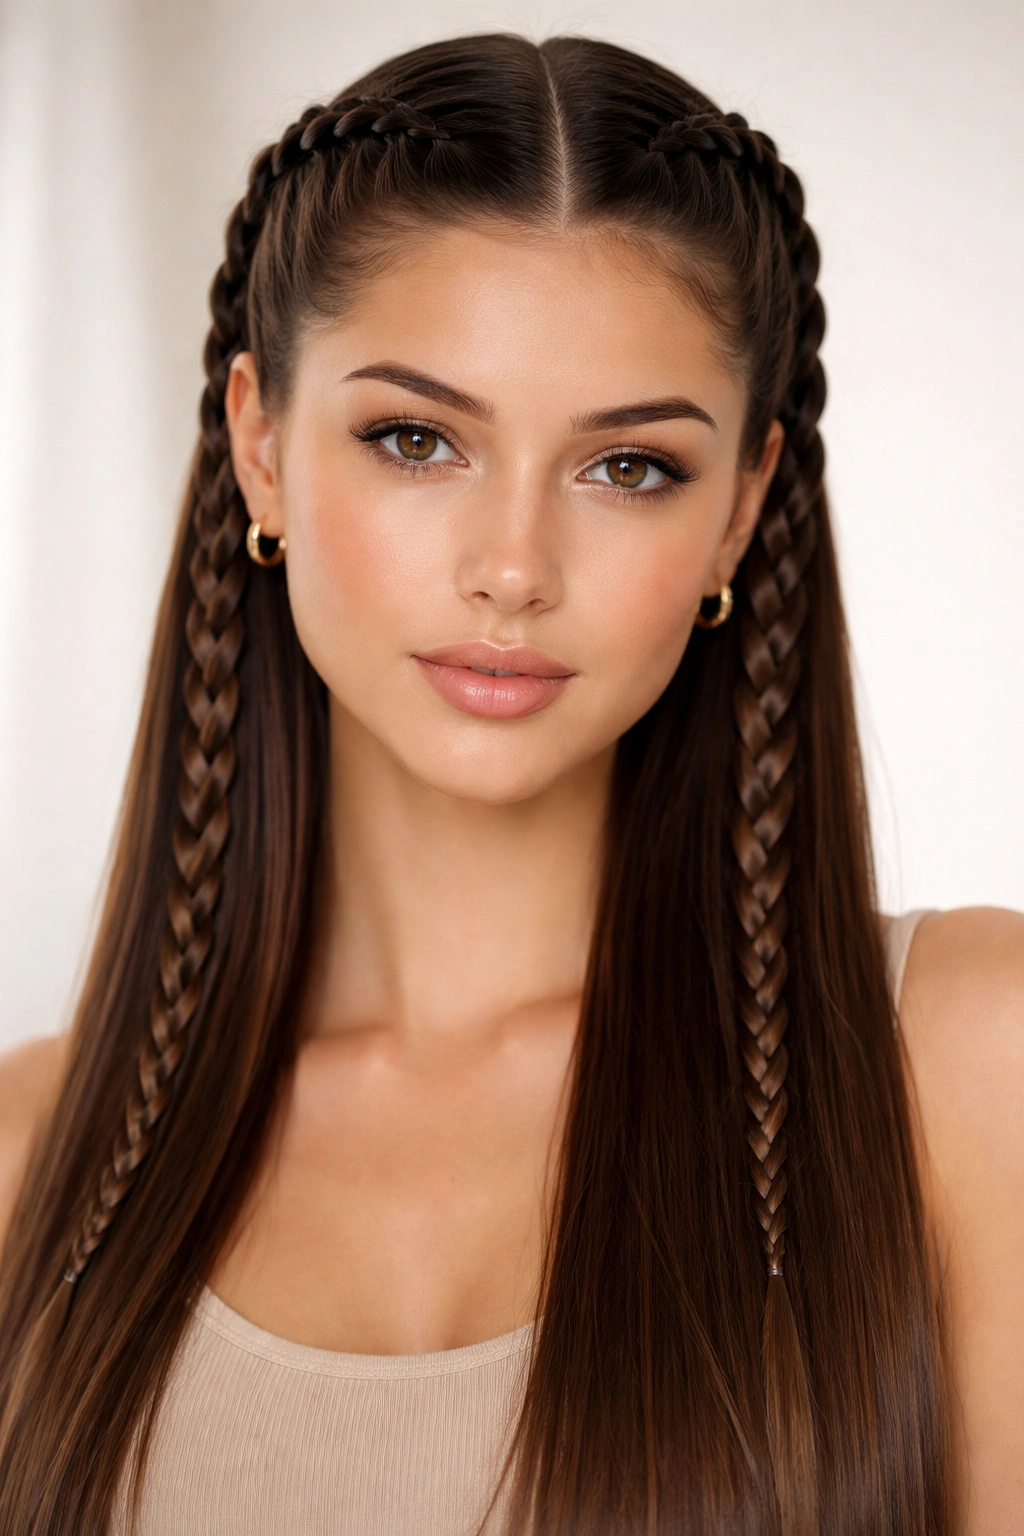
Straight hair might not have natural wave or curl, but it can absolutely hold texture when you create it intentionally—and double braids are the most effortless way to add dimension without any heat. The beauty of this style on straight hair is that the braids create genuine texture while maintaining the sleekness and shine that makes straight hair look premium.
Why This Creates Real Visual Interest
Braids work differently on straight hair than on curly or textured hair. Instead of blending into existing texture, they stand out as a deliberate design element. Double braids create symmetry, which reads as intentional and modern. They also break up the visual weight of long straight hair, making the whole look feel more dynamic. Plus, you can customize the placement—tight Dutch braids for sporty, loose three-strand braids for romantic, thin braids interwoven with the rest of your hair for subtle texture.
Getting the Best Results
- Brush hair thoroughly before you start—any tangles will make the braids look unfinished and uneven
- Start your first braid at the temple, moving back toward the ear, and repeat on the other side
- Keep tension consistent but not tight—you want the braid to be visible and textured, not painful or pulling your hairline
- For a relaxed look, gently pull the sides of the braid to loosen and widen it after you’ve secured it with a small elastic
- Leave the ends loose and flowing, or gather them into a low ponytail for a more finished look
- A light hairspray or texturizing spray applied before braiding actually helps straight hair grip the braid better and makes it last longer
Worth knowing: Braids on straight hair last longer between washes because your hair’s natural smoothness actually protects the braid structure—there’s less breakage and slipping than you’d get with textured hair.
3. The Half-Up Knot with Anchored Texture

This style splits the difference between fully up and fully down, and it’s become quietly iconic because it works across nearly every situation—professional enough for an office, casual enough for a weekend, and genuinely flattering on straight hair. The knot is the key detail that elevates this beyond a basic half-up style.
What Makes the Knot Special
Instead of pulling hair back into a typical half-up ponytail, you’re creating an actual knot with two sections of hair, which immediately reads as more intentional and design-forward. The knot provides a focal point that draws the eye, breaks up the length of your hair, and adds dimension without texture. On straight hair, where you don’t have natural texture to create visual interest at mid-length, this simple technique makes a significant difference.
Step-by-Step Execution
- Section off the top portion of your hair—from your temples back toward the crown, roughly a quarter of your total hair volume
- Divide this section into two equal parts and cross them over each other, then tie them into a simple knot (like the first step of tying shoelaces)
- Tighten the knot gently so it sits close to your scalp and looks polished rather than loose
- Secure the knot’s tail with a clear bobby pin hidden inside the knot itself, or a small clear elastic that captures any loose ends
- Let the remaining hair flow down past your shoulders—it should look effortless, not stiff or heavily styled
- Optional: twist the sections before knotting them for added visual texture
Insider note: If you have fine straight hair, use just bobby pins to anchor the knot rather than elastics, which can create creases and dents. The pins are less visible and gentler on finer hair.
4. Sleek Braided Crown with Face-Framing
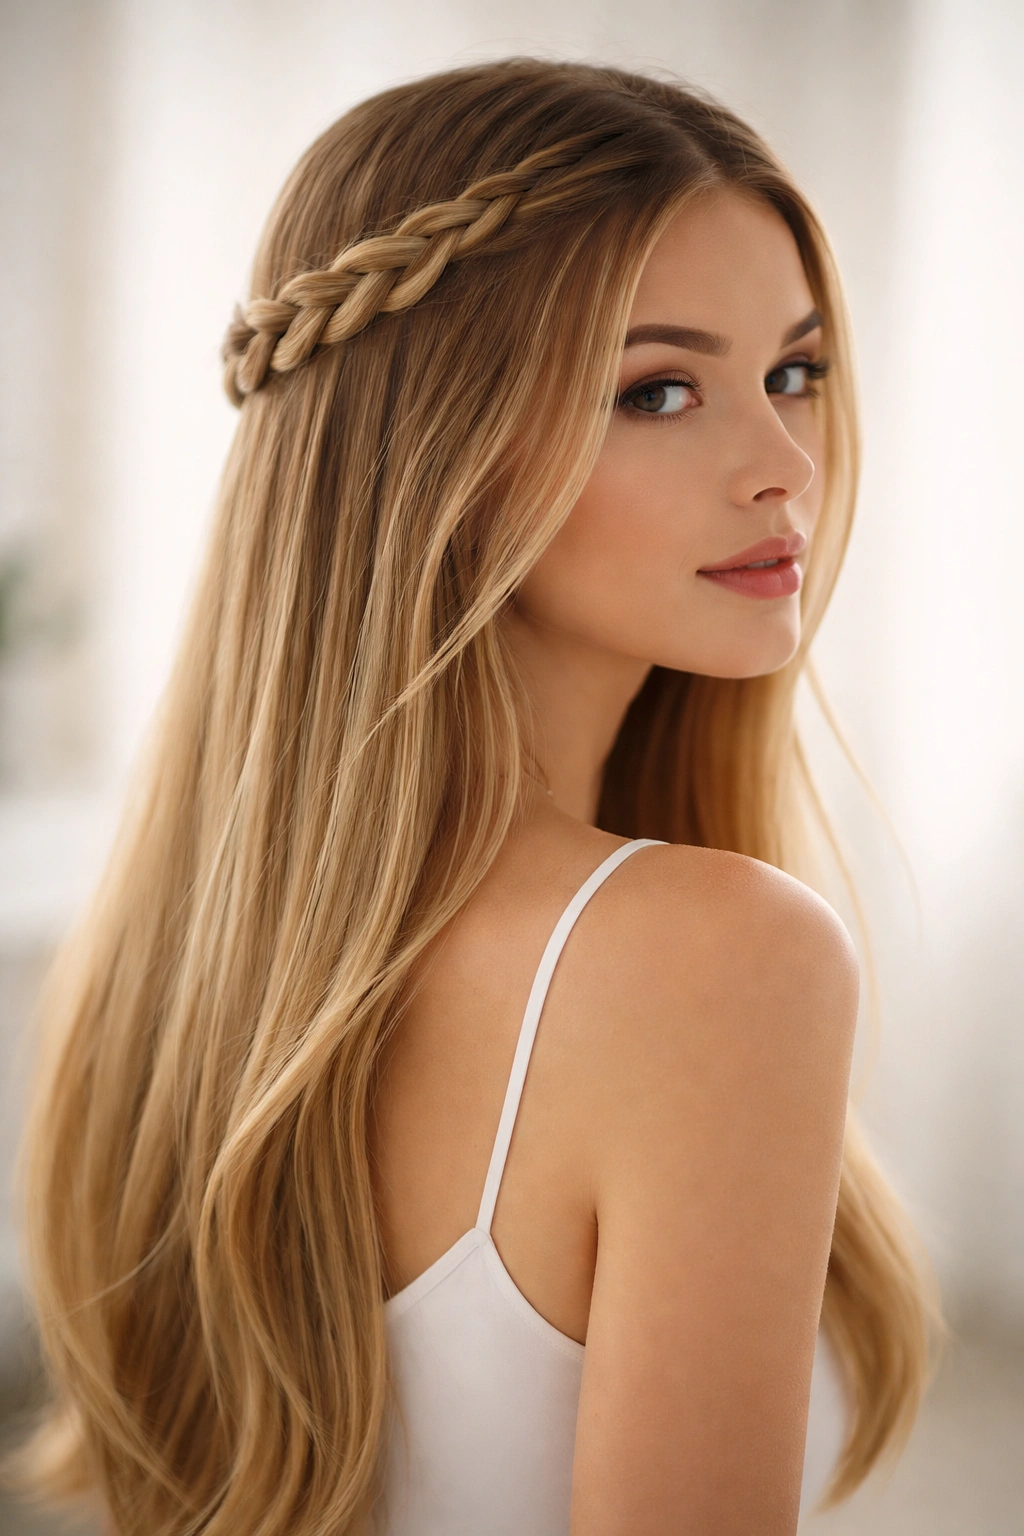
A braided crown sounds intricate, but it’s basically one or two braids that wrap around the back of your head, and it looks infinitely more complicated than it actually is. On straight hair, this style is stunning because the braids create clear visual interest against the backdrop of smooth, shiny hair.
Why Straight Hair Makes This Style Shine
The contrast between the textured braids and the smooth, sleek background hair creates dimension and visual impact. The style also frames your face beautifully—the front sections stay soft and undone while the back is polished, which reads as intentional and modern rather than accidentally messy. Straight hair doesn’t fight this balance the way textured hair might; the smoothness amplifies the effect.
How to Build the Crown
- Create a deep side part and leave the front section on one side completely loose for framing
- Starting just behind your ear on the opposite side, begin a loose Dutch braid (braiding strand under rather than over, which creates a raised appearance)
- Braid around toward the back of your head, keeping the braid loose and allowing pieces to fall naturally
- Secure the end of the braid with a small clear elastic or bobby pin hidden at the back, tucking it into the base of your hair
- Optional: create a second, thinner braid next to the first, or wrap a thin section of loose hair around the braided section for added dimension
- Keep the front pieces soft and slightly textured—finger-comb them or run your serum through them for a polished-but-relaxed feel
Quick facts:
- This style takes about 8–10 minutes once you practice the technique
- It works best on hair that’s a day or two old (freshly washed straight hair can be slippery)
- The braids hold their shape all day without heat and without heaviness
- It works for both formal occasions and casual everyday wear
5. Wet-Look Gel Slicked Back Style
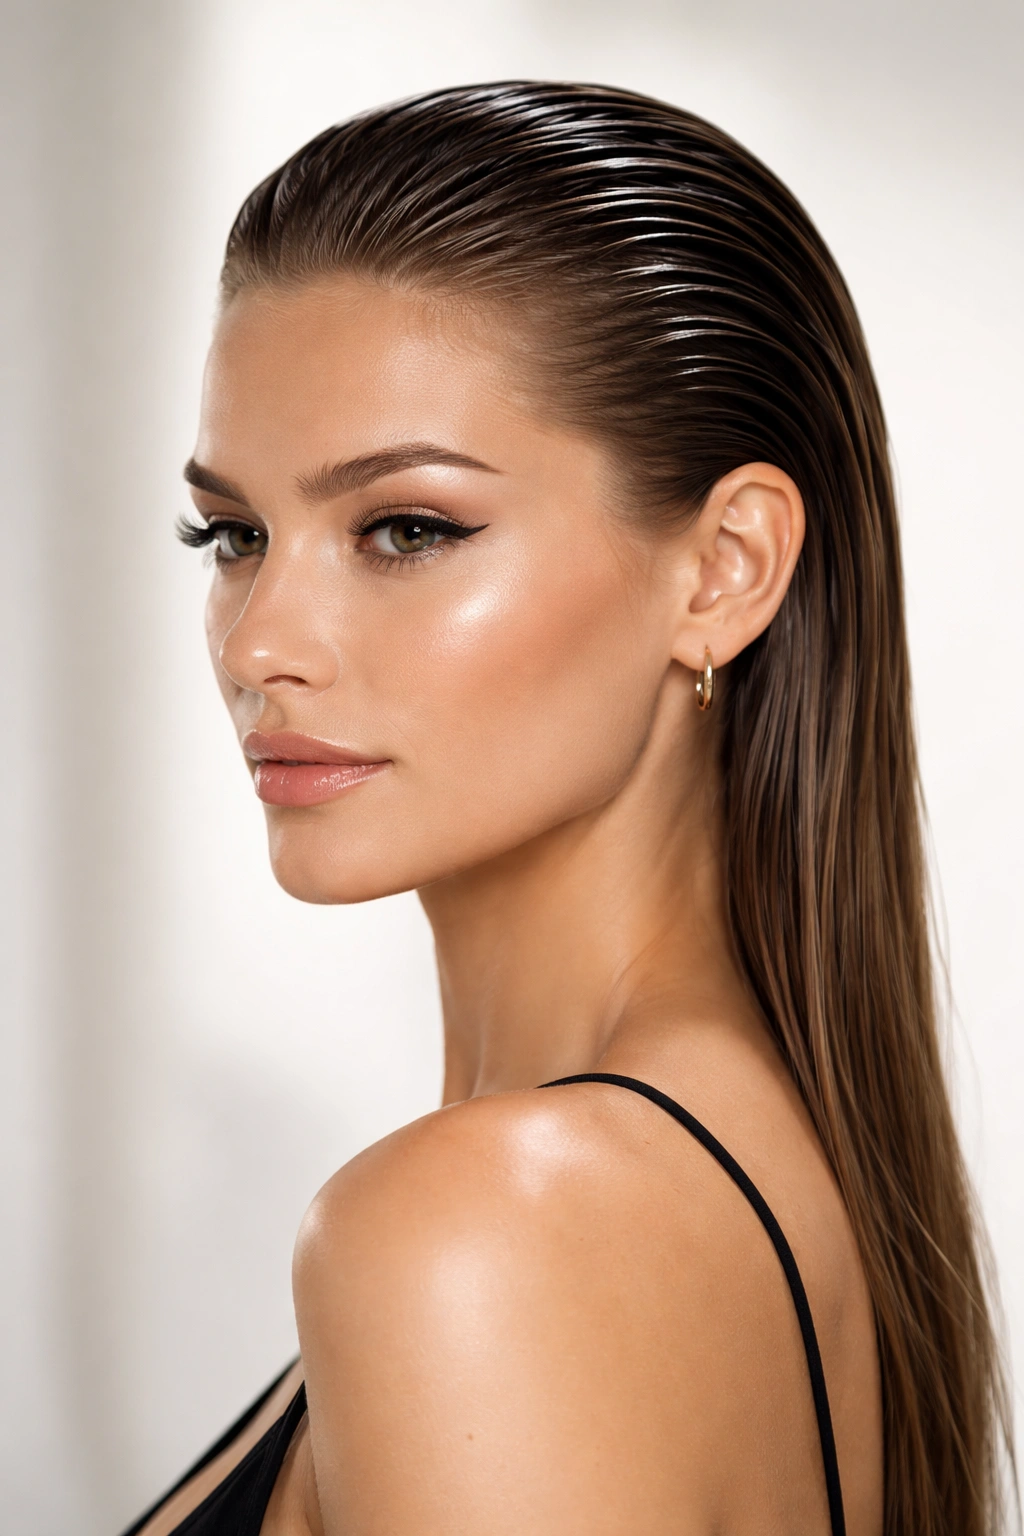
Wet-look styling is having a legitimate moment, and it looks absolutely striking on straight hair. This isn’t the greasy, unwashed appearance people sometimes associate with “wet look”—it’s a deliberate, high-shine finish that’s both edgy and polished. Done right, it reads as intentional, modern, and genuinely chic.
Why Wet Look Works on Straight Hair Specifically
Straight hair is naturally reflective and shiny. A wet-look gel amplifies that shine and creates a high-contrast, graphic appearance that’s eye-catching without being overdone. The style works because straight hair’s smoothness is the entire aesthetic—you’re not trying to add texture or hide anything; you’re emphasizing the sleekness and shine. It’s one of the rare times straight hair’s natural behavior is exactly what you want.
Achieving the Look Without Damage
- Start with damp hair (not soaking wet, but not dry either—damp holds the gel better and requires less product)
- Apply a strong-hold gel with your fingers, working through hair section by section from the roots through the ends
- Comb or brush hair back smoothly from your hairline, keeping tension consistent so there are no bumps or dips
- Smooth your hands over the top and sides repeatedly to create that unified, shiny finish
- Secure at the nape of your neck with a low ponytail, a bun, or leave it completely down depending on your preference and face shape
- Allow 10–15 minutes for the gel to fully dry and set into its final shape
- For extra shine, apply a light hairspray over the top
What to know: Not all gels create that wet look—you need a gel with high shine and strong hold. Look for formulas specifically labeled “wet-look,” “glossy,” or “shiny hold.” Avoid matte-finish gels, which defeat the entire purpose.
6. Twisted Side Chignon for Quiet Elegance
A chignon (a low, gathered knot at the back of the head) is classic, but a twisted version adds texture and visual interest that straight hair sometimes needs. The twist creates soft, romantic detail while maintaining the polish that makes straight hair look sophisticated.
The Anatomy of a Twisted Chignon
Instead of smoothing all your hair back and gathering it into a tight bun, you’re creating two loose twists and wrapping them together into a relaxed knot at the base of your neck. This creates visual texture and a more interesting silhouette than a standard sleek bun. On straight hair, where you don’t have natural dimension from texture or curl, this intentional twist-and-wrap creates exactly the kind of detail you need.
Building It Step by Step
- Create a deep side part and smooth one side of your hair back toward the opposite ear, anchoring it with bobby pins as you go
- Take the larger section of hair and divide it into two equal parts
- Twist each section loosely, moving from top to bottom, keeping the twists separated rather than combining them
- Bring both twisted sections to the nape of your neck and wrap them around each other, creating a loose, textured knot
- Secure everything with bobby pins, leaving small sections loose for a romantic, undone feel
- Gently pull the twisted sections to loosen them slightly, creating more visual texture and dimension
- Use a light hairspray to set the shape without making it feel stiff or heavy
Pro tip: This style works beautifully with a few delicate bobby pins left visible—they actually add to the intentional, handcrafted aesthetic rather than detracting from it.
7. High Sleek Ponytail for Maximum Impact
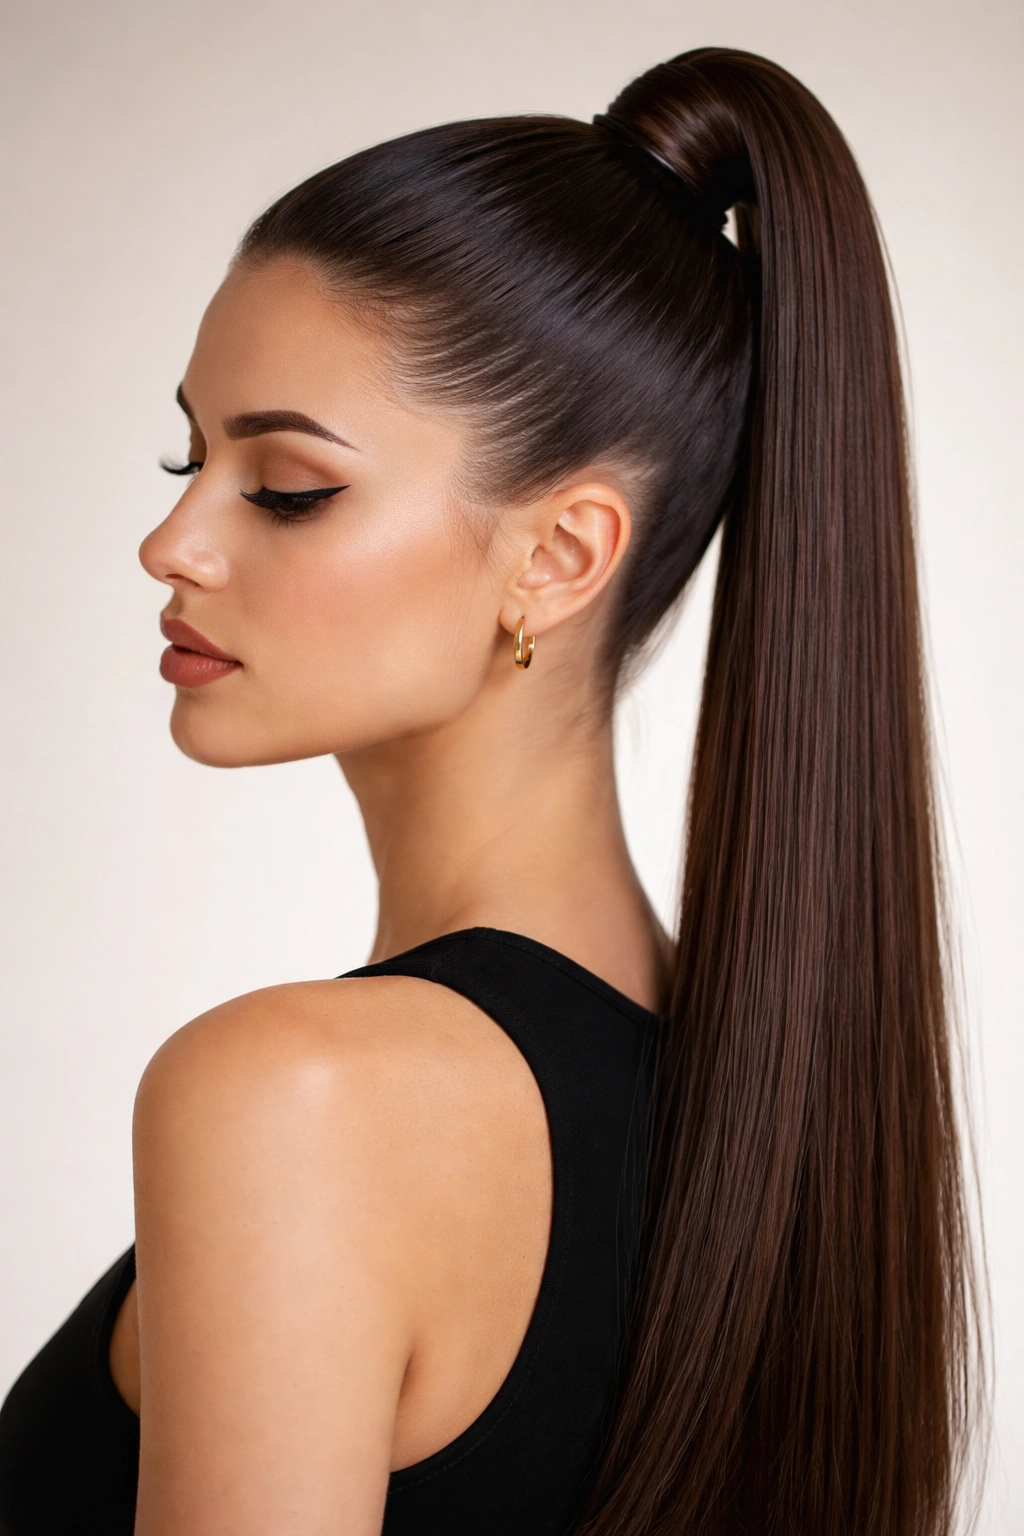
A high ponytail is the inverse of the low ponytail, and on straight hair, it reads completely different. Where the low ponytail is sophisticated and understated, the high ponytail is bold, youthful, and graphic. It demands attention and makes a statement, and it looks absolutely stunning on straight hair because the sleekness emphasizes the proportion and creates a strong visual line.
Why Position Matters This Much
The higher you position the ponytail, the more it changes your face shape, your overall silhouette, and the entire vibe of the style. A high ponytail on straight hair creates a sharp, clean line that emphasizes your features and draws the eye upward. This is why it’s such an effective style—it’s the proportion and positioning that create the impact, not added texture or accessories.
Execution for Maximum Sleekness
- Tilt your head forward and brush all hair toward the crown, gathering it at your highest comfortable point
- Use a fine-tooth comb to smooth every section back firmly, ensuring no bumps or loose strands
- Secure with a strong elastic band (preferably clear or color-matched to your hair)
- Wrap a thin section of hair around the base of the ponytail to hide the elastic and secure it with a bobby pin
- Apply a lightweight smoothing serum to the wrapped section for extra shine and polish
- Make sure the face-framing sections are completely smooth—any flyaways immediately break the clean line
- Finish with a light hairspray to keep everything in place
Quick facts:
- A high ponytail instantly lifts the face and makes features appear more defined
- On straight hair, even slightly damp sections smooth down and stay smooth throughout the day
- The style works across age groups and occasions when executed with clean lines and shine
- Adding one small accessory at the base (a delicate hair clip, a ribbon, or a silk tie) transforms the vibe from casual to formal
8. Loose Braided Texture Created Overnight
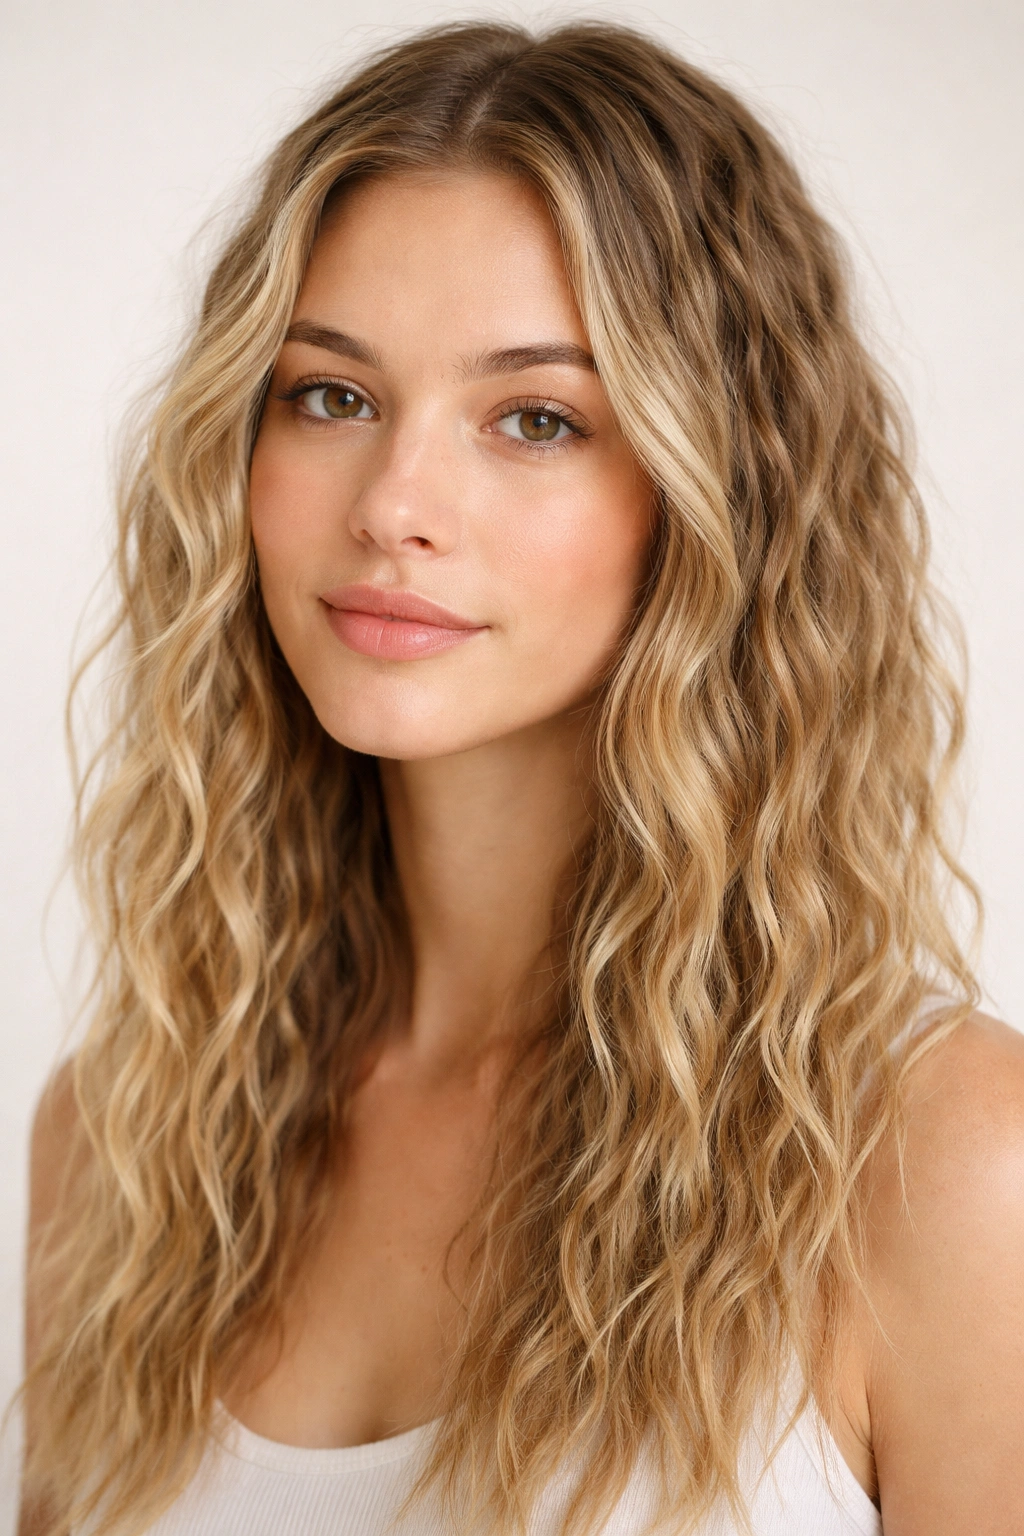
This is the heatless wave hack that actually works: braiding slightly damp hair overnight creates genuine texture that lasts for days. It’s not the same as heat-created waves, but it’s not supposed to be—it’s its own thing, and it looks beautiful on straight hair because the texture is clearly intentional rather than trying to mimic natural curls.
How Overnight Braiding Actually Works
When you braid damp hair and leave it overnight, the hair dries in that braided position, setting into a textured shape. When you unbraid it the next morning, you’re left with permanent texture that won’t straighten back out immediately. On straight hair, this process works reliably because straight hair doesn’t have existing texture to fight or interfere with the braid’s shape.
The Process for Best Results
- Wash your hair in the evening and leave it damp (not soaking wet)
- Divide hair into 2–4 sections depending on how much texture you want
- Create loose braids in each section, not pulling too tightly—tension matters less than you’d think, but you want the braids neat enough that they look intentional
- Secure each braid with a small elastic band
- Sleep in the braids (yes, it’s slightly uncomfortable, but it’s one night and the results are worth it)
- In the morning, carefully unbraid each section, gently separating the strands and fluffing the texture
- Don’t brush through the texture immediately—run your fingers through it to preserve the waves
- Apply a light texturizing spray or a small amount of sea salt spray to enhance and hold the waves
Worth knowing: The tighter your braids, the more defined and wavy your texture will be. For softer, looser waves, braid loosely. For more pronounced waves, braid more tightly. Experiment to find your preference.
9. The Minimalist No-Holder Twist Back
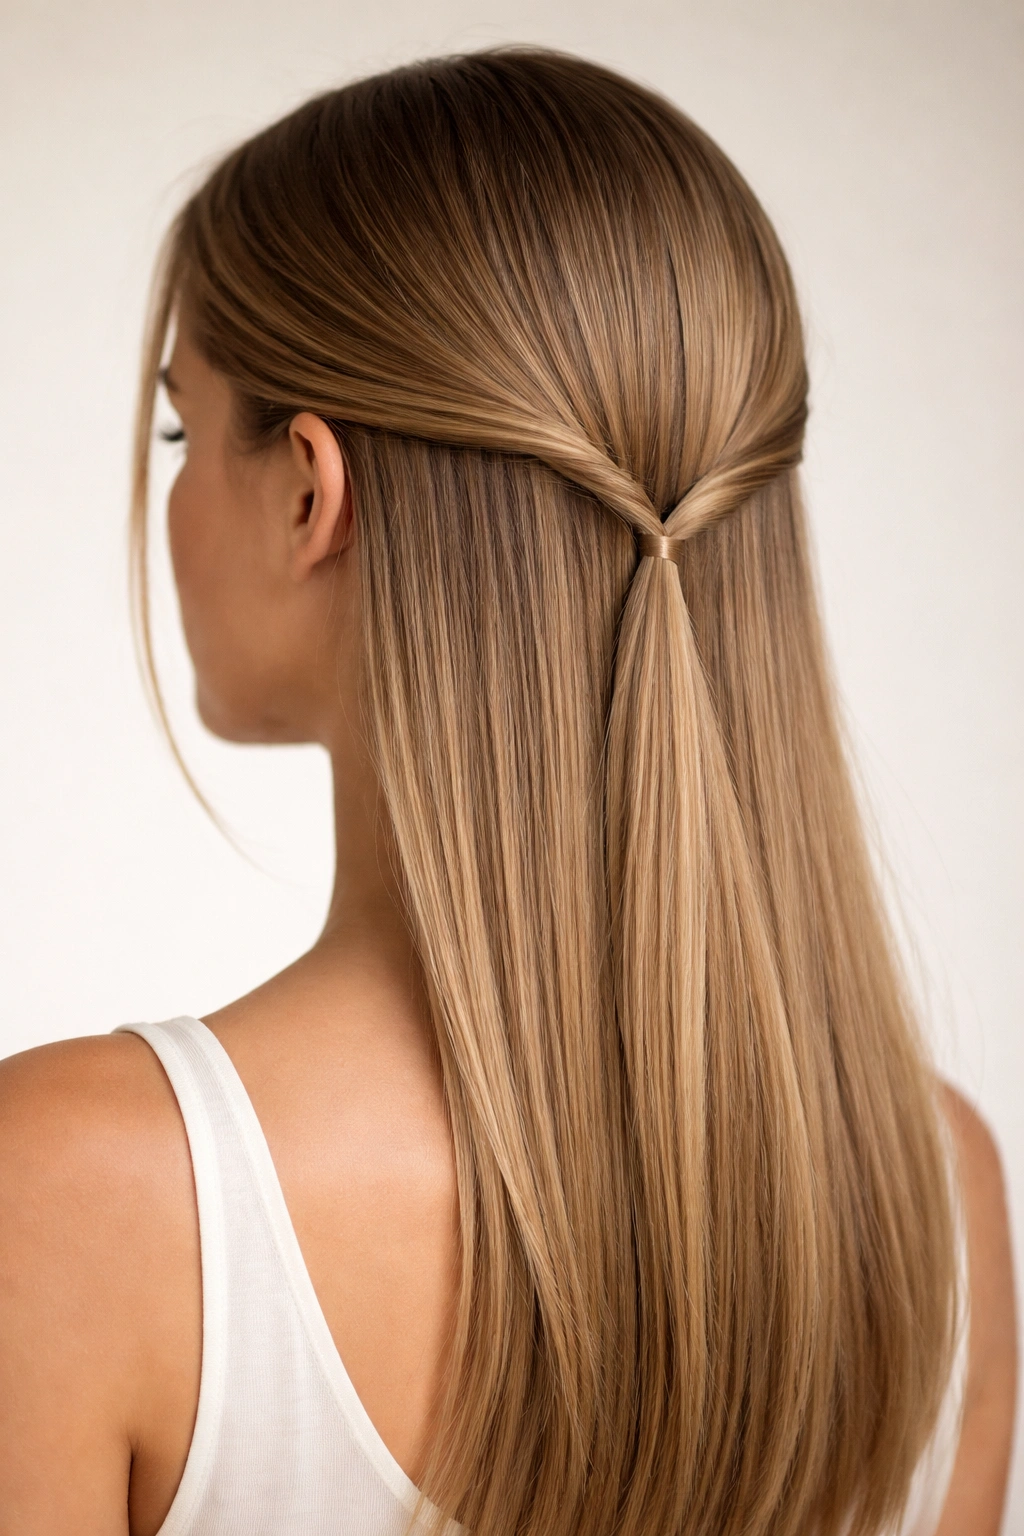
Sometimes the simplest styles are the most elegant. This is two thin twists that pull hair away from your face and meet at the back of your head, secured with nothing but bobby pins hidden underneath. It’s barely-there styling that creates enough visual interest to look intentional while maintaining the sleekness that makes straight hair look premium.
Why Invisibility Is the Goal Here
The whole point of this style is that no accessories are visible—just your hair, twisted and secured so subtly that people can’t quite figure out how it’s staying in place. On straight hair, this works beautifully because the smoothness of your hair and the grip of bobby pins can anchor the style without needing visible elastics or clips. It reads as effortlessly polished.
Creating the Effect
- Create a side part about an inch to the side of your natural part
- Take a thin section of hair just above your ear on one side
- Twist it loosely, moving from front to back toward the center of your head
- Repeat on the other side with a similar thin section
- Bring both twisted sections to meet at the center back of your head
- Overlap them or cross them slightly, then pin them in place with bobby pins inserted horizontally (this creates the most secure hold)
- Tuck the ends of the twists underneath and pin them down so they disappear into the rest of your hair
- Use a light hairspray to secure any flyaways
Pro tip: This style works best when your hair is at least 10–12 inches long, so the twists have enough length to reach and anchor at the back. On shorter hair, it can feel too subtle and might not hold through the day.
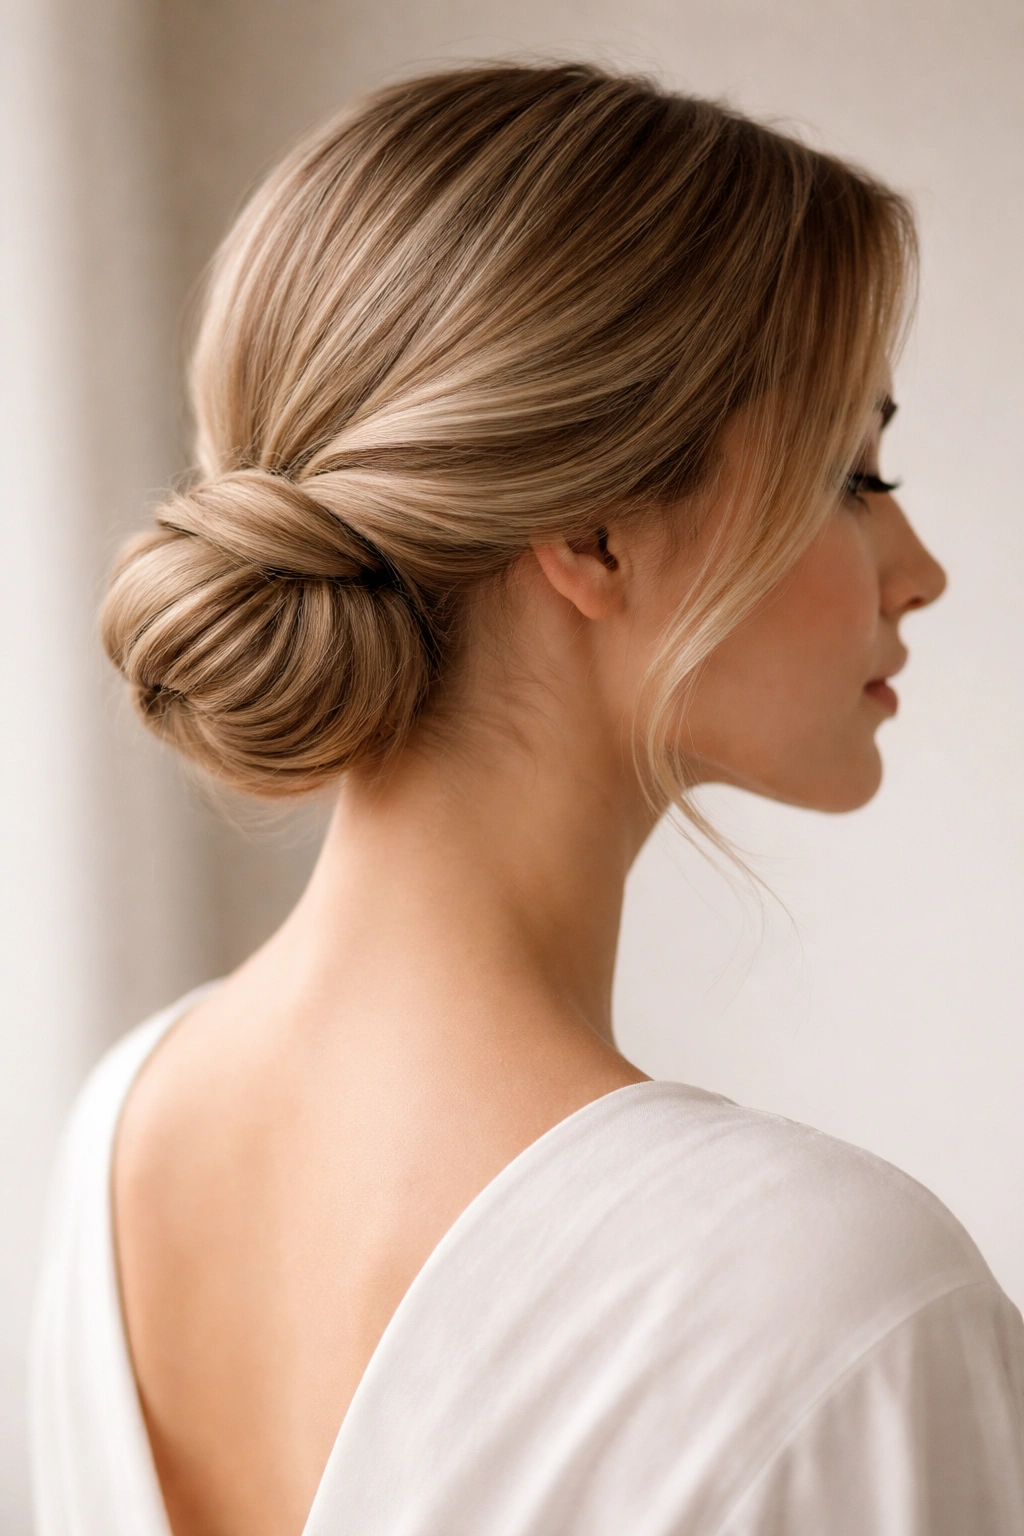
10. The Sleek Wrap-Around Bun for Polished Simplicity
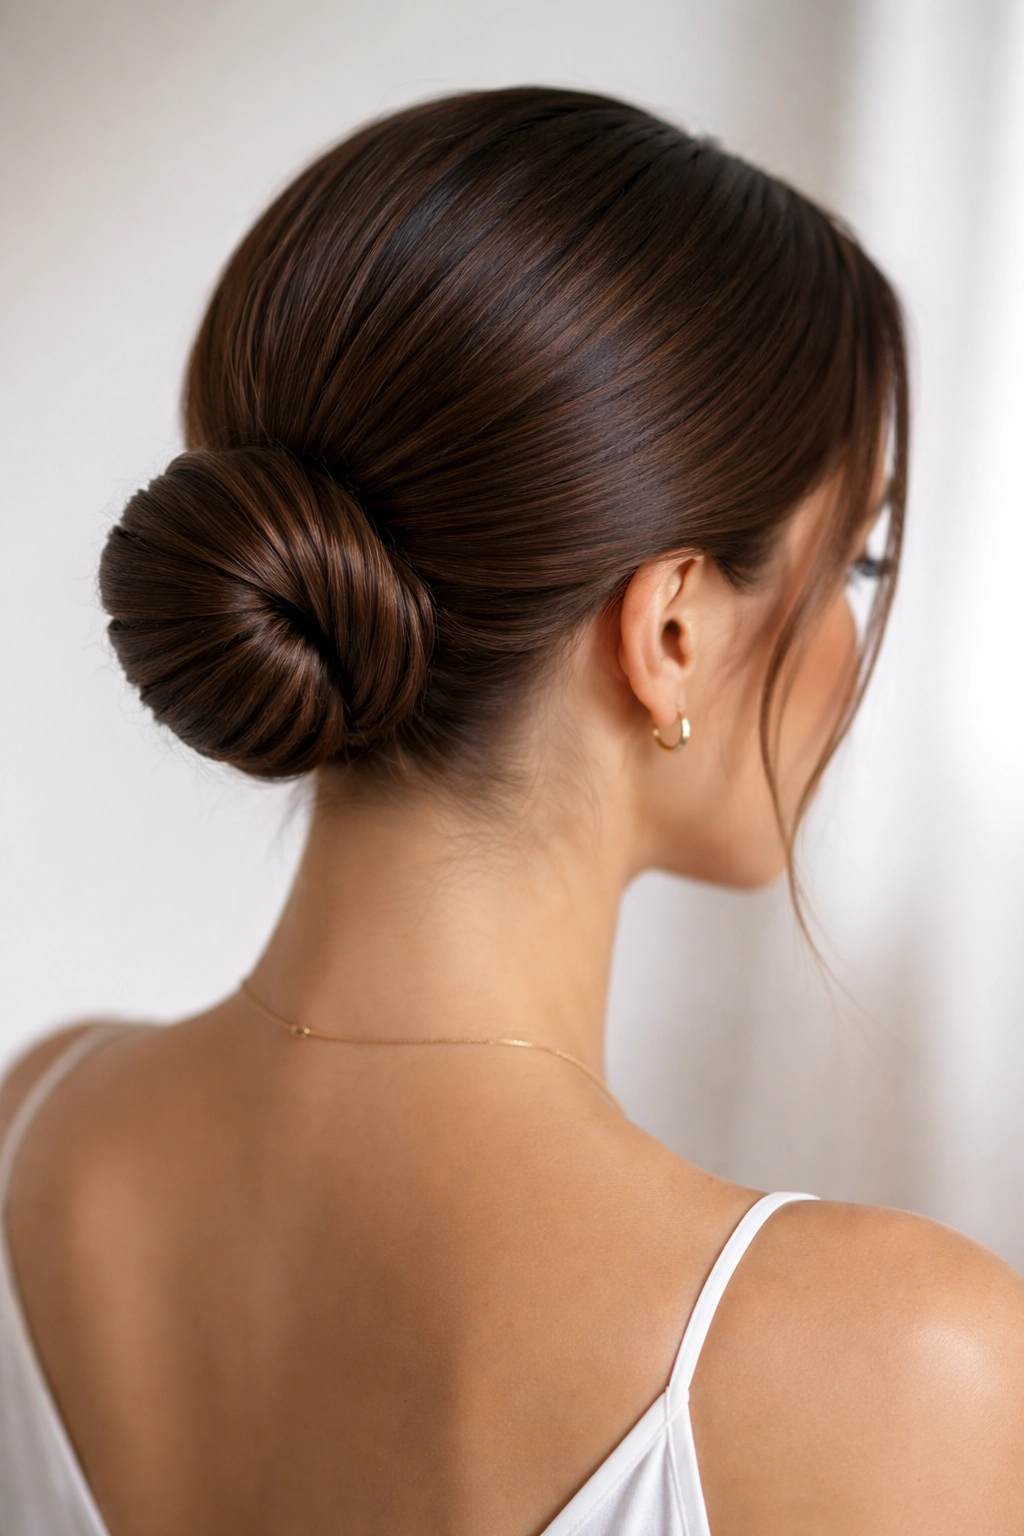
A wrap-around bun is a low bun where you twist or braid your hair, then wind it around itself to create a compact, polished knot. It’s supremely elegant, incredibly simple, and looks absolutely stunning on straight hair because of the way the wrapped sections catch light and create dimension.
What Makes This Different From a Standard Bun
A standard bun is hair gathered and twisted into a knot. A wrap-around bun is more intentional—you’re creating clear visual texture by wrapping twisted sections around a center point. The result is a bun that looks designed and deliberate rather than just a quick updo. The wrapped sections create visual interest and movement that straight hair sometimes needs at the back of the head.
Building the Wrap-Around
- Brush all hair back into a low ponytail at the nape of your neck, but don’t secure it tightly—you want it relaxed
- Divide the ponytail into 2–3 sections
- Twist each section loosely from the elastic down to the ends
- Take the first twisted section and wrap it around the base of the ponytail, securing it with bobby pins as you go
- Wrap the second section around the first, and if you have a third, wrap that around as well
- Tuck the ends of each twist underneath and into the center of the bun, securing with bobby pins
- Gently pull the wrapped sections to loosen and widen them slightly, creating visible texture
- Apply a light hairspray to set the shape without making it feel stiff
Quick facts:
- This style takes about 10 minutes and looks like it took 30
- It works for both casual wear and formal events depending on your overall styling
- The texture created by the wrapping makes it look more interesting and dimension-filled than a smooth bun
- It holds all day without heat and without heaviness
Final Thoughts
Straight hair doesn’t need to be complicated to look genuinely beautiful. The styles that work best aren’t the ones trying to add texture or fight what your hair naturally does—they’re the ones that enhance your hair’s inherent strengths: smoothness, shine, and the ability to hold a clean shape without constant intervention. Every single style in this list takes advantage of those strengths rather than working against them.
The real shift in perspective is recognizing that heatless styling isn’t a limitation on straight hair; it’s actually where straight hair shines most. You’re not trying to create texture that doesn’t naturally exist; you’re working with intention and minimal products to let your hair’s natural qualities do the work. These styles prove that polish and impact don’t require heat, damage, or hours of effort. They require understanding your hair’s behavior and knowing exactly how to position it, secure it, and let its natural shine do the communicating.
Start with whichever style resonates most, and give yourself permission to practice. The first time you try any new technique will take longer than the second, and the fifth. Within a week or two, you’ll find the styles that fit your lifestyle and your hair’s actual behavior, and you’ll have legitimate, genuinely beautiful options that don’t require any heat tools at all.