Straight hair is a styling advantage that many people don’t fully appreciate. It holds shape beautifully, reflects light with a natural shine, and creates clean lines that make any bun style look intentional and polished. But here’s the thing — straight hair can also feel slippery, which is exactly why slicked-back bun styles are absolutely perfect for this hair type. A properly executed slicked-back bun turns the natural smoothness of straight hair into an asset rather than a challenge, creating looks that range from effortlessly chic to dramatically sleek.
The appeal of slicked-back buns goes far beyond just containment. These styles communicate intention and control. They work equally well at a corporate office, a casual brunch, a formal event, or while you’re running errands. The beauty is that straight hair allows you to achieve that coveted “sleek” finish without frizz-fighting products, making slicked-back buns both practical and genuinely easy to master once you understand the fundamental technique.
What makes slicked-back buns work so well with straight hair is the lack of natural texture getting in the way. Your strands will lie flat against your scalp, which is precisely what you want. The challenge isn’t achieving slickness — it’s choosing which style actually suits your face shape, lifestyle, and the occasion you’re dressing for. That’s where the range comes in. There’s more variation in bun styles than most people realize, and each one creates a completely different vibe while still maintaining that signature sleek, polished look that defines the category.
1. The Classic Sleek Bun
This is the foundation style that everything else builds from, and it’s the one to master first. The classic sleek bun sits at the nape of your neck or slightly higher, completely smooth from scalp to the gathered base. It’s the hairstyle equivalent of a white button-down shirt — it works literally everywhere and never looks out of place.
Why It’s the Gold Standard
The reason this style dominates is pure versatility combined with pure simplicity. You can wear it to a job interview and then unbind it for drinks after work. It reads as put-together without feeling costume-y or overdone. For straight hair, the natural smoothness of your strands means you’re starting from a significant advantage — there’s no frizz to tame, no wave patterns fighting against the slicked look.
How to Style It Perfectly
- Start with hair that’s clean or one day old — fresh-from-the-shower hair can feel too slippery
- Apply a smoothing serum or lightweight gel to damp hair, working it through from mid-length to ends with your fingers
- Blow-dry your hair straight, directing the airflow downward to encourage flatness against your scalp
- Gather your hair at your desired height (lower is more classic, higher is more modern) and secure with a thin elastic
- Smooth any flyaways using a fine-tooth comb and a tiny bit of extra gel or wax
- Twist or wrap the ponytail around the elastic base and secure with bobby pins that match your hair color
Pro tip: The secret to a truly sleek finish isn’t the tightness of your bun — it’s the product application. Use less product than you think you need and apply it to damp hair, not dry. Too much product looks heavy and shows in the light.
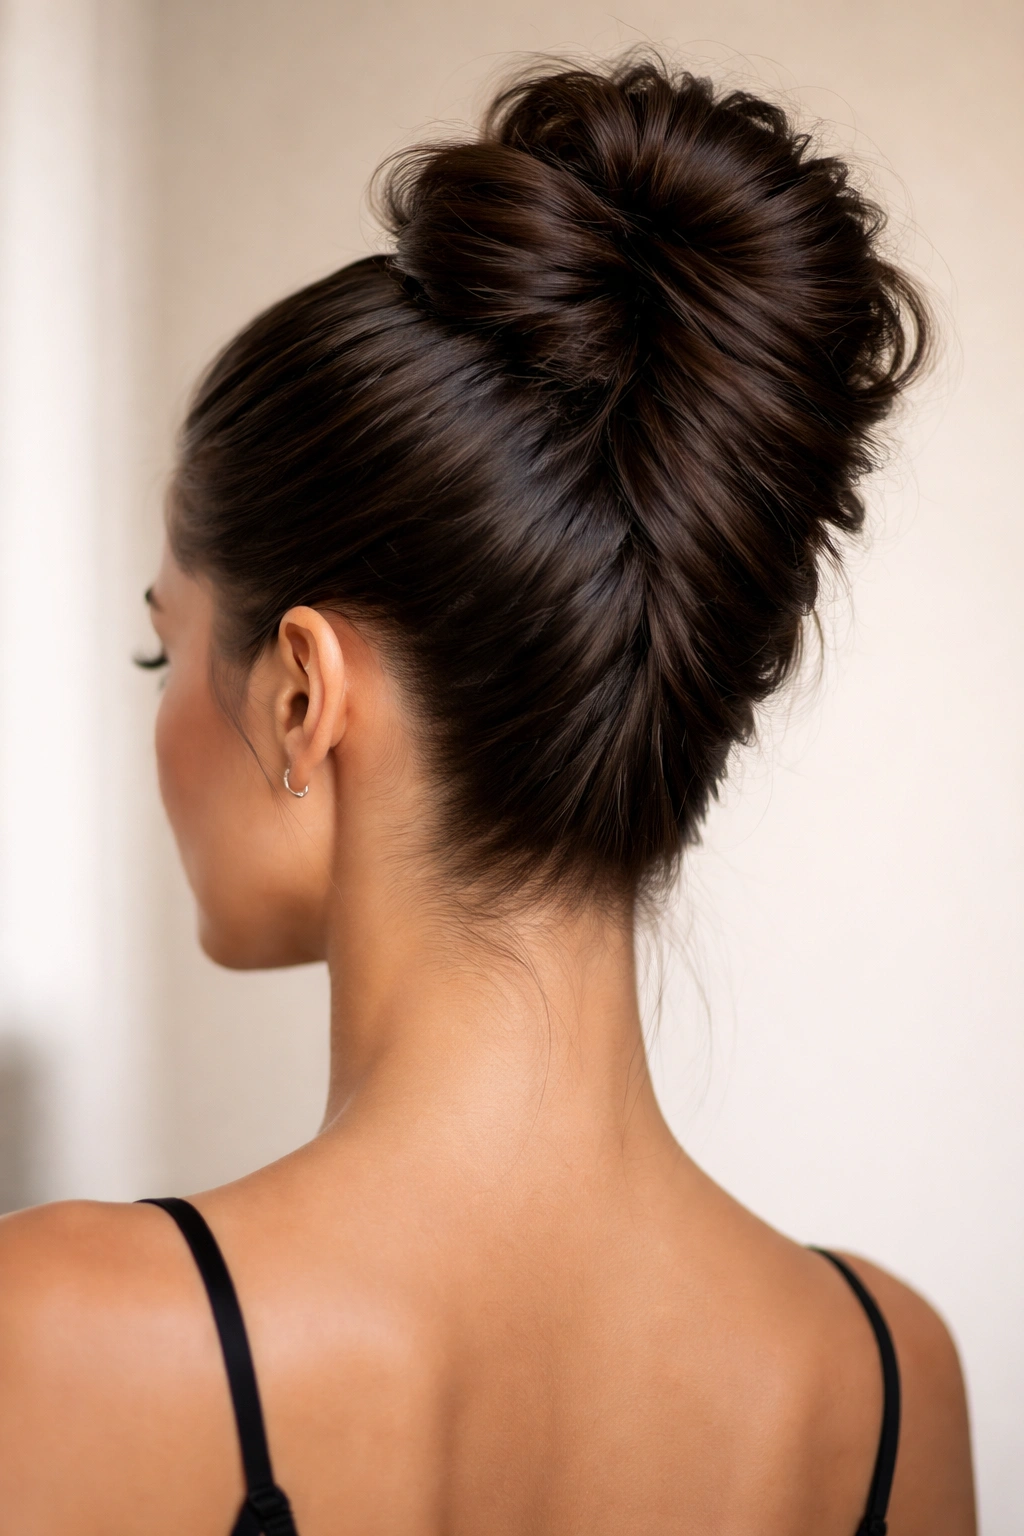
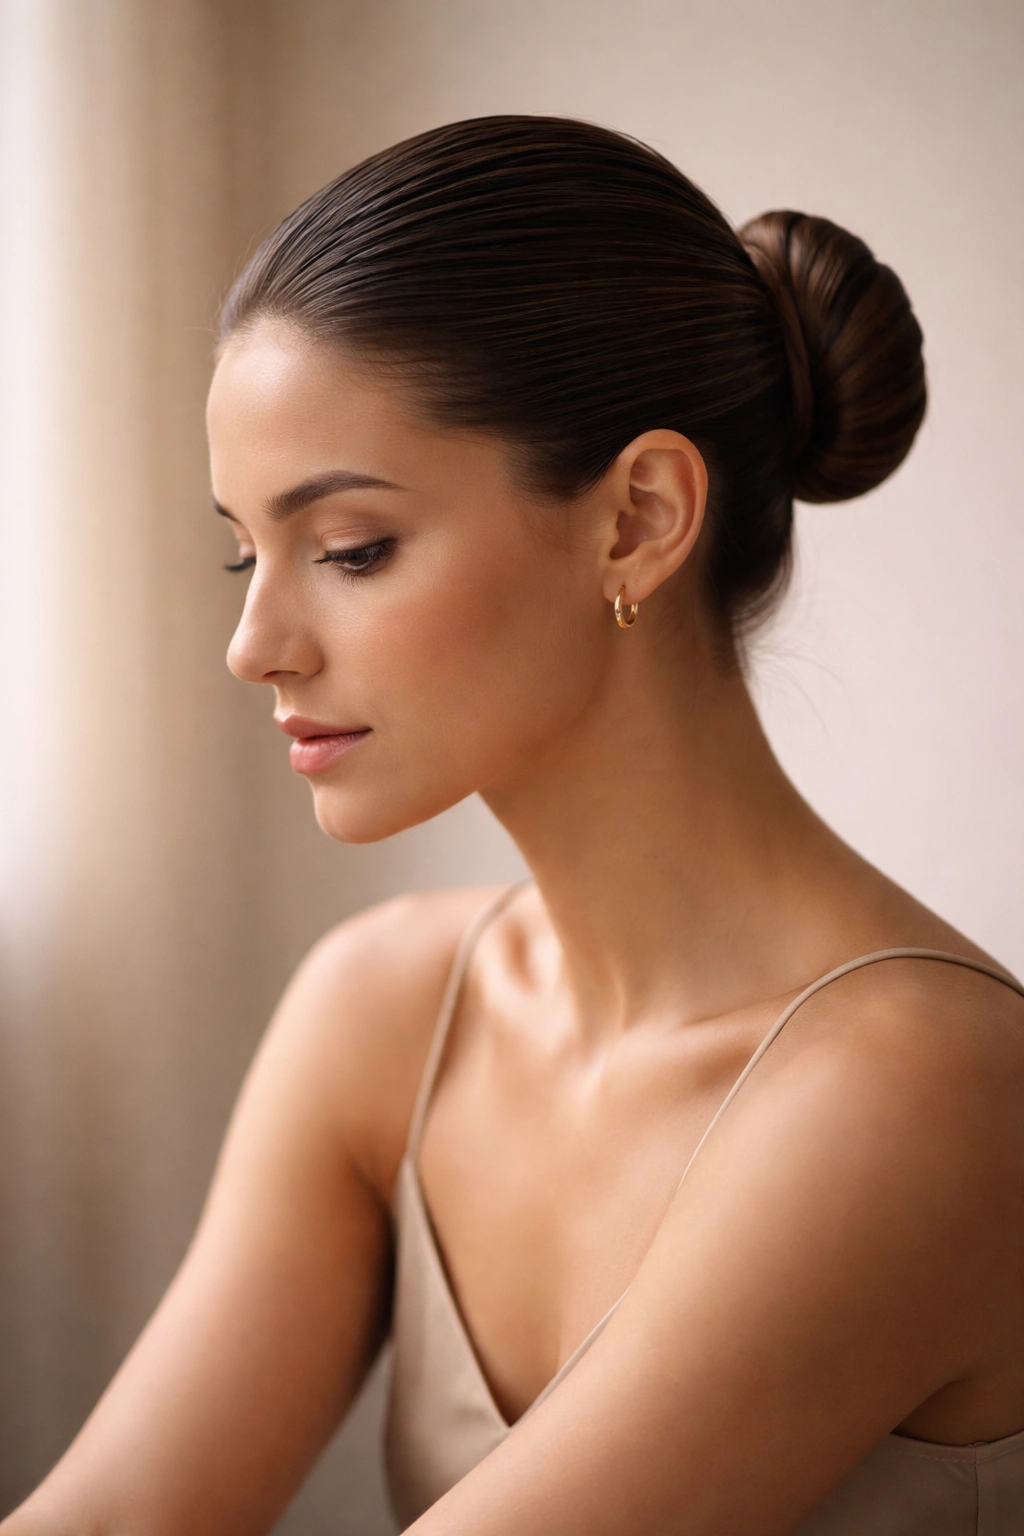
2. The High Tight Bun
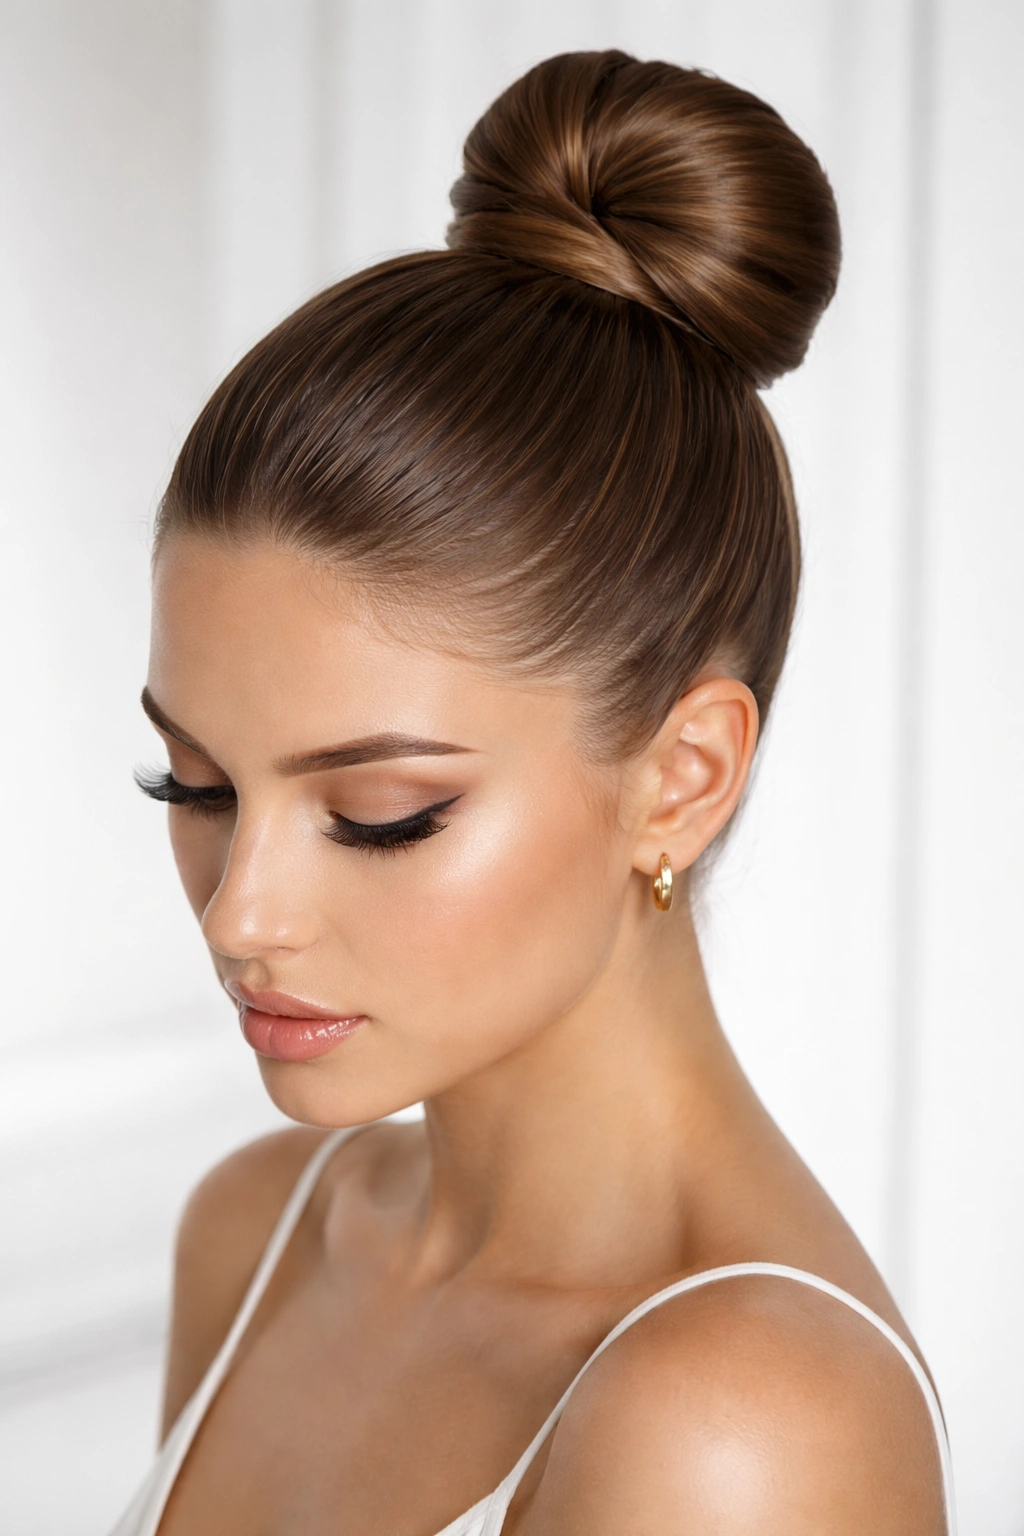
A high tight bun sits at the crown of your head and demands attention. It’s a performance statement, the look of a ballerina before she steps on stage or an athlete heading into competition. Straight hair makes this style look exceptionally clean because the gathered tension creates perfect definition without any texture softening the lines.
What Makes It Different
Height changes everything. A high bun pulls the eye upward, elongates your neck, and projects confidence in a way that’s almost physical. It’s also the most secure option if you’re actually engaging in athletic activity — it won’t shift during movement the way a lower bun might. For formal events, the high placement feels more elegant and intentional than casual.
Building Your High Bun
- Blow-dry your hair completely straight with lots of volume at the roots if possible
- Use a comb to gather your hair high at the crown — aim for placement that’s an inch or two below your actual crown point for comfort and longevity
- Secure the ponytail with a strong elastic that won’t slip
- Create tension throughout by brushing the ponytail smooth before wrapping
- Twist the ponytail and wrap it around the base in a spiral, pinning as you go with 3-4 bobby pins
- Smooth the outer layer with your comb and a smoothing product for that signature sleek finish
Worth knowing: High buns require some strength in your hairline and scalp. If you have a sensitive scalp or fine hair, skip the extreme tension and opt for a slightly lower placement that’s comfortable for extended wear.
3. The Twisted Crown Bun
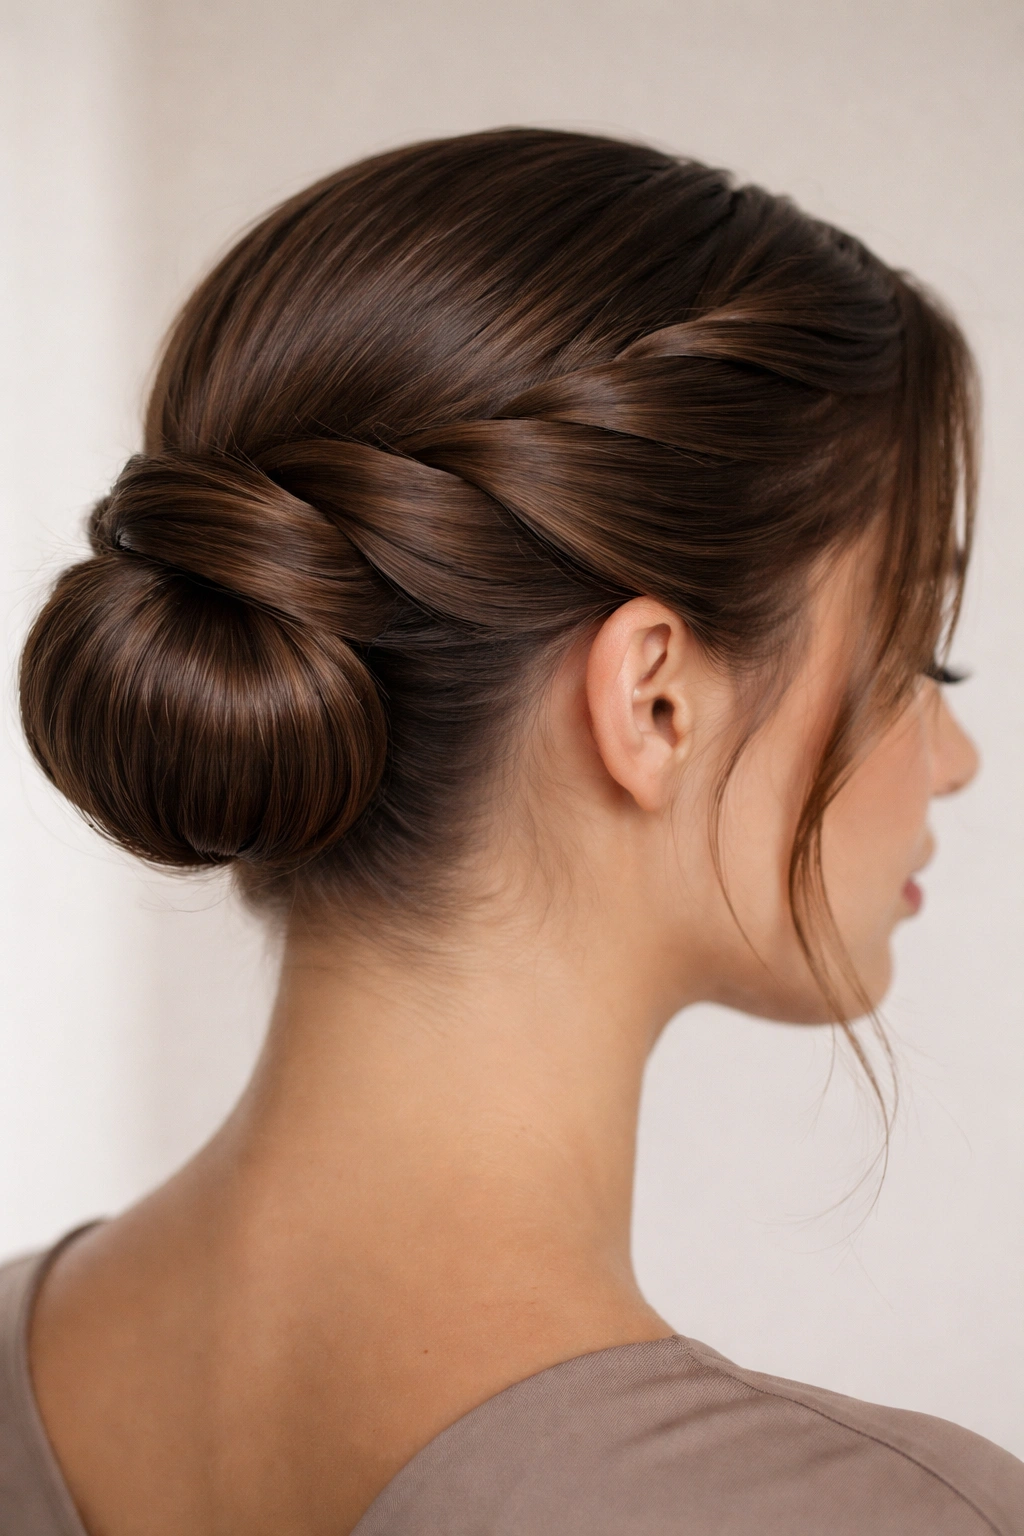
This style adds visual interest without adding complexity. Two sections of hair are twisted together before wrapping around a lower ponytail base, creating a subtle braid-like texture around the crown while maintaining the sleek bun aesthetic. It’s the best of both worlds — graphic enough to look intentional, simple enough to execute in five minutes.
Why Straight Hair Excels Here
The twist mechanism creates definition that would look messy on textured hair but looks deliberately graphic on straight strands. You get movement and visual texture without actually having wavy or curly hair. The smoothness of your base hair means the twisted sections stand out clearly without frizz interfering.
Step-by-Step Technique
- Start with a side parting if you want asymmetry, or center if you prefer balance
- Take a one-inch section from one side of your head at temple height
- Twist this section tightly as you move toward the back of your head, adding small sections of hair as you go (similar to a rope braid)
- Pin the completed twist to the back of your head temporarily
- Repeat on the other side, twisting in the same direction
- Gather all remaining hair into a ponytail at your desired bun height, incorporating the twisted sections
- Secure with an elastic and wrap the ponytail base with the remaining hair
Pro tip: Twist toward the center line rather than away from it. This creates a Crown-like effect that’s visually balanced and feels intentional.
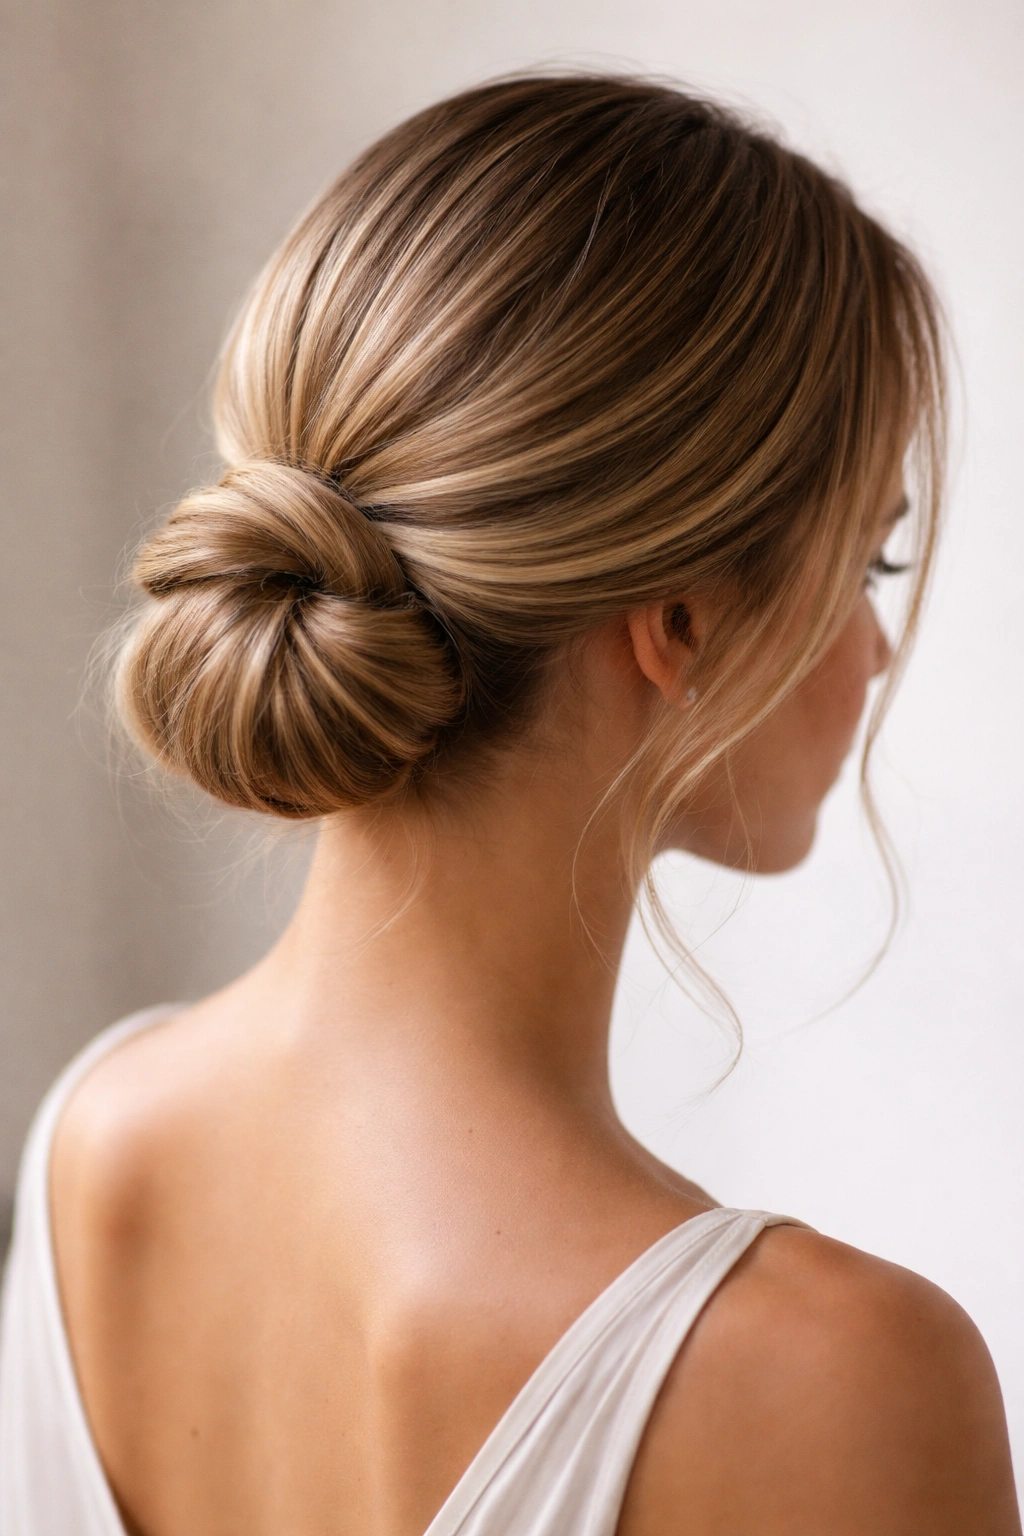
4. The Side-Swept Bun
Position your bun dramatically to one side, and suddenly you have a style that’s both modern and romantic. A side-swept bun sits lower than a traditional placement, usually gathering somewhere around ear level or just behind it. This asymmetrical approach creates an entirely different silhouette from a centered bun, and straight hair makes the lines of this style beautifully clear.
The Sophistication Factor
Side-swept styling feels inherently more artistic than centered placement. It works for creative professionals, anyone who wants an edge of style beyond corporate polish, and people who are dressing up but not formal. It’s the hairstyle equivalent of a blazer worn off-one-shoulder — intentionally imperfect in a very deliberate way.
Creating the Side-Swept Effect
- Add texture or waves if desired (you can work with straight hair, but a slight wave reads more romantic) using a flat iron to create soft bends
- Create a deep side part, using the wider section as your main working area
- Brush all hair smoothly toward the side where you want your bun to sit
- Gather into a ponytail at the chosen side location — lower placements work best for this style
- Apply smoothing serum and secure with an elastic
- Wrap the ponytail around the base or create a twisted version for more interest
- Smooth flyaways and leave a few wispy pieces around your face for softness
Insider note: The pieces you leave loose around your face matter. They shouldn’t be ragged or unintentional-looking. Pull out two or three thin pieces from near your temples and gently curl them with a small-barrel curling iron for that effortlessly romantic vibe.
5. The Double Bun
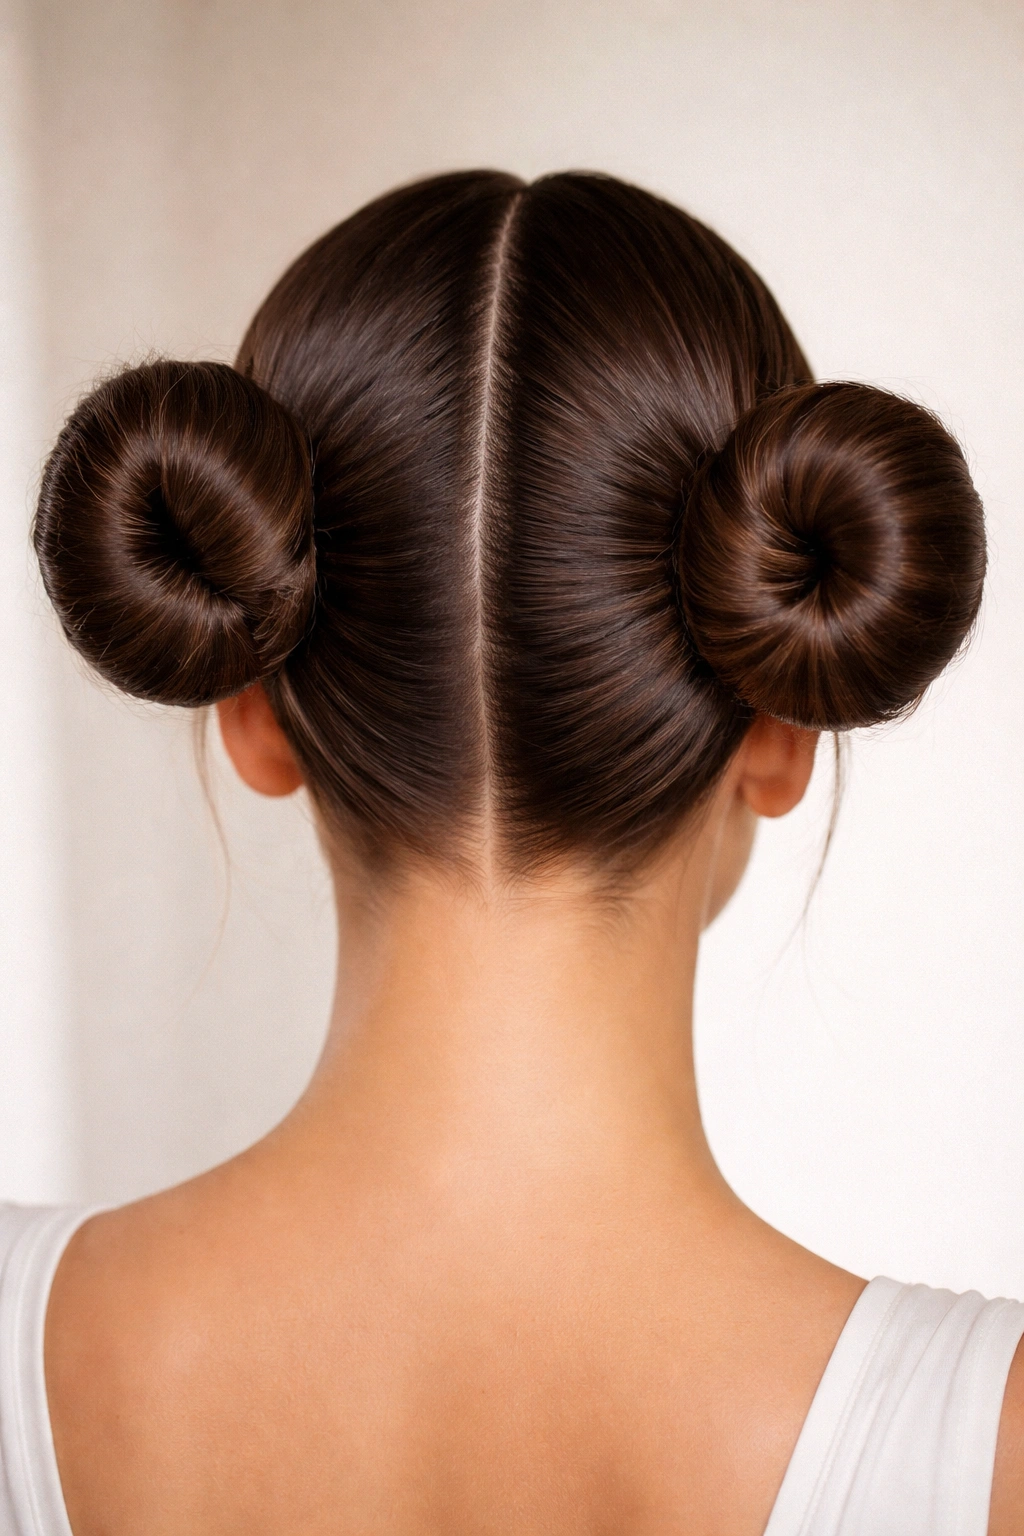
Two buns positioned symmetrically on either side of your head create a look that’s playful, youthful, and surprisingly versatile. Double buns aren’t just for children — styled sleekly with a modern color or unexpected accessories, they’re a bold adult statement. Straight hair is perfect for this style because the geometry is so clean and the visual balance so obvious.
Why This Works as an Adult Style
Double buns read as fashion-forward and creative rather than juvenile when executed with intention. Use a monochromatic color, keep the buns neat and symmetrically placed, and wear them with confidence and modern clothing. The key is treating them as a deliberate design choice, not a throwback.
Placing Your Double Buns
- Divide your hair down the center of your head from your forehead to the nape of your neck, using a tail comb for precision
- Create two equal sections on either side of your parting
- Brush one section smooth and secure it into a ponytail at your chosen height (temples work well for a balanced look, the crown for higher impact)
- Repeat on the other side, making sure both ponytail heights are exactly even
- Twist or wrap each ponytail around its elastic base, pinning securely
- Use a smoothing product to eliminate any flyaways and refine the outer edges of each bun
- Step back and verify symmetry — if one appears higher or looser, adjust before locking in your bobby pins
Worth knowing: The success of double buns lives or dies by symmetry. Spend an extra minute ensuring both ponytails are equally high and equally tight. Use a mirror if you’re struggling with the back placement.
6. The Textured Sleek Bun

Here’s how to add subtle dimension to the classic bun without abandoning the sleek aesthetic. Create gentle waves or texture in your hair before slicking it back, then bun it. The textured interior of your bun won’t be visible from the front, but it creates a softer, less severe vibe than a completely smooth bun. For straight hair that can sometimes feel flat or one-dimensional, this approach adds quiet sophistication.
The Balance Between Sleek and Soft
This style proves that sleek doesn’t have to mean severe. You get the polished, professional vibe of a slicked-back bun while maintaining a softer energy. It’s perfect for people who want the containment and formality of a bun but worry that their straight hair might look too austere or pulled.
Building the Textured Version
- Create soft waves in your hair using a large-barrel curling iron or waving product, working in sections and letting the waves cool completely
- Apply lightweight smoothing serum only to your roots and the outer layer that will be visible
- Gently brush your hair back, preserving the wave pattern in your mid-lengths and ends — you’re not creating a smooth surface, you’re directing the texture backward
- Gather into a ponytail at your preferred height, securing gently so you don’t flatten all the texture
- Instead of twisting the ponytail, fold it in half and wrap it loosely around the elastic base, letting the textured ends create a softer, less-defined bun shape
- Smooth your outer layer sleekly while leaving the interior texture visible
Pro tip: Don’t over-smooth the back of your hair. You want the silhouette to remain neat, but you’re inviting a little texture to peek through. This is a deliberate softness, not a styling mistake.
7. The Wrap-Around Bun
This geometric style uses your hair itself as the primary visual element. Rather than simply twisting your ponytail around an elastic base, you section out a piece of your ponytail and wrap it carefully around the remaining gathered hair. The wrapped section creates a clean band around the bun that looks intentional and graphic. Straight hair makes this technique look incredibly polished because the wrapping section lies absolutely flat without curling or flipping at the edges.
The Modern Simplicity
Wrap-around buns look contemporary and designed. They suit minimalist aesthetics perfectly and work in both professional and creative settings. The technique takes maybe thirty seconds longer than a basic bun, but the payoff in visual interest is significant.
Executing the Wrap
- Create a smooth, high ponytail secured with an elastic
- Section out a half-inch piece of your ponytail and clip it away temporarily
- Take the remaining ponytail and twist it into a coil, pinning it at the base to create your bun shape
- Release your clipped section and gently wrap it around the coiled bun, covering the elastic completely and the base of the twist
- Secure the wrapped section with bobby pins that match your hair color, positioning them underneath so they’re hidden from above
- Smooth the entire structure with a fine-tooth comb and smoothing serum
Worth knowing: The wrapped section should be thick enough to completely conceal your elastic and pins but not so thick that you’ve compromised the bulk of your bun. Aim for about one-quarter of your total hair volume.
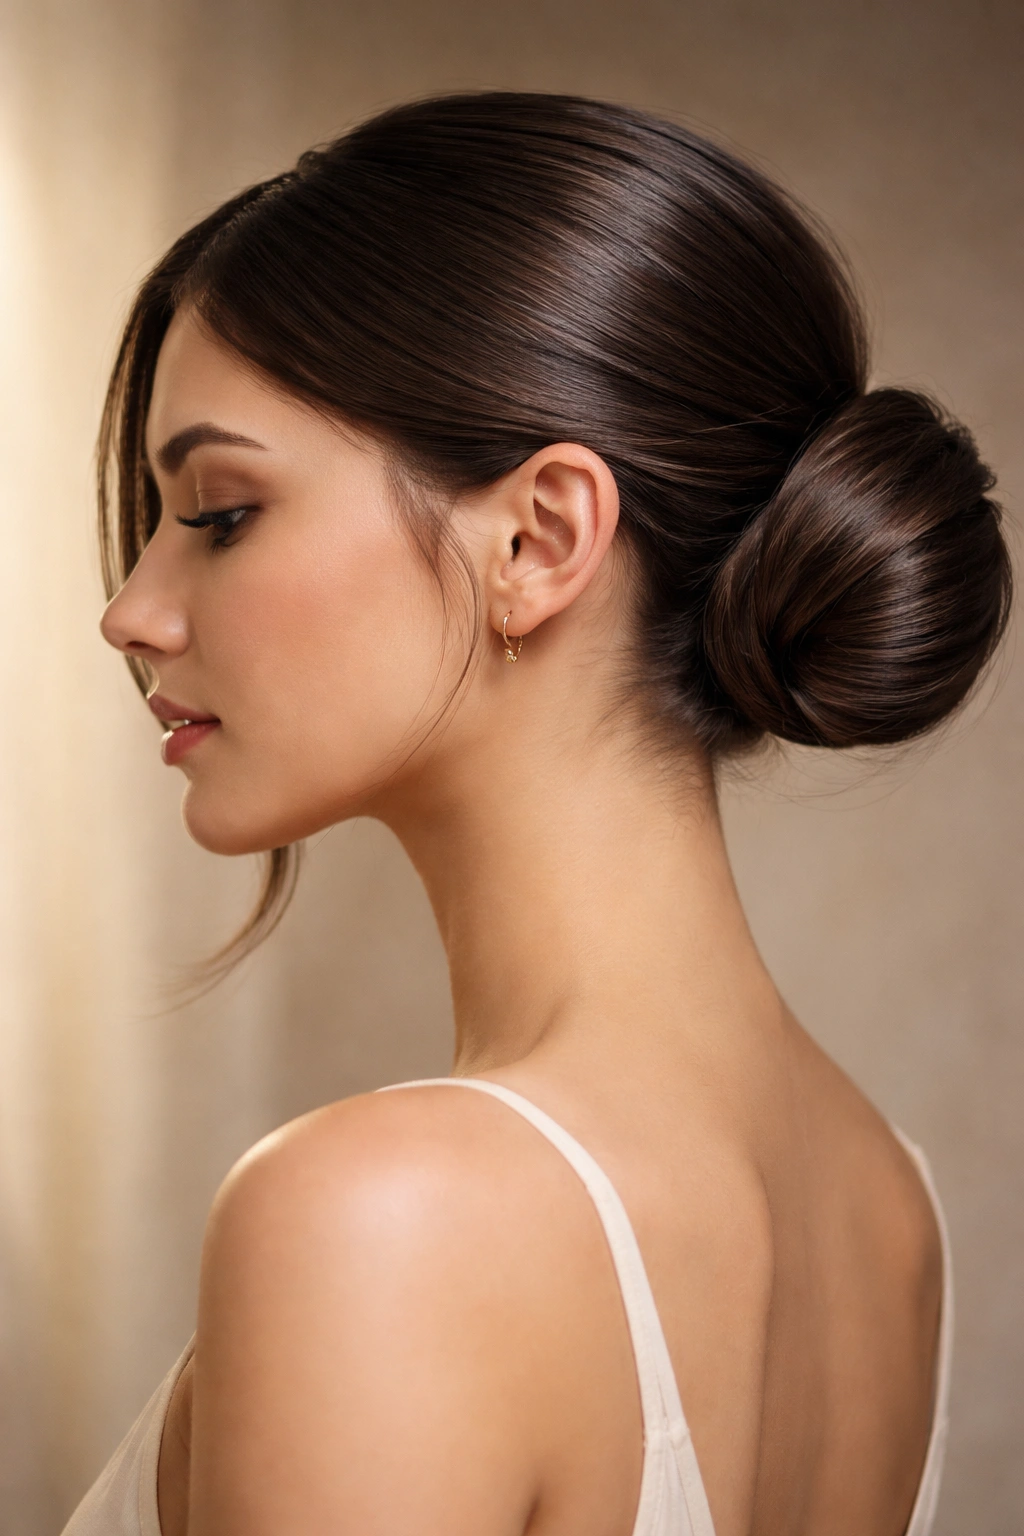
8. The Chignon Bun
A chignon is a more relaxed, textured version of a bun that still maintains that sleek, slicked back crown. The gathered section sits low, usually at the nape of your neck, and the bun itself is fuller and softer, with intentional texture showing throughout. For straight hair, you create this texture deliberately through waving or crimping before you gather and bun.
When to Wear a Chignon
This is the style for people who want elegance without severity, formality without rigidity. It works beautifully for dinner events, date nights, and any occasion where you want to look thoughtfully put-together but not militarily precise. The French origins of the style carry a certain inherent sophistication.
Creating Your Chignon
- Blow-dry your hair straight, then use a medium-barrel curling iron to create loose waves or curls throughout
- Work in sections, wrapping hair around the barrel and allowing each section to cool completely
- Don’t brush out the waves — you want them to maintain their shape and texture
- Apply light smoothing serum only to the crown area, leaving the lengths textured
- Gather all your hair at the nape of your neck, securing it with an elastic
- Instead of wrapping smoothly, tease the ponytail section gently to increase volume
- Twist the ponytail loosely and wrap it into a soft, rounded shape at the base
- Pin securely but don’t over-smooth — maintain visible texture throughout the bun itself
Pro tip: A chignon should look soft enough that you could run your fingers through it. If your bun looks too tight or controlled, you’re creating a regular bun, not a chignon. Loosen your grip and let texture show.
9. The Faux Hawk Bun
Take the attitude of a mohawk and translate it into elegant hair containment. A faux hawk bun combines volume down the center of your head with sleek sides, gathering all that central volume into a bun at the back. It’s bold, modern, and demands confidence. Straight hair allows you to create that stark contrast between smooth sides and voluminous center without texture softening the effect.
The Confidence Style
This isn’t a bun for people who want to blend in. It’s a statement of personal style and creative thinking. It works for artistic professionals, anyone with a bold fashion sense, and people who wear their identity on the outside. The style is inherently confident.
Building Your Faux Hawk
- Blow-dry your hair with significant lift at the roots, using a volumizing product applied to damp hair before drying
- Create a deep side parting, but instead of making it a traditional part, use it to define a narrow mohawk-like section down the center of your head
- Smooth the hair on both sides of this central section using smoothing serum and a paddle brush, directing it close to your scalp
- Secure the side sections with bobby pins clipped to the back, creating a sleek frame for your voluminous center
- Gather the central, voluminous section at the back of your head and secure into a ponytail
- Create texture in this ponytail using a curling iron if desired, then wrap it into a full, rounded bun
- The bun should look intentionally voluminous — tease it gently if needed to maximize the contrast with your sleek sides
Insider note: This style photographs beautifully from the side and back, but looks even more striking from the front because of that sculpted volume down the center. It’s a style that shows intention from every angle.
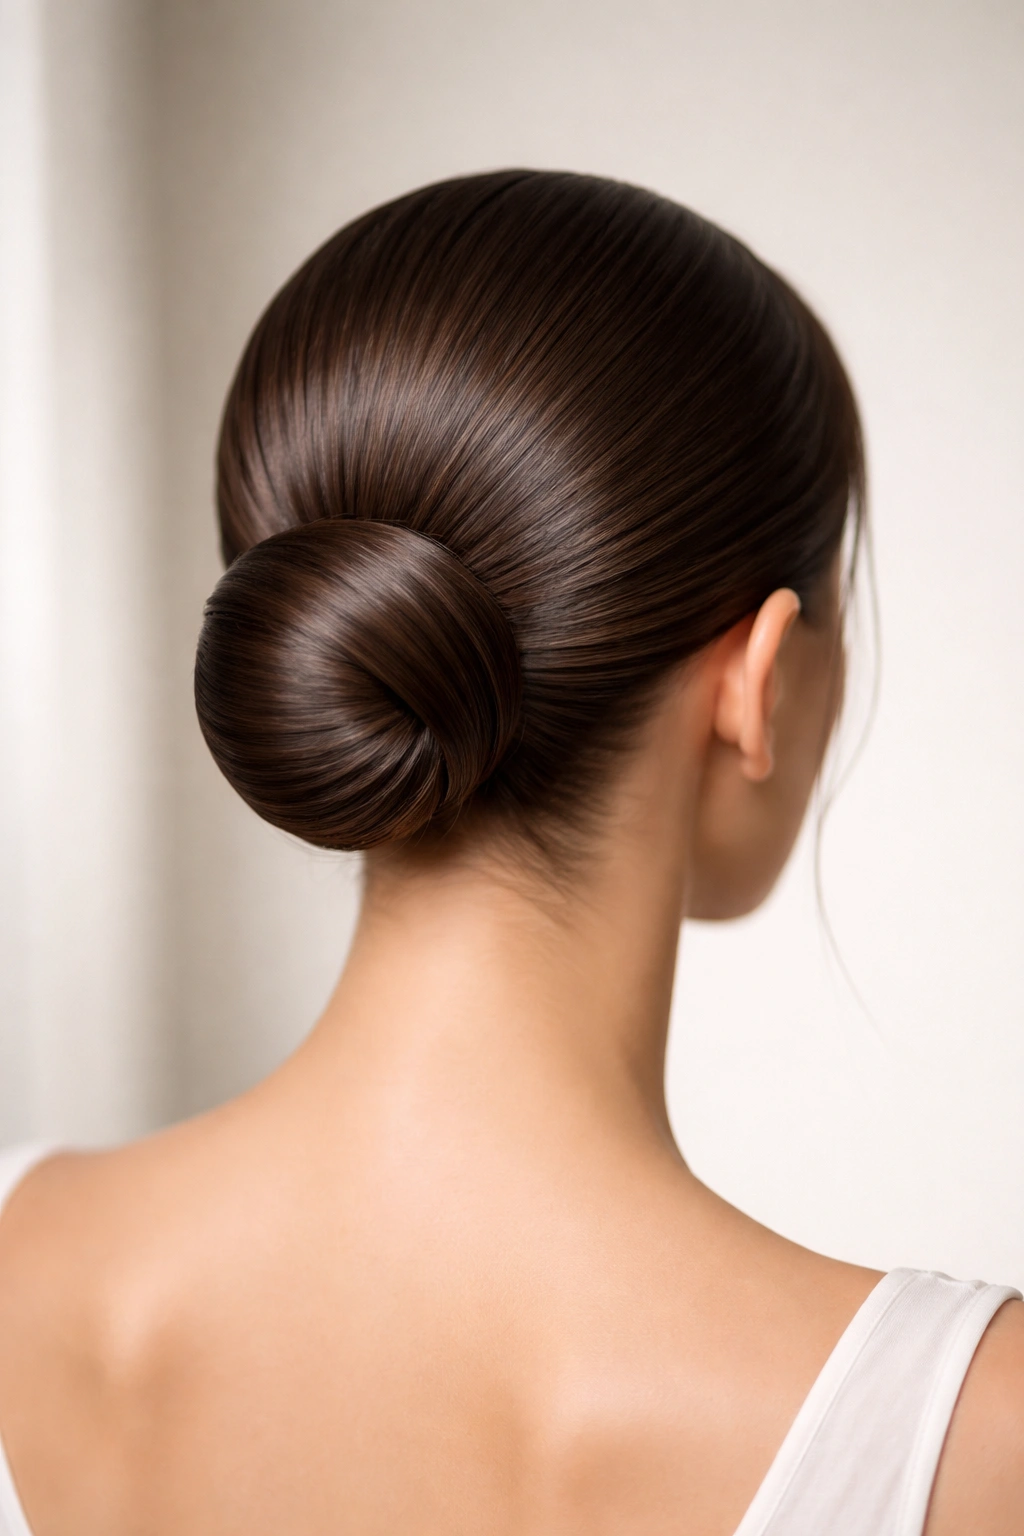
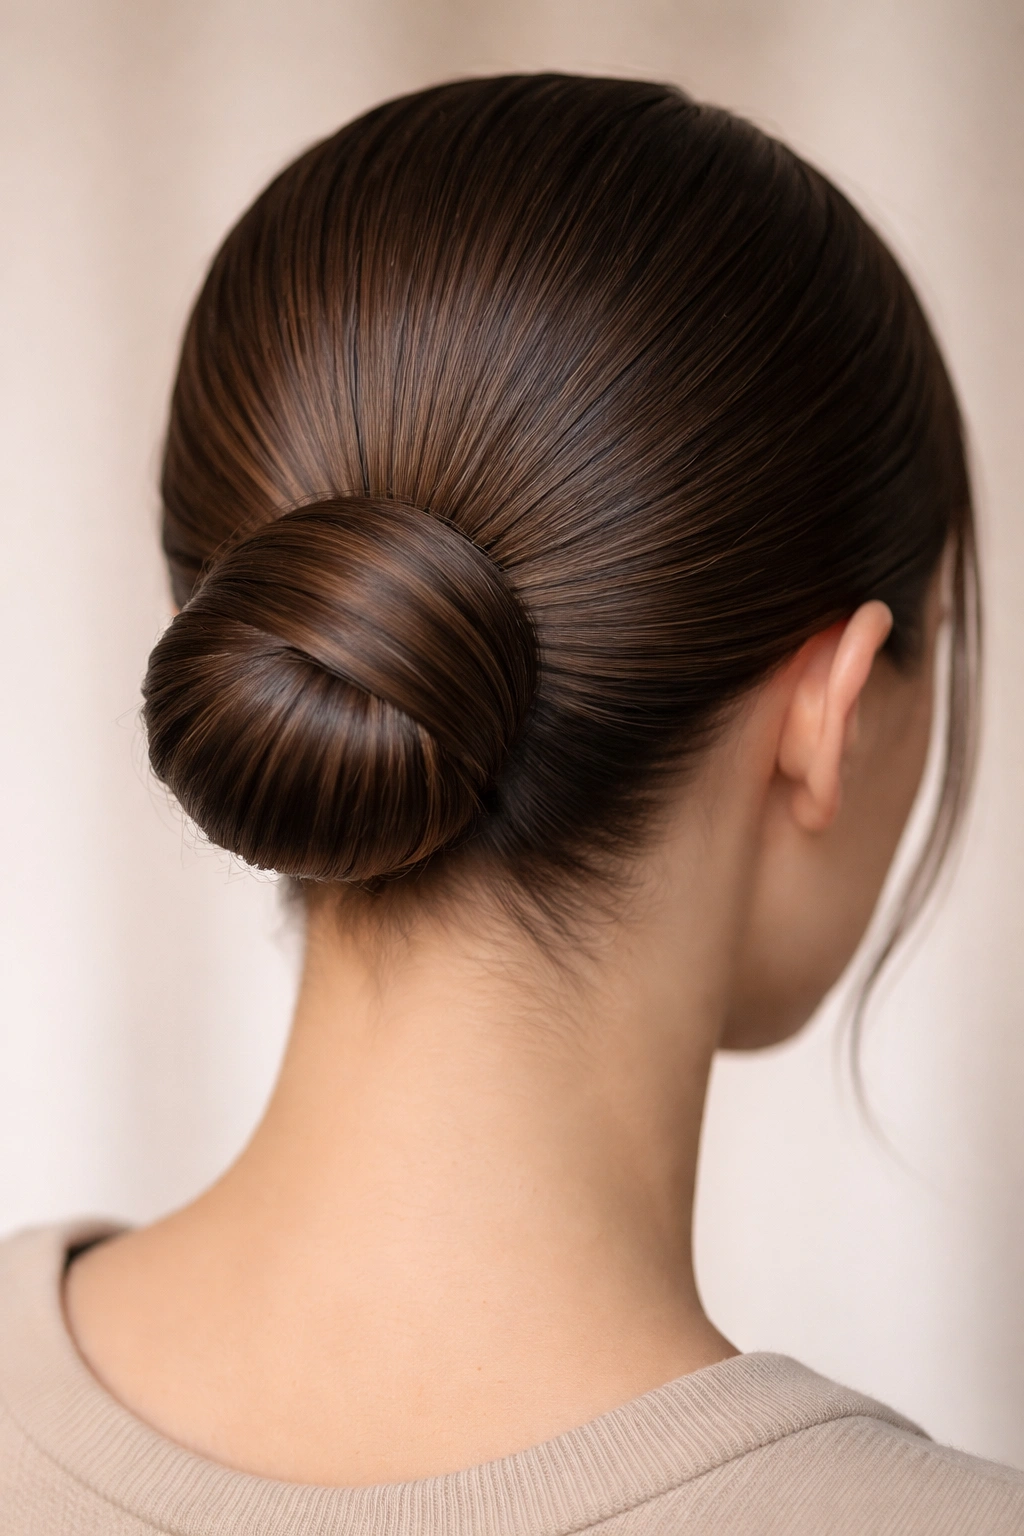
10. The Minimalist Low Bun
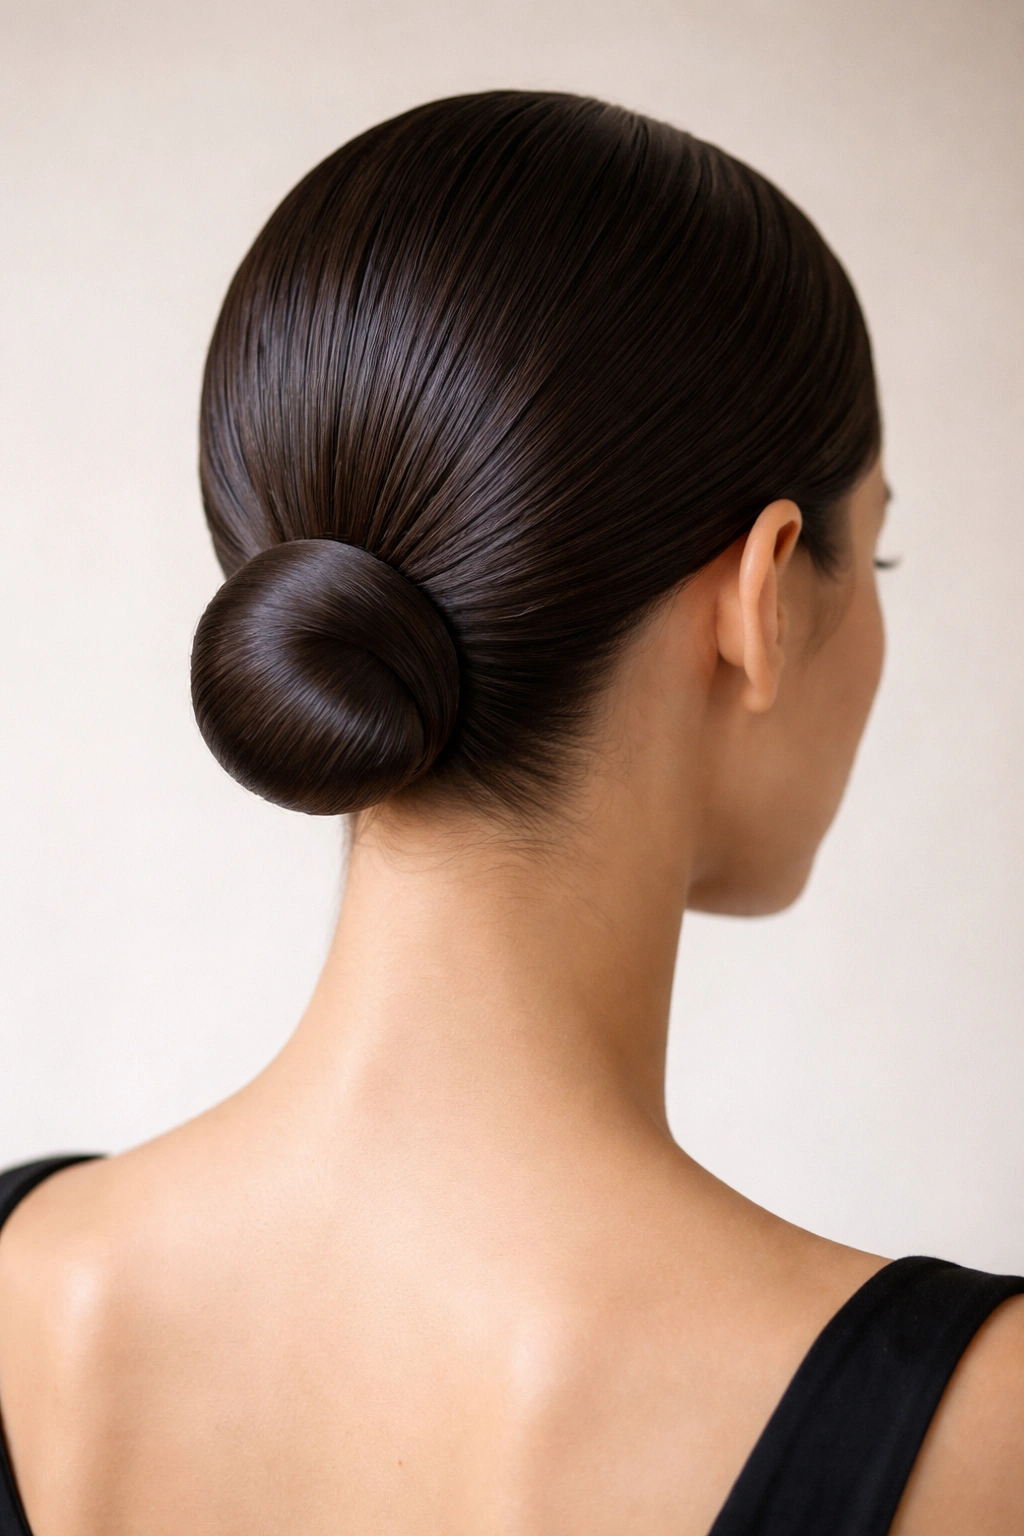
Sometimes the most sophisticated choice is also the simplest. A minimalist low bun sits just above the nape of your neck, is smooth and tight throughout, and requires nothing decorative — no wrapping, no texture, no extra elements. It’s pure architecture. Straight hair makes this style almost effortless because your natural smoothness is literally the entire point.
The Intentional Simplicity
Minimalist aesthetics have become increasingly valuable in a world of visual noise. A perfect, simple low bun communicates taste, confidence, and intention. It works for anyone from artists to executives, from casual coffee dates to formal galas. The beauty is in the execution, not in embellishment.
Perfecting Your Minimalist Bun
- Wash your hair and blow-dry it completely straight, using minimal product during this stage
- When your hair is fully dry, apply a small amount of smoothing cream or gel to your hands, rubbing them together to distribute evenly
- Brush your hair straight back into a smooth, tight ponytail at the nape of your neck, using a fine-tooth comb to eliminate flyaways as you go
- Secure with a thin, quality elastic that matches your hair color
- Take the ponytail and twist it tightly, then wrap it around the elastic base in a single, neat coil
- Pin securely with 3-4 bobby pins positioned underneath where they won’t be visible
- Run your comb one final time over the entire surface, smoothing any texture and refining the shape
- A light misting of hairspray locks everything in place without creating visible product residue
Pro tip: The minimalist approach relies on hair health and cleanliness. Make sure your hair is in genuinely good condition, as this style hides nothing. Any dullness, damage, or texture will be immediately apparent.
Final Thoughts
Slicked-back buns remain one of the most reliable, versatile, and genuinely chic styling options available to anyone with straight hair. Your natural advantage — that smooth, light-reflecting surface — is precisely what makes these styles look so polished and intentional. The variety across these ten approaches means you can select a bun style to match your mood, your outfit, your occasion, and your confidence level on any given day.
The real skill isn’t mastering just one bun style. It’s understanding the principles that make these styles work — how tension affects the silhouette, how product application influences the final look, how placement changes the entire vibe. Once you’ve internalized these basics, you’ll find yourself varying and improvising, creating hybrid styles that feel uniquely yours. Your straight hair gives you the technical ability to execute these styles flawlessly. What matters next is choosing which one feels like the truest expression of your style at any given moment.