Straight hair gets a reputation for being simple or boring, but the truth is it’s a canvas waiting for the right styling move. Hair clips have made a major comeback, and they’re no longer just practical hair-holding tools—they’re legitimate style statements. The beauty of clips with straight hair is that they create instant dimension, polish, and intentionality without requiring heat styling, complicated techniques, or products that weigh your strands down.
Whether you’re looking for something office-appropriate, a weekend vibe, or a going-out statement, clips work on straight hair in ways they don’t always manage on other textures. Because your strands have natural smoothness and clean lines, clips catch the light differently, read more deliberately, and create sharper visual definition. A single clip becomes an accent. Multiple clips become architecture.
The 10 looks below range from minimalist and wearable to bolder and more intentional—but all of them work beautifully on straight hair. Each one uses clips in a different way to transform how your hair reads, and each is genuinely achievable whether you’ve got fine, medium, or thick strands. The common thread: they’re all about letting clips do the actual styling work while your straight hair provides the polished foundation.
1. Sleek Low Bun With Pearl Hair Clips
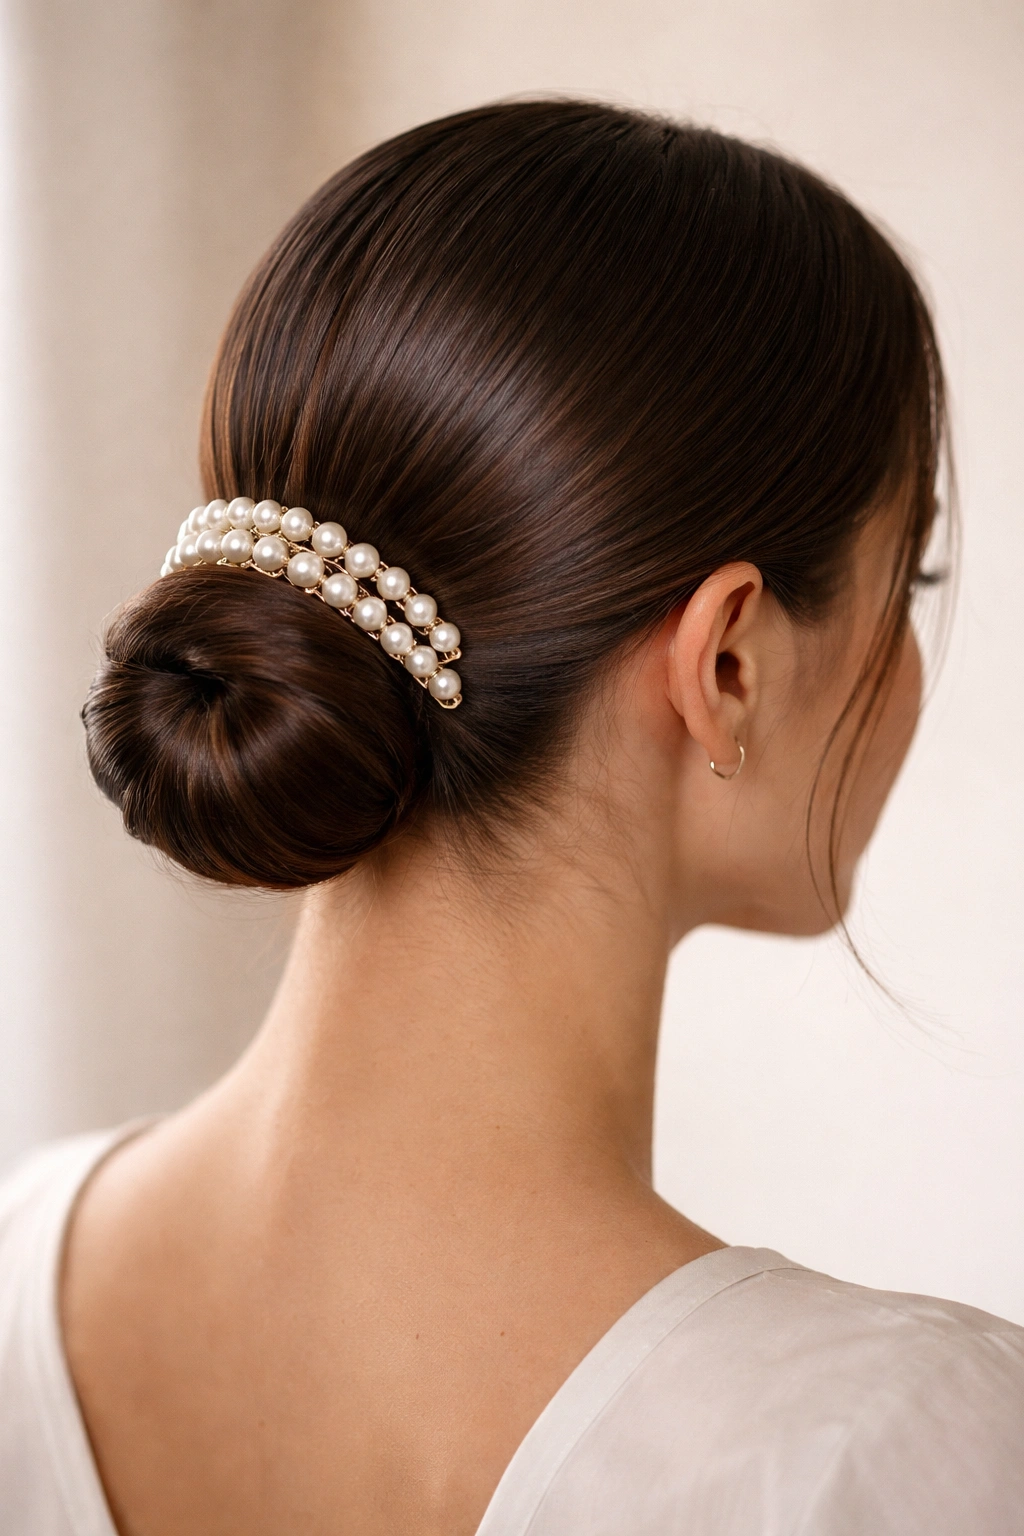
A low bun is the uniform of effortless polish, but it becomes genuinely elevated when you secure it with pearl clips instead of a standard elastic. Start by brushing your straight hair back and gathering it at the nape of your neck—aim for a height about 2-3 inches above the base of your neck, roughly where your natural hairline curves. Twist the gathered section gently and wrap it around itself to form a compact bun, then secure the base with a clear elastic or a thin hair tie that matches your natural color.
Here’s where the real styling happens: take 2-3 pearl clips (size varies depending on your hair thickness and personal preference) and position them strategically around the base of the bun, angling them horizontally or slightly diagonally. The clips should hide the elastic while the pearls catch light and add immediate sophistication. This works beautifully because straight hair creates clean, precise edges around the bun shape, so the clips sit flush against the base without any flyaways or frizz to distract from them.
Why This Look Works on Straight Hair
Pearl clips on straight hair read as intentional and curated rather than like you’re trying to hide something. The smoothness of straight strands means the clips stay exactly where you position them, creating a polished, almost architectural effect. The contrast between the sleekness of the hair and the subtle shine of pearls is genuinely elegant.
Key Details to Perfect It
- Brush your hair thoroughly before gathering it so the bun sits smooth and tight against your head
- Position clips at different angles around the bun base—avoid placing them all in a straight line, which can look too formal or rigid
- If your bun feels loose, gently tighten it by pulling small sections outward to create texture, then secure it with an extra clip placed horizontally through the center
- For finer hair, use smaller clips and position just one or two rather than overloading the bun with weight
Pro tip: This look holds beautifully all day because straight hair doesn’t slip as much as textured hair does—the slickness actually works in your favor, keeping the bun exactly where you styled it without daily adjustments.
2. Half-Up Half-Down With Tortoiseshell Clip
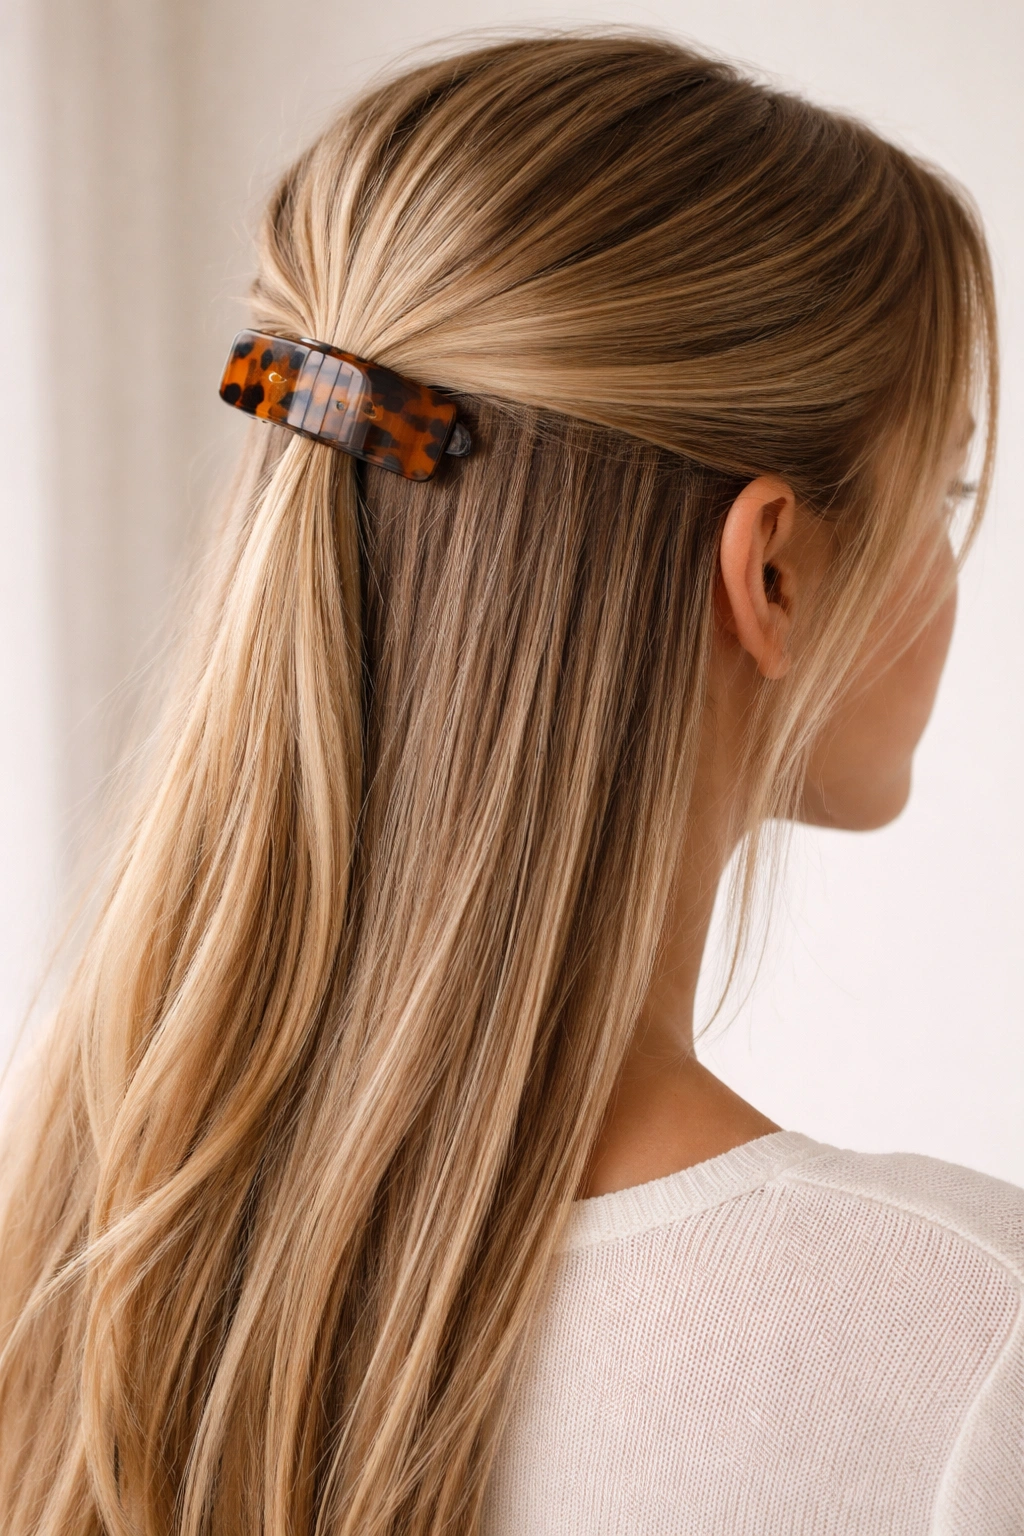
The half-up half-down style is endlessly versatile, but when you secure it with a tortoiseshell clip on straight hair, it becomes refined and modern. Start with your hair completely loose and straight, then use a comb to gather the hair from your temples back toward the crown—aim to pick up hair from about 2 inches above each ear, creating a clean line. Bring this gathered section to the back of your head, slightly above the crown, and use the clip to secure it at a slight angle rather than perfectly horizontal (an angled clip feels more contemporary than a straight placement).
The key to making this work is leaving the gathered section loose enough that it still has body and movement—you’re not creating a tight pulled-back look, but rather a soft, intentional hold. With straight hair, you’ll notice that the lower half of your hair frames your face beautifully while the clipped-up portion sits cleanly against your head, creating visible dimension and structure. The tortoiseshell pattern adds texture and visual interest to what would otherwise be a simple hold.
Why Tortoiseshell Works Better Than Metal
Tortoiseshell clips bring warmth and visual complexity to straight hair, especially if you have warm undertones. The pattern itself acts as a focal point, so the clip becomes a style accessory rather than just a functional tool. Straight hair lets the clip sit perfectly flush, showing off every detail of the tortoiseshell pattern without any frizz or stray hairs interfering with the view.
Styling Variations
- For a softer look, tease the hair at your crown before clipping, creating subtle volume that makes the style feel intentional rather than just “hair pulled back”
- Loosen the clipped section slightly after securing it, pulling small pieces forward around your face for a more romantic vibe
- Use a claw clip or a smaller rectangular clip rather than a large barrette—the scale should feel balanced with your face and hair volume
- For thicker hair, consider using two smaller tortoiseshell clips positioned side by side, each securing a section from one temple
Worth knowing: If your clip feels like it’s slipping on straight hair despite the smoothness, dampen the underside slightly with water or dry shampoo spray to increase grip—the moisture creates just enough texture to hold everything in place.
3. Face-Framing Clips on Straight Strands
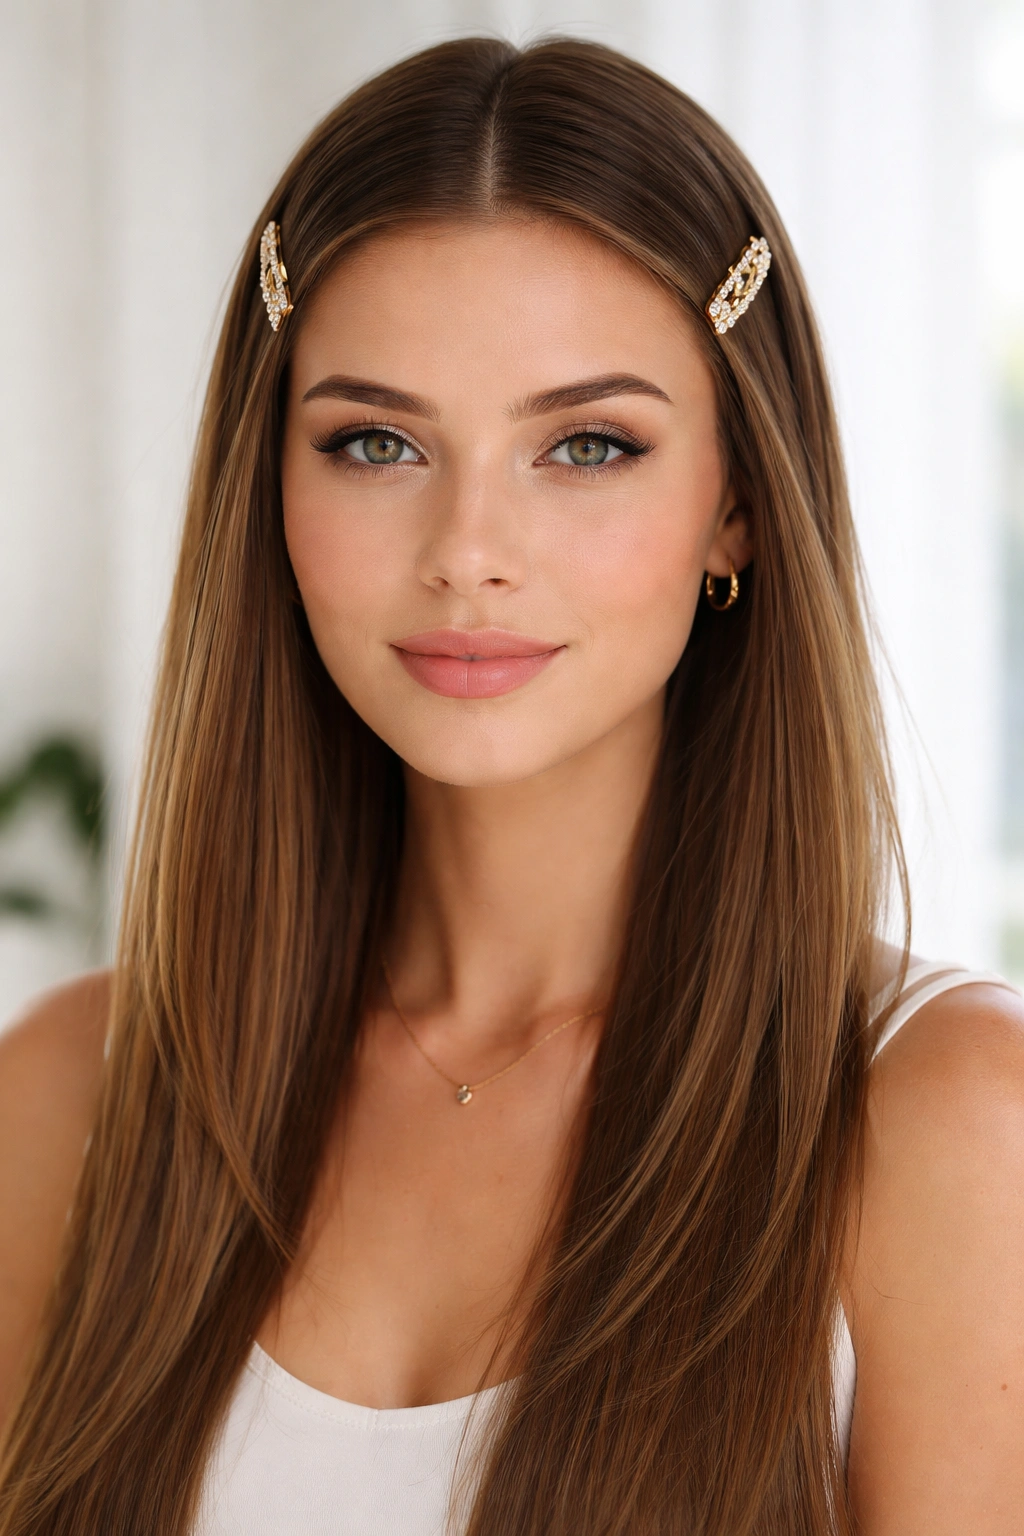
This is perhaps the simplest look on this list, but simplicity is exactly what makes it work. Instead of pulling hair back or creating a structured style, you’re using clips to deliberately frame your face by clipping small sections of hair from just above your ears—the pieces that naturally fall around your face anyway. Take a thin section from one side (about the width of two fingers) and clip it back with a decorative clip, then repeat on the opposite side.
The magic of this look is that it requires zero structural work and takes about 30 seconds, yet it transforms how your face reads. By framing it with clipped sections, you’re creating intentional lines that draw attention upward. On straight hair, these face-framing clips sit perfectly smooth without any frizz, and the clips themselves become jewelry-like accents. Choose clips in metallic tones, fun colors, or stone details to add personality, or go minimal with sleek rectangular clips for an understated vibe.
Why This Works on Straight Hair Specifically
With straight hair, these framing clips don’t disappear into texture—they’re visible from every angle, showcasing the detail of the clip itself. The strands they hold stay smooth and polished, creating clean lines that actually accentuate your features rather than muddying them. It’s a look that reads as intentional styling, not just hair pushed back.
Execution Tips
- Section your hair cleanly—a fine-tooth comb helps create the precise separation between clipped hair and the rest of your strands
- Position the clips close to your scalp, just behind the temples, for a more modern feel; place them lower if you prefer a softer, more draped effect
- Consider using matching clips on both sides for a balanced, intentional look, or mix and match for something more playful
- For finer straight hair, choose smaller, lighter-weight clips that won’t pull or strain the delicate sections
- Pair this with other styling choices: a straight middle part for bold geometry, a deep side part for asymmetrical elegance, or no specific part for effortless flow
Quick fact: This look is genuinely helpful if you’re trying to transition between washed-out hair and a full wash day—it gives a styled appearance while keeping everything clean and simple.
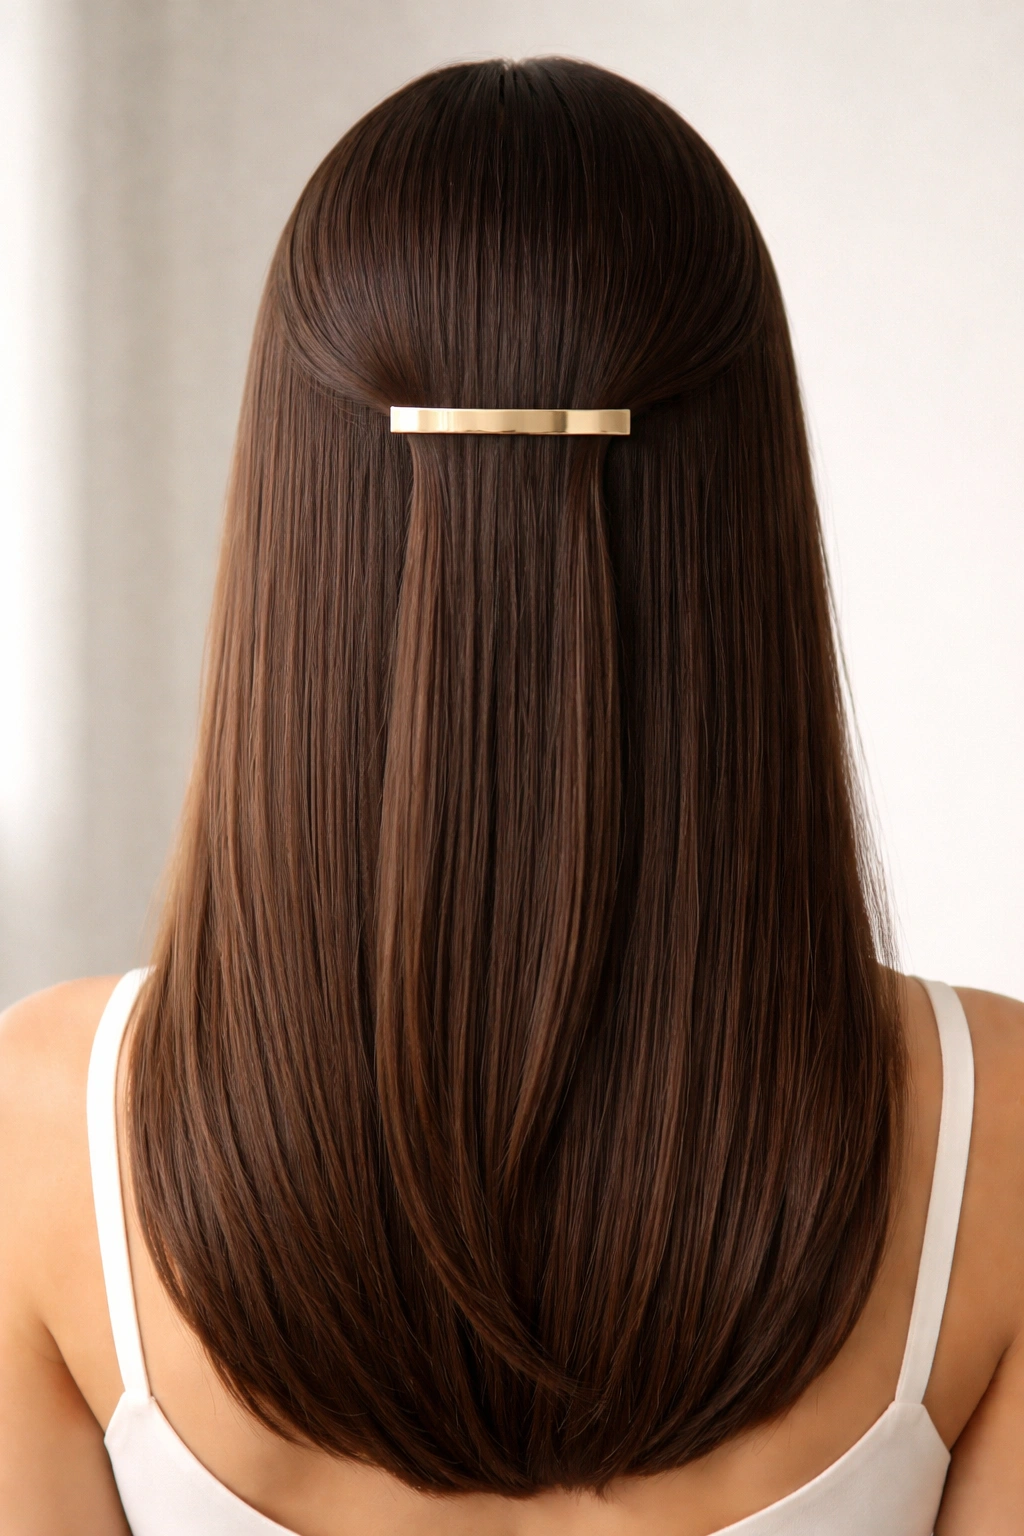
4. Geometric Barrettes Placed Down the Back
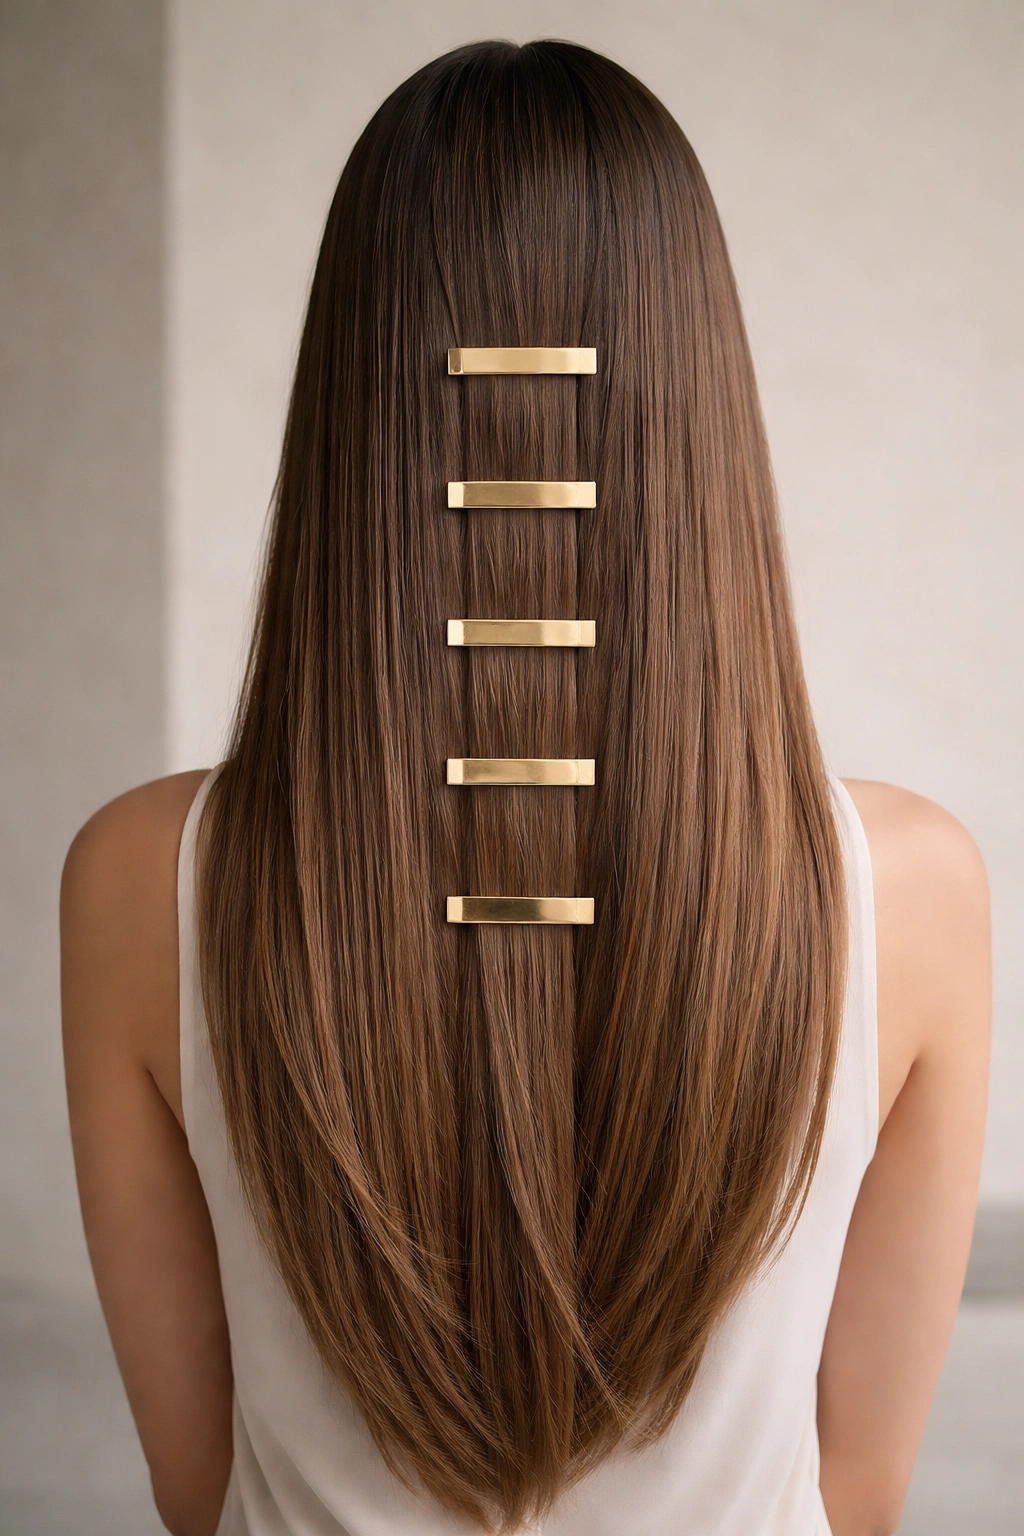
This look is architectural, modern, and built entirely on the idea that clips don’t need to hide—they’re the statement. With your hair in its naturally straight state, take a rectangular or geometric barrette and clip it horizontally across the back of your head at roughly ear level, securing a 2-inch section of hair. Below it, position a second geometric clip about 2-3 inches lower, securing another section. You can continue this pattern, spacing clips evenly down the back, or create an asymmetrical placement that feels more artistic.
The impact comes from the clips themselves becoming the visual focal point, so choose clips that genuinely work as accessories—polished metals, bold colors, tortoiseshell patterns, or minimalist designs that appeal to your style. Straight hair is absolutely essential for this look because it provides the smooth backdrop that lets the clips read as intentional design elements rather than functional holds. There’s no texture to compete with the geometry of the clips, no frizz to soften their edges.
Creating Visual Impact With Clip Placement
- Place clips at different heights across the back—varying their position makes the look feel artful rather than rigid or uniform
- Leave space between clips rather than clustering them tightly together; the space is part of the design
- Consider using clips of different widths or finishes to create intentional variation
- For a more daring look, use 4-5 clips traveling down the back; for something subtler, use just 2-3 strategically placed clips
- The clips work best when they secure only a thin layer of hair rather than thick sections—this emphasizes the geometry of the clip itself
Best Clip Styles for This Look
Choose rectangular barrettes for a clean, modern aesthetic; vintage-inspired clips for a more romantic approach; or minimalist metal clips for pure sophistication. Avoid clips with heavy decorations or loud patterns unless your personal style embraces maximum statement-making.
Pro tip: This look is easier to execute on second-day or third-day straight hair, which has slightly more grip and texture than freshly washed strands, helping the clips stay exactly where you position them throughout the day.
5. Side-Swept Look With Metallic Clip
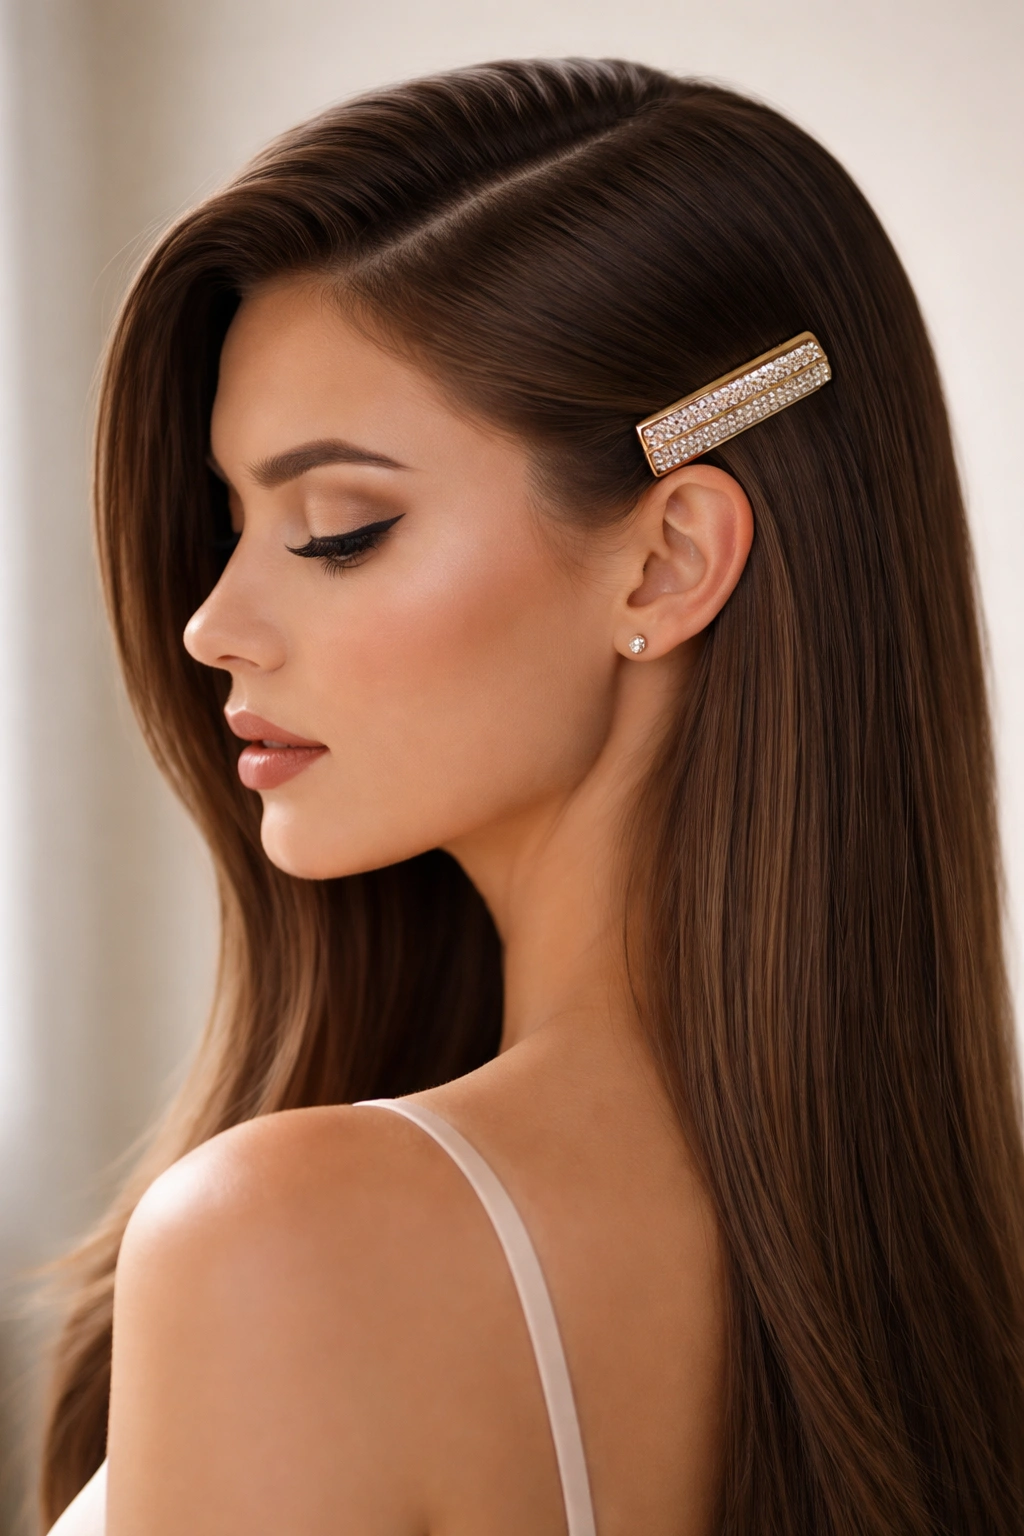
A side-swept style feels inherently glamorous, and on straight hair, it reads as polished without trying too hard. Create a deep side part—start at the center of your head and part your hair by running a comb toward one side, creating a line that starts roughly from your crown and curves down. Brush all your hair toward the fuller side (the side with more hair in the part), creating a smooth, flowing line from crown to shoulder. At the back of your head, just below the crown on the side you’ve swept to, position a metallic clip to secure the swept section and add polish.
The clip here isn’t about creating structure—it’s about giving intentionality to the sweep. The metallic finish catches light every time you move, and on straight hair, this creates a subtle but unmissable detail. The smoothness of your strands means the clip sits precisely where you positioned it, and the weight of long, straight hair naturally cooperates with the sweep rather than fighting against it.
Styling This Look for Maximum Impact
- Create your side part while hair is slightly damp for a cleaner line that holds better throughout the day
- Position the clip below and slightly behind your ear on the swept side, angling it slightly downward rather than horizontally—this creates a more contemporary feel
- Leave a few strands of hair free on the swept side to frame your face; don’t pull everything back tightly
- The clip should secure the bulk of the swept hair while still allowing some movement and flow
- For straight hair with significant length, a larger metallic clip (2-3 inches) looks proportionate; for shorter straight hair, choose a smaller clip that matches your hair volume
Metallic Clip Choices
Gold clips work beautifully on warm skin tones and with warm hair colors (warm blondes, deeper brunettes with golden undertones, warm black). Silver and rose gold clips offer versatility and work across all complexions. The finish of the metal matters—polished and shiny reads more glamorous; matte or brushed metal reads more understated and modern.
Insider note: If your swept section feels like it’s slipping throughout the day, apply dry shampoo to the underside of the clip before positioning it—this increases grip without showing or affecting the look’s cleanliness.
6. Middle-Parted Minimalist Look With Two Clips
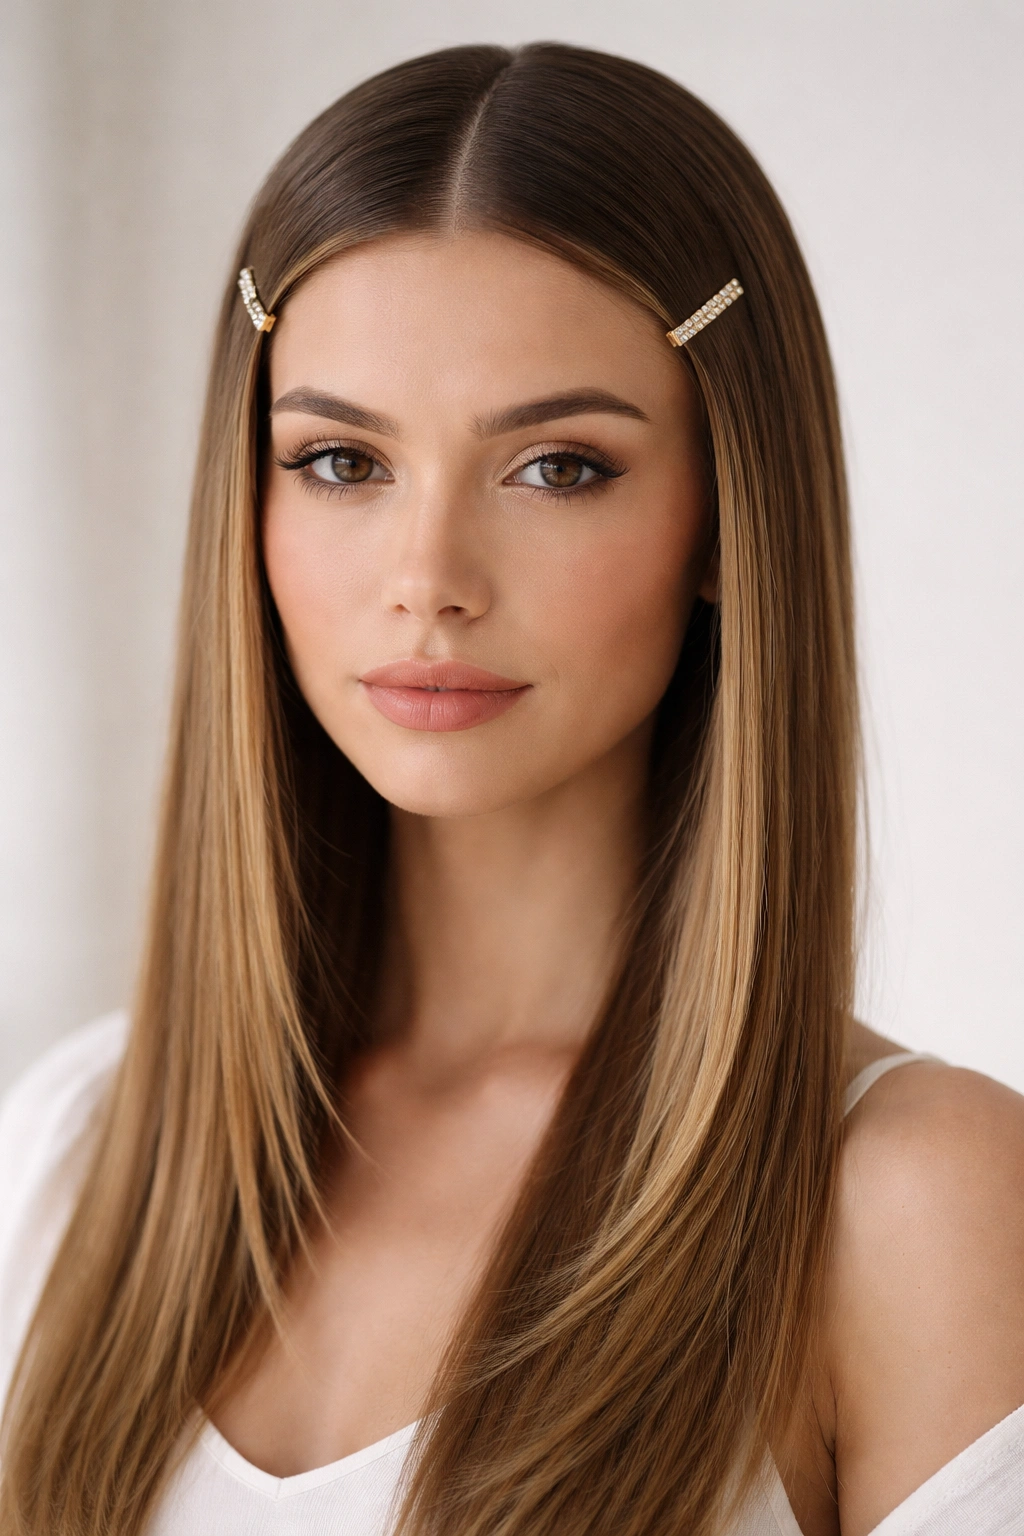
Sometimes the most striking looks are the simplest. Create a precise middle part—use a fine-tooth comb to create a clean line from the center of your forehead straight back to the crown. Once your hair is parted evenly, simply clip one thin section from each side, positioning the clips right at your temples or just slightly behind them. These clips should be small and sleek—think minimal rectangular clips in silver, gold, or a single-color design that enhances rather than overwhelms.
This look is devastatingly simple but works beautifully on straight hair because the middle part creates inherent balance and geometry, and the two matching clips reinforce that symmetry. The clips are barely noticeable in some lights, yet they’re clearly intentional styling choices. There’s something almost meditative about this look—it’s not trying to do too much, which is exactly why it feels so polished and modern. Straight hair is essential here because the precision of a clean middle part and the smooth framings around your face depend entirely on strands that cooperate with geometry.
Execution and Refinement
- Create your middle part on slightly damp hair for the crispest line, then smooth everything straight as it dries
- Position the clips at a 90-degree angle rather than slightly angled—this reinforces the geometric feel of the middle part
- Ensure the clips are truly identical; any variation in size or finish disrupts the intentional minimalism
- Leave all your hair down and flowing; this look pairs best with hair that moves freely rather than structured updos
- The clips should secure small enough sections that they disappear into your hair when viewed from the front, only visible when looking at your profile or full head view
Who This Look Suits Best
This is genuinely flattering on everyone because the middle part’s symmetry balances any face shape, and the paired clips add polish without overwhelming features. It works beautifully on people with straight hair of any length—shoulder-length, long, or very long all read equally polished.
Worth knowing: If your clips feel loose throughout the day, you may need to position them slightly higher, closer to your roots where hair is naturally grippier.
7. Textured Placement for Straight Hair Volume

This look uses clips not as functional holds but as styling tools that create the illusion of texture and volume in straight hair. Start by blow-drying your hair with a round brush, paying extra attention to lifting at the crown to build base volume. Once your hair is dry and smooth, strategically position several smaller clips throughout the crown and back sections—not to hold anything back, but to create subtle breaks and dimension in what would otherwise be completely smooth, flat hair.
Position the first clip horizontally at your crown, securing just the very top layer of hair. Below it, place a second clip offset slightly to one side, securing another thin layer. Continue this pattern down the back if you have long hair, creating a staggered, architectural placement. The clips themselves create visual texture and prevent your sleek straight hair from reading as one-dimensional. It’s a technique that requires you to think of clips as design elements creating shape rather than functional holders, and on straight hair, this approach creates genuinely striking results.
The Science Behind This Technique
When you clip sections of straight hair, you’re breaking up light reflection and creating visual dimension. Rather than all your hair reflecting light in the same direction (which reads as flat), the clipped sections create small interruptions that make hair appear to have more complexity and movement than it actually does. This is especially effective on very straight, very shiny hair that might otherwise feel monotonous.
Placement Strategy for Maximum Effect
- Position clips in a staggered pattern rather than symmetrical rows—asymmetry reads as more intentional and artistic
- Use clips of varying sizes if you have them; larger clips at the crown, smaller ones as you move down
- Don’t fully tighten the clips—they’re meant to hold without tension, just creating breaks in the hair
- Leave space between clipped sections rather than clustering them; the unclipped hair is as important as the clipped hair to the overall effect
- For very long, straight hair, you can create a cascading effect by positioning clips at different heights along the back
Pro tip: This technique works especially well for straight hair that tends to look flat in photos—the clips add visual complexity that photographs beautifully.
8. Color-Blocked Clips on Sleek Sides

This is the look for people who want clips to be fashion statements first and functional holds second. The concept is to deliberately use colorful, contrasting clips positioned strategically along the sides of your straight hair. If you have dark hair, choose bright metallic clips (gold, silver, rose gold) or jewel-toned clips (emerald, sapphire, ruby red). If you have lighter straight hair, warm metal tones, pastels, or bold primary colors create different vibes—choose based on what feels authentically you.
Position these clips vertically or slightly angled along the hairline from your temples toward your ears, spacing them about 1-2 inches apart. Each clip secures a thin section of hair, but the real point is that the clips themselves become visible, colorful design elements that frame your face and add visual interest. This is an inherently fashion-forward look—it’s not pretending to be subtle or understated. It reads as intentional styling, personality, and someone who thinks about how they present themselves. Straight hair is perfect for this because the smooth backdrop lets the colors and metallic finishes of the clips shine without visual competition.
Clip and Color Combinations That Work
- Gold clips on warm-toned brunettes or warm blondes read as luxurious and cohesive
- Rose gold clips bridge the gap between gold and silver, working across various skin and hair tones
- Jewel-toned translucent clips add sophistication while still being visually distinctive
- Neon or bright acrylic clips are genuinely fashion-forward and read as intentional artistry
- Matching your clip colors to your makeup or outfit creates intentional coordination
Styling Tips
- Use smaller clips rather than large ones; the goal is multiple colorful accents rather than heavy coverage
- Keep the rest of your styling minimal so the clips are the undisputed focal point
- Pair this with straight hair worn completely down and flowing, center-parted or side-parted, with minimal texture
- Consider using an odd number of clips on each side (1, 3, or 5 rather than 2 or 4)—odd numbers read as more artistic and less symmetrical
Quick fact: This look reads beautifully in photos and creates genuine visual interest, making it popular for social media, special events, and any occasion where you want to be remembered for your style choices.
9. Vintage-Inspired Hairpin Waves in Straight Hair

While straight hair is inherently smooth and modern, vintage hairpin styling can add an unexpectedly elegant dimension. Instead of creating actual waves through heat styling, you’re using decorative vintage hairpins to create the appearance of softly waved sections. Start with smooth, straight hair, then use vintage-inspired clips (think Art Deco designs, pearl accents, or delicate metal work) to subtly indent and shape small sections along the crown and back, creating an architectural pattern that echoes vintage wave placement.
Position your first clip to create a gentle inward curve at the crown, then position a second clip lower and offset, creating another gentle curve. Continue this pattern, spacing clips about 2-3 inches apart. The clips themselves become decorative elements, and straight hair provides the perfect backdrop for their vintage details. Because your hair is naturally smooth, the clips create distinct shadow lines and breaks that read as intentional styling rather than practical holds. It’s a look that merges contemporary minimalism with vintage romance.
Vintage Clip Selection
Choose clips with genuine vintage character: Art Deco geometric designs, pearl-adorned clips, delicate filigree patterns, or classic tortoiseshell. Avoid modern designs that don’t feel authentically vintage, which would undermine the cohesive aesthetic. Quality matters here because you’re using the clips as visible design elements—they should genuinely look beautiful and intentional.
Creating the Waved Effect
- Position clips to follow the natural shape of your head, angling slightly to create gentle curves rather than harsh angles
- Space clips close enough that they create a visual pattern across the back and crown, but far enough apart that they feel intentional rather than cluttered
- The clips should secure only enough hair to hold the positioned pattern; don’t pull tightly
- This works best on straight hair with some length—shorter hair doesn’t create enough visual surface for the effect to read clearly
Worth knowing: This look requires restraint—too many clips read as cluttered; the right number creates elegance. Three to five clips thoughtfully positioned beats seven or eight positioned haphazardly.
10. Multiple Small Clips for Scattered Accent Style
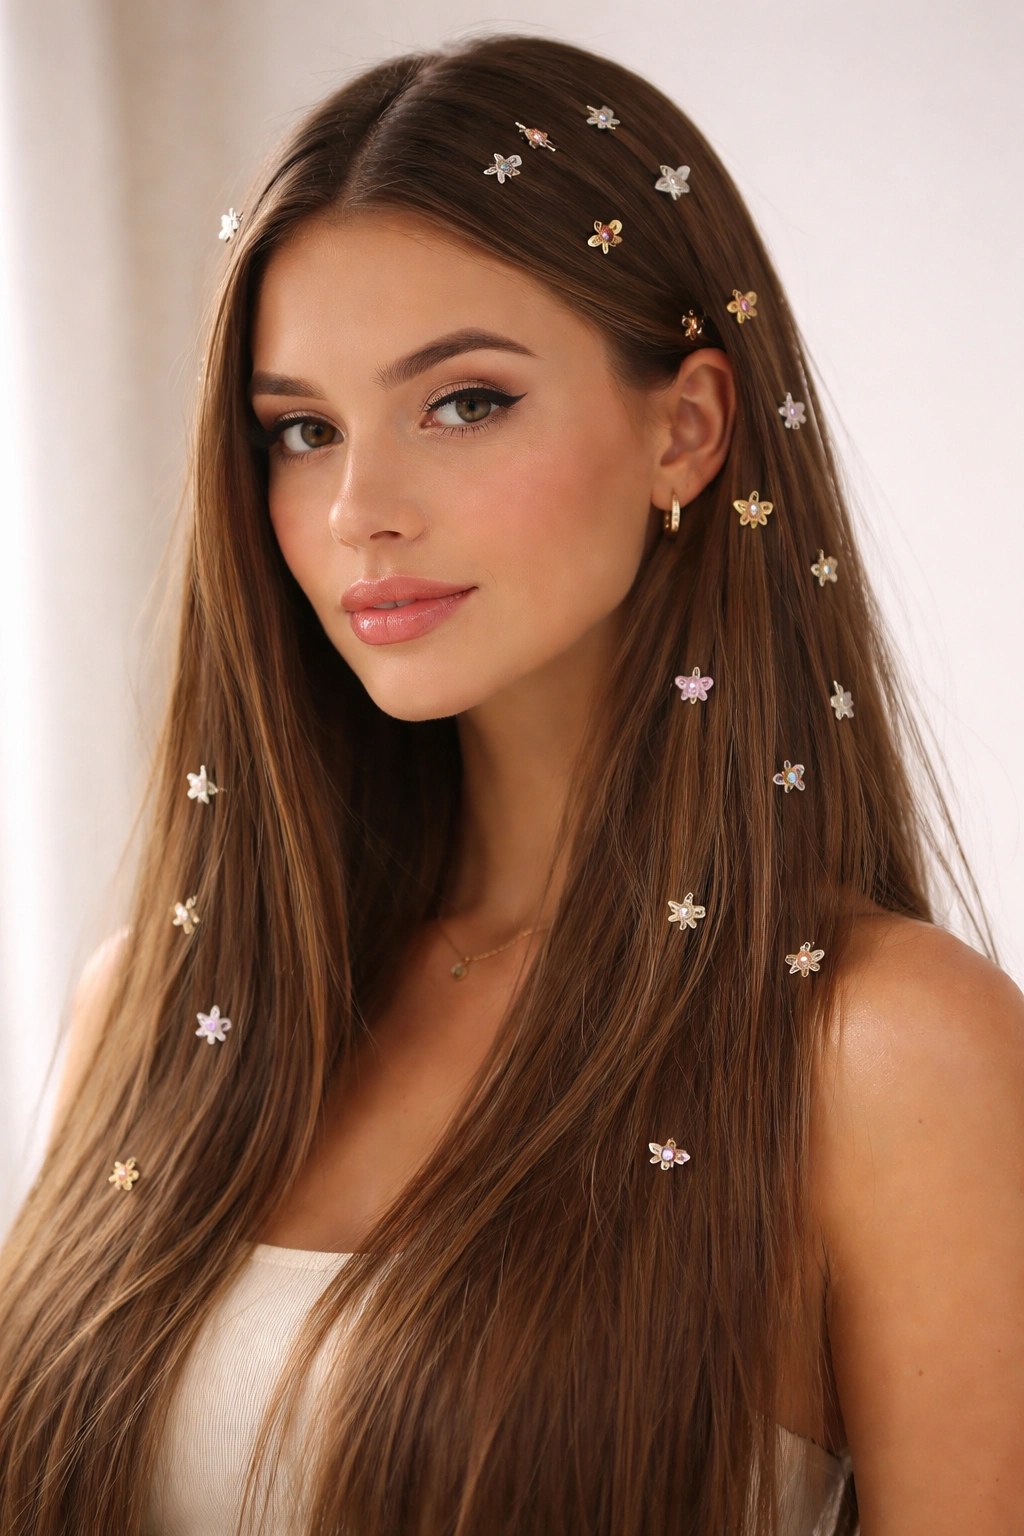
For the final look, embrace the idea that clips don’t need a system or logic—they can simply be scattered throughout your straight hair as decorative accents, each one adding a small pop of personality and visual interest. This is the most playful approach on this list, and it works beautifully on straight hair because each clip remains visible and distinct without fighting with texture or volume.
Use small clips in various finishes, colors, or styles—mix gold with silver, combine solid colors with tortoiseshell, pair minimalist clips with more decorative ones. Position them seemingly randomly throughout your hair: one at your crown, one near your ear, one toward the back, one along your side. The effect is deliberately non-uniform, suggesting that you’ve decorated your hair based on instinct and what feels right rather than following a predetermined system. On straight hair, this scattered approach reads as creative and intentional rather than accidental.
Making Scattered Clips Feel Intentional Rather Than Chaotic
- Choose a color or finish as a unifying element—all clips are gold, or all are jewel-toned, or all have a similar design aesthetic—this creates cohesion despite the scattered placement
- Vary clip sizes and shapes to add visual interest
- Position clips at different heights and angles rather than in straight lines
- Allow some clips to be obvious and visible, while others tuck slightly into your hair for subtle surprise
- Use this look with minimal other styling; let the clips be the focal point rather than competing with waves, braids, or structured updos
Best Occasions for This Look
This scattered clip approach works beautifully for casual outings, creative industries, events where individual expression is celebrated, or any time you want to signal that you’re someone with personality and style choices. It’s playful without being unprofessional if you choose clips with some sophistication rather than purely childish designs.
Pro tip: If you’re nervous about scattered clips feeling chaotic, start with just three thoughtfully placed clips and build from there—you can always add more as you get comfortable with the effect.
Final Thoughts
The beauty of clips with straight hair is that they work as both functional tools and genuine style statements. Your smooth, sleek strands provide the perfect canvas—they don’t compete with clips for visual attention, they cooperate with positioning, and they let whatever clip you choose shine without interference. Whether you’re leaning into minimalism with a single metallic clip or going bold with multiple colorful accents, straight hair makes every clip placement intentional and visible.
The 10 looks above cover the spectrum from understated polish to playful experimentation, but they all share one thing: they treat clips as styling decisions rather than just hair-holding necessities. Your straight hair is genuinely versatile—don’t underestimate what a simple clip or two can do to transform how a style reads. Start with whichever look resonates with your personal style, then experiment. Once you get comfortable with how clips work on your particular hair texture and thickness, you’ll probably find yourself reaching for them constantly—not because you need them to hold hair back, but because they’re an easy way to add intentional style and personality to every day.